Evans Cooling Systems, Inc. 1 Mountain Rd. Suffield, CT 06078 INSTALLATION PROCEDURE – Detroit Diesel DD15/DD13 CAUTIONARY NOTE: DO NOT FLUSH COOLING SYSTEM WITH WATER! 1. Obtain from Evans Cooling Systems or an Evans dealer: a. 16 gallons of Evans Waterless Heavy Duty Coolant. b. Two gallons of Evans Prep Fluid. c. Labels to warn against the addition of water d. Special refractometer for measuring small pct water content – Evans Part No. E2190 2. Obtain from Freightliner a new “non-chemical” coolant filter element. 3. Important items: a. A high-volume air source (rather than high pressure) such as Makita blower Model UB 1101, widely available from the internet (not from Evans). b. You may encounter a hose with an elastomer clamp. Use a torch to heat a screwdriver and then drag the hot screwdriver along the elastomer to melt it. On re-assembly, if you don’t have a replacement elastomer hose clamp, use a conventional hose clamp. c. A small funnel and a large funnel. 4. Important: The engine must be cool to efficiently remove the water-based coolant because the plug for draining the block is in a confined location that can burn your hand. 5. Place containers to catch coolant at draining locations. 6. Remove the pressure cap. 7. Drain the radiator, leaving it to drain. 8. Drain the block. The plug has a 19 mm hex head and is located behind and just forward of the thermostat housing and can be reached from the lower left corner of the engine. The thermostat is an inlet type and its housing connects to the lower radiator hose. Leave the plug out until instructed otherwise.

Welcome message from author
This document is posted to help you gain knowledge. Please leave a comment to let me know what you think about it! Share it to your friends and learn new things together.
Transcript
Evans Cooling Systems, Inc. 1 Mountain Rd.
Suffield, CT 06078
INSTALLATION PROCEDURE – Detroit Diesel DD15/DD13
CAUTIONARY NOTE: DO NOT FLUSH COOLING SYSTEM WITH WATER!
1. Obtain from Evans Cooling Systems or an Evans dealer: a. 16 gallons of Evans Waterless Heavy Duty Coolant. b. Two gallons of Evans Prep Fluid. c. Labels to warn against the addition of water d. Special refractometer for measuring small pct water content – Evans Part No. E2190
2. Obtain from Freightliner a new “non-chemical” coolant filter element.
3. Important items: a. A high-volume air source (rather than high pressure) such as Makita blower Model UB
1101, widely available from the internet (not from Evans). b. You may encounter a hose with an elastomer clamp. Use a torch to heat a screwdriver
and then drag the hot screwdriver along the elastomer to melt it. On re-assembly, if you don’t have a replacement elastomer hose clamp, use a conventional hose clamp.
c. A small funnel and a large funnel.
4. Important: The engine must be cool to efficiently remove the water-based coolant because the plug for draining the block is in a confined location that can burn your hand.
5. Place containers to catch coolant at draining locations.
6. Remove the pressure cap. 7. Drain the radiator, leaving it to drain.
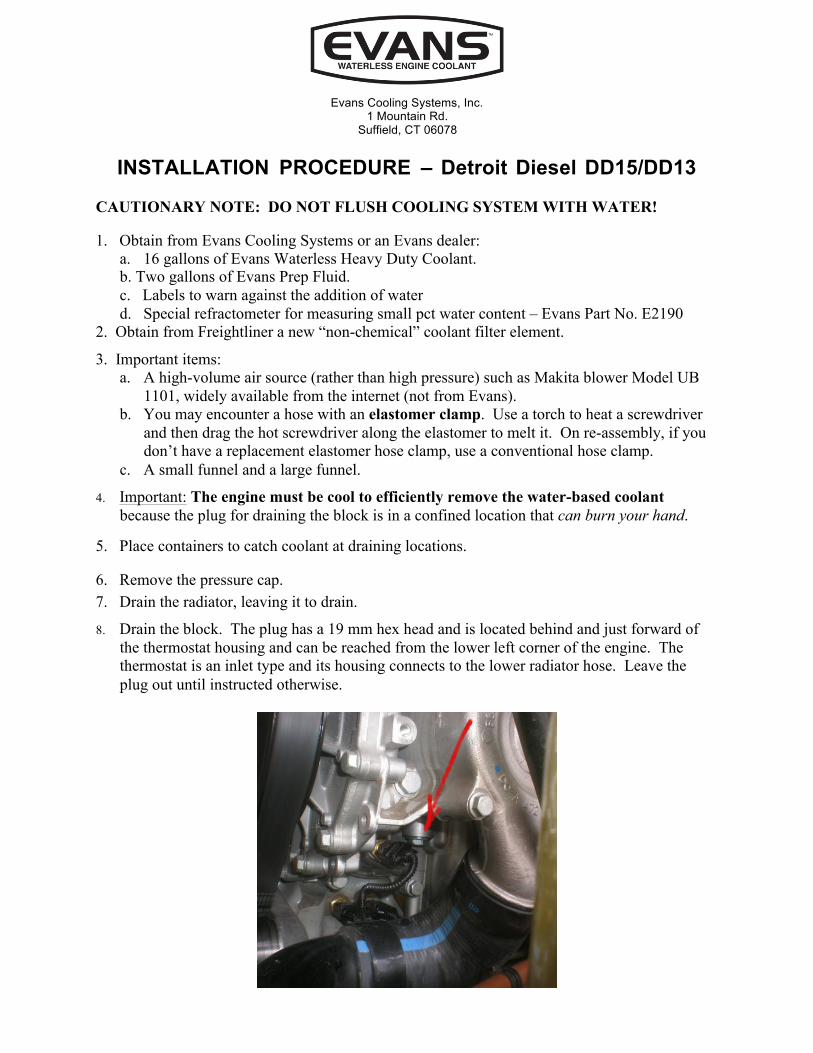
8. Drain the block. The plug has a 19 mm hex head and is located behind and just forward of the thermostat housing and can be reached from the lower left corner of the engine. The thermostat is an inlet type and its housing connects to the lower radiator hose. Leave the plug out until instructed otherwise.
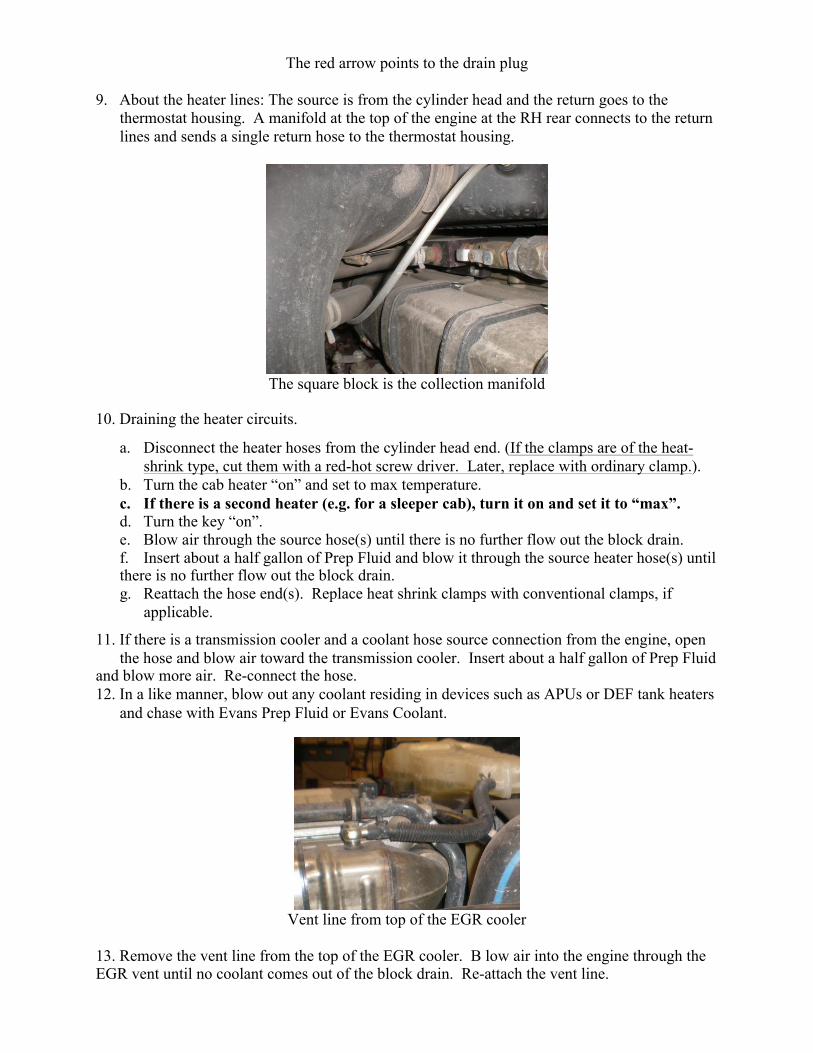
The red arrow points to the drain plug 9. About the heater lines: The source is from the cylinder head and the return goes to the
thermostat housing. A manifold at the top of the engine at the RH rear connects to the return lines and sends a single return hose to the thermostat housing.
The square block is the collection manifold
10. Draining the heater circuits.
a. Disconnect the heater hoses from the cylinder head end. (If the clamps are of the heat- shrink type, cut them with a red-hot screw driver. Later, replace with ordinary clamp.).
b. Turn the cab heater “on” and set to max temperature. c. If there is a second heater (e.g. for a sleeper cab), turn it on and set it to “max”. d. Turn the key “on”. e. Blow air through the source hose(s) until there is no further flow out the block drain. f. Insert about a half gallon of Prep Fluid and blow it through the source heater hose(s) until there is no further flow out the block drain. g. Reattach the hose end(s). Replace heat shrink clamps with conventional clamps, if
applicable.
11. If there is a transmission cooler and a coolant hose source connection from the engine, open the hose and blow air toward the transmission cooler. Insert about a half gallon of Prep Fluid
and blow more air. Re-connect the hose. 12. In a like manner, blow out any coolant residing in devices such as APUs or DEF tank heaters
and chase with Evans Prep Fluid or Evans Coolant.
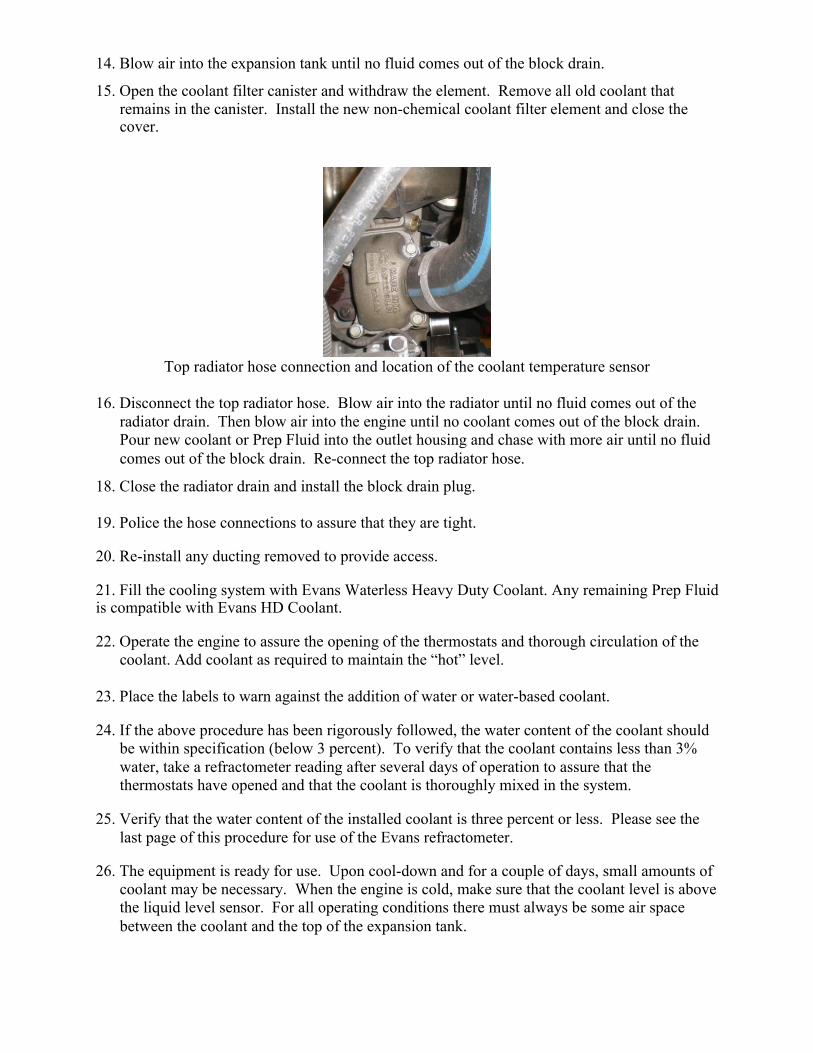
Vent line from top of the EGR cooler 13. Remove the vent line from the top of the EGR cooler. B low air into the engine through the EGR vent until no coolant comes out of the block drain. Re-attach the vent line.
14. Blow air into the expansion tank until no fluid comes out of the block drain.
15. Open the coolant filter canister and withdraw the element. Remove all old coolant that remains in the canister. Install the new non-chemical coolant filter element and close the cover.
Top radiator hose connection and location of the coolant temperature sensor 16. Disconnect the top radiator hose. Blow air into the radiator until no fluid comes out of the
radiator drain. Then blow air into the engine until no coolant comes out of the block drain. Pour new coolant or Prep Fluid into the outlet housing and chase with more air until no fluid comes out of the block drain. Re-connect the top radiator hose.
18. Close the radiator drain and install the block drain plug. 19. Police the hose connections to assure that they are tight.
20. Re-install any ducting removed to provide access.
21. Fill the cooling system with Evans Waterless Heavy Duty Coolant. Any remaining Prep Fluid is compatible with Evans HD Coolant.
22. Operate the engine to assure the opening of the thermostats and thorough circulation of the coolant. Add coolant as required to maintain the “hot” level.
23. Place the labels to warn against the addition of water or water-based coolant.
24. If the above procedure has been rigorously followed, the water content of the coolant should be within specification (below 3 percent). To verify that the coolant contains less than 3% water, take a refractometer reading after several days of operation to assure that the thermostats have opened and that the coolant is thoroughly mixed in the system.
25. Verify that the water content of the installed coolant is three percent or less. Please see the last page of this procedure for use of the Evans refractometer.
26. The equipment is ready for use. Upon cool-down and for a couple of days, small amounts of coolant may be necessary. When the engine is cold, make sure that the coolant level is above the liquid level sensor. For all operating conditions there must always be some air space between the coolant and the top of the expansion tank.
27. Use the same radiator cap without modifications. Although it is possible to run an open- vented system, the pressure cap will give you a virtually “sealed system”. Because there will be no vapor component, the pressure will remain quite low within the system (the only pressure will come from the expansion of the liquid against the air in the top of the expansion tank). It is unlikely that the pressure will ever breathe outward and that outside air will enter the system on a cool-down.
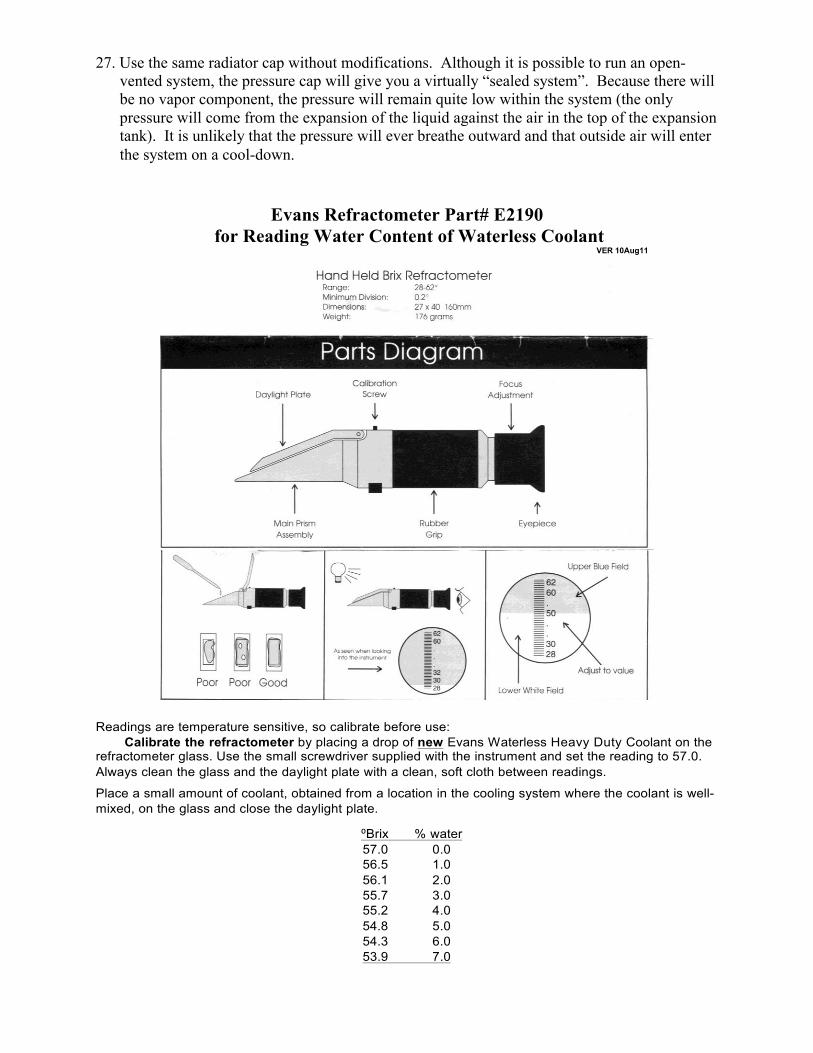
Evans Refractometer Part# E2190 for Reading Water Content of Waterless Coolant
VER 10Aug11
Readings are temperature sensitive, so calibrate before use:
Calibrate the refractometer by placing a drop of new Evans Waterless Heavy Duty Coolant on the refractometer glass. Use the small screwdriver supplied with the instrument and set the reading to 57.0. Always clean the glass and the daylight plate with a clean, soft cloth between readings.
Place a small amount of coolant, obtained from a location in the cooling system where the coolant is well- mixed, on the glass and close the daylight plate.
⁰Brix % water 57.0 0.0 56.5 1.0 56.1 2.0 55.7 3.0 55.2 4.0 54.8 5.0 54.3 6.0 53.9 7.0
Related Documents