Page 1 of 16 EPrints Install rev 20101004 Install and Configure EPrints v. 3.2.4 on Ubuntu Server 10.04 This guide explains how to set up a default installation of EPrints version 3.2.4 on a standard Ubuntu Linux Server version 10.04 virtual machine that you can run on your Windows or Intel-based Mac desktop using VMWare Server, Workstation or Fusion for the Mac, or other desktop virtualization software such as Sun VirtualBox. For more information on EPrints, visit http://www.EPrints.org. This guide is designed specifically to support exploration of a variety of open source digital information repositories in IRLS675, Advanced Digital Collections, for the Digital Information Management Certificate Program and Master’s program at the University of Arizona School of Information Resources and Library Science. For more information, visit http://digin.arizona.edu. This document, developed for use in IRLS675 and the DigIn program, is released under a creative commons license as described below. You may copy or distribute this work for non-commercial use in its original unaltered form. EPrints Installation Guide by Bruce Fulton, School of Information Resources and Library Science, University of Arizona is licensed under a Creative Commons Attribution-Noncommercial-No Derivative Works 3.0 United States License. The Digital Information Management Certificate Program (“DigIn”) has been developed in part with funds awarded by the Institute of Library and Museum Services (http://www.imls.gov). Some notes in this document refer to supplementary class resources that may be available only to students registered in a current DigIn or Master’s class; however lack of supplementary resources should not affect the overall usability of the processes described. You may wish to use the following values during the installation of the Ubuntu virtual machine; they are reflected in the instructions that follow. If this is a demonstration system for learning and experimentation, use easy to remember usernames and passwords; it can get confusing if you forget them or make them complicated. Obviously, this advice should NOT be followed on production installations. virtual machine name: EPrints324 host (server) name: eprints324 primary user: user1 password: password OpenSSH and LAMP applications selected during install

Welcome message from author
This document is posted to help you gain knowledge. Please leave a comment to let me know what you think about it! Share it to your friends and learn new things together.
Transcript

Page 1 of 16
EPrints Install rev 20101004
Install and Configure EPrints v. 3.2.4 on Ubuntu Server 10.04
This guide explains how to set up a default installation of EPrints version 3.2.4 on a standard Ubuntu
Linux Server version 10.04 virtual machine that you can run on your Windows or Intel-based Mac
desktop using VMWare Server, Workstation or Fusion for the Mac, or other desktop virtualization
software such as Sun VirtualBox. For more information on EPrints, visit http://www.EPrints.org.
This guide is designed specifically to support exploration of a variety of open source digital information
repositories in IRLS675, Advanced Digital Collections, for the Digital Information Management Certificate
Program and Master’s program at the University of Arizona School of Information Resources and Library
Science. For more information, visit http://digin.arizona.edu.
This document, developed for use in IRLS675 and the DigIn program, is released under a creative
commons license as described below. You may copy or distribute this work for non-commercial use in its
original unaltered form.
EPrints Installation Guide by Bruce Fulton, School of Information Resources and Library Science,
University of Arizona is licensed under a Creative Commons Attribution-Noncommercial-No Derivative
Works 3.0 United States License.
The Digital Information Management Certificate Program (“DigIn”) has been developed in part with
funds awarded by the Institute of Library and Museum Services (http://www.imls.gov).
Some notes in this document refer to supplementary class resources that may be available only to
students registered in a current DigIn or Master’s class; however lack of supplementary resources
should not affect the overall usability of the processes described.
You may wish to use the following values during the installation of the Ubuntu virtual machine; they are
reflected in the instructions that follow. If this is a demonstration system for learning and
experimentation, use easy to remember usernames and passwords; it can get confusing if you forget
them or make them complicated. Obviously, this advice should NOT be followed on production
installations.
virtual machine name: EPrints324
host (server) name: eprints324
primary user: user1
password: password
OpenSSH and LAMP applications selected during install

Page 2 of 16
EPrints Install rev 20101004
Contents
Prerequisites ........................................................................................................................................... 3
Install EPrints........................................................................................................................................... 4
Install EPrints – Apt Method ................................................................................................................ 5
Install EPrints – Manual Method .......................................................................................................... 6
Prepare the Installation ................................................................................................................... 6
Install Libraries and Helper Files ....................................................................................................... 6
Install EPrints ................................................................................................................................. 10
Configure EPrints ................................................................................................................................... 11
Configure Name-based Virtual Hosting for EPrints ................................................................................. 14
Configure the Hosts file on the primary (host) computer ....................................................................... 15
Confirm Login ........................................................................................................................................ 16

Page 3 of 16
EPrints Install rev 20101004
Prerequisites
This installation presumes you have created a new standard Ubuntu server install in a virtual machine as
described in the course’s StandardInstall document. Do not attempt to re-use an installation previously
used for another repository. You should select both LAMP and SSH options. Do not configure the web
directory permissions; The EPrints installation will manage proper web configuration. You will not need
to install Webmin for this application. Be sure to configure a static IP or make sure to note the server’s
dynamic IP address so you can access EPrints once it is installed. If you have other virtual machines
configured, you may use the same IP address for this one as long as you remember not to run more than
one virtual machine at that is configured with a duplicate IP address.
These instructions generally follow and expand on theEPrints community documentation for a
Debian/Ubuntu installation using an apt package at http://wiki.eprints.org/w/Category:Installation. The
process is simplified somewhat now that a Debian/Ubuntu package has been released. An older manual
installation procedure is documented on the community wiki and is included here as well, but for all
practical purposes, the only difference for purposes of setting up a demo/trial system is that the apt
package installs at /usr/share/eprints3 and the manual process (which requires manual installation of all
dependencies) installs at /opt/eprints3 (keep that in mind as you read some of the EPrints
documentation).
Before proceeding, verify that networking is operational and that you have connectivity between your
host and virtual machine and between your virtual machine and the web.

Page 4 of 16
EPrints Install rev 20101004
Install EPrints
Follow the instructions in the first section – Install EPrints Apt Method (recommended) – to install
EPrints automatically using Ubuntu’s built-in aptitude installer. If you would prefer to install EPrints
manually, skip to the next section, Install EPrints Manual Method.

Page 5 of 16
EPrints Install rev 20101004
Install EPrints – Apt Method Open the Ubuntu Partner Repositories by editing the repository sources list:
$ sudo nano /etc/apt/sources.list
Find the following lines and remove the hash marks at the beginning of the line to uncomment them
(lucid may be replaced with another term if using a version of Ubuntu other than 10.04 Lucid Lynx):
# deb http://archive.canonical.com/ubuntu lucid partner # deb-src http://archive.canonical.com/ubuntu lucid partner
Next, add the following two new lines at the end of the file:
deb http://deb.eprints.org/3.2/ stable/ deb-src http://deb.eprints.org/3.2/ source/
Note that there is a space before the words stable and source above. Then, run the aptitude update
and upgrade routines:
$ sudo aptitude update $ sudo aptitude safe-upgrade
Now install EPrints using aptitude:
$ sudo aptitude install eprints
There are a number of dependencies so installation may take some time. During installation:
Answer yes (not just y) to the Ubuntu security warning as the installation begins.
Accept the default fully qualified hostname eprints.localdomain.
Accept the default nullmailer smarthost name of mail.localdomain
Skip the manual method that follows and proceed directly to the section Configure Eprints.

Page 6 of 16
EPrints Install rev 20101004
Install EPrints – Manual Method Note: If you prefer, you may install EPrints and all the dependencies manually using these instructions. If
you have installed EPrints using the Apt method described in the previous section, skip to the next
section, Configure EPrints.
Prepare the Installation
Find the following lines and remove the hash marks at the beginning of the line to uncomment them
(lucid may be replaced with another term if using a version of Ubuntu other than 10.04 Lucid Lynx):
# deb http://archive.canonical.com/ubuntu lucid partner # deb-src http://archive.canonical.com/ubuntu lucid partner
Update aptitude and safe-upgrade the installation
$ sudo aptitude update $ sudo aptitude safe-upgrade
Install Libraries and Helper Files
Before proceeding, you may want to create a snapshot. If something goes terribly wrong with the install,
it will probably be easier to redo it from a snapshot point than to try to fix it.
A word of caution: case counts. Be sure to note carefully the use of upper and lower case letters. This
has always been the case, but there are a few mixed-case commands in this installation.
The following process is loosely based on the instructions provided by EPrints. This is not a tricky
installation, but there are a large number of steps that are all interdependent, so take your time and
read carefully.
First, install the following libraries. You can put more than one on a single aptitude install line, but then
it’s harder to see if there is a problem or if you mistyped the name of one of the libraries. By installing
these items one at a time, you can tell whether or not there are problems as you go. For each, you
should see the download progressing and then the item installation. Some packages may already be
installed, as noted. However be on the lookout for packages not found messages, as these usually
indicate typos. It may help to print out this section and check them off as you go along.

Page 7 of 16
EPrints Install rev 20101004
$ sudo aptitude install libapache2-mod-perl2 $ sudo aptitude install libxml-libxml-perl $ sudo aptitude install libunicode-string-perl $ sudo aptitude install libterm-readkey-perl [this may already be installed] $ sudo aptitude install libmime-lite-perl [note: you may get a prompt or two relating to configuration of nullmailer. If so, accept the defaults and proceed] $ sudo aptitude install libdbd-mysql-perl [note: this may already be installed] $ sudo aptitude install libxml-parser-perl [note: this may already be installed] $ sudo aptitude install libxml2-dev $ sudo aptitude install unzip $ sudo aptitude install make $ sudo aptitude install lynx $ sudo aptitude install ncftp $ sudo aptitude install gcc [note: this may already be installed] $ sudo aptitude install gs $ sudo aptitude install xpdf $ sudo aptitude install antiword $ sudo aptitude install elinks $ sudo aptitude install pdftk $ sudo aptitude install tetex-bin [optional, only if you need TeX compatibility and/or if you need to render math symbols and non-standard fonts as graphics; this module takes quite a bit of room and time to install] $ sudo aptitude install psutils

Page 8 of 16
EPrints Install rev 20101004
$ sudo aptitude install imagemagick
If you are so inclined, take a snapshot. If the following step fails, it will be easier to start from this point
rather than redoing the library and helper file installation.
Now, configure CPAN.
$ sudo cpan
If this is the first time you’ve run cpan, it will begin with a configuration routine. Answer yes (accept the
default) to indicate you will run the manual configuration. From then on, you should be able to accept
all defaults just by pressing enter at each prompt. If you have failed to install some of the libraries, you
may not see directories for the helper files (e.g. unzip, make, lynx, etc.). That’s a problem you’ll have to
go back and fix by first installing the helper app and then rerunning the CPAN configuration.
Toward the end, you’ll be prompted to enter your continent and country. When you get to the
continent prompt, enter 5 for North America (or another continent if you are so located), then 4 for the
United States (or another country if you are so located).
For repositories, unless you have a reason to scroll through and enter some particular ones, just enter
3 4 5 6 7 8 9 (note: all numbers are separated by one space) or any half dozen or so numbers up to the
number shown as being available. One of these will certainly be available when you need updates. Hit
enter, then hit enter again, and you’ll return to a cpan> prompt.
Now, update cpan.
cpan> install Bundle::CPAN
1. It may take a while for the files to download and configure, especially if any of the mirror sites
are slow or not responding. Give it some time if it appears to hang. If a download site does time
out, the script should automatically select an alternate, but it might take a while to time out.
Note that it is normal to see some failures messages while the files are downloaded and
installed. In many cases, a test is supposed to fail and that is what triggers specific installation
actions.
2. At certain points, you may be prompted to “prepend prerequisites to the queue of modules
being processed.” Accept the default answer of yes.
3. When prompted to modify/update your configuration, accept the default of no.

Page 9 of 16
EPrints Install rev 20101004
4. When prompted to “Enter arithmetic or Perl expression,” accept the default of exit.
5. When prompted to continue installing yaml.pm, accept the default of y.
When the initial installation completes continue with these steps, still working at the CPAN prompt:
cpan> reload CPAN cpan> install XML::LibXML cpan> install Readonly cpan> exit
Now might be a good time to take another snapshot.
Next, add a system user for EPrints. EPrints expects to have a user with the id of eprints who is a
member of the group eprints. The eprints user should also be added to the system account www-data.
You might use the following commands.
$ sudo adduser --system --home /opt/eprints3 --group eprints --shell /bin/bash $ sudo passwd eprints [and then enter a password and write it down] $ sudo adduser www-data eprints
Success should look something like this:

Page 10 of 16
EPrints Install rev 20101004
Install EPrints
Now, install EPrints, version 3.2.4 as follows, using the name of your server where the text indicates
yourdomain. Recall that the server name is the second part of the bash prompt, e.g. if the prompt is
user1@EPrints324:~$, then it indicates you are logged into server EPrints324 as user1. If you are
installing a later version of EPrints, simply substitute the appropriate url and rev numbers.
$ cd $ wget http://files.eprints.org/447/1/eprints-3.2.4.tar.gz $ tar -xzvf eprints-3.2.4.tar.gz $ cd eprints-3.2.4 $ ./configure --with-smtp-server=smtp.yourdomain --disable-diskfree $ sudo ./install.pl

Page 11 of 16
EPrints Install rev 20101004
Configure EPrints
[Note 1: Recall that the apt method of installation will place EPrints in the directory /usr/share. The
manual installation will place EPrints in the directory /opt (the /opt installation point is also reflected in
most of the EPrints documentation). Be sure to note where EPrints is installed as you begin to work
with it.]
[Note 2: If you wish, you may configure multiple repositories by repeating the following steps for each
repository you want to create. For example, you may wish to create a practice and irls675 repository.
Just make the appropriate substitution of practice for irls675 in the steps that follow to create the
second repository.]
Now it’s time to create your EPrints repository and do some initial EPrints configuration. Review the
process at http://wiki.EPrints.org/w/Getting_Started_with_EPrints_3. This lays out the process fairly
well.
Note that as configured, an eprints user is created, however a password is not assigned as a security
measure. You can either use sudo to switch to the eprints user (as recommended and shown below), or
assign the eprints user a password using the usual linux command (less secure for production
environments). Initiate the configuration program as follows:
$ sudo su eprints $ cd $ bin/epadmin create
You’ll be prompted for a series of configuration details as follows:
1. Archive ID: I suggest irls675. Choose that or a name of your own. This is the machine name, so
make it short, one word and all small case to avoid problems.
2. Accept the default answer of yes to configure the vital settings.
3. Hostname: For hostname, I suggest irls675.localdomain. Some explanation is in order. You want
to enter something that looks like a genuine node and domain name. This won’t be going live on
the internet, but you’ll still get at it from your browser, so this will make it easy. You’ll take care
of the DNS issue by entering this hostname with your VM’s IP address in your primary
computer’s host file in a subsequent step. It doesn’t really matter what the domain name is. This
will perhaps make more sense later when you configure the virtual hosting setting. It does
matter what the node name is because EPrints can support multiple repositories on the same
server. Pick something that refers to the particular repository you are creating.

Page 12 of 16
EPrints Install rev 20101004
4. For Webserver Port, hit enter for the default of 80.
5. Alias: You don’t really need any other aliases, so when prompted, just enter the # sign and hit
enter.
6. Accept the default path part of [/]
7. Leave hostname blank.
8. Administrator email: I entered admin@localdomain. It really doesn’t matter since we don’t have
a mail services configured (although the EPrints apt package does setup a nullmailer application
that fools the application into thinking that a mail system is enabled).
9. Archive Name: This is the full display name for the repository you are creating. I suggest IRLS675
Repository.
10. Accept the default yes to write the core settings.
11. Accept the default yes to configure the database.
12. Accept the default database name, which should be the same as the machine name you gave
the repository.
13. Accept the default localhost for MySQL host (you would need to configure something else if
MySQL were hosted on a different server, but that is not the case here).
14. You don’t need to set socket and port numbers for this installation, so just hit enter for these
prompts.
15. You’ll create a database user for this repository. It will default to a user with the machine name
of the repository. Press enter to accept this default. You’ll need to give it a password. I suggest a
password of password. If you are not choosing something obvious, like ‘password,’ I hope you
are writing these down. Note that when you enter the database password, no characters will be
echoed to the screen and you will not be prompted to confirm, so just type password and press
<enter>.
16. Accept the default yes to write the database settings and yes to create the database.
17. Accept [root] as the superuser username.
18. The script will ask for the root password you created when you installed the LAMP server.
19. Accept the default yes to create the database tables.

Page 13 of 16
EPrints Install rev 20101004
20. Accept the default yes to create an initial user. I suggest you create user admin with admin
privileges. Select a password that is obvious (e.g. password), or write it down as you will need it
later. You can make up something for the email, admin@localdomain for example.
21. Accept the default yes to build the static web pages.
22. Accept the default yes to import the LOC subjects (you can change this later if you want to
create a custom subjects table).
23. Accept the default yes to update the apache configuration files.
Run bin/epadmin create a second time to create a second repository. I suggest calling it practice. You
may use this for practice or testing as you build the primary repository for your collection, and it will also
provide a little more insight into name-based virtual hosting.
This completes the basic EPrints install. There are three housekeeping tasks you will need to run when
you make configuration changes. Run them now to initially configure EPrints. Keep in mind that you
need to re-run these periodically. For example, after you enter or modify your subject taxonomy, you’ll
need to run these commands before you’ll see the changes actually take place in your repository. Use
your actual archive name (e,.g. irls675 or practice) where you see yourarchivename in the following
commands:
$ bin/generate_views yourarchivename [note: if you did not import the LOC subject headings, you may receive an error message on this command’ $ bin/generate_static yourarchivename $ bin/generate_abstracts yourarchivename
If you have elected to create more than one repository, run these commands for each repository.

Page 14 of 16
EPrints Install rev 20101004
Configure Name-based Virtual Hosting for EPrints
By default, EPrints uses name-based virtual hosting to facilitate multiple repositories (see here and
here). Name-based virtual hosting allows multiple domain names to map to the same physical IP
address. For example, company1.mydomain.com and company2.mydomain.com can exist in different
directories on the same server with a single IP address. The webserver figures out which one to load
because the client (your browser) sends along the domain name you want to reach in the http header.
DNS resolves both domains to the same IP address, but when the packet reaches the host, Apache looks
at which domain was requested and points to the proper site.
EPrints does most of the Apache configuration work for you when you install it. All you really need to do
is configure a virtual site and point back to the configuration files that EPrints creates during the
installation process.
First, log back in as your primary user (e.g. user1 for username below):
$ su username $ cd
Use nano or your favorite editor to create the following file:
$ sudo nano /etc/apache2/sites-available/eprints
To the blank file, add the following line (be sure to use the correct installation point path if not installed
in /usr/share), followed by a return (e.g. press <enter> after you finish the line):
Include /usr/share/eprints3/cfg/apache.conf
Save the file, and then add the EPrints site to Apache and re-start Apache:
$ sudo a2ensite eprints $ sudo /etc/init.d/apache2 reload
Note that you don’t need to do anything specific about either of your two repositories (and you don’t
really have an “EPrints” site, per se). The EPrints software generates the necessary configuration files,
and the one include statement as part of a newly defined site will reference them all.
Page 15 of 16
EPrints Install rev 20101004
Configure the Hosts file on the primary (host) computer
If your repository were live on the Web, what you would do next is have your ISP (or your systems
people) create the virtual host information on the DNS servers servicing your domain. But, since this
installation is not live, you’ll use the hosts file to provide the DNS information needed to make the
EPrints virtual repository sites accessible to your browser.
On your primary (host) computer, edit the hosts file to add the IP address of the VM server and the
hostname(s) you gave your repository. Note that if you are using Windows Vista, you need to run
notepad as an administrator by navigating to it on the menu under accessories, right clicking it, and
selecting run as administrator. Otherwise, you won’t be able to save the revised hosts file. On a
windows machine, the file is usually c:\windows\system32\drivers\etc\hosts. On a Mac, the hosts file is
usually located at /private/etc/hosts. On Ubuntu, it’s located at /etc/hosts.
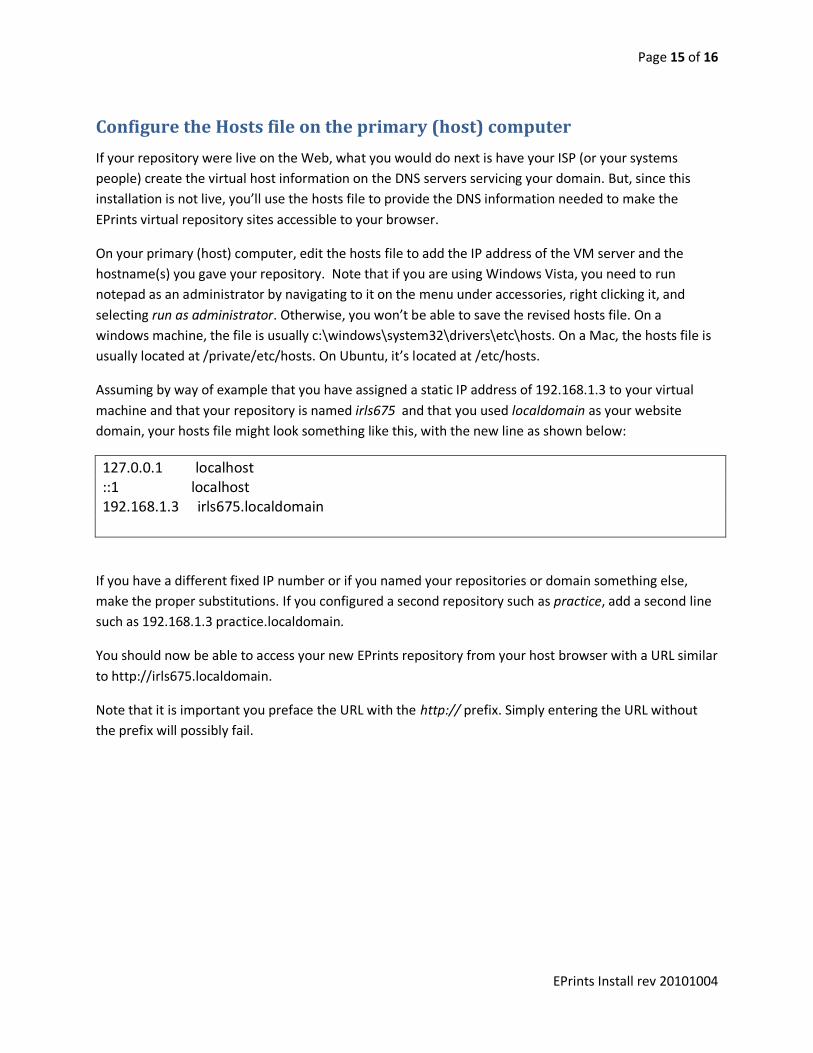
Assuming by way of example that you have assigned a static IP address of 192.168.1.3 to your virtual
machine and that your repository is named irls675 and that you used localdomain as your website
domain, your hosts file might look something like this, with the new line as shown below:
127.0.0.1 localhost ::1 localhost 192.168.1.3 irls675.localdomain
If you have a different fixed IP number or if you named your repositories or domain something else,
make the proper substitutions. If you configured a second repository such as practice, add a second line
such as 192.168.1.3 practice.localdomain.
You should now be able to access your new EPrints repository from your host browser with a URL similar
to http://irls675.localdomain.
Note that it is important you preface the URL with the http:// prefix. Simply entering the URL without
the prefix will possibly fail.

Page 16 of 16
EPrints Install rev 20101004
Confirm Login
Access EPrints from your host Web browser using the URL you created for your hosts file (e.g.
http://irls675.localdomain). Click login and login as the administrative user you created using the
epadmin config script (admin and password were suggested). Review the available functions under the
Admin option. Click Home to return to the EPrints home page.
Related Documents