IBM Tivoli Storage Productivity Center Version 5.1.1 Installation and Configuration Guide SC27-4047-01

Welcome message from author
This document is posted to help you gain knowledge. Please leave a comment to let me know what you think about it! Share it to your friends and learn new things together.
Transcript

IBM Tivoli Storage Productivity CenterVersion 5.1.1
Installation and Configuration Guide
SC27-4047-01
���


IBM Tivoli Storage Productivity CenterVersion 5.1.1
Installation and Configuration Guide
SC27-4047-01
���

Note:Before using this information and the product it supports, read the information in “Notices” on page 417.
This edition applies to version 5, release 1, modification 1 of IBM Tivoli Storage Productivity Center (productnumbers 5725-F93, 5725-G33, and 5725-F98) and to all subsequent releases and modifications until otherwiseindicated in new editions.
This edition replaces SC27-4047-00.
© Copyright IBM Corporation 2001, 2012.US Government Users Restricted Rights – Use, duplication or disclosure restricted by GSA ADP Schedule Contractwith IBM Corp.

Contents
Figures . . . . . . . . . . . . . . vii
Tables . . . . . . . . . . . . . . . ix
Preface . . . . . . . . . . . . . . . xiWho should read this guide . . . . . . . . . xiPublications . . . . . . . . . . . . . . xi
Accessing publications online . . . . . . . xiIBM Redbooks . . . . . . . . . . . . xiiiTranslation . . . . . . . . . . . . . xiiiOrdering publications. . . . . . . . . . xiiiProviding feedback about publications . . . . xiii
Contacting the IBM Support Center . . . . . . xivReporting a problem . . . . . . . . . . xiv
Conventions used in this guide . . . . . . . xiv
New for Tivoli Storage ProductivityCenter Version 5.1.1 . . . . . . . . xviiNew for Tivoli Storage Productivity Center Version5.1 . . . . . . . . . . . . . . . . . xx
Chapter 1. Planning for Tivoli StorageProductivity Center . . . . . . . . . . 1Planning for installation . . . . . . . . . . 1
Hardware requirements. . . . . . . . . . 1Software requirements . . . . . . . . . . 4Product licenses for Tivoli Storage ProductivityCenter . . . . . . . . . . . . . . . 18Running Tivoli Storage Productivity Center in a64-bit environment . . . . . . . . . . . 25
Planning for Tivoli Storage Productivity Center forReplication . . . . . . . . . . . . . . 25
Planning for Open HyperSwap replication . . . 25Planning for Configuration . . . . . . . . . 26
Configuration guidelines . . . . . . . . . 26Planning for Tivoli Storage Productivity Centerauthentication and authorization . . . . . . 28User names and passwords . . . . . . . . 30General requirements for user names andpasswords . . . . . . . . . . . . . . 30Worksheet for user names and passwords . . . 33TCP/IP ports used by Tivoli Storage ProductivityCenter . . . . . . . . . . . . . . . 35Tivoli Integrated Portal port numbers. . . . . 37Storage systems, devices, file systems, databases,and switches . . . . . . . . . . . . . 39Planning for multipath subsystem device drivers 44Planning for Storage Resource agents . . . . . 45Storage Resource agent protocol support . . . 46Planning for Internet Protocol Version 6 . . . . 47Planning for the native interface . . . . . . 50Planning to use LDAP. . . . . . . . . . 51Software requirements for CIM agents . . . . 53Planning for the single sign-on feature . . . . 54
Planning for enterprise-rollup reports. . . . . 54Planning for the SAN configuration tools . . . 56SAN Planner Overview . . . . . . . . . 58Storage Optimizer overview . . . . . . . . 64Planning for the Data Path Explorer . . . . . 66
Planning for the Data Manager . . . . . . . . 67Planning for the Storage Resource agents onOracle Solaris. . . . . . . . . . . . . 68
Planning for the Disk Manager . . . . . . . . 69Planning for the IBM CIM agents . . . . . . 70Planning for the TagmaStore CIM agents . . . 71Planning for Disk Manager configuration . . . 73Planning for TotalStorage Enterprise StorageServer FlashCopy reports . . . . . . . . . 75Storage capacity of volumes . . . . . . . . 75
Planning for the DS8000 . . . . . . . . . . 76Planning for DS8000 performance . . . . . . 76
Planning for the SAN Volume Controller . . . . 77Planning for Storwize V7000. . . . . . . . . 79Planning for Storwize V7000 Unified . . . . . . 82Planning for the XIV system. . . . . . . . . 85Planning for IBM Scale Out Network AttachedStorage . . . . . . . . . . . . . . . . 87Planning for the Fabric Manager . . . . . . . 88
Planning for Brocade management agents . . . 89Planning for QLogic or Cisco fabric managementagents . . . . . . . . . . . . . . . 93Collecting data with the Fabric Manager. . . . 94Storage Resource agent . . . . . . . . . 98Out-of-band Fabric agent . . . . . . . . . 99Configuration guidelines for agent placement . . 99Planning for Fabric Manager configuration . . 100Planning for Fabric Manager switches anddirectors . . . . . . . . . . . . . . 102Planning for host bus adapters (HBAs) . . . . 103Planning for private switch networks . . . . 104
Planning for performance management. . . . . 104Performance metrics . . . . . . . . . . 105Performance management configuration . . . 107
Microsoft Cluster Server . . . . . . . . . . 109Microsoft Cluster Server environment . . . . 110Microsoft Cluster Server support . . . . . . 110
Planning for PowerHA . . . . . . . . . . 112PowerHA environment . . . . . . . . . 114
NAS support . . . . . . . . . . . . . 115Network Attached Storage system requirements 115
Planning for NetApp device support . . . . . 117Planning for System Storage N Series Gatewayservers . . . . . . . . . . . . . . . 120Planning for VMware . . . . . . . . . . 120
VMware configuration . . . . . . . . . 123VMware capacity reports . . . . . . . . 123
Planning for the Virtual I/O Server . . . . . . 125Planning for SQL access to Tivoli StorageProductivity Center's views. . . . . . . . . 127
Setting up a view-only user on Windows . . . 128
© Copyright IBM Corp. 2001, 2012 iii

Monitoring your DB2 environment . . . . . . 129Planning for the Discovery Library Adapter . . . 129Tivoli Storage Productivity Center MonitoringAgent . . . . . . . . . . . . . . . . 130Tivoli Agent Management Services . . . . . . 131Planning to install Tivoli Storage ProductivityCenter . . . . . . . . . . . . . . . . 133
Tivoli Storage Productivity Center components 136Tivoli Storage Productivity Center in an IPv4 orIPv6 environment . . . . . . . . . . . 137
Chapter 2. Installing Tivoli StorageProductivity Center . . . . . . . . . 139Installing DB2 . . . . . . . . . . . . . 139
Preparing to install DB2 . . . . . . . . . 139Installing DB2 on a Windows operating system 140Installing DB2 on UNIX or Linux - GUI install 143Installing DB2 on AIX using the command line 145Installing DB2 on AIX 6.1 POWER7 Systems . . 148Verifying that DB2 is installed correctly. . . . 149
Installing Tivoli Storage Productivity Center . . . 151Tivoli Storage Productivity Center installation 151Windows domain and local user accounts . . . 154Preparing to install Tivoli Storage ProductivityCenter in a Windows domain . . . . . . . 155Installing Tivoli Storage Productivity Center ona Windows domain . . . . . . . . . . 159Verifying the connection to the domaincontroller computer by using the Dcdiag tool. . 162Starting the installation program . . . . . . 163Installing Tivoli Storage Productivity Center in asingle-server environment . . . . . . . . 166Installing Tivoli Storage Productivity Center in amultiple-server environment . . . . . . . 175Installing Tivoli Storage Productivity Centerclient components on a separate computer . . 186Installing Tivoli Common Reporting on aremote server . . . . . . . . . . . . 187Verifying the installation . . . . . . . . 188Reviewing the log files to resolve installationissues . . . . . . . . . . . . . . . 191Changing the operating system language . . . 192Starting the stand-alone GUI by using a webbrowser . . . . . . . . . . . . . . 192Adding an installation license . . . . . . . 192Installing the agents . . . . . . . . . . 195
Reinstalling the software if a failure occurs . . . 207Taking the first steps after installation . . . . . 208
Chapter 3. Configuring Tivoli StorageProductivity Center . . . . . . . . . 209Starting Tivoli Storage Productivity Center . . . 209
Starting the Tivoli Storage Productivity Centerstand-alone GUI . . . . . . . . . . . 209Starting the Tivoli Storage Productivity Centerweb-based GUI. . . . . . . . . . . . 212
Starting Tivoli Storage Productivity Center forReplication . . . . . . . . . . . . . . 213Starting the Tivoli Storage Productivity Centerfamily of products through Tivoli Integrated Portal. 214
Overview of required user IDs for initial log on tothe Tivoli Storage Productivity Center family ofproducts . . . . . . . . . . . . . . . 215User authentication considerations for multipleserver installations . . . . . . . . . . . 218Changing the user authentication configuration 218
Adding an LDAP repository to the federatedrepositories . . . . . . . . . . . . . 219Removing an LDAP repository from thefederated repositories. . . . . . . . . . 228
Tivoli Integrated Portal and Tivoli CommonReporting Roles . . . . . . . . . . . . 233Assigning Tivoli Integrated Portal roles to users 234Configuration overview . . . . . . . . . . 234Changing passwords by using the password tool 240
Single server installation where components usethe same logon credentials . . . . . . . . 240Single server installation where components usedifferent logon credentials . . . . . . . . 242Multiple server installation where TivoliIntegrated Portal is remote . . . . . . . . 244Multiple server installation where DB2 is remote 246
Configuration Utility . . . . . . . . . . . 249Configuration utility tasks . . . . . . . . 249
Adding resources for monitoring . . . . . . . 255Configuring storage subsystems . . . . . . 256Configure fabrics and switches . . . . . . 266Configure computers . . . . . . . . . . 268Configure tape libraries . . . . . . . . . 271
Managing schedules, jobs, and runs . . . . . . 272Job Management - Recommendations . . . . 279
Configuration nodes . . . . . . . . . . . 280Role-to-Group Mappings . . . . . . . . 280License Keys . . . . . . . . . . . . 283Alert disposition . . . . . . . . . . . 288Log File and Cached Batch Report Retention 290Quota and Constraint e-mail Address Rules . . 291Scan/Probe Agent Administration . . . . . 291Manual NAS Server Entry . . . . . . . . 292History Aggregator . . . . . . . . . . 295Storage Resource agent Deployments . . . . 296Storage Resource Agent Upgrades . . . . . 312Migrate Data/Fabric Agent . . . . . . . . 312Update Storage Subsystem Credentials . . . . 313Resource History Retention. . . . . . . . 317Removed Resource Retention . . . . . . . 318Resource History Retention for Databases . . . 319Removed Resource Retention for Databases . . 319Configuration History Settings . . . . . . 319
Configuration: Device server specific . . . . . 320Configuring switches . . . . . . . . . . 320Configuring the inactive zone sets for a fabricdata source . . . . . . . . . . . . . 322Managing a SAN without agents . . . . . . 322Setting timeouts values for the Device server 323Service Location Protocol (SLP) configurationconsiderations . . . . . . . . . . . . 324
Configuring IP addressing . . . . . . . . . 326Configuring Tivoli Storage Productivity Centerwith multiple IP addresses . . . . . . . . 326Changing the HOSTS file . . . . . . . . 327
iv IBM Tivoli Storage Productivity Center: Installation and Configuration Guide
|||||
||

Configuration guidelines for 500 or more agents 328Configuring LUN provisioning for Oracle Solaris 329
Assigning TotalStorage Enterprise StorageServer, DS6000, or DS8000 LUNs to OracleSolaris HBAs . . . . . . . . . . . . 329Modifying the HBA configuration file . . . . 329Setting Persistent Name Binding for QLA2200and QLA2300 HBAs by using the scfxcommand . . . . . . . . . . . . . 330Modifying the SCSI disk configuration file . . 331Checking for TotalStorage Enterprise StorageServer, DS6000, or DS8000 multipaths inVxDMP . . . . . . . . . . . . . . 332
How to import authentication information for aStorage Resource agent . . . . . . . . . . 333Configuring Tivoli Storage Productivity Center forDS8000 LDAP authentication . . . . . . . . 333Configuring multiple Tivoli Storage ProductivityCenter servers with one DS8000 R4.2 . . . . . 338Setting up dual Tivoli Storage Productivity Centerservers for high availability. . . . . . . . . 339Configuring Tivoli Storage Productivity Center andSAN Volume Controller or Storwize V7000 forsingle sign-on . . . . . . . . . . . . . 341Configuring and controlling the Tivoli StorageProductivity Center Monitoring Agent . . . . . 344
Configuring the Tivoli Storage ProductivityCenter Monitoring Agent on Windows . . . . 344Configuring the Tivoli Storage ProductivityCenter Monitoring Agent on AIX or Linux . . 344Starting and stopping the Tivoli StorageProductivity Center Monitoring Agent . . . . 345
Installing and configuring the Tivoli StorageProductivity Center server with multiple NIC cards 346Creating an SSH certificate for the root user ID . . 348Configuring DB2, AIX, and Linux for IPv6-onlyenvironment. . . . . . . . . . . . . . 349Changing the timeout value for the web-based GUIsession . . . . . . . . . . . . . . . 350Configuring IBM SONAS WAN caching . . . . 351
Chapter 4. Upgrading and migratingTivoli Storage Productivity Center . . 353Choosing the upgrade method . . . . . . . 355Changes to Tivoli Common Reporting reportpackages when you upgrade Tivoli StorageProductivity Center . . . . . . . . . . . 356Upgrading Tivoli Storage Productivity Center forReplication . . . . . . . . . . . . . . 360Fix packs and patches . . . . . . . . . . 360Storage Subsystem Credential Migration tool . . . 361Upgrading DB2 from DB2 9.1 or DB2 9.5 to DB29.7 . . . . . . . . . . . . . . . . . 361Preparing for an upgrade . . . . . . . . . 364
Backups . . . . . . . . . . . . . . 365Upgrade response file . . . . . . . . . 365Upgrade package . . . . . . . . . . . 367
Upgrading Tivoli Storage Productivity Center in asingle-server environment . . . . . . . . . 368
Upgrading Tivoli Storage Productivity Centerby using the wizard . . . . . . . . . . 368
Upgrading Tivoli Storage Productivity Centerby using silent mode . . . . . . . . . . 369
Upgrading Tivoli Storage Productivity Center in amultiple-server environment . . . . . . . . 371
Upgrading Tivoli Storage Productivity Centerwith a remote database by using the wizard . . 372Upgrading Tivoli Integrated Portal and TivoliCommon Reporting by using the wizard . . . 373Upgrading Tivoli Storage Productivity Centerwith a remote database by using silent mode. . 374Upgrading Tivoli Integrated Portal and TivoliCommon Reporting by using silent mode . . . 377
Upgrading Storage Resource agents . . . . . . 380Upgrading the Storage Resource agent by usingthe Data Sources node . . . . . . . . . 380Upgrading the Storage Resource agent by usingthe Configuration node . . . . . . . . . 381Upgrading Storage Resource agents by using acommand . . . . . . . . . . . . . 381
Migrating Data agents and Fabric agents to StorageResource agents . . . . . . . . . . . . 382
Migrating the Data agent or Fabric agent usingthe user interface . . . . . . . . . . . 382Migrating Data agents and Fabric agents using acommand . . . . . . . . . . . . . 382Migrating Data agents and Fabric agents byusing the upgrade wizard . . . . . . . . 384
Upgrading CIM agents for storage systems . . . 384Upgrading CIM agents . . . . . . . . . 384
Migrating BIRT reports . . . . . . . . . . 385Upgrading System Storage N Series Gatewayservers . . . . . . . . . . . . . . . 386
Chapter 5. Uninstalling Tivoli StorageProductivity Center . . . . . . . . . 393Uninstalling Tivoli Storage Productivity Center in asingle-server environment by using the wizard . . 393Uninstalling Tivoli Storage Productivity Center in amultiple-server environment by using the wizard . 394Uninstalling Tivoli Storage Productivity Center byusing silent mode . . . . . . . . . . . . 396Uninstalling the agents . . . . . . . . . . 398
Deleting or uninstalling an agent using the GUI 398Uninstalling the Storage Resource agentmanually . . . . . . . . . . . . . . 399
Uninstalling the Tivoli Storage Productivity CenterMonitoring Agent . . . . . . . . . . . . 400
Uninstalling the IBM Tivoli Storage ProductivityCenter Monitoring Agent on Windows . . . . 400Uninstalling the IBM Tivoli Storage ProductivityCenter Monitoring Agent on UNIX or Linux . . 400
Uninstalling DB2 . . . . . . . . . . . . 401Uninstalling DB2 on UNIX or Linux. . . . . 401
Deleting Storage Resource agent registry entriesafter a failed installation or uninstallation . . . . 403Manually uninstalling Tivoli Storage ProductivityCenter components on AIX or Linux . . . . . 404Manually uninstalling Tivoli Storage ProductivityCenter components on Windows . . . . . . . 405
Contents v
||
||||
||
||

Chapter 6. Reference . . . . . . . . 409agent.sh command . . . . . . . . . . . 409
Appendix A. Accessibility features forTivoli Storage Productivity Center . . 411
Appendix B. Accessibility features forTivoli Storage Productivity Center forReplication . . . . . . . . . . . . 413
Notices . . . . . . . . . . . . . . 417Trademarks . . . . . . . . . . . . . . 419
Glossary . . . . . . . . . . . . . 421
Index . . . . . . . . . . . . . . . 427
vi IBM Tivoli Storage Productivity Center: Installation and Configuration Guide

Figures
1. Global security page, configure federatedrepositories . . . . . . . . . . . . 222
2. Federated repositories page, Managerepositories . . . . . . . . . . . . 223
3. Manage repositories page, Add a newrepository. . . . . . . . . . . . . 223
4. Manage repositories > New page . . . . . 2245. Global security > Federated repositories page,
Add base entry to realm . . . . . . . . 2256. Global security > Federated repositories >
Repository reference page, Add base entry torealm . . . . . . . . . . . . . . 226
7. Launch the WebSphere administrative console 2308. Opening the Global security page . . . . . 230
9. Configuring the available realm definitions 23110. Removing the LDAP repository . . . . . 23111. Managing the repositories . . . . . . . 23212. Deleting the LDAP repository . . . . . . 23213. Update Storage Subsystem Credentials panel 31414. Save Confirmation prompt . . . . . . . 38715. Add NAS Server panel . . . . . . . . 38816. Verify that the N Series Gateway server is
added . . . . . . . . . . . . . . 38817. File system Agent Editor panel. . . . . . 38918. Scan/Probe Agent Administration panel 38919. View information for N Series Gateway
server . . . . . . . . . . . . . . 39020. View information for a file system . . . . 390
© Copyright IBM Corp. 2001, 2012 vii

viii IBM Tivoli Storage Productivity Center: Installation and Configuration Guide

Tables
1. Locations of publications for Tivoli StorageProductivity Center and related products . . xii
2. Hardware requirements for the Tivoli StorageProductivity Center servers . . . . . . . 1
3. Storage system requirements for the Replicationserver . . . . . . . . . . . . . . . 3
4. Hardware requirements for the StorageResource agents . . . . . . . . . . . 3
5. Hardware requirements for the Tivoli StorageProductivity Center command-line interface . . 4
6. Operating system support for Tivoli StorageProductivity Center server, Tivoli StorageProductivity Center for Replication server, andGUI . . . . . . . . . . . . . . . 5
7. Operating system support for the StorageResource agents . . . . . . . . . . . 8
8. Functions with each Tivoli StorageProductivity Center license . . . . . . . 19
9. Available reports with each IBM Tivoli StorageProductivity Center license . . . . . . . 22
10. Tivoli Storage Productivity Center licenseswhen you upgrade from Version 4 to Version 5 24
11. Operating system groups that are mapped tothe Superuser role . . . . . . . . . . 29
12. DB2 groups that are required to install thedatabase repository . . . . . . . . . . 29
13. Valid characters for user names and passwords 3114. User names and passwords for Tivoli Storage
Productivity Center installation . . . . . . 3315. TCP/IP ports used by Tivoli Storage
Productivity Center . . . . . . . . . . 3516. Other TCP/IP ports used by Tivoli Storage
Productivity Center . . . . . . . . . . 3617. TCP/IP ports used by Tivoli Storage
Productivity Center for Replication forincoming communication . . . . . . . . 37
18. TCP/IP ports used by Tivoli StorageProductivity Center for Replication foroutgoing communication . . . . . . . . 37
19. Multipath subsystem device drivers supportedby Tivoli Storage Productivity Center . . . . 44
20. IPv4 and IPv6 configurations in amultiple-servers environment . . . . . . 49
21. Main features of the Fabric Manager . . . . 8822. Supported and preferred interfaces for fabric
management . . . . . . . . . . . . 9023. Supported and preferred interfaces for fabric
management . . . . . . . . . . . . 9324. Information collected by agent . . . . . . 9525. Supported platforms and storage systems for
VMware . . . . . . . . . . . . . 12126. Tivoli Storage Productivity Center
configurations . . . . . . . . . . . 13627. DB2 Setup wizard default user and group
names . . . . . . . . . . . . . . 14028. Operating system for Storage Resource agents 16329. Options for the CHOSEN_INSTALL_TYPE
parameter. . . . . . . . . . . . . 16930. Parameters required for each protocol 19631. Storage Resource agent installation images 19732. Results from a partial rollback . . . . . . 20733. Required user ID for initial log on after
installation on a single server when thecommon user and a separate user for TivoliIntegrated Portal and Tivoli CommonReporting are defined . . . . . . . . . 216
34. Required user ID for initial log on afterinstallation on multiple servers with a remotedatabase schema . . . . . . . . . . 217
35. Required user ID for initial log on afterinstallation on multiple servers with remoteTivoli Integrated Portal and Tivoli CommonReporting . . . . . . . . . . . . . 217
36. Roles in Tivoli Integrated Portal and TivoliCommon Reporting . . . . . . . . . 233
37. Roles and authorization levels . . . . . . 28138. Database permissions . . . . . . . . . 28339. Location of MIB and Baroc files . . . . . 28940. Upgrading Tivoli Storage Productivity Center 35441. Resources and Performance packages 35742. Historical package . . . . . . . . . . 35743. License mapping from Tivoli Storage
Productivity Center Version 4 to TivoliStorage Productivity Center Version 5.1.1 . . 368
© Copyright IBM Corp. 2001, 2012 ix
||||||||

x IBM Tivoli Storage Productivity Center: Installation and Configuration Guide

Preface
Who should read this guideThis publication is intended for administrators or users who are installing andusing Tivoli® Storage Productivity Center and IBM® Tivoli Storage ProductivityCenter for Replication. It also describes the hardware and software requirementsfor installing the products and provides an overview of the installation procedures.
Administrators and installers should be familiar with the following topics:v General procedures for installing software on Microsoft Windows, AIX®, Linux,
HP-UX, and Oracle Solaris.v Storage Area Network (SAN) conceptsv Tivoli Storage Productivity Center conceptsv Tivoli Storage Productivity Center for Replication conceptsv DB2® Database for Linux, UNIX, and Windowsv Simple Network Management Protocol (SNMP) conceptsv IBM Tivoli Enterprise Console
This installation and configuration guide includes information for the TivoliStorage Productivity Center family of products which includes the followingprograms:v Tivoli Storage Productivity Centerv Tivoli Storage Productivity Center for Replication
PublicationsThis section lists publications in the Tivoli Storage Productivity Center library andother related publications. It also describes how to access publications online, howto order publications, and how to submit comments about publications.
The publications are available from the IBM Publications Center athttp://www.ibm.com/e-business/linkweb/publications/servlet/pbi.wss.
Accessing publications onlinePublications for this product and other related products are available online.
Information about installing, configuring, upgrading, and uninstalling TivoliStorage Productivity Center and related products is available online. Use Table 1 onpage xii to view and download these publications. Translated documents areavailable for some products.
© Copyright IBM Corp. 2001, 2012 xi

Table 1. Locations of publications for Tivoli Storage Productivity Center and related products
Product Online location (see Note)
IBM Tivoli StorageProductivity CenterandIBM Tivoli StorageProductivity Center forReplication
http://publib.boulder.ibm.com/infocenter/tivihelp/v59r1/index.jsp. In the left navigation pane, click IBM TivoliStorage Productivity Center.
To obtain PDF documents, click IBM Tivoli StorageProductivity Center > Printable documentation.
To view previous versions of the IBM Tivoli StorageProductivity Center Information Center, from the mainpage click Community and Support > Previous Versions.
IBM Tivoli StorageProductivity Center forReplication for System z®
http://publib.boulder.ibm.com/infocenter/tivihelp/v59r1/index.jsp. In the left navigation pane, click IBM TivoliStorage Productivity Center for Replication for System z.
To obtain PDF documents, click IBM Tivoli StorageProductivity Center for Replication for System z >Printable documentation.
To view previous versions of the IBM Tivoli StorageProductivity Center for Replication Information Center,from the main page, click Community and Support >Previous Versions.
IBM WebSphere® ApplicationServer
v http://publib.boulder.ibm.com/infocenter/wasinfo/v7r0/index.jsp
v http://publib.boulder.ibm.com/infocenter/wasinfo/v8r0/index.jsp
IBM System Storage® DS3000,IBM System Storage DS4000®,or IBM System StorageDS5000
http://www.ibm.com/support/entry/portal/
IBM System Storage DS6000™ http://publib.boulder.ibm.com/infocenter/dsichelp/ds6000ic/index.jsp
IBM System Storage DS8000® http://publib.boulder.ibm.com/infocenter/dsichelp/ds8000ic/index.jsp
IBM System Storage DS®
Open ApplicationProgramming Interfacepublications
http://www.ibm.com/support/entry/portal/Troubleshooting/Hardware/System_Storage/Storage_software/Other_software_products/CIM_Agent_for_DS_Open_(API)/
Use these publications for information about how to install,configure, and use the CIM agent.
IBM System Storage SANVolume Controller
http://pic.dhe.ibm.com/infocenter/svc/ic/index.jsp
IBM Storwize® V3500 http://pic.dhe.ibm.com/infocenter/storwize/v3500_ic/index.jsp
IBM Storwize V3700 http://pic.dhe.ibm.com/infocenter/storwize/v3700_ic/index.jsp
IBM Storwize V7000 http://pic.dhe.ibm.com/infocenter/storwize/ic/index.jsp
IBM Storwize V7000 Unified http://pic.dhe.ibm.com/infocenter/storwize/unified_ic/index.jsp
IBM XIV® Storage System http://publib.boulder.ibm.com/infocenter/ibmxiv/r2/index.jsp
xii IBM Tivoli Storage Productivity Center: Installation and Configuration Guide
|||
|||
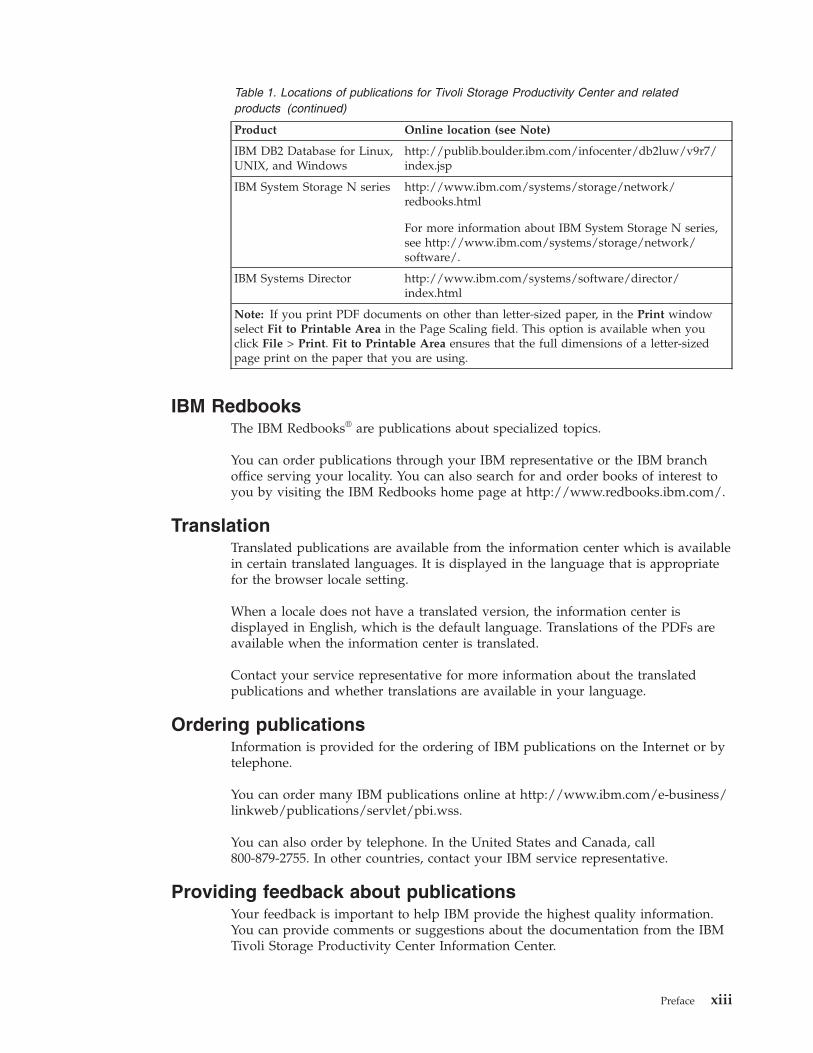
Table 1. Locations of publications for Tivoli Storage Productivity Center and relatedproducts (continued)
Product Online location (see Note)
IBM DB2 Database for Linux,UNIX, and Windows
http://publib.boulder.ibm.com/infocenter/db2luw/v9r7/index.jsp
IBM System Storage N series http://www.ibm.com/systems/storage/network/redbooks.html
For more information about IBM System Storage N series,see http://www.ibm.com/systems/storage/network/software/.
IBM Systems Director http://www.ibm.com/systems/software/director/index.html
Note: If you print PDF documents on other than letter-sized paper, in the Print windowselect Fit to Printable Area in the Page Scaling field. This option is available when youclick File > Print. Fit to Printable Area ensures that the full dimensions of a letter-sizedpage print on the paper that you are using.
IBM RedbooksThe IBM Redbooks® are publications about specialized topics.
You can order publications through your IBM representative or the IBM branchoffice serving your locality. You can also search for and order books of interest toyou by visiting the IBM Redbooks home page at http://www.redbooks.ibm.com/.
TranslationTranslated publications are available from the information center which is availablein certain translated languages. It is displayed in the language that is appropriatefor the browser locale setting.
When a locale does not have a translated version, the information center isdisplayed in English, which is the default language. Translations of the PDFs areavailable when the information center is translated.
Contact your service representative for more information about the translatedpublications and whether translations are available in your language.
Ordering publicationsInformation is provided for the ordering of IBM publications on the Internet or bytelephone.
You can order many IBM publications online at http://www.ibm.com/e-business/linkweb/publications/servlet/pbi.wss.
You can also order by telephone. In the United States and Canada, call800-879-2755. In other countries, contact your IBM service representative.
Providing feedback about publicationsYour feedback is important to help IBM provide the highest quality information.You can provide comments or suggestions about the documentation from the IBMTivoli Storage Productivity Center Information Center.
Preface xiii

Go to the information center at http://publib.boulder.ibm.com/infocenter/tivihelp/v59r1/index.jsp. From any topic page, click the Feedback link.
Contacting the IBM Support CenterYou can contact the IBM Support Center by phone, and you can register forsupport notifications at the technical support website.v Go to the IBM Tivoli Storage Productivity Center technical support website at
http://www.ibm.com/support/entry/portal/Overview/Software/Tivoli/Tivoli_Storage_Productivity_CenterTo receive future support notifications, sign in under Notifications. You arerequired to enter your IBM ID and password. After you are authenticated, youcan configure your subscription for Tivoli Storage Productivity Center technicalsupport website updates.
v Customers in the United States can call 1-800-IBM-SERV (1-800-426-7378).v For international customers, go to the Tivoli Storage Productivity Center
technical support website to find support by country. Expand Contact supportand click Directory of worldwide contacts.
You can also review the IBM Software Support Handbook, which is available athttp://www14.software.ibm.com/webapp/set2/sas/f/handbook/home.html.
The support website offers extensive information, including a guide to supportservices; frequently asked questions (FAQs); and documentation for all IBMSoftware products, including Redbooks and white papers. Translated documentsare also available for some products.
When you contact the IBM Support Center, be prepared to provide identificationinformation for your company so that support personnel can readily assist you.Company identification information might also be needed to access various onlineservices available on the website. See “Reporting a problem.”
Reporting a problemProvide the IBM Support Center with information about the problems that youreport.
Have the following information ready when you report a problem:v The IBM Tivoli Storage Productivity Center version, release, modification, and
service level number.v The communication protocol (for example, TCP/IP), version, and release number
that you are using.v The activity that you were doing when the problem occurred, listing the steps
that you followed before the problem occurred.v The exact text of any error messages.
Conventions used in this guideThis section provides information about the conventions used in this publication.
This publication uses several conventions for special terms and actions, andoperating system-dependent commands and paths.
The following typeface conventions are used in this publication:
xiv IBM Tivoli Storage Productivity Center: Installation and Configuration Guide

Bold
v Flags that appear with textv Graphical user interface (GUI) elements (except for titles of windows
and dialogs)v Names of keys
Italic
v Variablesv Values you must providev New termsv Words and phrases that are emphasizedv Titles of documents
monospace
v Commands and command optionsv Flags that appear on a separate linev Code examples and outputv Message textv Names of files and directoriesv Text strings you must type, when they appear within textv Names of Java methods and classesv HTML and XML tags also appear like this, in monospace type
For syntax notations, remember the following:v In UNIX, the prompt for the root user is #.v In UNIX and Linux, the commands are case sensitive, so you must type
commands exactly as they are shown.
Preface xv

xvi IBM Tivoli Storage Productivity Center: Installation and Configuration Guide

New for Tivoli Storage Productivity Center Version 5.1.1
Use this information to learn about new features and enhancements in IBM TivoliStorage Productivity Center Version 5.1.1. This information highlights the changessince the last release of Tivoli Storage Productivity Center.
Storwize V3500 and Storwize V3700 data replicationTivoli Storage Productivity Center and Tivoli Storage Productivity Centerfor Replication 5.1.1 provide data storage and replication management forthe IBM Storwize V3500 and IBM Storwize V3700 storage systems. Thesevirtualized storage systems are the newest additions to the IBM Storwizefamily of disk systems.
Except for the Storage Optimizer feature, Tivoli Storage ProductivityCenter and Tivoli Storage Productivity Center for Replication features thatare available for IBM Storwize V7000 are also available for Storwize V3500and Storwize V3700.
For more information about these storage systems, see the followinginformation centers:v Storwize V3500 http://pic.dhe.ibm.com/infocenter/storwize/v3500_ic/
index.jspv Storwize V3700 http://pic.dhe.ibm.com/infocenter/storwize/v3700_ic/
index.jsp
IBM SONAS wide area network cachingWide area network (WAN) caching is a scalable, high-performance remotefile data access function across a WAN that is integrated with IBM SONAS.You can use WAN caching to distribute data transparently among datacenters and multiple remote locations without disruption to applications.Remote operations for WAN caching are run on the local system by one ormore interface nodes. These nodes are configured as gateway nodes byusing Tivoli Storage Productivity Center CLI commands. The CLIcommands use network file system (NFS) protocols to read and write datafrom interface nodes in the remote home system.
For more information, see the Tivoli Storage Productivity Centerinformation center at http://publib.boulder.ibm.com/infocenter/tivihelp/v59r1/index.jsp and search for planning sonas and wan caching.
More information about IBM SONAS is available at the IBM SONASinformation center at http://pic.dhe.ibm.com/infocenter/sonasic/sonas1ic/index.jsp.
Opening the management GUI for a resourceResources such as storage systems and switches can have their ownmanagement GUIs or element managers. In the web-based GUI, you canopen the start page for these resource GUIs on the Storage Systems pageand Switches page.
Viewing the data path for a resourceIn the web-based GUI, the data path view shows the connectivity betweenhost connections, servers, hypervisors, virtual machines, storage systems,and the fabrics through which they share storage. You can use this view to
© Copyright IBM Corp. 2001, 2012 xvii
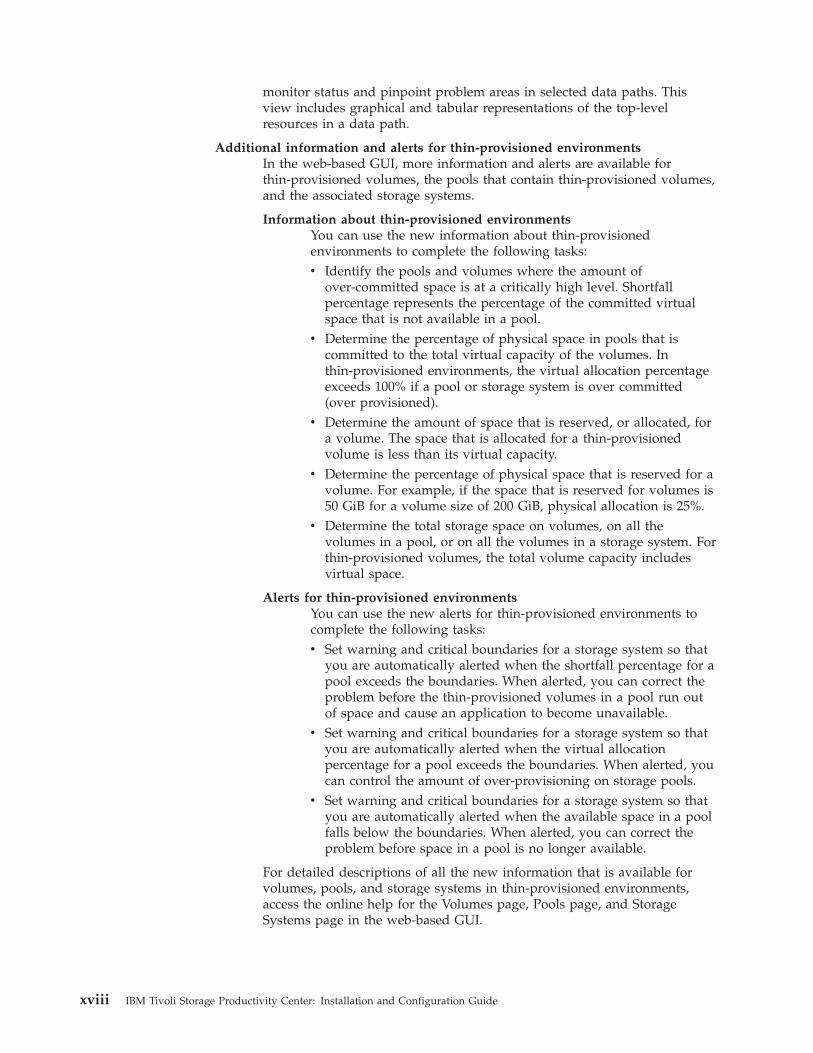
monitor status and pinpoint problem areas in selected data paths. Thisview includes graphical and tabular representations of the top-levelresources in a data path.
Additional information and alerts for thin-provisioned environmentsIn the web-based GUI, more information and alerts are available forthin-provisioned volumes, the pools that contain thin-provisioned volumes,and the associated storage systems.
Information about thin-provisioned environmentsYou can use the new information about thin-provisionedenvironments to complete the following tasks:v Identify the pools and volumes where the amount of
over-committed space is at a critically high level. Shortfallpercentage represents the percentage of the committed virtualspace that is not available in a pool.
v Determine the percentage of physical space in pools that iscommitted to the total virtual capacity of the volumes. Inthin-provisioned environments, the virtual allocation percentageexceeds 100% if a pool or storage system is over committed(over provisioned).
v Determine the amount of space that is reserved, or allocated, fora volume. The space that is allocated for a thin-provisionedvolume is less than its virtual capacity.
v Determine the percentage of physical space that is reserved for avolume. For example, if the space that is reserved for volumes is50 GiB for a volume size of 200 GiB, physical allocation is 25%.
v Determine the total storage space on volumes, on all thevolumes in a pool, or on all the volumes in a storage system. Forthin-provisioned volumes, the total volume capacity includesvirtual space.
Alerts for thin-provisioned environmentsYou can use the new alerts for thin-provisioned environments tocomplete the following tasks:v Set warning and critical boundaries for a storage system so that
you are automatically alerted when the shortfall percentage for apool exceeds the boundaries. When alerted, you can correct theproblem before the thin-provisioned volumes in a pool run outof space and cause an application to become unavailable.
v Set warning and critical boundaries for a storage system so thatyou are automatically alerted when the virtual allocationpercentage for a pool exceeds the boundaries. When alerted, youcan control the amount of over-provisioning on storage pools.
v Set warning and critical boundaries for a storage system so thatyou are automatically alerted when the available space in a poolfalls below the boundaries. When alerted, you can correct theproblem before space in a pool is no longer available.
For detailed descriptions of all the new information that is available forvolumes, pools, and storage systems in thin-provisioned environments,access the online help for the Volumes page, Pools page, and StorageSystems page in the web-based GUI.
xviii IBM Tivoli Storage Productivity Center: Installation and Configuration Guide

For a complete list of alerts, see the Tivoli Storage Productivity Centerinformation center at http://publib.boulder.ibm.com/infocenter/tivihelp/v59r1/index.jsp and search for triggering conditions for storage system alerts.
Web-based GUI reportsThe following features are new for reports that are in the web-based GUI.
Maximum values for pools and volumesIn custom reports about performance, you can include columnheadings that show the maximum values, such as the maximumread and write I/O rates, for pools and volumes that are onstorage virtualizers.
Version information for report packagesYou can view version information about report packages in theTivoli Common Reporting GUI.
Space statistics for thin-provisioned volumesAdditional information is provided about thin-provisionedvolumes on storage virtualizers and on storage systems. Thefollowing reports show information about thin-provisionedvolumes:v Storage Virtualizers - Space Reportv Storage Virtualizer - Pools Space Reportv Storage Virtualizer - Volumes Space Reportv Storage Systems - Space Reportv Storage System - Pools Space Reportv Storage System - Volumes Space Report
Assigned host alias for volumesIn the predefined reports and in custom reports about resources,the name of the port on the server that volumes are mapped to isidentified.
Installing Tivoli Storage Productivity Center on a Windows domainYou can install Tivoli Storage Productivity Center by using a Windowsdomain user account or a local user account.
For more information about installing Tivoli Storage Productivity Centeron a Windows domain, see the following topics:v “Windows domain and local user accounts” on page 154v “Preparing to install Tivoli Storage Productivity Center in a Windows
domain” on page 155v “Installing Tivoli Storage Productivity Center on a Windows domain” on
page 159
New for Tivoli Storage Productivity Center for ReplicationVersion 5.1.1
Use this information to learn about new features and enhancements in IBM TivoliStorage Productivity Center for Replication Version 5.1.1. This informationhighlights the changes since the last release of Tivoli Storage Productivity Centerfor Replication.
New for Tivoli Storage Productivity Center Version 5.1.1 xix

Support for the SAN Volume Controller 6.4 option to move volumes betweenI/O groups
To support this new IBM System Storage SAN Volume Controller feature,Tivoli Storage Productivity Center for Replication includes the followingchanges:v The I/O group was removed from the volume ID.v The volume ID or the volume name can be used as a CLI command
volume parameter for SAN Volume Controller, Storwize V3500, StorwizeV3700, IBM Storwize V7000, and IBM Storwize V7000 Unified storagesystems. The following CLI commands were updated to reflect thischange:– chvollspair
– lscpset
– lsvol
– mkcpset (where applicable for the specific volume parameter)– importcsv
– exportcsv
– rmcpset
– showcpset
For more information, see the Tivoli Storage Productivity Center forReplication for System z information center at http://publib.boulder.ibm.com/infocenter/tivihelp/v59r1/index.jsp and search bythe command name.
HyperSwap® options available for Metro Global Mirror with Practice sessionsThe session properties for Metro Global Mirror with Practice sessionsinclude the same HyperSwap options that are available for Metro GlobalMirror sessions.
For more information, see the Tivoli Storage Productivity Center forReplication for System z information center at http://publib.boulder.ibm.com/infocenter/tivihelp/v59r1/index.jsp and search forsession properties.
System Storage DS8000 consistency groups that are created for FlashCopysessions
For FlashCopy sessions, Tivoli Storage Productivity Center for Replicationcreates FlashCopy consistency groups in IBM System Storage DS8000. Theconsistency groups are created automatically during the creation of theFlashCopy session. You are no longer required to quiesce an applicationbefore you issue the Flash command for FlashCopy sessions.
New for Tivoli Storage Productivity Center Version 5.1Learn about new features and enhancements in IBM Tivoli Storage ProductivityCenter Version 5.1.
New Features
The following features are new in Tivoli Storage Productivity Center 5.1:
Graphical user interfacesTivoli Storage Productivity Center provides two graphical user interfacesfor managing the storage infrastructure in an enterprise environment: the
xx IBM Tivoli Storage Productivity Center: Installation and Configuration Guide

stand-alone GUI and the web-based GUI. Each GUI provides differentfunctions for working with monitored resources.
Viewing reports from the web-based GUIFrom the web-based GUI, you can now run the following types of reportin Tivoli Common Reporting:
Resources reportsShow the relationships between storage resources in yourenvironment. Resources reports also provide a snapshot of thecapacity, available space, and used space on servers, storagevirtualizers, storage systems, and related storage resources.
Performance reportsShow performance statistics for the most active storage resources inyour environment over a specified period. Performance reportsalso provide detailed statistics for specific storage resources.
Historical space reportsShow how space is used over a specified period on storagevirtualizers, storage systems, and related storage resources.
Storage tiering reportsShow volumes that might require migration from a pool in astorage resource group to a pool in another storage resource group.You also use the Tivoli Storage Productivity Center web-based GUIto view the workload activity reports for managed disk groups andvirtual disks.
Creating and designing reports from the web-based GUIFrom the web-based GUI, you can create custom reports and designcustom reports. You can create and design the reports in report tools inTivoli Common Reporting.
Custom reports can contain detailed information about the relationshipsbetween monitored resources, the properties of monitored resources, anddetailed information about the performance of monitored resources. Unlikepredefined reports, you can select the information that you want to includein custom reports.
You can create reports with basic formatting, or you can design morecomplex reports with advanced formatting features. The advancedformatting features include inserting charts that you can customize inreports, and inserting links that open related reports.
Installing Tivoli Storage Productivity CenterYou can install Tivoli Storage Productivity Center in one of the followingways:
Installation wizardThe installation wizard provides a graphical user interface forinstallation.
Command-line interface by using silent modeIn silent mode, you run a command and provide the installationvalues in a response file. A silent-mode installation is useful if yoursystem is running from a terminal that cannot display graphics.
Installation configurationsWhen you install Tivoli Storage Productivity Center, your system can beconfigured in one of the following ways:
New for Tivoli Storage Productivity Center Version 5.1.1 xxi

Single serverAll Tivoli Storage Productivity Center components are installed onone server.
Multiple serversIn the multiple-servers environment, you can have theseconfigurations:v DB2 and the Tivoli Storage Productivity Center database
repository on a remote server and the rest of the Tivoli StorageProductivity Center components on a local server.
v DB2 and the Tivoli Storage Productivity Center servers,stand-alone GUI, command-line interface, and Storage Resourceagent on one server, and IBM Tivoli Integrated Portal, TivoliCommon Reporting, and web-based GUI on a remote server.
Installation componentsWhen you install Tivoli Storage Productivity Center, the followingcomponents are included:v Database repositoryv Data serverv Device serverv Replication serverv Stand-alone graphical user interfacev Web-based graphical user interfacev Command-line interfacev Storage Resource agentv Tivoli Integrated Portal Version 2.2v Tivoli Common Reporting Version 2.1.1
Lightweight Directory Access ProtocolYou no longer have to configure Lightweight Directory Access Protocol(LDAP) as an authentication method during the installation. You configureLDAP as a post-installation task. The Tivoli Storage Productivity Centerinstallation program establishes a default authentication configuration byusing the federated repositories feature of the WebSphere ApplicationServer.
For more information about LDAP and how to add an LDAP repository,see the Tivoli Storage Productivity Center information center and searchfor Administering Tivoli Integrated Portal.
Tivoli Storage Productivity Center licensesThe following licenses are available in Tivoli Storage Productivity Center5.1:
IBM Tivoli Storage Productivity CenterThis license contains the following functions:v Data management. Data management includes enterprise-wide
reporting and monitoring, and automated capacity provisioningfor direct-attached storage (DAS), network-attached storage(NAS), and storage area networks (SAN) environments.
v Disk management. Disk management helps you manage SANsand heterogeneous storage from one console.
v Fabric management. Fabric management helps you manage theSAN fabric that connects the host systems and applications to
xxii IBM Tivoli Storage Productivity Center: Installation and Configuration Guide

the storage devices. This feature includes automatic resource andtopology discovery, monitoring, alerts, and zone control.
v Tape management. Tape management helps you manage yourtape libraries that must be SMI-S compliant.
Tivoli Storage Productivity Center for ReplicationAll of the Tivoli Storage Productivity Center for Replicationfunctions, including the functions that were previously in the TwoSite and Three Site Business Continuity licenses.v Performance management. Disk and Fabric performance
management functions.v Device support. For the devices that you can use with Tivoli
Storage Productivity Center, see http://www.ibm.com/support/docview.wss?rs=40&uid=swg21386446.
IBM Tivoli Storage Productivity Center Select EditionThis license contains all the functions of the IBM Tivoli StorageProductivity Center license.
IBM Tivoli Storage Productivity Center AdvancedThis license contains all the functions in the Tivoli StorageProductivity Center license plus these additional analyticalfunctions:v Configuration Analysisv Configuration Historyv SAN Plannerv Storage Optimizer
Tivoli Storage Productivity Center for data-related functions
v Scansv Policy managementv Server probesv Profilesv Data Manager for Databasesv Data Manager for Chargeback
IBM Scale Out Network Attached StorageIBM Scale Out Network Attached Storage (IBM SONAS) managesrepositories of information in enterprise environments that requirelarge capacities, high levels of performance, and high availability.IBM SONAS uses up 2 petabytes (PB) of storage in a large filesystem.
Policy-based storage tier reports
Use the Tivoli Storage Productivity Center command-line interfaceto issue commands that create user-defined storage tiering policies.Storage tiering policies set the conditions that must be met todetermine whether a volume requires migration to another pool.
New for Tivoli Storage Productivity Center Version 5.1.1 xxiii

New for Tivoli Storage Productivity Center for ReplicationVersion 5.1
Use this information to learn about new features and enhancements in IBM TivoliStorage Productivity Center for Replication Version 5.1. This information highlightsthe changes since the last release of Tivoli Storage Productivity Center forReplication.
Failover operations that are managed by other applicationsApplications such as the IBM Series i Toolkit, VMware Site RecoveryManager, and Veritas Cluster Server manage failover operations for certainsession types and storage systems. If an application completes a failoveroperation for a session, the Severe status is displayed for the session. Anerror message is also generated for the role pairs for which the failoveroccurred.
For more information, go to the Tivoli Storage Productivity Center forReplication information center at http://publib.boulder.ibm.com/infocenter/tivihelp/v59r1/index.jsp and search for failover and failback.
Additional support for space-efficient volumes in remote copy Tivoli StorageProductivity Center for Replication sessions
You can use extent space-efficient volumes as copy set volumes for thefollowing IBM System Storage DS8000 session types:v FlashCopy® (System Storage DS8000 6.2 or later)v Metro Mirror (System Storage DS8000 6.3 or later)v Global Mirror or Metro Global Mirror (System Storage DS8000 6.3 or
later)
For more information, go to the Tivoli Storage Productivity Center forReplication information center at http://publib.boulder.ibm.com/infocenter/tivihelp/v59r1/index.jsp and search for copy sets.
New featuresThe following features are new for Tivoli Storage Productivity Center forReplication version 5.1.
Reflash After Recover option for Global Mirror Failover/Failback withPractice sessions
You can use the Reflash After Recover option with System StorageDS8000 version 4.2 or later. Use this option to create a FlashCopyreplication between the I2 and J2 volumes after the recovery of aGlobal Mirror Failover/Failback with Practice session. If you donot use this option, a FlashCopy replication is created onlybetween the I2 and H2 volumes.
For more information, go to the Tivoli Storage Productivity Centerfor Replication information center at http://publib.boulder.ibm.com/infocenter/tivihelp/v59r1/index.jsp andsearch for session properties.
No Copy option for Global Mirror Failover/Failback with Practice andMetro Global Mirror with Practice sessions
You can use the No Copy option with System Storage DS8000version 4.2 or later. Use this option if you do not want thehardware to write the background copy until the source track iswritten to.
xxiv IBM Tivoli Storage Productivity Center: Installation and Configuration Guide

For more information, go to the Tivoli Storage Productivity Centerfor Replication information center at http://publib.boulder.ibm.com/infocenter/tivihelp/v59r1/index.jsp andsearch for session properties.
Recovery Point Objective Alerts option for Global Mirror sessionsYou can use the Recovery Point Objective Alerts option with IBMTotalStorage Enterprise Storage Server® Model 800, System StorageDS8000, and System Storage DS6000. Use this option to specify thelength of time that you want to set for the recovery point objective(RPO) thresholds. The values determine whether a Warning orSevere alert is generated when the RPO threshold is exceeded for arole pair. The RPO represents the length of time in seconds of dataexposure that is acceptable in the event of a disaster.
For more information, go to the Tivoli Storage Productivity Centerfor Replication information center at http://publib.boulder.ibm.com/infocenter/tivihelp/v59r1/index.jsp andsearch for session properties.
StartGC H1->H2 command for Global Mirror sessionsYou can use the StartGC H1->H2 command with TotalStorageEnterprise Storage Server Model 800, System Storage DS8000, andSystem Storage DS6000. This command establishes Global Copyrelationships between site 1 and site 2, and begins asynchronousdata replication from H1 to H2.
This command is available only for Global MirrorFailover/Failback and Global Mirror Failover/Failback withPractice sessions.
For more information about this command, go to the Tivoli StorageProductivity Center for Replication information center athttp://publib.boulder.ibm.com/infocenter/tivihelp/v59r1/index.jsp and search for session commands.
Export Global Mirror Data command for Global Mirror role pairsYou can use this option to export data for a Global Mirror role pairthat is in a session to a comma-separated value (CSV) file. You canthen use the data in the CSV file to analyze trends in your storageenvironment that affect your recovery point objective (RPO).
For more information, go to the Tivoli Storage Productivity Centerfor Replication information center at http://publib.boulder.ibm.com/infocenter/tivihelp/v59r1/index.jsp andsearch for exporting historical data.
New chsess command parametersThe command-line interface command chsess has new parameters:v -reflash
v -dsRPOwarning
v -dsRPOsevere
v -enableHardenedFreeze
For more information, go to the Tivoli Storage Productivity Centerfor Replication information center at http://publib.boulder.ibm.com/infocenter/tivihelp/v59r1/index.jsp andsearch for chsess.
New for Tivoli Storage Productivity Center Version 5.1.1 xxv

xxvi IBM Tivoli Storage Productivity Center: Installation and Configuration Guide

Chapter 1. Planning for Tivoli Storage Productivity Center
The following sections provide information to help plan your Tivoli StorageProductivity Center environment before you install the product. In a complexenvironment, good planning helps you avoid delays and problems in getting yoursystem up and running.
Planning for installationBefore installing Tivoli Storage Productivity Center for the first time, be familiarwith your operating systems, storage devices, communication protocols, andsystem configurations.
The Tivoli Storage Productivity Center server must be a dedicated system forTivoli Storage Productivity Center operations and not shared with otherapplications.
Hardware requirementsThe Tivoli Storage Productivity Center server can require a large amount ofmemory, disk space, network bandwidth, and processor resources. In many cases,the server performs best when other applications are not installed on the samesystem.
See Table 2 for information about the minimum hardware requirements needed forthe Tivoli Storage Productivity Center servers.
Table 2. Hardware requirements for the Tivoli Storage Productivity Center servers
Item Hardware requirements
Processor For Tivoli Storage Productivity Center
v For Windows or Linux operating system: Intel Xeon or greater, at least 4processors at 2.5 GHz CPUs each
v For AIX operating system: IBM POWER5 or later, at least 4 processors at2.3 GHz CPUs each
Memory 8 GB of RAM. If you have at least 4 GB but less than 8 GB of RAM, youcan still install Tivoli Storage Productivity Center but you get a warningmessage.
© IBM Corporation 2009 © IBM 2001, 2012 1

Table 2. Hardware requirements for the Tivoli Storage Productivity Centerservers (continued)
Item Hardware requirements
Disk space For a single server installation:
v For installations on Windows operating systems, 15 GB of free diskspace is required.
v For installations on Linux operating systems, 15 GB of free disk space isrequired.
v The disk space distribution for AIX is:
/usr - 220 MB/var - 1 MB/home - 2.0 GB/tmp - 150 MB/opt - 14.2 GB
Note: After you install Tivoli Storage Productivity Center and startcollecting data, a large amount of disk space is required. The amount ofdata collected depends on many factors:
v How many devices you have
v How long you keep the data
v How frequently you collect data
Some users have experienced disk space usage of about 40 - 80 GB.
Networkinterface card(NIC)
If you have multiple NIC cards on the Tivoli Storage Productivity Centerserver, see “Installing and configuring the Tivoli Storage ProductivityCenter server with multiple NIC cards” on page 346 for specialconsiderations.
Console For AIX or Linux operating systems, a console or remote-connectivityapplication such as KDE, Remote Desktop, or VNC is required when youinstall Tivoli Storage Productivity Center.
Restriction: For AIX or Linux operating systems, when you use a Virtual NetworkComputing (VNC) client that is connected to a VNC server, you should not use thefollowing key combinations:
v Alt + H (to start the Help page)
v Alt + N (to proceed to next page)
v Alt + P (to return to the previous page)
v Alt + I (to start an installation action on the Summary page)
You must press Tab and then press Enter or the space bar after the button you want topress is selected. For example, to start the Help, instead of pressing Alt+H, press Tab untilthe Help button is highlighted and then press Enter or the space bar.
See Table 3 on page 3 for information about the storage system requirements forthe Replication server. For the most current information about storage systemrequirements, see http://www-01.ibm.com/support/docview.wss?uid=swg27027303.
2 IBM Tivoli Storage Productivity Center: Installation and Configuration Guide

Table 3. Storage system requirements for the Replication server
Storagesystem Hardware requirements
IBM StorageSystemDS8000
v Release 2 minimum firmware level 6.2.410.30 or Release 3 minimumfirmware level 63.1.32.0
v Advanced Copy services licenses
v Optional Ethernet adapters for Tivoli Storage Productivity Center forReplication
– Single image - feature code 1801
– Dual image - feature code 1802 and 1803
IBM SystemStorageDS6000
v Minimum firmware level 6.2.2.64
v Advanced Copy services licenses
IBMEnterpriseStorage Server(ESS) 2105-800
v Minimum firmware level 2.4.4.72
v Feature codes 240 - PRC and 2240 - PRC
v IBM SystemStorageSANVolumeController4.2.1, 4.3.0,5.1.0, and6.1
v IBMStorwizeV7000
Copy services licenses
Host adapterfeature codes
One or more of the following host adapter feature codes:
v 3021 - Fibre Channel/FICON Host Adapter
v 3023 - Fibre Channel/FICON Host Adapter
v 3024 - 2 Gb Fibre Channel/FICON Host Adapter
v 3025 - 2 Gb Fibre Channel/FICON Host Adapter
See Table 4 for information about the minimum hardware requirements needed forthe Storage Resource agents.
Table 4. Hardware requirements for the Storage Resource agents
Operating System Item Hardware requirements
v Windows and Linux onIntel
v UNIX
v AIX on IBM PowerSystems™
Processor Pentium 400® MHz processor, or higher
Disk space andRAM
Minimum memory and spacerequirements to run:
v 256 MB of RAM
v Approximately 350 MB of hard diskspace
Chapter 1. Planning for Tivoli Storage Productivity Center 3
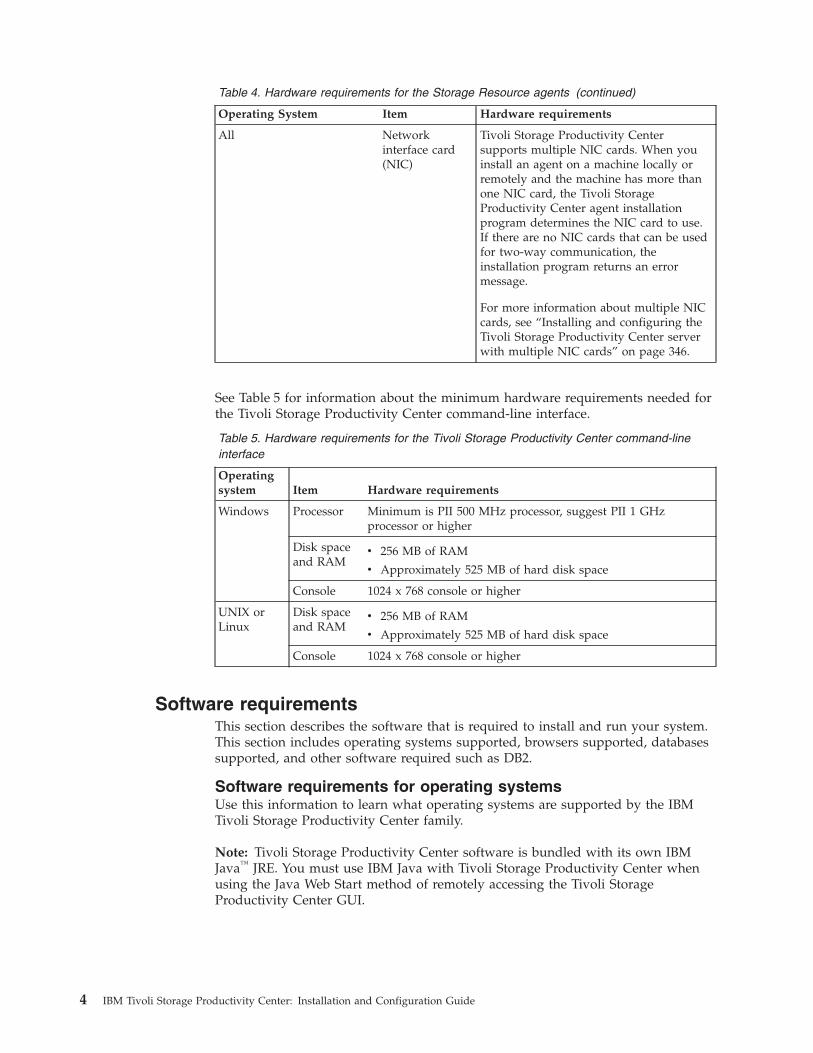
Table 4. Hardware requirements for the Storage Resource agents (continued)
Operating System Item Hardware requirements
All Networkinterface card(NIC)
Tivoli Storage Productivity Centersupports multiple NIC cards. When youinstall an agent on a machine locally orremotely and the machine has more thanone NIC card, the Tivoli StorageProductivity Center agent installationprogram determines the NIC card to use.If there are no NIC cards that can be usedfor two-way communication, theinstallation program returns an errormessage.
For more information about multiple NICcards, see “Installing and configuring theTivoli Storage Productivity Center serverwith multiple NIC cards” on page 346.
See Table 5 for information about the minimum hardware requirements needed forthe Tivoli Storage Productivity Center command-line interface.
Table 5. Hardware requirements for the Tivoli Storage Productivity Center command-lineinterface
Operatingsystem Item Hardware requirements
Windows Processor Minimum is PII 500 MHz processor, suggest PII 1 GHzprocessor or higher
Disk spaceand RAM
v 256 MB of RAM
v Approximately 525 MB of hard disk space
Console 1024 x 768 console or higher
UNIX orLinux
Disk spaceand RAM
v 256 MB of RAM
v Approximately 525 MB of hard disk space
Console 1024 x 768 console or higher
Software requirementsThis section describes the software that is required to install and run your system.This section includes operating systems supported, browsers supported, databasessupported, and other software required such as DB2.
Software requirements for operating systemsUse this information to learn what operating systems are supported by the IBMTivoli Storage Productivity Center family.
Note: Tivoli Storage Productivity Center software is bundled with its own IBMJava™ JRE. You must use IBM Java with Tivoli Storage Productivity Center whenusing the Java Web Start method of remotely accessing the Tivoli StorageProductivity Center GUI.
4 IBM Tivoli Storage Productivity Center: Installation and Configuration Guide

Before installing Tivoli Storage Productivity Center, check the Tivoli StorageProductivity Center support site for the latest platform support. Go to the TivoliStorage Productivity Center support website at https://www.ibm.com/support/docview.wss?uid=swg21386446.
Table 6. Operating system support for Tivoli Storage Productivity Center server, Tivoli Storage Productivity Center forReplication server, and GUI
Operating system or platform
Tivoli StorageProductivity Centerserver
Tivoli StorageProductivity Centerfor Replication server
Tivoli StorageProductivity Centerstand-alone GUI andcommand-lineinterface (CLI)
AIX, see“Notes for AIXoperatingsystems”
IBM AIX 6.1 (64-bit)
v POWER5
v POWER6®
Yes Yes Yes
IBM AIX 7.1 (64-bit)
v POWER5
v POWER6
v POWER7®
Yes Yes Yes
Linux, see“Notes forLinuxoperatingsystems”
Red Hat Enterprise LinuxBase Server and AdvancedPlatform 5 (x86-64)
Yes Yes Yes
Red Hat Linux Base Serverand Advanced Platform 6(x86-64)
No (This operatingsystem is supportedin a multiple-serverenvironment whereDB2 and TivoliStorage ProductivityCenter are installedon Red Hat Linux.You can install DB2or DB2 and TivoliStorage ProductivityCenter on thisoperating system.)
No (This operatingsystem is supported ina multiple-serverenvironment whereDB2 and Tivoli StorageProductivity Center areinstalled on Red HatLinux. You can installDB2 or DB2 and TivoliStorage ProductivityCenter on thisoperating system.)
Red Hat Linux BaseServer and AdvancedPlatform 6 (x86-64)
Windows, see“Notes forWindowsoperatingsystems”
Windows 2008 (x86, x86-64)
v Standard Edition
v Enterprise Edition
Yes Yes Yes
Windows 2008 R2 (x86-64)
v Standard Edition
v Enterprise Edition
Yes Yes Yes
Windows XP (x86) No No Yes
Windows Vista (x86) No No Yes
Windows Vista SP2 (x86) No No Yes
Windows 7 (x86) No No Yes
Chapter 1. Planning for Tivoli Storage Productivity Center 5

Table 6. Operating system support for Tivoli Storage Productivity Center server, Tivoli Storage Productivity Center forReplication server, and GUI (continued)
Operating system or platform
Tivoli StorageProductivity Centerserver
Tivoli StorageProductivity Centerfor Replication server
Tivoli StorageProductivity Centerstand-alone GUI andcommand-lineinterface (CLI)
VM onVMware
VMware ESX and ESXi3.0.x, 3.5.x, 4.0.x, and 4.1.x
v Red Hat EnterpriseLinux 5
v Red Hat EnterpriseLinux 6
v Windows 2008
v Windows 2008 R2
Refer to thecorrespondingoperating systemabove for TivoliStorage ProductivityCenter support inthat operatingsystem.
Refer to thecorrespondingoperating systemabove for TivoliStorage ProductivityCenter support in thatoperating system.
Refer to thecorrespondingoperating systemabove for TivoliStorage ProductivityCenter support in thatoperating system.
z/OS® V1.10,V1.11, V1.12(31-bit)
- No Yes No
Note: For AIX operating systems
1. For AIX 6.1, the minimum maintenance level required is Technology Level 6100-04 Service Pack 5.
You can determine the Technology Level and Service Pack installed by running the following command:
oslevel -s
You can download the package from http://www.ibm.com/eserver/support/fixes/fixcentral/pfixpacks/61.
2. AIX 6.1.0.4 or later comes with IBM Systems Director. IBM Systems Director has a common agent service thatcan use port 9510. The Storage Resource agent also uses port 9510. If you do not need IBM Systems Director,you can uninstall IBM Systems Director before installing Tivoli Storage Productivity Center. If you install TivoliStorage Productivity Center and require IBM Systems Director, specify a different port for the Storage Resourceagent. For information about the ports IBM Systems Director uses, go to http://publib.boulder.ibm.com/infocenter/director/v6r2x/index.jsp?topic=/com.ibm.director.plan.helps.doc/fqm0_r_ports_for_the_management_server.html.
3. AIX 6.1 comes with Lightweight Infrastructure (LWI). If this package is enabled, the package can cause TivoliStorage Productivity Center installation issues:
v Create a port conflict with Tivoli Storage Productivity Center at port 9510.
v Cause the Storage Resource agent installation to fail on hosts where only the agent is installed.
4. Use the GNU tar program version 1.14 or later rather than the native AIX tar program to extract files from TivoliStorage Productivity Center installation images. The AIX tar program truncates long file names, which can causeerrors in Tivoli Storage Productivity Center and Tivoli Integrated Portal installation.
The GNU tar file archiving program can be found from the following link. http://www.ibm.com/systems/power/software/aix/linux/toolbox/alpha.html.
Note: For Windows operating systems
Use the Windows setting for "Windows Classic" when installing the Tivoli Storage Productivity Center GUI onWindows Vista.
For more information, see “Installing Tivoli Storage Productivity Center client components on a separate computer”on page 186.
6 IBM Tivoli Storage Productivity Center: Installation and Configuration Guide

Table 6. Operating system support for Tivoli Storage Productivity Center server, Tivoli Storage Productivity Center forReplication server, and GUI (continued)
Operating system or platform
Tivoli StorageProductivity Centerserver
Tivoli StorageProductivity Centerfor Replication server
Tivoli StorageProductivity Centerstand-alone GUI andcommand-lineinterface (CLI)
Note: For Linux operating systems
1. If you are planning to install Tivoli Storage Productivity Center Version 5.1 on 64-bit Red Hat Enterprise Version5 or 6, you must ensure that you have the complete X Window System package group installed on your 64-bitRed Hat Enterprise Linux system.
2. For 64-bit Red Hat Enterprise Linux Version 5, Tivoli Storage Productivity Center requires the followingpackages (libraries) for Tivoli Common Reporting:
v compat-libstdc++-33-3.2.3-61.i386 or later
v compat-glibc-2.3.4-2.26.i386 or later
v openmotif22-2.2.3-18.i386 or later
Because Tivoli Common Reporting installs 32-bit binary files, you must install the 32-bit versions of theseprerequisite packages (libraries), even on a 64-bit Red Hat Linux Version 5 system. Otherwise, the installationfails.
In addition to the listed packages (libraries), Tivoli Storage Productivity Center also requires the followingpackages (libraries) for Red Hat Enterprise Linux Version 6:
v libXtst-1.0.99.2-3.el6.i686.rpm or later
v 32-bit version of pam_krb5 (required on 32-bit and 64-bit system)
To determine whether the 32-bit (i386) package is installed and which version is installed, use the
--queryformat option for the rpm command:
# rpm -q --queryformat=’%{N}-%{V}-%{R}.%{arch}\n’ compat-libstdc++-33-3.2.3-61compat-glibc-2.3.4-2.26 openmotif22-2.2.3-18 | grep -v x86_64
compat-libstdc++-33-3.2.3-61.i386compat-glibc-2.3.4-2.26.i386openmotif22-2.2.3-18.i386#
To install the required packages (libraries), search the Red Hat Enterprise Linux installation media for these .rpmfiles:
# find <Red Hat Enterprise Linux install media location>-name compat-libstdc++-*.i386.rpm# find <Red Hat Enterprise Linux install media location> -name compat-glibc-*.i386.rpm# find <Red Hat Enterprise Linux install media location> -name openmotif22-*.i386.rpm
After you locate the directory that contains the .rpm files, install or update these files to the required version.Use the -U option for the rpm command, for example:
# rpm -U compat-libstdc++-33-3.2.3-61.i386.rpm compat-glibc-2.3.4-2.26.i386.rpmopenmotif22-2.2.3-18.i386.rpm
Tip: The .rpm file versions on your installation media might differ from the preceding example.
To verify that you have the .rpm files installed, use the --queryformat option for the rpm command to see thearchitecture of the .rpm files that were installed:
# rpm -q --queryformat=’%{N}-%{V}-%{R}.%{arch}\n’ compat-libstdc++-33-3.2.3-61compat-glibc-2.3.4-2.26 openmotif22-2.2.3-18 | grep -v x86_64
compat-libstdc++-33-3.2.3-61.i386compat-glibc-2.3.4-2.26.i386openmotif22-2.2.3-18.i386#
3. Before installing Tivoli Storage Productivity Center on Red Hat Enterprise Linux version 5.2 or later, ensure thatthe shadow utility requirements are met. For information about the shadow utility, go to the Tivoli StorageProductivity Center information center and search for shadow password.
Chapter 1. Planning for Tivoli Storage Productivity Center 7

Software requirements for Storage Resource agentsUse this information to learn about the operating system support for StorageResource agents in Tivoli Storage Productivity Center.
Table 7. Operating system support for the Storage Resource agents
PlatformStorage Resourceagent File systems Volume managers
AIX, see “Notes forAIX operatingsystems”
AIX 6.1 (64-bit)
v POWER5
v POWER6
Yes v JFS
v JFS2
v GPFS™ 3.2
v NFS
v Veritas File System(VxFS) r4 or laterand r5 or later
Veritas VolumeManager (VxVM) r4or later and r5 orlater
AIX 7.1 (64-bit)
v POWER5
v POWER6
v POWER7
Yes
v AIX Virtual I/Oserver 1.5.2 or later
v AIX Virtual I/Oserver 2.2.1.0 orlater
Yes
HP-UX, see “Notesfor HP-UX operatingsystems”
HP-UX 11i v3
v Itanium 64-bit
Yes v HP_HFS
v NFS
v Veritas File System(VxFS) r4 or laterand r5 or later
v HP-UX LogicalVolume Manager
v Veritas VolumeManager (VxVM)r4 or later and r5or later
8 IBM Tivoli Storage Productivity Center: Installation and Configuration Guide

Table 7. Operating system support for the Storage Resource agents (continued)
PlatformStorage Resourceagent File systems Volume managers
Red Hat EnterpriseLinux, see “Notes forLinux operatingsystems”
v POWER5 (32-bit,64-bit)
v POWER6 (32-bit,64-bit)
v zSeries® (31-bit,64-bit)
Yes v EXT2
v EXT3
v NFS
v TMPFS
v Veritas File System(VxFS) r4 or laterand r5 or later
yep
Veritas VolumeManager (VxVM) r4or later and r5 orlater
Red Hat EnterpriseLinux Base Serverand AdvancedPlatform 5 (x86,x86-64):
v POWER5 (32-bit,64-bit)
v POWER6 (32-bit,64-bit)
v zSeries (64-bit)
Yes
Red Hat EnterpriseLinux Base Serverand AdvancedPlatform 6 (x86,x86-64):
v POWER5 (32-bit,64-bit)
v POWER6 (32-bit,64-bit)
v zSeries (64-bit)
Yes
Chapter 1. Planning for Tivoli Storage Productivity Center 9

Table 7. Operating system support for the Storage Resource agents (continued)
PlatformStorage Resourceagent File systems Volume managers
SUSE LinuxEnterprise Server, see“Notes® for Linuxoperating systems”
SUSE LinuxEnterprise Server 9(x86, x86-64)
v POWER5 (32-bit,64-bit)
v POWER6 (32-bit,64-bit)
v zSeries (31-bit,64-bit)
Yes v EXT2
v EXT3
v NFS
v REISERFS
v TMPFS
v Veritas File System(VxFS) r4.x and 5.x
Veritas VolumeManager (VxVM) 4.xand 5.x
SUSE LinuxEnterprise Server 10(x86, x86-64)
v POWER5 (32-bit,64-bit)
v POWER6 (32-bit,64-bit)
v zSeries (64-bit)
Yes
SUSE LinuxEnterprise Server 11(x86, x86-64)
v POWER5 (32-bit,64-bit)
v POWER6 (32-bit,64-bit)
v zSeries (64-bit)
Yes
Oracle Solaris Solaris 9
v SPARC architecture
v 32-bit, 64-bit
Yes (patches arerequired)
v NFS
v TMPFS
v UFS
v Veritas File System(VxFS) r4 or laterand r5 or later
Veritas VolumeManager (VxVM) r4or later and r5 orlater
Solaris 10
v SPARC architecture
v 32-bit, 64-bit
Yes
10 IBM Tivoli Storage Productivity Center: Installation and Configuration Guide

Table 7. Operating system support for the Storage Resource agents (continued)
PlatformStorage Resourceagent File systems Volume managers
Windows, see“Notesfor Windowsoperating systems”
Windows 2003 (x86,x86-64)
v Data CenterEdition
v Enterprise Edition
v Standard Edition
Yes v FAT
v FAT32
v NTFS
Windows 2003 R2(x86, x86-64)
v Data CenterEdition
v Enterprise Edition
v Standard Edition
Yes
Windows 2008 (x86,x86-64)
v Data CenterEdition
v Enterprise Edition
v Standard Edition
Yes
Windows 2008 R2(x86, x86-64)
v Data CenterEdition
v Enterprise Edition
v Standard Edition
Yes
VM on VMware, see“Notes for VMware”
VMware ESX 3.0.x,3.5.x, 4.0.x, and 4.1.x(guest operatingsystem):
v Red Hat EnterpriseLinux 5 (x86)
v SUSE LinuxEnterprise Server 9(x86)
v SUSE LinuxEnterprise Server10 (x86)
v SUSE LinuxEnterprise Server11 (x86)
v Windows 2003(x86)
v Windows 2008(x86)
Chapter 1. Planning for Tivoli Storage Productivity Center 11

Table 7. Operating system support for the Storage Resource agents (continued)
PlatformStorage Resourceagent File systems Volume managers
Note: For Windows operating systems
1. For information about IPv6 support in Windows Server 2003 Enterprise Server, see http://support.microsoft.com/kb/325449.
Note: For AIX operating systems
1. The following AIX fixes must be applied:
For AIX 6.1, the minimum maintenance level required are:
v Technology Level 6100-04 Service Pack 5
v Technology Level 6100-05 Service Pack 1
v Technology Level 6100-06
You can determine the Technology Level and Service Pack installed by running the following command:
oslevel -s
You can download the package from http://www.ibm.com/eserver/support/fixes/fixcentral/pfixpacks/61.
2. AIX 6.1.0.4 or later comes with IBM Systems Director. IBM Systems Director has a common agent service thatcan use port 9510. The Storage Resource agent also uses port 9510. If you do not need IBM Systems Director,you can uninstall IBM Systems Director before installing Tivoli Storage Productivity Center. If you install TivoliStorage Productivity Center and require IBM Systems Director, specify a different port for the Storage Resourceagent. For information about the ports IBM Systems Director uses, go to http://publib.boulder.ibm.com/infocenter/director/v6r2x/index.jsp?topic=/com.ibm.director.plan.helps.doc/fqm0_r_ports_for_the_management_server.html.
3. AIX 6.1 comes with Lightweight Infrastructure (LWI). If this package is enabled, the package can cause TivoliStorage Productivity Center installation issues:
v There can be a port conflict with Tivoli Storage Productivity Center at port 9510.
v Can cause the Storage Resource agent installation to fail on hosts where only the agent is installed.
4. Tivoli Storage Productivity Center also supports PowerHA® software on AIX for the following versions:
v 5.5.x
v 5.4.0.1 (APAR IY87447) or later
v 5.3.0.4 (APAR IY87534) or later
Also check the PowerHA version compatibility matrix on the support site at http://www.ibm.com/support/techdocs/atsmastr.nsf/84279f6ed9ffde6f86256ccf00653ad3/c03127c863a313898625711100635c80?OpenDocument
5. Your fabric probe or zone control job can fail on AIX with error message AGT0430I.
AIX has a constraint wherein the size of the response buffer passed in for GS-3 commands made to the switchcannot exceed 4 K. The Storage Resource agent passes 4 K buffer sizes for AIX.
If the zone configuration for a fabric probe or zone control job exceeds the 4 K limitation for AIX, Tivoli StorageProductivity Center flags this condition. The fabric probe or zone control operation fails under this conditionwith error message AGT0430I.
Consider using Storage Resource agents deployed on another platform that is connected to the same fabric. Usethis Storage Resource agent for collecting zone information and for performing zone changes. In this case, thefabric functions for the Storage Resource agent that is failing can be disabled.
If the fabric probe fails with the error message, and you try to make zone changes for the fabric, then you mightget a warning message that the zoning has changed. Also, the zone control job log displays the AGT0432E errormessage.
6. Use the GNU tar program version 1.14 or later, not the native AIX tar program, to extract files from TivoliStorage Productivity Center installation images. The AIX tar program truncates long file names, which can causeerrors in Total Storage Productivity Center and Tivoli Integrated Portal installation.
The GNU tar file archiving program can be downloaded from http://www.ibm.com/systems/power/software/aix/linux/toolbox/alpha.html.
12 IBM Tivoli Storage Productivity Center: Installation and Configuration Guide

Table 7. Operating system support for the Storage Resource agents (continued)
PlatformStorage Resourceagent File systems Volume managers
Note: For Linux operating systems
1. If you install the Storage Resource Agent on Red Hat Enterprise Linux Version 4 update 5 or later, RedHatEnterprise Linux Version 5, or RedHat Enterprise Linux Version 6, if some RPM package managers (RPMs) arenot on your system, you must install them.
For Storage Resource agents installed on Red Hat Linux AS release 4, you must have Update 5 or later. Youmust have the following package installed:
For Intel architecture:compat-libstdc++-33-3.2.3-47.3.i386.rpm
For Power Systems architecture:compat-libstdc++-33-3.2.3-47.3.ppc.rpm
For zSeries architecture:compat-libstdc++-33-3.2.3-47.3.s390.rpm
For Storage Resource agents installed on Red Hat Enterprise Linux release 5, you must have the followingpackage installed:
For Intel architecture:compat-libstdc++-33-3.2.3-61.i386.rpm
For Power Systems architecture:compat-libstdc++-33-3.2.3-61.ppc.rpm
For zSeries architecture:compat-libstdc++-33-3.2.3-61.s390.rpm
For Storage Resource agents installed on Red Hat Enterprise Linux release 6, you must have the followingpackage installed:
For Intel architecture:compat-libstdc++-33-3.2.3-69.el6.i686.rpm
For Power Systems architecture:compat-libstdc++-33-3.2.3-69.el6.ppc.rpm
For zSeries architecture:compat-libstdc++-33-3.2.3-69.el6.s390.rpm
2. For Storage Resource agent for fabrics connected to hosts running on Linux IBM Power Systems, or zSerieshardware:
v Does not allow zone configuration changes
v Does not report on HBA, fabric topology, or zoning information
These limitations also apply to Storage Resource agents on all guest operating systems for VMwareconfigurations.
3. Tivoli Storage Productivity Center does not support software RAID on Linux systems. A Storage Resource agentdoes not install and run on Linux systems with software RAID.
Chapter 1. Planning for Tivoli Storage Productivity Center 13

Table 7. Operating system support for the Storage Resource agents (continued)
PlatformStorage Resourceagent File systems Volume managers
Note: For HP-UX operating systems
1. Tivoli Storage Productivity Center agents running on HP-UX must have the HP libc cumulative patchPHC_34275 installed on those machines. You can download patch PHC_34275 from https://www1.itrc.hp.com/service/home/home.do.
Note: For Oracle Solaris operating systems
1. To install Storage Resource agents on Solaris 9, patches 111711 and 111712 are required. For more informationabout downloading patches, go to the Solaris web site at http://www.oracle.com. You can search for anddownload the patches that you want to install.
2. For Solaris 10, only Global Zone is supported for the Tivoli Storage Productivity Center agents. Local ornon-global zones are not supported.
If you upgrade from Solaris 9 to Solaris 10, reinstall all of the agents.
Note: For VMware
1. For more information about VMware platforms, see “Planning for VMware” on page 120.
2. The Storage Resource agent supports the VMware ESX environment in tolerance mode only. No fabric functionsare available with the Storage Resource agent for any guest operating systems.
Software requirements for the database repositoryUse this information to understand what the software requirements are for thedatabase repository.
Tivoli Storage Productivity Center supports DB2 as the database repository.
DB2 databaseFor the repository database, you can use the following products with TivoliStorage Productivity Center:v DB2 Enterprise Server Edition version 9.5 with fix pack 4.v DB2 Enterprise Server Edition version 9.7 with fix pack 4.
For the most current information about the supported database versions,see the Tivoli Storage Productivity Center support matrix athttps://www.ibm.com/support/docview.wss?uid=swg21386446.
Restriction: If DB2 is installed in the LDAP environment, you cannotuse Tivoli Storage Productivity Center.
DB2 9.5DB2 9.5 provides increased performance and scalability andimproved security. For more information, see http://publib.boulder.ibm.com/infocenter/db2luw/v9r5/index.jsp?topic=/com.ibm.db2.luw.wn.doc/doc/c0023235.html.
Tip:
v For DB2 9.5 on AIX, a 64-bit AIX kernel is required.v For DB2 9.5, do not use fix pack 6 (this fix pack causes issues
with Tivoli Storage Productivity Center).
DB2 9.7DB2 9.7 provides more manageability, monitoring, performance,security, and high-availability enhancements over DB2 9.5. For
14 IBM Tivoli Storage Productivity Center: Installation and Configuration Guide

more information, see http://publib.boulder.ibm.com/infocenter/db2luw/v9r7/index.jsp?topic=/com.ibm.db2.luw.wn.doc/doc/c0052035.html.
Note:
v For DB2 9.7, use the version of DB2 shipped with Tivoli StorageProductivity Center.
v For DB2 9.7 on AIX, a 64-bit AIX kernel is required.
The Windows operating system is enabled for both IPv6 and IPv4addressing. If the Windows operating system is used in IPv6–onlyscenarios, all communication must be done over IPv6. In this scenario, theWindows operating system still has an IPv4 stack active, even if no IPv4address is configured.
When you install Tivoli Storage Productivity Center, a single, shareddatabase instance is created on DB2. The default database name is TPCDB.
Web browser supportIBM Tivoli Storage Productivity Center starts a web browser when you access webpages from items in the Help menu, start another application using itslaunch-in-context feature, or start IBM Tivoli Storage Productivity Center forReplication from its user interface.
Note: The Tivoli Storage Productivity Center software is bundled with its ownIBM Java JRE. When you use the Java Web Start method of remotely accessing thestand-alone GUI, you must use the IBM Java.
Before you start Tivoli Storage Productivity Center, ensure that you are using asupported web browser. For a list of web browsers that you can use with TivoliStorage Productivity Center, see the support matrix at http://www.ibm.com/support/docview.wss?uid=swg21386446. In the Agents, Servers and GUI column,click the version of Tivoli Storage Productivity Center that you are installing. Onthe next page, click Web Browsers to find the web browsers that you can use.
If you do not have a web browser configured for use with Tivoli StorageProductivity Center when you access a web page from its user interface, the isdisplayed. Use this window to configure a web browser for use with the product.
Tip: For information about the web browsers that you can use with the DS8000,see the DS8000 Information Center at http://publib.boulder.ibm.com/infocenter/dsichelp/ds8000ic/index.jsp. Search for Internet browser support.
Tip: The web GUI requires the use of cookies to manage user preferences, such astable customization and frequently viewed charts. Ensure that cookies are enabledto make use of these features.
Browser-specific information:
The software to block pop-up windows must be turned off in Windows InternetExplorer for any application to start the graphical user interface (GUI) for thefollowing storage systems:v SAN Volume Controllerv Storwize V3500v Storwize V3700v Storwize V7000
Chapter 1. Planning for Tivoli Storage Productivity Center 15
|
|

v Storwize V7000 Unifiedv IBM SONAS
For example, if you are in Tivoli Storage Productivity Center and you want to startthe Element Manager of the SAN Volume Controller GUI, you must configureInternet Explorer with the following settings.1. Open Internet Explorer.2. From the Internet Explorer toolbar, click Tools > Pop-up Blocker > Turn Off
Pop-up Blocker.
Browser-specific information:
If the Internet Explorer Information Bar displays a message that content is blockedbecause it was not signed by a valid security certificate, click the Information Barand select Show blocked content.
Web browser support for Tivoli Storage Productivity Center forReplication
When you start Tivoli Storage Productivity Center for Replication from within theTivoli Storage Productivity Center, its user interface is displayed in a web browser.Depending on the configuration settings for the web browser on your computer,Tivoli Storage Productivity Center for Replication is displayed within a tab of anexisting browser session or it is displayed within a new browser session.
In Firefox, you can configure how Tivoli Storage Productivity Center forReplication is displayed when started from Tivoli Storage Productivity Center. Toconfigure Firefox, complete the following steps:1. Start Firefox.2. Select Tools > Options from the menu bar.3. Select Tabs.4. Select a new window to indicate that you want start Tivoli Storage Productivity
Center for Replication in a new web browser session. Select a new tab toindicate that you want to start Tivoli Storage Productivity Center forReplication in a new tab of an existing web browser session.
Note: For Internet Explorer, Tivoli Storage Productivity Center for Replicationis always started in a new web browser session.
Note: If you start Tivoli Storage Productivity Center for Replication from withinTivoli Storage Productivity Center, you might be logged out of the Tivoli StorageProductivity Center for Replication user interface unexpectedly. This action occurswhen you use Tivoli Storage Productivity Center to start a session of Tivoli StorageProductivity Center for Replication in an Internet Explorer web browser and thenopen and close a wizard or secondary window in that Tivoli Storage ProductivityCenter for Replication session.
To work around this problem, use one of these solutions:v Start Tivoli Storage Productivity Center for Replication from Tivoli Storage
Productivity Center using Firefoxv Start Tivoli Storage Productivity Center for Replication from Tivoli Integrated
Portalv Start Tivoli Storage Productivity Center for Replication by entering its web
address directly in a Firefox or Internet Explorer web browser.
16 IBM Tivoli Storage Productivity Center: Installation and Configuration Guide

Web browser support for Help menu items
Tivoli Storage Productivity Center provides a number of items in its Help menuthat you can click to learn more about how to use the product. When you click oneof these items, Tivoli Storage Productivity Center starts a web browser anddisplays the appropriate web page. You must have an internet connection on thesystem where you are running the Tivoli Storage Productivity Center userinterface. You must also have a default browser configured to successfully accessthese web pages.
Software requirements for LDAP servers
The LDAP repositories that can be used with Tivoli Storage Productivity Centerdepend on the operating systems on which you run Tivoli Integrated Portal. Formore information about the LDAP repositories supported, see one of the followingtopics, and search for LDAP Servers using Federated Repository Configuration.v For the Windows operating system: http://www.ibm.com/support/
docview.wss?rs=180&uid=swg27012421 .v For the AIX operating system: http://www.ibm.com/support/
docview.wss?rs=180&uid=swg27012389.v For the Linux operating system: http://www.ibm.com/support/
docview.wss?rs=180&uid=swg27012415.
Software requirements for CIM agents
CIM agents for DS3000, DS4000, DS5000, DS6000, and tape
Tivoli Storage Productivity Center requires CIM agents for some IBM storagedevices such as the DS3000, DS4000, DS5000, DS6000, and tape.
For information about installing and configuring the CIM agent for the DS3000,DS4000, and DS5000, contact your CIM agent (LSI SMI Provider) athttp://www.lsi.com/storage_home/products_home/external_raid/management_software/smis_provider/index.html.
The LSI CIM agent must be installed and configured before you can collect datafor the DS3000, DS4000, and DS5000 through Tivoli Storage Productivity Center.When you configure Tivoli Storage Productivity Center to connect to the CIMagent, you must provide the interoperability namespace for the device.
For information about the LSI CIM agent level required for each device and thenamespace, see http://www.ibm.com/support/docview.wss?uid=swg21386446.
Also see TPC Hints and Tips document at this website http://www.ibm.com/support/docview.wss?uid=swg27008254 for some useful information aboutinstalling the LSI CIM agent.
Also note the following information about the CIM agents from LSI:v Do not install the CIM agent on the same server as the Tivoli Storage
Productivity Center server.v Do not have the CIM agent monitor more than five storage systems.v Use the LSI SMI-S Provider V10.06.GG.33 or later for the DS4000 and DS5000
MC level V7.60.x. Otherwise, performance monitoring does not work.
Chapter 1. Planning for Tivoli Storage Productivity Center 17

v Do not use the LSI SMI-S agent for the DS4000 and DS5000 with an MC levelearlier than V7.50.x. Lower-level microcode can cause a reboot of the controllerdevice.
CIM agents for switches and directors
CIM agents (SMI-S Providers) are also required for switches and directors. For acomplete list of switches and directors supported and the level of CIM agentsrequired for each device, see http://www.ibm.com/support/docview.wss?uid=swg21386446.
CIM agents for non-IBM storage systems
Tivoli Storage Productivity Center also supports some non-IBM storage systems.For example, Tivoli Storage Productivity Center supports HP, TagmaStore,CLARiiON, Symmetrix, and other storage systems.
For a complete list of storage systems supported and the level of CIM agentsrequired for each device, see http://www.ibm.com/support/docview.wss?uid=swg21386446.
Product licenses for Tivoli Storage Productivity CenterProduct licenses are available for IBM Tivoli Storage Productivity Center. Eachlicense determines the functions that are accessible in the stand-alone GUI,command-line interface, and the API. You can review the functions that areincluded with each license and determine which license meets your storagemanagement needs.
IBM Tivoli Storage Productivity CenterThis license contains the following functions:
Data managementA file and capacity management solution for heterogeneous storageenvironments. Data management includes enterprise-widereporting and monitoring, and automated capacity provisioning forDirect Attached Storage (DAS), network-attached storage (NAS),and Storage Area Network (SAN) environments.
Disk managementDisk management helps you manage SANs and heterogeneousstorage from one console.
Fabric managementFabric management helps you manage the SAN fabric thatconnects the host systems and applications to the storage devices.This feature is a comprehensive management solution formulti-vendor SANs and includes automatic resource and topologydiscovery, monitoring, alerts, and zone control.
Tape managementTape management helps you manage your SMI-S compliant tapelibraries.
Tivoli Storage Productivity Center for ReplicationThis license includes all the Tivoli Storage Productivity Center forReplication functions.
Performance managementDisk and Fabric performance management functions.
18 IBM Tivoli Storage Productivity Center: Installation and Configuration Guide

Device supportYou can see a complete list of devices that can be used with TivoliStorage Productivity Center at https://www.ibm.com/support/docview.wss?uid=swg21386446. Click the appropriate release underStorage.
IBM Storage Productivity Center Select EditionThis license contains all the functions of the IBM Tivoli StorageProductivity Center license. This license is priced by enclosure rather thanby capacity.
IBM Tivoli Storage Productivity Center AdvancedThis license contains everything in IBM Tivoli Storage Productivity Centerlicense and the following functions:
Analytical functions
v Configuration analysisv Configuration historyv SAN Plannerv Storage Optimizer
Tivoli Storage Productivity Center for data-related functions
v Scansv Policy managementv Server probesv Scansv Profilesv Data Manager for databasesv Data Manager for Chargeback
Use the following tables to view the specific functions, reports, and elements of theuser interface that are available with each license.
Table 8. Functions with each Tivoli Storage Productivity Center license
Function
Tivoli StorageProductivity Center orStorage ProductivityCenter Select Edition
Tivoli StorageProductivity CenterAdvanced
Administrative Services
Device discovery Yes Yes1Data Sources11
v CIMOM agents
v Data/Storage Resource Agents
v Inband Fabric Agents
v Out of Band Fabric Agents
v Storage Subsystems
v TPC Servers
v VMWare VI Data Source
v Yes
v Yes
v Yes
v Yes
v Yes
v No
v Yes
v Yes
v Yes
v Yes
v Yes
v Yes
v Yes
v Yes
Configuration Yes2 Yes
IBM Tivoli Storage Productivity Center
Configuration Utility Yes Yes
Chapter 1. Planning for Tivoli Storage Productivity Center 19

Table 8. Functions with each Tivoli Storage Productivity Center license (continued)
Function
Tivoli StorageProductivity Center orStorage ProductivityCenter Select Edition
Tivoli StorageProductivity CenterAdvanced
Configure Devices Yes Yes
Job Management Yes Yes
Reporting Yes Yes
v Batch Reports
v User ID reports
v System Reports
v Rollup Reports
v Data Source Reports
See Table 9 on page 22for a list of availablereports.
See Table 9 on page 22for a list of availablereports.
Topology Viewer Yes Yes
Monitoring (data collection)
v Probes
v TPC Server Probes
v Yes
v No
v Yes
v Yes
Storage Resource Group Management Yes5 Yes
Analytics
v Configuration History
v Storage Optimizer
v SAN Planner
v Configuration Analysis
v No
v No
v No
v No
v Yes
v Yes
v Yes
v Yes
Alerting:
v Alert Log
v Authentication ConfigurationAlerts
v Yes3
v Yes
v Yes
v Yes
Data Manager
Monitoring: (data collection)
v Groups
v Pings
v Scans
v Profiles
v Yes
v Yes
v No
v No
v Yes
v Yes
v Yes
v Yes
Alerting Yes4 Yes
Policy Management No Yes
Reporting Yes
Not all reports areavailable with the TivoliStorage ProductivityCenter or StorageProductivity CenterSelect license. See Table 9on page 22 for a list ofavailable reports.
Yes
Data Manager for Databases No Yes
20 IBM Tivoli Storage Productivity Center: Installation and Configuration Guide

Table 8. Functions with each Tivoli Storage Productivity Center license (continued)
Function
Tivoli StorageProductivity Center orStorage ProductivityCenter Select Edition
Tivoli StorageProductivity CenterAdvanced
Data Manager for Chargeback No Yes
Disk Manager
Storage Subsystems Yes Yes
v Create Volumes
v Create Virtual Disks
v Launch Element Manager
v Yes
v Yes
v Yes
v Yes
v Yes
v Yes
Storage Optimizer No Yes
SAN Planner No Yes
Monitoring (data collection)
v Groups
v Jobs
v Storage Subsystem Performance
v Yes
v Yes
v Yes
v Yes
v Yes
v Yes
Alerting Yes Yes
Profile Management Yes Yes
Reporting
v Groups
v Storage Subsystems
v Storage Subsystem Performance
v Yes
v Yes
v Yes
v Yes
v Yes
v Yes
Fabric Manager
Fabrics Yes Yes
Monitoring (data collection)
v Groups
v Jobs
v Switch Performance Monitors
v Yes
v Yes
v Yes
v Yes
v Yes
v Yes
Alerting Yes Yes
Reporting Switch Performance Yes Yes
Tape Manager Yes Yes
Element Manager Yes Yes
Replication Manager Yes Yes
Chapter 1. Planning for Tivoli Storage Productivity Center 21

Table 8. Functions with each Tivoli Storage Productivity Center license (continued)
Function
Tivoli StorageProductivity Center orStorage ProductivityCenter Select Edition
Tivoli StorageProductivity CenterAdvanced
Note:
1. You cannot associate TPC Servers with Tivoli Storage Productivity Center in the TivoliStorage Productivity Center or Storage Productivity Center Select license. VMware DataSources are associated with the Tivoli Storage Productivity Center or StorageProductivity Center Select license. TPC Servers are associated with the Tivoli StorageProductivity Center Advanced license.
2. The following nodes under Configuration are not available with the Tivoli StorageProductivity Center or Storage Productivity Center Select license:
v License Keys
v Quota and Constraint e-mail Address Rules
v Resource History Retention for Databases
v Removed Resource Retention for Databases
v Configuration History Settings
3. The following nodes under Alert Log are not available with the Tivoli StorageProductivity Center or Storage Productivity Center Select license:
v Directory
v User
v OS User Group
v Configuration Analysis
4. The following node under Data Manager > Alerting is not available with the TivoliStorage Productivity Center or Storage Productivity Center Select license: DirectoryAlerts. Hypervisor Alerts and Other NAS Alerts are available with the Tivoli StorageProductivity Center or Storage Productivity Center Select license.
5. You cannot create a storage resource group for a type of capacity pool.
Table 9. Available reports with each IBM Tivoli Storage Productivity Center license
Reports
Tivoli StorageProductivity Centeror StorageProductivity CenterSelect
Tivoli StorageProductivity CenterAdvanced
Batch reports Yes1, 2 Yes1
System Reports:
v Data
v Fabric
v Disk
v Yes4
v Yes
v Yes
v Yes
v Yes
v Yes
Rollup Reports No Yes
Data Source Reports Yes Yes
Asset reports
22 IBM Tivoli Storage Productivity Center: Installation and Configuration Guide

Table 9. Available reports with each IBM Tivoli Storage Productivity Centerlicense (continued)
Reports
Tivoli StorageProductivity Centeror StorageProductivity CenterSelect
Tivoli StorageProductivity CenterAdvanced
v By Cluster
v By Computer
v By Hypervisor
v By IBM Storwize V7000 Unified/IBMSONAS
v By OS Type
v By Storage Subsystem
v System-wide
v Yes
v Yes
v Yes
v Yes
v Yes
v Yes
v Yes3
v Yes
v Yes
v Yes
v Yes
v Yes
v Yes
v Yes
Availability reports Yes Yes
TPC-wide Storage Space reports:
v Disk Space
v File System Space
v Consumed File System Space
v Available File System Space
v Yes
v Yes
v Yes
v Yes
v Yes
v Yes
v Yes
v Yes
Usage reports No Yes (these reportsare a result of ascan)
Usage Violation reports No Yes (these reportsare a result of ascan)
Backup reports: No Yes (these reportsare a result of ascan)
Monitored Computer Storage Space reports Yes Yes
Storage Subsystem reports Yes Yes
Storage Subsystem Performance reports Yes Yes
Switch Performance reports Yes Yes
Tape Library report Yes Yes
Chapter 1. Planning for Tivoli Storage Productivity Center 23

Table 9. Available reports with each IBM Tivoli Storage Productivity Centerlicense (continued)
Reports
Tivoli StorageProductivity Centeror StorageProductivity CenterSelect
Tivoli StorageProductivity CenterAdvanced
Note:
1. A Storage Resource agent must be deployed on the computer where you want to runbatch reports.
2. The following batch reports are not available with the Tivoli Storage ProductivityCenter or Storage Productivity Center Select license:
v Rollup
v Usage
v Usage Violations
v Backup
3. The following Asset > System-wide reports are available with the Tivoli StorageProductivity Center Advanced license:
v Monitored Directories
v Unmanaged Computers
v Users
v OS User Groups
4. The following Data system reports are available with the Tivoli Storage ProductivityCenter or Storage Productivity Center Select license:
v Disk Space Summary
v Disk Defects
v Computer Storage Availability
v Computer Disk Space
v Available File System Space
If you purchased a license for IBM Tivoli Storage Productivity Center Version 4,when you upgrade to Version 5, you can upgrade to the appropriatelicense.Table 10 shows the parallel functions in Version 5.
Table 10. Tivoli Storage Productivity Center licenses when you upgrade from Version 4 toVersion 5
If you have this Tivoli StorageProductivity Center Version 4 license
You are entitled to this Tivoli StorageProductivity Center Version 5 license
Basic There is no equivalent license in TivoliStorage Productivity Center Version 5.1. Youcan upgrade by purchasing the Tivoli StorageProductivity Center Version 5.1 license.
Disk Select IBM Storage Productivity Center SelectEdition
Data IBM Tivoli Storage Productivity CenterAdvanced
Disk IBM Tivoli Storage Productivity Center
Standard Select IBM Tivoli Storage Productivity CenterAdvanced
Standard IBM Tivoli Storage Productivity CenterAdvanced
24 IBM Tivoli Storage Productivity Center: Installation and Configuration Guide

Running Tivoli Storage Productivity Center in a 64-bitenvironment
This section provides information for running Tivoli Storage Productivity Center ina 64-bit environment.
If you are running Tivoli Storage Productivity Center in a 64-bit environment, notethe following conditions:v All Tivoli Storage Productivity Center programs that run in a 64-bit environment
are run in 32-bit compatibility mode for Tivoli Storage Productivity Center.v The Tivoli Storage Productivity Center agents must be running in a 32-bit native
mode or 32-bit compatibility mode environment.v The databases to be monitored by Tivoli Storage Productivity Center must be in
a 32-bit native mode or 32-bit compatibility mode environment.v Tivoli Storage Productivity Center can monitor DB2 in 64-bit native mode on
Windows and AIX as long as the DB instance is created in 32-bit mode.
Planning for Tivoli Storage Productivity Center for ReplicationWhen planning for disaster recovery, the Tivoli Storage Productivity Center forReplication server must be accessible if a disaster occurs. Even if you have a TivoliStorage Productivity Center for Replication standby server, this server still requiresauthentication.
For more information about planning for replication, see “Planning for OpenHyperSwap replication.”
Planning for Open HyperSwap replicationOpen HyperSwap replication is a special Metro Mirror replication methoddesigned to automatically failover I/O from the primary logical devices to thesecondary logical devices in the event of a primary disk storage system failure.This function can be done with minimal disruption to the applications that areusing the logical devices.
Overview
Open HyperSwap replication applies to both planned and unplanned replicationsessions. When a session has Open HyperSwap enabled, an I/O error on theprimary site automatically causes the I/O to switch to the secondary site withoutany user interaction and with minimal application impact. In addition, while OpenHyperSwap is enabled, the Metro Mirror session supports disaster recovery. If awrite is successful on the primary site but is unable to get replicated on thesecondary site, IBM Tivoli Storage Productivity Center for Replication suspends theentire set of data consistency checking, thus ensuring that a consistent copy of thedata exists on the secondary site. If the system fails, this data might not be thelatest data, but the data should be consistent and allow the user to manuallyswitch host servers to the secondary site.
You can control Open HyperSwap from any system running IBM Tivoli StorageProductivity Center for Replication (AIX, Windows, Linux, or z/OS). However, thevolumes that are involved with Open HyperSwap must be attached to an AIXsystem. The AIX system is then connected to Tivoli Storage Productivity Center forReplication.
Chapter 1. Planning for Tivoli Storage Productivity Center 25

Software and hardware requirements
There are several requirements for Open HyperSwap support:
AIX requirementsOpen HyperSwap support requires AIX version 5.3 or 6.1. (You can findthe supported AIX version for each Tivoli Storage Productivity Center forReplication release in the support matrix at http://www.ibm.com/support/docview.wss?rs=40&context=SSBSEX&context=SSMN28&context=SSMMUP&context=SS8JB5&context=SS8JFM&uid=swg21386446&loc=en_US&cs=utf-8&lang=en. Click the link for the applicable releaseunder Agents, Servers and GUI.)
You must have the following AIX modules installed:v Subsystem Device Driver Path Control Module (SDDPCM) version
3.0.0.0 or laterv Multi-Path Input/Output (MPIO) module (the version that is provided
with AIX version 5.3 or 6.1)
DS8000 hardware requirementsOnly DS8000 storage systems are supported. Open HyperSwap requiresDS8000 5.1 or later.
Note: Open HyperSwap does not support PowerHA (previously known as HighAvailability Cluster Multi-processing (HACMP™)).
General tasks
Before you can use Open HyperSwap, you must set up your environment for thisfunction. The general steps are:1. Prepare the AIX system for Open HyperSwap. Use the AIX configuration
manager (cfgmgr) to identify all volumes that are involved with the OpenHyperSwap session.
2. Set up the host connection of Tivoli Storage Productivity Center for Replicationto the AIX system. Use the Tivoli Storage Productivity Center for Replicationuser interface to manually set up the connection to the AIX system. Use theHost Systems page to enter the IP address and port number for the AIX system.
3. Set up the Tivoli Storage Productivity Center for Replication Metro MirrorFailover/Failback session, selecting the function Manage H1-H2 with OpenHyperSwap.
4. Add the copy sets to the session where all the volumes in the copy sets arevolumes that are on the AIX system that is connected to Tivoli StorageProductivity Center for Replication.
5. You can now start your Open HyperSwap session the same as other sessions.
Planning for ConfigurationUse this information to plan your IBM Tivoli Storage Productivity Centerenvironment. Topics include general configuration guidelines, TCP/IP ports used,user names and user rights, and SMI-S support.
Configuration guidelinesTivoli Storage Productivity Center must be configured properly for monitoring.
26 IBM Tivoli Storage Productivity Center: Installation and Configuration Guide

For a list of the capacity guidelines for Tivoli Storage Productivity Center, seehttp://www.ibm.com/support/docview.wss?uid=swg21424912.
Consider the following guidelines when you determine your capacityrequirements:
Database repositoryFor best performance, install the database repository across multiplephysical disks, either through operating system striping or hardware RAID.You must have a minimum of three disks that are separate from the TivoliStorage Productivity Center host server operating system location andTivoli Storage Productivity Center product installation directory location.
Tivoli Storage Productivity Center serverThe Tivoli Storage Productivity Center server must meet the followingrequirements:v The Tivoli Storage Productivity Center server must have dual 3.2-GHz
processors with a minimum of 8 GB of RAM.v The Tivoli Storage Productivity Center server must be a dedicated
computer for Tivoli Storage Productivity Center operations and notshared with other applications.
v Paging space: On the AIX operating system, the paging space must be atleast half or, if possible, the same amount as the physical memory. Youmust periodically monitor paging space usage by running the lsps -scommand and increasing the space if the percentage used is higher than50%.
Stand-alone GUIFor large environments, the Tivoli Storage Productivity Center GUI mustbe installed on a separate system from the Tivoli Storage ProductivityCenter server.
For a stand-alone GUI, a minimum of 2-GHz processor (single), 1-GB RAMworkstation for the GUI, and up to 2 GB of RAM is required if a largeserver is used.
An environment is considered large if you have 50% or more of themaximum for any Tivoli Storage Productivity Center recommendedmaximums. For example, an environment is considered large if you have500 or more disk volumes.
CIM agentsCIM agents are not required for storage systems that Tivoli StorageProductivity Center communicates with using the native interface, such asDS8000, IBM XIV Storage System, SAN Volume Controller, and IBMStorwize V7000. For those devices that require CIM agents to be set up,review the CIM agent documentation understand how many devices theCIM agent can be configured to manage. The memory consumed by theCIM agent includes the memory required for Tivoli Storage ProductivityCenter to probe a device through the CIM agent. The CIM agent istypically affected by the number of devices that the CIM agent manages. Ifno guidelines are available in the disk array subsystem CIM agentdocumentation, you should limit it to three subsystems per CIM agent.
Storage Resource agentsStorage Resource agents are designed to reduce the load of managementcalls on the fabric. Consider some improvements that Storage Resourceagents offer: :
Chapter 1. Planning for Tivoli Storage Productivity Center 27

v Storage Resource agents do not monitor HBAs for fabric events and donot notify the server regarding fabric events. The HBA event monitoringand event scanner function is not supported by the Storage Resourceagents. Instead, SNMP traps and CIM indications are used for reportingfabric events (and later an automatic fabric probe if the fabric is beingmonitored by the Storage Resource agent). This action reduces thenumber of event notifications while still monitoring fabrics using othermechanisms.
v An agent assignment algorithm is used to reduce the number of StorageResource agents that are used to probe a fabric. Depending on the mixof agents capable of reporting on a fabric, fewer Storage Resource agentsmight be used if multiple agents can collect similar information. Forexample, if Storage Resource agents are deployed on many systemsconnected to the same fabrics, then the algorithm automaticallydetermines the number of agents to be used or not used to probe thefabric.
v Tivoli Storage Productivity Center can selectively probe specific fabricsafter an event notification if there is sufficient information to determinewhich fabrics triggered the events. Because Tivoli Storage ProductivityCenter can determine the likelihood of which fabrics triggered theevents, the number of fabrics being probed can be reduced.
v For Storage Resource agents, there is an option to selectively disablefabric functions for one or more Storage Resource agents. If a StorageResource agent is disabled for fabric functions, no management calls aremade to the fabric. You can use this option to complement agentassignment to control the number of agents being used for fabricfunctions.
v Storage Resource agents only probe fabrics that you are interested inmonitoring (fabrics that are part of a probe definition).
v If there are many calls made by the Storage Resource agents, TivoliStorage Productivity Center can reduce the number of fabric probesbeing performed within a time window to reduce the probe activity.
v Tivoli Storage Productivity Center monitors the Device server filters forSNMP traps. Tivoli Storage Productivity Center filters out traps that arenot related to fabric events so that fabric probes are not automaticallytriggered as a result of SNMP traps received.
Storage subsystemsWhen probing storage subsystems that are registered with the sameStorage Resource agent, do not probe more than three storage subsystemswithin the same probe job. The increased load on the agent would increasethe likelihood of timeouts. Instead, spread the storage subsystems acrossmultiple probe jobs with different starting times.
LSI SMI-S ProviderTivoli Storage Productivity Center supports up to five storage systems withthe LSI SMI-S Provider 1.3 or later.
Planning for Tivoli Storage Productivity Center authenticationand authorization
An operating system user name is required to install and log on to Tivoli StorageProductivity Center for the first time. After you install Tivoli Storage ProductivityCenter, you can assign roles to users that enable users to log on and determine thecomponents that the user can view in the graphical user interface (GUI).
28 IBM Tivoli Storage Productivity Center: Installation and Configuration Guide

User requirements for installing Tivoli Storage ProductivityCenter
The user name that you use when you run the Tivoli Storage Productivity Centerinstallation program must belong to the following operating system groups. Theuser that you define as the common user during the Tivoli Storage ProductivityCenter installation must also belong to these groups. The Tivoli StorageProductivity Center installation program automatically maps these groups to theTivoli Storage Productivity Center Superuser role.
Table 11. Operating system groups that are mapped to the Superuser role
Operating System Group
Windows Administrators
AIX system
Linux root
The user name that is used to install the database repository must belong to one ofthe following DB2 groups. The user name that is used to install the databaserepository depends on your installation configuration. For example, if you installedTivoli Storage Productivity Center on a single server and you did not enterseparate user information for DB2, the database repository is installed by using thecommon user name. Therefore, the common user must have these DB2 privileges.
Table 12. DB2 groups that are required to install the database repository
Operating System Group
Windows DB2ADMNS
AIX and Linux db2iadm1
The Tivoli Storage Productivity Center installation program establishes a defaultauthentication configuration by using the federated repositories feature of theWebSphere Application Server. If you want to change the user authenticationconfiguration, go to the Tivoli Storage Productivity Center information center athttp://publib.boulder.ibm.com/infocenter/tivihelp/v59r1/index.jsp and search forChanging the user authentication configuration.
For more information about installing Tivoli Storage Productivity Center on aWindows domain, see “Preparing to install Tivoli Storage Productivity Center in aWindows domain” on page 155 and “Installing Tivoli Storage Productivity Centeron a Windows domain” on page 159.
Defining roles for Tivoli Storage Productivity Center
After you install Tivoli Storage Productivity Center, you can assign roles for TivoliStorage Productivity Center users. These roles are predefined in Tivoli StorageProductivity Center and are assigned at the group level. The role determines theauthorization level for the users who are in the group. The authorization leveldetermines the functions in Tivoli Storage Productivity Center that the user canaccess.
For example, if a user is in a group that is assigned to the Superuser role, the userhas full access to all Tivoli Storage Productivity Center functions. However, if auser is in a group that is assigned to the Tape Administrator role, the user hasaccess to only tape-related functions.
Chapter 1. Planning for Tivoli Storage Productivity Center 29

For more information about roles and how to assign a role to a group, see“Role-to-Group Mappings” on page 280.
Defining roles for Tivoli Storage Productivity Center forReplication
You can assign roles for Tivoli Storage Productivity Center for Replication users atthe user or group level. The roles are predefined in Tivoli Storage ProductivityCenter for Replication and determine the authorization level for individual users orall users who are in a group.
For example, if a user or a user group is assigned to the Administrator role, theuser has full access to all Tivoli Storage Productivity Center for Replicationfunctions. However, if a user or group is assigned to the Monitor role, the user canview the health and status of the Tivoli Storage Productivity Center for Replicationcomponents, but cannot complete any commands or actions.
For more information about roles and how to assign a role to a group, see the topicabout Tivoli Storage Productivity Center for Replication security in the IBM TivoliStorage Productivity Center User's Guide.
User names and passwordsSeveral user names and passwords are required to install, configure, and use IBMTivoli Storage Productivity Center. There are also some requirements andlimitations that you must understand before you install Tivoli Storage ProductivityCenter.
A worksheet is also provided to help you plan and document the user names andpasswords that you use with Tivoli Storage Productivity Center. Keep thecompleted worksheet in a safe, secure place. Before you install Tivoli StorageProductivity Center, you must understand your local security policies andrequirements. These policies can impose certain standards that you must considerwhen you create user names and passwords to comply with requirements.Related reference:“General requirements for user names and passwords”This section provides information about the requirements for user names andpasswords for Tivoli Storage Productivity Center.“Worksheet for user names and passwords” on page 33Use this worksheet to document the user names and passwords that you createwhen you install and administer IBM Tivoli Storage Productivity Center. Space isprovided for you to list additional user names and passwords you create whenyou configure additional devices in Tivoli Storage Productivity Center.
General requirements for user names and passwordsThis section provides information about the requirements for user names andpasswords for Tivoli Storage Productivity Center.
Important: Do not create passwords that begin with a dash character.
DB2 user names and passwordsThis topic lists rules for DB2 user names and passwords.
DB2 user names and passwords must follow these rules:
30 IBM Tivoli Storage Productivity Center: Installation and Configuration Guide

v UNIX user names and passwords cannot be more than eight characters long.They cannot begin with a numeric digit or end with $.
v Windows 32-bit user names and passwords can contain 1 to 20 characters.v Group and instance names can contain 1 to 8 characters.v Names cannot be any of the following:
– USERS– ADMINS– GUESTS– PUBLIC– LOCAL
v Names cannot begin with:– IBM– SQL– SYS
v Names cannot include accented characters.v UNIX users, groups, and instance names must be lowercase.v Windows 32-bit users, groups, or instance names can be any case.
User name and password requirementsThis information helps you create valid user names and passwords for TivoliStorage Productivity Center.
Table 1 lists the user names and passwords that are used with Tivoli StorageProductivity Center and specifies the following criteria:v User names must be local or an LDAP account (a Windows Active Directory or a
domain)
Restriction: If you use LDAP, Tivoli Storage Productivity Center must beinstalled and configured for LDAP authentication.
v Valid user name characters and minimum/maximum length requirementsv Valid password characters and minimum/maximum length requirements
For more information about setting passwords on the Windows operating system,see http://msdn.microsoft.com/en-us/library/windows/desktop/ms679635(v=vs.85).aspx
Table 13. Valid characters for user names and passwords
User name andpassword for
Windows domainOK? LDAP OK? Valid characters
Tivoli StorageProductivity Centerinstallation
Yes Yes Not applicable
Chapter 1. Planning for Tivoli Storage Productivity Center 31

Table 13. Valid characters for user names and passwords (continued)
User name andpassword for
Windows domainOK? LDAP OK? Valid characters
DB2 administrator,DB2 user
YesRestriction: Youmust follow thesenamingconventions:
v Windowsdomain username:domain_name/user_nameformat
v Local user name:machine_name/username format
Yes v A through Z (uppercasecharacters)
v a through z (lowercasecharacters)
v 0 through 9 (numericcharacters)
v Special characters: ~ @ #% ^ & ( ) - _ { }.
Restriction: User namesand passwords cannotcontain spaces and musthave at least 1 character.
WebSphereadministrator orhost authenticationpassword
YesRestriction: Youmust follow thesenamingconventions:
v Windowsdomain username:domain_name/user_nameformat
v Local user name:machine_name/username format
Yes v A through Z (uppercasecharacters)
v a through z (lowercasecharacters)
v 0 through 9 (numericcharacters)
v Special characters: - _.
NAS Filer username
No No v A through Z (uppercasecharacters)
v a through z (lowercasecharacters)
v 0 through 9 (numericcharacters)
v Special characters: ` ~ #% ^ & ( ) - _ { } ' .
Restriction: User namesand passwords cannotcontain spaces and musthave at least 1 character.
32 IBM Tivoli Storage Productivity Center: Installation and Configuration Guide

Table 13. Valid characters for user names and passwords (continued)
User name andpassword for
Windows domainOK? LDAP OK? Valid characters
NAS Filerpassword
No No v A through Z (uppercasecharacters)
v a through z (lowercasecharacters)
v 0 through 9 (numericcharacters)
v Special characters: ` ~ @# % ^ & * ( ) - _ = + [ ] {} \ | ; : ' " , . < > / ?
Restriction: User namesand passwords cannotcontain spaces and musthave at least 1 character.
Tivoli IntegratedPortal user nameand password
YesRestriction: Youmust follow thesenamingconventions:
v Windowsdomain username:domain_name/user_nameformat
v Local user name:machine_name/username format
Yes v A through Z (uppercasecharacters)
v a through z (lowercasecharacters)
v 0 through 9 (numericcharacters)
v Special characters: ` ~ @# % ^ & * ( ) - _ = + [ ] {} \ | ; : ' " , . < > / ?
Restriction: User namesand passwords cannotcontain spaces and musthave at least 1 character.
For information about the user names and passwords that are required to installand use Tivoli Integrated Portal, go to the Tivoli Storage Productivity Centerinformation center and search for User names and passwords for installing TivoliStorage Productivity Center.
Worksheet for user names and passwordsUse this worksheet to document the user names and passwords that you createwhen you install and administer IBM Tivoli Storage Productivity Center. Space isprovided for you to list additional user names and passwords you create whenyou configure additional devices in Tivoli Storage Productivity Center.
Table 14. User names and passwords for Tivoli Storage Productivity Center installation
Item Description Your input
Tivoli Storage ProductivityCenter and DB2 installationuser
v Windows: localadministrator
v UNIX: root
Chapter 1. Planning for Tivoli Storage Productivity Center 33

Table 14. User names and passwords for Tivoli Storage Productivity Centerinstallation (continued)
Item Description Your input
DB2 administrator user nameand password1
This user name andpassword are required toinstall Tivoli StorageProductivity Center. OnWindows, this user namemust be a member of theDB2ADMNS group andAdministrators group. OnUNIX, the user name mustbe the instance owner of theinstance you want to use.This user name andpassword are created whenyou install DB2.
Tivoli Storage ProductivityCenter Device server hostauthentication password 2
WebSphere administratoruser name and password3
This user name andpassword are required by theDevice server tocommunicate withembedded WebSphere.Embedded WebSphere runsas a Windows Service. TheWindows Service runs underthe authority of this username and password. Thisuser name and password areonly used when you installthe Device server.
If this user name andpassword do not exist, theyare created at installationtime.
Tivoli Integrated Portal username 4
Tivoli Integrated Portaladmin user name 5
LDAP bind user name 6
Storage subsystem user namefor access from Tivoli StorageProductivity Center 7
CIMOM / SMI providerlogin name8
NAS filer user name andpassword9
34 IBM Tivoli Storage Productivity Center: Installation and Configuration Guide
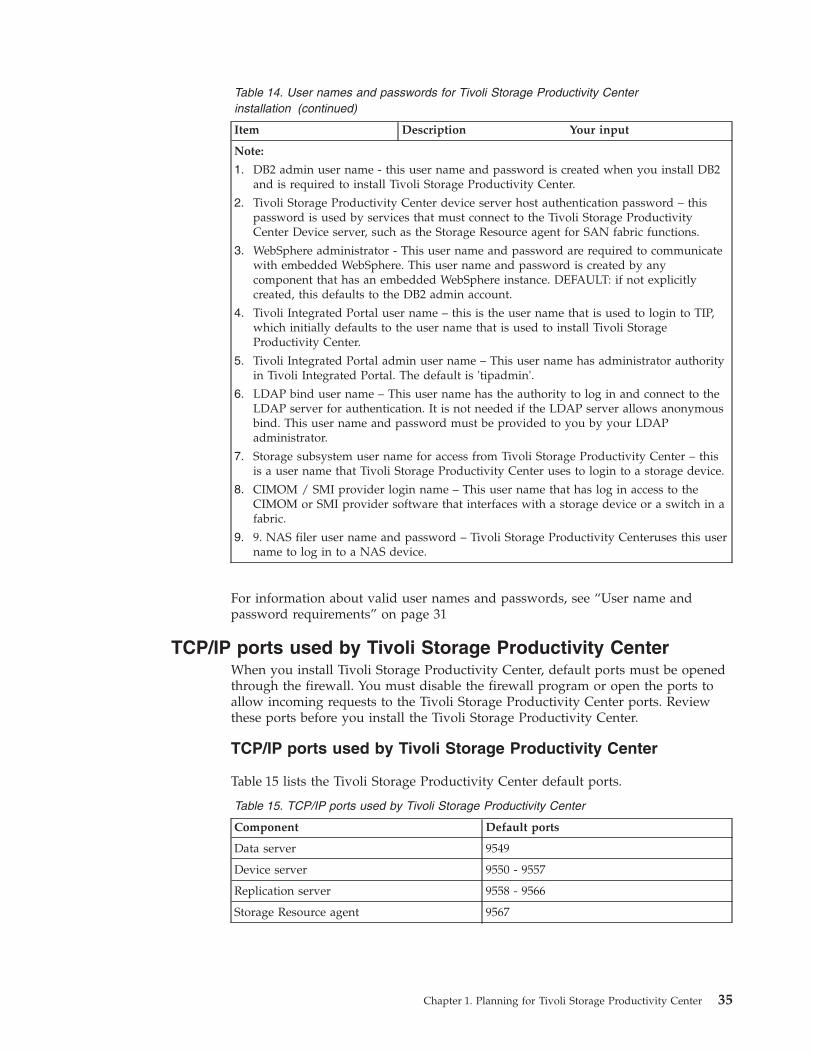
Table 14. User names and passwords for Tivoli Storage Productivity Centerinstallation (continued)
Item Description Your input
Note:
1. DB2 admin user name - this user name and password is created when you install DB2and is required to install Tivoli Storage Productivity Center.
2. Tivoli Storage Productivity Center device server host authentication password – thispassword is used by services that must connect to the Tivoli Storage ProductivityCenter Device server, such as the Storage Resource agent for SAN fabric functions.
3. WebSphere administrator - This user name and password are required to communicatewith embedded WebSphere. This user name and password is created by anycomponent that has an embedded WebSphere instance. DEFAULT: if not explicitlycreated, this defaults to the DB2 admin account.
4. Tivoli Integrated Portal user name – this is the user name that is used to login to TIP,which initially defaults to the user name that is used to install Tivoli StorageProductivity Center.
5. Tivoli Integrated Portal admin user name – This user name has administrator authorityin Tivoli Integrated Portal. The default is 'tipadmin'.
6. LDAP bind user name – This user name has the authority to log in and connect to theLDAP server for authentication. It is not needed if the LDAP server allows anonymousbind. This user name and password must be provided to you by your LDAPadministrator.
7. Storage subsystem user name for access from Tivoli Storage Productivity Center – thisis a user name that Tivoli Storage Productivity Center uses to login to a storage device.
8. CIMOM / SMI provider login name – This user name that has log in access to theCIMOM or SMI provider software that interfaces with a storage device or a switch in afabric.
9. 9. NAS filer user name and password – Tivoli Storage Productivity Centeruses this username to log in to a NAS device.
For information about valid user names and passwords, see “User name andpassword requirements” on page 31
TCP/IP ports used by Tivoli Storage Productivity CenterWhen you install Tivoli Storage Productivity Center, default ports must be openedthrough the firewall. You must disable the firewall program or open the ports toallow incoming requests to the Tivoli Storage Productivity Center ports. Reviewthese ports before you install the Tivoli Storage Productivity Center.
TCP/IP ports used by Tivoli Storage Productivity Center
Table 15 lists the Tivoli Storage Productivity Center default ports.
Table 15. TCP/IP ports used by Tivoli Storage Productivity Center
Component Default ports
Data server 9549
Device server 9550 - 9557
Replication server 9558 - 9566
Storage Resource agent 9567
Chapter 1. Planning for Tivoli Storage Productivity Center 35

Other TCP/IP ports used by Tivoli Storage Productivity Center
Table 16. Other TCP/IP ports used by Tivoli Storage Productivity Center
Port Default port
DB2 50000
Tivoli Integrated Portal The default port numbers for Tivoli Integrated Portal canvary. To view information about Tivoli Integrated Portal portnumbers, see “Tivoli Integrated Portal port numbers” onpage 37.
Tivoli Common Reporting 9581
SAN Volume Controller orIBM Storwize V7000
For native interface for SAN Volume Controller or IBMStorwize V7000 cluster:
v 22 for SSH (outbound). This port is used to upload theSSH keys. This action is done once at setup time.
v 5989 (outbound). Optionally, an SSH key can be uploadedonce at setup time using this port.
CIM agent for IBMTotalStorage EnterpriseStorage Server (ESS)
5989
DS8000 For native interface:
Inbound for events: 1750Outbound (on HMC): 1750Inbound and outbound on HMC foroffloading logs: 1755
IBM XIV Storage System For native interface:
Inbound: noneOutbound (on XIV storage system): 7777, 7778
IBM Tivoli StorageProductivity Center withDS8000 GUI
84518452
Tivoli Storage ProductivityCenter
162 (default SNMP listening port)
Restriction: The Tivoli Storage Productivity Center 4.x ports are reused when youmigrate from Tivoli Storage Productivity Center 4.x to 5.x.
The Tivoli Storage Productivity Center 5.x ports listed here apply only to the TivoliStorage Productivity Center 5.x installations that were not migrated or upgradedfrom Tivoli Storage Productivity Center 4.x. For more information about TivoliStorage Productivity Center 4.x ports, see http://publib.boulder.ibm.com/infocenter/tivihelp/v59r1/index.jsp?topic=%2Fcom.ibm.sspc_v15.doc%2Ffqz0_r_sspc_planning_tcpip_ports.html
TCP/IP ports used by Tivoli Storage Productivity Center forReplication
Table 17 on page 37 show the ports used for incoming communication. Table 18 onpage 37 show the ports used for outgoing communication.
36 IBM Tivoli Storage Productivity Center: Installation and Configuration Guide

Table 17. TCP/IP ports used by Tivoli Storage Productivity Center for Replication forincoming communication
Port Description
9558 and 9559 A web browser typically communicates with the Tivoli StorageProductivity Center for Replication GUI using HTTP ports 9558and 9559.
9560 The Tivoli Storage Productivity Center for Replication commandline and GUI typically communicate with the Tivoli StorageProductivity Center for Replication server using port 9560.
9561 Tivoli Storage Productivity Center for Replication uses port 9561 forcommunication with other Tivoli Storage Productivity Center forReplication servers for high-availability purposes.
Note: If you changed ports 9558 or 9559 during the installation or changed other portsettings, note the values to which these settings were changed.
Table 18. TCP/IP ports used by Tivoli Storage Productivity Center for Replication foroutgoing communication
Port Description
2433 For communication with ESS/DS (direct connection).
1750 For communication with DS8000 (HMC connection).
443 and 22 For communication with SAN Volume Controller or StorwizeV7000 clusters.
9930 For communication with the AIX host for the Open HyperSwap.
Note:
v If you changed the port configuration of your storage controller, the ports would bedifferent.
v Your network configuration must allow for Tivoli Storage Productivity Center forReplication to send outgoing TCP/IP packets to the storage controllers. It is possiblewhen adding the storage controllers to Tivoli Storage Productivity Center for Replicationto set a specific port number for your storage controller.
v Because there are typically multiple applications running on a server, it is possible thatport conflicts might arise if other applications attempt to use the same ports that TivoliStorage Productivity Center for Replication is using. You can find the port numbers usedon your system by running the following command:
netstat -an
v If firewalls are being used in your configuration, make sure that none of these ports arebeing blocked. Ensure that not only is the Tivoli Storage Productivity Center forReplication server granted access to reach the other components, but that the othercomponents are granted access to reach the Tivoli Storage Productivity Center forReplication server.
v If you are running Windows Server 2008, you must to configure the inbound andoutbound rules for Tivoli Storage Productivity Center for Replication. To create anoutbound rule, launch the New Outbound Rule wizard from the Windows Firewall withAdvanced Security menu.
v If you are installing or deploying Storage Resource agents on a system, you must firstdisable the firewall on that system before installing or deploying an agent.
Tivoli Integrated Portal port numbersDepending on how you installed Tivoli Storage Productivity Center, the defaultport numbers for Tivoli Integrated Portal can vary.
Chapter 1. Planning for Tivoli Storage Productivity Center 37

To find the default port numbers that are used in Tivoli Integrated Portal URLs, dothe following steps:
For a new installation of Tivoli Storage Productivity Center Version 5.1:
1. Go to the following directory:
On Windows operating systems:C:\Program Files\IBM\tipv2\properties\
On Linux or UNIX operating systems:/opt/IBM/tipv2/properties/
2. Open the TIPPortDef.properties file.3. Review the following entry:
For http:// protocols:WC_defaulthost_xxxx
For https:// protocols:WC_defaulthost_secure_xxxx
For an installation of Tivoli Storage Productivity Center Version 5.1 that wasupgraded from an earlier version:
1. Go to the following directory:
On Windows operating systems:C:\Program Files\IBM\Tivoli\tipv2\properties\
On Linux or UNIX operating systems:/opt/IBM/Tivoli/tipv2/properties/
2. Open the TIPPortDef.properties file.3. Review the following entry:
For http:// protocols:WC_defaulthost_xxxx
For https:// protocols:WC_defaulthost_secure_xxxx
Port numbers for a new installation of Tivoli Storage ProductivityCenter Version 5.1v If you installed Tivoli Storage Productivity Center Version 5.1 and used default
Tivoli Integrated Portal port numbers, the port numbers are as follows:
For http:// protocols:9568
For example:http://hostname:9568/ibm/console/logon.jsp
For https:// protocols:9569
For example:https://hostname:9569/ibm/console/logon.jsp
v If you installed Tivoli Storage Productivity Center version 5.1 and usedcustomized port numbers for Tivoli Integrated Portal, the URLs for a TivoliIntegrated Portal logon might appear as follows:
For http:// protocols:
For example:http://hostname:WC_defaulthost/ibm/console/logon.jsp
38 IBM Tivoli Storage Productivity Center: Installation and Configuration Guide

For https:// protocols:
For example:https://hostname:WC_defaulthost_secure/ibm/console/logon.jsp
Port numbers for an upgraded installation of Tivoli StorageProductivity Center Version 4.2.2v If you upgraded from Tivoli Storage Productivity Center Version 4.2.2 to Version
5.1, the default Tivoli Integrated Portal port numbers are as follows:
For http:// protocols:16310
For example:http://hostname:16310/ibm/console/logon.jsp
For https:// protocols:16311
For example:https://hostname:16311/ibm/console/logon.jsp
v If you used customized port numbers when you installed Tivoli StorageProductivity Center Version 4.2.2, upgraded to Version 5.1, and then usedcustomized port numbers for Tivoli Integrated Portal, the URLs for a TivoliIntegrated Portal logon might appear as follows:
For http:// protocols:http://hostname:12345/ibm/console/logon.jsp
For https:// protocols:https://hostname:12346/ibm/console/logon.jsp
Storage systems, devices, file systems, databases, andswitches
The information about the storage systems, tape libraries, file system formats, anddatabases supported by Tivoli Storage Productivity Center allows you to effectivelyset up and configure your environment.
Storage systemsIBM Tivoli Storage Productivity Center supports IBM and independent storagevendor systems through the native interfaces or with Storage ManagementInterface Specification (SMI-S) compatible interfaces. This support includes storageprovisioning, asset reporting, and capacity reporting.
You can use the following IBM storage systems:v SAN Volume Controller (with native interface)v IBM TotalStorage Enterprise Storage Serverv IBM storage systems (DS3000, DS4000, DS5000, DS6000 series)v DS8000 series (with native interface)v FAStTv The XIV system (with native interface)v Storwize V7000 (with native interface)v Storwize V7000 Unified (with native interface)v IBM SONAS (with native interface)
Chapter 1. Planning for Tivoli Storage Productivity Center 39

v SMI-S certified storage systems. For information about SMI-S certified storagesystems, see http://www.snia.org/ctp/conformingproviders#10provider.
For the Storage Optimizer, the DS4000 supports up to four Fibre Channel hostconnections and up to 112 SATA drives. SMI-S agents are not required for DS8000,the XIV system, SAN Volume Controller, Storwize V7000, Storwize V7000 Unified,and IBM SONAS storage systems.
Restriction:
v A specific SAN Volume Controller must not be managed by more than oneTivoli Storage Productivity Center server at the same time.
For the most current information about storage systems supported, firmware andprovider levels, see the Tivoli Storage Productivity Center support website athttps://www.ibm.com/support/docview.wss?uid=swg21386446.
SwitchesIBM Tivoli Storage Productivity Center supports IBM and independent switchvendor switches that are Storage Management Interface Specification (SMI-S)compatible.
Tivoli Storage Productivity Center supports the following switches:v Brocade
Note: The Brocade 8000 switch is supported in toleration mode only. TivoliStorage Productivity Center does not support the Converged Enhanced Ethernet(CEE) or Fibre Channel over Ethernet (FCoE) connectivity functions for theBrocade 8000 switch. Only WWN zoning is supported with the internal FCoEports. The domain-port zoning for Brocade 8000 switch is limited to the eight FCports.Tivoli Storage Productivity Center displays both the FCoE and FC ports inthe switch port lists.
v Cisco
Note: The Cisco Nexus 5000 switch is supported in toleration mode only. TivoliStorage Productivity Center does not support the Converged Enhanced Ethernet(CEE) or Fibre Channel over Ethernet (FCoE) connectivity functions for the CiscoNexus 5000 switch. Tivoli Storage Productivity Center also does not supportdomain-port zoning for Cisco Nexus switches. Tivoli Storage Productivity Centerdisplays the FCoE and FC ports in the switch port lists.
v IBMv QLogic
For the most current information about switches and directors supported, see theTivoli Storage Productivity Center support website at https://www.ibm.com/support/docview.wss?uid=swg21386446.
Tape librariesThis section provides information about the tape libraries that Tivoli StorageProductivity Center supports.
For the most current information about tape libraries supported, see the TivoliStorage Productivity Center support website at https://www.ibm.com/support/docview.wss?uid=swg21386446.
40 IBM Tivoli Storage Productivity Center: Installation and Configuration Guide

Tivoli Storage Productivity Center supports IBM and non-IBM tape librariesthrough the SMI-S (CIM) agent. This support assumes that the tape librarysupports the SMI-S 1.1. profile for tape libraries.
Note:
v The media changers displayed by Tivoli Storage Productivity Center for theTS3500 tape libraries are logical partitions of the library, and not physicalaccessors.
v Depending on the size of the tape library and network latency between theSMI-S agent host and the tape library, probes of the tape library might take along time. The probes might also fail because of timeouts.
v The SMI-S agent does not display an exception to the SMI-S client such as TivoliStorage Productivity Center when communication between the SMI-S agent andthe tape library fails. Instead, empty result sets are returned. This limits TivoliStorage Productivity Center's capabilities in detecting connection failures relatingto tape libraries.
v When probing tape libraries that are registered with the same IBM SMI-S agentfor tape, do not probe more than two or three tape libraries within the sameprobe job. The increased load on the agent would increase the likelihood oftimeouts. Instead, spread the libraries across multiple probe jobs with differentstart times.
v After the tape libraries are registered, and then a change is made to the IBMSMI-S Agent for Tape, a condition can occur where not all the tape cartridges arereturned to the CIM client. In this case, the CIM client is Tivoli StorageProductivity Center. To resolve this situation, restart the IBM SMI-S Agent forTape. For information about how to restart the agent, see the documentation forthe SMI-S Agent for instructions.The same issue might occur if one out of a set of libraries registered with thesame agent is unavailable. For example, there might be a network problem. Towork around this problem, unregister the affected library from the agent (or fixthe communication problem).
Databases for monitoringThis section lists the databases that the Data Manager can monitor.
The Data Manager can monitor these databases:v DB2 version 9.1 (32-bit and 64-bit)v DB2 version 9.5 (32-bit and 64-bit)v DB2 version 9.7 (32-bit and 64-bit, fix pack 1 and fix pack 2 are not supported)v Microsoft SQL Server 8v Microsoft SQL Server 2005 (32-bit and 64-bit)
Note: There are some configuration steps required before you can monitor theMicrosoft SQL Server 2005 database. For information about configuration, see“Configuring Microsoft SQL Server 2005 or 2008” on page 287.
v Microsoft SQL Server 2008 (32-bit and 64-bit)
Note: There are some configuration steps required before you can monitor theMicrosoft SQL Server 2008 database. For information about configuration, see“Configuring Microsoft SQL Server 2005 or 2008” on page 287.
v Oracle 10g (32-bit and 64-bit)v Oracle 10.1 and 10.2 (32-bit and 64-bit)
Chapter 1. Planning for Tivoli Storage Productivity Center 41

v Oracle 11g (32-bit and 64-bit)v Oracle 11.1 and 11.2 (32-bit and 64-bit)v Sybase Adaptive Server version 15 (32-bit and 64-bit)
Note: Databases installed on clustered servers or clustered database servers (forexample, MSCS, PowerHA for AIX (formerly HACMP), Veritas clusters, OracleReal Application Cluster (RAC) environment) are not supported for monitoring.
Use the Data Manager for Databases node in the Tivoli Storage ProductivityCenter user interface to help you monitor the databases within RDBMS instances.The Storage Resource agents are used to monitor the RDBMS instances.
You can monitor the storage assets associated with Oracle, Sybase, SQL Server, andDB2 throughout your enterprise, watching for predefined events to occur andalerting you to potential situations before they occur.
For example, it can notify you when an Oracle tablespace is reaching a criticalshortage of free space or when a Sybase table is dropped. By alerting you to theseand other issues related to your stored data for the databases within yourenvironment, it enables you to prevent unnecessary system and applicationdowntime.
Before you can use the Storage Resource agents to manage the storage for yourinstances, you must do the following steps:1. Assign Data Manager and Data Manager for Databases licenses to the agents
that are monitoring RDBMS instances.2. Register the instances on the machines that contain licensed agents.
You can do these steps by expanding Administrative Services > Configuration >License Keys in the navigation tree. For more information about this topic, see theonline help or “License Keys” on page 283.
For information about the operating systems supported for the agent, see“Software requirements for operating systems” on page 4.
See the online help for more information about the Data Manager for Databasesnode.
File systemsThis section lists the file systems that are supported for monitoring and reportingby IBM Tivoli Storage Productivity Center.
The Data Server supports monitoring and reporting of the following file systems:v AIX JFS, JFS2v Data ONTAP V7 for Network Appliance, including flexible volumes (FlexVol).
Flexvol enables you to create multiple flexible volumes on a large pool of disks.v EXT2, EXT3, EXT4v FAT, FAT32v GPFS 3.2, 3.3v HP_HFSv NTFS4, NTFS5v REISERFSv SANFS
42 IBM Tivoli Storage Productivity Center: Installation and Configuration Guide

v TMPFSv UFSv VMFSv Veritas Files System (VxFS) r4.5 and 5.x on the following operating systems:
– AIX– HP-UX– Linux– Oracle Solaris
Note: Tivoli Storage Productivity Center supports file systems and volumescreated through Veritas File System (VxFS) and Veritas Volume Manager (VxVM)release 4.x and 5.x, as long as those file systems and volumes conform to filesystems and volumes created with version 3.x of VxFS and VxVM. Tivoli StorageProductivity Center cannot work with volumes and files systems with newfeatures that were introduced with VxFS and VxVM release 4.x and 5.x.
v WAFLv Tivoli Storage Productivity Center SAN File System
Networked file systemsThis section describes support for IBM General Parallel File System.
When using the Data server, you can use the monitoring and reporting of the IBMGeneral Parallel File System (GPFS) Version 3.2 on AIX.v The IBM Tivoli Storage Productivity Center Storage Resource agent must be
installed on one node within a GPFS nodeset. A nodeset is a collection ofcomputers that see the same file system. If multiple agents are installed perGPFS nodeset, the first agent that sees the file system owns the file system. Youcannot change the owning (or scanning) agent. If the agent is deleted, anotheragent takes ownership.Because only one agent owns the file system and a file system cannot bescanned by more than one agent, there is no benefit to having more than oneagent.If more than one agent is installed, the last agent that runs a probe job takesownership of the volume group. If a GPFS file system exists in that volumegroup and the agent that owns the volume group is not the agent that owns thefile system, the file system information is not displayed in the volume group.The volume group is part of the asset tree. However, when the agent that ownsthe file system probes again, the data is corrected.There must be physical access to the GPFS disk for IBM Tivoli StorageProductivity Center to gather hardware disk information.
Volume managersThis section lists the volume managers supported for monitoring by IBM TivoliStorage Productivity Center.
The Data Server supports the monitoring of the following volume managers:v Veritas Volume Manager is supported on the following operating systems:
– AIX– HP-UX– Linux– Oracle Solaris
Chapter 1. Planning for Tivoli Storage Productivity Center 43

v AIX Logical Volume Manager (LVM)v HP-UX Logical Volume Manager
Using these volume managers, you can create groups of logical volumes and disks.You can generate various reports for these disk and volume groups.
Planning for multipath subsystem device driversThe subsystem device driver (SDD) is a software solution for multipleconfiguration environments in supported storage devices.
The subsystem device driver is installed on a host system with the nativedisk-device driver and provides the following functions:v Enhanced data availabilityv Dynamic input/output (I/O) load balancing across multiple pathsv Automatic path failover protectionv You can download licensed machine code at the same time that applications are
running
For the most current support for multipath subsystem device drivers, see thefollowing website: Supported Products and Platforms. Select the appropriateversion for Agents, Servers, and GUI.
With Tivoli Storage Productivity Center, you can use the subsystem device drivers(SDD) shown in Table 19.
Table 19. Multipath subsystem device drivers supported by Tivoli Storage ProductivityCenter
Multipath product PlatformSupported features in TivoliStorage Productivity Center
SDD AIX Full support
Red Hat 4 Full support
SUSE Linux Enterprise Server 9 Full support
Oracle Solaris Full support
SDDDSM Windows Full support
SDDPCM AIX Full support
DM_Multipath Red Hat 5 and 6 Full support
SUSE Linux Enterprise Server 10and 11
Full support
EMC PowerPath AIX Probe
Linux Probe
Windows Probe
HP-UX NativeMultipath
HP-UX Planner
Full support means that Tivoli Storage Productivity Center can:1. Report on the disks accessed using the multipath subsystem device driver
(probe).2. Display multiple paths in the Data Manager asset tree (Data Manager Asset
Tree).
44 IBM Tivoli Storage Productivity Center: Installation and Configuration Guide

3. Report on the multiple paths in the Data Path Explorer.4. Configure paths as part of the SAN Configuration Planner.
Note:
1. The AIX SDD cannot coexist with SDDPCM on the same system.2. The Linux SDD driver is no longer available. Starting with Red Hat Enterprise
Linux Version 5 and SUSE Linux Enterprise Server Version 10, only theDM_Multipath is available. With DM_Multipath, you can use the round-robinpolicy only for the SAN Planner.
3. The SDD driver is no longer supported on HP, starting with HP-UX 11i v3 withItanium®. HP-UX 11i v3 provides a native multipathing feature which issupported by SAN Planner.
Upgrading subsystem device drivers
SDD drivers cannot coexist on the same host with the SDDPCM, SDDDSM, orDM_Multiplath drivers. You must upgrade from the existing SDD drivers to theSDDPCM or SDDDSM driver. Part of the upgrade process is to unconfigure andremove all SDD vpath devices. After the upgrade and configuration of the devices,the device names might differ from the previous names. Each device is detected byTivoli Storage Productivity Center as a new device.
EMC PowerPath Multipathing
EMC PowerPath Multipathing supports a wide range of servers including clusterservers connected to EMC storage systems. It tunes your storage area network andselects alternate paths for your data if necessary. It also integrates multiple pathI/O capabilities, automatic load balancing, and path failover functions. For moreinformation about EMC PowerPath Multipathing, see http://www.emc.com.Search for EMC PowerPath.
Disks provided by the EMC PowerPath driver are detected by the StorageResource agents. The disks are visible in the topology viewer and in Data Managerasset reports. The correlation of EMC PowerPath provided hdisks to EMC storagesystems is supported and the relation is visible in the topology viewer.Multipathing information is not available for those disks. The data reports areaccurate because they do not double-count capacities. The Data Path Explorer doesnot show multipathing. The SAN Planner does not support configuringmultipathing on hosts using EMC PowerPath Multipathing.
Planning for Storage Resource agentsStorage Resource agents collect asset information, file and file system attributes,and other information that is needed from the computer system.
Storage Resource agents can also gather information about database managersinstalled on the server, and NAS device information. You can create ping, probe,and scan jobs to run against the servers that have Storage Resource agentsinstalled.
The Storage Resource agents perform fabric functions by collecting informationfrom the system they are installed on. The Storage Resource agents use scanners tocollect information. The scanners communicate through the HBA to collect fabrictopology information, port state information, and zoning information. They alsocan identify other SAN-attached devices (if they are in the same zone).
Chapter 1. Planning for Tivoli Storage Productivity Center 45

You can deploy the Storage Resource agent through the stand-alone GUI userinterface rather than an installation wizard. You must have administrativeprivileges to deploy the Storage Resource agent. The first time you deploy aStorage Resource agent to a computer system, the information collected by thatagent is added to the logs on that computer system. That information also displaysin the Tivoli Storage Productivity Center GUI after the next default system scancompletes.
To deploy a Storage Resource agent, expand Administrative Services >Configuration. Right-click Storage Resource Agent Deployments. Click CreateStorage Resource Agent Deployments. In the topic pane, the “Create StorageResource Agent Deployments” window opens. From this window, you can enterhost names from a Microsoft directory, enter host names manually, or import ahost list file. You can schedule a job to add the Storage Resource agents at a timethat is convenient for you. You can also specify the type of alerts to generate if ajob fails. After you enter information for the Storage Resource agent, you canoptionally validate the connection to the Data server. This step helps eliminatemost of the possible failure cases after you submit the job for Storage Resourceagent deployment.
For more information about Storage Resource agents, see “Deployment guidelinesand limitations for Storage Resource agents” on page 297.
Storage Resource agent protocol supportWhen installing the Storage Resource agent, Tivoli Storage Productivity Centeruses specific protocols for connectivity between the server and agent.
When installing the Storage Resource agent, Tivoli Storage Productivity Centeruses the following protocol for connectivity between the server and agent (listed inorder):1. Secure Shell protocol (SSH).2. Windows server message block protocol (SMB protocol).3. Remote execution protocol (REXEC).4. Remote shell protocol (RSH).
At run time, the connectivity used between the server and agent is dependent onthe type of service that is running: On-Demand service (non-daemon service) orrun as a service (daemon service).
On-Demand service (non-daemon service)In this case, connectivity between the server and agent is established usingthe same protocols as for installation of the agent: SSH, SMB, REXEC, orRSH.
run as a service (daemon service)In this case, connectivity between the server and agent is established usingthe secured socket connection. The server and agent have their respectivecertificates and no additional information is needed besides the certificatesand the security provided by the SSH protocol.
Note: Running the Storage Resource agent in daemon mode requires only onesocket connection to be open and thus simplifies any firewall rules that might be inplace. However, the daemon mode always consumes resources (although a verysmall amount) when idle. In non-daemon mode, the Storage Resource agent onlyconsumes resources when actively working for the Tivoli Storage Productivity
46 IBM Tivoli Storage Productivity Center: Installation and Configuration Guide

Center server. Because the non-daemon mode uses the RXA protocol, additionalfirewall ports and security configuration are required.
The information required for these protocols are as follows:
SSH protocolThere are two cases where you can use the SSH protocol:v You supply the user ID and password to connect to the server using the
SSH protocol. This user ID must have administrative privileges.v You supply a user ID, certificate, and passphrase. You create the
certificate and use that certificate when you connect to the agent. Thiscertificate must be accessible from the server.For information about how to create a certificate for SSH protocolconnectivity, see “Creating a certificate for SSH protocol” on page 301.This information uses Cygwin for the Storage Resource agent.
Windows SMB protocolYou supply the user ID and password. The user ID must haveadministrative privileges. You must also enable File & Printer Sharing forMicrosoft Windows under Network Properties for the connected networkadapter. Make sure that the Server service is running on the system.
REXEC protocolYou supply the user ID and password. The user ID must haveadministrative privileges. The system must be enabled for remoteexecution of commands.
RSH protocolYou supply the user ID with administrative privileges. The system must beenabled for the user to be able to run commands through the remote shell.
To enable RSH, edit the .rhosts file in the login directory of the user. Therhosts file provides access for the user to connect from a remote system.
If you elect to use a Microsoft directory, you can also get a list of domaincomputers. You are required to enter the domain controller, user ID, password, andcertificate location. After the list is displayed, you can select a list of computers onwhich to deploy the agent.
After the agent has been deployed, a probe job is automatically run.
The agent deployed on a Windows system has its registry information in theWindows registry. For UNIX or Linux, the registry information is stored in thefollowing file: /etc/Tivoli/TSRM/registryNA .
For more information about setting up the environment for installing StorageResource agents, see “Deployment guidelines and limitations for Storage Resourceagents” on page 297.
Planning for Internet Protocol Version 6IBM Tivoli Storage Productivity Center supports Internet Protocol Version 6 (IPv6)for communication between its components. The key IPv6 enhancement is theexpansion of IP address spaces from 32 bits (up to 15 characters in length) to 128bits (up to 45 characters in length).
Chapter 1. Planning for Tivoli Storage Productivity Center 47

Overview
You can install and run Tivoli Storage Productivity Center on systems that areenabled for IPv4, IPv6, or dual stack. Dual stack indicates that a machine has boththe IPv4 and IPv6 stacks enabled and both addresses configured.
Tivoli Storage Productivity Center can communicate with the following externalcomponents over IPv6:v SMI-S CIM agentsv SLP directory agentsv Out of band SNMP agentsv Storage devicesv SMTP server
Note: These external components must be IPv6 enabled to communicate withTivoli Storage Productivity Center using the IPv6 protocol.
Not all components and their related functions of Tivoli Storage ProductivityCenter are enabled for IPv6. Any functions that are not enabled for IPv6 areunavailable through the user interface when you install Tivoli Storage ProductivityCenter on an IPv6-only system. See for information about the functions that arecurrently not supported under IPv6 communication.
IPv6 when installing Tivoli Storage Productivity Center
Tivoli Storage Productivity Center accepts both IPv4 and IPv6 addresses. If youhave a system that is configured for dual stack networking, Tivoli StorageProductivity Center defaults to IPv4 addressing.
The preferred IPv6 address representation is written as eight groups of fourhexadecimal digits xxxx:xxxx:xxxx:xxxx:xxxx:xxxx:xxxx:xxxx, where each x is ahexadecimal digit representing 4 bits. You can also specify IPv6 addresses by usingshortened formats that omit leading zeros or use double colons in place of a seriesof zeros. You can specify only one double colon (::) in an IPv6 address.
You can use IPv6 addresses if one of the following conditions are met:v The system where Tivoli Storage Productivity Center is installed is IPv6.v Dual stack (IPv4 and IPv6) is enabled.
The following examples show an IPv6 address in the long form and in the shortform:
Long form: 2001:DB8:0:0:0:0:0:0
Short form: 2001:DB8::
If you are installing Tivoli Storage Productivity Center in an IPv6-onlyenvironment, the following requirements apply:v For Windows operating systems, the IPv4 loopback interface is enabled.v For AIX or Linux operating systems, the localhost option resolves to the IPv4
address 127.0.0.1, instead of the IPv6 address ::1. This value is specified in the/etc/hosts file.For Windows operating systems, the localhost option is specified in theC:\Windows\system32\drivers\etc\hosts directory and file.
48 IBM Tivoli Storage Productivity Center: Installation and Configuration Guide

Table 20. IPv4 and IPv6 configurations in a multiple-servers environment
If the database repositoryserver is configured for...
The Tivoli Storage Productivity Center server isconfigured for...
IPv4 IPv4
IPv4 Dual stack
Dual stack IPv4
Dual stack Dual stack
Dual stack IPv6
IPv6 IPv6
Using IPv6 addresses in the user interface
Support for IPv6 enables you to enter IPv6 addresses anywhere in the installationprocess and user interface that supports the entering of IP addresses. For example,you can enter and display 128–bit IP address spaces on the following panels in theuser interface:
Enter the host name (or IPv6 address) and port number of an TivoliStorage Productivity Center server to which you want to connect.
Administrative Services > Data Sources >Specify IPv4 or IPv6 addresses for the CIMOMs that are located on an IPv6or dual stack machine.
Administrative Services > Discovery >Specify IPv6 addresses when you run a discovery with SLP DA running onan IPv6-only or dual stack machine.
Administrative Services > Data Sources >Specify IPv6 addresses for the Out of Band Fabric agents that are locatedon an IPv6 or dual stack machine.
Administrative Services > Data Sources >Specify the names or IPv6 addresses of other Tivoli Storage ProductivityCenter servers that you want to add as subordinate servers for roll upprobes and reports.
Administrative Services > Discovery >Specify a range of IPv6 addresses for an SNMP discovery on an IPv6-onlyor dual stack machine against IPv6-enabled target machines.
Administrative Services > Configuration >If the Tivoli Storage Productivity Center servers are running on anIPv6-only or dual stack machine enter the following information:v Specify an IPv6 address for the target machine of SNMP traps that are
generated as a result of triggered alerts.v Specify an IPv6 address for a mail server that receives e-mail
notifications that are generated as a result of triggered alerts.
IBM Tivoli Storage Productivity Center > Configuration Utility >Use an IPv4 or IPv6 address when you specify the URL for an external toolthat you want to start from Tivoli Storage Productivity Center.
IPv6 considerations in Tivoli Storage Productivity CenterTivoli Storage Productivity Center provides limited support of some functionswhen using Internet Protocol Version 6 (IPv6) communication.
Chapter 1. Planning for Tivoli Storage Productivity Center 49
Keep in mind the following considerations when installing the product oncomputers configured for IPv6 only:
Starting the Tivoli Storage Productivity Center user interface by using Java WebStart You cannot use Java Web Start to start the Tivoli Storage Productivity
Center user interface on a Windows system if both of the followingconditions are true:v An IPv6 address or a host name that resolves to an IPv6 address is
specified as the target host in the Java Web Start URL.v Java Runtime Environment (JRE) is installed on the same system as the
Tivoli Storage Productivity Center user interface.
Using IPv6 communication between master and subordinate servers (for roll upreporting)
If the master server is on an IPv6-only computer, it can communicate withexisting subordinate servers under the following conditions: thesubordinate servers are upgraded to Tivoli Storage Productivity Centerv3.3.2 or later and the IPv6 protocol is enabled on the computers where theservers are located.
Defining Tivoli Enterprise Console® events as triggered actionsYou cannot use IBM Tivoli Enterprise Console events as triggered actionswhen defining alerts for Tivoli Storage Productivity Center jobs.
Selecting files for archive and backupYou cannot select files for Tivoli Storage Manager archive and delete jobs.For example, you cannot use the alerting function of a constraint toautomatically start a Tivoli Storage Manager archive or backup job to runagainst the files that violate that constraint.
Gathering data from XIV systemTivoli Storage Productivity Center does not support the version of IBMXIV Storage System that supports IPV6.
Planning for the native interfaceTivoli Storage Productivity Center now communicates with DS8000, the XIVsystem, SAN Volume Controller, or Storwize V7000 storage systems through theirnative interfaces. You no longer need to install and maintain CIM agents to collectdata from these storage systems.
Support for the native interfaces
For the DS8000, Tivoli Storage Productivity Center communication with the storagesystem is through the ESSNI interface. Through this interface, Tivoli StorageProductivity Center collects device information, performance information, and candetect changes and complete provisioning operations. This support simplifies theTivoli Storage Productivity Center configuration and the launch in contextconfiguration required to manage the storage system. Tivoli Storage ProductivityCenter also supports dual HMC environments.
For the SAN Volume Controller or Storwize V7000, Tivoli Storage ProductivityCenter uses the CLI interface to communicate with the storage system. Throughthis interface, Tivoli Storage Productivity Center collects device information,performance information, and can detect changes and complete provisioningoperations. This support simplifies the Tivoli Storage Productivity Centerconfiguration and the launch in context configuration required to manage thestorage system.
50 IBM Tivoli Storage Productivity Center: Installation and Configuration Guide

For the XIV system, Tivoli Storage Productivity Center uses the XIV system XMLAPI interface to communicate with the storage system. The Tivoli StorageProductivity Center server communicates directly with the XIV system using XMLover an SSL socket. Through this interface, Tivoli Storage Productivity Centercollects device information, performance information, and can detect changes andcomplete provisioning operations. This support simplifies the Tivoli StorageProductivity Center configuration and the launch in context configuration requiredto manage the storage system.
Use the Configure Devices wizard to define native interface connection informationfor these storage systems as described in “Adding resources for monitoring” onpage 255.
You can access the wizard in one of the following ways:v In the navigation tree, click Administrative Services > Data Sources > Storage
Subsystems and click Add on the Storage Subsystems panel.v In the navigation tree, click Disk Manager > Storage Subsystems and click Add
Storage Subsystem on the Storage Subsystems page.v Click the Configure Devices wizard icon in the toolbar.
Upgrading Tivoli Storage Productivity Center
If you are upgrading Tivoli Storage Productivity Center and have DS8000, the XIVsystem, or SAN Volume Controller that was monitored using CIM agents, youmust migrate your storage system credentials. Tivoli Storage Productivity Centernow communicates with the storage systems using their native interfaces insteadof the CIM agents.
You can migrate your storage system credentials in one of the following ways:v Use the migration tool that is shipped with Tivoli Storage Productivity Centerv Use the Tivoli Storage Productivity Center GUI to migrate the credentials. For
more information, see “Update Storage Subsystem Credentials” on page 313.v Run the Tivoli Storage Productivity Center upgrade installation program and
specify that you want to use the migration tool. Run the migration tool whenyou upgrade Tivoli Storage Productivity Center.
If Tivoli Storage Productivity Center can access the DS8000 using the existingcredentials, you can continue to use these credentials. For the XIV system and SANVolume Controller storage systems, you must manually update the credentials.
The storage system credential migration applies to all DS8000, XIV system, andSAN Volume Controller systems.
If you have run a CIMOM discovery job for a storage system but have not run aprobe job for that system, then upgrade Tivoli Storage Productivity Center, the IPaddress does not display in the GUI. You must manually enter the IP address forthat storage system.
Planning to use LDAPThe Lightweight Directory Access Protocol (LDAP) is an application protocol thatyou can use to query and modify directory services running over TCP/IP. TheTivoli Storage Productivity Center installation program establishes a defaultauthentication configuration using the federated repositories feature of the
Chapter 1. Planning for Tivoli Storage Productivity Center 51

WebSphere Application Server. You can add an LDAP repository to thisauthentication configuration as a post-install activity.
A directory is a set of objects with similar attributes that are organized in a logicaland hierarchical manner. An LDAP directory tree often reflects various political,geographic, and organizational boundaries, depending on the model chosen. Thedirectory might contain entries representing people, organizational units, printers,documents, groups of people, or anything else that represents a tree entry (ormultiple entries).
In the federated repositories framework, the Tivoli Storage Productivity Centerinstallation program creates the following repositories:
File-based user repositoryThis repository contains the user ID "tpcFileRegistryUser". This userpassword is the same as the common user password that you enter duringthe Tivoli Storage Productivity Center installation.
Operating system repositoryThis repository is referred to as the localOS repository. This repositorycontains the users and groups managed by the local operating system.
With this default authentication configuration, you cannot use the TivoliStorage Productivity Center single sign-on feature. Storage system elementmanagers do not support the localOS repository or the file-basedrepository for single sign-on, even if the element manager is installed onthe same system as Tivoli Storage Productivity Center.
To change the user authentication configuration, add or remove an LDAPrepository in the federated repositories framework and complete these tasks:1. Back up the existing Tivoli Integrated Portal WebSphere configuration files.
The WebSphere backup files provide a restoration point if a failure occurs whenyou complete these procedures.
2. Back up the WebSphere configuration files after you add an LDAP repository tothe user authentication configuration and want to later change the LDAPauthentication settings.
To authenticate user names on the Tivoli Storage Productivity Center by using aninstance of Microsoft Active Directory, complete one of the following options:
Authenticate User names: Method one1. Install Tivoli Storage Productivity Center on an AIX, Linux, or Windows
operating system.2. Configure Tivoli Storage Productivity Center for LDAP authentication.
The target LDAP repository is an instance of Active Directory running on Windows2003 or later. This method provides the following benefits:v The Tivoli Storage Productivity Center target system does not have to be a
Windows system.v The Tivoli Storage Productivity Center target system does not have to be a
member of a Windows domain.v There are fewer configuration steps for Tivoli Storage Productivity Center or
Windows.v The Tivoli Storage Productivity Center user names and group names do not
have to include the Windows Domain Name.
52 IBM Tivoli Storage Productivity Center: Installation and Configuration Guide

v You can use the single-sign on feature between Tivoli Storage ProductivityCenter and storage system element managers.
Authenticate User names: Method two1. Install Tivoli Storage Productivity Center on a Windows system that is a
member of a Windows domain or on the Windows Domain Controller.2. Configure Tivoli Storage Productivity Center for operating system
authentication.
Software requirements for CIM agents
CIM agents for DS3000, DS4000, DS5000, DS6000, and tape
Tivoli Storage Productivity Center requires CIM agents for some IBM storagedevices such as the DS3000, DS4000, DS5000, DS6000, and tape.
For information about installing and configuring the CIM agent for the DS3000,DS4000, and DS5000, contact your CIM agent (LSI SMI Provider) athttp://www.lsi.com/storage_home/products_home/external_raid/management_software/smis_provider/index.html.
The LSI CIM agent must be installed and configured before you can collect datafor the DS3000, DS4000, and DS5000 through Tivoli Storage Productivity Center.When you configure Tivoli Storage Productivity Center to connect to the CIMagent, you must provide the interoperability namespace for the device.
For information about the LSI CIM agent level required for each device and thenamespace, see http://www.ibm.com/support/docview.wss?uid=swg21386446.
Also see TPC Hints and Tips document at this website http://www.ibm.com/support/docview.wss?uid=swg27008254 for some useful information aboutinstalling the LSI CIM agent.
Also note the following information about the CIM agents from LSI:v Do not install the CIM agent on the same server as the Tivoli Storage
Productivity Center server.v Do not have the CIM agent monitor more than five storage systems.v Use the LSI SMI-S Provider V10.06.GG.33 or later for the DS4000 and DS5000
MC level V7.60.x. Otherwise, performance monitoring does not work.v Do not use the LSI SMI-S agent for the DS4000 and DS5000 with an MC level
earlier than V7.50.x. Lower-level microcode can cause a reboot of the controllerdevice.
CIM agents for switches and directors
CIM agents (SMI-S Providers) are also required for switches and directors. For acomplete list of switches and directors supported and the level of CIM agentsrequired for each device, see http://www.ibm.com/support/docview.wss?uid=swg21386446.
Chapter 1. Planning for Tivoli Storage Productivity Center 53

CIM agents for non-IBM storage systems
Tivoli Storage Productivity Center also supports some non-IBM storage systems.For example, Tivoli Storage Productivity Center supports HP, TagmaStore,CLARiiON, Symmetrix, and other storage systems.
For a complete list of storage systems supported and the level of CIM agentsrequired for each device, see http://www.ibm.com/support/docview.wss?uid=swg21386446.
Planning for the single sign-on featureSingle sign-on is an authentication process that enables you to enter one user IDand password to access multiple applications. For example, you can access IBMTivoli Integrated Portal and then access Tivoli Storage Productivity Center and IBMTivoli Storage Productivity Center for Replication from Tivoli Integrated Portalusing a single user ID and password. Single sign-on integrates with the launch andlaunch in context features to enable you to move smoothly from one application toanother application.
Selecting the user authentication method to use with singlesign-on
The Tivoli Storage Productivity Center installation program establishes a defaultauthentication configuration using the federated repositories feature of theWebSphere Application Server.
For information about changing the user authentication configuration, see theTivoli Storage Productivity Center information center and search for AdministeringTivoli Integrated Portal.
Additional considerationsv The single sign-on feature is not available for the IBM XIV Storage System
element manager, XIV Storage Manager.v The single sign-on feature is not supported by the Tivoli Storage Productivity
Center command-line interface (CLI).
Planning for enterprise-rollup reportsTivoli Storage Productivity Center enables you to use a single interface to generatereports based on data collected by multiple Tivoli Storage Productivity Centerservers.
You can perform the following actions:v View the storage information that is gathered by other servers from a single
Tivoli Storage Productivity Center user interface using enterprise-wide rollupreports. These rollup reports enable you to have a network-wide perspective ofstorage usage in an environment where multiple Tivoli Storage ProductivityCenter servers are deployed and collecting storage metrics.
Note: Performance-related reports are not rolled up.v Partition many agents across multiple Data servers. This action alleviates
performance issues when running aggregation reports and scan jobs for multipleagents on one Data server.
54 IBM Tivoli Storage Productivity Center: Installation and Configuration Guide

To get rollup reports, select one Tivoli Storage Productivity Center server to act asthe "master" server that gathers enterprise-wide data for the reports. You can thenassociate other Tivoli Storage Productivity Center servers to that master server as"subordinate" servers. These subordinate servers provide data to the master serverabout the entities they manage.
It is possible set-up a rollup-reporting environment where fragmentation occurs.Fragmentation occurs when related entities are being monitored by differentsubordinate Tivoli Storage Productivity Center servers.
Note: Keep in mind the following information when working with master andsubordinate servers:v The master and subordinate servers can change over time.v A master server can also manage entities just like any other server and report on
these entities.v We recommend that the master server monitor no more than 500 unique data
sources. This number includes subordinate servers, Storage Resource agents,CIMOM agents, and VM servers (VMWare).
v We recommend that each subordinate server monitors no more than 1200 uniquedata sources. This number includes Storage Resource agents, CIMOM agents,and VM servers (VMWare). After this threshold is met for a server, a new serveris deployed and all new agents point to it.
v You must have Tivoli Storage Productivity Center superuser or Tivoli StorageProductivity Center administrator authority to perform administrative operationssuch as adding a subordinate server to the master server list to monitor.
v After upgrading to Tivoli Storage Productivity Center 5.1, you must run probesagainst the monitored storage assets for the master server to have informationabout those assets displayed in Tivoli Storage Productivity Center > Reporting> Rollup Reports.
v When you add a subordinate server to the master server list, you must providethe host authentication password of the subordinate server to the master server.The host authentication password is checked each time the master server isprobed. This host authentication password is entered when installing TivoliStorage Productivity Center. Contact your system administrator or the personwho installed Tivoli Storage Productivity Center to determine this password.
Planning for enterprise roll up reports configurationThis topic provides information about planning for enterprise roll up reportsconfiguration.
Follow these general steps to get enterprise-wide roll up reports:1. Run discoveries, probes, and scans on the master server to gather information
about locally managed entities.2. Register the subordinate server with the master server. Click Administrative
Services > Data Sources > IBM Tivoli Storage Productivity Center Servers.Click Add Tivoli Storage Productivity Center Server. Enter information for thesubordinate server including the host authentication password. The hostauthentication password is checked each time the master server is probed.
3. Run discoveries, probes, and scans on the subordinate servers to gatherinformation about their locally managed entities.
4. Define and run Tivoli Storage Productivity Center server probes from themaster server to collect storage information that has been gathered bysubordinate servers.
Chapter 1. Planning for Tivoli Storage Productivity Center 55

5. View the information gathered by the Tivoli Storage Productivity Center serverprobes in roll up reports under Tivoli Storage Productivity Center > RollupReports.
Planning for the SAN configuration toolsThis topic provides information about planning for the SAN configuration tools.
System administrators can identify potential problems with storage area network(SAN) configurations by using the Configuration Analysis and ConfigurationHistory tools.
Configuration AnalysisThis tool allows the system administrators to check whether existingconfigurations violate defined best practices and policies. The user selects aset of best practices (policies) and specifies the name of a target SAN (orzone set) through the GUI, and then the tool checks to see whether theselected best practices are being violated in the specified SAN. The policyviolations are displayed as IBM Tivoli Storage Productivity Center alerts.The topology viewer displays these policy violations and the affected SANentities involved in each violation.
Configuration HistoryThis tool displays the changes that have occurred in the SAN environmentover time. Using this tool, the user can periodically or on-demand takesnapshots of the SAN configuration managed by Tivoli StorageProductivity Center. Using the configuration history viewer, the user canselect any two snapshots and view the changes that have occurred in theSAN environment between those two time periods when snapshots weretaken. Changes occur when SAN entities are added, removed, or modified.
To create and schedule jobs using these tools, you must have Tivoli StorageProductivity Center superuser or Tivoli Storage Productivity Center administratorauthority.
You must have the IBM Tivoli Storage Productivity Center Advanced license to usethese tools.
Planning for configuration analysisUse the configuration analysis tool so that you can determine whether an existingSAN configuration complies with predefined best practices (policies).
The configuration analysis feature allows a system administrator to select up to 16policies and to specify the name of a target SAN (or zone set) for the analysis. Theanalysis tool reads the specified SAN data and the policy information for thespecified policies from the IBM Tivoli Storage Productivity Center database. Thepolicy violations are displayed as Tivoli Storage Productivity Center alerts.
System administrators can use configuration analysis to learn of any best-practicesviolations their actions might have caused. For example, in provisioning a newstorage subsystem, an administrator might inadvertently violate a zoning-relatedpolicy. If the zoning-related configuration changes persist in the database,configuration analysis can detect this policy violation.
Note: The configuration analysis feature is available only with IBM Tivoli StorageProductivity Center Advanced.
The policies used by the configuration analysis tool are as follows:
56 IBM Tivoli Storage Productivity Center: Installation and Configuration Guide

1. Each connected computer and storage system port must be in at least onezone in the specified zone sets.
2. Each host bus adapter (HBA) accesses storage system ports or tape ports, butnot both.
3. Each volume can be accessed only by computers running the same type andversion of operating system.
4. Each zone contains only HBAs from a single vendor.5. Each zone contains only a single model of storage subsystem.6. Each zone is part of a zone set.7. Each host must be zoned so that it can access all of its assigned volumes.8. Each computer has only HBAs of the same model and firmware version.9. For each host type and operating system, every HBA of a given model must
have the same firmware version.10. Every SAN switch of a given model must have the same firmware version.11. Every storage subsystem of a given model must have the same firmware
version.12. Each fabric can have a maximum of x zones.13. Each zone can have a maximum of x zone members.
Note: The x values is a number that you can enter in the GUI.14. Replication plan is intact with respect to the storage resource groups (SRGs)
and the replication session associated during planning through the SANPlanner (for replication planning).
15. All the source volumes involved in Metro Mirror Failover/Failback sessionsare conforming to 1:4 primary to secondary LSS for a failback directionscenario (for replication planning).
16. Inter/intra site connectivity is valid for replication plan deployments (forreplication planning).
To use the configuration analysis tool, follow these general steps:1. Ensure that you have previously run discovery and probe jobs for the
computers, fabrics, switches, storage, and other objects of interest.2. Ensure that the Device server and Data server are up and running.3. Ensure that the Tivoli Storage Productivity Center agents are installed and
configured.4. Go to IBM Tivoli Storage Productivity Center > Analytics. Right-click
Configuration Analysis. Use the Create Analyzer window to select the scopeand policies for the configuration analysis.
5. Schedule how often you want the job to run and how to handle time zones.6. Save and run the job.7. After the configuration analysis job has run, you can view the alerts generated
by IBM Tivoli Storage Productivity Center. In the navigation tree, expand IBMTivoli Storage Productivity Center > Alerting > Alert Log > ConfigurationAnalysis.
For more information about using the configuration analysis tool, see theInformation Center. Search for Using configuration analysis. You can also find thisinformation in the IBM Tivoli Storage Productivity Center User's Guide.
Chapter 1. Planning for Tivoli Storage Productivity Center 57

Planning for the Configuration History toolThe Configuration History view is a variation of the topology viewer. TheConfiguration History view shows the current configuration as well as what theconfiguration looked like in the past.
Use the snapshot selection panel in the Configuration History page to viewchanges that occurred in your storage environment between two or more points intime. After you define the configuration history settings, the system takessnapshots of your configuration so that you can compare the configuration atdifferent points in time. The comparison can help you analyze system performance,as well as enhance the quality of provisioning and planning tasks. TheConfiguration History tool does not show the current configuration.
To use the Configuration History tool, follow these general steps:1. You must have run discovery and probe jobs for the computers, fabrics,
switches, storage, and other objects of interest. For computers, you must alsohave run scan jobs.
2. Make sure that the Device server and Data server are up and running.3. In the GUI, go to Administrative Services > Configuration > Configuration
History Settings. Enable the periodic scheduling of configuration historysnapshot creation or create some on-demand configuration history snapshots.
4. In the GUI, go to IBM Tivoli Storage Productivity Center > Analytics >Configuration History for the following:v Computersv Fabricsv Switchesv Storagev Storage resource groupsv Other
A Configuration History topology view is displayed of the item you selected.5. Select the time range for the snapshots and click Apply.6. You can view the SAN configuration changes in the configuration history view
for the two time periods you selected.
For more information about how to use this tool, see IBM Tivoli Storage ProductivityCenter Users Guide.
SAN Planner OverviewSAN Planner assists the user in end-to-end planning for fabrics, hosts, storagecontrollers, storage pools, volumes, paths, ports, zones, zone sets, storage resourcegroups (SRGs), and replication. You can implement a plan by using SAN Planner.
Supported Systems
You can use the following products with SAN Planner:v TotalStorage Enterprise Storage Serverv System Storage DS8000v System Storage DS6000v SAN Volume Controllerv Storwize V3500v Storwize V3700
58 IBM Tivoli Storage Productivity Center: Installation and Configuration Guide

v Storwize V7000v Storwize V7000 Unified block level supportv The XIV system
SAN Planner supports the Space Only workload profile option for any otherstorage system.
Requirements for SAN Planner
For planning, IBM Tivoli Storage Productivity Center must be managing the hostsystem, subsystem, and the fabric that interconnects them. If the host, subsystem,or fabric information is not collected by subsystem probes and fabric discovery,SAN Planner is not able to generate the plan or execute portions of the plan andissues an error message.
You can select host systems that do not have a Storage Resource agent installed, ifthe initiator ports for that host system are known to Tivoli Storage ProductivityCenter. The provisioning profile selected for these host systems can include onlycapacity and zone provisioning information. Path settings are not allowed for hostsystems with no Storage Resource agent, and the path planning option isunavailable in the SAN Planner wizard.
For volume or virtual disk creation, Tivoli Storage Productivity Center must bemanaging the subsystem. You must have run the subsystem probe either throughan active CIM object manager (CIMOM) or native API connection as applicable forthe subsystem.
For volume or virtual disk assignment, Tivoli Storage Productivity Center must bemanaging the host, fabric, and subsystem. The host and subsystem must be in thesame fabric. If zoning changes are required, the SAN planner can be used toconfigure the zoning.
For fabric zoning configuration or fabric zone control operations, Tivoli StorageProductivity Center must manage the fabric. Depending on fabric type and agentcapabilities, Tivoli Storage Productivity Center uses a CIM agent, inband agent, orStorage Resource Agent (SRA).
For a plan that requires a virtual disk to be assigned to a host, the virtual diskmust have access to two nodes within an I/O group on the following storagesystems:v SAN Volume Controllerv Storwize V3500v Storwize V3700v Storwize V7000
These two nodes must be shared on the same fabric as the host.
A storage controller performance monitor must be run to select the WorkloadProfile options. For the following storage systems, it is required that theperformance data is collected for all its back-end subsystems as well:v SAN Volume Controllerv Storwize V3500v Storwize V3700v Storwize V7000
Chapter 1. Planning for Tivoli Storage Productivity Center 59

If a performance monitor has not been run, the Space Only workload profileoption is allowed for planning based on available capacity only.
The IBM Subsystem Device Driver (SDD) installed on a host is required formultipath planning.
Note:
v The Linux SDD driver is no longer available. Starting with Red Hat EnterpriseLinux Version 5 and SUSE Linux Enterprise Server Version 10, only theDM_Multipath is available. The DM_Multipath is supported by SAN Planner
v The SDD driver is no longer supported on HP, starting with HP-UX 11i v3 withItanium. HP-UX 11i v3 provides a native multipathing feature which issupported by SAN Planner.
v If you are using the SAN planning tools which collect data from Oracle Solarissystems, the HBAs must be configured to use Solaris systems. This note appliesto Storage Resource agents.Run the following command on the Solaris system:cfgadm -al
If the system displays this message:fc-fabric connected unconfigured unknown
run this command:cfgadm -c configure c#
where c# is your HBA controller ID. An example of an HBA controller ID is: c5.You must reboot the Solaris system.
v The SAN Planner does not support Easy Tier® (mixed pools) as input to a planfor automated storage provisioning. These pools are not displayed when youselect resources for planning or request a list of recommended pools.
v When creating a plan with multipath provisioning, do not include computersthat have EMC Powerpath installed. For example, do not include EMC Clariionvolumes in a plan with multipath provisioning.
For replication planning, you must add all the subsystems to be used in planningto IBM Tivoli Storage Productivity Center for Replication. You must also ensurethat connectivity is established between the subsystems.
Creating a SAN plan
You can create a SAN plan by right-clicking the IBM Tivoli Storage ProductivityCenter > Analytics > SAN Planner node and selecting Create Plan. The plannerwizard is started.
You can also create a SAN plan from the IBM Tivoli Storage Productivity Center> Disk Manager > SAN Planner node and selecting Create Plan. The plannerwizard is started.
The type of plan that you select determines the content of the remaining pages inthe wizard. The options are:v Provision storage only, including optional multipath and zone considerations
Click to create a plan for provisioning new storage. The plan does not includeprovisioning for storage replication.
60 IBM Tivoli Storage Productivity Center: Installation and Configuration Guide

v Provision storage with replication, including optional multipath and zoneconsiderations on the source resources
Click to create a plan for provisioning new storage and storage replication.v Provision replication to existing storage
Click to create a plan for provisioning replication for existing storage (provisiontarget volumes for existing source volumes).
v Configure multipathing or zoning only
Click to create a plan for provisioning multipathing and zoning for existingstorage.
To print plan information from the interface, click File > Print on the Tivoli StorageProductivity Center menu bar, or click on the toolbar.
Provision storage only, including optional multipath and zoneconsiderations
Use this option to provision storage volumes or virtual disks with multipathingand zoning. The input resources for planning can be storage subsystems, volumes,hosts, or storage resource groups (SRGs). If you are provisioning storage for thefollowing storage systems, you must select Virtual Disks:v SAN Volume Controllerv Storwize V3500v Storwize V3700v Storwize V7000
An SRG is a set of entities managed by Tivoli Storage Productivity Center. Theseentities can be servers, switches, storage subsystems, fabrics, storage pools, andstorage volumes. Using SRGs provides you with a means of separating yourapplication data from your pool of unused resources. You can specify policies forprovisioning (volume creation and selection, workload profiles, zoning, andmultipathing configuration) and associate them with SRGs. These policies are usedby SAN Planner to populate default settings.
You can use this option to plan and select appropriate storage controllers, storagepools, and storage volumes (when using unassigned volumes) that satisfy yourinputs. This option enables you to select controller type preference, whetherstorage requests can be satisfied by multiple controller types, and the RedundantArray of Independent Disks (RAID) level. For the following storage systems, theRAID level represents the RAID level for the back-end controllers:v SAN Volume Controllerv Storwize V3500v Storwize V3700v Storwize V7000
When creating new volumes on an extent pool, SAN Planner uses one of thefollowing methods:v If an encryption group is selected, SAN Planner creates volumes on pools that
belong to the selected encryption group. Only pools that belong to thatencryption group are used for planning. This option might not be enabled if thestorage system does not support encryption.
v If an encryption group is not selected, SAN Planner uses the currentperformance utilization of storage resources to determine whether a new volume
Chapter 1. Planning for Tivoli Storage Productivity Center 61

should be allocated on particular pool in a particular storage controller. Ifmultiple storage pools from different controllers can potentially satisfy yourprovisioning request, then the SAN Planner uses the rated utilization of thepools (the sum of the previous provisioning performance requirements, whichmight be greater than the current utilization) to break the ties and select acandidate storage pool.
You can also select other options in the SAN Planner such as selecting a workloadprofile as an input to the SAN Planner's analysis, excluding solid-state drives fromplanning, or using thin provisioning for creating thin provisioned volumes basedon the thin provisioning profile selected.
See the Configure multipathing or zoning only section for details on SAN Plannermultipathing and zoning options.
Provision storage with replication, including optional multipathand zone considerations on the source resources
In addition to provisioning storage with multipathing and zoning options, whenyou select replication options in the wizard, SAN Planner provisions replication foryour storage resources. Resilient resource planning is available only for deviceswhich are supported by IBM Tivoli Storage Productivity Center for Replication.
Depending on the storage resources you are planning for, you can select from thefollowing copy services session types:v FlashCopyv VDisk mirroringv Synchronous Metro Mirror failover/failbackv Synchronous Metro Mirror failover/failback with practicev Synchronous Metro Mirror single directionv Asynchronous Global Mirror either direction with two-site practicev Asynchronous Global Mirror failover/failbackv Asynchronous Global Mirror failover/failback with practicev Asynchronous Global Mirror single directionv Three-site Metro Global Mirror with practicev Three-site Metro Global Mirrorv Snapshot
For example, if you are planning for the XIV system, you can only select fromSnapshot, Metro Mirror, or Global Mirror session types. Practice sessions are notsupported for the XIV system.
Provision replication to existing storage
This option extends existing replication sessions by adding more storage resourcesand protecting them. The new volumes are added to existing replication sessions.SAN Planner ensures that source volumes are added to the source side of a copyrelationship and target volumes are added to the target side. For Snapshot copysessions, SAN Planner does not provision or manage target volumes. The XIVsystem selects and manages the targets for Snapshot replication.
62 IBM Tivoli Storage Productivity Center: Installation and Configuration Guide

Configure multipathing or zoning only
SAN Planner enables you to set up multipath options. The supported multipathdriver on a host is the IBM SDD.
Note:
v The Linux SDD driver is no longer available. Starting with Red Hat EnterpriseLinux Version 5 and SUSE Linux Enterprise Server Version 10, only theDM_Multipath is available.
v The SDD driver is no longer supported on HP, starting with HP-UX 11i v3 withItanium. HP-UX 11i v3 provides a native multipathing feature which issupported by SAN Planner.
SAN Planner enables system administrators and storage area network (SAN)administrators to plan and implement storage provisioning for hosts and storagesystems with multipath support in fabrics managed by Tivoli Storage ProductivityCenter. Planning the provisioning of storage to hosts with multipath driversrequires knowing which storage systems are supported by the host multipathdriver and the multipath modes that are supported by the driver and storagesubsystem. Planning the paths between the hosts and storage controller requiresdesigning paths between hosts and storage subsystems which are implementedthrough zones in the fabric.
SAN Planner is used for specifying multiple paths options between selected hostsand storage systems. There should be at least two paths available to a storagesystem and at least four paths available to SAN Volume Controller. Although notrequired, it is beneficial to have at least two host ports.
Path planning in SAN Planner does not directly interact with zone planning. Thepath planning option provides the path information which the zone planningoption uses. Each path is represented by a host port WWPN, target port WWPN,and a Volume ID for the volume on the target that is mapped to the host port.These paths are created when the zone planning option is implemented.
SAN Planner specifies automatic zoning between ports on the selected hosts andsubsystems in a fabric. All zoning is done with WWPN-based zoning. SAN Plannerplans zoning configuration for new storage that is provisioned for use by a host.For example, the zoning option can be used when a new storage volume is createdand assigned to a host. The zoning option can also be used with a volume that hasalready been created and is assigned to a host that requires more storage. In thesecases, SAN Planner determines which host and storage need to be zoned together,which provides the zoning option with the exact set of ports that need to be zonedtogether. SAN Planner then uses the zoning inputs for the planning.
If the subsystem/host are within the same fabric and the zoning option is notchecked, then existing zones or zone sets are used. If the zoning option is checked,a new zone or zone set is created.
To perform zoning, the host and subsystem being zoned by SAN Planner must bewithin the same fabric. For the case where the host and subsystem reside in morethan one of the same fabrics, SAN Planner creates identical zones in all the fabrics.
The guidance policies used for zone planning are as follows:v One zone per host bus adapter (HBA)v One zone per host
Chapter 1. Planning for Tivoli Storage Productivity Center 63

v One zone per host portv Auto zone: largest zone that satisfies the validation policies
The validation policies used for zone planning are as follows:v Maximum number of zone members in a zone = N.v No two controllers of different types in the same zone.v Maximum number of zones in a fabric = N.
The second policy in the preceding list has a higher priority than the third policy.
Planner and user inputs interdependencies
The planner options depend on the inputs that you select. For example, selecting ahost that does not have an agent installed limits the planning that can be done.The planning process reveals inconsistencies in your preferences. For example, itmight not be possible to have your specified number of paths and have a differentzone for each host. In such cases, the planner makes a best effort to satisfy yourinputs. If the planner cannot satisfy conditions, it issues warnings. Errorsdiscovered before plan execution display in the planner. You can adjust the inputsto correct the problem. Errors discovered during plan execution are in the jobexecution log.
If the selected Storage Resource group has a provisioning profile associated with it,the profile is selected in the Effective Provisioning Profile field. You can select adifferent profile from the list of available profiles.
For more information about usingSAN Planner, go to the SAN Planner informationcenter and search for Planning and modifying storage configurations.
Storage Optimizer overviewThe Storage Optimizer uses data in the IBM Tivoli Storage Productivity Centerdatabase to analyze your storage subsystems to identify performance bottlenecks,and recommend changes to improve performance. This topic lists the supportedsubsystems and describes the general steps for using Storage Optimizer.
The Storage Optimizer helps you develop storage migration or storageconsolidation plans, and helps you plan for the growth of your storageinfrastructure. For example, you can use the Storage Optimizer to create a weeklyreport that provides details on the performance of your storage subsystems andmakes recommendations for how to improve performance.
Note: The Storage Optimizer does not actually perform any migrations or modifysubsystem configurations. Its primary purpose is to provide you with aperformance analysis and optimization recommendations that you can choose toimplement at your discretion.
Important: Storage Optimizer does not take into account any establishedreplication relationships or sessions. Follow migration recommendations with careto ensure continuity of all replication relationships.
To use the Storage Optimizer, you must have an IBM Tivoli Storage ProductivityCenter Advanced license.
The following IBM storage subsystems or applications are supported:
64 IBM Tivoli Storage Productivity Center: Installation and Configuration Guide

v DS8000v DS6000v DS5000v DS4000v TotalStorage Enterprise Storage Serverv SAN Volume Controllerv Storwize V7000v IBM Storwize V7000 Unified block level supportv The XIV systemv IBM SONAS
Before running Storage Optimizer, you must set up performance monitors tocollect performance data at least once a day for all storage subsystems that youwant Storage Optimizer to analyze. You must also collect performance monitoringdata for the back-end subsystems for SAN Volume Controller or Storwize V7000.The performance data for the subsystems produce the most accurate StorageOptimizer analysis.
The analysis is less accurate if there are any gaps in the data collection for the timeinterval being analyzed. It is recommended that you collect at least one week'sworth of performance monitoring data before using Storage Optimizer. Providing alonger time interval for data collection increases the accuracy of the StorageOptimizer analysis and recommendations.
You must provide the Storage Optimizer with the following input:v Configuration and performance data that you collect for the supported storage
subsystems before running the Storage Optimizerv One or more selected storage subsystems that you specify as input to the
Storage Optimizer.v Connected fabric topology and zoning information is used in the analysis if it is
available.
The Storage Optimizer produces the following output:v An analysis report that displays performance heat maps and tables that
graphically illustrate the performance utilization of the storage subsystems thatyou specified as input.
v An optimization report that provides migration and consolidationrecommendations for improving performance.
The Storage Optimizer produces more accurate results if you provide both therequired and optional input data requested by the Storage Optimizer, and if youcollect storage subsystem performance monitoring data over a longer time intervalbefore using the Storage Optimizer.
Note: Since running the Storage Optimizer is a processor-intensive task for the IBMTivoli Storage Productivity Center server, schedule a time to run the StorageOptimizer when processor demand on the IBM Tivoli Storage Productivity Centerserver is expected to be at a minimum.
The general steps for using the Storage Optimizer are as follows:1. In the Create Analysis window, enter information in the required fields and
choose File > Save to submit the analysis report job.
Chapter 1. Planning for Tivoli Storage Productivity Center 65

2. Review the Storage Optimizer analysis report.3. Create an optimization report based on this analysis.4. View the optimization report.5. At your discretion, implement the recommendations suggested in the
optimization report, or rerun the analysis using different inputs.
Planning for the Data Path ExplorerThe Data Path Explorer is a type of view in the topology viewer. Data pathexplorer combines several of the typical topology views into a visualization thatallows users to follow connectivity from one end point in the topology view toanother. Storage administrators can use this view to debug connectivity andperformance problems in the storage environment.
Data Path Explorer displays the different data paths (SAN access paths or I/Opaths) for each host disk. This action allows you to use the Data Path Explorer tocheck the health and performance statistics of the storage components along theI/O path.
Different agents play different roles when discovering information and what can beshown in the topology viewer. The Data Path Explorer view is also subject to thoselimitations. Different amounts of information can be shown by the Data PathExplorer view depending on the agents deployed throughout the fabric.
To display data paths from a host to a subsystem in this view, it is necessary tohave the following conditions:v CIM agent installed to monitor the storage subsystem (CIM agents are not
required for DS8000, the XIV system, SAN Volume Controller, Storwize V7000Unified, or Storwize V7000)
v Storage Resource agent installed to monitor the host or fabric
The Data Path Explorer view does not display the data path from a host to asubsystem if any one of these conditions is not met.
To show the host disk assignment from a given storage subsystem, it is necessaryfor the IBM Tivoli Storage Productivity Center Data server to have access to theCIM agent (SMI-S agent) or native interface for the subsystem. For the subsystem,the data path is defined by the host masking or mapping information maintainedby the CIM agent or native interface.
Analysis on data paths involving SAN Volume Controller, Storwize V7000 Unified,or Storwize V7000 would require the native interface pointing to the SAN VolumeController, Storwize V7000 Unified, or Storwize V7000 and the disk drives for thestorage system.
To show accurate information, it is important to have the most current informationfrom the CIM agents, native interface, or Storage Resource agents. You must probeall the components within the data path (or a set of agents strategically placedthroughout the fabric).
To show physical fabric connectivity, you must have a Storage Resource agent,out-of-band Fabric agent, or a CIM agent for the fabric. (CIM agents are notrequired for DS8000, the XIV system, SAN Volume Controller, Storwize V7000Unified, or Storwize V7000.)
66 IBM Tivoli Storage Productivity Center: Installation and Configuration Guide

To show performance overlay in the Data Path Explorer view, you must first createand run performance monitors on the switches and storage subsystems of interest.To see the overlays you must also go to the topology viewer. Right-click on thetopology viewer. Click Global Settings. On the Settings window under ActiveOverlays, click the Performance check box.
To show the zone overlay, you need a Storage Resource agent connected to thefabric along the data paths defined or a CIM agent or Storage Resource agent forthe fabric. To see the overlays you must also go to the topology viewer. Right-clickon the topology viewer. Click Global Settings and check the Show zone tab checkbox. Click OK.
If you want to start the Data Path Explorer view for a host, that host must have aStorage Resource agent running on it.
These are the general steps to follow to display the data path explorer view:1. Install and configure the SMI-S agents (CIM agents) for the subsystems to
collect subsystem data. CIM agents are not required for DS8000, the XIVsystem, SAN Volume Controller, Storwize V7000 Unified, or Storwize V7000 tocollect subsystem data. Install and configure the CIM agents for the fabric tocollect fabric data. Contact your vendor for information about installing andconfiguring the CIM agent for the subsystem or fabric.
2. Install and configure the out-of-band Fabric agent to monitor a fabric.3. Install the Storage Resource agent on the hosts.4. Run a discovery job for the CIM agents, Storage Resource agents, and storage
systems.5. Run a probe job for the subsystem, fabric, and Storage Resource agents.6. Run a performance monitoring job for the subsystem and switches if you want
to see performance information.7. You can now see the data paths from a host to a storage subsystem in the Data
Path Explorer view.
Planning for the Data ManagerThis section provides planning information for the Data Manager.
Data Manager is a comprehensive file and capacity management solution forheterogeneous storage environments. Data Manager includes enterprise-widereporting and monitoring, policy-based management and automated capacityprovisioning for Direct Attached Storage (DAS), Network Attached Storage (NAS),and SAN environments.
Data Manager helps you improve storage utilization, plan for future capacity, andensure availability by providing storage on demand for file systems. Use DataManager to perform the following functions:v Discover and monitor disks, partitions, shared directories, and servers.v Monitor and report on capacity and utilization across platforms to help you
identify trends and prevent problems.v Provides a wide variety of standardized reports about file systems and storage
infrastructure to track usage and availability.v Provide file analysis across platforms to help you identify and reclaim space
used by non-essential files.
Chapter 1. Planning for Tivoli Storage Productivity Center 67

v Provide policy-based management and automated capacity provisioning for filesystems when user-defined thresholds are reached.
Using these functions, Data Manager helps you reduce storage costs by:v Improving storage utilization.v Enabling intelligent capacity planning.v Helping you manage more storage with the same staff.v Supporting application availability through computer uptime reporting and
application database monitoring.
Information collected by Data Manager helps you understand what is really goingon with data on your servers and in your storage environment. You can viewwhen files are created, accessed, and modified, and by what group or user. Thistype of information helps system administrators map storage resources to theconsumers of the resource.
In addition to understanding the current consumption and usage of data withinthe enterprise, Data Manager tracks the information over time. Not only does thishistorical view of storage consumption and utilization show usage trends overtime, the system administrator can also see a projected use of storage in the future.System administrators can prepare for the need to purchase additional capacity ina planned proactive manner rather than reacting to out-of-space emergencies.
Use the Data Manager policy functions to help you evaluate and control the usageand status of your enterprise storage management assets. Because Data Manager ispolicy-based, it has autonomic self-healing capabilities that can detect potentialproblems and automatically adjust parameters based on the policies and actionsyou have established. Use the capability to provision storage based upon storagepolicies to expand a file system, and to allocate storage to a volume (LUN).
Planning for the Storage Resource agents on Oracle SolarisYou can skip automount maps (automaps) for a discovery job on Solaris. To skipautomount maps, specify the skipAutoFS=1 parameter in the server section of theTPCD.config file. The change globally affects all Solaris Storage Resource agentsmanaged by the Data server.
To change the TPCD.config file, follow these steps:1. Stop the Data server.2. Modify the TPCD.config file in this directory:
TPC_Data_Server_install_directory/config
The default directory for Windows is:C:\Program Files\IBM\TPC\data\config
The default directory for UNIX or Linux is:/usr_or_opt/IBM/TPC/data/config
3. Modify the TPCD.config file with the skipAutoFS=1 parameter added:[server]
threadPoolSize=3abbreviatedProbe=1maxThreads=8pingReceiveTimeout=10skipAutoFS=1 <== Set to 1 for Discovery
on Solaris Storage Resource agent to skip AutoMounts
68 IBM Tivoli Storage Productivity Center: Installation and Configuration Guide

process.By default, discovery will alwaysprocess AutoMounts on the Solaris Storage Resource agent.
[gui]threadPoolSize=3maxThreads=10reportRowLimit=5000keepCachedReport=120
Save the file.4. Restart the Data server.
Planning for the Disk ManagerTo effectively plan your Disk Manager, you must understand the terminology.
Tivoli Storage Productivity Center uses abstract terminology such as pools,volumes, and so on to help you view and manage your heterogeneous storagesystems. Most of these terms are derived from SMI-S, which already provides acommon model for storage subsystems.
storage poolA collection of storage capacity that provides the capacity requirements fora volume. A pool has certain storage capabilities, which indicate the rangeof quality of service requirements that can be applied to objects createdfrom the pool.
primordial poolA type of storage pool. This pool might contain unformatted orunprepared capacity. This type of pool might simply contain unassignedcapacity. Storage capacity is drawn from the primordial storage pool tocreate concrete storage pools. The primordial storage pool aggregatesstorage capacity that has not been assigned to a concrete storage pool.Storage volumes are allocated from concrete storage pools. For theTotalStorage Enterprise Storage Server, DS8000, and DS6000, the primordialpool is the disk groups or array sites which are installed in the machinebut have not yet been configured into RAID arrays. Primordial pools forSAN Volume Controller or Storwize V7000 are those MDisks which areavailable, but have not yet been configured to any MDisk Group (oneprimordial pool per back-end controller). The Primordial pool for the XIVsystem is a virtual concept that represents the aggregation of system-widedeallocated storage capacity which is available but unassigned to the XIVsystem storage pools.
storage volumesAllocations of storage capacity that is exposed from a system through anexternal interface. In SCSI terms, they are logical units.
The following table shows the mapping of the Tivoli Storage ProductivityCenter terms to the device-specific terms.
Tivoli StorageProductivity Centerterms: Storage pool
Primordialpool
Storagevolume Disk
Device terms
DS6000, DS8000,TotalStorage EnterpriseStorage Server
Extent pool not applicable Volume Disk drivemodule(DDM)
Chapter 1. Planning for Tivoli Storage Productivity Center 69

Tivoli StorageProductivity Centerterms: Storage pool
Primordialpool
Storagevolume Disk
Device terms
DS4000 Volume group not applicable Volume Disk
DS5000 Volume group not applicable Volume Disk
SAN Volume Controlleror Storwize V7000
MDisk group not applicable Volume MDisk
the XIV system Storage pool not applicable Volume Disk
Many disk arrays provide an interface for the administrator to specifywhich initiators can access what volumes through which target ports. Theeffect is that the given volume is only visible to SCSI commands thatoriginate from the specified initiators through specific sets of target ports.There might also be a capability to select the SCSI Logical Unit Number asseen by an initiator through a specific set of ports. The ability to limitaccess is called device masking. The ability to specify the device addressseen by particular initiators is called device mapping. For SCSI systems,these terms are known as LUN masking and LUN mapping. In TivoliStorage Productivity Center, masking and mapping is handled throughhost assignment.
Note:
v For DS6000 and DS8000: The DS6000 and DS8000 tracks the number of sparesstill available after a spare disk has been used to replace a failing disk drive inthe device by marking the failing drive with an operational status of "PredictiveFailure." If there are not enough spare disks remaining for a rank, then theoperational status of the disk also shows a status of "Error."If the DS6000 or DS8000 marks a disk drive with a status of "Predictive Failure"but not "Error", then Tivoli Storage Productivity Center shows a green icon witha consolidated status of "OK" in the health overlay, and does not create an alert.The topology viewer does show the real status of the disk drive as "PredictiveError" in the Operational Status column of the tabular view. The topologyviewer lets you see the changed status.
v For EMC storage systems: The data that Tivoli Storage Productivity Centercollects about EMC storage systems is based on SMI-S standards. Within SMI-Smodel different types of StoragePools are defined and several subsystemattributes can be modeled as special pool types. Beside the pools that areavailable for volume creation, additional storage space from the EMC storagesystem might be represented as a pool within the SMI-S model. Because of this,Tivoli Storage Productivity Center reports and CLI commands might displaymore pools for EMC storage systems than what is reported through the EMCNavisphere agent.
Planning for the IBM CIM agentsThe CIM agents are provided by the vendor of the storage device, fabric switch, ortape library. This topic provides planning information for the IBM CIM agents forthe IBM storage subsystems.
For storage subsystems, the CIM agents are needed for storage asset information,provisioning, alerting, and performance monitoring. For tape libraries, the CIMagents are used for asset and inventory information. The CIM agents conform to
70 IBM Tivoli Storage Productivity Center: Installation and Configuration Guide

the SNIA SMI-S specification to provide a communication transport between IBMTivoli Storage Productivity Center and the managed devices.
Note: For DS8000, the XIV system, SAN Volume Controller, Storwize V7000Unified, and Storwize V7000 storage subsystems, you do not need a CIM agent.
The CIM agents can be referred to by various names, such as CIMOM (CIM ObjectManager) or SMIS agent. A CIM agent consists of a CIMOM and an SMI-Sprovider for the managed device. The CIM agent can be a separate agentinstallation or can be embedded in the device itself, as is the case with Cisco fabricswitches. In this case, there is no proxy agent to install and Tivoli StorageProductivity Center is configured to point to the managed device itself.
Once the CIM agent is installed and configured, Tivoli Storage Productivity Centercan be configured to communicate with it.
Note:
v Do not use different CIM Agent releases (for example 5.1, 5.2.1, 5.3, and 5.4) tomanage the same DS6000 or TotalStorage Enterprise Storage Server with IBMTivoli Storage Productivity Center. Each CIM Agent release reports someinformation in a different way so this reporting can cause a reporting failure.Use the same release of CIM Agent for all CIMOMs managing the same device.
v If an Engenio or LSI SMI-S provider is being used by the Tivoli StorageProductivity Center server, then no other SMIS-enabled application should beusing that Engenio or LSI SMI-S provider. This controlled environment isrequired to ensure that the Engenio provider receives synchronized CIM Clientrequests.
v For the TotalStorage Enterprise Storage Server 2105, disk drive information couldbe displayed twice after an upgrade. The first half of the information is new andis displayed online. The second half of information is no longer detectable. Thesecond half of information is impossible to correlate.
Before installing Tivoli Storage Productivity Center check the Tivoli StorageProductivity Center support site for the latest CIM agent support. Go to the TivoliStorage Productivity Center support website at http://www.ibm.com/support/docview.wss?rs=40&uid=swg21386446.
For information about certified SMI-S devices, see http://www.snia.org/ctp/conformingproviders#10provider.
For information about how to install and configure the CIM agent, seehttp://www.ibm.com/servers/storage/support/software/cimdsoapi/.
Planning for the TagmaStore CIM agentsThe TagmaStore CIM agents are provided by Hitachi Data Systems for theTagmaStore storage subsystem. The TagmaStore CIM agent collects informationfrom the TagmaStore storage system.
IBM Tivoli Storage Productivity Center supports the Hitachi Data SystemsTagmaStore CIM Agent 5.8. This version of the CIM Agent supports only the ArrayProfile and not the Storage Virtualizer Profile. However, Tivoli Storage ProductivityCenter supports the TagmaStore as a Storage Virtualizer. Tivoli StorageProductivity Center displays information for virtual disks and local disks.
Chapter 1. Planning for Tivoli Storage Productivity Center 71

Tivoli Storage Productivity Center cannot provide correlation information betweenthe virtual storage used by TagmaStore and the volumes created on the storagedue to an existing limitation of the CIM agent 5.8 from Hitachi Data Systems.However, Tivoli Storage Productivity Center reports correctly display thecorrelation between volumes created on the local storage and the local disks. Thislimitation has no impact on the topology but it does affect several reports thatshow the correlation:v Data Manager > Reporting > Asset > By Storage Subsystem > HDS_device >
Managed Disks > LUN (does not show the relation between the disk and LUNor volume in the tree)
v Disk Manager > Reporting > Storage Subsystem > Volume to BackendVolume
v Disk Manager > Reporting > Storage Subsystem > Computer Views (becauseTivoli Storage Productivity Center cannot populate the information for volumescreated on the virtual disks)
All volumes are created from a storage pool that is allocated from a primordialstorage pool and an imported primordial pool. A volume cannot be created overboth local and virtual extents.
For LUN and volume correlation, the host machine must have the StorageResource agent installed and the TagmaStore device must be in the same SANfabric. You must also have a zone configured in the active zone set between theports of the host machine and the ports of the TagmaStore device. The Fabric agentor Storage Resource agent needs to be configured for the fabric to which the host isconnected.
For back-end correlation, the TagmaStore device ports and back-end subsystemports must be in the same zone and the back-end subsystem has assigned storagevolumes to all ports of the TagmaStore device.
Before you can use the CIM agent 5.8, you must uninstall pre-version 5.8 CIMagents. You cannot have a mixture of CIM agent 5.8 and pre-version 5.8 CIMagents. A mixture of CIM agents can cause failures.
The events returned by the CIM agent are:v Generation of a volumev Deletion of a volumev Allocation of a pathv Cancellation of a path
When you delete a volume, you can only delete the latest created volume. Forexample, if you create five volumes, you need to delete the volumes in reverseorder from the creation order.
General procedure
The general steps to follow to use the TagmaStore CIM agents are:1. Install or upgrade Tivoli Storage Productivity Center.2. Remove the pre-5.8 CIM agent from Tivoli Storage Productivity Center as a
data source before adding the 5.8 CIM agent. You must add the CIM agentbefore running a discovery job.
3. Run a discovery job for the TagmaStore CIM agent.
72 IBM Tivoli Storage Productivity Center: Installation and Configuration Guide

4. Run probe jobs, scan jobs, and ping jobs for the TagmaStore CIM agent.5. View the storage information gathered by the monitoring jobs through the
topology viewer and reports that you can generate through the Fabric Manager,Data Managerr, and Disk Manager.
Planning for Disk Manager configurationThis section provides information for planning Disk Manager configuration.
Disk Manager data can only be collected from devices managed by a CIM agent orthrough the native storage system interface.
To get Disk Manager data, complete the following steps:1. Prepare for collecting data from Disk Manager.
For those devices that need the CIM agent, make sure that the following itemsare done before adding the CIM agent:v The version of CIM agent and firmware for the device is supported. For
information about the CIM agent and firmware supported, seehttp://www.ibm.com/support/docview.wss?uid=swg21386446. Select theappropriate version for Storage.
v A CIM agent is installed on a different server from IBM Tivoli StorageProductivity Center. For some vendors, the device comes with an embeddedCIM agent, and therefore, no separate CIM agent installation is required.
v The CIM agent is configured to manage the intended device.For information about how to install and configure the CIM agent, contact yourCIM agent provider. Also see IBM Tivoli Storage Productivity Center Hints andTips for information about installing and configuring CIM agents. Seehttp://www.ibm.com/support/docview.wss?uid=swg27008254.
2. For devices that use CIM agents, follow these steps:a. Add the CIM agent connection to Tivoli Storage Productivity Center. For
information about adding a CIM agent, use the Configure Devices wizard.For information about the Configure Devices wizard, see “Adding resourcesfor monitoring” on page 255.
b. Run a CIMOM discovery job for the storage system.c. Run a probe job for the storage system. The probe job gets all component
level information into the database. The probe job also includes getting allthe instances of controllers, arrays, extents, volumes, LUN to hostmappings, FC ports, and so on.
3. For devices that use the native interface, add the device to Tivoli StorageProductivity Center. Use the Configure Devices wizard to add the device. Forinformation about the Configure Devices wizard, see “Adding resources formonitoring” on page 255. On the Select Device Type panel, select StorageSubsystem. After you add the storage system to Tivoli Storage ProductivityCenter, an automatic discovery and probe jobs are run.
4. Once the device is added to Tivoli Storage Productivity Center, automaticdiscovery and probe operations are done for the storage system.
5. Create alerts. You can specify which alerts you want to be notified of whenmonitoring the storage systems.For the storage systems that use the native interfaces, Tivoli StorageProductivity Center gets events directly from the storage system. For theDS8000, Tivoli Storage Productivity Center receives events from the DS8000enterprise storage server network interface (ESSNI). For the SAN Volume
Chapter 1. Planning for Tivoli Storage Productivity Center 73

Controller, Storwize V7000, and the XIV system, Tivoli Storage ProductivityCenter polls the device every minute for events.For storage systems that use the CIM agent, Tivoli Storage Productivity Centerreceives CIM indications.
6. You can configure Tivoli Storage Productivity Center to send SNMP traps.if you configure Tivoli Storage Productivity Center to send SNMP traps orOmnibus events, you must first import the Tivoli Storage Productivity CenterMIB and Baroc files into your SNMP manager or Omnibus manager. For moreinformation about configuring SNMP traps, see “Configuring Tivoli StorageProductivity Center to send SNMP traps and IBM Tivoli Enterprise Consoleevents” on page 288.
7. Run a probe job for storage systems other than DS8000, the XIV system, SANVolume Controller, or Storwize V7000. Probe jobs collect detailed informationabout the storage systems known to Tivoli Storage Productivity Center. Incontrast to a CIMOM discovery job, the probe interacts with the CIM agent toget information about just the storage devices configured to be probed. You canset up a probe job to gather data for just one storage system, or you can set upprobe jobs to collect data from more than one storage system. A probe job mustbe run before volumes can be created on a storage system or a storage systemcan be monitored for performance management.Running a probe job puts additional workload on the Tivoli StorageProductivity Center server, the repository database, and the CIM agents. Forprobe jobs, the additional workload is especially important if multiple devicesare managed by the same CIM agent and are probed concurrently. As a result,the probe completion time is impacted by the number of devices probed inparallel and the number of CIM agents involved in the probe job. This fact isespecially important if the CIM agent machines are lower-end machines of thehardware prerequisites.To help keep the workload low, run the probe jobs for the storage systems at atime when Tivoli Storage Productivity Center and the network are not usedheavily, which is typically at night time. To allow this workload distribution,run probe jobs for each storage system to run one after the other.The following example shows how you might run your probe jobs. Thisenvironment assumes that you have four storage systems (SS1, SS2, SS3, andSS4), with three of them having a probe job duration of less than 30 minutesand one (SS3) taking 90 minutes to complete a probe job. You could arrange theprobe jobs according to the following table:
Probe Probe 1 Probe 2 Probe 3 Probe 4
Storage system SS1 SS2 SS3 SS4
Start time 0:30 1:30 2:30 4:30
If you have a probe job that collects data from more than one storage system,then configure the probe job to contain only one storage system per CIM agent.The configured probe job is important because the CIM agent response time isa major contributor to the overall Tivoli Storage Productivity Center probe jobduration.The storage system probe jobs collect detailed information about theconfiguration of the storage systems and the properties describing thoseconfiguration elements. The elements gathered are:v Component computer systems (like the SAN Volume Controller or Storwize
V7000 nodes)v Storage pools
74 IBM Tivoli Storage Productivity Center: Installation and Configuration Guide

v Storage volumesv FC portsv Disksv Host-to-volume assignmentsv Relationships among the elements (for example storage pool to storage
volume relationships)This configuration is typically not changing that much, especially becauseTivoli Storage Productivity Center updates the repository database wheneveryou do configuration changes using the Tivoli Storage Productivity Center GUI(for example when creating a volume). Therefore, the probe jobs for the storagesystems can be scheduled to occur less often than the CIMOM discovery.If you use the device-specific CLI for configuration changes, the probe isneeded in case the CIM agent does not support all needed indications toinform Tivoli Storage Productivity Center about the change.Probe storage systems once every one or two days. Other factors influencingthis interval are:v Is the device managed by Tivoli Storage Productivity Center or is an
alternative tool used (for example device-specific CLI)?v Does the CIM agent support CIM indications and how extensively are Tivoli
Storage Productivity Center alerts used?8. You can view the Disk Manager reports and topology in Tivoli Storage
Productivity Center.
For information about how to configure Tivoli Storage Productivity Center forperformance monitoring, see “Performance management configuration” on page107.
Planning for TotalStorage Enterprise Storage ServerFlashCopy reports
Use this information to plan for displaying TotalStorage Enterprise Storage ServerFlashCopy reports in IBM Tivoli Storage Productivity Center.
If you want to display TotalStorage Enterprise Storage Server FlashCopyrelationships in additional to the general information in Tivoli Storage ProductivityCenter, there are two general steps that must be performed. For example:1. Add the following types to the CIM agent:
dscimcli mkdev 10.10.10.100 -type ess -user user_ID-password passworddscimcli mkdev 10.10.10.100 -type esscs -user user_ID-password password
2. You must also have a specific level of microcode. Before installing IBM TivoliStorage Productivity Center, check the IBM Tivoli Storage Productivity Centersupport site for the latest microcode level. Go to the Tivoli Storage ProductivityCenter support Web site at http://www.ibm.com/support/docview.wss?rs=40&uid=swg21386446.
Note: These steps are only required for the ESS and not the DS8000.
Storage capacity of volumesThis section provides information about how IBM Tivoli Storage ProductivityCenter displays the storage capacity of volumes.
Chapter 1. Planning for Tivoli Storage Productivity Center 75

The disk storage that IBM Tivoli Storage Productivity Center supports is expressedin powers of two:1 KB = 2 to the power of 10 bytes (1024)1 MB = 2 to the power of 20 bytes (1 048 576)1 GB = 2 to the power of 30 bytes (1 073 741 824)1 TB = 2 to the power of 40 bytes (1.09951E+12)1 PB = 2 to the power of 50 bytes (1.1259E+15)
This matches the convention of many storage systems but does not match thebehavior of the TotalStorage Enterprise Storage Server server family of devices andthe IBM XIV Storage System. Therefore, a volume created using the TotalStorageEnterprise Storage Server Server Specialist or the XIV GUI with a size of 17 GBmight be displayed by Tivoli Storage Productivity Center as 16 GB in size. TheDS6000 and DS8000 storage system GUIs display the storage as powers of two.
Planning for the DS8000Use this information to plan for using the IBM DS8000 storage system with TivoliStorage Productivity Center.
IBM System Storage DS8000 series is a high-performance, high-capacity series ofdisk storage that is designed to support continuous operations.
For more information about the DS8000, see the DS8000 Information Center athttp://publib.boulder.ibm.com/infocenter/dsichelp/ds8000ic/index.jsp.
Tivoli Storage Productivity Center support
The DS8000 uses the Tivoli Storage Productivity Center native interface forconnecting to the device. CIM agents are no longer required for the DS8000. Afteryou add the DS8000 to Tivoli Storage Productivity Center, an automatic discoveryand probe jobs are run.
General procedure
To view the reports and topology for the DS8000, complete the following steps:1. Open the Tivoli Storage Productivity Center user interface and add the DS8000
to Tivoli Storage Productivity Center. Click Administrative Services > DataSources > Storage Subsystems. Click Add. This action opens the ConfigureDevices wizard. For information about adding the storage system, see“Configure storage subsystem connections page” on page 259.
2. After you add the DS8000, an automatic discovery and probe are performed.3. View the reports and topology for the DS8000 in Tivoli Storage Productivity
Center.
Planning for DS8000 performanceThis section provides information about DS8000 performance.
Space-efficient volumes are not fully allocated when they are created, unlike the"normal" type of volumes. Their actual allocated space grows as the volume isused, until it has reached the full size of the volume. After the full size of thevolume is reached, the allocated size does not change further. For performancemanagement, the current size of the volume is unknown at any given point intime. Because the current size of the volume is unknown, it is impossible to knowhow the segments (extents) for the volume are distributed among the various
76 IBM Tivoli Storage Productivity Center: Installation and Configuration Guide

ranks in a multi-rank extent pool. It is therefore impossible to accurately computethe performance statistics for the arrays associated with a multi-rank extent poolthat contains one or more space-efficient volumes.
Planning for the SAN Volume ControllerUse this information to plan for using the SAN Volume Controller with TivoliStorage Productivity Center.
You can view reports and the topology for your SAN Volume Controllerenvironment. Use this information to understand the configuration that is requiredto use SAN Volume Controller with Tivoli Storage Productivity Center.
By using Tivoli Storage Productivity Center, you can view SAN Volume Controllerperformance statistics for the following reports:v Disk Manager > Reporting > Storage Subsystem Performance > By Storage
Subsystem
v Disk Manager > Reporting > Storage Subsystem Performance > By I/O Group
v Disk Manager > Reporting > Storage Subsystem Performance > By Node
You can also view the SAN Volume Controller environment through the topologyviewer.
When you have hosts connected to storage subsystems which have multi-pathingenabled, you must have the multi-pathing subsystem device drivers (SDD)installed on the hosts. For more information, see the SAN Volume ControllerInformation Center and search for multipath support.
SAN Volume Controller Version 6.1 or later
SAN Volume Controller includes IBM System Storage Easy Tier, a function thatresponds to the presence of solid-state drives (SSDs) in a storage pool that alsocontains hard disk drives (HDDs). The system automatically and nondisruptivelymoves frequently accessed data from HDD MDisks to SSD MDisks, thus placingsuch data in a faster tier of storage.
Easy Tier eliminates manual intervention when assigning highly active data onvolumes to faster responding storage. In this dynamically tiered environment, datamovement is seamless to the host application regardless of the storage tier inwhich the data resides.
SAN Volume Controller supports these tiers:
Generic SSD tierThe SSD tier exists when SSDs are in the storage pool. The SSDs providegreater performance than hard disk drives (HDDs).
Generic HDD tierThe HDD tier exists when HDDs are in the storage pool.
All MDisks belong to one tier or the other, which includes MDisks that are not yetpart of a storage pool.
If you create a storage pool (managed disk group) with both generic SSD MDisksand generic HDD MDisks, Easy Tier is automatically turned on for pools with bothSSD MDisks and HDD MDiasks. SAN Volume Controller does not automatically
Chapter 1. Planning for Tivoli Storage Productivity Center 77

identify external SSD MDisks; all external MDisks are put into the HDD tier bydefault. You must manually identify external SSD MDisks and change their tiers.
Note:
v The terminology for this release of SAN Volume Controller has changed:– Error is now event– MDisk is now storage pool– Space-efficient is now thin provisioning– VDisk is now volumeHowever, the terms have not been changed in Tivoli Storage Productivity Centerreports and views.
v In SAN Volume Controller 5.1 or earlier, there was a one-to-one mappingbetween MDisks and internal SSD drives. For SAN Volume Controller 6.1 orlater, there are now one-to-many mapping between MDisks and drives.
v For this release of Tivoli Storage Productivity Center, the performance monitor,SAN Planner, and Storage Optimizer do not support Easy Tier.
In addition to information already available for SAN Volume Controller, TivoliStorage Productivity Center reports and topology views also provide informationabout the tier, tier capacity, and tier free capacity.
Tivoli Storage Productivity Center also supports launch in context and singlesign-on for SAN Volume Controller.
Note: Launch in context and single sign-on is not supported for SAN VolumeController Version 5.1 or earlier.
Tivoli Storage Productivity Center for Replication also supports SAN VolumeController Version 6.1.
Upgrading SAN Volume Controller Version 5.1
Currently SAN Volume Controller Version 6.1 does not support the solid-statedrives. This support will be added in a future fix pack.
If you are upgrading SAN Volume Controller Version 5.1 to Version 6.1, you havethe following options:v Do not upgrade SAN Volume Controller Version 5.1 to Version 6.1 until the
solid-state drive support is available.v Follow these steps to upgrade SAN Volume Controller Version 5.1:
1. Migrate data off the solid-state drive MDisks.2. Unconfigure (unmanage) the solid-state drive MDisks.3. Run a Tivoli Storage Productivity Center for Replication probe for the SAN
Volume Controller.4. Upgrade the SAN Volume Controller Version 5.1 to Version 6.1.
Note: SAN Volume Controller does not permit an upgrade of SAN VolumeController Version 5.1 to Version 6.1 while there are managed solid-state driveMDisks. After the upgrade, the unmanaged solid-state drive MDisk objects aremarked as unused drive objects. You cannot configure these drive objects intoRAID arrays.
78 IBM Tivoli Storage Productivity Center: Installation and Configuration Guide

General procedure
To view the reports and topology for the SAN Volume Controller environment,complete the following steps:1. Log in to the SAN Volume Controller console and create a user ID and
password for use with Tivoli Storage Productivity Center.2. Open the Tivoli Storage Productivity Center user interface and add the SAN
Volume Controller to Tivoli Storage Productivity Center. Click AdministrativeServices > Data Sources > Storage Subsystems. Click Add. This opens theConfigure Devices wizard. For information about adding the storage system,see “Configure storage subsystem connections page” on page 259.
3. Tivoli Storage Productivity Center supports both OpenSSH format or putty key(.ppk) format that is not password protected. You only need to provide theprivate SSH key.If you have a password protected putty .ppk key, you can use the PuTTY toolon Windows to convert that key to OpenSSH format by following these steps:a. Load the putty .ppk file into the PuTTY tool.b. Open the PuTTY tool.c. From the menu bar, select Conversion and select the OpenSSH conversion.
This action saves the key in OpenSSH format.Important: If you upload a new key for the existing user ID using TivoliStorage Productivity Center, that new key overrides the existing key. If youhave another application using that SAN Volume Controller user ID (forexample Tivoli Storage Productivity Center for Replication), the applicationcannot log into SAN Volume Controller because the key associated with theuser ID is overwritten.If you have this situation, you should create a user ID specifically for TivoliStorage Productivity Center or Tivoli Storage Productivity Center forReplication on the SVC cluster. Add the SAN Volume Controller to TivoliStorage Productivity Center for Replication using the new user ID andpassword (or change the user ID and password while in the disconnectedstate).
Note:
v IBM Tivoli Storage Productivity Center ships default public and private keysin OpenSSH format. The public and private keys can be found intpc_installation_directory/device/conf. The file names are tpc_svc.pub(public key) and tpc_svc.pem (private key).
4. After you add the SAN Volume Controller, an automatic discovery and probeare performed.
5. Before you can view performance reports for the SAN Volume Controller, youmust define and run a performance monitor job.
6. View the reports and topology for the SAN Volume Controller in Tivoli StorageProductivity Center.
Planning for Storwize V7000Storwize V7000 is a hardware and software solution that provides unmatchedperformance, availability, advanced functions, and highly scalable capacity.
Chapter 1. Planning for Tivoli Storage Productivity Center 79

General concepts
Storwize V7000 offers IBM storage virtualization, SSD optimization and “thinprovisioning” technologies built in to improve storage utilization. The storagesystem can be reconfigured to meet changing needs quickly and easily. Thissolution helps to reduce costs without performance degradation.
The Storwize V7000 hardware consists of a set of drive enclosures. Controlenclosures contain disk drives and two node canisters. The two nodes within thecanisters make an I/O group that is attached to the SAN fabric. A single pair ofnodes is responsible for serving I/O on a given volume. Because a volume isserved by two nodes, there is no loss of availability if one node fails or is takenoffline.
Storwize V7000 can be used as a traditional RAID storage system where theinternal drives are configured into arrays, and volumes are created from thosearrays. Storwize V7000 can also be used to virtualize other storage systems.
Storwize V7000 supports both regular and solid-state drives (SSDs). A StorwizeV7000 system without any internal drives can be used as a storage virtualizationsolution.
Each Storwize V7000 node has two Ethernet ports that can be used formanagement. Ethernet port 1 must be configured with a management IP addressand must be connected on all nodes in the system. The use of Ethernet port 2 isoptional. At any point in time, only one node in the system can operate as thefocal point for configuration and monitoring requests. This node is called theconfiguration node and is the only node that activates the management IPaddresses.
Each Storwize V7000 can have zero to four management IP addresses. You canassign up to two IPv4 addresses and up to two IPv6 addresses.
All configuration, monitoring, and service tasks are performed at the cluster level(a cluster is a Storwize V7000 system that consists of two nodes).
Storwize V7000 includes IBM System Storage Easy Tier, a function that supportssolid-state drives (SSDs) in a storage pool that also contains hard disk drives(HDDs). The system automatically and nondisruptively moves frequently accesseddata from HDD MDisks to SSD MDisks, thus placing such data in a faster tier ofstorage.
Easy Tier eliminates manual intervention when assigning highly active data onvolumes to faster responding storage. In this dynamically tiered environment, datamovement is seamless to the host application regardless of the storage tier inwhich the data resides. Manual controls exist so that you can change the defaultbehavior, for example, such as turning off Easy Tier on storage pools that haveboth types of MDisks.
Using Tivoli Storage Productivity Center to monitor StorwizeV7000
Tivoli Storage Productivity Center communicates with Storwize V7000 storagesystems through a native interface. No CIM agents are required.
80 IBM Tivoli Storage Productivity Center: Installation and Configuration Guide

Use Tivoli Storage Productivity Center to monitor Storwize V7000 systems,including discovery, data collection (probes), performance monitoring, trending,storage optimization, and SAN planning. Tivoli Storage Productivity Center reportsand topology views also provide information about the tier, tier capacity, and tierfree capacity for Storwize V7000.
Note: For this release of Tivoli Storage Productivity Center, the performancemonitor, SAN Planner, and Storage Optimizer do not support Easy Tier.
Similar to other systems, Storwize V7000 appears as an entity within data sources,reports, data collection schedules, the topology viewer, and so on. Tivoli StorageProductivity Center also supports launch in context and single sign-on for StorwizeV7000.
General procedure
To view the reports and topology for the Storwize V7000 environment, completethe following steps:1. Log in to the Storwize V7000 console and create a user ID and password for
use with Tivoli Storage Productivity Center.2. Open the Tivoli Storage Productivity Center user interface and add the
Storwize V7000 to Tivoli Storage Productivity Center. Click AdministrativeServices > Data Sources > Storage Subsystems. Click Add. This opens theConfigure Devices wizard. For information about adding the storage system,see “Configure storage subsystem connections page” on page 259.
3. Tivoli Storage Productivity Center supports both OpenSSH format or putty key(.ppk) format that is not password protected. You only need to provide theprivate SSH key.If you have a password protected putty .ppk key, you can use the PuTTY toolon Windows to convert that key to OpenSSH format by following these steps:a. Load the putty .ppk file into the PuTTY tool.b. Open the PuTTY tool.c. From the menu bar, select Conversion and select the OpenSSH conversion.
This action saves the key in OpenSSH format.Important: If you upload a new key for the existing user ID using TivoliStorage Productivity Center, that new key overrides the existing key. If youhave another application using that Storwize V7000 user ID (for example TivoliStorage Productivity Center for Replication), the application cannot log intoStorwize V7000 because the key associated with the user ID is overwritten.If you have this situation, you should create a user ID specifically for TivoliStorage Productivity Center or Tivoli Storage Productivity Center forReplication on the Storwize V7000 cluster. Add the Storwize V7000 to TivoliStorage Productivity Center for Replication using the new user ID andpassword (or change the user ID and password while in the disconnectedstate).
Note:
v IBM Tivoli Storage Productivity Center ships default public and private keysin OpenSSH format. The public and private keys can be found intpc_installation_directory/device/conf. The file names are tpc_svc.pub(public key) and tpc_svc.pem (private key).
4. After you add the Storwize V7000, an automatic discovery and probe areperformed.
Chapter 1. Planning for Tivoli Storage Productivity Center 81

5. Before you can view performance reports for the Storwize V7000, you mustdefine and run a performance monitor.
6. View the reports and topology for the Storwize V7000 in Tivoli StorageProductivity Center.
Planning for Storwize V7000 UnifiedThe IBM Storwize V7000 Unified system is a virtualizing redundant array ofindependent disks (RAID) storage system that supports both block protocols andfile protocols. This unified system includes Storwize V7000 File Module and theStorwize V7000 storage system.
General concepts
Storwize V7000 offers IBM storage virtualization, SSD optimization and “thinprovisioning” technologies built in to improve storage utilization. The storagesystem can be reconfigured to meet changing needs quickly and easily. Thissolution helps to reduce costs without performance degradation.
The Storwize V7000 hardware consists of a set of drive enclosures. Controlenclosures contain disk drives and two node canisters. The two nodes within thecanisters make an I/O group that is attached to the SAN fabric. A single pair ofnodes is responsible for serving I/O on a specific volume. Because a volume isserved by two nodes, there is no loss of availability if one node fails or is takenoffline.
Storwize V7000 File Module is a clustered system that consists of two units thatprovide file systems for use by network-attached storage. The file module uses theStorwize V7000 storage system to provide the file module with volumes. Othervolumes, which are block volumes, are provided on the SAN to be presented tohosts.
The Storwize V7000 File Module software within the Storwize V7000 Unifiedsystem contains the interface node and management node functions. Themanagement node function provides for configuring, administering, andmonitoring a system. The interface node function connects a system to an InternetProtocol (IP) network. You can connect by using any of the following protocols:v Common Internet File System (CIFS)v Network File System (NFS)v File Transfer Protocol (FTP)v Hypertext Transfer Protocol Secure (HTTPS)v Secure Copy Protocol (SCP)
The Storwize V7000 Unified software also performs the following functions for thehost systems that attach to the Storwize V7000 Unified system by using blockprotocols:v Creates a single pool of storagev Provides logical unit virtualizationv Manages logical volumesv Mirrors logical volumesv Large scalable cachev Copy Services
82 IBM Tivoli Storage Productivity Center: Installation and Configuration Guide

– IBM FlashCopy (point-in-time copy) function, including thin-provisionedFlashCopy to make multiple targets affordable
– Metro Mirror (synchronous copy)– Global Mirror (asynchronous copy)– Data migration
v Space management– IBM System Storage® Easy Tier™ to migrate the most frequently used data to
higher performing storage– Metering of service quality when combined with IBM Tivoli Storage
Productivity Center– Thin-provisioned logical volumes
Storwize V7000 can be used as a traditional RAID storage system where theinternal drives are configured into arrays, and volumes are created from thosearrays. Storwize V7000 can also be used to virtualize other storage systems.
Storwize V7000 supports both regular and solid-state drives (SSDs). A StorwizeV7000 system without any internal drives can be used as a storage virtualizationsolution.
Each Storwize V7000 node has two Ethernet ports that can be used formanagement. Ethernet port 1 must be configured with a management IP addressand must be connected on all nodes in the system. The use of Ethernet port 2 isoptional. At any point in time, only one node in the system can operate as thefocal point for configuration and monitoring requests. This node is called theconfiguration node and is the only node that activates the management IPaddresses.
Each Storwize V7000 can have zero to four management IP addresses. You canassign up to two IPv4 addresses and up to two IPv6 addresses.
All configuration, monitoring, and service tasks are performed at the cluster level(a cluster is a Storwize V7000 system that consists of two nodes).
Storwize V7000 includes IBM System Storage Easy Tier, a function that supportssolid-state drives (SSDs) in a storage pool that also contains hard disk drives(HDDs). The system automatically and nondisruptively moves frequently accesseddata from HDD MDisks to SSD MDisks, thus placing such data in a faster tier ofstorage.
Easy Tier eliminates manual intervention when assigning highly active data onvolumes to faster responding storage. In this dynamically tiered environment, datamovement is seamless to the host application regardless of the storage tier inwhich the data resides. Manual controls exist so that you can change the defaultbehavior, for example, such as turning off Easy Tier on storage pools that haveboth types of MDisks.
Using Tivoli Storage Productivity Center to monitor StorwizeV7000 Unified
Tivoli Storage Productivity Center communicates with Storwize V7000 Unifiedstorage systems through a native interface. No CIM agents are required.
Chapter 1. Planning for Tivoli Storage Productivity Center 83
Use Tivoli Storage Productivity Center to monitor Storwize V7000 Unified systems,including discovery, data collection (probes), performance monitoring, andtrending. Tivoli Storage Productivity Center reports and topology views alsoprovide information about the tier, tier capacity, and tier free capacity for StorwizeV7000 Unified.
Similar to other systems, Storwize V7000 Unified appears as an entity within datasources, reports, data collection schedules, the topology viewer, and so on. TivoliStorage Productivity Center also supports launch in context and single sign-on forStorwize V7000 Unified.
General procedure
To view the reports and topology for the Storwize V7000 Unified environment,complete the following steps:1. Log on to the Storwize V7000 Unified console and create a user ID and
password for use with Tivoli Storage Productivity Center.2. Open the Tivoli Storage Productivity Center user interface and add the
Storwize V7000 Unified to Tivoli Storage Productivity Center. ClickAdministrative Services > Data Sources > Storage Subsystems. Click Add.This opens the Configure Devices wizard. For information about adding thestorage system, see “Configure storage subsystem connections page” on page259.
3. Tivoli Storage Productivity Center supports Secure Shell (SSH) keys that are inOpenSSH format or PuTTY (.ppk) format that is not password protected.If you have a password protected PuTTY .ppk key, use the PuTTYgen utilityon a Windows operating system to convert that key to OpenSSH format byfollowing these steps:a. Start the PuTTYgen utility.b. Load the .ppk file. Click File > Load private key.c. From the menu bar, click Conversion > Export OpenSSH key conversion.
This action saves the key in OpenSSH format.Important: If you upload a new key for the existing user ID using TivoliStorage Productivity Center, that new key overrides the existing key. If youhave another application using that Storwize V7000 Unified user ID (forexample Tivoli Storage Productivity Center for Replication), the applicationcannot log on to Storwize V7000 Unified because the key associated with theuser ID is overwritten.If you have this situation, create a user ID specifically for Tivoli StorageProductivity Center or Tivoli Storage Productivity Center for Replication on theStorwize V7000 Unified cluster. Add the Storwize V7000 Unified to TivoliStorage Productivity Center for Replication using the new user ID andpassword (or change the user ID and password while in the disconnectedstate).
Note:
v Tivoli Storage Productivity Center ships default public and private keys inOpenSSH format. The public and private keys can be found intpc_installation_directory/device/conf. The file names are tpc_svc.pub(public key) and tpc_svc.pem (private key).
4. After you add the Storwize V7000 Unified, an automatic discovery and probeare performed.
84 IBM Tivoli Storage Productivity Center: Installation and Configuration Guide

5. Before you can view performance reports for the Storwize V7000 Unified, youmust define and run a performance monitor.
6. View the reports and topology for the Storwize V7000 Unified in Tivoli StorageProductivity Center.
To scan a Storwize V7000 Unified file system, complete the following steps:1. Export the Storwize V7000 Unified file system to be scanned as a CIFS or NFS
export.2. Mount the export on a host which has a Storage Resource agent deployed on it.
Exports are accessible to the TCP/IP data network through the Storwize V7000Unified interface node public IPs. Exports must be mounted as a CIFS exporton Windows agents or an NFS export on UNIX agents. On Windows operatingsystems, the export must be mounted as the local system user or from a servicethat is running under the local system account so that it is visible to all logonsessions. One way of mapping a drive as the local system user is to map thedrive from a psexec command window. The psexec command window isavailable as part of the Sysinternals command-line tools for Windowsoperating systems.
3. Probe the Storwize V7000 Unified and the Storage Resource agent. The defaultbehavior of the probe is to discard export paths that are not at the root of thefile system. This is done so that a situation cannot occur where the productcounts information twice on a file system. The reason for this behavior isbecause the probe is treating two exports to the same file system as separatefile systems. This behavior can be overridden by setting the saveNonRootparameter. The probe picks up all exports (shares) of a specific NAS device asfile systems. To set the saveNonRoot parameter, insert the line saveNonRoot=1in the server section of the TPCD.config file and restart the Data server to takeeffect. The TPCD.config file is located in the TPC_installation_directory/data/config directory where TPC_installation_directory is where Tivoli StorageProductivity Center is installed.
4. Assign a scan agent to Storwize V7000 Unified file system. Open the TivoliStorage Productivity Center GUI and click Administrative Services >Configuration > Scan/Probe Agent Administration. Save the page.
5. A scan job for the Storwize V7000 Unified can be created and run from DataManager > Monitoring > Scans.
Identifying Storwize V7000 Unified devices in the user interface
The way you configure a Storwize V7000 Unified device determines how theStorwize V7000 Unified device is represented in the Tivoli Storage ProductivityCenter user interface, as follows:v Storwize V7000 File Module generally appears as a "computer" in the user
interface. In Data Manager > Alerting > Other NAS Alerts > NAS, it appears asa "NAS cluster."
v Storwize V7000 storage system appears as a "subsystem" in the user interface.
Planning for the XIV systemUse this information to plan for using the XIV Storage System with Tivoli StorageProductivity Center.
IBM XIV Storage System is a disk storage architecture designed to eliminate thecomplexity of administration and management of storage. The XIV systemparallelized architecture of the system, optimal exploitation of all system
Chapter 1. Planning for Tivoli Storage Productivity Center 85

components (including disks, CPUs, and switches), and unique cachingarchitecture all translate into excellent performance.
The unique balancing of all data across system components prevents theoccurrence of hot spots. With all components working under the same load,performance and reliability are exceptional.
The XIV system uses large capacity Serial Advanced Technology Attachment(SATA) disk drives which optimizes the use of disk capacity, resulting inoutstanding power consumption without compromising performance.
The XIV system is designed to be scalable in storage, interfaces, cache, CPU power,and internal bandwidth. The architecture supports each aspect to growindependently, resulting in a scalable system in both capacity and performance.
The XIV system provides data protection and availability. All disk drives, modules,switches, and uninterruptible power supply units are fully redundant, ensuringhigh reliability and excellent performance.
The built-in thin provisioning of the XIV system helps reduce direct and indirectcosts by allowing users to install capacity only for data written. You can grow yourdata capacity over time with minimal management effort.
For more information about XIV system, see the XIV system Information Center.
Tivoli Storage Productivity Center support
Tivoli Storage Productivity Center uses the native interface for the XIV system torun discovery and probe jobs. Because of the dynamic XIV architecture, wherevolume data is spread over all disks, no data that describes the space allocationfrom volumes to a specific physical disk is available.
The XIV system includes a graphical user interface (GUI) for configuration andadministration (XIV Storage Manager). XIV Storage Manager is the elementmanager for the XIV system. XIV Storage Manager version 4.2 or later must beinstalled on the same computer as the Tivoli Storage Productivity Center GUI. IfXIV Storage Manager is not installed on the same computer as the Tivoli StorageProductivity Center GUI or is configured incorrectly, an error message is displayedwhen you attempt to start XIV Storage Manager from Tivoli Storage ProductivityCenter.
The XIV systems have the capability of defining up to three administrative nodes,each with their own IP address. In Tivoli Storage Productivity Center 4.2.1 or later,if an XIV system is configured with multiple administrative nodes, Tivoli StorageProductivity Center detects the IP addresses for these nodes. If Tivoli StorageProductivity Center fails to connect to one of the IP addresses, then an attempt ismade to connect to the XIV system using one of the other IP addresses.
Note: The XIV system does not support IPv6.
Considerations for data collected for XIV system
The following considerations apply to values shown in the XIV system and TivoliStorage Productivity Center GUIs.v The XIV Storage System GUI and the XIV Storage System command-line
interface (CLI) report sizes in GB of disks, volumes, pools, and so on, based on
86 IBM Tivoli Storage Productivity Center: Installation and Configuration Guide
10^9. Tivoli Storage Productivity Center reports sizes in GB based on 2^30. Forexample, a volume showing a size of 17 GB in the XIV Storage System GUI isreported as 16 GB (XIV GB size * 1000 * 1000 * 1000 / 1024 /1024 / 1024rounded to the nearest GB) in Tivoli Storage Productivity Center.
v The XIV system differentiates thin provisioned pools from non-thin provisioned(regular) pools and volumes in a thin provisioned pool and a non-thinprovisioned pool. When hard size is equal to soft size, the pool is represented asa regular pool, otherwise the pool is represented as thin provisioned. However,the XIV system CLI and CIM do not distinguish between regular and thinprovisioned pools and all pool volume names in Tivoli Storage ProductivityCenter are prefixed with an asterisk (*) to indicate that the volume is thinprovisioned.
General procedure
To view the reports and topology for the XIV system environment, complete thefollowing steps:1. Open the Tivoli Storage Productivity Center user interface and add the XIV
system to Tivoli Storage Productivity Center. In the navigation tree, expandIBM Tivoli Storage Productivity Center > Configure Devices. This opens theConfigure Devices wizard. For information about adding the storage system,see “Configure storage subsystem connections page” on page 259.
2. After you add the XIV system, an automatic discovery and probe areperformed.
3. View the reports and topology for the XIV system in Tivoli Storage ProductivityCenter.
Planning for IBM Scale Out Network Attached Storage
IBM Scale Out Network Attached Storage (IBM SONAS) manages repositories ofinformation in enterprise environments that require large capacities of storage,high levels of performance, and high availability. Before you install IBM SONAS, itis important to become familiar with the IBM SONAS environment.
You can configure the IBM SONAS system for petabytes (PB) of storage andbillions of files in a single file system (up to 2 PB). You can have as few as 11 filesystems in a fully configured 21.6-PB IBM SONAS system or as many as 256 filesystems.
Network overviewThe IBM SONAS system uses a two-level, split-responsibility networkarchitecture. IBM SONAS system interface nodes act as network-attachedstorage (NAS) servers and IBM SONAS system storage nodes act asNetwork Shared Disk (NSD) servers to access storage.
ScalabilityYou can install as many IBM SONAS systems as you need. Each IBMSONAS system that you install is scalable. For example, a small system cancontain the following components:v One rackv Two interface nodesv Two 36-port InfiniBand switchesv One interface node that hosts the active management node role
Chapter 1. Planning for Tivoli Storage Productivity Center 87
||||
||||
|||||
||||
|
|
|
|

v Two storage nodes with one storage controller that contains 60 hard diskdrives
A fully configured system can contain up to 7,200 hard disk drives.
Software componentsEach node in the IBM SONAS system contains the IBM SONAS software.The software runs General Parallel File System (GPFS) and a single, unifiednamespace is used for authentication and connectivity.
Cluster componentsThe IBM SONAS cluster consists of the following components:v A management node that is an interface node with an active
management role, which is configured to manage IBM SONASv Interface nodes that are the network path to IBM SONAS, which
maintain customer systems connectivity by using client system protocolsand connectivity to GPFS
v Storage nodes that are the path from the IBM SONAS system to itsstorage. These storage nodes aid the retrieval and storage of data overclient system protocols and connectivity to the file systems
v The network, which is either LAN or WAN
Hardware componentsThe IBM SONAS system includes the following hardware components:v A base rack that contains the interface nodes that host the management
node rolesv An interface expansion rack that can contain as many as 20 interface
nodesv A storage expansion rack that can contain up to two configured storage
pods for up to 480 drives. This configuration provides a raw storagecapacity of up to 1440 terabytes (TB) with 3-TB drives
Related information:
http://publib.boulder.ibm.com/infocenter/sonasic/sonas1ic/index.jspMore information about IBM SONAS is available at the IBM SONAS InformationCenter.
Planning for the Fabric ManagerFabric Manager helps you manage the SAN fabric that connects the host systemsand applications to the storage devices. Fabric Manager is a comprehensivemanagement solution for multi-vendor SANs, and includes automatic resource andtopology discovery, monitoring and alerts, and zone control.
The main features of Fabric Manager are shown in the following table.
Table 21. Main features of the Fabric Manager
Feature Advantages Benefit
Automatic device discovery Enables you to see the datapath from the servers to theswitches and storage systems
Easily manage your SANsfrom a single console
Real-time monitoring andalerts
Monitors SAN events andalerts administrators ofproblems
Helps maintain theavailability of your SAN
88 IBM Tivoli Storage Productivity Center: Installation and Configuration Guide
||
|
||||
||
||
|||
|||
|
||
||
||
|||

Table 21. Main features of the Fabric Manager (continued)
Feature Advantages Benefit
Zone control Gives you the ability to addand remove devices fromzones
Comprehensive fabricmanagement from a singleconsole
SAN reporting Provides the ability togenerate reports on the SANdevices
Quickly provides reports andinventories of your SAN
Enterprise scalability Scale from SAN islands toenterprise SANs
Accommodates new and everchanging business needs
Switch performancemanagement (1)
Provides the ability tomonitor switches forperformance metrics whichallows for the triggering ofswitch threshold alerts andperformance reporting. Theperformance reporting is atthe switch and port levelsand displays in the definedSwitch Performance reportsand in the topology viewer.
Helps you maintain highSAN availability
Note:
1. Tivoli Storage Productivity Center provides predictive fault analytics for theSAN infrastructure through reporting, monitoring, and alerting of link failurerates and error frame rates. These transient errors are indicative of potentialpending SAN link failures.
2. Tivoli Storage Productivity Center does not support heterogeneous fabrics inversions 5.1 and later.
Planning for Brocade management agentsIBM Tivoli Storage Productivity Center uses a Storage Management Initiative (SMI)agent to manage Brocade switches.
Supported Brocade models
If you are using Brocade Data Center Fabric Manager (DCFM) 10.4 or later, theStorage Management Initiative (SMI) agent used by Tivoli Storage ProductivityCenter is embedded in the DCFM. If you are using Brocade Network Advisor(BNA) 11.1 or later, the SMI agent is embedded in the BNA. If you are not usingBrocade DCFM 10.4 or later, and not using BNA 11.1 or later, you must useexternal SMI agents for Brocade switches.
For the Brocade models, firmware versions, and SMI agents that are used by TivoliStorage Productivity Center, see the support matrix at http://www.ibm.com/support/docview.wss?uid=swg21386446.
Discovering fabrics and switches that use an SMI agent
When you configure Tivoli Storage Productivity Center to connect to the SMI agent(embedded or external), you can run a CIM object manager (CIMOM) discoveryjob. The discovery job discovers the fabric and switches and the status of thesefabrics and switches.
Chapter 1. Planning for Tivoli Storage Productivity Center 89

When you run a probe job using the SMI agent, you can see the topology of thefabric, the properties of the hardware that make up the fabric, zoning information,and the endpoint devices.
When you run a fabric performance monitor job, you can see the performance datafor the fabric.
Using other agents for discovery: out-of-band SNMP agents orStorage Resource agents
SMI agents provide the following benefits for fabric management:v Probes and zone control do not occur in the data path.v Zone alias control is supported by Tivoli Storage Productivity Center only
through the fabric SMI agents.v Propagation of alerts for real-time SAN events is not degraded by using fabric
SMI agents.
Using multiple agent types allows the redundant collection of information if onetype of agent fails. Also, some types of agents provide certain features the otheragents do not. However, using multiple agent types can increase network trafficand the management load on the switches.
The following table outlines the fabric management functions that are supportedby agent type. Where multiple agents can be used, the preferred agent type isnoted.
Table 22. Supported and preferred interfaces for fabric management
Function Brocade
Performance monitoring Fabric SMI agent
Topology information collected Preferred:Fabric SMI agent
Still supported:Storage Resource agent
Out-of-band SNMP agent
Zone information collected Fabric SMI agent
Zone control Fabric SMI agent
Zone control with zone aliases Fabric SMI agent
Switch and switch port informationcollected (for running performancemonitor)
Preferred:Fabric SMI agent
Fabric and switch events (see table note) Preferred:Fabric SMI agentSwitch SNMP trapconfiguration
Launch of switch and fabric elementmanagers
Preferred:Fabric SMI agent
Still supported:Storage Resource agent
Out-of-band SNMP agent
90 IBM Tivoli Storage Productivity Center: Installation and Configuration Guide

Table 22. Supported and preferred interfaces for fabric management (continued)
Function Brocade
Hosts, endpoint devices, device-centricand host-centric information collected
Storage Resource agent
Switch sensors and events Out-of-band SNMP agent
Note:
v The Storage Resource agent runs the following jobs:
DiscoveryWhen a discovery job is run, Tivoli Storage Productivity Center gathersinformation about the fabrics, fabric to switch relationships, and other keyattributes about the switches in the fabrics.
Probe When a probe job is run, Tivoli Storage Productivity Center gathers additionaldetails for topology and zoning information.
If you deploy a Storage Resource agent, and a fabric probe job has not been run, theconnections from the Storage Resource agents to the switches are not displayed, and allthe fibre channel (FC) ports are reported as unused.
v Collected zone information indicates that the active zone set and the inactive zoninglibrary information is collected during a fabric probe. Zone control refers to the ability toactively configure zoning.
v Tivoli Storage Productivity Center does not get a transaction lock on the switch whilemaking zone changes on the fabric.
v For fabric and switch events, the Storage Resource agent relies on both SNMP traps andCIM indications for event notification and automatic fabric discovery and probe, ifneeded.
The preferred method includes both SMI agent and switch SNMP trap configuration. Anout-of-band SNMP agent is not necessary for getting SNMP traps. You can configure theswitch to send SNMP traps to the Device server. However, you can configure theout-of-band SNMP agent for other reasons.
Planning to use the embedded SMI agentA software-embedded Storage Management Initiative (SMI) agent is provided inBrocade Data Center Fabric Manager (DCFM) 10.4 or later, or Brocade NetworkAdvisor 11.1 or later. DCFM and Brocade Network Advisor manage multiplefabrics within and across data centers. When you configure DCFM or BrocadeNetwork Advisor, you set up one switch to be the seed or master switch thatinterconnects to all the other switches in the fabric.
Configuring the Brocade switch
Before Tivoli Storage Productivity Center can discover the switches in a fabricthrough the software-embedded SMI agent, you must configure the Brocade DCFMor Brocade Network Advisor to manage the fabric. Use a seed switch to configurethe Brocade DCFM or Brocade network advisor. This configuration is done throughthe seed switch. For heterogeneous Fabric OS (FOS) fabrics, the seed switch mustbe one of the FOS switches. There are special requirements for the seed switch:v For pure FOS fabrics, the seed switch must have a firmware of 5.3 or later.v For heterogeneous FOS fabrics, the seed switch must have a firmware of 6.0 or
later.
Migrating from a legacy agent to an SMI agent
You can configure Tivoli Storage Productivity Center to use the software-embeddedSMI agent instead of the out-of-band Fabric agent for the FOS fabric.
Chapter 1. Planning for Tivoli Storage Productivity Center 91

Limitations
These are some limitations using the software-embedded SMI agent:v The software-embedded SMI agent has asset collection period logic for handling
fabric events. If anything in the fabric topology changes and is restored withinthe asset collection period, the SMI agent does not send a CIM indication. In thissituation, you must run a fabric probe to collect the most updated fabrictopology information. For more information about the asset collection period,including the value for the collection period, refer to the DCFM or BrocadeNetwork Advisor documentation.
v The software-embedded SMI agent is not supported on IBM AIX.v Zone control sessions through the SMI agent do not establish a session with the
seed switch until the session from Tivoli Storage Productivity Center iscommitted.
v DCFM Professional Edition does not have the software-embedded SMI agent.v You can use either the HTTPS or HTTP protocol at one time with DCF or
Brocade Network Advisor. You cannot use both protocols at the same time.v Empty zones, zone sets, and zone aliases are not supported through FOS fabrics
through the SMI agent.v When you set up the seed switch, if the switch link is broken anywhere along
the connection line, Tivoli Storage Productivity Center will not be able to reporton the switches past the broken link.
v When a Brocade i10000 switch has a faulty control processor card, the SMI agentmanaging the switch can hang indefinitely. This issue causes time-outs andprobe failures from the Tivoli Storage Productivity Center server.
Planning for external SMI agent supportBrocade fabrics that are not managed by Brocade Data Center Fabric Manager(DCFM) 10.4.0 or later and are not managed by Brocade Network Advisor 11.1 orlater require a separate external Storage Management Initiative (SMI) agent for theBrocade hardware. The external SMI agents must be installed on separate hostsand can manage one or more switches.
Installing and Configuring external SMI agents
You need to install and configure the external SMI agents before adding the SMIagents to Tivoli Storage Productivity Center.
For more information about configuring the external SMI agents for Brocadeswitches, refer to the documentation for the switch.
Considerations
Consider these items when using external SMI agents:v If Brocade fabrics are not laid out as a mesh, and one inter-switch link (ISL)
break can segment the fabric, manage the fabric with both a fabric SMI agentand an out-of-band Fabric agent (SNMP). The reason for this is that Brocade SMIagents do not automatically manage newly created fabrics in the event of afabric segmentation.
v Brocade SMI agents do not correctly report whether switches and fabrics arerunning in Interop Mode or Native Mode. Because of this limitation, TivoliStorage Productivity Center is unable to determine whether a fabric or switch is
92 IBM Tivoli Storage Productivity Center: Installation and Configuration Guide

in Interop Mode or Native Mode. For homogeneous Brocade fabrics that areconfigured in Interop Mode, the following actions from Tivoli StorageProductivity Center will fail:– Zone control with domain/port members and node WWN members– Creating zone aliases
Planning for QLogic or Cisco fabric management agentsDepending on the function that you want to perform (topology discovery, zonediscovery, performance monitoring, and so forth), IBM Tivoli Storage ProductivityCenter uses a Storage Management Initiative (SMI) agent, out-of-band SimpleNetwork Management Protocol (SNMP) agent, or Storage Resource agent tomanage QLogic and Cisco switches.
Supported QLogic and Cisco models
For the QLogic and Cisco models, firmware versions, and agents that aresupported by Tivoli Storage Productivity Center, see the support matrix athttp://www.ibm.com/support/docview.wss?uid=swg27019378.
The following table outlines the fabric management functions that are supportedby agent type.
Table 23. Supported and preferred interfaces for fabric management
Function QLogic Cisco
Performance monitoring Fabric SMI agent Fabric SMI agent
Topology informationcollected
Storage Resource agent
Out-of-band SNMP agent
Storage Resource agent
Out-of-band SNMP agent
SNMP is needed for physicalinfrastructure discovery.
Zone information collected Storage Resource agent Storage Resource agentrequired in each VSAN
Zone control Storage Resource agent Storage Resource agentrequired in each VSAN
Zone control with zonealiases
Not supported Not supported
Switch and switch portinformation collected (forrunning performancemonitor)
Preferred:Fabric SMI agent
Preferred:Fabric SMI agent
Fabric and switch events(see table note)
Out-of-band SNMP agent Out-of-band SNMP agent
Launch of switch andfabric element managers
Storage Resource agent
Out-of-band SNMP agent
Storage Resource agent
Out-of-band SNMP agent
Hosts, endpoint devices,device-centric, andhost-centric informationcollected
Storage Resource agent Storage Resource agent
Switch sensors and events Out-of-band SNMP agent Out-of-band SNMP agent
Chapter 1. Planning for Tivoli Storage Productivity Center 93

Table 23. Supported and preferred interfaces for fabric management (continued)
Function QLogic Cisco
Note:
1. The Storage Resource agent has 2 distinct functions:
v Discovery
When a discovery job is run, Tivoli Storage Productivity Center gathers informationabout the fabrics, fabric to switch relationships, and other key attributes about theswitches in the fabrics.
v Probe
When a probe job is run, Tivoli Storage Productivity Center gathers additional detailsfor topology and zoning information.
If you deploy a Storage Resource agent and a fabric probe job is not run, theconnections from the Storage Resource agents to the switches are not displayed, and allthe Fibre Channel (FC) ports are reported as unused.
2. Zone information collected indicates that the active zone set and the inactive zoninglibrary information is collected during a fabric probe. Zone control is the ability toactively configure zoning.
3. Tivoli Storage Productivity Center does not get a transaction lock on the switch whilemaking zone changes on the fabric.
4. The following notes are specific to Cisco:
v Each virtual storage area network (VSAN) is viewed as an individual storage areanetwork (SAN).
v The out-of-band SNMP agent and SMI agent gets the physical fabric information andcan correlate the VSAN information to a physical infrastructure.
v The out-of-band SNMP agent also collects some VSAN information.
v The GS-4 function is not supported by the Storage Resource agent for Cisco.
v For many Cisco proprietary zone members, the values are displayed as zeros.
v If a zoning configuration has Cisco proprietary zones, then you cannot modify thezoning for that configuration through Tivoli Storage Productivity Center. You mustuse the element manager to remove proprietary zone members or to perform zoning.
v No aliases for Cisco are reported.
v Orphan Cisco zones and aliases are not reported.
5. For fabric and switch events, the Storage Resource agent relies on both SNMP traps andCIM indications for event notification and automatic fabric discovery and probe, ifneeded.
The preferred method includes both SMI agent and switch SNMP trap configuration.An out-of-band SNMP agent is not necessary for getting SNMP traps. You canconfigure the switch to send SNMP traps to the Device server. However, you canconfigure the out-of-band SNMP agent for other reasons.
Discovering fabrics and switches
The type of discovery that is performed for fabrics and switches depends on theagent that you are using. For information about discovery by agent type, see thetopic about discovering storage resources in the IBM Tivoli Storage ProductivityCenter User's Guide .
Collecting data with the Fabric ManagerTivoli Storage Productivity Center uses different types of agents to gather dataabout switches. Different combinations of these agents are required to effectively
94 IBM Tivoli Storage Productivity Center: Installation and Configuration Guide

enable the functions of Fabric Manager. In addition, the topology viewer is greatlyaffected by the discovery of all the managed entities in the management scope ofTivoli Storage Productivity Center.
The following table shows the actions that trigger data collection and the data thatis collected depending on the type of agent that is used.
Table 24. Information collected by agent
Action thattriggers datacollection Storage Resource agent
Out-of-band fabric agent(SNMP) SMI agent (Brocade)
SMI agent (Ciscoand QLogic)
AdministrativeServices >Discovery > Outof Band Fabric
– v Discovers switches andconnections forswitches with IPaddresses in a specifiedrange (if you selectedthis option)
v Discovers switches andconnections forswitches that werepreviously added asout-of-band agents(either manually orswitches with IPaddresses in a specifiedrange for which anout-of-band discoverywas previously run)
v Retrieves Cisco VSANand physicalinfrastructure andcorrelates VSAN tophysical infrastructure(see note 2 on page 97)
–
AdministrativeServices >Discovery >CIMOM
– – v Discovers StorageManagementInitiative (SMI)agents throughService LocationProtocol (SLP)
v Retrieves switchinformation
v Retrieves fabricinformation
v Discovers SMIagents throughSLP
v Retrieves switchinformation
v Retrieves fabricinformation
IBM TivoliStorageProductivityCenter > Probe(including fabric)(see notes 3 onpage 97 and 9 onpage 97)
v Retrieves zoninginformation,excluding zone aliasinformation, forQLogic and Cisco
v Retrieves switch andtopology information
v Retrieves attributeinformation for hostsand devicesconnected to thefabric
v Retrieves switch andtopology information
v Retrieves Cisco VSANand physicalinfrastructure andcorrelates VSAN tophysical infrastructure(see note 2 on page 97)
v Retrieves detailedfabric, switch,switch port, andblade information
v Retrieves zoninginformation,including zonealiases for Brocadedevices
v Retrieves fabrictopologyconnectivityinformation
v Subscribes to CIMindications
v Retrievesdetailed fabric,switch, switchport, and bladeinformation
Chapter 1. Planning for Tivoli Storage Productivity Center 95

Table 24. Information collected by agent (continued)
Action thattriggers datacollection Storage Resource agent
Out-of-band fabric agent(SNMP) SMI agent (Brocade)
SMI agent (Ciscoand QLogic)
Action of StorageResource agent(see note 1):
v Turns on
v Connectivitychanges
v Change eventdetected
v Retrieves zoninginformation,excluding zone aliasinformation
v Retrieves switch andtopology information
v Retrieves attributeinformation for hostsand devicesconnected to thefabric
v Retrieves switch andtopology information
v Retrieves Cisco VSANand physicalinfrastructure andcorrelates VSAN tophysical infrastructure(see note 2 on page 97)
SNMP trapreceived fromswitch (see note 6on page 97)
v Retrieves zoninginformation,excluding zone aliasinformation
v Retrieves switch andtopology information
v Retrieves attributeinformation for hostsand devicesconnected to thefabric
v Retrieves switch andtopology information
v Retrieves Cisco VSANand physicalinfrastructure andcorrelates VSAN tophysical infrastructure(see note 2 on page 97)
CIM indicationreceived fromfabric SMI agent(see note 7 onpage 97)
Performs amini-probe to collectinformation that isrelevant to theindication received,or sets entities asmissing. Might doone of the followingactions:
v Retrieves switchesand fabrics, or
v Retrieves zoningdata, or
v Retrieves switchport status andconnection tonode, or
v Retrieves switchblade status andall portconnections for theblade, or
v Sets fabric, switch,blades,connections, ornodes as missing
Table notes:
1. The Storage Resource agent has two distinct functions:v Discovery
96 IBM Tivoli Storage Productivity Center: Installation and Configuration Guide

When a discovery job is run, Tivoli Storage Productivity Center gathersinformation about the fabrics, fabric to switch relationships, and other keyattributes about the switches in the fabrics.
v Probe
When a probe job is run, Tivoli Storage Productivity Center gathersadditional details for topology and zoning information.
If you deploy a Storage Resource agent and a fabric probe job is not run, theconnections from the Storage Resource agents to the switches are notdisplayed, and all the Fibre Channel (FC) ports are reported as unused
2. SNMP traps received result in a fabric probe of fabrics for the switches (forwhich traps were received). Agent assignment determines the agents that needto be used for that probe. Event notifications from the event agent could resultin any of the agent types to be used (Storage Resource agent, SNMP agent,and SMI agent) for the probe.
3. A fabric probe always results in a fabric discovery using Storage Resourceagents and SMIS agents that can report on fabrics been probed.
4. With agent assignment, all Storage Resource agents capable of reporting on aspecific fabric might not be run if Tivoli Storage Productivity Center does notdeem it necessary to do so.
5. For Storage Resource agents:v Starting a Storage Resource agent results in a fabric discovery using that
Storage Resource agent. If the fabrics discovered are part of some fabricprobe definition, then a fabric probe is also done. Agent assignment is usedto determine the actual agents needed for that fabric probe.
v Stopping a storage resource agent does not cause any data collection6. SNMP traps result in a fabric probe of fabrics for which the traps were
received. Agent assignment determines the agents that need to be used forthat probe. So, SNMP traps might result in any of the agent types being used(Storage Resource agent, SNMP agent, and SMIS agent).
7. A CIM indication results in a Storage Resource agent fabric discovery forStorage Resource agents that can report on fabrics for which CIM indicationswere received. Also, if a mini-probe fails and a Storage Resource agent canreport on the fabric for which the indication is received, the Storage Resourceagent is run to collect fabric information.
8. Starting or restarting a device or the Data server or both can result in a fabricprobe of fabrics which are part of some probe definition defined by the user.Agent assignment determines the agents that must be used for that probe.This action might result in any of the agent types being used (StorageResource agent, SNMP agent, and SMIS agent).Deleting or uninstalling a Storage Resource agent can result in agentassignment attempting to use an alternative agent to probe fabrics that theuninstalled Storage Resource agent might report on if such fabrics were partof a probe definition defined by the user.
9. If a fabric is in the process of rebuilding itself, a fabric probe job might fail.The fabric rebuilds itself if you add or remove a switch, or if you change theprincipal switch. If you experience a fabric probe job failure, suspect recentchanges to the fabric which might have caused the fabric to rebuild. After thefabric rebuilds itself, the fabric probe job will likely succeed. Considerimplementing a change-control process for the storage environment so that thepreviously mentioned changes are planned, approved, and recorded.
10. Your fabric probe or zone control job can fail on the AIX operating systemwith error message: AGT0430I.
Chapter 1. Planning for Tivoli Storage Productivity Center 97
AIX has a constraint wherein the size of the response buffer passed in forGS-3 commands made to the switch cannot exceed 4 K. The Storage Resourceagent passes 4-K buffer sizes for AIX.If the zone configuration for a fabric probe or zone control job exceeds the 4-Klimitation for AIX, Tivoli Storage Productivity Center flags this condition. Thefabric probe or zone control operation fails under this condition with errormessage AGT0430I.Consider using Storage Resource agents deployed on another platform that isconnected to the same fabric. Use this Storage Resource agent for collectingzone information and for performing zone changes. In this case, the fabricfunctions for the Storage Resource agent that is failing can be disabled.If the fabric probe fails with the error message, and you try to make zonechanges for the fabric, then you might get a warning message indicating thatthe zone changed. Also, the zone control job log displays the AGT0432E errormessage.
For information about the supported agent types by switch vendor, see “Planningfor Brocade management agents” on page 89 or “Planning for QLogic or Ciscofabric management agents” on page 93.
Storage Resource agentThe Storage Resource agent collects information about the SAN and sends thatinformation to the Tivoli Storage Productivity Center Device server. The StorageResource agent can gather topology information for the entire fabric. To gatherhost-level and detailed Host Bus Adapter (HBA) information, the agent must beinstalled on each host where that information is wanted.
The Storage Resource agent performs the following functions:v Gathers information about the SAN by querying switches and devices for
topology and identification information.v Gathers host-level information for the local system.v Gathers information about the zoning and allows zone control (except for
Brocade switches) of the fabric.v Gathers information about the HBAs installed on the local system, including
make, model, and driver versions.v Gathers event information detected by the HBAs and forwards it to the Device
server.
Limitations to note are:v Can gather only host-level and HBA information about the host containing the
Storage Resource agent.v Can provide only detailed identification for devices that are in the same zone as
the Storage Resource agent. The Storage Resource agent identifies the device byworldwide name (WWN) if the Storage Resource agent is not in the same zoneas the device rather than being able to uniquely identify the device by devicetype (for example, host, and subsystem).
v Identification of endpoint devices is reliant on the endpoint device responding toRNID or other queries.
v Can gather only a subset of the switch attributes. There are some switchattributes that can be collected only by using out-of-band Fabric agents.
v Tivoli Storage Productivity Center does not collect information about aliasesthrough the Storage Resource agents.
98 IBM Tivoli Storage Productivity Center: Installation and Configuration Guide

Out-of-band Fabric agentIBM Tivoli Storage Productivity Center uses SNMP queries to discover informationabout the SAN. Management Information Base (MIB) information is collected fromthe switches and directors by the out-of-band Fabric agent. Switches and directorsare added as out-of-band Fabric agents and contacted from the Tivoli StorageProductivity Center Device server by SNMP.
The out-of-band Fabric agent performs the following functions:v Gathers information about the fabric by querying the switch or director for
topology information.v Gathers virtual SAN information for Cisco switches.
Limitations to note are:v Topology information is only gathered for the switch added as an out-of-band
Fabric agent. The agent cannot gather the topology information for anyconnected switches unless they are also defined as out-of-band Fabric agents. Ifyou are performing out-of-band discovery only on a fabric with several switches,you must install an out-of-band Fabric agent for each switch in the fabric todiscover the whole fabric.
v Device information is limited; most devices are unknown with a type equal to"Other" and identified by their WWN.
v There must be a TCP/IP connection between the switch and the Tivoli StorageProductivity Center Device server.
v To enable events from the switch to the Device server, the switch must beconfigured to send SNMP traps to the Device server. The SNMP traps aresynonymous to the events that are received by the in-band Fabric agent.
Configuration guidelines for agent placementThis section provides configuration guidelines for various agent types required forfabric functions.
The placement of out-of-band agents, Storage Resource agents, and CIM agentsdetermines the information displayed in the topology. Switches must be configuredto send SNMP traps to the server for fabric event notification. Follow theseguidelines to determine the best agent placement strategy for these agent types.v For a topology map, if no CIM agents are present, you must define Storage
Resource agents and out-of-band agents to discover all of your topology. If CIMagents are present for Brocade fabrics, Storage Resource agents are still requiredto collect detailed information about endpoints and HBA information. If no CIMagents are present, switch zoning and LUN masking might restrict access tosome devices, and some zone control features are unavailable.
v For a complete topology map, including correct device icons, you must defineStorage Resource agents and out-of-band agents, or Storage Resource agents andCIM agents (for Brocade), on all servers and switches.
v For information about Brocade zoning, you must configure CIM agents for theBrocade fabric.
v For complete device centric and host centric views, you must place StorageResource agents on all servers you want displayed.
v Cisco requires an out-of-band discovery for VSAN information.
Chapter 1. Planning for Tivoli Storage Productivity Center 99

Before implementing out-of-band agents, Storage Resource agents, and CIM agents,formulate a clear plan of your environment and the information you want tocollect.
For more information about what the agents collect and for the supported agenttypes for switch performance management and fabric zone configuration, see“Collecting data with the Fabric Manager” on page 94.
Planning for Fabric Manager configurationYou must configure the main SAN devices properly before using IBM TivoliStorage Productivity Center.
There are two main components to setting up Tivoli Storage Productivity Center:v SAN environment setupv Tivoli Storage Productivity Center setup
The essential elements of the SAN environment needed for Tivoli StorageProductivity Center are:v Switches and directorsv Host Bus Adapters (HBAs)v CIM agents for switches
The Storage Resource agent collects the full zone database information from thesame switch in the fabric during a fabric probe. This condition assumes that thereare no topology changes.
When there are topology changes and the agent state changes, Tivoli StorageProductivity Center might switch to reporting on the full zone database from adifferent switch in the fabric. When zone control is done through Tivoli StorageProductivity Center, a check is made to see if the zoning on the switch is the sameas zoning information in the Tivoli Storage Productivity Center database. If theinformation is not the same, a warning message is issued before proceeding withzone changes.
This function is similar to selecting a data source for zoning for CIM agents. ForCIM agents, the agent managing the principal switch in the fabric is the defaultdata source for zoning. You have the option of specifying an alternative datasource for zoning using the Tivoli Storage Productivity Center user interface.
For any fabric, the active configuration information is the same regardless of whichswitch in the fabric is queried by Tivoli Storage Productivity Center. However,zoning entities in the inactive configuration (also referred to as full zone database)can be different depending on the switch in the fabric that was queried.
Switches have a configuration parameter that controls propagation of inactivezoning entities to all switches in the fabric. If the parameter is set to propagateinactive zoning entities to every switch in the fabric, then any time an inactivezone entity changes, this change is propagated to all switches in the fabric so allswitches have the same full zone database.
For Storage Resource agents, the selected data source is automatically determinedby Tivoli Storage Productivity Center. If the Storage Resource agent is connected tomultiple switches in the fabric, then the agent collects zoning information usingonly one switch (so that redundant fabric information is not collected from
100 IBM Tivoli Storage Productivity Center: Installation and Configuration Guide

multiple switches). Not all Storage Resource agents connected to a fabric is used tocollect zoning information (only one switch is used).
You might see different inactive zone sets displayed because of the followingconditions for the Storage Resource agent:v A different Storage Resource agent is used to collect informationv There was a topology changev The Storage Resource agent was stoppedv The Storage Resource agent was uninstalledv A new Storage Resource agent was deployed
You might see different inactive zone sets displayed because of the followingconditions for the switch:v A different CIM agent is usedv The switch is not configured to propagate inactive zoning entities
If the switch configuration parameter is not set to propagate the information, thenit is possible for switches in the fabric that have full zone database to havedifferent zoning entities (active configuration is always the same for all switches inthe fabric).
To configure the fabric, complete the following steps:1. Install and configure the SMI-S agent (CIM agent) for the switch. Contact your
switch vendor for instructions on how to install and configure the SMI-S agent.2. For every fabric you want to monitor, configure one or more switches in the
fabric to send SNMP traps to the Device server. This action causes SNMP trapsto be sent to Tivoli Storage Productivity Center whenever there are changes inthe fabric. Tivoli Storage Productivity Center can then perform automatic fabricdiscoveries and probes in response to these traps.
3. For each fabric you want to monitor, install a Storage Resource agent on eachhost that is connected to the fabric of interest.
4. Run a CIMOM discovery job for the CIM agents. Wait for the job to completesuccessfully for the CIM agents.
5. Run a fabric probe job. Wait for the job to complete successfully for the fabric.6. You can now view information for the fabric and create a switch performance
monitor job.
These are limitations for switches:
SNMP V1 protocolSwitches that are being managed out-of-band such as SNMP agents mustbe configured to use the SNMP V1 protocol. Some switches use SNMP V2or V3 by default and must be reconfigured before they can work correctlywith Tivoli Storage Productivity Center. Refer to the switch vendordocumentation for specific configuration information.
HBA API for HP-UXThe HBA API for the HP-UX platform does not support the API functionthat is required for the in-band Fabric agent to support the collection ofSAN events through the HBA. If there are no other Fabric agents(out-of-band or in-band agent) that is covering a particular SAN, or noswitch in the fabric is configured to send SNMP traps to the Device server,an automatic discovery that would have normally been triggered due toreporting of such events will not occur.
Chapter 1. Planning for Tivoli Storage Productivity Center 101

Users might still be able to have a Tivoli Storage Productivity Center agentreport SAN events for a particular SAN and have automatic triggering ofdiscovery if one of the following conditions is true:v Installing a Storage Resource agent on another supported host
(non-HP-UX platform) that is connected to the same SAN that theHP-UX Fabric agent or Storage Resource agent is connected to.
v Defining out-of-band agents that are configured to get SNMP traps fromswitches in that SAN. You must consider this option carefully becausethere can be performance implications for this option.
Performance statisticsSome switch vendors do not return all the performance statistics requiredby Tivoli Storage Productivity Center. In these cases, some performancestatistics might report as zero.
Note: A CIMOM discovery and fabric probe are required for all switchvendors supporting SMIS 1.1 and higher.
In the Storage Management Initiative Specification (SMI-S), peak data ratesfor a port are reported in the CIM_FcPortRateStatistics class. For SMI-SVersion 1.1, this class is an optional class, meaning that it might not besupported by a given vendor. This can be the case if the Tivoli StorageProductivity Center user interface shows zero values for the peak rates,even when there is non-zero traffic flowing through the port. When avendor does support this class, the peak data rate represents the peakvalue of the associated metric counter (as reported by the CIMOM used toaccess the device) over a recent, vendor-defined measurement window (forexample, 20 milliseconds) of the Tivoli Storage Productivity Centermeasurement window (for example, 15 minutes).
Index number of a fiber channel port on a bladeCurrently there is no SMI-S standard property that holds the index valuenumber of a fiber channel port on a blade. For this reason, the TivoliStorage Productivity Center SMIS Fabric Topology Table Mappers musthave vendor-specific code for calculating the index. At this time, only Ciscoand Brocade implement the Blades Subprofile, so index calculations aredone only for Cisco and Brocade.
Switch blade port index valuesThe switch blade port index values might be incorrect for Brocade switcheswhere one of the following scenarios apply:v When a port swap operation is performedv When the Extended Edge PID mode has been enabled on the director.
For more information about the Extended Edge PID mode, see theBrocade document Fabric OS Administrator's Guide.
Planning for Fabric Manager switches and directorsFor the Fabric Manager to gather and display information about switches anddirectors, the switches and directors must be configured correctly. Theconfiguration varies between vendors. Incorrect switch configuration can lead tomissing information and misconceptions about the Tivoli Storage ProductivityCenter product not working properly with certain switches.
For the switch to successfully receive and respond to queries, there are some basicrequirements:v The FC Management MIB and FE MIB must be enabled on the switch.
102 IBM Tivoli Storage Productivity Center: Installation and Configuration Guide

v The switch must be configured to receive SNMPv1 queries and respond inSNMPv1. Some switches are configured to use SNMPv2 or SNMPv3 by default.
v The community string configured in Tivoli Storage Productivity Center mustmatch one of the community strings configured on the switch with read access.Cisco switches must additionally have a community string match for writeaccess. The default community strings in Tivoli Storage Productivity Center are"public" for read access and "private" for write access. Additional communitystrings can be defined on the switches, but are not used.
v SNMP access control lists need to include the Tivoli Storage Productivity CenterDevice Server. Some automatically include all hosts while others exclude allhosts by default.
Another aspect of the SNMP configuration includes trap notification. SNMP trapsare generated by the switch and directed to the Tivoli Storage Productivity CenterDevice Server as an indication that something in the fabric has changed and that adiscovery must occur to identify changes. The default configuration for handlingswitch traps is to send them from the switch to port 162 on the Tivoli StorageProductivity Center Device Server. For the successful generation and reception oftraps, there are some configuration requirements:v The trap destination must be set. The trap destination is typically the Tivoli
Storage Productivity Center Device server, but it can also be an intermediarySNMP manager that receives the trap and sends it to Tivoli Storage ProductivityCenter. The trap destination is set on the switch.
v The destination port must be set on the switch. Tivoli Storage ProductivityCenter listens on port 162 by default.
v The traps must be sent as SNMPv1. The SNMPv1 designation is set on theswitch.
v The trap severity level must be set to generate traps for change conditions. Thetrap severity level indicates that error level traps and anything more severe aresent. The trap severity level is set on the switch.
Note:
v Storage Resource agents do not collect HBA events.v If you want to monitor the fabric, you should have one or more switches
configured to send SNMP traps to the server.
Configuring these settings differs between switch vendors and models. Forinformation about configuring supported switches, see http://www.ibm.com/developerworks. Use the search field provided to search for "configure switches."Open the article "Configure switches successfully for Tivoli Storage ProductivityCenter."
Planning for host bus adapters (HBAs)Proper installation of the HBA driver is an essential element for enabling datacollection and is one of the most common problems when an agent appears to behealthy, but is not discovering any data other than the host information. SomeHBA vendors require a separate installation of the HBA API package while othersinclude it with the driver.
For the switches to successfully receive and respond to queries, there are somebasic requirements:v The switch must support the FC-GS-3 standard interface for discovery:
– Name server
Chapter 1. Planning for Tivoli Storage Productivity Center 103

– Configuration server– Unzoned name server
v For zone control functions, the fabric zone server must be supported, except inthe case of Brocade switches.
There are some basic requirements on the HBA for proper agent operation:v The HBA driver must be installed.v The HBA API package must be installed. Some vendors include the HBA API
package as part of their driver.v HBA firmware is at a level that IBM Tivoli Storage Productivity Center supports.v The current state of the HBA as reported by the operating system is good.v The HBA has a good connection to the fabric.
Fabric events are automatically sent from the agent to the Tivoli StorageProductivity Center Device server. There is no need for configuration.
Note: This item applies only to the in-band Fabric agents. Storage Resource agentsdo not send fabric events to the server.
Planning for private switch networksSome switch vendors recommend a private IP network for the fiber channelswitches. It is important to understand that the IBM Tivoli Storage ProductivityCenter Device server cannot communicate with the switches if they are on aprivate IP network. It is important to note that the out-of-band Fabric agentsrequire a TCP/IP connection from the the Device server to the switch. Also, SNMPtraps from the switches cannot travel directly from the switches to the the Deviceserver.
If you are using a private switch IP network you must rely on Storage Resourceagents to gather your SAN information and to forward SAN events to the Deviceserver.
Another option that is sometimes used with a private switch network is to allowthe Tivoli Storage Productivity Center Device server to communicate on the privateswitch network using a second network interface card (NIC).
Planning for performance managementIBM Tivoli Storage Productivity Center can collect performance data for devicesthat use the native interfaces ( DS8000, XIV system, SAN Volume Controller,Storwize V7000 Unified, or Storwize V7000 storage systems), or for storage systemsand fiber channel switches that use CIM agents. The devices that use CIM agentsmust be SMI-S 1.1 compliant.
There are three main functions for Tivoli Storage Productivity Center performancemanagement:v Performance data collection (performance monitoring)v Performance thresholds and alertsv Performance reports
You can define how long performance data is stored in the database. Tivoli StorageProductivity Center can set thresholds for important performance metrics. Whenany boundary condition is crossed, Tivoli Storage Productivity Center can notify
104 IBM Tivoli Storage Productivity Center: Installation and Configuration Guide

the user through email, SNMP, or other alerting mechanisms. Tivoli StorageProductivity Center can generate reports, historic trend charts, and help analyzethe bottleneck of a performance congestion by drilling down to threshold violatedcomponents and the affected hosts. A combination of these functions can be usedto:v Monitor a complicated storage network environmentv Predict warning signs of system failurev Do capacity planning as overall workload grows
For more information about performance planning, see http://www.ibm.com/support/docview.wss?uid=swg27017573.
Performance metricsIBM Tivoli Storage Productivity Center can report on many different performancemetrics, which indicate the particular performance characteristics of the monitoreddevices.
Two important metrics for storage systems are throughput in I/O per second, andthe response time in milliseconds. Throughput is measured and reported in severaldifferent ways:v Throughput of an entire box (subsystem)v Each cluster (TotalStorage Enterprise Storage Server)v Each controller (DS6000 or DS8000)v Each I/O Group (SAN Volume Controller or Storwize V7000
Throughputs are measured for:v Each volume (or LUN)v At the Fibre Channel interfaces (ports) on some of the storage boxesv On fiber channel switchesv At the RAID array after cache hits have been filtered out
For storage systems, the performance statistics are separated into frontend I/Ometrics and backend I/O metrics. Frontend I/O metrics are a measure of the trafficbetween the servers and storage systems. Backend I/O metrics are a measure of alltraffic between the storage system cache and the disks in the RAID arrays in thebackend of the subsystem. Most storage systems give metrics for both kinds of I/Ooperations: frontend and backend operations. It is important to know whether thethroughput and response times are at the frontend (close to the system levelresponse time as measured from a server) or backend (between the cache anddisk).
Note: A CIMOM discovery and fabric probe are required for all switch vendorssupporting SMIS 1.1 and higher.
The main frontend throughput metrics are:v Total IO rate (overall)v Read IO rate (overall)v Write IO rate (overall)
The corresponding frontend response time metrics are:v Overall response time
Chapter 1. Planning for Tivoli Storage Productivity Center 105

v Read response timev Write response time
The main backend throughput metrics are:v Total backend IO rate (overall)v Backend read IO rate (overall)v Backend write IO rate (overall)
The corresponding backend response time metrics are:v Overall backend response timev Backend read response timev Backend write response time
It is desirable to track any growth or change in the rates and response times. Itfrequently happens that I/O rate grows over time, and that response time increasesas the I/O rates increase. This relationship is what "capacity planning" is all about.As I/O rates increase, and as response times increase, you can use these trends toproject when additional storage performance (as well as capacity) is required.
Depending on the particular storage environment, it might be that throughput orresponse time times change drastically from hour to hour or day to day. Theremight be periods when the values fall outside the expected range of values. In thatcase, other performance metrics can be used to understand what is happening.Here are some additional metrics that can be used to make sense of throughputand response times:v Total cache hit percentagev Read cache hit percentagev Write-cache delay percentage (previously known as NVS full percentage)v Read transfer size (KB/operation)v Write transfer size (KB/operation)
Low cache hit percentages can drive up response times, because a cache missrequires access to backend storage. Low hit percentages also tend to increase theutilization percentage of the backend storage, which might adversely affect thebackend throughput and response times. High write-cache delay percentage(previously known as NVS full percentage) can drive up the write response times.High transfer sizes typically indicate more of a batch workload, in which case theoverall data rates are more important than the I/O rates and the response times.
All these metrics can be monitored through reports or graphs in the Tivoli StorageProductivity Center GUI. Some examples of supported thresholds are:v Total I/O rate and total data rate thresholdsv Total backend I/O rate and total backend data rate thresholdsv Read backend response time and write backend response time thresholdsv Total port I/O rate (packet rate) and data rate thresholdsv Overall port response time thresholdv Port send utilization percentage and port receive utilization percentage
thresholdsv Port send bandwidth percentage and port receive bandwidth percentage
thresholds
106 IBM Tivoli Storage Productivity Center: Installation and Configuration Guide

For fiber channel switches, the important metrics are total port packet rate andtotal port data rate, which provide the traffic pattern over a particular switch port.Port bandwidth percentage metrics are also important to provide an indicator ofbandwidth usage based on port speeds. When there are lost frames from the hostto the switch port, or from the switch port to a storage device, the dumped framerate on the port can be monitored.
The important things are:v Monitor the throughput and response time patterns over time for your
environmentv Develop an understanding of expected behaviorsv Investigate the deviations from normal patterns of behavior to get warning signs
of abnormal behaviorv Generate the trend of workload changes
Performance management configurationPerformance data can be collected from devices that are managed through thenative interfaces or with devices that are managed by a CIM agent. For thosedevices that use the CIM agent, the devices must be SMI-S compliant.
To get performance data for devices, complete the following steps:1. Prepare for performance monitoring.
For those devices that need the CIM agent, make sure that the following itemsare done before adding the CIM agent:v The version of CIM agent and firmware for the device is supported. For
information about the CIM agent and firmware supported, seehttp://www.ibm.com/support/docview.wss?uid=swg21386446. Select theappropriate version for Storage.
v A CIM agent is installed on a different server from IBM Tivoli StorageProductivity Center. For some switch vendors, the switch comes with anembedded CIM agent, and therefore, no separate CIM agent installation isrequired.
v For subsystems or switches on a private network, be sure to have the CIMagent installed on a gateway machine so that the Tivoli Storage ProductivityCenter server on a different machine can communicate with the CIM agent.
v The CIM agent is configured to manage the intended device.For information about how to install and configure the CIM agent, contact yourCIM agent provider. Also see IBM Tivoli Storage Productivity Center Hints andTips for information about installing and configuring CIM agents. Seehttp://www.ibm.com/support/docview.wss?uid=swg27008254.
2. Select the steps to follow for your device:v For the devices that use the native interface DS8000, the XIV system, SAN
Volume Controller, and Storwize V7000), follow these steps:a. Add the device to Tivoli Storage Productivity Center. Use the Configure
Devices wizard to add the device. For information about the ConfigureDevices wizard, see “Adding resources for monitoring” on page 255. Onthe Select Device Type panel, select Storage Subsystem.
b. After the device is added to Tivoli Storage Productivity Center, automaticdiscovery and probe operations are done for the storage systems.
v For devices that use the CIM agent (ESS, DS3000, DS4000, DS5000, DS6000 allnon-IBM devices), complete these steps:
Chapter 1. Planning for Tivoli Storage Productivity Center 107

a. Add the CIM agent to Tivoli Storage Productivity Center. For informationabout adding a CIM agent, use the Configure Devices wizard. Forinformation about the Configure Devices wizard, see “Adding resourcesfor monitoring” on page 255.
b. Run a CIMOM discovery job for the storage system or switch.c. Run a probe job for the storage system or switch. The probe job gets all
component level information into the database. The probe job alsoincludes getting all the instances of controllers, arrays, extents, volumes,LUN to host mappings, FC ports, and so on. Only those storage systemsfor which configuration information is successfully collected can haveperformance monitor jobs run on them.
d. For fiber channel switches, run a fabric probe job for the fabric.3. Create threshold alerts. A performance threshold is a mechanism by which you
can specify one or more boundary values for various performance metrics, andcan specify to be notified if any collected performance data violates theseboundaries.Tivoli Storage Productivity Center has default thresholds defined (but nodefault alerts). If you explicitly define an alert for one of the default thresholds,that means that if the threshold is violated, the constraint violation reportdisplays the violation but the alert log will not.When thresholds are applied during the processing of data collection, aperformance monitor for a device must be actively running for a thresholdviolation to be recognized. Chronologically, you would need to define thethreshold alert before the performance monitor job starts.There is a special report that can provide statistics about how often and whenan alert threshold has been reached, even without setting up alert destinationslike email receivers or SNMP trap destinations. This special report is called aconstraint violation report. To get a constraint violation report, expand DiskManager > Reporting > Storage Subsystem Performance > ConstraintViolations.
Note: Alerts can be created, deleted, or modified at any time, even if theperformance monitor is already running. Changes are applied dynamically tothe running job and take effect the next time data is collected for the job.
4. Create a performance monitor job. Performance data collection is performedthrough a performance monitor job. This job can be run immediately, can bescheduled to run one time only, or can be scheduled to run repeatedly aswanted. Only after the device has been probed successfully is that deviceeligible for a performance monitor. If the probe is not successful, that devicewill not show up in the performance monitor creation panel.Performance management for storage systems is done through the DiskManager. Data collection for the storage systems can be scheduled throughDisk Manager > Monitoring > Subsystem Performance Monitors. Right-clickon Subsystem Performance Monitors. Click Create Subsystem PerformanceMonitor. In the content pane, enter the information schedule and run aperformance monitor job. To view the performance reports, expand DiskManager > Reporting > Storage Subsystem Performance.Performance management for fiber channel switches is done through the FabricManager. Data collection for the switches can be scheduled through FabricManager > Monitoring > Switch Performance Monitors. Right-click on SwitchPerformance Monitors and click Create Switch Performance Monitors. Toview the performance reports, expand Fabric Manager > Monitoring > SwitchPerformance Monitors.
108 IBM Tivoli Storage Productivity Center: Installation and Configuration Guide
5. Check the performance monitor status. When the performance monitor jobstarts to run, you begin to collect performance data for the device. Check thestatus of the performance monitor job to make sure that it runs and continuesrunning. In the navigation tree, expand IBM Tivoli Storage ProductivityCenter > Job Management. In the content pane, click the Refresh buttonbecause refreshes are not automatic on the Job Management panel. See Jobs forSelected Schedule for a list of performance monitor jobs and the status of thejobs. For more information about the Job Management panel, see “Managingschedules, jobs, and runs” on page 272.
6. Specify the retention period for the performance data. After the monitor job iscreated, you can configure how long to keep performance data. You can specifya retention period for collected sample data, for aggregated hourly data, andfor daily data. The retention period applies to all performance monitors. Formore information about the retention period, see “Resource History Retention”on page 317.Sample data is the data that is collected at the specified interval length of themonitor job, for example, data is collected every 5 minutes.For storage systems, the most numerous components are usually volumes,therefore, the largest amount of performance data collected is for volumes.
7. View the performance reports in Tivoli Storage Productivity Center.
Microsoft Cluster ServerData Manager can monitor and report on Microsoft Cluster Server (MSCS)clustered nodes and cluster resource groups.
Microsoft Cluster Server (MSCS) is a built-in feature of the Windows operatingsystem. It is software that supports the connection of up to eight servers into a"cluster" for higher availability and easier manageability of data and applications.MSCS can automatically detect and recover from server or application failures. Itcan be used to move server workload to balance utilization and to provide forplanned maintenance without downtime.
As with standard Windows clusters, you perform most of the configuration tasks,and also the management tasks, associated with Exchange clusters using theCluster Administrator. Cluster Administrator is installed by default on servers thathave Cluster Service installed.
You can also use Cluster Administrator to remotely administer a server cluster.Computers that are used to administer a server cluster remotely must be secureand restricted to trusted personnel.
When a cluster node is probed, there are normal errors in the logs for the disksbelonging to the cluster resource groups that are not currently hosted on this node.
When looking at an MSCS cluster problem, the current state of the clusteringenvironment is often needed. Microsoft provides a tool to dump the MSCS clusterconfiguration into a set of files.
Note: The term "virtual servers" is replaced with "cluster resource groups" in TivoliStorage Productivity Center. Microsoft still refers to "virtual servers."
Chapter 1. Planning for Tivoli Storage Productivity Center 109
Microsoft Cluster Server environmentThis topic provides information about Tivoli Storage Productivity Center supportin an MSCS environment.
Report information can include local resources for a clustered node and theresources in a cluster resource group. The Storage Resource agent is not clusteraware so the Storage Resource agent cannot run in the cluster resource group andfail over from one node to another. The Storage Resource agent supports failoverof a clustered file system so that Tivoli Storage Productivity Center scan jobs cancontinue to work when the clustered file system is moved from one node toanother. The Storage Resource agent running on the node hosting the clusterresource group discovers the resources on that cluster resource group. The StorageResource agents must be installed on every node in the cluster.
The following information lists the requirements for using the Data server in anMSCS cluster environment.
Server requirementNot applicable. The server component can be installed on a node in anMSCS cluster, but the Data Manager can monitor and report only on nodesthat have an agent installed.
agent requirementsEach node in an MSCS cluster must have a Storage Resource agentinstalled. The Data Manager can monitor and report only on nodes thathave a daemon Storage Resource agent installed. All agents installed in acluster must use the same port number to communicate with the TivoliStorage Productivity Center server. Agents in other clusters can beconfigured with a different port address. However, all agents in the clustermust use the port address used by the other agents in that cluster.
client requirementsNot applicable. The client component can be installed on a node in anMSCS cluster, but the Data Manager can monitor and report on only thenodes with an agent installed.
Note: The Data server does not currently support the monitoring ofclustered database application.
If the Storage Resource agent port is behind a firewall, that port needs to beopened for all virtual server and cluster resource group addresses.
Microsoft Cluster Server supportUse this information to plan for running IBM Tivoli Storage Productivity Centerwith MSCS.
Cluster resource groups
A cluster resource group represents an MSCS entity.
You can configure MSCS into cluster resource groups. You can define resourcegroup policies and attributes that dictate how MSCS manages resources to keepthem highly available at different stages of cluster operation (startup, failover, andfallback). The types of resources you can put into clustered resource groups are:
110 IBM Tivoli Storage Productivity Center: Installation and Configuration Guide

Logical volumesA set of logical partitions that MSCS makes available as a single storageunit that is, the logical volume is the “logical view” of a physical disk.
FilesystemA file system is written to a single logical volume. Typically, you organizea set of files as a file system for convenience and speed in managing data.
Shared filesystemsA file system that resides entirely in a shared logical volume.
Physical diskA physical disk.
Network nameA network name.
IP addressAn IP address.
Reports
The asset reporting navigation tree includes a By Cluster report that shows thenodes and cluster resource groups in each cluster. The disks and file systems thatare shared as clustered resources are associated with the cluster resource groupand not with the node where they are hosted.
When generating reports, you can use the By Cluster report subtype wherever theBy Computer subtype is available. The By Cluster report summarizes the results ofthe nodes and the cluster resource groups in the cluster.
Monitoring groups
When you create a monitoring group or create a data collection schedule, you canselect individual nodes and cluster resource groups. You can create a file systemmonitoring group that includes clustered and non-clustered resources.
Computer alerts
You can register for cluster-specific alerts that notifies you that your cluster hasgone through a configuration change such as a cluster resource being added orremoved. You can also register for an alert that is triggered when a cluster resourcegroup is moved. The same alert is used for a cluster resource group failover,cluster resource group fallback, and when the cluster resource group is manuallymoved to a new node.
Cluster alerts are not triggered until the next time the cluster is probed.
Upgrading agents in an MSCS cluster
Take the following steps when upgrading the Tivoli Storage Productivity Centeragents in an MSCS cluster:v Make sure that all agents in the cluster are configured to use the same port
address.v Use either the Tivoli Storage Productivity Center installation program or the
graphical user interface to perform the agent upgrades.v Do not probe or scan the agents in the cluster while the agent upgrade is in
progress.
Chapter 1. Planning for Tivoli Storage Productivity Center 111

v Once all agents in the cluster have been upgraded successfully, create and run anew probe job on the cluster.
For more information about upgrading Tivoli Storage Productivity Center agents,see “Upgrading Storage Resource agents” on page 380.
Installing MSCS support
To install MSCS support, complete the following steps:1. Make sure that your MSCS environment is configured for Tivoli Storage
Productivity Center support.2. Install a Storage Resource agent on each node of the cluster. All agents in the
cluster must be configured to use the same listening port.3. Run a discovery job for the agent.4. Add a Network Name resource with an IP address that can be contacted from
the Tivoli Storage Productivity Center server.5. Run a scan job for the agent.6. Run a probe job for the agent.7. View reports for the MSCS entities.8. View the MSCS environment in the topology viewer.
Planning for PowerHATivoli Storage Productivity Center supports Storage Resource agents installed onPowerHA nodes (previously known as HACMP). Use this information to configurethe PowerHA environment before using it with Tivoli Storage Productivity Center.
Cluster resource groups
A cluster resource group represents a PowerHA entity.
You can configure PowerHA into cluster resource groups so that they can be highlyavailable. You can define resource group policies and attributes that dictate howPowerHA manages resources to keep them highly available at different stages ofcluster operation (startup, failover, and fallback). The types of resources you canput into clustered resource groups are:
Volume groupsA set of physical volumes that AIX treats as a contiguous, addressable diskregion.
Logical volumesA set of logical partitions that AIX makes available as a single storage unitthat is, the logical volume is the “logical view” of a physical disk.
FilesystemA file system is written to a single logical volume. Typically, you organizea set of files as a file system for convenience and speed in managing data.
Shared filesystemsA journaled file system that resides entirely in a shared logical volume.
ApplicationsCritical services that are accessible to users.
Service IP labels or addressesA way to establish communication between client nodes and the server
112 IBM Tivoli Storage Productivity Center: Installation and Configuration Guide

node. Services, such as a database application, are provided using theconnection mode over the service IP label.
Tape resourcesYou can configure a SCSI or a Fiber Channel tape drive as a clusterresource in a non-concurrent resource group, making it highly available totwo nodes in a cluster.
Communication linksYou can define communication links as resources in a PowerHA resourcegroup.
Planning for PowerHA support
With PowerHA, you can use the following types of configurations:v PowerHA with cluster resources groups that are nonconcurrent. Concurrent
cluster resource groups are not supported.v The following volume groups in a PowerHA environment:
– Standard volume groups– Enhanced concurrent-mode volume groups– Scalable volume groups
When you create a Tivoli Storage Productivity Center configuration, include theStorage Resource agent. A Storage Resource agent must be installed on each nodeof the cluster. All agents in a cluster must be configured to use the same listeningport. You must also have a cluster resource group (CRG) with at least one IPaddress that is accessible from the Tivoli Storage Productivity Center server if youplan to perform scans on the cluster resource group. Each Storage Resource agentcollects information about the local node and the clustered resources that arecurrently hosted on the node.
The following operations are not supported:v Probing and scanning of clustered databasesv Reporting on cluster information when the cluster is configured to have
concurrent cluster resource groups
Note:
v Cluster resource group scanning is only supported by the Tivoli StorageProductivity Center Advanced license.
v If the Storage Resource agent port is behind a firewall, that port needs to beopened for all virtual server and cluster resource group addresses.
Reports
The asset reporting navigation tree includes a By Cluster report that shows thenodes and cluster resource groups in each cluster. The disks, volume groups, andfile systems that are shared as clustered resources are associated with the clusterresource group and not with the node where they are hosted.
When generating reports, you can use the By Cluster report subtype wherever theBy Computer subtype is available. The By Cluster report summarizes the results ofthe nodes and the cluster resource groups in the cluster.
Chapter 1. Planning for Tivoli Storage Productivity Center 113

Monitoring groups
When you create a monitoring group or create a data collection schedule, you canselect individual nodes and cluster resource groups. You can create a file systemmonitoring group that includes clustered and non-clustered resources.
Computer alerts
You can register for cluster-specific alerts that notify you that your cluster has gonethrough a configuration change such as a cluster resource being added or removed.You can also register for an alert that is triggered when a cluster resource group ismoved. The same alert is used for a cluster resource group failover, clusterresource group fallback, and when the cluster resource group is manually movedto a new node.
Cluster alerts will not be triggered until the next time the cluster is probed.
Installing PowerHA support
To install PowerHA support, complete the following steps:1. Ensure that your PowerHA environment is configured for Tivoli Storage
Productivity Center support.2. Create a service IP label for the CRG with an IP address that can be contacted
from the Tivoli Storage Productivity Center server.3. Install a Storage Resource agent on each node of the cluster. All agents in the
cluster must be configured to use the same listening port.4. Run a discovery job for the agent.5. Run a probe job on the agents.6. Run a scan job on the agents.7. Run a scan job on the cluster resource groups.8. View reports for the PowerHA entities.9. View the PowerHA environment in the topology viewer.
PowerHA environmentThis topic provides information about Tivoli Storage Productivity Center supportin a PowerHA environment.
Tivoli Storage Productivity Center supports Storage Resource agents installed onPowerHA nodes. The Storage Resource agent must be installed on every node inthe cluster. You cannot configure the Storage Resource agent as a clusteredapplication.
The Storage Resource agent collects information from the cluster when the node isprobed. The information that is collected is available in the Data Manager and DiskManager reports and the topology viewer. Resources that are not clustered arereported under the node. The resources that are associated with a cluster resourcegroup are reported under a computer entity that represents the cluster resourcegroup. For example, if a single node cluster that has one cluster resource group isprobed it produces two computer entities in the Data Manager and Disk Managerreports and the topology viewer.
The following entities are reported under the associated clustered resource groupand not the node:
114 IBM Tivoli Storage Productivity Center: Installation and Configuration Guide

v Volume groupsv NFS sharesv Service IP labels
Physical volumes, logical volumes, and file systems for clustered volume groupsare also reported under the cluster resource group. Scan and ping jobs can becreated for a cluster resource group and these jobs work regardless of which nodeis hosting the cluster resource group. Scan and ping requests for a cluster resourcegroup are sent to the service IP label defined for the cluster resource group.Therefore, in order for these jobs to succeed the service IP label must be accessiblefrom the Data server and the CRG must be online.
Restriction: You can use PowerHA only with cluster resource groups that arenonconcurrent. You cannot use PowerHA with concurrent cluster resource groups.
The following information lists the support requirements for a PowerHA clusterenvironment.
Agent requirementEach node in a PowerHA cluster must have a Storage Resource agentinstalled. The Data Manager can only monitor and report on nodes thathave a daemon Storage Resource agent installed. If you are using daemonStorage Resource agents, all agents installed in a cluster must listen on thesame port number. Agents in other clusters can be configured with adifferent port address. However, all agents in the cluster must use the portaddress used by the other agents in that cluster.
You can use either Storage Resource agents or Data agents on each node.You can have a mixed configuration when migrating Data agents toStorage Resource agents, but scan jobs of clustered file systems will failuntil all the nodes in the cluster have the same type of agent.
Probe requirementsProbes are not automatically executed in response to cluster events.Schedule probes to run as appropriate for the needs of the environment.
Scan requirementsTo perform scans on a cluster resource group, the cluster resource groupmust be configured with an IP address that the Tivoli Storage ProductivityCenter server can communicate with. This IP address is displayed inreports associated with PowerHA clusters. If the server cannot contact thisaddress once it has been configured, the server tries the next knownaddress for the cluster resource group until it successfully contacts an IPaddress.
Note: Cluster resource groups are now listed as computers in scan jobresults, and now have log files specific to the cluster resource group.
NAS supportThis section provides information for the planning of NAS support.
Network Attached Storage system requirementsThis section provides information about the requirements for installing andrunning the Data Manager within a Network Attached Storage (NAS)environment.
Chapter 1. Planning for Tivoli Storage Productivity Center 115

IBM Tivoli Storage Productivity Center supports the monitoring of the NetAppData ONTAP.
To be supported, NAS devices other than Network Appliance Filers must meet thefollowing criteria:v If scanned from a UNIX agent, a NAS device must support Network File System
(NFS) queries.v If scanned from a Windows agent, a NAS device must support Common
Internet File System (CIFS) queries.v A NAS device must support SNMP queries (sysName and sysOID).v A NAS device must supply a unique sysName.v If a NAS device hosts both Windows and UNIX file systems, you need at least
two proxy Storage Resource agents to monitor the device. At least one Windowsproxy Storage Resource agent is required to probe and scan the Windows CIFSshares. At least one UNIX proxy Storage Resource agent is required to probe andscan UNIX NFS shares.
For detailed information about configuring NAS and Tivoli Storage ProductivityCenter, see http://www.redbooks.ibm.com/. Search for sg247490.
Here are the requirements for installing and running the Data Manager within aNAS environment.
Server requirementNot applicable. You cannot install the server on a NAS filer.
Agent requirementsYou must install the agent on a machine that has access to the NAS filerswithin your environment that you want to monitor.
WindowsThe agent that is logging in to and scanning the NAS filer is notrequired to be in the same domain as the user or the NAS filer. Ifyou install the agent on a different domain from the NAS filer, theagent scans the NAS filer if the domain of the agent computer is a"trusted domain" by the domain of the NAS filer.
UNIX and LinuxThe agent computer must import the NAS filer export files as NFSmounts (or automounts on Oracle Solaris).
Note:
v You do not install agents to the NAS filers themselves.v For Tivoli Storage Productivity Center 5196 Network Attached
Storage 300 G machines only, install the agent directly on thosemachines. If the 300 G is clustered, you need to install an agenton each local node.
Client requirementsNot applicable. You cannot install the client component to a NAS filer.
NAS requirementsThe NAS filers within your environment must be visible to the machineswhere you install the agent or agents. If you want to monitor NAS filersfrom Windows, you must configure those NAS filers to be members of aWindows domain.
116 IBM Tivoli Storage Productivity Center: Installation and Configuration Guide
Planning for NetApp device supportNetApp devices provide unified storage for organizations with Network AttachedStorage or storage area network environments that have file and block-levelservices. IBM Tivoli Storage Productivity Center provides the same file andblock-level support for NetApp devices as is provided for other filers and storagesubsystem devices.
Overview
Tivoli Storage Productivity Center provides the following support for NetAppdevices:v supports NetApp Data ONTAP SMI-S Agent 3.0v supports the SMI-S 1.2 Array profile implemented by the NetApp SMI-S agentv supports all filer models running NetApp Data ONTAP version 7.2 and 7.3
NAS Gateway and V Series are not supported with the Array profile.
The following licenses are required:v For performance monitoring, an IBM Tivoli Storage Productivity Center license
is requiredv For SNMP discovery, an IBM Tivoli Storage Productivity Center Advanced
license is required
Configuration considerations
The way you use Tivoli Storage Productivity Center to interact with NetAppdevices, and the data you can collect for NetApp devices, depends on how youconfigure your NetApp devices. For example:v If you configure a Storage Resource agent to be a Scan/Proxy agent, you use
Data Manager to work with NetApp devices. The Data Manager user interfacedisplays a NetApp filer as a "computer". For NetApp devices configured thisway, Tivoli Storage Productivity Center collects file storage information.
v If you configure a NetApp SMI-S agent (CIMOM), you use Disk Manager towork with NetApp devices. The Disk Manager user interface displays a NetAppdevice as a "subsystem". For NetApp devices configured this way, Tivoli StorageProductivity Center collects block storage information.
v If you configure a NetApp device as both a filer and a subsystem, Tivoli StorageProductivity Center collects both file and block storage information. You can useDisk Manager and Data Manager to work with the NetApp device. Keep inmind the following considerations for the user interface:– In Data Manager, a NetApp filer is shown as a "computer".– In Disk Manager, a NetApp device is shown as a "subsystem" and a Fibre
Channel (FC) LUN as a "volume".v If multiple Storage Resource agents are set up to probe or scan the same NetApp
filer, the Storage Resource agent that was added to Tivoli Storage ProductivityCenter first is used for the probe or scan. Therefore, only data that is gatheredby the first Storage Resource agent is shown. For example, if you add a StorageResource Agent for the Windows operating system and then you add a StorageResource Agent for the UNIX operating system, Windows operating systemrelated data such as shares are shown, but not exports.
Chapter 1. Planning for Tivoli Storage Productivity Center 117

If you initially configure a NetApp device using a Storage Resource agent, you donot lose any function if you later decide to also configure the NetApp device usinga CIM agent.
General procedure to install and configure NetApp devices
To install and configure a NetApp device to enable the Data Manager feature,complete the following steps:1. Select a machine to act as the Storage Resource agent that meets the
auto-discovery requirements for Tivoli Storage Productivity Center toauto-discover the NetApp filers.
2. Install a Storage Resource agent on that machine.3. Set the license for the NetApp filers that are discovered.4. Set the Scan/Proxy agent for the discovered filers.5. Create and run a probe job for each of the filers to collect Data Manager
information.
To install and configure a NetApp device to enable Disk Manager functionality,complete the following steps:1. Install Tivoli Storage Productivity Center or upgrade to version 4.2 or later.2. Install the NetApp SMI-S agent and add filers to its configuration using the
NetApp SMI-S agent utility3. Add the NetApp CIMOM by using Administrative Services > Data Sources >
CIMOM Agents. In the content pane, click Add CIMOM. To automaticallydiscover the NetApp SMI-S agent using SLP, skip this step.
4. Run a CIMOM discovery.5. If you want to use SLP to discover the NetApp SMI-S agent, make sure that
your SLP directory agents are configured or the Scan local subnet box ischecked on the Administrative Services > Discovery > CIMOM. In the contentpane, go to the Options page to enter the IP addresses or host names for theSLP directory agents to be used before you run the CIMOM discovery.
6. Create and run a probe job for the configured filers to collect Disk Managerinformation.
7. If wanted, use the command-line interface (CLI) tpctool command to viewinformation for NetApp storage systems.
Refer to the IBM Tivoli Storage Productivity Center User's Guide for more informationabout how to collect and view information gathered by NetApp devices. Refer tothe IBM Tivoli Storage Productivity Center Command-Line Interface Reference forinformation about using the tpctool command.
Removing a NetApp device
If you later decide to remove a NetApp device, the steps to remove it depend onhow you configured it. For example, if the NetApp device is configured only as afiler, you can remove it using the Administrative Services > Configuration >Scan/Probe Agent Administration page. If the NetApp device is configured onlyas a subsystem, you can remove it using the Disk Manager > Storage Subsystemspage. If the NetApp device is configured as both a filer and a subsystem, then youmust perform both of the preceding steps.
118 IBM Tivoli Storage Productivity Center: Installation and Configuration Guide

Limitations of NetApp support
Keep in mind the following limitations for NetApp support:v The NetApp Data ONTAP SMI-S Agent 3.0 or later implements the Block Server
Performance subprofile. It provides volume performance data but, for now, doesnot provide performance data at the storage subsystem level.
v Tivoli Storage Productivity Center supports only the SMI-S Array profile of theNetApp Data ONTAP SMI-S Agent. Other SMI-S profiles, including theself-contained NAS profile and the NAS Head profile, are not supported.
v For the Data ONTAP SMI-S 3.0 agent or later, if a volume is offline, theperformance monitor might fail with the message: PM HWNPM2132W Performancedata could not be collected for device device.
v To work with Network Appliance quotas (using Data Manager > PolicyManagement > Network Appliance Quotas), the NetApp device must beconfigured as a filer. This function is not available if the NetApp device isconfigured only as a CIMOM.
Identifying NetApp devices in the user interface
The way you configure a NetApp device determines how the NetApp device isrepresented in the Tivoli Storage Productivity Center user interface, as follows:v NetApp device configured as a filer: the NetApp device appears as a "computer"
in the user interface.v NetApp device configured as a storage subsystem using a CIMOM: the NetApp
device appears as a "subsystem" in the user interface.v NetApp device configured as both a filer and storage subsystem: the NetApp
device appears as either a "computer" or a "subsystem" in different places in theuser interface. For example, some reports under My Reports refer to the NetAppfiler as a "computer" while others refer to the NetApp device as a "subsystem".
The NetApp device is represented either as a "computer" or a "subsystem", or both,depending on how you have configured the NetApp device, are:v Dashboardv My Reportsv Topology viewerv Alertingv Data Managerv Disk Manager
For example:v Data Manager > Reporting > Asset > By Storage Subsystem lists a NetApp
device as a storage subsystem if the device was probed by the NetApp DataONTAP SMI-S agent.
v System Reports > Data > Disk Defects displays a NetApp device name aseither a "computer" or a "subsystem", depending on whether the deviceinformation was collected by the Storage Resource agent or the SMI-S agent.
In the topology viewer, the NetApp device appears as follows:v If a Storage Resource agent is configured to probe the NetApp device, the
NetApp device is displayed as a "computer"v If a CIM agent is configured to probe the NetApp device, the NetApp device is
displayed as a "storage subsystem"
Chapter 1. Planning for Tivoli Storage Productivity Center 119

Planning for System Storage N Series Gateway serversTivoli Storage Productivity Center supports the System Storage N Series Gatewayservers as the Other NAS node.
Upgrade information
If you are upgrading Tivoli Storage Productivity Center from TotalStorageProductivity Center 3.3.x, there are specific steps to follow. You must delete andunlicense existing N Series Gateway servers first before adding the N SeriesGateway servers. For information about upgrading Tivoli Storage ProductivityCenter with N Series Gateway servers, see “Upgrading System Storage N SeriesGateway servers” on page 386.
New installation
If you are installing Tivoli Storage Productivity Center as a new installation, the NSeries Gateway servers can be automatically discovered after the Storage Resourceagent is installed. If the N Series Gateway servers are automatically discovered,they are listed under Administrative Services > Configuration > License Keys. Inthe content pane, click the magnifying glass icon for the product to display theLicensing page. The Licensing page displays the OS Type as NetApp DataONTAP with the Licensed box cleared.
To manually add the N Series Gateway servers as Other NAS, the Licensed boxmust be cleared. The OS Type and Licensed fields are updated after the N SeriesGateway Server is manually added as Other NAS. For more information, see“Manually adding an N Series Gateway server ” on page 387.
Planning for VMwareTivoli Storage Productivity Center supports the VMware Virtual Infrastructurewhich consists of the ESX Server and VMware VirtualCenter.
Overview
The ESX Server is a true hypervisor product which can host multiple virtualmachines that run independently of each other while sharing hardware resources.The VirtualCenter is the management application that is the central entry point forthe management and monitoring of the ESX Servers for a data center. Install aStorage Resource agent on each virtual machine that you want to monitor.
For more information about the ESX Server or VMware VirtualCenter, seehttp://www.vmware.com.
For information about permissions required by Tivoli Storage Productivity Centerto access information from VMware, see the information center. Search for“VMware data source”.
The storage systems and platforms supported on VMware are shown in Table 25on page 121.
120 IBM Tivoli Storage Productivity Center: Installation and Configuration Guide
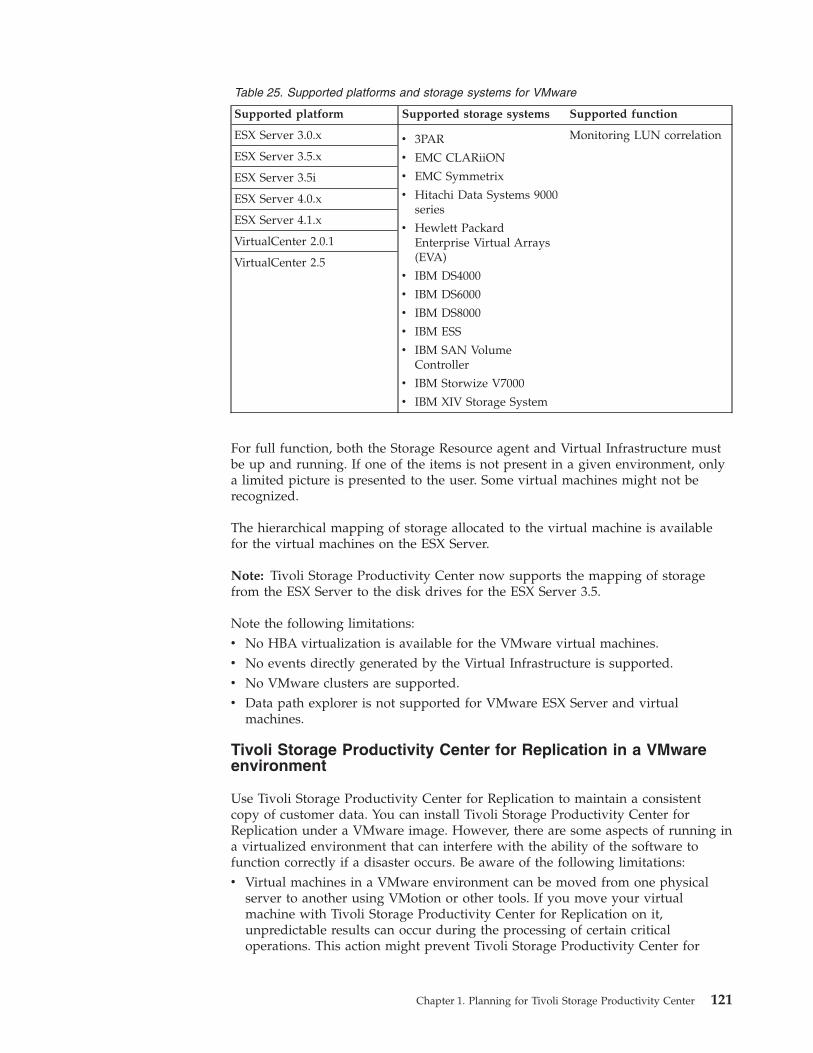
Table 25. Supported platforms and storage systems for VMware
Supported platform Supported storage systems Supported function
ESX Server 3.0.x v 3PAR
v EMC CLARiiON
v EMC Symmetrix
v Hitachi Data Systems 9000series
v Hewlett PackardEnterprise Virtual Arrays(EVA)
v IBM DS4000
v IBM DS6000
v IBM DS8000
v IBM ESS
v IBM SAN VolumeController
v IBM Storwize V7000
v IBM XIV Storage System
Monitoring LUN correlation
ESX Server 3.5.x
ESX Server 3.5i
ESX Server 4.0.x
ESX Server 4.1.x
VirtualCenter 2.0.1
VirtualCenter 2.5
For full function, both the Storage Resource agent and Virtual Infrastructure mustbe up and running. If one of the items is not present in a given environment, onlya limited picture is presented to the user. Some virtual machines might not berecognized.
The hierarchical mapping of storage allocated to the virtual machine is availablefor the virtual machines on the ESX Server.
Note: Tivoli Storage Productivity Center now supports the mapping of storagefrom the ESX Server to the disk drives for the ESX Server 3.5.
Note the following limitations:v No HBA virtualization is available for the VMware virtual machines.v No events directly generated by the Virtual Infrastructure is supported.v No VMware clusters are supported.v Data path explorer is not supported for VMware ESX Server and virtual
machines.
Tivoli Storage Productivity Center for Replication in a VMwareenvironment
Use Tivoli Storage Productivity Center for Replication to maintain a consistentcopy of customer data. You can install Tivoli Storage Productivity Center forReplication under a VMware image. However, there are some aspects of running ina virtualized environment that can interfere with the ability of the software tofunction correctly if a disaster occurs. Be aware of the following limitations:v Virtual machines in a VMware environment can be moved from one physical
server to another using VMotion or other tools. If you move your virtualmachine with Tivoli Storage Productivity Center for Replication on it,unpredictable results can occur during the processing of certain criticaloperations. This action might prevent Tivoli Storage Productivity Center for
Chapter 1. Planning for Tivoli Storage Productivity Center 121

Replication from maintaining data consistency or prevent you from being able toquickly recover your data at the remote site.
v If the VMware image resides on the same storage that is managed by TivoliStorage Productivity Center for Replication, Tivoli Storage Productivity Centerfor Replication might attempt to "freeze" I/O on the storage system. Thisfreezing of I/O on the storage system can cause Tivoli Storage ProductivityCenter for Replication to stop responding. If this freeze occurs, the I/O is notreleased until the storage system freeze timeout occurs. Any applicationsrunning against that storage system might be affected by a delay, which canprevent Tivoli Storage Productivity Center for Replication from maintaining dataconsistency.
v Virtual images are controlled and managed by the ESX server. You must ensurethat the internal VM network is set up correctly so users can access TivoliStorage Productivity Center for Replication. Correctly setting up the networkensures that:– Tivoli Storage Productivity Center for Replication can access the storage
systems that it is managing– Helps users quickly recover data on the remote storage systems if a disaster
occurs
Also ensure that the virtual environment is secure and that it is monitored tomaintain data consistency.
v Because virtual environments can vary, ensure that you thoroughly test yourenvironment with Tivoli Storage Productivity Center for Replication, and ensurethat you test disaster recovery-related steps.
Software requirements
For information about the software requirements for your ESX Server or VMwareVirtualCenter environment, see “Software requirements for operating systems” onpage 4.
Installing Tivoli Storage Productivity Center server on a virtualmachine
You can install the Tivoli Storage Productivity Center server on a virtual machineon VMware ESX server 3.5.x. The hardware and operating system requirements arethe same requirements as for a physical machine.
In addition, the following requirements must be met:
CPU For the ESX server, do not have more virtual processors than there arephysical cores in the system. Plan your system so that no processorscheduling is required by the VM kernel for the virtual machine.
RAM Ensure that you have enough RAM in the ESX server to service all thevirtual machines with a maximum RAM usage. Plan your system so thatthe ESX server does not need to swap RAM for the virtual machine.
Disk Use the SAN-attached RDM with SCSI pass-through for DB2 data and logstorage.
For more information about VMware, see the following publications:v “Using VMware ESX Server with IBM WebSphere Application Server” at
http://www.vmware.com/partners/vmware/ESX_WAS_WP.pdf.
122 IBM Tivoli Storage Productivity Center: Installation and Configuration Guide
v “Scaling IBM DB2 9 in a VMware Infrastructure 3 Environment” athttp://www.vmware.com/pdf/db2_scalability_wp_vi3.pdf.
VMware configurationBefore you can display reports or see the topology for VMware VirtualInfrastructure, you must configure the VMware environment.
To configure the VMware environment, complete the following steps:1. If the VMware Virtual Infrastructure uses SSL certificates for communication,
you have to use keytool to manually import the SSL certificates into atruststore. Each Virtual Infrastructure data source provides an individualcertificate. There is a default truststore registered in the Device server's systemproperties file. Keytool is a tool shipped with the Java run-time environment.For information about how to import the SSL certificates, go to the TivoliStorage Productivity Center information center. Search for Importing SSLcertificates for VMware.
2. Add the VMware VI data source. The data source can be a hypervisor (ESXServer or VirtualCenter). Adding the data source is the first step in gettinginformation from VMware Virtual Infrastructure. Adding a VMware datasource is like adding a CIM agent or Storage Resource agent.
3. Test the connection to the VMware VI data source. This test ensures that youcan access information from the VMware data source.
4. Run a discovery job for the VMware environment. The discovery is needed toretrieve every ESX Server instance that is part of the Virtual Infrastructure thathas been added. The discovery mechanism is like a discovery for storagesubsystems. Discovery jobs can be scheduled and are performed on thecomplete list of known VMware data sources.
5. Run a probe job for the ESX Server, hypervisor, and virtual machines. This stepgets the detailed information from the hypervisors and virtual machines forIBM Tivoli Storage Productivity Center.
6. Configure alerts for VMware. You can create alerts for the following alertconditions:v Hypervisor discoveredv Hypervisor missingv Virtual Machine addedv Virtual Machine deleted
7. Install the Storage Resource agent on each of the virtual machines you want tomonitor. For full functionality, you need two data sources.
8. You can now view VMware reports and VMware topology.
VMware capacity reportsYou must probe both the ESX Server and the Storage Resource agent on the virtualmachines before you can generate accurate reports for disk and file systemcapacity.
The TOTAL row in the capacity report shows the capacity for the file system or thedisk capacity. The total includes virtualized disks, virtual machines, non-virtualizeddisks, and non-virtualized machines.
For example, you have an ESX Server that has a capacity of 100 GB and 60 GB isallocated to the virtual machine. The virtual machine uses 5 GB of space. Both the
Chapter 1. Planning for Tivoli Storage Productivity Center 123

ESX Server (H1) and the virtual machine (VC1) are probed. You also have aphysical machine (PC1) that is probed. The capacity is shown in the report, asfollows:
Column heading Capacity
Used space(calculated asCapacity minus FreeSpace) Free space
TOTAL 130 GB 25 GB 105 GB
H1 100 GB 60 GB 40 GB
VC1 60 GB 5 GB 55 GB
PC1 30 GB 20 GB 10 GB
If you probed the physical machine (PC1) and the virtual machine (VC1) but didnot probe the ESX Server (hypervisor), the capacity is shown as follows:
Column heading Capacity
Used Space(calculated asCapacity minus FreeSpace; negativevalues are shown as0) Free Space
TOTAL 30 GB 0 GB 65 GB
PC1 30 GB 20 GB 10 GB
VC1 60 GB 5 GB 55 GB
If you probed the hypervisor (H1) and the physical machine (PC1) but did notprobe the virtual machine (VC1), the capacity is shown as follows:
Column heading Capacity
Used Space(calculated asCapacity minus FreeSpace) Free Space
TOTAL 130 GB 80 GB 50 GB
H1 100 GB 60 GB 40 GB
PC1 30 GB 20 GB 10 GB
If you have an ESX Server that has devices that are directly attached to the virtualmachine, the file system capacity created on the virtual machine is not added inthe TOTAL row.
For example, the file system capacity shown in the table is based on the followingfactors:v The file system (FS1) created on the hypervisor has a capacity of 100 GB and
uses 60 GB of space.v The file system (FS1) created from internal storage on the hypervisor (H1) has a
capacity of 60 GB and uses 5 GB of space.v The file system (FS2) on the device that is directly attached to the virtual
machine (VC1) has a capacity of 5 GB and uses 4 GB of space.v The file system created on the physical machine (PC1) has a capacity of 30 GB
and uses 20 GB of space.
124 IBM Tivoli Storage Productivity Center: Installation and Configuration Guide

Column heading Capacity
Used Space(calculated asCapacity minus FreeSpace) Free Space
TOTAL 130 GB 24 GB 106 GB
H1 FS1 100 GB 60 GB 40 GB
VC1 FS1 60 GB 5 GB 55 GB
VC1 FS2 5 GB 4 GB 1 GB
PC1 FS1 30 GB 20 GB 10 GB
Planning for the Virtual I/O ServerYou can use the Storage Resource agent to gather information about Virtual I/OServers. Before you can monitor Virtual I/O Servers, you must plan on how toinstall the agents in your environment.
Overview
The Virtual I/O Server is part of the IBM PowerVM® hardware feature. The VirtualI/O Server allows the sharing of physical resources between LPARs includingVirtual SCSI and virtual networking. Sharing of physical resources allows moreefficient utilization of physical resources through sharing between LPARs andfacilitates server consolidation.
Support for Virtual SCSI environment
The Virtual SCSI environment consists of a Virtual SCSI Server Adapter orAdapters that are created on the Virtual I/O Server and mapped to a Virtual I/OClient. If you have a Virtual SCSI environment and the virtual target device has aone to one mapping to a storage volume, Tivoli Storage Productivity Center canextract the storage system serial number and correlate the Virtual SCSI disk on theLPAR to a corresponding storage volume. This function means that the StorageResource agent installed on the Virtual I/O Client (LPAR), can collect thisinformation. The Linux system must be running on the IBM Power® System.
Note:
v Tivoli Storage Productivity Center performs the correlation only if the virtualtarget device is a one to one mapping to a single storage system volume.
The storage systems supported are:v DS8000v SAN Volume Controllerv Storwize V7000v Storwize V7000 Unifiedv DS3000,v DS4000v DS5000
After the Storage Resource agent is installed on the Virtual I/O Server, you can seethe following information:v Storage system serial number
Chapter 1. Planning for Tivoli Storage Productivity Center 125

v Virtual SCSI Client Adapterv Virtual SCSI diskv Volume groups, logical volumes, and file system
Note:
v Currently, the correlation of Virtual SCSI disks that originate from the XIVsystem is not performed.
v Tivoli Storage Productivity Center can perform the correlation of Virtual SCSIdisks only if AIX Multiple Path I/O (MPIO) or SDDPCM multipath driver isused on the Virtual I/O Server.
v If there is one or more Virtual SCSI disks present on an LPAR, Tivoli StorageProductivity Center considers the LPAR as a virtual machine. In this case, TivoliStorage Productivity Center does not include disk space for this LPAR in theTOTAL disk space reports.Disks that are assigned directly through the physical Fibre Channel adapter tothe LPAR in a Virtual SCSI environment are listed as virtual disks in TivoliStorage Productivity Center.
Login requirements
Use the padmin user ID when logging in to a Virtual I/O Server, padmin is themain administrator ID for Virtual I/O Servers. Upon login, a password change isrequired. There is no default password to remember.
The Virtual I/O Server does not support users logging in as root to install orconfigure Tivoli Storage Productivity Center agents. However, you can debugerrors generated by agents as a root user. For example, you can run the service.shscript to gather debugging information.
Upon logging in to the Virtual I/O Server, you are placed into a restricted Kornshell. The restricted Korn shell works the same way as a regular Korn shell, exceptyou cannot:v Change the current working directory.v Set the value of the SHELL, ENV, or PATH variable.v Specify the path name of the command that contains a redirect output of a
command with a >, >|, <>, or >.
As a result of these restrictions, you cannot run commands that are in locations notdefined in your PATH variable. These restrictions prevent you from directlysending the output of the command to a file, instead requiring you to pipe theoutput to the tee command.
Installation requirements
You must use the padmin user ID to perform the following actions:v Install the Storage Resource agent. See “Installing the Storage Resource agent on
the Virtual I/O Server” on page 198.v Run the commands to configure, start, and stop the agent. Go to the information
center. Search for managing the daemon.v For information about disk space requirements for the Storage Resource agent,
see “Hardware requirements” on page 1 (Hardware requirements for the TivoliStorage Productivity Center agents).
126 IBM Tivoli Storage Productivity Center: Installation and Configuration Guide

The installation requirements are:v Tivoli Storage Productivity Center supports Virtual I/O Server version 1.5.2 or
later.v The Virtual I/O Server for POWER5 processor-based systems, must have a
minimum of 512 MB of memory.v The Virtual I/O Server for POWER6 processor-based systems, must have a
minimum of 768 MB of memory.
General procedure to install and configure agents
To install and configure the agents on the Virtual I/O Server, complete thefollowing steps:1. Install Tivoli Storage Productivity Center.2. Install and configure the agents on the Virtual I/O Server.3. When you install the agents, they are automatically started4. Run a discovery job for the agents on the Virtual I/O Server.5. Collect information about a Virtual I/O Server by running probe, scan, and
ping jobs.6. View the storage information gathered by the monitoring jobs through the
topology viewer and reports that you can generate through the Fabric Managerand Data Manager.
See the IBM Tivoli Storage Productivity Center User's Guide for more informationabout how to use the Tivoli Storage Productivity Center user interface to collectand view information gathered by agents on the Virtual I/O Servers.
Planning for SQL access to Tivoli Storage Productivity Center's viewsUse this topic for planning to retrieve storage information that is stored in theTivoli Storage Productivity Center database repository.
Tivoli Storage Productivity Center stores the information collected by datacollection jobs in its DB2 database repository. The information in the databaserepository is organized into a set of tables. A view is a way of describing data thatexists in one or more of these tables.
You can use the Structured Query Language (SQL) to retrieve the information fromthese views and then use that information in reports and applications outside ofTivoli Storage Productivity Center, such Business Intelligence and Reporting Tools(BIRT), Microsoft Excel, and Crystal Reports. Other applications can also use theseviews to gather and import information that is collected by Tivoli StorageProductivity Center.
The views are created within a DB2 schema when you install the Tivoli StorageProductivity Center server. A schema defines the views and the fields within eachview. The name of the schema containing the views for Tivoli Storage ProductivityCenter is TPCREPORT.
To view this schema using the DB2 Control Center, complete the following steps:1. Start the DB2 Control Center.
Important: If you are using DB2 10.1, you must use the command-lineinterface.
Chapter 1. Planning for Tivoli Storage Productivity Center 127

2. Expand All Databases > TPCDB in the left-hand pane.3. Click Schemas.4. Click TPCREPORT in the content pane.
Before you can work with the data stored in views, keep in mind the followingplanning considerations:v A view is a logical table that consists of data that is generated by a query. A
view is based on an underlying set of base tables in the database repository, andthe data in a view is determined by a SELECT statement that is run on the basetables.
v The views are available in Tivoli Storage Productivity Center version 4.1 orhigher. If you want to retrieve data from the database repositories of previousversions of the product, you must first upgrade to version 4.1 or higher. SeeChapter 4, “Upgrading and migrating Tivoli Storage Productivity Center,” onpage 353 for information about how to upgrade Tivoli Storage ProductivityCenter.
v You must run data collection jobs to collect data about the storage resources inyour environment before you can retrieve data from views. The data collectedby probes, scans, pings, switch performance monitors, and subsystemperformance monitors populates those views.
v You must have proper authority to access and retrieve data from the views. Theviews can be accessed by the following users:– DB2 administrator– The DB2 user that Tivoli Storage Productivity Center uses to store and
retrieve information in the database repository– A view-only user that uses the operating system credentials associated to DB2
(for example, db2admin/password).v For information about performing the following tasks, go to the information
center. Search for Accessing views in the database repository.– Use the Business Intelligence and Reporting Tools (BIRT) report designer to
create a report based on the information available in Tivoli StorageProductivity Center's exposed views. See the following Web site for moreinformation about BIRT: http://www.eclipse.org/birt/phoenix/.
– View the report you created in BIRT through the Tivoli Common Reportingv1.2 feature of Tivoli Enterprise Portal. See the following web site for moreinformation about Tivoli Common Reporting: http://www.ibm.com/developerworks/spaces/tcr.
v See the following page on Tivoli Storage Productivity Center's support web sitefor detailed information about the views provided with Tivoli StorageProductivity Center: http://www.ibm.com/systems/support/storage/software/tpc. Search for Views Documentation.
Setting up a view-only user on WindowsThis topic provides information about how to set up a user with view-onlyprivileges for the exposed views in the TPCREPORT schema. This procedure is forWindows only.
To set up a user with view-only privileges on Windows, complete these steps:1. Create a new user on Windows. For example, create a user named TPCRPT.
a. Open Administrative Tools > Computer Management in the Control Panel.b. Click New User on the Action menu.
128 IBM Tivoli Storage Productivity Center: Installation and Configuration Guide

c. Enter information about the new user and click Create.d. Click Close.
2. Add the new user to the DB2USERS group. When you add the new user tothe DB2USERS group it automatically provides that user with SQL connectauthority only.a. Open User Accounts in the Control Panel.b. On the Users tab under Users for this computer, select the user account
name and click Properties.c. On the Group Membership tab, select the DB2USERS group and then OK.
3. Use the DB2 Control Center to assign SELECT only authority to the newuser.
Important: If you are using DB2 10.1, you must use the command-lineinterface.a. Start the DB2 Control Panel.b. In the Control Center navigation tree, expand TPCDB > User and Group
Objects.c. Select the DB Users folder. A list of users appears in the content pane.d. Select the new user that you created in step 1.e. Select Change... from the Selected menu while the new user is highlighted.f. Click the View tab. A list of views appears in the content pane. A green
check mark in the columns next to each view indicates that the user canperform the actions represented by those columns. A red circle with a linethrough it indicates that the user cannot perform the actions represented bythose columns.
g. Do not change the privileges for the views in the TPCREPORT schema. Thedefault settings for the views in the TPCREPORT schema indicate that thenew user cannot perform the following SQL commands against those views:INSERT, UPDATE, DELETE, CONTROL. Accept the default settings thatrestrict the new user from performing actions against the views.
h. Click the Schema tab. A list of schemas and the users level of authority foreach appears in the content pane.
i. Make sure that the user does not have CREATEIN, DROPIN, or ALTERINprivileges. This check ensures that the user has read-only access to theexposed Tivoli Storage Productivity Center views.
Monitoring your DB2 environmentIt is a good practice to monitor your DB2 environment to better understand whatis happening inside your DB2 data server. DB2 9.7 includes a new monitoringinfrastructure that you can access through new event monitors.
This infrastructure is a superior alternative to the existing system monitor, eventmonitors, snapshot commands, and snapshot SQL interfaces.
For more information about monitoring your DB2 environment, seehttp://publib.boulder.ibm.com/infocenter/db2luw/v9r7/index.jsp?topic=/com.ibm.db2.luw.wn.doc/doc/c0055019.html.
Planning for the Discovery Library AdapterUse this topic to plan for using the Discovery Library Adapter.
Chapter 1. Planning for Tivoli Storage Productivity Center 129

IBM Tivoli Storage Productivity Center provides a Discovery Library Adapterwhich can be used in a multiple IBM Tivoli products environment to exchangedata with other Tivoli products. The data gathered by IBM Tivoli StorageProductivity Center is put into a common data model format and written to a fileusing the Identification Markup Language. This file can be loaded into the changeand configuration management database (CCMDB) so that other Tivoli productssuch as Tivoli Application Dependency Discovery Manager or Tivoli BusinessService Manager can use that data.
The Discovery Library Adapter also enables Tivoli Application DependencyDiscovery Manager to be able to perform a launch in context operation to the IBMTivoli Storage Productivity Center server. The following IBM Tivoli StorageProductivity Center panels are accessible:v Topology view for computersv Topology view for fabricsv Topology view for switchesv Topology view for storage systems
Tivoli Storage Productivity Center Monitoring AgentThe Tivoli Storage Productivity Center Monitoring Agent can be used by the IBMTivoli Enterprise Monitoring Server to monitor systems in your enterprise. Thisagent is an optional program you can install and use in your enterprise.
IBM Tivoli Monitoring monitors and manages system and network applications ona variety of operating systems, tracks the availability and performance of yourenterprise system, and provides reports to track trends and troubleshoot problems.The Tivoli Storage Productivity Center Monitoring Agent participates in thatenvironment.
For performance reasons, install the Tivoli Storage Productivity Center server on aseparate system from the IBM Tivoli Monitoring server. You will be installing theTivoli Storage Productivity Center Monitoring Agent in the Tivoli StorageProductivity Center environment. You will also be installing the Tivoli StorageProductivity Center Monitoring Agent support files in the IBM Tivoli Monitoringserver environment.
Before using the Tivoli Storage Productivity Center Monitoring Agent, you musthave IBM Tivoli Enterprise Monitoring Server installed. For information about theIBM Tivoli Enterprise Monitoring Server, see http://publib.boulder.ibm.com/infocenter/tivihelp/v15r1/index.jsp?topic=/com.ibm.itm.doc_6.2.2/welcome.htm.
For information about installing IBM Tivoli Monitoring, see the Quick Start Guideat http://publib.boulder.ibm.com/infocenter/tivihelp/v15r1/index.jsp?topic=/com.ibm.itm.doc_6.2.2fp2/itm622fp2_qsg_en.htm .
This agent is on the installation media disk 1, part 4.
Hardware and software requirements
You must install Tivoli Agent Management Services version 6.2 or later onWindows, AIX or Linux. The following Tivoli Monitoring components are required:
Tivoli Enterprise Monitoring Agent Framework - TEMA
v Tivoli Enterprise Monitoring Agent Framework
130 IBM Tivoli Storage Productivity Center: Installation and Configuration Guide

v Warehouse Proxyv Summarization and Pruning Agentv Tivoli Enterprise Services User Interface Extensions
Tivoli Enterprise Monitoring Server - TEMS
v Tivoli Enterprise Monitoring Serverv Warehouse Proxyv Summarization and Pruning Agentv Monitoring Agent support for the corresponding operating system on
which the agent is installed
Tivoli Enterprise Portal Server - TEPS
v Tivoli Enterprise Portal Serverv Warehouse proxyv Monitoring Agent support for the operating system on which the agent
is installedv Summarization and Pruning Agent
Tivoli Enterprise Desktop Client - TEPD
v Tivoli Enterprise Desktop Clientv Warehouse Proxyv Monitoring Agent support for the operating system on which the agent
is installedv Summarization and Pruning Agent
Tivoli Enterprise Portal Browser Client
IBM Eclipse Help Server
Note: IBM Tivoli Monitor does not support the Tivoli Enterprise Portal DesktopClient (TEPDC) on AIX.
The following disk space is required:
MemoryApproximately 100 MB of RAM per agent instance.
Disk spaceApproximately 300 MB of disk space for the IBM Tivoli StorageProductivity Center Monitoring Agent. For information about disk spacerequired for historical data, see the IBM Tivoli MonitoringAdministrator's Guide at http://publib.boulder.ibm.com/infocenter/tivihelp/v15r1/index.jsp?topic=/com.ibm.itm.doc_6.2.2/itm_admin.htm.
To install the IBM Tivoli Storage Productivity Center Monitoring Agent, you musthave Administrator authority on Windows and root authority on AIX and Linux.
For information about installing the IBM Tivoli Enterprise Monitoring Server, seehttp://publib.boulder.ibm.com/infocenter/tivihelp/v15r1/index.jsp?topic=/com.ibm.itm.doc_6.2.2/itm_install86.htm.
Tivoli Agent Management ServicesThe Tivoli Agent Management Services extension of IBM Tivoli Monitoringmonitors the health and availability of Storage Resource agents that are run asdaemon processes.
Chapter 1. Planning for Tivoli Storage Productivity Center 131

The purpose of Agent Management Services is to provide customers with a centralview of various Tivoli agents, and to perform the following functions:v Monitors the health of Storage Resource agentsv Starts, stops, and manages agents
Through these functions, Tivoli Agent Management Services provides the followingbenefits for agent management:v Adds a dimension of fault tolerance to agents by keeping a deployed Storage
Resource agent up and running.v Reduces the mean time to recovery of failed agents to seconds, limiting the
number of situations that need to be configured to those reported asunrecoverable faults.
v Reduces the number of events flowing to your event managers to those reportedby Tivoli Agent Management Services.
For information about Tivoli Monitoring, see http://publib.boulder.ibm.com/infocenter/tivihelp/v15r1/index.jsp?topic=/com.ibm.itm.doc_6.2.2fp2/itm622fp2_qsg_en.htm .
A Tivoli Monitoring Agent for OS must be installed on every computer that youwant to monitor with a Storage Resource agent. The Tivoli Monitoring Agent forOS monitors all agents that have CAP files located in the CAP file directories. TheTivoli Agent Management Services can stop, start, and check the status of agentslisted in the CAP file. The CAP file is created when a daemon Storage Resourceagent is installed on a system.
For more information about the Tivoli Agent Management Services, seehttp://publib.boulder.ibm.com/infocenter/tivihelp/v15r1/topic/com.ibm.itm.doc_6.2.2fp2/agentmgmtsvcs_intro_tema.htm .
For information about Tivoli Monitoring supported platforms, seehttp://publib.boulder.ibm.com/infocenter/tivihelp/v15r1/topic/com.ibm.itm.doc_6.2.2fp2/ch2.4.htm#ch2.4.
On Windows, the status, start, and stop functions are handled through theWindows services.
The CAP file is installed in the following directories:
Windows%ALLUSERSPROFILE%\Application Data\IBM\CAP
For example:Windows 2008: C:\Program Data\IBM\CAPWindows 2003: C:\Documents and Settings\All Users\Application Data\IBM\CAP
Non-Windows/opt/IBM/CAP
CAP files are not configurable. You cannot change the location of these directories.
If the creation of the CAP file fails, you receive an error message in the installationlog file and trace log file. If the CAP is not created, the lack of a CAP file does notaffect the function of the Storage Resource agent. You can reinstall the agent withthe -force option to create the CAP file.
132 IBM Tivoli Storage Productivity Center: Installation and Configuration Guide
For more information about the CAP file or Tivoli Agent Management Services, seehttp://publib.boulder.ibm.com/infocenter/tivihelp/v15r1/topic/com.ibm.itm.doc_6.2.2fp2/agentmgmtsvcs_intro_tema.htm .
Planning to install Tivoli Storage Productivity CenterInstall Tivoli Storage Productivity Center on the system to manage storageresources, storage system management, fabric management, replicationmanagement, alerting, and analytical functions. Install Storage Resource agents oneach computer to collect information about the hosts, applications, storage systems,and SAN fabrics. The Storage Resource agents transfer that data to the TivoliStorage Productivity Center server.
Hardware and software requirements
Tivoli Storage Productivity Center can require a large amount of memory, diskspace, network bandwidth, and processor resources.
Tip: Use a dedicated server that is not running other applications when you installTivoli Storage Productivity Center. A dedicated server improves performance.
For information about hardware and software requirements, see “Planning forinstallation” on page 1. See the following website for any changes to product andplatform support: https://www.ibm.com/support/docview.wss?uid=swg21386446.
Read the Readme for IBM Tivoli Storage Productivity Center Version 5.1 onhttp://www.ibm.com/support/entry/portal/Overview/Software/Tivoli/Tivoli_Storage_Productivity_Center. The readme file contains last-minuteinformation that could not be included in the documentation.
Choosing the installation method
You can install Tivoli Storage Productivity Center by using the installation wizardor the command-line interface in silent mode. When you use silent mode, you runa command and provide the installation values in a response file.
To use the installation wizard on operating systems such as UNIX and Linux, youmust have X Window System software. For more information about the installationwizard, see “Installing Tivoli Storage Productivity Center in a single-serverenvironment by using the wizard” on page 166.
The installation wizard helps you install Tivoli Storage Productivity Center withminimal user interaction. The silent-mode installation is useful if your system isrunning from a terminal that cannot display graphics. For more information aboutusing the installation wizard, see “Installing Tivoli Storage Productivity Center in asingle-server environment by using the wizard” on page 166. For more informationabout installing the product in silent mode, see “Installing Tivoli StorageProductivity Center in a single-server environment by using silent mode” on page167 or “Installing Tivoli Storage Productivity Center with a remote database byusing silent mode” on page 179.
The installation procedures use the following directory to indicate where TivoliStorage Productivity Center is installed:
TPC_installation_directory
Chapter 1. Planning for Tivoli Storage Productivity Center 133

where the default directory for Windows operating systems is C:\ProgramFiles\IBM\TPC, and the default directory for AIX or Linux operating systems is/opt/IBM/TPC.
In Tivoli Storage Productivity Center, servers can include any of the followingtypes:v Data serverv Device serverv Replication server
Choosing an interface
Tivoli Storage Productivity Center has the following graphical user interfaces(GUIs):v web-based GUI, which provides simplified monitoring and troubleshooting
capabilities and helps you to complete the following tasks:– Find information about the capacity and health of the resources managed by
Tivoli Storage Productivity Center.– Display information about the web server, such as the internal and related
resources for the server.In the web-based GUI, you can only acknowledge and delete alerts.
v stand-alone GUI, which helps you add devices, manage devices, provision,schedule jobs, and create alerts.
For more information about the GUIs, go to the Tivoli Storage Productivity CenterInformation Center and search for Interfaces to Tivoli Storage Productivity Center.
Languages
When you install Tivoli Storage Productivity Center, you must select one of thefollowing languages:v Englishv Czechv Frenchv Germanv Hungarianv Italianv Japanesev Koreanv Polishv Brazilian Portuguesev Russianv Spanishv Chinese (Simplified)v Chinese (Traditional)
For more information about changing the operating system for the user interfaces,go to “Changing the operating system language” on page 192.
134 IBM Tivoli Storage Productivity Center: Installation and Configuration Guide

Messages, online help, and text are displayed in the language that you select. Youare not required to install a language pack after installation. When you use TivoliStorage Productivity Center, the language that is displayed is the language settingof the operating system.
To install Tivoli Storage Productivity Center on a Windows domain, see “Preparingto install Tivoli Storage Productivity Center in a Windows domain” on page 155and “Installing Tivoli Storage Productivity Center on a Windows domain” on page159.
If you are installing Tivoli Storage Productivity Center and want to use an existinginstance of Tivoli Integrated Portal 2.2, see “Tivoli Integrated Portal and TivoliCommon Reporting” on page 151.
Installation restrictions
Before you install Tivoli Storage Productivity Center, ensure that you are familiarwith following issues:
Installation images on AIXWhen you extract installation images, use the GNU tar program instead ofthe AIX tar program. The AIX tar program might truncate long file names,which can cause installation errors in Tivoli Storage Productivity Centerand Tivoli Integrated Portal.
Go to http://www.ibm.com/systems/power/software/aix/linux/toolbox/alpha.html and install GNU 1.14 or later. You need to specify this programas the default tar program in the PATH environment variable.
Cygwin softwareWhen you install Tivoli Storage Productivity Center on a Windowsoperating system and have Cygwin software on the same server, do notinclude Cygwin software as a path-related environment variable, forexample, the PATH variable.
Tivoli Common Reporting requirementsWhen you install Tivoli Storage Productivity Center on the Linux operatingsystem, there are other packages that you may need to install. See“Software requirements for operating systems” on page 4 for moreinformation about the packages that you need to install.
DB2 on AIX or LinuxWhen you install DB2 on operating systems such as AIX or Linux, bydefault DB2 is not configured to start when the server restarts. To ensurethat DB2 starts when the server starts, after you install DB2 on AIX orLinux, restart DB2, and run the following command:DB2_installation_directory/bin/db2iauto -on instance_name
where DB2_installation_directory is the location of DB2 and instance_name isdb2inst1.
Chapter 1. Planning for Tivoli Storage Productivity Center 135

Related tasks:“Installing Tivoli Storage Productivity Center with a remote database by using theinstallation wizard” on page 175You can install Tivoli Storage Productivity Center in a multiple-server environmentby using the installation wizard.“Installing Tivoli Integrated Portal and Tivoli Common Reporting by using theinstallation wizard” on page 177You can install Tivoli Integrated Portal, Tivoli Common Reporting, and theweb-based GUI in a multiple-server environment using the installation wizard.
Tivoli Storage Productivity Center componentsYou can install Tivoli Storage Productivity Center in single- or multiple-serverenvironments. In a single-server environment, all components are installed on oneserver.
When you install Tivoli Storage Productivity Center, the following components areinstalled:v Database repositoryv Data serverv Device serverv Replication serverv Stand-alone graphical user interface (GUI)v Web-based graphical user interface (GUI)v Command-line interface (CLI)v Storage Resource agentv IBM Tivoli Integrated Portalv IBM Tivoli Common Reporting
This table contains configuration scenarios, which are valid for both installationtypes. You can use the information in this table to help you install Tivoli StorageProductivity Center:
Table 26. Tivoli Storage Productivity Center configurations
If server A includes... If server B includes... Install in this order...
Data server, Device server,Replication server, databaserepository, web-based GUI,stand-alone GUI, CLI,Storage Resource agent,Tivoli Integrated Portal,Tivoli Common Reporting(single-server environment)
This scenario applies to asingle-server environment.There is no server B.
This scenario applies to asingle-server environment.There is no server B.
136 IBM Tivoli Storage Productivity Center: Installation and Configuration Guide

Table 26. Tivoli Storage Productivity Center configurations (continued)
If server A includes... If server B includes... Install in this order...
Data server, Device server,Replication server, web-basedGUI, stand-alone GUI, CLI,Storage Resource agent,Tivoli Integrated Portal,Tivoli Common Reporting(multiple-serverenvironment)
Database repository 1. Install the DB2 server onserver B.
2. Run the Tivoli StorageProductivity Centerinstallation program onserver B to install thedatabase repository.
3. Install the DB2 client onserver A.
4. Run the Tivoli StorageProductivity Centerinstallation program onserver A to install theremainder of the TivoliStorage ProductivityCenter components.
Data server, Device server,Replication server, databaserepository, stand-alone GUI,CLI, and Storage Resourceagent (multiple-serverenvironment)
Tivoli Integrated Portal,Tivoli Common Reporting,and the web-based GUI
1. Install the DB2 server onserver A.
2. Run the Tivoli StorageProductivity Centerinstallation program onserver A to install all thecomponents except forTivoli Integrated Portal,Tivoli CommonReporting, and theweb-based GUI.
3. Install the DB2 client onserver B.
4. Run the Tivoli StorageProductivity Centerinstallation program onserver B to install TivoliIntegrated Portal, TivoliCommon Reporting, andthe web-based GUI.
Tivoli Storage Productivity Center in an IPv4 or IPv6environment
Tivoli Storage Productivity Center can use both IPv4 and IPv6 addresses forcommunication between its components.
If you have a system that is configured for dual-stack networking (with both IPv4and IPv6 addresses), Tivoli Storage Productivity Center defaults to IPv4addressing.
For information about using IPv4 and IPv6, see “Planning for Internet ProtocolVersion 6” on page 47.
Chapter 1. Planning for Tivoli Storage Productivity Center 137

138 IBM Tivoli Storage Productivity Center: Installation and Configuration Guide

Chapter 2. Installing Tivoli Storage Productivity Center
Before you install IBM Tivoli Storage Productivity Center, you must install IBMDB2 because DB2 is required for the Tivoli Storage Productivity Center databaserepository.
Installing DB2This topic describes how to install DB2 Version 9.7 for operating systems such asLinux, AIX, or Windows.
Note: If you are installing DB2 9.7, see “Software requirements for the databaserepository” on page 14 for the versions supported.
Preparing to install DB2Before you install DB2, it is important to understand that default the user nameand groups are created. The DB2 administrator user name and password are usedto install IBM Tivoli Storage Productivity Center. You can use the default username and password or provide your own.
Note: Windows platforms do not support systems that are configured only forIPv6. (Windows is enabled for IPv6 and IPv4.)
Preparing to install DB2 on WindowsIf you have an administrator user ID that you want to use to install DB2 and IBMTivoli Storage Productivity Center, this user ID must be a member of theDB2ADMNS and the Administrator groups.
When you install DB2, these groups are created:v DB2ADMNS, which has all the required user rights assigned for administrative
authority.v DB2USERS, which has user rights assigned to DB2 users.
Assign users who need administrative authority to the DB2ADMNS group andDB2 users to the DB2USERS group. When you assign a user ID to either group, theuser ID has all the user rights required for that group. You do not have to assignindividual user rights to each user ID.
Important:
v The Windows user ID Administrator does not have the authority to create theTivoli Storage Productivity Center database TPCDB. The DB2 administrator userID that you need when you install IBM Tivoli Storage Productivity Center musthave DB2 administrative rights. The user ID needed to install IBM Tivoli StorageProductivity Center must be a member of the DB2ADMNS and Administratorsgroups. The DB2 user ID db2admin, which was created when you installed DB2,has the authority for Tivoli Storage Productivity Center. For valid DB2 user IDsand passwords, see http://publib.boulder.ibm.com/infocenter/db2luw/v9r7/index.jsp?topic=/com.ibm.db2.luw.admin.dbobj.doc/doc/c0007248.html.
Note: When you assign the Windows user ID Administrator to the DB2ADMNSgroup, this authority is active the next time the Administrator user ID logs in.
© IBM Corporation 2012 © IBM 2001, 2012 139

Preparing to install DB2 on UNIX or LinuxTo operate DB2 on operating systems such as UNIX or Linux, the instance owner,the fenced user, and the DB2 administration server user are required. These usersand groups are automatically created when DB2 is installed.
The user ID you need to install IBM Tivoli Storage Productivity Center must be theowner of the instance that you want to use. This user ID and password are createdwhen you install DB2.
Table 27. DB2 Setup wizard default user and group names
Required user Default user name Default group name Description
instance owner db2inst1 db2iadm1 Created in theinstance owner homedirectory. This userID controls all DB2processes and ownsall file systems anddevices used by thedatabases containedwithin the instance.
fenced user db2fenc1 db2fadm1 Used to runuser-definedfunctions (UDFs) andstored proceduresoutside of theaddress space usedby the DB2 database.
DB2 administrationserver user
dasusr1 dasadm1 Used to run the DB2administration serveron your system. Usedby the DB2 GUI toolsto performadministration tasks.This user does notcontain databasesand there is only oneadministration serverper machine.
Note: For valid DB2 user IDs and passwords, see http://publib.boulder.ibm.com/infocenter/db2luw/v9r7/index.jsp?topic=/com.ibm.db2.luw.admin.dbobj.doc/doc/c0007248.html.
Installing DB2 on a Windows operating systemBefore you can install Tivoli Storage Productivity Center, you must install DB2 andregister the DB2 license key.
To install DB2 on a Windows operating system, complete the following steps:1. Log on with a user ID that has Administrator authority on Windows.2. Insert the DB2 product DVD into the DVD drive or use the extracted DB2
installation image. Windows Autorun starts the Launchpad.If you are using Windows Autorun, the installation program should start in15-30 seconds. If the installation program does not start, complete one of thefollowing steps:
140 IBM Tivoli Storage Productivity Center: Installation and Configuration Guide

v In a command prompt, to start DB2 set up page, navigate to theDVD-ROM\server directory or the web image extraction\server folder andrun the setup.exe command.
v In Windows Explorer, navigate to the DVD-ROM\server directory or the webimage extraction\server folder, and double-click the setup.exe file.
3. On the DB2 Setup Launchpad page, click Install a Product.4. In the content pane, click Install New for DB2 Enterprise Server Edition
Version 9.7.5. In the Welcome to the DB2 Setup wizard for DB2 Enterprise Server Edition,
Version 9.7 panel, click Next.6. In the Software License Agreement page, read, accept the license agreement,
and click Next.7. In the Select the installation type page, select Typical and click Next.8. In Select installation, response file creation, or both page, select Install DB2
Enterprise Server Edition on this computer and save my settings in aresponse file.
9. Enter a response file name or accept the default and click Next.10. In the Select the installation folder page, enter a directory or use the default
and lick Next.11. In the Set user information for the DB2 Administration Server page, enter the
following information for User information:a. Leave Domain blank.b. In User name, type a user name of the DB2 user account that you want to
use.DB2 adds this user ID to the DB2ADMNS group.
c. Type your password and retype to confirm it.12. Select the Use the same user name and password for the remaining DB2
services checkbox and click Next.The user ID and password are used to install Tivoli Storage ProductivityCenter.
13. In the Configure DB2 instances page, click Next.
Note: This panel appears if you are installing DB2 on a computer that belongsto an accessible domain.
14. In the Prepare the DB2 tools catalog page, accept the defaults, click Next.The default is to not prepare the DB2 tools catalog.
15. In the Set up notifications page, clear the Set up your DB2 server to sendnotifications checkbox, and click Next.
16. In the Enable operating system security for DB2 objects page, accept thedefaults, and click Next.The default is to enable operating system security.
Note: If you have installed DB2 before on this system, and the DB2ADMSgroup exists, when you click Next in the security page, the following messageis displayed: :WarningThe group; name "DB2ADMS" already existsin the system and will be granted complete
Chapter 2. Installing Tivoli Storage Productivity Center 141

access to the DB2 folders and objects throughthe operating system.Click OK to continue installation, or clickCancel to input another group name.
17. In the Start copying files and create response file page, review the summaryinformation, and click Finish.
18. Read the information about the page and click Next.19. In the Install additional products page, do not install additional products, and
click Finish.20. The setup wizard closes and you return to the DB2 Welcome screen that now
has "Welcome to First Steps" in the left pane. Click Product Updates to seewhether there are any product updates.
21. Click Product Updates and install the necessary updates and click Exit.Attention: In the dialog box that is displayed, do not upgrade to DB2 9.5 fixpack 6 or DB2 9.7 fix pack 5. Tivoli Storage Productivity Center does notsupport DB2 9.5 fix pack 6 or DB2 9.7 fix pack 5 and installing these versionscan create installation errors.
22. On the Tivoli Storage Productivity Center download image or DVD package,find the db2ese_o.lic file, which is the DB2 Enterprise Server Edition, Version9.7 license key.
23. In the /db2/license/Windows directory, read and agree to the licenseconditions for DB2.
24. Register the license key in one of the following ways:
From the command line:Enter the db2licm command:
db2licm -a x:\db2\license\license_filename.lic
where x represents the DVD drive that contains the DB2 license keyfile and license_filename.lic is the license key file: db2ese_o.lic.
From the License Center:
To register the license key:a. Start the DB2 Control Center and click Tools > License Center.
Important: If you are using DB2 10.1, you must use thecommand-line interface.
b. Select the system and installed product for DB2 and click License> Add.
c. In the Add License window, select the directory that contains thelicense file.
d. Select the license file and click OK.25. Log off and log on to the system before you install Tivoli Storage Productivity
Center.
142 IBM Tivoli Storage Productivity Center: Installation and Configuration Guide

Related reference:“Preparing to install Tivoli Storage Productivity Center in a Windows domain” onpage 155Before you can install Tivoli Storage Productivity Center on a Windows domain,you must determine which installation method is appropriate, based on yourenvironment. You must also complete some prerequisite installations.
Installing DB2 on UNIX or Linux - GUI installThis topic describes how to install DB2 on operating systems such as UNIX orLinux using a GUI installation program.
Note: Before you install DB2 using the GUI, install the X11 graphic capability.
To install DB2 on an operating system such as UNIX or Linux, complete thefollowing steps:1. Log in as a user ID with root authority.2. Do one of the following:
v If you are not using a DVD, skip to step 6 and run db2setup from thedirectory where you have the DB2 source installation program.
v If you are installing a DVD, create a mount point called /cdrom by enteringmkdir /cdrom.
Note: If the installation program is compressed, you must use an extractiontool to decompress the downloaded file. See step 6 and run db2setup that islocated in the server directory.You can also select an existing mount point.
3. Insert the DB2 DVD and mount the DVD file system at the wanted mountpoint.
4. Run one of the following commands to add an entry to /etc/filesystems forthe DVD mount point:
AIX/usr/sbin/crfs -v cdrfs -p ro -d’cd0’ -m’/cdrom’ -A’no’mount /cdrom
Linuxmkdir /cdrommount -o ro /dev/cdrom /cdrom
The crfs command only has to be run once for a given mount point. For eachDVD you insert later, you can use mount and umount, for example, mount/cdrom and umount /cdrom.
5. Enter cd /cdrom to access the directory where the DVD is mounted.6. Enter ./db2setup to start the DB2 Setup wizard.7. Enter cd /cdrom/server and then ./db2setup to start the DB2 Setup wizard.8. On the DB2 Setup Launchpad page, click Install a Product.9. On the content page, click Install New for DB2 Enterprise Server Edition
Version 9.7 Fix Pack 4.10. On the Welcome to the DB2 Setup wizard page, click Next.11. On the Software License Agreement page, read, click Accept, and click Next.12. On the Select the installation type page, select Typical and click Next.13. On the Select installation, response file creation, or both page, select Install
DB2 Enterprise Server Edition on this computer and save my settings in aresponse file.
Chapter 2. Installing Tivoli Storage Productivity Center 143

14. Enter a response file name, or accept the default, and click Next.15. On the Select the installation directory page, enter a directory or use the
default and click Next.16. On the Install the IBM Tivoli System Automation for Multiplatforms (SA MP)
page, select Do not install SA MP, and click Next.17. On the Set user information for the DB2 Administration Server page, select
New user, and enter the following information:a. User name and password of the DB2 user account that you want to use.
DB2 adds this user ID to the DB2ADMNS group, and if this user ID doesnot exist, DB2 creates it.
b. Group namec. Passwordd. Home directory
18. Select Use default UID and Use default GID and click Next The DAS user isused to administer the DB2 database.
19. On the Set up a DB2 instance page, select Create a DB2 instance, and clickNext.
20. On the Set up partitioning options for the DB2 instance page, select Singlepartition instance, and click Next.
21. On the Set user information for the DB2 instance owner page, select Newuser, and enter the following information: The DB2 instance owner user is theuser you enter when installing Tivoli Storage Productivity Center.v User namev Group namev Passwordv Home directory
22. Select Use default UID and Use default GID, and click Next.23. On the Set user information for the fenced user page, select New user, and
enter the following information:v User namev Group namev Password and confirm passwordv Home directory
24. Select Use default UID and Use default GID, and click Next.25. On the Prepare the DB2 tools catalog page, select Do not prepare the DB2
tools catalog and click Next.26. On the Set up notifications page, select Do not set up your DB2 server to
send notifications at this time, and click Next.27. On the Start copying files and create response file page, review the summary
information, and click Finish.28. Read the information about the panel and click Finish.29. From the Tivoli Storage Productivity Center download image or DVD
package, find the db2ese_o.lic file for the DB2 Enterprise Server Edition,Version 9.7 license key.
30. Ensure that you understand and agree to the license conditions for DB2.31. You can register the license key by using one of the following ways:
v From the command line:
Enter the db2licm command:
144 IBM Tivoli Storage Productivity Center: Installation and Configuration Guide

db2licm -a x/server/db2/license/license_filename.lic
where x represents the DVD drive that contains the DB2 license key file andlicense_filename.lic is the license key file db2ese_o.lic.
v From the License Center:
a. Start the DB2 Control Center and click Tools > License Center.
Important: If you are using DB2 10.1, you must use the command-lineinterface.
b. Select the system and installed product for DB2 and click License >Add.
c. In the Add License window, select the directory that contains the licensefile.
d. Select the license file and click OK.
After you install DB2, edit the /etc/group file, add root to the db2iadm1 group.The db2iadm1 line in /etc/group looks like the following line: .db2iadm1:x:102:root
You must edit the /etc/group file and add db2inst1 to the group root. Afteradding db2inst1, the line should look like this line:root:x:0:root,db2inst1
Installing DB2 on AIX using the command lineYou can install DB2 on an operating system such as AIX using commands.
Ensure that you have:v Two to three GB of hard disk drive space for the DB2 installation tar file and
extracted files.v Chosen a file system with at least 30 GB for the Tivoli Storage Productivity
Center repository.
To install DB2 on the AIX operating system using the command line, complete thefollowing steps:1. Log in with a user ID that has root authority.2. Do one of the following steps:
v If you are not using a DVD, skip to step 5 and work from the directorywhere you have the DB2 source installation program.
v If you are using a DVD, create a mount point called /cdrom by enteringmkdir /cdrom.
3. Insert the DB2 DVD into the DVD drive and mount the file system at themount point. On AIX, you can use the crfs command to add an entry to/etc/filesystems for the mount point.
4. Run the following commands:/usr/sbin/crfs -v cdrfs -p ro -d’cd0’ -m’/cdrom’ -A’no’mount /cdrom
The crfs command must be run only once for a mount point. For each DVDyou insert after that, you can use mount and umount, for example, mount/cdrom and umount /cdrom.
5. Enter cd /cdrom and navigate to the directory where the DVD-ROM ismounted.
Chapter 2. Installing Tivoli Storage Productivity Center 145

6. Install the DB2 Manager.a. Create a temporary directory (for example, db2temp) to hold the DB2
installer tar file and extracted files.b. Copy or download the DB2 installer into db2temp. The name of the file
varies depending on the location from where the file is downloaded orcopied and the language to which it is associated.
c. Optional: If the DB2 installer file is compressed, use the appropriateextracting tool. For example, if the name of the file isv9.7fp4_aix64_server.tar.gz, enter gunzip v9.7fp4_aix64_server.tar.gz. Inthis example, v9.7fp4_aix64_server.tar.gz is displayed in the db2tempdirectory.
d. Create an installation directory by entering, for example, mkdir install.e. Enter cd install to change to the new installation directory.f. Extract the DB2 installation file. For example, if the name of the installation
file is v9.7fp4_aix64_server.tar , enter tar xvf ../v9.7fp4_aix64_server.tar .
g. Enter cd /db2temp/installer/ese/disk1 and navigate to the directory thatcontains the DB2 installation program db2_install.
h. Enter ./db2_install to run the command-line installation program.i. Select DB2.ESE. The Installation Summary is displayed, which indicates a
successful installation. DB2 is installed in /opt/ibm/db2.7. Create users and groups for use with DB2.
a. Enter mkgroup id=999 db2iadm1.b. Enter mkgroup id=998 db2fadm1.c. Enter mkgroup id=997 dasadm1.d. Enter mkuser id=1004 pgrp=db2iadm1 groups=db2iadm1
home=/home/db2inst1 db2inst1.e. Enter mkuser id=1003 pgrp=db2fadm1 groups=db2fadm1
home=/home/db2fenc1 db2fenc1.f. Enter mkuser id=1002 pgrp=dasadm1 groups=dasadm1 home=/home/dasusr1
dasusr1.g. Verify the owner of the directories by entering ls -ld /home/db2inst1. The
directory ownership is displayed as follows:v /home/db2inst1 shows group db2iadm1 and user db2inst1
v /home/db2fenc1 shows group db2fadm1 and user db2fenc1
v /home/dasusr1 shows group dasadm1 and user dasusr1
If the directory ownership is not correct, run the following commands asappropriate:chown -R db2inst1:db2iadm1 /home/db2inst1chown -R db2fenc1:db2fadm1 /home/db2fenc1chown -R dasusr1:dasadm1 /home/dasusr1
h. Enter passwd db2inst1 password, where password represents the passwordyou want to use for the DB2 instance.
i. Enter pwdadm -f NOCHECK db2inst1.j. Enter passwd db2fenc1 password, where password represents the password
you want to use for the fenced user.k. Enter pwdadm -f NOCHECK db2fenc1.l. Enter passwd dasusr1 password, where password represents the password
you want to use for the DB2 administration server (DAS) user.
146 IBM Tivoli Storage Productivity Center: Installation and Configuration Guide

m. Enter pwdadm -f NOCHECK dasusr1.n. Enter chgroup users=db2inst1,root db2iadm1.
8. Create a DB2 Administrative Server (DAS) and enter /opt/db2/V9.5/instance/dascrt -u dasusr1.
9. Create a DB2 instance:a. Enter /opt/db2/V9.5/instance/db2icrt -a server -u db2fenc1 db2inst1.b. Enter . /home/db2inst1/sqllib/db2profile.
10. Change the default location for database repositories. By default, this locationis /home/db2inst1. /home is typically not large enough for databaserepositories.
11. To change the default location:a. Enter db2 update dbm cfg using DFTDBPATH new_repository_path IMMEDIATE,
where new_repository_path represents the new location for the repository.b. Enter chown -R db2inst1:db2iadm1 new_repository_path to assign ownership
to db2inst1 and permission to anyone in db2iadm1(same as the ownershipfor /home/db2inst1.
12. Configure DB2 communication:a. Edit /etc/services and verify or add the following line at the end of the
file: db2c_db2inst1 50000/tcp
b. Enter db2 update dbm cfg using svcename db2c_db2inst1.c. Enter db2set. An example of the output is DB2COMM=tcpip.
13. From the Tivoli Storage Productivity Center download image or DVDpackage, find the db2ese_o.lic file for the DB2 Enterprise Server Edition,Version 9.7 license key.db2licm -a x:\db2\license\license_filename.lic
where x represents the DVD drive that contains the DB2 license key file andlicense_filename.lic is the license key file: db2ese_o.lic.
14. To list the license after you add it, at the command prompt, enter thiscommand:db2licm -l
15. Read and agree to the DB2 license terms that are located in the/db2/license/Windows directory.
16. Register the license key by entering the db2licm -a x:\db2\license\license_filename.lic command.
17. Enter the following commands to restart DB2:db2stop forcedb2 terminatedb2start
18. In a command window, do the following to test your DB2 instance:a. Enter . /home/db2inst1/sqllib/db2profile to source the environment.b. Enter db2level to get information about the instance and DB2.c. Enter db2 create db test to create a test database.d. Enter db2 list db directory to list information about all the databases
created for this instance.e. Enter db2 connect to test user db2inst1 using password to connect to
the test database, where password is the password you defined in step 7 forthe DB2 instance.
f. Enter db2 disconnect test to disconnect from the test database.
Chapter 2. Installing Tivoli Storage Productivity Center 147

g. Enter db2 drop db test to drop the test database.
Installing DB2 on AIX 6.1 POWER7 SystemsThis topic describes how to install DB2 on AIX 6.1 POWER7 Systems.
Ensure that you have run export JAVA_COMPILER=none from a command window.This command is necessary as a result of APAR IC63450.
To install DB2, complete the following steps:
For more information about installing DB2, see http://publib.boulder.ibm.com/infocenter/db2luw/v9r7/index.jsp?topic=/com.ibm.db2.luw.qb.server.doc/doc/t0006833.html .1. Log on using a user ID with root authority.2. Do one of the following:
v If you are not using a CD, you can skip to step 5 and run db2setup fromthe directory where you have the DB2 source installation program.
v If you are using the CD, enter, for example, mkdir /cdrom to create a mountpoint called /cdrom,
3. Insert the DB2 CD into the CD drive.On AIX, you can use the crfs command to add an entry to /etc/filesystemsfor the CD mount point.
4. Mount the CD file system at the wanted mount point.5. Run the following commands:
/usr/sbin/crfs -v cdrfs -p ro -d'cd0' -m'/cdrom' -A'no' mount /cdrom
The crfs command only must be run once for a given mount point. For eachCD or DVD you insert after that, you can use mount and umount, forexample, mount /cdrom and umount /cdrom.
6. Enter cd /cdrom and change to the directory where the CD is mounted.7. Run the following command from the installation image:
./db2_install
Enter the necessary information.
Note: If the following message is displayed: :WARNING: A minor error occurred while installing
check the installation log for errors. If you do not see any errors, ignore thiswarning message.
8. Create DB2 groups, users, and instances.a. For the DB2 groups, run the following commands:
mkgroup id=999 db2iadm1mkgroup id=998 db2fadm1mkgroup id=997 dasadm1
b. For the DB2 users, run the following commands:mkuser id=1004 pgrp=db2iadm1 groups=db2iadm1
home=/home/db2inst1 db2inst1mkuser id=1003 pgrp=db2fadm1 groups=db2fadm1home=/home/db2fenc1 db2fenc1mkuser id=1002 pgrp=dasadm1 groups=dasadm1home=/home/dasusr1 dasusr1
c. Set the password for db2inst1, db2fenc1, and dasusr1 by running thefollowing commands:
148 IBM Tivoli Storage Productivity Center: Installation and Configuration Guide

passwd db2inst1passwd db2fenc1passwd dasusr1
d. Setting the new passwords might require that you log in once to changethe initial password.login db2inst1
Change the initial password and replace with a new password. Repeat thisstep for db2fenc1 and dasusr1 users.
e. Create the db2inst1 instance by running the following command:/opt/IBM/db2/V9.7/instance/db2icrt -a server -u db2fenc1 db2inst1
f. Create the dasusr1 instance by running the following command:/opt/IBM/db2/V9.7/instance/dascrt dasusr1
9. Assign a communication port for the DB2 instance in the /etc/services file.a. Select a name that is related to the instance name.b. Select a free port, for example, 50000. Add the following line to the
/etc/services file:db2inst1c 50000/tcp
10. Configure the communication port in the database manager configuration forthe instance:db2 update dbm cfg using SVCENAME db2inst1c
11. Enable TCP/IP for the instance:db2set DB2COMM=TCPIP
12. From the Tivoli Storage Productivity Center download image or DVDpackage, find the db2ese_o.lic file for the DB2 Enterprise Server Edition,Version 9.7 license key:db2licm -a x/db2/license/license_filename.lic
where x represents the DVD drive that contains the DB2 license key file andlicense_filename.lic is the license key file: db2ese_o.lic.
13. Restart the database instance:14. Read and agree to the license conditions that are located in the
/db2/license/Windows directory.15. To register the license key, enter the db2licm command from the command
line:su - db2inst1db2stopdb2start
Note: After you install DB2, edit the file /etc/group and add root to the db2iadm1group. The db2iadm1 line in /etc/group looks like the following line:db2iadm1:x:102:root
Verifying that DB2 is installed correctlyYou can verify that DB2 has been installed properly using the command-lineprocessor (CLP) or the First Steps GUI.
To verify that DB2 has been installed, complete the following steps:1. Create the SAMPLE database.2. Connect to the SAMPLE database.3. Run a query against the SAMPLE database.4. Drop the SAMPLE database.
Chapter 2. Installing Tivoli Storage Productivity Center 149

Verifying DB2 installation using the command-line processor(CLP)You can verify that DB2 has been successfully installed using the command-lineprocessor (CLP).
To verify that DB2 is installed using the command line processor, complete thefollowing steps:1. Log on to the system as a user with SYSADM authority.2. Enter db2start to start the database manager.
Note: In operating systems such as UNIX and Linux, you must source thedb2profile before you run the db2start command. For more informationsourcing the profile, go to the Tivoli Storage Productivity Center informationcenter and search for Using the command line on UNIX and Linux.
3. Enter the db2sampl command to create the SAMPLE database. This commandmight take a few minutes to process. There is no completion message. Whenthe command prompt returns, the process is complete. The SAMPLE database isautomatically cataloged with the database alias SAMPLE when it is created.
4. Enter the following commands in a DB2 command window to connect to theSAMPLE database, retrieve a list of all the employees who work in Department20, and reset the database connection:db2 connect to sampledb2 "select * from staff where dept = 20"db2 connect reset
5. After verifying the installation, remove the SAMPLE database to free up diskspace. For more information about verifying DB2 installation, refer to the DB2documentation for your operating system.
6. Enter db2 drop database sample to drop the SAMPLE database.
Verifying DB2 installation using First StepsYou can use First Steps to verify that DB2 has been installed successfully.v Ensure that the domain user account you use to create the sample database has
SYSADM or SYSCTRL authority.v Install Control Center and the First Steps component.
Important: If you are using DB2 10.1, you must use the command-line interface.
First Steps are part of the getting started component grouping in the DB2 Setupwizard. It is installed as part of a typical installation or can be selected during aCustom installation.
To verify the DB2 installation using First Steps, complete the following steps:1. Log on to the system with the user account that you want to use to verify the
installation.2. Start First Steps by doing one of the following:
v On operating systems such as UNIX or Linux, type db2fs.v On Windows, type db2fs.bat.
3. On the First Steps launchpad, select Create Sample Databases.4. On the Create Sample Databases page, select the databases you want to create
and click OK. The DB2 UDB sample database is used to verify the installation.By default, the SAMPLE database is created on the computer where DB2 isinstalled. When the SAMPLE database has been created, you receive acompletion message.
150 IBM Tivoli Storage Productivity Center: Installation and Configuration Guide

5. Click OK.6. Open the DB2 Control Center. You can perform administration tasks on
different instance and database objects through the Control Center.7. Expand the Control Center object tree to view the SAMPLE database and SAMPLE
database objects.8. Select the Tables object to view the SAMPLE database tables in the content pane.9. After verifying the installation, remove the SAMPLE database to free up disk
space. For more information about verifying DB2 installation, refer to the DB2documentation for your operating system.
10. Enter db2 drop database sample to drop the SAMPLE database.
Installing Tivoli Storage Productivity CenterTivoli Storage Productivity Center provides an installation program that guidesyou through the installation process. You can use the installation wizard or thecommand line in silent mode.
Tivoli Storage Productivity Center installationYou can install Tivoli Storage Productivity Center by using the installation wizardor the command line in silent mode.
Overview
When you install Tivoli Storage Productivity Center, Tivoli Integrated Portal andTivoli Common Reporting are automatically installed. You can specify a location toinstall the new instance of Tivoli Integrated Portal. You can reuse an existing TivoliIntegrated Portal instance, if its authentication mechanism is using the operatingsystem repository or the Federated repositories.
Fully qualified host names
Some systems might be configured to return a short host name such as server22,instead of a fully qualified host name such as server22.myorg.mycompany.com.Tivoli Storage Productivity Center requires fully qualified host names, so you mustinstall the software on a computer that has a fully qualified host name.
Installation method
You can install Tivoli Storage Productivity Center by using the installation wizardor the command line in silent mode. In silent mode, a command is provided withthe values in a response file.
Use the installation wizard to install Tivoli Storage Productivity Center withminimal user interaction. Use the silent-mode installation if your system is runningfrom a terminal that cannot display graphics.
Important: On UNIX operating systems (for example, AIX or Linux) you musthave X Windows support to display the installation wizard graphical user interface(GUI).
Tivoli Integrated Portal and Tivoli Common Reporting
You can install a new instance of Tivoli Integrated Portal 2.2 and Tivoli CommonReporting 2.1.1, or you can reuse the existing instances.
Chapter 2. Installing Tivoli Storage Productivity Center 151

The installation program detects the existing instances of Tivoli Integrated Portal.The unsupported instances are disabled or grayed out. A Tivoli Integrated Portalinstance is shown as unsupported if any of the following is true:v Tivoli Integrated Portal version is lower than Version 2.2.v Tivoli Common Reporting version is lower than Version 2.1.1.v Tivoli Integrated Portal is a 64-bit instance and does not have 64-bit Tivoli
Common Reporting and 64-bit Embedded Security Services components installedon it.
During the installation, if Tivoli Integrated Portal Version 2.2 is not detected, a newinstance of Tivoli Integrated Portal Version 2.2 is installed. Tivoli CommonReporting 2.1.1, Embedded Security Services, and the web-based GUI componentsare also installed. During this process, you must enter a Tivoli Common Reportingport. Tivoli Storage Productivity Center always installs 32-bit versions of thesecomponents.
If an instance of Tivoli Common Reporting 2.1.1 and Tivoli Integrated Portal 2.2are detected, those instances are used by Tivoli Storage Productivity Center. Whenyou use an existing instance of Tivoli Integrated Portal, you must enter the sameadministrative user name and password that you used when you installed theTivoli Integrated Portal instance.
When you uninstall Tivoli Integrated Portal 1.1 and an instance of Tivoli IntegratedPortal 2.2 does not exist, the ports, administrative user name, and password thatwere used in Version 1.1 are reused for Version 2.2.
Important:
v Tivoli Storage Productivity Center can only detect the Tivoli Integrated Portalinstances that were installed by a root user. If you are planning to share a TivoliIntegrated Portal instance with Tivoli Storage Productivity Center and otherproducts, such as IBM® Tivoli® Business Service Manager 6.1, you must alsoinstall those products as a root user.
v Tivoli Storage Productivity Center always installs a 32-bit version of TivoliCommon Reporting 2.1.1 and Embedded Security Services. As a result, TivoliStorage Productivity Center can only reuse an existing 64-bit Tivoli IntegratedPortal instance that already has the 64-bit Tivoli Common Reporting and the64-bit Embedded Security Services components installed on that instance.
The following installation images are included with Tivoli Storage ProductivityCenter:v Tivoli Storage Productivity Center for AIXv Tivoli Storage Productivity Center for Linuxv Tivoli Storage Productivity Center for Windowsv Tivoli Storage Productivity Center Storage Resource Agent
The Tivoli Storage Productivity Center installation image has the following disks:v Disk 1, which comprises the following parts:
– Disk 1, Part 1, the base Tivoli Storage Productivity Center installationprogram.
– Disk 1, Part 2, the Tivoli Storage Productivity Center Device and ReplicationServer installation programs.
– Disk 1, Part 3, the base Tivoli Integrated Portal installation program.
152 IBM Tivoli Storage Productivity Center: Installation and Configuration Guide

– Disk 1, Part 4, the Tivoli Common Reporting and Embedded SecurityServices installation programs.
– Disk 1, Part 5, the Tivoli Integrated Portal Temporary Fix (PTF) installationprogram.
– Disk 1, Part 6, the Tivoli Common Reporting interim fixes.Download each of the Disk 1 compressed image files to the same directory (forexample, c:\tpcdownload). After you download the files, extract each file into thesame target directory (for example, c:\tpcinstall) in order (for example, firstDisk 1 - part 1, then Disk 1 - part 2, and so on).While you extract the files, if you are prompted to merge (or replace) folders orfiles with the same name, click Merge/Replace.
v Disk 2, which comprises the following:– Disk 2, itm_unix1 and itm_unix2, the Tivoli Storage Productivity Center
Monitoring Agent installation program for IBM Tivoli Monitoring on theUNIX operating system.
– Disk 2, itm_windows, the Tivoli Storage Productivity Center MonitoringAgent installation program for IBM Tivoli Monitoring on the Windowsoperating system.
– Disk 2, sde_unix, which is the IBM System Discovery Engine on the Unixoperating system.
– Disk 2, sde_windows, which is the IBM System Discovery Engine on theWindows operating system.
Tivoli Storage Productivity Center installation package
The following software is included with Tivoli Storage Productivity Center:v DB2 9.7 for Windows (32-bit)v DB2 9.7 for Windows (64-bit)v DB2 9.7 for Linux (64-bit)v DB2 9.7 for AIX (64-bit)
Tivoli Monitoring server and DB2 installation images are included with TivoliStorage Productivity Center.
The Tivoli Monitoring server that is included with Tivoli Storage ProductivityCenter has a limited license and that can be used to manage or monitor your TivoliStorage Productivity Center environment. The product license defines the specificentitlements.
The following software is included with the Tivoli Monitoring server installationimages:v IBM Tivoli Monitoring 6.2.2.2 Server for Windowsv IBM Tivoli Monitoring 6.2.2.2 Server for Linuxv IBM Tivoli Monitoring 6.2.2.2 Server for UNIXv IBM Tivoli Monitoring 6.2.2.2 Agent (this is the Tivoli Monitoring Agent for the
operating system)v IBM Tivoli Monitoring 6.2.2.2 National Language Support
For information about installing these components, see http://publib.boulder.ibm.com/infocenter/tivihelp/v15r1/index.jsp?topic=/com.ibm.itm.doc_6.2.2fp2/installation.htm .
Chapter 2. Installing Tivoli Storage Productivity Center 153
|

For information about the supported platforms for Tivoli Monitoring, seehttp://publib.boulder.ibm.com/infocenter/tivihelp/v15r1/topic/com.ibm.itm.doc_6.2.2fp2/ch2.4.htm#ch2.4.
Windows domain and local user accountsWhen a computer is a member of a Windows domain, you can install IBM DB2 onthe local computer or on a computer that is a member of a Windows domain. Theinstallation process creates a local DB2 user account or a domain DB2 user account.
User accounts
Windows domain user accounts are used to manage multiple computers, and localuser accounts can be used to manage one computer.
Restriction: Before you install Tivoli Storage Productivity Center by using aWindows domain or a local user account as the common user name, you must addthe Windows domain user account or local user account to the local administratorsgroup. The Tivoli Storage Productivity Center installation software only recognizesWindows domain or local user accounts (and not Windows domain or localgroups) that are added to the local administrators group.
domain DB2 user account is an example of a Windows domain user account, andlocal DB2 user account is an example of a local user account.
Naming conventions for user accounts
You can install Tivoli Storage Productivity Center by using the same user accountthat is defined in both the local and Windows domain registries. The Windowsoperating system resolves this naming collision on computers that belong to aWindows domain by prefixing the user name with the host name or domain name.This user name is also called a fully qualified user name.
You must use the following naming conventions for each user account:v domain_name\administrator
v domain_name\user 1, domain_name\user2, domain_name\userN.v host_name\administrator
v host_name\user1, host_name\user2, host_name\userN.
For example, if the domain name is TPC51, and the user name is db2admin, theWindows domain user account is TPC51\db2admin. The naming convention for alocal user account is host_name\user name. For example, if the host name ismachine2, and the user name is db2admin, the user account is machine2\db2admin.
You must enter the fully qualified user names in the common user and TivoliIntegrated Portal user name fields when you install Tivoli Storage ProductivityCenter on computers that are members of a Windows domain.
Installation considerations
As part of your planning process, you must determine which user accounts to usewhen you install Tivoli Storage Productivity Center and DB2, consider theenvironment and security requirements.
154 IBM Tivoli Storage Productivity Center: Installation and Configuration Guide
|
|||
|
||
||||||
||
|
|||||
|
|
|
|
|
||||
|||
|
|||

Related reference:“Preparing to install Tivoli Storage Productivity Center in a Windows domain”Before you can install Tivoli Storage Productivity Center on a Windows domain,you must determine which installation method is appropriate, based on yourenvironment. You must also complete some prerequisite installations.“Installing Tivoli Storage Productivity Center on a Windows domain” on page 159You can install Tivoli Storage Productivity Center and DB2 by using a Windowsdomain or a local user account.
Preparing to install Tivoli Storage Productivity Center in aWindows domain
Before you can install Tivoli Storage Productivity Center on a Windows domain,you must determine which installation method is appropriate, based on yourenvironment. You must also complete some prerequisite installations.
Installation methods
Install DB2 and Tivoli Storage Productivity Center in one of the following ways:v Use local user accounts to install both DB2 and Tivoli Storage Productivity
Center (common and Tivoli Integrated Portal).v Use a local user account to install DB2 and a domain user account to install
Tivoli Storage Productivity Center (common and Tivoli Integrated Portal).v Use domain user accounts to install both DB2 and Tivoli Storage Productivity
Center (common and Tivoli Integrated Portal).
When you are ready to install Tivoli Storage Productivity Center on a Windowsdomain, see “Installing Tivoli Storage Productivity Center on a Windows domain”on page 159.
Adding a computer to the Windows domain
To add a computer by using the Windows XP operating system to a Windowsdomain, complete the following steps:
Note: These steps will vary if you are using a different Windows operating system.1. Access the network connections for your computer in one of the following
ways:v Click Start > Network.v Right-click on the network.
2. On the Network and Sharing Center window, to access your networkconnection, click one of the following options:v Manage Network Connectionsv Select your Local Area Connection
3. Open the properties page for the network.4. Select Internet Protocol Version 4 (TPC/IP4).5. On the General tab, in Preferred DNS server field, enter the IP address of the
domain controller computer.6. Click Advanced.7. In the Advanced TCP/IP Settings window, click the DNS tab.8. In the Append these DNS Suffixes (in order) window, click Add.
Chapter 2. Installing Tivoli Storage Productivity Center 155
|
||||
|||
|
|
|||
|
|
||
||
||
|||
|
||
|
||
|
|
||
|
|
|
|
||
|
|
|
9. Enter the fully qualified domain name and click OK. For example, you canenter vero1.storage.tucson.ibm.com.
10. In DNS suffix for this connection field, enter the fully qualified domainname.
11. Right-click My Computer and click Properties > Advanced System Settings.12. In the Computer Name tab, click Change > More.13. In Primary DNS Suffix of this computer, enter the fully qualified domain
name of the domain controller computer and click OK.14. In the Computer Name/Domain Changes window, select Domain, enter the
fully qualified domain name, and click OK.15. Enter the user name and password for the domain controller computer.16. Restart the computer.
You can log on to a computer that is a member of a Windows domain by enteringa user name that is prefixed with the domain name. For example, you can enterTPC51\Administrator if you are the domain administrator of the TPC51 domain.
Verifying that the Computer Browser service is running
Attention: When Tivoli Storage Productivity Center is installed by using Windowsdomain user accounts, the Computer Browser service must be enabled andrunning.
To verify that the Computer Browser service is running on the domain controllercomputer and the computer that is a member of a domain, complete the followingsteps:1. Right-click Computer and select Manage.2. In the navigation tree, click Server Manager > Configuration > Services.3. Verify that the Computer Browser service is started.
If the service has a Stopped/Disabled status on the domain controllercomputer, you must also restart the computer that is a member of a Windowsdomain after you start the service on the domain controller computer.
4. In a Command Prompt window, enter the following command:net view
If there are no errors, the domain is correctly configured and the computerbrowser is working.
For information about installing Tivoli Storage Productivity Center and DB2 byusing a Windows domain user account, see “Installing Tivoli Storage ProductivityCenter on a Windows domain” on page 159.
Installing DB2 by using a Windows domain user account
Before you can install Tivoli Storage Productivity Center in a Windows domain,you must install DB2. You do not have to complete this task if you are planning toinstall DB2 by using a local user account.
To install DB2 by using a domain user account, complete the following steps:1. Log on to Windows by using a domain administrator user account (for
example, TPC51\Administrator).
156 IBM Tivoli Storage Productivity Center: Installation and Configuration Guide
||
||
|
|
||
||
|
|
|||
|
|||
|||
|
|
|
|||
|
|
||
|||
|
|||
|
||

2. In a Command Prompt window, go to the directory where the installationimage is located (for example DB2_ installation_dir\license\ESE\image andrun the following command:runas /USER:domain name\Administrator db2\Windows\utilities\db2schex.exe
where domain name is the name of your domain, for example, TPC.3. In the window that is displayed, enter a password and click OK.4. In Windows Explorer, go to the directory where DB2 installation image is
located.5. Right-click setup.exe and select Run as administrator.6. Complete the DB2 setup wizard.7. On the Set user information for the DB2 Administration Server page, in the
User Information pane, select your domain.8. Enter a domain user name and password.
Tip: You can reuse an existing domain user name or create one during theinstallation.
9. On the Enable operating system security for DB2 objects page, complete thefollowing steps:a. Verify that Enable operating system security check box is selected.b. In the DB2 administrators group and DB2 users group sections, select the
domain.
Note: Before you install Tivoli Storage Productivity Center, you must create theDB2 administrative and DB2 users group manually on the domain controllercomputer. If the DB2 installation program cannot create the DB2 administratorsgroup on the domain, the installation can fail.
For more information about creating users in DB2, go to the DB2 informationcenter and search for Creating databases and users for DB2.
Installing Microsoft .NET Framework 3.5
These steps apply only to a Windows 2008 (64-bit) environment.
If you are using a Windows 2008 32-bit environment, you must manuallydownload and install .NET, as described in the error message BPCIN0216E. Formore information about this message, go to the Tivoli Storage Productivity Centerinformation center and search for BPCIN0216E in the IBM Tivoli StorageProductivity Center Messages Guide.
Restriction: You cannot run these commands on a Windows PowerShell (x86).
To install Microsoft .NET Framework 3.5, complete the following steps:1. Click Start > All Programs > Accessories > Window PowerShell > Window
PowerShell.2. To install the .NET Framework software, in the Windows PowerShell window,
enter the following text:Import-Module ServerManagerAdd-WindowsFeature as-net-framework
Chapter 2. Installing Tivoli Storage Productivity Center 157
|||
|
|
|
||
|
|
||
|
||
||
|
||
||||
||
|
|
|||||
|
|
||
||
||

Creating a Windows domain common user account for TivoliStorage Productivity Center
To create a domain common user account for Tivoli Storage Productivity Center,complete the following steps:1. Log on to the domain controller computer by using a domain administrator
user account.2. Click Start > Administrative Tools > Active Directory Users and Computers.3. Create a domain common user account for Tivoli Storage Productivity Center
(for example, commonid).4. Log on to the domain client computer on which you want to install Tivoli
Storage Productivity Center by using a domain administrator user account.5. Open Server Manager.6. In the navigation tree, click Server Manager > Configuration > Local Users
and Groups > Groups.7. Add the domain common user name that you created in step 3 (commonid) to
the local administrator group.
Restriction: When you install Tivoli Storage Productivity Center with by using aWindows domain user account, the sAMAccountName and userPrincipalName (theUser login name) Active Directory attributes in the Windows domain user accountcannot contain spaces. The sAMAccountName must have the same value as the partof the userPrincipalName Active Directory attribute that precedes the @ character.
Granting DB2 SYSADM authority to a Windows domain useraccount
If a Windows domain user account is used to install Tivoli Storage ProductivityCenter, the user account may not have the DB2 SYSADM authority, because DB2goes to the domain controller computer to list the groups.
Before you install Tivoli Storage Productivity Center, to grant the Windows domainuser accounts the DB2 SYSADM authority, enter the following commands:db2cmddb2set -g DB2_GRP_LOOKUP=local,TOKENLOCALdb2 force application alldb2stopdb2startdb2set -all
To enter the commands, complete the following steps:1. Click Start > Command Prompt.2. Right-click Command Prompt and select Run as administrator.3. Enter these commands:
db2cmddb2set -g DB2_GRP_LOOKUP=local,TOKENLOCALdb2 force application alldb2stopdb2startdb2set -all
After you run the commands, you can log in to Tivoli Storage Productivity Centerby using a user account that has DB2 SYSADM authority.
158 IBM Tivoli Storage Productivity Center: Installation and Configuration Guide
||
||
||
|
||
||
|
||
||
|||||
||
|||
||
||||||
|
|
|
|
||||||
||

If you are logged in by using your Windows domain user account, you may nothave the authorization to run the db2 force application all command.
Important: When you grant DB2 SYSADM authority, and the db2 forceapplication all command does not work, you can enter the db2stop commandinstead of the db2 force application all command.
For more information about acquiring user group information in the Windowsoperating system, see http://publib.boulder.ibm.com/infocenter/db2luw/v9r5/index.jsp?topic=%2Fcom.ibm.db2.luw.admin.sec.doc%2Fdoc%2Fc0011958.html.
For more information about the sysadmin_group parameter, seehttp://publib.boulder.ibm.com/infocenter/db2luw/v9r5/index.jsp?topic=%2Fcom.ibm.db2.luw.admin.config.doc%2Fdoc%2Fr0000311.html.Related reference:“Installing Tivoli Storage Productivity Center on a Windows domain”You can install Tivoli Storage Productivity Center and DB2 by using a Windowsdomain or a local user account.
Installing Tivoli Storage Productivity Center on a Windowsdomain
You can install Tivoli Storage Productivity Center and DB2 by using a Windowsdomain or a local user account.
Installing Microsoft .NET Framework
Before you install Tivoli Storage Productivity Center on a Windows domain, youmust install Microsoft .NET Framework.
Important: The steps in this procedure apply only if you are installing Microsoft.NET Framework in a Windows 2008 R2 (64-bit) environment. If you are using aWindows 2008 R2 32-bit environment, you must manually download and installMicrosoft .NET Framework, as described in error message BPCIN0216E. For moreinformation about this message, go to the Tivoli Storage Productivity Centerinformation center and search for BPCIN0216E in the IBM Tivoli StorageProductivity Center Messages Guide.
Prerequisite: You cannot run the commands to install the .NET Frameworksoftware on a Windows PowerShell (x86).
To install Microsoft .NET Framework software, complete the following steps:1. Click Start > All Programs > Accessories > Window PowerShell > Window
PowerShell.2. To install the .NET Framework software, in the Windows PowerShell window,
run the following commands:Import-Module ServerManagerAdd-WindowsFeature as-net-framework
Installation Methods
Install DB2 and Tivoli Storage Productivity Center in one of the following ways:v Use local user accounts to install both DB2 and Tivoli Storage Productivity
Center (common and Tivoli Integrated Portal).
Chapter 2. Installing Tivoli Storage Productivity Center 159
||
|||
|||
|||
|
|||

v Use a local user account to install DB2 and a domain user account to installTivoli Storage Productivity Center (common and Tivoli Integrated Portal).
v Use domain user accounts to install both DB2 and Tivoli Storage ProductivityCenter (common and Tivoli Integrated Portal).
Remember: For more information about the prerequisite installations and planningyour Tivoli Storage Productivity Center installation on a Windows domain, see“Preparing to install Tivoli Storage Productivity Center in a Windows domain” onpage 155.
Installing DB2 and Tivoli Storage Productivity Center by usinglocal user accounts
Prerequisite: If the local user account is used to install the database repository, thisaccount must be a member of the DB2 administrator (DB2ADMNS) group.
To install Tivoli Storage Productivity Center and DB2 by using local user account,complete the following steps:1. Install DB2 by using a local user account.
For more information about installing DB2 on a Windows domain, see“Preparing to install Tivoli Storage Productivity Center in a Windows domain”on page 155.
2. Log on to Tivoli Storage Productivity Center by using a local user account thatis a member of the local administrator and the local DB2 administrator(DB2ADMNS) groups.
3. In the Single Server Installation Information window, in the Common UserName and Password field, enter a local user account that is a member of localadministrator group.
Installing DB2 by using a local user account and Tivoli StorageProductivity Center by using a domain user account
Prerequisite: If the domain user account is used to install the database repository,this account must be a member of DB2 administrator (DB2ADMNS) group.
To install DB2 with a local user account and Tivoli Storage Productivity Centerwith a domain user account, complete the following steps:1. Install DB2 by using a local user account.
For more information about installing DB2 on a Windows domain, see“Preparing to install Tivoli Storage Productivity Center in a Windows domain”on page 155.
2. Log on to Tivoli Storage Productivity Center by using a domain user accountthat is a member of the local administrator and the local DB2 administrator(DB2ADMNS) groups.This user must have the Act as part of the operating system and Login as aservice permissions set in the security policy.
3. In the Single Server Installation Information window, in the Common UserName and Password field, enter a domain user account that is a member oflocal administrators group.
Restriction: If the domain security policy overrides the local security policy, youmust set the indicators on the domain controller computer.
160 IBM Tivoli Storage Productivity Center: Installation and Configuration Guide
Installing DB2 and Tivoli Storage Productivity Center by usingdomain user accounts
Prerequisite: If the domain user account is used to install the database repository,this user account must have DB2 SYSADM authority.
To install Tivoli Storage Productivity Center and DB2 by using domain useraccounts complete the following steps:1. Install DB2 by using a domain user account.
For more information about installing DB2 on a Windows domain, see“Preparing to install Tivoli Storage Productivity Center in a Windows domain”on page 155.
2. Log on to Tivoli Storage Productivity Center by using a domain user accountthat has domain administrator rights and is a member of the localadministrator group.
3. In the Single Server Installation Information window, in the Common UserName and Password field, enter a domain user account that is a member oflocal administrators group.For more information about granting a domain user account DB2 SYSADMauthority, see “Preparing to install Tivoli Storage Productivity Center in aWindows domain” on page 155.
Resolving Windows domain prevalidation errors
Adding Windows domain user accounts to a local group, such as Administrator orDB2ADMNS, and later deleting these user accounts from the domain controllercomputer can cause an error when the account is validated.
When you delete user accounts from the domain controller computer, a referenceto the user account is created as a security ID on the computer that is a member ofa Windows domain. If these references are not removed, the Tivoli StorageProductivity Center installation can fail. On the Administration Properties windowof this computer, these references are displayed with a security ID, and the usericon is displayed with a question mark.
A security ID can look like the following example:S-1-5-21-337177553-1671989427-887411491-500
To remove a reference, Select the security ID and click Remove.
To add the user account back to the group, click Add. The user account nowbelongs to the group.
When a prevalidation error occurs, depending on the type of user account and thegroup, one of the following error messages is displayed:v BPCIN0220E
v BPCIN0221E
v BPCIN0222E
v BPCIN0223E
For more information about these messages, go to the Tivoli Storage ProductivityCenter information center and search for the message number in the IBM TivoliStorage Productivity Center Messages Guide.
Chapter 2. Installing Tivoli Storage Productivity Center 161

In the error message window, click OK to resume the installation program or Quitto restart the Tivoli Storage Productivity Center.
For more information about resolving installation errors on a computer thatbelongs to a Windows domain, see Installation fails on a Windows domainmember computer.
If you cannot log on to stand-alone GUI or web-based GUI by using a Windowsdomain user account, see Unable to log on to the stand-alone GUI or theweb-based GUI when using a Windows domain user name.
Verifying the connection to the domain controller computer byusing the Dcdiag tool
Use the Dcdiag command-line tool to help you determine whether the domaincontroller computer is registered with the domain name server (DNS), whether thecontroller can be pinged, and whether the controller has Lightweight DirectoryAccess Protocol (LDAP) connectivity.
To install and use the Dcdiag tool, complete the following steps on the computerthat is a member of a Windows domain:1. Go to http://www.microsoft.com/en-us/download/details.aspx?id=15326.2. Download the following files to the same location:
v support.cab
v suptools.msi
3. Run the suptools.msi file.4. Proceed through the installation software and click Finish to install the tool.5. In a command prompt window, to run the tool, enter the following command:
DCDIAG /TEST:DNS /V /E /S:domaincontroller
Where domaincontroller is the name of the domain controller computer, forexample, tb326-wi.
Important: You can run the command only if you are logged in by using aWindows domain user name. If you try to run the command when you arelogged in with a local user name, the following error message is displayed:Connecting to directory service on server 9.11.91.70. [9.11.91.70]LDAP bind failed with error 1326,Logon failure: unknown user name or bad password.
When you run the DCDIAG command, and you connect to the domain controllercomputer, the output contains text such as passed test Connectivity. This text isdisplayed even if text such as tpc.storage.tucson.ibm.com failed test DNS":Testing server: Default-First-Site-Name\TB326-WI is displayed at the end of theoutput.
The following output shows that the connection was successful:Starting test: Connectivity* Active Directory LDAP Services Check*** Warning: could not confirm the identityof this server in the directory versusthe names returned by DNS servers. Ifthere are problems accessing this directoryserver then you may need to check that this
162 IBM Tivoli Storage Productivity Center: Installation and Configuration Guide

server is correctly registered with DNS* Active Directory RPC Services Check......................... TB326-WI passed test Connectivity
Starting the installation programThis topic describes how to start the Tivoli Storage Productivity Center installationprograms.
Installation imagesIf you are using electronic images, you must select an installation image.For a list of installation images, see “Tivoli Storage Productivity Centerinstallation” on page 151.
Storage Resource AgentContains the files to perform local Storage Resource agent installations. Youmust download the file for the platform on which you want the agent toreside.v The Storage Resource Agent location and operating system file name is
the same as the disk 1 image.v The Storage Resource agent image is in DVD/data/sra/
operating_system_name.
The operating systems supported are listed in the following table.
Table 28. Operating system for Storage Resource agents
Operating system Operating system name
AIX aix_power
HP-UX hp-ux_itanium
Linux x86 linux_ix86
Linux for Power Systems Servers linux_power
Linux s390 linux_s390
Oracle Solaris solaris_spark
Windows windows
Note:
v If you are using Tivoli Storage Productivity Center electronic installation imagesthat are downloaded to a Windows directory, and the directory has spaces orunusual special characters in the name, Tivoli Storage Productivity Center doesnot install correctly.For example, if you have a directory name:C:\tpc 51 edition\disk1
Tivoli Storage Productivity Center does not install correctly.When you remove the spaces, for example:C:\tpc51edition\disk1
Tivoli Storage Productivity Center installs correctly.v If you are deploying the Storage Resource agent on the UNIX or Linux operating
system, you must use root as the user name.
Chapter 2. Installing Tivoli Storage Productivity Center 163

Starting the installation program on the Windows operatingsystem
To start the Tivoli Storage Productivity Center installation program using anelectronic image, complete the following steps:1. Download the image into a directory.2. Extract the file.3. At the command prompt, enter setup.bat from the source installation directory.
To start the Tivoli Storage Productivity Center installation program using the disk1 DVD, complete the following steps:1. Open Windows Explorer and navigate to the Tivoli Storage Productivity Center
DVD drive or directory.2. At the command prompt, enter cd DVD_drive\disk1 and navigate to the Tivoli
Storage Productivity Center DVD drive or directory.3. Double-click setup.bat.
Important: When you install Tivoli Storage Productivity Center Version 5.1.1 onthe Windows operating system, the installation time has increased by as much asan hour. This is because the Tivoli Integrated Portal fix pack 7 (may change to 9)and Tivoli Common Reporting interim fix must also to be installed.
Starting the installation program on the Linux operating system
To start the Tivoli Storage Productivity Center installation program from theelectronic image (disk 1), complete the following steps:1. Enter the following to create a directory:
mkdir /tpcinst
2. Enter cd tpcinst.3. Enter ftp filename.tar to transfer the Tivoli Storage Productivity Center
installation tar file into a directory.4. Enter this command:
tar -xvf filename.tar
5. Set up your shell environment to point to the instance where the databaserepository is installed. Source the db2profile for the wanted instance. Forexample, if the DB2 instance is db2inst1, source the db2profile by entering:. /home/db2inst1/sqllib/db2profile
Remember: There is a space between . and /home.6. Start the installation program by running the ./setup.bin command.
To start the Tivoli Storage Productivity Center installation program from the disk 1DVD, complete the following steps:1. At the command prompt, enter mkdir /cdrom to create a mount point.2. Insert the DVD into the DVD drive.3. Mount the DVD file system at the appropriate mount point. For example, to
mount a DVD into a DVD drive known as /dev/cd0 at mount point /cdrom,enter the following command:mount -o ro /dev/cdrom /cdrom
4. Enter cd /cdrom to navigate to the directory where the DVD is mounted.5. Set up your shell environment to point to the instance where the database
repository is installed.
164 IBM Tivoli Storage Productivity Center: Installation and Configuration Guide

6. Source the db2profile for the appropriate instance. For example, if the DB2instance is db2inst1, source the file by entering:. /home/db2inst1/sqllib/db2profile
Remember: There is a space between . and /home.7. Start the installation program from the disk1 directory (for example,
TPC_installation_directory/disk1.8. Enter/setup.bin. If setup.bin exits prematurely because the media (DVD) is
not ready, run the /setup.bin command again until the installation wizard isdisplayed.
Important: When you install Tivoli Storage Productivity Center Version 5.1.1 onthe Linux operating system, the installation time has increased by as much as anhour. This is because the Tivoli Integrated Portal fix pack 7 (may change to 9) andTivoli Common Reporting interim fix must also to be installed.
Starting the installation program on the AIX operating system
To start the Tivoli Storage Productivity Center installation program from theelectronic image (disk 1), complete the following steps:1. Enter the following to create a directory:
mkdir /tpcinst
2. Enter cd tpcinst.3. Enter ftp filename.tar to transfer the Tivoli Storage Productivity Center
installation tar file into a directory.4. Enter this command:
tar -xvf filename.tar
5. Set up your shell environment to point to the instance where the databaserepository is installed. Source the db2profile for the wanted instance. Forexample, if the DB2 instance is db2inst1, source the file by entering:. /home/db2inst1/sqllib/db2profile
Remember: There is a space between . and /home.6. Add the db2inst1 user to the system group.7. Start the installation program by running the ./setup.bin command.
To start the Tivoli Storage Productivity Center installation program from the disk 1DVD, complete the following steps:1. Insert the DVD into the DVD drive and mount the DVD file system at the
wanted mount point. On the AIX operating system, you can use the crfscommand to add an entry to /etc/filesystems for the mount point. Enter thefollowing commands:/usr/sbin/crfs -v cdrfs -p ro -d’cd0’ -m’/cdrom’ -A’no’mount /cdrom
The crfs command must be run once for a mount point. After that you can usemount and umount for each DVD you insert, for example, mount /cdrom andumount /cdrom.
2. Enter cd /cdrom to navigate to the directory where the DVD is mounted.3. Set up your shell environment to point to the instance where the database
repository is installed.4. Source the db2profile for the appropriate instance.
For example, if the DB2 instance is db2inst1, source the file by entering:
Chapter 2. Installing Tivoli Storage Productivity Center 165

. /home/db2inst1/sqllib/db2profile
Remember: There is a space between . and /home.5. Start the installation program from the disk1 directory (for example,
TPC_installation_directory/disk1.6. Run the ./setup.bin command. If the setup.bin command exits prematurely
because the media (DVD) is not ready, run the ./setup.bin command again untilthe installation wizard is displayed.
Important: When you install Tivoli Storage Productivity Center Version 5.1.1 onthe AIX operating system, the installation time has increased by as much as anhour. This is because the Tivoli Integrated Portal fix pack 7 (may change to 9) andTivoli Common Reporting interim fix must also to be installed.
Installing Tivoli Storage Productivity Center in a single-serverenvironment
Install Tivoli Storage Productivity Center by using the installation wizard or thecommand line in silent mode.
Installing Tivoli Storage Productivity Center in a single-server environment is asimple process and can be completed successfully by most Tivoli StorageProductivity Center customers.Related tasks:“Installing Tivoli Storage Productivity Center in a single-server environment byusing the wizard”You can use the installation wizard to install Tivoli Storage Productivity Center ina single-server environment.“Installing Tivoli Storage Productivity Center in a single-server environment byusing silent mode” on page 167You can install Tivoli Storage Productivity Center using the command line in silentmode.
Installing Tivoli Storage Productivity Center in a single-serverenvironment by using the wizardYou can use the installation wizard to install Tivoli Storage Productivity Center ina single-server environment.
Before you start the Tivoli Storage Productivity Center installation wizard on AIXor Linux operating system, you must source the user profile (db2profile) for theinstance owner of the DB2 database. For example:. /home/db2inst1/sqllib/db2profile
When you install Tivoli Storage Productivity Center, a database called TPCDB iscreated. In this repository, the TPC database schema is created, which describes thestructure of the database repository. If you already have the TPCDB database onyour system, Tivoli Storage Productivity Center assigns a new default databaserepository name with a number as a suffix for example, TPCDB1.
To install Tivoli Storage Productivity Center in a single-server environment byusing the wizard, complete the following steps:1. Log on to the server where you want to install Tivoli Storage Productivity
Center. Ensure that you have the required administrator privileges to installapplications on the server.
166 IBM Tivoli Storage Productivity Center: Installation and Configuration Guide

2. Install DB2 Enterprise Server Edition. For more information about installingDB2, see “Installing DB2” on page 139.If you are installing DB2 on a Windows operating system, log out and then logon again before you install Tivoli Storage Productivity Center.
3. Start the Tivoli Storage Productivity Center installation wizard.4. On the Choose Installation Location and Type page, select Single server.5. Follow the instructions and complete the installation by using the wizard.
If an error occurred during the installation process, review the installation log filesto find details about the error.Related tasks:“Installing DB2” on page 139This topic describes how to install DB2 Version 9.7 for operating systems such asLinux, AIX, or Windows.Related reference:“Planning for Tivoli Storage Productivity Center authentication and authorization”on page 28An operating system user name is required to install and log on to Tivoli StorageProductivity Center for the first time. After you install Tivoli Storage ProductivityCenter, you can assign roles to users that enable users to log on and determine thecomponents that the user can view in the graphical user interface (GUI).“Starting the installation program” on page 163This topic describes how to start the Tivoli Storage Productivity Center installationprograms.“Verifying the installation” on page 188After you install Tivoli Storage Productivity Center, you can verify whether theinstallation was successful.“Reviewing the log files to resolve installation issues” on page 191If an error occurs during Tivoli Storage Productivity Center installation, you canreview the error log files to resolve issues and continue the installation.
Installing Tivoli Storage Productivity Center in a single-serverenvironment by using silent modeYou can install Tivoli Storage Productivity Center using the command line in silentmode.
Before you start the Tivoli Storage Productivity Center installation program on AIXor Linux operating system, you must source the user profile (db2profile) for theinstance owner of the DB2 database. For example:. /home/db2inst1/sqllib/db2profile
To install Tivoli Storage Productivity Center in a single-server environment byusing silent mode, complete the following steps:1. Log on to the server where you want to install Tivoli Storage Productivity
Center. Ensure that you have the required administrator privileges to installapplications on the server.
2. Install DB2 Enterprise Server Edition. For more information about installingDB2, see “Installing DB2” on page 139.If you are installing on a Windows operating system, log out and then log onagain before you install Tivoli Storage Productivity Center.
3. Edit and save the appropriate response file. See “Editing the response file” onpage 168.
Chapter 2. Installing Tivoli Storage Productivity Center 167

Restriction: If you install Tivoli Storage Productivity Center by using silentmode, and are not using the response file, you must set-DLICENSE_ACCEPTED=true to accept the license agreement. For example:setup.exe/bin -i silent -DLICENSE_ACCEPTED=true
4. Run the installation program.v For Windows operating systems, run the following command:
setup.bat -l language -i silent -f absolute_path_to_response_file
where language can be one of the following values:– Czech - cs– English - en– French - fr– German - de– Hungarian - hu– Italian - it– Japanese - ja– Korean - ko– Polish - pl– Brazilian Portuguese - pt_BR– Russian - ru– Spanish - es– Chinese (Simplified) - zh_CN– Chinese (Traditional) - zh_TW
absolute_path_to_response_file is the absolute path to the response file.For example, the following command specifies the language and the path:setup.bat -l fr -i silent -fc:\TPC51\silent_SingleServerTypical.properties
v For AIX or Linux operating systems, run the following command:./setup.bin -l language -i silent -f /absolute_path_to_response_file
For example, the following command specifies the language and the path:./setup.bin -l de -i silent -f /TPC51/silent_SingleServerTypical.properties
If you do not specify a language or if the language is not specified correctly, theinstallation program uses the English language as the default.
5. Optional: Monitor the progress of the installation.v To view the progress of the silent mode installation on Windows operating
systems, check the trace log in the following path:TPC_installation_directory\logs\traceTPCInstall.log
v To view the progress of the silent mode installation on AIX or Linuxoperating systems, check the trace log in the following path:TPC_installation_directory/logs/traceTPCInstall.log
Editing the response fileYou must edit and save the appropriate response file when you install TivoliStorage Productivity Center in silent mode. The silent mode install option for theresponse file is -f absolute_path_to_response_file. For example, in the Windowsoperating system, you enter -f C:\installimage\silent_SingleServerTypical.properties.
Use the following response files during a silent mode installation:
168 IBM Tivoli Storage Productivity Center: Installation and Configuration Guide

silent_SingleServerTypical.propertiesThis file specifies that all the Tivoli Storage Productivity Centercomponents are installed on one server. There are no customizationoptions.
silent_SingleServerCustom.propertiesThis file specifies that all the Tivoli Storage Productivity Centercomponents are installed on one server with the following customizationoptions:v Change the user name and password to install the database repository.v Change the name of the database repository.v Change the paths for the database repository.v Change the path for the database repository log.v Change the ports for the Data server, Device server, Replication server,
and Storage Resource agent.v Change the user name and password to install Tivoli Integrated Portalv Change the installation location for Tivoli Integrated Portalv Change the ports for Tivoli Integrated Portal and Tivoli Common
Reportingv Install Tivoli Storage Productivity Center to use an existing instance of
Tivoli Integrated Portal.v Provide installation location and authentication information for that
existing instance of Tivoli Integrated Portal.
silent_MultipleServer.propertiesThis file specifies the information that is required for a multiple-serverenvironment. You can have these configurations:v The database repository on a remote server and the other Tivoli Storage
Productivity Center components on a local server.v Tivoli Integrated Portal, Tivoli Common Reporting, and the web-based
GUI components on a remote server and the other Tivoli StorageProductivity Center components on a local server.
Common response file parameters
These installation parameters are valid for all the response files.
CHOSEN_INSTALL_TYPE="option"Specifies the installation type. Not all options are available in all the responsefiles. Table 29 lists the options you can specify.
Table 29. Options for the CHOSEN_INSTALL_TYPE parameter
Properties file Valid options
silent_SingleServerTypical v Single Server Install
v License Upgrade
silent_SingleServerCustom v Single Server Install
v License Upgrade
silent_MultipleServer v Multiple Server Install
v License Upgrade
For example:CHOSEN_INSTALL_TYPE="Single Server Install"
Chapter 2. Installing Tivoli Storage Productivity Center 169

LICENSE_ACCEPTED=falseSpecifies whether the user accepts the Tivoli Storage Productivity Centerlicense agreement. The options are:
trueThe user accepts all the terms and conditions of the Tivoli Storage ProductivityCenter license agreement.
false or any other valueThe user does not accept the Tivoli Storage Productivity Center licenseagreement. The installation program will exit.
USER_INSTALL_DIR=optionSpecifies the location where you want to install Tivoli Storage ProductivityCenter.
On Windows operating systems, you must use double backslashes. Forexample:USER_INSTALL_DIR=C:\\Program Files\\IBM\\TPC
The default value for Windows operating systems is C:\\ProgramFiles\\IBM\\TPC.
The default value for AIX or Linux operating systems is /opt/IBM/TPC.
varSrvName=optionSpecifies the fully qualified host name of the server.
If your system is configured for dual stack networking (with both IPv4 andIPv6 addresses), Tivoli Storage Productivity Center defaults to IPv4 addressing.
Ensure that DNS is configured correctly on your server and verify that thesefiles exist on your target server:v For Windows operating systems, C:\Windows\system32\drivers\etc\hosts.v For AIX or Linux operating systems, /etc/hosts.
These files must have an entry similar to the following example:myserver.example.mycompany.com myserver
varTPCPortRangeSP=portSpecifies the first port in a range of ports. The default beginning port is 9549.These ports are used by the Tivoli Storage Productivity Center servers, StorageResource agent, Tivoli Integrated Portal, and Tivoli Common Reporting.
varCommonUsrID=user_nameSpecifies the user name to install Tivoli Storage Productivity Center. Thedefault user name for Windows operating system is db2admin. The default username for AIX or Linux operating system is db2inst1.
The user name that you select must have the following operating systemprivileges:v For Windows operating systems, the user name must be in the
administrators group.v For Linux operating systems, the user name must be in the root group.v For AIX operating systems, the user name must be in the system group.
If you are using the common user name to also install the database repository,the user name must have these DB2 privileges:v For Windows operating systems, the user name must be in the DB2ADMNS
group.
170 IBM Tivoli Storage Productivity Center: Installation and Configuration Guide

v For AIX or Linux operating systems, the user name must be in the db2iadm1group.
varCommonUsrPw=passwordSpecifies the password for the common user name.
varFullRollback=valueSpecifies whether a full rollback or partial rollback is done when an installationfailure occurs. The value is:
0 Specifies that a partial rollback occurs. This is the default.
1 Specifies that a full rollback occurs.
varUseLicenseKeyOnImage=valueSpecifies whether to use the license key file that is present on the installationimage. The value can be:
0 Uses the license key that is present on the installation image (default value)
1 Provides the location of the license key file
Depending on the license package you purchased, one of these license files isincluded with Tivoli Storage Productivity Center in the root installationdirectory and is on disk 1, part 1 of the DVD or electronic image:
nodelockTivoli Storage Productivity Center license
nodelock.SELTivoli Storage Productivity Center Select license
nodelock.AETivoli Storage Productivity Center Advanced license
nodelock.EETivoli Storage Productivity Center product included with IBM SystemsDirector
varLicenseKeyFile=location_of_license_key_fileSpecifies the path for the license key file. This value must be set if thevarUseLicenseKeyOnImage=1 parameter is specified.
On the Windows operating system, you must use double backslashes. Forexample:varLicenseKeyFile=C:\\license\\key\\nodelock.SEL
Response file parameter to customize Tivoli Storage ProductivityCenter ports
This parameter is used for the silent_SingleServerCustom.properties andsilent_MultipleServer.properties response files to configure the ports.
varTPCServersPortRangeSP=port
Specifies the first port in a range of ports for the Tivoli Storage ProductivityCenter servers, and Storage Resource agent. The default beginning port is 9549.
This value overrides the value specified in the varTPCPortRangeSP parameter.
Chapter 2. Installing Tivoli Storage Productivity Center 171

Response file parameters for advanced customization of the databaserepository
These parameters are used for the silent_SingleServerCustom.properties andsilent_MultipleServer.properties response files to configure the databaserepository.
varDBAdmUsr=user_name
Specifies the user name that you must use to install the Tivoli StorageProductivity Center database. The user who logs in with this user name mustbe the owner of the DB2 instance where the database is created.
This user name must have these DB2 privileges:v For Windows operating systems, the user name must be in the DB2ADMNS
group. The default user name is db2admin.v For AIX or Linux operating systems, the user name must be in the db2iadm1
group. The default user name is db2inst1.
varDBAdmPW=passwordSpecifies the password that is associated with the DB2 user name.
varDBName=database_name
Specifies the name of the Tivoli Storage Productivity Center database. Thedefault database name is TPCDB.
Specify the database name using the following rules:v The name can contain the following characters:
– a - z– A - Z– 0 - 9
v The name must be 1 - 8 characters long.
Restriction: The database name cannot have the following conditions:v Contain a space or a blank.v Begin with SYS, DBM, or IBM.v Be the name of an existing database.
varDBPath=database_location, database_location, ...
Specifies the absolute paths for the database.
The database path must follow these rules:v The path cannot be longer than 242 bytes.v The path must be an absolute path and not a relative path, for example, C:\
You can specify a maximum of 10 database paths and separate them withcommas. For example, in the Windows operating system, you would specifyC:,D:. In the AIX or Linux operating system, you would specify/home/db2inst1,/testPath.v For example, on the Windows operating system, if the database is on the C
drive, you can add a D drive, an E drive, and so on.On Windows operating systems, you must use double backslashes. Forexample:varDBPath=C\:\\DB2\\TPCDB,D\:\\TPCDB,E\:\\TPCDB
v For example, on the AIX operating system:
172 IBM Tivoli Storage Productivity Center: Installation and Configuration Guide

/home/db2inst1,/testPath
varDBLogPath=log_location
Specifies the absolute path where the database log files are stored. The defaultvalue of the variable is set to <dftdbpath>/<instance name>/<varDBName>/SQLLOG.
For example:v On Windows operating systems, c:\\DB2\\TPCDB\\SQLLOGv On AIX operating systems, /home/db2inst1/db2inst1/TPCDB/SQLLOG
Response file parameters for advanced customization of TivoliIntegrated Portal and Tivoli Common Reporting
These parameters are used for the silent_SingleServerCustom.properties andsilent_MultipleServer.properties response files to configure Tivoli IntegratedPortal and Tivoli Common Reporting.
varTIPAdmUsr=user_nameSpecifies the administrative user name to install Tivoli Integrated Portal, TivoliCommon Reporting, and the web-based GUI.
The default user name for the Windows operating system is db2admin. Thedefault user name for the AIX and Linux operating system is db2inst1.
When you use an existing instance of Tivoli Integrated Portal, you must enterthe Tivoli Integrated Portal administrative user name that was used when youinstalled that instance. You cannot enter a new user name.
varTIPAdmPW=passwordSpecifies the password for the user name.
varReuseExistingTIP=valueSpecifies whether to install a new instance of Tivoli Integrated Portal or use anexisting instance of Tivoli Integrated Portal that is installed on the server. Thevalues are:
0 Install a new instance of Tivoli Integrated Portal 2.2. This option is thedefault.
1 Use an existing instance of Tivoli Integrated Portal 2.2 that is installed onthe server.
varTIPPath=locationSpecifies the location where Tivoli Integrated Portal will be installed. If you areusing an existing instance of Tivoli Integrated Portal, enter the location wherethe program is installed.
For Windows operating systems, use two backslashes. An example of thisparameter is:varTIPPath=C:\\Program Files\\IBM\TIP
varTIPPortRangeSP=port
Specifies the first port in a range of ports for Tivoli Integrated Portal and TivoliCommon Reporting servers. The default beginning port is 9568.
Tivoli Integrated Portal and Tivoli Common Reporting use these default portnumbers:
Tivoli Integrated Portal9568 - 9580.
Chapter 2. Installing Tivoli Storage Productivity Center 173

Tip: Tivoli Integrated Portal port numbers can vary. To viewinformation about Tivoli Integrated Portal port numbers, see “TivoliIntegrated Portal port numbers” on page 37.
Tivoli Common Reporting9581
This value overrides the value specified in the varTPCPortRangeSP parameter.
varTCRPort=portSpecifies the Tivoli Common Reporting port. The default port is 9581. Thisvalue overrides the varTPCServersPortRangeSP and varTIPPortRangeSPparameters.
Response file parameter for the multiple-server environment
This parameter is valid for the silent_MultipleServer.properties file.
varMultipleServerComponentList=componentsSpecifies the Tivoli Storage Productivity Center components to install. Separatethe components with commas:
databaseInstalls the Tivoli Storage Productivity Center database repository.
serversInstalls the Data server, Device server, Replication server, the StorageResource agent, CLI, and the stand-alone GUI.
tiptcrInstalls Tivoli Integrated Portal, Tivoli Common Reporting, the web-basedGUI, and Storage Resource agent. You can reuse an existing instance ofTivoli Integrated Portal and Tivoli Common Reporting.
Response file parameters for the remote database
The following parameters are used only in the silent_MultipleServer.propertiesresponse file to access the Tivoli Storage Productivity Center database on a remoteserver.
Remember: The DB2 database must be installed before you can use theseparameters to access the database.
varRemoteDBSrvName=host_nameSpecifies the fully qualified host name or IP address of the remote serverwhere the Tivoli Storage Productivity Center database repository is installed.
Tivoli Storage Productivity Center accepts both IPv4 and IPv6 addresses. If youhave a system that is configured for dual stack networking (with both IPv4and IPv6 addresses), Tivoli Storage Productivity Center defaults to IPv4addressing.
For example, an IPv6 address in long form can be 2001:DB8:0:0:0:0:0:0. An IPv6address in short form can be 2001:DB8:: or 2001:DB8:0.0.0.0.0.0.
varRemoteDBPort=portSpecifies the DB2 port on the remote server. The default port is 50000.
varRemoteDBAdmUsr=user_nameSpecifies the administrative user name to connect to the remote database. Thedefault user name for the Windows operating system is db2admin. The defaultuser name for the AIX or Linux operating system is db2inst1.
174 IBM Tivoli Storage Productivity Center: Installation and Configuration Guide
varRemoteDBAdmPW=passwordSpecifies the password for the user name.
varRemoteDBName=database_nameSpecifies the Tivoli Storage Productivity Center database on the remote server.The default name is TPCDB.
Related reference:“TCP/IP ports used by Tivoli Storage Productivity Center” on page 35When you install Tivoli Storage Productivity Center, default ports must be openedthrough the firewall. You must disable the firewall program or open the ports toallow incoming requests to the Tivoli Storage Productivity Center ports. Reviewthese ports before you install the Tivoli Storage Productivity Center.
Installing Tivoli Storage Productivity Center in amultiple-server environment
You can install Tivoli Storage Productivity Center by using the installation wizardor by using silent mode from the command line.
A multiple-server environment is ideal if you are monitoring large storageenvironments, where one server is not sufficient to manage the Tivoli StorageProductivity Center components. In this environment, Tivoli Integrated Portal andTivoli Common Reporting can run on a separate server.
This environment facilitates the integration with other Tivoli products that areusing Tivoli Integrated Portal and Tivoli Common Reporting components andallows the sharing of components that are installed on a separate server. If youhave different administrators for DB2 andTivoli Storage Productivity Center, thisenvironment allows the database repository and DB2 to be installed and managedon a separate server.Related tasks:“Installing Tivoli Storage Productivity Center with a remote database by using theinstallation wizard”You can install Tivoli Storage Productivity Center in a multiple-server environmentby using the installation wizard.“Installing Tivoli Integrated Portal and Tivoli Common Reporting by using theinstallation wizard” on page 177You can install Tivoli Integrated Portal, Tivoli Common Reporting, and theweb-based GUI in a multiple-server environment using the installation wizard.“Installing Tivoli Storage Productivity Center with a remote database by usingsilent mode” on page 179You can install Tivoli Storage Productivity Center in a multiple-server environmentby using silent mode. With this configuration, you install the Tivoli StorageProductivity Center components on two servers.“Installing Tivoli Integrated Portal and Tivoli Common Reporting by using silentmode” on page 182You can install Tivoli Integrated Portal, Tivoli Common Reporting, and theweb-based GUI in a multiple-server environment using silent mode. With thisconfiguration, you will be installing the Tivoli Storage Productivity Centercomponents on two servers.
Installing Tivoli Storage Productivity Center with a remotedatabase by using the installation wizardYou can install Tivoli Storage Productivity Center in a multiple-server environmentby using the installation wizard.
Chapter 2. Installing Tivoli Storage Productivity Center 175

Before you start the Tivoli Storage Productivity Center installation wizard on AIXor Linux operating system, you must source the user profile (db2profile) for theinstance owner of the DB2 database. For example:. /home/db2inst1/sqllib/db2profile
When you install Tivoli Storage Productivity Center, a database called TPCDB iscreated. In this repository, the TPC database schema is created, which describes thestructure of the database repository. If you already have the TPCDB on yoursystem, Tivoli Storage Productivity Center assigns a new default databaserepository name with a number as a suffix for example, TPCDB1.
DB2 Enterprise Server Edition and the Tivoli Storage Productivity Center databaserepository are installed on one server, and the DB2 Client and the other TivoliStorage Productivity Center components are installed on the second server.
For this procedure, the terms Server A and Server B denote the two servers. ServerA has DB2 Enterprise Server Edition and the TPCDB database repository installed.Server B has the DB2 client and the other Tivoli Storage Productivity Centercomponents installed.
To install Tivoli Storage Productivity Center with a remote database by using theinstallation wizard, complete the following steps:1. Complete the following steps on Server A:
a. Log on to Server A.b. Install DB2 Enterprise Server Edition. For more information about installing
DB2, see “Installing DB2” on page 139.c. If you are installing on a Windows operating system, log out and then log
on again before installing Tivoli Storage Productivity Center.d. Start the Tivoli Storage Productivity Center installation wizard.e. Select the language for your installation and click OK.f. On the Choose Installation Location and Type page, select Multiple servers.g. Follow the instructions in the installation wizard and install the Tivoli
Storage Productivity Center database repository on this server.h. Select Database repository.i. Follow the installation wizard to complete the installation.j. Review the message on the summary page. The message indicates that you
have successfully installed the database repository.2. Complete the following steps on Server B:
a. Log on to the Tivoli Storage Productivity Center system with theappropriate user privileges.
b. Install the DB2 client. For more information about installing DB2, see“Installing DB2” on page 139.
c. If you are installing the DB2 client on a Windows operating system, log outand then log on again before installing Tivoli Storage Productivity Center.
d. On the Launch Pad page, select Install a Product.e. Install the IBM Data Server Client. Only the DB2 client ID, db2caep1, is
required on the client host.f. Follow the steps for creating the instance owner ID. The administrative ID,
dasusr1, and the fenced ID, db2fenc1, are not required.g. Start the Tivoli Storage Productivity Center installation wizard. Before you
start the Tivoli Storage Productivity Center installation wizard on AIX or
176 IBM Tivoli Storage Productivity Center: Installation and Configuration Guide

Linux operating system, you must source the user profile, db2profile, forthe instance owner of the DB2 database. For example:. /home/db2inst1/sqllib/db2profile
h. Select the language for your installation and click OK.i. On the Choose Installation Location and Type page, select Multiple servers.j. Follow the instructions in the installation wizard to install the following
components on this server:v Tivoli Storage Productivity Center serversv web-based GUIv stand-alone GUIv Tivoli Integrated Portalv Tivoli Common Reportingv CLIv Storage Resource agent
k. Select Tivoli Storage Productivity Center servers and Tivoli IntegratedPortal.
l. After the installation is finished, review the message log to ensure that noerrors occurred.
Related tasks:“Installing DB2” on page 139This topic describes how to install DB2 Version 9.7 for operating systems such asLinux, AIX, or Windows.Related reference:“Planning for Tivoli Storage Productivity Center authentication and authorization”on page 28An operating system user name is required to install and log on to Tivoli StorageProductivity Center for the first time. After you install Tivoli Storage ProductivityCenter, you can assign roles to users that enable users to log on and determine thecomponents that the user can view in the graphical user interface (GUI).“Starting the installation program” on page 163This topic describes how to start the Tivoli Storage Productivity Center installationprograms.“Tivoli Storage Productivity Center components” on page 136You can install Tivoli Storage Productivity Center in single- or multiple-serverenvironments. In a single-server environment, all components are installed on oneserver.“Verifying the installation” on page 188After you install Tivoli Storage Productivity Center, you can verify whether theinstallation was successful.“Reviewing the log files to resolve installation issues” on page 191If an error occurs during Tivoli Storage Productivity Center installation, you canreview the error log files to resolve issues and continue the installation.
Installing Tivoli Integrated Portal and Tivoli Common Reportingby using the installation wizardYou can install Tivoli Integrated Portal, Tivoli Common Reporting, and theweb-based GUI in a multiple-server environment using the installation wizard.
Before you start the Tivoli Storage Productivity Center installation wizard on theAIX or Linux operating systems, you must source the user profile, db2profile, forthe instance owner of the DB2 database. For example:
Chapter 2. Installing Tivoli Storage Productivity Center 177

. /home/db2inst1/sqllib/db2profile
The DB2 Enterprise Server Edition, the Tivoli Storage Productivity Center servers,database repository, the stand-alone GUI, CLI, and Storage Resource agent areinstalled on one server, and the DB2 client, Tivoli Integrated Portal, Tivoli CommonReporting, and web-based GUI are installed on the second server.
For this procedure, the terms Server A and Server B denote the two servers. ServerA has DB2 Enterprise Server Edition, the Tivoli Storage Productivity Centerservers, the database repository, CLI, Storage Resource agent, and stand-alone GUIinstalled. Server B has the DB2 client,Tivoli Integrated Portal, Tivoli CommonReporting, and web-based GUI installed.
To install Tivoli Integrated Portal and Tivoli Common Reporting by using theinstallation wizard:1. Complete the following steps on Server A:
a. Log on to the Tivoli Storage Productivity Center system with theappropriate user privileges.
b. Install DB2 Enterprise Server Edition. For more information about installingDB2, see “Installing DB2” on page 139.
c. If you are installing on a Windows operating system, log out and then logon again before installing Tivoli Storage Productivity Center.
d. Start the Tivoli Storage Productivity Center installation wizard.e. Select the language for your installation and click OK. The language that
you select is used for product installation.f. On the Choose Installation Location and Type page, select Multiple servers.g. Follow the instructions in the installation wizard and install the Tivoli
Storage Productivity Center components and database repository on thisserver. On the Multiple Servers Option page, select Database repositoryand Tivoli Storage Productivity Center servers. Follow the instructions inthe installation wizard to install the Tivoli Storage Productivity Centercomponents.
h. After the installation is finished, review the message log to ensure that noerrors occurred.
2. Complete the following steps on Server B:a. Log on to the Tivoli Storage Productivity Center system with the
appropriate user privileges.b. Install the DB2 Client. For more information about installing DB2, see
“Installing DB2” on page 139.c. If you are installing on a Windows operating system, log out and then log
on again before installing Tivoli Storage Productivity Center.d. On the Launch Pad page, select Install a Product.e. Install the IBM Data Server Client. Only the DB2 client ID (db2caep1) is
required on the client host.f. Follow the steps for creating the instance owner ID. The administrative ID
(dasusr1) and the fenced ID (db2fenc1) are not required.g. Start the Tivoli Storage Productivity Center installation wizard. Before you
start the Tivoli Storage Productivity Center installation wizard on AIX orLinux operating system, you must source the user profile (db2profile) forthe instance owner of the DB2 database. For example:. /home/db2inst1/sqllib/db2profile
178 IBM Tivoli Storage Productivity Center: Installation and Configuration Guide

h. Select the language for your installation and click OK.i. On the Choose Installation Location and Type page, select Multiple servers.j. Follow the instructions in the installation wizard and install Tivoli Integrated
Portal, Tivoli Common Reporting, and the web-based GUI on this server.k. On the Choose Multiple Server Option page, select Tivoli Integrated Portal.l. After the installation is finished, review the message log to ensure that no
errors occurred.
If you install Tivoli Storage Productivity Center using LDAP authentication, youcan log in to Tivoli Integrated Portal using either LDAP or the local administrativeuser. The local administrative user can log in to Tivoli Integrated Portal to makeadministrative changes even if the LDAP server is offline or configured incorrectly.To restrict log in access to LDAP authentication, remove the local administrativeuser from Tivoli Integrated Portal after you install Tivoli Storage ProductivityCenter.Related reference:“Planning for Tivoli Storage Productivity Center authentication and authorization”on page 28An operating system user name is required to install and log on to Tivoli StorageProductivity Center for the first time. After you install Tivoli Storage ProductivityCenter, you can assign roles to users that enable users to log on and determine thecomponents that the user can view in the graphical user interface (GUI).“Starting the installation program” on page 163This topic describes how to start the Tivoli Storage Productivity Center installationprograms.“Verifying the installation” on page 188After you install Tivoli Storage Productivity Center, you can verify whether theinstallation was successful.“Reviewing the log files to resolve installation issues” on page 191If an error occurs during Tivoli Storage Productivity Center installation, you canreview the error log files to resolve issues and continue the installation.
Installing Tivoli Storage Productivity Center with a remotedatabase by using silent modeYou can install Tivoli Storage Productivity Center in a multiple-server environmentby using silent mode. With this configuration, you install the Tivoli StorageProductivity Center components on two servers.
Before you start the Tivoli Storage Productivity Center installation program on theAIX or Linux operating system, you must source the user profile, db2profile, forthe instance owner of the DB2 database. For example:. /home/db2inst1/sqllib/db2profile
The DB2 Enterprise Server Edition and the Tivoli Storage Productivity Centerdatabase repository are installed on one server, and the DB2 client and the otherTivoli Storage Productivity Center components are installed on the second server.
When you install Tivoli Storage Productivity Center, a database that is calledTPCDB is created. In this repository, the TPC database schema is created, whichdescribes the structure of the database repository. If you already have the TPCDBon your system, Tivoli Storage Productivity Center assigns a new default databaserepository name with a number as a suffix for example, TPCDB1.
Chapter 2. Installing Tivoli Storage Productivity Center 179

For this procedure, the terms Server A and Server B denote the two servers. ServerA has DB2 Enterprise Server Edition and the TPCDB database repository installed.Server B has the DB2 client and the other Tivoli Storage Productivity Centercomponents installed.
To install Tivoli Storage Productivity Center with a remote database by using silentmode, complete the following steps:1. Complete the following steps on Server A:
a. Log on to Server A to install DB2.b. Install DB2 Enterprise Server Edition. For more information about installing
DB2, see “Installing DB2” on page 139c. If you are installing on a Windows operating system, log out and then log
on again before you install Tivoli Storage Productivity Center.d. In silent_MultipleServer.properties, set the following parameters for the
remote database repository:v CHOSEN_INSTALL_TYPE="Multiple Server Install"
v varMultipleServerComponentList=database
v USER_INSTALL_DIR=option
v varDBAdmUsr=user_name
v varDBAdmPW=password
v varDBName=database_name
v varDBPath=database_location
v varDBLogPath=log_location
Restriction: If you install Tivoli Storage Productivity Center by using silentmode, and are not using the response file, you must set-DLICENSE_ACCEPTED=true to accept the license agreement. For example:setup.exe/bin -i silent -DLICENSE_ACCEPTED=true
e. Save the response file.f. Run the Tivoli Storage Productivity Center installation program on the DB2
server to install the database repository.v For Windows operating systems, run the following command:
setup.bat -l language -i silent-f absolute_path_to_response_file
where language is one of the following languages:
language
– Czech - cs– English - en– French - fr– German - de– Hungarian - hu– Italian - it– Japanese - ja– Korean - ko– Polish - pl– Brazilian Portuguese - pt_BR– Russian - ru
180 IBM Tivoli Storage Productivity Center: Installation and Configuration Guide

– Spanish - es– Chinese (Simplified) - zh_CN– Chinese (Traditional) - zh_TW
absolute_path_to_response_fileThe absolute path to the response file. For example, the followingcommand specifies the language and the path:setup.bat -l fr -i silent -f c:\TPC51\silent_MultipleServer.properties.
v For AIX or Linux operating systems, run the following command:./setup.bin -l language -i silent-f /absolute_path_to_response_file
For example, the following command specifies the language and the path:./setup.bin -l de -i silent -f /TPC51/silent_MultipleServer.properties
If you do not specify a language or specify the language incorrectly, theinstallation program uses the English language as the default.
g. Optional: Monitor the progress of the installation.
Note: If there are preinstallation errors, you can review the lax*out.txtand lax*err.txt files that are in the /tmp and %TEMP% directories.To view the progress of the silent mode installation on Windows operatingsystems, check the trace log in the following path:TPC_installation_directory\logs\traceTPCInstall.log
To view the progress of the silent mode installation on AIX or Linuxoperating systems, check the trace log in the following path:TPC_installation_directory/logs/traceTPCInstall.log
2. Complete the following steps on Server B:a. Log on to the Tivoli Storage Productivity Center system with the
appropriate user privileges.b. Install the DB2 Client.
If you are installing on a Windows operating system, log out and log onagain before you install Tivoli Storage Productivity Center.
c. Before you start the Tivoli Storage Productivity Center installation programon the AIX or Linux operating system, you must source the user profile(db2profile) for the instance owner of the DB2 database. For example:. /home/db2inst1/sqllib/db2profile
d. Edit and save the silent_MultipleServer.properties file. Set the followingparameters for Tivoli Storage Productivity Center.v CHOSEN_INSTALL_TYPE="Multiple Server Install"
v varMultipleServerComponentList=servers,tiptcr
v USER_INSTALL_DIR=option
v varSrvName=option
v varCommonUsrID=user_name
v varCommonUsrPw=password
v varRemoteDBSrvName=host_name
v varRemoteDBPort=port
v varRemoteDBAdmUsr=user_name
v varRemoteDBAdmPW=password
v varRemoteDBName=database_name
Chapter 2. Installing Tivoli Storage Productivity Center 181

v varTPCServersPortRangeSP=port
v varTIPAdmUsr=user_name
v varTIPAdmPW=password
v varTIPPath=location
v varTIPPortRangeSP=port
v varTIPPortRangeSP=port
e. Run the Tivoli Storage Productivity Center installation program to installthe Tivoli Storage Productivity Center components (excluding the databaserepository).v For Windows operating systems, run the following command:
setup.bat -l language -i silent -fabsolute_path_to_response_file
v For AIX or Linux operating systems, run the following command:./setup.bin -l language -i silent-f /absolute_path_to_response_file
For example, the following command specifies that the language to installis German:./setup.bin -l de -i silent -f /TPC51/silent_MultipleServer.properties
If you do not specify a language or specify the language incorrectly, theinstallation program uses the English language as the default.
f. Optional: Monitor the progress of the installation.
Note: If there are preinstallation errors, you can review the lax*out.txt andlax*err.txt files that are in the /tmp and %TEMP% directories.To view the progress of the silent mode installation on Windows operatingsystems, check the trace log in the following path:TPC_installation_directory\logs\traceTPCInstall.log
To view the progress of the silent mode installation on AIX or Linuxoperating systems, check the trace log in the following path:TPC_installation_directory/logs/traceTPCInstall.log
Related reference:“Editing the response file” on page 168You must edit and save the appropriate response file when you install TivoliStorage Productivity Center in silent mode. The silent mode install option for theresponse file is -f absolute_path_to_response_file. For example, in the Windowsoperating system, you enter -f C:\installimage\silent_SingleServerTypical.properties.
Installing Tivoli Integrated Portal and Tivoli Common Reportingby using silent modeYou can install Tivoli Integrated Portal, Tivoli Common Reporting, and theweb-based GUI in a multiple-server environment using silent mode. With thisconfiguration, you will be installing the Tivoli Storage Productivity Centercomponents on two servers.
Before you start the Tivoli Storage Productivity Center installation program on AIXor Linux operating system, you must source the user profile, db2profile, for theinstance owner of the DB2 database. For example:. /home/db2inst1/sqllib/db2profile
182 IBM Tivoli Storage Productivity Center: Installation and Configuration Guide

The DB2 Enterprise Server Edition, the Tivoli Storage Productivity Center servers,database repository, the stand-alone GUI, CLI, and Storage Resource agent areinstalled on one server, and the DB2 client, Tivoli Integrated Portal, Tivoli CommonReporting, and web-based GUI are installed on the second server.
For this procedure, the terms Server A and Server B denote the two servers. ServerA has DB2 Enterprise Server Edition, the Tivoli Storage Productivity Centerservers, the database repository, CLI, Storage Resource agent, and stand-alone GUIinstalled. Server B has the DB2 client,Tivoli Integrated Portal, Tivoli CommonReporting, and web-based GUI installed.
To install Tivoli Integrated Portal and Tivoli Common Reporting by using silentmode, complete the following steps:1. Complete the following steps on Server A:
a. Log on to the Tivoli Storage Productivity Center system with theappropriate user privileges.
b. Install DB2 Enterprise Server Edition. For more information about installingDB2, see “Installing DB2” on page 139
c. If you are installing on a Windows operating system, log out and then logon again before installing Tivoli Storage Productivity Center.
d. In silent_MultipleServer.properties file, set all the parameters in the fileexcept for the Tivoli Integrated Portal and Tivoli Common Reportingcustomization parameters.
Restriction: If you install Tivoli Storage Productivity Center by using silentmode, and are not using the response file, you must set-DLICENSE_ACCEPTED=true to accept the license agreement. For example:setup.exe/bin -i silent -DLICENSE_ACCEPTED=true
e. Save silent_MultipleServer.properties.f. Run the Tivoli Storage Productivity Center installation program on the DB2
server to install the database repository and Tivoli Storage ProductivityCenter components.v For Windows operating systems, run the following command:
setup.bat -l language -i silent -f absolute_path_to_response_file
where language can be one of the following languages:
language
– Czech - cs– English - en– French - fr– German - de– Hungarian - hu– Italian - it– Japanese - ja– Korean - ko– Polish - pl– Brazilian Portuguese - pt_BR– Russian - ru– Spanish - es– Chinese (Simplified) - zh_CN
Chapter 2. Installing Tivoli Storage Productivity Center 183

– Chinese (Traditional) - zh_TW
absolute_path_to_response_fileThe absolute path to the response file. For example, the followingcommand specifies the language and the path:setup.bat -l fr -i silent -f c:\TPC51\silent_MultipleServer.properties.
v For AIX or Linux operating systems, run the following command:./setup.bin -l language -i silent -f /absolute_path_to_response_file
For example, the following command specifies the language and the path:./setup.bin -l de -i silent -f /TPC51/silent_MultipleServer.properties
If you do not specify a language or specify the language incorrectly, theinstallation program uses the English language as the default.
g. Optional: Monitor the progress of the installation.
Note: If there are preinstallation errors, you can review the lax*out.txtand lax*err.txt files that are in the /tmp and %TEMP% directories.To view the progress of the silent mode installation on Windows operatingsystems, check the trace log in the following path:TPC_installation_directory\logs\traceTPCInstall.log
To view the progress of the silent mode installation on AIX or Linuxoperating systems, check the trace log in the following path:TPC_installation_directory/logs/traceTPCInstall.log
2. Complete the following steps on Server B:a. Log on to the Tivoli Storage Productivity Center system with the
appropriate user privileges.b. Install the DB2 Client.c. If you are installing on a Windows operating system, log out and then log
on again before installing Tivoli Storage Productivity Center.d. Before you start the Tivoli Storage Productivity Center installation program
on AIX or Linux operating system, you must source the user profile,db2profile, for the instance owner of the DB2 database. For example:. /home/db2inst1/sqllib/db2profile
e. In the silent_MultipleServer.properties file, set the following parametersfor Tivoli Integrated Portal and Tivoli Common Reporting:v CHOSEN_INSTALL_TYPE="Multiple Server Install"
v varMultipleServerComponentList=tiptcr
v USER_INSTALL_DIR=option
v varRemoteDBSrvName=host_name
v varRemoteDBPort=port
v varRemoteDBAdmUsr=user_name
v varRemoteDBAdmPW=password
v varRemoteDBName=database_name
v varTIPAdmUsr=option
v varTIPAdmPW=password
v varTIPPath=TIP_location
v varTIPPortRangeSP=log_location
v varTCRPort=port
184 IBM Tivoli Storage Productivity Center: Installation and Configuration Guide

f. Run the Tivoli Storage Productivity Center installation program on Server Bto install Tivoli Integrated Portal and Tivoli Common Reporting.v For Windows operating systems, run the following command:
setup.bat -l language -i silent -fabsolute_path_to_response_file
where language can be one of the following languages:
language
– Czech - cs– English - en– French - fr– German - de– Hungarian - hu– Italian - it– Japanese - ja– Korean - ko– Polish - pl– Brazilian Portuguese - pt_BR– Russian - ru– Spanish - es– Chinese (Simplified) - zh_CN– Chinese (Traditional) - zh_TW
absolute_path_to_response_fileThe absolute path to the response file. For example, the followingcommand specifies the language and the path:setup.bat -l fr -i silent -f c:\TPC51\silent_MultipleServer.properties.
v For AIX or Linux operating systems, run the following command:./setup.bin -l language -i silent -f /absolute_path_to_response_file
For example, the following command specifies the language and the path:./setup.bin -l de -i silent -f /TPC51/silent_MultipleServer.properties
If you do not specify a language or specify the language incorrectly, theinstallation program uses the English language as the default.
g. Optional: Monitor the progress of the installation.
Note: If there are preinstallation errors, you can review the lax*out.txtand lax*err.txt files that are in the /tmp and %TEMP% directories.To view the progress of the silent mode installation on Windows operatingsystems, check the trace log in the following path:TPC_installation_directory\logs\traceTPCInstall.log
To view the progress of the silent mode installation on AIX or Linuxoperating systems, check the trace log in the following path:TPC_installation_directory/logs/traceTPCInstall.log
If you experience an error, check the installation log files.
Chapter 2. Installing Tivoli Storage Productivity Center 185

If you install Tivoli Storage Productivity Center using LDAP authentication, youcan log in to Tivoli Integrated Portal using either LDAP or the local administrativeuser. The local administrative user can log in to Tivoli Integrated Portal to makeadministrative changes even if the LDAP server is offline or configured incorrectly.To restrict log in access to LDAP authentication, remove the local administrativeuser from Tivoli Integrated Portal after you install Tivoli Storage ProductivityCenter.Related reference:“Planning for Tivoli Storage Productivity Center authentication and authorization”on page 28An operating system user name is required to install and log on to Tivoli StorageProductivity Center for the first time. After you install Tivoli Storage ProductivityCenter, you can assign roles to users that enable users to log on and determine thecomponents that the user can view in the graphical user interface (GUI).“Starting the installation program” on page 163This topic describes how to start the Tivoli Storage Productivity Center installationprograms.“Verifying the installation” on page 188After you install Tivoli Storage Productivity Center, you can verify whether theinstallation was successful.“Reviewing the log files to resolve installation issues” on page 191If an error occurs during Tivoli Storage Productivity Center installation, you canreview the error log files to resolve issues and continue the installation.
Installing Tivoli Storage Productivity Center client componentson a separate computer
You can install IBM Tivoli Storage Productivity Center client components on acomputer other than the Tivoli Storage Productivity Center Server.
To install Tivoli Storage Productivity Center client components on a separatecomputer, complete the following steps:1. Install the Tivoli Storage Productivity Center server.2. Navigate to the client_images subdirectory in the Tivoli Storage Productivity
Center installation directory. In the Windows operating system, for example,the path is C:\Program Files\IBM\TPC\client_images.
3. Locate the appropriate compressed file for your operating system of thecomputer where you want to install the stand-alone GUI and command-lineinterface (CLI). Examples of compressed bundles include TPC_CLIENT_AIX.tar,TPC_CLIENT_LINUX.zip, or TPC_CLIENT_WIN.zip.
Restriction: You must use only the client images from Tivoli StorageProductivity Center installation directory. The client images in the TivoliStorage Productivity Center image or download directory must not be used,because they are updated by the installation program.
4. Extract the appropriate compressed file on another computer. For example, inthe AIX operating system, you must extract the TPC_CLIENT_AIX.tar into/opt/IBM/TPCClient folder and run /opt/IBM/TPCClient/gui/TPCD.sh to startstand-alone GUI.
Tivoli Storage Productivity Center GUI and CLI components are now installed on aseparate computer. You can issue Tivoli Storage Productivity Center commandsand run the stand-alone GUI from that computer.
186 IBM Tivoli Storage Productivity Center: Installation and Configuration Guide

Installing Tivoli Common Reporting on a remote serverUse this procedure to install and configure Tivoli Common Reporting on a remoteserver.
To install Tivoli Common Reporting on a remote server, complete these steps:1. Install the DB2 client on the remote server. For information about installing the
DB2 client, see the DB2 information center. For more information about settingup multiple connections to the TPCDB data source, go to the Tivoli StorageProductivity information center and search for Setting up multiple connections tothe TPCDB data source in Tivoli Common Reporting.
2. Install Tivoli Common Reporting on the remote server.3. Create the data source in DB2 for the remote server by completing the
following steps:a. Catalog the DB2 TCP/IP node:
Run the following command:CATALOG TCPIP NODE db2_node_nameREMOTE host_nameSERVER port_numberREMOTE_INSTANCE db2_instance_nameSYSTEM system_nameOSTYPE operating_system_type
In the preceding command, specify the following values:
CATALOG TCPIP NODE db2_node_nameThis value specifies the node name of the DB2 server.
REMOTE host_nameThis value specifies the host name or IP address of the DB2 server.
SERVER port_numberThis value specifies the port number of the DB2 server. The default portis 50000.
REMOTE_INSTANCE db2_instance_nameThis value specifies the DB2 instance name on the remote server.
SYSTEM system_nameThis value specifies the DB2 system name that is used to identify theserver system.
OSTYPE operating_system_typeThis value specifies the operating system type of the server system.Valid values for Tivoli Common Reporting are: AIX, WIN, and LINUX.
An example for this command is:CATALOG TCPIP NODE db2nodeREMOTE system53.ibm.comSERVER 50000REMOTE_INSTANCE db2 system53SYSTEM system53OSTYPE win
b. Catalog the Tivoli Storage Productivity Center database.Run the following command:CATALOG DATABASE tpc_database_name AS tpc_database_alias_nameAT NODE db2_node_name AUTHENTICATION SERVER
In the preceding command, specify the following values:
Chapter 2. Installing Tivoli Storage Productivity Center 187

CATALOG DATABASE tpc_database_nameThis value specifies the name of the remote database to catalog.
AS tpc_database_alias_nameThis value specifies the alias for the remote database that is beingcataloged. If you do not specify an alias, the database manager uses thename of the remote database as the alias.
AT NODE db2_node_nameThis value specifies the name of the node that you previously cataloged.
AUTHENTICATION SERVERThis value specifies that authentication takes place on the DB2 datasource node.
An example for this command is:CATALOG DATABASE tpc_database_name AS tpc_database_alias_nameAT NODE db2node AUTHENTICATION SERVER
4. Type the following command on the client to connect to the remote database:CONNECT TO tpc_database_alias_name USER userid
5. When prompted, enter your password.6. If the connection is successful, move to step 7. If not, verify that step 3 was
done correctly.7. Configure Tivoli Common Reporting. For information about configuring Tivoli
Common Reporting, go to the Tivoli Common Reporting information centerand search for Configuring IBM Tivoli Common Reporting.
Related tasks:“Installing Tivoli Integrated Portal and Tivoli Common Reporting by using theinstallation wizard” on page 177You can install Tivoli Integrated Portal, Tivoli Common Reporting, and theweb-based GUI in a multiple-server environment using the installation wizard.“Installing Tivoli Integrated Portal and Tivoli Common Reporting by using silentmode” on page 182You can install Tivoli Integrated Portal, Tivoli Common Reporting, and theweb-based GUI in a multiple-server environment using silent mode. With thisconfiguration, you will be installing the Tivoli Storage Productivity Centercomponents on two servers.
Verifying the installationAfter you install Tivoli Storage Productivity Center, you can verify whether theinstallation was successful.
Use the following questions to guide you through the verification process.
Restriction: You must do the following tasks:v Use a user name with DB2 administrative privileges to run the DB2 commands.v Run the commands on the DB2 command line.
Was the TPCDB database created?To verify that the TPCDB database exists, run the following command:db2 list db directory
This command returns information about the TPCDB database.
188 IBM Tivoli Storage Productivity Center: Installation and Configuration Guide

Are the tables and views present in the TPCDB database?To verify that the tables and views are present, run the following DB2commands:db2 connect to TPCDBdb2 list tables for schema TPCdb2 disconnect TPCDB
These commands indicate that you can connect to and disconnect from theTivoli Storage Productivity Center database repository and list the tablesand views in the TPCDB database.
Is Tivoli Integrated Portal running?For Windows operating systems:
To verify that Tivoli Integrated Portal is running, go to the Services listingand find Tivoli Integrated Portal - V2.2_TIPProfile_Port_port. port is theport used by Tivoli Integrated Portal. The default port is 9568.
For the AIX or Linux operating systems:To verify that Tivoli Integrated Portal is running, run the followingcommand:ps -eaf | grep tip
This command returns a list of the Tivoli Integrated Portal processes in theprocess table.
Is Tivoli Common Reporting running?For Windows operating systems:
To verify that Tivoli Common Reporting is running, go to the Serviceslisting and find IBM Cognos Content Database.
For the AIX or Linux operating systems:To verify that Tivoli Common Reporting is running, run the followingcommand:ps -eaf | grep NetworkServerControl
This command returns a list of the IBM® Cognos® Business Intelligenceserver process in the processes table.
Is the Device server running?For Windows operating systems:
To verify that the Device server is running, go to the Services window andfind IBM WebSphere Application Server V8.0 - TPCDeviceServer.
For the AIX or Linux operating systems:To verify that the Device server is running, run the following command:ps -eaf | grep deviceServer
This command returns a list of the Device server processes in the processtable.To verify that the Device server services are running, enter the followingaddress in a web browser:http://hostname:port/ITSRM/ServiceManger
Is the Data server running?For the Windows operating systems:
To verify that the Data server is running, go to the Services listing and findIBM Tivoli Storage Productivity Center - Data Server.
Chapter 2. Installing Tivoli Storage Productivity Center 189

For the AIX or Linux operating systems:To verify that the Data server is running, run the following command:ps -eaf | grep DataServer.jar
This command returns a list of the Data server processes in the processtable.
Is the Replication server running?For the Windows operating system
To verify that the Replication server is running, go to the Services windowand find IBM WebSphere Application Server V8.0 -TPCReplicationServer.
For the AIX or Linux operating systems:To verify that the Replication server is running, run the followingcommand:ps -eaf | grep replicationServer
This command returns a list of the Replication server processes in theprocess table.
Is the Storage Resource agent running?For the Windows operating systems:
To verify that the Storage Resource agent is running, go to the Serviceswindow and find IBM Tivoli Storage Resource Agent.
For the AIX or Linux operating systems:To run the following command:ps -eaf | grep Agent
This command returns a list of the Storage Resource agent processes in theprocess table.
Can I log on to the web-based GUI ?Open a web browser and enter the following web address:http://host_name:port/srm
where host_name is the fully qualified host name where the web-based GUIis installed, and port is the port that is used by the web-based GUI. Thedefault port is 9568.
Are you running in a multiple-server environment?In a multiple-server environment, Tivoli Storage Productivity Centerauthenticates using the following rules:v Device server authentication is done through the Tivoli Integrated Portal
server. To run the tpctool command, you must authenticate from theTivoli Integrated Portal server and not from the Tivoli StorageProductivity Center server.
v For the stand-alone GUI, you must have a user name from the TivoliIntegrated Portal server and not from the Tivoli Storage ProductivityCenter server. The user name must be in the system group for the AIXoperating system, in the root group for the Linux operating system, andin the Administrators group for the Windows operating system. You canalso use a user name that is in a group that is mapped to the TivoliStorage Productivity Center superuser role.
v For the Replication server, authorization is done through the access list.You can configure the user access list in the administration console or
190 IBM Tivoli Storage Productivity Center: Installation and Configuration Guide

the CLI. At installation time, the common user name andtpcFileRegistryUser are the only users configured. If you want other usernames authorized, you must add those user names.
Reviewing the log files to resolve installation issuesIf an error occurs during Tivoli Storage Productivity Center installation, you canreview the error log files to resolve issues and continue the installation.
To resolve errors before you install Tivoli Storage Productivity Center, complete thefollowing steps:1. Navigate to one of the following directories:
v For the Windows operating system, go to %TEMP% directory
v For the UNIX or Linux operating system, go to /tmp directory
2. Review the following log files:v lax-xxxxx-out.txt
v lax-xxxxx-err.txt
Tip: The files are InstallAnywhere log files and are automatically generated. Thexxxxx are numeric characters that are assigned by the InstallAnywhere software.
To resolve errors after the Tivoli Storage Productivity Center installation starts,complete the following steps:1. Navigate to one of the following default directories:
v For the Windows operating system, go to C:\Program Files\IBM\TPC\logs
v For the AIX or Linux operating system, go to /opt/IBM/TPC/logs
2. Review these log files:v msgTPCInstall.log
v traceTPCInstall.log
v sra\agent.trace
v sra\agent_number.log
3. Review the Tivoli Integrated Portal log file:v On the Windows operating system, navigate to the C:\Users\Administrator\
TIPInstaller-00.log file.You are installing Tivoli Integrated Portal as an administrator.
v On the Linux operating system, navigate to the /root/TIPInstaller-00.logfile.
v On the AIX operating system, navigate to the /home/root/TIPInstaller-00.log file.
4. For agent log files, navigate to one of the following default directories:v For the Windows operating system, go to SRA_location\install
v For the UNIX or Linux operating system, go to /SRA_location/install
where SRA_location is where the Storage Resource agent is installed.5. Navigate to one of the following directories:
v For the Windows operating system, go to C:\Users\administrator\
v For the Linux operating system, go to /root
v For the AIX operating system, go to /home/root
Chapter 2. Installing Tivoli Storage Productivity Center 191

If an installation error occurred and you decide to do a partial rollback, themsgTPCInstall.log and traceTPCInstall.log files are updated with additionalinformation when you resume the installation.
Changing the operating system languageYou can change the operating system language that determines the language inwhich Tivoli Storage Productivity Center services, the stand-alone GUI, and theweb-based GUI are displayed.
To change the Windows operating system language for the stand-alone GUI,complete the following steps:1. Click Start > Control Panel.2. Click Clock, Language, and Region > Region and Language.3. On the Format tab, select a language and click OK.4. Restart all Tivoli Storage Productivity Center services or restart the system.
To change the language for the web-based GUI, see Displaying information in yourpreferred language.
To change the AIX operating system language, for example from English toGerman (de_DE), complete the following steps:1. At the command prompt, run the following commands:
chlang -m de_DE de_DEexport LANG=de_DE
2. Restart all Tivoli Storage Productivity Center services or restart the system.
Starting the stand-alone GUI by using a web browserYou can start the stand-alone GUI by using Java Web Start.
For information about starting the stand-alone GUI in a web browser, see “Startingthe Tivoli Storage Productivity Center stand-alone GUI by using Java Web Start”on page 210.
Adding an installation licenseIf you installed Tivoli Storage Productivity Center and want to add a Tivoli StorageProductivity Center license to use additional functions of the software, you can usethe installation wizard or silent-mode installation.
To determine the type of license you have, find these files in theTPC_installation_directory/properties/version directory: :
Tivoli_Storage_Productivity_Center.5.1.1.swtagIndicates that you have a Tivoli Storage Productivity Center license.
Tivoli_Storage_Productivity_Center_Advanced.5.1.1.swtagIndicates that you have a Tivoli Storage Productivity Center Advancedlicense.
Tivoli_Storage_Productivity_Center_Select.5.1.1.swtagIndicates that you have a Storage Productivity Center Select license.
Tivoli_Storage_Productivity_Center_Embedded.5.1.1.swtagIndicates that you have a license for the Tivoli Storage Productivity Centerproduct included with IBM Systems Director.
192 IBM Tivoli Storage Productivity Center: Installation and Configuration Guide
|
|||
||
|
|
|
|
||
||
|
||
|

Depending on the license you purchased, one of the following license key files canbe found in the license\key sub-directory, on disk1, part1 of the DVD, orelectronic image:
nodelockTivoli Storage Productivity Center license
nodelock.SELStorage Productivity Center Select license
nodelock.AETivoli Storage Productivity Center Advanced license
nodelock.EETivoli Storage Productivity Center product included with IBM SystemsDirector
Obtaining a license key to install Tivoli Storage ProductivityCenter 5.1.xThe media that is provided for Tivoli Storage Productivity Center 5.1.x does notinclude a license key. You must obtain the license key to install Version 5.1.x.
To obtain a license key, complete one of the following options:v Installing Tivoli Storage Productivity Center 5.1.x
1. In Tivoli Storage Productivity Center 5.1, navigate to the license keydirectory:root_directory/license/key/
2. Copy the entire directory from the Version 5.1 disk1 DVD or electronic imageand paste the contents into the disk1 source installation directory in Version5.1.x.
3. Use the modified source installation directory to complete the installation.v Upgrading to Tivoli Storage Productivity Center 5.1.x
When you upgrade from Version 5.1, your license is automatically transferred toTivoli Storage Productivity Center 5.1.x. For more information about upgradingfrom Version 4, go to the Tivoli Storage Productivity Center information centerand search for Product licenses for Tivoli Storage Productivity Center.Fore more information about upgrading from a previous version to TivoliStorage Productivity Center 5.1.x,, go to the Tivoli Storage Productivity Centerinformation center and search for Upgrading and Migrating Tivoli StorageProductivity Center.
Adding an installation license by using the installation wizardIf you installed Tivoli Storage Productivity Center and want to add a Tivoli StorageProductivity Center license for more functions, you can do so by using theinstallation wizard.
Before you add an installation license, you need the following image files:v Tivoli Storage Productivity Center 5.1 DVD or downloaded image files for the
license version that you plan to add.v Tivoli Storage Productivity Center 5.1.x downloaded image files for the version
of Tivoli Storage Productivity Center that is installed.
To add the license to your system by using the installation wizard, complete thefollowing steps:
Chapter 2. Installing Tivoli Storage Productivity Center 193

1. Obtain the license key file for the license you want to install from one of thefollowing locations:v Tivoli Storage Productivity Center 5.1 DVDv Tivoli Storage Productivity Center 5.1 downloaded image filesv
For more information about obtaining the license key file, see “Obtaining alicense key to install Tivoli Storage Productivity Center 5.1.x” on page 193.
2. Extract the Tivoli Storage Productivity Center 5.1.x downloaded image files toa temporary directory and start the installation software.
3. Select the installation language and click Next.4. On the Select a License Key page, enter the location of the license key file that
you obtained in the first step and click Next:5.1_GA_image/license/key/nodelock*
where 5.1_GA_image is the DVD mount point or the directory in which theVersion 5.1 installation image was extracted, and nodelock* is the name of yourlicense key file
5. Accept the license agreement and click Next.6. On the Choose Installation Location and Type page, the installation software
detects that you are installing the same version of Tivoli Storage ProductivityCenter 5.1.x and automatically selects License upgrade as the installation type.
7. Click Next.8. On the Upgrade the License page, select the Specify the location of the license
key file option and enter the following directory path to the license key file:5.1_GA_image/license/key/nodelock*
where 5.1_GA_image is the DVD mount point or the directory where the 5.1installation image was extracted, and nodelock* is the name of your license keyfile.
9. Click Next and click Install.Related reference:“Planning for Tivoli Storage Productivity Center authentication and authorization”on page 28An operating system user name is required to install and log on to Tivoli StorageProductivity Center for the first time. After you install Tivoli Storage ProductivityCenter, you can assign roles to users that enable users to log on and determine thecomponents that the user can view in the graphical user interface (GUI).
Adding an installation license using silent modeIf you installed Tivoli Storage Productivity Center and want to add a Tivoli StorageProductivity Center license to access additional function, you can do so by usingsilent-mode installation.
To add the license to your system using silent mode, complete the following steps:1. If you are adding a license on the AIX or Linux operating system, source the
db2profile.2. Log on to your Tivoli Storage Productivity Center system with the appropriate
user privileges.3. Start the Tivoli Storage Productivity Center installation wizard from the DVD
or from the license image you want to add.
194 IBM Tivoli Storage Productivity Center: Installation and Configuration Guide

4. Modify the following parameters in thesilent_SingleServerTypical.properties,silent_SingleServerCustom.properties, or silent_MultipleServer.propertiesfile:v CHOSEN_INSTALL_TYPE="License Upgrade"
v varUseLicenseKeyOnImage=
v varLicenseKeyFile=
5. Save the appropriate response file.6. Stop and restart the Tivoli Storage Productivity Center GUI.Related reference:“Planning for Tivoli Storage Productivity Center authentication and authorization”on page 28An operating system user name is required to install and log on to Tivoli StorageProductivity Center for the first time. After you install Tivoli Storage ProductivityCenter, you can assign roles to users that enable users to log on and determine thecomponents that the user can view in the graphical user interface (GUI).“Editing the response file” on page 168You must edit and save the appropriate response file when you install TivoliStorage Productivity Center in silent mode. The silent mode install option for theresponse file is -f absolute_path_to_response_file. For example, in the Windowsoperating system, you enter -f C:\installimage\silent_SingleServerTypical.properties.
Installing the agentsYou can install the Storage Resource agent using the installation program, theTivoli Storage Productivity Center user interface, or a command.
You can select one of the following agent installation scenarios:v To deploy the Storage Resource agent using the GUI, see “Storage Resource
agent Deployments” on page 296.v To install the agent using a command, see “Installing the agent using a
command” on page 196.v To install the agent on a Virtual I/O Server, see “Installing the Storage Resource
agent on the Virtual I/O Server” on page 198.v To deploy the agent remotely on the Virtual I/O Server, see “Deploying the
Storage Resource agent remotely” on page 199.
Restriction:
v Before you install or deploy the Storage Resource agent on a system, you mustdisable the firewall on that system.
v If you are using PowerHA software, a Storage Resource agent must be installedon each node of the cluster and all agents in a cluster must be configured to usethe same listening port.
v To scan a cluster resource group, you must configure the cluster resource groupto have at least one IP address that is accessible from the Tivoli StorageProductivity Center server.
To install the Storage Resource agents, you must log in as a user with thefollowing authority:
On Windows operating systemsYou must have Windows Administrator authority.
Chapter 2. Installing Tivoli Storage Productivity Center 195

On UNIX or Linux operating systemsYou must be logged in as the root user.
Preparing to install Storage Resource agentsThis section provides information on preparing to install the Storage Resourceagents.
General information
For information about deploying Storage Resource agents, see “Deploymentguidelines and limitations for Storage Resource agents” on page 297.
Installing the agent using a commandYou can install the Storage Resource agent using a command.
You would typically install the Storage Resource agents using the Tivoli StorageProductivity Center GUI. However, if you need to install the Storage Resourceagents locally, you can do so with limited support.
During this installation method, a return code of zero means that a successfulinstallation occurred and a nonzero return code means that an unsuccessfulinstallation occurred. If you have an unsuccessful installation, you must review thelog files to determine the problem.
The -force option can be used when you have a Storage Resource agent pointing tomultiple servers. If one server has installed an agent, and another server wants toinstall an agent in the same location, the second server can use the -force option toinstall the agent.
If you use this installation method, when you enter a directory to install theStorage Resource agent, do not add an ending slash mark (\). For example, do notspecify C:\agent1\. This action causes the installation to fail.
If you run the agent as a non-daemon service (On-Demand service), you mustmake sure that at least one protocol is valid for a successful connection from theserver to the agent. See Table 30 for the required parameters for each protocol.
Table 30. Parameters required for each protocol
Protocol Description
SSH Requires the user ID and password or user ID, certificate, andpassphrase.
Windows (SMB) Requires the user ID and password.
REXEC Requires user ID and password.
RSH Requires the user ID.
The Storage Resource Agent image contains the installation images for the StorageResource agents in the following directory:DVD_installation_image_location/data/sra/operating_system
See Table 31 on page 197 for the Storage Resource agent installation images.
196 IBM Tivoli Storage Productivity Center: Installation and Configuration Guide

Table 31. Storage Resource agent installation images
Operating system Operating system name
AIX aix_power
HP-UX hp-ux_itanium
Linux x86 linux_ix86
Linux for Power Systems Servers linux_power
Linux s390 linux_s390
Oracle Solaris solaris_sparc
Windows windows
To install the Storage Resource agents locally, complete the following steps:1. Go to the installation image location:
cd DVD_installation_image_location
2. Run the following command:
�� bin/Agent -install -serverPort server_secure_port-force
�
� -serverIP server_IP_address -installLoc Agent_install_location-debug MAX
�
�(1)
-agentPort agent_port -commtype daemon �
�(2)
-userID user_ID -password password -certFile certificate_file �
�(3)
-passphrase passphrase ��
Notes:
1 Parameters when the agent is run as a daemon service.
2 Parameters when the agent is run as a non-daemon service. See Table 30on page 196 to determine which parameter is required for each protocol.
3 Parameters when the agent is run as a non-daemon service. See Table 30on page 196 to determine which parameter is required for each protocol.
The parameters are as follows:
-installInstalls the Storage Resource agent.
-forceThis forces the agent to be installed. There are two different situations inwhich this parameter must be specified:v If an earlier installation failed and there is residue on the system which
causes further installations to fail. You must make sure that all theparameters provided are valid, such as the installation location, port, andso on.
v If the agent is already installed from one server and you now mustinstall the agent pointing to another server.
-serverPort server_secure_portThe default port for the Data server is 9549.
Chapter 2. Installing Tivoli Storage Productivity Center 197

-serverIP server_IP_addressThe IP address of the server. If the server can be reached through multipleIP addresses, then multiple IP addresses can be specified with IP addressesseparated with a comma.
-installLoc "Agent_install_location"Location where the agent is installed. Enclose the directory name inquotation marks, for example, "C:\Program Files\IBM\TPC_SRA\".
-debug MAXOptional parameter for debugging purposes.
-agentPort agent_portIf the agent is run as a daemon service, then the agent port must bespecified.
-commtype daemonIf the agent is run as a daemon service, then this parameter must bespecified.
-userID user_IDFor non-daemon service. The user ID defined on the agent system. Thisuser ID is used by the server to connect to the agent system.
-password passwordFor non-daemon service. Password for the user ID.
-certFile "certificate_file"For non-daemon service. The certificate used for SSH communicationbetween the server and agent. This certificate must be stored on the serversystem. Enclose the directory name in quotation marks, for example,"c:\keys\id_sra".
For information about SSH protocol and SSL protocol certificates, see“Creating a certificate for SSH protocol” on page 301 and “Replacing acustom certificate for SSL protocol” on page 306.
-passphrase passphraseFor non-daemon service. The passphrase defined for the certificate used inSSH communication.
Installing the Storage Resource agent on the Virtual I/O ServerYou can install the Storage Resource agent on the Virtual I/O Server.
Local installation
To install the Storage Resource agent on the Virtual I/O Server, complete thefollowing steps:1. Log in to the Virtual I/O Server using the padmin user ID.2. Run the following command to set up the AIX environment:
oem_setup_env
3. Change to the directory where the Storage Resource agent installation image islocated.
Note: You can either mount the Storage Resource agent installation DVD orFTP to the Storage Resource agent installation image to the padmin homedirectory.
198 IBM Tivoli Storage Productivity Center: Installation and Configuration Guide
4. Run the Storage Resource agent installation command. For information aboutthe Storage Resource agent installation command, see “Installing the agentusing a command” on page 196.
Deploying the Storage Resource agent remotelyYou can deploy the Storage Resource agent remotely for the Virtual I/O Serverfrom your local workstation.
Remote deployment
To deploy the Storage Resource agent remotely, complete the following steps:1. Enable remote access for the root user ID. Follow these steps:
a. Connect to the Virtual I/O Server using ssh/telnet with the padmin userID.
b. Run the following command to set up the AIX environment:oem_setup_env
c. Run the following command:smitty login_user
d. In the User NAME field, type root and press Enter.e. In the User can LOGIN REMOTELY(rsh,tn,rlogin)? field, set the value to
true.2. Click Save.3. Create an SSH certificate for the root user ID. For information about creating
the SSH certificate for the root user, see “Creating an SSH certificate for theroot user ID” on page 348.
4. Start the remote deployment.
Installing the Tivoli Storage Productivity Center Monitoring AgentThe Tivoli Storage Productivity Center Monitoring Agent can be used by the IBMTivoli Enterprise Monitoring Server to monitor systems in your enterprise. Thisagent is an optional program you can install and use in your enterprise. TheMonitoring Agent uses an existing Tivoli Storage Productivity Center server in theenvironment to obtain information.
You will be installing the Tivoli Storage Productivity Center Monitoring Agent inthe Tivoli Storage Productivity Center environment. You will also be installing theagent-specific support files needed by the Tivoli Enterprise Monitoring Server.
Installing and configuring the Tivoli Storage Productivity Center MonitoringAgent on Windows:
This topic describes how to install the Tivoli Storage Productivity CenterMonitoring agent on Windows.
Installing the Monitoring Agent in the Tivoli Storage Productivity Centerenvironment
This procedure describes how to install the Monitoring Agent in the Tivoli StorageProductivity Center environment. You can install the agent on the Tivoli StorageProductivity Center server or on another computer. This example assumes thefollowing:v The Tivoli Monitoring Server environment is installed and running.
Chapter 2. Installing Tivoli Storage Productivity Center 199
v You are installing the agent on a computer that is different from the server onwhich Tivoli Storage Productivity Center is installed.
To install the Tivoli Storage Productivity Center Monitoring Agent on Windows:1. Gather information required by the Tivoli Storage Productivity Center
Monitoring agent installation wizard. You will need to know the host nameand authentication password of the Tivoli Storage Productivity Center server.
2. Log on to the system with administrator authority on Windows.If you are using the installation DVD, the files are located in the itm folder. Ifyou are using the installation image, use the Disk 2 image.
3. In the installation directory and run setup.exe.4. Proceed through the wizard.5. On the User Data Encryption Key page, enter a data encryption key for
encrypted communication.The Tivoli Enterprise Monitoring server uses a data encryption key for SecureSocket (SSL) communication between the agent and server.
6. Write down the key so that you can configure the Tivoli MonitoringEnterprise server with the encryption key and click Next when you havespecified the key.
Note: For information about the data encryption key, see Step 4: Define thenode's security environment in http://publib.boulder.ibm.com/infocenter/tivihelp/v24r1/index.jsp?topic=%2Fcom.ibm.itcamfad.doc_7.1%2FABD003%2Fsection1.html.
7. On the Select Program Folder page, enter a Program Folder name or select afolder from the Existing Folders list, and click Next.
8. On the Start Copying Files page, review your current setting, and click Next.Wait for the installation to complete.
9. On the Tivoli Storage Productivity Center Agent Configuration page, in thenavigation tree, you see these configuration steps:v For Log Configuration, enter the following information, and click Next:
Log FileDirectory and file name where the Monitoring Agent log file iscreated. The default is $ITM_INSTALL_DIR/tmaitm6/logs/TPCAgent.log..
Log LevelSpecify the debugging level for the log file.
v For TPC Configuration , enter this information, and click Next:
AddressIP address or host name of the Device server.
TPC Device Server PortPort for connecting to the Device server. The default port is 9550.
TPC Host Authentication PasswordPassword to use to connect to the Device server.
Confirm TPC Host Authentication PasswordEnter the password again.
200 IBM Tivoli Storage Productivity Center: Installation and Configuration Guide

v For the optional Server and Data Sources Node, click New, enter a nodename, and click Next. This node name is internal to Tivoli StorageProductivity Center and will not be displayed in the Tivoli StorageProductivity Center user interface.
v For the optional Computers and Hypervisors Node, click New, enter anode name, and click Next. This node name is internal to Tivoli StorageProductivity Center and will not be displayed in the Tivoli StorageProductivity Center user interface.
v For the optional Storage Systems Node, click New, enter a node name, andclick Next. This is node name is internal to Tivoli Storage ProductivityCenter and will not be displayed in the Tivoli Storage Productivity Centeruser interface.
v For the optional Fabrics and Switches Node, click New to add a new datanode, and enter a node name, and click OK. This node name is internal toTivoli Storage Productivity Center will not be displayed in the TivoliStorage Productivity Center user interface.
Note: You can specify information for the optional nodes if you want TivoliStorage Productivity Center to collect information about those nodes.
Note: If you configure more than one Monitoring Agent to collect informationfor these optional nodes, use unique node names for the different MonitoringAgents. Using identical names for the same node on more than one agent canresult in Tivoli Monitoring Server displaying information for only the nodeson the most recently refreshed Monitoring Agent. For example, do not use thesame node name for Server and Data Sources Node on more than oneMonitoring Agent.
10. If the TEMS connection panel is not displayed, open the Manage TivoliEnterprise Monitoring Services page.
11. Select Monitoring Agent for TPC, right-click Monitoring Agent for TPC, andclick Reconfigure.
12. On the Configure Monitoring Agent for TPC, for the TEMS Connection page,enter this information for the Protocol 1 tab:
TEMS HostnameHost name of the Tivoli Enterprise Monitoring Server.
Port NumberThe default port is 1918.
ProtocolEnter the protocol type. For IP.PIPE settings, enter the port number.
For information about the TEMS connection parameters, seehttp://publib.boulder.ibm.com/infocenter/tivihelp/v15r1/index.jsp?topic=/com.ibm.omegamon.mes.doc/zosconfigguide601263.htm. Your configuration isnow complete.
13. To enable the Eclipse Help Server for Tivoli Monitoring Services, configure theEclipse Help Server.
14. Specify port 80 and restart TEMS and TEPS if necessary.
Chapter 2. Installing Tivoli Storage Productivity Center 201

Installing the Monitoring Agent support files in the IBM Tivoli MonitoringServer environment
Tivoli Storage Productivity Center has support files that are installed on each ofthese Tivoli Monitoring components:v Tivoli Enterprise Monitoring Server (TEMS)v Tivoli Enterprise Portal Server (TEPS)v Tivoli Enterprise Portal Desktop Client (TEPDC)
To install the Monitoring Agent in the IBM Tivoli Monitoring Server environment:1. Log on to the IBM Tivoli Monitoring system with administrator authority on
Windows.v If you are using the installation DVD, the files are located in the itm folder.v If you are using the installation image, use the Disk 1 part 4 image.
2. Go to the installation directory and run setup.exe.3. Proceed through the wizard.4. On the Select Features page, select the features you want to install:
a. Expand Tivoli Enterprise Monitoring Agents - TEMA, ensuring that youexpand all nodes and select all checkboxes.
Tivoli Enterprise Monitoring Server - TEMSTPC
Tivoli Enterprise Portal Server - TEPSTPC
TEP Desktop Client - TEPDTPC
b. Click Next
5. In the IBM Tivoli Productivity Center Monitoring - InstallShield Wizard, selectall the components related to Tivoli Storage Productivity Center:
Note: This panel is displayed when the Monitoring Agent is installed on theTivoli Monitoring Server.
Tivoli Enterprise Monitoring Agents - TEMATivoli Enterprise Monitoring Agent FrameworkTPCTivoli Enterprise Services User Intrface Extensions
Tivoli Enterprise Monitoring Server - TEMSTPC
Tivoli Enterprise Portal Server - TEPSTPC
TEP Desktop Client - TEPDTPC
6. Ensure that you expand all the nodes and select all the checkboxes and clickNext.
7. Select the appropriate program folder in which the agent will be installed andclick Next.
8. On the summary page, review the summary information and click Next.9. After installation is complete, on the Configuration Defaults for Connecting to
a TEMS page, you can enter connection information for the Tivoli Monitoringserver and the Tivoli Storage Productivity Center Device server.
Note: This panel is displayed when the Monitoring Agent is installed on theTivoli Monitoring server.
202 IBM Tivoli Storage Productivity Center: Installation and Configuration Guide
10. Enter this information for the Protocol 1 tab and click OK:
TEMS HostnameHost name of the Tivoli Enterprise Monitoring Server.
ProtocolEnter the protocol type. For IP.PIPE settings, enter the port number.
For information about the TEMS connection parameters, gotohttp://publib.boulder.ibm.com/infocenter/tivihelp/v15r1/index.jsp?topic=/com.ibm.omegamon.mes.doc/zosconfigguide601263.htmYour configuration is now complete. To see the reports that were generated,go to theTivoli Storage Productivity Center Information Center and search formonitoring agent reports.
Installing and configuring the Tivoli Storage Productivity Center MonitoringAgent on AIX or Linux:
This topic describes how to install the Tivoli Storage Productivity CenterMonitoring Agent on AIX or Linux.
Installing the Monitoring Agent and support files in the Tivoli StorageProductivity Center environment
This example assumes that the Tivoli Monitoring environment is installed andrunning and that you are installing the agent in the Tivoli Storage ProductivityCenter environment.
Tivoli Storage Productivity Center install support files on each of these TivoliMonitoring components:v Tivoli Enterprise Monitoring Server (TEMS)v Tivoli Enterprise Portal Server (TEPS)v Tivoli Enterprise Portal Desktop Client (TEPDC)
Note:
v IBM Tivoli Monitor does not support the Tivoli Enterprise Portal Desktop Client(TEPDC) on AIX.
v If you have the Tivoli Enterprise Portal Browser Client installed, you must alsoinstall the Monitoring Agent support files on the Browser Client.
To install the Tivoli Storage Productivity Center Monitoring agent on AIX or Linux:1. Gather the following information required by the Tivoli Storage Productivity
Center Monitoring agent installation wizard, such as the host name and IPaddress of the Tivoli Enterprise Monitoring server.
2. Log on to the system with the root user ID or a user ID that has root accessrights.v If you are using the installation DVD, the files are located in the itm folder.v If you are using the installation image, use the Disk 1 part 4 image.
3. Go to the installation directory and run ./install.sh.4. Here is an example of the prompts and responses you will see. This example
assumes that you do not have a directory and are creating a directory and areinstalling the agent on a local host.
Chapter 2. Installing Tivoli Storage Productivity Center 203

UPGRADE
Enter the name of the IBM Tivoli Monitoring directory[ default = /opt/IBM/ITM ]:
"/opt/IBM/ITM" does not existTry to create it [ 1-yes, 2-no; "1" is default ]? 1
Select one of the following:
1) Install products to the local host.2) Install products to depot for remote deployment (requires TEMS).3) Install TEMS support for remote seeding4) Exit install.
Please enter a valid number: 1
5. This example is a continuation from the previous step and lets you read thelicense agreement.
International Program License Agreement
...
...
6. Read and agree with the license agreement, make a selection, and press Enter.7. This example is a continuation from the previous step and lets you enter an
encryption key for a secure connection between the monitoring agent and theTivoli Enterprise Monitoring Server.
Enter a 32-character encryption key, or just press Enter to use the defaultDefault = IBMTivoliMonitoringEncryptionKey
GSkit encryptin key has been set.Key File directory: /opt/IBM/ITM/keyfiles
Note: For information about the encryption key, go tohttp://publib.boulder.ibm.com/infocenter/tivihelp/v24r1/index.jsp?topic=%2Fcom.ibm.itcamfad.doc_7.1%2FABD003%2Finstall_unix.html and see Step 5:Provide an encryption key.
8. Enter the encryption key and press Enter.9. Use the default key or enter a new key.
10. Write down and save the key so that you can configure the Tivoli EnterpriseMonitoring Server later and press Enter.
11. This example is a continuation from the previous step and lets you select theproduct packages to install. Make a selection and press Enter. For an agentonly installation, select 1.
Product packages are available for this operating system and component supportcategories:
1) IBM Tivoli Monitoring components for this operating system2) Tivoli Enterprise Portal Browser Client support3) Tivoli Enterprise Portal Desktop Client support4) Tivoli Enterprise Portal Server support5) Tivoli Enterprise Monitoring Server support6) Other operating systems
12. This example is a continuation from the previous step and lets you select theproduct to install:
204 IBM Tivoli Storage Productivity Center: Installation and Configuration Guide

a. Enter 3 (for Tivoli Enterprise Portal Desktop Client support) on theProduct packages panel and press Enter.
The following products are available for installation:
1) Monitoring Agent for TPC V06.22.00.002) All of the above
Select 2 and press Enter. Wait for this step to complete.b. Enter 4 (for Tivoli Enterprise Portal Server support) on the Product
packages panel and press Enter.
The following products are available for installation:
1) Monitoring Agent for TPC V06.22.00.002) All of the above
Select 2 and press Enter. Wait for this step to complete.c. Enter 5 (for Tivoli Enterprise Monitoring Server support) on the Product
packages panel and press Enter.
The following products are available for installation:
1) Monitoring Agent for TPC V06.22.00.002) All of the above
Select 2 and press Enter. Wait for this step to complete.13. You see this prompt. Enter 2 and press Enter.
Do you want to install additional products or product support packages?
You see the following message:Installation step complete.
14. You see this prompt.
You may now configure any locally installed IBM Tivoli Monitoring productvia the "/opt/IBM/ITM/bin/itmcmd config" command.
Go to the following directory:cd /opt/IBM/ITM/bin
Run this command:./itmcmd manage &
15. The Manage Tivoli Enterprise Monitoring Services window is displayed. SelectMonitoring Agent for TPC. Right-click Monitoring Agent for TPC and clickConfigure.
16. The Tivoli Storage Productivity Center Agent Configuration panel isdisplayed. In the navigation tree, you see these configuration steps:v For Log Configuration, enter the following information, and click Next:
Log FileDirectory and file name where the Monitoring Agent log file iscreated. The default is $ITM_INSTALL/li6263/p1/bin/logs/TPCAgent.log.
Log LevelSpecify the debugging level for the log file.
Chapter 2. Installing Tivoli Storage Productivity Center 205

v TPC Configuration, enter this information, and click Next:
AddressIP address or host name of the Device server.
TPC Device Server PortPort for connecting to the Device server.
TPC Host Authentication PasswordPassword to use to connect to the Device server.
Confirm TPC Host Authentication PasswordEnter the password again.
v For the optional Server and Data Sources Node, click New, enter a nodename, and click Next. This internal Tivoli Storage Productivity Center nodename will not be displayed in the Tivoli Storage Productivity Center userinterface.
v For the optional Computers and Hypervisors Node, click New, enter anode name, and click Next. This internal Tivoli Storage Productivity Centernode name will not be displayed in the Tivoli Storage Productivity Centeruser interface.
v For the optional Storage Systems Node, click New, enter a node name, andclick Next. This internal Tivoli Storage Productivity Center node name willnot be displayed in the Tivoli Storage Productivity Center user interface.
v For the optional Fabrics and Switches Node, click New, enter a node name,and click OK. This internal Tivoli Storage Productivity Center node namewill not be displayed in the Tivoli Storage Productivity Center userinterface.
Note: You can specify information for the optional nodes if you want TivoliStorage Productivity Center to collect information about those nodes.
Note: If you configure more than one Monitoring Agent to collect informationfor these optional nodes, use unique node names for the different MonitoringAgents. Using identical names for the same node on more than one agent canresult in Tivoli Monitoring Server displaying information for only the nodeson the most recently refreshed Monitoring Agent. For example, do not use thesame node name for Server and Data Sources Node on more than oneMonitoring Agent.
17. Open the Manage Tivoli Enterprise Monitoring Services window and selectMonitoring Agent for TPC.
18. Right-click Monitoring Agent for TPC and click Configure.19. On the Configure Monitoring Agent for TPC page, for the TEMS Connection
page, enter this information for the Protocol 1 tab:
TEMS HostnameHost name of the Tivoli Enterprise Monitoring Server.
ProtocolEnter the protocol type. For IP.PIPE settings, enter the port number.
For information about the TEMS connection parameters, gotohttp://publib.boulder.ibm.com/infocenter/tivihelp/v15r1/index.jsp?topic=/com.ibm.omegamon.mes.doc/zosconfigguide601263.htm.Your configuration is now complete.
206 IBM Tivoli Storage Productivity Center: Installation and Configuration Guide

Note: If you need to reconfigure the Tivoli Enterprise Portal Server, TivoliEnterprise Monitoring Server, and Tivoli Enterprise Portal Desktop Client,do the following:a. Open the Manage Tivoli Enterprise Monitoring Services console by
running the command:itmcmd manage
b. Right-click Tivoli Enterprise Portal Server and click RebuildConfiguration.
c. Right-click Tivoli Enterprise Monitoring Server and click RebuildConfiguration.
d. Right-click Tivoli Enterprise Portal Desktop Client and click RebuildConfiguration.
20. To enable the Eclipse Help Server for Tivoli Monitoring Services, openManage Tivoli Monitoring Services and configure the Eclipse Help Server.
21. Specify port 80 be used and restart TEMS and TEPS if necessary.
Reinstalling the software if a failure occursIf an installation failure occurs, you do not have to uninstall components that weresuccessfully installed. Tivoli Storage Productivity Center provides an option topartially, or fully, roll back the installation.
A full rollback uninstalls all the components (even if they were installedsuccessfully), and a partial rollback uninstalls only the components that were notsuccessfully installed. The partial rollback option helps you resolve the problemsthat are causing the installation failure. After you resolve the problem, you caninstalling the remaining components. For example, if the correct libraries were notinstalled for the Linux operating system, and the installation stops. You can installthe correct libraries and resume the installation.
Tip: If you install Tivoli Storage Productivity Center on a Windows operatingsystem and select Full Rollback, you must restart the server after the rollback iscomplete. The installation is complete only after the rollback errors are resolved.
If you originally selected a partial rollback, but decided to completely uninstall,you must run the uninstallation program before you reinstall Tivoli StorageProductivity Center.
The following table shows the results from a partial rollback. The components arelisted in the order in which they were installed.
Table 32. Results from a partial rollback
If an installation failureoccurs when you install thiscomponent... Partial rollback results are...
Tivoli Storage ProductivityCenter common files andJava Runtime Environment
There is no partial rollback. The installation programperforms a full rollback.
Tivoli Integrated Portal Tivoli Integrated Portal is uninstalled.
Database repository The database repository is uninstalled.
Data server The Data server is uninstalled.
WebSphere ApplicationServer
The WebSphere Application Server is uninstalled.
Chapter 2. Installing Tivoli Storage Productivity Center 207

Table 32. Results from a partial rollback (continued)
If an installation failureoccurs when you install thiscomponent... Partial rollback results are...
Device server The Device server is uninstalled.
Replication server The Replication server is uninstalled.
Storage Resource agent The Storage Resource agent is uninstalled.
stand-alone GUI The stand-alone GUI is uninstalled.
web-based GUI The web-based GUI is uninstalled.
Command-line interface The command-line interface is uninstalled.
Taking the first steps after installationAfter you install IBM Tivoli Storage Productivity Center, there are tasks that youshould complete before you begin configuring the product.
Remove the Tivoli Storage Productivity Center installationdirectory from the antivirus scan
Scans that are conducted by antivirus software cause more I/O write operations onthe Tivoli Storage Productivity Center and Tivoli Storage Productivity Center forReplication server disk drives. For example, the antivirus software might be set toscan any file, record, or process that is written to or read. In this example, the scanwould include logs, read/write operations for database records, and Java processesthat are used by the product. The antivirus software might then complete writeoperations that are associated with these scans.
These additional operations can affect product performance and are visible inperformance monitoring tools for the operating system on which the product isinstalled. For example, on the Windows operating system, the Reliability andPerformance Monitor might show an unusually high number of active writeoperations for Tivoli Storage Productivity Center and Tivoli Storage ProductivityCenter for Replication.
To improve performance, update your antivirus software so that it excludes theTivoli Storage Productivity Center installation directory. To create an exception, seethe documentation for your antivirus software.
208 IBM Tivoli Storage Productivity Center: Installation and Configuration Guide

Chapter 3. Configuring Tivoli Storage Productivity Center
After you installed IBM Tivoli Storage Productivity Center, you must configure it.You can use the Configuration Utility to learn how to configure and use TivoliStorage Productivity Center. This section also describes each node underAdministrative Services > Configuration.
The Data server hosts the control points for product scheduling functions,configuration, event information, reporting, and graphical user interface support.The Data server coordinates communication with the agents for data collection.The agents scan file systems and databases to gather storage demographics andpopulate the database with results. Automated actions can be defined to drivefunctions like data deletion, IBM Tivoli Storage Manager backup or archiving, orevent reporting when defined thresholds are encountered. The Data server is theprimary contact point for all user interface functions. The user interface functionsalso include actions that schedule data collection and discovery for the Deviceserver.
The Device server discovers objects, gathers information from, analyzesperformance of, and controls storage subsystems and SAN fabrics. The Deviceserver coordinates communication with the agents to collect data about the SANfabrics.
Starting Tivoli Storage Productivity CenterIBM Tivoli Storage Productivity Center provides two graphical user interface (GUI)applications for managing and monitoring the resources in a storage environment:a stand-alone GUI and a web-based GUI. You can start these GUIs on the TivoliStorage Productivity Center server or on a remote system.
The stand-alone GUI and the web-based GUI provide different functions and offerdifferent advantages. Start the one that is best suited to your current needs.v The stand-alone GUI contains functions for monitoring the condition of storage
resources, and all the tools for managing data, disk, fabric, tape, and replication.Start the stand-alone GUI if you must have the full administrative capabilities ofTivoli Storage Productivity Center. How you start the stand-alone GUI dependson whether the stand-alone GUI component is installed on your system.
v The web-based GUI provides quick access to pages that you can use to monitorthe condition, capacity, and relationships of the resources within your storageenvironment. Start the web-based GUI if you are interested in monitoring yourstorage environment but do not require the full set of administrative toolsavailable in the stand-alone GUI.
Starting the Tivoli Storage Productivity Center stand-aloneGUI
The stand-alone GUI contains functions for monitoring the condition of storageresources, and all the tools for managing data, disk, fabric, tape, and replication.
How you start the stand-alone GUI depends on whether the stand-alone GUIcomponent is installed on your system.
© Copyright IBM Corp. 2001, 2012 209

v On the Tivoli Storage Productivity Center server, or on a remote system wherethe stand-alone GUI component is installed, you start the stand-alone GUI byrunning a batch file or a shell script. For Windows operating systems, you runthe batch file tpc.bat, which you can run from the Start menu. For AIX or Linuxoperating systems, you run the shell script TPCD.sh.
v If the stand-alone GUI component is not installed on a remote system, you use aJava Web start application to download and start the stand-alone GUI.
Starting the Tivoli Storage Productivity Center stand-alone GUIby using Java Web StartStart the stand-alone Tivoli Storage Productivity Center GUI by using Java WebStart to interact remotely with Tivoli Storage Productivity Center running on theserver.
Before you start Tivoli Storage Productivity Center, ensure that you are using asupported web browser. For a list of web browsers that you can use with TivoliStorage Productivity Center, see the support matrix at http://www.ibm.com/support/docview.wss?uid=swg21386446. In the Agents, Servers and GUI column,click the version of Tivoli Storage Productivity Center that is installed on yoursystem. On the next page, click Web Browsers to find the web browsers that youcan use.
On remote systems where the stand-alone GUI component is not installed, you canstart the stand-alone Tivoli Storage Productivity Center GUI using Java Web Start.To start the stand-alone GUI by using Java Web Start, you click a web link thatdownloads a Java Network Launching Protocol (JNLP) file from the server. TheJNLP file specifies all the files needed by the application. The Java Web StartLauncher on the remote system opens the JNLP file, downloads and caches all therequired files, and starts the stand-alone GUI in a new window.1. Start a web browser, and type the following address for the Java Web Start
page.http://hostname:port/ITSRM/app/welcome.html
In the preceding address, specify the following values:
hostnameThe Tivoli Storage Productivity Center server. You can specify the hostnameas an IP address or a Domain Name System (DNS) name. To verify yourhost name, ask your Tivoli Storage Productivity Center administrator.
portThe port number for the Device server. The default port number forconnecting to the Device server using the HTTP protocol is 9550. However,this port number might be different for your site. For example, the portnumber might be different if the default port range was not acceptedduring installation. If the default port number does not work, ask yourTivoli Storage Productivity Center administrator for the correct portnumber.
2. The Tivoli Storage Productivity Center GUI requires an IBM Java RuntimeEnvironment 1.6.0. Links are provided on the Java Web start page for you todownload the IBM Java Runtime Environment 1.6.0 for Windows, Linux, orAIX. If an IBM Java Runtime Environment 1.6.0 is not already installed on thesystem, click the link to download the IBM Java Runtime Environment 1.6.0 foryour operating system. On Windows, download a self-extracting executable. OnLinux, download an RPM file. On AIX, download an executable JAR file. Install
210 IBM Tivoli Storage Productivity Center: Installation and Configuration Guide

the JRE from the file that you downloaded before you start the stand-aloneGUI. If you are prompted to install the JRE as the system JRE or to overwritethe current system JRE, click No.
3. From the Java Web Start page, click TPC GUI (Java Web Start)
The JNLP file is downloaded.
Important: Depending on your browser and operating system and theirdefault settings for your browser and operating system) you might need to:v Verify to your browser that the tpcgui.jnlp file is safe to downloadv Indicate that JNLP files are to be opened by the Java Web Start Launcher
For more information, go to the Tivoli Storage Productivity Center informationcenter at http://publib.boulder.ibm.com/infocenter/tivihelp/v59r1/index.jspand search for Cannot start the Tivoli Storage Productivity Center stand-alone GUIremotely.
4. The stand-alone Tivoli Storage Productivity Center GUI opens in a separatewindow. To log on to Tivoli Storage Productivity Center, enter the followinginformation and click OK.a. Enter your user ID and password.
Important: If you are logging on immediately after installation and, see“Overview of required user IDs for initial log on to the Tivoli StorageProductivity Center family of products” on page 215 for information on theuser ID you must use.
b. If the server field does not contain the address and port number of for theserver, specify the following values for the hostname and port.
hostnameThe Tivoli Storage Productivity Center server. You can specify thehostname as an IP address or a Domain Name System (DNS) name. Toverify your host name, ask your Tivoli Storage Productivity Centeradministrator.
portThe port number for the Data server. The default port number forconnecting to the Data server is 9549. However, this port number mightbe different for your site. For example, the port number might bedifferent if the default port range was not accepted during installation.
Starting the Tivoli Storage Productivity Center stand-alone GUIon a system where the GUI component is installedOn the Tivoli Storage Productivity Center server, or on a remote system where thestand-alone GUI component is installed, you start the Tivoli Storage ProductivityCenter stand-alone GUI using the batch file tpc.bat on a Windows operatingsystem or the shell script TPCD.sh on an AIX and Linux operating system.
A typical installation of Tivoli Storage Productivity Center on the server includesthe stand-alone GUI component. A remote system can also have the stand-aloneGUI component installed. On a system where the stand-alone GUI component isinstalled, use the following instructions for starting the stand-alone GUI. If you areon a remote system where the stand-alone GUI component is not installed, startthe stand-alone GUI by using Java Web Start instead.1. Start the Tivoli Storage Productivity Center GUI by using the Start menu or
batch file on a Windows operating system or a shell script on an AIX or Linuxoperating system.
Chapter 3. Configuring Tivoli Storage Productivity Center 211

v On Windows, click Start > Programs > IBM Tivoli Storage ProductivityCenter > TPC Stand-alone GUI. This runs the Windows batch file tpc.bat.If you are on a remote system, the Start menu item for the stand-alone GUImight not be available. In this case, run the tpc.bat directly. The defaultlocation for the batch file is C:\Program Files\IBM\TPC\gui\tpc.bat.
v On AIX or Linux, type the following path and command at the commandline./opt/IBM/TPC/gui/TPCD.sh
2. From the Tivoli Storage Productivity Center GUI logon window, log on toTivoli Storage Productivity Center.a. Enter your user ID and password.b. If the server field does not contain the address of the server, enter the
information in the format hostname:port. Specify the following values forthe hostname and port:
hostnameThe Tivoli Storage Productivity Center server. You can specify thehostname as an IP address or a Domain Name System (DNS) name.
portThe port number for the Data server. The default port number forconnecting to the Data server is 9549. However, this port number mightbe different for your site. For example, the port number might bedifferent if the default port range was not accepted during installation.
c. Click OK.
Starting the Tivoli Storage Productivity Center web-based GUIYou can start the web-based Tivoli Storage Productivity Center GUI by opening aweb browser and entering a web address for the Tivoli Storage Productivity Centerlogon page.
Before you start IBM Tivoli Storage Productivity Center, ensure that you are usinga supported web browser. For a list of web browsers that you can use with TivoliStorage Productivity Center, see the support matrix at http://www.ibm.com/support/docview.wss?uid=swg21386446. In the Agents, Servers and GUI column,click the version of Tivoli Storage Productivity Center that is installed on yoursystem. On the next page, click Web Browsers to find the web browsers that youcan use.
The web-based GUI provides quick access to pages that you can use to monitor thecondition, capacity, and relationships of the resources within your storageenvironment. Start the web-based GUI if you are interested in monitoring yourstorage environment, but do not need the full set of administrative tools availablein the stand-alone GUI.1. On a server running the Windows operating system, click Start > Programs >
IBM Tivoli Storage Productivity Center > TPC Web-based GUI to open abrowser to the correct address. If you are not on a server running the Windowsoperating system, start a web browser and enter the following address in theaddress field:http://hostname:port/srm
In the preceding address, specify the following values:
212 IBM Tivoli Storage Productivity Center: Installation and Configuration Guide

hostnameThe Tivoli Storage Productivity Center server. You can specify the hostname as an IP address or a Domain Name System (DNS) name.
portThe port number for Tivoli Storage Productivity Center. The default portnumber for connecting to Tivoli Storage Productivity Center by using theHTTP protocol is 9568. However, this port number might be different foryour site. For example, the port number might be different if the defaultport range was not accepted during installation. If the default port numberdoes not work, ask your Tivoli Storage Productivity Center administratorfor the correct port number.
You might be redirected from the address that you enter to another addressand port that provides secure access using the HTTPS protocol. This page is theTivoli Storage Productivity Center logon page.
2. From the Tivoli Storage Productivity Center logon page, type your user nameand password and click Log in. The web-based Tivoli Storage ProductivityCenter GUI opens in the browser.
Starting Tivoli Storage Productivity Center for ReplicationYou can start the IBM Tivoli Storage Productivity Center for Replication GUI byopening a web browser and entering a web address for the Tivoli StorageProductivity Center for Replication logon page.
Before you start Tivoli Storage Productivity Center for Replication, ensure that youare using a supported web browser. For a list of web browsers that you can usewith Tivoli Storage Productivity Center, see the support matrix athttp://www.ibm.com/support/docview.wss?uid=swg21386446. In the Agents,Servers and GUI column, click the version of Tivoli Storage Productivity Centerthat is installed on your system. On the next page, click Web Browsers to find theweb browsers that you can use.
The Tivoli Storage Productivity Center for Replication GUI provides a single pointof control to configure, manage, and monitor copy services. Whether you start iton the server or on a remote system, the GUI is web-based and is displayed in abrowser.1. On a server running the Windows operating system, click Start > Programs >
IBM Tivoli Storage Productivity Center > TPC Replication Manager GUI toopen a browser to the correct address. If you are not on a server running theWindows operating system, start a web browser and enter the followingaddress in the address field. The address is case-sensitive.https://hostname:port/CSM
In the preceding address, specify the following values:
hostnameThe Tivoli Storage Productivity Center for Replication server. You canspecify the host name as an IP address or a Domain Name System (DNS)name.
portThe port number for Tivoli Storage Productivity Center for Replication. Thedefault port number for connecting to Tivoli Storage Productivity Centerfor Replication using the HTTPS protocol is 9559. However, this portnumber might be different for your site. For example:
Chapter 3. Configuring Tivoli Storage Productivity Center 213

v If you upgraded from Tivoli Storage Productivity Center for Replicationversion 3.3 or earlier, the default HTTPS port is 9443.
v If you upgraded from Tivoli Storage Productivity Center for Replicationversion 3.4 or later, the default HTTPS port is 3443.
v If you are using IBM WebSphere Application Server for z/OS, the defaultHTTPS port is 9443.
v If you are using IBM WebSphere Application Server OEM Edition forz/OS, the default HTTPS port is 32209.
You can also find the port number in the install_root/eWAS/profiles/profile_name/properties/portdef.props file. The default port for the HTTPprotocol is defined by the WC_defaulthost_secure property within the file.
2. From the Tivoli Storage Productivity Center for Replication logon page, typeyour user name and password and click Login. The web-based Tivoli StorageProductivity Center for Replication GUI opens in the browser.
Starting the Tivoli Storage Productivity Center family of productsthrough Tivoli Integrated Portal
You can start the Tivoli Storage Productivity Center stand-alone GUI, the TivoliStorage Productivity Center web-based GUI, and the Tivoli Storage ProductivityCenter for Replication web-based GUI within IBM Tivoli Integrated Portal. TivoliIntegrated Portal provides the advantages of the single sign-on capability andlaunch-in-context integration.
Before you start Tivoli Storage Productivity Center, ensure that you are using asupported web browser. For a list of web browsers that you can use with TivoliStorage Productivity Center, see the support matrix at http://www.ibm.com/support/docview.wss?uid=swg21386446. In the Agents, Servers and GUI column,click the version of Tivoli Storage Productivity Center that is installed on yoursystem. On the next page, click Web Browsers to find the web browsers that youcan use.
These instructions assume that you have previously started the Tivoli StorageProductivity Center stand-alone GUI, Tivoli Storage Productivity Center web-basedGUI, or the Tivoli Storage Productivity Center for Replication web-based GUIoutside of Tivoli Integrated Portal and that you already configured your system.For example, to start the stand-alone Tivoli Storage Productivity Center GUI byusing Java Web Start, an IBM Java Runtime Environment 1.6.0 is required.
By logging on to Tivoli Integrated Portal, you eliminate the need to log on to TivoliStorage Productivity Center or any other Tivoli application that uses the commonportal framework. In addition to the convenience of single sign-on, TivoliIntegrated Portal provides launch-in-context integration. By using these functions,you can move between Tivoli Storage Productivity Center and another Tivoliapplication at specific points within the other application interface.1. Start a web browser and enter the following address in the address field:
http://hostname:port/ibm/console
In the preceding address, specify the following values:
hostnameThe Tivoli Integrated Portal server. You can specify the host name as an IPaddress or a Domain Name System (DNS) name.
214 IBM Tivoli Storage Productivity Center: Installation and Configuration Guide

portThe port number for Tivoli Integrated Portal. If you did not upgrade yoursystem from an earlier version of the product, the default port number forconnecting to Tivoli Integrated Portal using the HTTP protocol is 9568.However, this port number might be different for your site. For example,the port number might be different if you upgraded your system from anearlier version of the product or if the default port range was not acceptedduring installation. If the default port number does not work, see “TivoliIntegrated Portal port numbers” on page 37 for alternative default ports.
You might be redirected from the address you enter to another address andport that provides secure access using the HTTPS protocol. This page is theTivoli Integrated Portal logon page.
2. From the Tivoli Integrated Portal logon page, type your Tivoli StorageProductivity Center ID and password and click Log in.
3. From the Tivoli Integrated Portal navigation tree, click Tivoli StorageProductivity Center.
4. From the Tivoli Storage Productivity Center portlets page, you can start theTivoli Storage Productivity Center stand-alone GUI, the Tivoli StorageProductivity Center web-based GUI, or the Tivoli Storage Productivity Centerfor Replication web-based GUI. Select one of the following options:v Start the stand-alone GUI for Tivoli Storage Productivity Center.v Start the web-based GUI for Tivoli Storage Productivity Center.v Start the web-based GUI for Tivoli Storage Productivity Center for
Replication.Related tasks:“Starting the Tivoli Storage Productivity Center stand-alone GUI by using JavaWeb Start” on page 210Start the stand-alone Tivoli Storage Productivity Center GUI by using Java WebStart to interact remotely with Tivoli Storage Productivity Center running on theserver.“Starting the Tivoli Storage Productivity Center web-based GUI” on page 212You can start the web-based Tivoli Storage Productivity Center GUI by opening aweb browser and entering a web address for the Tivoli Storage Productivity Centerlogon page.“Starting Tivoli Storage Productivity Center for Replication” on page 213You can start the IBM Tivoli Storage Productivity Center for Replication GUI byopening a web browser and entering a web address for the Tivoli StorageProductivity Center for Replication logon page.
Overview of required user IDs for initial log on to the Tivoli StorageProductivity Center family of products
All the graphical user interfaces (GUIs) in the Tivoli Storage Productivity Centerfamily require a user ID and password. If you are logging on to a GUIimmediately after you installed the software, the user ID that you must use differsdepending on the type of installation and the GUI interface.
Immediately after you install the software, you must use the user ID as describedin the following tables. After you log on, you can assign roles for users in TivoliStorage Productivity Center and Tivoli Storage Productivity Center for Replication.When users log on, their user roles determine their authorization level and thecomponents that they can view in each GUI.
Chapter 3. Configuring Tivoli Storage Productivity Center 215

For example, if a user is in a group that is assigned to the Tivoli StorageProductivity Center Superuser role, the user has full access to all Tivoli StorageProductivity Center functions. However, if a user is in a group that is assigned tothe Tape Administrator role, the user has access to only tape-related functions.
Required user ID for initial log on after installation on a singleserver when only the common user is defined
After you install the software on a single server, if you defined only the commonuser, and did not define a separate user for Tivoli Integrated Portal and TivoliCommon Reporting, the required user ID for initial log is the common user namethat was defined for the installation of Tivoli Storage Productivity Center.
You must use this user ID to log on to Tivoli Storage Productivity Centerstand-alone GUI, the Tivoli Storage Productivity Center web-based GUI, the TivoliStorage Productivity Center for Replication web-based GUI, or the TivoliIntegrated Portal.
Required user ID for initial log on after installation on a singleserver when the common user and a separate user for TivoliIntegrated Portal and Tivoli Common Reporting are defined
After you install the software on a single server if you defined a common user anda separate user for Tivoli Integrated Portal and Tivoli Common Reporting, youmust use the user ID as described in the following table.
Table 33. Required user ID for initial log on after installation on a single server when thecommon user and a separate user for Tivoli Integrated Portal and Tivoli Common Reportingare defined
To log on to: Use this user ID:
Tivoli Storage Productivity Centerstand-alone GUI
The common user name that was defined forthe installation of Tivoli Storage ProductivityCenter
Tivoli Storage Productivity Centerweb-based GUI
The common user name that was defined forthe installation of Tivoli Storage ProductivityCenter
Tivoli Storage Productivity Center forReplication web-based GUI
The common user name that was defined forthe installation of Tivoli Storage ProductivityCenter
Tivoli Integrated Portal The common user name that was defined forthe installation of Tivoli Integrated Portaland Tivoli Common Reporting
Required user ID for initial log on after installation on multipleservers with a remote database schema
After you install the software on multiple servers with a remote database schema,you must use the user ID as described in the following table.
216 IBM Tivoli Storage Productivity Center: Installation and Configuration Guide

Table 34. Required user ID for initial log on after installation on multiple servers with aremote database schema
To log on to: Use this user ID:
Tivoli Storage Productivity Centerstand-alone GUI
The user name that was defined for theinstallation of Tivoli Storage ProductivityCenter
Tivoli Storage Productivity Centerweb-based GUI
The user name that was defined for theinstallation of Tivoli Storage ProductivityCenter
Tivoli Storage Productivity Center forReplication web-based GUI
The user name that was defined for theinstallation of Tivoli Storage ProductivityCenter
Tivoli Integrated Portal The user name that was defined for theinstallation Tivoli Integrated Portal andTivoli Common Reporting
Required user ID for initial log on after installation on multipleservers with remote Tivoli Integrated Portal and Tivoli CommonReporting
After you install the software on multiple servers with remote Tivoli IntegratedPortal and Tivoli Common Reporting, you must use the user ID as described in thefollowing table.
Table 35. Required user ID for initial log on after installation on multiple servers with remoteTivoli Integrated Portal and Tivoli Common Reporting
To log on to: Use this user ID:
Tivoli Storage Productivity Centerstand-alone GUI
The user name that was defined for theinstallation of Tivoli Storage ProductivityCenter. Because user authentication isconducted on the server where TivoliIntegrated Portal is installed, the user nameand user group must exist in the operatingsystem user and group registry on the TivoliIntegrated Portal server.
Tivoli Storage Productivity Centerweb-based GUI
The user name that was defined for theinstallation Tivoli Integrated Portal andTivoli Common Reporting
Tivoli Storage Productivity Center forReplication web-based GUI
The user name that was defined for theinstallation of Tivoli Storage ProductivityCenter. The Tivoli Storage ProductivityCenter for Replication GUI detects onlyusers and groups that are in the operatingsystem user and group registry on the serverwhere Tivoli Integrated Portal is installed. Toprovide access to a user or group in theTivoli Storage Productivity Center forReplication GUI, the user or group must bein the operating system user and groupregistry on the Tivoli Integrated Portalserver.
Tivoli Integrated Portal The user name that was defined for theinstallation of Tivoli Integrated Portal andTivoli Common Reporting
Chapter 3. Configuring Tivoli Storage Productivity Center 217

User authentication considerations for multiple server installationsThese are installation considerations when you install DB2 and Tivoli StorageProductivity Center on one server, and IBM Tivoli Integrated Portal and IBM TivoliCommon Reporting on the second server.
Tivoli Storage Productivity Center authenticates users with Tivoli Integrated Portal.When the Tivoli Storage Productivity Center servers and Tivoli Integrated Portalare installed on separate servers, the user and group accounts on the TivoliIntegrated Portal server are used for authentication.
Tivoli Storage Productivity Center is installed using local OS repository. When thelocal OS repository is used for authentication, the user accounts on TivoliIntegrated Portal Server host must be used to log on to stand-alone GUI and to runcommand-line interface (CLI) commands.
Since the user accounts on the Tivoli Storage Productivity Center servers hostcannot be used for authentication, in this scenario, you should change the userauthentication from OS to LDAP repository. If you cannot change the userauthentication to an LDAP repository, then both servers should have the sameoperating system. The user names, passwords, group names, and membershipsused to administer Tivoli Storage Productivity Center are defined on both serversand are kept identical.
Changing the user authentication configurationThe Tivoli Storage Productivity Center installation program establishes a defaultauthentication configuration using the federated repositories feature of theWebSphere Application Server. If you want to change the user authenticationconfiguration, follow these procedures.
Within the federated repositories framework, the Tivoli Storage Productivity Centerinstallation program creates two repositories:
File-based user repositoryThis repository contains the user "tpcFileRegistryUser" (This user passwordis the same as the common user password entered during the TivoliStorage Productivity Center installation.)
Operating system repositoryIn the federated repositories framework, the Tivoli Storage ProductivityCenter installation program creates two repositories on all the followingTivoli Storage Productivity Center IBM® WebSphere® Application Servers:v Tivoli Integrated Portal serverv Device serverv Replication server
The Tivoli Integrated Portal server is used as the primary WebSphereApplication Server for user authentication in Tivoli Storage ProductivityCenter. If the Tivoli Integrated Portal server is down, the Device Serverand Replication Server are used as the back up WebSphere ApplicationServers to perform the user authentication and allow the authorized localOS users to log in to the Tivoli Storage Productivity Center stand-aloneGUI and Tivoli Storage Productivity Center for Replication web-based GUI.You can add an LDAP repository as a post-install task. This configurationis completed on the Tivoli Integrated Portal server. The LDAP repositoryconfiguration settings are not propagated to the Device and Replication
218 IBM Tivoli Storage Productivity Center: Installation and Configuration Guide

servers. So, if the Tivoli Integrated Portal server is down, then theauthorized LDAP users cannot log in to Tivoli Storage Productivity Centerstand-alone GUI and Tivoli Storage Productivity Center for Replicationweb-based GUI. The back up user authentication mechanism based onDevice and Replication servers allows the authorized local OS users to login to the Tivoli Storage Productivity Center stand-alone GUI and the TivoliStorage Productivity Center for Replication web-based GUI.
This repository is referred to as the local OS repository and contains theusers and groups that are managed by the local operating system.On computers that are members of a Windows domain, this local OSrepository also contains the domain users and groups that are managed bythe Windows domain, provided that the computer is correctly configuredwith the Windows domain.Use of the Tivoli Storage Productivity Center single sign-on feature,especially with storage system element managers, is limited with thisdefault authentication configuration. Storage system element managers donot support using the localOS repository or the file-based repository forsingle sign-on, even when the element manager is installed on the samesystem as Tivoli Storage Productivity Center.
The LDAP repositories supported by Tivoli Storage Productivity Center depend onthe Tivoli Integrated Portal support. For more information about the LDAPrepositories supported, see one of the following topics:v For the Windows operating system: http://www.ibm.com/support/
docview.wss?rs=180&uid=swg27012421 .v For the AIX operating system: http://www.ibm.com/support/
docview.wss?rs=180&uid=swg27012389.v For the Linux operating system: http://www.ibm.com/support/
docview.wss?rs=180&uid=swg27012415.
Search for LDAP Servers using Federated Repository Configuration.
When you change the user authentication configuration (by adding or removing anLDAP repository within the federated repositories framework), you must first backup the existing Tivoli Integrated Portal WebSphere configuration files. TheWebSphere backup files provide a restoration point in the event of a failure whenperforming these procedures. You must also back up the WebSphere configurationfiles after you add an LDAP repository to the user authentication configurationand want to later change the LDAP authentication settings.
The WebSphere Application Server cannot resolve duplicated users or groups ifthese users or groups are present in more than one repository in the federatedrepositories framework. For example, an Administrator user exists in both the localOS and LDAP repository. You must ensure that the duplicated users (or groups)are not used during the configuration or to manage Tivoli Storage ProductivityCenter.
The following topics describe how to select and configure each user authenticationmethod.
Adding an LDAP repository to the federated repositoriesYou can configure Tivoli Storage Productivity Center to communicate with anexternal Lightweight Directory Access Protocol (LDAP) repository such as IBM
Chapter 3. Configuring Tivoli Storage Productivity Center 219

Tivoli Directory Server or Microsoft Active Directory. To add an LDAP repositoryto the federated repositories in Tivoli Storage Productivity Center, you must useTivoli Integrated Portal.
If you installed Tivoli Storage Productivity Center on a correctly configuredcomputer that is a member of a Windows domain, Active Directory users andgroups also exist in the localOS repository. To determine whether the ActiveDirectory users exist in the localOS repository, log on to Tivoli Integrated Portaland click Users and Groups > Manage users. You should not add the ActiveDirectory repository if the Active Directory users exist. If you plan to add theActive Directory repository for performance reasons, you must remove the localOSrepository from the federated repositories.
The WebSphere Application Server cannot resolve duplicated users or groups ifthese users or groups are present in more than one repository in the federatedrepositories framework. For example, an Administrator user exists in both thelocalOS and LDAP repository. You must ensure that the duplicated users (orgroups) are not used during the configuration or to manage Tivoli StorageProductivity Center.
To add an LDAP repository to the federated repositories in Tivoli StorageProductivity Center, complete the following steps. Contact your LDAP serveradministrator for assistance.1. Back up the Tivoli Integrated Portal WebSphere Application Server
configuration files. The WebSphere Application Server configuration backupfiles provide a restoration point in the event of a failure when you completethis procedure. This procedure uses the variable nameTIP_installation_directory to indicate where Tivoli Integrated Portal islocated.a. Back up the WebSphere Application Server configuration files.
For the AIX or Linux operating systems, run the following command:TIP_installation_directory/profiles/TIPProfile/bin/backupConfig.sh
For the Windows operating systems, run the following command:TIP_installation_directory\profiles\TIPProfile\bin\backupConfig.bat
b. Back up the soap.client.props file for Tivoli Integrated Portal.For the Windows operating systems, use the copy command to back upthis file:TIP_installation_directory\profiles\TIPProfile\properties\soap.client.props
For the AIX or Linux operating systems, use the cp command to back upthis file:TIP_installation_directory/profiles/TIPProfile/properties/soap.client.props
c. Back up the IBM Cognos 8.ear directory.For Windows operating systems, enter the xcopy command to back up thisdirectory:TIP_installation_directory\profiles\TIPProfile\installedApps\TIPCell\IBM Cognos 8.ear
For the AIX or Linux operating systems, enter the cp command to back upthis directory:
220 IBM Tivoli Storage Productivity Center: Installation and Configuration Guide

TIP_installation_directory/profiles/TIPProfile/installedApps/TIPCell/IBM Cognos 8.ear
d. The WebSphere Application Server backupConfig command generates acompressed file: WebSphereConfig_YYYY-DD-MM.zip. When you run thebackupConfig command, the Tivoli Integrated Portal server will shutdown. The Tivoli Integrated Portal server must be restarted after thebackupConfig command is finished.To start the Tivoli Integrated Portal server, follow these steps:1) For Windows operating systems, click Start > Administrative Tools >
Services. On the Windows Services page, right-click Tivoli IntegratedPortal - V2.2_TIPProfile_Port_xxxx where xxxx indicates the portspecified during installation and select Start.
2) For AIX or Linux operating systems, open a command prompt windowand enter the following command:TIP_installation_directory/profiles/TIPProfile/bin/startServer.sh
2. To restore the WebSphere Application Server and IBM Cognos configuration,complete the following steps:a. Restore the WebSphere configuration by running the restoreConfig.sh or
restoreConfig.bat command. The restoreConfig command is located here:v For Windows operating systems:
TIP_installation_directory\profiles\TIPProfile\bin\restoreConfig.bat
v For AIX or Linux operating systems:TIP_installation_directory/profiles/TIPProfile/bin/restoreConfig.sh
b. Restore the IBM Cognos 8.ear directory that you backed up in step 1c. Forthe Windows operating systems, enter the xcopy command to replace thecontents of this directory:TIP_installation_directory\profiles\TIPProfile\installedApps\TIPCell\IBM Cognos 8.ear
For the AIX or Linux operating systems, use the cp command to replacethe contents of this directory:TIP_installation_directory/profiles/TIPProfile/installedApps/TIPCell/IBM Cognos 8.ear
3. Open an Internet Explorer or Mozilla Firefox web browser and enter thefollowing information in the address bar:http://hostname:port/ibm/console/logon.jsp
orhttps://hostname:port/ibm/console/logon.jsp
Where hostname is the server that is running Tivoli Integrated Portal such asthe server name or IP address and port is the port number for TivoliIntegrated Portal.The port number differs depending on the protocol that you use (http orhttps) and the options that you selected during the installation of TivoliStorage Productivity Center. For more information about port numbers, see“Tivoli Integrated Portal port numbers” on page 37.You can also contact your Tivoli Storage Productivity Center administrator toverify the host name and port number.
Chapter 3. Configuring Tivoli Storage Productivity Center 221

4. On the Tivoli Integrated Portal logon page, log on using the appropriate userID and password. Your user ID must have Tivoli Integrated Portaladministrator authorization.
5. In the Tivoli Integrated Portal navigation tree, click Settings > WebSphereAdministrative Console.
6. In the Tivoli Integrated Portal window, click Launch WebSphereadministrative console.
7. In the WebSphere Application Server Administrative Console navigation tree,click Security > Global security.
8. On the Global security page, in the User account repository section, click theConfigure button next to the Available realm definitions list.
9. On the Global security > Federated repositories page, under "Related Items,"click Manage repositories.
Figure 1. Global security page, configure federated repositories
222 IBM Tivoli Storage Productivity Center: Installation and Configuration Guide

In this window, you must ensure that the Primary administrative user nameexists only in one repository. The WebSphere Application Server will not startif this user name exists in multiple repositories.
10. On the Global security > Federated repositories > Manage repositories page,add the LDAP repository that you want to use for authentication. Followthese steps:a. Click Add to add a new repository.
b. Enter the values for the following fields:
Figure 2. Federated repositories page, Manage repositories
Figure 3. Manage repositories page, Add a new repository
Chapter 3. Configuring Tivoli Storage Productivity Center 223

Repository identifierA unique identifier for the LDAP repository. This identifieruniquely identifies the repository within the realm, for example,LDAP1.
Directory typeThe type of LDAP server that you want to connect to.
Primary host nameThe host name of the primary LDAP server. This host name iseither an IP address or a domain name service (DNS) name.
Port The LDAP server port. The default value is 389. You can specify adifferent port depending on your LDAP server configuration. Ifyou do not know what port to use, contact your LDAP serveradministrator.
Bind distinguished nameThe distinguished name (DN) for WebSphere Application Server touse when binding to the LDAP repository. If no name is specified,WebSphere Application Server binds anonymously. In most cases,bind DN and bind password are required. However, when ananonymous bind can satisfy all the required functions, bind DNand bind password are not required.
Bind passwordThe password for WebSphere Application Server to use whenbinding to the LDAP repository.
Login propertiesThe authentication properties that are used to log on to WebSphereApplication Server. Type uid;cn in this field. This value enablesWebSphere Application Server to use the property that is requiredfor the directory type.
c. Click OK.
Figure 4. Manage repositories > New page
224 IBM Tivoli Storage Productivity Center: Installation and Configuration Guide

d. In the messages dialog box that is displayed on the Manage repositoriespage, click the Save link in Save directly to the master configuration.
Important: On the Global security > Federated repositories > Managerepositories page, do not delete the "localOS" repository.
11. From the Manage repositories page, return to the Global security > Federatedrepositories page.
12. Under "Repositories in the realm," click Add Base entry to Realm.
13. If the Messages dialog box is displayed on the Repository reference page, clickthe Save link in Save directly to the master configuration.
14. On the Repository reference page, configure the following items:a. In the Repository list, select the repository that you created in step 10 on
page 223.b. In the Distinguished name of a base entry that uniquely identifies this
set of entries in the realm field, enter a DN for the repository. This DNmaps to the DN of the base entry within the LDAP repository that youenter in the Distinguished name of a base entry in this repository field.To avoid duplicate results during searches, the DN must uniquely identifythe base entry in the repository. If multiple repositories are included in therealm and the repositories have the same base entry, use this field todefine a DN that uniquely identifies each base entry. For example,repositories LDAP1 and LDAP2 might both use o=ibm,c=us as the baseentry in the repository. Enter a DN in this field that distinguishes the baseentries for each repository. For example: o=ibm,c=us for LDAP1 ando=ibm2,c=us for LDAP2.
c. In the Distinguished name of a base entry in this repository field, enterthe DN of the base entry in the LDAP repository that you want to map tothe DN that you entered in the Distinguished name of a base entry thatuniquely identifies this set of entries in the realm field. In mostinstances, the value is the same in both fields.
Figure 5. Global security > Federated repositories page, Add base entry to realm
Chapter 3. Configuring Tivoli Storage Productivity Center 225
||||
||||||||
|||||

The value in this field indicates the starting point for searches in the LDAPdirectory server. For example, for a user with a DN of cn=John Doe,ou=rochester, o=ibm, c=us, you can specify the LDAP base entry as anyof the following options:v ou=rochester, o=ibm, c=us
v o=ibm, c=us
v c=us
Important: The DN value that is entered in this field must be broadenough to include both users and the groups that the users belong to. Forexample, if a user in ou=rochester, o=ibm, c=us is also a member ofgroups that are in dc=stategroups, ou=rochester, o=ibm, c=us, entero=ibm, c=us in this field.
d. Click OK.e. In the messages dialog box that is displayed, click the Save link in Save
directly to the master configuration.
Important: In the Repositories in the realm table, do not remove theInternalFileRepository entry. Do not remove the localOS entry, unlessyou are planning to add an Active Directory repository to Tivoli StorageProductivity Center that is installed on a computer that is a member of aWindows domain and have verified that the Active Directory users exist inthe localOS repository.
15. Log out from the WebSphere Application Server Administrative Console.16. Log out from the Tivoli Integrated Portal Administrative Console.17. Stop and restart the Tivoli Integrated Portal server. For information about
stopping and starting the Tivoli Integrated Portal server, see the Tivoli StorageProductivity Center information center. Search for Starting and stopping theTivoli Integrated Portal server.
Figure 6. Global security > Federated repositories > Repository reference page, Add baseentry to realm
226 IBM Tivoli Storage Productivity Center: Installation and Configuration Guide
||||
|
|
|
|||||
To verify that the LDAP federated repository is configured correctly, complete thefollowing steps:1. Log on to Tivoli Integrated Portal by using the same user ID and password
from step 4 on page 222.2. In the Tivoli Integrated Portal navigation tree, click Users and Groups >
Manage Users.3. In the Search by list, select User ID.4. Click Search to search for users in the federated repositories. The list of users
includes users from the local file repository, the operating system repository,and the LDAP repository.
5. In the Tivoli Integrated Portal navigation tree, click Users and Groups >Manage Groups.
6. In the Search by list, select Group name.7. Click Search to search for groups in the federated repositories. The list of
groups includes groups from the operating system repository and the LDAPrepository.
Important: Before you establish the desired authorization configuration forTivoli Integrated Portal, Tivoli Storage Productivity Center, and Tivoli StorageProductivity Center for Replication, you must ensure that there are noduplicated user names or group names within the local file repository, theoperating system repository, and the LDAP repository.
After you have completed and verified the addition of an LDAP repository to theTivoli Storage Productivity Center federated repositories authenticationconfiguration, you must establish the desired authorization configuration for TivoliIntegrated Portal. Tivoli Integrated Portal administrators require the iscadmins andadministrator roles. Operators viewing Tivoli Storage Productivity Center reportsrequire the tcrPortalOperator role. For Tivoli Storage Productivity Center Version5.1 single sign-on and launch in context features to work correctly, the LDAP useror group requires the following Tivoli Integrated Portal roles:v administratorv iscadminsv tcrPortalOperatorv chartAdministratorv monitor
For information about user roles and groups, go to the Tivoli Integrated Portaladministrative console online help. On the Welcome page, open the online help byclicking ?. On the Help welcome page, click Using the Tivoli Integrated Portal >Users and Groups in the navigation pane.
You should also assign Tivoli Storage Productivity Center roles to groups using theRole-to-Group Mapping node in the Tivoli Storage Productivity Centerstand-alone GUI. You can map Tivoli Storage Productivity Center roles, such asTape Operator or Fabric Administrator, to user groups that you create in youroperating system repository and your LDAP repository. For information about theRole-to-Group Mapping node, go to the Tivoli Storage Productivity Centerinformation center. Search for Role-to-Group Mappings.
Chapter 3. Configuring Tivoli Storage Productivity Center 227

For information about assigning roles to users and roles to groups for TivoliStorage Productivity Center for Replication, go to the Tivoli Storage ProductivityCenter information center. Search for Managing replication. On the Managingreplication page, click Security.
Removing an LDAP repository from the federated repositoriesTo remove an LDAP repository from the federated repositories, you must useTivoli Integrated Portal.
If removing an LDAP repository from the federated repositories in Tivoli StorageProductivity Center leaves only the localOS repository and the file-basedrepository, so the use of the Tivoli Storage Productivity Center single sign-onfeature is limited. Storage system element managers do not support using thelocalOS repository for single sign-on, even if the element manager is installed onthe same system as Tivoli Storage Productivity Center. This procedure uses thevariable name TIP_installation_directory to indicate where Tivoli IntegratedPortal is located.
To remove an LDAP repository from the federated repositories, complete thefollowing steps:1. Back up the Tivoli Integrated Portal WebSphere configuration files. The
WebSphere configuration backup files provide a restoration point in the eventof a failure when you complete this procedure. This procedure uses thevariable name TIP_installation_directory to indicate where Tivoli IntegratedPortal is located.a. Back up the WebSphere configuration files.
For the AIX or Linux operating systems, run the following command:TIP_installation_directory/profiles/TIPProfile/bin/backupConfig.sh
For the Windows operating systems, run the following command:TIP_installation_directory\profiles\TIPProfile\bin\backupConfig.bat
b. Back up the soap.client.props file for Tivoli Integrated Portal .For the Windows operating systems, use the copy command to back upthis file:TIP_installation_directory\profiles\TIPProfile\properties\soap.client.props
For the AIX or Linux operating systems, use the cp command to back upthis file:TIP_installation_directory/profiles/TIPProfile/properties/soap.client.props
c. Back up the IBM Cognos 8.ear directory.v For Windows operating systems:
TIP_installation_directory\profiles\TIPProfile\installedApps\TIPCell\IBM Cognos 8.ear
v For AIX or Linux operating systems:TIP_installation_directory/profiles/TIPProfile/installedApps/TIPCell/IBM Cognos 8.ear
d. The WebSphere backupConfig command generates a compressed file:WebSphereConfig_YYYY-DD-MM.zip. When you run the backupConfigcommand, the Tivoli Integrated Portal server will shut down. The TivoliIntegrated Portal server must be restarted after the backupConfigcommand is finished.
228 IBM Tivoli Storage Productivity Center: Installation and Configuration Guide

To start the Tivoli Integrated Portal server, follow these steps:1) For Windows operating systems, click Start > Administrative Tools >
Services. On the Windows Services page, right-click Tivoli IntegratedPortal - V2.2_TIPProfile_Port_xxxx where xxxx indicates the portspecified during installation. Select Start.
2) For AIX or Linux operating systems, open a command prompt windowand enter the following command:TIP_installation_directory/profiles/TIPProfile/bin/startServer.sh
2. To restore the WebSphere Application Server and IBM Cognos configuration,complete the following steps:a. Restore the WebSphere configuration by running the restoreConfig.sh or
restoreConfig.bat command. The restoreConfig command is located here:v For Windows operating systems:
TIP_installation_directory\profiles\TIPProfile\bin\restoreConfig.bat
v For AIX or Linux operating systems:TIP_installation_directory/profiles/TIPProfile/bin/restoreConfig.sh
b. Restore the IBM Cognos 8.ear directory that you backed up in step 1c.v For the Windows operating systems, use the xcopy command to replace
the contents of this directory:TIP_installation_directory\profiles\TIPProfile
v For the AIX or Linux operating systems, use the cp command to replacethe contents of this directory:TIP_installation_directory/profiles/TIPProfile/installedApps/TIPCell/IBM Cognos 8.ear
3. Open an Internet Explorer or Mozilla Firefox web browser and type thefollowing information in the address bar:https://hostname:port/ibm/console/logon.jsp
Where hostname defines the server that is running Tivoli Integrated Portal suchas the server name or IP address and port defines the port number for TivoliIntegrated Portal. If the default port range was accepted during theinstallation of Tivoli Integrated Portal, the port number is 9569. Contact yourTivoli Storage Productivity Center administrator if you must verify the hostname and port number.
4. On the Tivoli Integrated Portal logon page, log on using the appropriate userID and password. Your user ID must have administrator authorization.
5. In the Tivoli Integrated Portal navigation tree, click Settings > WebSphereAdministrative Console.
6. In the Tivoli Integrated Portal content pane, click Launch WebSphereadministrative console.
Chapter 3. Configuring Tivoli Storage Productivity Center 229

7. In the WebSphere Administrative Console navigation tree, click Security >Global Security.
8. On the Global security page, in the "User account repository" section, clickConfigure next to the "Available realm definitions" drop-down list.
Figure 7. Launch the WebSphere administrative console
Figure 8. Opening the Global security page
230 IBM Tivoli Storage Productivity Center: Installation and Configuration Guide

9. On the Global security > Federated repositories page, in the "Repositories inthe realm" table, select the entry for the LDAP repository you previouslyadded. Click Remove.
10. In the message dialog box displayed on the Federated repositories page, clickthe Save link in Save directly to the master configuration.
11. On the Global security > Federated repositories page, under "Related items,"click Manage repositories.
Figure 9. Configuring the available realm definitions
Figure 10. Removing the LDAP repository
Chapter 3. Configuring Tivoli Storage Productivity Center 231

12. On the Global security > Federated repositories > Manage repositories page,select the entry for the LDAP repository that you previously added and clickDelete.
13. In the message dialog box displayed on the Manage repositories page, clickthe Save link in Save directly to the master configuration.
14. Log out from the WebSphere Administrative Console.15. Log out from the Tivoli Integrated Portal Administrative Console.16. Stop and restart the Tivoli Integrated Portal server. For information about
stopping and starting the server, go to the Tivoli Storage Productivity Centerinformation center. Search for starting and stopping the Tivoli Integrated Portalserver.
Figure 11. Managing the repositories
Figure 12. Deleting the LDAP repository
232 IBM Tivoli Storage Productivity Center: Installation and Configuration Guide

Important: Before establishing the desired authorization configuration forTivoli Integrated Portal, Tivoli Storage Productivity Center, and Tivoli StorageProductivity Center for Replication, you must ensure that there are noduplicated user names or group names within the local file-based repositoryand the localOS repository.After you have completed the removal of the LDAP repository from the TivoliStorage Productivity Center federated repositories authenticationconfiguration, you should establish the desired authorization configuration forTivoli Integrated Portal. Tivoli Integrated Portal administrators require theiscadmins and administrator roles. Operators viewing Tivoli CommonReporting reports require the tcrPortalOperator role. For information aboutuser roles and groups, go to the Tivoli Integrated Portal administrative consoleonline help. On the Welcome page, open the online help by clicking ?. On thehelp welcome page, click Using the Tivoli Integrated Portal > Users andGroups in the navigation pane.You should also assign Tivoli Storage Productivity Center roles to groupsusing the Role-to-Group Mapping node in the Tivoli Storage ProductivityCenter stand-alone GUI. You can map Tivoli Storage Productivity Center roles,such as Tape Operator or Fabric Administrator, to user groups that you createin your local operating system repository. For information about theRole-to-Group Mapping node, go to the Tivoli Storage Productivity Centerinformation center. Search for Role-to-Group Mappings.For information about assigning roles to users and roles to groups for TivoliStorage Productivity Center for Replication, go to the Tivoli StorageProductivity Center information center. Search for Managing replication. On theManaging replication page, click Security.
Tivoli Integrated Portal and Tivoli Common Reporting RolesThis topic provides a list of the predefined roles in IBM Tivoli Integrated Portaland IBM Tivoli Common Reporting.
Note: The Tivoli Storage Productivity Center installation program adds theadministrator, iscadmins, tcrPortalOperator, chartAdministrator, and monitor rolesto the Tivoli Storage Productivity Center installation user.
The Tivoli Storage Productivity Center administrator needs to assign theappropriate Tivoli Integrated Portal roles to any other Tivoli Storage ProductivityCenter users who are added later to the system.
Table 36. Roles in Tivoli Integrated Portal and Tivoli Common Reporting
Role Description
iscusers This role is set to All Authenticated users,and all users have this role by default. Userswho are assigned this role can access theWelcome page and Credential Store portlets.
operator Legacy role with no special privileges.
monitor This Tivoli Integrated Portal role is a legacyrole with no special privileges.
configurator This Tivoli Integrated Portal role is a legacyrole with no special privileges.
administrator This Tivoli Integrated Portal role is a legacyrole with no special privileges.
Chapter 3. Configuring Tivoli Storage Productivity Center 233

Table 36. Roles in Tivoli Integrated Portal and Tivoli Common Reporting (continued)
Role Description
iscadmins Users assigned to this role are the superusers and have administrative access to allpages and portlets defined in TivoliIntegrated Portal.
chartAdministrator Users assigned to this Tivoli IntegratedPortal role create and delete chartingconnections to data sources, download theBIRT Designer, upload charts, and clear thecharting cache (useful for troubleshooting).
chartCreator Users assigned to this role can download theBIRT Designer, upload charts, view, and editthem. They cannot create or delete chartconnections nor can they clear the chartingcache.
chartViewer Users assigned to this role can select andview charts, but cannot modify them or theirpreferences. They cannot download the BIRTDesigner, upload charts, create connections,or clear the charting cache.
tcrPortalOperator Users assigned to this Tivoli CommonReporting role are authorized to the TivoliCommon Reporting navigation items in theTivoli Integrated Portal console.
Assigning Tivoli Integrated Portal roles to usersAssigning LDAP users and operating system users a Tivoli Integrated Portal roleenables the users to take advantage of all the features in the Tivoli IntegratedPortal Version 5.1 web-based GUI and IBM Cognos® Business Intelligence reports.Users can also use all of the launch-in-context and single sign-on features in TivoliStorage Productivity Center 5.1.
To assign a Tivoli Integrated Portal role, complete the following steps:1. Log on to Tivoli Integrated Portal. For example, you can enter http://<machine
where Tivoli Integrated Portal is installed>:9568/ibm/console.2. Click Users and Groups > User Roles.3. Search for a user using an ID or a first and last name.4. Select a user.5. Under Available Roles, select a role and click Save.
The selected role is assigned to the user.
Configuration overviewAfter you install Tivoli Storage Productivity Center, you must configure yoursystem to get the information you want. Some of the tasks associated withconfiguring the system include knowing which agents are required, the jobs thatmust be run, and the alerts you can set, and changing passwords.
234 IBM Tivoli Storage Productivity Center: Installation and Configuration Guide

To collect data from the devices and servers that are managed and monitored,different configuration steps are required to enable these different functions inTivoli Storage Productivity Center.
Tivoli Storage Productivity Center uses four different types of agents to gather dataabout the devices and servers that are managed and monitored. Differentcombinations of these agents are required to effectively enable the functions ofData Manager, Fabric Manager, Disk Manager, and Tape Manager. In addition tothese manager functions, the topology viewer is affected by the discovery of all themanaged entities in the management scope of Tivoli Storage Productivity Center.
Agents
The agents are:
Storage Management Initiative Specification (SMI-S) providers
SMI-S providers or Common Information Model (CIM) agents are providedby the vendor of the storage device, fabric switch, or tape library. Forstorage, they are needed for storage asset information, provisioning,alerting, and performance monitoring.
CIM agents are not required for the DS8000, SAN Volume Controller,Storwize V7000 Unified, Storwize V7000, the XIV system, or IBM SONAS.Tivoli Storage Productivity Center uses native interfaces for these storagesystems.
For the fabric switch, CIM agents are used for performance monitoring.The CIM agents are also used for certain switch models to collect topologyinformation, port state information, zoning information, zone control, andalerting. For tape libraries, they are used for asset and inventoryinformation. Each vendor of the storage, fabric switch, or tape librarysupplies unique CIM agent code for their family of devices. These agentsimplement an SMI-S provider to provide a communication transportbetween Tivoli Storage Productivity Center and the managed devices. Aftera CIM agent is installed and configured, Tivoli Storage Productivity Centercan be configured to communicate with it.
When setting up your CIM agents for managing devices, read the CIMagent documentation first. This documentation can provide guidelines forhow many devices the CIM agent can be configured to manage. If the CIMagent documentation does not include such guidelines, limit threesubsystems per CIM agent.
Storage Resource agentsThe Storage Resource agents perform the functions of the Data agents andFabric agents. Tivoli Storage Productivity Center does not use Data agentor the Fabric agent.
For computers that have storage that must be monitored, the StorageResource agents are used to monitor that storage. These agents collectinformation from the server they are installed on. Asset information, fileand file system attributes, and any other information needed from thecomputer system is gathered. The Storage Resource agents can also gatherinformation about database managers installed on the server, and NASdevice information. In Tivoli Storage Productivity Center, you can createping, probe, and scan jobs to run against the servers that have StorageResource agents installed.
Chapter 3. Configuring Tivoli Storage Productivity Center 235

For fabric information, the Storage Resource agents are installed oncomputer systems that have fiber connectivity (through HBAs) into theSAN fabrics you want to manage and monitor. The Storage Resourceagents use scanners to collect information. The scanners communicatethrough the HBA to collect fabric topology information, port stateinformation, and zoning information. They also can identify otherSAN-attached devices (if they are in the same zone). Storage Resourceagents are discovered during the agent installation process and are notrequired to be discovered separately. A best practice is to have two agentsconnected to each switch for redundancy.
Out-of-band agentsThe out-of-band agents are used to collect topology information from fabricswitches through the IP network by using SNMP queries to the switches. Abest practice is to have Tivoli Storage Productivity Center communicatingwith the out-of-band agent (SNMP agent) on each switch in each SANfabric you are managing.
Jobs
Tivoli Storage Productivity Center uses data collection jobs to provide informationabout your environment. The types of data collection jobs are:
Discovery jobsDiscovery jobs locate data sources and collect basic information about thesedata sources.
When the discovery job collects basic information for the DS8000, SANVolume Controller, Storwize V7000, Storwize V7000 Unified, the XIVsystem, or IBM SONAS, Tivoli Storage Productivity Center communicatesdirectly with the storage system.
For other storage systems, the discovery job communicates with a storagesubsystem CIM agent or tape library CIM agent. The discovery job locatesall the storage systems or tape libraries for the CIM agent and retrievesbasic information that the CIM agent holds for these systems. When adiscovery job communicates with a fabric switch CIM agent, the jobretrieves basic available information about the fabric and switches.
Probe jobsProbe jobs collect detailed statistics on all the assets of the managedinfrastructure, such as computers, disk controllers, hard disks, clusters,fabrics, storage subsystems, LUNs, tape libraries, and file systems. Probejobs can also discover information about new or removed disks and filesystems. Probe jobs can be directed against any element in the managedinfrastructure.
There are four types of probe jobs: for computers, fabrics, storagesubsystems, and tape libraries.
Computer probe jobs collect local host information such as file systems,directories, clusters, and hard disks. Storage subsystem probe jobs collectinformation about the storage subsystems, such as disk, volumes, andLUNs. Fabric probe jobs collect information about the fabric. Tape libraryprobe jobs collect information about the tape libraries.
Computer probe jobs for a Storage Resource agent also perform a fabricdiscovery. The information collected includes fabric WWNs of the fabricsconnected to the host on which the Storage Resource agent is running,
236 IBM Tivoli Storage Productivity Center: Installation and Configuration Guide

fabric to switch relationships, and some key switch attributes. Computerprobe jobs for a Storage Resource agent also collect HBA information.
When probing storage subsystems that are registered with the same CIMagent, do not probe more than three storage subsystems within the sameprobe job because the increased load on the agent would increase thelikelihood of timeouts. Instead, spread the storage subsystems acrossmultiple probe jobs with different starting times.
Scan jobsScan jobs collect statistics about the actual storage consumption. Scan jobsare always directed against a Storage Resource agent and deliver detailedinformation about the file systems, files, and databases of a computer.
Ping jobsPing jobs gather statistics about the availability of the managed computers.Ping jobs generate TCP/IP pings and consider the computer available if itgets an answer. Like scan jobs, ping jobs can be directed against computersonly.
Performance monitoring jobsPerformance monitoring jobs collect statistics about the performance ofstorage subsystems and switches. Performance monitoring jobs can be runagainst storage subsystems, SAN Volume Controllers, Storwize V7000Unified, Storwize V7000 systems, the XIV system, IBM SONAS systems,and switches.
Restriction: You cannot use storage subsystem groups with theperformance monitor.
Alerts
You can define alerts so that Tivoli Storage Productivity Center notifies you when aspecified event occurs. Such events are the triggering conditions for the alert. Thespecific triggering conditions that you can use to define an alert depends on thestorage resource that you are monitoring.
The alerts you can define are:
ComputerUse this alert to be notified when a condition is detected on a computerduring a probe job.
This alert is a Data Manager alert.
Examples of computer alerts are when RAM is increased or decreased,virtual storage is increased or decreased, or when a new disk is detected ornot found.
FilesystemUse this alert to be notified when a condition is detected on a file systemduring a probe job or upon an SNMP event.
Examples of file system alerts are when the file system is not found orreconfigured or is low on free space.
This alert is a Data Manager alert.
DirectoryUse this alert to be notified when a condition is detected on a directoryduring a scan job.
Chapter 3. Configuring Tivoli Storage Productivity Center 237

Examples of directory alerts are when the directory is not found or when auser or directory storage quota is exceeded.
This alert is a Data Manager alert.
HypervisorUse this alert to be notified when a hypervisor is discovered or missing, ora virtual machine is added or deleted from a VMware system.
This alert is a Data Manager alert.
Other NASUse this alert to be notified when a condition is detected on anetwork-attached storage (NAS) device during a probe job or upon anSNMP event. This alert type is for NAS devices that are not included inother alert types.
This alert is a Data Manager alert.
InstanceUse this alert to be notified when a condition is detected for a database.
Examples of instance alerts are when a new database or table space isdiscovered for a specific RDBMS.
This alert is a Data Manager for Databases alert.
Database-tablespaceUse this alert to be notified when a condition is detected for adatabase-tablespace.
Examples of database-tablespace alerts are when Tivoli StorageProductivity Center detects that free space is low or the database or tablespace is offline or dropped for a specific RDBMS.
This alert is a Data Manager for Databases alert.
Table Use this alert to be notified when a condition is detected for a table in adatabase.
Examples of table alerts are when a managed table is dropped or exceedsits storage quota.
This alert is a Data Manager for Databases alert.
Storage subsystemUse this alert to be notified when a condition is detected on a storagesubsystem during a probe job.
This alert is a Disk Manager alert.
Storage subsystem alerts include the following examples:v When a storage subsystem is discovered or not foundv A subsystem cache is increased or decreasedv A disk is detected or not foundv A subsystem goes offline or onlinev A port is discovered or missingv A back-end controller goes offline or onlinev A volume goes offline or onlinev A pool is missing or discoveredv A node goes offline or online
238 IBM Tivoli Storage Productivity Center: Installation and Configuration Guide

v A SAN Volume Controller Storwize V7000 Unified, Storwize V7000, oran IBM SONAS node is missing or discovered
v A disk utilization percentage threshold is reached
Restriction: You cannot use storage subsystem groups with thresholdalerts.
FabricUse this alert to be notified when a condition is detected on a fabric duringa probe job.
Examples of fabric alerts are if a fabric is missing or discovered, a fabricgoes online or offline, a zone is missing or discovered, or a zone set ismissing or discovered.
This alert is a Fabric Manager alert.
SwitchUse this alert to be notified when a condition is detected on a switchduring a probe job.
Examples of switch alerts are if a switch is missing or discovered, a switchgoes online or offline, a switch blade is missing or discovered, a switchblade goes online or offline, a total port data rate threshold is reached, or atotal port packet rate threshold is reached.
This alert is a Fabric Manager alert.
Endpoint deviceUse this alert to be notified when a condition is detected on an endpointdevice during a probe job. Endpoint devices are devices discovered by theFabric Manager but cannot be identified as a specific device type, such as acomputer or subsystem.
Examples of endpoint device alerts are when an endpoint device is missingor discovered, a peripheral entity to node association is missing ordiscovered, or the version for an endpoint device changes.
This alert is a Fabric Manager alert.
After you define alerts, you can choose to be notified through different methods.
SNMP trapGenerate an SNMP trap message to any console or terminal to indicate theoccurrence of an alert.
TEC/OMNIbus eventSend alerts to the IBM Tivoli Enterprise Console or OMNIbus console. TheTivoli Enterprise Console administrator can write correlation andautomation rules to analyze Data Manager events and perform responsessuch as send further notification, create or update trouble tickets, or runprograms.
Login notificationSend alerts to a specified user upon logging on to the system.
Windows Event Log, UNIX SyslogRecord alerts to the OS Event Log. If you already have an administratormonitoring OS logs, this action is an easy way to have all of your prioritymessages centralized for quick notification and viewing.
Chapter 3. Configuring Tivoli Storage Productivity Center 239

Run scriptRun a script in response to an alert. (This option is not valid for theStorage Resource agent.)
Email Send alerts through to email addresses that you specify.
Change password tool
The password tool changes the passwords for DB2, Tivoli Storage ProductivityCenter, and IBM Tivoli Integrated Portal so that they can continue to authenticateto one another whenever you change a password.
Important: You must change passwords in the following order:1. The Tivoli Integrated Portal password.2. The Tivoli Storage Productivity Center servers password.3. The DB2 password and select the Restart servers check box.
When you change the passwords in the listed order, you do not have to manuallystop or restart Tivoli Integrated Portal or Tivoli Storage Productivity Centerservers. For more information about the password tool, see “Changing passwordsby using the password tool.”
Changing passwords by using the password toolThe password tool changes the passwords for DB2, Tivoli Storage ProductivityCenter, and IBM Tivoli Integrated Portal so that they can continue to authenticateto one another whenever you change a password.
Important: If you are logged on to Tivoli Storage Productivity Center by using adomain user account, which is also a member of the local administrator group,when you run the change password tool, passwords are not updated. If you runthe tool by using a local OS user account, and an error occurs, complete thesesteps.
To run the password tool when you log in by using a domain user account, chooseone of the following steps:v Right-click the changepasswords.bat file and select Run as administrator.v Complete the following steps:
1. Select Start > Administrative Tools > Local Security Policy.2. On the Local Security Policy window, disable User Account Control: Run all
administrators in Admin Approval Mode.3. Restart your computer.
Single server installation where components use the samelogon credentials
Use the password tool to change the password for DB2, Tivoli Storage ProductivityCenter, and IBM Tivoli Integrated Portal when they are installed on the sameserver, and use the same user name and password.
Before you use the password tool, ensure that you know the existing password orpasswords that you want to change.1. Complete the following steps:
240 IBM Tivoli Storage Productivity Center: Installation and Configuration Guide
|||||
||
|
|
|
||
|
For Windows operating systems where Tivoli Storage Productivity Center isconfigured for OS authentication:
a. From the desktop, click Start > Control Panel.b. Double-click User Accounts.c. Click Change your password.d. Enter the current password, and then enter and confirm the new
password. Click Change password. Close theUser Accountswindow.
For AIX or Linux operating systems where Tivoli Storage Productivity Centeris configured for OS authentication:
Log in with the DB2 user ID, and run the passwd command.
Tip: To change other user credentials, run the passwd usernamecommand.
Tip: To find out how to change the LDAP user password, see your LDAPserver documentation.
2. Open a command prompt window and change the directory to the followingdefault directory:
On Windows operating systems:C:\Program Files\IBM\TPC\service
On Linux or UNIX operating systems:/opt/IBM/TPC/service
3. Start the password tool by running the following program:
On Windows operating systems:changepasswords.bat
On Linux or AIX operating systems:changepasswords.sh
4. From the "Choose the password to change" window, click Change TivoliIntegrated Portal password and click OK.
5. Complete the following steps:a. Enter and confirm the new password, ensuring that it is the same as the
new password that you entered in step 1.b. Ensure that the Restart servers option is selected. Click OK.c. In response to the following message, click Yes:
Are you sure you want to change the password?
d. When the process is completed, click Back to Main.6. To change the password for Tivoli Storage Productivity Center, click Change
Tivoli Storage Productivity Center server and DB2 passwords and click OK.a. Enter and confirm the new password, ensuring that it is the same as the
new password that you entered in step 1. Click OK.b. In response to the following message, click Yes:
Are you sure you want to change the password?
Tip: After you click Yes, if the DB2 servers are already started, thefollowing errors might be displayed in a command prompt window. Ignorethem and continue with the procedure.Changing DB2 User password for Data Server...Changing DB2 User password for Device Server...
Chapter 3. Configuring Tivoli Storage Productivity Center 241

c. When the process is completed, click Back to Main.
Tip: To verify that the password changes were completed successfully,review the PWTool.log file that is in the TPC_installation_directory\service directory, where TPC_installation_directory is the directory whereTivoli Storage Productivity Center is installed.
7. Exit the password tool.Related tasks:“Single server installation where components use different logon credentials”Use the password tool to change the passwords for DB2, Tivoli StorageProductivity Center, and IBM Tivoli Integrated Portal when they are installed onthe same server, but use different user names and passwords.“Multiple server installation where Tivoli Integrated Portal is remote” on page 244Change the passwords for DB2, Tivoli Storage Productivity Center, and IBM TivoliIntegrated Portal when they are installed on two servers, with Tivoli IntegratedPortal on server A, and DB2 and Tivoli Storage Productivity Center on server B.“Multiple server installation where DB2 is remote” on page 246Change the passwords for DB2, Tivoli Storage Productivity Center, and IBM TivoliIntegrated Portal when they are installed on two servers, with Tivoli IntegratedPortal and Tivoli Storage Productivity Center on server A, and DB2 on server B.
Single server installation where components use differentlogon credentials
Use the password tool to change the passwords for DB2, Tivoli StorageProductivity Center, and IBM Tivoli Integrated Portal when they are installed onthe same server, but use different user names and passwords.
Before you use the password tool, ensure that you know the existing password orpasswords that you want to change.1. Complete the following steps:
On Windows operating systems where Tivoli Storage Productivity Center isconfigured for OS authentication:
a. From the desktop, click Start > Control Panel.b. Double-click User Accounts.c. Click Change your password.d. Enter the current password, and then enter and confirm the new
password. Click Change password. Close the User Accountswindow.
On AIX or Linux operating systems where Tivoli Storage Productivity Centeris configured for OS authentication:
When you are logged in with the DB2 user ID, run the passwdcommand. To change other user credentials, run the passwd usernamecommand.
Tip: To find out how to change the LDAP user password, refer to your LDAPserver documentation.
2. Open a command prompt window and change the directory to the followingdefault directory:
On Windows operating systems:C:\Program Files\IBM\TPC\service
242 IBM Tivoli Storage Productivity Center: Installation and Configuration Guide
On Linux or UNIX operating systems:/opt/IBM/TPC/service
3. Start the password tool by running the following program:
On Windows operating systems:changepasswords.bat
On Linux or AIX operating systems:changepasswords.sh
4. From the “Choose the password to change” window, click Change TivoliIntegrated Portal password and click OK.
5. To change the password, complete the following steps:a. Enter and confirm the new password and click OK.b. In response to the following message, click Yes:
Are you sure you want to change the password?
c. When the process is completed, click Back to Main.6. To change the password for Tivoli Storage Productivity Center, click Change
Tivoli Storage Productivity Center server passwords and click OK.7. Complete the following steps:
a. Enter and confirm the new password and click OK.b. In response to the following message, click Yes:
Are you sure you want to change the password?
c. When the process is completed, click Back to Main.8. To change the password for DB2, click Change DB2 password and click OK.9. Complete the following steps:
a. Enter and confirm the new password. Ensure that the Restart servers checkbox is selected and click OK.
b. In response to the following message, click Yes:Are you sure you want to change the password?
Tip: After you click Yes, if the DB2 servers are already started, thefollowing errors might be displayed in a command prompt window. Ignorethem and continue with the procedure.Changing DB2 User password for Data Server...Changing DB2 User password for Device Server...OpenServiceW failed, error code = 5OpenServiceW failed, error code = 5OpenServiceW failed, error code = 5OpenServiceW failed, error code = 5
c. When the process is completed, click Back to Main.
Tip: To verify that the password changes were completed successfully,review the PWTool.log file that is in the TPC_installation_directory\service directory, where TPC_installation_directory is the directory whereTivoli Storage Productivity Center is installed.
Important: For Windows operating systems, if Tivoli Integrated Portal fails tostop and restart, restart your system manually.
Chapter 3. Configuring Tivoli Storage Productivity Center 243

Related tasks:“Single server installation where components use the same logon credentials” onpage 240Use the password tool to change the password for DB2, Tivoli Storage ProductivityCenter, and IBM Tivoli Integrated Portal when they are installed on the sameserver, and use the same user name and password.“Multiple server installation where Tivoli Integrated Portal is remote”Change the passwords for DB2, Tivoli Storage Productivity Center, and IBM TivoliIntegrated Portal when they are installed on two servers, with Tivoli IntegratedPortal on server A, and DB2 and Tivoli Storage Productivity Center on server B.“Multiple server installation where DB2 is remote” on page 246Change the passwords for DB2, Tivoli Storage Productivity Center, and IBM TivoliIntegrated Portal when they are installed on two servers, with Tivoli IntegratedPortal and Tivoli Storage Productivity Center on server A, and DB2 on server B.
Multiple server installation where Tivoli Integrated Portal isremote
Change the passwords for DB2, Tivoli Storage Productivity Center, and IBM TivoliIntegrated Portal when they are installed on two servers, with Tivoli IntegratedPortal on server A, and DB2 and Tivoli Storage Productivity Center on server B.
Before you use the password tool, ensure that you know the existing password orpasswords that you want to change.1. On the server where DB2 and Tivoli Storage Productivity Center are installed,
complete the following steps to change the DB2 and Tivoli StorageProductivity Center passwords:
On Windows operating systems where Tivoli Storage Productivity Center isconfigured for OS authentication:
a. From the desktop, click Start > Control Panel.b. Double-click User Accounts.c. Click Change your password.d. Enter the current password, and then enter and confirm the new
password. Click Change password. Close the User Accountswindow.
For AIX or Linux operating systems where Tivoli Storage ProductivityCenter is configured for OS authentication:
When you are logged in with the DB2 user ID, run the passwdcommand. To change other user credentials, run the passwd usernamecommand.
Tip: To find out how to change the LDAP user password, refer to your LDAPserver documentation.
2. On the server where Tivoli Integrated Portal is installed, complete thefollowing tasks:
On Windows operating systems where Tivoli Storage Productivity Center isconfigured for OS authentication:
a. From the desktop, click Start > Control Panel.b. Double-click User Accounts.c. Click Change your password.
244 IBM Tivoli Storage Productivity Center: Installation and Configuration Guide

d. Enter the current password, and then enter and confirm the newpassword. The new password can be different from the passwordthat you created in step 1. Click Change password. Close the UserAccounts window.
For AIX or Linux operating systems where Tivoli Storage ProductivityCenter is configured for OS authentication:
When you are logged in with the DB2 user ID, run the passwdcommand. To change other user credentials, run the passwd usernamecommand.
3. On the same server, open a command prompt window and change thedirectory to the following default directory:
On Windows operating systems:C:\Program Files\IBM\TPC\service
On Linux or UNIX operating systems:/opt/IBM/TPC/service
4. Start the password tool by running the following program:
On Windows operating systems:changepasswords.bat
On Linux or AIX operating systems:changepasswords.sh
5. From the “Choose the password to change” window, click Change TivoliIntegrated Portal password and click OK.
6. Complete the following steps:a. Enter and confirm the new password and click OK.b. In response to the following message, click Yes:
Are you sure you want to change the password?
c. When the process is completed, click Back to Main.7. On the same server, from the “Choose the password to change” window, click
Change DB2 password and click OK.8. Complete the following steps:
a. Enter and confirm the new password, ensuring that it is the same as thenew password that you entered in step 1. Ensure that the Restart serverscheck box is selected and click OK.
b. In response to the following message, click Yes:Are you sure you want to change the password?
Tip: After you click Yes, if the DB2 servers are already started, thefollowing errors might be displayed in a command prompt window.Ignore them and continue with the procedure.Changing DB2 User password for Data Server...Changing DB2 User password for Device Server...OpenServiceW failed, error code = 5OpenServiceW failed, error code = 5OpenServiceW failed, error code = 5OpenServiceW failed, error code = 5
c. When the process is completed, click Back to Main.9. On the server where Tivoli Storage Productivity Center and DB2 are installed,
from the “Choose the password to change” window, click Change TivoliStorage Productivity Center server passwords and click OK.
10. Complete the following steps:
Chapter 3. Configuring Tivoli Storage Productivity Center 245

a. Enter and confirm the new password, ensuring that it is the same as thenew password that you entered in step 1. Click OK.
b. In response to the following message, click Yes:Are you sure you want to change the password?
c. When the process is completed, click Back to Main.11. On the same server, click Change DB2 password and click OK.12. Complete the following steps:
a. Enter and confirm the new password, ensuring that it is the same as thenew password that you entered in step 1. Click OK.
b. In response to the following message, click Yes:Are you sure you want to change the password?
Tip: After you click Yes, if the DB2 servers are already started, thefollowing errors might be displayed in a command prompt window.Ignore them and continue with the procedure.Changing DB2 User password for Data Server...Changing DB2 User password for Device Server...OpenServiceW failed, error code = 5OpenServiceW failed, error code = 5OpenServiceW failed, error code = 5OpenServiceW failed, error code = 5
c. When the process is completed, click Back to Main.13. Exit the password tool.
Tip: To verify that the password changes were completed successfully, reviewthe PWTool.log file that is in the TPC_installation_directory\servicedirectory, where TPC_installation_directory is the directory where Tivoli StorageProductivity Center is installed.
Related tasks:“Single server installation where components use the same logon credentials” onpage 240Use the password tool to change the password for DB2, Tivoli Storage ProductivityCenter, and IBM Tivoli Integrated Portal when they are installed on the sameserver, and use the same user name and password.“Single server installation where components use different logon credentials” onpage 242Use the password tool to change the passwords for DB2, Tivoli StorageProductivity Center, and IBM Tivoli Integrated Portal when they are installed onthe same server, but use different user names and passwords.“Multiple server installation where DB2 is remote”Change the passwords for DB2, Tivoli Storage Productivity Center, and IBM TivoliIntegrated Portal when they are installed on two servers, with Tivoli IntegratedPortal and Tivoli Storage Productivity Center on server A, and DB2 on server B.
Multiple server installation where DB2 is remoteChange the passwords for DB2, Tivoli Storage Productivity Center, and IBM TivoliIntegrated Portal when they are installed on two servers, with Tivoli IntegratedPortal and Tivoli Storage Productivity Center on server A, and DB2 on server B.
Before you use the password tool, ensure that you know the existing password orpasswords that you want to change.1. On the server where DB2 is installed, do the following steps:
246 IBM Tivoli Storage Productivity Center: Installation and Configuration Guide

For Windows operating systems where Tivoli Storage Productivity Center isconfigured for OS authentication:
a. From the desktop, click Start > Control Panel.b. Double-click User Accounts.c. Click Change your password.d. Enter the current password, and then enter and confirm the new
password. Click Change password. Close the User Accountswindow.
For AIX or Linux operating systems where Tivoli Storage ProductivityCenter is configured for OS authentication:
When you are logged in with the DB2 user ID, run the passwdcommand. To change other user credentials, run the passwd usernamecommand.
Tip: To find out how to change the LDAP user password, refer to your LDAPserver documentation.
2. On the server where Tivoli Integrated Portal and Tivoli Storage ProductivityCenter are installed, do the following steps:
For Windows operating systems where Tivoli Storage Productivity Center isconfigured for OS authentication:
a. From the desktop, click Start > Control Panel.b. Double-click User Accounts.c. Click Change your password.d. Enter the current password, and then enter and confirm the new
password. The new password can be different from the passwordthat you created in step 1. Click Change password. Close the UserAccounts window.
For AIX or Linux operating systems where Tivoli Storage ProductivityCenter is configured for OS authentication:
When you are logged in with the DB2 user ID, run the passwdcommand. To change other user credentials, run the passwd usernamecommand.
3. On the same server, open a command prompt window and change thedirectory to the following default directory:
On Windows operating systems:C:\Program Files\IBM\TPC\service
On Linux or UNIX operating systems:/opt/IBM/TPC/service
4. Start the password tool by running the following program:
On Windows operating systems:changepasswords.bat
On Linux or AIX operating systems:changepasswords.sh
5. From the “Choose the password to change” window, click Change TivoliIntegrated Portal password and click OK.
6. Complete the following steps:a. Enter and confirm the new password and click OK.b. In response to the following message, click Yes:
Are you sure you want to change the password?
Chapter 3. Configuring Tivoli Storage Productivity Center 247

c. When the process is completed, click Back to Main.7. On the same server, from the “Choose the password to change” window, click
Change Tivoli Storage Productivity Center server passwords and click OK.8. Complete the following steps:
a. Enter and confirm the new password, ensuring that it is the same as thenew password that you entered in step 2. Click OK.
b. In response to the following message, click Yes:Are you sure you want to change the password?
c. When the process is completed, click Back to Main.9. On the server where DB2 is installed, from the “Choose the password to
change” window, click Change DB2 password and click OK.10. Complete the following steps:
a. Enter and confirm the new password, ensuring that it is the same as thenew password that you entered in step 1. Ensure that the Restart serverscheck box is selected, and click OK.
b. In response to the following message, click Yes:Are you sure you want to change the password?
Tip: After you click Yes, if the DB2 servers are already started, thefollowing errors might be displayed in a command prompt window.Ignore them and continue with the procedure.Changing DB2 User password for Data Server...Changing DB2 User password for Device Server...OpenServiceW failed, error code = 5OpenServiceW failed, error code = 5OpenServiceW failed, error code = 5OpenServiceW failed, error code = 5
c. When the process is completed, click Back to Main.11. Click Exit program.12. On the server where Tivoli Integrated Portal and Tivoli Storage Productivity
Center are installed, from the “Choose the password to change” window, clickChange DB2 password.
13. Complete the following steps:a. Enter and confirm the new password, ensuring that it is the same as the
new password that you entered in step 1. Ensure that the Restart serverscheck box is selected, and click OK.
b. In response to the following message, the following message, click Yes:Are you sure you want to change the password?
Tip: After you click Yes, if the DB2 servers are already started, thefollowing errors might be displayed in a command prompt window.Ignore them and continue with the procedure.Changing DB2 User password for Data Server...Changing DB2 User password for Device Server...OpenServiceW failed, error code = 5OpenServiceW failed, error code = 5OpenServiceW failed, error code = 5OpenServiceW failed, error code = 5
c. When the process is completed, click Back to Main.14. Exit the password tool.
Important: For the changes to take effect, you might have to manually restartthe Data server, the Device server, or Tivoli Integrated Portal, or all three.
248 IBM Tivoli Storage Productivity Center: Installation and Configuration Guide

Tip: To verify that the password changes were completed successfully, reviewthe PWTool.log file that is in the TPC_installation_directory\servicedirectory, where TPC_installation_directory is the directory where Tivoli StorageProductivity Center is installed.
Related tasks:“Single server installation where components use the same logon credentials” onpage 240Use the password tool to change the password for DB2, Tivoli Storage ProductivityCenter, and IBM Tivoli Integrated Portal when they are installed on the sameserver, and use the same user name and password.“Single server installation where components use different logon credentials” onpage 242Use the password tool to change the passwords for DB2, Tivoli StorageProductivity Center, and IBM Tivoli Integrated Portal when they are installed onthe same server, but use different user names and passwords.“Multiple server installation where Tivoli Integrated Portal is remote” on page 244Change the passwords for DB2, Tivoli Storage Productivity Center, and IBM TivoliIntegrated Portal when they are installed on two servers, with Tivoli IntegratedPortal on server A, and DB2 and Tivoli Storage Productivity Center on server B.
Configuration UtilityUse the Configuration Utility to help you learn how to configure your TivoliStorage Productivity Center system.
Configuration utility tasksThe configuration utility is a tool that guides you through the steps andprerequisite steps required to configure your system.
All of the functions in the configuration utility exist on their own within the IBMTivoli Storage Productivity Center GUI. However, the configuration utility providesyou with a single place for new users to find all these common functions andinformation to help you decide what agents you need and which jobs to run to getthe information you want. It provides links into the Tivoli Storage ProductivityCenter GUI to display reports, add agents, create jobs, create alerts, and so on.
If you are a new user of Tivoli Storage Productivity Center, use the configurationutility to learn what the common functions are and to help you with the task ofdeciding what agents you need and which jobs to run to get the information youwant.
If you are an experienced Tivoli Storage Productivity Center user, you can go tothe GUI directly to perform all of the configuration tasks. However, you might alsowant to use the configuration utility to provide you with a quick summary reviewof your system.
Depending on what information you want to see and collect, you will go to adifferent tab in the configuration utility for information and configuration.
How to manage the servers and agentsThis section describes how to use the configuration utility to manage your serversand agents.
Chapter 3. Configuring Tivoli Storage Productivity Center 249

To manage your servers, storage subsystems, and agents, complete the followingsteps:1. Expand IBM Tivoli Storage Productivity Center > Configuration Utility >
Services tab.2. You can see the following items to manage:
v Data Server - indicates whether the server is up or down. Provides detailedinformation about the Data server.
v Device Server - indicates whether the server is up or down. Provides detailedinformation about the Device server.
v Data/Storage Resource Agents - lists the Data agents and Storage Resourceagents. Provides detailed information about the agents and their status.
v CIM Agents - lists the CIM Agents installed and connected to Tivoli StorageProductivity Center. You can add CIM agents, edit CIM agent details, test theCIM agent connections, run a CIMOM discovery, and show the manageddevices for the CIM agent.
v Inband Fabric Agents - lists the Inband Fabric agents installed. Providesdetailed information about the agents and their status.
v Out of Band Fabric Agents - lists the Out of Band Fabric agents. Providesdetailed information about the agents and their status.
v Storage Subsystem Interfaces - lists the storage systems. You can add, modify,or remove a storage system. You can also update or configure the credentialsfor the storage system, or test the connection to the storage system.
Show managed devicesThis section describes how to use the configuration utility to show the devices(storage subsystems, switches, or tape libraries) that are managed by the CIMagent.
To show the devices, complete the following steps:1. Expand IBM Tivoli Storage Productivity Center > Configuration Utility >
Services tab.2. Under the CIM Agents section, click Show Managed Devices. A dialog box
displays the managed devices.
How to display availability reportsThis section describes how to use the configuration utility to display availabilityreports.
To display availability reports of storage assets, complete the following steps:1. Expand IBM Tivoli Storage Productivity Center > Configuration Utility >
Data Manager tab.2. In the Ping section, you can run, create, or display information about the ping
job. You can then display or define the storage availability system report.
How to monitor your storage assets, storage systems, andfabricsThis section describes how to use the configuration utility to monitor your storageassets, storage systems, and fabrics in your enterprise.
To monitor your storage assets, storage systems, and fabrics, complete thefollowing steps:1. For information collected from the Data Manager, expand Tivoli Storage
Productivity Center > Configuration Utility > Data Manager tab. Use the Ping
250 IBM Tivoli Storage Productivity Center: Installation and Configuration Guide

section to collect information about the availability of the hosts managed byStorage Resource agents or Data agents in your enterprise. The ping jobsprovide information for the availability reports.Use the Computer Probes section to collect statistics about the storage assets inyour enterprise. The computer probe jobs provide information for differentreports.Use the Scan section to collect statistics about the files on the hosts whereStorage Resource agents or Data agents are installed. The scan jobs provideinformation for capacity, usage, usage violations, and backup reports.
2. For information collected from the Disk Manager, expand IBM Tivoli StorageProductivity Center > Configuration Utility > Disk Manager tab. Use theStorage Subsystems Probes section to collect information about theconfiguration of the storage system. Some of the information collected arestorage pools, storage volumes, FC ports, disks, and host-to-volumeassignments. A probe job must be run before volumes can be created ormonitored for performance on a storage system.Use the Storage Subsystem Performance Management section to create and edita performance monitor job. The performance monitor job collects informationabout the performance statistics for the storage system.
3. For information collected from the Fabric Manager, expand IBM Tivoli StorageProductivity Center > Configuration Utility > Fabric Manager tab.You can have Storage Resource agents installed on systems in each fabric thatyou are managing, CIM agents that are configured to manage each fabric, andout-of-band Fabric agents that communicate with each switch in the fabric. It isa good practice to have multiple agent types configured. CIM agents are thepreferred agent type for Brocade fabrics. For Cisco switches, out-of-band agentsare required for VSAN information. Zoning information is provided only by theStorage Resource agents for Cisco and QLogic switches.Before you can run a switch performance monitoring job in IBM Tivoli StorageProductivity Center, you must have a switch CIM agent installed andconfigured in Tivoli Storage Productivity Center. This CIM agent must be SMI-SV1.1 compliant.For more information about the supported agent types for switch performancemanagement and fabric zone configuration, see “Collecting data with the FabricManager” on page 94.Use the Fabric Probes section to collect information about the configuration ofthe fabric. A probe job must be run before information about performance for afabric can be collected.The discovery of Storage Resource agents is performed automatically when theagent associated with your Tivoli Storage Productivity Center is installed orstarted. Storage Resource agents perform fabric discovery during a computerprobe and in response to events. The information gathered during a fabricdiscovery performed by the Storage Resource agent includes fabric and fabricto switch relationships.A Storage Resource agent discovery gathers the WWN of the fabric and WWNof the switches. For topology information, the agent discovers the topology forthe entire fabric. A fabric probe with the Storage Resource agent collects otherinformation such as zoning, topology, and so on. For more information aboutwhat information is gathered, see “Planning for the Fabric Manager” on page88.
Chapter 3. Configuring Tivoli Storage Productivity Center 251

How to create alert definitionsThis section describes how to use the configuration utility to create alertdefinitions.
You can create alert definitions to notify you of an alert condition. When youreceive an alert notification, you can take the appropriate action when a certaincondition occurs on storage subsystems, computers, file systems, directories,fabrics, switches, or endpoint devices.
To create an alert definition, complete the following steps:1. If you want to see the alerts for Data Manager, expand IBM Tivoli Storage
Productivity Center > Configuration Utility > Data Manager tab to createalerts for a computer resource.In the Alerting section, you can create alerts for computers, file systems, anddirectories. You can also see the alert logs for computers, file systems, anddirectories.
2. If you want to see the alerts for Disk Manager, expand IBM Tivoli StorageProductivity Center > Configuration Utility > Disk Manager. tabIn the Alerting section, you can create alert definitions for the storage systemand view the alert logs.There are two categories of alerts: device alerts and performance alerts. Devicealerts use triggering conditions such as actions on the device itself. These alertsinclude discovery or state changes. Performance alerts use triggering conditionsthat are thresholds on measured metrics.Performance thresholds are only available with alert definitions when the IBMTivoli Storage Productivity Center package contains the performance capability.Performance alerts must be defined before the performance monitor job is run.Because these alerts are based on thresholds violated from measured metrics,they can only be triggered when defined in an alert and when those metrics arebeing collected by a monitoring job.
3. If you want to see the alerts for Fabric Manager, expand IBM Tivoli StorageProductivity Center > Configuration Utility > Fabric Manager tab. In theAlerting section, you can create fabric, switch, and endpoint point device alerts.You can also view the logs for these alerts.There are two categories of alerts: the device alert and performance alert.Device alerts use triggering conditions which are actions on the device itself.Examples of these alerts are discovery, state change, and so on. Performancealerts use triggering conditions that are thresholds on measured metrics. Devicealerts are composed of three categories: fabric alerts, switch alerts, andendpoint alerts. A best-practice procedure would be to define more than thethree default alerts that are present. In addition, the three default alerts shouldbe modified to include a "Triggered Action".Performance thresholds are only available for alert definitions when the IBMTivoli Storage Productivity Center package contains the performance capability.For Fabric Manager, the only performance alerts are switch.Performance alerts must be defined before a performance monitor job is run.Because these alerts are based on thresholds violated from measured metrics,they can only be triggered when they are defined in an alert and when thosemetrics are being collected in a monitoring job.
How to manage tape library reportsThis section describes how to use the configuration utility to manage tape libraryreports.
252 IBM Tivoli Storage Productivity Center: Installation and Configuration Guide

A CIM agent must be installed and configured to collect information from the tapelibraries. After the CIMOM discovery job completes, you can create a tape libraryprobe job that collects asset information.
To manage your tape library reports, complete the following steps:1. Expand IBM Tivoli Storage Productivity Center > Configuration Utility >
Tape Manager tab.2. Use the CIMOM Discovery section to run a CIMOM Discovery job.3. Use the Tape Library Probes section to create and run a probe job for the tape
library.4. After you have run the probe job, you can see information in the tape library
reports. The probe job collects information about the configuration of the tapelibrary. Some of the information collected are drives, changers, cartridges, slots,and I/O ports.
Managing element managers and external toolsIn the Configuration Utility node of the stand-alone GUI, you can add andmanage element managers and external tools.
Element managers helps you configure and maintain your storage devices. Anexample of an element manager is DS8000 Storage Manager, which is the defaultelement manager that is provided with IBM System Storage DS8000. External toolsare tools that are web-based user interfaces and local executable files. For example,you might use an external tool like a text editor or spreadsheet application thatyou often use. You can add and manage connections to element managers andexternal tools from the Configuration Utility.
To add and manage connections to element managers and external tools:1. Log in to the IBM Tivoli Storage Productivity Center stand-alone GUI.2. Click IBM Tivoli Storage Productivity Center > Configuration Utility >
Element Manager.3. On the Element Manager tab, configure the following panels:
DS8000 Element ManagerDisplays the element managers that were added for DS8000.
Other Device Element Managerdisplays the element managers that were added for devices other thanDS8000. For example, element managers for other DS series systems,IBM TotalStorage Enterprise Storage Server, SAN Volume Controller,Storwize V7000, and IBM XIV Storage System.
External ToolsDisplays external tools such as web-based interfaces and localexecutable files that were added.
Advanced SettingsDefines default settings for element managers and external tools. Forexample, you can define the default web browser to start web-basedapplications.
a. In the list, select Configure Launch and enter information in the followingfields:v AIX/UNIX/Linux application launch command, enter the command that
is used to start applications on an AIX, UNIX, or Linux operating system.
Chapter 3. Configuring Tivoli Storage Productivity Center 253
v AIX/UNIX/Linux URL launch command, enter the command that is usedto start the web browser for web-based applications on AIX, UNIX, orLinux operating systems.For example, to start the Mozilla Firefox browser, if the executable file isin the /usr/bin directory, enter /usr/bin/firefox.
v Windows application launch command, enter the command that is usedto start applications on a Windows operating system.
v Windows URL launch command, enter the command that is used to startthe web browser for web-based applications on a Windows operatingsystem. For example, to start Mozilla Firefox, and the executable file canbe in any directory, you enter:cmd /c start firefox
v URL parsing regular expression, enter the regular expressions used forUniform Resource Locator (URL) commands. Regular expressions are setsof symbols and characters that are used to match patterns of text. You canuse regular expressions to search specific URLs across your webenvironment. The default regular expression in this field matches theURLs that include the protocol http, https, or ftp.
Accessing Tivoli Storage Productivity Center for Replicationthrough Tivoli Storage Productivity CenterTo access Tivoli Storage Productivity Center for Replication through the TivoliStorage Productivity Center graphical user interface (GUI), you must configure theReplication Manager and specify a web browser in the Element Manager.
To access Tivoli Storage Productivity Center for Replication through Tivoli StorageProductivity Center:1. Click IBM Tivoli Storage Productivity Center > Configuration Utility >
Element Manager.a. Expand Advanced Settings.b. Select Configure Launch.c. Enter the URL launch command for your operating system.
v In the AIX/Linux/UNIX URL launch command field, specify a webbrowser for your operating system. For example, to start Mozilla Firefox,if the executable file is in /usr/bin, change {DEFAULT_BROWSER} to/usr/bin/firefox.
v In the Windows URL launch command field, enter the command that isused to start the web browser for web-based applications on a Windowsoperating system. For example, to start Mozilla Firefox, where theexecutable file can be in any directory, enter cmd /c start firefox
Restriction: You must define a web browser for operating systems to startTivoli Storage Productivity Center for Replication from Tivoli StorageProductivity Center. If a browser is not specified in this field, or an incorrectbrowser is defined, Tivoli Storage Productivity Center for Replication cannotstart.
2. Click IBM Tivoli Storage Productivity Center > Configuration Utility andclick the following buttons to configure Replication Manager:
Replication Health OverviewProvides the following statuses and connections for Tivoli StorageProductivity Center for Replication:v Sessions
254 IBM Tivoli Storage Productivity Center: Installation and Configuration Guide

v ConnectionsIf you are logged on to the local server, the status of the standbyserver is displayed, and if you are logged on to the standby server,the status of the local server is displayed.
Replication Sessions OverviewLists the sessions that are defined in the Tivoli Storage ProductivityCenter for Replication environment, including state and status. Youmust click Create Session to define a session.
Replication Storage Systems OverviewLists all known storage systems and, if enabled, indicates whether thestorage systems are communicating with the active and remote servers.
Replication Paths OverviewSummarizes all known ESS/DS series paths and lists them by storagesystem.
Replication Management Servers OverviewDisplays the status of the management servers configuration and listsup to operating two management servers. Using the list, you can definea standby server or define the local server as a standby server to analternate server. If you defined a standby server, this page has morethan one variation.
Replication AdministrationIf you belong the Administrator user role in Tivoli Storage ProductivityCenter for Replication, displays a list of Tivoli Storage ProductivityCenter for Replication users and groups and their access privileges. Usethis option to manage users and groups.
Replication Advanced ToolsUse this option to create a diagnostic package, change the automaticrefresh rate of the GUI, and in IBM TotalStorage Enterprise StorageServer and DS, enable or disable the heartbeat.
Adding resources for monitoringUse the Configure Devices wizard to add resources for monitoring by IBM TivoliStorage Productivity Center. The wizard guides you through the steps forconfiguring a resource as a data source, running a discovery, including devices ingroups, specifying alerts, and setting up data collection.
In previous versions of IBM Tivoli Storage Productivity Center, setting up a storagedevice for monitoring required completing tasks in different locations of the userinterface, and each type of device required different steps. In Tivoli StorageProductivity Center v4.2 and later, all the tasks for setting up and configuring adevice are included in the Configure Devices wizard.
Use the wizard to configure the following device types for monitoring:v Storage subsystemsv Fabrics and switchesv Computersv Tape libraries
You can add multiple devices of the same type in a single session of the wizard.For example, you can add an IBM DS8000, IBM XIV, IBM SAN Volume Controller,IBM Storwize V7000, IBM Storwize V7000 Unified, IBM SONAS, and storage
Chapter 3. Configuring Tivoli Storage Productivity Center 255

subsystems that are associated with CIM agents by using a single session of thewizard. You cannot configure multiple devices of different types at the same time.For example, you cannot add a storage subsystem and a fabric in a single sessionof the wizard.
Note: The Configure Devices wizard queries all schedules to identify whether aresource is already included in a probe. If a probe was defined for a global entitysuch as All Computers or All Storage subsystems, the Configure Devices wizarddoes not display a resource of that type as an entity that requires configuration.
The pages in the wizard are divided into two sections:
Steps Displays the steps for completing in the wizard. An icon is displayed nextto the current step. The wizard includes the following steps for configuringa device:1. Select the device type that you want to configure.2. Select the specific devices that you want to configure.3. Determine how data is collected from the devices.4. Review your selections and run the wizard.5. Review the results of the wizard.
How you access the wizard determines on what step you begin. Forexample, if you click the Configure Devices icon in the toolbar or selectthe Configure Devices node in the navigation tree, you start by selectingthe device type that you want to configure. If you click the Add StorageSubsystem button on the Disk Manager > Storage Subsystems panel, youbegin by entering connection information about the storage systems thatyou want to configure.
OptionsDisplays the options and fields that you must select and complete for eachstep.
Configuring storage subsystemsUse the Configure Devices wizard to add storage systems for monitoring by TivoliStorage Productivity Center. Storage subsystems that you configure areautomatically included in probe schedules and associated with alert conditions.
You can configure more than one storage system at a time by using the ConfigureDevices wizard. All the storage systems that you configure by using the wizardshare probe schedule and alert conditions.
Depending on the type of storage system that you want to configure, you mustdefine connection information for its native interface or associated CIMOM. Enterinformation in the wizard about the native interfaces for the following storagesystems:v System Storage DS8000v SAN Volume Controllerv The XIV systemv Storwize V3500v Storwize V3700v Storwize V7000v Storwize V7000 Unifiedv IBM SONAS
256 IBM Tivoli Storage Productivity Center: Installation and Configuration Guide
|
|

For all other storage systems, you must enter information about the CIM agentsthat manage them.
To configure storage systems to be monitored by Tivoli Storage ProductivityCenter, complete the following steps:1. Select one of the following ways to access the wizard:
v To configure existing storage systems, click the Configure Devices icon onthe toolbar. You cannot configure existing storage systems if they are alreadyincluded in a probe schedule.If you select this method, you must also complete the following steps:a. On the Select Device Type page, select Storage Subsystem.b. Click Configure existing storage subsystems. The page displays the
storage systems that are known to Tivoli Storage Productivity Center.Continue to next step.
v To only add storage systems, select one of the following methods andproceed to step 4:– In the navigation tree, expand Disk Manager > Storage Subsystems and
click Add Storage Subsystem.– In the navigation tree, expand IBM Tivoli Storage Productivity Center >
Configuration Utility > Services > Storage Subsystem Interfaces andclick Add.
2. Select the existing storage systems that you want to configure. Storage systemsthat are already included in probe schedules are not displayed.If the Credentials column indicates Missing or New Credentials Required forthe storage systems that you select, you must update the storage systemconnection properties before you continue.
3. Specify connection properties for each storage system that you want toconfigure, and continue to step 6.
4. Configure the storage system or CIMOM connections. Tivoli StorageProductivity Center uses this information to connect to a storage system orCIMOM.Enter information for a storage system or CIMOM, and then click Add. Repeatsteps 1 - 3 to configure multiple storage systems or CIMOMs in the samesession of the wizard.Tivoli Storage Productivity Center discovers the storage systems that aremanaged by each of the CIMOM connections that you entered.
5. Select the storage systems that you want to configure. Any storage systems thatwere added in previous steps are automatically selected. Clear storage systemsthat you do not want to configure.
6. Specify how data is collected for storage systems by including them in amonitoring group or template. Use monitoring groups and templates todetermine when data is collected and what alert conditions are checked for thestorage systems that you are configuring.v Select a monitoring group if you want to manage a collection of storage
systems in the same manner. By default, the monitoring group that youselect is associated with an existing probe schedule and set of alerts. Whenyou select the group, its data collection schedule and alerts are automaticallyapplied to all the storage systems that you are configuring. After youcomplete the wizard, the storage systems remain in the group and you canuse that group in other parts of the user interface, such as in reports.
Chapter 3. Configuring Tivoli Storage Productivity Center 257

Tip: Tivoli Storage Productivity Center provides a number of alerts andschedules that are associated with monitoring groups for storage systems. Ifyou want to include a storage system in a user-defined group rather than ina default group, that group must be associated with a data collectionschedule. If the user-defined group is not associated with a data collectionschedule, it is not displayed in the list of monitoring groups from which youcan select.
v Select a template if you want to create a unique probe schedule and set ofalerts for a storage system rather than using the settings of an existing group.
The option that you select in this step determines the next step in the wizard.v If you select a monitoring group, the following actions occur:
– The storage systems are automatically included in a probe schedule towhich the group is associated. For example, if you select Subsystem BasicGroup, the storage systems are included in the Subsystem Basic Probeschedule. The Subsystem Basic Probe schedule runs one time per week onTuesday at 1:00 am.
– A set of alert conditions is applied to the storage systems in a group.When any of these conditions are detected during data collection, an alertis triggered. The group that you select determines the alerts that areassociated with the storage systems. For example, if you select SubsystemBasic Group, 14 alert conditions are automatically checked for the storagesystems.
– The storage systems are included in the group. You can use that group inother parts of the user interface, such as in reports.
v If you select a monitoring template, the following actions occur:– The storage systems are automatically included in a probe schedule that is
created for the template. For example, if you select the Basic SubsystemMonitoring template, the storage systems are automatically included in anew probe that runs one time per week on Tuesday. The probe is createdafter the wizard is completed. Tivoli Storage Productivity Centerdetermines the time when the probe is run based on server load to ensureoptimal performance.
– A set of alert conditions is applied to storage systems in the template.When any of these conditions are detected during data collection, an alertis triggered. The template that you select determines the alerts that areassociated with the storage systems. For example, if you select to the BasicSubsystem Monitoring template, 14 alert conditions are automaticallychecked for the storage systems.
– You must enter a prefix for the probe schedule and alerts that are createdfor the template. This prefix is used to identify the probe and alerts in theuser interface. For example, if you select the Basic Subsystem Monitoringtemplate and enter the prefix "ABC", a probe schedule named "userID.ABCssBasicProbe" and alerts such as "user ID.ABCPool Discovered(Basic)" are created, where user ID represents the ID of the user that islogged on toTivoli Storage Productivity Center.The new probe and alerts are displayed under the corresponding node inthe navigation tree for you to view and edit. For example, a probeschedule that is created from a template in the wizard is displayed underthe IBM Tivoli Storage Productivity Center > Monitoring > Probes node;new storage system alerts is displayed under the Disk Manager >Alerting node.
258 IBM Tivoli Storage Productivity Center: Installation and Configuration Guide

See Alerts and schedules that are associated with monitoring groups in theinformation center for a list of groups and templates with their associatedschedules and alerts.
7. On the summary page of the wizard, review the selections that you made.
View the results of the device configuration and close the wizard. The devices thatyou configured are probed.
Configure storage subsystem connections pageUse this page in the Configure Devices wizard to enter or update connectionproperties for the storage systems and CIMOMs that you are configuring. TivoliStorage Productivity Center uses this information to collect data about the storagesystems.
Use the Configure storage system connections page to enter or update connectionproperties for the following storage entities. Depending on the type of storagesystem that you want to configure, you must define connection information for itsnative interface or associated CIMOM.
The entity that is selected from the Device Type list determines the informationthat Tivoli Storage Productivity Center requires to connect to that entity. Thefollowing sections describe the fields for each entity.
Requirement: If you are adding or updating connection properties for a SANVolume Controller, Storwize V3500, Storwize V3700, or Storwize V7000 storagesystem, select IBM SAN Volume Controller / IBM Storwize V7000 in the DeviceType list. If you are adding or updating connection properties for a Storwize V7000Unified storage system, select IBM Storwize V7000 Unified.
IBM DS8000
Enter or update the following information to have Tivoli Storage ProductivityCenter connect to a System Storage DS8000 storage system.
HMC AddressEnter the IP address or host name for the Hardware Management Console(HMC) that is used to manage the System Storage DS8000 storage system.
HMC2 Address (Optional)Enter the IP address or host name for a second HMC that is used tomanage the storage system.
UsernameEnter the user name for logging in to the System Storage DS8000 elementmanager. The default user name is admin.
Note: This user name is the same as the ESSNI user name.
PasswordEnter the password for the user name.
IBM XIV
Enter or update the following information to have Tivoli Storage ProductivityCenter connect to the XIV system.
Chapter 3. Configuring Tivoli Storage Productivity Center 259

IP AddressEnter the IP address or host name for the XIV system that you want toconfigure.
UsernameEnter the user name for the XIV system.
PasswordEnter the password for the user name.
IBM SAN Volume Controller / IBM Storwize V7000
Enter or update the following information to have Tivoli Storage ProductivityCenter connect to a SAN Volume Controller, Storwize V3500, Storwize V3700, orStorwize V7000 storage system.
Software VersionEnter the version of the SAN Volume Controller, Storwize V3500, StorwizeV3700, or Storwize V7000 software that you want to configure.
IP AddressEnter the IP address or host name of the storage system. You can enter anIPv4 or IPv6 address, for example:v 127.0.0.1v [2001:DB8:0:0:0:0:0:0/32]
Select KeyA Secure Shell (SSH) key is required to access the storage system. Selectone of the following actions for the SSH key:v Upload new key: Select this option to upload a new key. Public key
content is extracted from the private key that is provided in the PrivateSSH Key field and is uploaded to the storage system cluster. If youselect this option, the Administrator User Name and AdministratorPassword fields are required.
v Use existing uploaded key: Select this option if you want to use apublic key that was already uploaded by using a method other thanthrough Tivoli Storage Productivity Center, such as the storage systemweb interface. Enter the location of the private key file that correspondsto the public key in the Private SSH Key field. The Administrator UserName and Administrator Password fields are not required if you selectthis option.
Administrator User NameIf you selected Upload new key in the Select Key list, enter the name of auser that has the Security Administrator role for the cluster that containsthe storage system. Tivoli Storage Productivity Center uses this valueduring the setup process to contact the cluster and configure the SSH keysfor the user. This user name must have privileges to modify other useraccounts (Security Administrator role); otherwise, Tivoli StorageProductivity Center cannot configure the SSH keys.
If you selected the Use existing uploaded key option, this field is optional.
Note: The Administrator User Name applies to only SVC5.x+; it does notapply to SVC 4.x.
Administrator PasswordEnter the password for the user name that you entered in theAdministrator User Name field.
260 IBM Tivoli Storage Productivity Center: Installation and Configuration Guide

User NameEnter an authorized user name for the storage system. Tivoli StorageProductivity Center uses this value when monitoring and configuring thestorage system. If the user name does not exist it is created. This username must be assigned the Administrator role.
This field is active if you selected Upload new key in the Select Key listand entered a user name and password in the Administrator User Nameand Administrator Password fields.Important: If you upload a new key for the existing storage system user byusing Tivoli Storage Productivity Center, that new key overrides theexisting key for the user. If you have another application that is using thatuser (for example Tivoli Storage Productivity Center for Replication), theapplication cannot log on to the storage system because the key associatedwith the user is overwritten.If you have this situation, create a user ID specifically for Tivoli StorageProductivity Center or Tivoli Storage Productivity Center for Replicationon the storage system cluster. Add the storage system to Tivoli StorageProductivity Center for Replication using the new user ID and password(or change the user ID and password while the storage system is in thedisconnected state).
Select UserClick this button to select from a list of existing users that aredefined on the storage system.
Private SSH KeyBy default, the private key entry includes ${device.conf}\tpc_svc.pem,which represents the Tivoli Storage Productivity Center default keytpc_svc.pem. The tpc_svc.pem key is in the conf directory where theDevice server is installed. If you want to use your own key, the key mustexist on the system where you are running the Tivoli Storage ProductivityCenter user interface. The key is uploaded to the Tivoli StorageProductivity Center server system. To identify a new key, click Browse.
The private SSH key must be in OpenSSH format or in PuTTY (.ppk)format that is not password protected. If you have a passwordprotected PuTTY .ppk key, use the PuTTYgen utility on a Windowsoperating system to convert that key to OpenSSH format by followingthese steps:1. Start the PuTTYgen utility.2. Load the .ppk file by clicking File > Load private key.3. From the menu bar, click Conversion > Export OpenSSH key
conversion.
This action saves the key in OpenSSH format.
Passphrase (Optional)Enter the passphrase for the private SSH key. The passphrase protects yourprivate SSH key file. If you do not have a passphrase, leave this fieldblank.
Storwize V7000 Unified
Enter or update the following information to have Tivoli Storage ProductivityCenter connect to a Storwize V7000 Unified storage system.
Chapter 3. Configuring Tivoli Storage Productivity Center 261

Storwize V7000 Unified is composed of Storwize V7000 and Storwize V7000 FileModule. You can connect to only Storwize V7000 or to both Storwize V7000 andStorwize V7000 File Module. Storwize V7000 provides block-level data andStorwize V7000 File Module provides file-level data.
Storwize V7000Use the information in this section to connect Storwize V7000.
IP AddressEnter the IP address or host name of the Storwize V7000 storagesystem. You can enter an IPv4 or IPv6 address, for example:v 127.0.0.1v [2001:DB8:0:0:0:0:0:0/32]
Select KeyAn SSH key is required to access Storwize V7000. Select one of thefollowing actions for the SSH key:v Upload new key: Select this option to upload a new key. Public
key content is extracted from the private key that is provided inthe Private SSH Key field and is uploaded to the StorwizeV7000 cluster. If you select this action, the Administrator UserName and Administrator Password fields are required.
v Use existing uploaded key: Select this option if you want to usea public key that was already uploaded by using a method otherthan through Tivoli Storage Productivity Center, such as theStorwize V7000 web interface. Enter the location of the privatekey file that corresponds to the public key in the Private SSHKey field. The Administrator User Name and AdministratorPassword fields are not required if you select this option.
Administrator User NameIf you selected Upload new key in the Select Key list, enter thename of a user that has the Security Administrator role for theStorwize V7000 cluster that contains the storage system. TivoliStorage Productivity Center uses this value during the setupprocess to contact the cluster and configure the SSH keys for theuser. This user must belong to the Security Administrator role,which has privileges to modify other user accounts. Otherwise,Tivoli Storage Productivity Center cannot configure the SSH keys.
If you selected Use existing uploaded key, this field is optional.
Administrator PasswordEnter the password for the user name that you entered in theAdministrator User Name field.
If you selected Use existing uploaded key, this field is optional.
User NameEnter an authorized user name for the storage system. TivoliStorage Productivity Center uses this value to monitor andconfigure the storage system. If the user name does not exist, it iscreated. This user name must belong to the Administrator role.
This field is active if you selected Upload new key in the SelectKey list and entered a user name and password in theAdministrator User Name and Administrator Password fields.Important: If you upload a new key for the existing StorwizeV7000 user by using Tivoli Storage Productivity Center, that new
262 IBM Tivoli Storage Productivity Center: Installation and Configuration Guide

key overrides the existing key for the user name. If you haveanother application that is using that user name (for example TivoliStorage Productivity Center for Replication), the application cannotlog on to Storwize V7000 because the key associated with the useris overwritten.If this situation occurs, create a user ID specifically for TivoliStorage Productivity Center or Tivoli Storage Productivity Centerfor Replication on the Storwize V7000 cluster. Add the StorwizeV7000 storage system to Tivoli Storage Productivity Center forReplication using the new user ID and password (or change theuser ID and password while the storage system is in thedisconnected state).
Select UserSelect a user name from the list. The names are defined onStorwize V7000.
Private SSH KeyBy default, the private key entry includes ${device.conf}\tpc_svc.pem, which represents the Tivoli Storage ProductivityCenter default key tpc_svc.pem. The tpc_svc.pem key is in the confdirectory where the Device server is installed. If you want to useyour own key, the key must exist on the system where you arerunning the Tivoli Storage Productivity Center user interface. Thekey is uploaded to the Tivoli Storage Productivity Center serversystem. To identify a new key, click Browse.
The private SSH key must be in OpenSSH format or in PuTTY(.ppk) format that is not password protected. If you have apassword protected PuTTY .ppk key, use the PuTTYgen utility ona Windows operating system to convert that key to OpenSSHformat by following these steps:1. Start the PuTTYgen utility.2. Load the .ppk file by clicking File > Load private key.3. From the menu bar, click Conversion > Export OpenSSH key
conversion.
This action saves the key in OpenSSH format.
Passphrase (Optional)Enter the passphrase for the private SSH key. The passphraseprotects your private SSH key file. If you do not have apassphrase, leave this field blank.
Storwize V7000 File Module (Optional)To connect to the Storwize V7000 Unified system, select the check box.
Depending on the configuration of Storwize V7000 Unified, theinformation that is required to connect to this system can be the same as ordifferent from the information for Storwize V7000. The fields and fielddescriptions are the same as the fields in the Storwize V7000 pane with thefollowing exceptions:v The IP Address field is not displayed because the IP address is retrieved
automatically.v The Select Key list contains the option Use user password in addition to
the Upload new key and Use existing uploaded key options. If youselect Use user password, the User Password field is enabled and youcan use a user name and password to connect to the file module.
Chapter 3. Configuring Tivoli Storage Productivity Center 263

If you select Use user password, the Administrator User Name andAdministrator Password fields are optional.
v The User Name field is always required.v The private SSH key must be in OpenSSH format. The PuTTY format is
not supported. You can use the PuTTYgen utility to convert the key tothe OpenSSH format.
IBM SONAS
Enter or update the following information so that Tivoli Storage ProductivityCenter can connect to an IBM SONAS system.
IP AddressEnter the IP address or host name of the IBM SONAS system. You canenter an IPv4 or IPv6 address, for example:v 127.0.0.1v 2001:DB8:0:0:0:0:0:0/32
Select KeyYou must use a Secure Shell (SSH) key to access the storage system. Selectone of the following actions for the SSH key:v Upload new key: Select this option to upload a new key. Public key
content is extracted from the private key that is provided in the PrivateSSH Key field and is uploaded to the IBM SONAS system. If you selectthis action, you must specify a value for the Administrator User Nameand Administrator Password fields.
v Use existing uploaded key: Select this option if you want to use apublic key that was already uploaded by using a method outside ofTivoli Storage Productivity Center, such as the IBM SONAS system webinterface. Enter the location of the private key file that corresponds tothe public key in the Private SSH Key field. You do not have to specifya value in the Administrator User Name and Administrator Passwordfields.
v Use user password: Select this option if you want to use a user nameand password to connect to the file module. If you select this option, theUser Password field is enabled and you can use a user name andpassword to connect to the file module.If you select Use user password, the User Password field is enabled andthe Administrator User Name and Administrator Password fields areoptional.
Administrator User NameIf you selected Upload new key in the Select Key list, enter the name of auser that has the Security Administrator role for the IBM SONAS system.Tivoli Storage Productivity Center uses this value during the setup processto contact the system and configure the SSH keys for the user. This username must have privileges to modify other user accounts (SecurityAdministrator role); otherwise, Tivoli Storage Productivity Center cannotconfigure the SSH keys.
If you selected Use existing uploaded key, this field is optional.
Administrator PasswordEnter the password for the user name that you entered in theAdministrator User Name field.
264 IBM Tivoli Storage Productivity Center: Installation and Configuration Guide
User NameEnter an authorized user name for the storage system. Tivoli StorageProductivity Center uses this value when it configures and monitors thestorage system. If the user name does not exist it is created. This username must have the Administrator role.
This field is active if you selected Upload new key in the Select Key listand entered a user name and password in the Administrator User Nameand Administrator Password fields.
Select UserSelect from a list of existing user names that are defined on theIBM SONAS system.
Private SSH KeyBy default, the private key entry includes ${device.conf}\tpc_svc.pem,which represents the Tivoli Storage Productivity Center default keytpc_svc.pem. The tpc_svc.pem key is in the conf directory where theDevice server is installed. If you want to use your own key, the key mustexist on the system where you are running the Tivoli Storage ProductivityCenter user interface. The key is uploaded to the Tivoli StorageProductivity Center server system. To identify a new key, click Browse.
The private SSH key must be in OpenSSH format or in PuTTY (.ppk)format that is not password protected. If you have a passwordprotected PuTTY .ppk key, use the PuTTYgen utility on a Windowsoperating system to convert that key to OpenSSH format by followingthese steps:1. Start the PuTTYgen utility.2. Load the .ppk file by clicking File > Load private key.3. From the menu bar, click Conversion > Export OpenSSH key
conversion.
This action saves the key in OpenSSH format.
Passphrase (Optional)Enter the passphrase for the private SSH key. The passphrase protects theprivate SSH key file. If you do not have a passphrase, leave this fieldblank.
User PasswordEnter the password for the user name that you entered in the User Namefield.
Other (CIMOM)
Enter or update connection properties for a CIMOM. Tivoli Storage ProductivityCenter uses this information to discover the storage systems that are managed by aCIMOM. You can then configure those storage systems as part of the wizardsession.
The connection information that you enter for a CIMOM is similar to theinformation that you enter when adding a CIMOM on the Add CIMOM page.Adding a CIM agent connection in the information center for descriptions of thefields on this page.For information about the fields on this page, go to theinformation center. Search for Adding a CIM agent connection.
Chapter 3. Configuring Tivoli Storage Productivity Center 265

Discovered Storage Systems
After you run a discovery job, a table is displayed on the "Configure storagesubsystem connections" page. This table provides information about the storagesystems that were discovered for the selected storage system type.
You can remove the connection to a storage system by clicking the row for thesystem in the table, and then clicking Remove.
Configure fabrics and switchesUse the Configure Devices wizard to add fabrics and switches for monitoring byTivoli Storage Productivity Center. Fabrics and switches that you configure in thewizard are automatically included in probe schedules and associated with alertconditions.
You can use the wizard to configure the following fabric and switch types formonitoring:v Brocadev Ciscov QLogic
You can configure one or more fabrics in a single session of the Configure Deviceswizard. All the fabrics and switches that you configure in a single pass share aprobe schedule and alert conditions.
To configure fabrics and switches, complete the following steps:1. Access the wizard:
v If you want to add new or configure existing fabrics and switches, click theconfigure devices icon in the toolbar or select the Configure Devices node inthe navigation tree. If you use this method, you must also complete thefollowing steps:a. Select Fabrics/Switches on the Select Device Type page.b. Determine whether to add new fabrics or configure existing fabrics that
are known to Tivoli Storage Productivity Center.– To add fabrics and switches, select Add and configure new fabrics
and go to step 3.– To configure existing fabrics and switches, select Configure existing
fabrics. The page displays the fabrics that are known to Tivoli StorageProductivity Center. Go to step 2.
v If you only want to add new fabrics and switches, go to Fabric Manager >Fabrics and click Add Fabric. Go to step 3.
2. Select the existing fabrics that you want to configure. Fabrics that are alreadyincluded in probe schedules are not displayed. Go to step 6 after you select thefabrics that you want to configure.
3. Configure CIMOM or agent connections. The fields for entering connectioninformation for a fabric changes based on the type of fabric you are adding.Tivoli Storage Productivity Center uses the information that you enter in thisstep to connect to a fabric or CIMOM. Click Add to configure multiple fabricsin a session of the wizard.
Note: Depending on the type of fabric you are adding, the wizard recommendswhether to enter CIMOM or agent information. For example, if you are
266 IBM Tivoli Storage Productivity Center: Installation and Configuration Guide

configuring a Brocade fabric, the recommended way to administer it is with aCIMOM. If a CIMOM is not available, enter connection information for an outof band fabric agent.
4. Discover the fabrics that are managed by the CIMOMs that you entered in theprevious step. Tivoli Storage Productivity Center collects initial configurationinformation for these entities.
5. Select the fabrics that you want to configure for monitoring. Any fabrics thatwere added in previous steps are automatically selected. Clear the check boxfor the fabrics that you do not want to configure.
6. Specify how data is collected for fabrics by including them in a monitoringgroup or template. Use monitoring groups and templates to determine whendata is collected and what alert conditions are checked for the fabrics that youare configuring.v Select a monitoring group if you want to manage a collection of fabrics in
the same manner. Each monitoring group that you can select is associatedwith an existing probe schedule and set of alerts. When you select a group,its data collection schedule and alerts are automatically applied to all thefabrics that you are configuring. After you complete the wizard, the fabricsremain in the group and you can use that group in other parts of the userinterface, such as in reports.
Tip: Tivoli Storage Productivity Center provides a number of for fabrics. Ifyou want to include a fabric in a user-defined group rather than in a defaultgroup, that group must be associated with a data collection schedule. If theuser-defined group is not associated with a data collection schedule, it is notdisplayed in the list of monitoring groups from which you can select.
v Select a template if you want to create a unique probe schedule and set ofalerts for a fabric rather than using the settings of an existing group.
The option that you select in this step determines the field and pages thatappear next in the wizard.v If you select a monitoring group, the following actions occur:
– The fabrics are automatically included in a probe schedule to which thegroup is associated. For example, if you select Fabric Basic Group, thefabrics are included in the Fabric Basic Probe schedule. The Fabric BasicProbe schedule runs two times per week on Monday and Wednesday at3:00 am.
– A set of alert conditions it applied to the fabrics in a group. When any ofthese conditions are detected during data collection, an alert is triggered.The group that you select determines the alerts that are associated withthe fabrics. For example, if you select Fabric Basic Group, nine alertconditions are automatically checked for the fabrics.
– The fabrics are included in the group. You can use that group in otherparts of the user interface, such as in reports.
v If you select a monitoring template, the following actions occur:– The fabrics are automatically included in a probe schedule that is created
for a template. For example, if you select the Basic Fabric Monitoringtemplate, the fabrics are automatically included in a new probe that runstwo times per week on Monday and Wednesday. The probe is createdafter the wizard is completed.Tivoli Storage Productivity Centerdetermines the time when the probe is run based on server load to ensureoptimal performance.
Chapter 3. Configuring Tivoli Storage Productivity Center 267

– A set of alert conditions it applied to the fabrics in a template. When anyof these conditions are detected during data collection, an alert istriggered. The template that you select determines the alerts that areassociated with the fabrics. For example, if you select to the Basic FabricMonitoring template, nine alert conditions are automatically checked forthe fabrics.
– You must enter a prefix for the probe schedule and alerts that are basedon a template. This prefix is used to identify the probe and alerts in theuser interface. For example, if you select the Basic Fabric Monitoringtemplate and enter the prefix "ABC", a probe schedule named "userID.ABCfabBasicProbe" and alerts such as "user ID.ABCFabric State Change(Basic)" are created, where user ID represents the ID of the user that islogged on toTivoli Storage Productivity Center.The new probe and alerts are displayed under the corresponding node inthe navigation tree for you to view and edit. For example, a probeschedule created from a template in the wizard appears under the TivoliStorage Productivity Center > Monitoring > Probes node; new storagesystem alerts appear under the Fabric Manager > Alerting node.
See for a list of groups and templates with their associated schedules andalerts.
7. On the summary page of the wizard, review the selections that you made.
View the results of the device configuration and close the wizard. The devices thatyou configured are probed.
Configure computersUse the Configure Devices wizard to add computers for monitoring by TivoliStorage Productivity Center. Computers that you configure in the wizard areautomatically included in probe and ping schedules and associated with alertconditions.
Use the Configure Devices wizard to configure computers that meet the followingconditions:v A Storage Resource agent was deployed on the computer. For information about
deploying Storage Resource agents, see Storage Resource Agent Deployments.v The computer is not included in an existing probe schedule. Devices that are
included in existing probe schedules are not displayed in the Configure Deviceswizard because they are considered to be already configured for monitoring.
Important: When computers are added to Tivoli Storage Productivity Center,they are automatically included in the default computer group, and that group isincluded in the default probe schedule (TPCUser.Default Probe). Because thecomputers are included in TPCUser.Default Probe, they are considered to beconfigured for monitoring and are not displayed in the wizard.
To use the Configure Devices wizard to configure computers that were includedin TPCUser.Default Probe, move them into a group that is not associated withan existing probe schedule. To move them into a new group, complete thefollowing steps:1. In the navigation tree, go to Data Manager > Monitoring > Groups >
Computer.2. Right click Computer and select Create Computer Group.
268 IBM Tivoli Storage Productivity Center: Installation and Configuration Guide

3. Select the computers that you want to configure in the Configure Deviceswizard and click the right arrow icon to move them into the new group.
4. Click the save icon in the toolbar to save the group. Do not associate thisgroup with a probe schedule.
5. Start the Configure Devices wizard to the configure computers. Thecomputers in the new group are displayed in the wizard.
You can configure one or more computers in a single session of the ConfigureDevices wizard. All the computers that you configure in a single session share aprobe schedule, ping schedule, and alert conditions.
To configure computers, complete the following steps:1. Click the configure devices icon in the toolbar or select the Configure Devices
node in the navigation tree.2. Select Computers on the Select Device Type page.3. Select the computers that you want to configure. Computers that are already
included in an existing probe schedule are not displayed.4. Specify how data is collected for computers by including them in a monitoring
group or template. Use monitoring groups and templates to determine whendata is collected and what alert conditions are checked for the computers thatyou are configuring.v Select a monitoring group if you want to manage a collection of computers
in the same manner. Each monitoring group that you can select is associatedwith existing probe and ping schedules and a set of alerts. When you select agroup, its data collection schedules and alerts are automatically applied to allthe computers that you are configuring. After you complete the wizard, thecomputers remain in the group and you can use that group in other parts ofthe user interface, such as in reports.
Tip: Tivoli Storage Productivity Center provides a number of defaultmonitoring groups for computers. If you want to include a computer in auser-defined group rather than in a default group, that group must beassociated with a data collection schedule. If the user-defined group is notassociated with a data collection schedule, it is not displayed in the list ofmonitoring groups from which you can select.
v Select a template if you want to create a unique probe schedule, pingschedule, and set of alerts for a computer rather than using the settings of anexisting group.
The option that you select in this step determines the field and pages thatappear next in the wizard.v If you select a monitoring group, the following actions occur:
– The computers are automatically included in probe and ping schedules towhich the group is associated. For example, if you select Computer BasicGroup, the computers are included in the Computer Basic Probe andComputer Basic Ping schedules. The Computer Basic Probe schedule runstwo times per week on Monday and Wednesday at 3:00 am. TheComputer Basic Ping schedule runs every 3 hours.
– A set of alert conditions is applied to the computers in a group. When anyof these conditions are detected during data collection, an alert istriggered. The group that you select determines the alerts that areassociated with the computers. For example, if you select Computer BasicGroup, seven alert conditions are automatically checked for thecomputers.
Chapter 3. Configuring Tivoli Storage Productivity Center 269

– The computers are included in the group. You can use that group in otherparts of the user interface, such as in reports.
v If you select a monitoring template, the following actions occur:– The computers are automatically included in a probe and ping schedule
that are created for the template. For example, if you select the BasicComputer Monitoring template, the computers are automatically includedin a new probe that runs two times per week on Monday and Wednesdayand a ping that runs every three hours. The probe and ping are createdafter the wizard is completed. Tivoli Storage Productivity Centerdetermines the time when the probe is run based on server load to ensureoptimal performance.
– A set of alert conditions is applied to the computers in a template. Whenany of these conditions are detected during data collection, an alert istriggered. The template that you select determines the alerts that areassociated with the computers. For example, if you select to the BasicComputer Monitoring template, seven alert conditions are automaticallychecked for the computers.
– You must enter a prefix for the probe schedules, ping schedules, and alertsthat are based on a template. This prefix is used to identify thesedefinitions in the user interface. For example, if you select the StandardComputer Monitoring template and enter the prefix "ABC", the followingdefinitions are created in the user interface after the wizard is completed:- A probe schedule named "user ID.ABCcompStandardProbe"- A ping schedule named "user ID.ABCcompStandardPing"- Seven alerts that follow this naming convention: user ID.ABCStatus
Change Online (Standard)
Where user ID represents the ID of the user that is logged in toTivoliStorage Productivity Center.The new schedule definitions and alerts are displayed under thecorresponding node in the navigation tree for you to view and edit. Forexample, a probe schedule that is created from a template in the wizard isdisplayed under the Tivoli Storage Productivity Center > Monitoring >Probes node; a ping schedule is displayed under the Data Manager >Monitoring > Pings node; new storage system alerts appear under theData Manager > Alerting node.
See "Alerts and schedules that are associated with monitoring groups andtemplates" for a list of groups and templates with their associated schedulesand alerts.
5. Review the selections that you made in the wizard. The Review user selectionspage includes the following information:v A list of devices that you are configuring.v The name of the monitoring group that you selected. This value is not
displayed if you selected a template.v The name of the probe and ping schedules that are created based on the
template you selected. This value is not displayed if you selected amonitoring group.
v Information about the schedules that are created for a template.v The names of the alerts that are created based on the template you selected.
This value is not displayed if you selected a monitoring group.
270 IBM Tivoli Storage Productivity Center: Installation and Configuration Guide

View the results of the device configuration and close the wizard. The devices thatyou configured are probed.
Configure tape librariesUse the Configure Devices wizard to add tape libraries for monitoring by IBMTivoli Storage Productivity Center. Tape libraries that you configure in the wizardare automatically included in probe schedules.
You can configure one or more tape libraries in a single session of the wizard. Allthe tape libraries that you configure in a single session share a probe schedule.
To configure tape libraries, complete the following steps:1. Access the wizard:
v If you want to add new or configure existing tape libraries, click theconfigure devices icon in the toolbar or select the Configure Devices node inthe navigation tree. If you use this method, you must also complete thefollowing steps:a. Select Tape Libraries on the Select Device Type page.b. Determine whether to add new tape libraries or configure existing tape
libraries that are known to Tivoli Storage Productivity Center.– To add tape libraries, select Add and configure new tape libraries and
go to step 3.– To configure existing tape libraries, select Configure existing tape
libraries. The page displays the tape libraries that are known to TivoliStorage Productivity Center. Go to step 2.
v If you want to only add new tape libraries, go to Tape Manager > TapeLibraries and click Add Tape Library. Go to step 3.
2. Select the existing tape libraries that you want to configure. Tape libraries thatare already included in probe schedules are not displayed. Go to step 6 afteryou select the tape libraries that you want to configure.
3. Configure CIMOM connections for tape libraries. Tivoli Storage ProductivityCenter uses the information that you enter in this step to connect to a CIMOM.Click Add to configure multiple CIMOMs in a session of the wizard.The connection information that you enter for a CIMOM is like the informationthat you enter on the Add CIMOM panel.
4. Discover the tape libraries that are managed by the CIMOMs you entered inthe previous step. Tivoli Storage Productivity Center uses the information thatyou enter in this step to connect to a CIMOM. Click Add to configure multipleCIMOMs in a session of the wizard.
5. Select the tape libraries that you want to configure for monitoring. Any tapelibraries that were added in previous steps are automatically selected. Cleartape libraries that you do not want to configure.
6. Specify how data is collected for tape libraries by including them in amonitoring group or template. Use monitoring groups and templates todetermine when data is collected for the tape libraries that you are configuring.v Select a monitoring group if you want to manage a collection of tape libraries
in the same manner. Each monitoring group that you can select is associatedwith an existing probe schedule. When you select a group, its data collectionschedule is automatically applied to all the tape libraries that you areconfiguring. After you complete the wizard, the tape libraries remain in thegroup and you can use that group in other parts of the user interface, suchas in reports.
Chapter 3. Configuring Tivoli Storage Productivity Center 271

Tip: Tivoli Storage Productivity Center provides a number of "Alerts andschedules that are associated with monitoring groups and templates" for tapelibraries. If you want to include a tape library in a user-defined group ratherthan in a default group, that group must be associated with a data collectionschedule. If the user-defined group is not associated with a data collectionschedule, it is not displayed in the list of monitoring groups from which youcan select.
v Select a template if you want to create a unique probe schedule for a tapelibrary rather than using the settings of an existing group.
The option that you select in this step determines the field and pages thatappear next in the wizard.v If you select a monitoring group, the following actions occur:
– The tape libraries are automatically included in a probe schedule to whichthe group is associated. For example, if you select Tape Basic Group, thetape libraries are included in the Tape Basic Probe schedule. The TapeBasic Probe schedule runs one time per week on Sunday at 4:00 am.
– The tape libraries are included in the group. You can use that group inother parts of the user interface, such as in reports.
v If you select a monitoring template, the following actions occur:– The tape libraries are automatically included in a probe schedule that is
created for a template. For example, if you select the Basic TapeMonitoring template, the tape libraries are automatically included in anew probe that runs one time per week on Sunday. The probe is createdafter the wizard is completed.Tivoli Storage Productivity Centerdetermines the time when the probe is run based on server load to ensureoptimal performance.
– You must enter a prefix for the probe schedule and alerts that are basedon a template. This prefix is used to identify the probe and alerts in theuser interface. For example, if you select the Basic Tape Monitoringtemplate and enter the prefix "ABC", a probe schedule named "userID.ABCtapeBasicProbe" is created, where user ID represents the ID of theuser that is logged in toTivoli Storage Productivity Center.The new probe is displayed under the corresponding node in thenavigation tree for you to view and edit. For example, a probe schedulecreated from a template in the wizard appears under the Tivoli StorageProductivity Center > Monitoring > Probes node.
See "Alerts and schedules that are associated with monitoring groups andtemplates" for a list of groups and templates with their associated schedulesand alerts.
7. On the summary page of the wizard, review the selections that you made.
View the results of the device configuration and close the wizard. The devices thatyou configured are probed.
Managing schedules, jobs, and runsUse the Job Management panel to view and manage all the schedules, runs, andjobs related to the storage devices that are monitored by IBM Tivoli StorageProductivity Center.
Specifically, you can use the Job Management panel to perform the following tasks:
272 IBM Tivoli Storage Productivity Center: Installation and Configuration Guide
v View information about all schedules, runs, and jobs in one central location. Inprevious versions of the product, this information was available only throughnodes under each schedule type in the navigation tree.
v Identify all the schedules that include a particular storage device.v Identify all the schedules, runs, and jobs that are encountering problems when
executing.v Ensure that a storage device is fully monitored by Tivoli Storage Productivity
Center.v Edit, rename, delete, and run schedules. You must be logged in as the user who
created a schedule to perform some of these actions.
Use either of the following methods to access the Job Management panel:
v Click the job management icon in the toolbar.v Open the definition of a schedule and click the View Job History button to view
the runs and jobs related to the schedule. For example, in the navigation tree,click IBM Tivoli Storage Productivity Center > Monitoring > Probes >TPCUser.Default Probe to view the probe definition panel and click View JobHistory.
The following terms are used on this panel:v Schedule: A schedule is a definition of a monitoring task that collects data about
storage resources. Monitoring tasks include scans, probes, pings, quotas,discovery, and performance monitors. For example, define a probe schedule tocollect data about storage subsystems; define a scan schedule to collect file-levelinformation about hosts.
v Run: A run is a single invocation of a schedule.v Job: A job is a unit of work within a run for a schedule. One run might have
multiple jobs. For example, a subsystem probe schedule has one job created persubsystem for which it collects data.
The Job Management panel is divided into the following sections:
Filters sectionUse this section to perform the following tasks:v Determine the type of storage entities whose schedules are displayed on
the panel.v View recommendations for storage entities that are not fully monitored
by Tivoli Storage Productivity Center.
Filtering the contents of this panel based on entity type is optional. Youselect Show All from the Entity Type menu to display all the schedulesdefined in Tivoli Storage Productivity Center.
Schedules sectionUse this section to manage the schedules related to the entities youselected in the Filters section. You can perform the following actions foreach schedule:v View and edit the definition of a schedule.v Run a schedule immediately.v Rename a schedule.v Delete a schedule.v Display schedules that have a certain status, such as Success, Running,
or Failed.
Chapter 3. Configuring Tivoli Storage Productivity Center 273

v View basic information about a schedule, including the ID of the userwho created it, description, job type (for example, ping, probe, or scan),the last time the schedule was run, and the next time the schedule isrun.
Jobs for Selected Schedule sectionUse this section to manage each run of a schedule and the jobs associatedwith a run. You can perform the following tasks for jobs and runs:v View the status of a run and the date and time when it was executed.v View information about the jobs associated with each run, including the
name of the computer on which a job was run, the type of themonitored device, and the status of the job.
v View the log files for one or more jobs at a time.v Display jobs that have started or completed within a specified length of
time. For example, display jobs that have completed in the last twoweeks.
v Display jobs that have a certain status, such as Success, Running, orFailed.
Click and drag the horizontal lines on the panel to resize each section. Click thenames of columns in the Schedules and Jobs for Selected Schedule sections tosort the contents of lists based on the clicked column.
Filters
Refresh AllClick this button to update all the lists that are displayed on the panel.
Entity TypeSelect the type of storage entity whose related schedule information youwant to view. By default all schedules are displayed when you first accessthis panel. When you select a specific entity type, the following actionstake place:v The schedules, runs, and jobs related to the entity type are displayed in
the appropriate sections on the panel.v The names of the devices that belong to that entity type are displayed in
the Entity Name list box.v The text that is displayed above the Show Recommendations button
indicates if the devices are fully monitored.
You can select from the following entity types in the Entity Type menu:
Show All(default) View all the schedules defined in Tivoli StorageProductivity Center.
Storage SubsystemView the schedules for storage subsystems that are monitored byTivoli Storage Productivity Center.
Fabric View the schedules for fabrics that are monitored by Tivoli StorageProductivity Center.
ComputerView the schedules for computers that are monitored by TivoliStorage Productivity Center.
274 IBM Tivoli Storage Productivity Center: Installation and Configuration Guide

SwitchView the schedules for switches that are monitored by TivoliStorage Productivity Center.
Tape LibraryView the schedules for tape libraries that are monitored by TivoliStorage Productivity Center.
Monitoring GroupView the schedules that contain monitoring groups.
Storage Resource GroupView the schedules for all the devices contained within a particularstorage resource group.
Entity Name FilterEnter text to filter the names of entities that are displayed in the EntityName list box. You can enter a combination of letters, numbers, dashes,underscores, and spaces. The filter text is not case sensitive. You can alsoenter the following wildcard characters:v Use an asterisk (*) to represent zero or more unknown characters of any
value. For example, enter DS8* to display devices of the selected typethat begin with DS in their names, such as DS6000-A12-IBM,DS8000-B34-IBM, and DS5000-B35-IBM.
v Use a question mark to represent a single unknown character of anyvalue. For example, enter D?000-B3?-IBM to include devices such asDS8000-B34-IBM, DS8000-B36-IBM, and DS5000-B35-IBM in the EntityName list box.
Text that is displayed above the Show Recommendations buttonWarning text is displayed above the Show Recommendations button if thedevices selected in the Entity Name list box are not fully monitored.
A device is considered not fully monitored if it is not included in all datacollection schedules that are available in the licensed edition of TivoliStorage Productivity Center that is installed. For example, if using theAdvanced edition of Tivoli Storage Productivity Center to monitor a host,that host must appear in the following schedule definitions to beconsidered fully monitored: ping, probe, and scan. If using the Disk editionof Tivoli Storage Productivity Center to monitor a storage subsystem, thatstorage subsystem must appear in the following schedule definitions to beconsidered fully monitored: probe.
If a device is considered not fully monitored, click ShowRecommendations to view a list of recommended actions you can take toaddress the warning.
Show RecommendationsClick this button to view recommended actions for a selected device that isnot fully monitored. From the Recommendations panel, you can performthe following tasks:v View the schedules that are recommended for a device.v Click the Take Action button to create the recommended schedule for a
device.
Schedules
View DetailView the definition of a schedule that is selected in the schedule list. The
Chapter 3. Configuring Tivoli Storage Productivity Center 275

schedule definition panel opens when you click this button. Use this panelto view and edit the definition of a schedule.
Run NowRun the selected schedule immediately. This option is only available if thejob is not currently running.
RefreshUpdate the status of the schedule that is selected in the schedule list. Theprocess to refresh the status of a schedule might take a few moments basedon the current server load and network speed.
action drop down menuUse the options in this menu to perform actions against the selectedschedule. The menu includes View Detail, Run Now, Stop Now (forperformance monitor schedules) and the following actions:
RenameRename a schedule. You must be the owner of a schedule or theTivoli Storage Productivity Center superuser to perform this action.This action is not available for the default schedules that areowned by TPCUser.
Delete Delete a schedule. When you delete a schedule, all the runs andjobs associated with the schedule are also deleted. You must be theowner of a schedule or the Tivoli Storage Productivity Centersuperuser to perform this action. This action is not available for thedefault schedules that are owned by TPCUser.
Only show schedules with statusFilter the schedules that appear in the schedules list based on their status.For example, use this menu to indicate that only schedules with a status ofRunning are displayed in the schedules list. The default setting displays allschedules.
You can filter schedules using the following statuses:v Show Allv Show All Unsuccessfulv Successv Runningv Warningsv Failedv The job is waitingv The job is running
Tivoli Storage Productivity Center automatically updates the schedules listif you change the value selected in this menu.
schedules listUse this list to view the schedules for the storage entities that are selectedin the Filters section of the panel. The schedules that are displayed mustalso meet the filter selected in the Only show schedules with status menu.Click the name of a column to sort the contents of this list based on thatcolumn.
Some jobs that run in Tivoli Storage Productivity Center do not have aschedule associated with them. For example, jobs that are run through thecommand-line interface (CLI) do not have a schedule defined for them. Toensure that these job types are displayed on the Job Management panel, a
276 IBM Tivoli Storage Productivity Center: Installation and Configuration Guide

new schedule called CLI and Event Driven Jobs was created. Select thisschedule to view the runs and jobs that do not have user-created schedulesassociated with them. The job log files for the CLI and Event Driven Jobsschedule are automatically retained for 90 days and then deleted.
The following information is displayed for each schedule:
CreatorThe ID of the Tivoli Storage Productivity Center user who createdthe schedule.
Name The name of a schedule.
DescriptionThe description of a schedule.
Job TypeThe type of the schedule, such as Probe, Ping, Scan, AggregatorJob, CIMOM Discovery, or Subsystem Performance Monitor.
Last Run FinishedThe data and time when the most recent run of a schedulecompleted. This column is blank if the schedule has never beenrun.
Last Run StatusThe status of the most recent run of a schedule.
Next RunThe date and time when the next run of the schedule is planned.The value On Demand is displayed for schedules that are definedwith the Run Now option. The value Never is displayed forschedules that are defined with the Run Once option and havealready run.
row numberAppears in the lower right corner of the schedules list and indicates thenumber of rows in the schedules list. One row is displayed for eachschedule. Use the horizontal lines on the panel to resize the section andincrease or decrease the number of rows that are displayed.
Jobs for Selected Schedule
View Log File(s)View the log files of jobs that are selected in the runs list. Use the Shift +click and Ctrl + click keyboard shortcuts to select multiple jobs. You canview up to 10 logs at one time. The Log File Viewer panel opens when youclick this button or when you double-click a row for a job. Use this panelto view all the processing performed by the Tivoli Storage ProductivityCenter server and agents for jobs.
Note: The number of job log files that are retained for a schedule isdetermined by the values defined on the Log File and Cached BatchReport Retention panel under Administrative Services > Configuration.However, for CLI and Event Driven Jobs schedules, job log files areautomatically retained for 90 days.
Show Jobs, in the lastUse these fields to determine the runs that are displayed for the selectedschedule. Use the following conditions in the filter:
Chapter 3. Configuring Tivoli Storage Productivity Center 277

v Select Started or Completed from the Show Jobs menu to display runsbased on whether they started or completed in the time frame specifiedon the last field.
v Specify a time frame for started or completed runs by entering a numberin the last field and selecting a unit of measurement from the menu.
For example, select Started, enter 4, and select weeks to display the runsfor a schedule that have started within the last four weeks. Tivoli StorageProductivity Center automatically updates the runs list if you change thevalue selected in these fields.
Only show jobs with statusDetermine the runs that are displayed in the runs list based on their status.For example, use this menu to indicate that only runs with a status ofCompleted with warning(s) are displayed. The default setting displays allruns for the selected schedule.
You can filter the display of runs using the following statuses:v Show Allv Show All Unsuccessfulv The job is waitingv Runningv The job is runningv Completed successfullyv Running with warning(s)v Completed with warning(s)v Completed with error(s)v System error occurredv The agent did not respond (to a request from the server)v The agent is being upgradedv The agent is not licensedv Agent not foundv Agent could not be reachedv The job delay limit was exceeded.v The agent disconnectedv Host was shutdown or recycledv Cluster resource group unreachable: no IPv Scripts are disabled for this agentv Script was not found or has an invalid extensionv The agent disk space is low
Tivoli Storage Productivity Center automatically updates the runs list ifyou change the value selected in this menu.
runs listUse this list to view the runs and jobs of the schedule selected in theSchedules section of the panel. This list displays runs based on the criteriaspecified in the Show jobs and in the last fields.
Click the + symbol next to an entry in the Run field to view the jobsassociated with a run. Click the name of a column to sort the contents ofthis list based on that column.
The following information is displayed for each run or job:
278 IBM Tivoli Storage Productivity Center: Installation and Configuration Guide

Run StatusThe status of a run.
Run The run number assigned to a run and the date and time when therun was started.
Computer(jobs only) The name of the computer where a job is executed. Fordatabase probes, this column displays the name of the StorageResource agent that is performing the probe. For storage subsystemprobes, this column displays localhost because the probe isperformed by the Tivoli Storage Productivity Center server.
Device(jobs only) The name of the device to which a job applies. Thiscolumn is blank if the job is not related to a specific device.
Status (jobs only) The status of a job.
Start Time(jobs only) The date and time when a job started.
Finish Time(jobs only) The data and time when a job completed.
Log File Name(jobs only) The name of the log file for a job. Click the View LogFile to view the contents of a job log.
row numberAppears in the lower right corner of the runs list and indicates the numberof rows in the runs list. One row is displayed for each run. You can expandeach run row to view the jobs related to that run. Use the horizontal lineson the panel to resize the section and increase or decrease the number ofrows that are displayed.
Job Management - RecommendationsUse this window to view and apply the recommendations for storage resourcesthat are not fully monitored by Tivoli Storage Productivity Center.
A resource is not fully monitored if it is not included in all the data collectionschedules that are available in the licensed edition of Tivoli Storage ProductivityCenter that is installed. For example, when you use the IBM Tivoli StorageProductivity Center Advanced license to monitor a host, that host must beincluded a ping, probe, and scan to be considered fully monitored. If you use IBMStorage Productivity Center Select Edition to monitor a storage subsystem, thatstorage subsystem must be included in a probe to be fully monitored.
Recommendation SeverityIndicates whether a recommendation is a warning or only informational.v A warning message indicates an action that you can take to more fully
use Tivoli Storage Productivity Center to monitor a resource. Forexample, when you use a probe schedule in the IBM Tivoli StorageProductivity Center Advanced license to collect data about a storagesystem, a warning message is displayed. This message recommends thatyou also include the storage subsystem in a performance monitorschedule. You can then use the data that is collected by performancemonitor to identify the bottlenecks in storage usage and performance forthe storage subsystem.
Chapter 3. Configuring Tivoli Storage Productivity Center 279

v An informational message is a recommendation to upgrade TivoliStorage Productivity Center to an edition that includes more monitoringfunctions. For example, when you use probe schedules in IBM StorageProductivity Center Select Edition to collect data about a fabric, aninformational message is displayed. This message indicates that if youupgrade to IBM Tivoli Storage Productivity Center Advanced,performance data can be collected about the fabric.
For warning messages, select the corresponding row and click Take Actionto take the recommended action.
Entity Displays the name of a storage resource to which the recommendationapplies.
RecommendationIndicates the recommended actions for a storage entity. One row isdisplayed per recommendation. Click Take Action to resolverecommendations that have a warning severity.
If multiple recommendations are displayed for a resource, sometimescompleting one of the recommended actions might resolve the otherrecommendations. For example, consider if these two recommendations aredisplayed for a fabric:v In order to collect information about resource configuration,
define a probe schedule for fabric {0}
v To enable zone control, add a data source that is capable of zonecontrol for fabric {0}
If you click Take Action for the first recommendation and include thefabric in a probe, the second recommendation is also resolved. Bothrecommendations are then automatically removed from theRecommendation list
Take ActionTake the recommended action for a warning. When you click the TakeAction button, the corresponding panel for the action is displayed. Forexample, if the recommended action is to include a storage subsystem in aperformance monitor, the Create Subsystem Performance Monitor panel isdisplayed.
CancelExit the window without taking any actions.
Configuration nodesThis section is organized to help you associate the information in the IBM TivoliStorage Productivity Center GUI with an explanation of each node.
Expand Administrative Services > Configuration. You see these nodes.
Role-to-Group MappingsOne of the first tasks to perform after installing IBM Tivoli Storage ProductivityCenter is to assign roles to individuals who use the product. From theRole-to-Group Mapping node, you can map Tivoli Storage Productivity Centerroles, such as Tape Operator or Fabric Administrator, to user groups that youcreate in your operating system or in your LDAP-compliant repository.
280 IBM Tivoli Storage Productivity Center: Installation and Configuration Guide

For example, on a Windows computer you can create user groups using theAdministrative Tools control panel. When a user name is used to authenticate withTivoli Storage Productivity Center, the group membership for the user determinesthe authorization level.
Role-based authorizationOperating system groups or LDAP groups (for example, groups contained in yourLDAP-compliant repository) are associated with predefined roles. When a user IDis authenticated to Tivoli Storage Productivity Center through the GUI, CLI, orAPIs, membership in an operating system or LDAP group determines theauthorization level of the user.
Table 37 shows the association between roles and authorization level.
If you select OS authentication for your Tivoli Storage Productivity Centerinstallation, then you do not have to create any of the groups before installation.The Tivoli Storage Productivity Center superuser role automatically gets mappedto the Administrators group on the Windows operating system, to the systemgroup on the AIX operating system, or to the root group on the Linux operatingsystem.
Table 37. Roles and authorization levels
Role Authorization level
Superuser Has full access to all Tivoli Storage Productivity Centerfunctions.
Productivity Center administrator Has full access to operations in the Administrationsection of the GUI.
Disk administrator Has full access to Tivoli Storage Productivity Centerdisk functions.
Disk operator Has access to reports only for Tivoli StorageProductivity Center disk functions. These reportsinclude information about tape devices.
Fabric administrator Has full access to Tivoli Storage Productivity CenterFabric Manager functions.
Fabric operator Has access to reports only for Tivoli StorageProductivity Center Fabric Manager functions.
Data administrator Has full access to Tivoli Storage Productivity CenterData Manager functions.
Data operator Has access to reports only Tivoli Storage ProductivityCenter Data Manager functions.
Tape administrator Has full access to Tivoli Storage Productivity Centertape functions.
Tape operator Has access to reports only for tape functions.
Notes:
1. If a user has multiple roles, the authorization level is a combination of thelevels for each of the roles.
2. If a user is not a member of any of the roles listed, no access is granted to thatuser.
3. For enterprise-rollup reports, you need superuser or Tivoli Storage ProductivityCenter administrator authority to do the following actions:
Chapter 3. Configuring Tivoli Storage Productivity Center 281

v Add, remove, or modify the Tivoli Storage Productivity Center subordinateserver that the master server is monitoring.
v Create or run probe jobs that include Tivoli Storage Productivity Centersubordinate servers.
Any Tivoli Storage Productivity Center user can generate enterprise-rollupreports.
4. You need to assign the appropriate Tivoli Integrated Portal roles to other TivoliStorage Productivity Center users and groups who are added later to thesystem.
5. For more information about Tivoli Integrated Portal roles, see “Tivoli IntegratedPortal and Tivoli Common Reporting Roles” on page 233.
How to associate a user and group with IBM Tivoli StorageProductivity CenterThis section provides information about how to associate a user and group withIBM Tivoli Storage Productivity Center.
Creating a system group on Windows:
You must first create an operating system group on your computer, and thenassign the users to the group. Then you can use the GUI to associate the groupwith the IBM Tivoli Storage Productivity Center role.
For Windows, first create the users you want to have access to the various TivoliStorage Productivity Center roles. Complete the following steps:1. Go to Start > Settings > Control Panel > Administrative Tools > Computer
Management > Local Users and Groups.2. Right-click on Users and click New Users.3. The New User panel is displayed. Enter a user name, description (optional),
and password (twice). Click Create.4. Repeat steps 3 and 4 for each new user you want to create. Then create a
system group on Windows:a. Go to Start > Settings > Control Panel > Administrative Tools > Computer
Management > Local Users and Groups.b. Right-click on Groups and click New Group.c. The New Group panel is displayed. Enter a Group Name and Description
(optional). Click Add.d. The Select Users or Groups panel is displayed. Enter or select the users or
groups you want to add to the new group you have created. Click Add.Then click Create.
Creating a system group on UNIX or Linux:
For UNIX or Linux, to add new users to the system, follow the steps in this topic.
Complete the following steps:1. Create a name for the user.2. The new user must have a home directory allocated for them.3. That user must be placed in the group file. Refer to your UNIX or Linux
documentation for information about how to create a system group.
282 IBM Tivoli Storage Productivity Center: Installation and Configuration Guide

Associating the user groups to IBM Tivoli Storage Productivity Center roles:
After you have created the operating system group and assigned users to thatgroup, you must assign the groups to IBM Tivoli Storage Productivity Center roles.
Complete the following steps:1. Open the Tivoli Storage Productivity Center GUI.2. Go to Administrative Services > Configuration > Role-to-Group Mappings.3. On the content pane, click Edit for the role you want to associate with the
group you have created.4. The Edit Group dialog is displayed. Enter the group you want to associate with
the Tivoli Storage Productivity Center role. Click OK. This associates theoperating system group with the Tivoli Storage Productivity Center role.
5. Click File > Save to save the mappings.
License KeysYou must set database permissions to monitor databases with the Data Manager.
You must have the following permissions set to monitor the databases with DataManager:
Table 38. Database permissions
Database Permissions
DB2 db2admin
Microsoft SQL Server public
Oracle DBA
Sybase SA level
To monitor Oracle databases with Tivoli Storage Productivity Center, the Oracleuser needs DBA authority. A non-DBA Oracle user with “create session”, “selectany dictionary”, “analyze any”, and “analyze any dictionary” roles can stillmonitor the Oracle database through Tivoli Storage Productivity Center. However,Tivoli Storage Productivity Center is not able to obtain free space information fordatabase objects. During the database registration, when a non-DBA Oracle user isused with the roles mentioned in the preceding list, the following warningmessage displays:RDBMS login does not have dba privilege. Freespace will not be calculated forsystem objects.
Clicking OK continues with the registration process. This message also is alsodisplayed in the scan logs when scan jobs are run.
Through the License Keys node, you can administer the license keys for DataManager for Databases. Specifically, you can:v Assign Data Manager for Databases licenses to your Storage Resource agents.v Edit, add, and delete the instances within your organization that you want to
monitor.v View the number of Data Manager for Databases licenses.v View the number of Data Manager for Databases licenses that are not currently
assigned (unused) to agents.
Chapter 3. Configuring Tivoli Storage Productivity Center 283

Before you can use Storage Resource agents to manage the storage for yourinstances, you must do the following steps:1. Assign Data Manager and Data Manager for Databases licenses to the agents
that are monitoring RDBMS instances.2. Register the instances on the systems that contain licensed agents.
Assigning Data Manager database licenses to installed agentsThis topic describes how to assign Data Manager database licenses to an agent.
To assign a Data Manager database license to an agent, complete the followingsteps:1. Expand Administrative Services > Configuration > License Keys. The License
Editor window is displayed.2. Click the icon for the IBM Tivoli Storage Productivity Center for Data -
Databases row. The Tivoli Storage Productivity Center for Data - DatabasesLicense Editor window is displayed. The field and button descriptions for theLicensing tab are:
Select AllSelects all the Licensed boxes.
Deselect AllRemoves all the licenses for Data Manager - Databases.
ComputerDisplays all the computers on which a Data Manager agent is installed.
OS TypeDisplays the operating system of the computer where the agent isinstalled.
DomainDisplays the domain of a computer where the agent is installed.
Tree NameFor NetWare devices that are managed by Storage Resource agentsfrom previous releases.
LicensedContains a check box that indicates whether a computer is licensed foruse with Data Manager - Databases.
If you have unused Data Manager - Databases licenses, continue to the nextstep. To unassign licenses from agents, see “Unassigning Data Manager -Databases license” on page 288.
3. Click the check box in the Licensed column next to the computer with theinstance you want to monitor.
4. Click File > Save to save the updated license settings. If an instance isregistered on the machine where you licensed the agent, you are ready to setup your Data Manager - Databases jobs to monitor its storage. If an instance isnot registered on the machine where you licensed the agent, see “Registeringinstances on machines that contain licensed agents.”
Registering instances on machines that contain licensed agentsThis topic describes how to register instances on machines that contain licensedagents.1. Click the RDBMS Logins tab on the IBM Tivoli Storage Productivity Center for
Data - Databases License Editor window.
284 IBM Tivoli Storage Productivity Center: Installation and Configuration Guide

2. The RDBMS Logins window is displayed. Use this window to edit, add, anddelete the instances within your organization that you want to monitor. Thefield and button descriptions for the RDBMS Logins tab are:
Edit Highlight a row and click this button to edit the login information forthe corresponding instance. The RDBMS Login Editor window isdisplayed.
Add NewClick this button to add login information for a new instance. TheRDBMS Login Editor window is displayed.
Delete Highlight a row for an instance and click this button to delete thatinstance from Data Manager - Databases. Once you delete an instance,all the previously gathered statistics for that instance are automaticallydeleted from the database repository and that instance is no longeravailable for selection in the reporting section of the navigation tree.
3. Click Add New to add a new instance. The RDBMS Login Editor window isdisplayed. Use this window to enter information about the instance that youwant Data Manager - Databases to monitor.
Note: In an Oracle Parallel Server (OPS) environment, you only need toregister one of the instances within that environment. OPS is a resource-sharingsystem that increases availability and performance by partitioning the workloadacross multiple servers of a cluster (nodes). Databases installed on clusteredservers or clustered database servers (for example, Oracle Real ApplicationCluster (RAC) environment) are not supported for monitoring.
4. Select the name of the machine where the instance is running from the HostName list box.
Note: You can only register instances on machines that contain licensed agents.5. Enter the following information in the next field:
For OracleEnter the Oracle SID and host for the instance.
For Microsoft SQL/ServerEnter the name of the instance you want to register in the Instancefield.
Note: When you use the Storage Resource agent to monitor theRDBMS, the JDBC field is not shown. The Storage Resource agent doesnot require this field.
For SybaseEnter the server name in the Server field.
For IBM UDBEnter the name of the instance you want to register in the Instancefield.
6. Enter a user ID that has the appropriate database privileges within the instancein the User field. See “License Keys” on page 283.
For OracleThe following privileges are required for this user ID:v CREATE SESSIONv SELECT ANY DICTIONARYv ANALYZE ANY
Chapter 3. Configuring Tivoli Storage Productivity Center 285

Note: For Oracle 9i or 10g, specify ANALYZE ANY DICTIONARY
For Microsoft SQL ServerThe login ID that Data Manager uses to log in to Microsoft SQL Serverinstances that you want to probe must have "permit" access.
7. Enter a password for the user ID in the Password field.8. Enter the port on which the instance is listening in the Port field.
For OracleThe default port is 1521.
For Microsoft SQL/ServerThe default port is 1433. You must also provide the fully qualified pathto the JDBC driver in the JDBC Driver field.
Note: When you use the Storage Resource agent to monitor theRDBMS, the JDBC field is not shown. The Storage Resource agent doesnot require this field.
For SybaseThe default port is 5000.
For IBM UDBWhen monitoring multiple UDB instances within your environment,you must ensure that the port numbers you choose are open (uniquefor each instance) for JDBC and Java connections to those instances. Toopen up a port, run the following DB2 command on the machine wherethe instance is located:db2jstrt
The default port number is 6789. You can change this default byindicating the port number you want to use when running the db2jstrtcommand. For example:db2jstrt 6790
If you enter an incorrect port number, an error occurs. To verify theport number for an instance, do the following steps:
UNIX or LinuxView the etc/services file to confirm the correct port number.
AIX Run the following command:ps -ef | grep db2jd
The output from this command indicates the port on which theinstance is listening. Use this port number when running thedb2jstrt command.
WindowsUse the information in the IBM DB2 configuration tools toconfirm the port number.
9. Click File > Save to save the instance configuration information. You can nowrun a probe job against the registered instances. You must run a probe jobagainst an instance before you can select any databases or table spaces againstwhich you want to run a scan job.
286 IBM Tivoli Storage Productivity Center: Installation and Configuration Guide
Configuring Microsoft SQL Server 2005 or 2008:
Before you can monitor a Microsoft SQL Server 2005 or Microsoft SQL Server 2008database, you must make some configuration changes to the Microsoft SQL Server.
Note: Before registering an instance of Microsoft SQL Server 2005 or 2008 to bemonitored by a Storage Resource agent, please make sure that the directorycontaining the sqlcmd utility (sqlcmd.exe) is in the system PATH environmentvariable on the Microsoft SQL Server system. The default location of sqlcmd isC:\Program Files\Microsoft SQL Server\<version>\Tools\Binn.
Before monitoring the Microsoft SQL Server database, follow these steps:1. Install the Microsoft SQL Server and provide the required information about
the installation panels. See the Microsoft SQL Server 2005 Installation andConfiguration Guide for detailed information. For the installation andconfiguration guide, see http://msdn.microsoft.com/en-us/library/ms143516.aspx.
2. For Microsoft SQL Server 2005 and 2008, make sure that the Microsoft SQLServer is using Mixed Mode authentication.
3. After the installation, go to the SQL Server Configuration Manager and makesure that you set the Dynamic TCP/IP port to the default port 1433. (See theMicrosoft SQL Server 2005 Installation and Configuration Guide for detailedinformation.) To, configure the Microsoft SQL Server, follow these steps:a. Open the SQL Server Configuration Manager.b. Go to SQL Server 2005/2008 Network Configuration.c. Select Protocols for MSSQLINST (name of the instance).d. Right-click TCP/IP.e. Select Enable: Yes.f. Go to the IP Addresses / IP All and add TCP Dynamic Ports : 1433
(default port).4. Launch the Microsoft SQL Server setup.exe.5. Go to Installation/Search for product updates. You are redirected to the
Microsoft update Web site that scans the computer for the components thatneed to be updated.
6. When finished, select Express Install to install the components found.7. Install the Microsoft CoreXML Services (MSXML) 6.0 SP 2. Reboot the system.8. For Microsoft SQL Server 2008 only: Install the Microsoft SQL Server 2008
Management Objects from the following Microsoft SQL Server 2008 FeaturePack link: http://www.microsoft.com/downloads/. Search for ManagementObjects.
9. For Microsoft SQL Server 2008 only: Install the Microsoft SQL Server 2005Backward Compatibility Components from the link specified in step 8. Searchfor 2005 Backward Compatibility.
10. Install the Storage Resource agent and JDBC driver on the Microsoft SQLServer system.
11. Open the RDBMS Login Editor. Expand Administrative Services >Configuration > License Keys. In the content pane, click RDBMS Logins tab.
12. Click Add New. The RDBMS Login Editor opens. Enter the followinginformation:
DatabaseMicrosoft SQL/Server.
Chapter 3. Configuring Tivoli Storage Productivity Center 287
Instance nameName of the instance (mssqlinst).
User User ID to logon to the Microsoft SQL Server.
PasswordPassword for the user ID.
Port 1433
JDBC DriverEnter the JDBC driver. For Microsoft SQL Server 2005 and 2008, openthe Microsoft SQL Server 2005/2008 JDBC Driver package and installthe driver to the wanted location. After the package is unpacked, inthe RDBMS logon panel, enter the absolute path to the JDBC Driver(suggested version 1.2):%MS_SQL_DRIVER_HOME%/sqljdbc_1.2/enu/sqljdbc.jar
13. Click Save.
Unassigning Data Manager - Databases licenseThis topic describes how to unassign a Data Manager - Databases license.
To unassign a license, complete the following steps:1. Expand Administrative Services > Configuration > License Keys.2. The License Editor window is displayed.3. Click the icon for the IBM Tivoli Storage Productivity Center for Data -
Databases row. The IBM Tivoli Storage Productivity Center for Data -Databases License Editor window is displayed. Use the Licensed column inthis window to view the agents to which licenses are currently assigned.
4. Clear the Licensed check box next to a machine to remove the license for theagent on that machine.
5. Click File > Save. When you remove the license for an agent, the followingactions occur:v All the data gathered by that agent for the instance it monitors is removed
from the database repository.v You can no longer run monitoring, alerting, or policy management jobs
against the instance on the machine where the agent was located.v The number of unused licenses increases by one.
Alert dispositionYou can configure IBM Tivoli Storage Productivity Center so that SNMP traps andTivoli Enterprise Console events can be sent to other consoles.
Configuring Tivoli Storage Productivity Center to send SNMPtraps and IBM Tivoli Enterprise Console eventsThis topic provides information about how to configure Tivoli Storage ProductivityCenter to send SNMP traps, Tivoli Enterprise Console events, or e-mailnotifications. These actions are taken when an event specified in an alert isdetected. From this node, you can also specify the number of days after whichrecords in the alert log are deleted.
To enable SNMP traps and Tivoli Enterprise Console event alert notifications,consider the following information:
288 IBM Tivoli Storage Productivity Center: Installation and Configuration Guide

SNMP trapsSystem administrators must set up their SNMP trap ringer with theprovided MIB files in order to receive SNMP traps from Tivoli StorageProductivity Center.
TEC eventsSend an alert to the Tivoli Enterprise Console. The Tivoli EnterpriseConsole administrator can write correlation and automation rules toanalyze Tivoli Storage Productivity Center events. The event definitions arespecified in the tivoliSRM.baroc and fabric.baroc files. It also performsresponses such as sending further notification, creating or updating troubletickets, running programs, and so on.
The tivoliSRM.baroc and fabric.baroc files must be loaded into thecurrent active rule base of the Tivoli Enterprise Console server. This actionallows Tivoli Enterprise Console events sent by Tivoli Storage ProductivityCenter to display on the console.
Table 39. Location of MIB and Baroc files
Component MIB file location Baroc file location
Data Manager and DiskManager
v Installation media, disk1,part 1
v Data server:data\snmp\tivoliSRM.mib
v Installation media, disk1,part 1
v Data server:data\tec\tivoliSRM.baroc
Fabric Manager v Installation media, disk1,part 1
v Device server:device\snmp\fabric.mib
v Installation media, disk1,part 1
v Device server:device\tec\fabric.baroc
Tivoli Storage ProductivityCenter for Replication
v Installation media, disk1,part 2
v tpcr\TPCRM\CSM-Client\etc\ibm-TPC-Replication.mib
v Installation media, disk1,part 2
v tpcr\TPCRM\CSM-Client\etc\ibm-TPC-Replication.baroc
Note:
v The Tape Manager displays only indications received from the tape CIM agent in thetape alert log. Because the tape alerts cannot be configured, there is no forwarding ofSNMP traps and there are no MIB or baroc files for the Tape Manager.
v Some alerts are generated by Tivoli Storage Productivity Center about Tivoli StorageProductivity Center for Replication. Examples of these alerts are communication failuresbetween Tivoli Storage Productivity Center and Tivoli Storage Productivity Center forReplication. Other alerts generated are Tivoli Storage Productivity Center for Replicationconfiguration changes. These alerts can be forwarded by Tivoli Storage ProductivityCenter as SNMP traps or through e-mail. These alerts are generated directly by TivoliStorage Productivity Center and not by SNMP traps from Tivoli Storage ProductivityCenter for Replication. If Tivoli Storage Productivity Center and Tivoli StorageProductivity Center for Replication are running on the same system, only one programcan listen on the SNMP default port. All traps received on the default port areforwarded to the other server process using a different port number.
Port 162Tivoli Storage Productivity Center uses port 162 to listen for SNMP traps.This port is the default port. To receive SNMP traps from switches, youmust configure the switch to send SNMP traps to the Device server's IPaddress and port.
Chapter 3. Configuring Tivoli Storage Productivity Center 289

Note: Port 162 is also used by the Windows SNMP Trap service. If theWindows SNMP Trap service is running, stop the service or change thedefault port that Tivoli Storage Productivity Center uses to listen for SNMPtraps. If you need to change the Device server's default port number, usethe setdscfg command. The attribute to set is SNMPTrapPort.
To configure Tivoli Storage Productivity Center to send traps and Tivoli EnterpriseConsole events, follow these steps:1. Open the Tivoli Storage Productivity Center GUI.2. Go to Administrative Services > Configuration > Alert Disposition.3. On the content pane, you can enter information for two SNMP destinations and
one Tivoli Enterprise Console event destination. For the SNMP destination,enter the community name, host, and port information. For the TivoliEnterprise Console event destination, enter the server and port information.You can also enter information for e-mail information. Click File -> Save.
Log File and Cached Batch Report RetentionYou can set the retention period for log files.
You can specify the number of runs and the length of time to maintain the log filesgenerated by IBM Tivoli Storage Productivity Center. We recommend that you setthe value for Maximum number of runs to keep of each schedule to be less thanor equal to the value in the Maximum number of days' worth of log files to keep(regardless of schedule) field. This setting helps avoid the situation where entriesfor schedule runs are displayed in the user interface, but the corresponding logfiles are deleted.
Note: By default, job log files for schedules are retained for 90 days, but you canchange that value on the Log File and Cached Batch Report Retention panel.However, for CLI and Event Driven Jobs schedules, job log files are automaticallyretained for 90 days.
To set the retention period, complete the following steps:1. Go to Administrative Services > Configuration > Log file and Cached Batch
Report Retention.2. In the Maximum number of runs to keep of each schedule field, enter the
maximum number of runs for a schedule that you want to display in the userinterface. The default is five runs per schedule. For example: if you enter 10 inthis field and then run a probe schedule 11 times, job log and job informationentries for the first run are deleted from the database repository. Additionally,only the 10 most recent runs of the schedule are displayed in the JobManagement panel.
3. In the Maximum number of days ' worth of log files to keep (regardless ofschedule) field, enter the maximum number of days to keep a log file for a run.A log file is generated for each job in a run and is stored in the appropriate logdirectory. Every log file that is older than the number of days you specify hereis deleted. The default is 90 days.
4. In the Cached Batch Report Retention field, enter the maximum number ofdays to keep a batch report. The default is 90 days.
Note: When the batch report is created on the Tivoli Storage ProductivityCenter server and copied to the Storage Resource agent, the copying of thereport to the agent might fail. If a failure occurs, no attempt is made to sendthe report again. Instead, the report remains cached on the Tivoli Storage
290 IBM Tivoli Storage Productivity Center: Installation and Configuration Guide

Productivity Center server. You can configure the time the report remainscached on the Tivoli Storage Productivity Center server.
Quota and Constraint e-mail Address RulesYou can specify rules for generating e-mail addresses of users who break the quotaand constraint e-mail address rules based on their user ID, given name, or familyname as they are registered within the operating system.
The user names are obtained as follows:v For Windows: Full name field, from LDAP.v For UNIX or Linux: User description from the Password file.
To set the rules, complete the following steps:1. Expand Administrative Services > Configuration > Quota and Constraint
e-mail Address Rules.2. Click Add After or Add Before to include elements within an e-mail address
template. An e-mail address template describes how to build the user ID. Theuser ID is notified in the event of a quota violation. This user ID represents theactual user who breaks the quota rules.
3. Select USERNAME, FIRSTNAME, LASTNAME, Text, or Substring from thepop-up menu to include as an element in the e-mail address rule:v USERNAME: the login ID of the user who breaks the quota or constraint
rules.v FIRSTNAME: the given name of the user who breaks the quota or constraint
rules.v LASTNAME: the family name of the user who breaks the quota or constraint
rules.v Text: free form text that you want to appear within the e-mail address.v Substring: an element in the e-mail address that is a substring of
USERNAME, LASTNAME, or FIRSTNAME. For example,LASTNAME + SUBSTRING(USERNAME, 0, 3)
includes the first three characters of the USERNAME. If the family name isSmith and USERNAME (as defined by file owner information) is 9A0723,then this substring example is equal to "SMITH9A0".To define a substring, complete the following steps:a. Select Substring after clicking Add After or Add Before.b. Select the substring variable: USERNAME, LASTNAME, or
FIRSTNAME.c. Highlight the range for the substring.d. Click OK. That substring appears within the e-mail address template.e. Click File > Save to save the e-mail address rule.
Scan/Probe Agent AdministrationYou can assign Storage Resource agents to run scan and probe jobs.
Assign the Storage Resource agents to perform scans against the following objects:v File systems within NAS filersv IBM Tivoli Storage SAN File Systems
Chapter 3. Configuring Tivoli Storage Productivity Center 291

The window associated with this node provides a complete listing of the NASfilers and SAN File System discovered by Data Manager.
Manual NAS Server EntryUse the Manual NAS Server Entry node to enter, and view information aboutNetwork Attached Storage (NAS) servers.
In the manual NAS Server Entry node, you can complete the following tasks:v Enter information about Network Attached Storage (NAS) servers that you want
to monitor in your environment. After you enter information about the NASservers, you can assign agents to the servers in the Scan/Probe Agent window.
v View a list of NAS filers. The NAS filers that were registered using the DataManager are shown in the list.
v Delete NAS filers. The NAS filers that were registered using the Data Managerare deleted.
You can set up individual NAS servers for monitoring by Data Manager using thiswindow, or you can use a discovery method to automatically add multiple serverssimultaneously.
When you want to add multiple NAS Filers for monitoring, use the discoverymethod. When you want to add individual NAS Filers for monitoring, use theManual NAS Server Entry window.
For more information about configuring NAS, see http://www.redbooks.ibm.com/. Search for sg247490.
Manually adding a NAS filer or gatewayTo manually add a NAS filer or gateway:1. Expand Administrative Services > Configuration > Manual NAS Server
Entry.2. Click the Add NAS Server button. The Add NAS Server window is displayed.3. Enter the following information:
Network nameEnter the network name of the NAS server you want to add.
When manually adding a NAS Gateway or Filer that is monitored by aStorage Resource agent on a UNIX system, you must add the NASusing the same name that was used when mounting its file systems onthat UNIX system. You can mount file systems using the short name,fully qualified name, or IP address of a NAS.
For example, if the file systems from a NAS Gateway were mounted toa UNIX computer (where the Storage Resource agent is installed) usingthe short name of the NAS Gateway, you must add the NAS Gatewayin Tivoli Storage Productivity Center using the short name of the NASGateway. If the file systems from a NAS Gateway are mounted usingan IP address, you must add the NAS Gateway in Tivoli StorageProductivity Center using the IP address as its name.
Consider the following example:a. The NAS filer named "oxide" was mounted on the UNIX system
where a Storage Resource agent is located. The following commandsused the short name and IP address to identify the NAS filer duringa file system mount:
292 IBM Tivoli Storage Productivity Center: Installation and Configuration Guide

v oxide:/vol/john1 81920 22108 74% 123 5% /n3700_john1v 192.168.1.65:/vol/vol0 47566060 28715228 40% 1016085 52%
/n3700_vol0b. To add this NAS filer to Tivoli Storage Productivity Center, enter
the following values in the Network Name field:v oxidev 192.168.1.65
If file systems from a NAS Gateway or Filer is mounted on a UNIXsystem in different ways, you must add that NAS to Tivoli StorageProductivity Center with the names used in both methods. Forexample, if one file system is mounted using the fully qualified nameof a NAS Gateway and the other file system is mounted using the IPaddress, you must add that NAS Gateway to Tivoli StorageProductivity Center twice: once with the fully qualified name and oncewith the IP address. Only one row is displayed for this NAS on ManualNAS Server Entry panel, but both file systems are listed on theScan/Probe Agent Administration panel.
Data Manager Agent OS TypeSelect the operating system of the computer that contains the agent thatgathers information about the NAS filer.
Accessible fromSelect the agent that you want to use to "discover" the NAS filer. Thislist box displays agents that are:v Running under the operating system selected in the Data Manager
Agent OS Type field.v Found on Windows or UNIX operating systems that are accessible to
the NAS filers (Data Manager's agents are not found on the NASfilers themselves):– Windows: agents are found on Windows operating systems within
the same domain as the NAS filers.– UNIX: agents are found on UNIX or Linux operating systems that
have NFS imports for the file systems within the NAS filers.
SNMP CommunityEnter the name of the SNMP communities that Data Manager useswhen communicating with systems in your environment. If you do notenter the name of an SNMP community, the default community publicis used. Data Manager uses the SNMP protocol to contact and identifyNAS filers. This field is optional.
Login ID(Windows operating systems only.) Enter the login ID that DataManager uses when logging in to the NAS filer.
Password(Windows operating systems only.) Enter the password that DataManager uses when logging in to the NAS filer.
Add as Other NASSelect this check box to add a NAS server as Other NAS filer. With thisoption, you can monitor and report on file system information aboutthe NAS filer or gateway through Windows CIFS or UNIX NFS sharesaccessible to the scan or probe job for the agent. No controllers, disks,and logical volumes information are collected or reported.
Chapter 3. Configuring Tivoli Storage Productivity Center 293

NAS Server Vendor NameEnter the vendor name (or manufacturer) hosting the file system of theNAS server. The default vendor is Network Appliance.
4. Click OK to have the Data Manager verify the filer for which you enteredinformation. During this verification, Data Manager will:v Log in to the NAS filer.v Gather information about the file systems visible on those filers to the agent.
For the UNIX or Linux operating system, it gathers information about the filesystems that it can actually see (for example, file systems that are mounted tothe UNIX operating systems). By default, file systems are discovered at theroot. For the Windows operating system, it finds all the NAS filers that arevisible through CIFS.
v Determine which file systems are visible to which agents.v Enter the NAS server information into the repository.
5. Expand Administrative Services > Configuration > Scan/Probe AgentAdministration. This window allows you to assign agents to each file systemof the NAS server.
Note: At any time, you can change the login ID and password for a NAS fileron the Administrative Services > Configuration > License Keys > Filer Loginswindow.
Deleting a manually added NAS filerTo delete a NAS filer whose information was manually entered into Data Manager,follow these steps:1. Expand Administrative Services > Configuration > Manual NAS Server
Entry.2. Highlight a row that represents the device you want to delete.3. Click Delete. Remember that when you delete a device from this window, all
information about that device is removed from the repository.
Editing Data Manager configuration filesTivoli Storage Productivity Center provides you with the ability to edit DataManager configuration files to further customize the settings for a componentaccording to the standards at your site.
Data Manager has configuration files for customizing the operation of the serverand agent components within your environment. These files are located in theTPC_installation_directory/config/ directory, where TPC_installation_directoryrepresents the directory where you installed the product.
The configuration file for the Tivoli Storage Productivity Center server is located inthe following default installation directory:
Windows operating systemC:\Program files\IBM\TPC\Data\config\
UNIX or Linux operating system/opt/IBM/TPC/Data/config
The agent configuration file for the Storage Resource agent is located in thefollowing default installation directory:
Windows operating systemC:\Program Files\IBM\TPC\agent\config
294 IBM Tivoli Storage Productivity Center: Installation and Configuration Guide

UNIX or Linux operating system/opt/IBM/TPC/agent/config/
When you change the configuration files for the server component on the UNIX orLinux operating system, you must stop and start the server before those changestake effect.
Edit the agent.config file to configure the Data Manager agents in yourenvironment. This file is located in the agent installation directory on everycomputer where an agent is installed. For information about the agent.config file,go to the information center. Search for agent.config file.
Edit the nas.config file to configure the Data Manager NAS feature for yourenvironment.
The nas.config file contains the following information:v On each line not beginning with #, the first blank-delimited field must contain
the SNMP Enterprise code of a NAS filer that the agent discovers, probes, orscans.
v The second field contains identifying information about the filer.
Any remote host that cannot be reached by SNMP or whose enterprise code doesnot match one of these values is ignored.
For information about the server files to configure, go to the information center.Search for server.config file, scheduler.config file, and TPCD.config file.
For information about the agent.config file, go to the information center. Searchfor agent.config file.
Editing the NAS configuration fileThis topic provides information about editing the nas.config file for the DataManager NAS feature.
Edit the nas.config file to configure the Data Manager NAS feature for yourenvironment.
The nas.config file contains the following information:v On each line not beginning with #, the first blank-delimited field must contain
the SNMP Enterprise code of a NAS filer that the agent discovers, probes, orscans.
v The second field contains identifying information about the filer.
Any remote host that cannot be reached by SNMP or whose enterprise code doesnot match one of these values are ignored.
History AggregatorYou can configure reports for data aggregation.
The History Aggregator in IBM Tivoli Storage Productivity Center defines and runsjobs to sum data in the database repository for historical reporting purposes. Forexample, you can view the sum of usage across multiple storage resources, byfilesystem. Trending enables you to see patterns of your historical data across yourentire network.
Chapter 3. Configuring Tivoli Storage Productivity Center 295

You have the option of turning aggregation off, although this action is notrecommended. To turn off aggregation, access the History Aggregator window,clear the Enabled check box, and select File > Save.
To configure reports for data aggregation, complete the following steps:1. Expand Administrative Services > Configuration > History Aggregator.2. The Edit History Aggregator panel is displayed in the content pane. You can
specify the following information:v How often to run the jobv How to handle time zonesv Triggering conditionsv Triggered actions
Storage Resource agent DeploymentsYou can use this page to manage your Storage Resource agent deployments.
Deploying Storage Resource agents
Deploy Storage Resource agents through the user interface rather than a separateinstallation wizard. You can have only one agent per host that points to the sameserver.
You can enter host names from a Microsoft directory, enter host names manually,or import a host list file. You can define a schedule to add the Storage Resourceagents at a time that is convenient for you. You can also specify the type of alertsto generate if a schedule fails. After you enter information for the Storage Resourceagent, you can optionally validate the connection to the Data server. This stephelps to eliminate most of the possible failure cases after you submit thedeployment schedule.
You can define a deployment schedule to include multiple computers on which toinstall Storage Resource agents. The computers you include in a deployment mustshare the administrative user ID and password. IBM Tivoli Storage ProductivityCenter uses these user credentials to log in to the computers when installingStorage Resource agents. If the computers in a deployment do not share theadministrative user credentials, you must create separate deployment schedule forthem.
To deploy Storage Resource agents, follow these steps:1. See “Deployment guidelines and limitations for Storage Resource agents” on
page 297 for a list of considerations before deploying Storage Resource agents.If you are deploying Storage Resource agents on UNIX or Linux operatingsystems, you must use root as the user ID.
2. Open the Tivoli Storage Productivity Center user interface.3. In the navigation tree pane, expand Administrative Services > Configuration >
Storage Resource agent Deployments. Right-click Storage Resource agentDeployments and click Create Storage Resource agent Deployments.
4. The Create Storage Resource agent Deployment window opens. Enterinformation for the Computers tab.
5. Enter information for the When to run tab.6. Enter information for the Alert tab.7. Click File > Save.
296 IBM Tivoli Storage Productivity Center: Installation and Configuration Guide

Related reference:“Deployment guidelines and limitations for Storage Resource agents”There are a number of guidelines and limitations that you must consider whenmanaging the Storage Resource agents in your environment.
Deployment guidelines and limitations for Storage ResourceagentsThere are a number of guidelines and limitations that you must consider whenmanaging the Storage Resource agents in your environment.
Use the following information when you deploy Storage Resource agents andmigrate existing Data agents:
Multiple Storage Resource agents that are probing or scanning the same storageresources
If multiple Storage Resource agents are set up to probe or scan the samestorage resources, the Storage Resource agent that was added to TivoliStorage Productivity Center first is used for the probe or scan. Therefore,only data that is gathered by the first Storage Resource agent is shown.
Platforms that support Storage Resource agents for the sameFor a list of platforms on which you can deploy Storage Resource agents,go to the Tivoli Storage Productivity Center support site at , click theDocumentation link, and enter Platform Support: Agents, Servers andGUI in the Search box. Click the link to the document for the appropriaterelease.
Product functions that are not available for storage devices monitored by StorageResource agents
Before you migrate an existing Data agent to a Storage Resource agent ordeploy a new Storage Resource agent, make sure that the productfunctions you want to use on the monitored devices are available for thoseagents. The following functions are not available for storage devices thatare monitored by Storage Resource agents:v Certain relational database monitoring. For list of relational databases
that can be monitored by Storage Resource agents, go to the TivoliStorage Productivity Center support site at , click the Documentationlink, and enter Platform Support: Agents, Servers and GUI in theSearch box. Click the link to the document for the appropriate release.
v The changing of zone configurations and the reporting of HBA, fabrictopology, or zoning information for fabrics connected to hosts runningLinux on IBM System z hardware. These limitations also apply toStorage Resource agents on all guest operating systems for VMwareconfigurations.
Required authorities for deploying and running Storage Resource agentsBefore you can create deployment schedules and deploy Storage Resourceagents on target computers, you must meet the following requirements:v To create deployment schedules, you must be logged in to Tivoli Storage
Productivity Center with a user ID that has the Productivity CenterAdministrator role. See the Configuration - Role-to-Group Mappingstopic for more information about user roles.
v To deploy Storage Resource agents on target computers, you mustprovide a user ID that has administrative rights on those computers. Youenter this ID when creating a deployment schedule. Tivoli StorageProductivity Center uses this ID to log on to the target computers andinstall and configure the necessary runtime files for the agents.
Chapter 3. Configuring Tivoli Storage Productivity Center 297

The user under which a Storage Resource agent (daemon or non-daemon)runs must have the following authorities on the target computers:v On Linux or UNIX, the user must have root authority. By default, an
agent runs under the user 'root'.v On Windows, the user must have Administrator authority and be a
member of the Administrators group. By default, a Storage Resourceagent runs under the 'Local System' account.
Orphan zonesStorage Resource agents do not collect information about orphan zones. Anorphan zone is a zone that does not belong to at least one zoneset.
Firewalls and Storage Resource agent deploymentsBefore you can deploy a Storage Resource agent on a computer, you mustturn off the firewall on that computer. If you do not turn off the firewall,the deployment fails. To turn off the firewall on a Windows 2008 computer,complete the following steps:1. On the desktop of the Windows 2008 computer, click Start >
Administrative Tools.2. Click Windows Firewall with Advanced Security.3. Click Windows Firewall Properties.4. Change the Firewall state field to Off on the following tabs: Domain
Profile, Private Profile, Public Profile.5. Click OK to accept the changes and exit.6. Deploy a Storage Resource agent to the Windows 2008 computer.
Multiple computers in a deploymentYou can define a deployment schedule to include multiple computers onwhich to install Storage Resource agents. The computers you include in adeployment schedule must share the same administrative user ID andpassword. IBM Tivoli Storage Productivity Center uses these usercredentials to log on to the computers when installing Storage Resourceagents. If the computers in a deployment schedule do not share the sameadministrative user credentials, you must create separate deployment jobsfor them.
Note: When you deploy a Storage Resource agent to multiple computers, aglobally unique identifier (GUID) is created for each computer (if one doesnot exist).
Communication between the Tivoli Storage Productivity Center server and aStorage Resource agent
The Tivoli Storage Productivity Center server connects to a monitoredcomputer when a Storage Resource agent is deployed and whenever a datacollection schedule runs against that agent.
During deployment, the server communicates with the target computerusing one of the following protocols:v Windows server message block protocol (SMB)v Secure Shell protocol (SSH)v Remote execution protocol (REXEC)v Remote shell protocol (RSH)
After deployment, the type of communication between the server andagent on that computer depends on whether you deployed the agent asdaemon service or non-daemon service. See the IBM Tivoli Storage
298 IBM Tivoli Storage Productivity Center: Installation and Configuration Guide

Productivity Center and IBM Tivoli Storage Productivity Center for ReplicationInstallation and Configuration Guide for more information about theseprotocols.
Daemon and non-daemon servicesYou can deploy a Storage Resource agent agent as a daemon ornon-daemon service:v A Storage Resource agent that is deployed as a daemon service runs in
the background on the monitored computer and listens for requests fromthe Tivoli Storage Productivity Center server. Connectivity between theserver and agent is established using SSL. The server and agent havetheir respective certificates and no additional information is requiredbesides those certificates and the security that is provided by the SSLprotocol.
v A Storage Resource agent deployed as a service on demand(non-daemon service) runs as a stand-alone executable file on themonitored computer. Communication from the server to the agent usesthe same protocol that was used during the deployment of the agent.Communication from the agent to the server uses SSL.
Authentication between the Tivoli Storage Productivity Center server and aStorage Resource agent
Tivoli Storage Productivity Center requires the correct authenticationinformation (user ID, password, port, certificate location, or passphrase) formonitored computers each time it communicates with Storage Resourceagents on those computers. If the authentication information changes for ahost computer on which a Storage Resource agent is deployed, theauthentication information for that agent must be updated using theChange Authentication or Update Storage Resource agent List functionson the panel located under the Administrative Services > Data Sourcesnode in the navigation tree.
Storage Resource agents on the same computerYou cannot deploy a Storage Resource agent on a computer where aStorage Resource agent is already installed and pointing to the same Dataserver. You can deploy a Storage Resource agent on the same computer asanother Storage Resource agent if those agents communicate with differentData servers and use different ports when listening for requests.
Time zones for computers monitored by Storage Resource agentsThe time zones of computers that are monitored by Storage Resourceagents are shown as Greenwich Mean Time (GMT) offsets in Tivoli StorageProductivity Center reports. For example, a computer in Los Angelesshows the following time zones in the By Computer report in Assetreporting:(GMT-8:00) GMT-8:00
UNIX operating systems using Remote Shell protocol (RSH)If RSH is configured to use a user ID and password, the connection fails.To successfully connect to a system using RSH, you must set up the .rhostsfile (in the home directory of the account). RSH must be configured toaccept a login from the system that is running your application.
Deployments on Windows operating systems - NetBIOS settingIf you want to install a Storage Resource agent on Windows targets, theEnable NetBIOS over TCP/IP option must be selected in the Control Panelsettings for the computer's network connections properties. To set thisoption, click Start > Settings > Control Panel > Network and Dial-Up
Chapter 3. Configuring Tivoli Storage Productivity Center 299
Connections > <some_connection> > Properties > Internet Protocol(TCP/IP) > Advanced > WINS > Enable NetBIOS over TCP/IP.
See the documentation for your firewall to determine if these ports are notblocked for inbound requests.
To determine if security policies are blocking the connection ports, clickStart > Settings > Control Panel > Administrative Tools.
Depending on whether your policies are stored locally or in ActiveDirectory, follow these directions:
Locally stored policiesFor locally stored policies, click Start > Settings > Control Panel >Administrative Tools > Local Security Policy > IP SecurityPolicies on Local Computer.
Policies stored in Active DirectoryFor policies stored in Active Directory, examine the IP securitypolicies and edit or remove filters that block the ports:v Click Administrative Tools > Default Domain Security Settings
> IP Security Policies on Active Directory.v Click Administrative Tools > Default Domain Controller
Security Settings > IP Security Policies on Active Directory.
For all Windows systems, the Server service must be running to connect toa Windows system using the Windows protocol.
The following table lists the ports reserved for NetBIOS. Ensure that theseports are not blocked.
Port Description
135 NetBIOS Remote procedure call. (Not currently used.)
137 NetBIOS name service.
138 NetBIOS datagram. (Not currently used.)
139 NetBIOS session (for file and print sharing).
445 CIFS (on Windows XP).
For Windows Server 2008, shares must be shared for the Guest orEveryone accounts, and password protected sharing must be disabled. Todisable password protected sharing, follow these steps:1. Click Control Panel > Networking and Sharing Center.2. Click the down arrow next to Password protected sharing.3. Click Turn off password protected sharing.4. Click Apply. Exit from the Control Panel.
Deployments on Windows 2008 - User Account Control (UAC) remoterestrictions
If you are planning to install Storage Resource agents remotely on aWindows 2008 operating system, you must disable the User AccountControl (UAC) remote restrictions on the Windows operating system. UserAccount Control is a security component on Windows operating systems.
Note: This task contains steps that tell you how to modify the registry.Serious problems might occur if you modify the registry incorrectly.Therefore, make sure that you follow these steps carefully. For added
300 IBM Tivoli Storage Productivity Center: Installation and Configuration Guide

protection, back up the registry before you modify it. Then you can restorethe registry if problems occur. For information about how to back up andrestore the registry, see .
To disable UAC remote restrictions, follow these steps:1. Click Start > Run. Enter regedit and click OK.2. Locate and click the following registry subkey:
HKEY_LOCAL_MACHINE\SOFTWARE\Microsoft\Windows\CurrentVersion\Policies\System
3. If the LocalAccountTokenFilterPolicy registry entry does not exist,follow these steps:a. On the Edit menu, click New > DWORD Value.b. Enter LocalAccountTokenFilterPolicy as the name for the DWORD
value in the content pane. Click Enter.c. Right-click LocalAccountTokenFilterPolicy, then click Modify.d. In the Edit DWORD Value window, enter 1, then click OK.
This value can be 0 or 1:
0 This value builds a filtered token. This value is the defaultvalue. The administrator credentials are removed.
1 This value builds an elevated token.e. Exit the registry editor.
Additional information about Storage Resource agentsSee “Planning for Storage Resource agents” on page 45 for moreinformation about Storage Resource agents.
Creating a certificate for SSH protocolBefore installing the Storage Resource agents using the SSH protocol, you canoptionally create a certificate.
Note: The Storage Resource agent only supports either DES-EDE3-CBC encryptionor no encryption for the private key used in SSH protocol communication betweenthe server and agent. The default encryption used in the ssh-keygen command onUNIX is always DES-EDE3-CBC. However, with Windows Cygwin, ssh-keygengenerates a key with AES-128-CBC encryption if a passphrase is specified. If thereis no passphrase, the private key is generated without encryption. For moreinformation about encryption, see http://www.openssl.org/docs/apps/enc.html.
Creating a certificate for SSH protocol (non-Windows)
Note: The Storage Resource agent only supports either DES-EDE3-CBC encryptionor no encryption for the private key used in SSH protocol communication betweenthe server and agent. The default encryption used in ssh-keygen command onUNIX is always DES-EDE3-CBC but with Windows Cygwin, it is usingAES-128-CBC encryption if a passphrase is specified. If there is no passphrase, theprivate key is generated without encryption.
To create a certificate for SSH protocol, complete the following steps:
To create a certificate for SSH protocol, complete the following steps:1. Telnet to the remote machine using the root user ID.2. To create an SSH certificate on AIX, you must first install the following
packages (if not already installed):
Chapter 3. Configuring Tivoli Storage Productivity Center 301

openssl.base.openssh.base.clientopenssh.base.server
3. Go to the directory where you want to create the certificate:cd to ~/.ssh
4. Enter ssh-keygen. Accept the default names (for example, id_rsa).5. Enter the passphrase.6. Two files are created:
id_rsa The private key.
id_rsa.pubThe public key.
7. Create an authorized_key file in the same location as id_rsa.pub by enteringthe following command:cat id_rsa.pub >> authorized_keys
8. Copy the id_rsa (private key) to your server machine. For example, to copy theid_rsa file to :\keys\id_rsa on the IBM Tivoli Storage Productivity Centerserver (user responses are in boldface type):
# ssh-keygenGenerating public/private rsa key pair.Enter file in which to save the key (//.ssh/id_rsa):Enter passphrase (empty for no passphrase):Enter same passphrase again:You identification has been save in //.ssh/id_rsa.Your public key has been save in //.ssh/id_rsa.pub.The key fingerprint is:xx:xx:xx:xx:xx:xx:xx:xx:xx:xx:xx:xx:xx:xx:xx:xx root@server# cat id_rsa >> authorized_keys# ls -ltotal 24-rw-r–r– 1 root system 1743 Oct 15 09:40 authorized_keys-rw--– 1 root system 1743 Oct 15 09:39 id_rsa-rw-r–r– 1 root system 399 Oct 15 09:39 id_rsa.pub#
Note: You must copy the file in binary mode.9. To connect to the remote system using the private key, the following
information needs to be entered on the Remote Agent Machines panel whenyou install the Storage Resource agent:v Userv Certificate Location (c:\keys\id_rsa)v Passphrase
Setting up an SSH daemon on Windows
On Windows Server 2003, Windows XP, Windows Server 2008, or Windows Vista,you must run the ssh-host-config command.
Note: Cygwin is not a prerequisite for the Storage Resource agent on Windows. Touse the SSH protocol on Windows, an SSH software program must be usedbecause Windows does not come with an SSH service. Cygwin is a free softwareprogram providing SSH access to a Windows server. Cygwin can be used if youwant to run the Storage Resource agent using the SSH protocol.
You must be in a Cygwin window or be an X term user to create the sshd service.In most cases, you click the cygwin.bat to start the Bash shell.
302 IBM Tivoli Storage Productivity Center: Installation and Configuration Guide

Run the following steps:1. Install Cygwin.2. Set up your sshd service in Cygwin.3. Create the certificate (this step is optional).
Installing CygwinTo install Cygwin, go to http://cygwin.com. This page contains a link thatdisplays help for the setup program and a link to download the setupprogram. Read the help before running the setup program. Then downloadthe Cygwin program by clicking the Install Cygwin now link. Start thesetup program on your computer by running the setup.exe program. Selectthe appropriate download option (Install from Internet, Download fromInternet, or Install from Local Directory ) as described in the help files.
If you are upgrading from an older version of Cygwin to a newer version,you need to remove the sshd service before installing the new version ofCygwin.
Accept the default installation options as they are presented to you (RootDirectory, Install For, Default Text File Type, and so on). Select a downloadmirror that is geographically close to your location. Some sites require anFTP account before you can install Cygwin. You can either request anaccount or simply select another mirror.
During the installation process, a Select Packages list is displayed. Expandthe plus sign (+) next to the Admin category and select cygrunsrv and theBin check box. Expand the plus sign (+) next to the Net category andselect openssh. Expand the plus sign (+) next to the Util category andselect diffutils. Click Next to resume the setup program. The time requiredto download the packages depends on how busy the mirror is, and on thespeed of your internet connection. With openssh and cygrunsrv, thedownloaded files require approximately 70 MB of disk space. Allow 20minutes to 30 minutes for the download and installation to complete.
Setting up your sshd service in Cygwin
Here is an example of the sequence of steps and responses. The responsesto the prompts are in boldfaced type.1. Run the ssh-host-config command.
Note: With Cygwin, you might experience permission problems whenrunning the ssh-host-config command. If you have permissionproblems, run these commands:chmod +r /etc/passwdchmod +r /etc/groupchmod 777 /var
Chapter 3. Configuring Tivoli Storage Productivity Center 303
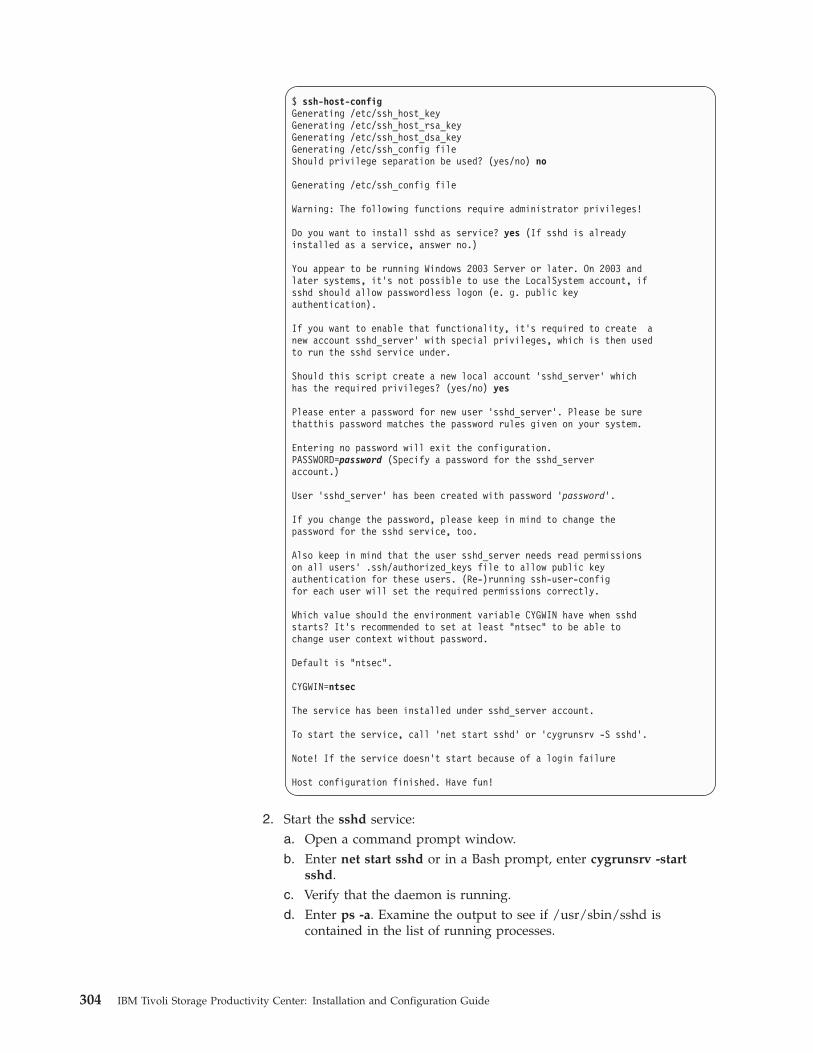
$ ssh-host-configGenerating /etc/ssh_host_keyGenerating /etc/ssh_host_rsa_keyGenerating /etc/ssh_host_dsa_keyGenerating /etc/ssh_config fileShould privilege separation be used? (yes/no) no
Generating /etc/ssh_config file
Warning: The following functions require administrator privileges!
Do you want to install sshd as service? yes (If sshd is alreadyinstalled as a service, answer no.)
You appear to be running Windows 2003 Server or later. On 2003 andlater systems, it’s not possible to use the LocalSystem account, ifsshd should allow passwordless logon (e. g. public keyauthentication).
If you want to enable that functionality, it’s required to create anew account sshd_server’ with special privileges, which is then usedto run the sshd service under.
Should this script create a new local account ’sshd_server’ whichhas the required privileges? (yes/no) yes
Please enter a password for new user ’sshd_server’. Please be surethatthis password matches the password rules given on your system.
Entering no password will exit the configuration.PASSWORD=password (Specify a password for the sshd_serveraccount.)
User ’sshd_server’ has been created with password ’password’.
If you change the password, please keep in mind to change thepassword for the sshd service, too.
Also keep in mind that the user sshd_server needs read permissionson all users’ .ssh/authorized_keys file to allow public keyauthentication for these users. (Re-)running ssh-user-configfor each user will set the required permissions correctly.
Which value should the environment variable CYGWIN have when sshdstarts? It’s recommended to set at least "ntsec" to be able tochange user context without password.
Default is "ntsec".
CYGWIN=ntsec
The service has been installed under sshd_server account.
To start the service, call ’net start sshd’ or ’cygrunsrv -S sshd’.
Note! If the service doesn’t start because of a login failure
Host configuration finished. Have fun!
2. Start the sshd service:a. Open a command prompt window.b. Enter net start sshd or in a Bash prompt, enter cygrunsrv -start
sshd.c. Verify that the daemon is running.d. Enter ps -a. Examine the output to see if /usr/sbin/sshd is
contained in the list of running processes.
304 IBM Tivoli Storage Productivity Center: Installation and Configuration Guide

To stop the service from a Windows command prompt, enter net stopsshd. Alternatively, you can change to the C:\cygwin\bin directory (oropen a Bash shell) and enter cygrunsrv -stop sshd.
3. When you have started the sshd service, test it by entering thefollowing command from a Bash shell prompt:ssh localhost -l user_ID
orssh host_name -l user_ID
If localhost does not work, use the short host name. If you receive amessage indicating that the authenticity of localhost cannot beestablished, answer Yes to the question "Are you sure you want tocontinue connecting?" When prompted for your account password onlocalhost, enter the password you use when logging in to thecomputer.
4. Create the accounts that can log in to the computer:a. Create the Windows accounts. Click Start > Settings > Control
Panel > User Accounts. Make each user a member of theAdministrators group. Perform this operation for each user youwant to add before you create the corresponding Cygwin accounts.
b. Make a backup copy of the /etc/passwd file.c. Create the Cygwin user accounts. Run the following command:
mkpasswd -l>/etc/passwd
d. Verify that a home directory has been created for each account thatyou have added. Change the ownership of the home directory to itsowner (run the chown command). If a home directory for the userdoes not exist, create one. For example, enter the followingcommand:mkdir home/account_name;chown account_name/home/account_name
e. When you add users, you need to stop and start sshd before thataccount is recognized because sshd only reads the file /etc/passwdwhen the service starts.
f. If you need to create groups of accounts, create the Windows groupsfirst, then create the Cygwin groups. After creating the Windowsgroups, run the following command:mkgroup -l>/etc/passwd
When you add groups, you also need to stop and start sshd beforethe new group is recognized.
5. Set the TEMP environment variable. For information about setting theenvironment variable, see http://www.cygwin.com/cygwin-ug-net/setup-env.html.Here is an example of setting the environment variable:a. Right-click My Computer > Properties > Advanced > Environment
Variables.b. Under System variables, find out the value of TEMP. For example,
"C:\WINNT\TEMP"c. Set the TEMP environment variable to point to the Cygwin format
of TEMP in the ~/.bashrc file. For example run the followingcommand:export TEMP=/cygdrive/c/WINNT/temp
Chapter 3. Configuring Tivoli Storage Productivity Center 305

Uncomment and modify this line in the ~/.bashrc file from thedefault:# export TEMP=/tmptoexport TEMP=/cygdrive/c/WINNT/temp
The Cygwin sshd service must be added as a service that startsautomatically. To verify this step, click Start > Settings > Control Panel >Administrative Tools > Services. Look for CYGWIN sshd in the name list.Verify that it is started and configured to start automatically.
Creating the certificate
To create a certificate for SSH protocol, complete the following steps:1. Run this command:
cd to ~/.ssh
2. Generate the public and private keys with a passphrase.From the Bash shellprompt, here is an example of the input and output (user responses are inboldface type):
Administrator:
~/.ssh$ openssl genrsa -des3 -out key 1024
Response:
Generating RSA private key, 1024 bit long modulus......e is 65537 (0x10001)Enter pass phrase for key: (enter pass phrase for key)Verifying - Enter pass phrase for key: (enter pass phrase for key again)
Administrator:
~/.ssh$ chmod 600 ~/.ssh/key
~/.ssh$ ssh-keygen -y -f ~/.ssh/key > key.pub
Response:
Enter passphrase: (enter passphrase)
Administrator:
~/.ssh$ cat key.pub >> authorized_keys
3. Once the key.pub file has been added to the authorized_keys directory, copythe private key key to the IBM Tivoli Storage Productivity Center server.
Replacing a custom certificate for SSL protocolIBM Tivoli Storage Productivity Center provides default SSL certificates forcommunication between the Data server and Storage Resource agent. You canreplace your custom certificates with the default certificates.
Overview of replacing a custom certificate for SSL protocol
Tivoli Storage Productivity Center uses SSL certificates for communication betweenthe Data server and Storage Resource agent (daemon service). Tivoli Storage
306 IBM Tivoli Storage Productivity Center: Installation and Configuration Guide

Productivity Center provides default SSL certificates for this communication. If youwant to use your own certificates, you can replace the default certificates with yourcustom certificates.
Server certificateThe Tivoli Storage Productivity Center Data server uses theTPCDataServer.jks and server.pwd files for communication with theStorage Resource agents. If you are using custom certificates, you mustreplace these files.
There are two ways you can replace these certificates:v Before installation of the Data serverv After installation of the Data server
Storage Resource agent certificateThe Storage Resource agent uses the certificate files sra.pem and sra.pwdfor communication with the Data server. These two files are compressedinto the certs.zip file on the server system for deployment purposes. Ifyou are using custom certificates, you must replace these files.
There are two ways you can replace the certificates:v Before deployment of the agentv After deployment of the agent
The general steps for replacing custom certificates are:1. Generate the custom certificates.2. Stop the Data server (and the Storage Resource agent, if the agent is already
deployed).3. Replace the custom certificates on the Data server and Storage Resource agent
or on the disk 1 or Storage Resource Agent installation image.4. Start the Data server (and the Storage Resource agent, if the agent is already
deployed).
Note: When you generate custom SSL certificates, the certificates have a start date,end date, and time when they are valid. These dates and times are related to thesystem where these custom certificates were generated (which is usually the serversystem). When you install a Storage Resource agent on a remote system, you mustcheck the date and time on the Storage Resource agent system. If the server andagent systems are in the same time zone, they must have the same date and time.Otherwise, the time zone difference should be set.
For example, if the server system is 8:00 PM, the agent system should also be 8:00PM. If the agent system is set at a different time (for example, 6:00 PM) at the timethe SSL custom certificates are generated on the server system with a time of 8:00PM, the deployment of the Storage Resource agent fails.
How to generate custom certificates
The script file createSRACerts.sh (for Linux or UNIX) or createSRACerts.bat (forWindows) is in the following directory:TPC_install_directory/data/sra/tools/certs
TPC_install_directory is where the IBM Tivoli Storage Productivity Center serversare installed. The default directory is /opt/IBM/TPC for Linux or UNIX orC:\Program Files\IBM\TPC for Windows.
Chapter 3. Configuring Tivoli Storage Productivity Center 307

To generate custom certificates, follow these steps:1. Create the custom certificates.
The createSRACerts script creates the custom certificates. The syntax is:
�� createSRACertsoutput_directory rootCAPassword
�
�server_key_password server_store_password agent_password
��
output_directoryDirectory where the certificates are created.
rootCAPasswordRoot CA password (root common authority password). The defaultnon-encrypted password is: s5umEvApR6cafruhustu.
server_key_passwordServer key password. The default non-encrypted password is:drUtaxahaswefraf9uth.
server_store_passwordServer store password. The default non-encrypted password is:wr4d5Xekaqafehet5u2a.
agent_passwordAgent password. The default non-encrypted password is:jawUchezuthew6azEjef.
Note: You are prompted for the password when the script is run. Provide thevalue of the rootCAPassword on the command line (if specified on thecommand line). Otherwise, use the default values in the createSRACerts.sh orcreateSRACerts.bat script when prompted for the password (twice).The following example creates the SSL certificate by using the default outputdirectory and default passwords.createSRACerts
The following examples create the SSL certificates by using the directory /tmpon UNIX and C:\temp on Windows. These examples use the default passwords.The certificate files are created in the following directory:
WindowsC:\temp\sra_certs_out
Here is an example:createSRACerts C:\temp
UNIX or Linux/tmp/sra_certs_out
Here is an example:./createSRACerts.sh /tmp
The following examples create SSL certificates in the directory /tmp on UNIXand C:\temp on Windows. These examples use non-default passwords for rootCA and server key. The certificate files are created in the following directory:
WindowsC:\temp\sra_certs_out
308 IBM Tivoli Storage Productivity Center: Installation and Configuration Guide

Here is an example of creating a non-default password for the root CApassword and server key password:createSRACerts C:\temp newpasswordforrootCA newpasswordforserver
UNIX or Linux/tmp/sra_certs_out
Here is an example of creating a non-default password for the root CApassword and server key password:createSRACerts.sh /tmp newpasswordforrootCA newpasswordforserver
2. Regenerate the certificates again if you have a failure. Delete the files in theoutput directory before you rerun the createSRACerts script.
3. Stop the Data server and the Storage Resource agent.If the Storage Resource agent is deployed as a daemon service, stop the agent ifthe agent is running. If the agent is deployed as a non-daemon service, thenyou do not have to stop the agent. To remotely stop agents from the Data orStorage Resource agents table, complete one of the following steps:v For Storage Resource agents that are running as a daemon service, in the
Select Action menu, select Shutdown. For Storage Resource agents that arerunning as non-daemon agents, you do not need to stop the agent.Non-daemon processes do not need to be started or stopped.For more information about shutting down the agent, search the TivoliStorage Productivity Center information center for Shutting down an agent.
Note: For Storage Resource agents that are running as a non-daemon service,search the Tivoli Storage Productivity Center information center for agent.shcommand.
v At the command prompt, enter the following command:"Storage_Resource_Agent_installation_directory/agent/bin/agent.[sh|bat] stop"
This command must be run locally on each system where an agent isrunning. On the Linux and UNIX operating systems, enter the agent.shcommand, and on the Windows operating system, enter the agent.batcommand.
For more information about starting or stopping Tivoli Storage ProductivityCenter services, go to the Tivoli Storage Productivity Center information centerand search for Starting and stopping the Tivoli Storage Productivity Center services.
4. Replace the certificates. There are four scenarios:v Replacing the certificates after the server is installed.v Replacing the certificates before the server is installed.v Replacing the certificates after the agent is installed.v Replacing the certificates before the agent is locally.
Replacing the certificates after the server is installed
The new server certificates are created in the following directory:output_directory/sra_certs_out/server
By default output_directory is the directory where the createSRACertsscript is run:TPC_install_directory/data/sra/tools/certs
These files are the server certificate files:TPCDataServer.jksserver.pwd
Chapter 3. Configuring Tivoli Storage Productivity Center 309
For the server certificate, copy the server certificate files to thefollowing directory:TPC_install_directory/data/sra/certs
The server certificate files are created in the certs.zip file in thefollowing directory:output_directory/sra_certs_out/agent
Copy the certs.zip file into each agent directory:TPC_install_directory/data/sra/agent_operating_system
TPC_install_directory/data/sra/server_operating_system
Extract the certs.zip file into the following directory:TPC_install_directory/data/sra/server_operating_system
agent_operating_system is the operating system of an agent that isremotely deployed. server_operating_system is the operating systemon which the Data server is installed.
Replacing the certificates before the server is installed
By default, the output directory is the directory where thecreateSRACerts script is run.
The createSRACerts script is extracted in the disk1 image in thefollowing directory:disk1_image_install_directory/data/sra/tools/certs
Restriction: The following process applies to only extracted images. Ifyou are installing by using a DVD, see the Replacing the certificatesafter the server is installed procedure.The new server certificate files are created in the following directory:output_directory/sra_certs_out/server
By default, output_directory is the directory where the createSRACertsscript is run:disk1_install_image_directory/data/sra/tools/certs/
The following files are the server certificate files:TPCDataServer.jksserver.pwd
The disk1 image is in the disk1_image_install_directory directory.
Copy the server certificate files into the following directory:disk1_image_install_directory/data/sra/certs
The agent certificates are created in the certs.zip file in the followingdirectory:output_directory/sra_certs_out/agent
Copy the certs.zip file into each agent directory:disk1_image_install_directory/data/sra/agent_operating_system
Extract the certs.zip file into the following directory:disk1_image_install_directory/data/sra/server_operating_system
server_operating_system is the operating system on which the Dataserver is installed.
310 IBM Tivoli Storage Productivity Center: Installation and Configuration Guide

Replacing the certificates after the agent is installedThe new agent certificates were created on the server in the followingdirectory:output_directory/sra_certs_out/agent
By default, output_directory is:TPC_install_directory/data/sra/tools/certs
You must copy the certs.zip file to the agent system before youextract it in the storage_resource_agent_install_directory/certsdirectory. The Storage Resource agent is installed in thestorage_resource_agent_install_directory directory.
Replacing the certificates before the agent is installed locally
Restriction: This process assumes that the Storage Resource agent diskimage can be modified. If you are installing from a DVD, you mustcopy the installation files to a writable location before proceeding.
Before the agent can be installed locally, the custom certificate must becopied to the agent system. Copy the certs.zip Storage Resource agentcertificate file from the output_directory/sra_certs_out/agentdirectory on the Tivoli Storage Productivity Center server to the agentsystem.
By default, the output_directory is where the createSRACerts script wasrun. An example of this directory path is:TPC_installation_directory/data/sra/tools/certs/
a. On the agent system, extract the Storage Resource agent installationimage in the SRA_image_install_directory.
b. Extract the custom certs.zip file in the following directory:storage_resource_agent_install_directory/agent/certs
directory.
Note: SRA_image_install_directory is the directory where the StorageResource agent image was extracted. agent_operating_system is thedirectory that is named for the operating system where the agent isinstalled.
c. Install the Storage Resource agent with the wanted option.5. Start the Data server and the Storage Resource agent. If the Data server is
stopped for replacement of the certificates, start the Data server after thereplacement of the certificates.If the Storage Resource agent is stopped for replacement of certificates, start theStorage Resource agent after the replacement of the certificates.
Chapter 3. Configuring Tivoli Storage Productivity Center 311

Related tasks:“Installing the agents” on page 195You can install the Storage Resource agent using the installation program, theTivoli Storage Productivity Center user interface, or a command.“Installing the agent using a command” on page 196You can install the Storage Resource agent using a command.
Storage Resource Agent UpgradesYou can configure IBM Tivoli Storage Productivity Center for a Storage Resourceagent upgrade.
When you apply maintenance to Tivoli Storage Productivity Center, you canupgrade the Storage Resource agent now or upgrade the agent at a later time. Toensure that all your agents are at the current release level and to manage yournetwork load, schedule upgrades on a regular basis.
To configure Tivoli Storage Productivity Center for a Storage Resource agentupgrade, complete the following steps:1. In the navigation tree, expand Administrative Services > Configuration >
Storage Resource Agent Upgrades.2. Right-click on Storage Resource Agent Upgrades. Click Create Storage
Resource Agent Upgrade.3. The Create Storage Resource Agent Upgrade page is displayed in the topic
pane. You have the following tabs:
ComputersYou can select Computer Groups or Computers.
When to RunYou can specify how often to run the job or how to handle time zones.
OptionsYou can specify to force an upgrade for an agent, maintenance upgradefor an agent, or language pack to apply to an agent.
Alerts You can specify the triggering conditions and triggering actions.
Enter your information in the appropriate fields.4. Save and run the job.
Migrate Data/Fabric AgentDefine schedules to migrate existing Data agents or Inband Fabric agents toStorage Resource agents. The migration process installs a Storage Resource agenton a target host and then uninstalls the existing agent.
Tivoli Storage Productivity Center provides the following benefits when youmigrate an existing Data agent or Inband Fabric agent to a Storage Resource agent:v Storage Resource agents require less resources on a host computer than a Data
agent or Inband Fabric agent that is based on Common Agent Services.Additionally, you can deploy Storage Resource agent as a daemon ornon-daemon service.
v Reduced complexity when deploying agents. You can deploy Storage Resourceagents directly from the Tivoli Storage Productivity Center user interface.
v Improved interface when deploying, upgrading, and administering agents. Youcan manage Storage Resource agents using the nodes in the Administrative
312 IBM Tivoli Storage Productivity Center: Installation and Configuration Guide

Services section of the navigation tree. You can deploy and upgrade StorageResource agents on schedules that you define.
See “Deployment guidelines and limitations for Storage Resource agents” on page297 to view additional information about deploying and using Storage Resourceagents.
To migrate a Data agent or Inband Fabric agent to a Storage Resource agent on ahost, complete the following steps:1. Expand Administrative Services > Configuration in the navigation tree.2. Right-click Migrate Data/Fabric Agent and select Create Data/Fabric Agent
Migration from the menu. The Create Data/Fabric Agent Migration panel isdisplayed.
3. Enter information about the schedule on the following pages:v Computers: Use this page to select the computers and groups of computers
that contain the Data or Fabric agents that you want to migrate to StorageResource agents.
v When to run: Use this page to determine when the Data and Fabric agents ina schedule are migrated.
v Options: Use this page to specify the runtime settings of a Storage Resourceagent, the method for migrating an agent, and the login credentials for anagent.
v Alert: Use this page to define the actions that occur if a Data/Fabric AgentMigration schedule fails.
4. Click File > Save from the menu bar to save the migration schedule. Themigration runs according to the date and time that you defined in the scheduledefinition. Use the Administrative Services > Data Sources > Data/StorageResource Agents panel to view a list of the Storage Resource agents that aredeployed in your environment.
Update Storage Subsystem CredentialsIf you have a System Storage DS8000, XIV system, or SAN Volume Controllerstorage system, you must update your storage system credentials to use the TivoliStorage Productivity Center native interfaces.
To enter the storage subsystem credentials, follow these steps:1. Start the Tivoli Storage Productivity Center migration tool to enter storage
subsystem credentials. You can start the migration tool in one of the followingways:v Use the migration tool from the Tivoli Storage Productivity Center DVD. Use
the DVD or download the migration tool: MigrateUserInfo.bat (forWindows) or MigrateUserInfo.sh (for UNIX or Linux). Run the migrationtool from the directory UserMigrationTool.
v Run the Tivoli Storage Productivity Center upgrade installation program.When Tivoli Storage Productivity Center detects the storage system, use thepanel that is displayed to run the migration tool. Run the migration tool.
v After upgrading Tivoli Storage Productivity Center, open the GUI. In thenavigation tree, expand Administrative Services > Configuration > UpdateStorage Subsystem Credentials. This node is visible only when TivoliStorage Productivity Center detects that you have a System Storage DS8000,XIV system, or SAN Volume Controller storage system.
2. The Update Storage Subsystem Credentials panel is displayed.
Chapter 3. Configuring Tivoli Storage Productivity Center 313

Top tableAll System Storage DS8000 storage systems are displayed if TivoliStorage Productivity Center can use the existing CIM agent user ID andpassword to connect to the HMC. If you want to use the existingcredentials, click Update or Update All (if you have more than oneSystem Storage DS8000). Tivoli Storage Productivity Center updates thecredentials and removes the System Storage DS8000 from the table.
Bottom tableAll XIV system and SAN Volume Controller storage systems aredisplayed in this table. All other System Storage DS8000 storagesystems are displayed in this table if they are not listed in the othertable. All XIV system and SAN Volume Controller storage systemsmust have the storage system credentials migrated manually.
If you want to manually update the credentials for the System Storage DS8000,select a storage system and click Update. The Update Subsystem Credentialswindow is displayed. Enter the following information:
UsernameEnter the user ID for the System Storage DS8000 element manager.
PasswordEnter the password for the user name.
HMC2 Address (Optional)You can enter a second HMC address. This parameter is optional.
Click Save. The System Storage DS8000 is removed from the table after youupdate the credentials.To update the credentials for the XIV system, select a storage system and clickUpdate. The Update Subsystems Credentials window is displayed. Enter thefollowing information:
UsernameEnter the user ID for the XIV system.
Figure 13. Update Storage Subsystem Credentials panel
314 IBM Tivoli Storage Productivity Center: Installation and Configuration Guide

PasswordEnter the password for the user name.
Click Save. The XIV system is removed from the table after you update thecredentials.If you want to update the credentials for IBM SAN Volume Controller, select astorage system and click Update. The Update Subsystem Credentials window isdisplayed. Enter the following information:
Software VersionEnter the version of the SAN Volume Controller software that you wantto configure.
IP addressEnter the IP address or host name of the SAN Volume Controller. Youcan enter an IPv4 or IPv6 address, for example:v 9.47.97.128v [2001:DB8::1234:0000:0000:5678:ABCD]
Select KeySelect one of the following actions for the Secure Shell (SSH) key:v Use existing uploaded key: Select this option if you want to use a
public key that has been uploaded using a method other thanthrough Tivoli Storage Productivity Center, such as the SAN VolumeController web console. Enter the location of the private key file thatcorresponds to the public key in the Private SSH Key field. TheAdmin Username and Admin Password fields are not required ifyou select this option.
v Upload new key: Select this option to upload a new key. Public keycontent is extracted from the private key that is provided in thePrivate SSH Key field and is uploaded to the SAN VolumeController cluster. If you select this action, the Admin Username andAdmin Password fields are required.
Admin UsernameIf you selected Upload new key in the Select Key list, enter the nameof a user that has the Security Administrator role for the SAN VolumeController cluster that contains the device. Tivoli Storage ProductivityCenter uses this value during the setup process to contact the clusterand configure the SSH keys for the user. This user name must haveprivileges to modify other user accounts (Security Administrator role),otherwise Tivoli Storage Productivity Center cannot configure the SSHkeys.
If you selected Use existing uploaded key, this field is optional.
Note: The Admin Username only applies to SVC5.x+; it does notapply to SVC 4.x.
Admin PasswordEnter the password for the user that you entered in the AdminUsername field.
UsernameEnter an authorized user for the device. Tivoli Storage ProductivityCenter uses this value when monitoring and configuring the storagesystem. If the user name does not exist it is created. This user namemust have the Administrator role.
Chapter 3. Configuring Tivoli Storage Productivity Center 315

This field is active if you selected Upload new key in the Select Keylist and entered a user name and password in the Admin Usernameand Admin Password fields.Important: If you upload a new key for the existing SAN VolumeController user using Tivoli Storage Productivity Center, that new keyoverrides the existing key for the user. If you have another applicationusing that SAN Volume Controller user (for example Tivoli StorageProductivity Center for Replication), the application cannot log on toSAN Volume Controller because the key associated with the user isoverwritten.If you have this situation, create a user ID specifically for Tivoli StorageProductivity Center or Tivoli Storage Productivity Center forReplication on the SAN Volume Controller cluster. Add the SANVolume Controller to Tivoli Storage Productivity Center for Replicationusing the new user ID and password (or change the user ID andpassword while in the disconnected state).
Select UserClick this button to select from a list of existing users that aredefined on the SAN Volume Controller.
Private SSH KeyBy default, the private key entry includes ${device.conf}\tpc_svc.pem,which represents the Tivoli Storage Productivity Center default keytpc_svc.pem. The tpc_svc.pem key is in the conf directory where theDevice server is installed. If you want to use your own key, the keymust exist on the system where you are running the Tivoli StorageProductivity Center user interface. The key is uploaded to the TivoliStorage Productivity Center server system. To identify a new key, clickBrowse.
The private SSH key must be in OpenSSH format or in PuTTY (.ppk)format that is not password protected. If you have a passwordprotected PuTTY .ppk key, use the PuTTYgen utility on a Windowsoperating system to convert that key to OpenSSH format by followingthese steps:a. Start the PuTTYgen utility.b. Load the .ppk file by clicking File > Load private key.c. From the menu bar, click Conversion > Export OpenSSH key
conversion.
This action saves the key in OpenSSH format.
Passphrase (Optional)Enter the passphrase for the SSH key pair. The passphrase protectsyour private SSH key file. If you do not have a passphrase, leave thisfield blank.
Click Save. The SAN Volume Controller is removed from the table after youupdated the credentials.
After a successful migration of System Storage DS8000, XIV system, or SANVolume Controller credentials, the CIMOMs that previously managed these devicesmust be removed from the Tivoli Storage Productivity Center configuration. Themigration process tries to determine and remove these CIMOMs automatically, butif there are CIMOMs remaining, they must be deleted manually. For DS CIMOMsmanaging DS6000 or ESS devices and additional System Storage DS8000 devices,the System Storage DS8000 devices must be removed from the CIMOM if possible.
316 IBM Tivoli Storage Productivity Center: Installation and Configuration Guide

Resource History RetentionSpecify how long to keep a history of the data that is collected by Tivoli StorageProductivity Center.
By specifying a number for days, weeks, or months for each element, you cancontrol the amount of data that is retained and available for historical analysis andcharting. The longer you keep the data, the more informative your analysis.
You can set retention periods for:v Directoriesv File systemsv Pingsv Computer Uptimev Disksv Storage subsystemsv Performance Monitors
Keep in mind the following considerations when specifying how long to retainhistorical data:v If you do not select a check box, the data related to that check box is retained
permanently. This action might cause a large amount of data to accumulate inthe database repository over time.
v If you select a check box and enter a value of 0, Tivoli Storage ProductivityCenter stops collecting history data for the related element.
Note: If you enter 0 for the items under Performance Monitors, the data alreadycollected by performance monitors is deleted and no more data is collected.
When you set the retention period for Performance Monitors, remember thefollowing restrictions:v The hourly and daily values for Performance Monitors can be set to 0 only if the
per performance monitoring task is also set to 0.v The hourly and daily values for Performance Monitors cannot be set lower than
the per performance monitoring task value.
To set the retention periods, complete the following steps:1. Expand Administrative Services > Configuration > Resource History
Retention.2. The Retain History panel is displayed in the content pane. Enter the
information for the retention periods.
Note: Some default profiles have Accumulate history settings. If set, thesesettings dictate the number of days, weeks, or months to be retained. If a scanincludes any of these profiles, then the history data is persisted and appears inthe corresponding reports. The following default profiles have Accumulatehistory settings:v TPCUser.By Accessv TPCUser.By Creationv TPCUser.By Mod Not Backed Upv TPCUser.Summary By File Typev TPCUser.Summary By Filesystem/Directory
Chapter 3. Configuring Tivoli Storage Productivity Center 317

v TPCUser.Summary By Groupv TPCUser.Summary By Ownerv TPCUser.Temporary Filesv TPCUser.Wasted Space
Removed Resource RetentionYou can specify the number of days to keep information about directories, filesystems, disks, and so on, that have been removed from the system and can nolonger be found.
Information is kept in the database repository. To clear the history record for aresource and activate a new period for resource retention, perform a discovery orprobe job on the resource.
You can set the retention period for the following:v Directoriesv File systemsv Disksv Filersv Subsystemsv Fabricv Tapev Hypervisorsv Virtual Machinesv IBM Tivoli Storage Productivity Center Servers: When you remove a data source
(agent) from a subordinate server or a storage entity that it monitors, the masterserver continues displaying information about that agent or storage entity in rollup reports for a specified amount of time. You can specify how quickly thatinformation is removed by changing this setting.
If the check box for a storage resource is not selected, the data related to theresource is retained permanently. This action might cause a large amount of data toaccumulate in the database repository over time. If you select a check box andenter a value of 0, the data related to that check box is removed immediately fromthe database repository.
The retention time for cluster resource groups that are monitored by Tivoli StorageProductivity Center is determined by the values that you enter in the Filers andFilesystems fields. If the values in the Filesystems and Filers fields are different,the field with the higher value (longer retention period) is applied to clusterresource groups.
The following list shows the fields that determine the retention period for StorwizeV7000 File Module storage resources:v Filers: Storage systems, storage pools, and nodes.v Disks: Network Shared Disks (NSDs).v Filesystems: File systems, exports, file sets, and quotas.
To set the retention period, complete the following steps:1. Expand Administrative Services > Configuration > Removed Resource
Retention.
318 IBM Tivoli Storage Productivity Center: Installation and Configuration Guide
2. The Retain Removed panel is displayed in the content pane. Select the resourceand enter the number of days to keep.
Resource History Retention for DatabasesYou can specify how long to keep a history of the database-related statisticalelements collected by the system.
By specifying a number of days, weeks, or months for each element, you cancontrol the amount of data that is retained and is available for historical analysisand charting. The longer you keep the data, the more informative your analysis.
You can retain the histories for:v Databases-Tablespacesv Tables
Note: If you do not select a check box, the data related to that check box isretained permanently. This action might cause a large amount of data toaccumulate in the database repository over time. If you select a check box andenter a value of 0, the data related to that check box is removed immediately fromthe database repository.
To set the retention period, complete the following steps:1. Expand Administrative Services > Configuration > Resource History
Retention for Databases.2. The Retain History panel is displayed in the content pane. Enter the retention
period information.
Removed Resource Retention for DatabasesYou can specify how long to keep information in the enterprise repository that isrelated to a database entity that has been removed from the system and can nolonger be found.
By specifying a number for days, you can indicate how long to keep informationfor table spaces and tables that have been removed from the system.
Note: If you do not select a check box, the data related to that check box isretained permanently. This action might cause a large amount of data toaccumulate in the database repository over time. If you select a check box andenter a value of 0, the data related to that check box is removed immediately fromthe database repository.
To specify a retention period, complete the following steps:1. Expand Administrative Services > Configuration > Removed Resource
Retention for Databases.2. The Retain Removed panel is displayed in the content pane. Enter the
information for the retention period.
Configuration History SettingsThis page allows you to specify how often the system captures snapshots of yourconfiguration and when to delete them. It also gives the number of snapshots inthe database, indicates when the last one was taken (and allows you to refresh thissetting), and enables you to create and enter a title for a snapshot on demand.
Chapter 3. Configuring Tivoli Storage Productivity Center 319

You must configure and save the settings on this page before you can use theConfiguration History function.
To specify the configuration history settings, complete the following steps:1. In the Create snapshot every field, type how often (in hours) you want the
system to take snapshot views of the configuration.2. To automatically delete snapshots, click the check box to place a check mark
before Delete snapshots older than. In the box that follows that field, type howlong you want to keep the snapshots (in days) before they are automaticallydeleted.
3. To optionally refresh the date and time of when the latest snapshot wascreated, click Update.
4. To optionally create a snapshot on demand, click Create Snapshot now. If youchoose, you might want to type a name for the snapshot in the box Title thissnapshot (optional).
5. To change your settings to the default, click Reset to defaults. The defaults arecreate snapshots every 12 hours and delete snapshots older than 14 days.
6. Click File > Save to save the configuration history settings.
Configuration: Device server specificThis section provides configuration information that is specific to the Device server.
Configuring switchesThis section provides configuration information for switches.
IBM Tivoli Storage Productivity Center is a storage area network (SAN)management application that discovers devices in the SAN and displays atopology of the SAN environment. Tivoli Storage Productivity Center is designedto operate using industry-based standards for communicating with Fibre Channelswitches and other SAN devices. This communication can be done using thesimple network management protocol (SNMP) interface for out-of-band agents, theFC-GS-3 interface for Storage Resource agents, Storage Management Initiative(SMI) agents, or a combination of these agent types. FC-GS-3 refers to the FibreChannel Generic Services 3 standard. To gather and display the information asexpected, the switches must be configured correctly. The configuration varies byvendor and the type or types of agents that are used. One of the common sourcesof customer problems is incorrect configuration of the switches that are beingmanaged. This incorrect configuration leads to missing information andmisconceptions that the Tivoli Storage Productivity Center product does not workwith certain switches. The switch vendors supported are Brocade, Cisco, andQLogic. Other vendors such as IBM, often sell these switches under their ownlabels.
Determining the agent type or types to use with a switch
For Brocade fabrics, the preferred type of agent is the SMI agent. The SMI agentprovides most fabric functions and the other agent types can be added forredundancy. However, Storage Resource agents are required to gather host busadapter (HBA) information.
For QLogic and Cisco fabrics, a combination of different agent types is required toenable all functions.
320 IBM Tivoli Storage Productivity Center: Installation and Configuration Guide

For information about information that is gathered by each agent type, see thetopic about discovering storage resources in the IBM Tivoli Storage ProductivityCenter User's Guide.
Using Storage Resource agents
With Tivoli Storage Productivity Center Storage Resource agent discovery, theTivoli Storage Productivity Center for agent software is installed on SAN-attachedhosts. The Storage Resource agents collect information about the fabric across theFibre Channel network by querying the switch and the attached devices throughthe host bus adapter (HBA) in the system. For the switches to successfully receiveand respond to the queries, there are some basic requirements:v The switch must support the FC-GS-3 standard interface for discovery.
– Name server– Configuration server– Unzoned name server
v For zone control functions, the fabric zone server must be supported, except inthe case of Brocade switches.
For Storage Resource agent discovery, fabric events are automatically sent from theagent to Tivoli Storage Productivity Center. There is no need for configuration.
For Storage Resource agent discovery, you must configure SNMP traps to be sentfrom the switches in your fabric to the Tivoli Storage Productivity Center Deviceserver.
Using out-of-band SNMP agents
Out-of-band SNMP agent discovery collects some of the same information that canbe obtained by Storage Resource agents, but out-of-band agent discovery isperformed differently. In out-of-band discovery, Tivoli Storage Productivity Centerqueries the switch directly rather than going through a Storage Resource agent andthe Fibre Channel network.Tivoli Storage Productivity Center uses the SNMPprotocol to send queries across the IP network to management information bases(MIBs) supported on the switch. Tivoli Storage Productivity Center uses the FCManagement MIB (sometimes referred to as the FA MIB) and the FE MIB. Thequeries are sent only to switches that were added to Tivoli Storage ProductivityCenter for use as SNMP agents. SNMP information is collected for a single switch.The out-of-band discovery registers each switch. The following list shows the basicrequirements for the switch to successfully receive and respond to the query:v The FC Management MIB and FE MIB must be enabled on the switch.v The switch must be configured to receive SNMPv1 queries and respond in
SNMPv1. Some switches are configured to use SNMPv2 or SNMPv3 by default.v The community string configured in Tivoli Storage Productivity Center must
match one of the community strings configured on the switch with read access.Cisco switches must additionally have a community string match for writeaccess. The default community strings in Tivoli Storage Productivity Center are"public" for read access and "private" for write access. Additional communitystrings can be defined on the switches, but are not used.
v SNMP access control lists must include the Tivoli Storage Productivity Centersystem. Some lists automatically include all hosts while others exclude all bydefault.
Chapter 3. Configuring Tivoli Storage Productivity Center 321

Another aspect of the SNMP configuration includes trap notification. SNMP trapsare generated by the switch and directed to Tivoli Storage Productivity Center asan indication that something in the fabric changed and that a discovery must occurto identify the changes. The default configuration for handling switch traps is tosend them from the switch to port 162 on the Tivoli Storage Productivity Centersystem. To successfully generate and receive traps, there are some configurationrequirements:v The trap destination parameter on the switch must be set. This parameter is the
host that receives the trap and sends it to Tivoli Storage Productivity Center. Theparameter is set on the switch.
v The destination port parameter on the switch must be set. Tivoli StorageProductivity Center listens on port 162 by default. The parameter is set on thehost.
v The traps must be sent as SNMPv1. This parameter is set on the switch.v The trap severity level must be set to generate traps for change conditions. This
level typically means to send error level traps and anything more severe. Thisparameter is set in Tivoli Storage Productivity Center.
Using SMI agents
You must install or enable an SMI agent for to perform the following tasks:v Gather fabric performance data.v Collect and configuring Brocade zone aliases.
For information about installing or enabling a SMI agent for the switch, contactyour switch vendor.
Configuring the inactive zone sets for a fabric data sourceSome fabrics have multiple locations to retrieve a database for inactive zone sets.In some scenarios, and for some switch vendors, these definitions for inactive zonesets are not synchronized.
For fabrics composed of Brocade switches, IBM Tivoli Storage Productivity Centerallows you to choose which CIM agent to use to retrieve inactive zone sets andwhen configuring zoning. To set the inactive zone sets for Data Source, go toFabric Manager > Fabrics, select the fabric, and click Select Inactive Zone SetsData Source.
Managing a SAN without agentsIn the following situations, there might not be any agents on the SAN:v The hosts do not currently have a Storage Resource agent or Fabric agent
installed.v The host operating system is not supported by the Storage Resource agent or
Fabric agent.v The customer requirements do not require the deployment of a Storage Resource
agent or Fabric agent (topology map only).
In these cases, it is recommended that an agent is installed on the Device serveritself. This action allows the Device server to use advanced features like RemoteNode Identification (RNID) which requires an agent.
Normally the Device server does not have a Fibre Channel host bus adapter. Inthis configuration, the following steps are taken:
322 IBM Tivoli Storage Productivity Center: Installation and Configuration Guide

1. A Fibre Channel host bus adapter is added to the manager.2. An agent is installed on the Device server(the Device server is installed first).3. All storage devices are verified to ensure that they use LUN masking
techniques. The LUN masking techniques prevent the Device server fromaccessing the disks used by the host systems.
4. The Fibre Channel host bus adapter is attached to the SAN to be managed.This host is added to each zone that is intended to be managed by the Deviceserver.
Setting timeouts values for the Device serverIf a probe or discovery of a storage subsystem times out before the operationcompletes, you can increase the timeout values for the Device server.
If a probe or discovery of a storage subsystem times out before the operationcompletes, you receive the following error message:HWN021650E Encountered timeout while connecting to CIMOM IP:port.Check the CIMOM or increase timeout value.
where IP is the IP address, and port is the port number. If you determine that theCommon Information Model Object Manager (CIMOM) is not the cause of theproblem, you can use the command-line interface (CLI) to increase the timeoutvalues for the Device server.
For those storage systems that use native interfaces to connect to Tivoli StorageProductivity Center you see this error message:HWN020103E The external process exceeded the timeout limit and was cancelled.
The following storage systems use native interfaces to connect to Tivoli StorageProductivity Center:v System Storage DS8000v SAN Volume Controllerv The XIV systemv Storwize V7000v Storwize V7000 Unifiedv IBM SONAS1. Run the getdscfg command to determine the current values of the timeout
properties. From the command prompt, enter the following command:cli>tpctool getdscfg -user user -pwd password -url host:port-property timeout_property
where:v user is an IBM Tivoli Storage Productivity Center user ID.v password is the password for the Tivoli Storage Productivity Center user ID.v host is the host name or IP address, and port is a valid port number for the
HTTP service of the Device server. The default value for port is usually 9550.v timeout_property is one of the following strings:
– http.timeout– CIMClientWrapper.Timeout– Probe.Timeout.Array– Probe.Timeout.InBand– Probe.Timeout.LMM
Chapter 3. Configuring Tivoli Storage Productivity Center 323

– Discovery.Timeout– CIMOMManager.TestConnectionTimeout
Important: Timeout properties are displayed in milliseconds. If the value is 0(zero), it means that there is no timeout.For the storage systems that use the native interface, the timeout_propertystrings are:– NAPI.Timeout.TestConnection– NAPI.Timeout.Probe– NAPI.Timeout.EventPoll
v timeout_value is the value for the timeout.
.2. Run the setdscfg command to increase the timeout value. Run the following
command:cli>tpctool setdscfg -user user -pwd password -url host:port-property timeout_property timeout_value
For more information about tpctool, see the Tivoli Storage Productivity CenterCommand-Line Interface Reference. You also can view help from the command line byissuing the command with the -help option.
Service Location Protocol (SLP) configuration considerationsThis topic provides some configuration considerations for enabling Tivoli StorageProductivity Center to discover a larger set of storage devices through SLP. Theserecommendations cover some of the more common SLP configuration problems.This topic discusses router configuration, SLP directory agent configuration, andenvironment configuration.
For additional information about SLP, see the Service Location Protocol Requestfor Comments website at http://www.ietf.org/rfc/rfc2165.txt.
Note: The storage systems that use the native interfaces (DS8000, XIV system, SANVolume Controller, and Storwize V7000) do not use SLP discovery.
Router configurationConfigure the routers in the network to enable general multicasting or to allowmulticasting for the SLP multicast address and port, 239.255.255.253, port 427. Therouters of interest are the ones associated with subnets that contain one or morestorage devices that are to be discovered and managed by Tivoli StorageProductivity Center.
To configure your router hardware and software, refer to your router andconfiguration documentation.
SLP directory agent configurationThis topic provides information about suggestions for configuring the SLPdirectory agent.
Configure the SLP directory agents (DAs) to circumvent the multicast limitations.With statically configured DAs, all service requests are unicast by the user agent.Therefore, it is possible to configure one DA for each subnet that contains storagedevices that are to be discovered by Tivoli Storage Productivity Center. One DA issufficient for each of the subnets. Each of these DAs can discover all services
324 IBM Tivoli Storage Productivity Center: Installation and Configuration Guide

within its own subnet, but no other services outside its own subnet. To allow TivoliStorage Productivity Center to discover all the devices, it needs to be staticallyconfigured with the addresses of each of these DAs. This operation can beaccomplished by using the Tivoli Storage Productivity Center Discovery Preferencepanel.
You can use this panel to enter a list of DA addresses. Tivoli Storage ProductivityCenter sends unicast service requests to each of these statically configured DAs,and sends multicast service requests on the local subnet on which Tivoli StorageProductivity Center is installed. Configure an SLP DA by changing theconfiguration of the SLP service agent (SA) that is included as part of an existingCIM Agent installation. This action causes the program that normally runs as anSLP SA to run as an SLP DA.
Note: The change from SA to DA does not affect the CIMOM service of thesubject CIM Agent, which continues to function normally, sending registration andderegistration commands to the DA directly.
Environment configurationThis section provides information about the configuration of your environment.
It might be advantageous to configure SLP DAs in the following environments:v In environments where there are other non-Disk Manager SLP UAs that
frequently perform discovery on the available services, an SLP DA must beconfigured. This action ensures that the existing SAs are not overwhelmed bytoo many service requests.
v In environments where there are many SLP SAs, a DA helps decrease networktraffic that is generated by the multitude of service replies. It also ensures thatall registered services can be discovered by a given UA. The configuration of anSLP DA is recommended when there are more than 60 SAs that need to respondto any given multicast service request.
SLP registration and slptool
IBM Tivoli Storage Productivity Center uses Service Location Protocol (SLP)discovery, which requires that all the CIMOMs that Disk Manager discovers areregistered using the SLP.
In a non-multicast network environment, SLP can only discover CIMOMs that areregistered in its IP subnet. For CIMOMs outside of the IP subnet, you need to usean SLP DA and register the CIMOM using slptool. Ensure that theCIM_InteropSchemaNamespace and Namespace attributes are specified.
For example, enter the following command:slptool register service:wbem:https://myhost.com:port
Where myhost.com is the name of the server hosting the CIMOM, and port is theport number of the service, for example 5989.
Note: slptool is installed with a CIMOM. Run the command from the machinehosting the CIMOM.
SLP discoveryA common problem with SLP discovery is due to IP multicasting being disabled onthe network router. Communication between the SLP SA and UA is done with IP
Chapter 3. Configuring Tivoli Storage Productivity Center 325

multicasting. Follow these recovery procedures when there are SLP discoveryproblems and IP multicasting is disabled on the network router.
Note: The storage systems that use native interfaces (DS8000, XIV system, SANVolume Controller, and Storwize V7000) do not use SLP discovery.
There are two recovery procedures when there are SLP discovery problems and IPmulticasting is disabled on the network router:1. Configure one DA for each subnet within the environment.2. Enable IP multicasting on the router which is disabled by default. Here is a list
of common router configurations for multicasting:v Internet Group Management Protocol (IGMP) is used to register individual
hosts in particular multicast groups and to query group membership onparticular subnets.
v Distance Vector Multicast Routing Protocol (DVMRP) is a set of routingalgorithms that use a technique called reverse path forwarding. Thesealgorithms provide the best solution for how multicast packets are to berouted in the network.
v Protocol-Independent Multicast (PIM) comes in two varieties: dense mode(PIM-DM) and sparse mode (PIM-SM). The dense mode and sparse moderoutines are optimized for networks where either a large percentage of nodesrequires multicast traffic (dense) or a small percentage of nodes requires thesparse traffic.
v Multicast Open Shortest Path First (MOSPF) is an extension of OSPF. It is alink-state unicast routing protocol that attempts to find the shortest pathbetween any two networks or subnets to provide the most optimal packetrouting.
To properly configure the routers for multicasting, see the reference andconfiguration documentation from the router manufacturer.
Configuring IP addressingThis section provides information about configuring IP addressing.
Configuring Tivoli Storage Productivity Center with multiple IPaddresses
If the system where IBM Tivoli Storage Productivity Center is to be installed hasmultiple IP addresses, then a configuration value must be set manually as apost-installation task using the tpctool setdscfg command. The value to be set isfor the local IP address which must be used for subscription for CIM Indicationsfor CIM agents.
Note: This task does not apply to storage systems that use the native interfaces(DS8000, XIV system, SAN Volume Controller, and Storwize V7000).
If you are using IPv6 machines, see “Planning for Internet Protocol Version 6” onpage 47.
For multiple IPv6 addresses, the IPv6 address to use for CIM indicationsubscription by Tivoli Storage Productivity Center can be specified by setting theproperty System.LocalIPv6Address as described.
326 IBM Tivoli Storage Productivity Center: Installation and Configuration Guide

With dual stack IPv4 and IPv6 Tivoli Storage Productivity Center servers, two IPaddresses are required to subscribe to IPv4 CIMOMs and IPv6 CIMOMs. Theconfiguration property System.LocalIPv6Address is used for IPv6 CIMOMs and theproperty System.LocalIPAddress is used for IPv4 CIMOMs.
To change the IP address, follow these steps:1. Open a command prompt window on the server system.2. Change to the following directory:
cd TPC_installation_directory\cli
3. Enter the following command:tpctool setdscfg -user user_ID -pwd password -urlhost:port -property System.LocalIPv6Address value
Where:
user_IDis the user ID.
passwordis the password for the user.
host is either the host name or IP address of the system running TivoliStorage Productivity Center.
port is a valid port number for the HTTP service of the Device server (thedefault is 9550).
value is the local IP address which must be used for subscription for CIMIndications for CIM agents.
4. Verify that the command was successful by entering this command:tpctool getdscfg -user user_ID -pwd password-url host:port -property System.LocalIPv6Address
Changing the HOSTS fileWhen you install IBM Tivoli Storage Productivity Center on your Windowscomputers, you must follow these steps to avoid addressing problems with thesystems you want to manage. These problems are caused by the address resolutionprotocol returning the host short name rather than the fully qualified host name.You can avoid this by modifying the entries in the corresponding host tables onthe DNS server and on the local computer system. The fully qualified host namemust be listed before the short name in each entry associated with systemsmanaged by IBM Tivoli Storage Productivity Center.
The HOSTS file is located in the %SystemRoot%\system32\drivers\etc\ directory.To change the HOSTS file, follow these steps:1. Open the HOSTS file in a text editor.2. Add, remove, or modify the host entries. In the following example of a HOSTS
file, the short name is incorrectly listed before the fully qualified host name.This can cause address resolution problems in IBM Tivoli Storage ProductivityCenter.# Copyright (c) 1993-1995 Microsoft Corp.## This is a sample HOSTS file used by Microsoft TCP/IP for Windows NT.## This file contains the mappings of IP addresses to host names. Each# entry should be kept on an individual line. The IP address should# be placed in the first column followed by the corresponding host name.
Chapter 3. Configuring Tivoli Storage Productivity Center 327

# The IP address and the host name should be separated by at least one# space.## Additionally, comments (such as these) may beinserted on individual# lines or following the machine name denoted by a ’#’ symbol.## For example:## 102.54.94.97 rhino.acme.com # source server# 38.25.63.10 x.acme.com # x client host#192.168.123.146 jason jason.groupa.mycompany.com
3. In the following example, the order of the host names has been changed so thatthe fully qualified host name is placed before the short name. The host namesmust be entered in the order shown so IBM Tivoli Storage Productivity Centercan locate the host. Use this format for any hosts associated with IBM TivoliStorage Productivity Center.# For example:## 102.54.94.97 rhino.acme.com # source server# 38.25.63.10 x.acme.com # x client host#192.168.123.146 jason.groupa.mycompany.com jason
Note: Host names are case sensitive. This is a WebSphere requirement. Forexample, if your computer shows the name as JASON (uppercase), then youmust enter JASON in the HOSTS file.
Configuration guidelines for 500 or more agentsThis topic provides information if you have 500 or more agents in IBM TivoliStorage Productivity Center.
If you have 500 or more agents for the Data Server, follow these steps.
Note: Probes can overwhelm Data Server resources, because by default, they canreturn information all at once.1. Probe the machines at least once a day or more, depending on when you want
to test for alert conditions. This action applies to alert conditions other thandirectory alerts, quotas, or constraints.
2. If you use anything but the "ALL" groups (ALL file systems, ALL computers),you need to manually populate the groups.
3. Always run a probe before a scan. Set the following parameters in theserver.config file:
MaxConnections=1200The default is 500. Agents can have multiple connections to the server.
routerThreads=3 (max)Incoming connections need to be routed to the correct Data Manager"service" queue and can stack up behind this thread. You can watch thisbehavior by watching the connections in the "server service" and the"agent service" in the GUI. The server service runs the router and theagent service is where the connections are queued once routed andsaved by any of three threads here to the repository.
4. Set the following parameter in the Scheduler.config file:
328 IBM Tivoli Storage Productivity Center: Installation and Configuration Guide

MaxSubmitthreads=8Tells how many threads are used to tell the agents to start a job. Agentconnections can queue up the scheduler service. After a job is run, theagent makes a connection to communicate with this thread to give itthe job status.
Configuring LUN provisioning for Oracle SolarisTivoli Storage Productivity Center for Data provides a file system extension featurethat can be used to automatically increase file system capacity for managed hostswhen utilization reaches a specified level. This function allows for the automaticprovisioning of (TotalStorage Enterprise Storage Server, DS6000, DS8000) LUNswhen there is not enough space available in a volume group to extend a filesystem. This section provides information about LUN provisioning for Solaris.
LUNs can be provisioned for file system hosts that run Solaris, but you mustconfigure the hosts must to avoid a restart after provisioning. Before you install theStorage Resource agent, complete the following steps:1. Assign TotalStorage Enterprise Storage Server, DS6000, or DS8000 LUNs to
Solaris Host Bus Adapters (HBAs).2. Modify the HBA configuration file to include persistent name binding.3. Modify the SCSI Disk configuration file to allow the maximum number of
LUNs.4. If you are using multipathing, ensure that TotalStorage Enterprise Storage
Server, DS6000, or DS8000 multipaths are detected by the Veritas DynamicMultipathing (VxDMP) utility.
This section provides basic instructions for performing these configuration steps.For detailed information, see the HBA and VxDMP documentation.
Assigning TotalStorage Enterprise Storage Server, DS6000, orDS8000 LUNs to Oracle Solaris HBAs
This section provides information about assigning TotalStorage Enterprise StorageServer, DS6000, or DS8000 LUNs to Solaris HBAs.
You must assign at least one TotalStorage Enterprise Storage Server, DS6000, orDS8000 LUN to each HBA on the Solaris host.
If you are using multipathing, there are different ways to configure either the hostand TotalStorage Enterprise Storage Server, DS6000, or DS8000. For example:v For an TotalStorage Enterprise Storage Server, DS6000, or DS8000 without
internal multipath configuration, assign the same LUNs to the World Wide PortNode (WWPN) of each HBA.
v For an TotalStorage Enterprise Storage Server, DS6000, or DS8000 with internalmultipath configuration, assign the LUNs to the WWPN of one HBA or assignthe same LUNs to the WWPNs of two or more HBAs.
Modifying the HBA configuration fileThe HBA configuration file must be modified to include Persistent Name Bindingon HBAs and targets so that both the controller and target numbers remain thesame across system reboots. This section provides information about what tomodify in the configuration file.
Chapter 3. Configuring Tivoli Storage Productivity Center 329

The HBA configuration file (for example, qla2200.conf) must be modified toinclude Persistent Name Binding on HBAs and targets so that both the controllerand target numbers remain the same across system reboots. You must reboot thesystem with the new configuration for the changes to take effect.
QLogic QLA2200 and QLA2300 HBAs have been tested for use with IBM TivoliStorage Productivity Center. You can use the QLogic SANblade Control FX (scfx)application to modify the configuration file for these HBAs. The scfx application isincluded as part of the device driver installation package. The scfx application isinstalled in the /opt/QLogic_Corporation/SANblade_Control_FX directory.
Setting Persistent Name Binding for QLA2200 and QLA2300HBAs by using the scfx command
This section describes how to set Persistent Name Binding in the HBAs by usingthe scfx command for LUN provisioning under Oracle Solaris.
Follow these steps:1. Install the QLogic HBA Driver, Common API Library, and QLogic SANblade
Control FX (scfx) application if you have not already done so. For installationinstructions, see the SANblade 2200 Series User's Guide or SANblade 2300 SeriesUser's Guide. After these packages are installed successfully, restart andreconfigure the system by using the reboot -- -rv command.
2. After the system is rebooted, use scfx to configure Persistent Bind on HBAsand Targets in the /kernel/drv/qla2xxx.conf file.a. Start the scfx application. For example:
# /opt/QLogic_Corporation/SANblade_Control_FX/scfx
The main window of the scfx application consists of three sections:
Menu BarThe menu bar provides three options: File, Tools, and Help.
HBA TreeThe HBA Tree displays the host with its connected adapters (HBAs),devices and LUNs. The HBAs are displayed with a model nameand instance number. For example, Adapter 2200 (Instance #0). Ifa device is connected to an HBA, it has a plus sign (+) by the HBA,which can be expanded to view the list of attached devices. Thedevices are listed with their World Wide Port Names (WWPN).
Click the plus sign next to a device to expand the tree to show allthe LUNs in that device. For a RAID device, such as an TotalStorageEnterprise Storage Server, DS6000, or DS8000, there are multipleLUNs per device.
Note: Expand all the devices to search the TotalStorage EnterpriseStorage Server, DS6000, or DS8000 LUNs assigned to the system andnote the WWPN of the target device. This information is required toidentify the SCSI Target ID assigned or specified for the PersistentBind Targets Setting.
Tabbed PagesThe contents of the Tabbed Pages changes depending on what iscurrently selected in the HBA Tree.
b. Select an HBA.
330 IBM Tivoli Storage Productivity Center: Installation and Configuration Guide

Select an adapter in the HBA Tree. The Tabbed Pages show the HBAInformation, HBA Options, Target Settings, Boot Device, Diagnostics, andUtilities tabs.
c. Select the Persistent Bind HBA Setting.Click the HBA Options tab. In the Select Parameter Section drop-down list,select Advanced Host Parameters. Select the check box for Persistent BindHBA. Click Save.
d. Select the Persistent Bind Target Setting.Click the Target Settings tab. Select the check box for each target in theBind column. If the check boxes are already checked and disabled, proceedto the next step. In the Target ID column, you can either accept thepre-selected SCSI Target ID or change to a different value. Each SCSI targetID must be unique and range from 0 to 255.
Note: Write down the selected Target ID for each TotalStorage EnterpriseStorage Server subsystem device.Click Save.
e. Repeat Steps b through d for the next HBA.f. Exit the scfx application.
From the Menu Bar, select File | Exit. A Reboot Reminder dialog isdisplayed. Click OK to exit.
3. Restart and reconfigure the system by using the reboot -- -rv command.
Modifying the SCSI disk configuration fileYou must configure the SCSI disk configuration file for the maximum number ofLUNs per target for LUN provisioning for Oracle Solaris.
You must configure the SCSI disk (sd.conf) configuration file for the maximumnumber of LUNs (256) per target. The system must then be rebooted with the newconfiguration for the changes to take effect. Follow these steps:1. Identify the SCSI Target ID assigned to the TotalStorage Enterprise Storage
Server.2. Edit the /kernel/drv/sd.conf file to include all the possible target and LUN
mappings for the RAID device. For example, assume the SCSI Target IDassigned for an TotalStorage Enterprise Storage Server is 2. You can allow up to256 LUNs (0 - 255) for this target:name="sd" class="scsi" target=0 lun=0;name="sd" class="scsi" target=1 lun=0;name="sd" class="scsi" target=2 lun=0;name="sd" class="scsi" target=2 lun=1;name="sd" class="scsi" target=2 lun=2;::name="sd" class="scsi" target=2 lun=253;name="sd" class="scsi" target=2 lun=254;name="sd" class="scsi" target=2 lun=255;name="sd" class="scsi" target=3 lun=0;name="sd" class="scsi" target=4 lun=0;::name="sd" class="scsi" target=253 lun=0;name="sd" class="scsi" target=254 lun=0;name="sd" class="scsi" target=255 lun=0;
Chapter 3. Configuring Tivoli Storage Productivity Center 331

In this example, the system can detect up to 256 targets with 1 LUN (forexample, multiple RAID devices with a total of 256 LUNs) and up to 256 LUNsfor target 2 (for example, a RAID device with a total of 256 LUNs).
3. Restart and reconfigure the system by using the reboot -- -rv command.
Checking for TotalStorage Enterprise Storage Server, DS6000,or DS8000 multipaths in VxDMP
If you are using IBM TotalStorage Enterprise Storage Server, DS6000, or DS8000LUNs with multipaths, you must ensure that all the paths are detected by VeritasDynamic Multipathing (VxDMP) utility. This section provides information abouthow to check for multipathing in the VxDMP utility.
The VxDMP utility is an administrative interface to the Veritas Volume Manager(VxVM) Dynamic Multipathing (DMP) facility. It lists the paths under a DMPdevice, gets the DMP device corresponding to a path, lists all the disk controllerson the system, lists all the paths through a host disk controller, lists all the DMPnodes through a disk array, and enables or disables a host disk controller on thesystem. For more information, and detailed instructions, see the VxDMPdocumentation.
To list all disk controllers on the system, enter the following command:# vxdmpadm listctlr all
The following sample output shows that controllers c3 and c4 are connected to theIBM TotalStorage Enterprise Storage Server with an Enclosure Type ofIBM_SHARK and an Enclosure Name of IBM_SHARK0.CTLR-NAME ENCLR-TYPE STATE ENCLR-NAME=====================================================c1 Disk ENABLED Diskc3 IBM_SHARK ENABLED IBM_SHARK0c4 IBM_SHARK ENABLED IBM_SHARK0
To list all subpaths for controller c3, enter the following command:# vxdmpadm getsubpaths ctlr=c3
The following sample output shows that the DMPNODENAME is the same as thedevice name for each TotalStorage Enterprise Storage Server LUN:NAME STATE PATH-TYPE DMPNODENAME ENCLR-TYPE ENCLR-NAME======================================================================c3t4d0s2 ENABLED - c3t4d0s2 IBM_SHARK IBM_SHARK0c3t4d1s2 ENABLED - c3t4d1s2 IBM_SHARK IBM_SHARK0
To list all subpaths for controller c4, enter the following command:# vxdmpadm getsubpaths ctlr=c4
The following sample output shows that the DMPNODENAME for eachTotalStorage Enterprise Storage Server LUN is from controller c3. This means thatVxDMP refers to the TotalStorage Enterprise Storage Server, DS6000 or DS8000LUNs as devices from controller c3 and mask devices on controller c4 from VxVM:NAME STATE PATH-TYPE DMPNODENAME ENCLR-TYPE ENCLR-NAME======================================================================c4t4d0s2 ENABLED - c3t4d0s2 IBM_SHARK IBM_SHARK0c4t4d1s2 ENABLED - c3t4d1s2 IBM_SHARK IBM_SHARK0
332 IBM Tivoli Storage Productivity Center: Installation and Configuration Guide

How to import authentication information for a Storage Resourceagent
The Storage Resource agent is installed as a non-daemon or daemon process. IBMTivoli Storage Productivity Center stores the authentication information to connectto the host on which the Storage Resource agent has installed for the non-daemonagent. This authentication information can be changed depending on theenvironment.
To change a Storage Resource agent's authentication information (for non-daemonservice), follow these steps:1. Export the authentication information for a Storage Resource agent. For more
information, go to the information center. Search for Exporting a StorageResource agent list.
2. The data file exported contains information such as the host name, user ID,password, certificate location, and passphrase for every agent selected. Theinformation is separated by the pipe character (|). For example,agent_host|user|password|certificate|passphrase
You can update the password or passphrase in encrypted format or plain textformat. If you want to update the password or passphrase in encrypted format,then you can use the tpctool. For example go to this directory and run thetpctool:cd TPC_install_directory/clitpctool encrypt string_to_be_encrypted
This generates an encrypted string. Place this string in the data file to beimported and add @ENC@ to the end of the encrypted string. For example,agent_host|usera|encrypted_password@ENC@|certificate|encrypted_passphrase@ENC@
encrypted_password is the encrypted string for the password andencrypted_passphrase is the encrypted string for the passphrase.
3. Import the data file. For more information, go to the information center. Searchfor Updating a Storage Resource agent list.
Configuring Tivoli Storage Productivity Center for DS8000 LDAPauthentication
You must configure IBM Tivoli Storage Productivity Center to use LDAP for singlesign-on support for the DS8000 R4.2.
Overview
Configuring Tivoli Storage Productivity Center and DS8000 for single sign-oninvolves this process:
For Tivoli Storage Productivity Center
1. Extract the certificate. This certificate is used for securingcommunication between the Authentication Client on the HMC and theAuthentication Service (server component) on Tivoli StorageProductivity Center.
2. Create a truststore which includes the certificate from step 1.3. Know the URL for the Authentication Service.
Chapter 3. Configuring Tivoli Storage Productivity Center 333

For DS8000
1. Create a Storage Authentication Service (SAS) policy with informationcollected from Tivoli Storage Productivity Center and the LDAP server.
2. Test the Storage Authentication Service policy by using a valid LDAPuser mapped to a DS8000 user role in the policy.
3. Activate the Storage Authentication Service policy by using a validLDAP user mapped to the DS8000 administrative user role in thepolicy.
Configuring Tivoli Storage Productivity Center
This procedure assumes that Tivoli Storage Productivity Center is configured withan LDAP repository for authentication. To configure Tivoli Storage ProductivityCenter:1. You need to know the URL for the Authentication Service.
Tip: An example of the Authentication Service URL is:https://TIP_server_host:9569/TokenService/services/Trust
Here is an example:https://tpcserver1.storage.mycompany.com:9569/TokenService/services/Trust
The port for the Authentication Service is one plus the default IBM TivoliIntegrated Portal port. The port numbers for IBM Tivoli Integrated Portal canvary. To view information about Tivoli Integrated Portal port numbers, see“Tivoli Integrated Portal port numbers” on page 37. Contact your Tivoli StorageProductivity Center administrator if you need to verify the Tivoli IntegratedPortal port.
2. Access the Tivoli Integrated Portal administrative console. Start a web browserand enter the following in the Address field:http://hostname:port/ibm/console
Where hostname defines the server that is running Tivoli Integrated Portal suchas the server name or IP address and port defines the port number for TivoliIntegrated Portal. To view information about Tivoli Integrated Portal portnumbers, see “Tivoli Integrated Portal port numbers” on page 37. Contact yourTivoli Storage Productivity Center administrator if you need to verify the hostname and port number. On the Tivoli Integrated Portal logon page, log onusing the appropriate user ID and password. Your user ID must have TivoliIntegrated Portal administrator authorization.
3. Create the truststore in Tivoli Integrated Portal. In the Tivoli Integrated Portalnavigation tree, click Settings > WebSphere Administrative Console. In theTivoli Integrated Portal content pane, click Launch WebSphere administrativeconsole. In the WebSphere Administrative Console, click Security > SSLcertificate and key management > Key stores and certificates >NodeDefaultKeyStore > Personal Certificates. On this page, select the defaultcertificate and click Extract. On the next page, enter the following information:
Certificate file nameEnter a file name for the extracted certificate. This file automatically iscreated in TIP_installation_directory/profiles/TIPProfile/etc/.
For Windows, the default directory is C:\TIP_installation_directory\profiles\TIPProfile\etc\.
334 IBM Tivoli Storage Productivity Center: Installation and Configuration Guide

Accept and select the default data type. Click OK.4. Create the truststore file and import the certificate into the truststore file by
using the ikeyMan tool.a. Start the ikeyMan tool.
For example on Windows: C:\Program Files\IBM\tipv2\bin\ikeyman.bat
b. Click Key Database File > New. On the New panel, enter the followinginformation and click OK:
Key database typeIn the drop-down list, select JKS.
File NameEnter a file name. For example, enter tpc_ess.jks.
LocationEnter a location. For example, enter C:\tpc\. Click OK.
Tip: The default location is: C:\Program Files\IBM\tipv2\bin
c. The next panel prompts you to specify a password for this truststore.Specify a password that you can remember. Click OK.
d. On the main Key database information panel, in the Key database contentsection, select Signer Certificates and click Add. In the Open panel, clickBrowse and select the certificate file you created in Step 3 on page 334.Click Open and OK.
Note: Look for the certificate file, change the Files of Type to All files. ClickOpen.
e. You see a prompt to specify a label. Provide any label. An example of alabel is: ESS_Cert. Click OK.
f. The ESS_Cert is now one of the listed Signer Certificates.g. Exit the ikeyman tool and locate the truststore file you created in Step 4b
(for this example, tpc_ess.jks). You need this truststore file and thepassword for configuring the LDAP-based policy on DS8000.
h. You are now finished with IBM Tivoli Integrated Portal and the truststoresetup.
5. Find the user ID and password that is used in LDAP to use for the DS8000Storage Authentication Service policy configuration page.This user ID is used for authenticating with the Authentication Service. It canbe any user ID in LDAP, or a user ID that is also used by Tivoli StorageProductivity Center. This user ID is used as the Application Client User ID for aStorage Authentication Service policy on the DS8000.
6. Find the name of a group in LDAP with which you can log on to Tivoli StorageProductivity Center and the DS8000. You would use this LDAP group on theDS8000 also, for mapping to DS8000 roles.You can go to the Tivoli Storage Productivity Center Role-to-Group Mappingnode to find out which LDAP group is mapped to the role in Tivoli StorageProductivity Center.To find the LDAP group name, open the Tivoli Storage Productivity CenterGUI and click Tivoli Storage Productivity Center > Configuration >Role-to-Group Mapping.The information gathered in steps 1, 3, 4, 5, and 6 is used on the DS8000Storage Authentication Service policy creation page.
7. Configure DS8000 R 4.2.
Chapter 3. Configuring Tivoli Storage Productivity Center 335

Configuring DS8000 for LDAP authentication
Follow these steps:1. Add the IP address of the DS8000 Hardware Management Console to the
Internet Explorer list of trusted sites by using the following steps:a. Open the Internet Explorer by clicking the Internet Explorer icon on the
Quick Launch toolbar.b. From the Internet Explorer toolbar, click Tools > Internet options.c. Click the Security tab, click the Trusted sites icon and then click Sites.d. In the Add this web site to the zone field, type the IP address of the
DS8000 Hardware Management Console (HMC). Click Add and the IPaddress is added to the Websites field.
e. Click Close and then click OK to exit the Internet Options window, andthen close the Internet Explorer.
2. To access the DS8000 GUI, complete the following steps:a. In the Tivoli Storage Productivity Center GUI, expand the Element
Manager tree.b. Click DS8000.c. Complete one of the following steps:
v In the content pane, select a DS8000 system.v Click DS8000 Element Manager > Select Action > Add Element
Manager.d. In Select Action, select Launch Default Element Manager. This action
opens the DS8000 Storage Manager GUI so that you can administerDS8000. Enter the user name and password and click OK.
3. On the DS8000 Storage Manager Welcome page, click Real-time manager >Monitor System > User Administration.
4. On the User and Authentication Policy Administration Summary page, select aComplex Name. Under the Select action menu, select Create StorageAuthentication Service Policy.
5. The Authentication Service Configuration page is displayed. Enter thefollowing information:v Policy Namev Authentication Service URL (primary)v Authentication Service Client User IDv Authentication Service Client Passwordv Confirm Authentication Service Client Password
Click Next.
Tip: An example of the authentication URL is:https://TIP_server_host:9569/TokenService/services/Trust
Here is an example:https://tpcserver1.storage.mycompany.com:9569/TokenService/services/Trust
The port for the Authentication Service is one plus the default TivoliIntegrated Portal port. The Tivoli Integrated Portal port number can vary. Toview information about Tivoli Integrated Portal port numbers, see “Tivoli
336 IBM Tivoli Storage Productivity Center: Installation and Configuration Guide

Integrated Portal port numbers” on page 37. Contact your Tivoli StorageProductivity Center administrator if you need to verify the Tivoli IntegratedPortal port.
6. In the Truststore file Information page, enter the following information:v Truststore File Locationv Truststore File Passwordv Confirm Truststore File Password
Click Next.7. In the Map External Users and User Groups to DS8000 User Roles page, enter
the following information:v External Entity Namev External Entity Typev DS8000 User Role
Click Add. The entry is entered in the table on this page. Select the entry youcreated and click Next.
8. The Verification page is displayed. Verify the information and click Next.9. The Summary page is displayed. Click Activate the Policy if you want to
activate the policy immediately. If you want to test the policy before activatingit, do not select Activate the Policy and click Finish to create the policy. Thisscenario assumes that you want to test the policy before activating it. You seea message dialog that indicates whether the policy was successfully created ornot. If the policy was successfully created, close the message dialog.
10. The Manage Authorization Policy page is displayed. Select a policy. Under theSelect action menu, click Test Authentication Policy.
11. The Test Storage Authentication Service Policy page is displayed. Enter thefollowing information:v External User Namev External User Password
Provide an LDAP user ID and password for External User Name and ExternalUser Password. The user ID must already be mapped to a valid DS8000 userrole in the Storage Authentication Service policy. This user ID does not have tobe in the Administrator group. Click OK.
12. The Manage Authentication Policy page is displayed. Select the policy youwant. Under the Select action menu, click Activate Authentication Policy.
13. The Activate Storage Authentication Service Policy page is displayed. Enterthe following information:v External User Namev External User Password
Provide an LDAP user ID and password for External User Name and ExternalUser Password. The user ID must already be mapped to a valid DS8000 userrole in the Storage Authentication Service policy. This user ID must be in theAdministrator group. Click OK. The policy is now activated. Close the page.
14. To access the DS8000 GUI again from Tivoli Storage Productivity Center,update the user name and password:a. In the stand-alone GUI, expand the Element Manager tree.b. Click DS8000.c. In the content pane, select the DS8000 system you configured.
Chapter 3. Configuring Tivoli Storage Productivity Center 337

d. Click DS8000 Element Manager > Select Action > Modify ElementManager.
e. Change the user name and password to the External User Name andExternal User Password that were previously used to configure the DS8000system.
Configuring multiple Tivoli Storage Productivity Center servers withone DS8000 R4.2
You can configure multiple Tivoli Storage Productivity Center servers to use LDAPfor single sign-on support for the DS8000 R4.2.
Configuring multiple Tivoli Storage Productivity Center servers
To configure multiple Tivoli Storage Productivity Center servers:1. Configure one server as described in “Configuring Tivoli Storage Productivity
Center for DS8000 LDAP authentication” on page 333. This server is calledTPC_server1.
2. Install a second Tivoli Storage Productivity Center server and configure it withthe same LDAP repository information as the first Tivoli Storage ProductivityCenterserver. The second server is called TPC_server2.
3. Open a command prompt window on TPC_server2:TIP_installation_directory/bin
4. Run the wsadmin command to export LTPA keys from TPC_server1 into a fileon TPC_server2.wsadmin -user TIP_admin_ID -password TIP_admin_password -lang jython-port TIP_SOAP_port -host TPC_server1_hostname_or_IP_address-f "TPC_install_dir_on_TPC_server2/tip/scripts/exportLTPAKeys.py""LTPA_keys_file_name" LTPA_keys_password
An example is:C:\Program Files\IBM\tipv2\bin>wsadmin -user tpcsuperuser-password tpcsuperuser -lang jython-port 9571 -host 9.56.98.41-f "c:/program files/ibm/tpc/tip/scripts/exportLTPAKeys.py""c:/share/ltpaKeys_serv1" ltpa123
This creates a file on TPC_server2 named ltpaKeys_serv1 that contains theLTPA keys of TPC_server1.
Note: Use forward slashes.5. In the same command window, run the following command to import the
LTPA keys into Tivoli Integrated Portal on TPC_server2.wsadmin -user TIP_admin_ID -password TIP_admin_password -lang jython-f "TPC_install_dir_on_TPC_server2/tip/scripts/importLTPAKeys.py""LTPA_keys_file_name" LTPA_keys_password
An example is:C:\Program Files\IBM\tipv2\bin>wsadmin -user tpcsuperuser-password tpcsuperuser -lang jython-f "c:/program files/ibm/tpc/tip/scripts/importLTPAKeys.py""c:/share/ltpaKeys_serv1" ltpa123
Note: Use forward slashes.
338 IBM Tivoli Storage Productivity Center: Installation and Configuration Guide

6. The LTPA keys in TPC_server1 and TPC_server2 are now synchronized. You canperform a successful single sign-on launch from TPC_server2 to the DS8000R4.2. The DS8000 uses the same policy that was set up when you set upTPC_server1.The same steps can be used to launch the same DS8000 from any number ofTivoli Storage Productivity Center servers. This is not a high-availability setupbecause the policy in DS8000 is still pointing to only one Embedded SecurityService, which is that of TPC_server1
Note: Use forward slashes.
Setting up dual Tivoli Storage Productivity Center servers for highavailability
This section describes how to set up dual Tivoli Storage Productivity Centerservers for high availability of LDAP Authentication and single sign-on.
Procedure
Follow these steps:1. Configure one Tivoli Storage Productivity Center server as described in
“Configuring Tivoli Storage Productivity Center for DS8000 LDAPauthentication” on page 333. In this example, this server is called TPC_server1.
2. Install a second Tivoli Storage Productivity Center server with the same LDAPinformation as the first server. In this example, this server is calledTPC_server2.
3. Open a command prompt window and navigate to the following directory:TIP_install_directory/bin
v On Windows systems, the default installation path for Tivoli IntegratedPortal is C:\Program Files\IBM\Tivoli\TIP. The default installation path forTivoli Storage Productivity Center is C:\Program Files\IBM\TPC.
v On Linux or AIX systems, the default installation path for Tivoli IntegratedPortal is /opt/IBM/Tivoli/tip. The default installation path for Tivoli StorageProductivity Center is /opt/IBM/TPC.
4. On TPC_Server2, run the following WebSphere command to export the LTPAkeys from TPC_server1 into a file on TPC_server2:wsadmin -user TIP_admin_ID -password TIP_admin_password-lang jython-port TIP_SOAP_port-host TPC_server1_hostname_or_IP_address-f "TPC_install_directory_on_TPC_server2/tipv2/scripts/exportLTPAKeys.py""LTPA_keys_file_name" LTPA_keys_password
Here is an example on a Windows system using the default Tivoli StorageProductivity Center installation file path:C:\Program Files\IBM\tipv2\bin>wsadmin -user tpcsuperuser-password tpcsuperuserpassword-lang jython-port 9571-host 9.54.91.40-f "c:/Program Files/IBM/TPC/tipv2/scripts/exportLTPAKeys.py""c:/share/ltpakeys_serv1" ltpa123
This step creates a file named ltpakeys_serv1 which contains the LTPA keys ofTPC_server1. The LTPA keys are imported into TPC_server2.
Chapter 3. Configuring Tivoli Storage Productivity Center 339
Note: Use forward slashes with the -f parameter.5. In the same command window, run the following WebSphere command to
import the LTPA keys into Tivoli Integrated Portal:wsadmin -user TIP_admin_ID -password TIP_admin_password-lang jython-f "TPC_install_directory_on_TPC_server2/tipv2/scripts/importTPAKeys.py""LTPA_keys_file_name" LTPA_keys_password
Here is an example on a Windows system using the default Tivoli StorageProductivity Center installation file path:C:\Program Files\IBM\tipv2\bin>wsadmin -user tpcsuperuser-password tpcsuperuserpassword-lang jython-f "c:/Program Files/IBM/TPC/tipv2/scripts/importTPAKeys.py""c:/share/ltpakeys_serv1" ltpa123
Note: Use forward slashes with the -f parameter.6. Synchronize the second authentication service (on TPC_server2) with the correct
LTPA keys:C:\Program Files\IBM\tipv2\bin>wsadmin -user tpcsuperuser-password tpcsuperuserpassword-lang jython-c "AdminTask.importESSLTPAKeys(’[-pathname c:/share/ltpakeys_serv1 -password ltpa123]’)"
Restart the second Tivoli Integrated Portal server (on TPC_server2).The LTPA keys in TPC_server1 and TPC_server2 are now synchronized.
7. If you are using the Java client, add the SSL certificates for all servers to thetruststore file:a. Log on to Tivoli Integrated Portal on TPC_server1 and extract the certificate.
In this example, the certificate is named cert1.cer.b. Log on to Tivoli Integrated Portal on TPC_server2 and extract the certificate.
In this example, the certificate is named cert2.cer.c. On TPC_server1, take the cert1.cer and cert2.cer certificates at one
location and use the Java keytool command to create a truststore.d. Go to C:\Program Files\IBM\tipv2\java\bin and add these two certificates:
keytool -import -alias TPCServer1-file c:\cert1.cer-keystore c:\ess.truststore.jks-storetype jks-storepass password
keytool -import -alias TPCServer2-file c:\cert2.cer-keystore c:\ess.truststore.jks-storetype jks-storepass password
e. Verify that the two certificates exist in the keystore by running thiscommand:keytool -list-keystore c:\ess.trustore.jks-storepass password
This command must list the two aliases (TPCServer1 and TPCServer2) in thekeystore.
340 IBM Tivoli Storage Productivity Center: Installation and Configuration Guide

f. Copy the ess.trustore.jks keystore to c:\Program Files\IBM\TPC\device\conf on TPC_server1 and TPC_server2.
Configuring Tivoli Storage Productivity Center and SAN VolumeController or Storwize V7000 for single sign-on
To use one user ID and password to access multiple applications, configure TivoliStorage Productivity Center and SAN Volume Controller or Storwize V7000 forsingle sign-on.
Overview
Configuring Tivoli Storage Productivity Center and SAN Volume Controller orStorwize V7000 for single sign-on involves these general steps:
Tivoli Storage Productivity CenterKnow the web address for the Authentication Service and the HTTP basicauthentication user name and password.
SAN Volume Controller or Storwize V7000Configure the remote authentication service of the cluster.
Configuring Tivoli Storage Productivity Center for single sign-on
Before you begin, ensure that Tivoli Storage Productivity Center is configured withan LDAP repository.
To configure Tivoli Storage Productivity Center for single-sign on:1. Extract the Secure Sockets Layer (SSL) certificate.
Remember: The certificate must be in the Privacy Enhanced Mail (PEM)format.v On the Windows operating system, complete the following steps:
a. Go to https://TIP_server_host:9569/ibm/console/logon.jsp whereTIP_server_host is the IP address or host name of the Tivoli IntegratedPortal server.On the Tivoli Integrated Portal logon page, log on using the appropriateuser ID and password. Your user ID must have Tivoli Integrated Portaladministrator authorization.
b. In the Tivoli Integrated Portal tree, click Settings > WebSphereAdministrative Console.
c. In the Tivoli Integrated Portal topic pane, click Launch WebSphereadministrative console.
d. In the WebSphere Administrative Console, click Security > SSL certificateand key management > Key stores and certificates >NodeDefaultKeyStore > Personal Certificates.
e. Select the default certificate and click Extract.f. Enter the following information:
– Certificate file name
Enter a file name for the extracted certificate and click OK. This file isautomatically created in TIP_install_directory/profiles/TIPProfile/etc/. In Microsoft Windows, the default directory isC:\\TIP_install_directory\profiles\TIPProfile\etc\.
Chapter 3. Configuring Tivoli Storage Productivity Center 341

– Data Type
Select Base64-encoded ASCII data.v Alternatively, on the Linux or UNIX operating systems, you can run the
following Shell command to extract the SSL certificate from Tivoli IntegratedPortal:echo | openssl s_client -connect TIP_server_ip:9569 2>&1 \| sed -ne ’/-BEGIN CERTIFICATE-/,/-END CERTIFICATE-/p’
where TIP_server_ip is the IP address of the Tivoli Integrated Portal server.2. Determine the web address for the authentication service.
Remember:
v SAN Volume Controller or Storwize V7000 does not support Domain NameSystem (DNS) host names. IP addresses must be used.
v The default port for the unencrypted (HTTP) Tivoli Integrated PortalAuthentication Service is 9568.
v The default port for the encrypted (HTTPS) Tivoli Integrated PortalAuthentication Service is 9569.
v Web address for HTTP:http://TIP_server_ip:port/TokenService/services/Trust
where TIP_server_ip is the IP address of the Tivoli Integrated Portal server.v Web address for HTTPS:
https://TIP_server_ip:port/TokenService/services/Trust
where TIP_server_ip is the IP address of the Tivoli Integrated Portal server.3. Determine the authentication service user ID and authentication service
password to be used on the cluster for remote authentication. It can be anyuser ID in the LDAP repository that is also used by Tivoli Storage ProductivityCenter. Use this user ID and password when you configure SAN VolumeController or Storwize V7000.
Configuring SAN Volume Controller or Storwize V7000 for remoteauthentication service
You can use either the SAN Volume Controller or Storwize V7000 ManagementGUI or the command-line interface (CLI) to configure the remote authentication ofa cluster. To configure remote authentication service on SAN Volume Controller orStorwize V7000, you must have the Security Administrator role.
To use the SAN Volume Controller Console Version 5.x to configure remoteauthentication of a cluster:1. Log on to the SAN Volume Controller Management GUI and select Launch
the SAN Volume Controller Console for the particular cluster.2. From the main menu, select Manage Authentication > Remote
Authentication.3. Check Enabled to enable remote authentication.4. Enter the following information:
v Remote service user name
v Remote service password
v Protocol:
342 IBM Tivoli Storage Productivity Center: Installation and Configuration Guide

– HTTP
– HTTPS
v Remote service web address
5. Click OK.6. From the main menu, click Manage Authentication > User Groups.7. Select Create a Group and then click Go.8. Enter a Name.
The name of the group you create in the SAN Volume Controller ManagementGUI must be identical to the name of a group in the LDAP repository, whichis also used by Tivoli Storage Productivity Center. The members of this LDAPgroup must be the LDAP users who use single sign-on between Tivoli StorageProductivity Center and the SAN Volume Controller cluster.
9. Select a Role.10. Select the Enable this user group to be visible to the remote authentication
service check box.11. Click OK.12. Repeat steps 6 - 11 to create another group in the SAN Volume Controller
Management GUI that corresponds to another group in the LDAP repositorythat is also used by Tivoli Storage Productivity Center.
To use the SAN Volume Controller Management GUI Version 6.1 or later orStorwize V7000 Management GUI to configure remote authentication of a cluster,follow these steps:1. In a browser, enter the IP address for the Management GUI:
https://cluster_domain_name or IP_address
2. Log on to the Management GUI with your user name and password.3. In the navigation portion of the Management GUI, click Settings > Directory
Services.4. On the Directory Services panel click Global Actions > Enable Remote
Authentication.5. After successfully enabling remote authentication, click Global Actions >
Configure Remote Authentication.6. Select IBM Tivoli Integrated Portal and click Next.7. Enter the following information:
v Remote Service Credentials Name
v Remote Service Credentials Password
v Web address for the remote authentication service
8. Click OK.9. If you are using the encrypted authentication service (HTTPS), you see a
message that the SSL certificate is automatically retrieved from the webaddress.
10. Click OK.11. In the navigation portion of the Management GUI, click Access > Users.12. Click New User Group.13. Enter a Group Name.
The name of the group you create in the Management GUI must be identicalto the name of a group in the LDAP repository that is also used by Tivoli
Chapter 3. Configuring Tivoli Storage Productivity Center 343

Storage Productivity Center. The members of this LDAP group must be theLDAP users that use single sign-on between Tivoli Storage ProductivityCenter and the cluster.
14. Select a Role.15. Under Remote Authentication (IBM Tivoli Integrated Portal), select the
Enable for this group check box.16. Click Create.17. Repeat steps 11-16 to create another group in the Management GUI that
corresponds to another group in the LDAP repository that is also used byTivoli Storage Productivity Center.
Configuring and controlling the Tivoli Storage Productivity CenterMonitoring Agent
You might want to change the parameters or start and stop the Tivoli StorageProductivity Center Monitoring Agent. This topic describes how to configure theTivoli Storage Productivity Center Monitoring Agent to change the TivoliEnterprise Monitoring Services connection, log path, or authentication parameters.This topic also describes how to start and stop the Tivoli Storage ProductivityCenter Monitoring Agent.
Configuring the Tivoli Storage Productivity Center MonitoringAgent on Windows
This topic describes how to configure the Tivoli Storage Productivity CenterMonitoring agent on Windows.
To configure the Tivoli Storage Productivity Center Monitoring agent on Windows,complete the following steps:1. Log on to the system with administrator authority on Windows.2. Open the Tivoli Enterprise Monitoring Services Console. Click Start > All
Programs > IBM Tivoli Monitoring > Manage Tivoli Monitoring Services.
Note: Depending on how you have your Tivoli Monitoring Servicescomponents distributed across your enterprise, you will see different types ofTivoli Enterprise Monitoring Services components displayed.
3. On the Manage Tivoli Enterprise Monitoring Services window, selectMonitoring Agent for TPC. Right-click Monitoring Agent for TPC and clickReconfigure.
4. For information about the different parameters to change, see “Installing andconfiguring the Tivoli Storage Productivity Center Monitoring Agent onWindows” on page 199.
Configuring the Tivoli Storage Productivity Center MonitoringAgent on AIX or Linux
This topic describes how to configure the Tivoli Storage Productivity CenterMonitoring Agent on AIX or Linux.
To configure the Tivoli Storage Productivity Center Monitoring agent on AIX orLinux, complete the following steps:1. Log on to the system with the root user ID or a user ID that has root access
rights.
344 IBM Tivoli Storage Productivity Center: Installation and Configuration Guide

2. Open the Tivoli Enterprise Monitoring Services Console. Open a terminalsession window and go to the Tivoli Monitoring Services bin installationdirectory. The default directory is:/opt/IBM/ITM/bin
3. Run the following command:./itmcmd manage
Note: Depending on how you have your Tivoli Monitoring Servicescomponents distributed across your enterprise, you will see different types ofTivoli Enterprise Monitoring Services components displayed.
4. On the Manage Tivoli Enterprise Monitoring Services window, selectMonitoring Agent for TPC. Right-click Monitoring Agent for TPC and clickConfigure.
5. For information about the different parameters to change, see “Installing andconfiguring the Tivoli Storage Productivity Center Monitoring Agent on AIX orLinux” on page 203.
Starting and stopping the Tivoli Storage Productivity CenterMonitoring Agent
This topic describes how to start and stop the Tivoli Storage Productivity CenterMonitoring Agent.
To start or stop the Tivoli Storage Productivity Center Monitoring agent onWindows, complete the following steps:1. Open the Tivoli Enterprise Monitoring Services Console. Click Start > All
Programs > IBM Tivoli Monitoring > Manage Tivoli Monitoring Services.2. On the Manage Tivoli Enterprise Monitoring Services window, select
Monitoring Agent for TPC. Right-click Monitoring Agent for TPC. Click Startto start the agent, Stop to stop the agent, or Recycle to recycle the agent.
3. Wait for the agent to start, stop, or recycle.
To start or stop the Tivoli Storage Productivity Center Monitoring agent on AIX orLinux, complete the following steps:1. Open the Tivoli Enterprise Monitoring Services Console. Open a terminal
session window and go to the Tivoli Monitoring Services bin installationdirectory. The default directory is:/opt/IBM/ITM/bin
2. Run the following command:./itmcmd manage
3. On the Manage Tivoli Enterprise Monitoring Services window, selectMonitoring Agent for TPC. Right-click Monitoring Agent for TPC. Click StartService to start the agent, Stop Service to stop the agent, or Recycle Service torecycle the agent.
4. Wait for the agent to start, stop, or recycle.
Chapter 3. Configuring Tivoli Storage Productivity Center 345

Installing and configuring the Tivoli Storage Productivity Center serverwith multiple NIC cards
If your Tivoli Storage Productivity Center server has multiple network interfacecards (NIC), install the Tivoli Storage Productivity Center server using a fullyqualified hostname that resolves to the IP address of NIC card you want to use.After you install the Tivoli Storage Productivity Center server, all incoming andoutgoing communication are successfully handled.
Installing Tivoli Storage Productivity Center for a multiplenetwork configuration
If the Tivoli Storage Productivity Center server you are installing has multiple NIC,and is configured to use multiple network addresses, ensure that you use the fullyqualified hostname that resolves to the appropriate IP address during installation.You can either setup the HOSTS file or the DNS to resolve the fully qualified hostnames to appropriate IP addresses.
Outgoing communication initiated by the Tivoli StorageProductivity Center server
All the outgoing communication that is initiated by the Tivoli Storage ProductivityCenter server is not affected if the server is configured for a multiple networkenvironment.
For example, if you have a Tivoli Storage Productivity Center server with two IPaddresses: 10.10.10.11 and 9.9.9.10, and 10.10.10.11 is used during installation, alloutgoing transmissions can be sent to the devices and agents in both networks.
The following list includes examples of outgoing communication that is initiatedby the Tivoli Storage Productivity Center server:
Storage systems using native interfacesRun probe, performance management, and provisioning jobs, and collectdata events (SAN Volume Controller, Storwize V7000 Unified, StorwizeV7000, and XIV Systems)
Switches (SNMP)Run SNMP discovery and probe jobs
CIM agentsRun discovery, probe, and performance management jobs, andprovisioning jobs
VMware vSphere or vCenterRun discovery and probe jobs
Agents (Storage Resource agents)Deploy agents, run probe, discovery, scan, and batch report jobs, and runscripts
Tivoli Storage Productivity Center serversRun probe jobs
346 IBM Tivoli Storage Productivity Center: Installation and Configuration Guide
Incoming communication that is initiated by the devices, agents,and GUI
Incoming communication that is initiated by the devices or agents can work withonly the IP address that is specified during the installation with the exception ofDS8000 events.
For DS8000 events, the Tivoli Storage Productivity Center server must initiate andestablish a socket connection directly with the Hardware Management Console(HMC) to receive events. The DS8000 HMC uses that socket connection to sendevents. As long as the Tivoli Storage Productivity Center server can initiate thecommunication to the HMC, DS8000 events can be received.
Tivoli Storage Productivity Center informs devices and agents to initiatecommunication to the IP address provided during the installation. This exampleuses the IP address 10.10.10.11. However, depending on the communication, youmight be able to change the IP address. For example, Tivoli Storage ProductivityCenter does not configure SAN switches to send SNMP traps to Tivoli StorageProductivity Center, so you can use either 9.9.9.10 or 10.10.10.11.
The following list includes examples of incoming communication that are initiatedby the devices, agents, and the GUI:
DS8000 eventsEvents sent by the HMC to the Tivoli Storage Productivity Center server
SNMP trap notificationsSNMP traps sent from the switches and other devices
CIM indicationsIndications sent by the CIM agents
Servers (agents)Job results and registration
Tivoli Storage Productivity Center GUIAny request.
CIM indications
A CIM indication is an event that occurs on a managed object, for example, thecompletion or failure of an operation. The CIM indications are managed by theCIM object manager. Tivoli Storage Productivity Center uses the CIM agents forthe managed objects to gather information about the device.
Manually customize CIM indications on a Tivoli Storage Productivity Centersystem that has multiple IP addresses. To configure Tivoli Storage ProductivityCenter to receive CIM indications in an IPv4, IPv6, and dual stack (IPv4 and IPv6)environment, see “Configuring Tivoli Storage Productivity Center with multiple IPaddresses” on page 326.
The manual customization task does not apply to storage devices that use thenative interfaces.
Chapter 3. Configuring Tivoli Storage Productivity Center 347
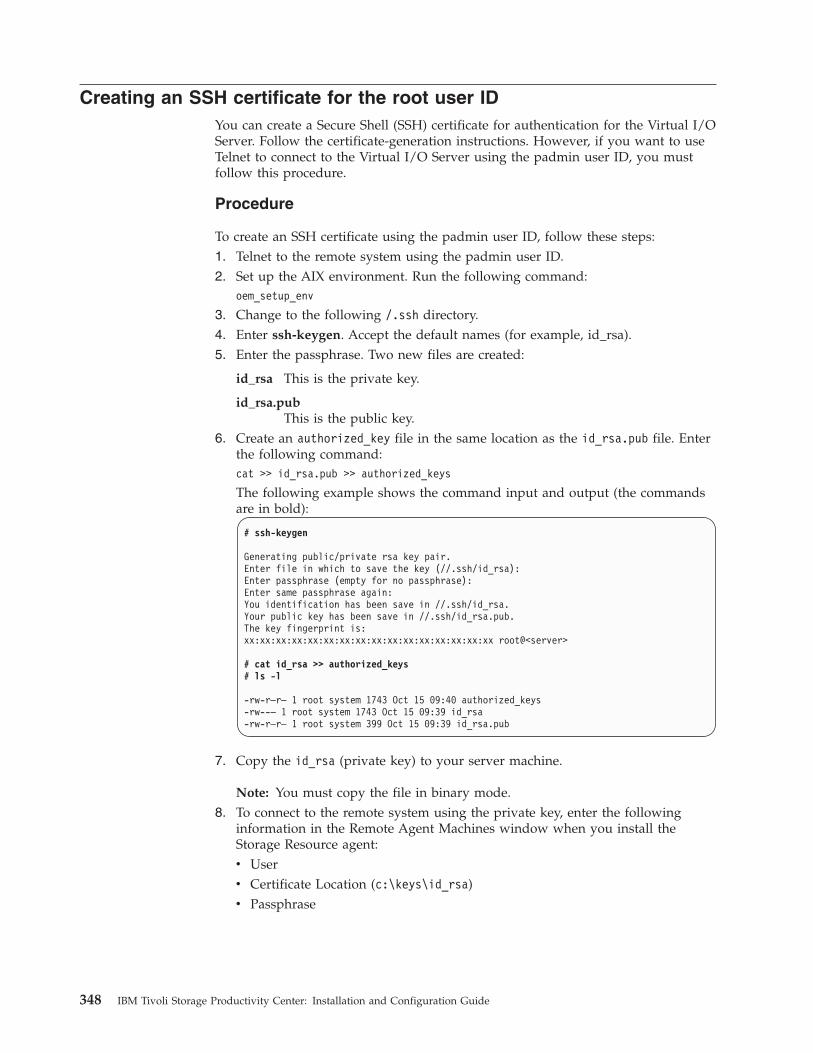
Creating an SSH certificate for the root user IDYou can create a Secure Shell (SSH) certificate for authentication for the Virtual I/OServer. Follow the certificate-generation instructions. However, if you want to useTelnet to connect to the Virtual I/O Server using the padmin user ID, you mustfollow this procedure.
Procedure
To create an SSH certificate using the padmin user ID, follow these steps:1. Telnet to the remote system using the padmin user ID.2. Set up the AIX environment. Run the following command:
oem_setup_env
3. Change to the following /.ssh directory.4. Enter ssh-keygen. Accept the default names (for example, id_rsa).5. Enter the passphrase. Two new files are created:
id_rsa This is the private key.
id_rsa.pubThis is the public key.
6. Create an authorized_key file in the same location as the id_rsa.pub file. Enterthe following command:cat >> id_rsa.pub >> authorized_keys
The following example shows the command input and output (the commandsare in bold):
# ssh-keygen
Generating public/private rsa key pair.Enter file in which to save the key (//.ssh/id_rsa):Enter passphrase (empty for no passphrase):Enter same passphrase again:You identification has been save in //.ssh/id_rsa.Your public key has been save in //.ssh/id_rsa.pub.The key fingerprint is:xx:xx:xx:xx:xx:xx:xx:xx:xx:xx:xx:xx:xx:xx:xx:xx root@<server>
# cat id_rsa >> authorized_keys# ls -l
-rw-r–r– 1 root system 1743 Oct 15 09:40 authorized_keys-rw--– 1 root system 1743 Oct 15 09:39 id_rsa-rw-r–r– 1 root system 399 Oct 15 09:39 id_rsa.pub
7. Copy the id_rsa (private key) to your server machine.
Note: You must copy the file in binary mode.8. To connect to the remote system using the private key, enter the following
information in the Remote Agent Machines window when you install theStorage Resource agent:v Userv Certificate Location (c:\keys\id_rsa)v Passphrase
348 IBM Tivoli Storage Productivity Center: Installation and Configuration Guide

Configuring DB2, AIX, and Linux for IPv6-only environmentUse this information to configure DB2, AIX, and Linux for an IPv6-onlyenvironment.
Configuring the AIX system for IPv6 only
Note: For IPv6 support, the AIX operating system must have level TL 5300–06installed.
Follow these steps:1. Obtain the most recent versions of openssh and openssl packages for AIX and
install them. Some older version of openssh does not work in an IPv6-onlyenvironment.
2. Change sshd (Secure Shell Daemon) on AIX system to accept IPv6 connections.a. In the /etc/ssh/sshd_config file, uncomment the line "ListenAddress:".b. Restart sshd with the following commands:
stopsrc -g sshstartsrc -g ssh
c. From another IPv6 system, verify that you contact AIX over IPv6 (usingssh).
3. In SMIT, set the IPv4 address to 0.0.0.0 for all interfaces. Save the file.4. Edit the /etc/resolv.conf file to use IPv6 DNS server or servers.
Configuring DB2 on AIX for IPv6 systems
To get DB2 on AIX to work on IPv6 systems, follow these steps:1. Identify the host name used by DB2 in the db2nodes.cfg file:
# cat ~db2inst1/sqllib/db2nodes.cfg0 myhost 0#
2. Edit the /etc/hosts file and make sure that the host name found in thedb2nodes.cfg file resolves to an IPv6 address. Use the vi editor to verify thatthe host name is not on any line with an IPv4 address. In particular, ensure thatthe host name is not listed as an alias for the IPv4 loopback address 127.0.0.1.# vi /etc/hosts127.0.0.1 loopback localhost::1 localhost2001:db8:0:0:209:6bff:fe09:63fa myhost.mydomain myhost
3. Stop DB2 and set DB2 to use IPv6 addressing. Restart DB2.a. Source the DB2 profile:
. ~db2inst1/sqllib/db2profile
b. Stop DB2:db2stop
c. Configure DB2 to use IPv6.db2set
An example of the output is: DB2FCMCOMM=TCPIP6.d. Start DB2.
db2start
Chapter 3. Configuring Tivoli Storage Productivity Center 349

In some installations, the AIX server does not have a graphical console attached tothe server. In this situation, you can select another system with an X11 server todisplay the IBM Tivoli Storage Productivity Center installation and Tivoli StorageProductivity Center application. The X11 server must have IPv6 configured and anSSH client installed. Open an SSH connection from a shell on the X11 serverdesktop with the -X option to permit forwarding of X11 applications from theremote AIX server. Start the Tivoli Storage Productivity Center installation programor application from the SSH shell.ssh -X my_IPv6_host/opt/IBM/TPC/gui/TPCD.sh
Configuring DB2 on Linux for IPv6-only systems
To get DB2 on Red Hat Enterprise Linux Version 5 and 6 systems to work in anIPv6-only environment, follow these steps:1. Install DB2 in dual-stack configuration.2. Stop DB2 and set DB2 to use IPv6 addressing:
a. As the root user from the UNIX command line, run this command:su - db2inst1
b. Stop DB2 by running this command:db2stop
c. Configure DB2 to use IPv6 by running this command:db2set
An example of the output is: DB2FCMCOMM=TCPIP6.
Note: The host name in the db2nodes.cfg file resolves to an IPv6 address.This action can require you to change the domain or search directive in the/etc/resolv.conf file to specify a domain in which the host name canresolve to IPv6. You can also edit the /etc/hosts file so that the host nameresolves to an IPv6 address.
d. Start DB2 by running this command:db2start
Changing the timeout value for the web-based GUI sessionYou can change the timeout value for the web-based GUI session through TivoliIntegrated Portal so that you are not logged off the session before you completeyour tasks.1. Open an Internet Explorer or Firefox web browser.2. Enter the following information in the address bar:
https://hostname:port/ibm/console/logon.jsp
where hostname defines the server that is running Tivoli Integrated Portal suchas the server name or IP address and port defines the port number for TivoliIntegrated Portal. For more information about Tivoli Integrated Portal portnumbers, see “Tivoli Integrated Portal port numbers” on page 37.
3. On the Tivoli Integrated Portal logon page, log on using the appropriate userID and password.
4. In the Tivoli Integrated Portal navigation tree, click Settings > WebSphereAdministrative Console.
350 IBM Tivoli Storage Productivity Center: Installation and Configuration Guide

5. In the Tivoli Integrated Portal content pane, click Launch WebSphereadministrative console.
6. In the WebSphere Administrative Console navigation tree, click Security >Global Security.
7. Click the link labeled LTPA under the Authentication section to change thetimeout value.
8. Restart the Tivoli Integrated Portal server.
Configuring IBM SONAS WAN caching
WAN caching is a scalable, remote file data-access function across a wide areanetwork (WAN) that is integrated with IBM SONAS. You can use WAN caching todistribute data transparently between data centers and multiple remote locationswithout disruption to applications.
Remote operations for WAN caching are performed on the local system by one ormore interface nodes. These nodes are configured as gateway nodes by usingTivoli Storage Productivity Center CLI commands. The CLI commands usenetwork file system (NFS) protocols to read and write data from interface nodes inthe remote home system.
To configure WAN caching for IBM SONAS, set up the different components forWAN caching with the appropriate CLI commands.
Configuring the home systemSet up the home system for WAN caching.v mkwcachesource creates a caching-enabled share or export configuration
on the home file setv lswcachesource lists the caching-enabled shares and exports on the
home file setv chwcachesource changes a cache-enabled share or export configuration,
for example, to add or remove a caching client systemv rmwcachesource removes a cache-enabled share or export
Caching gateway nodesEnable remote caching on the client IBM SONAS system.v mkwcachenode configures interface nodes to function as caching
gateway nodes that exchange data with other systemsv rmwcachenode removes the ability of interface nodes to function as
cache gateway nodes
Configuring the cache systemSet up the cache file set on a cache system.v mkwcache creates a cache file set on a client IBM SONAS systemv chwcache changes the configured parameters of a cache file setv lswcache lists the cache file sets on a systemv ctlwcache runs caching maintenance operations on a cache file set, for
example to resynchronize client cache data to the home file setv rmwcache removes a cache file set
Prepopulating cacheCache files in batch mode to ensure that they are already cached whenthey are accessed by an application.
Chapter 3. Configuring Tivoli Storage Productivity Center 351
|
||||
|||||
||
||
||
||
||
|
||
||
||
||
|
|
|
||
|
|||

v runprepop caches all the data in a home file set in a WAN to the cachefile set
v lsprepop displays the status of a prepopulation operation
For more information about the CLI commands for WAN caching, go to the TivoliStorage Productivity Center information center and search for the command in thetpctool command section.Related information:
http://publib.boulder.ibm.com/infocenter/sonasic/sonas1ic/index.jspMore information about IBM SONAS is available at the IBM SONAS InformationCenter.
352 IBM Tivoli Storage Productivity Center: Installation and Configuration Guide
||
|
|||
|
|||

Chapter 4. Upgrading and migrating Tivoli StorageProductivity Center
You can upgrade any Tivoli Storage Productivity Center Version 4 release to TivoliStorage Productivity Center Version 5.
The following section provides information for a successful upgrade:v Tivoli Storage Productivity Center Version 5 does not use the Data agent or
Fabric agent, so you must migrate the Data agents and Fabric agents to StorageResource agents.
v You must decide whether you want to migrate performance and configurationhistory data. Depending on how much data you have, it can take from one toseveral hours or more to migrate the data. If you do not migrate the data, thisinformation is deleted from the database repository.
v If the upgrade process fails and a Tivoli Storage Productivity Center componentcannot be upgraded, the upgrade process ends and the status of the componentis shown as failed. When you restart the upgrade process, the installationresumes upgrading the failed component.
v The Tivoli Storage Productivity Center Version 4 ports are reused in TivoliStorage Productivity Center Version 5.
Complete the following tasks before you upgrade Tivoli Storage ProductivityCenter:v Ensure that your system meets the hardware and software requirements for
upgrading. For more information, see “Hardware requirements” on page 1 and“Software requirements” on page 4.
v Back up your Tivoli Storage Productivity Center environment, including thedatabase repository. For more information, see “Backups” on page 365.
v Migrate any Data agents or Fabric agents to a Storage Resource agent. For moreinformation, see “Migrating Data agents and Fabric agents to Storage Resourceagents” on page 382.
Restriction: To migrate Data agents or Fabric agents before the upgrade, use theTivoli Storage Productivity Center Version 4 GUI or use the command-lineinterface. To migrate Data agents or Fabric agents after the upgrade, use theTivoli Storage Productivity Center 5 GUI or the migration command in thecommand-line interface.
v You must manually migrate BIRT reports. These reports must be exported fromTivoli Integrated Portal 1.1 before you migrate Tivoli Storage ProductivityCenter. For more information about migrating BIRT reports, see “Migrating BIRTreports” on page 385.
Upgrading and migrating Tivoli Integrated Portal
If the Tivoli Storage Productivity Center installation wizard does not detect TivoliIntegrated Portal Version 2.2, a new instance of Tivoli Integrated Portal Version 2.2is installed. Tivoli Common Reporting Version 2.1.1, Extended Security Services,and the web-based GUI components are also installed. You must enter a TivoliCommon Reporting port.
© Copyright IBM Corp. 2001, 2012 353

Note: If you are upgrading on the Linux operating system, you do not need toenter a Tivoli Common Reporting port.
If the installation wizard detects Tivoli Common Reporting Version 2.1.1, andTivoli Integrated Portal Version 2.2 on the system, those instances are used byTivoli Storage Productivity Center installation. When you use an existing instanceof Tivoli Integrated Portal, you must enter the Tivoli Integrated Portaladministrative user name and password that was used when you installed thatinstance. You cannot enter a new user name and password for that instance.
The installation program migrates the user authentication settings including theLDAP configuration. The installation program does not migrate any data fromTivoli Integrated Portal 1.1 to Tivoli Integrated Portal 2.2.
Uninstalling Tivoli Integrated Portal
If you uninstall Tivoli Integrated Portal Version 1.1, and an instance of TivoliIntegrated Portal Version 2.2 does not exist, the ports, administrative user name,and password that were used in Version 1.1 are reused for the Version 2.2 instance.
If you uninstall Tivoli Integrated Portal Version 1.1, and an instance of TivoliIntegrated Portal Version 2.2 exists, you must change the values to the TivoliIntegrated Portal administrative user name and password associated with theVersion 2.2 instance on the Tivoli Integrated Portal and Tivoli Common Reporting:Specify Server Information page. The installation location and port fields must bechanged to contain the values associated with the Version 2.2 instance.
If you do not uninstall Tivoli Integrated Portal Version 1.1, the Tivoli IntegratedPortal and Tivoli Common Reporting: Specify Server Information page isdisplayed. You can enter information for Tivoli Integrated Portal Version 2.2. TheTivoli Integrated Portal Version 1.1 server must be running before Tivoli StorageProductivity Center can uninstall the product.
Restriction: You can uninstall Tivoli Integrated Portal Version 1.1 only if it is notshared with another product. If it is shared with another product, do not uninstallit.
Upgrading Tivoli Storage Productivity Center components
In a multiple-servers environment, you must upgrade the Tivoli StorageProductivity Center components in the order listed in this table:
Table 40. Upgrading Tivoli Storage Productivity Center
Server A includes... Server B includes... Upgrade in this order...
Data server, Device server,replication server, databaserepository, web-based GUI,stand-alone GUI, CLI,Storage Resource agent,Tivoli Integrated Portal,Tivoli Common Reporting(single-server environment)
Not applicable Not applicable
354 IBM Tivoli Storage Productivity Center: Installation and Configuration Guide
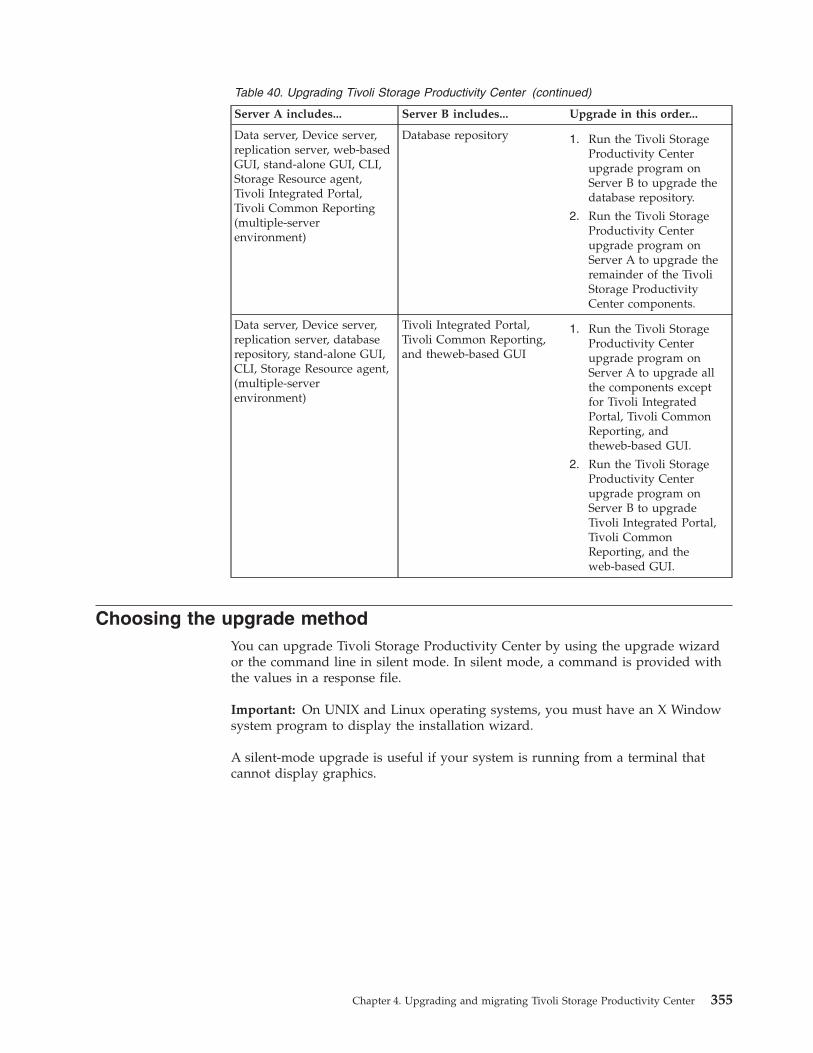
Table 40. Upgrading Tivoli Storage Productivity Center (continued)
Server A includes... Server B includes... Upgrade in this order...
Data server, Device server,replication server, web-basedGUI, stand-alone GUI, CLI,Storage Resource agent,Tivoli Integrated Portal,Tivoli Common Reporting(multiple-serverenvironment)
Database repository 1. Run the Tivoli StorageProductivity Centerupgrade program onServer B to upgrade thedatabase repository.
2. Run the Tivoli StorageProductivity Centerupgrade program onServer A to upgrade theremainder of the TivoliStorage ProductivityCenter components.
Data server, Device server,replication server, databaserepository, stand-alone GUI,CLI, Storage Resource agent,(multiple-serverenvironment)
Tivoli Integrated Portal,Tivoli Common Reporting,and theweb-based GUI
1. Run the Tivoli StorageProductivity Centerupgrade program onServer A to upgrade allthe components exceptfor Tivoli IntegratedPortal, Tivoli CommonReporting, andtheweb-based GUI.
2. Run the Tivoli StorageProductivity Centerupgrade program onServer B to upgradeTivoli Integrated Portal,Tivoli CommonReporting, and theweb-based GUI.
Choosing the upgrade methodYou can upgrade Tivoli Storage Productivity Center by using the upgrade wizardor the command line in silent mode. In silent mode, a command is provided withthe values in a response file.
Important: On UNIX and Linux operating systems, you must have an X Windowsystem program to display the installation wizard.
A silent-mode upgrade is useful if your system is running from a terminal thatcannot display graphics.
Chapter 4. Upgrading and migrating Tivoli Storage Productivity Center 355
Related tasks:“Upgrading Tivoli Storage Productivity Center by using the wizard” on page 368The upgrade wizard is one method of upgrading Tivoli Storage ProductivityCenter.“Upgrading Tivoli Storage Productivity Center by using silent mode” on page 369Silent-mode upgrade is one method of upgrading Tivoli Storage ProductivityCenter. This installation method is useful if your system is running from a terminalthat cannot display graphics.
Changes to Tivoli Common Reporting report packages when youupgrade Tivoli Storage Productivity Center
After you upgrade from Tivoli Storage Productivity Center 5.1 to Tivoli StorageProductivity Center 5.1.1, and you run custom or predefined Tivoli CommonReporting reports, some warning or error messages might be displayed. Thesemessages are displayed because some properties were either renamed or added inTivoli Storage Productivity Center 5.1.1.
If you modified predefined reports, but you did not save these reports to anotherlocation, after you upgrade to Tivoli Storage Productivity Center 5.1.1, thesereports are overwritten. No warning message is displayed for predefined reports.
Important: If you modified predefined reports, you must save the reports to MyFolders or another folder at the root of Public Folders. If you do not save thereports to the specified location, these reports are overwritten.
Messages that are received after you upgrade
One of the following messages is displayed for custom reports:v If you created custom reports with properties that were renamed or removed in
Tivoli Storage Productivity Center 5.1, the following message is displayed:The report must be updated because a more recent version of the packageexists, or because the report contains objects, such as members and levels,that are no longer in the model. After the report was updated, you must saveit to complete the update. As a precaution, you can keep by the originalreport unchanged and save this report with another name.
Do you want to update?
If you accept the changes, the properties that are renamed in Tivoli StorageProductivity Center 5.1.1 are removed from the report. Only the unchangedproperties are displayed. If you do not accept the changes, no changes are madeto the report.
v If you created custom reports, and these reports contain columns that wererenamed or removed in Tivoli Storage Productivity Center 5.1.1, a QE-DEF-0359message is displayed. For example, if your custom reports contain the StorageVirtualizer Volume Real Space (GiB) column, the following message is displayed:QE-DEF-0359 The query contains a reference to at least one object’[Servers to Storage Systems].[Storage Virtualizer Volumes].[Storage Virtualizer Volume Real Space (GiB)]’ that does not exist.
You must update the report by using Report Studio or Query Studio with thecorrect columns.
356 IBM Tivoli Storage Productivity Center: Installation and Configuration Guide
|
|
|||||
|||
|||
|
|
||
|||||||
||||
||||
|||
||

Properties that were renamed after an upgrade
In Tivoli Storage Productivity Center 5.1.1, some properties were renamed fromTivoli Storage Productivity Center 5.1.
Table 41. Resources and Performance packages
ResourceProperty in Tivoli StorageProductivity Center 5.1
Property in Tivoli StorageProductivity Center 5.1.1
Storage Virtualizer Pool Storage Virtualizer PoolVirtual Volume Capacity(GiB)
Storage Virtualizer Pool TotalVolume Capacity (GiB)
Storage Virtualizer Pool RealVolume Capacity (GiB)
Storage Virtualizer PoolAllocated Space (GiB)
Storage Virtualizer PoolOverallocation Percentage
This property was removedin Tivoli Storage ProductivityCenter 5.1.1.
Storage Virtualizer Volumes Storage Virtualizer VolumeReal Space (GiB)
Storage Virtualizer VolumeAllocated Space (GiB)
Storage Pools Storage Pool Virtual VolumeCapacity (GiB)
Storage Pool Total VolumeCapacity (GiB)
Storage Volumes Storage Volume Used Space(GiB)
Storage Volume AllocatedSpace (GiB)
Storage Virtualizer PoolVirtual Volume Capacity(GiB)
Storage Virtualizer Pool TotalVolume Capacity (GiB)
Table 42. Historical package
ResourceProperty in Tivoli StorageProductivity Center 5.1
Property in Tivoli StorageProductivity Center 5.1.1
Storage Virtualizer Pool Storage Virtualizer PoolCapacity (GiB)
Storage Virtualizer Total PoolCapacity (GiB)
Storage Virtualizer Pool RealVolume Capacity (GiB)
Storage Virtualizer PoolAllocated Space (GiB)
Storage Virtualizer PoolVirtual Volume Capacity(GiB)
Storage Virtualizer Pool TotalVolume Capacity (GiB)
Storage Virtualizer PoolOverallocation Percentage
This property was removedin Tivoli Storage ProductivityCenter 5.1.1 in the Resources,Performance, and Historicalpackages.
Storage Virtualizer Volume Storage Virtualizer VolumeReal Space (GiB)
Storage Virtualizer VolumeAllocated Space (GiB)
Storage Pool Storage Pool Virtual VolumeCapacity (GiB)
Storage Pool Total VolumeCapacity (GiB)
Properties that were added to the Resources and Performancepackages
The following properties were added in Tivoli Storage Productivity Center 5.1.1.
Storage Virtualizers
Chapter 4. Upgrading and migrating Tivoli Storage Productivity Center 357
|
||
||
|||||
||||
||
|||||
||||||
|||||
|||||
|||||
||||
||
|
||
|||||
|||||
|||||
||||
||
||||||||
|||||
||||||
||
|
||

v Storage Virtualizer Physical Allocation Percentagev Storage Virtualizer Virtual Allocation Percentagev Storage Virtualizer Shortfall Percentage
Storage Virtualizers Pools
v Storage Virtualizer Pool Physical Allocation Percentagev Storage Virtualizer Pool Virtual Allocation Percentagev Storage Virtualizer Pool Shortfall Percentagev Storage Virtualizer Pool Unallocated Volume Space (GiB)v Storage Virtualizer Pool Unused Volume Space (GiB)v Storage Virtualizer Pool Unallocatable Volume Space (GiB)v Storage Virtualizer Pool Used Space Percentage
Storage Virtualizer Volumes
v Storage Virtualizer Volume Assigned Host Aliasv Storage Virtualizer Volume Used Allocated Space Percentagev Storage Virtualizer Volume Unallocated Space (GiB)v Storage Virtualizer Volume Physical Allocation Percentagev Storage Virtualizer Volume Unused Space (GiB)v Storage Virtualizer Volume Shortfall Percentagev Storage Virtualizer Volume Unallocatable Space (GiB)
Storage Virtualizer Volume Copy
v Storage Virtualizer Volume Copy Used Allocated Space Percentagev Storage Virtualizer Volume Copy Used Space (GiB)v Storage Virtualizer Volume Copy Allocated Space (GiB)v Storage Virtualizer Volume Copy Unallocated Space (GiB)v Storage Virtualizer Volume Copy Physical Allocation Percentagev Storage Virtualizer Volume Copy Unused Space (GiB)v Storage Virtualizer Volume Copy Shortfall Percentagev Storage Virtualizer Volume Copy Unallocatable Space (GiB)
Storage Systems
v Storage System Physical Allocation Percentagev Storage System Virtual Allocation Percentagev Storage System Shortfall Percentage
Storage Pools
v Storage Pool Physical Allocation Percentagev Storage Pool Virtual Allocation Percentagev Storage Pool Shortfall Percentagev Storage Pool Allocated Space (GiB)v Storage Pool Unallocated Volume Space (GiB)v Storage Pool Unallocatable Volume Space (GiB)
Storage Volumes
v Storage Volume Unallocated Space (GiB)v Storage Volume Physical Allocation Percentagev Storage Volume Shortfall Percentagev Storage Volume Unallocatable Space (GiB)
358 IBM Tivoli Storage Productivity Center: Installation and Configuration Guide
|
|
|
|
|
|
|
|
|
|
|
|
|
|
|
|
|
|
|
|
|
|
|
|
|
|
|
|
|
|
|
|
|
|
|
|
|
|
|
|
|
|
|
|

v Storage Volume Used Space (GiB)v Storage Volume Used Allocated Space Percentage
Storage Virtualizer Pool
v Storage Virtualizer Physical Allocation Percentagev Storage Virtualizer Pool Virtual Allocation Percentagev Storage Virtualizer Pool Shortfall Percentagev Storage Virtualizer Pool Unallocated Volume Space (GiB)v Storage Virtualizer Pool Unused Volume Space (GiB)v Storage Virtualizer Pool Unallocatable Volume Space (GiB)v Storage Virtualizer Pool Used Space Percentage
Switch PortSwitch Blade Slot Number
Properties that were added to predefined resource reports
The following properties were added to predefined reports in Tivoli StorageProductivity Center 5.1.1.
Relationship reports
v The following properties were added to the Storage ResourceRelationships Summary report:– Storage Virtualizer Volume Assigned Host Alias– Storage System Volume Assigned Host Alias
v The following properties were added to the Storage ResourceRelationships Summary Report (Configurable) report:– Storage Virtualizer Volume Assigned Host Alias– Storage System Volume Assigned Host Alias
Storage virtualizer reports
v The following properties were added to reports in the StorageVirtualizer - Pools Space report:– Storage Virtualizer Pool Physical Allocation Percentage– Storage Virtualizer Pool Shortfall Percentage
v The following properties were added to the Storage Virtualizer -Volumes Space report:– Storage Virtualizer Volume Physical Allocation Percentage– Storage Virtualizer Volume Shortfall Percentage– Storage Virtualizer Volume Used Allocated Space Percentage
Storage system reports
v The following properties were added to Storage Systems - Space report:– Storage System Physical Allocation Percentage– Storage System Shortfall Percentage
v The following properties were added to Storage Systems - Pools Spacereport:– Storage Pool Physical Allocation Percentage– Storage Pool Shortfall Percentage
v The following properties were added to Storage System - VolumesSpace report:
Chapter 4. Upgrading and migrating Tivoli Storage Productivity Center 359
|
|
|
|
|
|
|
|
|
|
||
|
||
|
||
|
|
||
|
|
|
||
|
|
||
|
|
|
|
|
|
|
||
|
|
||

– Storage Volume Physical Allocation Percentage– Storage Volume Shortfall Percentage– Storage Volume Used Allocated Space Percentage
Properties that were added to predefined performance reports
Switch reportsThe following property was added to the Most Active Switch Ports report:v Switch Blade Slot Number and Switch Port Number
The following property was added to the Switch Port Performance Detailsreport:v Switch Blade Slot Number and Switch Port Number
Upgrading Tivoli Storage Productivity Center for ReplicationWith Tivoli Storage Productivity Center for Replication version 4.2 or later, anembedded database is used for the database repository. DB2 is no longersupported as the database repository for Tivoli Storage Productivity Center forReplication.
As a part of the upgrade process, an embedded repository is created and any datafrom an existing DB2 Tivoli Storage Productivity Center for Replication database iscopied to the new database repository. This process is automatic and does notrequire any input or action from the user.
For a typical upgrade procedure, follow this general procedure:1. Issue the takeover command to the standby server and then upgrade the
standby server.
Note: This action makes both the Replication servers active.2. Wait for the standby server to complete installation and start the standby
server. .3. While upgrading the active server, avoid making any configuration changes to
the sessions.4. Upgrade the active server.5. If no changes have been made to the configuration while the active server is
being upgraded, reestablish the High Availability function from the activeserver to the standby server. If configuration changes were made to the standbyserver, synchronize the High Availability function from the standby server tothe active server. Then perform a takeover operation and reestablish the HighAvailability function from the active server to the standby server.
During the initial synchronization, the current information in the database is savedand held until the synchronization is complete. If an error occurs during thisprocess, the server database is restored to its original state before thesynchronization process began. If an error occurs during the synchronizationprocess which causes the status to be in the disconnected or inconsistent state, youcan reconnect to a synchronized state.
Fix packs and patchesAll fix packs and patches use the upgrade procedure to upgrade Tivoli StorageProductivity Center.
360 IBM Tivoli Storage Productivity Center: Installation and Configuration Guide
|
|
|
|
||
|
||
|
|
You must have a valid Tivoli Storage Productivity Center license to use theupgrade procedure. For information about fix packs and patches, go tohttp://www.ibm.com/support/docview.wss?&uid=swg21320822.
Storage Subsystem Credential Migration toolUse this tool If you have DS8000, XIV, or SAN Volume Controller storage systemsand are upgrading Tivoli Storage Productivity Center Version 4.1x to Version 5.1.These storage systems use the native storage system interface instead of the CIMagents.
You can migrate your storage system credentials in one of the following ways:v Use the migration tool from the Tivoli Storage Productivity Center DVD. Use the
DVD or download the migration tool: MigrateUserInfo.bat (for Windows) orMigrateUserInfo.sh (for UNIX or Linux). Run the migration tool from thedirectory UserMigrationTool.
v Use the Tivoli Storage Productivity Center GUI to migrate the credentials (see“Update Storage Subsystem Credentials” on page 313)
v Run the Tivoli Storage Productivity Center upgrade installation program andspecify that you want to use the migration tool. Run the migration tool duringthe Tivoli Storage Productivity Center upgrade procedure.
Note: For Windows, the credential migration tool has a dependency onMSVCR90.dll if you run the tool from a command window. If you get an errorexception when running this tool, check to see that your system has this DLL file.If you use the tool from the installation wizard, the wizard automatically loads therequired DLL files.
If Tivoli Storage Productivity Center can access the DS8000 by using the existingcredentials, you can continue to use the existing credentials. For XIV and SANVolume Controller storage systems, you must manually update the credentials.
The storage system credential migration applies to all DS8000 systems, XIVsystems, and SAN Volume Controller systems.
If you ran a CIMOM discovery job for a storage system but have not run a probejob for that system, then upgrade Tivoli Storage Productivity Center, the IP addressdoes not display in the GUI. You must manually enter the IP address for thatstorage system.
Note: After a successful migration of DS8000, XIV, or SAN Volume Controllercredentials, the CIMOMs that manage these devices previously must be removedfrom the Tivoli Storage Productivity Center configuration. The migration processtries to determine and remove these CIMOMs during migration automatically, butif there are CIMOMs remaining, they must be deleted manually. For DS CIMOMsmanaging DS6000 or ESS devices and additional DS8000 devices, the DS8000devices must be removed from the CIMOM if possible.
Upgrading DB2 from DB2 9.1 or DB2 9.5 to DB2 9.7If you are upgrading DB2 from DB2 9.1 or DB2 9.5 to DB2 9.7, follow this generalprocedure.
For information about upgrading to DB2 9.7, go to this website:http://publib.boulder.ibm.com/infocenter/db2luw/v9r7/index.jsp.
Chapter 4. Upgrading and migrating Tivoli Storage Productivity Center 361

For the general procedure to upgrade the DB2 database repository to DB2 9.7,follow these steps:1. Stop the Tivoli Storage Productivity Center services and Agent Manager. For
information about stopping the services, go to the Tivoli Storage ProductivityCenter information center. Search for Starting and stopping the TivoliStorage Productivity Center services.
2. Check to see if your databases are ready for migration:a. On DB2 9.1 or DB2 9.5, disconnect all users, stop the back-end process,
and stop your existing instances by running the following commands:db2stop force (disconnects all users and stops the instance)db2 terminate (terminates back-end process)
b. Verify that the local databases that are owned by the current instance areready to be upgraded and generate a log file. Run the db2ckupgradecommand.
Note: For Windows, click Start > Programs > IBM DB2 > Command LineTools > Command Window.Go to the directory for the db2ckupgrade command:cd DB2_9.7_installer_kit\ESE\image\db2\Windows\utilities
Run this command:db2ckupgrade database_name -l db2ckupgrade.log -u user_name-p password
where database_name is the name of the database and db2ckupgrade.log isthe name of the log file created in the current directory. The log fileincludes error and warning messages. Each time you run this command, itoverwrites the existing log file. You can rename the log file to avoid losingthe information from a previous run. You must correct these errors beforeyou upgrade.
c. Check the log file. For a successful run, the output provides this message:db2ckupgrade was successful. Database(s) can be upgraded.
3. Back up the database. Run the following DB2 command from a commandprompt window:DB2 BACKUP DATABASE TPCDB USER user_name USING passwordTO path_to_backup_folder
where user_name is the user ID, password is the password, andpath_to_backup_folder is the directory path to the backup folder. Test the imageintegrity by running this command:DB2CKBKP *.001
4. Run the DB2 extended security command:db2set DB2_EXTSECURITY=NO
5. Install DB2 9.7. For information about installing DB2 9.7, see “Installing DB2”on page 139. Select the Install New option on the Install a Product panel.Install all DB2 add-on products that you installed on your previous DB2version.
6. Upgrade the DB2 instances.a. On DB2 9.1 or DB2 9.5, disconnect all users, stop the back-end process,
and stop your existing instances by running the following commands:db2stop force (disconnects all users and stops the instance)db2 terminate (terminates back-end process)
362 IBM Tivoli Storage Productivity Center: Installation and Configuration Guide

b. Log on to the DB2 9.1 or DB2 9.5 server with root authority on UNIX orlocal administrator authority on Windows.
c. Upgrade your existing instances by running the db2iupgrade commandfrom the target DB2 version 9.7 copy location.For Windows, run this command:"%DB2PATH%"\bin\db2iupgrade InstName /u:user,password
Where DB2PATH is set to the location you specified during DB2 Version9.7 installation, user,password are the user name and password under whichthe DB2 service runs, and InstName is the name of the instance.For UNIX or Linux, run this command:$DB2DIR/instance/db2iupgrade [ -u fencedID ] InstName
Where DB2DIR is set to the location you specified during DB2 Version 9.7installation, fencedID is the user name under which the fenced user-definedfunctions (UDFs) and stored procedures run, and InstName is the loginname of the instance owner. This example upgrades the instance to thehighest level for DB2 database product that you installed.
d. Check the following configuration file for Windows (2008):C:\ProgramData\IBM\DB2\DB2COPY1\DB2\db2node.cfg
Remove the extra line. The line should look like this:0 beesspc BEESPC 0
Where beesspc and BEESSPC is the name of the Tivoli StorageProductivity Center server.
e. Log on to the DB2 9.7 server as a user with sufficient authority to startyour instance.
f. Restart your instance by running the db2start command.g. Verify that your instance is running on DB2 9.7 by running the db2level
command. The output provides a string like:DB2 v9.7.x.x
Where x is a digit number.7. Upgrade the DB2 Administration Server.
a. Log on to the DB2 9.7 server with root authority on UNIX or Linux orlocal administrator authority on Windows.
b. Upgrade your existing DB2 Administration Server by running the dasmigrcommand.For Windows, run this command:%DB2PATH%\bin\dasmigr
Where DB2PATH indicates the location that you specified during DB2Version 9.7 installation.For UNIX or Linux, run this command:$DB2DIR/instance/dasmigr
Where DB2DIR indicates the location that you specified during DB2Version 9.7 installation.
8. Upgrade the databases.
Chapter 4. Upgrading and migrating Tivoli Storage Productivity Center 363

a. Log on to the DB2 9.7 server as the instance owner or a user withSYSADM authority.
b. Migrate the TPCDB database. Run this command from the DB2 commandprompt window:db2 migrate db TPCDB
c. From a DB2 command prompt window, run this command:db2 update dbm cfg using JDK_PATH ’C:\Program Files\IBM\SQLLIB\java\jdk’
d. Verify that your database upgrade is successful. Connect to the upgradeddatabases and run a small query:db2 connect to database_name
Database Connection Information
Database server = DB2/INT 9.7.0SQL authorization ID = ADMINISTRATORLocal database alias = database_name
db2 "select * from syscat.dbauth"
e. For SSPC only: Open the DB2 - DB2COPY1 - DB2-0 Properties window.Click the Log On tab. Check to see if the "Log On As" service for DB2 -DB2COPY1 - DB2-0 is .\administrator.Set this DB2 service to Automatic. Open the Services window and find theDB2 - DB2COPY1 - DB2-0 service. Right-click this service and clickAutomatic.
9. Start the Tivoli Storage Productivity Center services and Agent Manager (ifthe Agent Manager is installed). For information about starting the services,go to the Tivoli Storage Productivity Center. Search for Starting and stoppingthe Tivoli Storage Productivity Center services.
10. Upgrade Tivoli Storage Productivity Center.Related reference:Chapter 4, “Upgrading and migrating Tivoli Storage Productivity Center,” on page353You can upgrade any Tivoli Storage Productivity Center Version 4 release to TivoliStorage Productivity Center Version 5.
Preparing for an upgradeTo upgrade Tivoli Storage Productivity Center, use the same starting procedure asthe installation program. Depending on the components you install, you can seedifferent pages.
Before you upgrade, you must review the following information:v “Hardware requirements” on page 1v “Software requirements” on page 4
Important: Before you upgrade Tivoli Storage Productivity Center from Version 4to Version 5.1.1, if you changed your authentication from OS to LDAP or fromLDAP to OS, you must log on to the stand-alone GUI, select Configuration >Role-to-Group Mappings, and set the Superuser role for the group.
If you changed your authentication from LDAP to OS, the group can be, forexample, Administrators. If you changed your authentication from OS to LDAP,the group must be an LDAP-specific group. If you do not set at least one role for
364 IBM Tivoli Storage Productivity Center: Installation and Configuration Guide
||||
|||

the group, your migration will fail during the prevalidation check process. Formore information about Role-to-Group mappings, see “Role-to-Group Mappings”on page 280.
For a complete list of installation images, see “Tivoli Storage Productivity Centerinstallation” on page 151.
Note:
v If you are deploying Storage Resource agent on UNIX or Linux systems, youmust use root as the user ID.
v You can no longer install the Storage Resource agent from the disk 1 image oncomputers that do not have a Data server installed. To install a Storage Resourceagent on a computer where the Data server is not installed, you must use theseparate Storage Resource agent electronic image or DVD.
v After you upgrade Tivoli Storage Productivity Center, all trace settings are resetto the default values. If you changed the trace settings, you must reset the tracesettings after an upgrade.
Important: This procedure is disruptive to the Tivoli Storage Productivity Centerfor Replication services. For Tivoli Storage Productivity Center for Replication, youcan complete a takeover to a standby server to ensure that consistency can bemaintained for any active servers.
BackupsBefore you can migrate, you must back up the entire Tivoli Storage ProductivityCenter system.
The process involves backing up the following parts:v Tivoli Storage Productivity Center database by using DB2 backup utilities.
For more information about backing up your database, see http://pic.dhe.ibm.com/infocenter/tivihelp/v59r1/index.jsp?topic=%2Fcom.ibm.tpc_V51.doc%2Ffqz0_t_backing_up_tpc_database.html
v The entire Tivoli Storage Productivity Center server by using software such asIBM Tivoli Storage Manager.
Remember: The frequency of backups depends on the data protection policiesof your company, the Tivoli Storage Productivity Center work load, and the sizeof the Tivoli Storage Productivity Center environment. Your backup plan mustinclude documentation with the user names and passwords for DB2, TivoliStorage Productivity Center, and Tivoli Integrated Portal.
If you experience problems during the migration, use these backups to restore youroriginal Tivoli Storage Productivity Center system and try to migrate again. Formore information about restoring the Tivoli Storage Productivity Center database,see http://pic.dhe.ibm.com/infocenter/db2luw/v9r7/index.jsp?topic=%2Fcom.ibm.db2.luw.admin.ha.doc%2Fdoc%2Fc0006237.html
Upgrade response fileYou do not need an upgrade response file to upgrade Tivoli Storage ProductivityCenter in silent mode from Version 5 to another Version 5 fix pack. To accept thelicense agreement, you must specify the value of the LICENSE_ACCEPTEDvariable to true. To upgrade from Version 5 to a Version 5 fix pack, run thecommand setup.bat|bin -i silent -DLICENSE_ACCEPTED=true.
Chapter 4. Upgrading and migrating Tivoli Storage Productivity Center 365
|||
|
||
|
|
|||
||
|||||
|||||

You must use the silent_Upgrade4x.properties file to upgrade Tivoli StorageProductivity Center in silent mode from Tivoli Storage Productivity Center Version4 to Version 5. When you maintain a current version of this response file, youminimize upgrade errors.
Upgrade response file parameters
The response file contains the following parameters:
CHOSEN_INSTALL_TYPE="4.x Upgrade"Specifies the upgrade type. You can upgrade any Tivoli Storage ProductivityCenter version 4 release to version 5.
LICENSE_ACCEPTED=falseSpecify whether the user accepts the Tivoli Storage Productivity Center licenseagreement. The options are:
trueThe user accepts all the terms and conditions of the Tivoli Storage ProductivityCenter license agreement.
false or any other valueThe user does not accept the Tivoli Storage Productivity Center licenseagreement. The installation program will exit.
varMigrateCASAgentsLater=optionSpecify when to migrate the Data agents and Fabric agents. The options are:
falseYou have migrated all the Data agents and Fabric agents to StorageResource agents before this upgrade. This option is the default.
trueYou plan to migrate the Data agents and Fabric agents to Storage Resourceagents after this upgrade.
varMigratePerfAndConfigHistoryData=optionSpecify whether you want to migrate performance and configuration historydata.
If you generated performance and configuration history data in Tivoli StorageProductivity Center Version 4 and want to save this information, migrate thedata to Version 5. This migration can take from a few minutes up to a fewhours or more depending on the amount of data to migrate.
If you do not migrate this data, the performance and configuration history datais deleted from the database repository. The options are:
trueMigrate the performance and configuration history data. This option is thedefault.
falseDelete the performance and configuration history data from the databaserepository.
varPreserveTIP1x=valueSpecify whether to uninstall Tivoli Integrated Portal 1.1 by selecting one of thefollowing values:
0 Uninstall Tivoli Integrated Portal 1.1. This option is the default.
1 Do not uninstall Tivoli Integrated Portal 1.1.
366 IBM Tivoli Storage Productivity Center: Installation and Configuration Guide

varTIPAdmUsr=user_name
If you use an existing Tivoli Integrated Portal 2.2 instance, you must provide auser name that has administrative privileges and enter the Tivoli IntegratedPortal administrative user name and password that you used when youinstalled that instance. You cannot enter a new user name and password forthat instance.
varTIPAdmPW=passwordSpecifies the password for the Tivoli Integrated Portal user name.
varReuseExistingTIP=valueSpecifies whether to install a new instance of Tivoli Integrated Portal or reusean existing instance of Tivoli Integrated Portal. Select one of these values:
0 Install a new instance of Tivoli Integrated Portal 2.2. This value is thedefault.
1 Reuse an existing instance of Tivoli Integrated Portal 2.2.
varTIPPath=pathSpecifies the directory where Tivoli Integrated Portal is installed. If you reusean existing instance of Tivoli Integrated Portal, provide the directory whereTivoli Integrated Portal is installed.
For Windows directories, use double backslashes for the path. For example:varTIPPath=c:\\TIP\\version2.2\\
varTIPPortRangeSP=pathSpecifies the first port in a range of ports for Tivoli Integrated Portal. Thedefault port range is 9568 - 9581.
This parameter overrides varTPCPortRangeSP.
varTCRPort=port
Specifies the Tivoli Common Reporting port. The default is 9581.
This parameter overrides varTPCServersPortRangeSP andvarTIPPortRangeSP.
Upgrade packageYou can use the upgrade package to upgrade the Tivoli Storage ProductivityCenter Basic Edition license or Tivoli Storage Productivity Center from Version 4 toVersion 5.1.1.
To upgrade the license or the software, you must download the upgrade packagefrom http://www.ibm.com/support/entry/myportal/overview/software/tivoli/tivoli_storage_productivity_center.
Basic Edition license
You can upgrade the Version 4 Basic Edition license to the Version 5.1.1 BasicEdition license by using the upgrade package. You can then upgrade the Version5.1.1 Basic Edition license to the Version 5.1.1 Select license.
Tivoli Storage Productivity Center licenses
The Tivoli Storage Productivity Center Version 4 licenses are automatically mappedto Tivoli Storage Productivity Center Version 5.1.1 licenses as described in Table 43on page 368.
Chapter 4. Upgrading and migrating Tivoli Storage Productivity Center 367
|
|||
|||
|
|||
|
|||

Table 43. License mapping from Tivoli Storage Productivity Center Version 4 to TivoliStorage Productivity Center Version 5.1.1
If you have this Tivoli Storage ProductivityCenter 4 license
You are entitled to this license after youupgrade
Tivoli Storage Productivity Center Version4.1.0 Standard Edition (SE)
Tivoli Storage Productivity Center Version5.1.1 Advance Edition License
Tivoli Storage Productivity Center Version4.1.1 for Data and IBM Tivoli StorageProductivity Center for Replication 3 SiteLicense
Tivoli Storage Productivity Center Version5.1.1 Advance Edition License
Tivoli Storage Productivity Center Version4.2.0 for Disk Midrange
Tivoli Storage Productivity Center Version5.1.1 Select License
Tivoli Storage Productivity Center Version4.2.1 for Disk and Tivoli StorageProductivity Center for Replication BasicLicense
Tivoli Storage Productivity Center Version5.1.1 TPC License
Tivoli Storage Productivity Center Version4.2.2 for Disk Select
Tivoli Storage Productivity Center Version5.1.1 Select License
Upgrading Tivoli Storage Productivity Center in a single-serverenvironment
You can upgrade Tivoli Storage Productivity Center by using the upgrade wizardor silent mode.
In a single-server environment, to upgrade Tivoli Storage Productivity Center, seethe following topics:v “Upgrading Tivoli Storage Productivity Center by using the wizard”v “Upgrading Tivoli Storage Productivity Center by using silent mode” on page
369
Migrating from an older version of Tivoli Storage ProductivityCenter to Tivoli Storage Productivity Center 5.1.1
To migrate from Version 3 to Tivoli Storage Productivity Center 5.1.1, you mustfirst migrate from Version 3 to Version 4. For more information about migratingfrom Version 3 to Version 4, see http://publib.boulder.ibm.com/infocenter/tivihelp/v4r1/index.jsp?topic=%2Fcom.ibm.tpc_V4221.doc%2Ffqz0_r_migrating_tpc.html. You can use your Version 3 license to migrate fromTivoli Storage Productivity Center Version 3 to Tivoli Storage Productivity Center4.
Initially, Tivoli Storage Productivity Center 5.1.1 will be available through IBMPassport Advantage (download). If your license maintenance is current, you candownload Tivoli Storage Productivity Center 5.1.1 from IBM Passport Advantageor access the physical media.
Upgrading Tivoli Storage Productivity Center by using thewizard
The upgrade wizard is one method of upgrading Tivoli Storage ProductivityCenter.
368 IBM Tivoli Storage Productivity Center: Installation and Configuration Guide
|||
||||
||||
||||
||
||||
||||
||
|||||
|

Before you start the Tivoli Storage Productivity Center upgrade program on theAIX or Linux operating systems, you must source the DB2 profile, db2profile, forthe instance owner of the DB2 database. The following example sources the DB2profile:. /home/db2inst1/sqllib/db2profile
To upgrade Tivoli Storage Productivity Center in a single-server environment:1. Log on to the Tivoli Storage Productivity Center system with the appropriate
user privileges.2. Back up Tivoli Storage Productivity Center.3. Start the Tivoli Storage Productivity Center upgrade program by running
setup.bin ./setup/bin.4. Select the language for your installation and click OK. The language that you
select is used to install the product.5. On the Choose Installation Location and Type page, select Single server.
Note: Tivoli Storage Productivity Center detects the currently installed versionand components and determines whether this step is an upgrade operation.
6. Follow the wizard instructions to complete the upgrade process.7. After the upgrade is completed, review the message that is displayed on the
summary page. Review the installation log files, and correct any errorsRelated concepts:“Backups” on page 365Before you can migrate, you must back up the entire Tivoli Storage ProductivityCenter system.Related tasks:“Preparing for an upgrade” on page 364To upgrade Tivoli Storage Productivity Center, use the same starting procedure asthe installation program. Depending on the components you install, you can seedifferent pages.Related reference:“Planning for Tivoli Storage Productivity Center authentication and authorization”on page 28An operating system user name is required to install and log on to Tivoli StorageProductivity Center for the first time. After you install Tivoli Storage ProductivityCenter, you can assign roles to users that enable users to log on and determine thecomponents that the user can view in the graphical user interface (GUI).“Reviewing the log files to resolve installation issues” on page 191If an error occurs during Tivoli Storage Productivity Center installation, you canreview the error log files to resolve issues and continue the installation.
Upgrading Tivoli Storage Productivity Center by using silentmode
Silent-mode upgrade is one method of upgrading Tivoli Storage ProductivityCenter. This installation method is useful if your system is running from a terminalthat cannot display graphics.
Before you start the Tivoli Storage Productivity Center upgrade program on theAIX or Linux operating system, you must source the DB2 profile, db2profile, forthe instance owner of the DB2 database. An example of sourcing the DB2 profile is:. /home/db2inst1/sqllib/db2profile
Chapter 4. Upgrading and migrating Tivoli Storage Productivity Center 369

To upgrade Tivoli Storage Productivity Center by using silent mode:1. Log on to the Tivoli Storage Productivity Center system with the appropriate
user privileges.2. Back up Tivoli Storage Productivity Center.3. Edit and save the appropriate response file.4. Run the upgrade program. This is a list of the languages that can be used with
the upgrade command:v Czech - csv English - env French - frv German - dev Hungarian - huv Italian - itv Japanese - jav Korean - kov Polish - plv Brazilian Portuguese - pt_BRv Russian - ruv Spanish - esv Chinese (Simplified) - zh_CNv Chinese (Traditional) - zh_TWv For Windows operating systems, run the following command:
setup.bat -l language -i silent -f absolute_path_to_response_file
absolute_path_to_response_fileThe absolute path to the response file. This example specifies thelanguage and the path:setup.bat -l fr -i silent -f c:\TPC51\silent_Upgrade4x.properties.
v For the AIX or Linux operating system, run the following command:./setup.bin -l language -i silent -f ./path_to_response_file
This example specifies the language and the path:./setup.bin -l de -i silent -f ./TPC51/silent_Upgrade4x.properties
If you do not specify a language or specify the language incorrectly, theinstallation program uses the English language as the default.
5. Optional: Monitor the progress of the upgrade.To view the progress of the silent mode installation on Windows operatingsystems, review the trace log in the following path:TPC_installation_directory\logs\traceTPCInstall.log
To view the progress of the silent mode installation on AIX or Linux operatingsystems, review the trace log in the following path:TPC_installation_directory/logs/traceTPCInstall.log
370 IBM Tivoli Storage Productivity Center: Installation and Configuration Guide

Related reference:“Planning for Tivoli Storage Productivity Center authentication and authorization”on page 28An operating system user name is required to install and log on to Tivoli StorageProductivity Center for the first time. After you install Tivoli Storage ProductivityCenter, you can assign roles to users that enable users to log on and determine thecomponents that the user can view in the graphical user interface (GUI).“Upgrade response file” on page 365You do not need an upgrade response file to upgrade Tivoli Storage ProductivityCenter in silent mode from Version 5 to another Version 5 fix pack. To accept thelicense agreement, you must specify the value of the LICENSE_ACCEPTEDvariable to true. To upgrade from Version 5 to a Version 5 fix pack, run thecommand setup.bat|bin -i silent -DLICENSE_ACCEPTED=true.“Reviewing the log files to resolve installation issues” on page 191If an error occurs during Tivoli Storage Productivity Center installation, you canreview the error log files to resolve issues and continue the installation.
Upgrading Tivoli Storage Productivity Center in a multiple-serverenvironment
You can upgrade Tivoli Storage Productivity Center by using the upgrade wizardor silent mode.
In a multiple-server environment, to upgrade Tivoli Storage Productivity Center,see the following topics:v Using the upgrade wizard:
– “Upgrading Tivoli Storage Productivity Center with a remote database byusing the wizard” on page 372
– “Upgrading Tivoli Integrated Portal and Tivoli Common Reporting by usingthe wizard” on page 373
v Using silent mode:– “Upgrading Tivoli Storage Productivity Center with a remote database by
using silent mode” on page 374– “Upgrading Tivoli Integrated Portal and Tivoli Common Reporting by using
silent mode” on page 377
Migrating from an older version of Tivoli Storage ProductivityCenter to Tivoli Storage Productivity Center 5.1.1
To migrate from Version 3 to Tivoli Storage Productivity Center 5.1.1, you mustfirst migrate from Version 3 to Version 4. For more information about migratingfrom Version 3 to Version 4, see http://publib.boulder.ibm.com/infocenter/tivihelp/v4r1/index.jsp?topic=%2Fcom.ibm.tpc_V4221.doc%2Ffqz0_r_migrating_tpc.html. You can use your Version 3 license to migrate fromTivoli Storage Productivity Center Version 3 to Tivoli Storage Productivity Center4.
Initially, Tivoli Storage Productivity Center 5.1.1 will be available through IBMPassport Advantage (download). If your license maintenance is current, you candownload Tivoli Storage Productivity Center 5.1.1 from IBM Passport Advantageor access the physical media.
Chapter 4. Upgrading and migrating Tivoli Storage Productivity Center 371
Upgrading Tivoli Storage Productivity Center with a remotedatabase by using the wizard
The upgrade wizard is one method of upgrading Tivoli Storage ProductivityCenter.
Before you start the Tivoli Storage Productivity Center upgrade program on theAIX or Linux operating systems, you must source the DB2 profile, db2profile, forthe instance owner of the DB2 database. The following example sources the DB2profile:. /home/db2inst1/sqllib/db2profile
You can upgrade Tivoli Storage Productivity Center in a multiple-serverenvironment. With this configuration, you upgrade Tivoli Storage ProductivityCenter components on two servers. You upgrade the database server first on oneserver, and the other Tivoli Storage Productivity Center components on the secondserver.
In this procedure, the terms Server A and Server B denote the two servers. Server Ahas the Tivoli Storage Productivity Center database repository installed. Server Bhas the other Tivoli Storage Productivity Center components installed.
To upgrade Tivoli Storage Productivity Center by using the wizard:1. On Server B, stop the all Tivoli Storage Productivity Center components.2. Complete the following steps on Server A:
a. Log on to the Tivoli Storage Productivity Center system with theappropriate user privileges.
b. Back up the Tivoli Storage Productivity Center database repository.c. Start the Tivoli Storage Productivity Center upgrade wizard.d. Select the language for your installation and click OK.e. On the Choose Installation Location and Type page, select Multiple servers.f. Follow the wizard instructions to complete the upgrade process.g. After the upgrade is completed, review the message that is displayed on the
summary page.3. Complete the following steps on Server B:
a. Log on to the Tivoli Storage Productivity Center system with theappropriate user privileges.
b. Back up Tivoli Storage Productivity Center (except for the databaserepository).
c. Select the language for your installation and click OK.d. Follow the wizard instructions and complete the upgrade process.e. After the installation is finished, review the message log to ensure that no
errors occurred.
372 IBM Tivoli Storage Productivity Center: Installation and Configuration Guide

Related concepts:“Backups” on page 365Before you can migrate, you must back up the entire Tivoli Storage ProductivityCenter system.Related tasks:“Preparing for an upgrade” on page 364To upgrade Tivoli Storage Productivity Center, use the same starting procedure asthe installation program. Depending on the components you install, you can seedifferent pages.Related reference:“Planning for Tivoli Storage Productivity Center authentication and authorization”on page 28An operating system user name is required to install and log on to Tivoli StorageProductivity Center for the first time. After you install Tivoli Storage ProductivityCenter, you can assign roles to users that enable users to log on and determine thecomponents that the user can view in the graphical user interface (GUI).“Reviewing the log files to resolve installation issues” on page 191If an error occurs during Tivoli Storage Productivity Center installation, you canreview the error log files to resolve issues and continue the installation.
Upgrading Tivoli Integrated Portal and Tivoli CommonReporting by using the wizard
The upgrade wizard is one method of upgrading Tivoli Integrated Portal andTivoli Common Reporting.
Before you start the Tivoli Storage Productivity Center upgrade program on theAIX or Linux operating systems, you must source the DB2 profile, db2profile, forthe instance owner of the DB2 database. The following example sources the DB2profile:. /home/db2inst1/sqllib/db2profile
You can upgrade Tivoli Integrated Portal and Tivoli Common Reporting in amultiple-server environment. With this configuration, you upgrade the TivoliStorage Productivity Center components first on one server, and Tivoli IntegratedPortal and Tivoli Common Reporting on the second server.
The terms Server A and Server B denote the two servers. Server A has the TivoliStorage Productivity Center components installed, and Server B has TivoliIntegrated Portal and Tivoli Common Reporting installed.
To upgrade Tivoli Integrated Portal and Tivoli Common Reporting by using thewizard:1. On Server B, stop all Tivoli Storage Productivity Center components.2. Complete the following steps on Server A:
a. Log on to the Tivoli Storage Productivity Center system with theappropriate user privileges.
b. Back up Tivoli Storage Productivity Center.c. Start the Tivoli Storage Productivity Center upgrade wizard.d. Select the language for your installation and click OK.e. On the Choose Installation Location and Type page, select Multiple servers.f. Follow the wizard instructions to complete the upgrade process.
Chapter 4. Upgrading and migrating Tivoli Storage Productivity Center 373

g. After the installation is finished, review the message log to ensure that noerrors occurred.
3. Complete the following steps on Server B:a. Follow the steps to create the instance owner ID. The administrative ID,
dasusr1, and the fenced ID, db2fenc1, are not required.b. If you are upgrading on a Windows operating system, log out and then log
on again before upgrading Tivoli Storage Productivity Center.c. Log on to the Tivoli Storage Productivity Center system with the
appropriate user privileges.d. Select the language for your installation and click OK.e. On the Choose Installation Location and Type page, select Multiple servers.f. Follow the wizard instructions to complete the upgrade process.g. After the installation is finished, review the message log to ensure that no
errors occurred.Related concepts:“Backups” on page 365Before you can migrate, you must back up the entire Tivoli Storage ProductivityCenter system.Related tasks:“Installing DB2” on page 139This topic describes how to install DB2 Version 9.7 for operating systems such asLinux, AIX, or Windows.“Preparing for an upgrade” on page 364To upgrade Tivoli Storage Productivity Center, use the same starting procedure asthe installation program. Depending on the components you install, you can seedifferent pages.Related reference:“Planning for Tivoli Storage Productivity Center authentication and authorization”on page 28An operating system user name is required to install and log on to Tivoli StorageProductivity Center for the first time. After you install Tivoli Storage ProductivityCenter, you can assign roles to users that enable users to log on and determine thecomponents that the user can view in the graphical user interface (GUI).“Reviewing the log files to resolve installation issues” on page 191If an error occurs during Tivoli Storage Productivity Center installation, you canreview the error log files to resolve issues and continue the installation.
Upgrading Tivoli Storage Productivity Center with a remotedatabase by using silent mode
Silent-mode upgrade is one method of upgrading Tivoli Storage ProductivityCenter.
Before you start the Tivoli Storage Productivity Center upgrade program on theAIX or Linux operating systems, you must source the DB2 profile db2profile forthe instance owner of the DB2 database. An example of sourcing the DB2 profile is:. /home/db2inst1/sqllib/db2profile
You can upgrade Tivoli Storage Productivity Center in a multiple-serverenvironment. With this configuration, you upgrade the database server first on oneserver, and the other Tivoli Storage Productivity Center components on the secondserver.
374 IBM Tivoli Storage Productivity Center: Installation and Configuration Guide

The terms Server A and Server B denote the two servers. Server A has the TivoliStorage Productivity Center database repository installed. Server B has the otherTivoli Storage Productivity Center components installed.
To upgrade Tivoli Storage Productivity Center by using silent mode:1. On Server B, stop the all Tivoli Storage Productivity Center components.2. Complete the following steps on Server A:
a. Log on to the Tivoli Storage Productivity Center system with theappropriate user privileges.
b. Back up the Tivoli Storage Productivity Center database repository.c. Edit and save the appropriate response file.d. Run the upgrade program. The following languages apply to commands
you run:
language
v Czech − csv English − env French − frv German − dev Hungarian − huv Italian − itv Japanese − jav Korean − kov Polish − plv Brazilian Portuguese − pt_BRv Russian − ruv Spanish − esv Chinese (Simplified) − zh_CNv Chinese (Traditional) − zh_TW
absolute_path_to_response_fileThe absolute path to the response file. This example specifies thelanguage and the path:setup.bat -l fr -i silent -f c:\TPC51\silent_Upgrade4x.properties.
v For Windows operating systems, run the following command:setup.bat -l language -i silent -f absolute_path_to_response_file
v For the AIX or Linux operating system, run the following command:./setup.bin -l language -i silent -f /absolute_path_to_response_file
This example specifies the language and the path:./setup.bin -l de -i silent -f /TPC51/silent_Upgrade4x.properties
If you do not specify a language or specify the language incorrectly, theinstallation program uses the English language as the default.
e. Optional: Monitor the progress of the upgrade.To view the progress of the silent mode installation on Windows operatingsystems, check the trace log in the following path:TPC_installation_directory\logs\traceTPCInstall.log
To view the progress of the silent mode installation on AIX or Linuxoperating systems, check the trace log in the following path:
Chapter 4. Upgrading and migrating Tivoli Storage Productivity Center 375

TPC_installation_directory/logs/traceTPCInstall.log
3. Complete the following on Server B:a. Log on to the Tivoli Storage Productivity Center system with the
appropriate user privileges.b. Back up Tivoli Storage Productivity Center (except for the database
repository).c. Before you start the Tivoli Storage Productivity Center upgrade program on
the AIX or Linux operating system, you must source the DB2 profiledb2profile for the instance owner of the DB2 database. An example ofsourcing the DB2 profile is:. /home/db2inst1/sqllib/db2profile
d. Edit and save the appropriate response file.e. Run the upgrade program. Use one of the following languages when you
run the command:
language
v Czech − csv English − env French − frv German − dev Hungarian − huv Italian − itv Japanese − jav Korean − kov Polish − plv Brazilian Portuguese − pt_BRv Russian − ruv Spanish − esv Chinese (Simplified) − zh_CNv Chinese (Traditional) − zh_TW
absolute_path_to_response_fileThe absolute path to the response file. The following example specifiesthe language and the path:setup.bat -l fr -i silent -f c:\TPC51\silent_Upgrade4x.properties.
v For Windows operating systems, run the following command:setup.bat -l language -i silent -f absolute_path_to_response_file
v For the AIX or Linux operating system, run the following command:./setup.bin -l language -i silent -f /absolute_path_to_response_file
The following example specifies the language and the path:./setup.bin -l de -i silent -f /TPC51/silent_Upgrade4x.properties
If you do not specify a language or specify the language incorrectly, theinstallation program uses the English language as the default.
f. Optional: Monitor the progress of the upgrade.v To view the progress of the silent mode installation on Windows operating
systems, check the trace log in the following path:TPC_installation_directory\logs\traceTPCInstall.log
v To view the progress of the silent mode installation on AIX or Linuxoperating systems, check the trace log in the following path:
376 IBM Tivoli Storage Productivity Center: Installation and Configuration Guide

TPC_installation_directory/logs/traceTPCInstall.log
Related tasks:“Installing DB2” on page 139This topic describes how to install DB2 Version 9.7 for operating systems such asLinux, AIX, or Windows.Related reference:“Planning for Tivoli Storage Productivity Center authentication and authorization”on page 28An operating system user name is required to install and log on to Tivoli StorageProductivity Center for the first time. After you install Tivoli Storage ProductivityCenter, you can assign roles to users that enable users to log on and determine thecomponents that the user can view in the graphical user interface (GUI).“Upgrade response file” on page 365You do not need an upgrade response file to upgrade Tivoli Storage ProductivityCenter in silent mode from Version 5 to another Version 5 fix pack. To accept thelicense agreement, you must specify the value of the LICENSE_ACCEPTEDvariable to true. To upgrade from Version 5 to a Version 5 fix pack, run thecommand setup.bat|bin -i silent -DLICENSE_ACCEPTED=true.“Reviewing the log files to resolve installation issues” on page 191If an error occurs during Tivoli Storage Productivity Center installation, you canreview the error log files to resolve issues and continue the installation.
Upgrading Tivoli Integrated Portal and Tivoli CommonReporting by using silent mode
Silent-mode upgrade is one method of upgrading Tivoli Integrated Portal andTivoli Common Reporting.
Before you start the Tivoli Storage Productivity Center upgrade program on theAIX or Linux operating systems, you must source the DB2 profile db2profile forthe instance owner of the DB2 database. An example of sourcing the DB2 profile is:. /home/db2inst1/sqllib/db2profile
You can upgrade Tivoli Storage Productivity Center in a multiple-serverenvironment. With this configuration, you upgrade the Tivoli Storage ProductivityCenter components first on one server, and Tivoli Integrated Portal and TivoliCommon Reporting on the second server.
The terms Server A and Server B denote the two servers. Server A has the TivoliStorage Productivity Center components installed. Server B has the TivoliIntegrated Portal and Tivoli Common Reporting installed.
To upgrade Tivoli Integrated Portal and Tivoli Common Reporting by using silentmode:1. On Server B, stop the all Tivoli Storage Productivity Center components.2. Complete the following steps on Server A:
a. Log on to the Tivoli Storage Productivity Center system with theappropriate user privileges.
b. Back up Tivoli Storage Productivity Center.c. Edit and save the appropriate response file.d. Run the upgrade program. Use one of the following languages when you
run this command:
language
Chapter 4. Upgrading and migrating Tivoli Storage Productivity Center 377

v Czech − csv English − env French − frv German − dev Hungarian − huv Italian − itv Japanese − jav Korean − kov Polish − plv Brazilian Portuguese − pt_BRv Russian − ruv Spanish − esv Chinese (Simplified) − zh_CNv Chinese (Traditional) − zh_TW
absolute_path_to_response_fileThe absolute path to the response file. This example specifies the pathand the language:setup.bat -l fr -i silent -f c:\TPC51\silent_Upgrade4x.properties.
v For Windows operating systems, run the following command:setup.bat -l language -i silent -f absolute_path_to_response_file
v For the AIX or Linux operating system, run the following command:./setup.bin -l language -i silent -f /absolute_path_to_response_file
This example specifies the path and the language:./setup.bin -l de -i silent -f /TPC51/silent_Upgrade4x.properties
If you do not specify a language or specify the language incorrectly, theinstallation program uses the English language as the default.
e. Optional: Monitor the progress of the upgrade one of the followingoperating systems:v On Windows operating systems:
TPC_installation_directory\logs\traceTPCInstall.log
v On AIX or Linux operating systems, check the trace log in the followingpath:TPC_installation_directory/logs/traceTPCInstall.log
3. Complete the following steps on Server B:a. Log on to the Tivoli Storage Productivity Center system with the
appropriate user privileges.b. Before you start the Tivoli Storage Productivity Center upgrade program on
the AIX or Linux operating system, you must source the DB2 profiledb2profile for the instance owner of the DB2 database. An example ofsourcing the DB2 profile is:. /home/db2inst1/sqllib/db2profile
c. Edit and save the appropriate response file.d. Run the upgrade program. Use one of the following languages when you
run the program:
language
v Czech − cs
378 IBM Tivoli Storage Productivity Center: Installation and Configuration Guide

v English − env French − frv German − dev Hungarian − huv Italian − itv Japanese − jav Korean − kov Polish − plv Brazilian Portuguese − pt_BRv Russian − ruv Spanish − esv Chinese (Simplified) − zh_CNv Chinese (Traditional) − zh_TW
absolute_path_to_response_fileThe absolute path to the response file. This example specifies thelanguage and the path:setup.bat -l fr -i silent -f c:\TPC51\silent_Upgrade4x.properties.
v For Windows operating systems, run the following command:setup.bat -l language -i silent -f absolute_path_to_response_file
v For the AIX or Linux operating system, run the following command:./setup.bin -l language -i silent -f /absolute_path_to_response_file
This example specifies the language and the path:./setup.bin -l de -i silent -f /TPC51/silent_Upgrade4x.properties
If you do not specify a language or specify the language incorrectly, theinstallation program uses the English language as the default.
e. Optional: Monitor the progress of the upgrade on one of the followingoperating systems:v On Windows operating systems, check the trace log in the following path:
TPC_installation_directory\logs\traceTPCInstall.log
v On AIX or Linux operating systems, check the trace log in the followingpath:TPC_installation_directory/logs/traceTPCInstall.log
Chapter 4. Upgrading and migrating Tivoli Storage Productivity Center 379

Related tasks:“Installing DB2” on page 139This topic describes how to install DB2 Version 9.7 for operating systems such asLinux, AIX, or Windows.Related reference:“Planning for Tivoli Storage Productivity Center authentication and authorization”on page 28An operating system user name is required to install and log on to Tivoli StorageProductivity Center for the first time. After you install Tivoli Storage ProductivityCenter, you can assign roles to users that enable users to log on and determine thecomponents that the user can view in the graphical user interface (GUI).“Upgrade response file” on page 365You do not need an upgrade response file to upgrade Tivoli Storage ProductivityCenter in silent mode from Version 5 to another Version 5 fix pack. To accept thelicense agreement, you must specify the value of the LICENSE_ACCEPTEDvariable to true. To upgrade from Version 5 to a Version 5 fix pack, run thecommand setup.bat|bin -i silent -DLICENSE_ACCEPTED=true.“Reviewing the log files to resolve installation issues” on page 191If an error occurs during Tivoli Storage Productivity Center installation, you canreview the error log files to resolve issues and continue the installation.
Upgrading Storage Resource agentsThis section provides general steps for upgrading an existing or older version ofStorage Resource agents to the current release.
If you are upgrading the Storage Resource agents, you can upgrade them usingone of the following methods:v Use the Tivoli Storage Productivity Center user interface. You can use the
Configuration node or Data Sources node to upgrade the agents.v Use a Storage Resource agent command.v Use the installation wizard when upgrading the server. The installation wizard
also upgrades the Storage Resource agent on the server.
Upgrading the Storage Resource agent by using the DataSources node
Use this information to upgrade a previous Storage Resource agent to the currentrelease.
To upgrade a Storage Resource agent, follow these steps:1. In the navigation tree, expand Administrative Services > Data Sources.
Left-click Data/Storage Resource Agents.2. In the topic pane, select one or more agents for which you want to upgrade.
Click Upgrade Agents.3. The Create Storage Resource Agent Upgrade page is displayed. Use this page
to schedule an upgrade of the Storage Resource agent. You have the followingtabs:
ComputersYou can select Computer Groups or Computers.
When to RunYou can specify how often to run the job or how to handle time zones.
380 IBM Tivoli Storage Productivity Center: Installation and Configuration Guide

OptionsYou can specify to force an upgrade for an agent, maintenance upgradefor an agent, or language pack to apply to an agent.
Alerts You can specify the triggering conditions and triggering actions.
Enter your information in the appropriate fields.4. Save and run the job.
Note: The Storage Resource agent upgrade job delivers the software upgradepackages to the agent computer. The job log displays the status of the delivery. Theactual status of the upgrade is found in the agent log on the agent computer. If theagent log indicates that the upgrade failed and the state of the Storage Resourceagent remains in the “Upgrading agent software status”, try restarting the agentand running the upgrade job again.
Upgrading the Storage Resource agent by using theConfiguration node
Use this information to upgrade a previous Storage Resource agent to the currentrelease.
To upgrade a Storage Resource agent, see “Storage Resource Agent Upgrades” onpage 312.
Upgrading Storage Resource agents by using a commandThis section describes how to upgrade the Storage Resource agents manually.
To upgrade the Storage Resource agent agent, follow these steps:1. Go to the DVD location of the installation program (using the Storage
Resource Agent image) and go to the bin directory:cd DVD_image_location/data/sra/operating_system_name
Where DVD_image_location is the Storage Resource agent installation imagelocation.
2. Run the upgrade command:
�� bin/Agent -upgrade -installLoc agent_install_directory �
�(1)
-commType Daemon ��
Notes:
1 Parameter when the agent is run as a daemon service.The parameters are:
-installLoc "agent_install_directory"Location where the agent is installed. Enclose the directory name inquotation marks, for example, "C:\Program Files\IBM\TPC_SRA\".
-commType DaemonIf the agent is run as a daemon service, then this parameter must bespecified.
Chapter 4. Upgrading and migrating Tivoli Storage Productivity Center 381

Here is an example for a daemon-based service using the default location:bin/Agent -upgrade-installLoc "/opt/IBM/TPC/"-commType Daemon
Here is an example for a non-daemon service using a non-default location:bin/Agent-upgrade -installLoc "C:\Program Files\IBM\TPC_SRA\"
Note:
If you run the upgrade program outside of the DVD_image_location installationdirectory, then you must specify the full path.If the upgrade fails, see the return codes in the Information Center. Search forReturn codes used by Storage Resource agent.
Migrating Data agents and Fabric agents to Storage Resource agentsThe Storage Resource agents now perform the functions of the Data agents andFabric agents. You can migrate the Data agents and Fabric agents to StorageResource agents by using the Tivoli Storage Productivity Center user interface,upgrade installation wizard (for server system only), or using a command.
Migrating the Data agent or Fabric agent using the userinterface
This topic describes how to migrate the Data agent or Fabric agent to a StorageResource agent using the Tivoli Storage Productivity Center user interface.
To schedule a migration of the Data agent or Fabric agent to a Storage Resourceagent through the user interface, complete the following steps:1. Open the Tivoli Storage Productivity Center user interface.2. In the navigation tree, expand Administrative Services > Configuration >
Migrate Data/Fabric Agent.3. Right-click the Migrate Data/Fabric Agent node.4. Click Create Data/Fabric Agent Migration.5. Specify the information for the migration job in the appropriate fields.6. Click File > Save in the menu bar to save the migration definition. The agents
you specify are migrated at the scheduled time.
Migrating Data agents and Fabric agents using a commandThis section describes how to migrate the Data agents and Fabric agents to StorageResource agents using a command.
To migrate the Data agent or Fabric agent to the Storage Resource agent, followthese steps:1. If the Data agent or Fabric agent is on a Virtual I/O system, you must follow
this log in procedure:a. Log in with the padmin user ID.b. Run the following command to set up the AIX environment:
eom_setup_env
2. Go to the DVD location of the installation program and go to the bin directory.The directory for disk 1:
382 IBM Tivoli Storage Productivity Center: Installation and Configuration Guide

DVD_image_location/data/sra/operating_system/bin
Where DVD_image_location is the Storage Resource agent installation imagelocation and operating_system is the operating system type of the agent system.
3. Run the Migration command:
�� bin/Migration -MIGRATE-COMMTYPE DAEMON -FORCE -SERVERPORT port_number
�
�-USERID user_ID -password -PASSWORD password
�
�-CERTFILE certificate_file -PASSPHRASE passphrase
�
�-DUSER daemon_user_name -DPASSWORD daemon_password -DEBUG min
midmax
��
The parameters are:
-COMMTYPE DAEMONSpecify this parameter if you want the Storage Resource agent to run asa daemon service.
-FORCEThis forces the migration to continue even if the Storage Resource agentcannot perform all the functions of the Data agent. The -FORCE optionapplies to the following conditions:v The Data agent is monitoring an unsupported RDBMS type.v The Data agent is responsible for a file system extension job.
-SERVERPORT port_numberSpecify the port number of the Data server. This value is only requiredwhen the Data agent is not installed on the local system. The defaultport for the Data server is 9549.
-USERID user_nameFor non-daemon service. The user ID defined on the agent system. Thisuser ID is used by the server to connect to the agent system.
-PASSWORD passwordFor non-daemon service. Password for the user ID.
-CERTFILE certificate_fileFor non-daemon service. The certificate used for SSH communicationbetween the server and agent. This certificate needs to be stored on theserver system.
-PASSPHRASE passphraseFor non-daemon service. The passphrase defined for the certificate usedin SSH communication.
-DUSER daemon_user_name (for Windows only)For daemon service. Login account used to start the Storage Resourceagent service on Windows.
-DPASSWORD daemon_password (for Windows only)For daemon service. Password for the Windows login account specifiedby the -duser parameter.
-DEBUG [min|mid|max]Optional parameter for debugging purposes. You can specify thefollowing:
Chapter 4. Upgrading and migrating Tivoli Storage Productivity Center 383
min The minimum amount of debugging information.
mid A moderate amount of debugging information.
max The maximum amount of debugging information.Here is an example for a daemon-based service:bin/Migration -MIGRATE-COMMTYPE DAEMON-SERVERPORT 9549-DEBUG max
Here is an example for a non-daemon service:bin/Migration -MIGRATE-SERVERPORT 9549-USERID myuserid-CERTFILE mycertfile-PASSPHRASE mypassphrase-DEBUG max
Note:
If you run the migration program outside of the DVD_image_locationinstallation directory, then you must specify the full path.
Migrating Data agents and Fabric agents by using the upgradewizard
This section describes how to migrate the Data agents and Fabric agents on theTivoli Storage Productivity Center server to Storage Resource agent by using theupgrade wizard.
You can migrate the Data agent or Fabric agent to the Storage Resource agentwhen you upgrade Tivoli Storage Productivity Center. If you upgrade the TivoliStorage Productivity Center servers, any Data agent or Fabric agent detected onthe server is automatically migrated to a Storage Resource agent. For informationabout migrating the Data agent or Fabric agent, see “Upgrading Tivoli StorageProductivity Center by using the wizard” on page 368 and follow the upgradewizard directions.
Upgrading CIM agents for storage systemsBefore you upgrade a Common Information Model (CIM) agent, make sure thatIBM Tivoli Storage Productivity Center supports the CIM agent that you want andthat the agent is compatible with the firmware versions of your storage systems.
To ensure that a CIM agent is supported, review the supported products list forthe current release of Tivoli Storage Productivity Center. Go tohttp://www.ibm.com/support/docview.wss?rs=40&context=SWJ50&q1=matrix&uid=swg21386446&loc=en_US&cs=utf-8&lang=en and click the applicable TivoliStorage Productivity Center release in the Storage column. If you are uncertainabout the CIM agent support, contact IBM customer support to help you with yourupgrade plans.
Upgrading CIM agentsTo upgrade a Common Information Model (CIM) agent, you must have theupgrade instructions that are supplied by the provider of the agent.
To upgrade the CIM agent, follow these steps:
384 IBM Tivoli Storage Productivity Center: Installation and Configuration Guide

1. Stop all Tivoli Storage Productivity Center server activity that might bedependent on the CIM agent (for example, performance monitor jobs, anddiscovery or probe jobs).
2. Stop the Tivoli Storage Productivity Center server services.3. If any Tivoli Storage Productivity Center server processes remain, shut down
the Tivoli Storage Productivity Center server for the duration of the CIM agentupgrade. If it is not possible to shut down the Tivoli Storage ProductivityCenter server, stop or kill the running processes.
4. Upgrade the CIM agent.a. Refer to the instructions supplied by the CIM agent to perform the upgrade.b. Verify that the CIM agent configuration is intact after the upgrade. Make
sure that user accounts and passwords used with Tivoli StorageProductivity Center are still in place, and that all devices managed by theCIM agent are still listed.
5. Restart the Tivoli Storage Productivity Center server and Tivoli StorageProductivity Center server services.
6. Open the Tivoli Storage Productivity Center graphical user interface (GUI).7. Run a CIM object manager (CIMOM) discovery job.8. Run a probe job for each storage system that is managed by the CIM agent.
Migrating BIRT reportsYou must migrate Business Intelligence and Reporting Tools (BIRT) reports beforeyou upgrade Tivoli Storage Productivity Center.
Because Tivoli Storage Productivity Center does not migrate BIRT reports duringthe upgrade process, you must migrate the reports before the upgrade.
Tivoli Storage Productivity Center Version 4 can include Tivoli Integrated PortalVersion 1.1 and Tivoli Common Reporting Version 1.2. Tivoli Storage ProductivityCenter Version 5 includes Tivoli Integrated Portal Version 2.2 and Tivoli CommonReporting Version 2.1.1.
The BIRT reports are in the following Tivoli Common Reporting installationdirectory:v For Tivoli Storage Productivity Center Version 4:
– For Windows operating systems: c:/Program Files/IBM/Tivoli/tip/products/tcr
– For Linux and AIX operating systems: /opt/IBM/Tivoli/tip/products/tcrv For Tivoli Storage Productivity Center Version 5:
– For Windows operating systems: c:/Program Files/IBM/tipv2Components/TCRComponent
– For Linux and AIX operating systems: /opt/IBM/tipv2Components/TCRComponent
To migrate BIRT reports from Tivoli Storage Productivity Center Version 4 toVersion 5:1. Export BIRT reports from Tivoli Storage Productivity Center Version 4. Run the
following command:TCR_installation_directory/bin/tcrmd -export
Chapter 4. Upgrading and migrating Tivoli Storage Productivity Center 385

where TCR_installation_directory is the location of the BIRT reports for TivoliStorage Productivity Center Version 4.
2. Copy the custom jar files to a temporary location. These files are in theTCR_installation_directory/lib directory.
3. Upgrade Tivoli Storage Productivity Center Version 4 to Tivoli StorageProductivity Center Version 5.
4. Import the BIRT reports that you exported in step 1 on page 385 into TivoliStorage Productivity Center Version 5. Run the following command:TCR_installation_directory/bin/tcrmd -import
where TCR_installation_directory is the location of the BIRT reports for TivoliStorage Productivity Center Version 5. For information about the -importcommand, see the Tivoli Common Reporting information center.
5. Copy the custom jar files that you saved in step 2. Copy these files to theTCR_installation_directory/lib directory.
Related information:
http://publib.boulder.ibm.com/infocenter/tivihelp/v3r1/index.jsp?topic=%2Fcom.ibm.tivoli.tcr.doc_211%2Fic-home.html
Upgrading System Storage N Series Gateway serversFollow this procedure to upgrade Tivoli Storage Productivity Center before addingN Series Gateway servers by using the Other NAS node.
Deleting and unlicensing existing N Series Gateway servers
If you are upgrading Tivoli Storage Productivity Center from TotalStorageProductivity Center 3.3.x, there are specific steps to follow. You must first deleteand unlicense existing N Series Gateway servers before adding the N SeriesGateway servers.
Follow these steps:1. Stop all Tivoli Storage Productivity Center services.2. Make a backup copy of the Tivoli Storage Productivity Center database.3. Open the Tivoli Storage Productivity Center GUI.4. Manually delete all N Series Gateway servers.
a. Expand Administrative Services > Configuration > Manual NAS ServerEntry.
b. Select a NAS gateway server (for example, ratbert1) from the Manual NASServer table.
c. Click Delete.d. Click Yes to Delete Manual NAS Server Entry prompt.e. Repeat steps b through d for other manually added NAS gateway servers.
5. Unlicense all NAS gateway servers that were automatically discovereda. Click Administrative Services > Configuration > License Keys.b. Expand IBM TPC for Data under the Licensing tab.c. Clear the Licensed check box for all automatically discovered NAS gateway
servers (for example, zinc).d. Click the disk icon to save the changes.
386 IBM Tivoli Storage Productivity Center: Installation and Configuration Guide

e. Click Yes to the Save Confirmation prompt.
Note: The OS Type and Licensed fields of existing NAS gateway servers areupdated after it is manually added as Other NAS. See “Manually adding an NSeries Gateway server .”
6. Exit the Tivoli Storage Productivity Center GUI.7. Make another backup of the Tivoli Storage Productivity Center database after
the N Series Gateway servers are deleted and unlicensed (make sure all TivoliStorage Productivity Center services are stopped).
8. Restart all the Tivoli Storage Productivity Center services.9. Go to “Manually adding an N Series Gateway server .”
Manually adding an N Series Gateway server1. Start the Tivoli Storage Productivity Center GUI.2. Manually add the N Series Gateway server as Other NAS.
a. Click Administrative Services > Configuration > Manual NAS ServerEntry.
b. Click Add NAS Server.c. Enter information for the Network Name, Accessible from, SNMP
Community, Login ID, and Password fields for an N Series Gateway server(for example, ratbert1).
d. Check the Add as Other NAS check box.e. Enter the NAS Server Vendor Name or accept the Network Appliance as the
default.f. Click OK to save the input. This action enables IBM Tivoli Storage
Productivity Center to verify the NAS gateway server information anddiscover CIFS or NFS shares accessible to the selected Data agent or StorageResource agent.
Figure 14. Save Confirmation prompt
Chapter 4. Upgrading and migrating Tivoli Storage Productivity Center 387

g. Verify that the N Series Gateway server is added and listed with OtherNAS as OS Type.
h. Repeat steps b to g for other N Series Gateway servers.3. Assign a Scan/Probe agent or agents to the exported CIFS or NFS shares
accessible to the selected Data agent or Storage Resource agent.a. Click Administrative Services > Configuration > Scan/Probe Agent
Administration.b. Select one or more file systems (for example, /vol/tpc1, /vol/tpc2, and
/vol/vol0 for ratbert1) and assign the Data agent or Storage Resource agentby clicking Set agent per row or Set agent for all the selected rows.
Figure 15. Add NAS Server panel
Figure 16. Verify that the N Series Gateway server is added
388 IBM Tivoli Storage Productivity Center: Installation and Configuration Guide
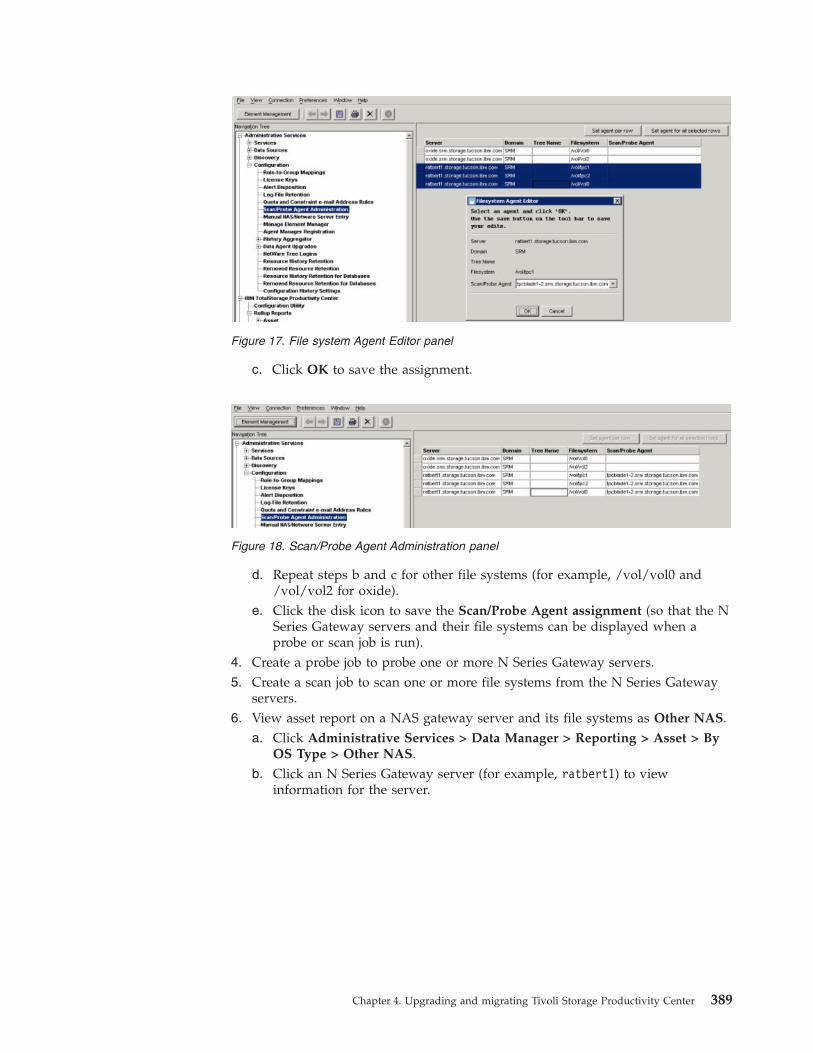
c. Click OK to save the assignment.
d. Repeat steps b and c for other file systems (for example, /vol/vol0 and/vol/vol2 for oxide).
e. Click the disk icon to save the Scan/Probe Agent assignment (so that the NSeries Gateway servers and their file systems can be displayed when aprobe or scan job is run).
4. Create a probe job to probe one or more N Series Gateway servers.5. Create a scan job to scan one or more file systems from the N Series Gateway
servers.6. View asset report on a NAS gateway server and its file systems as Other NAS.
a. Click Administrative Services > Data Manager > Reporting > Asset > ByOS Type > Other NAS.
b. Click an N Series Gateway server (for example, ratbert1) to viewinformation for the server.
Figure 17. File system Agent Editor panel
Figure 18. Scan/Probe Agent Administration panel
Chapter 4. Upgrading and migrating Tivoli Storage Productivity Center 389

c. Click a file system (for example, /vol/tpc2) to view file system information.
7. You can see the following information and reports for Other NAS:a. Dashboardb. System reportsc. Batch reportsd. Asset reportse. Capacity reports
v Capacity reports - Chartingf. Usage reports
v Usage reports - Filesystem Quota Violationv Capacity reports - Charting
Figure 19. View information for N Series Gateway server
Figure 20. View information for a file system
390 IBM Tivoli Storage Productivity Center: Installation and Configuration Guide

8. You can monitor the N Series Gateway servers and create and monitor alertsfor Other NAS:v Monitoring
– Monitoring - Assign a Scan agent to a Filesystem– Monitoring - Grouping– Monitoring - Scan job– Monitoring - Filesystem Quotas
v Alerting– Filesystem Alert definition– Alerting - Directory Alerts– Alerting - Alert Log– Alerting - Alerts shown on the topology
Chapter 4. Upgrading and migrating Tivoli Storage Productivity Center 391

392 IBM Tivoli Storage Productivity Center: Installation and Configuration Guide

Chapter 5. Uninstalling Tivoli Storage Productivity Center
You can uninstall Tivoli Storage Productivity Center by using the uninstallationwizard or by using silent mode from the command line.
You must uninstall the components and related software in the following order:1. If you installed a Storage Resource agent on many systems, uninstall those
agents before you uninstall the stand-alone GUI.2. If all Tivoli Storage Productivity Center components are installed on one server,
uninstall all components.3. If Tivoli Integrated Portal and Tivoli Common Reporting are installed on a
separate server, uninstall those components.4. If the database repository is installed on a separate server, uninstall the
database repository.5. Uninstall DB2.
Note: On the Windows operating system, if you have installed the MonitoringAgent service, you must stop the Monitoring Agent for Windows OS - Watchdogand Monitoring Agent for Windows OS - Primary services before you uninstallTivoli Storage Productivity Center.
Uninstalling Tivoli Storage Productivity Center in a single-serverenvironment by using the wizard
In a single-server environment, you can uninstall Tivoli Storage ProductivityCenter by using a wizard. With the wizard, the uninstallation process requiresminimal user interaction.
Before you start the Tivoli Storage Productivity Center uninstallation program, youmust source the DB2 profile db2profile for the instance owner of the DB2database. For example:. /home/db2inst1/sqllib/db2profile
To uninstall the software in a single-server environment:1. Log on to the Tivoli Storage Productivity Center system with the appropriate
user privileges.2. Start the Tivoli Storage Productivity Center uninstallation wizard in one of the
following operating systems:v For the Windows operating system:
a. Click Start > Control Panel > Programs > Programs and Features.b. Highlight Tivoli Storage Productivity Center and click
Uninstall/Change.v For the AIX or Linux operating systems:
Run the following command from the root directory:TPC_installation_directory/_uninst/uninstall
where TPC_installation_directory is where Tivoli Storage Productivity Center isinstalled.
© Copyright IBM Corp. 2001, 2012 393
3. Review the message that indicates that all installed Tivoli Storage ProductivityCenter components is uninstalled.
4. Click Uninstall and click Next. You cannot cancel the uninstallation processafter it starts.
5. Restart the system if needed.v For the AIX or Linux operating system, you do not have to restart the
system.v For the Windows operating system, you can restart the system now or later.
You must restart the system to reinstall Tivoli Storage Productivity Center.6. If an error occurred during the installation process, review the installation log
files.Related reference:“Planning for Tivoli Storage Productivity Center authentication and authorization”on page 28An operating system user name is required to install and log on to Tivoli StorageProductivity Center for the first time. After you install Tivoli Storage ProductivityCenter, you can assign roles to users that enable users to log on and determine thecomponents that the user can view in the graphical user interface (GUI).“Reviewing the log files to resolve installation issues” on page 191If an error occurs during Tivoli Storage Productivity Center installation, you canreview the error log files to resolve issues and continue the installation.
Uninstalling Tivoli Storage Productivity Center in a multiple-serverenvironment by using the wizard
Uninstalling Tivoli Storage Productivity Center by using the uninstallation wizardrequires minimal user interaction.
For Configuration A and Configuration B, for the AIX or Linux operating systems,you must source the DB2 profile db2profile for the instance owner of the DB2database. The following example sources the DB2 profile:. /home/db2inst1/sqllib/db2profile
For this procedure, the terms Server A and Server B denote the two servers.v Configuration A: The Tivoli Storage Productivity Center database repository is
installed on Server A and all other Tivoli Storage Productivity Centercomponents are installed on Server B.
v Configuration B: The Tivoli Storage Productivity Center database repository,Tivoli Storage Productivity Center Servers, Storage Resource agents, stand-aloneGUI, and command-line interface (CLI) on Server A and Tivoli Integrated Portal,Tivoli Common Reporting, and web-based GUI on Server B.
To uninstall the software in a multiple-server environment:1. Complete the following steps for Configuration A:
a. Complete these steps on Server B for Configuration A:1) Log on to Server B with the appropriate user privileges to uninstall the
Tivoli Storage Productivity Center components.2) Start the Tivoli Storage Productivity Center uninstallation wizard.
For the Windows operating system, click Start > Control Panel >Programs > Programs and Features. Highlight Tivoli StorageProductivity Center and click Uninstall/Change.
394 IBM Tivoli Storage Productivity Center: Installation and Configuration Guide

For the AIX or Linux operating system, run the following commandfrom the root directory:TPC_installation_directory/_uninst/uninstall
where TPC_installation_directory is the location where Tivoli StorageProductivity Center is installed.A window is displayed that indicates that all Tivoli Storage ProductivityCenter components installed on the system will be uninstalled.
3) Click Uninstall. A confirmation is displayed.4) Click Next to start the uninstallation process.
Remember the following for your operating system:v For the Windows operating system, when the uninstallation process is
finished, a window is displayed so you can choose to start yoursystem now or later. You must restart the system before you canreinstall Tivoli Storage Productivity Center.
v For the AIX or Linux operating system, you do not have to restartyour system.
b. Complete the following steps on Server A:1) Log on to Server A with the appropriate user privileges to uninstall the
Tivoli Storage Productivity Center database repository.2) Start the Tivoli Storage Productivity Center uninstallation wizard.3) Follow the instructions in the wizard to uninstall the database
repository.2. Complete these steps for Configuration B:
a. Do the following on Server B:1) Log on to Server B with the appropriate user privileges to uninstall
Tivoli Integrated Portal and Tivoli Common Reporting.2) Start the Tivoli Storage Productivity Center uninstallation wizard.3) Proceed through the wizard to uninstall Tivoli Integrated Portal and
Tivoli Common Reporting.b. Complete the following steps on Server A:
1) Log on to Server A with the appropriate user privileges to uninstall theTivoli Storage Productivity Center components.
2) Start the Tivoli Storage Productivity Center uninstallation wizard.v For the Windows operating system, click Start > Control Panel >
Programs > Programs and Features. Highlight Tivoli StorageProductivity Center and click Uninstall/Change.
v For the AIX or Linux operating systems, run the following commandfrom the root directory:TPC_installation_directory/_uninst/uninstall
where TPC_installation_directory is the location where Tivoli StorageProductivity Center is installed.
A window is displayed that indicates that all Tivoli Storage ProductivityCenter components installed on the system will be uninstalled.
3) Click Uninstall. A confirmation is displayed.4) Click Next to start the uninstallation process.5) Follow the instructions in the wizard to uninstall Tivoli Storage
Productivity Center.
Chapter 5. Uninstalling Tivoli Storage Productivity Center 395

3. If an error occurred during the installation process, review the installation logfiles.
Related reference:“Planning for Tivoli Storage Productivity Center authentication and authorization”on page 28An operating system user name is required to install and log on to Tivoli StorageProductivity Center for the first time. After you install Tivoli Storage ProductivityCenter, you can assign roles to users that enable users to log on and determine thecomponents that the user can view in the graphical user interface (GUI).“Reviewing the log files to resolve installation issues” on page 191If an error occurs during Tivoli Storage Productivity Center installation, you canreview the error log files to resolve issues and continue the installation.
Uninstalling Tivoli Storage Productivity Center by using silent modeYou can uninstall Tivoli Storage Productivity Center by using silent mode. Thismode is useful if your system is running from a terminal that cannot displaygraphics.
In silent mode, the following server configurations are possible:
Tip: The terms Server A and Server B denote the two servers in a multiserverenvironment.
Option 1All Tivoli Storage Productivity Center components are installed on oneserver (single-server environment).
Option 2The Tivoli Storage Productivity Center database repository is installed onServer A and all other Tivoli Storage Productivity Center components areinstalled on Server B.
Option 3Tivoli Integrated Portal, Tivoli Common Reporting, and the web-based GUIare installed on Server B and the other Tivoli Storage Productivity Centercomponents are installed on Server A.
To uninstall Tivoli Storage Productivity Center in silent mode:1. Complete the following steps for option 1:
a. Log on to the Tivoli Storage Productivity Center system with theappropriate user privileges.
b. Start the uninstallation program.v For the Windows operating system, run the following in the C:\
directory:TPC_installation_directory\_uninst\uninstall.bat -i silent
v For the AIX or Linux operating systems, source the DB2 profile, and runthe following command from the root directory:TPC_installation_directory/_uninst/uninstall -i silent
where TPC_installation_directory is where Tivoli Storage ProductivityCenter is installed.
c. Restart the system if needed.v For the Windows operating systems, restart the system after the
uninstallation process is complete.
396 IBM Tivoli Storage Productivity Center: Installation and Configuration Guide

v For the AIX or Linux operating systems, you do not have to restart yoursystem.
2. Complete the following steps for option 2:a. Log on to Server B with the appropriate user privileges to uninstall Tivoli
Storage Productivity Center.b. Start the uninstallation program.
v For the Windows operating system, run the following from the C:\directory:TPC_installation_directory\_uninst\uninstall.bat -i silent
v For the AIX or Linux operating system, source the DB2 profile, and runthe following command from the root directory:TPC_installation_directory/_uninst/uninstall -i silent
c. Restart the system if needed.v For the Windows operating systems, restart the system after the
uninstallation process is complete.v For the AIX or Linux operating systems, you do not have to restart your
system.d. Log on to Server A with the appropriate user privileges to uninstall the
Tivoli Storage Productivity Center database repository.e. Start the uninstallation program.
v For the Windows operating system, run the following command from theC:\ directory:TPC_installation_directory\_uninst\uninstall.bat -i silent
f. Restart the system if needed.v For the Windows operating systems, restart the system after the
uninstallation process is complete.v For the AIX or Linux operating systems, you do not have to restart your
system.3. Complete the following steps for option 3:
a. Log on to Server B with the appropriate user privileges to uninstall TivoliIntegrated Portal and Tivoli Common Reporting.
b. Start the uninstallation program.v For the Windows operating system, run the following from the C:\
directory:TPC_installation_directory\_uninst\uninstall.bat -i silent
v For the AIX or Linux operating system, source the DB2 profile, and runthe following from the root directory:TPC_installation_directory/_uninst/uninstall -i silent
where TPC_installation_directory is where Tivoli Storage ProductivityCenter is installed.
c. Restart the system if needed.v For the Windows operating systems, restart the system after the
uninstallation process is complete.v For the AIX or Linux operating systems, you do not have to restart your
system.d. Log on to Server A with the appropriate user privileges to uninstall the
Tivoli Storage Productivity Center components (including the databaserepository).
Chapter 5. Uninstalling Tivoli Storage Productivity Center 397

e. Start the uninstallation program.v For the Windows operating system, run the following from the C:\
directory:TPC_installation_directory\_uninst\uninstall.bat -i silent
Remember: You must restart the system after the uninstallation processis finished. There is no automatic reboot.
v For the AIX or Linux operating system, source the DB2 profile, and runthe following from the root directory:TPC_installation_directory/_uninst/uninstall -i silent
where TPC_installation_directory is where Tivoli Storage ProductivityCenter is installed.
Tip: For the AIX or Linux operating system, you do not have to restartyour system.
f. If an error occurred during the installation process, review the installationlog files.
Related tasks:“Manually uninstalling Tivoli Storage Productivity Center components onWindows” on page 405If the Tivoli Storage Productivity Center uninstallation process fails, you mustmanually uninstall the components.“Manually uninstalling Tivoli Storage Productivity Center components on AIX orLinux” on page 404If the Tivoli Storage Productivity Center uninstallation process fails, you mustmanually uninstall the components.Related reference:“Planning for Tivoli Storage Productivity Center authentication and authorization”on page 28An operating system user name is required to install and log on to Tivoli StorageProductivity Center for the first time. After you install Tivoli Storage ProductivityCenter, you can assign roles to users that enable users to log on and determine thecomponents that the user can view in the graphical user interface (GUI).“Reviewing the log files to resolve installation issues” on page 191If an error occurs during Tivoli Storage Productivity Center installation, you canreview the error log files to resolve issues and continue the installation.
Uninstalling the agentsYou can uninstall locally or remotely installed agents. This section describes how touninstall these agents locally or remotely.
The Storage Resource agents are uninstalled by using the Tivoli StorageProductivity Center GUI.
Restriction: Do not delete the Storage Resource agent component from the TivoliStorage Productivity Center server by using the stand-alone GUI or thecommand-line interface (CLI). This component must exist on the server tocomplete the uninstall process.
Deleting or uninstalling an agent using the GUIYou can delete or uninstall a Storage Resource agent and all the data that iscollected by that agent from the database repository. The information that is
398 IBM Tivoli Storage Productivity Center: Installation and Configuration Guide

collected by the agent is no longer available within Tivoli Storage ProductivityCenter reports. When you delete an agent, the agent is uninstalled and you can nolonger activate the agent.
To delete or uninstall a Storage Resource agent:1. In the navigation tree, click Administrative Services > Data Sources. Left-click
Data/Storage Resource Agents.2. In the content pane, select an agent and under the Select Action menu, click
Delete.3. In the confirmation dialog, select Yes Delete the agent.
Uninstalling the Storage Resource agent manuallyYou can manually uninstall the Storage Resource agent.
To uninstall the Storage Resource agent, complete the following steps:1. If the Storage Resource agent is on the Virtual I/O system, complete the
following steps:a. Log in with the padmin user ID.b. Run the following command to set up the AIX environment:
oem_setup_env
2. Go to the directory where the agent is installed:agent_install_location
where agent_install_location is where the Storage Resource agent is installed.3. Run the uninstallation command:
Restriction: Do not delete the Storage Resource agent component from theTivoli Storage Productivity Center server by using the stand-alone GUI or thecommand-line interface (CLI). This component must exist on the server tocomplete the uninstall process.
�� bin/Agent -uninstall -serverName TPC_server_name-force -debug MAX
��
Where:
-uninstallUninstalls the agent.
-forceThis optional parameter forces an uninstallation. If you use this parameter,do not provide the serverName parameter.
-serverName TPC_server_nameTPC_server_name is the Data server name as defined in IBM Tivoli StorageProductivity Center. You can check the configuration file for the servername:agent_install_location/config/Agent.config
where agent_install_location is where is the agent is installed.
-debug MAXThis optional parameter is for debugging purposes. If you set the -debugparameter, then some files are not deleted.
Chapter 5. Uninstalling Tivoli Storage Productivity Center 399

Remember: If you run the uninstallation program from the bin directory, thebin directory is not deleted.
If you run the uninstallation program outside of the agent installation directory,then you must specify the full path.If the uninstallation fails, you must look at the return codes. For moreinformation about return codes, see http://publib.boulder.ibm.com/infocenter/tivihelp/v59r1/index.jsp and search for Return codes used by StorageResource agent.
Uninstalling the Tivoli Storage Productivity Center Monitoring AgentThis procedure provides information about uninstalling the Tivoli StorageProductivity Center Monitoring Agent.
Uninstalling the IBM Tivoli Storage Productivity CenterMonitoring Agent on Windows
You can uninstall the IBM Tivoli Storage Productivity Center Monitoring Agent onWindows.
To uninstall the Tivoli Storage Productivity Center Monitoring Agent on Windows:1. Stop the IBM Tivoli Monitoring agent before uninstalling the agent. For
information about stopping the agent for Windows, go tohttp://publib.boulder.ibm.com/infocenter/tivihelp/v24r1/index.jsp?topic=/com.ibm.omegamon.mes.doc_7.0.1/t_stop_win.html.
2. Log on to the system as a local administrator with administrative authority onWindows.
3. Exit the Tivoli Storage Productivity Center GUI.4. Click Start > Settings > Control Panel > Add/Remove Programs.5. Select IBM Tivoli Storage Productivity Center and click Remove.6. On the language page, select a language and click OK.7. On the Welcome page, click Next.8. Select IBM Tivoli Storage Productivity Center Monitoring Agent and click
Next.9. On the Summary Information page, review the information and click
Uninstall.10. Click Finish.11. On the Restart Your Computer page, click Yes, restart my computer.12. Click Finish.
Uninstalling the IBM Tivoli Storage Productivity CenterMonitoring Agent on UNIX or Linux
You can uninstall the IBM Tivoli Storage Productivity Center Monitoring Agent onUNIX or Linux.
To uninstall the Tivoli Storage Productivity Center Monitoring Agent on UNIX orLinux:1. Stop the IBM Tivoli Monitoring agent before uninstalling the agent. For
information about stopping the agent on UNIX or Linux operating systems, go
400 IBM Tivoli Storage Productivity Center: Installation and Configuration Guide

to http://publib.boulder.ibm.com/infocenter/tivihelp/v24r1/topic/com.ibm.docguide.doc/using.htm and search for Starting or stopping an agent onUNIX and Linux systems.
2. For UNIX and Linux, ensure that you have root authority.
Tip: For UNIX and Linux systems, you must source the DB2 profile beforeuninstalling the Tivoli Storage Productivity Center Monitoring Agent.
3. Open a terminal session and go to the Tivoli Monitoring Services installationdirectory.
4. Run the uninstallation program from this default directory:/opt/IBM/ITM/bin/uninstall.sh
5. On the Manage Tivoli Enterprise Monitoring Services window, selectMonitoring Agent for TPC and press Enter.
6. Confirm your selection by entering 1 and pressing Enter again.7. Wait for the uninstallation program to complete.
For more information about uninstalling an agent from Tivoli Monitoring Services,see http://publib.boulder.ibm.com/infocenter/tivihelp/v15r1/index.jsp?topic=/com.ibm.itm.doc_6.2.1/itm_install427.htm.
Uninstalling DB2Uninstall DB2 after you have uninstalled IBM Tivoli Storage Productivity Centerand Agent Manager. Use the DB2 uninstallation program to uninstall DB2.
For information about uninstalling DB2 V9.1 on Windows systems, go tohttp://publib.boulder.ibm.com/infocenter/db2luw/v9/index.jsp?topic=/com.ibm.db2.udb.uprun.doc/doc/t0007436.htm.
For information about uninstalling DB2 V9.5 on Windows systems, go tohttp://publib.boulder.ibm.com/infocenter/db2luw/v9r5/index.jsp?topic=/com.ibm.db2.luw.qb.server.doc/doc/t0007436.html.
Uninstalling DB2 on UNIX or LinuxYou can uninstall DB2 on UNIX or Linux systems.
To uninstall DB2 on UNIX and Linux:
Note: This example applies to DB2 V9.7.1. As the DB2 instance user (typically db2inst1), drop the databases, and stop
DB2.a. If you are the user with root authority, run su - db2inst1 to switch the user
to the DB2 instance user. Otherwise, log in as the DB2 instance user.b. Run db2 list db directory to list the databases that might not have been
removed by the Tivoli Storage Productivity Center uninstallation program.c. For each database name listed by the command in the previous step, run
db2 drop db database_name. For example:Command:
$ db2 drop db tcpdbResponse:
DB20000I The DROP DATABASE command completed successfully.$ db2 drop db ibmcdb
Response:DB20000I The DROP DATABASE command completed successfully.
Chapter 5. Uninstalling Tivoli Storage Productivity Center 401

d. Run db2stop force. The following messages are displayed:08/10/2010 21:46:13 0 0 SQL1064N DB2STOP processing was successful.SQL1064N DB2STOP processing was successful.
e. Run db2 terminate. The following message is displayed:DB20000I The TERMINATE command completed successfully.
f. Run exit to close the su shell or log out.2. Drop the DB2 instance.
Note: This step must be performed as a user with root authority and run in ashell that has not had the db2profile sourced.a. Log in as a user with root authority.b. Change to the DB2 instance directory. The default path depends on your
operating system.On AIX, run cd /opt/IBM/db2/V9.7/instance.On Linux, run cd /opt/ibm/db2/V9.7/instance.
c. Run ./db2ilist to list the db2instance name (typically db2inst1).d. Run ./db2idrop -f db2inst1 where "db2inst1" is the instance name reported
by the db2ilist command in the previous step. The following messages aredisplayed:DBI1324W Support of the -f command is deprecated. For more information,
see the DB2 Information Center.DBI1070I Program db2idrop completed successfully.
3. As the DB2 administration server (DAS) user (typically dasusr1), stop DAS.a. If you are the user with root suthority, run su - dasusr1 to switch user to
the DAS user. Otherwise, log in as the DAS user.b. Run db2admin stop. The following message is displayed:
SQL4407W The DB2 Administration Server was stopped successfully.
c. Run exit to close the su shell or log out.4. Remove the DB2 administration server. You must remove the DB2
administration server before you remove the DB2 product.a. Log in as a user with root authority.b. Change to the DB2 instance directory. The default path depends on your
operating system.On AIX, run cd /opt/IBM/db2/V9.7/instance.On Linux, run cd /opt/ibm/db2/V9.7/instance.
c. Run ./dasdrop. The following messages are displayed:SQL4410W The DB2 Administration Server is not active.DBI1070I Program dasdrop completed successfully.
5. Uninstall DB2. Use the db2_deinstall command to remove DB2 products orDB2 components. The db2_deinstall command removes all DB2 products fromyour system.a. Change to the DB2 installation directory. The default path depends on your
operating system.On AIX, run cd /opt/IBM/db2/V9.7/instance.On Linux, run cd /opt/ibm/db2/V9.7/instance.
b. Run ./db2_deinstall -a. The following messages are displayed:
402 IBM Tivoli Storage Productivity Center: Installation and Configuration Guide

DBI1016I Program db2_deinstall is performing uninstallation.Please wait.The execution completed successfully.For more information see the DB2 uninstallation log at"/tmp/db2_deinstall.log.pid".
6. Delete DB2 users and groups. The default user and group names are shown inthe following commands.a. Run the following commands to remove the users:
userdel -r dasusr1userdel -r db2inst1userdel -r db2fenc1
b. Run the appropriate commands for your operating system to remove thegroups.On AIX run the following commands:rmgroup dasadm1rmgroup db2iadm1rmgroup db2fadm1
On Linux run the following commands:groupdel dasadm1groupdel db2iadm1groupdel db2fadm1
7. Remove the DB2 directory.a. Run cd.b. Run the command to remove the DB2 directory on your operating system:
On AIX, run rm -r /opt/IBM/db2.On Linux, run rm -r /opt/ibm/db2.
8. Remove any DB2 definitions from /etc/services.
Deleting Storage Resource agent registry entries after a failedinstallation or uninstallation
If your Tivoli Storage Productivity Center Version 5.1 installation or uninstallationfails, you must find and manually delete the Storage Resource agent registryentries that remain.
Deleting registry files in the Windows operating system
To delete registry entries after a failed installation or uninstallation in the Windowsoperating system:1. In Windows Registry Editor, navigate to HKEY_LOCAL_MACHINE > SOFTWARE > IBM
> TPCAGENT > NUMBER or HKEY_LOCAL_MACHINE > SOFTWARE > Wow6432Node > IBM> TPCAGENT > NUMBER.
2. Delete this entry:[HKEY_LOCAL_MACHINE\SOFTWARE\Wow6432Node\IBM\TPCAGENT\1]"Home"="C:\\Program Files\\IBM\\TPC""Port"="9510"
3. If the Storage Resource agent is running as a daemon service, delete the service.For example, sc delete AgentX, where AgentX is the name of the StorageResource agent.
4. Delete the folder in which the agent was installed.Display the agent name and folder by running services.msc and right-click theservice to see the properties.
Chapter 5. Uninstalling Tivoli Storage Productivity Center 403

5. For daemon agents, verify that the associated CAP file was deleted.The CAP file is located in the %ALLUSERSPROFILE%\Application Data\IBM\CAPfolder. The naming convention for this file is srainstance_default.xml.
Remember: After uninstalling a daemon agent, you must restart your system.
Deleting registry files on the UNIX or Linux operating systems
To delete registry entries after a failed installation or uninstallation on the UNIX orLinux operating systems:1. Delete the Storage Resource agent entry that is associated with the Tivoli
Storage Productivity Center installation on the local server.The terms Server A and Server B are used in this procedure to denote thedifferent servers.When you install Tivoli Storage Productivity Center on Server A, a StorageResource agent is also installed on Server A. When you deploy another StorageResource agent from Tivoli Storage Productivity Center Server B to Server A, anentry is added to the file /etc/Tivoli/TSRM/registryNA on Server A. This entryis associated with the Storage Resource agent deployed from Server B.If a failure occurs when you install or uninstall the Storage Resource agentfrom Server A, you must delete the entry from the /etc/Tivoli/TSRM/registryNA file that is associated with the agent on Server A. For example, youwould delete these lines from the file:Instance=1Home=/opt/IBM/TPCPort=9567
2. If the agent was a daemon, verify that the process is running and stop it.v To list all the running processes, run the following command:
ps -ef
v To stop a process, run the following command:kill -9 process_number
3. For daemon agents, verify that the associated CAP File was deleted.The CAP file is located in the /opt/IBM/CAP directory. The naming conventionfor this file is srainstance_default.xml.
Manually uninstalling Tivoli Storage Productivity Center componentson AIX or Linux
If the Tivoli Storage Productivity Center uninstallation process fails, you mustmanually uninstall the components.
This procedure assumes the following conditions:v You installed Tivoli Storage Productivity Center in the default directory.v You used default ports.v The Storage Resource agent service name is Agent1.v You used the default Tivoli Storage Productivity Center database repository
named TPCDB.
To manually uninstall Tivoli Storage Productivity Center components:1. Stop the Deployment engine by running the following command:
kill -9 `ps -aef | grep acsi | grep -v grep | \awk ’{ print $2 }’` 2> /dev/null
404 IBM Tivoli Storage Productivity Center: Installation and Configuration Guide

2. Stop Tivoli Integrated Portal and Tivoli Common Reporting by using thefollowing command:kill -9 `ps -aef | grep tip | grep -v grep | \awk '{ print $2}'` 2> /dev/null
3. Uninstall Tivoli Integrated Portal and the deployment engine by using thefollowing commands:. /var/ibm/common/acsi/setenv.sh/usr/ibm/common/acsi/bin/si_inst.sh -r -frm -rf /var/ibm/common/acsi /usr/ibm/common/acsi/opt/IBM/Tivoli/ /opt/IBM/tipv2/ /opt/IBM/tipv2Components/
4. Stop the Storage Resource agent by using the following command:kill -9 `ps -aef | grep /opt/IBM/TPC/agent| \grep -v grep | awk'{ print $2 }'` 2> /dev/null
5. Stop the Data server by using the following command:kill -9 `ps -aef | grep data | grep -v grep | \awk ’{ print $2 }’` 2> /dev/null
6. Stop the Device server by using the following command:kill -9 `ps -aef | grep device | grep -v grep | \awk ’{ print $2 }’` 2> /dev/null
7. Stop the Replication server by using the following command:kill -9 `ps -aef | grep replication | grep -v grep | \awk ’{ print $2 }’` 2> /dev/null
8. Stop the Tivoli Storage Productivity Center GUI by running the followingcommand:kill -9 `ps -aef | grep TSRMgui | grep -v grep | \awk ’{ print $2 }’` 2> /dev/null
9. Delete the following files and folders:v rm -fr `find . -name *tpcdsrv* -print`
v rm -fr `find . -name *itsanm* -print`
v rm -fr /etc/Tivoli/TSRM/registry
v rm -fr /etc/Tivoli/TSRM/registryNA
v rm -fr /etc/Tivoli/TSRM/lock
v rm -fr /opt/IBM/TPC
v rm -fr /root/.coi (Linux)v rm -fr /home/root/.coi (AIX)
10. Drop the database by completing the following steps:a. Source the db2profile.b. Enter db2 drop db TPCDB.
11. Navigate to the /db2_admin_home/db2_instance_name/ directory and ensure thatthe database directory is deleted.
Manually uninstalling Tivoli Storage Productivity Center componentson Windows
If the Tivoli Storage Productivity Center uninstallation process fails, you mustmanually uninstall the components.
This procedure assumes that the following conditions have been met:v You installed Tivoli Storage Productivity Center in the default directory.v You used default ports.
Chapter 5. Uninstalling Tivoli Storage Productivity Center 405

v The Storage Resource agent service name is Agent1.v The service name for the Tivoli Integrated Portal service is created by using the
Tivoli Integrated Portal port. For example, if the port for IBM Tivoli IntegratedPortal V2.2 is 9568, the service name is IBMWAS70Service –V2.2_TIPProfile_Port_9568.
v You used the default Tivoli Storage Productivity Center database repositoryname TPCDB.
To manually uninstall Tivoli Storage Productivity Center components:1. Uninstall IBM Tivoli Integrated Portal and the Deployment engine:
a. Navigate to one of the following systems:v On 32-bit systems, navigate to the following directory:
C:\Program Files\IBM\Common\acsi\
and run the following command:setenv.cmd
v On 64-bit systems, navigate to the following directory:C:\Program Files (x86)\IBM\Common\acsi\
and run the following command:setenv.cmd
b. Navigate to C:\Program Files\IBM\Common\acsi\bin\ and run thefollowing command:si_inst.bat -r -f
The Deployment engine is uninstalled. Depending on the environment,you might see the following message:The System cannot find the path specified.
This is an expected result, and you do not need to do anything.c. If the directory exists, in a command prompt window, enter the following
command:rmdir /s /q "C:\Program Files\IBM\Common\acsi"
d. If the directory exists, in a command prompt window, enter the followingcommand:rmdir /s /q "C:\Program Files (x86)\IBM\Common\acsi"
e. Navigate to the C:\Program Files\ibm\tipv2\profiles\TIPProfile\binfolder.
f. Run the following command:stopserver.bat server1
g. Optional: Run the following command:sc stop "IBMWAS70Service - V2.2_TIPProfile_Port_9568"
If you run this command with a user ID that has administrative authority,you do not have to provide a user name and password.
h. In a command prompt window, enter the following command:sc delete "IBMWAS70Service - V2.2_TIPProfile_Port_9568"
i. In a command prompt window, enter the following command:rmdir /s/q "C:\Program Files\IBM\tipv2"
2. Uninstall Tivoli Common Reporting by entering the following commands:
406 IBM Tivoli Storage Productivity Center: Installation and Configuration Guide

sc stop "IBM Cognos Content Database"sc delete "IBM Cognos Content Database"rmdir /s/q "C:\Program Files\IBM\tipv2Components"
3. Uninstall the Storage Resource agent by using these commands:sc stop Agent1sc delete Agent1
4. Remove the Storage Resource agent registry entries by using the followingcommands:v On a 32-bit system:
reg delete HKEY_LOCAL_MACHINE\SOFTWARE\IBM\TPCAGENT\1
where 1 is the instance of the Agent.If you do not have multiple agents, you can also type the reg deleteHKEY_LOCAL_MACHINE\SOFTWARE\IBM\TPCAGENT command. If you havemultiple agents, and you run this command, all of the agents are deleted.
v On a 64-bit system:reg delete HKLM\SOFTWARE\Wow6432Node\IBM\TPCAGENT\1
where 1 is the instance of the Agent.If you do not have multiple agents, you can also type the reg deleteHKEY_LOCAL_MACHINE\SOFTWARE\Wow6432Node\IBM\TPCAGENT command. If youhave multiple agents and you run this command, all of the agents aredeleted.
5. Uninstall the Data server by using these commands:sc stop TSRMsrv1sc delete TSRMsrv1
6. Uninstall the Device server by using these commands:sc stop "IBMWAS80Service - TPCDeviceServer"sc delete "IBMWAS80Service - TPCDeviceServer"
7. Uninstall the Replication server by using these commands:sc stop "IBMWAS80Service - TPCReplicationServer"sc delete "IBMWAS80Service – TPCReplicationServer"
8. Drop the database by using this command:db2cmd /C db2 drop db TPCDB
9. Navigate to the C:\DB2\ directory and ensure that the database directory isdeleted.
10. In a command window, enter the following command:rmdir /s/q "c:\Program files\ibm\tpc"
11. Restart your system.
Chapter 5. Uninstalling Tivoli Storage Productivity Center 407

408 IBM Tivoli Storage Productivity Center: Installation and Configuration Guide

Chapter 6. Reference
agent.sh commandThe agent.sh command lets you start, stop, and restart the Storage Resource agent.You can also display the status and version of the Storage Resource agent.
Note:
v You must have root authority to run this command.v For Windows, the status, stop, and start functions are handled through the
Windows Services panel.
�� agent.shstatus start stop restart version versionall
��
Parameters:
statusDisplays the current status of the Storage Resource agent. The status isreturned is running or not running.
startStarts the Storage Resource agent.
stopStops the Storage Resource agent.
restartStop and then start the Storage Resource agent.
versionDisplays the current version of the Storage Resource agent.
versionallDisplays the version of the Storage Resource agent and its related components.
© Copyright IBM Corp. 2001, 2012 409

410 IBM Tivoli Storage Productivity Center: Installation and Configuration Guide

Appendix A. Accessibility features for Tivoli StorageProductivity Center
Accessibility features help users who have a disability, such as restricted mobilityor limited vision, to use information technology products successfully.
Accessibility features
The following list includes the major accessibility features in IBM Tivoli StorageProductivity Center:v Keyboard-only operation in the stand-alone GUI and the web-based GUI.
Restriction: In the stand-alone GUI, you must use the mouse to navigate theTopology Viewer and report graphs.
v Interfaces that are commonly used by screen readers.v An information center that includes the following accessibility features:
– The information center is provided in XHTML 1.0 format, which is viewablein most web browsers. With XHTML, you can view documentation accordingto the display preferences that are set in your browser. XHTML supportsscreen readers and other assistive technologies.
– All documentation for Tivoli Storage Productivity Center is available inAdobe Portable Document Format (PDF) by using the Adobe Acrobat Reader.You can access the PDFs from the Printable PDFs topic in the informationcenter at http://publib.boulder.ibm.com/infocenter/tivihelp/v59r1/index.jsp.
– All images in the information center are provided with alternative text, sothat visually impaired users can understand the contents of the images.
Keyboard navigation in the stand-alone GUI
The stand-alone GUI uses standard Microsoft Windows navigation keys. However,you must use the mouse to navigate the Topology Viewer and report graphs.Standard operating system keystrokes are used for standard operating systemoperations.
Keyboard navigation in the web-based GUI
Most of the features of the web-based GUI are accessible by using the keyboard.For those features that are not accessible, equivalent function is available by usingthe command-line interface (CLI), except as noted in the product release notes.
You can use keys or key combinations to perform operations and initiate manymenu actions that can also be done through mouse actions. The following sectionsdescribe the keys or key combinations for different parts of the web-based GUI:
For navigating the web-based GUI and the context-sensitive help system:
v To navigate to the next link, button, or topic within a panel, press Tab.v To move to the previous link, button, or topic within a panel, press
Shift+Tab.v To select an object, when the object is in focus, press Enter.
For actions menus:
v To navigate to the grid header, press Tab.
© Copyright IBM Corp. 2001, 2012 411

v To reach the drop-down field, press the Left Arrow or Right Arrow key.v To open the drop-down menu, press Enter.v To select the menu items, press the Up Arrow or Down Arrow key.v To start the action, press Enter.
For filters:To specify a filter option and text:1. Press Tab to navigate to the magnifying glass icon.2. Press the Up Arrow or Down Arrow key to navigate the filtering list.3. Press Enter to select a filtering option.4. When a filtering option is selected, the cursor moves to the filter text
box. Type the filter text and press Enter. To reset a filter, press Enter.
For text fields:
v To navigate to text fields, press Tab.v To navigate to the fields that are available for editing, press Tab.v To navigate to the next field or to the Submit button, press Tab.
For tables:
v To navigate between column headers, focus on a column header and usethe Left Arrow and Right Arrow keys to move to other column headers.
v To navigate between data cells, focus on a data cell and use the Left,Right, Up, Down, Pageup and Pagedown Arrow keys.
v To sort a column, focus on a column header and press Enter. The focusremains on the column header after the sort occurs.
v To change the size of a column, focus on the column header, holdShift+Control, and press the Left or Right Arrow keys.
v To follow a link in a data cell, focus on a data cell and press Shift+F9.v To open a menu for a table row, focus on the row and press Shift+F10.
IBM and accessibility
For more information about IBM's commitment to accessibility, see the IBM HumanAbility and Accessibility Center website at http://www.ibm.com/able/.
412 IBM Tivoli Storage Productivity Center: Installation and Configuration Guide
||
|
|

Appendix B. Accessibility features for Tivoli StorageProductivity Center for Replication
Accessibility features help users who have a disability, such as restricted mobilityor limited vision, to use information technology products successfully.
The following list includes the major accessibility features in Tivoli StorageProductivity Center for Replication:v Keyboard-only operationv Interfaces that are commonly used by screen readersv Keys that are discernible by touch but do not activate just by touching themv Industry-standard devices for ports and connectorsv The attachment of alternative input and output devices
See the IBM Human Ability and Accessibility Center website atwww.ibm.com/able for more information about the commitment that IBM has foraccessibility.
Accessibility and keyboard shortcuts in the information center
Accessibility features help users with physical disabilities, such as restrictedmobility or limited vision, to use software products successfully. Using the majoraccessibility features in this product, users can perform these tasks:v Use assistive technologies, such as screen-reader software and digital speech
synthesizer, to hear what is displayed on the screen. Consult the productdocumentation of the assistive technology for details on using those technologieswith this product.
v Operate specific or equivalent features by using only the keyboard.v Magnify what is displayed on the screen.
In addition, the documentation was modified to include the following features toaid accessibility:v All documentation is available in HTML formats to give the maximum
opportunity for users to apply screen-reader software technology.v All images in the documentation are provided with alternative text so that users
with vision impairments can understand the contents of the images.
Use the following key combinations to navigate the interface by keyboard:v To go directly to the Topic pane, press Alt+K, and then press Tab.v In the Topic pane, to go to the next link, press Tab.v To go directly to the Search Results view, press Alt+R, and then press the Enter
or Up-Arrow key to enter the view.v To go directly to the Navigation (Table of Contents) view, press Alt+C, and then
press the Enter or Up-Arrow key to enter the view.v To expand and collapse a node in the navigation tree, press the Right and
Left-Arrow keys.v To move to the next topic node, press the Down-Arrow or Tab key.v To move to the previous topic node, press the Up-Arrow key or Shift+Tab.
© Copyright IBM Corp. 2001, 2012 413

v To go to the next link, button, or topic node from inside on of the views, pressTab.
v To scroll all the way up or down in a pane, press Home or End.v To go back, press Alt+Left Arrow; to go forward, press Alt+Right Arrow.v To go to the next pane, press F6.v To move to the previous pane, press Shift+F6.v To print the active pane, press Ctrl+P.
Related accessibility information for sight-impaired users
The following list contains hints and tips that can help you more fully use thegraphical user interface:
Drop-down lists are positioned directly over or before the radio button thatactivates it.
If you use a screen reader, you should be aware that there are radiobuttons to activate drop-down lists for several GUI pages. The way toactivate the drop-down list is by selecting the associated radio button. Thedrop-down list is positioned directly over or before the radio button thatactivates it. When you use a screen reader that processes the fields andcontrols of a page sequentially, you might select the radio button, but notknow that the associated drop-down list has been activated. The screenreader processes inactive drop-down lists first, and then processes the nextradio button. The drop-down list is activated if you select the radio button.
On the following pages, keep in mind that radio buttons activate adrop-down list:v Administrationv ESS/DS Pathsv Sessionsv Session Detailsv Storage Systems
Tables are best understood by reviewing the surrounding text and the table rowand column number of the table.
On some graphical user pages, tables use the header or row ID attributeswhen reading a single cell. The screen reader reads the table row andcolumn number, along with cell data. Therefore, you can infer the columnheader and row ID.
Experiment with and fine-tune the way your screen reader pronounces some ofthe product abbreviations.
Your screen reader might pronounce abbreviations as if they were words.For example, the common abbreviation for Enterprise Storage Server isESS. Your screen reader might read ESS as the word "ess". With somescreen readers you can hear alternate pronunciations. If you frequently usethe software you might prefer to fine-tune such associations in yoursettings. When an association is created, the screen reader can recognizethe abbreviation as a word. If you can add dictionary words with yourscreen reader, replace the capitalized character sequence with the sequenceE space S space S.
Typically, this abbreviation is used in the combination form of ESS/DS.This term refers to the Enterprise Storage Server 800, the DS6000, or theDS8000.
414 IBM Tivoli Storage Productivity Center: Installation and Configuration Guide
Some decorative artifacts might persist if the cascading style sheet is disabled.
Enable cascading style sheets when possible; otherwise, some decorativeelements might persist in the web browser GUI. These artifacts do notaffect performance. If they become too distracting, consider using thecommand-line interface instead.
For efficiency, confirmation dialogs place initial focus on the Yes button.
When a confirmation dialog box is displayed, focus is given to the Yesbutton. Therefore, the screen reader reads “Yes” but does not read theconfirmation text. The software processes the information in this way whenyou do the following types of tasks:v Perform an action on a sessionv Remove a connection to a storage systemv Click the About link
v Create a high-availability connection
To read the confirmation text before clicking the Yes, No, or OK button,view the previous heading before the button.
Dojo components are not read by all screen readers.
The Job Access for Windows and Speech (JAWS) screen reader does notread some Dojo components on Internet Explorer 7. Use the command-lineinterface instead of the GUI with JAWS on Internet Explorer 7.
Firefox is the preferred browser for use with a screen reader.Use Firefox as the screen reader because other browsers might not fullyexpose assistive technology content to the screen reader.
Appendix B. Accessibility features for Tivoli Storage Productivity Center for Replication 415

416 IBM Tivoli Storage Productivity Center: Installation and Configuration Guide

Notices
This information was developed for products and services offered in the U.S.A.
IBM may not offer the products, services, or features discussed in this document inother countries. Consult your local IBM representative for information on theproducts and services currently available in your area. Any reference to an IBMproduct, program, or service is not intended to state or imply that only that IBMproduct, program, or service may be used. Any functionally equivalent product,program, or service that does not infringe any IBM intellectual property right maybe used instead. However, it is the user's responsibility to evaluate and verify theoperation of any non-IBM product, program, or service.
IBM may have patents or pending patent applications covering subject matterdescribed in this document. The furnishing of this document does not grant youany license to these patents. You can send license inquiries, in writing, to:
IBM Director of LicensingIBM CorporationNorth Castle DriveArmonk, NY 10504-1785U.S.A.
For license inquiries regarding double-byte character set (DBCS) information,contact the IBM Intellectual Property Department in your country or sendinquiries, in writing, to:
Intellectual Property LicensingLegal and Intellectual Property LawIBM Japan, Ltd.19-21, Nihonbashi-Hakozakicho, Chuo-kuTokyo 103-8510, Japan
The following paragraph does not apply to the United Kingdom or any othercountry where such provisions are inconsistent with local law:INTERNATIONAL BUSINESS MACHINES CORPORATION PROVIDES THISPUBLICATION "AS IS" WITHOUT WARRANTY OF ANY KIND, EITHEREXPRESS OR IMPLIED, INCLUDING, BUT NOT LIMITED TO, THE IMPLIEDWARRANTIES OF NON-INFRINGEMENT, MERCHANTABILITY OR FITNESSFOR A PARTICULAR PURPOSE. Some states do not allow disclaimer of express orimplied warranties in certain transactions, therefore, this statement may not applyto you.
This information could include technical inaccuracies or typographical errors.Changes are periodically made to the information herein; these changes will beincorporated in new editions of the publication. IBM may make improvementsand/or changes in the product(s) and/or the program(s) described in thispublication at any time without notice.
Any references in this information to non-IBM Web sites are provided forconvenience only and do not in any manner serve as an endorsement of those Websites. The materials at those Web sites are not part of the materials for this IBMproduct and use of those Web sites is at your own risk.
© Copyright IBM Corp. 2001, 2012 417
|||||

IBM may use or distribute any of the information you supply in any way itbelieves appropriate without incurring any obligation to you.
Licensees of this program who wish to have information about it for the purposeof enabling: (i) the exchange of information between independently createdprograms and other programs (including this one) and (ii) the mutual use of theinformation which has been exchanged, should contact:
IBM Corporation2Z4A/10111400 Burnet RoadAustin, TX 78758U.S.A
Such information may be available, subject to appropriate terms and conditions,including in some cases, payment of a fee.
The licensed program described in this document and all licensed materialavailable for it are provided by IBM under terms of the IBM Customer Agreement,IBM International Program License Agreement or any equivalent agreementbetween us.
Any performance data contained herein was determined in a controlledenvironment. Therefore, the results obtained in other operating environments mayvary significantly. Some measurements may have been made on development-levelsystems and there is no guarantee that these measurements will be the same ongenerally available systems. Furthermore, some measurements may have beenestimated through extrapolation. Actual results may vary. Users of this documentshould verify the applicable data for their specific environment.
Information concerning non-IBM products was obtained from the suppliers ofthose products, their published announcements or other publicly available sources.IBM has not tested those products and cannot confirm the accuracy ofperformance, compatibility or any other claims related to non-IBM products.Questions on the capabilities of non-IBM products should be addressed to thesuppliers of those products.
This information contains examples of data and reports used in daily businessoperations. To illustrate them as completely as possible, the examples include thenames of individuals, companies, brands, and products. All of these names arefictitious and any similarity to the names and addresses used by an actual businessenterprise is entirely coincidental.
COPYRIGHT LICENSE: This information contains sample application programs insource language, which illustrate programming techniques on various operatingplatforms. You may copy, modify, and distribute these sample programs in anyform without payment to IBM, for the purposes of developing, using, marketing ordistributing application programs conforming to the application programminginterface for the operating platform for which the sample programs are written.These examples have not been thoroughly tested under all conditions. IBM,therefore, cannot guarantee or imply reliability, serviceability, or function of theseprograms. The sample programs are provided "AS IS", without warranty of anykind. IBM shall not be liable for any damages arising out of your use of the sampleprograms.
418 IBM Tivoli Storage Productivity Center: Installation and Configuration Guide

If you are viewing this information softcopy, the photographs and colorillustrations may not appear.
Trademarks
IBM, the IBM logo, and ibm.com® are trademarks or registered trademarks ofInternational Business Machines Corporation, registered in many jurisdictionsworldwide. Other product and service names might be trademarks of IBM or othercompanies. A current list of IBM trademarks is available on the Web at "Copyrightand trademark information" at http://www.ibm.com/legal/copytrade.shtml.
Adobe and the Adobe logo are either registered trademarks of Adobe SystemsIncorporated in the United States, and/or other countries.
Intel, Intel logo, Intel Xeon, Itanium, and Pentium are trademarks or registeredtrademarks of Intel Corporation or its subsidiaries in the United States and othercountries.
Java and all Java-based trademarks and logos are trademarks or registeredtrademarks of Oracle and/or its affiliates.
Linux is a registered trademark of Linus Torvalds in the United States, othercountries, or both.
Microsoft, Windows, and Windows NT are trademarks of Microsoft Corporation inthe United States, other countries, or both.
UNIX is a registered trademark of The Open Group in the United States and othercountries.
Notices 419

420 IBM Tivoli Storage Productivity Center: Installation and Configuration Guide

Glossary
This glossary includes terms and definitions for IBM Tivoli Storage Productivity Center.
The following cross-references are used in thisglossary:v See refers the reader from a term to a preferred
synonym, or from an acronym or abbreviationto the defined full form.
v See also refers the reader to a related orcontrasting term.
To view glossaries for other IBM products, go to:http://www.ibm.com/software/globalization/terminology/.
active management serverA management server from which thestorage environment can be monitoredand managed. The active managementserver replicates its database to thestandby server.
business continuityThe capability of a business to withstandoutages and to operate mission-criticalservices normally and withoutinterruption in accordance withpredefined service-level agreements.
CIM See Common Information Model.
CIM agentThe code that consists of commonbuilding blocks that can be used insteadof proprietary software or device-specificprogramming interfaces to managedevices that are compliant with theCommon Information Model (CIM).
CKD See count key data.
cluster1. In Storwize V7000, a pair of nodes thatprovides a single configuration andservice interface. 2. In IBM SystemStorage™ DS8000®, a partition capable ofperforming all DS8000 series functions.With two clusters in the DS8000 storageunit, any operational cluster can take overthe processing of a failing cluster.
Common Information Model (CIM)An implementation-neutral,object-oriented schema for describingnetwork management information. The
Distributed Management Task Force(DMTF) develops and maintains CIMspecifications.
community nameThe part of a Simple NetworkManagement Protocol (SNMP) messagethat represents a password-like name andthat is used to authenticate the SNMPmessage.
consistency groupA group of copy relationships betweenvirtual volumes or data sets that aremaintained with the same time referenceso that all copies are consistent in time.
copy setThe set of source volumes or targetvolumes involved in a FlashCopyoperation.
count key data (CKD)In mainframe computing, a data-recordformat employing self-defining recordformats in which each record isrepresented by up to three fields: a countfield identifying the record and specifyingits format, an optional key field that canbe used to identify the data area contents,and an optional data field that typicallycontains the user data.
data collectionThe process of obtaining performance andavailability monitoring data andproviding that data to a metric evaluator.Examples of data collectors includeDomain Name System (DNS) probes, webpage analyzers, or database analyzers. Seealso discovery.
discoveryThe process of finding resources withinan enterprise, including finding the newlocation of monitored resources that weremoved. See also schedule.
enterprise repositoryA component of the Data server thatrecords and stores all information aboutthe monitored computers' storage assets
© Copyright IBM Corp. 2001, 2012 421

and their usage over time. The repositoryis organized into relational databasetables and is accessed by Data serverusing Java Database Connectivity (JDBC).
extended count key data (ECKD™)An extension of the count key data (CKD)architecture.
FlashCopyIn storage systems, a feature that creates apoint-in-time copy of a volume or set ofvolumes on a specified target volume.
freeze An operation in which a storage systemblocks I/O from the host system to theaffected volumes on the primary site. Afreeze operation stops mirroring betweenthe primary and secondary volumes toensure data consistency at the secondarysite. See also thaw.
GiB See gibibyte.
gibibyte (GiB)A base-2 unit of measurement that isequal to 1,073,741,824 bytes (2 to the 30thpower). See also gigabyte.
gigabyte (GB)A base-10 unit of measurement equal to1,000,000,000 bytes (10 to the 9th power)when referring to storage capacity orperformance, or 1,073,741,824 bytes (2 tothe 30th power) in other contexts. See alsogibibyte.
Global CopyA non-synchronous long-distance copyoption for data migration and backup. Seealso remote mirror and copy and MetroMirror.
Global MirrorAn optional capability of the remotemirror and copy feature that provides atwo-site extended-distance remote copy.Data that is written by the host to thestorage unit at the local site isautomatically maintained at the remotesite. See also Metro Mirror and remotemirror and copy.
Globally Unique Identifier (GUID)An algorithmically determined numberthat uniquely identifies an entity within asystem.
grain sizeThe unit size for allocating space onthin-provisioned volumes, such as 32, 64,
128, and 256 kibibyte. The grain size isdefined when a volume is created.
GUID See Globally Unique Identifier.
Hardware Management Console (HMC)In a system storage environment, asystem that acts as the focal point forconfiguration, management of CopyServices functions, and maintenance.
heat mapA color-coded data chart in which colorsare used to differentiate values in a dataset.
high availabilityPertaining to a clustered system that isreconfigured when node or daemonfailures occur, so that workloads can beredistributed to the remaining nodes inthe cluster.
high-availability solutionA combination of hardware, software, andservices that fully automates the recoveryprocess and does not disrupt user activity.High-availability solutions must providean immediate recovery point with a fastrecovery time.
HMC See Hardware Management Console.
host volumeA volume that represents the volumefunctional role from an application pointof view. The host volume can beconnected to a host or server. It receivesread, write, and update application I/O,depending on the site to which theapplication is writing.
hypervisorA program or a portion of LicensedInternal Code that allows multipleinstances of operating systems to runsimultaneously on the same hardware.
in-band discoveryThe process of discovering informationabout the storage area network (SAN),including topology and attribute data,through the Fibre Channel data paths. Seealso out-of-band discovery.
job A unit of work within a run for aschedule. One run can have multiple jobs.For example, a system probe schedule hasone job created per system in itsdefinition.
422 IBM Tivoli Storage Productivity Center: Installation and Configuration Guide

job schedulerA component of the Data server thatdeploys all monitoring activities.
journal volumeA volume that holds a consistent copy ofdata until a new consistent copy isformed. The journal volume restores thelast consistent point during a recovery.
KiB See kibibyte.
kibibyte (KiB)A base-2 unit of measurement that isequal to 1,024 bytes (2 to the 10th power).See also kilobyte.
kilobyteFor processor storage, real and virtualstorage, and channel volume, 2 to thepower of 10 or 1,024 bytes. For diskstorage capacity and communicationsvolume, 1,000 bytes.
logical unit number (LUN)In the Small Computer System Interface(SCSI) standard, a unique identifier that isused to differentiate devices, each ofwhich is a logical unit (LU).
LUN See logical unit number.
Management Information Base (MIB)In the Simple Network ManagementProtocol (SNMP), a database of objectsthat can be queried or set by a networkmanagement system.
management serverA system that provides a central point ofcontrol for managing data replication.
management server relationshipA connection between two replicationservers, where one server acts as theactive server and replicates the data thatis necessary for the standby server to takecontrol of the replication environment.
MB See megabyte.
mebibyte (MiB)A base-2 unit of measurement that isequal to 1,048,576 bytes (2 to the 20thpower). See also megabyte.
megabyte (MB)For processor storage, real and virtualstorage, and channel volume, 2 to the20th power or 1,048,576 bytes. For diskstorage capacity and communicationsvolume, 1,000,000 bytes.
Metro MirrorA method of synchronous remotereplication that operates over distances upto 300 kilometers. This method constantlyupdates a secondary copy of a volume tomatch changes that are made to a sourcevolume. See also remote mirror and copyand Global Copy.
Metro Global MirrorA three-site, high-availability, disasterrecovery solution. Metro Global Mirroruses synchronous replication to mirrordata between a local site and anintermediate site, and asynchronousreplication to mirror data from anintermediate site to a remote site.
MiB See mebibyte.
MIB See Management Information Base.
native interfaceAn interface that is specific to a system orsubsystem.
namespaceThe scope within which a CommonInformation Model (CIM) schema applies.
out-of-band discoveryThe process of discovering storage areanetwork (SAN) information, includingtopology and device data, without usingthe fibre-channel data paths. A commonmechanism for out-of-band discovery isthe use of Simple Network ManagementProtocol (SNMP) ManagementInformation Base (MIB) queries, which areinvoked over an IP network. Contrastwith in-band discovery.
ping A job that tracks the availability of assetsand that is performed by an agent.Several ping jobs can be used to monitorthe availability of any computer or subsetof computers in the network. See alsoschedule.
pool A grouping of storage space that consistsof volumes, logical unit numbers (LUNs),or addresses that share a common set ofadministrative characteristics.
practice volumeA volume that can be used to testdisaster-recovery actions whilemaintaining disaster-recovery capability.
Glossary 423

primordial poolStorage capacity that is deallocated on astorage device. Storage pools are createdby allocating storage capacity fromprimordial pools.
probe A job that itemizes and creates aninventory of assets, such as computers,controllers, disk drives, file systems, andlogical units. See also schedule.
recovery point objectiveThe maximum amount of data loss thatcan be tolerated during a serviceinterruption.
remote mirror and copyA feature of a storage server thatconstantly updates a secondary copy of alogical volume to match changes made toa primary logical volume. The primaryand secondary volumes can be on thesame storage server or on separatestorage servers. See also Metro Mirror andGlobal Mirror.
resourceIn a storage environment, an entity that ismonitored. Resources can include fabrics,switches, computers, storage systems, andtape libraries.
role A job function that identifies the tasksthat a user can perform and the resourcesto which a user has access. A user can beassigned one or more roles.
role pairThe association of two roles in areplication session that take part in a copyrelationship. For example, in a MetroMirror session, the role pair can be theassociation between the volume roles ofHost1 and Host2.
scan jobA job that monitors the usage andconsumption of storage. See also schedule.
scheduleA monitoring task that collects data aboutstorage resources. Monitoring tasksinclude scans, probes, pings, discovery,and performance monitors. For example,you can define a probe schedule to collectdata about storage systems or define ascan schedule to collect file-levelinformation about hosts.
sessionA collection of volumes within a logicalsubsystem that are managed togetherduring the creation of consistent copies ofdata. All volumes in a session musttransfer their data successfully to theremote site before the increment can becalled complete.
site awarenessThe association of a location (site) witheach storage system and each session'svolume role. When a copy set is added,only the storage systems with locationsthat match those locations of the volumes'roles can be selected. This constraintprevents the reversing of a hardwarerelationship or the selection of a volumeat the wrong location.
SMI-S See Storage Management InitiativeSpecification.
standby management serverA management server that is a backup forthe active server. The replicationenvironment cannot be monitored ormanaged from the standby server.
Storage Management Initiative Specification(SMI-S)
A design specification developed by theStorage Networking Industry Association(SNIA) that specifies a secure and reliableinterface with which storage managementsystems (SMSs) can identify, classify,monitor, and control physical and logicalresources in a storage area network(SAN). The interface integrates thevarious devices to be managed in a SANand the tools used to manage them.
storage podA logical entity of components of asystem that consists of two storage nodes,and one or two storage subsystemsdirectly connected with these storagenodes.
storage resource groupA named collection of logically relatedresources that are monitored by TivoliStorage Productivity Center. Monitoredresources can include fabrics, switches,computers, storage systems, tape libraries,and other storage resource groups.
target volumeA volume that receives data from a host
424 IBM Tivoli Storage Productivity Center: Installation and Configuration Guide

volume or another intermediate volume.It is used only in FlashCopy sessions.
thaw An operation in which a storage systemreleases the block of the I/O from thehost system to the affected volumes onthe primary site. A thaw operation canoccur after a freeze operation ends andconsistency is formed on the secondarysite. See also freeze.
track space-efficient (TSE) volumeA volume in which storage space isallocated on an as-needed basis by usingspace on the target volume only whentracks are copied from the source volumeto the target volume.
virtualizationThe substitution of virtual resources foractual resources, where the virtualresources have the same functions andexternal interfaces as their counterparts,but differ in attributes, such as size,performance, and cost. Virtualization iscommonly applied to physical hardwareresources by combining multiple physicalresources into shared pools from whichusers receive virtual resources.
virtual storage area network (VSAN)A fabric within the storage area network(SAN).
VSAN See virtual storage area network.
zone A logical grouping of switches, switchports, and their attached devices in afabric.
zone aliasA name that is given to a collection of oneor more zone members that you want tomanage together.
zone setA group of zones that function togetheron a fabric.
Glossary 425

426 IBM Tivoli Storage Productivity Center: Installation and Configuration Guide

Index
Numerics64-bit environment supported 25
Aabout this document xivaccessibility features
for Tivoli Storage ProductivityCenter 411
accessibility features for users withdisabilities 413
addingcomputers or servers for
monitoring 268fabrics for monitoring 266installation license 192, 193, 194resources for monitoring 255storage systems for monitoring 256switches for monitoring 266tape libraries for monitoring 271
agent.sh commandsyntax 409
agentsassigning agents for scan and probe
jobs 291configuration file 295configuring for Storage Resource
agent upgrade 312deploying Storage Resource
agents 296deployment considerations for Storage
Resource agents 297hardware requirements 3overview 235planning for CIM agents 70planning for Storage Resource
agents 45planning for TagmaStore CIM
agents 71preparing Storage Resource agents for
installation 196, 297upgrading Storage Resource
agent 380, 381AIX 404alerts, overview 237as a stand-alone system 186assign
roles 234
Bback up
migrating 365Baroc file location 289Brocade
planning for Brocade NetworkAdvisor 91
planning for DCFM 91, 92Brocade Network Advisor
planning for 91
browsers supported 15
CCAP file 130, 132certificates
creating for Storage Resourceagents 301
replacing for Storage Resourceagents 306
changing the operating systemlanguagestand-alone GUI 192
changing timeout value for web-basedGUI 350
CIM agentsplanning for 70planning for TagmaStore 71software requirements 17, 53
cluster resource groupfor PowerHA 112
cluster resource groups 110commands
agent.sh 409comments, sending xivcommon user, about 29, 215components 404, 405computers
adding to IBM Tivoli StorageProductivity Center 268, 271
configurationanalysis tool 56authorizing users 281editing nas.config file 295for Device server 99for switches 320guidelines 27History Aggregator 295history settings 320history tool 58NetApp 117overview 235planning for Fabric Manager 100planning for HBAs 103planning for roll up reports 55planning for VMware 123Removed Resource Retention 318Resource History Retention 317role-to-group mapping 281the Device server 320
configuration filesagent.config file 294server.config file 294
configuration utilityaccessing Tivoli Storage Productivity
Center for Replication 254how to create alert definitions 252how to display availability
reports 250how to manage tape library
reports 253
configuration utility (continued)how to monitor storage assets, storage
systems and fabrics 250learn how to manage element
managers and external tools 253learn how to manage servers and
agents 250show managed devices 250tasks 249
configuring 218IBM SONAS 351inactive zone sets for fabric data
source 322Monitoring agent 344Storage Resource agent for
upgrade 312credentials, migrating 361
DData agents
migrating using upgrade wizard 384uninstalling using GUI 399
Data Manageragent.config file 294databases that can be monitored 41
Data Path Explorer view 66database repository
planning to retrieve information fromDB2 views 127, 128
software requirements 14databases
histories, specifying how long tokeep 319
specifying how long to keepinformation 319
that Data Manager can monitor 41DB2
installing on AIX 145, 148installing on Linux 143installing on UNIX 143installing on Windows 140monitoring the DB2 environment 129preparing to install on UNIX 140preparing to install on Windows 139uninstalling 401upgrading 361verifying installation 149verifying installation using CLP 150verifying installation using First
Steps 150DCFM
planning for 91, 92Device server
configuration 99, 320setting timeout values 323
devicesadding to IBM Tivoli Storage
Productivity Center 255disabilities, accessibility features for users
with 413
© Copyright IBM Corp. 2001, 2012 427

Discovery Library Adpater 130drop-down lists, limitations of to the
sight-impaired 413DS8000
how to manage DS8000 elementmanagers 253
planning for 76planning for performance 76
Eediting configuration files 294EMC PowerPath Multipathing
planning for 45
FFabric agents
migrating using upgrade wizard 384fabric management
planning forBrocade 89QLogic and Cisco 93
Fabric Managerdirectors 102planning for 88planning for configuration 100planning for HBAs 103switches 102
fabrics 58adding to IBM Tivoli Storage
Productivity Center 266federated repositories
adding an LDAP repository 220removing an LDAP repository 228
file systemssupported 42
fully qualified host nameshost names
fully qualified host namesrequired 151
required 151
Gglossary 421
Hhardware requirements 1
Tivoli Storage Productivity Center forReplication 1
Tivoli Storage Productivity CenterGUI 4
HBA 58HBAs
planning for Fabric Manager 103History Aggregator, configuring 295host port 58hosts 58
IIBM SONAS
planning for 87
IBM SONAS (continued)WAN caching 87, 351
installationcomponents 136reinstalling 207silent mode, multiple-server
environment 179, 182silent mode, single-server
environment 167upgrading using upgrade
wizard 369, 372, 373installation failure
deleting registry files 403installing 186
agents 195DB2 on AIX 145DB2 on AIX POWER7 Systems 148DB2 on Linux 143DB2 on UNIX 143DB2 on Windows 140DB2, preparing for installation on
UNIX 140DB2, preparing for installation on
Windows 139GUI
TIP 151Monitoring agent 199new installation 151on a Windows domain 159planning 133preparing to install on a Windows
domain 155single-server environment 166starting installation 163Storage Resource agent
considerations 297Storage Resource agents 296Storage Resource agents locally 196Storage Resource agents
remotely 196, 297TIP
installing 151Tivoli Integrated Portal 385Windows domain
Dcdiag tool 162Windows domain or local 154wizard
remote database 176IPv6
configuringAIX for IPv6 349DB2 on AIX for IPv6 349DB2 on Linux for IPv6 350
configuring DB2 on Linux 350configuring for AIX 349configuring for DB2 on AIX 349limitations 50planning for 48
Jjobs, overview 236
LLDAP
planning for 52LDAP repository
adding to federated repositories 220removing 228
LDAP serverssoftware requirements 17
licenseadding 192, 193, 194
license keyobtaining 193
licenses 24Linux 404log files
installation error 191setting retention period 290
MMIB file location 289migrating
Data agents 382Fabric agents 382
monitoringdatabases 41file systems 42MSCS clustered nodes and cluster
resource groups 110networked file systems 43PowerHA clustered nodes and cluster
resource groups 114volume managers 43
Monitoring agentconfiguring 344configuring for Windows 344configuring on UNIX 344installing 199installing and configuring 199, 203starting 345stopping 345
Monitoring Agentuninstalling 400uninstalling on UNIX 400uninstalling on Windows 400
MSCS support 109, 110multipath 58multipath subsystem device drivers
planning for 44upgrading 45
NNAS
monitor 292support of 116
NAS configuration file, editing 295nas.config file, editing 295native interfaces
planning for 50NetApp
configuration 117identifying in user interface 119limitations 119planning for 117removing a device 118
428 IBM Tivoli Storage Productivity Center: Installation and Configuration Guide

networked file systemssupported 43
Ooperating systems supported 4
Ppasswords
changing using password tool 240,242, 244, 246
valid characters 31path planning 58performance
configuration 107planning for DS8000 76
performance metrics 105performance monitor 58planning
authorization for users 29, 215for an MSCS environment 110for CIM agents 70for Data Path Explorer view 66for DS8000 76for IBM SONAS 87for MSCS support 109for NAS system support 116for retrieving information from DB2
views 127, 128for roll up reports configuration 55for rollup reports 54for SAN configuration tools 56for Solaris Storage Resource
agents 68for System Storage N Series Gateway
servers 120for TagmaStore CIM agents 71for tape library support 40for VMware configuration 123for VMware support 120for volume manager support 43for XIV system 85IPv6 support 48, 50NetApp support 117overview 1storage system support 39switches 40Virtual I/O Server support 125
PowerHAenvironment 114planning for 112upgrading agents 114
preparing for an upgrade 364probe 58problems
report xiv
Qquota and constraint e-mail address
rules 291
RRAID 58reader feedback, sending xivreplication planning 58Replication server
upgrading 360reporting problems xivreports
configuring for data aggregation 295specifying how long to keep
information 319VMware capacity 123
resource historiessetting retention periods 317
resourcesadding to IBM Tivoli Storage
Productivity Center 255specifying how long to keep 318
roles 233roll up reports
planning for configuration 55rollup reports
planning for 54
SSAN configuration tools
planning 56SAN Planner 58SAN Volume Controller
publications xiSDD 58sending comments xivservers
adding to IBM Tivoli StorageProductivity Center 268
sight-impaired 413silent mode installation
multiple-server environment 179, 182single-server environment 167
silent-mode upgrade 369, 374, 377single sign-on
planning for 54user authentication method used
with 54SNMP
sending traps 288software requirements
database repository 14for CIM agents 17, 53for LDAP servers 17operating systems 4Storage Resource agent support 8
SSH protocolcreating a certificate 301
SSL certificatesreplacing a certificate 306
startingthrough Tivoli Integrated Portal
Tivoli Storage ProductivityCenter 214
Tivoli Storage Productivity Centerfor Replication 214
Tivoli Storage ProductivityCenter 209
starting (continued)Tivoli Storage Productivity Center for
Replication 213Tivoli Storage Productivity Center
stand-alone GUI 209Tivoli Storage Productivity Center
web-based GUI 212storage capacity of volumes 76Storage Optimizer
analysis report 64optimization report 64supported storage systems 64
storage pools 58storage port 58Storage Resource agents
configuring for upgrade 312creating certificates for 301deploying 296deployment considerations 297importing authentication
information 333installing 296installing locally 196monitoring by Tivoli Agent
Management Services 130, 132planning for 45planning for Solaris 68preparing for 196protocol support 46replacing SSL certificates 306uninstalling manually 399uninstalling using GUI 399upgrading 380, 381upgrading manually 381, 382
storage resource groups 58Storage Subsystem Credential Migration
tool 361storage system supported 39storage systems
adding to IBM Tivoli StorageProductivity Center 256
subsystem device driversplanning for 44upgrading 45
Supportcontact xiv
switch 58switch zone 58switches
adding to IBM Tivoli StorageProductivity Center 266
configuring 320planning for 102supported 40using private networks 104
System Storage N Series Gateway serversplanning for 120upgrading 386
Ttape libraries
adding to IBM Tivoli StorageProductivity Center 271
tape library support 40TCP/IP ports
planning for 35, 36
Index 429

TCP/IP ports (continued)used by Tivoli Storage Productivity
Center for Replication 36TEC events
sending 288time zone 58timeout values
setting for Device server 323Tivoli Agent Management Services
monitoring Storage Resourceagents 130, 132
Tivoli Common Reportinginstalling and configuring 187
Tivoli Integrated Portal 234Tivoli Common Reporting 233
Tivoli Storage Productivity Centerhardware requirements 1installing 151Lightweight Directory Access Protocol
SAN Volume Controller remoteauthentication support 341
software requirements 4uninstalling 393, 394, 396uninstalling Monitoring Agent 400uninstalling Monitoring Agent on
UNIX 400uninstalling Monitoring Agent on
Winsows 400uninstalling the agents 398
Tivoli Storage Productivity Center forReplication
accessing through Tivoli StorageProductivity Center 254
software requirements 4uninstalling 393, 394, 396
topology 58trademarks 419translations
browser locale requirement xiii
Uuninstall 404, 405uninstalling
Data agent 399DB2 401Storage Resource agent 399Storage Resource agent manually 399Tivoli Storage Productivity
Center 393, 394, 396Tivoli Storage Productivity Center
agents 398Tivoli Storage Productivity Center for
Replication 393, 394, 396Tivoli Storage Productivity Center
Monitoring Agent 400Tivoli Storage Productivity Center
Monitoring Agent on UNIX 400Tivoli Storage Productivity Center
Monitoring Agent on Windows 400upgrading 364
changes in Tivoli CommonReporting 356
in silent mode 369, 374, 377multiple-server environment 371Replication server 360single-server environment 368
upgrading (continued)Storage Resource agents
manually 381, 382System Storage N Series Gateway
servers 386Upgrade package 367
user authentication 30, 218DB2 user names and passwords 30general requirements 30work sheets 33
user namesvalid characters 31
Vviews
planning to retrieve information 127,128
Virtual I/O Serverplanning for 125
VMwarecapacity reports 123
VMware support 120configuration 123
volume managerssupported 43
volume planning 58VPA 58
WWAN caching
IBM SONAS 87, 351web-based GUI 192windows 405workload profile 58WWPN 58
XXIV system
planning for 85
Zzone 58zone planning 58zone set 58zone sets
configuring for inactive zonesets 322
430 IBM Tivoli Storage Productivity Center: Installation and Configuration Guide


����
Product Number: 5725-F93, 5725-G33, 5725-F98
Printed in USA
SC27-4047-01
Related Documents