IAN 75092 KOMPERNASS GMBH Burgstraße 21 D-44867 Bochum www.kompernass.com Stand der Informationen · Version des informations Versione delle informazioni · Stand van de informatie Last Information Update: 04 / 2012 Ident.-No.: SFB 10.1B2042012-1 IAN 75092 MANDO A DISTANCIA UNIVERSAL SFB 10.1 B2 ES Instrucciones de uso Página 1 IT / MT Istruzioni per l‘uso Pagina 31 GB / MT Operating instructions Page 59 Antes de empezar a leer abra la página que contiene las imágenes y, en seguida, familiarícese con todas las funciones del dispositivo. Prima di leggere aprire la pagina con le immagini e prendere confidenza con le diverse funzioni dell’apparecchio. Before reading, unfold the page containing the illustrations and familiarise yourself with all functions of the device. MANDO A DISTANCIA UNIVERSAL Instrucciones de uso TELECOMANDO UNIVERSALE Istruzioni per l‘uso 10-IN-1 REMOTE CONTROL Operating instructions

Welcome message from author
This document is posted to help you gain knowledge. Please leave a comment to let me know what you think about it! Share it to your friends and learn new things together.
Transcript
IAN 75092
KOMPERNASS GMBHBurgstraße 21 D-44867 Bochumwww.kompernass.com
Stand der Informationen · Version des informations Versione delle informazioni · Stand van de informatie Last Information Update: 04 / 2012 Ident.-No.: SFB 10.1B2042012-1
IAN 75092
MANDO A DISTANCIA UNIVERSAL SFB 10.1 B2
ES Instrucciones de uso Página 1IT / MT Istruzioni per l‘uso Pagina 31GB / MT Operating instructions Page 59
Antes de empezar a leer abra la página que contiene las imágenes y, en seguida, familiarícese con todas las funciones del dispositivo.
Prima di leggere aprire la pagina con le immagini e prendere confidenza con le diverse funzioni dell’apparecchio.
Before reading, unfold the page containing the illustrations and familiarise yourself with all functions of the device.
MANDO A DISTANCIA UNIVERSALInstrucciones de uso
TELECOMANDO UNIVERSALEIstruzioni per l‘uso
10-IN-1 REMOTE CONTROLOperating instructions
CV_SFB 10.1 B2 - TOZ-75092.indd 6 28.04.2012 12:15:50
CV.indd 8 26.04.2012 22:16:12
- 1 -
ÍNDICE PÁGINAIndicaciones de seguridad importantes 2Visión general del aparato 3Puesta en funcionamiento 4
Desembalar el aparato/Comprobar el volumen de suministro 4Insertar las pilas 4
Elementos de operación 5Pantalla LCD 5Botones 6
El menú de configuración 9Configurar idiomas del menú 11Configurar código (programación del mando a distancia) 11
Programación mediante búsqueda de código por marcas 11Programación introduciendo el código manualmente 12Programación mediante búsqueda automática de código 13
Configurar el sistema 14Ajustar la hora 14Ajustar la fecha 15Ajustar el contraste 15Luz de fondo 15Ajustar el volumen/conmutador silenciador general 16Seleccionar el aparato de cinta/disco para el mando directo 17Ajustar la función de bloqueo 17Restaurar el sistema 18
Configurar temporizador 18Temporizador de desconexión 18Temporizador de eventos 19Borrar Timer 20
Configurar aprendizaje 20Función de programación de códigos 21
Configurar macros 22Canal de favoritos 23Regulación del volumen 25
Vol +/—, (silenciamiento) 25Para la operación 25
Desconexión total 25Limpieza y almacenamiento 26Error / Solución 26Evacuación 27Características técnicas 28Indicación acerca de la conformidad 28Importador 28Garantía y asistencia técnica 28
BDA_SFB 10.1 B2 - IAN-75092_es.indd 1 26.04.2012 15:43:25

- 2 -
MANDO A DISTANCIA UNIVERSAL SFB 10.1 B2
IntroducciónFelicidades por la compra de su aparato nuevo.Ha optado por adquirir un producto de alta calidad. Las ins-trucciones de uso forman parte del producto. Contiene indica-ciones importantes acerca de la seguridad, uso y evacuación. Antes de usar el producto familiaricese con todas las indica-ciones de manejo y de seguridad. Utilice el producto como se describe y para los ámbitos de aplicación indicados. Guarde convenientemente estas instrucciones. Entregue todos los docu-mentos cuando transfiera el producto a terceros.
Derechos de autorEsta documentación está protegida por derechos de autor. Se reservan todos los derechos, también de reproducción fotomecánica, reproducción y difusión por medio de un pro-cedimiento especial (por ejemplo, procesamiento de datos, soportes de datos y redes de datos), también parcialmente, así como las modificaciones técnicas y en el contenido.
IndicacionesdeseguridadimportantesFinalidad de usoLos niños sólo deben utilizar el mando a distancia bajo la supervisión de adultos. El mando a distancia universal puede sustituir como máximo a diez mandos a distancia. Sólo se puede utilizar con apara-tos audiovisuales con receptor de infrarrojos. Las funciones del mando a distancia universal se corresponden fundamental-mente con las de los mandos a distancia originales. El man-do a distancia universal está indicado para el uso privado. No está indicado para el uso comercial. Cualquier uso distinto no se considerará conforme a lo pre-visto. El fabricante no asume ninguna responsabilidad por daños derivados de un uso no conforme a lo previsto.
AdvertenciaUna advertencia de este nivel de peligro indica una posible situación de peligro. Si no puede evitarse la situación de pe-ligro, pueden producirse lesiones. Deben seguirse las instruc-ciones de esta advertencia para evitar lesiones a personas.
AtenciónUna advertencia de este nivel de peligro indica un posible daño material. Si no puede evitarse la situación, pueden pro-ducirse daños materiales. Deben seguirse las instrucciones de esta advertencia para evitar daños materiales.
AdvertenciaUna indicación advierte de informaciones adicionales que facilitan el manejo del aparato.
BDA_SFB 10.1 B2 - IAN-75092_es.indd 2 26.04.2012 15:43:26

- 3 -
¡Advertenciaantepeligrodelesionesdebidoaunusoinadecuadodelaspilas!
Se deben manejar las pilas con especial cuidado. Observe las siguientes indicaciones de seguridad:
• Saque las pilas del compartimiento de las pilas cuando estén gastadas.
• No tire las pilas al fuego. No se deben exponer las pilas a altas temperaturas.
• Si no va a utilizar el aparato durante una temporada, reti-re las pilas para evitar que se descarguen.
• ¡Riesgo de explosión! No se deben cargar las pilas.• No abra las pilas ni las cortocircuite.• El ácido derramado de las pilas puede provocar irritación
en la piel. Lave la zona de contacto con abundante agua. Si el líquido alcanza los ojos, enjuáguelos bien con agua, no los frote y acuda inmediatamente al médico.
• Cambie en su caso siempre todas las pilas a la vez y no mezcle nunca pilas de diferentes tipos.
• Los niños no deben tener acceso a las pilas. Los niños pueden meterse las pilas en la boca y atragantarse. En caso de ingestión de una pila consulte inmediatamente con un médico.
¡Atención!El mando a distancia universal incorpora un diodo infrarrojo láser de clase 1. Para evitar lesiones oculares, no lo observe con dispositivos ópticos.
Dañosenelaparato• Si el aparato estuviese defectuoso, no intente repararlo
usted mismo. En caso de daños póngase en contacto con el fabricante o su línea directa de asistencia (véase la tar-jeta de garantía).
• Si penetrase líquido en el aparato o resultase dañado de otro modo, deberá ser revisado por el fabricante o su línea directa de asistencia. Póngase en contacto con el fabricante o su línea directa de asistencia (véase la infor-mación de la garantía).
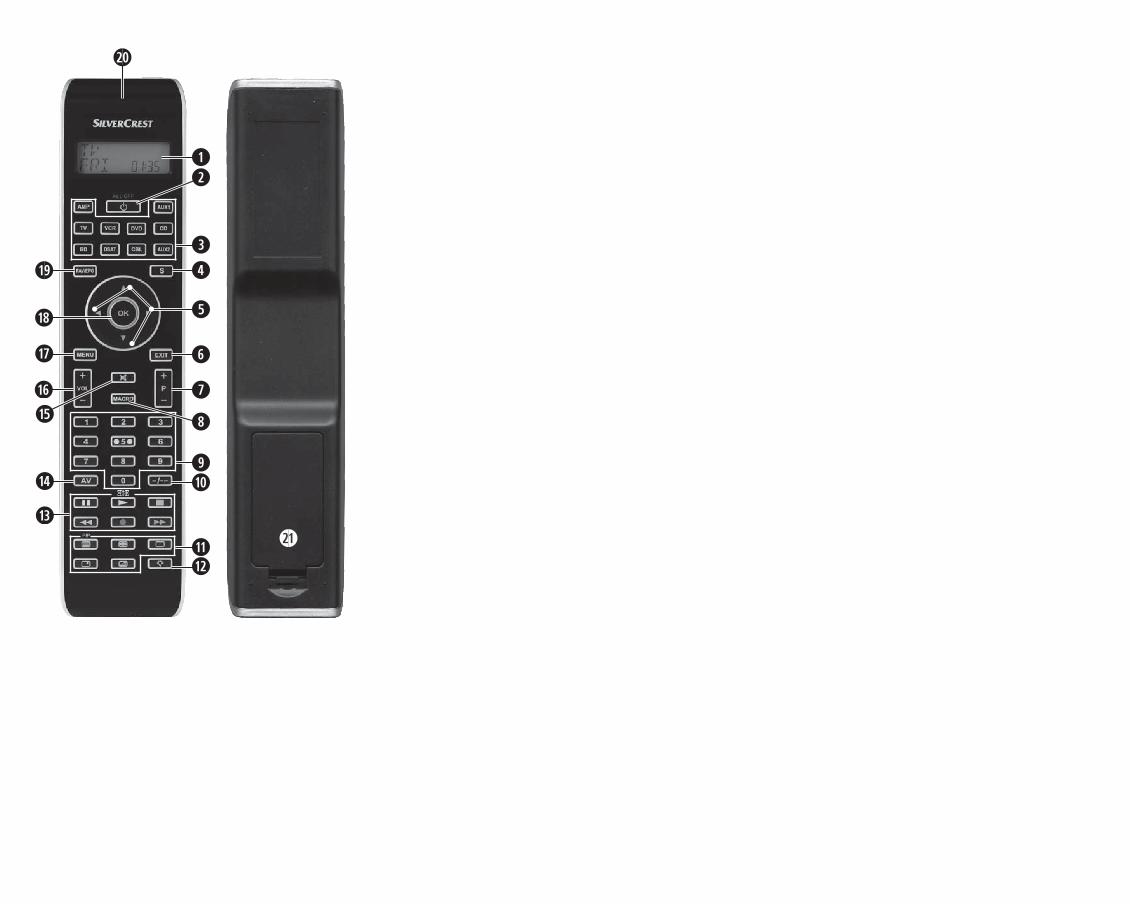
Visióngeneraldelaparatoq Pantalla LCDw Botón /ALL OFFe Botones de aparator Botón St Botones de direccióny Botón EXITu Botones P +/—i Botón MACROo Botones numéricosa Botón para números de canal de una o dos cifrass Botones de función de teletexto
BDA_SFB 10.1 B2 - IAN-75092_es.indd 3 26.04.2012 15:43:26
- 4 -
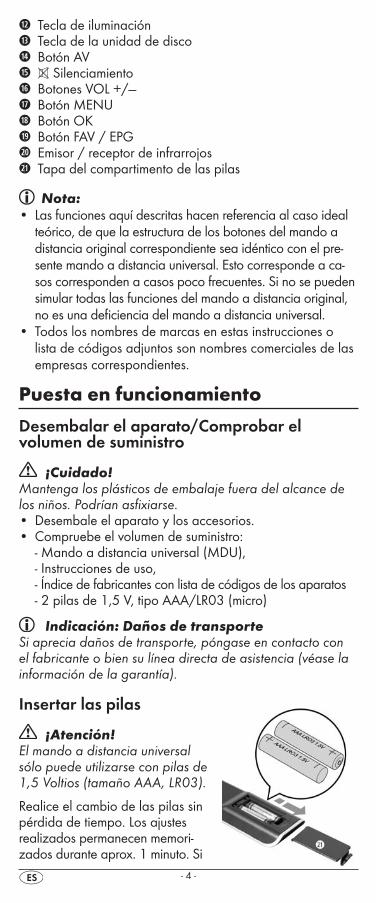
d Tecla de iluminaciónf Tecla de la unidad de disco g Botón AVh Silenciamientoj Botones VOL +/—k Botón MENUl Botón OK1( Botón FAV / EPG2) Emisor / receptor de infrarrojos2! Tapa del compartimento de las pilas
Nota:• Las funciones aquí descritas hacen referencia al caso ideal
teórico, de que la estructura de los botones del mando a distancia original correspondiente sea idéntico con el pre-sente mando a distancia universal. Esto corresponde a ca-sos corresponden a casos poco frecuentes. Si no se pueden simular todas las funciones del mando a distancia original, no es una deficiencia del mando a distancia universal.
• Todos los nombres de marcas en estas instrucciones o lista de códigos adjuntos son nombres comerciales de las empresas correspondientes.
Puestaenfuncionamiento
Desembalar el aparato/Comprobar el volumen de suministro
¡Cuidado!Mantenga los plásticos de embalaje fuera del alcance de los niños. Podrían asfixiarse.• Desembale el aparato y los accesorios.• Compruebe el volumen de suministro:
- Mando a distancia universal (MDU), - Instrucciones de uso, - Índice de fabricantes con lista de códigos de los aparatos - 2 pilas de 1,5 V, tipo AAA/LR03 (micro)
Indicación:DañosdetransporteSi aprecia daños de transporte, póngase en contacto con el fabricante o bien su línea directa de asistencia (véase la información de la garantía).
Insertar las pilas
¡Atención!El mando a distancia universal sólo puede utilizarse con pilas de 1,5 Voltios (tamaño AAA, LR03).
Realice el cambio de las pilas sin pérdida de tiempo. Los ajustes realizados permanecen memori-zados durante aprox. 1 minuto. Si
BDA_SFB 10.1 B2 - IAN-75092_es.indd 4 26.04.2012 15:43:26
- 5 -
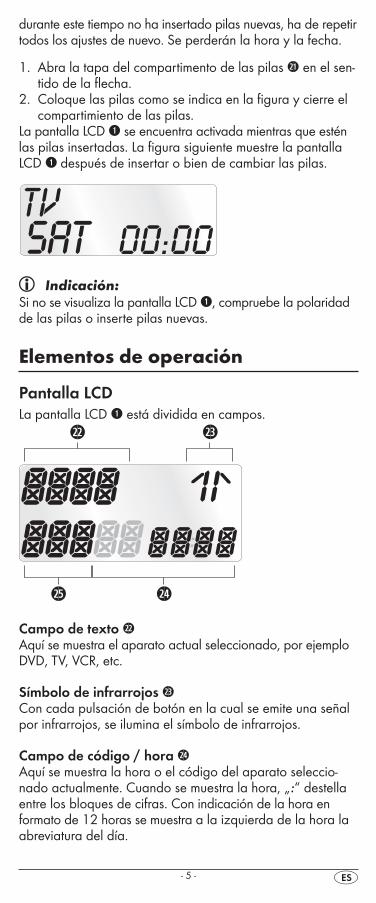
durante este tiempo no ha insertado pilas nuevas, ha de repetir todos los ajustes de nuevo. Se perderán la hora y la fecha.
1.Abra la tapa del compartimento de las pilas 2! en el sen-tido de la flecha.
2. Coloque las pilas como se indica en la figura y cierre el compartimiento de las pilas.
La pantalla LCD q se encuentra activada mientras que estén las pilas insertadas. La figura siguiente muestre la pantalla LCD q después de insertar o bien de cambiar las pilas.
Indicación:Si no se visualiza la pantalla LCD q, compruebe la polaridad de las pilas o inserte pilas nuevas.
Elementosdeoperación
Pantalla LCDLa pantalla LCD q está dividida en campos.
Campo de texto 2@Aquí se muestra el aparato actual seleccionado, por ejemplo DVD, TV, VCR, etc.
Símbolo de infrarrojos 2#Con cada pulsación de botón en la cual se emite una señal por infrarrojos, se ilumina el símbolo de infrarrojos.
Campo de código / hora 2$Aquí se muestra la hora o el código del aparato seleccio-nado actualmente. Cuando se muestra la hora, „:“ destella entre los bloques de cifras. Con indicación de la hora en formato de 12 horas se muestra a la izquierda de la hora la abreviatura del día.
BDA_SFB 10.1 B2 - IAN-75092_es.indd 5 26.04.2012 15:43:26
- 6 -
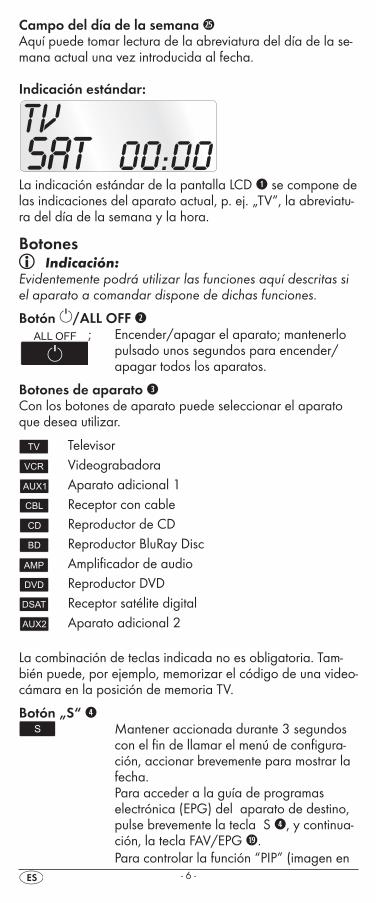
Campo del día de la semana 2%Aquí puede tomar lectura de la abreviatura del día de la se-mana actual una vez introducida al fecha.
Indicación estándar:
La indicación estándar de la pantalla LCD q se compone de las indicaciones del aparato actual, p. ej. „TV“, la abreviatu-ra del día de la semana y la hora.
Botones Indicación:
Evidentemente podrá utilizar las funciones aquí descritas si el aparato a comandar dispone de dichas funciones.
Botón /ALL OFF w; Encender/apagar el aparato; mantenerlo
pulsado unos segundos para encender/apagar todos los aparatos.
Botones de aparato eCon los botones de aparato puede seleccionar el aparato que desea utilizar.
Televisor Videograbadora Aparato adicional 1 Receptor con cable Reproductor de CD Reproductor BluRay Disc Amplificador de audio Reproductor DVD Receptor satélite digital Aparato adicional 2
La combinación de teclas indicada no es obligatoria. Tam-bién puede, por ejemplo, memorizar el código de una video-cámara en la posición de memoria TV.
Botón „S“ r Mantener accionada durante 3 segundos
con el fin de llamar el menú de configura-ción, accionar brevemente para mostrar la fecha.
Para acceder a la guía de programas electrónica (EPG) del aparato de destino, pulse brevemente la tecla S r, y continua-ción, la tecla FAV/EPG 1(. Para controlar la función “PIP” (imagen en
BDA_SFB 10.1 B2 - IAN-75092_es.indd 6 26.04.2012 15:43:26
- 7 -
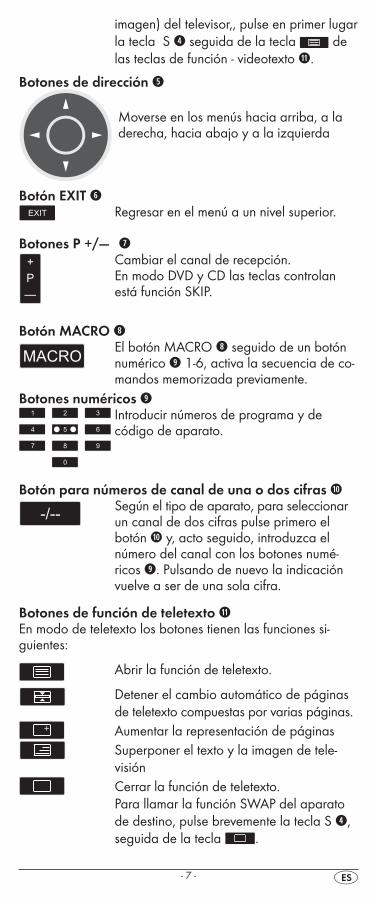
imagen) del televisor,, pulse en primer lugar la tecla S r seguida de la tecla de las teclas de función - videotexto s.
Botones de dirección t
Moverse en los menús hacia arriba, a la derecha, hacia abajo y a la izquierda
Botón EXIT y Regresar en el menú a un nivel superior.
Botones P +/— u Cambiar el canal de recepción. En modo DVD y CD las teclas controlan
está función SKIP.
Botón MACRO i El botón MACRO i seguido de un botón
numérico o 1-6, activa la secuencia de co-mandos memorizada previamente.
Botones numéricos o Introducir números de programa y de
código de aparato.
Botón para números de canal de una o dos cifras a Según el tipo de aparato, para seleccionar
un canal de dos cifras pulse primero el botón a y, acto seguido, introduzca el número del canal con los botones numé-ricos o. Pulsando de nuevo la indicación vuelve a ser de una sola cifra.
Botones de función de teletexto sEn modo de teletexto los botones tienen las funciones si-guientes:
Abrir la función de teletexto.
Detener el cambio automático de páginas de teletexto compuestas por varias páginas.
Aumentar la representación de páginas Superponer el texto y la imagen de tele-
visión Cerrar la función de teletexto.
Para llamar la función SWAP del aparato de destino, pulse brevemente la tecla S r, seguida de la tecla .
BDA_SFB 10.1 B2 - IAN-75092_es.indd 7 26.04.2012 15:43:26
- 8 -
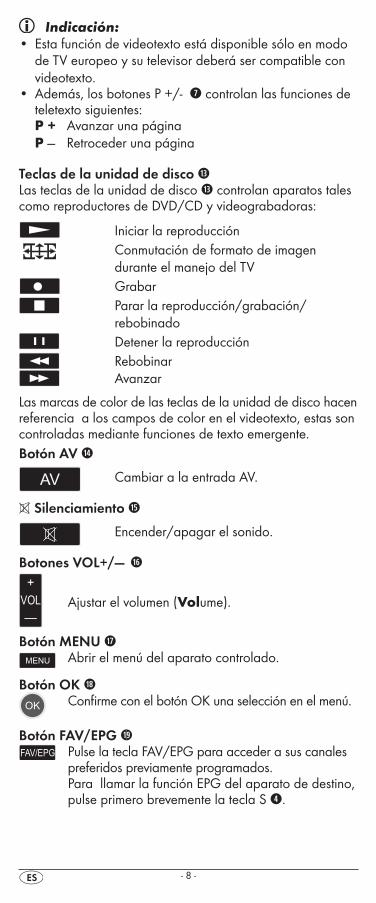
Indicación:• Esta función de videotexto está disponible sólo en modo
de TV europeo y su televisor deberá ser compatible con videotexto.
• Además, los botones P +/- u controlan las funciones de teletexto siguientes: P+ Avanzar una páginaP— Retroceder una página
Teclas de la unidad de disco fLas teclas de la unidad de disco f controlan aparatos tales como reproductores de DVD/CD y videograbadoras:
Iniciar la reproducción Conmutación de formato de imagen
durante el manejo del TV Grabar Parar la reproducción/grabación/
rebobinado Detener la reproducción Rebobinar Avanzar
Las marcas de color de las teclas de la unidad de disco hacen referencia a los campos de color en el videotexto, estas son controladas mediante funciones de texto emergente.Botón AV g
Cambiar a la entrada AV.
Silenciamiento h
Encender/apagar el sonido.
Botones VOL+/—j
Ajustar el volumen (Volume).
Botón MENU k Abrir el menú del aparato controlado.
Botón OK l Confirme con el botón OK una selección en el menú.
Botón FAV/EPG 1( Pulse la tecla FAV/EPG para acceder a sus canales
preferidos previamente programados. Para llamar la función EPG del aparato de destino, pulse primero brevemente la tecla S r.
BDA_SFB 10.1 B2 - IAN-75092_es.indd 8 26.04.2012 15:43:26
- 9 -
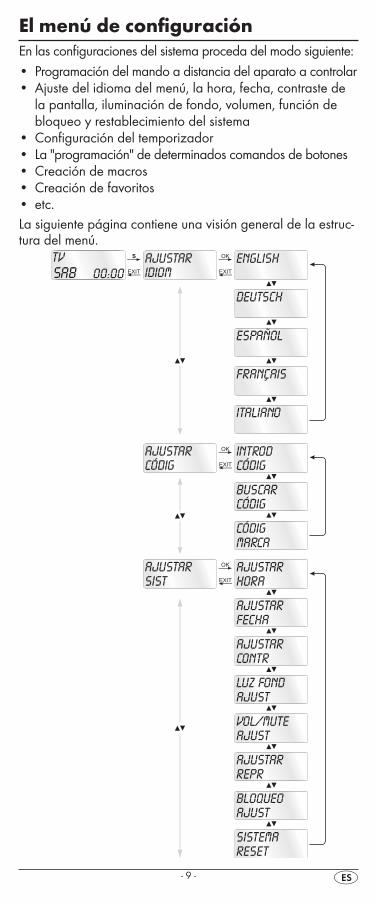
El menú de configuraciónEn las configuraciones del sistema proceda del modo siguiente:• Programación del mando a distancia del aparato a controlar• Ajuste del idioma del menú, la hora, fecha, contraste de
la pantalla, iluminación de fondo, volumen, función de bloqueo y restablecimiento del sistema
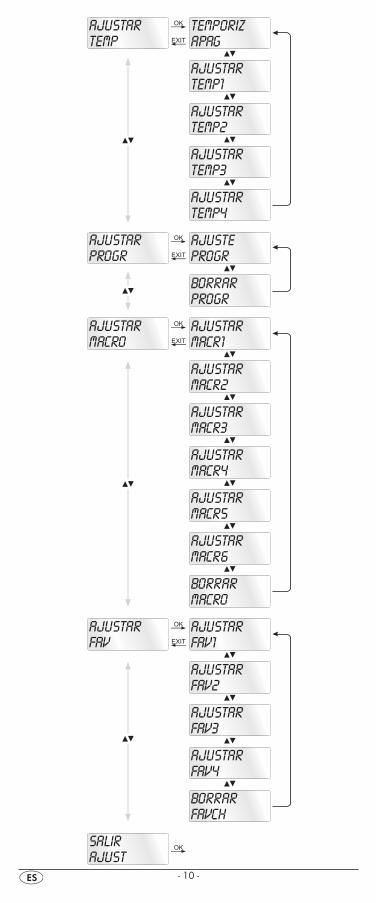
• Configuración del temporizador• La "programación" de determinados comandos de botones• Creación de macros• Creación de favoritos• etc.La siguiente página contiene una visión general de la estruc-tura del menú.
BDA_SFB 10.1 B2 - IAN-75092_es.indd 9 26.04.2012 15:43:26
- 10 -
BDA_SFB 10.1 B2 - IAN-75092_es.indd 10 26.04.2012 15:43:26
- 11 -
Configurar idiomas del menúPara la representación del menú del aparato puede elegir entre 5 idiomas: Inglés, Alemán, Español, Francés e Italiano.
1. Mantenga pulsado el botón S r durante algo más de 3 segundos. Realice las entradas en el menú rápidamente, puesto que el menú se cierra sin transcurren 15 segundos sin realizar ninguna entrada.
2. En la pantalla LCD q se visualiza „LANGUAGE SETUP“. Pulse la tecla OK l.
3. En la pantalla LCD aparece ahora „ENGLISH“ q. Con las teclas t seleccione el idioma elegido y confirme con la tecla OK l.
4. Con la tecla EXIT y finaliza el menú.
El menú de aparatos se muestran ahora en el idioma selec-cionado. Para el resto de las instrucciones presuponemos que ha seleccionado el idioma del país.
Configurar código(programación del mando a distancia)
Están disponibles 3 métodos de programación para el mando a distancia: Programación mediante búsqueda de código por marcas, mediante búsqueda de código automática y mediante entrada directa de código (manual).
En primer lugar debería utilizar la búsqueda de códigos por marcas, puesto que éste representa el método más rápido de programación siempre que el fabricante de su aparato se en-cuentre en la lista de códigos. Como segunda opción se reco-mienda la entrada directa de código seguida de la búsqueda automática de código.
Programación mediante búsqueda de código por marcasEn este método seleccione directamente la marca y el código a través de la pantalla LCD q.
Para programar su mando a distancia, siga las instrucciones de operación siguientes:
1.Pulse el botón de aparatos e del aparato para el cual desea programar el mando a distancia.
2.Mantenga pulsado el botón S r durante algo más de 3 segundos. En la pantalla LCD q aparece „AJUSTAR IDIOM”. Con la tecla o bien t seleccione „AJUS-TAR CÓDIG“ y confirme con la tecla OK l.
3. En la pantalla LCD q aparece ahora „INTROD CÓDIG“. Seleccione „CÓDIGO MARCA“ con los botones t y confirme con el botón OK l.
4. A continuación aparece en orden alfabético la primera marca de la lista de aparatos preprogramados.
BDA_SFB 10.1 B2 - IAN-75092_es.indd 11 26.04.2012 15:43:26
- 12 -
5. Utilice los 34 botones t para seleccionar las distintas marcas.
6.Para facilitar el acceso puede saltar con los botones numéricos o directamente a las letras de inicio:2 => A 3 => D 4 => G 5 => J 6 => M 7 => P 8 => T 9 => W Ejemplo para la búsqueda de un código de marca de TV: Con el botón 5 la indicación salta a la „J“. La pri-mera marca es „JEC“*. Si dispone por ejemplo de un aparato de la marca „Kenwood“*, pulse el botón 4 t para pasar de página hasta que aparezca esta marca. (* Todos los nombres de marcas son marcas comerciales de las empresas correspondientes.)
7.La mayoría de los fabricantes utilizan varios códigos diferen-tes para el mando a distancia. Lo que tiene que descubrir ahora cuales de los códigos disponibles son los más ade-cuados para su aparato. En el lado derecho de la pantalla LCD q, debajo de la marca, se muestra el código actual.
8. Oriente el mando a distancia sobre el aparato actual y pulse las teclas, que correspondan las funciones de este aparato, para comprobar estos códigos (excepto 34t, OK l, EXIT y, las teclas de los aparatos e o las teclas numéricas o).
9.Si funcionan la mayoría de los botones, pulse el botón OK l, para memorizar el ajuste. En la pantalla LCD q aparece „OK”. A continuación, el menú se cierra auto-máticamente.
10. Si no funcionan los botones o si sólo funcionan unas cuantas, utilice el botón ó t para seleccionar el siguiente código y vuelva a comprobarlo conforme a lo descrito bajo el punto 8.
11.El botón EXIT y permite regresar un nivel en el menú.
Repita estos pasos operativos para todos los aparatos que desea controlar con el mando a distancia.
Programación introduciendo el código manualmenteEn este modo se puede programar el mando a distancia intro-duciendo directamente un número de código. Consulte el nú-mero código necesario en el índice de fabricantes adjunto a la lista de códigos de aparatos. Si el código nuevo no es válido, se restablece el código válido programado como último.
1.Pulse el botón de aparatos e del aparato para el cual desea programar el mando a distancia.
2.Mantenga pulsado el botón S r durante algo más de 3 segundos. En la pantalla LCD q aparece „AJUSTAR IDIOM”. Con la tecla o bien t seleccione „AJUS-TAR CÓDIG“ y confirme con la tecla OK l.
3.En la pantalla LCD q aparece ahora „INTROD CÓDIG“. Pulse el botón l para abrir esta función.
4.En la pantalla LCD q aparece el código utilizado actual-mente para el aparato seleccionado. Ahora parpadea el
BDA_SFB 10.1 B2 - IAN-75092_es.indd 12 26.04.2012 15:43:27
- 13 -
primer dígito del código esperando que se introduzca el código. Introduzca el nuevo código de cuatro cifras con los botones numéricos o. Después de introducir el cuarto dígi-to parpadea el código completo. Ahora puede comprobar si el MDU puede controlar con este código el aparato ele-gido. Pulse las teclas que correspondan a las funciones del aparato, en el televisor p. ej. PROG +/–. Si el aparato re-acciona tal como se desea, confirme la entrada de código con la tecla OK l. De lo contrario introduzca el siguiente código posible de la lista y vuelva a comprobarlo.
5.Si el CÓDIGO introducido es válido, se memoriza el código. En la pantalla LCD qaparece brevemente „OK“. A continuación, el menú se cierra automáticamente. En caso de un fallo la pantalla LCD q muestra brevemente „ERROR“ (error), quedando en espera a que se introduzca el código de nuevo. Repita el paso 4.
6. El botón EXIT y permite subir un nivel en el menú.
Programación mediante búsqueda automática de códigoEste proceso puede durar por aparato varios minutos ya que se ha de recorrer todos los códigos para el aparato seleccio-nado. Por ello se deberá utilizar este método en caso de no poder programar el aparato mediante la búsqueda directa por marcas o bien entrada de código directo y en el caso de que el aparato no figure en el índice de fabricante con lista de código de aparatos.
Siga los pasos indicados a continuación para realizar la pro-gramación mediante búsqueda automática de códigos.
1.Pulse el botón de aparato e correspondiente al aparato que quiere controlar (p.ej. VCR).
2. Encienda el aparato que desea controlar con el mando a distancia. En los aparatos VCR/DVD/CD inserte una cinta o bien un disco.
3.Mantenga pulsado el botón S r durante algo más de 3 segundos. En la pantalla LCD q aparece „AJUSTAR IDIOM”. Con la tecla o bien t seleccione „AJUS-TAR CÓDIG“ y confirme con la tecla OK l.
4.En la pantalla LCD q aparece ahora „INTROD CÓDIG“. Pulse el botón o bien t, hasta que en la pantalla LCD q aparezca „CERCA CODIC“. Oriente el mando a distancia hacia el aparato y, acto seguido, pulse el botón OK l para activar el modo "búsqueda automática de código".
5.Comienza la búsqueda. Durante esta operación, el apa-rato envía los códigos uno tras otro en orden ascendente. Esta situación se indica mediante el símbolo de infrarro-jos 2#. Cada búsqueda comienza con el código actual ajustado.
6.Si el aparato reacciona desconectándose, pulse inmedia-tamente el botón OK l para memorizar el código actual. En la pantalla LCD q se muestra brevemente „OK“.
BDA_SFB 10.1 B2 - IAN-75092_es.indd 13 26.04.2012 15:43:27
- 14 -
7. Compruebe si puede controlar con el mando a distancia la mayor parte de las funciones de su aparato. En caso afir-mativo es muy probable que haya encontrado el código correcto. Si hay algunas funciones no operativas, puede iniciar de nuevo la búsqueda automática de códigos a partir del paso 1.
8. Si el aparato deja de reaccionar, es posible que en el paso 6 no haya pulsado el botón OK l con suficiente rapidez. En este caso, pulse repetidamente el botón EXIT y para salir del menú y regresar a la indicación estándar.
9.A continuación, mantenga pulsado el botón de aparatos e correspondiente al aparato cuyo código está buscan-do. En el lado inferior derecho de la pantalla LCD q se muestra el código actual. Anote este número.
10. Acto seguido, proceda tal como se explicó en el ca-pítulo anterior "Programación introduciendo el código manualmente" y compruebe si el código funciona con la siguiente combinación de números más baja.
Nota:1.Cuando la búsqueda de códigos están todos los botones
sin función excepto OK l y EXIT y.2. Si ha alcanzado la búsqueda automática el final de la
lista de códigos, se detendrá. La pantalla regresa entonces a „CERCA CODIC“.
Configurar el sistema
Ajustar la horaLa pantalla LCD q le muestra la hora. La ajusta del modo siguiente:
1.Mantenga pulsado el botón S r durante algo más de 3 segundos. Aparece la indicación „AJUSTAR IDIOM“. Si transcurren 15 segundos sin que se realice ninguna en-trada, el aparato sale del menú y regresa a la indicación estándar.
2. Seleccione „AJUSTAR SIST“ con el botón o t y confirme con el botón OK l.
3. En la pantalla LCD q se visualiza „AJUSTAR HORA“. Confirme con el botón OK l. En la pantalla LCD q aho-ra se muestra „TEMPO“ y el formato de la hora (24 HR) destella.
4. Pulse el botón o t para cambiar al otro formato de hora (12 HR). Más adelante con la indicación de hora para visualizar la hora del día se muestra „AM“ o „PM“ antespuesto a la hora. „AM“ representa „AM“ = „ante meridium“ (por la mañana, 0:00 horas hasta 12:00 horas). „PM“ representa „PM“ = „post meridium“ (por la tarde, 12:00 horas hasta 0:00 horas). Pulse el botón OK l para confirmar.
5. Ahora destella la indicación de las horas. Seleccione la hora actual con el botón o t y pulse el botón OK l.
BDA_SFB 10.1 B2 - IAN-75092_es.indd 14 26.04.2012 15:43:27
- 15 -
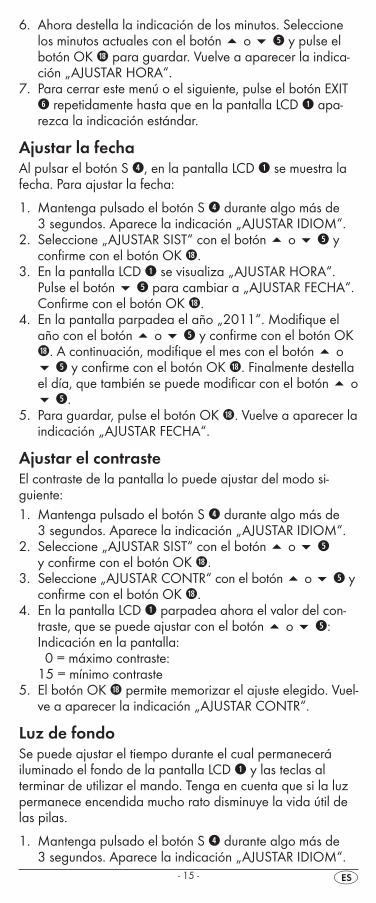
6. Ahora destella la indicación de los minutos. Seleccione los minutos actuales con el botón o t y pulse el botón OK l para guardar. Vuelve a aparecer la indica-ción „AJUSTAR HORA“.
7.Para cerrar este menú o el siguiente, pulse el botón EXIT y repetidamente hasta que en la pantalla LCD q apa-rezca la indicación estándar.
Ajustar la fechaAl pulsar el botón S r, en la pantalla LCD q se muestra la fecha. Para ajustar la fecha:
1.Mantenga pulsado el botón S r durante algo más de 3 segundos. Aparece la indicación „AJUSTAR IDIOM“.
2. Seleccione „AJUSTAR SIST“ con el botón o t y confirme con el botón OK l.
3.En la pantalla LCD q se visualiza „AJUSTAR HORA“. Pulse el botón t para cambiar a „AJUSTAR FECHA“. Confirme con el botón OK l.
4. En la pantalla parpadea el año „2011“. Modifique el año con el botón o t y confirme con el botón OK l. A continuación, modifique el mes con el botón o t y confirme con el botón OK l. Finalmente destella el día, que también se puede modificar con el botón o t.
5.Para guardar, pulse el botón OK l. Vuelve a aparecer la indicación „AJUSTAR FECHA“.
Ajustar el contrasteEl contraste de la pantalla lo puede ajustar del modo si-guiente:1.Mantenga pulsado el botón S r durante algo más de
3 segundos. Aparece la indicación „AJUSTAR IDIOM“.2. Seleccione „AJUSTAR SIST“ con el botón o t
y confirme con el botón OK l.3. Seleccione „AJUSTAR CONTR“ con el botón o t y
confirme con el botón OK l.4.En la pantalla LCD q parpadea ahora el valor del con-
traste, que se puede ajustar con el botón o t:Indicación en la pantalla: 0 = máximo contraste: 15 = mínimo contraste
5.El botón OK l permite memorizar el ajuste elegido. Vuel-ve a aparecer la indicación „AJUSTAR CONTR“.
Luz de fondoSe puede ajustar el tiempo durante el cual permanecerá iluminado el fondo de la pantalla LCD q y las teclas al terminar de utilizar el mando. Tenga en cuenta que si la luz permanece encendida mucho rato disminuye la vida útil de las pilas.
1.Mantenga pulsado el botón S r durante algo más de 3 segundos. Aparece la indicación „AJUSTAR IDIOM“.
BDA_SFB 10.1 B2 - IAN-75092_es.indd 15 26.04.2012 15:43:27
- 16 -
2. Seleccione „AJUSTAR SIST“ con el botón o t y confirme con el botón OK l.
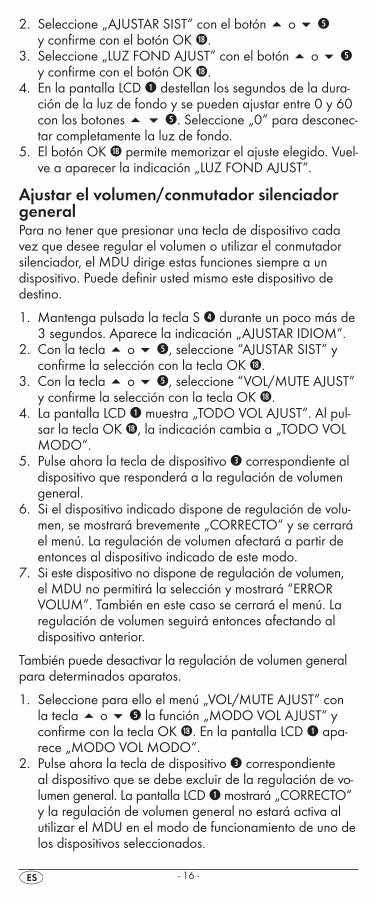
3. Seleccione „LUZ FOND AJUST” con el botón o t y confirme con el botón OK l.
4.En la pantalla LCD q destellan los segundos de la dura-ción de la luz de fondo y se pueden ajustar entre 0 y 60 con los botones t. Seleccione „0“ para desconec-tar completamente la luz de fondo.
5.El botón OK l permite memorizar el ajuste elegido. Vuel-ve a aparecer la indicación „LUZ FOND AJUST“.
Ajustar el volumen/conmutador silenciador generalPara no tener que presionar una tecla de dispositivo cada vez que desee regular el volumen o utilizar el conmutador silenciador, el MDU dirige estas funciones siempre a un dispositivo. Puede definir usted mismo este dispositivo de destino.
1. Mantenga pulsada la tecla S r durante un poco más de 3 segundos. Aparece la indicación „AJUSTAR IDIOM“.
2. Con la tecla o t, seleccione “AJUSTAR SIST” y confirme la selección con la tecla OK l.
3. Con la tecla o t, seleccione “VOL/MUTE AJUST” y confirme la selección con la tecla OK l.
4. La pantalla LCD q muestra „TODO VOL AJUST“. Al pul-sar la tecla OK l, la indicación cambia a „TODO VOL MODO“.
5. Pulse ahora la tecla de dispositivo e correspondiente al dispositivo que responderá a la regulación de volumen general.
6. Si el dispositivo indicado dispone de regulación de volu-men, se mostrará brevemente „CORRECTO“ y se cerrará el menú. La regulación de volumen afectará a partir de entonces al dispositivo indicado de este modo.
7. Si este dispositivo no dispone de regulación de volumen, el MDU no permitirá la selección y mostrará “ERROR VOLUM”. También en este caso se cerrará el menú. La regulación de volumen seguirá entonces afectando al dispositivo anterior.
También puede desactivar la regulación de volumen general para determinados aparatos.
1. Seleccione para ello el menú „VOL/MUTE AJUST“ con la tecla o t la función „MODO VOL AJUST“ y confirme con la tecla OK l. En la pantalla LCD q apa-rece „MODO VOL MODO“.
2. Pulse ahora la tecla de dispositivo e correspondiente al dispositivo que se debe excluir de la regulación de vo-lumen general. La pantalla LCD q mostrará „CORRECTO“ y la regulación de volumen general no estará activa al utilizar el MDU en el modo de funcionamiento de uno de los dispositivos seleccionados.
BDA_SFB 10.1 B2 - IAN-75092_es.indd 16 26.04.2012 15:43:27
- 17 -
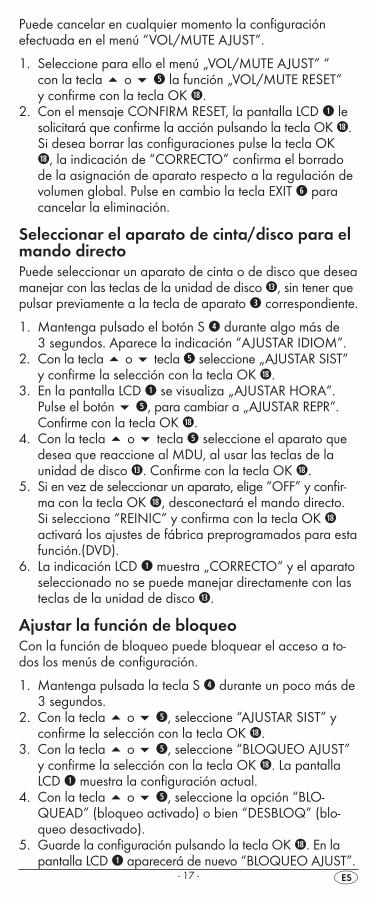
Puede cancelar en cualquier momento la configuración efectuada en el menú “VOL/MUTE AJUST”.
1. Seleccione para ello el menú „VOL/MUTE AJUST“ “ con la tecla o t la función „VOL/MUTE RESET“ y confirme con la tecla OK l.
2. Con el mensaje CONFIRM RESET, la pantalla LCD q le solicitará que confirme la acción pulsando la tecla OK l. Si desea borrar las configuraciones pulse la tecla OK l, la indicación de “CORRECTO” confirma el borrado de la asignación de aparato respecto a la regulación de volumen global. Pulse en cambio la tecla EXIT y para cancelar la eliminación.
Seleccionar el aparato de cinta/disco para el mando directo Puede seleccionar un aparato de cinta o de disco que desea manejar con las teclas de la unidad de disco f, sin tener que pulsar previamente a la tecla de aparato e correspondiente.
1. Mantenga pulsado el botón S r durante algo más de 3 segundos. Aparece la indicación “AJUSTAR IDIOM”.
2. Con la tecla o tecla t seleccione „AJUSTAR SIST“ y confirme la selección con la tecla OK l.
3. En la pantalla LCD q se visualiza „AJUSTAR HORA“. Pulse el botón t, para cambiar a „AJUSTAR REPR“. Confirme con la tecla OK l.
4. Con la tecla o tecla t seleccione el aparato que desea que reaccione al MDU, al usar las teclas de la unidad de disco f. Confirme con la tecla OK l.
5. Si en vez de seleccionar un aparato, elige “OFF” y confir-ma con la tecla OK l, desconectará el mando directo. Si selecciona “REINIC” y confirma con la tecla OK l activará los ajustes de fábrica preprogramados para esta función.(DVD).
6. La indicación LCD q muestra „CORRECTO“ y el aparato seleccionado no se puede manejar directamente con las teclas de la unidad de disco f.
Ajustar la función de bloqueoCon la función de bloqueo puede bloquear el acceso a to-dos los menús de configuración.
1. Mantenga pulsada la tecla S r durante un poco más de 3 segundos.
2. Con la tecla o t, seleccione “AJUSTAR SIST” y confirme la selección con la tecla OK l.
3. Con la tecla o t, seleccione “BLOQUEO AJUST” y confirme la selección con la tecla OK l. La pantalla LCD q muestra la configuración actual.
4. Con la tecla o t, seleccione la opción “BLO-QUEAD” (bloqueo activado) o bien “DESBLOQ” (blo-queo desactivado).
5.Guarde la configuración pulsando la tecla OK l. En la pantalla LCD q aparecerá de nuevo “BLOQUEO AJUST”.
BDA_SFB 10.1 B2 - IAN-75092_es.indd 17 26.04.2012 15:43:27
- 18 -
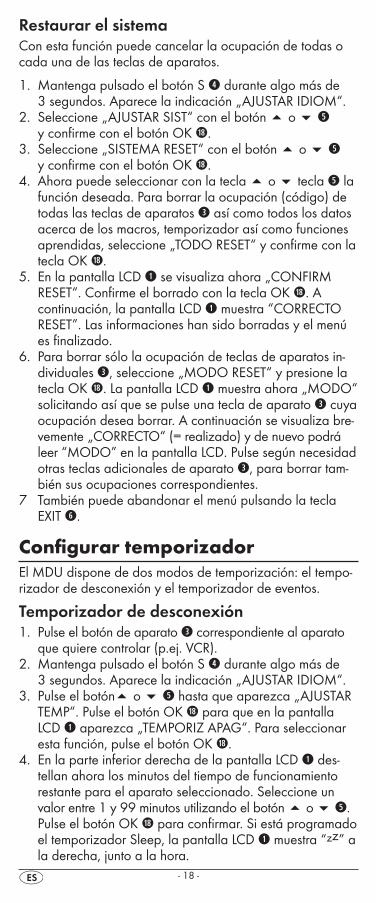
Restaurar el sistemaCon esta función puede cancelar la ocupación de todas o cada una de las teclas de aparatos.
1.Mantenga pulsado el botón S r durante algo más de 3 segundos. Aparece la indicación „AJUSTAR IDIOM“.
2. Seleccione „AJUSTAR SIST“ con el botón o t y confirme con el botón OK l.
3. Seleccione „SISTEMA RESET“ con el botón o t y confirme con el botón OK l.
4. Ahora puede seleccionar con la tecla o tecla t la función deseada. Para borrar la ocupación (código) de todas las teclas de aparatos e así como todos los datos acerca de los macros, temporizador así como funciones aprendidas, seleccione „TODO RESET“ y confirme con la tecla OK l.
5. En la pantalla LCD q se visualiza ahora „CONFIRM RESET“. Confirme el borrado con la tecla OK l. A continuación, la pantalla LCD q muestra “CORRECTO RESET”. Las informaciones han sido borradas y el menú es finalizado.
6. Para borrar sólo la ocupación de teclas de aparatos in-dividuales e, seleccione „MODO RESET“ y presione la tecla OK l. La pantalla LCD q muestra ahora „MODO“ solicitando así que se pulse una tecla de aparato e cuya ocupación desea borrar. A continuación se visualiza bre-vemente „CORRECTO“ (= realizado) y de nuevo podrá leer “MODO” en la pantalla LCD. Pulse según necesidad otras teclas adicionales de aparato e, para borrar tam-bién sus ocupaciones correspondientes.
7 También puede abandonar el menú pulsando la tecla EXIT y.
Configurar temporizadorEl MDU dispone de dos modos de temporización: el tempo-rizador de desconexión y el temporizador de eventos.
Temporizador de desconexión1. Pulse el botón de aparato e correspondiente al aparato
que quiere controlar (p.ej. VCR).2. Mantenga pulsado el botón S r durante algo más de
3 segundos. Aparece la indicación „AJUSTAR IDIOM“.3. Pulse el botón o t hasta que aparezca „AJUSTAR
TEMP“. Pulse el botón OK l para que en la pantalla LCD q aparezca „TEMPORIZ APAG“. Para seleccionar esta función, pulse el botón OK l.
4. En la parte inferior derecha de la pantalla LCD q des-tellan ahora los minutos del tiempo de funcionamiento restante para el aparato seleccionado. Seleccione un valor entre 1 y 99 minutos utilizando el botón o t. Pulse el botón OK l para confirmar. Si está programado el temporizador Sleep, la pantalla LCD q muestra “zz” a la derecha, junto a la hora.
BDA_SFB 10.1 B2 - IAN-75092_es.indd 18 26.04.2012 15:43:27
- 19 -
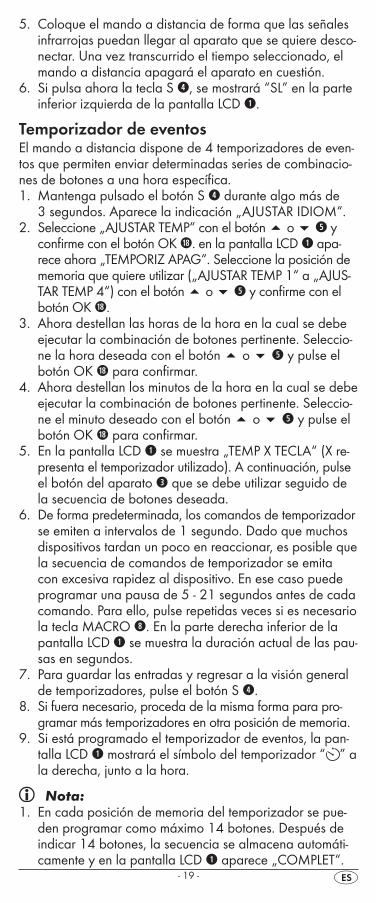
5. Coloque el mando a distancia de forma que las señales infrarrojas puedan llegar al aparato que se quiere desco-nectar. Una vez transcurrido el tiempo seleccionado, el mando a distancia apagará el aparato en cuestión.
6.Si pulsa ahora la tecla S r, se mostrará “SL” en la parte inferior izquierda de la pantalla LCD q.
Temporizador de eventosEl mando a distancia dispone de 4 temporizadores de even-tos que permiten enviar determinadas series de combinacio-nes de botones a una hora específica.1.Mantenga pulsado el botón S r durante algo más de
3 segundos. Aparece la indicación „AJUSTAR IDIOM“.2. Seleccione „AJUSTAR TEMP“ con el botón o t y
confirme con el botón OK l. en la pantalla LCD q apa-rece ahora „TEMPORIZ APAG“. Seleccione la posición de memoria que quiere utilizar („AJUSTAR TEMP 1“ a „AJUS-TAR TEMP 4“) con el botón o t y confirme con el botón OK l.
3. Ahora destellan las horas de la hora en la cual se debe ejecutar la combinación de botones pertinente. Seleccio-ne la hora deseada con el botón o t y pulse el botón OK l para confirmar.
4. Ahora destellan los minutos de la hora en la cual se debe ejecutar la combinación de botones pertinente. Seleccio-ne el minuto deseado con el botón o t y pulse el botón OK l para confirmar.
5. En la pantalla LCD q se muestra „TEMP X TECLA“ (X re-presenta el temporizador utilizado). A continuación, pulse el botón del aparato e que se debe utilizar seguido de la secuencia de botones deseada.
6. De forma predeterminada, los comandos de temporizador se emiten a intervalos de 1 segundo. Dado que muchos dispositivos tardan un poco en reaccionar, es posible que la secuencia de comandos de temporizador se emita con excesiva rapidez al dispositivo. En ese caso puede programar una pausa de 5 - 21 segundos antes de cada comando. Para ello, pulse repetidas veces si es necesario la tecla MACRO i. En la parte derecha inferior de la pantalla LCD q se muestra la duración actual de las pau-sas en segundos.
7.Para guardar las entradas y regresar a la visión general de temporizadores, pulse el botón S r.
8. Si fuera necesario, proceda de la misma forma para pro-gramar más temporizadores en otra posición de memoria.
9.Si está programado el temporizador de eventos, la pan-talla LCD q mostrará el símbolo del temporizador “ ” a la derecha, junto a la hora.
Nota:1.En cada posición de memoria del temporizador se pue-
den programar como máximo 14 botones. Después de indicar 14 botones, la secuencia se almacena automáti-camente y en la pantalla LCD q aparece „COMPLET“.
BDA_SFB 10.1 B2 - IAN-75092_es.indd 19 26.04.2012 15:43:27
- 20 -
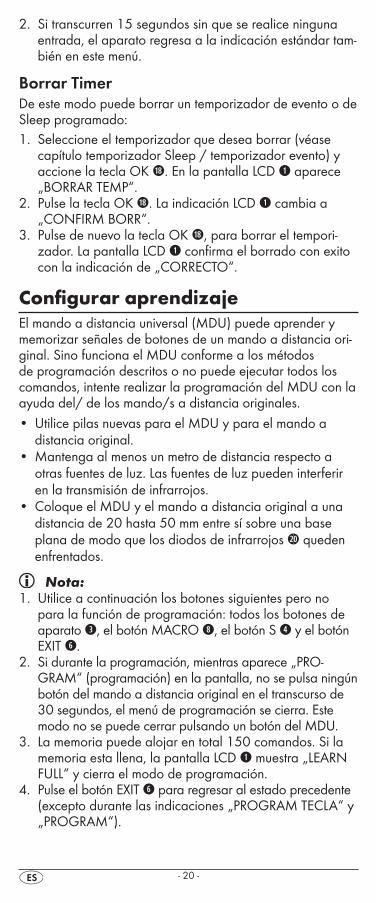
2. Si transcurren 15 segundos sin que se realice ninguna entrada, el aparato regresa a la indicación estándar tam-bién en este menú.
Borrar TimerDe este modo puede borrar un temporizador de evento o de Sleep programado:1. Seleccione el temporizador que desea borrar (véase
capítulo temporizador Sleep / temporizador evento) y accione la tecla OK l. En la pantalla LCD q aparece „BORRAR TEMP“.
2. Pulse la tecla OK l. La indicación LCD q cambia a „CONFIRM BORR“.
3. Pulse de nuevo la tecla OK l, para borrar el tempori-zador. La pantalla LCD q confirma el borrado con exito con la indicación de „CORRECTO“.
Configurar aprendizajeEl mando a distancia universal (MDU) puede aprender y memorizar señales de botones de un mando a distancia ori-ginal. Sino funciona el MDU conforme a los métodos de programación descritos o no puede ejecutar todos los comandos, intente realizar la programación del MDU con la ayuda del/ de los mando/s a distancia originales.• Utilice pilas nuevas para el MDU y para el mando a
distancia original.• Mantenga al menos un metro de distancia respecto a
otras fuentes de luz. Las fuentes de luz pueden interferir en la transmisión de infrarrojos.
• Coloque el MDU y el mando a distancia original a una distancia de 20 hasta 50 mm entre sí sobre una base plana de modo que los diodos de infrarrojos 2) queden enfrentados.
Nota:1.Utilice a continuación los botones siguientes pero no
para la función de programación: todos los botones de aparato e, el botón MACRO i, el botón S r y el botón EXIT y.
2. Si durante la programación, mientras aparece „PRO-GRAM“ (programación) en la pantalla, no se pulsa ningún botón del mando a distancia original en el transcurso de 30 segundos, el menú de programación se cierra. Este modo no se puede cerrar pulsando un botón del MDU.
3.La memoria puede alojar en total 150 comandos. Si la memoria esta llena, la pantalla LCD q muestra „LEARN FULL“ y cierra el modo de programación.
4.Pulse el botón EXIT y para regresar al estado precedente(excepto durante las indicaciones „PROGRAM TECLA“ y „PROGRAM“).
BDA_SFB 10.1 B2 - IAN-75092_es.indd 20 26.04.2012 15:43:27
- 21 -
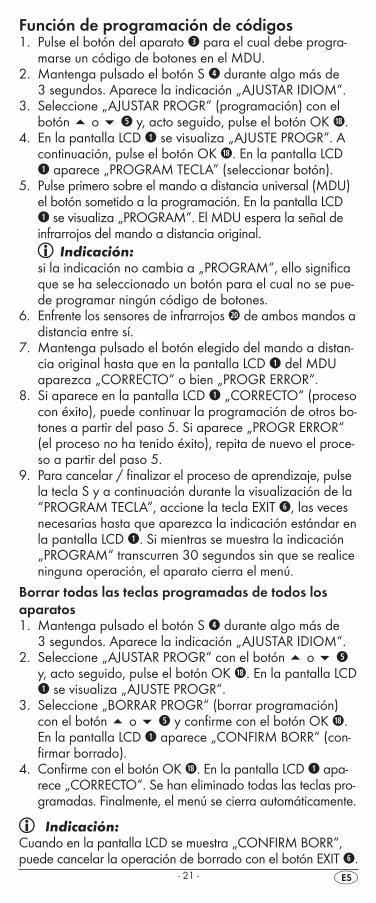
Función de programación de códigos1.Pulse el botón del aparato e para el cual debe progra-
marse un código de botones en el MDU.2.Mantenga pulsado el botón S r durante algo más de
3 segundos. Aparece la indicación „AJUSTAR IDIOM“.3. Seleccione „AJUSTAR PROGR“ (programación) con el
botón o t y, acto seguido, pulse el botón OK l.4.En la pantalla LCD q se visualiza „AJUSTE PROGR“. A
continuación, pulse el botón OK l. En la pantalla LCD q aparece „PROGRAM TECLA” (seleccionar botón).
5.Pulse primero sobre el mando a distancia universal (MDU) el botón sometido a la programación. En la pantalla LCD q se visualiza „PROGRAM“. El MDU espera la señal de infrarrojos del mando a distancia original.
Indicación:si la indicación no cambia a „PROGRAM“, ello significa que se ha seleccionado un botón para el cual no se pue-de programar ningún código de botones.
6.Enfrente los sensores de infrarrojos 2) de ambos mandos a distancia entre sí.
7.Mantenga pulsado el botón elegido del mando a distan-cia original hasta que en la pantalla LCD q del MDU aparezca „CORRECTO“ o bien „PROGR ERROR“.
8.Si aparece en la pantalla LCD q „CORRECTO“ (proceso con éxito), puede continuar la programación de otros bo-tones a partir del paso 5. Si aparece „PROGR ERROR“ (el proceso no ha tenido éxito), repita de nuevo el proce-so a partir del paso 5.
9.Para cancelar / finalizar el proceso de aprendizaje, pulse la tecla S y a continuación durante la visualización de la “PROGRAM TECLA”, accione la tecla EXIT y, las veces necesarias hasta que aparezca la indicación estándar en la pantalla LCD q. Si mientras se muestra la indicación „PROGRAM“ transcurren 30 segundos sin que se realice ninguna operación, el aparato cierra el menú.
Borrar todas las teclas programadas de todos los aparatos1.Mantenga pulsado el botón S r durante algo más de
3 segundos. Aparece la indicación „AJUSTAR IDIOM“.2. Seleccione „AJUSTAR PROGR“ con el botón o t
y, acto seguido, pulse el botón OK l. En la pantalla LCD q se visualiza „AJUSTE PROGR“.
3. Seleccione „BORRAR PROGR“ (borrar programación) con el botón o t y confirme con el botón OK l. En la pantalla LCD q aparece „CONFIRM BORR“ (con-firmar borrado).
4.Confirme con el botón OK l. En la pantalla LCD q apa-rece „CORRECTO“. Se han eliminado todas las teclas pro-gramadas. Finalmente, el menú se cierra automáticamente.
Indicación:Cuando en la pantalla LCD se muestra „CONFIRM BORR“, puede cancelar la operación de borrado con el botón EXIT y.
BDA_SFB 10.1 B2 - IAN-75092_es.indd 21 26.04.2012 15:43:27
- 22 -
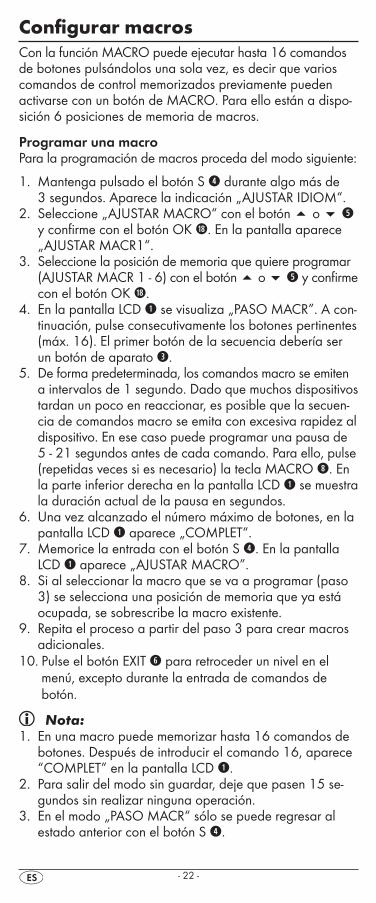
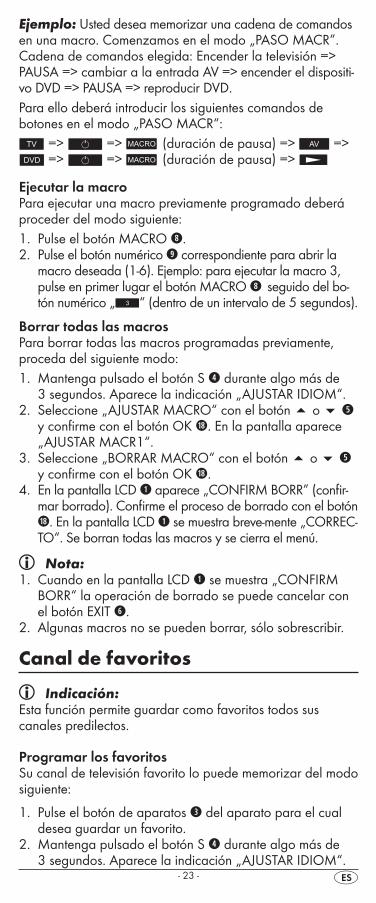
Configurar macrosCon la función MACRO puede ejecutar hasta 16 comandos de botones pulsándolos una sola vez, es decir que varios comandos de control memorizados previamente pueden activarse con un botón de MACRO. Para ello están a dispo-sición 6 posiciones de memoria de macros.
Programar una macroPara la programación de macros proceda del modo siguiente:
1.Mantenga pulsado el botón S r durante algo más de 3 segundos. Aparece la indicación „AJUSTAR IDIOM“.
2. Seleccione „AJUSTAR MACRO“ con el botón o t y confirme con el botón OK l. En la pantalla aparece „AJUSTAR MACR1“.
3. Seleccione la posición de memoria que quiere programar (AJUSTAR MACR 1 - 6) con el botón o t y confirme con el botón OK l.
4.En la pantalla LCD q se visualiza „PASO MACR”. A con-tinuación, pulse consecutivamente los botones pertinentes (máx. 16). El primer botón de la secuencia debería ser un botón de aparato e.
5.De forma predeterminada, los comandos macro se emiten a intervalos de 1 segundo. Dado que muchos dispositivos tardan un poco en reaccionar, es posible que la secuen-cia de comandos macro se emita con excesiva rapidez al dispositivo. En ese caso puede programar una pausa de 5 - 21 segundos antes de cada comando. Para ello, pulse (repetidas veces si es necesario) la tecla MACRO i. En la parte inferior derecha en la pantalla LCD q se muestra la duración actual de la pausa en segundos.
6.Una vez alcanzado el número máximo de botones, en la pantalla LCD q aparece „COMPLET“.
7.Memorice la entrada con el botón S r. En la pantalla LCD q aparece „AJUSTAR MACRO”.
8. Si al seleccionar la macro que se va a programar (paso 3) se selecciona una posición de memoria que ya está ocupada, se sobrescribe la macro existente.
9. Repita el proceso a partir del paso 3 para crear macros adicionales.
10.Pulse el botón EXIT y para retroceder un nivel en el menú, excepto durante la entrada de comandos de botón.
Nota:1.En una macro puede memorizar hasta 16 comandos de
botones. Después de introducir el comando 16, aparece “COMPLET” en la pantalla LCD q.
2. Para salir del modo sin guardar, deje que pasen 15 se-gundos sin realizar ninguna operación.
3.En el modo „PASO MACR“ sólo se puede regresar al estado anterior con el botón S r.
BDA_SFB 10.1 B2 - IAN-75092_es.indd 22 26.04.2012 15:43:27
- 23 -
Ejemplo: Usted desea memorizar una cadena de comandos en una macro. Comenzamos en el modo „PASO MACR”.Cadena de comandos elegida: Encender la televisión => PAUSA => cambiar a la entrada AV => encender el dispositi-vo DVD => PAUSA => reproducir DVD.Para ello deberá introducir los siguientes comandos de botones en el modo „PASO MACR“:
=> => (duración de pausa) => => => => (duración de pausa) =>
Ejecutar la macroPara ejecutar una macro previamente programado deberá proceder del modo siguiente:1.Pulse el botón MACRO i.2.Pulse el botón numérico o correspondiente para abrir la
macro deseada (1-6). Ejemplo: para ejecutar la macro 3, pulse en primer lugar el botón MACRO iseguido del bo-tón numérico „ “ (dentro de un intervalo de 5 segundos).
Borrar todas las macrosPara borrar todas las macros programadas previamente, proceda del siguiente modo:1.Mantenga pulsado el botón S r durante algo más de
3 segundos. Aparece la indicación „AJUSTAR IDIOM“.2. Seleccione „AJUSTAR MACRO“ con el botón o t
y confirme con el botón OK l. En la pantalla aparece „AJUSTAR MACR1“.
3. Seleccione „BORRAR MACRO“ con el botón o t y confirme con el botón OK l.
4.En la pantalla LCD q aparece „CONFIRM BORR” (confir-mar borrado). Confirme el proceso de borrado con el botón l. En la pantalla LCD q se muestra breve-mente „CORREC-TO“. Se borran todas las macros y se cierra el menú.
Nota:1.Cuando en la pantalla LCD q se muestra „CONFIRM
BORR“ la operación de borrado se puede cancelar con el botón EXIT y.
2. Algunas macros no se pueden borrar, sólo sobrescribir.
Canaldefavoritos
Indicación:Esta función permite guardar como favoritos todos sus canales predilectos.
Programar los favoritosSu canal de televisión favorito lo puede memorizar del modo siguiente:
1.Pulse el botón de aparatos e del aparato para el cual desea guardar un favorito.
2.Mantenga pulsado el botón S r durante algo más de 3 segundos. Aparece la indicación „AJUSTAR IDIOM“.
BDA_SFB 10.1 B2 - IAN-75092_es.indd 23 26.04.2012 15:43:27
- 24 -
3. Seleccione „AJUSTAR FAV“ con el botón o t y confirme con el botón OK l. En la pantalla aparece „AJUSTAR FAV 1“.
4. Seleccione la posición de memoria que quiere programar (AJUSTAR FAV 1 - 4) con el botón o t y confirme con el botón OK l.
5.En la pantalla LCD q se visualiza „FAV PASO”. A continuación, pulse de forma sucesiva los botones (4 como máximo) para abrir el canal favorito deseado.
6.Una vez alcanzado el número máximo de botones, en la pantalla LCD q aparece „COMPLET“.
7.Memorice la entrada con el botón S r. En la pantalla LCD q aparece „AJUSTAR FAV”.
8. Si al seleccionar el favorito que se va a programar (paso 4) se selecciona una posición de memoria que ya está ocupada, se sobrescribe el favorito existente.
9. Repita los pasos para crear más favoritos.10.Pulse el botón EXIT y para retroceder un nivel en el menú,
excepto durante la entrada de comandos de botón.
Indicación:La entrada del número de canal puede variar según modelo y marca del aparato seleccionado. En algunos casos, antes de seleccionar un canal de más de un número debe pulsarse primero el botón a.
Abrir los favoritosPara abrir un favorito programado previamente, pulse el bo-tón FAV/EPG 1( seguido del botón numérico correspondien-te a la posición de memoria deseada (1 - 4).
Borrar todos los canales FAVPara borrar todos los favoritos programados previamente, proceda del siguiente modo:
1.Mantenga pulsado el botón S r durante algo más de 3 segundos.
2. Seleccione „AJUSTAR FAV“ con el botón o t y confirme con el botón OK l. En la pantalla aparece „AJUSTAR FAV 1“.
3. Seleccione „BORRAR FAVCH“ con el botón o t y confirme con el botón OK l.
4.En la pantalla LCD q aparece „CONFIRM BORR” (con-firmar borrado). Confirme el proceso de borrado con el botón OK l.En la pantalla LCD q se muestra breve-mente „CORRECTO“. Se borran todos los favoritos y se cierra el menú.
Nota:1.Cuando en la pantalla LCD q se muestra „CONFIRM
BORR“ la operación de borrado se puede cancelar con el botón EXIT y.
2. Algunos favoritos no se pueden borrar, sólo sobrescribir.
BDA_SFB 10.1 B2 - IAN-75092_es.indd 24 26.04.2012 15:43:27
- 25 -
Regulacióndelvolumen
Vol +/—, (silenciamiento)Para subir el volumen pulse el botón „VOL +“. Con el botón „VOL —“ lo reduce. Para enmudecer el sonido, pulse el botón
h. Pulsando de nuevo el botón, se activa de nuevo el sonido.
Si no ha ajustado ningún otro aparato como aparato destino para la regulación de volumen global, se activa al accionar las teclas VOL +/— j de la MDU de forma predeterminada, la regulación de volumen del televisor, indistintamente si ha pulsado previamente cualquier tecla del aparato e. Esto no se aplica a dispositivos “AMP”, “DVD” y “DSAT”, pues se puede presuponer que estos dispositivos disponen de regula-ción de volumen propia.
Paralaoperación > Para utilizar un aparato programado con el MDU, pulse primero el botón del aparato e correspondiente. Señale a continuación con el MDU sobre dicho aparato y presio-ne el botón elegido.
> Utilice los botones numéricos o del mismo modo que el mando a distancia original. Antes de realizar una entrada de dos dígitos, pulse si procede el botón a.
> Pulse la tecla S r y a continuación la tecla FAV/EPG 1(, para iniciar en el aparato equipado con la función de guía de programa electrónico.
> Al pulsar la tecla S r, se muestra la hora en la parte infe-rior derecha de la pantalla LCD q durante 10 segundos.
> Mientras se muestra pulsado un botón de aparato e, en la parte inferior derecha de la pantalla LCD q se muestra el código activo para este aparato.
> El botón MENU k permite activar el diálogo de configu-ración de los aparatos de destino correspondientes.
> Pulse la tecla de iluminación d para activar o desactivar la pantalla y la iluminación de las teclas.
Desconexión total Nota:
El botón ALL OFF (desconexión total) w permite apa-gar automáticamente todos los aparatos que están encendi-dos. Dependiendo del aparato, esta función puede volver a encender aquellos aparatos que ya están apagados. Para ello mantenga pulsada la tecla ALL OFF w durante algunos segundos. Puede tardar hasta 10 segundos hasta que se desconecten todos los aparatos. Funciona sólo bajo las con-diciones siguientes:1. Existe una conexión visual entre todos los aparatos y el
mando a distancia universal.
BDA_SFB 10.1 B2 - IAN-75092_es.indd 25 26.04.2012 15:43:28

- 26 -
2. La búsqueda automática de código, búsqueda de códi-go por marcas y funciones de MACRO no se encuentran activas.
3. Todos los aparatos de destino tienen que ser aptos para poder ser apagados mediante el mando a distancia.
Para volver a encender automáticamente todos los aparatos, vuelva mantenga pulsado nuevamente el botón w hasta que se hayan encendido todos los aparatos.
Limpiezayalmacenamiento
¡Atención!¡Al realizar la limpieza tenga cuidado de que no penetre humedad en la carcasa del aparato! ¡De lo contrario existe riesgo de un daño irreparable para el aparato!
> Limpie la carcasa del aparato únicamente con un paño ligeramente húmedo con detergente suave.
> Almacene el aparato exclusivamente en un entorno con-forme a las indicaciones en las características técnicas.
> Antes de almacenar extraiga las pilas con el fin de que no se pueda dañar el aparato por si se derramasen du-rante el almacenamiento.
Error/SoluciónSu aparato no reacciona al MDU.
> Compruebe las pilas. Tienen que disponer de tensión sufi-ciente e insertadas correctamente.
> ¿Ha pulsado previamente el botón de aparato e correcto correspondiente al aparato de destino elegido?
> Compruebe si el aparato de destino tiene programado el código correcto (véase apartado „ Configuración de códigos“).
El MDU no transmite los comandos correctamente. > Pulse el botón del aparato e correspondiente para poner el MDU en el modo correcto.
> Las pilas tienen que disponer de tensión suficiente e inser-tadas correctamente.
> Posiblemente este usando un código incorrecto. Inicie la búsqueda de código por marcas, la búsqueda automática de códigos o bien la entrada directa de códigos (de for-ma manual).
El MDU no cambia de canales en el aparato. > Pulse el botón del aparato e correspondiente para poner el MDU en el modo correcto.
> Si el mando a distancia original no dispone del botón „-/- -“, cambie los canales con los botones P +/— u o con los botones numéricos o.
> Si sigue sin funcionar, la causa puede ser que está activa-do el bloqueo de censura en el aparato de destino.
BDA_SFB 10.1 B2 - IAN-75092_es.indd 26 26.04.2012 15:43:28
- 27 -
Algunos botones del MDU no funcionan correctamente. > Su MDU posiblemente no disponga de todas las funcio-nes del mando a distancia original del aparato.
> Posiblemente no ha programado el código más óptimo. Busque un código con el que pueda controlar más fun-ciones del aparato de destino.
El MDU no reacciona después de pulsar un botón. > Las pilas tienen que disponer de tensión suficiente e inser-tadas correctamente.
> Oriente el MDU hacia el aparato.
La pantalla LCD q no muestra nada. > Las pilas tienen que disponer de tensión suficiente e inser-tadas correctamente.
> El contraste está ajustado demasiado bajo. Aumente el ajuste del contraste.
Evacuación En ningún caso deberá tirar el aparato a la basura doméstica. Este producto está sujeto a la directiva europea 2002/96/EC.
Mando a distancia universal• Evacue el mando a distancia universal o partes de ella
por medio de una empresa de evacuación de residuos autorizada o a través de las instalaciones de evacuación de residuos municipales.
• Preste atención a las normas en vigor. En caso de dudas póngase en contacto con su centro de evacuación.
Pilas/baterías• Las pilas/baterías no pueden ser desechadas con la
basura doméstica.• Las pilas pueden contener sustancias tóxicas perjudiciales
para el medio ambiente. Por ello, evacue las pilas/bate-rías de acuerdo con las disposiciones oficiales vigentes.
• Cada consumidor está obligado legalmente a entregar las pilas/baterías en un punto de recogida de residuos de su municipio, barrio o en un establecimiento. Con esta obligación se consigue que las pilas / baterías se des-echen de forma respetuosa con el medio ambiente.
• Devuelva las pilas/acumuladores en estado descargado.
Embalajes• Evacue todos los materiales de embalaje respetando
el medio ambiente.
BDA_SFB 10.1 B2 - IAN-75092_es.indd 27 26.04.2012 15:43:28

- 28 -
CaracterísticastécnicasAparatos que se pueden controlar: 10 Medidas A x A x P: 217 x 50 x 22 mm Peso : 133 g (incl. pilas)LED de infrarrojos: láser de clase 1 Alimentación de corriente pilas: 2 x 1,5 V tipo AAA/LR03 (Micro) (incluida en el volumen de suministro)
Temperatura de servicio : + 5 – +35°C
Temperatura de almacenamiento: -20 - +50 °C
Humedad: 5 - 90 % (sin condensación)
Indicaciónacercadelaconformidad Este aparato cumple respecto a concordancia
con los requisitos básicos y demás prescripciones relevantes de las directivas EMC 2004/108/EC.
ImportadorKOMPERNASS GMBH BURGSTRASSE 21 44867 BOCHUM, GERMANY
www.kompernass.com
GarantíayasistenciatécnicaCon este aparato recibe usted 3 años de garantía desde la fecha de compra. El aparato ha sido fabricado cuidadosa-mente y ha sido probado antes de su entrega. Guarde el com-probante de caja como justificante de compra. Si necesitara hacer uso de la garantía, póngase en contacto por teléfono con su centro de servicio habitual.
Éste es el único modo de garantizar un envío gratuito.La garantía cubre sólo defectos de fabricación o del material, pero no los daños de transporte, piezas sujetas a desgaste y los daños sufridos por las piezas frágiles p. ej. el interruptor o baterías.
Este producto ha sido diseñado exclusivamente para el uso particular y no para el uso industrial.En caso de manipulación indebida e incorrecta, uso de la fuerza y en caso de abrir el aparato personas extrañas a nuestros centros de asistencia técnica autorizados, la garantía pierde su validez.
Esta garantía no reduce en forma alguna sus derechos legales.
BDA_SFB 10.1 B2 - IAN-75092_es.indd 28 26.04.2012 15:43:28

- 29 -
Por el mero hecho de hacer uso de la garantía no implica la prolongación del período de válidez de la garantía. Ello rige también para piezas sustituidas y reparadas. Los posibles daños y defectos detectados al comprar el producto, se han de notificar de inmediato o como muy tarde dos días desde la fecha de compra. . Finalizado el periodo de garantía, las reparaciones se han de abonar.
Servicio EspañaTel.: 902 59 99 22 (0,08 EUR/Min. + 0,11 EUR/llamada (tarifa normal)) (0,05 EUR/Min. + 0,11 EUR/llamada (tarifa reducida))
E-Mail: [email protected] IAN 75092
BDA_SFB 10.1 B2 - IAN-75092_es.indd 29 26.04.2012 15:43:28

- 30 -
BDA_SFB 10.1 B2 - IAN-75092_es.indd 30 26.04.2012 15:43:28
- 31 -
INDICE PAGINAImportanti avvertenze di sicurezza 32Tasti e funzioni apparecchio 33Messa in funzione 34
Disimballaggio dell'apparecchio/controllo del materiale in dotazione 34Inserimento delle pile 34
Elementi di comando 35Display LCD 35Tasti 36
I menu di configurazione 39Configurazione delle lingue del menu 41
Configurazione del codice (Programmazione del telecomando) 41Programmazione per ricerca del codice marca 41Programmazione tramite immissione manuale dei codici 42Programmazione per ricerca automatica dei codici 43
Configurazione del sistema 44Impostazione dell'ora 44Impostazione della data 45Impostazione contrasto 45Retroilluminazione 45Impostazione del volume globale/disattivazione del volume 46Selezionare apparecchio banda/disco per il comando diretto 47Impostazione della funzione Lock 47SYSTEM-REIMP 48
Configurazione del timer 48Sleep-Timer 48Timer eventi 49Cancellazione timer 50
Configurazione dell’apprendimento 50Funzione di apprendimento codici 50
Configurazione macro 52Canale preferiti 53Regolazione volume 54
Vol +/—, (disattivazione suono) 54Uso 55
Tasto ALL OFF 55Pulizia e conservazione 56Guasti / Risoluzione 56Smaltimento 57Dati tecnici 57Avviso sulla conformità 58Importatore 58Garanzia & assistenza 58
BDA_SFB 10.1 B2 - IAN-75092_it.indd 31 26.04.2012 15:54:20
- 32 -
TELECOMANDO UNIVERSALE SFB 10.1 B2IntroduzioneCongratulazioni!Con il suo acquisto, ha scelto un prodotto di alta qualità. Si familiarizzi con il prodotto prima del montaggio e della messa in funzione. A tale scopo, le consigliamo di leggere attentamente le seguenti istruzioni di montaggio e avverten-ze di sicurezza. Utilizzi il prodotto solo come descritto e per i campi di impiego indicati. Conservi con cura il manuale. In caso di cessione del prodotto a terzi, consegni anche tutta la documentazione relativa.
Diritto d’autoreLa presente documentazione è tutelata dal diritto d'autore. Tutti i diritti, nonché la riproduzione fotomeccanica, la copia e la diffusione tramite procedimenti particolari (ad es. elabo-razione dei dati, supporto dati e reti di dati) anche parziale, nonché le modifiche ai contenuti e le modifiche tecniche sono riservati.
ImportantiavvertenzedisicurezzaUso conformeI bambini devono utilizzare il telecomando soltanto sotto la supervisione di adulti. Il telecomando universale può sosti-tuire un massimo di dieci telecomandi. Può essere utilizzato esclusivamente per apparecchi di elettronica di intrattenimen-to con un ricevitore a infrarossi. Le funzioni del telecomando universale corrispondono in essenza a quelle del telecoman-do originale. Il telecomando universale è concepito per l'uso privato. Non è idoneo all'uso commerciale. Ogni altro tipo di impiego non è conforme alla destinazione. Il produttore non si assume alcuna responsabilità per i danni derivanti da uso non conforme o da modifiche apportate auto-nomamente.
AvvisoUn'avvertenza contrassegnata da questo livello di pericolo indica una situazione potenzialmente pericolosa. Qualora sia impossibile evitare tale situazione pericolosa, essa può dare luogo a lesioni. Seguire le istruzioni contenute in questa avvertenza per evitare lesioni personali.
AttenzioneUn'avvertenza contrassegnata da questo livello di pericolo indica la possibilità di riportare danni materiali. Qualora sia impossibile evitare tale situazione pericolosa, essa può dare luogo a danni materiali. Seguire le istruzioni contenute in questa avvertenza, per evitare danni materiali.
AvvertenzaUn avviso contrassegna ulteriori informazioni volte a facilita-re l'uso dell'apparecchio.
BDA_SFB 10.1 B2 - IAN-75092_it.indd 32 26.04.2012 15:54:20
- 33 -
Avvisorelativoalpericolodilesioniacausadell'usoerroneodellepile!
Le pile devono essere trattate con particolare cautela. Rispettare le seguenti avvertenze di sicurezza:
• Impedire ai bambini di entrare in possesso delle pile. I bambini potrebbero mettere in bocca le pile e ingoiarle. In caso di ingestione di una pila, consultare immediatamente un medico.
• Non gettare le pile nel fuoco. Non sottoporre le pile ad elevate temperature.
• Pericolo di esplosione! Le pile non devono essere ricaricate.• Non aprire né cortocircuitare le pile.• L'acido che fuoriesce dalle pile può provocare irritazioni
cutanee. In caso di contatto con la pelle, risciacquare con acqua abbondante. Qualora il liquido avesse raggiunto gli occhi, sciacquare abbondantemente con acqua, non sfre-gare e consultare subito un medico.
Attenzione!Il telecomando universale possiede un diodo a infrarossi del-la classe di laser 1. Non osservare con apparecchi ottici per evitare lesioni oculari.
Danni all'apparecchio• Qualora l'apparecchio fosse guasto, non cercare di ri-
pararlo autonomamente. In caso di danni, contattare il produttore o la hotline di assistenza (v. la scheda di ga-ranzia).
• In caso di penetrazione di liquidi all'interno dell'apparec-chio o danni di altro genere, farlo controllare dal produt-tore o dalla hotline di assistenza. Mettersi in contatto con il produttore o con la relativa Hotline di assistenza (vede-re le indicazioni di garanzia).
• Rimuovere le pile dal vano pile non appena si scaricano.• In caso di inutilizzo prolungato dell'apparecchio, rimuove-
re le pile per evitarne lo scaricamento.• Sostituire le pile sempre contemporaneamente e utilizzare
sempre pile dello stesso tipo.
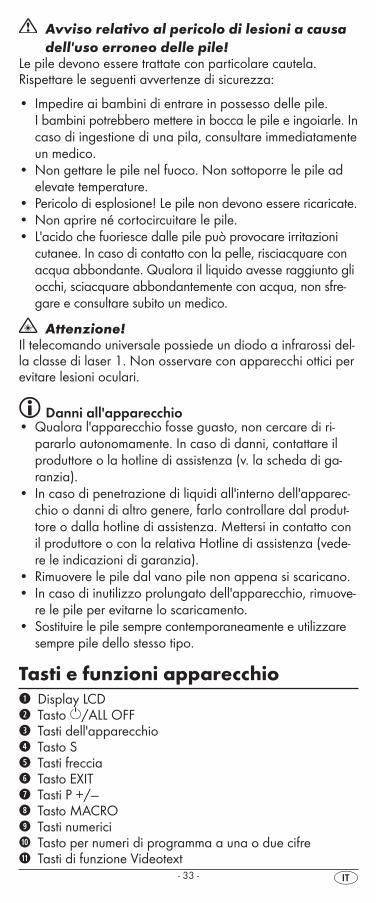
Tastiefunzioniapparecchioq Display LCDw Tasto /ALL OFFe Tasti dell'apparecchior Tasto St Tasti frecciay Tasto EXITu Tasti P +/—i Tasto MACROo Tasti numericia Tasto per numeri di programma a una o due cifres Tasti di funzione Videotext
BDA_SFB 10.1 B2 - IAN-75092_it.indd 33 26.04.2012 15:54:20
- 34 -
d Tasto di illuminazionef Tasti unità discog Tasto AVh Disattivazione dell'audioj Tasti VOL +/—k Tasto MENUl Tasto OK1( Tasto FAV / EPG2) Emittente/ricevente a infrarossi2! Copertura vano pile
Suggerimenti:• le funzioni qui descritte si riferiscono a un caso teorico
ideale in cui la struttura dei tasti dei singoli telecomandi coincide perfettamente con quella di questo teleco- mando universale. Tale evento è tuttavia rarissimo nella realtà. Se pertanto non si potessero riprodurre tutte le funzioni del telecomando originale, tale impossibilità non dev'essere addebitata a qualche ipotetico difetto del telecomando universale.
• Tutti i nomi di marchi menzionati nel presente manuale o nell'acclusa lista dei codici sono marchi commerciali di proprietà delle relative ditte.
Messainfunzione
Disimballaggio dell'apparecchio/controllo del materiale in dotazione
Attenzione!Tenere fuori dalla portata dei bambini anche le pellicole di imballaggio. Pericolo di soffocamento!• Disimballare l'apparecchio e i relativi accessori.• Verificare la completezza del materiale in dotazione
- Telecomando universale (UFB), - Manuale di istruzioni, - Guida del produttore con l'elenco dei codici degli apparecchi - 2 x 1,5 pile, tipo AAA/LR03 (micro)
Avvertenza:dannidatrasportoQualora si rilevassero dei danni da trasporto, rivolgersi al produttore o alla relativa hotline di assistenza (v. indicazioni di garanzia).
Inserimento delle pile
Attenzione!Il telecomando universale dev'essere alimentato solo da pile da 1,5 Volt (AAA, LR03).
Nella sostituzione di pile, inserire immediatamente le pile nuove. Le impostazioni eseguite restano memorizzate per circa 1 minuto.
BDA_SFB 10.1 B2 - IAN-75092_it.indd 34 26.04.2012 15:54:20
- 35 -
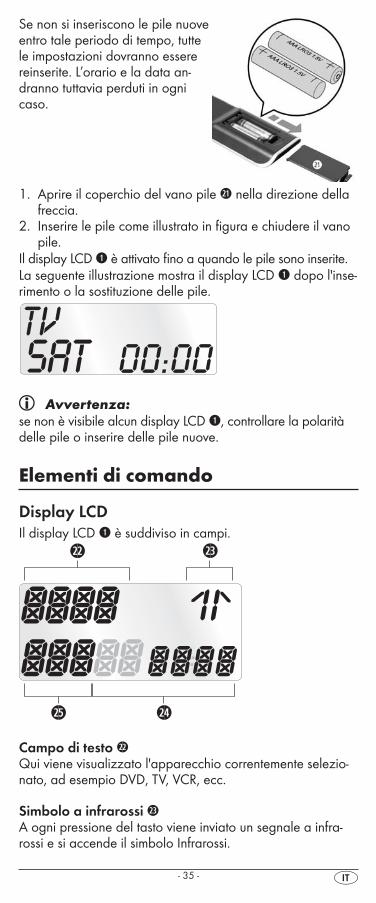
Se non si inseriscono le pile nuove entro tale periodo di tempo, tutte le impostazioni dovranno essere reinserite. L’orario e la data an-dranno tuttavia perduti in ogni caso.
1.Aprire il coperchio del vano pile 2! nella direzione della freccia.
2. Inserire le pile come illustrato in figura e chiudere il vano pile.
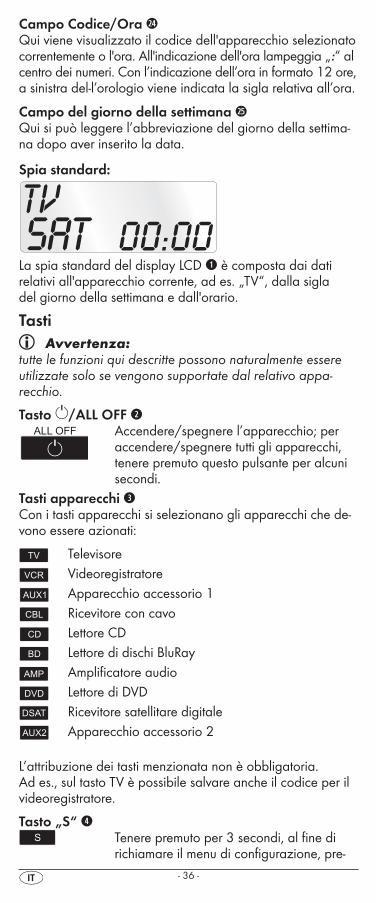
Il display LCD q è attivato fino a quando le pile sono inserite.La seguente illustrazione mostra il display LCD q dopo l'inse-rimento o la sostituzione delle pile.
Avvertenza:se non è visibile alcun display LCD q, controllare la polarità delle pile o inserire delle pile nuove.
Elementidicomando
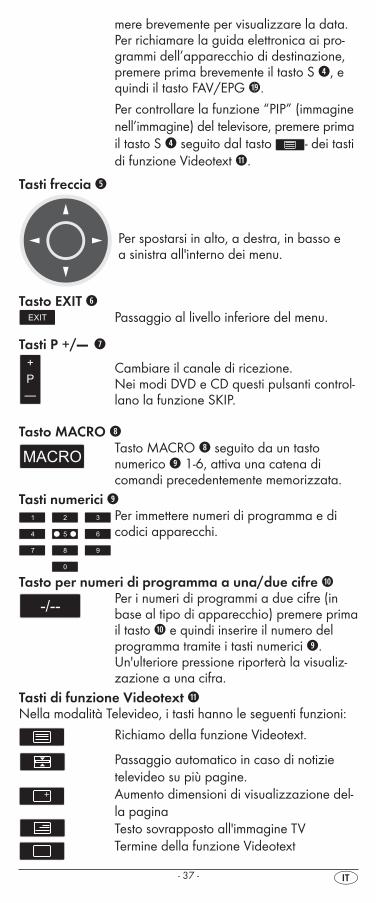
Display LCDIl display LCD q è suddiviso in campi.
Campo di testo 2@Qui viene visualizzato l'apparecchio correntemente selezio-nato, ad esempio DVD, TV, VCR, ecc.
Simbolo a infrarossi 2#A ogni pressione del tasto viene inviato un segnale a infra-rossi e si accende il simbolo Infrarossi.
BDA_SFB 10.1 B2 - IAN-75092_it.indd 35 26.04.2012 15:54:20
- 36 -
Campo Codice/Ora 2$Qui viene visualizzato il codice dell'apparecchio selezionato correntemente o l'ora. All'indicazione dell'ora lampeggia „:“ al centro dei numeri. Con l’indicazione dell’ora in formato 12 ore, a sinistra del-l’orologio viene indicata la sigla relativa all’ora.
Campo del giorno della settimana 2%Qui si può leggere l’abbreviazione del giorno della settima-na dopo aver inserito la data.
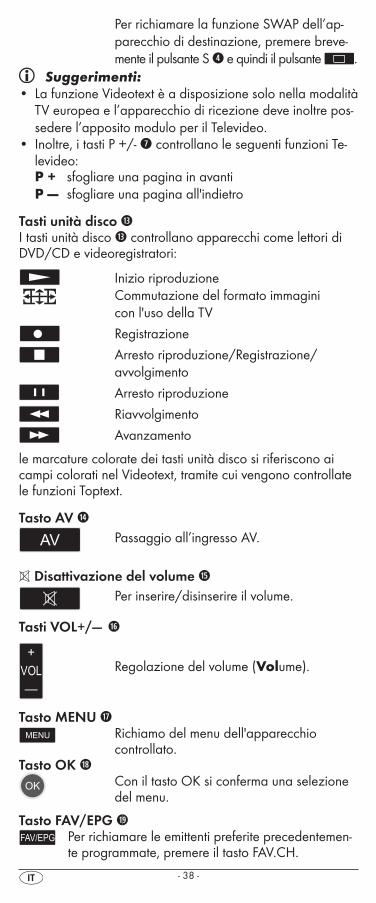
Spia standard:
La spia standard del display LCD q è composta dai dati relativi all'apparecchio corrente, ad es. „TV“, dalla sigla del giorno della settimana e dall'orario.
Tasti Avvertenza:
tutte le funzioni qui descritte possono naturalmente essere utilizzate solo se vengono supportate dal relativo appa-recchio.
Tasto /ALL OFF w Accendere/spegnere l’apparecchio; per
accendere/spegnere tutti gli apparecchi, tenere premuto questo pulsante per alcuni secondi.
Tasti apparecchi eCon i tasti apparecchi si selezionano gli apparecchi che de-vono essere azionati:
Televisore Videoregistratore Apparecchio accessorio 1 Ricevitore con cavo Lettore CD Lettore di dischi BluRay Amplificatore audio Lettore di DVD Ricevitore satellitare digitale Apparecchio accessorio 2
L’attribuzione dei tasti menzionata non è obbligatoria. Ad es., sul tasto TV è possibile salvare anche il codice per il videoregistratore.
Tasto „S“ r Tenere premuto per 3 secondi, al fine di
richiamare il menu di configurazione, pre-
BDA_SFB 10.1 B2 - IAN-75092_it.indd 36 26.04.2012 15:54:20
- 37 -
mere brevemente per visualizzare la data. Per richiamare la guida elettronica ai pro-
grammi dell’apparecchio di destinazione, premere prima brevemente il tasto S r, e quindi il tasto FAV/EPG 1(.
Per controllare la funzione “PIP” (immagine nell’immagine) del televisore, premere prima il tasto S r seguito dal tasto - dei tasti di funzione Videotext s.
Tasti freccia t
Per spostarsi in alto, a destra, in basso e a sinistra all'interno dei menu.
Tasto EXIT y Passaggio al livello inferiore del menu.
Tasti P +/—u
Cambiare il canale di ricezione. Nei modi DVD e CD questi pulsanti control-
lano la funzione SKIP.
Tasto MACRO i Tasto MACRO i seguito da un tasto
numerico o 1-6, attiva una catena di comandi precedentemente memorizzata.
Tasti numerici o Per immettere numeri di programma e di
codici apparecchi.
Tasto per numeri di programma a una/due cifre a Per i numeri di programmi a due cifre (in
base al tipo di apparecchio) premere prima il tasto a e quindi inserire il numero del programma tramite i tasti numerici o.Un'ulteriore pressione riporterà la visualiz-zazione a una cifra.
Tasti di funzione Videotext sNella modalità Televideo, i tasti hanno le seguenti funzioni:
Richiamo della funzione Videotext.
Passaggio automatico in caso di notizie televideo su più pagine.
Aumento dimensioni di visualizzazione del-la pagina
Testo sovrapposto all'immagine TV Termine della funzione Videotext
BDA_SFB 10.1 B2 - IAN-75092_it.indd 37 26.04.2012 15:54:21
- 38 -
Per richiamare la funzione SWAP dell’ap-parecchio di destinazione, premere breve-mente il pulsante S r e quindi il pulsante .
Suggerimenti:• La funzione Videotext è a disposizione solo nella modalità
TV europea e l’apparecchio di ricezione deve inoltre pos-sedere l’apposito modulo per il Televideo.
• Inoltre, i tasti P +/- u controllano le seguenti funzioni Te-levideo: P+ sfogliare una pagina in avantiP— sfogliare una pagina all'indietro
Tasti unità disco fI tasti unità disco f controllano apparecchi come lettori di DVD/CD e videoregistratori:
Inizio riproduzione Commutazione del formato immagini
con l'uso della TV Registrazione Arresto riproduzione/Registrazione/
avvolgimento Arresto riproduzione Riavvolgimento Avanzamento
le marcature colorate dei tasti unità disco si riferiscono ai campi colorati nel Videotext, tramite cui vengono controllate le funzioni Toptext.
Tasto AV g Passaggio all’ingresso AV.
Disattivazione del volume h Per inserire/disinserire il volume.
Tasti VOL+/—j
Regolazione del volume (Volume).
Tasto MENU k Richiamo del menu dell'apparecchio
controllato.Tasto OK l
Con il tasto OK si conferma una selezione del menu.
Tasto FAV/EPG 1( Per richiamare le emittenti preferite precedentemen-
te programmate, premere il tasto FAV.CH.
BDA_SFB 10.1 B2 - IAN-75092_it.indd 38 26.04.2012 15:54:21
- 39 -
Per richiamare la funzione EPG dell’apparecchio di destinazione, premere prima brevemente il tasto S r.
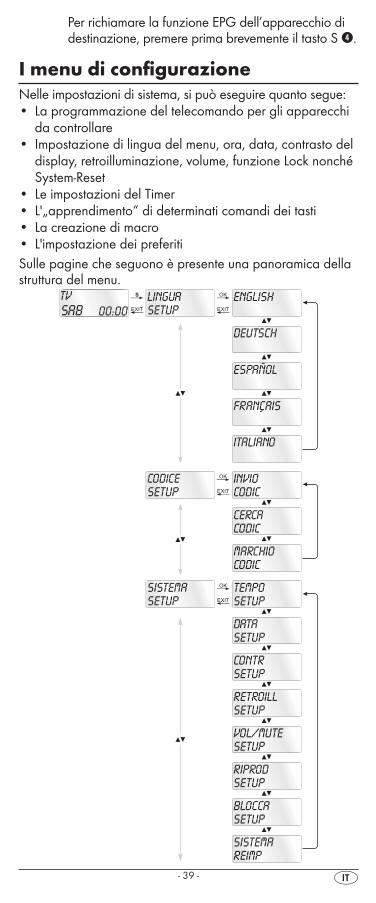
ImenudiconfigurazioneNelle impostazioni di sistema, si può eseguire quanto segue:• La programmazione del telecomando per gli apparecchi
da controllare• Impostazione di lingua del menu, ora, data, contrasto del
display, retroilluminazione, volume, funzione Lock nonché System-Reset
• Le impostazioni del Timer• L'„apprendimento“ di determinati comandi dei tasti• La creazione di macro• L'impostazione dei preferitiSulle pagine che seguono è presente una panoramica della struttura del menu.
BDA_SFB 10.1 B2 - IAN-75092_it.indd 39 26.04.2012 15:54:21

- 40 -
BDA_SFB 10.1 B2 - IAN-75092_it.indd 40 26.04.2012 15:54:21
- 41 -
Configurazione delle lingue del menuPer la visualizzazione del menu dell’apparecchio si può scegliere fra 5 lingue: inglese, tedesco, spagnolo, francese e italiano.
1. Tenere premuto il tasto S r per oltre 3 secondi. Inserire subito i dati nel menu, poiché il menu termina dopo 15 secondi senza immissioni di dati.
2. Il display LCD q mostra il messaggio “LANGUAGE SETUP”. Premere il tasto OK l.
3. Nel display LCD q compare “ENGLISH”. Con i tasti t selezionare la lingua desiderata e confermare con il tasto OK l.
4. Uscire dal menu con il tasto EXIT y.
I menu dell’apparecchio vengono così visualizzati nella lingua selezionata. Per le ulteriori istruzioni presumiamo che sia stata selezionata la lingua del proprio paese di origine.
Configurazione del codice(Programmazione del telecomando)
Sono a disposizione 3 metodi di programmazione per il telecomando: programmazione tramite ricerca del codice marca, ricerca automatica del codice e immissione diretta del codice (manuale).
Utilizzare prima la ricerca con il codice marca, poiché si trat-ta del metodo di programmazione più rapido, se l'apparec-chio è presente nell'elenco dei codici. Come seconda alternativa si consiglia l'immissione diretta del codice, seguita dalla ricerca automatica del codice.
Programmazione per ricerca del codice marcaCon questo metodo, selezionare la marca diretta e il codice tramite il display LCD q.
Procedere in base alle seguenti istruzioni, per programmare il telecomando:
1.Premere il tasto dell'apparecchio e per l'apparecchio rispetto al quale si desidera programmare il telecomando.
2.Tenere premuto il tasto S r per oltre 3 secondi. Nel display LCD q compare “LINGUA SETUP”. Con il tasto o t selezionare “CODICE SETUP” e confermare con il tasto OK l.
3.„INVIO CODIC“ compare quindi nel display LCD q. Con i tasti t selezionare „MARCHIO CODIC“ e confer-mare con il tasto OK l.
4. Comparirà quindi il primo nome di marca in ordine alfa-betico nell'elenco degli apparecchi preprogrammati.
5.Con i tasti 34t selezionare i vari nomi di marche.
BDA_SFB 10.1 B2 - IAN-75092_it.indd 41 26.04.2012 15:54:21
- 42 -
6.Per facilitare l'accesso, è possibile passare direttamente alle relative lettere alfabetiche iniziali con i tasti numerici o:2 => A 3 => D 4 => G 5 => J6 => M 7 => P 8 => T 9 => WEsempio per la ricerca di un codice TV: con il tasto 5 si arriva alla „J“. La prima marca è „JEC“*. Se si possiede ad es. un apparecchio marca „Kenwood“*, sfogliare in avanti con il tasto 4 t, fino alla comparsa del nome del marchio. (* Tutti i nomi di marchi qui utilizzati sono marchi commerciali di proprietà delle rispettive società).
7.La maggior parte dei produttori utilizzano vari codici diversi per il telecomando. È necessario quindi scoprire quale dei codici disponibili si adatta meglio al proprio apparecchio. In basso a destra del nome del marchio vie-ne visualizzato il codice nel relativo display LCD q.
8. Dirigere il telecomando verso l’apparecchio corrente e premere i tasti corrispondenti alle funzioni di tale appa- recchio, per controllare il codice (esclusi i tasti 34t, OK l, EXIT y, i tasti dell’apparecchio e o i tasti numerici o).
9.Se la maggioranza dei tasti funziona, premere il tasto OK l, per salvare l'impostazione. Nel display LCD q com-pare il messaggio „OK“. Infine il menu viene terminato automaticamente.
10. Se funziona solo uno o pochi tasti, con il tasto o t selezionare il codice successivo e controllare come già descritto al punto 8.
11.Con il tasto EXIT y si avanza di un livello nel menu.Ripetere questi passaggi per tutti gli apparecchi che si inten-de comandare con il telecomando.
Programmazione tramite immissione manuale dei codiciIn questa modalità, il telecomando può essere programmato con l'immissione diretta di un codice numerico. Il numero di codice necessario si rileva dalla guida dei produttori allega-ta con l'elenco dei codici degli apparecchi. Qualora il codi-ce non fosse valido, verrà ripristinato l'ultimo codice valido programmato.
1.Premere il tasto dell'apparecchio e per l'apparecchio rispetto al quale si desidera programmare il telecomando.
2.Tenere premuto il tasto S r per oltre 3 secondi. Nel display LCD q compare “LINGUA SETUP”. Con il tasto o t selezionare “CODICE SETUP” e confermare con il tasto OK l.
3.„INVIO CODIC“ compare quindi nel display LCD q. Per richiamare questa funzione premere il tasto OK l.
4.Nel display LCD q compare il codice attualmente utiliz-zato per l'apparecchio selezionato. Ora la prima cifra del codice lampeggerà in attesa dell'immissione del codi-ce da parte dell'utente. Inserire il nuovo codice a quattro cifre tramite i tasti numerici o. All’immissione del quarto
BDA_SFB 10.1 B2 - IAN-75092_it.indd 42 26.04.2012 15:54:21
- 43 -
carattere, tutto il codice lampeggia. Ora si può verificare se il telecomando universale riesce a controllare l’appa-recchio desiderato con questo codice. Premere i tasti cor-rispondenti alle funzioni dell’apparecchio, in caso di appa-recchio TV, ad es. PROG +/–. Se l’apparecchio reagisce come desiderato, confermare l’immissione del codice con il tasto OK l. In caso contrario, inserire il codice successivo nell’elenco ed eseguire una nuova prova.
5.Se il CODE inserito è corretto, viene salvato. Nel display LCD q compare brevemente „OK“. Infine il menu viene terminato automaticamente. In caso di errore del codice, il display LCD q mostra brevemente il messaggio "ERROR" (errore) ed è necessario reinserire il codice. Ripetere il pun-to 4.
6. Con il tasto EXIT y si torna indietro di un livello nel menu.
Programmazione per ricerca automatica dei codiciQuesto processo può durare vari minuti per apparecchio, poiché vengono scansionati tutti i codici per l'apparecchio selezionato. Utilizzare pertanto questo metodo solo se l'apparecchio non può essere programmati con la ricerca del codice della marca o con l'immissione diretta del codice, op-pure se l'apparecchio non compare nell'elenco dei produttori con il relativo elenco dei codici degli apparecchi.
Compiere i passaggi descritti di seguito per eseguire la programmazione tramite la ricerca automatica del codice.
1.Premere il tasto dell'apparecchio e per l'apparecchio da controllare (ad es. VCR).
2. Accendere l'apparecchio da controllare con il telecoman-do. Per gli apparecchi VCR/DVD/CD, inserire un nastro o un disco.
3.Tenere premuto il tasto S r per oltre 3 secondi. Nel display LCD q compare “LINGUA SETUP”. Con il tasto o t selezionare “CODICE SETUP” e confermare con il tasto OK l.
4.„INVIO CODIC“ compare quindi nel display LCD q. Pre-mere il tasto o t, fino alla comparsa di „CERCA CODIC“ nel display LCD q. Dirigere il telecomando sull'apparecchio e premere quin-di il tasto OK l, per richiamare la modalità „Ricerca auto-matica del codice“.
5.La ricerca comincia. A tale scopo l'apparecchio invia i numeri dei codici consecutivamente in sequenza cre-scente. Il simbolo dell'infrarosso 2# lo indica. Ogni ricerca si avvia con il codice correntemente inserito.
6.Se l'apparecchio reagisce spegnendosi, premere imme-diatamente il tasto OK l, per salvare il codice corrente. Il display LCD q mostra brevemente il messaggio "OK".
BDA_SFB 10.1 B2 - IAN-75092_it.indd 43 26.04.2012 15:54:21
- 44 -
7. Controllare che sia possibile eseguire la maggior parte delle funzioni dell'apparecchio con il telecomando. Se è possibile, si è probabilmente trovato il codice corretto. Se alcune funzioni non fossero operative, si può ricominciare la ricerca automatica del codice al punto 1.
8. Se l'apparecchio non reagisce più, probabilmente al pun-to 6 non si è premuto velocemente il tasto OK l. Premere quindi più volte il tasto EXIT y, per uscire dal menu e ritornare alla visualizzazione standard.
9.Tenere premuto il tasto apparecchi e dell'apparecchio per il quale si cerca il codice adatto. In basso a destra nel display LCD q viene visualizzato il codice corrente.Annotarsi questo numero.
10. Procedere quindi come descritto nel precedente capitolo „Programmazione tramite immissione manuale dei codici“ e controllare se funziona il codice con la combinazione di numeri immediatamente inferiore.
Suggerimenti:1.Con la ricerca attivata del codice tutti i tasti, tranne OK l
ed EXIT y, sono privi di funzioni.2. Se la ricerca automatica è arrivata alla fine dell'elenco
dei codici, si fermerà a tal punto. Il display torna alla vi-sualizzazione del messaggio „CERCA CODIC“.
Configurazione del sistema
Impostazione dell'oraIl display LCD q indica l'orario. Per impostarlo, procedere come segue:
1.Tenere premuto il tasto S r per oltre 3 secondi. Compare il messaggio „LINGUA SETUP“. Se si attende circa 15 secondi senza inserire alcun dato, l'apparecchio esce dal menu e ritorna alla visualizzazione standard.
2.Con il tasto o t selezionare „SISTEMA SETUP“ e confermare con il tasto OK l.
3. Il display LCD q mostra il messaggio „TEMPO SETUP“. Confermare con il tasto OK l. Il display LCD qmostra ora „TEMPO“ e il formato dell'ora (24 HR) lampeggia.
4. Con il tasto o t si può passare all'altro formato dell'ora (12 HR). In tal caso, nell'indicazione dell'orario, davanti a esso comparirà la lettera „Am“ o „Pm“. „Am“ sta per „AM“ = „ante meridiem“ (mattina, dalle ore 0:00 alle ore 12:00). „Pm“ sta per „PM“ = „post meridiem“ (pomeriggio, dalle ore 12:00 alle ore 0:00). Premere il tasto OK l per la conferma.
5.Lampeggerà quindi l'indicazione dell'ora. Con il tasto o t selezionare l'ora dell'orario corrente e confermare con il tasto OK l.
6.Lampeggerà quindi l'indicazione dei minuti. Con il tasto o t selezionare i minuti dell'orario corrente e confer-mare con il tasto OK l. Comparirà nuovamente il messaggio „TEMPO SETUP“.
BDA_SFB 10.1 B2 - IAN-75092_it.indd 44 26.04.2012 15:54:21
- 45 -
7.Per uscire da questo menu o dai seguenti, premere il tasto EXIT y tante volte fino a ottenere il messaggio standard nel display LCD q.
Impostazione della dataIl display LCD q mostra la data se si preme il tasto S r. Per impostare la data:
1.Tenere premuto il tasto S r per oltre 3 secondi. Compare il messaggio „LINGUA SETUP“.
2.Con il tasto o t selezionare „SISTEMA SETUP“ e confermare con il tasto OK l.
3. Il display LCD q mostra il messaggio „TEMPO SETUP“. Premere il tasto t, per passare a „DATA SETUP“. Confermare con il tasto OK l.
4.Nel display lampeggia l'indicazione dell'anno „2011“. Con il tasto o t si può modificare la cifra dell'anno e con il tasto OK l si può confermarla. Con il tasto o t si può modificare la cifra relativa ai mesi, mentre lampeggia, e confermare con il tasto OK l. Lampeggia quindi l'indicazione del giorno, che si può modificare nuovamente anche con il tasto o t.
5.Per il salvataggio premere il tasto OK l. Comparirà nuo-vamente il messaggio „DATA SETUP“.
Impostazione contrastoIl contrasto del display può essere impostato come segue:1.Tenere premuto il tasto S r per oltre 3 secondi.
Compare il messaggio „LINGUA SETUP“.2.Con il tasto o t selezionare „SISTEMA SETUP“
e confermare con il tasto OK l.3.Con il tasto o t selezionare „CONTR SETUP“ e
confermare con il tasto OK l.4.Nel display LCD q lampeggia quindi il valore del contra-
sto, che si può impostare con il tasto o t:Messaggi nel display: 0 = massimo contrasto 15 = minimo contrasto
5.Con il tasto OK l memorizzare le impostazioni desi-derate. Comparirà nuovamente il messaggio „CONTR SETUP“.
RetroilluminazioneSi può impostare la durata dell'illuminazione dello sfondo del display LCD q e dei tasti al termine dell'immissione dei comandi. Ricordare che una durata maggiore dell'illumina-zione riduce la durata di vita delle pile.
1.Tenere premuto il tasto S r per oltre 3 secondi. Compare il messaggio „LINGUA SETUP“.
2.Con il tasto o t selezionare „SISTEMA SETUP“ e confermare con il tasto OK l.
3.Con il tasto o t selezionare „RETROILL SETUP“ e confermare con il tasto OK l.
BDA_SFB 10.1 B2 - IAN-75092_it.indd 45 26.04.2012 15:54:21
- 46 -
4.Nel display LCD q lampeggia quindi il numero dei se-condi per la durata dell'illuminazione che si può imposta-re da 0 a 60 con i tasti t. Selezionando „0“, la retroilluminazione viene disattivata.
5.Con il tasto OK l memorizzare le impostazioni deside-rate. Comparirà nuovamente il messaggio „RETROILL SETUP“.
Impostazione del volume globale/disattivazione del volumePer evitare di dover sempre premere prima un tasto dell’appa-recchio per la regolazione e la disattivazione del volume, il TU per queste funzioni fa riferimento sempre a un unico apparecchio, di solito il televisore. Questo apparecchio di destinazione può essere stabilito.
1.Tenere premuto il tasto S r per oltre 3 secondi. Compare il messaggio “LINGUA SETUP”.
2.Con il tasto o t selezionare “SISTEMA SETUP” e confermare con il tasto OK l.
3.Con il tasto o t selezionare “VOL/MUTE SETUP” e confermare con il tasto OK l.
4. Il display LCD q mostra il messaggio “TUTTIVOL IMP”. Premere il tasto OK l, il display passa al messaggio “TUTTI VOL MOD”.
5. Ora premere il tasto dell’apparecchio e per l’appa-recchio che dev’essere controllato tramite la funzione glo-bale di regolazione del volume.
6. Se l’apparecchio indicato possiede un comando di regolazione del volume, verrà visualizzato brevemente “SUCCESSO” e il menu verrà terminato. La regolazione del volume funzionerà da subito sull’apparecchio appena impostato.
7. Se questo apparecchio non dispone di comandi per la regolazione del volume, il TU non consente tale selezione e indica “VOLUME ERR” (= errore). Anche in tal caso il menu viene terminato. La regolazione del volume conti-nuerà a funzionare sull’apparecchio precedente.
La regolazione globale del volume per determinati apparec-chi si può anche disattivare.
1. Nel menu “VOL/MUTE SETUP” con il tasto o t se-lezionare la funzione “MOD VOL IMP” e confermare con il tasto OK l. Nel display LCD q compare “MOD VOL MOD”.
2.Ora premere il tasto dell’apparecchio e per l’appa-recchio che dev’essere escluso dalla funzione globale di regolazione del volume. Il display LCD q mostra “SUCCESSO” e la regolazione globale del volume viene disattivata se il TU funziona nella modalità di esercizio di uno degli apparecchi selezionati.
È possibile eliminare nuovamente le impostazioni nel menu “VOL/MUTE SETUP”.
BDA_SFB 10.1 B2 - IAN-75092_it.indd 46 26.04.2012 15:54:21
- 47 -
1. Nel menu “VOL/MUTE SETUP”, con i tasti o t se-lezionare nuovamente la funzione “VOL/MUTE REIMP” e confermare con il tasto OK l.
2. Il display LCD q con il messaggio CONFERMA REIMP chiede la conferma con il tasto OK su l. Premere il tasto OK l, se si desidera eliminare le impostazioni, il mes-saggio “ERFOLG” indica che è stata eseguita la cancella-zione dell’attribuzione dell’apparecchio alla regolazione globale del volume. Oppure si può premere il tasto EXIT y per interrompere la cancellazione.
Selezionare apparecchio banda/disco per il comando diretto Si può selezionare un apparecchio banda o disco che si può utilizzare con i tasti unità disco f, senza dover prima premere i relativi tasti dell’apparecchio e.
1. Tenere premuto il tasto S r per oltre 3 secondi. Compare il messaggio “LINGUA SETUP”.
2. Con il tasto o t selezionare “SISTEMA SETUP” e confermare con il tasto OK l.
3. Il display LCD q mostra il messaggio „TEMPO SETUP“. Premere il tasto t, per passare a „RIPROD SETUP“. Confermare con il tasto OK l.
4. Con il tasto o t selezionare l’apparecchio che deve reagire al telecomando universale con l’impiego dei tasti unità disco f. Confermare con il tasto OK l.
5. Selezionando “OFF” al posto di un apparecchio e con-fermando con il tasto OK l, si passa al comando diretto. Selezionando “REIMP” e confermando con il tasto OK l, si attiva l’impostazione operativa preprogrammata (DVD) per questa funzione.
6. Il display LCD q indica “SUCCESSO” e l’apparecchio selezionato può essere ora controllato direttamente con i tasti unità disco f.
Impostazione della funzione LockCon la funzione di blocco si può bloccare l’accesso a tutti i menu di configurazione.
1. Tenere premuto il tasto S r per oltre 3 secondi.2. Con il tasto o t selezionare “SISTEMA SETUP”
e confermare con il tasto OK l.3.Con il tasto o t selezionare “BLOCCA SETUP” e
confermare con il tasto OK l. Il display LCD q indica l’impostazione corrente.
4.Con il tasto o t selezionare ora scegliendo fra “BLOCCA” (blocco attivato) o “SBLOCCA” (blocco disatti-vato).
5.Con il tasto OK l memorizzare l’impostazione. Nel di-splay LCD q compare di nuovo il messaggio “BLOCCA SETUP”.
BDA_SFB 10.1 B2 - IAN-75092_it.indd 47 26.04.2012 15:54:21
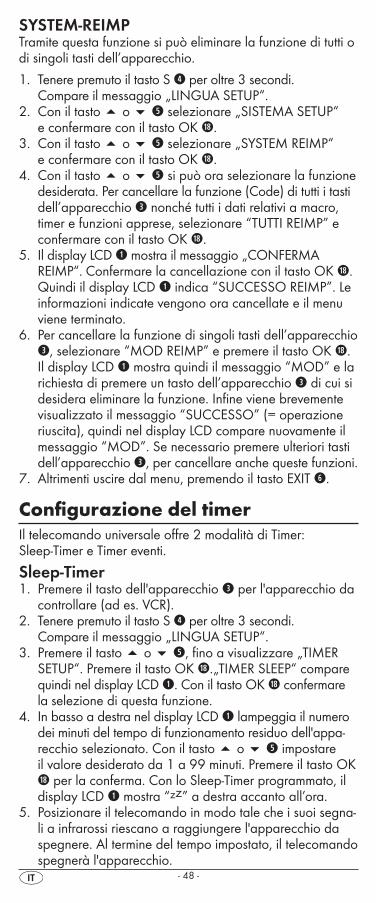
- 48 -
SYSTEM-REIMPTramite questa funzione si può eliminare la funzione di tutti o di singoli tasti dell’apparecchio.
1.Tenere premuto il tasto S r per oltre 3 secondi. Compare il messaggio „LINGUA SETUP“.
2.Con il tasto o t selezionare „SISTEMA SETUP“ e confermare con il tasto OK l.
3.Con il tasto o t selezionare „SYSTEM REIMP“ e confermare con il tasto OK l.
4.Con il tasto o t si può ora selezionare la funzione desiderata. Per cancellare la funzione (Code) di tutti i tasti dell’apparecchio e nonché tutti i dati relativi a macro, timer e funzioni apprese, selezionare “TUTTI REIMP” e confermare con il tasto OK l.
5. Il display LCD q mostra il messaggio „CONFERMA REIMP“. Confermare la cancellazione con il tasto OK l.
Quindi il display LCD q indica “SUCCESSO REIMP”. Le informazioni indicate vengono ora cancellate e il menu viene terminato.
6. Per cancellare la funzione di singoli tasti dell’apparecchio e, selezionare “MOD REIMP” e premere il tasto OK l.
Il display LCD q mostra quindi il messaggio “MOD” e la richiesta di premere un tasto dell’apparecchio e di cui si desidera eliminare la funzione. Infine viene brevemente visualizzato il messaggio “SUCCESSO” (= operazione riuscita), quindi nel display LCD compare nuovamente il messaggio “MOD”. Se necessario premere ulteriori tasti dell’apparecchio e, per cancellare anche queste funzioni.
7. Altrimenti uscire dal menu, premendo il tasto EXIT y.
Configurazione del timerIl telecomando universale offre 2 modalità di Timer: Sleep-Timer e Timer eventi.
Sleep-Timer1.Premere il tasto dell'apparecchio e per l'apparecchio da
controllare (ad es. VCR).2.Tenere premuto il tasto S r per oltre 3 secondi.
Compare il messaggio „LINGUA SETUP“.3.Premere il tasto o t, fino a visualizzare „TIMER
SETUP“. Premere il tasto OK l.„TIMER SLEEP“ compare quindi nel display LCD q. Con il tasto OK l confermare la selezione di questa funzione.
4. In basso a destra nel display LCD q lampeggia il numero dei minuti del tempo di funzionamento residuo dell'appa-recchio selezionato. Con il tasto o t impostare il valore desiderato da 1 a 99 minuti. Premere il tasto OK l per la conferma. Con lo Sleep-Timer programmato, il display LCD q mostra “zz” a destra accanto all’ora.
5. Posizionare il telecomando in modo tale che i suoi segna-li a infrarossi riescano a raggiungere l'apparecchio da spegnere. Al termine del tempo impostato, il telecomando spegnerà l'apparecchio.
BDA_SFB 10.1 B2 - IAN-75092_it.indd 48 26.04.2012 15:54:22
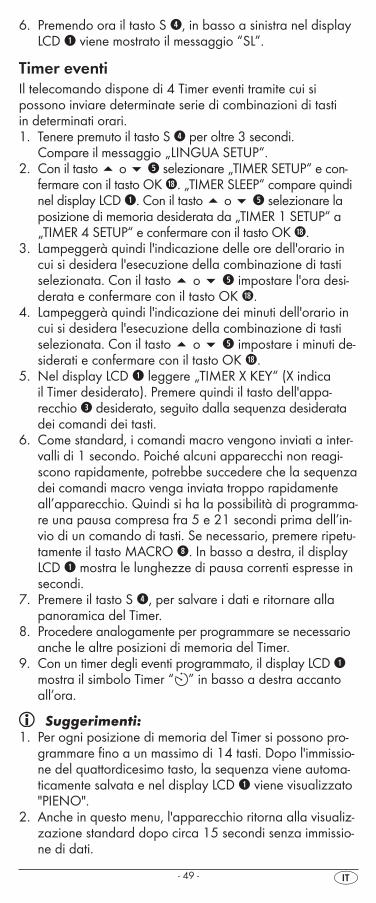
- 49 -
6.Premendo ora il tasto S r, in basso a sinistra nel display LCD q viene mostrato il messaggio “SL”.
Timer eventiIl telecomando dispone di 4 Timer eventi tramite cui si possono inviare determinate serie di combinazioni di tasti in determinati orari.1.Tenere premuto il tasto S r per oltre 3 secondi.
Compare il messaggio „LINGUA SETUP“.2.Con il tasto o t selezionare „TIMER SETUP“ e con-
fermare con il tasto OK l. „TIMER SLEEP“ compare quindi nel display LCD q. Con il tasto o t selezionare la posizione di memoria desiderata da „TIMER 1 SETUP“ a „TIMER 4 SETUP“ e confermare con il tasto OK l.
3.Lampeggerà quindi l'indicazione delle ore dell'orario in cui si desidera l'esecuzione della combinazione di tasti selezionata. Con il tasto o t impostare l'ora desi-derata e confermare con il tasto OK l.
4.Lampeggerà quindi l'indicazione dei minuti dell'orario in cui si desidera l'esecuzione della combinazione di tasti selezionata. Con il tasto o t impostare i minuti de-siderati e confermare con il tasto OK l.
5.Nel display LCD q leggere „TIMER X KEY“ (X indica il Timer desiderato). Premere quindi il tasto dell'appa-recchio e desiderato, seguito dalla sequenza desiderata dei comandi dei tasti.
6. Come standard, i comandi macro vengono inviati a inter-valli di 1 secondo. Poiché alcuni apparecchi non reagi-scono rapidamente, potrebbe succedere che la sequenza dei comandi macro venga inviata troppo rapidamente all’apparecchio. Quindi si ha la possibilità di programma-re una pausa compresa fra 5 e 21 secondi prima dell’in-vio di un comando di tasti. Se necessario, premere ripetu-tamente il tasto MACRO i. In basso a destra, il display LCD q mostra le lunghezze di pausa correnti espresse in secondi.
7.Premere il tasto S r, per salvare i dati e ritornare alla panoramica del Timer.
8. Procedere analogamente per programmare se necessario anche le altre posizioni di memoria del Timer.
9.Con un timer degli eventi programmato, il display LCD q mostra il simbolo Timer “ ” in basso a destra accanto all’ora.
Suggerimenti:1.Per ogni posizione di memoria del Timer si possono pro-
grammare fino a un massimo di 14 tasti. Dopo l'immissio-ne del quattordicesimo tasto, la sequenza viene automa-ticamente salvata e nel display LCD q viene visualizzato "PIENO".
2. Anche in questo menu, l'apparecchio ritorna alla visualiz-zazione standard dopo circa 15 secondi senza immissio-ne di dati.
BDA_SFB 10.1 B2 - IAN-75092_it.indd 49 26.04.2012 15:54:22
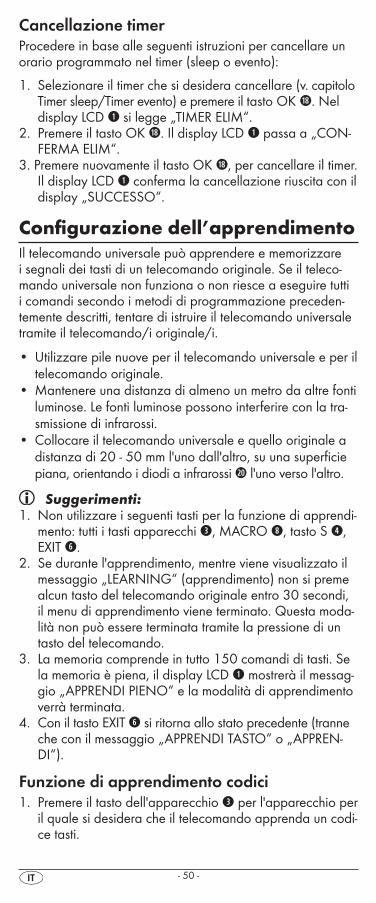
- 50 -
Cancellazione timerProcedere in base alle seguenti istruzioni per cancellare un orario programmato nel timer (sleep o evento):
1. Selezionare il timer che si desidera cancellare (v. capitolo Timer sleep/Timer evento) e premere il tasto OK l. Nel display LCD q si legge „TIMER ELIM“.
2. Premere il tasto OK l. Il display LCD q passa a „CON-FERMA ELIM“.
3. Premere nuovamente il tasto OK l, per cancellare il timer. Il display LCD q conferma la cancellazione riuscita con il display „SUCCESSO“.
Configurazione dell’apprendimentoIl telecomando universale può apprendere e memorizzare i segnali dei tasti di un telecomando originale. Se il teleco-mando universale non funziona o non riesce a eseguire tutti i comandi secondo i metodi di programmazione preceden-temente descritti, tentare di istruire il telecomando universale tramite il telecomando/i originale/i.
• Utilizzare pile nuove per il telecomando universale e per il telecomando originale.
• Mantenere una distanza di almeno un metro da altre fonti luminose. Le fonti luminose possono interferire con la tra-smissione di infrarossi.
• Collocare il telecomando universale e quello originale a distanza di 20 - 50 mm l'uno dall'altro, su una superficie piana, orientando i diodi a infrarossi 2) l'uno verso l'altro.
Suggerimenti:1.Non utilizzare i seguenti tasti per la funzione di apprendi-
mento: tutti i tasti apparecchi e, MACRO i, tasto S r, EXIT y.
2. Se durante l'apprendimento, mentre viene visualizzato il messaggio „LEARNING“ (apprendimento) non si preme alcun tasto del telecomando originale entro 30 secondi, il menu di apprendimento viene terminato. Questa moda-lità non può essere terminata tramite la pressione di un tasto del telecomando.
3.La memoria comprende in tutto 150 comandi di tasti. Se la memoria è piena, il display LCD q mostrerà il messag-gio „APPRENDI PIENO“ e la modalità di apprendimento verrà terminata.
4.Con il tasto EXIT y si ritorna allo stato precedente (tranne che con il messaggio „APPRENDI TASTO“ o „APPREN-DI“).
Funzione di apprendimento codici1.Premere il tasto dell'apparecchio e per l'apparecchio per
il quale si desidera che il telecomando apprenda un codi-ce tasti.
BDA_SFB 10.1 B2 - IAN-75092_it.indd 50 26.04.2012 15:54:22
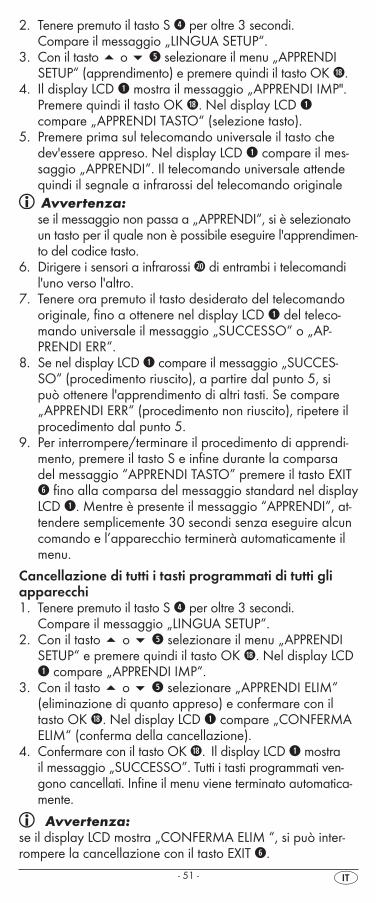
- 51 -
2.Tenere premuto il tasto S r per oltre 3 secondi. Compare il messaggio „LINGUA SETUP“.
3.Con il tasto o t selezionare il menu „APPRENDI SETUP“ (apprendimento) e premere quindi il tasto OK l.
4. Il display LCD q mostra il messaggio „APPRENDI IMP". Premere quindi il tasto OK l. Nel display LCD q compare „APPRENDI TASTO“ (selezione tasto).
5.Premere prima sul telecomando universale il tasto che dev'essere appreso. Nel display LCD q compare il mes-saggio „APPRENDI“. Il telecomando universale attende quindi il segnale a infrarossi del telecomando originaleAvvertenza:se il messaggio non passa a „APPRENDI“, si è selezionato un tasto per il quale non è possibile eseguire l'apprendimen-to del codice tasto.
6.Dirigere i sensori a infrarossi 2) di entrambi i telecomandi l'uno verso l'altro.
7.Tenere ora premuto il tasto desiderato del telecomando originale, fino a ottenere nel display LCD q del teleco-mando universale il messaggio „SUCCESSO“ o „AP-PRENDI ERR“.
8.Se nel display LCD q compare il messaggio „SUCCES-SO“ (procedimento riuscito), a partire dal punto 5, si può ottenere l'apprendimento di altri tasti. Se compare „APPRENDI ERR“ (procedimento non riuscito), ripetere il procedimento dal punto 5.
9.Per interrompere/terminare il procedimento di apprendi-mento, premere il tasto S e infine durante la comparsa del messaggio “APPRENDI TASTO” premere il tasto EXIT y fino alla comparsa del messaggio standard nel display LCD q. Mentre è presente il messaggio “APPRENDI”, at-tendere semplicemente 30 secondi senza eseguire alcun comando e l’apparecchio terminerà automaticamente il menu.
Cancellazione di tutti i tasti programmati di tutti gli apparecchi1. Tenere premuto il tasto S r per oltre 3 secondi.
Compare il messaggio „LINGUA SETUP“.2.Con il tasto o t selezionare il menu „APPRENDI
SETUP“ e premere quindi il tasto OK l. Nel display LCD q compare „APPRENDI IMP“.
3.Con il tasto o t selezionare „APPRENDI ELIM“ (eliminazione di quanto appreso) e confermare con il tasto OK l. Nel display LCD q compare „CONFERMA ELIM“ (conferma della cancellazione).
4.Confermare con il tasto OK l.Il display LCD q mostra il messaggio „SUCCESSO”. Tutti i tasti programmati ven-gono cancellati. Infine il menu viene terminato automatica-mente.
Avvertenza:se il display LCD mostra „CONFERMA ELIM “, si può inter-rompere la cancellazione con il tasto EXIT y.
BDA_SFB 10.1 B2 - IAN-75092_it.indd 51 26.04.2012 15:54:22
- 52 -
Configurazione macroCon la funzione MACRO si possono eseguire fino a 16 co-mandi di tasti con una semplice pressione di un tasto, cioè è possibile eseguire con un tasto di macro vari comandi prece-dentemente salvati. Sono a disposizione 6 posizioni di macro.Programmazione di una macroPer la programmazione di una macro, procedere come segue:1.Tenere premuto il tasto S r per oltre 3 secondi.
Compare il messaggio „LINGUA SETUP“.2.Con il tasto o t selezionare „MACRO SETUP"
e confermare con il tasto OK l. Nel display compare „MACRO 1 SETUP".
3.Con il tasto o t selezionare la posizione di memoria da programmare (MACRO SETUP 1 - 6) e confermare con il tasto OK l.
4. Il display LCD q mostra il messaggio „MACRO FASE". Premere i tasti desiderati in sequenza (max. 16). La sequenza deve cominciare con un tasto apparecchi e.
5.Come standard, i comandi macro vengono inviati a inter-valli di 1 secondo. Poiché alcuni apparecchi non reagi-scono rapidamente, potrebbe succedere che la sequenza dei comandi macro venga inviata troppo rapidamente all’apparecchio. Quindi si ha la possibilità di programmare una pausa compresa fra 5 e 21 secondi prima dell’invio di un comando di tasti. Premere eventualmente ripetutamente il tasto MACRO i. In basso a destra, il display LCD q mo-stra le lunghezze di pausa correnti espresse in secondi.
6.Una volta raggiunta la quantità massima dei comandi di tasti, il display LCD q indica „PIENO“.
7.Salvare l'immissione con il tasto S r. Il display LCD q mostra il messaggio „MACRO SETUP".
8. Se durante la selezione della macro da programmare (punto 3) si seleziona una posizione di memoria già occupata, la macro preesistente verrà sovrascritta.
9. Ripetere il procedimento dal punto 3 per la creazione di ulteriori macro.
10.Con il tasto EXIT y si retrocede di un livello nel menu, tranne durante l’immissione dei comandi dei tasti.
Suggerimenti:1. In una macro si possono memorizzare un massimo di 16
comandi. Dopo l’immissione del sedicesimo comando di tasti, nel display LCD q compare la scritta “PIENO”.
2. Per uscire dalla modalità senza salvare, attendere circa 15 secondi senza eseguire immissioni.
3.Nella modalità „MACRO FASE“ si può tornare allo stato precedente solo con il tasto S r.
Esempio: si desidera salvare una sequenza di comandi in una macro. Cominciamo nella modalità „MACRO FASE”.
Sequenza di comandi desiderata: accensione della TV => PAUSE => passaggio all’ingresso AV => accensione DVD => PAUSE => riproduzione DVD.
BDA_SFB 10.1 B2 - IAN-75092_it.indd 52 26.04.2012 15:54:22

- 53 -
Nella modalità "MACRO FASE"inserire la seguente sequenza di comandi:
=> => (tempo di pausa) => => => => (tempo di pausa) =>
Esecuzione macroPer eseguire una macro precedentemente programmata, pro-cedere come segue:
1.Premere il tasto MACRO i.2.Con il relativo tasto numerico o richiamare la macro
desiderata (1-6). Esempio: se si desidera eseguire la Macro 3, premere prima il tasto MACRO i e quindi nel giro di 5 secondi il tasto numerico „ “.
Cancellazione di tutte le macroPer eliminare tutte le macro precedentemente programmate, procedere come segue:
1.Tenere premuto il tasto S r per oltre 3 secondi. Compare il messaggio „LINGUA SETUP“.
2.Con il tasto o t selezionare „MACRO SETUP" e confermare con il tasto OK l. Nel display compare „MACRO SETUP 1".
3.Con il tasto o t selezionare „MACRO ELIM“ e confermare con il tasto OK l.
4.Nel display LCD q compare „CONFERMA ELIM“ (con-ferma della cancellazione). Confermare l'eliminazione con il tasto OK l. Il display LCD q mostra il messaggio "SUCCESSO". Tutte le macro vengono annullate, il menu viene terminato.
Suggerimenti:1.Se il display LCD q mostra „CONFERMA ELIM“, si può
interrompere la cancellazione con il tasto EXIT y.2. Non è possibile cancellare le singole macro, ma solo so-
vrascriverle.
Canalepreferiti Avvertenza:
con questa funzione si possono salvare le emittenti preferite come Preferiti.
Programmazione dei PreferitiLe emittenti preferite possono essere memorizzate come segue:
1.Premere il tasto dell'apparecchio e per l'apparecchio per il quale si desidera salvare un preferito.
2.Tenere premuto il tasto S r per oltre 3 secondi. Compare il messaggio „LINGUA SETUP“.
3.Con il tasto o t selezionare „PREF CH SETUP" e confermare con il tasto OK l. Nel display compare „PREF CH 1 SETUP".
4.Con il tasto o t selezionare la posizione di memoria da programmare (PREF CH 1 - 4 SETUP) e confermare con il tasto OK l.
BDA_SFB 10.1 B2 - IAN-75092_it.indd 53 26.04.2012 15:54:22
- 54 -
5. Il display LCD q mostra il messaggio „PREF CH FASE". Premere in sequenza i tasti (max. 4) per richiamare l'emit-tente desiderata preferita.
6.Una volta raggiunta la quantità massima dei comandi di tasti, il display LCD q indica „PIENO“.
7.Salvare l'immissione con il tasto S r. Il display LCD q mostra il messaggio „PREF CH SETUP".
8. Se durante la selezione del preferito da programmare (punto 4) si seleziona una posizione di memoria già occupata, il preferito preesistente verrà sovrascritto.
9. Ripetere il procedimento per impostare nuovi preferiti.10.Con il tasto EXIT y si retrocede di un livello nel menu,
tranne durante l'immissione dei comandi dei tasti.
Avvertenza:L'immissione dei numeri dei canali può variare a seconda del modello e della marca dell'apparecchio selezionato. Even-tualmente potrebbe essere necessario premere prima il tasto a in caso di numeri di canali a più cifre.
Richiamo dei preferitiPer richiamare uno dei preferiti precedentemente program-mati, premere il tasto FAV/EPG 1(, seguito dal relativo tasto numerico per la posizione di memoria desiderata (1 - 4).
Eliminazione di tutti i canali PREFPer eliminare tutti i preferiti precedentemente programmati, procedere come segue:1.Tenere premuto il tasto S r per oltre 3 secondi.2.Con il tasto o t selezionare „PREF CH SETUP"
e confermare con il tasto OK l. Nel display compare „PREF CH SETUP 1".
3.Con il tasto o t selezionare „PREF CH CLEAR“ e confermare con il tasto OK l.
4.Nel display LCD q compare „CONFERMA ELIM“ (con-ferma della cancellazione). Confermare l'eliminazione con il tasto OK l. Il display LCD q mostra il messaggio "SUCCESSO". Tutti i preferiti vengono annullati, il menu viene terminato.
Suggerimenti:1.Se il display LCD q mostra „CONFERMA ELIM“, si può
interrompere la cancellazione con il tasto EXIT y.2. Non è possibile cancellare i singoli preferiti, ma solo so-
vrascriverli.
Regolazionevolume
Vol +/—, (disattivazione suono)Premere il tasto "VOL+" per aumentare il volume. Con il tasto „VOL —“ si può diminuire il volume. Per disattivare il suono, premere il tasto h. Un'ulteriore pressione di questo tasto riattiverà il suono.
BDA_SFB 10.1 B2 - IAN-75092_it.indd 54 26.04.2012 15:54:22
- 55 -
Se non si è impostato alcun altro apparecchio come appa-recchio di destinazione per la regolazione globale del volu-me, all’azionamento dei tasti VOL +/— j del telecomando, come standard viene azionata la regolazione del volume dell’apparecchio TV, indipendentemente dai tasti dell’appa-recchio e premuti precedentemente. Ciò tuttavia non vale per gli apparecchi “AMP”, “DVD” e “DSAT”, poiché si può partire anche dal presupposto che questi apparecchi dispon-gano di regolazione autonoma del volume.
Uso > Per comandare uno degli apparecchi programmati con il telecomando universale, premere prima di tutto il relativo tasto apparecchi e. Dirigere quindi il telecomando univer-sale su tale apparecchio e premere il tasto desiderato.
> Impostare i tasti numerici o esattamente come si farebbe con il telecomando originale. Prima di eseguire un'immis-sione a due cifre, premere il tasto a.
> Premere il tasto S r e infine il tasto FAV/EPG 1(, per av-viare la guida dei programmi di un apparecchio provvisto di questa funzione.
> Premendo il tasto S r, in basso a destra verrà visualizzata la data per 10 secondi nel display LCD q.
> Premendo uno dei tasti apparecchi e, in basso a destra nel display LCD q viene visualizzato il codice attivo per l'apparecchio.
> Tramite il tasto MENU k richiamare il dialogo per le im-postazioni del rispettivo apparecchio di destinazione.
> Premere il tasto di illuminazione d, per attivare o disatti-vare l’illuminazione del display e dei tasti.
Tasto ALL OFF Suggerimenti:
Con il tasto ALL OFF (tutto spento) w si possono spegnere automaticamente tutti gli apparecchi accesi. Questa funzione può riaccendere gli apparecchi già spenti (a seconda dell'apparecchio). Tenere premuto in tal caso per qualche secondo il tasto ALL OFF w. Possono essere necessari fino a 10 secondi per lo spegnimento di tutti gli apparecchi. Tale operazione funziona solo in presenza delle seguenti condizioni:
1. Esiste una connessione visibile fra tutti gli apparecchi e il telecomando universale.
2. Le funzioni di ricerca automatica del codice, ricerca del codice in base alla marca e MACRO non sono attive.
3. Tutti gli apparecchi di arrivo devono essere idonei allo spegnimento tramite telecomando.
Per riaccendere automaticamente tutti gli apparecchi, tenere premuto nuovamente il tasto w fino ad accendere tutti gli apparecchi.
BDA_SFB 10.1 B2 - IAN-75092_it.indd 55 26.04.2012 15:54:22
- 56 -
Puliziaeconservazione
Attenzione!Impedire la penetrazione di umidità nell'apparecchio durante la pulizia! In caso contrario, possono verificarsi danni irreparabili all'apparecchio!
> Pulire l'alloggiamento dell'apparecchio solo con un panno leggermente umido e un detergente delicato.
> Collocare l'apparecchio esclusivamente in un ambiente corrispondente alle indicazioni contenute nella sezione Dati tecnici.
> Prima della conservazione, rimuovere le pile, in modo da impedire che esse danneggino l'apparecchio in caso di deterioramento delle stesse.
Guasti/Risoluzione
L'apparecchio non reagisce al telecomando universale. > Controllare le pile. È necessaria una tensione sufficiente e il corretto inserimento delle pile.
> Si è premuto il tasto apparecchi e corretto per l'apparec-chio di destinazione desiderato?
> Controllare che sia stato programmato il codice corretto per l'apparecchio di destinazione (v. paragrafo „CODI-CE SETUP“).
Il telecomando universale non trasmette correttamente i comandi.
> Premere il relativo tasto apparecchi e per portare il tele-comando nella modalità corretta.
> È necessaria una tensione sufficiente e il corretto inseri-mento delle pile.
> Probabilmente si sta utilizzando un codice errato. Avviare la ricerca dei codici delle marche, la ricerca automatica dei codici o l'immissione diretta del codice (manuale).
Il telecomando universale non cambia l'emittente sull'apparecchio.
> Premere il relativo tasto apparecchi e per portare il tele-comando nella modalità corretta.
> Se il telecomando originale non possiede tasti „-/- -“, cambiare i programmi con i tasti P +/— u o con i tasti numerici o.
> Se anche tale opzione non funzionasse, controllare che non sia attivata la protezione bambini per l'apparecchio di destinazione.
Alcuni tasti del telecomando universale non funzionano correttamente.
> Il telecomando universale probabilmente non possiede tutte le funzioni del telecomando originale dell'appa-recchio.
BDA_SFB 10.1 B2 - IAN-75092_it.indd 56 26.04.2012 15:54:22
- 57 -
> Probabilmente non è stato programmato il codice otti-male. Cercare un codice che supporti maggiori funzioni dell'apparecchio di destinazione.
Il telecomando universale non reagisce più a seguito della pressione di un tasto.
> È necessaria una tensione sufficiente e il corretto inseri-mento delle pile.
> Dirigere il telecomando universale verso l'apparecchio.
Il display LCD q non mostra alcun messaggio. > È necessaria una tensione sufficiente e il corretto inseri-mento delle pile.
> Il contrasto potrebbe essere troppo ridotto. Aumentare il contrasto.
Smaltimento Non gettare per alcun motivo l'apparecchio insieme ai normali rifiuti domestici. Questo prodotto è soggetto alla direttiva europea 2002/96/EC.Telecomando universale• Smaltire il telecomando universale o parti di esso tramite
un'azienda autorizzata di smaltimento o tramite l'ente mu-nicipale competente.
• Rispettare le prescrizioni attualmente in vigore. In caso di dubbi mettersi in contatto con l'ente di smaltimento com-petente.
Pile/accumulatori• Pile e/o accumulatori non devono essere smaltiti insieme
ai rifiuti domestici.• Le pile possono contenere sostanze tossiche dannose per
l'ambiente. Smaltire pertanto le pile/gli accumulatori uni-camente in conformità alle leggi vigenti.
• Ogni utente è obbligato per legge a restituire le pile/gli accumulatori a un centro di raccolta comunale, locale o presso il rivenditore. Questo obbligo è finalizzato allo smaltimento ecologico delle pile e/o degli accumulatori.
• Restituire pile/accumulatori solo se completamente scarichi.
Imballaggi• Smaltire tutti i materiali dell'imballaggio in modo
ecologicamente conforme.
DatitecniciApparecchi comandabili: 10Dimensioni L x P x A: 217 x 50 x 22 mmPeso : 133 g (incl. pile)LED a infrarossi: classe di laser 1Alimentazione Pile: 2 x 1,5 V tipo AAA/LR03 (micro) (incluse nella fornitura)
BDA_SFB 10.1 B2 - IAN-75092_it.indd 57 26.04.2012 15:54:22
- 58 -
Temperatura di esercizio: + 5 – +35°C Temperatura di conservazione : -20 - +50° C
Umidità: 5 - 90 % (senza condensa)
AvvisosullaconformitàQuesto apparecchio è conforme ai requisiti di base e alle altre norme rilevanti della direttiva EMV 2004/108/EC.
ImportatoreKOMPERNASS GMBH BURGSTRASSE 21 44867 BOCHUM, GERMANYwww.kompernass.com
Garanzia&assistenzaQuesto apparecchio è garantito per tre anni a partire dalla data di acquisto. L'apparecchio è stato prodotto con cura e debitamente collaudato prima della consegna. Conservare lo scontrino come prova d'acquisto. Nei casi contemplati dal-la garanzia, mettersi in comunicazione telefonicamente con il centro di assistenza più vicino. Solo in tal modo è possibile garantire una spedizione gratuita della merce.La garanzia copre solo i difetti del materiale o di fabbrica-zione, ma non i danni da trasporto, danni alle parti soggette a usura o alle parti fragili, come ad esempio interruttori o accumulatori.Il prodotto è destinato esclusivamente all'uso domestico e non a quello commerciale. La garanzia decade in caso di impie-go improprio o manomissione, uso della forza e interventi non eseguiti dalla nostra filiale di assistenza autorizzata.Questa garanzia non costituisce alcun limite ai diritti legali del consumatore. Il periodo di garanzia non viene prolungato da interventi in garanzia. Ciò vale anche per le parti sostituite e riparate. I danni e i difetti eventualmente presenti già all'acquisto devono essere comunicati immediatamente dopo il disimbal-laggio, e comunque entro e non oltre due giorni dalla data d'acquisto. Le riparazioni effettuate al termine del periodo di validità della garanzia sono a pagamento.
Assistenza ItaliaTel.: 02 36003201E-Mail: [email protected]
IAN 75092
BDA_SFB 10.1 B2 - IAN-75092_it.indd 58 26.04.2012 15:54:22
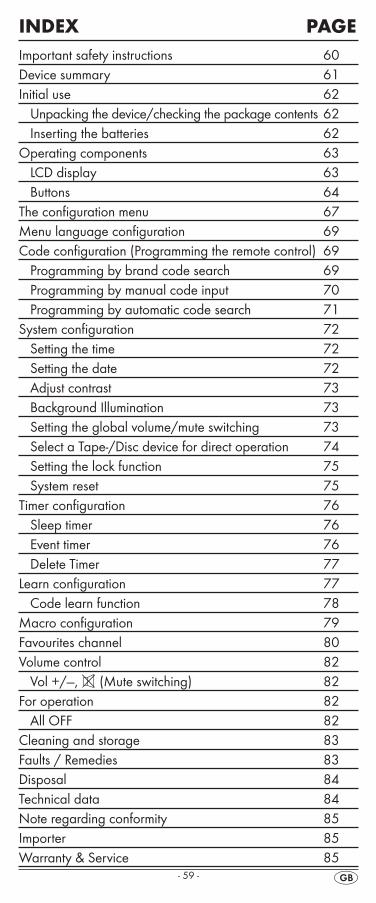
- 59 -
INDEX PAGEImportant safety instructions 60Device summary 61Initial use 62
Unpacking the device/checking the package contents 62Inserting the batteries 62
Operating components 63LCD display 63Buttons 64
The configuration menu 67Menu language configuration 69Code configuration (Programming the remote control) 69
Programming by brand code search 69Programming by manual code input 70Programming by automatic code search 71
System configuration 72Setting the time 72Setting the date 72Adjust contrast 73Background Illumination 73Setting the global volume/mute switching 73Select a Tape-/Disc device for direct operation 74Setting the lock function 75System reset 75
Timer configuration 76Sleep timer 76Event timer 76Delete Timer 77
Learn configuration 77Code learn function 78
Macro configuration 79Favourites channel 80Volume control 82
Vol +/—, (Mute switching) 82For operation 82
All OFF 82Cleaning and storage 83Faults / Remedies 83Disposal 84Technical data 84Note regarding conformity 85Importer 85Warranty & Service 85
BDA_SFB 10.1 B2 - IAN-75092_gb.indd 59 26.04.2012 16:07:03
- 60 -
10-IN-1 REMOTE CONTROL SFB 10.1 B2IntroductionCongratulations on the purchase of your new appliance.You have clearly decided in favour of a quality product. These operating instructions are a part of this product. They contain important information in regard to safety, use and disposal. Before using the product, familiarise yourself with all of these operating and safety instructions. Use the product only as de-scribed and only for the specified areas of application. Retain these instructions for future reference. In addition, pass these documents on, together with the product, to any future owner.
CopyrightThis documentation is copyright protected. All rights includ-ing those of photographic reproduction, duplication and distribution by means of particular methods (for example data processing, data carriers and data networks), wholly or partially as well as substantive and technical changes are reserved.
ImportantsafetyinstructionsProper useChildren may only operate the remote control under adult supervision. The universal remote control can replace a maximum of ten remote controls. It can only be used for entertainment elec-tronics with infrared receivers. The functions of the Universal remote control essentially correspond to those of the original remote control. The universal remote control is intended for private use. It is not suitable for commercial use. Any other use is considered improper use. The manufacturer accepts no responsibility for damage caused by improper handling or unauthorized reconstruction.
WarningA warning of this danger level signifies a possible dangerous situation. If the dangerous situation is not avoided it can lead to injuries. The directives in this warning are there to avoid personal injuries.
ImportantA warning of this danger level signifies possible property damage. If the situation is not avoided it can lead to property damage. The directives in this warning are there to avoid property damage.
NoteA note signifies additional information that assists in the handling of the device.
BDA_SFB 10.1 B2 - IAN-75092_gb.indd 60 26.04.2012 16:07:03
- 61 -
Warningofinjurydangerasaresultofimproperhandlingofbatteries!
Batteries must be handled with special care. Take note of the following safety instructions:• Keep batteries well away from children. Children can
put batteries into their mouths and swallow them. If a bat-tery is swallowed medical assistance must be sought IM-MEDIATELY.
• Do not throw batteries into a fire. Never subject batteries to high temperatures.
• Explosion hazard! Non-rechargeable batteries must never be recharged.
• Do not open the batteries or short-circuit them.• Battery acid leaking from a battery can cause inflamma-
tion of the skin. In event of contact with the skin, rinse with large amounts of water. If the liquid comes into contact with your eyes, rinse thoroughly with water, do not rub and immediately consult a doctor.
Attention!The Universal remote control contains an infrared diode of la-ser class 1. In order to avoid eye injuries do not look at the diode with optical devices.
Damagetothedevice• If the device is defective, do not attempt to repair it your-
self. In case of damage, contact the manufacturer or the manufacturer's service hotline (see Warranty information).
• If liquid escapes from the device or if the device has been otherwise damaged, it must be inspected by the manu-facturer or the manufacturer's service hotline. Contact the manufacturer or the manufacturer's service hotline (see Warranty information).
• Take the batteries out of the battery compartment as soon as they are depleted.
• If you will not be using the device for a long period of time, remove the batteries to prevent them from discharging.
• Always change all batteries at the same time and always use batteries of the same type.
Devicesummaryq LCD displayw /ALL OFF buttone Device buttonsr S buttont Arrow buttonsy EXIT buttonu P +/— buttonsi MACRO buttono Number buttonsa Button for one or two digit programme numbers
BDA_SFB 10.1 B2 - IAN-75092_gb.indd 61 26.04.2012 16:07:03
- 62 -
s Teletext function buttonsd Illumination buttonf Playback buttonsg AV buttonh Mute switchingj VOL +/— buttonsk MENU buttonl OK button1( FAV / EPG button2) Infrared sender/receiver2! Battery compartment cover
Tips:• The functions described here pertain to the theoretically
ideal circumstance that the button structure of the respec-tive original remote control is identical to this universal remote control. This only occurs, however, in rare cases. If, therefore, not all of the original remote control's functions can be reproduced it is not due to a dificiency in the Uni-versal remote control.
• All the brand names used in these instructions or in the accompanying code list are trademarks of the correspond-ing companies.
Initialuse
Unpacking the device/checking the package contents
Warning!Keep the plastic packaging well away from small children. There is a risk of suffocation!• Unpack the device and accessories.• Check the package contents
- Universal remote control (URC), - Operating instructions, - Manufacturers directory with device code list: - 2 x 1,5 V Batteries, type AAA/LR03 (Micro)
Note:TransportdamageIf you notice any transport damage contact the manufacturer or the manufacturer's Service-Hotline (see warranty information).
Inserting the batteries
Attention!The Universal remote control must only be operated with 1.5 Volt batteries (Type AAA, LR03).
Carry out the battery change as quickly as possible. Preset settings will remain saved for approx. 1 minute. If new batter-ies have not been installed within this time all of the settings will have to be carried out again. The time of day and date will, however, be lost in either case.
BDA_SFB 10.1 B2 - IAN-75092_gb.indd 62 26.04.2012 16:07:04
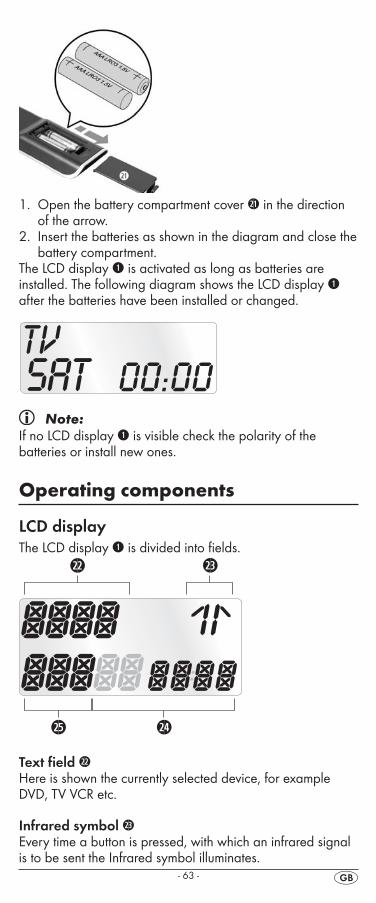
- 63 -
1.Open the battery compartment cover 2! in the direction of the arrow.
2. Insert the batteries as shown in the diagram and close the battery compartment.
The LCD display q is activated as long as batteries are installed. The following diagram shows the LCD display q after the batteries have been installed or changed.
Note:If no LCD display q is visible check the polarity of the batteries or install new ones.
Operatingcomponents
LCD displayThe LCD display q is divided into fields.
Text field 2@Here is shown the currently selected device, for example DVD, TV VCR etc.
Infrared symbol 2#Every time a button is pressed, with which an infrared signal is to be sent the Infrared symbol illuminates.
BDA_SFB 10.1 B2 - IAN-75092_gb.indd 63 26.04.2012 16:07:04
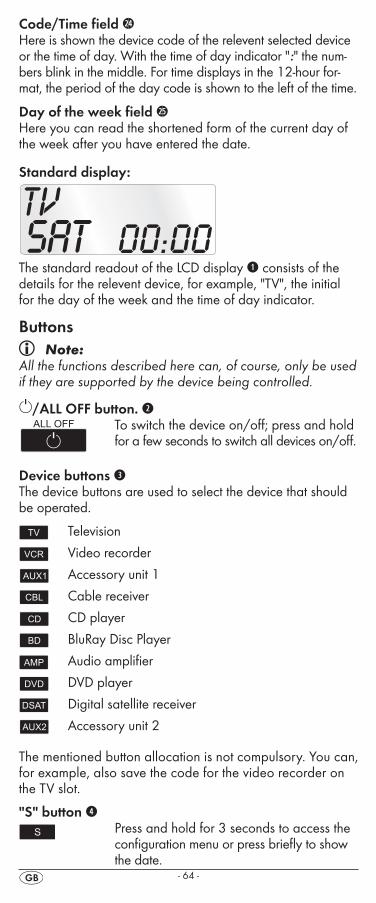
- 64 -
Code/Time field 2$Here is shown the device code of the relevent selected device or the time of day. With the time of day indicator ":" the num-bers blink in the middle. For time displays in the 12-hour for-mat, the period of the day code is shown to the left of the time.
Day of the week field 2%Here you can read the shortened form of the current day of the week after you have entered the date.
Standard display:
The standard readout of the LCD display q consists of the details for the relevent device, for example, "TV", the initial for the day of the week and the time of day indicator.
Buttons Note:
All the functions described here can, of course, only be used if they are supported by the device being controlled.
/ALL OFF button. w To switch the device on/off; press and hold
for a few seconds to switch all devices on/off.
Device buttons eThe device buttons are used to select the device that should be operated.
Television
Video recorder
Accessory unit 1
Cable receiver
CD player
BluRay Disc Player
Audio amplifier
DVD player
Digital satellite receiver
Accessory unit 2
The mentioned button allocation is not compulsory. You can, for example, also save the code for the video recorder on the TV slot.
"S" button r �Press�and�hold�for�3�seconds�to�access�the�
configuration�menu�or�press�briefly�to�show�the�date.
BDA_SFB 10.1 B2 - IAN-75092_gb.indd 64 26.04.2012 16:07:05
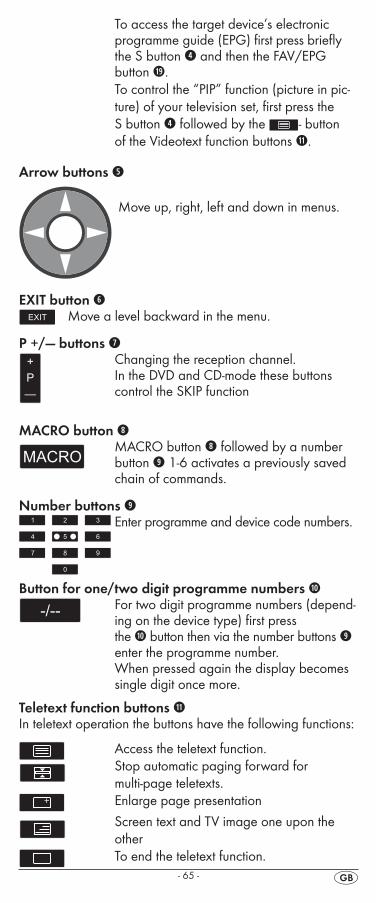
- 65 -
� � �To�access�the�target�device’s�electronic��programme�guide�(EPG)�first�press�briefly�the�S�button�r�and�then�the�FAV/EPG�button�1(.
To control the “PIP” function (picture in pic-ture) of your television set, first press the S button r followed by the - button of the Videotext function buttons s.
Arrow buttons t
Move up, right, left and down in menus.
EXIT button y Move a level backward in the menu.
P +/— buttons u Changing the reception channel. In the DVD and CD-mode these buttons
control the SKIP function
MACRO button i MACRO button i followed by a number
button o 1-6 activates a previously saved chain of commands.
Number buttons o Enter programme and device code numbers.
Button for one/two digit programme numbers a For two digit programme numbers (depend-
ing on the device type) first press the a button then via the number buttons o enter the programme number. When pressed again the display becomes single digit once more.
Teletext function buttons sIn teletext operation the buttons have the following functions:
Access the teletext function. Stop automatic paging forward for
multi-page teletexts. Enlarge page presentation Screen text and TV image one upon the
other To end the teletext function.
BDA_SFB 10.1 B2 - IAN-75092_gb.indd 65 26.04.2012 16:07:06
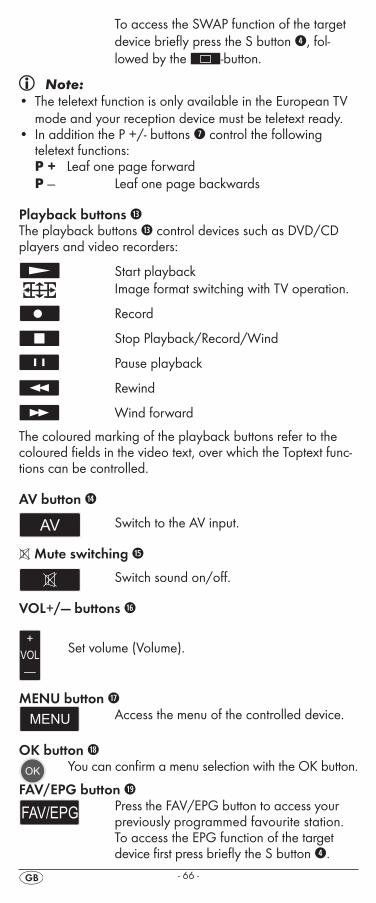
- 66 -
To access the SWAP function of the target device briefly press the S button r, fol-lowed by the -button.
Note:•� The�teletext�function�is�only�available�in�the�European�TV�
mode�and�your�reception�device�must�be�teletext�ready.• In addition the P +/- buttons u control the following
teletext functions: P+ Leaf one page forwardP— Leaf one page backwards
Playback buttons fThe playback buttons f control devices such as DVD/CD players and video recorders:
Start playback Image format switching with TV operation.
Record
Stop Playback/Record/Wind
Pause playback
Rewind
Wind forward
The coloured marking of the playback buttons refer to the coloured fields in the video text, over which the Toptext func-tions can be controlled.
AV button g
Switch to the AV input.
Mute switching h
Switch sound on/off.
VOL+/— buttons j
Set volume (Volume).
MENU button k Access the menu of the controlled device.
OK button l You can confirm a menu selection with the OK button.
FAV/EPG button 1( Press the FAV/EPG button to access your
previously programmed favourite station. To�access�the�EPG�function�of�the�target� � device�first�press�briefly�the�S�button�r.
BDA_SFB 10.1 B2 - IAN-75092_gb.indd 66 26.04.2012 16:07:07
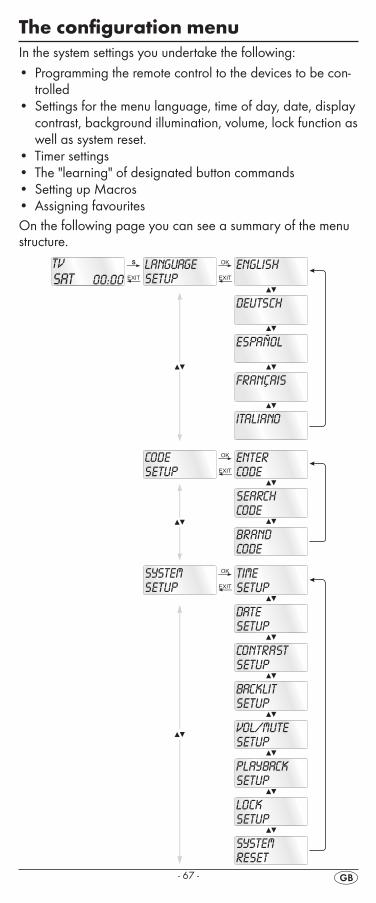
- 67 -
The configuration menuIn the system settings you undertake the following:• Programming the remote control to the devices to be con-
trolled•� Settings�for�the�menu�language,�time�of�day,�date,�display�
contrast,�background�illumination,�volume,�lock�function�as�well�as�system�reset.
• Timer settings• The "learning" of designated button commands• Setting up Macros• Assigning favouritesOn the following page you can see a summary of the menu structure.
BDA_SFB 10.1 B2 - IAN-75092_gb.indd 67 26.04.2012 16:07:07
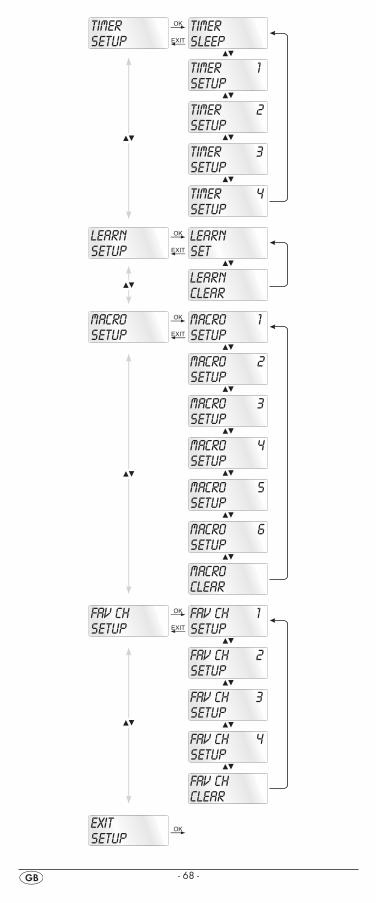
- 68 -
BDA_SFB 10.1 B2 - IAN-75092_gb.indd 68 26.04.2012 16:07:08
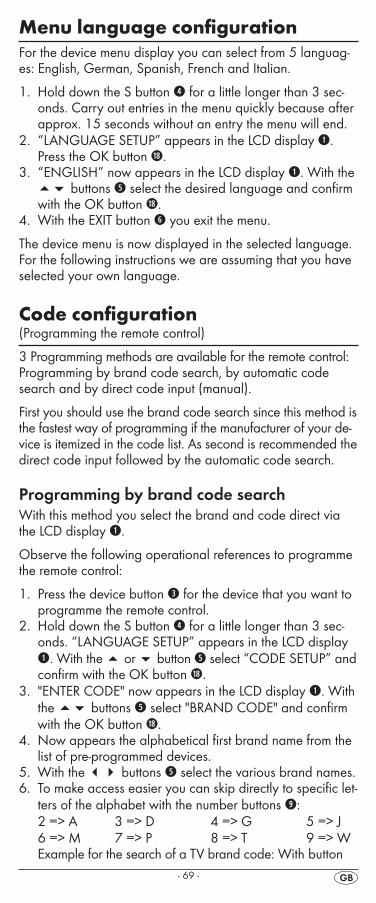
- 69 -
Menu language configurationFor�the�device�menu�display�you�can�select�from�5�languag-es:�English,�German,�Spanish,�French�and�Italian.
1. Hold�down�the�S�button�r�for�a�little�longer�than�3�sec-onds.�Carry�out�entries�in�the�menu�quickly�because�after�approx.�15�seconds�without�an�entry�the�menu�will�end.
2. “LANGUAGE�SETUP”�appears�in�the�LCD�display�q.�Press�the�OK�button�l.
3. “ENGLISH”�now�appears�in�the�LCD�display�q.�With�the��buttons�t�select�the�desired�language�and�confirm�with�the�OK�button�l.
4. With�the�EXIT�button�y�you�exit�the�menu.
The�device�menu�is�now�displayed�in�the�selected�language.�For�the�following�instructions�we�are�assuming�that�you�have�selected�your�own�language.
Code configuration(Programming the remote control)
3 Programming methods are available for the remote control: Programming by brand code search, by automatic code search and by direct code input (manual).
First you should use the brand code search since this method is the fastest way of programming if the manufacturer of your de-vice is itemized in the code list. As second is recommended the direct code input followed by the automatic code search.
Programming by brand code searchWith this method you select the brand and code direct via the LCD display q.
Observe the following operational references to programme the remote control:
1. Press the device button e for the device that you want to programme the remote control.
2. Hold�down�the�S�button�r�for�a�little�longer�than�3�sec-onds.�“LANGUAGE�SETUP”�appears�in�the�LCD�display�q.�With�the��or��button�t�select�“CODE�SETUP”�and�confirm�with�the�OK�button�l.
3. "ENTER CODE" now appears in the LCD display q. With the buttons t select "BRAND CODE" and confirm with the OK button l.
4. Now appears the alphabetical first brand name from the list of pre-programmed devices.
5. With the 34 buttons t select the various brand names.6. To make access easier you can skip directly to specific let-
ters of the alphabet with the number buttons o:2 => A 3 => D 4 => G 5 => J6 => M 7 => P 8 => T 9 => WExample�for�the�search�of�a�TV�brand�code: With button
BDA_SFB 10.1 B2 - IAN-75092_gb.indd 69 26.04.2012 16:07:08
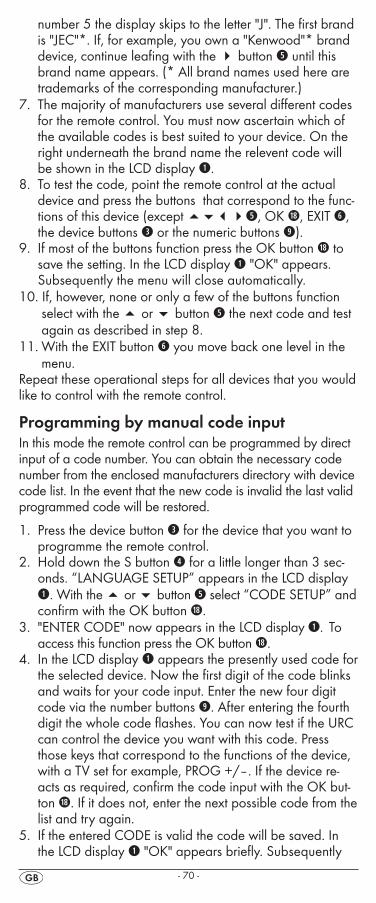
- 70 -
number 5 the display skips to the letter "J". The first brand is "JEC"*. If, for example, you own a "Kenwood"* brand device, continue leafing with the 4 button t until this brand name appears. (* All brand names used here are trademarks of the corresponding manufacturer.)
7.The majority of manufacturers use several different codes for the remote control. You must now ascertain which of the available codes is best suited to your device. On the right underneath the brand name the relevent code will be shown in the LCD display q.
8. To test the code, point the remote control at the actual device and press the buttons that correspond to the func-tions of this device (except 34t, OK l, EXIT y, the device buttons e or the numeric buttons o).
9. If most of the buttons function press the OK button l to save the setting. In the LCD display q "OK" appears. Subsequently the menu will close automatically.
10. If, however, none or only a few of the buttons function select with the or button t the next code and test again as described in step 8.
11.With�the�EXIT�button�y�you�move�back�one�level�in�the�menu.
Repeat these operational steps for all devices that you would like to control with the remote control.
Programming by manual code inputIn this mode the remote control can be programmed by direct input of a code number. You can obtain the necessary code number from the enclosed manufacturers directory with device code list. In the event that the new code is invalid the last valid programmed code will be restored.
1.Press the device button e for the device that you want to programme the remote control.
2.Hold�down�the�S�button�r�for�a�little�longer�than�3�sec-onds.�“LANGUAGE�SETUP”�appears�in�the�LCD�display�q.�With�the��or��button�t�select�“CODE�SETUP”�and�confirm�with�the�OK�button�l.
3. "ENTER CODE" now appears in the LCD display q.To access this function press the OK button l.
4. In the LCD display q appears the presently used code for the selected device. Now the first digit of the code blinks and waits for your code input. Enter the new four digit code via the number buttons o. After entering the fourth digit the whole code flashes. You can now test if the URC can control the device you want with this code. Press those keys that correspond to the functions of the device, with a TV set for example, PROG +/–. If the device re-acts as required, confirm the code input with the OK but-ton l. If it does not, enter the next possible code from the list and try again.
5. If the entered CODE is valid the code will be saved. In the LCD display q "OK" appears briefly. Subsequently
BDA_SFB 10.1 B2 - IAN-75092_gb.indd 70 26.04.2012 16:07:08
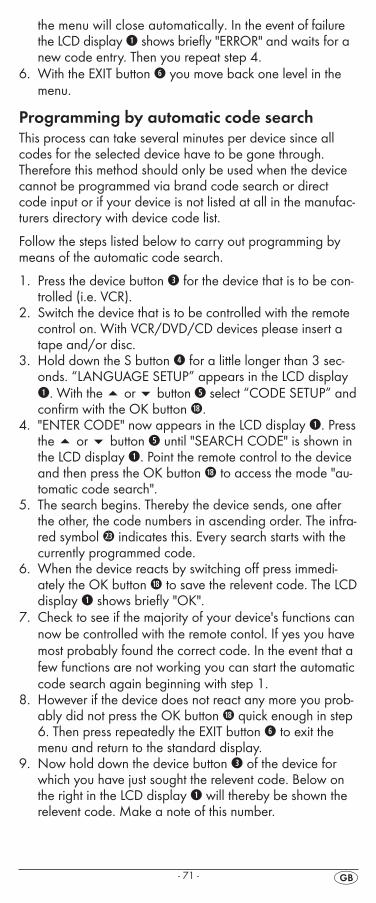
- 71 -
the menu will close automatically. In the event of failure the LCD display q shows briefly "ERROR" and waits for a new code entry. Then you repeat step 4.
6. With�the�EXIT�button�y�you�move�back�one�level�in�the�menu.
Programming by automatic code searchThis process can take several minutes per device since all codes for the selected device have to be gone through. Therefore this method should only be used when the device cannot be programmed via brand code search or direct code input or if your device is not listed at all in the manufac-turers directory with device code list.
Follow the steps listed below to carry out programming by means of the automatic code search.
1.Press the device button e for the device that is to be con-trolled (i.e. VCR).
2. Switch the device that is to be controlled with the remote control on. With VCR/DVD/CD devices please insert a tape and/or disc.
3.Hold�down�the�S�button�r�for�a�little�longer�than�3�sec-onds.�“LANGUAGE�SETUP”�appears�in�the�LCD�display�q.�With�the��or��button�t�select�“CODE�SETUP”�and�confirm�with�the�OK�button�l.
4. "ENTER CODE" now appears in the LCD display q. Press the or button t until "SEARCH CODE" is shown in the LCD display q. Point the remote control to the device and then press the OK button l to access the mode "au-tomatic code search".
5.The search begins. Thereby the device sends, one after the other, the code numbers in ascending order. The infra-red symbol 2# indicates this. Every search starts with the currently programmed code.
6.When the device reacts by switching off press immedi-ately the OK button l to save the relevent code. The LCD display q shows briefly "OK".
7. Check to see if the majority of your device's functions can now be controlled with the remote contol. If yes you have most probably found the correct code. In the event that a few functions are not working you can start the automatic code search again beginning with step 1.
8. However if the device does not react any more you prob-ably did not press the OK button l quick enough in step 6. Then press repeatedly the EXIT button y to exit the menu and return to the standard display.
9.Now hold down the device button e of the device for which you have just sought the relevent code. Below on the right in the LCD display q will thereby be shown the relevent code. Make a note of this number.
BDA_SFB 10.1 B2 - IAN-75092_gb.indd 71 26.04.2012 16:07:08
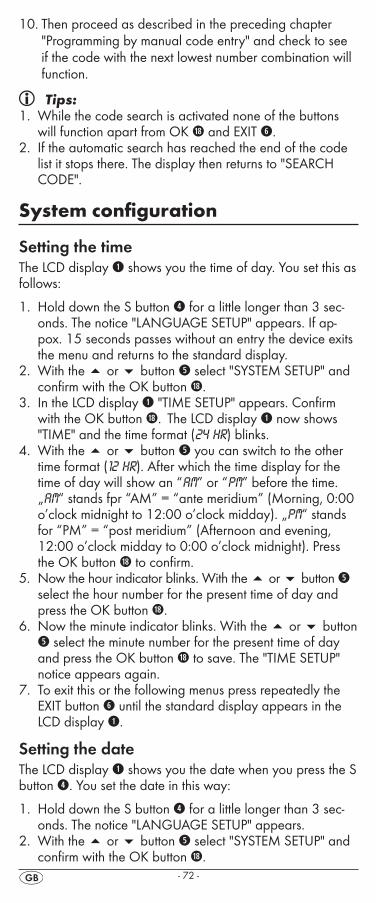
- 72 -
10. Then proceed as described in the preceding chapter "Programming by manual code entry" and check to see if the code with the next lowest number combination will function.
Tips:1.While�the�code�search�is�activated�none�of�the�buttons�
will�function�apart�from�OK�l�and�EXIT�y.2. If the automatic search has reached the end of the code
list it stops there. The display then returns to "SEARCH CODE".
System configuration
Setting the timeThe LCD display q shows you the time of day. You set this as follows:
1.Hold down the S button r for a little longer than 3 sec-onds. The notice "LANGUAGE SETUP" appears. If ap-pox. 15 seconds passes without an entry the device exits the menu and returns to the standard display.
2. With the or button t select "SYSTEM SETUP" and confirm with the OK button l.
3. In the LCD display q "TIME SETUP" appears. Confirm with the OK button l.The LCD display q now shows "TIME" and the time format (24 HR) blinks.
4.With the or button t you can switch to the other time format (12 HR). After which the time display for the time of day will show an “AM” or “PM” before the time. „AM“ stands fpr “AM” = “ante meridium” (Morning, 0:00 o’clock midnight to 12:00 o’clock midday). „PM“ stands for “PM” = “post meridium” (Afternoon and evening, 12:00 o’clock midday to 0:00 o’clock midnight). Press the OK button l to confirm.
5.Now the hour indicator blinks. With the or button t select the hour number for the present time of day and press the OK button l.
6.Now the minute indicator blinks. With the or button t select the minute number for the present time of day and press the OK button l to save. The "TIME SETUP" notice appears again.
7.To exit this or the following menus press repeatedly the EXIT button y until the standard display appears in the LCD display q.
Setting the dateThe LCD display q shows you the date when you press the S button r. You set the date in this way:
1.Hold down the S button r for a little longer than 3 sec-onds. The notice "LANGUAGE SETUP" appears.
2.With the or button t select "SYSTEM SETUP" and confirm with the OK button l.
BDA_SFB 10.1 B2 - IAN-75092_gb.indd 72 26.04.2012 16:07:08
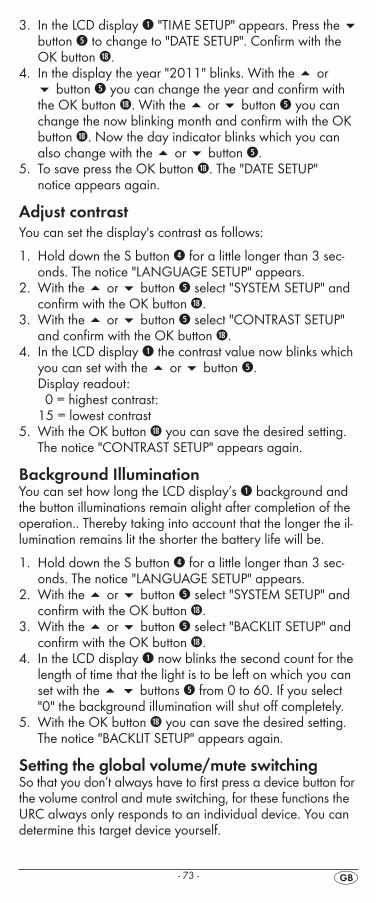
- 73 -
3. In the LCD display q "TIME SETUP" appears. Press the button t to change to "DATE SETUP". Confirm with the OK button l.
4.In the display the year "2011" blinks. With the or button t you can change the year and confirm with the OK button l. With the or button t you can change the now blinking month and confirm with the OK button l. Now the day indicator blinks which you can also change with the or button t.
5.To save press the OK button l. The "DATE SETUP" notice appears again.
Adjust contrastYou can set the display's contrast as follows:
1.Hold down the S button r for a little longer than 3 sec-onds. The notice "LANGUAGE SETUP" appears.
2.With the or button t select "SYSTEM SETUP" and confirm with the OK button l.
3.With the or button t select "CONTRAST SETUP" and confirm with the OK button l.
4. In the LCD display q the contrast value now blinks which you can set with the or button t.Display readout: 0 = highest contrast: 15 = lowest contrast
5.With the OK button l you can save the desired setting. The notice "CONTRAST SETUP" appears again.
Background IlluminationYou can set how long the LCD display’s q background and the button illuminations remain alight after completion of the operation.. Thereby taking into account that the longer the il-lumination remains lit the shorter the battery life will be.
1.Hold down the S button r for a little longer than 3 sec-onds. The notice "LANGUAGE SETUP" appears.
2.With the or button t select "SYSTEM SETUP" and confirm with the OK button l.
3.With the or button t select "BACKLIT SETUP" and confirm with the OK button l.
4. In the LCD display q now blinks the second count for the length of time that the light is to be left on which you can set with the buttons t from 0 to 60. If you select "0" the background illumination will shut off completely.
5.With the OK button l you can save the desired setting. The notice "BACKLIT SETUP" appears again.
Setting the global volume/mute switchingSo that you don’t always have to first press a device button for the volume control and mute switching, for these functions the URC always only responds to an individual device. You can determine this target device yourself.
BDA_SFB 10.1 B2 - IAN-75092_gb.indd 73 26.04.2012 16:07:08
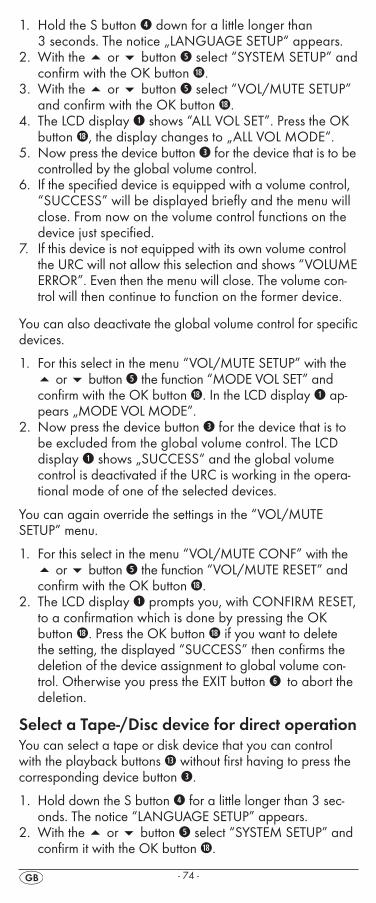
- 74 -
1.Hold the S button r down for a little longer than 3 seconds. The notice „LANGUAGE SETUP“ appears.
2.With the or button t select “SYSTEM SETUP” and confirm with the OK button l.
3.With the or button t select “VOL/MUTE SETUP” and confirm with the OK button l.
4.The LCD display q shows “ALL VOL SET”. Press the OK button l, the display changes to „ALL VOL MODE“.
5. Now press the device button e for the device that is to be controlled by the global volume control.
6. If the specified device is equipped with a volume control, “SUCCESS” will be displayed briefly and the menu will close. From now on the volume control functions on the device just specified.
7. If this device is not equipped with its own volume control the URC will not allow this selection and shows “VOLUME ERROR”. Even then the menu will close. The volume con-trol will then continue to function on the former device.
You can also deactivate the global volume control for specific devices.
1. For�this�select�in�the�menu�“VOL/MUTE�SETUP”�with�the��or��button�t�the�function�“MODE�VOL�SET”�and�confirm�with�the�OK�button�l.�In�the�LCD�display�q�ap-pears�„MODE�VOL�MODE”.
2.Now press the device button e for the device that is to be excluded from the global volume control. The LCD display q shows „SUCCESS“ and the global volume control is deactivated if the URC is working in the opera-tional mode of one of the selected devices.
You�can�again�override�the�settings�in�the�“VOL/MUTE�SETUP”�menu.
1. For�this�select�in�the�menu�“VOL/MUTE�CONF”�with�the��or��button�t�the�function�“VOL/MUTE�RESET”�and�confirm�with�the�OK�button�l.
2.The LCD display q prompts you, with CONFIRM RESET, to a confirmation which is done by pressing the OK button l. Press�the�OK�button�l�if�you�want�to�delete�the�setting,�the�displayed�“SUCCESS”�then�confirms�the�deletion�of�the�device�assignment�to�global�volume�con-trol. Otherwise you press the EXIT button yto abort the deletion.
Select a Tape-/Disc device for direct operation You can select a tape or disk device that you can control with the playback buttons f without first having to press the corresponding device button e.
1. Hold down the S button r for a little longer than 3 sec-onds. The notice “LANGUAGE SETUP” appears.
2. With the or button t select “SYSTEM SETUP” and confirm it with the OK button l.
BDA_SFB 10.1 B2 - IAN-75092_gb.indd 74 26.04.2012 16:07:08
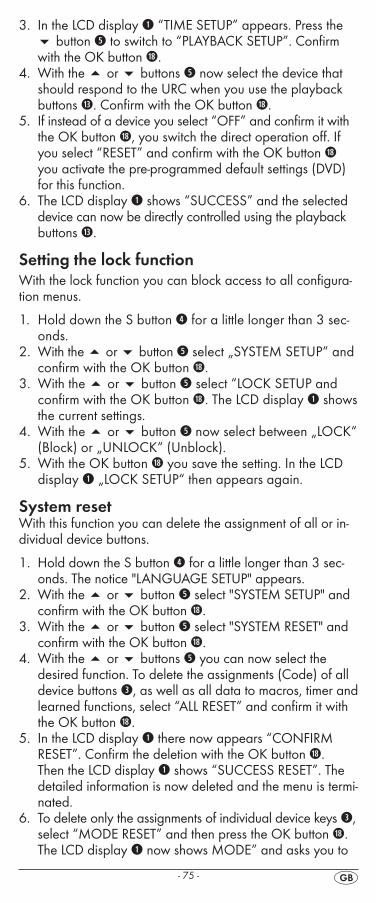
- 75 -
3. In the LCD display q “TIME SETUP” appears. Press the button t to switch to “PLAYBACK SETUP”. Confirm with the OK button l.
4. With the or buttons t now select the device that should respond to the URC when you use the playback buttons f. Confirm with the OK button l.
5. If instead of a device you select “OFF” and confirm it with the OK button l, you switch the direct operation off. If�you�select�“RESET”�and�confirm�with�the�OK�button�lyou�activate�the�pre-programmed�default�settings�(DVD)�for�this�function.
6. The LCD display q shows “SUCCESS” and the selected device can now be directly controlled using the playback buttons f.
Setting the lock functionWith�the�lock�function�you�can�block�access�to�all�configura-tion�menus.
1.Hold down the S button r for a little longer than 3 sec-onds.
2. With the or button t select „SYSTEM SETUP“ and confirm with the OK button l.
3.With the or button t select “LOCK SETUP and confirm with the OK button l. The LCD display q shows the current settings.
4.With the or button t now select between „LOCK“ (Block) or „UNLOCK“ (Unblock).
5.With the OK button l you save the setting. In the LCD display q „LOCK SETUP“ then appears again.
System resetWith this function you can delete the assignment of all or in-dividual device buttons.
1.Hold down the S button r for a little longer than 3 sec-onds. The notice "LANGUAGE SETUP" appears.
2.With the or button t select "SYSTEM SETUP" and confirm with the OK button l.
3.With the or button t select "SYSTEM RESET" and confirm with the OK button l.
4. With the or buttons t you can now select the desired function. To delete the assignments (Code) of all device buttons e, as well as all data to macros, timer and learned functions, select “ALL RESET” and confirm it with the OK button l.
5. In the LCD display q there now appears “CONFIRM RESET”. Confirm the deletion with the OK button l. Then the LCD display q shows “SUCCESS RESET”. The detailed information is now deleted and the menu is termi-nated.
6. To delete only the assignments of individual device keys e, select “MODE RESET” and then press the OK button l. The LCD display q now shows MODE” and asks you to
BDA_SFB 10.1 B2 - IAN-75092_gb.indd 75 26.04.2012 16:07:08
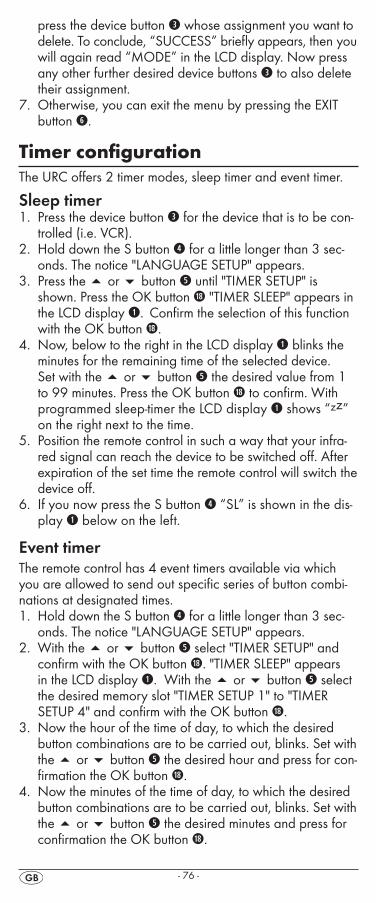
- 76 -
press the device button e whose assignment you want to delete. To conclude, “SUCCESS” briefly appears, then you will again read “MODE” in the LCD display. Now press any other further desired device buttons e to also delete their assignment.
7. Otherwise, you can exit the menu by pressing the EXIT button y.
Timer configurationThe URC offers 2 timer modes, sleep timer and event timer.
Sleep timer1.Press the device button e for the device that is to be con-
trolled (i.e. VCR).2.Hold down the S button r for a little longer than 3 sec-
onds. The notice "LANGUAGE SETUP" appears.3.Press the or button t until "TIMER SETUP" is
shown. Press the OK button l "TIMER SLEEP" appears in the LCD display q.Confirm the selection of this function with the OK button l.
4.Now, below to the right in the LCD display q blinks the minutes for the remaining time of the selected device. Set with the or button t the desired value from 1 to 99 minutes. Press the OK button l to confirm. With programmed sleep-timer the LCD display q shows “zz” on the right next to the time.
5. Position the remote control in such a way that your infra-red signal can reach the device to be switched off. After expiration of the set time the remote control will switch the device off.
6. If you now press the S button r “SL” is shown in the dis-play q below on the left.
Event timerThe remote control has 4 event timers available via which you are allowed to send out specific series of button combi-nations at designated times.1.Hold down the S button r for a little longer than 3 sec-
onds. The notice "LANGUAGE SETUP" appears.2.With the or button t select "TIMER SETUP" and
confirm with the OK button l. "TIMER SLEEP" appears in the LCD display q.With the or button t select the desired memory slot "TIMER SETUP 1" to "TIMER SETUP 4" and confirm with the OK button l.
3. Now the hour of the time of day, to which the desired button combinations are to be carried out, blinks. Set with the or button t the desired hour and press for con-firmation the OK button l.
4. Now the minutes of the time of day, to which the desired button combinations are to be carried out, blinks. Set with the or button t the desired minutes and press for confirmation the OK button l.
BDA_SFB 10.1 B2 - IAN-75092_gb.indd 76 26.04.2012 16:07:08

- 77 -
5. In the LCD display q you will see "TIMER X KEY" (X stands for the desired timer). Now press the desired device button e followed by the desired sequence of the button commands.
6. By default, the timer commands are sent at intervals of 1 second. Since many devices react sluggishly, it is possible that the sequences of the timer commands are sent to the device too quickly. Then you have the option of program-ming, before a button command, a pause of between 5 to 21 seconds. For this press, if necessary repeatedly, on the MACRO button i. Below and to the right the LCD display q shows the current pause length in seconds.
7.Press the S button r to save your entry and to return to the timer menu.
8. Procede in a similar manner in order to, if required, programme the other timer memory slots also.
9.With programmed event timer the LCD display q shows the timer symbol „ ” on the right next to the time.
Tips:1.Per timer memory slot a maximum of 14 buttons can be
programmed. After entry of the 14th button the sequence will be automatically saved and "FULL" is shown in the LCD display q.
2. In this menu also the device will return to the standard dis-play after approx. 15 seconds without an entry.
Delete TimerYou can delete a programmed sleep or event timer as follows:1. Select the timer that you wish to delete (see chapter
Sleep-Timer/Event-Timer) and then press the OK button l. In the LCD display q you will read „TIMER CLEAR“.
2. Press the OK button l. The LCD display q changes to „CONFIRM CLEAR“.
3. Press the OK button l once again to delete the timer. The LCD display q confirms the successful deletion with the message „SUCCESS“.
LearnconfigurationThe Universal remote control (URC) can learn and save but-ton signals of an original remote control. If the URC does not work after applying the programming methods already de-scribed or cannot carry out all commands please attempt to teach the URC with the help of the original remote control.
• Use new batteries for the URC and the original remote control.
• Maintain a distance of at least one metre from other light sources. The light sources could disrupt the infrared trans-mission.
• Place the URC and the original remote control at a dis-tance of 20 to 50 mm from each other on an even surface so that the infrared diodes 2) are facing each other.
BDA_SFB 10.1 B2 - IAN-75092_gb.indd 77 26.04.2012 16:07:08
- 78 -
Tips:1.Do not use the following buttons for the learn function: all
device buttons e, MACRO i, S button r, EXIT y.2. If when teaching, during the notice "LEARNING", no
button is pressed on the original RC after 25 seconds the learn menu will end. This mode can not be ended by pressing a button on the URC.
3.The memory can accommodate 150 button commands. If the memory is full the LCD display q shows "LEARN FULL" and the learn mode will end.
4.With the EXIT button y you return to the previous status (except with a notice of "LEARN KEY" and/or "LEARNING").
Code learn function1.Press the device button e for the device that the URC
should learn a button code.2.Hold down the S button r for a little longer than 3 sec-
onds. The notice "LANGUAGE SETUP" appears.3. With the or button t select the menu "LEARN
SETUP" and then press the OK button l.4. In the LCD display q "LEARN SET" appears. Then press
the OK button l.In the LCD display q "LEARN KEY" ap-pears.
5.First press the button on the URC that is to be taught. In the LCD display q "LEARNING" appears. The URC now waits for the infrared signal from the original remote control.
Note:Should the notice not change to "LEARNING" you have selected a button for which no button code can be taught.
6.Point the infrared sensors 2) of both remote controls towards each other.
7.Now hold down the desired button of the original remote control until "SUCCESS" or "LEARN ERROR" appears in the display q of the URC.
8. If in the LCD display q "SUCCESS" appears (process successful), you can teach further buttons begining with step 5. If "LEARN ERROR" appears (process unsuccessful) repeat the process in any case from step 5.
9.To�stop/end�the�learn�process�press�the�S�button�and�subsequently,�while�“LEARN�KEY”�is�displayed,�repeatedly�the�EXIT�button�y�until�the�normal�indicator�appears�in�the�LCD�display�q.�During�the�displayed�“LEARNING”�simply�allow�30�seconds�to�pass�without�any�operation�and�the�device�will�then�exit�the�menu.
Delete all programmed buttons of all devices1.Hold down the S button r for a little longer than 3 sec-
onds. The notice "LANGUAGE SETUP" appears.2.With the or button t select the menu "LEARN
SETUP" and then press the OK button l. In the LCD display q "LEARN SET" appears.
BDA_SFB 10.1 B2 - IAN-75092_gb.indd 78 26.04.2012 16:07:08
- 79 -
3.With the or button t select "LEARN CLEAR" (taught delete) and confirm with the OK button l. In the LCD display q "CONFIRM CLEAR" (confirm delete) appears.
4.Confirm with the OK button l.In the LCD display q "SUCCESS" appears. All programmed buttons are de-leted. Finally the menu will automatically end.
Note:When the LCD display shows “CONFIRM CLEAR” you can stop the deletion with the EXIT button y.
Macro configurationWith the MACRO function up to 16 button commands can be carried out with the press of a single button, that is to say, several previously saved control commands can be deleted with one MACRO button. There are 6 Macro memory slots available for you.
To programme a MacroFor Macro programming proceed as follows:
1.Hold down the S button r for a little longer than 3 sec-onds. The notice "LANGUAGE SETUP" appears.
2.With the or button t select "MACRO SETUP" and confirm with the OK button l. In the display "MACRO SETUP 1" appears.
3.With the or button t select the memory slot to be programmed (MACRO SETUP 1 - 6) and confirm with the OK button l.
4. In the LCD display q "MACRO STEP" appears. Now press, one after the other, the desired buttons (max. 16). The sequence should begin with a device button e.
5.By default the Macro commands are sent in intervals of 1 every second. Since many devices react sluggishly it is possible that the sequence of the Macro commands are sent too quickly to the device. Then you have the option of programming, before a button command, a pause of between 5 - 21 seconds. For this purpose press, if nec-essary repeatedly, the MACRO button i. Below and to the right the LCD display q shows the current pause length in seconds.
6.When the maximum number of button commands is reached the LCD display q shows "FULL".
7.Save the entry with the S button r. In the LCD display q "MACRO SETUP" appears.
8. If, with the selection of the Macros to be programmed (step 3), you select a memory slot that is already occupied the existing Macro will be overwritten.
9. Repeat the process from step 3 to create further Macros.10.With�the�EXIT�button�y�you�move�back�a�level�in�the�
menu,�except�during�the�input�of�the�button�commands.
BDA_SFB 10.1 B2 - IAN-75092_gb.indd 79 26.04.2012 16:07:10
- 80 -
Tips:1.A maximum of 16 button commands can be saved in a
Macro. After input of the 16th button command, “FULL” appears in the LCD display q.
2. To exit the mode without saving allow approx. 15 sec-onds to pass without an entry.
3. In the mode "MACRO STEP" you can only return to the previous status with the S button r.
Example: You want to save a command chain in a Macro. We begin in the mode "MACRO STEP".
Desired command chain: Switch on TV => PAUSE => switch to the AV input => switch on DVD => PAUSE => Playback DVD.
In the mode "MACRO STEP", for this you enter the following button commands:
=> => (Pause time) => => => => (Pause time) =>
Execute a MacroTo execute a pre-programmed Macro proceed as follows:
1.Press the MACRO button i.2.With the corresponding number button o you access the
desired Macro (1-6). Example: If Macro 3 is to be imple-mented press first the Macro button i and then, within 5 seconds, the number button " ".
To delete all MacrosTo delete all pre-programmed Macros proceed as follows:
1.Hold down the S button r for a little longer than 3 sec-onds. The notice "LANGUAGE SETUP" appears.
2.With the or button t select "MACRO SETUP" and confirm with the OK button l. In the display "MACRO SETUP 1" appears.
3.With the or button t select "MACRO CLEAR" and confirm with the OK button l.
4. In the LCD display q "CONFIRM CLEAR" (confirm delete) appears. Confirm the delete process with the OK button l.The LCD display q shows "SUCCESS". All Macros are now deleted and the menu will end.
Tips:1.When the LCD display q shows "CONFIRM CLEAR" you
can stop the delete process with the EXIT button y.2. Individual Macros can not be deleted they can only be
overwritten.
Favouriteschannel
Note:With this function you can save your preferred stations as favourites.
BDA_SFB 10.1 B2 - IAN-75092_gb.indd 80 26.04.2012 16:07:10
- 81 -
To programme favouritesYour favourite stations are saved as follows:
1.Press the device button e for the device that you want to save a favourite.
2.Hold down the S button r for a little longer than 3 sec-onds. The notice "LANGUAGE SETUP" appears.
3.With the or button t select "FAV CH SETUP" and confirm with the OK button l. In the display "FAV CH 1 SETUP" appears.
4.With the or button t select the memory slot to be programmed (FAV CH 1 - 4 SETUP) and confirm with the OK button l.
5. In the LCD display q "FAV CH STEP" appears. Now press, one after the other, the buttons (max. 4) for access to your desired favourite stations.
6.When the maximum number of button commands is reached the LCD display q shows "FULL".
7.Save the entry with the S button r.In the LCD display q "FAV CH SETUP 1 - 4" appears.
8. If, with the selection of the favourites to be programmed (step 4), you select a memory slot that is already occu-pied the existing favourite will be overwritten.
9. Repeat the steps to apply further favourites.10.With the EXIT button y you move a level backwards in the
menu except during the entry of the button commands.
Note:The input of the channel numbers can vary according to the model and brand of the selected devices. If necessary, with multi-digit channel numbers you must first press the button a.
To access favouritesTo access a pre-programmed favourite press the FAV/EPG button 1( followed by the corresponding number button for the desired memory slot (1 - 4).
Delete All FAV channelsTo delete all pre-programmed favourites proceed as follows:1.Hold down the S button r for a little longer than 3 sec-
onds.2.With the or button t select "FAV CH SETUP" and
confirm with the OK button l. In the display "FAV CH 1 SETUP" appears.
3.With the or button t select "FAV CH CLEAR" and confirm with the OK button l.
4. In the LCD display q "CONFIRM CLEAR" (confirm delete) appears. Confirm the delete process with the OK button l.The LCD display q shows "SUCCESS". All favourites are now deleted and the menu will end.
Tips:1.When the LCD display q shows "CONFIRM CLEAR" you
can stop the delete process with the EXIT button y.
BDA_SFB 10.1 B2 - IAN-75092_gb.indd 81 26.04.2012 16:07:10
- 82 -
2. Individual favourites can not be deleted they can only be overwritten.
Volumecontrol
Vol +/—, (Mute switching)Press the "VOL+" button to increase the volume. With the "VOL —" button you reduce the volume. To mute the sound press the -button h. A further press of this button turns the sound back on.
If you have not set any other device as the target for the global volume control, when you press the VOL +/- buttons j on the URC the volume control of the TV set is addressed by default, regardless of which device button e was previously pressed. However, this does not apply to the following de-vices: “AMP”, “DVD”, and “DSAT” since it can be assumed that these devices are equipped with their own volume con-trol.
Foroperation > To operate one of the programmed devices with the URC first press the corresponding device button e. Then point the URC to this device and press the desired button.
> Put the number buttons o exactly as you do with the original remote control. Before you make a two digit entry press, if necessary, the button a.
�> Press�the�S�button�r�and�subsequently�the�FAV/EPG�but-ton�1(�to�start�the�electronic�programme�guide�of�a�device�equipped�with�this�function.
> If you press the S button r the date is superimposed for 10 seconds in the LCD display q below and on the right.
> Whilst you hold down one of the device buttons e the active code for this device will be superimposed below to the right in the LCD display q.
> Via the MENU button k you access the dialogue for the setting of the respective target device.
> Press the illumination button dto switch the display and button illuminations on and/or off.
All OFF Tips:
With the button ALL OFF (all off) w all devices that are switched on can be automatically switched off. This func-tion can switch on again devices that have already been switched off (depending on the device). For this, press and hold the ALL OFF button w for a few seconds. It may take up to 10 seconds before all devices are switched off. This will only function under the following circumstances:1. A visible connection exists between all the devices and
the URC.
BDA_SFB 10.1 B2 - IAN-75092_gb.indd 82 26.04.2012 16:07:10
- 83 -
2. Automatic code search, brand code search and MACRO function are not active.
3. All target devices must be suitable for remote control switch off.
To again switch on all devices automatically hold down once more the button w until all devices are switched on.
Cleaningandstorage Attention!
Ensure that moisture cannot permeate into the device during cleaning! Otherwise there is the danger of causing irreparable damage to the device!
> Clean the housing of the device exclusively with a soft moist cloth and a mild dishwashing detergent.
> Store the device exclusively in an environment that com-plies with the specifications given in the technical data.
> Before storing remove the batteries so that they will not cause damage to the device if, during storage, they happen to leak.
Faults/RemediesYour device does not react to the URC.
> Check the batteries. They must have enough voltage and be properly installed.
> Firstly have you pressed the correct device button e for the desired target device?
> Check to see that the correct code is programmed in for the target device (see section "Code Setup").
The URC is transmitting the commands incorrectly. > Press the corresponding device button e to set the URC to the correct mode.
> The batteries must have enough voltage and be properly installed.
> It is possible that you are using the wrong code. Start the brand code search, the automatic code search or the di-rect code input (manual).
The URC does not change the station on the device. > Press the corresponding device button e to set the URC to the correct mode.
> In the event that the original RC does not have a "-/- -" button, change the programme with the P +/— buttons u or the number buttons o.
> If this also does not work the child protection for the target device could be activated.
Some buttons on the URC do not function properly. > It is possible that your URC does not have all of the func-tions that are on the device's original remote control.
BDA_SFB 10.1 B2 - IAN-75092_gb.indd 83 26.04.2012 16:07:10
- 84 -
> It is possible that you have not programmed in the optimal code. Search for a code that supports more of the target device's functions.
The URC stops reacting after a button is pressed. > The batteries must have enough voltage and be properly installed.
> Point the URC towards your device.
The LCD display q shows nothing. > The batteries must have enough voltage and be properly installed.
> The contrast could be set too low. Increase the contrast setting.
Disposal Do not dispose of the device in your normal domestic waste. This product is subject to the European directive 2002/96/EC.
Universal remote control• Have the universal remote control or parts of it disposed
of by a professional disposal company or by your commu-nal disposal facility.
• Observe the currently applicable regulations. In case of doubt contact your disposal facility.
Batteries/rechargeable batteries• Used batteries/rechargeable batteries may not be dis-
posed of in household waste.• Batteries can contain poisons which are damaging to the
environment. Therefore, dispose of the batteries/recharge-able batteries in accordance with statutory regulations.
• Every consumer is legally obliged to surrender batteries/rechargeable batteries to a community collection centre in their district or to a dealer. The purpose of this obliga-tion is to ensure that batteries are disposed of in a non-polluting manner.
• Only dispose of batteries when they are fully discharged.
Packaging• Dispose of packaging materials in an environmen-
tally responsible manner.
TechnicaldataControllable devices: 10 Dimensions L x W x H: 217 x 50 x 22 mm Weight : 133�g�(incl.�batteries)Infrared LED: Laser class 1 Power supply Batteries: 2 x 1.5 V, type AAA/LR03 (micro) (supplied)
BDA_SFB 10.1 B2 - IAN-75092_gb.indd 84 26.04.2012 16:07:10
- 85 -
Operating temperature: + 5 – +35°C Storage temperature : -20 - +50 °CHumidity: 5 - 90 % (No condensation)
NoteregardingconformityThis device satisfies the fundamental requirements and other relevant regulations of the EMC Directive 2004/108/EC.
ImporterKOMPERNASS GMBH BURGSTRASSE 21 44867 BOCHUM, GERMANYwww.kompernass.com
Warranty&ServiceYou receive a 3-year warranty for this appliance as of the purchase date. This appliance has been manufactured with care and meticulously examined before delivery.
Please retain your receipt as proof of purchase. In the case of a warranty claim, please make contact by telephone with our service department. Only in this way can a post-free des-patch for your goods be assured.
The warranty covers only claims for material and manufactur-ing defects, but not for transport damage, wearing parts or for damage to fragile components, e.g. buttons or batteries.
This product is for private use only and is not intended for commercial use. The warranty is void in the case of abusive and improper handling, use of force and internal modifica-tions not carried out by our authorized Service Centre.
Your statutory rights are not restricted in any way by this war-ranty.
The warranty period is not extended through repairs made under warranty. This applies also for replaced or repaired parts. Any damages or deficiencies found on purchase must be reported as soon as possible after unpacking, at the lat-est two days after purchase. On expiry of the warranty, all repairs carried out are subject to payment.
Service Great BritainTel.: 0871 5000 720 (£ 0.10/Min.) E-Mail: [email protected]
IAN�75092
BDA_SFB 10.1 B2 - IAN-75092_gb.indd 85 26.04.2012 16:07:10
10-in-1 Remote Control SFB 10.1 B2
HerstellerverzeichnismitGerätecodeliste
Registervanproducentenmetlijstvanapparaatcodes
Indexdesfabricantsaveclistedescodesappareil
Registroproduttoriconelencocodici apparecchi
Índicedefabricantesconlistade códigosdeaparatos
ManufacturerListwithDeviceCodeList
Producentfortegnelsemedapparat-kodeliste
Wykazproducentówzlistąkodówurządzeń
Gyártókkészülékkódjáttartalmazójegyzék
Κατάλογοςκατασκευαστήµελίστακωδικώνσυσκευών
Zoznamvýrobcovskódmiprístrojov
Adresářvýrobcůseseznamemkódůpropřístroj
Index producători cu lista de coduri ale aparatelor
KOMPERNASS GMBHBurgstraße 21 D-44867 Bochumwww.kompernass.com
Stand der Informationen · Version des informations Versione delle informazioni · Stand van de informatie Last Information Update: 05 / 2012 Ident.-No.: SFB 10.1B2042012-1
IAN 75092 IAN 75092
CV_Codelist_SFB 10.1 B2 - IAN-75092.indd 1 03.05.2012 11:22:19
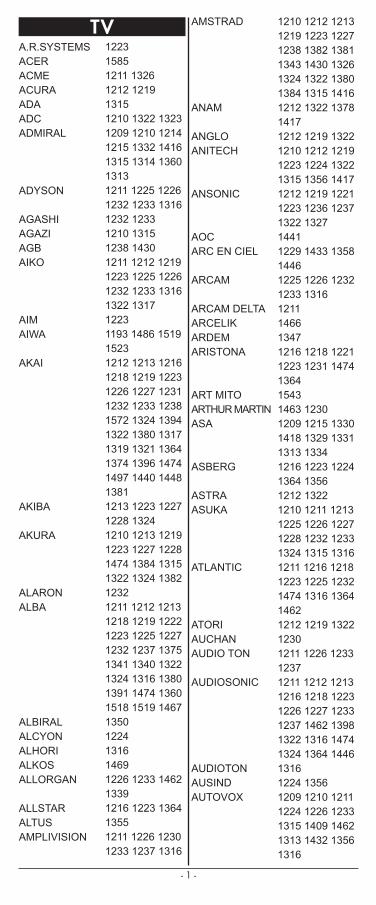
- 1 -
A.R.SYSTEMSACERACMEACURAADAADCADMIRAL
ADYSON
AGASHIAGAZIAGBAIKO
AIMAIWA
AKAI
AKIBA
AKURA
ALARONALBA
ALBIRALALCYONALHORIALKOSALLORGAN
ALLSTARALTUSAMPLIVISION
AMSTRAD
ANAM
ANGLOANITECH
ANSONIC
AOCARC EN CIEL
ARCAM
ARCAM DELTAARCELIKARDEMARISTONA
ART MITOARTHUR MARTINASA
ASBERG
ASTRAASUKA
ATLANTIC
ATORIAUCHANAUDIO TON
AUDIOSONIC
AUDIOTONAUSINDAUTOVOX
1223 1585 1211 1326 1212 1219 1315 1210 1322 1323 1209 1210 1214 1215 1332 1416 1315 1314 1360 1313 1211 1225 1226 1232 1233 1316 1232 1233 1210 1315 1238 1430 1211 1212 1219 1223 1225 1226 1232 1233 1316 1322 1317 1223 1193 1486 1519 1523 1212 1213 1216 1218 1219 1223 1226 1227 1231 1232 1233 1238 1572 1324 1394 1322 1380 1317 1319 1321 1364 1374 1396 1474 1497 1440 1448 1381 1213 1223 1227 1228 1324 1210 1213 1219 1223 1227 1228 1474 1384 1315 1322 1324 13821232 1211 1212 1213 1218 1219 1222 1223 1225 1227 1232 1237 1375 1341 1340 1322 1324 1316 1380 1391 1474 1360 1518 1519 14671350 1224 1316 1469 1226 1233 1462 1339 1216 1223 1364 1355 1211 1226 1230 1233 1237 1316
1210 1212 1213 1219 1223 1227 1238 1382 1381 1343 1430 1326 1324 1322 1380 1384 1315 1416 1212 1322 1378 1417 1212 1219 1322 1210 1212 1219 1223 1224 1322 1315 1356 1417 1212 1219 1221 1223 1236 1237 1322 1327 1441 1229 1433 1358 1446 1225 1226 1232 1233 1316 1211 1466 1347 1216 1218 1221 1223 1231 1474 1364 1543 1463 1230 1209 1215 1330 1418 1329 1331 1313 1334 1216 1223 1224 1364 1356 1212 1322 1210 1211 1213 1225 1226 1227 1228 1232 1233 1324 1315 13161211 1216 1218 1223 1225 1232 1474 1316 1364 1462 1212 1219 1322 1230 1211 1226 1233 1237 1211 1212 1213 1216 1218 1223 1226 1227 1233 1237 1462 1398 1322 1316 1474 1324 1364 1446 1316 1224 1356 1209 1210 1211 1224 1226 1233 1315 1409 1462 1313 1432 1356 1316
Codelist_SFB 10.1 B2 - IAN-75092.indd 1 03.05.2012 11:24:35
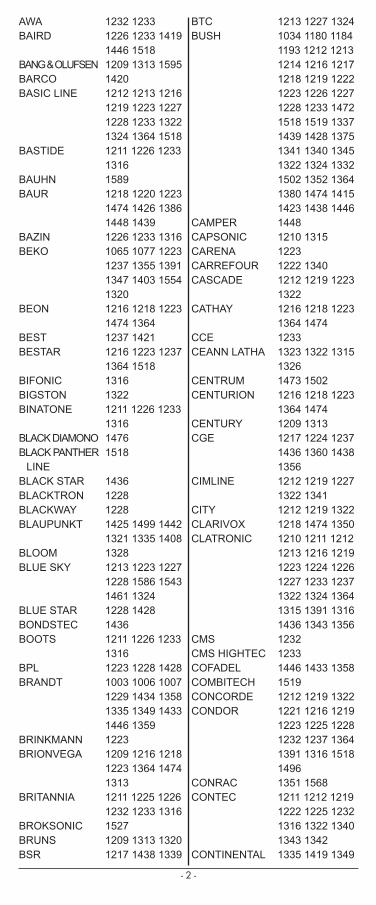
- 2 -
AWABAIRD
BANG & OLUFSENBARCOBASIC LINE
BASTIDE
BAUHNBAUR
BAZINBEKO
BEON
BESTBESTAR
BIFONICBIGSTONBINATONE
BLACK DIAMONOBLACK PANTHER LINEBLACK STARBLACKTRONBLACKWAYBLAUPUNKT
BLOOMBLUE SKY
BLUE STARBONDSTECBOOTS
BPLBRANDT
BRINKMANNBRIONVEGA
BRITANNIA
BROKSONICBRUNSBSR
BTCBUSH
CAMPERCAPSONICCARENACARREFOURCASCADE
CATHAY
CCECEANN LATHA
CENTRUMCENTURION
CENTURYCGE
CIMLINE
CITYCLARIVOXCLATRONIC
CMSCMS HIGHTECCOFADELCOMBITECHCONCORDECONDOR
CONRACCONTEC
CONTINENTAL
1232 1233 1226 1233 1419 1446 1518 1209 1313 1595 1420 1212 1213 1216 1219 1223 1227 1228 1233 1322 1324 1364 15181211 1226 1233 1316 1589 1218 1220 1223 1474 1426 1386 1448 1439 1226 1233 1316 1065 1077 1223 1237 1355 1391 1347 1403 1554 1320 1216 1218 1223 1474 1364 1237 1421 1216 1223 1237 1364 1518 1316 1322 1211 1226 1233 1316 1476 1518
1436 1228 1228 1425 1499 1442 1321 1335 1408 1328 1213 1223 1227 1228 1586 1543 1461 1324 1228 1428 1436 1211 1226 1233 1316 1223 1228 1428 1003 1006 1007 1229 1434 1358 1335 1349 1433 1446 1359 1223 1209 1216 1218 1223 1364 1474 1313 1211 1225 1226 1232 1233 1316 1527 1209 1313 1320 1217 1438 1339
1213 1227 1324 1034 1180 1184 1193 1212 1213 1214 1216 1217 1218 1219 1222 1223 1226 1227 1228 1233 1472 1518 1519 1337 1439 1428 1375 1341 1340 1345 1322 1324 1332 1502 1352 1364 1380 1474 1415 1423 1438 1446 1448 1210 1315 1223 1222 1340 1212 1219 1223 1322 1216 1218 1223 1364 1474 1233 1323 1322 1315 1326 1473 1502 1216 1218 1223 1364 1474 1209 1313 1217 1224 1237 1436 1360 1438 1356 1212 1219 1227 1322 1341 1212 1219 1322 1218 1474 1350 1210 1211 1212 1213 1216 1219 1223 1224 1226 1227 1233 12371322 1324 1364 1315 1391 1316 1436 1343 1356 1232 1233 1446 1433 1358 1519 1212 1219 1322 1221 1216 1219 1223 1225 1228 1232 1237 1364 1391 1316 1518 1496 1351 1568 1211 1212 1219 1222 1225 1232 1316 1322 1340 1343 1342 1335 1419 1349
Codelist_SFB 10.1 B2 - IAN-75092.indd 2 03.05.2012 11:24:35
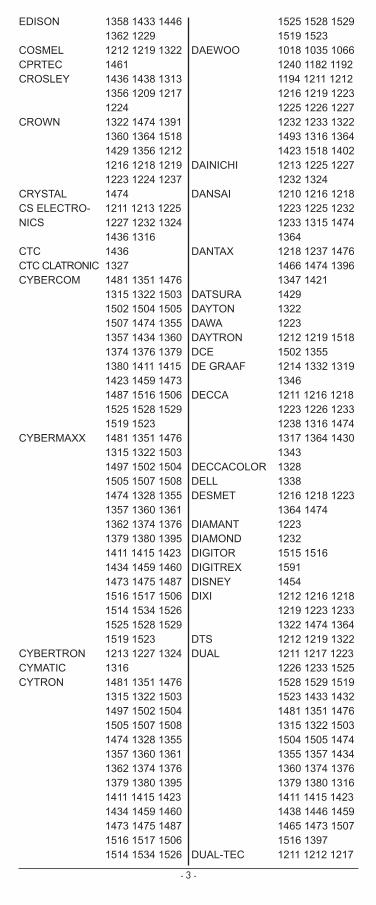
- 3 -
EDISON
COSMELCPRTECCROSLEY
CROWN
CRYSTALCS ELECTRO-NICS
CTCCTC CLATRONICCYBERCOM
CYBERMAXX
CYBERTRONCYMATICCYTRON
DAEWOO
DAINICHI
DANSAI
DANTAX
DATSURADAYTONDAWADAYTRONDCEDE GRAAF
DECCA
DECCACOLORDELLDESMET
DIAMANTDIAMONDDIGITORDIGITREXDISNEYDIXI
DTSDUAL
DUAL-TEC
1358 1433 1446 1362 1229 1212 1219 1322 1461 1436 1438 1313 1356 1209 1217 1224 1322 1474 1391 1360 1364 1518 1429 1356 1212 1216 1218 1219 1223 1224 1237 1474 1211 1213 1225 1227 1232 1324 1436 1316 1436 1327 1481 1351 1476 1315 1322 1503 1502 1504 1505 1507 1474 1355 1357 1434 1360 1374 1376 1379 1380 1411 1415 1423 1459 1473 1487 1516 1506 1525 1528 1529 1519 1523 1481 1351 1476 1315 1322 1503 1497 1502 1504 1505 1507 1508 1474 1328 1355 1357 1360 1361 1362 1374 1376 1379 1380 1395 1411 1415 1423 1434 1459 1460 1473 1475 1487 1516 1517 1506 1514 1534 1526 1525 1528 1529 1519 1523 1213 1227 1324 1316 1481 1351 1476 1315 1322 1503 1497 1502 1504 1505 1507 1508 1474 1328 1355 1357 1360 1361 1362 1374 1376 1379 1380 1395 1411 1415 1423 1434 1459 1460 1473 1475 1487 1516 1517 1506 1514 1534 1526
1525 1528 1529 1519 1523 1018 1035 1066 1240 1182 1192 1194 1211 1212 1216 1219 1223 1225 1226 1227 1232 1233 1322 1493 1316 1364 1423 1518 14021213 1225 1227 1232 1324 1210 1216 1218 1223 1225 1232 1233 1315 1474 1364 1218 1237 1476 1466 1474 1396 1347 1421 1429 1322 1223 1212 1219 1518 1502 1355 1214 1332 1319 1346 1211 1216 1218 1223 1226 1233 1238 1316 1474 1317 1364 14301343 1328 1338 1216 1218 1223 1364 1474 1223 1232 1515 1516 1591 1454 1212 1216 1218 1219 1223 1233 1322 1474 1364 1212 1219 1322 1211 1217 1223 1226 1233 1525 1528 1529 1519 1523 1433 1432 1481 1351 1476 1315 1322 1503 1504 1505 1474 1355 1357 1434 1360 1374 1376 1379 1380 1316 1411 1415 1423 1438 1446 1459 1465 1473 1507 1516 1397 1211 1212 1217
Codelist_SFB 10.1 B2 - IAN-75092.indd 3 03.05.2012 11:24:35
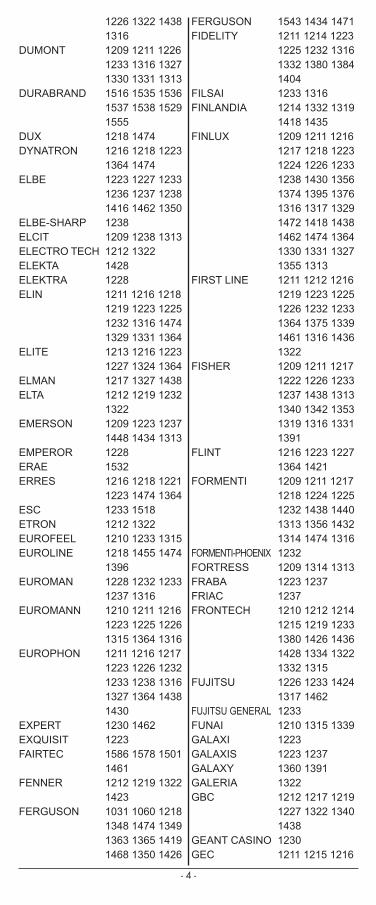
- 4 -
DUMONT
DURABRAND
DUXDYNATRON
ELBE
ELBE-SHARPELCITELECTRO TECHELEKTAELEKTRAELIN
ELITE
ELMANELTA
EMERSON
EMPERORERAEERRES
ESCETRONEUROFEELEUROLINE
EUROMAN
EUROMANN
EUROPHON
EXPERTEXQUISITFAIRTEC
FENNER
FERGUSON
FERGUSONFIDELITY
FILSAIFINLANDIA
FINLUX
FIRST LINE
FISHER
FLINT
FORMENTI
FORMENTI-PHOENIXFORTRESSFRABAFRIACFRONTECH
FUJITSU
FUJITSU GENERALFUNAIGALAXIGALAXISGALAXYGALERIAGBC
GEANT CASINOGEC
1226 1322 1438 1316 1209 1211 1226 1233 1316 1327 1330 1331 1313 1516 1535 1536 1537 1538 1529 1555 1218 1474 1216 1218 1223 1364 1474 1223 1227 1233 1236 1237 1238 1416 1462 1350 1238 1209 1238 1313 1212 1322 1428 1228 1211 1216 1218 1219 1223 1225 1232 1316 1474 1329 1331 13641213 1216 1223 1227 1324 1364 1217 1327 1438 1212 1219 1232 1322 1209 1223 1237 1448 1434 1313 1228 1532 1216 1218 1221 1223 1474 1364 1233 1518 1212 1322 1210 1233 1315 1218 1455 1474 1396 1228 1232 1233 1237 1316 1210 1211 1216 1223 1225 1226 1315 1364 1316 1211 1216 1217 1223 1226 1232 1233 1238 1316 1327 1364 14381430 1230 1462 1223 1586 1578 1501 1461 1212 1219 1322 1423 1031 1060 1218 1348 1474 1349 1363 1365 1419 1468 1350 1426
1543 1434 1471 1211 1214 1223 1225 1232 1316 1332 1380 1384 1404 1233 1316 1214 1332 1319 1418 1435 1209 1211 1216 1217 1218 1223 1224 1226 1233 1238 1430 1356 1374 1395 1376 1316 1317 1329 1472 1418 1438 1462 1474 1364 1330 1331 1327 1355 1313 1211 1212 1216 1219 1223 1225 1226 1232 1233 1364 1375 1339 1461 1316 1436 1322 1209 1211 1217 1222 1226 1233 1237 1438 1313 1340 1342 1353 1319 1316 1331 1391 1216 1223 1227 1364 1421 1209 1211 1217 1218 1224 1225 1232 1438 1440 1313 1356 14321314 1474 1316 1232 1209 1314 1313 1223 1237 1237 1210 1212 1214 1215 1219 1233 1380 1426 1436 1428 1334 13221332 1315 1226 1233 1424 1317 1462 1233 1210 1315 1339 1223 1223 1237 1360 1391 1322 1212 1217 1219 1227 1322 1340 1438 1230 1211 1215 1216
Codelist_SFB 10.1 B2 - IAN-75092.indd 4 03.05.2012 11:24:35
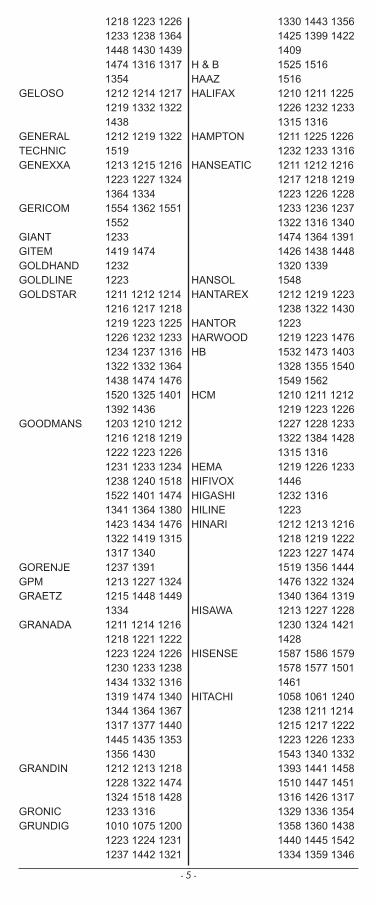
- 5 -
GELOSO
GENERAL TECHNICGENEXXA
GERICOM
GIANTGITEMGOLDHANDGOLDLINEGOLDSTAR
GOODMANS
GORENJEGPMGRAETZ
GRANADA
GRANDIN
GRONICGRUNDIG
1218 1223 1226 1233 1238 1364 1448 1430 1439 1474 1316 1317 1354 1212 1214 1217 1219 1332 1322 1438 1212 1219 1322 1519 1213 1215 1216 1223 1227 1324 1364 1334 1554 1362 1551 1552 1233 1419 1474 1232 1223 1211 1212 1214 1216 1217 1218 1219 1223 1225 1226 1232 1233 1234 1237 1316 1322 1332 1364 1438 1474 1476 1520 1325 14011392 1436 1203 1210 1212 1216 1218 1219 1222 1223 1226 1231 1233 1234 1238 1240 1518 1522 1401 1474 1341 1364 1380 1423 1434 1476 1322 1419 1315 1317 1340 1237 1391 1213 1227 1324 1215 1448 1449 1334 1211 1214 1216 1218 1221 1222 1223 1224 1226 1230 1233 1238 1434 1332 1316 1319 1474 1340 1344 1364 1367 1317 1377 1440 1445 1435 1353 1356 1430 1212 1213 1218 1228 1322 1474 1324 1518 1428 1233 1316 1010 1075 1200 1223 1224 1231 1237 1442 1321
1330 1443 1356 1425 1399 1422 1409 1525 1516 1516 1210 1211 1225 1226 1232 1233 1315 1316 1211 1225 1226 1232 1233 1316 1211 1212 1216 1217 1218 1219 1223 1226 1228 1233 1236 12371322 1316 1340 1474 1364 1391 1426 1438 1448 1320 1339 1548 1212 1219 1223 1238 1322 1430 1223 1219 1223 1476 1532 1473 1403 1328 1355 1540 1549 1562 1210 1211 1212 1219 1223 1226 1227 1228 1233 1322 1384 14281315 1316 1219 1226 1233 1446 1232 1316 1223 1212 1213 1216 1218 1219 1222 1223 1227 1474 1519 1356 14441476 1322 1324 1340 1364 1319 1213 1227 1228 1230 1324 1421 1428 1587 1586 1579 1578 1577 1501 1461 1058 1061 1240 1238 1211 1214 1215 1217 1222 1223 1226 1233 1543 1340 1332 1393 1441 1458 1510 1447 1451 1316 1426 1317 1329 1336 1354 1358 1360 1438 1440 1445 1542 1334 1359 1346
H & BHAAZHALIFAX
HAMPTON
HANSEATIC
HANSOLHANTAREX
HANTORHARWOODHB
HCM
HEMAHIFIVOXHIGASHIHILINEHINARI
HISAWA
HISENSE
HITACHI
Codelist_SFB 10.1 B2 - IAN-75092.indd 5 03.05.2012 11:24:35
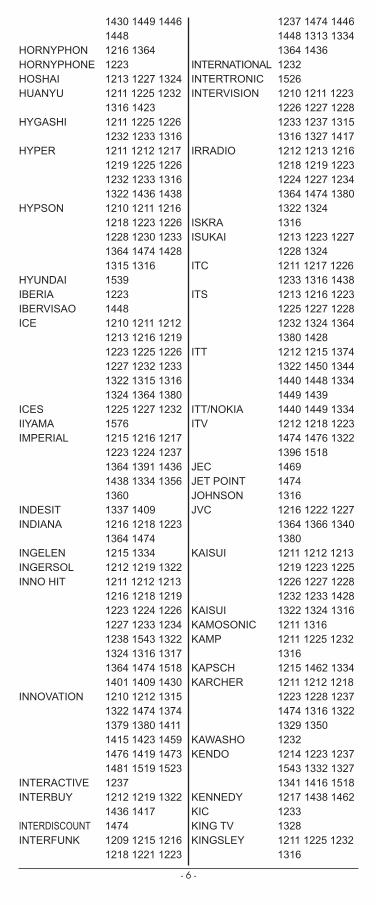
- 6 -
HORNYPHONHORNYPHONEHOSHAIHUANYU
HYGASHI
HYPER
HYPSON
HYUNDAIIBERIAIBERVISAOICE
ICESIIYAMAIMPERIAL
INDESITINDIANA
INGELENINGERSOLINNO HIT
INNOVATION
INTERACTIVEINTERBUY
INTERDISCOUNTINTERFUNK
1430 1449 1446 1448 1216 1364 1223 1213 1227 1324 1211 1225 1232 1316 1423 1211 1225 1226 1232 1233 1316 1211 1212 1217 1219 1225 1226 1232 1233 1316 1322 1436 14381210 1211 1216 1218 1223 1226 1228 1230 1233 1364 1474 1428 1315 1316 1539 1223 1448 1210 1211 1212 1213 1216 1219 1223 1225 1226 1227 1232 1233 1322 1315 1316 1324 1364 1380 1225 1227 1232 1576 1215 1216 1217 1223 1224 1237 1364 1391 1436 1438 1334 1356 1360 1337 1409 1216 1218 1223 1364 1474 1215 1334 1212 1219 1322 1211 1212 1213 1216 1218 1219 1223 1224 1226 1227 1233 1234 1238 1543 1322 1324 1316 1317 1364 1474 1518 1401 1409 14301210 1212 1315 1322 1474 1374 1379 1380 1411 1415 1423 1459 1476 1419 1473 1481 1519 1523 1237 1212 1219 1322 1436 1417 1474 1209 1215 1216 1218 1221 1223
INTERNATIONALINTERTRONICINTERVISION
IRRADIO
ISKRAISUKAI
ITC
ITS
ITT
ITT/NOKIAITV
JECJET POINTJOHNSONJVC
KAISUI
KAISUIKAMOSONICKAMP
KAPSCHKARCHER
KAWASHOKENDO
KENNEDYKICKING TVKINGSLEY
1237 1474 1446 1448 1313 13341364 1436 1232 1526 1210 1211 1223 1226 1227 1228 1233 1237 1315 1316 1327 14171212 1213 1216 1218 1219 1223 1224 1227 1234 1364 1474 13801322 1324 1316 1213 1223 1227 1228 1324 1211 1217 1226 1233 1316 1438 1213 1216 1223 1225 1227 1228 1232 1324 1364 1380 1428 1212 1215 1374 1322 1450 1344 1440 1448 1334 1449 1439 1440 1449 1334 1212 1218 1223 1474 1476 1322 1396 1518 1469 1474 1316 1216 1222 1227 1364 1366 1340 1380 1211 1212 1213 1219 1223 1225 1226 1227 1228 1232 1233 14281322 1324 1316 1211 1316 1211 1225 1232 1316 1215 1462 1334 1211 1212 1218 1223 1228 1237 1474 1316 1322 1329 1350 1232 1214 1223 1237 1543 1332 1327 1341 1416 1518 1217 1438 1462 1233 1328 1211 1225 1232 1316
Codelist_SFB 10.1 B2 - IAN-75092.indd 6 03.05.2012 11:24:35
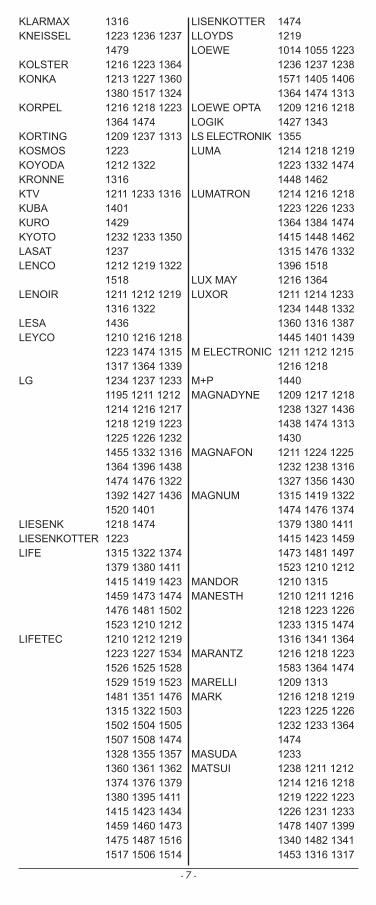
- 7 -
KLARMAXKNEISSEL
KOLSTERKONKA
KORPEL
KORTINGKOSMOSKOYODAKRONNEKTVKUBAKUROKYOTOLASATLENCO
LENOIR
LESALEYCO
LG
LIESENKLIESENKOTTERLIFE
LIFETEC
LISENKOTTERLLOYDSLOEWE
LOEWE OPTALOGIKLS ELECTRONIKLUMA
LUMATRON
LUX MAYLUXOR
M ELECTRONIC
M+PMAGNADYNE
MAGNAFON
MAGNUM
MANDORMANESTH
MARANTZ
MARELLIMARK
MASUDAMATSUI
1316 1223 1236 1237 1479 1216 1223 1364 1213 1227 1360 1380 1517 1324 1216 1218 1223 1364 1474 1209 1237 1313 1223 1212 1322 1316 1211 1233 1316 1401 1429 1232 1233 1350 1237 1212 1219 1322 1518 1211 1212 1219 1316 1322 1436 1210 1216 1218 1223 1474 1315 1317 1364 1339 1234 1237 1233 1195 1211 1212 1214 1216 1217 1218 1219 12231225 1226 1232 1455 1332 1316 1364 1396 1438 1474 1476 13221392 1427 1436 1520 1401 1218 1474 1223 1315 1322 1374 1379 1380 1411 1415 1419 1423 1459 1473 14741476 1481 1502 1523 1210 1212 1210 1212 1219 1223 1227 1534 1526 1525 1528 1529 1519 15231481 1351 1476 1315 1322 1503 1502 1504 1505 1507 1508 14741328 1355 1357 1360 1361 1362 1374 1376 1379 1380 1395 14111415 1423 1434 1459 1460 1473 1475 1487 1516 1517 1506 1514
1474 1219 1014 1055 1223 1236 1237 1238 1571 1405 1406 1364 1474 13131209 1216 1218 1427 1343 1355 1214 1218 1219 1223 1332 1474 1448 1462 1214 1216 1218 1223 1226 1233 1364 1384 1474 1415 1448 14621315 1476 1332 1396 1518 1216 1364 1211 1214 1233 1234 1448 1332 1360 1316 1387 1445 1401 14391211 1212 1215 1216 1218 1440 1209 1217 1218 1238 1327 1436 1438 1474 1313 1430 1211 1224 1225 1232 1238 1316 1327 1356 1430 1315 1419 1322 1474 1476 1374 1379 1380 1411 1415 1423 14591473 1481 1497 1523 1210 1212 1210 1315 1210 1211 1216 1218 1223 1226 1233 1315 1474 1316 1341 13641216 1218 1223 1583 1364 1474 1209 1313 1216 1218 1219 1223 1225 1226 1232 1233 1364 1474 1233 1238 1211 1212 1214 1216 1218 1219 1222 1223 1226 1231 12331478 1407 1399 1340 1482 1341 1453 1316 1317
Codelist_SFB 10.1 B2 - IAN-75092.indd 7 03.05.2012 11:24:35
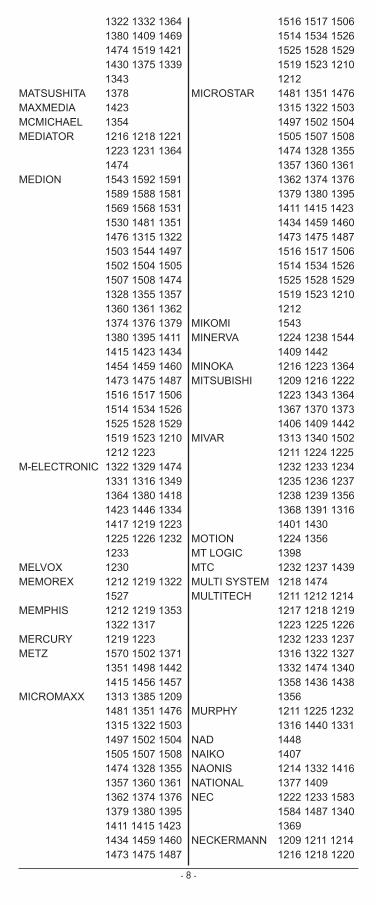
- 8 -
MATSUSHITAMAXMEDIAMCMICHAELMEDIATOR
MEDION
M-ELECTRONIC
MELVOXMEMOREX
MEMPHIS
MERCURYMETZ
MICROMAXX
MICROSTAR
MIKOMIMINERVA
MINOKAMITSUBISHI
MIVAR
MOTIONMT LOGICMTCMULTI SYSTEMMULTITECH
MURPHY
NADNAIKONAONISNATIONALNEC
NECKERMANN
1322 1332 13641380 1409 1469 1474 1519 1421 1430 1375 1339 1343 1378 1423 1354 1216 1218 1221 1223 1231 1364 1474 1543 1592 1591 1589 1588 1581 1569 1568 1531 1530 1481 13511476 1315 1322 1503 1544 1497 1502 1504 1505 1507 1508 14741328 1355 1357 1360 1361 1362 1374 1376 1379 1380 1395 14111415 1423 1434 1454 1459 1460 1473 1475 1487 1516 1517 15061514 1534 1526 1525 1528 1529 1519 1523 1210 1212 1223 1322 1329 1474 1331 1316 1349 1364 1380 1418 1423 1446 13341417 1219 1223 1225 1226 1232 1233 1230 1212 1219 1322 1527 1212 1219 1353 1322 1317 1219 1223 1570 1502 1371 1351 1498 1442 1415 1456 1457 1313 1385 12091481 1351 1476 1315 1322 1503 1497 1502 1504 1505 1507 15081474 1328 1355 1357 1360 1361 1362 1374 1376 1379 1380 13951411 1415 1423 1434 1459 1460 1473 1475 1487
1516 1517 15061514 1534 1526 1525 1528 1529 1519 1523 1210 1212 1481 1351 1476 1315 1322 1503 1497 1502 1504 1505 1507 1508 1474 1328 1355 1357 1360 1361 1362 1374 1376 1379 1380 1395 1411 1415 1423 1434 1459 1460 1473 1475 1487 1516 1517 1506 1514 1534 1526 1525 1528 1529 1519 1523 1210 1212 1543 1224 1238 1544 1409 1442 1216 1223 1364 1209 1216 1222 1223 1343 1364 1367 1370 1373 1406 1409 14421313 1340 1502 1211 1224 1225 1232 1233 1234 1235 1236 1237 1238 1239 13561368 1391 1316 1401 1430 1224 1356 1398 1232 1237 1439 1218 1474 1211 1212 1214 1217 1218 1219 1223 1225 1226 1232 1233 12371316 1322 1327 1332 1474 1340 1358 1436 1438 1356 1211 1225 1232 1316 1440 1331 1448 1407 1214 1332 1416 1377 1409 1222 1233 1583 1584 1487 1340 1369 1209 1211 1214 1216 1218 1220
Codelist_SFB 10.1 B2 - IAN-75092.indd 8 03.05.2012 11:24:35
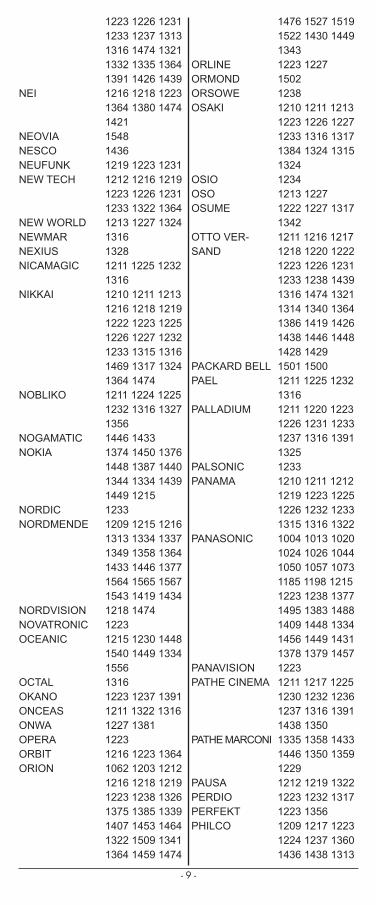
- 9 -
NEI
NEOVIANESCONEUFUNKNEW TECH
NEW WORLDNEWMARNEXIUSNICAMAGIC
NIKKAI
NOBLIKO
NOGAMATICNOKIA
NORDICNORDMENDE
NORDVISIONNOVATRONICOCEANIC
OCTALOKANOONCEASONWAOPERAORBITORION
ORLINEORMONDORSOWEOSAKI
OSIOOSOOSUME
OTTO VER-SAND
PACKARD BELLPAEL
PALLADIUM
PALSONICPANAMA
PANASONIC
PANAVISIONPATHE CINEMA
PATHE MARCONI
PAUSAPERDIOPERFEKTPHILCO
1223 1226 1231 1233 1237 13131316 1474 1321 1332 1335 1364 1391 1426 1439 1216 1218 1223 1364 1380 1474 1421 1548 1436 1219 1223 1231 1212 1216 1219 1223 1226 1231 1233 1322 1364 1213 1227 1324 1316 1328 1211 1225 1232 1316 1210 1211 1213 1216 1218 1219 1222 1223 1225 1226 1227 12321233 1315 1316 1469 1317 1324 1364 1474 1211 1224 1225 1232 1316 1327 1356 1446 1433 1374 1450 1376 1448 1387 1440 1344 1334 1439 1449 1215 1233 1209 1215 1216 1313 1334 1337 1349 1358 1364 1433 1446 13771564 1565 1567 1543 1419 1434 1218 1474 1223 1215 1230 1448 1540 1449 1334 1556 1316 1223 1237 1391 1211 1322 1316 1227 1381 1223 1216 1223 1364 1062 1203 1212 1216 1218 1219 1223 1238 1326 1375 1385 13391407 1453 1464 1322 1509 1341 1364 1459 1474
1476 1527 15191522 1430 1449 1343 1223 1227 1502 1238 1210 1211 1213 1223 1226 1227 1233 1316 1317 1384 1324 13151324 1234 1213 1227 1222 1227 1317 1342 1211 1216 1217 1218 1220 1222 1223 1226 1231 1233 1238 14391316 1474 1321 1314 1340 1364 1386 1419 1426 1438 1446 14481428 1429 1501 1500 1211 1225 1232 1316 1211 1220 1223 1226 1231 1233 1237 1316 1391 1325 1233 1210 1211 1212 1219 1223 1225 1226 1232 1233 1315 1316 13221004 1013 1020 1024 1026 1044 1050 1057 1073 1185 1198 12151223 1238 1377 1495 1383 1488 1409 1448 1334 1456 1449 14311378 1379 1457 1223 1211 1217 1225 1230 1232 1236 1237 1316 1391 1438 1350 1335 1358 1433 1446 1350 1359 1229 1212 1219 1322 1223 1232 1317 1223 1356 1209 1217 1223 1224 1237 1360 1436 1438 1313
Codelist_SFB 10.1 B2 - IAN-75092.indd 9 03.05.2012 11:24:35
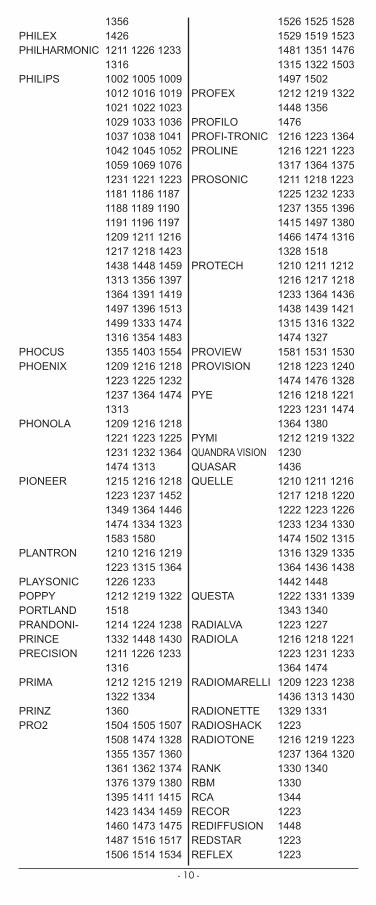
- 10 -
PHILEXPHILHARMONIC
PHILIPS
PHOCUSPHOENIX
PHONOLA
PIONEER
PLANTRON
PLAYSONICPOPPYPORTLANDPRANDONI-PRINCEPRECISION
PRIMA
PRINZPRO2
PROFEX
PROFILOPROFI-TRONICPROLINE
PROSONIC
PROTECH
PROVIEWPROVISION
PYE
PYMIQUANDRA VISIONQUASARQUELLE
QUESTA
RADIALVARADIOLA
RADIOMARELLI
RADIONETTERADIOSHACKRADIOTONE
RANKRBMRCARECORREDIFFUSIONREDSTARREFLEX
1356 1426 1211 1226 1233 1316 1002 1005 1009 1012 1016 1019 1021 1022 1023 1029 1033 10361037 1038 1041 1042 1045 1052 1059 1069 1076 1231 1221 12231181 1186 1187 1188 1189 1190 1191 1196 1197 1209 1211 12161217 1218 1423 1438 1448 1459 1313 1356 1397 1364 1391 14191497 1396 1513 1499 1333 1474 1316 1354 1483 1355 1403 1554 1209 1216 1218 1223 1225 1232 1237 1364 1474 1313 1209 1216 1218 1221 1223 1225 1231 1232 1364 1474 1313 1215 1216 1218 1223 1237 1452 1349 1364 1446 1474 1334 13231583 1580 1210 1216 1219 1223 1315 1364 1226 1233 1212 1219 1322 1518 1214 1224 1238 1332 1448 1430 1211 1226 1233 1316 1212 1215 1219 1322 1334 1360 1504 1505 1507 1508 1474 1328 1355 1357 1360 1361 1362 13741376 1379 1380 1395 1411 1415 1423 1434 1459 1460 1473 14751487 1516 1517 1506 1514 1534
1526 1525 1528 1529 1519 15231481 1351 1476 1315 1322 1503 1497 1502 1212 1219 1322 1448 1356 1476 1216 1223 1364 1216 1221 1223 1317 1364 1375 1211 1218 1223 1225 1232 1233 1237 1355 1396 1415 1497 13801466 1474 1316 1328 1518 1210 1211 1212 1216 1217 1218 1233 1364 1436 1438 1439 14211315 1316 1322 1474 1327 1581 1531 1530 1218 1223 1240 1474 1476 1328 1216 1218 1221 1223 1231 1474 1364 1380 1212 1219 1322 1230 1436 1210 1211 1216 1217 1218 1220 1222 1223 1226 1233 1234 13301474 1502 1315 1316 1329 1335 1364 1436 1438 1442 1448 1222 1331 1339 1343 1340 1223 1227 1216 1218 1221 1223 1231 1233 1364 1474 1209 1223 1238 1436 1313 1430 1329 1331 1223 1216 1219 1223 1237 1364 1320 1330 1340 1330 1344 1223 1448 1223 1223
Codelist_SFB 10.1 B2 - IAN-75092.indd 10 03.05.2012 11:24:35

- 11 -
1543 1216 1218 1223 1237 1364 1474 1210 1214 1215 1332 1315 1416 1462 1334 1209 1236 1237 1313 1320 1232 1216 1218 1223 1364 1474 1193 1210 1212 1213 1219 1227 1315 1322 1324 1518 1209 1313 1232 1233 1316 1237 1209 1313 1006 1060 1068 1172 1209 1215 1238 1334 1449 1359 1313 14301434 1419 1433 1349 1358 1446 1448 1518 1350 1341 1315 1316 1322 1519 1343 1430 1326 1238 1219 1226 12331210 1211 1212 1415 1416 1426 1438 1445 1448 1401 1429 1435 1439 1334 13741332 1344 1360 1214 1215 1217 1234 1238 1573 1327 1474 1356 1430 1224 1238 1232 1233 1412 1322 1364 1477 1391 1315 1465 1316 1317 15241398 1413 1343 1401 1218 1219 1223 1225 1226 1231 1212 12161039 1043 1056 1063 1070 1237 1234 1201 1210 1211 1211 1225 1226 1232 1233 1316 1322 1316
1578 1577 1216 1223 1364 1527 1049 1211 1217 1219 1222 1225 1226 1232 1233 1236 1237 15191319 1344 1316 1340 1329 1331 1391 1434 1465 1438 1353 13561543 1317 1342 1343 1519 1218 1221 1223 1231 1354 1474 1215 1560 1561 1562 1563 1334 1449 1558 1559 1355 1540 15491448 1499 1502 1532 1473 1403 1328 1211 1213 1216 1217 1218 1221 1223 1226 1227 1231 1233 14321481 1316 1474 1324 1364 1380 1438 1446 1465 1518 1521 13821553 1210 1211 1217 1218 1219 1222 1223 1225 1226 1232 1233 13561476 1315 1502 1316 1474 1322 1327 1340 1396 1436 1438 1543 1473 1220 1223 1238 1209 1215 1238 1327 1326 1334 1339 1385 1430 1313 1328 1214 1215 1217 1332 1340 1438 1416 1462 1334 1212 1219 1322 1219 1227 1469 1232 1017 1028 1048 1051 1072 1222 1238 1318 1340 1489 1490 13421314 1372 1339
RELISYSREVOX
REX
RFT
RHAPSODYR-LINE
ROADSTAR
ROBOTRONROWAROWSONICROYAL LUXRTFSABA
SACCSSAISHO
SALORA
SAMBERS
SAMSUNG
SANDRA
SANDRA COLOR
SANDSTROMSANSUI
SANYO
SAVILLESBR
SCHAUB LORENZ
SCHNEIDER
SCHWAIGERSEG
SEISEI-SINUDYNE
SEITECHSELECO
SENCORASENTRASERINOSHARP
SHARPSHORAI
Codelist_SFB 10.1 B2 - IAN-75092.indd 11 03.05.2012 11:24:35
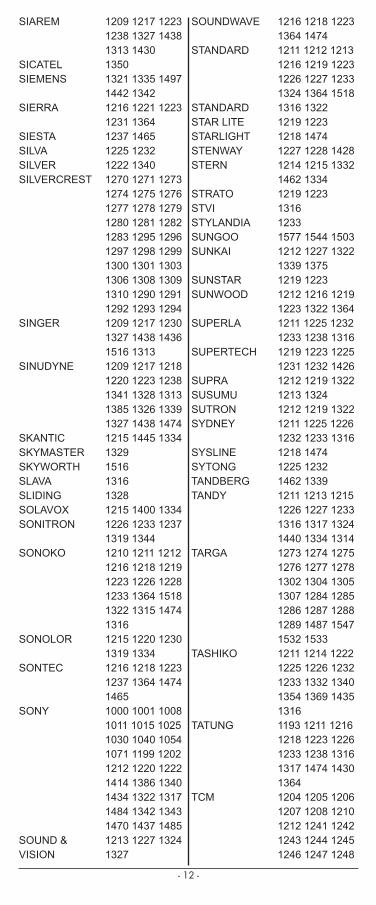
- 12 -
SIAREM
SICATELSIEMENS
SIERRA
SIESTASILVASILVERSILVERCREST
SINGER
SINUDYNE
SKANTICSKYMASTERSKYWORTHSLAVASLIDINGSOLAVOXSONITRON
SONOKO
SONOLOR
SONTEC
SONY
SOUND & VISION
SOUNDWAVE
STANDARD
STANDARDSTAR LITESTARLIGHTSTENWAYSTERN
STRATOSTVISTYLANDIASUNGOOSUNKAI
SUNSTARSUNWOOD
SUPERLA
SUPERTECH
SUPRASUSUMUSUTRONSYDNEY
SYSLINESYTONGTANDBERGTANDY
TARGA
TASHIKO
TATUNG
TCM
1209 1217 1223 1238 1327 1438 1313 1430 1350 1321 1335 1497 1442 1342 1216 1221 1223 1231 1364 1237 1465 1225 1232 1222 1340 1270 1271 1273 1274 1275 1276 1277 1278 1279 1280 1281 12821283 1295 1296 1297 1298 1299 1300 1301 1303 1306 1308 13091310 1290 1291 1292 1293 1294 1209 1217 1230 1327 1438 1436 1516 1313 1209 1217 1218 1220 1223 1238 1341 1328 1313 1385 1326 13391327 1438 1474 1215 1445 1334 1329 1516 1316 1328 1215 1400 1334 1226 1233 1237 1319 1344 1210 1211 1212 1216 1218 1219 1223 1226 1228 1233 1364 15181322 1315 1474 1316 1215 1220 1230 1319 1334 1216 1218 1223 1237 1364 1474 1465 1000 1001 1008 1011 1015 1025 1030 1040 1054 1071 1199 12021212 1220 1222 1414 1386 1340 1434 1322 1317 1484 1342 13431470 1437 1485 1213 1227 1324 1327
1216 1218 1223 1364 1474 1211 1212 1213 1216 1219 1223 1226 1227 1233 1324 1364 15181316 1322 1219 1223 1218 1474 1227 1228 1428 1214 1215 1332 1462 1334 1219 1223 1316 1233 1577 1544 1503 1212 1227 1322 1339 1375 1219 1223 1212 1216 1219 1223 1322 1364 1211 1225 1232 1233 1238 1316 1219 1223 1225 1231 1232 1426 1212 1219 1322 1213 1324 1212 1219 1322 1211 1225 1226 1232 1233 1316 1218 1474 1225 1232 1462 1339 1211 1213 1215 1226 1227 1233 1316 1317 1324 1440 1334 13141273 1274 1275 1276 1277 1278 1302 1304 1305 1307 1284 1285 1286 1287 1288 1289 1487 1547 1532 1533 1211 1214 1222 1225 1226 1232 1233 1332 1340 1354 1369 1435 1316 1193 1211 1216 1218 1223 1226 1233 1238 1316 1317 1474 1430 1364 1204 1205 1206 1207 1208 1210 1212 1241 1242 1243 1244 1245 1246 1247 1248
Codelist_SFB 10.1 B2 - IAN-75092.indd 12 03.05.2012 11:24:36
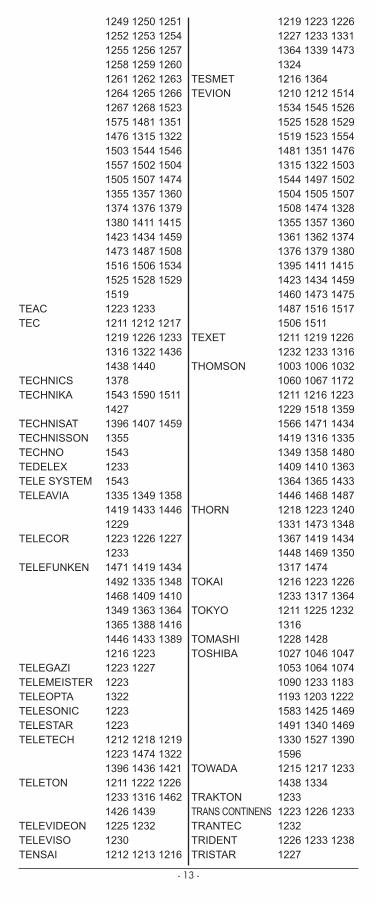
- 13 -
TEACTEC
TECHNICSTECHNIKA
TECHNISATTECHNISSONTECHNOTEDELEXTELE SYSTEMTELEAVIA
TELECOR
TELEFUNKEN
TELEGAZITELEMEISTERTELEOPTATELESONICTELESTARTELETECH
TELETON
TELEVIDEONTELEVISOTENSAI
TESMETTEVION
TEXET
THOMSON
THORN
TOKAI
TOKYO
TOMASHITOSHIBA
TOWADA
TRAKTONTRANS CONTINENSTRANTECTRIDENTTRISTAR
1249 1250 1251 1252 1253 1254 1255 1256 12571258 1259 1260 1261 1262 1263 1264 1265 1266 1267 1268 15231575 1481 1351 1476 1315 1322 1503 1544 1546 1557 1502 15041505 1507 1474 1355 1357 1360 1374 1376 1379 1380 1411 14151423 1434 1459 1473 1487 1508 1516 1506 1534 1525 1528 15291519 1223 1233 1211 1212 1217 1219 1226 1233 1316 1322 1436 1438 1440 1378 1543 1590 1511 1427 1396 1407 1459 1355 1543 1233 1543 1335 1349 1358 1419 1433 1446 1229 1223 1226 1227 1233 1471 1419 1434 1492 1335 1348 1468 1409 1410 1349 1363 13641365 1388 1416 1446 1433 1389 1216 1223 1223 1227 1223 1322 1223 1223 1212 1218 1219 1223 1474 1322 1396 1436 1421 1211 1222 1226 1233 1316 1462 1426 1439 1225 1232 1230 1212 1213 1216
1219 1223 1226 1227 1233 1331 1364 1339 14731324 1216 1364 1210 1212 1514 1534 1545 1526 1525 1528 1529 1519 1523 15541481 1351 1476 1315 1322 1503 1544 1497 1502 1504 1505 15071508 1474 1328 1355 1357 1360 1361 1362 1374 1376 1379 13801395 1411 1415 1423 1434 1459 1460 1473 1475 1487 1516 15171506 1511 1211 1219 1226 1232 1233 1316 1003 1006 1032 1060 1067 1172 1211 1216 1223 1229 1518 13591566 1471 1434 1419 1316 1335 1349 1358 1480 1409 1410 13631364 1365 1433 1446 1468 1487 1218 1223 1240 1331 1473 1348 1367 1419 1434 1448 1469 13501317 1474 1216 1223 1226 1233 1317 1364 1211 1225 1232 1316 1228 1428 1027 1046 1047 1053 1064 1074 1090 1233 1183 1193 1203 12221583 1425 1469 1491 1340 1469 1330 1527 1390 1596 1215 1217 1233 1438 1334 1233 1223 1226 1233 1232 1226 1233 1238 1227
Codelist_SFB 10.1 B2 - IAN-75092.indd 13 03.05.2012 11:24:36
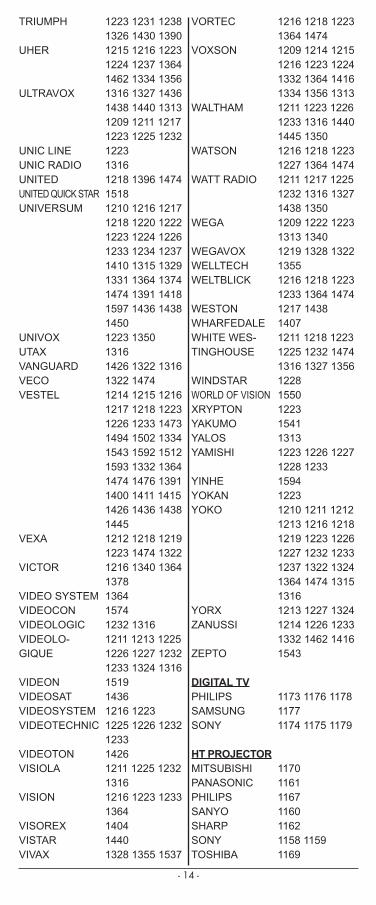
- 14 -
TRIUMPH
UHER
ULTRAVOX
UNIC LINEUNIC RADIOUNITEDUNITED QUICK STARUNIVERSUM
UNIVOXUTAXVANGUARDVECOVESTEL
VEXA
VICTOR
VIDEO SYSTEMVIDEOCONVIDEOLOGICVIDEOLO-GIQUE
VIDEONVIDEOSATVIDEOSYSTEMVIDEOTECHNIC
VIDEOTONVISIOLA
VISION
VISOREXVISTARVIVAX
VORTEC
VOXSON
WALTHAM
WATSON
WATT RADIO
WEGA
WEGAVOXWELLTECHWELTBLICK
WESTONWHARFEDALEWHITE WES-TINGHOUSE
WINDSTARWORLD OF VISIONXRYPTONYAKUMOYALOSYAMISHI
YINHEYOKANYOKO
YORXZANUSSI
ZEPTO
DIGITAL TVPHILIPSSAMSUNGSONY
HT PROJECTORMITSUBISHIPANASONICPHILIPSSANYOSHARPSONYTOSHIBA
1223 1231 1238 1326 1430 1390 1215 1216 1223 1224 1237 1364 1462 1334 1356 1316 1327 1436 1438 1440 1313 1209 1211 1217 1223 1225 12321223 1316 1218 1396 1474 1518 1210 1216 1217 1218 1220 1222 1223 1224 1226 1233 1234 12371410 1315 1329 1331 1364 1374 1474 1391 1418 1597 1436 14381450 1223 1350 1316 1426 1322 1316 1322 1474 1214 1215 1216 1217 1218 1223 1226 1233 1473 1494 1502 13341543 1592 1512 1593 1332 1364 1474 1476 1391 1400 1411 14151426 1436 1438 1445 1212 1218 1219 1223 1474 1322 1216 1340 1364 1378 1364 1574 1232 1316 1211 1213 1225 1226 1227 1232 1233 1324 1316 1519 1436 1216 1223 1225 1226 1232 1233 1426 1211 1225 1232 1316 1216 1223 1233 1364 1404 1440 1328 1355 1537
1216 1218 1223 1364 1474 1209 1214 1215 1216 1223 1224 1332 1364 1416 1334 1356 13131211 1223 1226 1233 1316 1440 1445 1350 1216 1218 1223 1227 1364 1474 1211 1217 1225 1232 1316 1327 1438 1350 1209 1222 1223 1313 1340 1219 1328 1322 1355 1216 1218 1223 1233 1364 1474 1217 1438 1407 1211 1218 1223 1225 1232 1474 1316 1327 1356 1228 1550 1223 1541 1313 1223 1226 1227 1228 1233 1594 1223 1210 1211 1212 1213 1216 1218 1219 1223 1226 1227 1232 12331237 1322 1324 1364 1474 1315 1316 1213 1227 1324 1214 1226 1233 1332 1462 1416 1543
1173 1176 1178 1177 1174 1175 1179
1170 1161 1167 1160 1162 1158 1159 1169
Codelist_SFB 10.1 B2 - IAN-75092.indd 14 03.05.2012 11:24:36
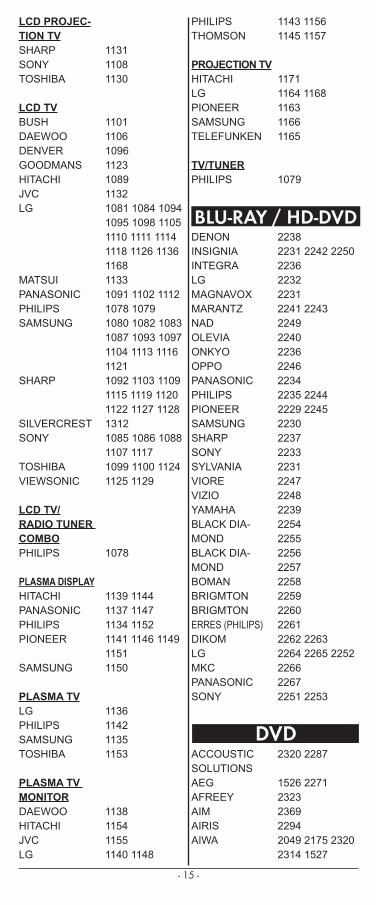
- 15 -
LCD PROJEC-TION TVSHARPSONYTOSHIBA
LCD TVBUSHDAEWOODENVERGOODMANSHITACHIJVCLG
MATSUIPANASONICPHILIPSSAMSUNG
SHARP
SILVERCRESTSONY
TOSHIBAVIEWSONIC
LCD TV/ RADIO TUNER COMBOPHILIPS
PLASMA DISPLAYHITACHIPANASONICPHILIPSPIONEER
SAMSUNG
PLASMA TVLGPHILIPSSAMSUNGTOSHIBA
PLASMA TV MONITORDAEWOOHITACHIJVCLG
PHILIPSTHOMSON
PROJECTION TVHITACHILGPIONEERSAMSUNGTELEFUNKEN
TV/TUNERPHILIPS
BLU-RAY / HD-DVDDENONINSIGNIAINTEGRALGMAGNAVOXMARANTZNADOLEVIAONKYOOPPOPANASONICPHILIPSPIONEERSAMSUNGSHARPSONYSYLVANIAVIOREVIZIOYAMAHABLACK DIA-MONDBLACK DIA-MONDBOMANBRIGMTONBRIGMTONERRES (PHILIPS)DIKOMLGMKCPANASONICSONY
ACCOUSTIC SOLUTIONSAEGAFREEYAIMAIRISAIWA
1131 1108 1130
1101 1106 1096 1123 1089 1132 1081 1084 1094 1095 1098 1105 1110 1111 1114 1118 1126 11361168 1133 1091 1102 1112 1078 1079 1080 1082 1083 1087 1093 1097 1104 1113 1116 1121 1092 1103 1109 1115 1119 1120 1122 1127 1128 1312 1085 1086 1088 1107 1117 1099 1100 1124 1125 1129
1078 1139 1144 1137 1147 1134 1152 1141 1146 1149 1151 1150 1136 1142 1135 1153
1138 1154 1155 1140 1148
1143 1156 1145 1157 1171 1164 1168 1163 1166 1165 1079
2238 2231 2242 22502236 2232 2231 2241 2243 2249 2240 2236 2246 2234 2235 2244 2229 2245 2230 2237 2233 2231 2247 2248 2239 2254 2255 2256 2257 2258 2259 2260 2261 2262 2263 2264 2265 22522266 2267 2251 2253
2320 2287
1526 2271 2323 2369 2294 2049 2175 2320 2314 1527
Codelist_SFB 10.1 B2 - IAN-75092.indd 15 03.05.2012 11:24:36
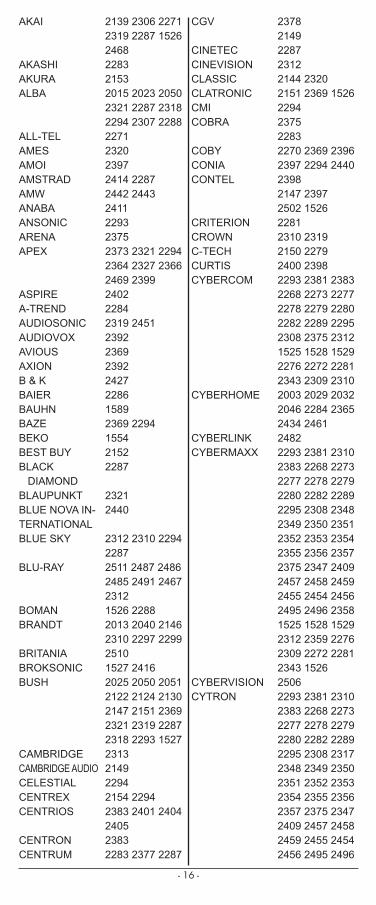
- 16 -
AKAI
AKASHIAKURAALBA
ALL-TELAMESAMOIAMSTRADAMWANABAANSONICARENAAPEX
ASPIREA-TRENDAUDIOSONICAUDIOVOXAVIOUSAXIONB & K BAIERBAUHNBAZEBEKOBEST BUYBLACK DIAMONDBLAUPUNKTBLUE NOVA IN-TERNATIONALBLUE SKY
BLU-RAY
BOMANBRANDT
BRITANIABROKSONICBUSH
CAMBRIDGECAMBRIDGE AUDIOCELESTIALCENTREXCENTRIOS
CENTRONCENTRUM
CGV
CINETECCINEVISIONCLASSICCLATRONICCMICOBRA
COBYCONIACONTEL
CRITERIONCROWNC-TECHCURTISCYBERCOM
CYBERHOME
CYBERLINKCYBERMAXX
CYBERVISIONCYTRON
2139 2306 2271 2319 2287 1526 2468 2283 2153 2015 2023 2050 2321 2287 2318 2294 2307 2288 2271 2320 2397 2414 2287 2442 2443 2411 2293 2375 2373 2321 2294 2364 2327 2366 2469 2399 2402 2284 2319 2451 2392 2369 2392 2427 2286 1589 2369 2294 1554 2152 2287
2321 2440
2312 2310 2294 2287 2511 2487 2486 2485 2491 2467 2312 1526 2288 2013 2040 2146 2310 2297 2299 2510 1527 2416 2025 2050 2051 2122 2124 2130 2147 2151 2369 2321 2319 22872318 2293 1527 2313 2149 2294 2154 2294 2383 2401 2404 2405 2383 2283 2377 2287
2378 2149 2287 2312 2144 2320 2151 2369 1526 2294 2375 2283 2270 2369 2396 2397 2294 2440 2398 2147 2397 2502 1526 2281 2310 2319 2150 2279 2400 2398 2293 2381 2383 2268 2273 2277 2278 2279 2280 2282 2289 22952308 2375 2312 1525 1528 1529 2276 2272 2281 2343 2309 23102003 2029 2032 2046 2284 2365 2434 2461 2482 2293 2381 2310 2383 2268 2273 2277 2278 2279 2280 2282 22892295 2308 2348 2349 2350 2351 2352 2353 2354 2355 2356 23572375 2347 2409 2457 2458 2459 2455 2454 2456 2495 2496 23581525 1528 1529 2312 2359 2276 2309 2272 2281 2343 1526 2506 2293 2381 2310 2383 2268 2273 2277 2278 2279 2280 2282 22892295 2308 2317 2348 2349 2350 2351 2352 2353 2354 2355 23562357 2375 2347 2409 2457 2458 2459 2455 2454 2456 2495 2496
Codelist_SFB 10.1 B2 - IAN-75092.indd 16 03.05.2012 11:24:36
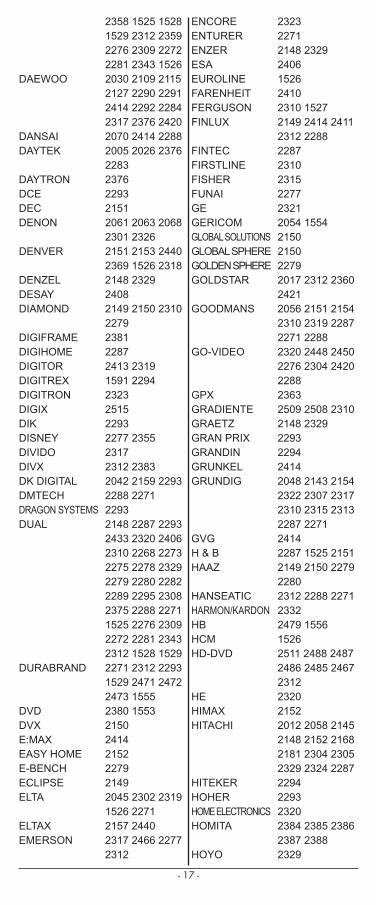
- 17 -
DAEWOO
DANSAIDAYTEK
DAYTRONDCEDECDENON
DENVER
DENZELDESAYDIAMOND
DIGIFRAMEDIGIHOMEDIGITORDIGITREXDIGITRONDIGIXDIKDISNEYDIVIDODIVXDK DIGITALDMTECHDRAGON SYSTEMSDUAL
DURABRAND
DVDDVXE:MAXEASY HOMEE-BENCHECLIPSEELTA
ELTAXEMERSON
ENCOREENTURERENZERESAEUROLINEFARENHEITFERGUSONFINLUX
FINTECFIRSTLINEFISHERFUNAIGEGERICOMGLOBAL SOLUTIONSGLOBAL SPHEREGOLDEN SPHEREGOLDSTAR
GOODMANS
GO-VIDEO
GPXGRADIENTEGRAETZGRAN PRIXGRANDINGRUNKELGRUNDIG
GVGH & BHAAZ
HANSEATICHARMON/KARDONHBHCMHD-DVD
HEHIMAXHITACHI
HITEKERHOHERHOME ELECTRONICSHOMITA
HOYO
2358 1525 1528 1529 2312 2359 2276 2309 2272 2281 2343 15262030 2109 2115 2127 2290 2291 2414 2292 2284 2317 2376 24202070 2414 2288 2005 2026 2376 2283 2376 2293 2151 2061 2063 2068 2301 2326 2151 2153 2440 2369 1526 2318 2148 2329 2408 2149 2150 2310 2279 2381 2287 2413 2319 1591 2294 2323 2515 2293 2277 2355 2317 2312 2383 2042 2159 2293 2288 2271 2293 2148 2287 2293 2433 2320 2406 2310 2268 2273 2275 2278 23292279 2280 2282 2289 2295 2308 2375 2288 2271 1525 2276 23092272 2281 2343 2312 1528 1529 2271 2312 2293 1529 2471 2472 2473 1555 2380 1553 2150 2414 2152 2279 2149 2045 2302 2319 1526 2271 2157 2440 2317 2466 2277 2312
2323 2271 2148 2329 2406 1526 2410 2310 1527 2149 2414 2411 2312 2288 2287 2310 2315 2277 2321 2054 1554 2150 2150 2279 2017 2312 2360 2421 2056 2151 2154 2310 2319 2287 2271 2288 2320 2448 2450 2276 2304 2420 2288 2363 2509 2508 2310 2148 2329 2293 2294 2414 2048 2143 2154 2322 2307 2317 2310 2315 2313 2287 2271 2414 2287 1525 2151 2149 2150 2279 2280 2312 2288 2271 2332 2479 1556 1526 2511 2488 2487 2486 2485 2467 2312 2320 2152 2012 2058 2145 2148 2152 2168 2181 2304 2305 2329 2324 22872294 2293 2320 2384 2385 2386 2387 2388 2329
Codelist_SFB 10.1 B2 - IAN-75092.indd 17 03.05.2012 11:24:36
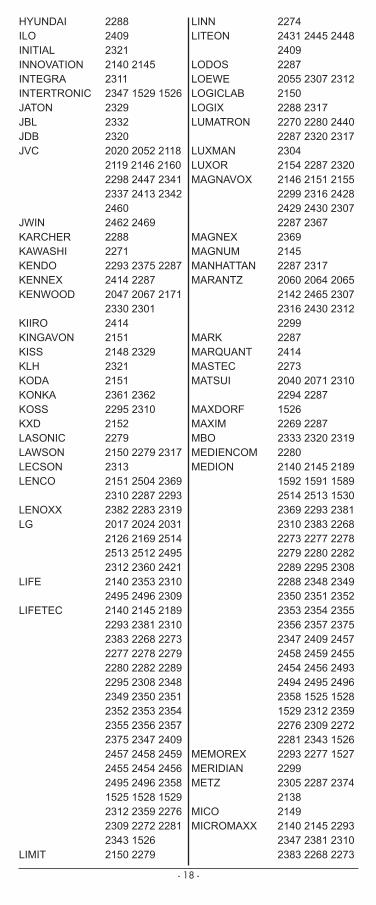
- 18 -
HYUNDAIILOINITIALINNOVATIONINTEGRAINTERTRONICJATONJBLJDBJVC
JWINKARCHERKAWASHIKENDOKENNEXKENWOOD
KIIROKINGAVONKISSKLHKODAKONKAKOSSKXDLASONICLAWSONLECSONLENCO
LENOXXLG
LIFE
LIFETEC
LIMIT
LINNLITEON
LODOSLOEWELOGICLABLOGIXLUMATRON
LUXMANLUXORMAGNAVOX
MAGNEXMAGNUMMANHATTANMARANTZ
MARKMARQUANTMASTECMATSUI
MAXDORFMAXIMMBOMEDIENCOMMEDION
MEMOREXMERIDIANMETZ
MICOMICROMAXX
2288 2409 2321 2140 2145 2311 2347 1529 1526 2329 2332 2320 2020 2052 2118 2119 2146 2160 2298 2447 2341 2337 2413 23422460 2462 2469 2288 2271 2293 2375 2287 2414 2287 2047 2067 2171 2330 2301 2414 2151 2148 2329 2321 2151 2361 2362 2295 2310 2152 2279 2150 2279 2317 2313 2151 2504 2369 2310 2287 2293 2382 2283 2319 2017 2024 2031 2126 2169 2514 2513 2512 2495 2312 2360 24212140 2353 2310 2495 2496 2309 2140 2145 2189 2293 2381 2310 2383 2268 2273 2277 2278 22792280 2282 2289 2295 2308 2348 2349 2350 2351 2352 2353 23542355 2356 2357 2375 2347 2409 2457 2458 2459 2455 2454 24562495 2496 2358 1525 1528 1529 2312 2359 2276 2309 2272 22812343 1526 2150 2279
2274 2431 2445 2448 2409 2287 2055 2307 2312 2150 2288 2317 2270 2280 2440 2287 2320 2317 2304 2154 2287 2320 2146 2151 2155 2299 2316 2428 2429 2430 2307 2287 2367 2369 2145 2287 2317 2060 2064 2065 2142 2465 2307 2316 2430 2312 2299 2287 2414 2273 2040 2071 2310 2294 2287 1526 2269 2287 2333 2320 2319 2280 2140 2145 2189 1592 1591 1589 2514 2513 1530 2369 2293 23812310 2383 2268 2273 2277 2278 2279 2280 2282 2289 2295 23082288 2348 2349 2350 2351 2352 2353 2354 2355 2356 2357 23752347 2409 2457 2458 2459 2455 2454 2456 2493 2494 2495 24962358 1525 1528 1529 2312 2359 2276 2309 2272 2281 2343 15262293 2277 1527 2299 2305 2287 2374 2138 2149 2140 2145 2293 2347 2381 2310 2383 2268 2273
Codelist_SFB 10.1 B2 - IAN-75092.indd 18 03.05.2012 11:24:36

- 19 -
MICROMEDIAMICROMEGAMICROSOFTMICROSTAR
MINATOMINERVAMINTEKMIRRORMITSUBISHIMIZUDAMONYKAMT LOGICMUSTEK
MX ONDAMYSTRALNADNAIKONAKAMICHINAKIONECNEOTEKNEUFUNKNEVIRNEXXTECH
NORCENT
NORDMENDE
NORIKONORTEKNU-TECOCEANICOKANOOMNIONIXONKYO
OPTIMUSORAVAORION
ORITRONP&BPACIFIC
PACKARD BELL
PALSONICPANASONIC
PANDAPHILCOPHILIPS
PHOCUSPHONOTRENDPIONEER
POLAROIDPORTLANDPRISMPRINZPRO2
2277 2278 22792280 2282 2289 2295 2308 2348 2349 2350 2351 2352 2353 23542355 2356 2357 2375 2409 2457 2458 2459 2455 2454 2456 24952496 2358 1525 1528 1529 2312 2359 2276 2309 2272 2281 23431526 1527 2146 2307 2481 2336 2140 2145 2293 2381 2310 2383 2268 2273 2277 2278 2279 22802282 2289 2295 2308 2348 2349 2350 2351 2352 2353 2354 23552356 2357 2375 2347 2409 2457 2458 2459 2455 2454 2456 24952496 2358 1525 1528 1529 2312 2359 2276 2309 2272 2281 23431526 2286 2317 2369 2321 2286 2287 2303 2151 2152 2414 2148 2329 2451 2001 2144 2163 2320 2149 2310 2293 2312 2331 2154 2335 2414 2312 2323 2148 2329 2293 2502 2383 2404 2405 2406 2270 2431 2394 2395 2398 2293
2286 2409 2147 1556 2286 2299 2319 2283 2141 2146 2155 2311 2424 2305 2374 2151 2069 2122 1527 2273 2140 2310 2151 2150 2293 2287 2271 2389 2390 2482 2441 2397 2294 2014 2016 2039 2111 2117 2131 2162 2166 2167 2176 2485 23382301 2340 2419 2423 2288 2507 2000 2006 2027 2034 2037 2043 2060 2108 2125 2142 2146 21552158 2307 2316 2428 2429 2430 2299 2466 2500 2501 2418 22772505 2452 1554 2369 2007 2008 2011 2035 2057 2138 2172 2487 2486 2305 2426 23742417 2425 2470 2407 2399 2319 2273 2293 2293 2381 2310 2383 2268 2273 2277 2278 2279 2280 2282 22892295 2308 2348 2349 2350 2351 2352 2353 2354 2355 2356 23572375 2347 2409 2457 2458 2459 2455 2454 2456
Codelist_SFB 10.1 B2 - IAN-75092.indd 19 03.05.2012 11:24:36
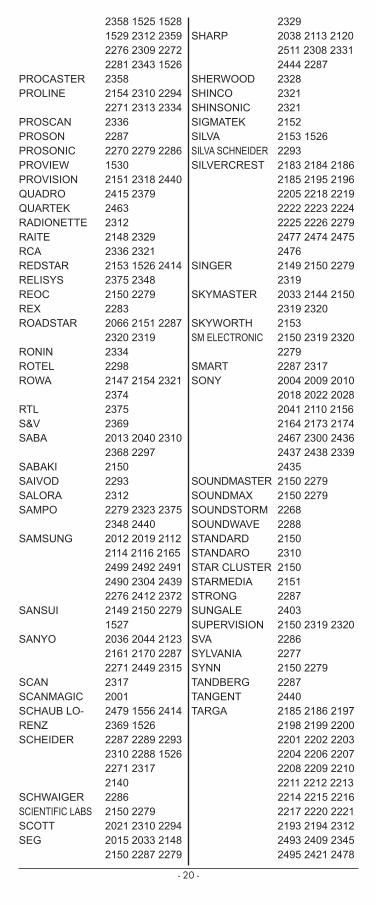
- 20 -
PROCASTERPROLINE
PROSCANPROSONPROSONICPROVIEWPROVISIONQUADROQUARTEKRADIONETTERAITERCAREDSTARRELISYSREOCREXROADSTAR
RONINROTELROWA
RTLS&VSABA
SABAKISAIVODSALORASAMPO
SAMSUNG
SANSUI
SANYO
SCANSCANMAGICSCHAUB LO-RENZSCHEIDER
SCHWAIGERSCIENTIFIC LABSSCOTTSEG
SHARP
SHERWOODSHINCOSHINSONICSIGMATEKSILVASILVA SCHNEIDERSILVERCREST
SINGER
SKYMASTER
SKYWORTHSM ELECTRONIC
SMARTSONY
SOUNDMASTERSOUNDMAXSOUNDSTORMSOUNDWAVESTANDARDSTANDAROSTAR CLUSTERSTARMEDIASTRONGSUNGALESUPERVISIONSVASYLVANIASYNNTANDBERGTANGENTTARGA
2358 1525 15281529 2312 2359 2276 2309 2272 2281 2343 1526 2358 2154 2310 2294 2271 2313 2334 2336 2287 2270 2279 2286 1530 2151 2318 2440 2415 2379 2463 2312 2148 2329 2336 2321 2153 1526 2414 2375 2348 2150 2279 2283 2066 2151 2287 2320 2319 2334 2298 2147 2154 2321 2374 2375 2369 2013 2040 2310 2368 2297 2150 2293 2312 2279 2323 2375 2348 2440 2012 2019 2112 2114 2116 2165 2499 2492 2491 2490 2304 24392276 2412 2372 2149 2150 2279 1527 2036 2044 2123 2161 2170 2287 2271 2449 2315 2317 2001 2479 1556 2414 2369 1526 2287 2289 2293 2310 2288 1526 2271 2317 2140 2286 2150 2279 2021 2310 2294 2015 2033 2148 2150 2287 2279
2329 2038 2113 2120 2511 2308 2331 2444 2287 2328 2321 2321 2152 2153 1526 2293 2183 2184 2186 2185 2195 2196 2205 2218 2219 2222 2223 22242225 2226 2279 2477 2474 2475 2476 2149 2150 2279 2319 2033 2144 2150 2319 2320 2153 2150 2319 2320 2279 2287 2317 2004 2009 2010 2018 2022 2028 2041 2110 2156 2164 2173 21742467 2300 2436 2437 2438 2339 2435 2150 2279 2150 2279 2268 2288 2150 2310 2150 2151 2287 2403 2150 2319 2320 2286 2277 2150 2279 2287 2440 2185 2186 2197 2198 2199 2200 2201 2202 2203 2204 2206 22072208 2209 2210 2211 2212 2213 2214 2215 2216 2217 2220 22212193 2194 2312 2493 2409 2345 2495 2421 2478
Codelist_SFB 10.1 B2 - IAN-75092.indd 20 03.05.2012 11:24:36
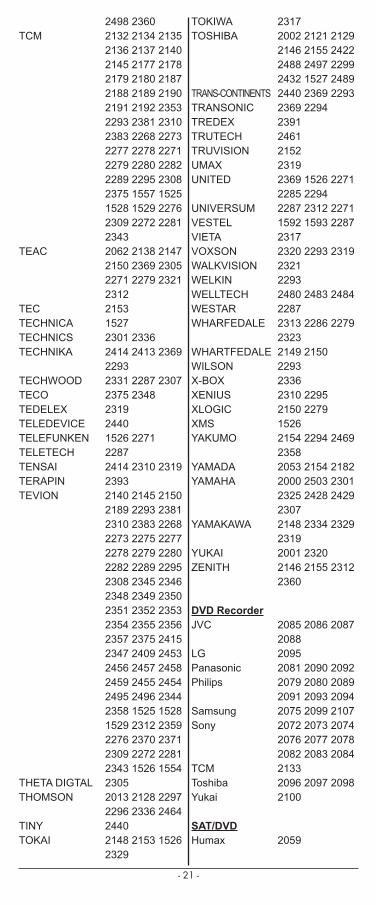
- 21 -
TCM
TEAC
TECTECHNICATECHNICSTECHNIKA
TECHWOODTECOTEDELEXTELEDEVICETELEFUNKENTELETECHTENSAITERAPINTEVION
THETA DIGTALTHOMSON
TINYTOKAI
TOKIWATOSHIBA
TRANS-CONTINENTSTRANSONICTREDEXTRUTECHTRUVISIONUMAXUNITED
UNIVERSUMVESTELVIETAVOXSONWALKVISIONWELKINWELLTECHWESTARWHARFEDALE
WHARTFEDALEWILSONX-BOXXENIUSXLOGICXMSYAKUMO
YAMADAYAMAHA
YAMAKAWA
YUKAIZENITH
DVD RecorderJVC
LGPanasonicPhilips
SamsungSony
TCMToshibaYukai
SAT/DVDHumax
2498 2360 2132 2134 2135 2136 2137 2140 2145 2177 2178 2179 2180 21872188 2189 2190 2191 2192 2353 2293 2381 2310 2383 2268 22732277 2278 2271 2279 2280 2282 2289 2295 2308 2375 1557 15251528 1529 2276 2309 2272 2281 2343 2062 2138 2147 2150 2369 2305 2271 2279 2321 2312 2153 1527 2301 2336 2414 2413 2369 2293 2331 2287 2307 2375 2348 2319 2440 1526 2271 2287 2414 2310 2319 2393 2140 2145 2150 2189 2293 2381 2310 2383 2268 2273 2275 22772278 2279 2280 2282 2289 2295 2308 2345 2346 2348 2349 23502351 2352 2353 2354 2355 2356 2357 2375 2415 2347 2409 24532456 2457 2458 2459 2455 2454 2495 2496 2344 2358 1525 15281529 2312 2359 2276 2370 2371 2309 2272 2281 2343 1526 15542305 2013 2128 2297 2296 2336 2464 2440 2148 2153 1526 2329
2317 2002 2121 2129 2146 2155 2422 2488 2497 2299 2432 1527 24892440 2369 2293 2369 2294 2391 2461 2152 2319 2369 1526 2271 2285 2294 2287 2312 2271 1592 1593 2287 2317 2320 2293 2319 2321 2293 2480 2483 2484 2287 2313 2286 2279 2323 2149 2150 2293 2336 2310 2295 2150 2279 1526 2154 2294 2469 2358 2053 2154 2182 2000 2503 2301 2325 2428 2429 2307 2148 2334 2329 2319 2001 2320 2146 2155 2312 2360
2085 2086 2087 2088 2095 2081 2090 2092 2079 2080 2089 2091 2093 2094 2075 2099 2107 2072 2073 2074 2076 2077 2078 2082 2083 20842133 2096 2097 2098 2100
2059
Codelist_SFB 10.1 B2 - IAN-75092.indd 21 03.05.2012 11:24:36
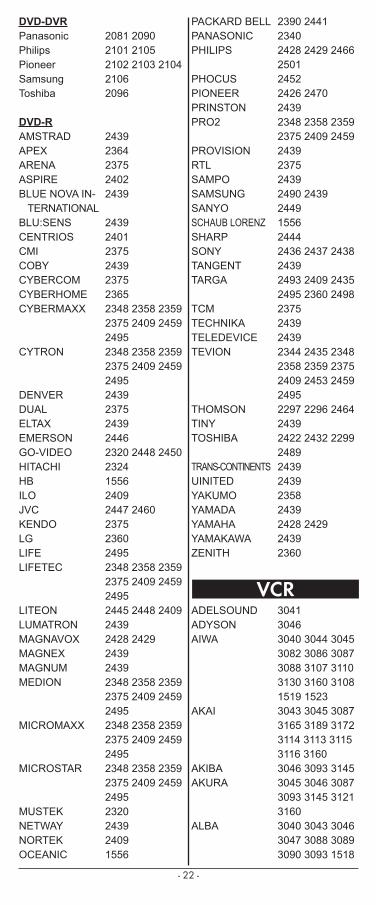
- 22 -
DVD-DVRPanasonicPhilipsPioneerSamsungToshiba
DVD-RAMSTRADAPEXARENAASPIREBLUE NOVA IN- TERNATIONALBLU:SENSCENTRIOSCMICOBYCYBERCOMCYBERHOMECYBERMAXX
CYTRON
DENVERDUALELTAXEMERSONGO-VIDEOHITACHIHBILOJVCKENDOLGLIFELIFETEC
LITEONLUMATRONMAGNAVOXMAGNEXMAGNUMMEDION
MICROMAXX
MICROSTAR
MUSTEKNETWAYNORTEKOCEANIC
PACKARD BELLPANASONICPHILIPS
PHOCUSPIONEERPRINSTONPRO2
PROVISIONRTLSAMPOSAMSUNGSANYOSCHAUB LORENZSHARPSONYTANGENTTARGA
TCMTECHNIKATELEDEVICETEVION
THOMSONTINYTOSHIBA
TRANS-CONTINENTSUINITEDYAKUMOYAMADAYAMAHAYAMAKAWAZENITH
ADELSOUNDADYSONAIWA
AKAI
AKIBAAKURA
ALBA
2081 20902101 21052102 2103 210421062096
2439 2364 2375 2402 2439
2439 2401 2375 2439 2375 2365 2348 2358 2359 2375 2409 2459 2495 2348 2358 2359 2375 2409 2459 2495 2439 2375 2439 2446 2320 2448 2450 2324 1556 2409 2447 2460 2375 2360 2495 2348 2358 2359 2375 2409 2459 2495 2445 2448 2409 2439 2428 2429 2439 2439 2348 2358 2359 2375 2409 2459 2495 2348 2358 2359 2375 2409 2459 2495 2348 2358 2359 2375 2409 2459 2495 2320 2439 2409 1556
2390 2441 2340 2428 2429 2466 2501 2452 2426 2470 2439 2348 2358 2359 2375 2409 2459 2439 2375 2439 2490 2439 2449 1556 2444 2436 2437 2438 2439 2493 2409 2435 2495 2360 2498 2375 2439 2439 2344 2435 2348 2358 2359 2375 2409 2453 2459 24952297 2296 2464 2439 2422 2432 2299 2489 2439 2439 2358 2439 2428 2429 2439 2360
3041 3046 3040 3044 3045 3082 3086 3087 3088 3107 3110 3130 3160 31081519 1523 3043 3045 3087 3165 3189 3172 3114 3113 3115 3116 3160 3046 3093 3145 3045 3046 3087 3093 3145 3121 3160 3040 3043 3046 3047 3088 3089 3090 3093 1518
Codelist_SFB 10.1 B2 - IAN-75092.indd 22 03.05.2012 11:24:37
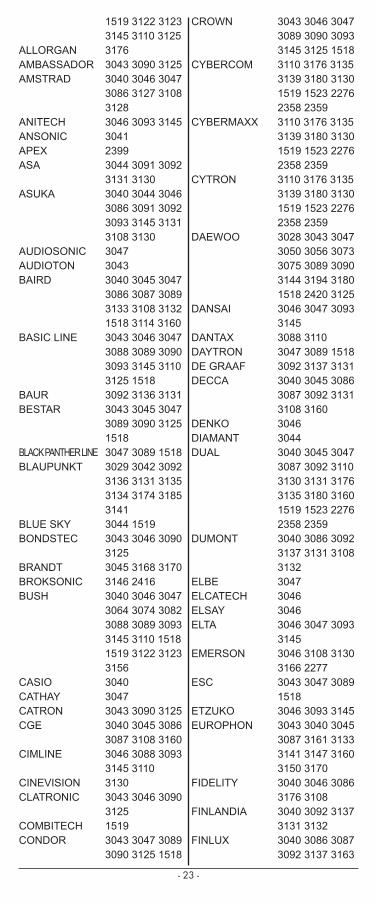
- 23 -
ALLORGANAMBASSADORAMSTRAD
ANITECHANSONICAPEXASA
ASUKA
AUDIOSONICAUDIOTONBAIRD
BASIC LINE
BAURBESTAR
BLACK PANTHER LINEBLAUPUNKT
BLUE SKYBONDSTEC
BRANDTBROKSONICBUSH
CASIOCATHAYCATRONCGE
CIMLINE
CINEVISIONCLATRONIC
COMBITECHCONDOR
CROWN
CYBERCOM
CYBERMAXX
CYTRON
DAEWOO
DANSAI
DANTAXDAYTRONDE GRAAFDECCA
DENKODIAMANTDUAL
DUMONT
ELBEELCATECHELSAYELTA
EMERSON
ESC
ETZUKOEUROPHON
FIDELITY
FINLANDIA
FINLUX
1519 3122 31233145 3110 3125 3176 3043 3090 3125 3040 3046 3047 3086 3127 3108 3128 3046 3093 3145 3041 2399 3044 3091 3092 3131 3130 3040 3044 3046 3086 3091 3092 3093 3145 3131 3108 3130 3047 3043 3040 3045 3047 3086 3087 3089 3133 3108 3132 1518 3114 31603043 3046 3047 3088 3089 3090 3093 3145 3110 3125 1518 3092 3136 3131 3043 3045 3047 3089 3090 3125 1518 3047 3089 1518 3029 3042 3092 3136 3131 3135 3134 3174 3185 3141 3044 1519 3043 3046 3090 3125 3045 3168 3170 3146 2416 3040 3046 3047 3064 3074 3082 3088 3089 3093 3145 3110 15181519 3122 3123 3156 3040 3047 3043 3090 3125 3040 3045 3086 3087 3108 3160 3046 3088 3093 3145 3110 3130 3043 3046 3090 3125 1519 3043 3047 3089 3090 3125 1518
3043 3046 3047 3089 3090 3093 3145 3125 1518 3110 3176 3135 3139 3180 3130 1519 1523 2276 2358 2359 3110 3176 3135 3139 3180 3130 1519 1523 2276 2358 2359 3110 3176 3135 3139 3180 3130 1519 1523 2276 2358 2359 3028 3043 3047 3050 3056 3073 3075 3089 3090 3144 3194 31801518 2420 3125 3046 3047 3093 3145 3088 3110 3047 3089 1518 3092 3137 3131 3040 3045 3086 3087 3092 3131 3108 3160 3046 3044 3040 3045 3047 3087 3092 3110 3130 3131 3176 3135 3180 31601519 1523 2276 2358 2359 3040 3086 3092 3137 3131 3108 3132 3047 3046 3046 3046 3047 3093 3145 3046 3108 3130 3166 2277 3043 3047 3089 1518 3046 3093 3145 3043 3040 3045 3087 3161 3133 3141 3147 3160 3150 3170 3040 3046 3086 3176 3108 3040 3092 3137 3131 3132 3040 3086 3087 3092 3137 3163
Codelist_SFB 10.1 B2 - IAN-75092.indd 23 03.05.2012 11:24:37
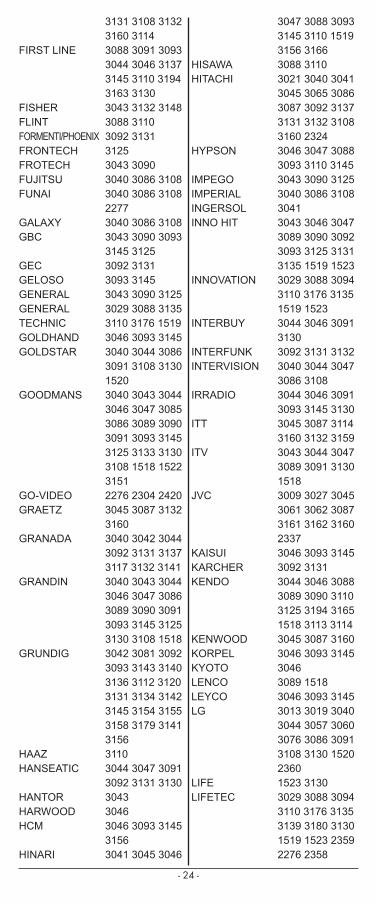
- 24 -
FIRST LINE
FISHERFLINTFORMENTI/PHOENIXFRONTECHFROTECHFUJITSUFUNAI
GALAXYGBC
GECGELOSOGENERALGENERAL TECHNICGOLDHANDGOLDSTAR
GOODMANS
GO-VIDEOGRAETZ
GRANADA
GRANDIN
GRUNDIG
HAAZHANSEATIC
HANTORHARWOODHCM
HINARI
HISAWAHITACHI
HYPSON
IMPEGOIMPERIALINGERSOLINNO HIT
INNOVATION
INTERBUY
INTERFUNKINTERVISION
IRRADIO
ITT
ITV
JVC
KAISUIKARCHERKENDO
KENWOODKORPELKYOTOLENCOLEYCOLG
LIFELIFETEC
3131 3108 3132 3160 3114 3088 3091 3093 3044 3046 3137 3145 3110 3194 3163 3130 3043 3132 3148 3088 3110 3092 3131 3125 3043 3090 3040 3086 3108 3040 3086 3108 2277 3040 3086 3108 3043 3090 3093 3145 3125 3092 3131 3093 3145 3043 3090 3125 3029 3088 3135 3110 3176 1519 3046 3093 3145 3040 3044 3086 3091 3108 3130 1520 3040 3043 3044 3046 3047 3085 3086 3089 3090 3091 3093 31453125 3133 3130 3108 1518 1522 3151 2276 2304 2420 3045 3087 3132 3160 3040 3042 3044 3092 3131 3137 3117 3132 3141 3040 3043 3044 3046 3047 3086 3089 3090 3091 3093 3145 31253130 3108 1518 3042 3081 3092 3093 3143 3140 3136 3112 3120 3131 3134 31423145 3154 3155 3158 3179 3141 3156 3110 3044 3047 3091 3092 3131 3130 3043 3046 3046 3093 3145 3156 3041 3045 3046
3047 3088 3093 3145 3110 1519 3156 3166 3088 3110 3021 3040 3041 3045 3065 3086 3087 3092 3137 3131 3132 31083160 2324 3046 3047 3088 3093 3110 3145 3043 3090 3125 3040 3086 3108 3041 3043 3046 3047 3089 3090 3092 3093 3125 3131 3135 1519 15233029 3088 3094 3110 3176 3135 1519 1523 3044 3046 3091 3130 3092 3131 3132 3040 3044 3047 3086 3108 3044 3046 3091 3093 3145 3130 3045 3087 3114 3160 3132 3159 3043 3044 3047 3089 3091 3130 1518 3009 3027 3045 3061 3062 3087 3161 3162 3160 2337 3046 3093 3145 3092 3131 3044 3046 3088 3089 3090 3110 3125 3194 3165 1518 3113 31143045 3087 3160 3046 3093 3145 3046 3089 1518 3046 3093 3145 3013 3019 3040 3044 3057 3060 3076 3086 3091 3108 3130 15202360 1523 3130 3029 3088 3094 3110 3176 3135 3139 3180 3130 1519 1523 23592276 2358
Codelist_SFB 10.1 B2 - IAN-75092.indd 24 03.05.2012 11:24:37

- 25 -
LOEWE
LOEWE OPTA
LOGIK
LUMATRON
LUXOR
MAGNASONICMAGNAVOXMAGNUMMANESTH
MARANTZ
MARKMATSUI
MEDIATORMEDION
M-ELECTRONIC
MEMOREX
MEMPHISMETZ
MICROMAXX
MICROSTAR
MIGROSMINERVAMITSUBISHI
MULTITECH
MURPHYNATIONALNEC
3029 3138 3185 3135 3131 3130 3141 3041 3042 3044 3091 3092 3041 3046 3093 3145 3047 3089 3144 1518 3046 3163 3132 3114 3150 3132 2367 3153 3094 1523 3046 3093 3145 3194 3042 3092 3131 3141 3150 3164 3047 3040 3041 3044 3088 3091 3110 3130 1519 3166 3092 3131 3110 3176 3135 3139 3180 3130 1519 1523 2325 2358 2359 30943029 3088 3040 3044 3108 3086 3040 3044 3086 3091 3117 3130 3108 3132 3148 3046 3093 3145 3029 3042 3135 3136 3138 3143 3185 3141 3029 3088 3094 3110 3176 3135 3139 3180 3130 1519 1523 23252358 2359 3029 3088 3094 3110 3176 3135 3139 3180 3130 1519 1523 23252358 2359 3040 3086 3108 3136 3141 3086 3092 3163 3131 3157 3161 3108 3040 3043 3046 3086 3090 3092 3093 3145 3125 3131 3108 3040 3086 3108 3029 3135 3134 3045 3087 3161
NECKERMANN
NEINESCO
NIKKAI
NOKIA
NORDMENDE
OCEANIC
OKANO
ORION
ORSONOSAKI
OTTO VERSANDPALLADIUM
PANASONIC
PATHE CINEMAPATHE MARCONIPENTAXPERDIOPHILCOPHILIPS
PHONOLAPIONEER
3160 3164 3042 3045 3087 3092 3131 3160 3166 3092 3131 3040 3046 3093 3145 3043 3046 3047 3090 3125 3167 3045 3047 3087 3117 3165 3172 3132 3114 3159 3160 3045 3087 3161 3160 3168 3170 3040 3045 3086 3087 3117 3108 3160 3046 3047 3088 3110 3165 3041 3064 3085 3088 3111 3110 3169 1519 1522 3166 3122 3040 3086 3108 3040 3044 3046 3086 3091 3093 3145 3108 3130 3092 3131 3041 3042 3044 3045 3046 3087 3091 3093 3165 3130 3141 31603145 3002 3007 3010 3011 3016 3017 3025 3029 3033 3052 3059 30793135 3138 3134 3178 3182 3185 2360 3041 3166 3045 3087 3160 3137 3040 3086 3108 3046 3164 3006 3008 3014 3022 3024 3026 3030 3034 3035 3042 3049 30673068 3069 3070 3071 3072 3077 3078 3092 3112 3131 3158 31793187 3154 3153 3119 3141 3160 2418 3092 3131 3092 3161 3131
Codelist_SFB 10.1 B2 - IAN-75092.indd 25 03.05.2012 11:24:37
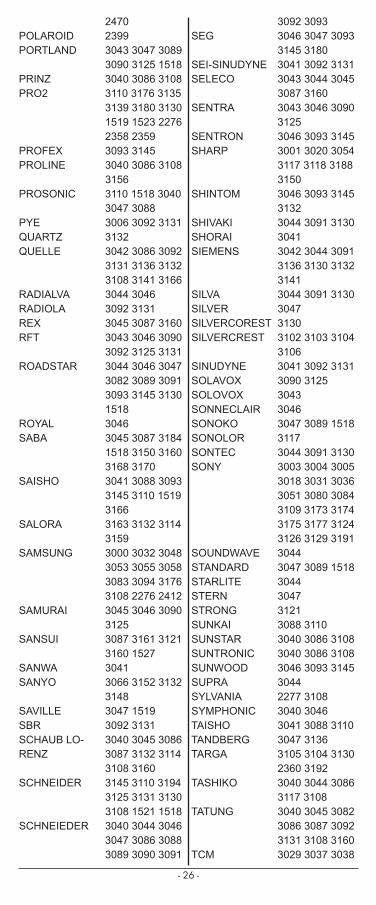
- 26 -
POLAROIDPORTLAND
PRINZPRO2
PROFEXPROLINE
PROSONIC
PYEQUARTZQUELLE
RADIALVARADIOLAREXRFT
ROADSTAR
ROYALSABA
SAISHO
SALORA
SAMSUNG
SAMURAI
SANSUI
SANWASANYO
SAVILLESBRSCHAUB LO-RENZ
SCHNEIDER
SCHNEIEDER
2470 2399 3043 3047 3089 3090 3125 1518 3040 3086 3108 3110 3176 3135 3139 3180 3130 1519 1523 2276 2358 2359 3093 3145 3040 3086 3108 3156 3110 1518 3040 3047 3088 3006 3092 3131 3132 3042 3086 3092 3131 3136 3132 3108 3141 3166 3044 3046 3092 3131 3045 3087 3160 3043 3046 3090 3092 3125 3131 3044 3046 3047 3082 3089 3091 3093 3145 3130 1518 3046 3045 3087 3184 1518 3150 3160 3168 3170 3041 3088 3093 3145 3110 1519 3166 3163 3132 3114 3159 3000 3032 3048 3053 3055 3058 3083 3094 3176 3108 2276 24123045 3046 3090 3125 3087 3161 3121 3160 1527 3041 3066 3152 3132 3148 3047 1519 3092 3131 3040 3045 3086 3087 3132 3114 3108 3160 3145 3110 3194 3125 3131 3130 3108 1521 1518 3040 3044 3046 3047 3086 3088 3089 3090 3091
SEG
SEI-SINUDYNESELECO
SENTRA
SENTRONSHARP
SHINTOM
SHIVAKISHORAISIEMENS
SILVASILVERSILVERCORESTSILVERCREST
SINUDYNESOLAVOXSOLOVOXSONNECLAIRSONOKOSONOLORSONTECSONY
SOUNDWAVESTANDARDSTARLITESTERNSTRONGSUNKAISUNSTARSUNTRONICSUNWOODSUPRASYLVANIASYMPHONICTAISHOTANDBERGTARGA
TASHIKO
TATUNG
TCM
3092 3093 3046 3047 3093 3145 3180 3041 3092 3131 3043 3044 3045 3087 3160 3043 3046 3090 3125 3046 3093 3145 3001 3020 3054 3117 3118 3188 3150 3046 3093 3145 3132 3044 3091 3130 3041 3042 3044 3091 3136 3130 3132 3141 3044 3091 3130 3047 3130 3102 3103 3104 3106 3041 3092 3131 3090 3125 3043 3046 3047 3089 1518 3117 3044 3091 3130 3003 3004 3005 3018 3031 3036 3051 3080 3084 3109 3173 31743175 3177 3124 3126 3129 3191 3044 3047 3089 1518 3044 3047 3121 3088 3110 3040 3086 3108 3040 3086 3108 3046 3093 3145 3044 2277 3108 3040 3046 3041 3088 3110 3047 3136 3105 3104 3130 2360 3192 3040 3044 3086 3117 3108 3040 3045 3082 3086 3087 3092 3131 3108 3160 3029 3037 3038
Codelist_SFB 10.1 B2 - IAN-75092.indd 26 03.05.2012 11:24:37
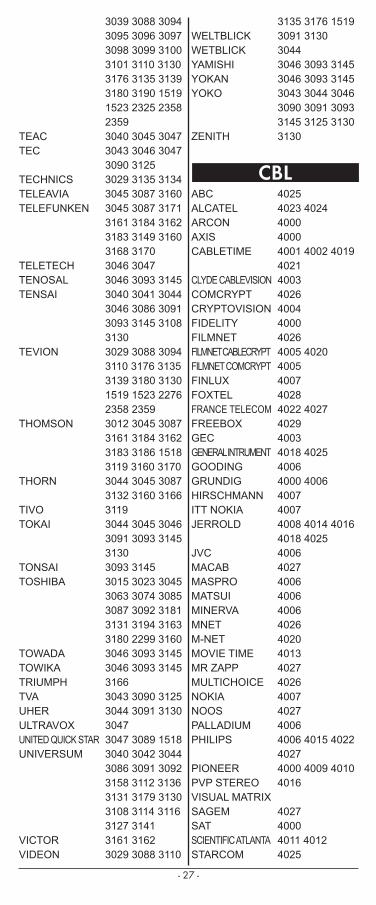
- 27 -
TEACTEC
TECHNICSTELEAVIATELEFUNKEN
TELETECHTENOSALTENSAI
TEVION
THOMSON
THORN
TIVOTOKAI
TONSAITOSHIBA
TOWADATOWIKATRIUMPHTVAUHERULTRAVOXUNITED QUICK STARUNIVERSUM
VICTORVIDEON
3039 3088 3094 3095 3096 3097 3098 3099 31003101 3110 3130 3176 3135 3139 3180 3190 1519 1523 2325 23582359 3040 3045 3047 3043 3046 3047 3090 3125 3029 3135 3134 3045 3087 3160 3045 3087 3171 3161 3184 3162 3183 3149 3160 3168 3170 3046 3047 3046 3093 3145 3040 3041 3044 3046 3086 3091 3093 3145 3108 3130 3029 3088 3094 3110 3176 3135 3139 3180 3130 1519 1523 22762358 2359 3012 3045 3087 3161 3184 3162 3183 3186 1518 3119 3160 31703044 3045 3087 3132 3160 3166 3119 3044 3045 3046 3091 3093 3145 3130 3093 3145 3015 3023 3045 3063 3074 3085 3087 3092 3181 3131 3194 31633180 2299 3160 3046 3093 3145 3046 3093 3145 3166 3043 3090 3125 3044 3091 3130 3047 3047 3089 1518 3040 3042 3044 3086 3091 3092 3158 3112 3136 3131 3179 31303108 3114 3116 3127 3141 3161 3162 3029 3088 3110
WELTBLICKWETBLICKYAMISHIYOKANYOKO
ZENITH
ABCALCATELARCONAXISCABLETIME
CLYDE CABLEVISIONCOMCRYPTCRYPTOVISIONFIDELITYFILMNETFILMNET CABLECRYPTFILMNET COMCRYPTFINLUXFOXTELFRANCE TELECOMFREEBOXGECGENERAL INTRUMENTGOODINGGRUNDIGHIRSCHMANNITT NOKIAJERROLD
JVCMACABMASPROMATSUIMINERVAMNETM-NETMOVIE TIMEMR ZAPPMULTICHOICENOKIANOOSPALLADIUMPHILIPS
PIONEERPVP STEREO VISUAL MATRIXSAGEMSATSCIENTIFIC ATLANTASTARCOM
3135 3176 1519 3091 3130 3044 3046 3093 3145 3046 3093 3145 3043 3044 3046 3090 3091 3093 3145 3125 3130 3130
4025 4023 4024 4000 4000 4001 4002 4019 4021 4003 4026 4004 4000 4026 4005 4020 4005 4007 4028 4022 4027 4029 4003 4018 4025 4006 4000 4006 4007 4007 4008 4014 4016 4018 40254006 4027 4006 4006 4006 4026 4020 4013 4027 4026 4007 4027 4006 4006 4015 4022 4027 4000 4009 4010 4016
4027 4000 4011 4012 4025
Codelist_SFB 10.1 B2 - IAN-75092.indd 27 03.05.2012 11:24:37
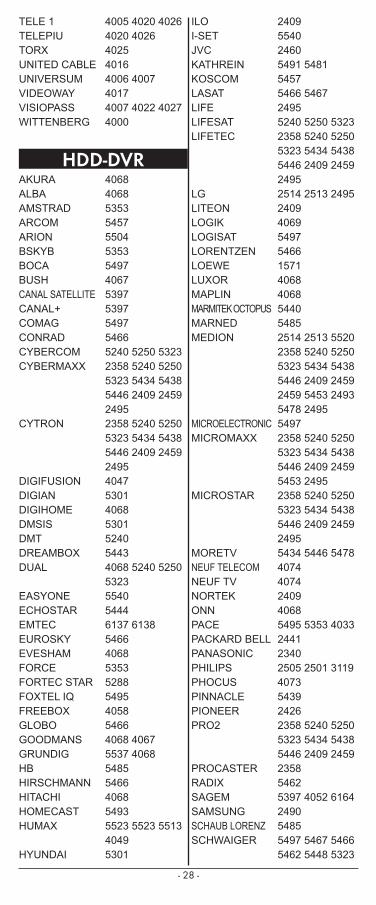
- 28 -
TELE 1TELEPIUTORXUNITED CABLEUNIVERSUMVIDEOWAYVISIOPASSWITTENBERG
HDD-DVRAKURAALBAAMSTRADARCOMARIONBSKYBBOCABUSHCANAL SATELLITECANAL+COMAGCONRADCYBERCOMCYBERMAXX
CYTRON
DIGIFUSIONDIGIANDIGIHOMEDMSISDMTDREAMBOXDUAL
EASYONEECHOSTAREMTECEUROSKYEVESHAMFORCEFORTEC STARFOXTEL IQFREEBOXGLOBOGOODMANSGRUNDIGHBHIRSCHMANNHITACHIHOMECASTHUMAX
HYUNDAI
4005 4020 4026 4020 4026 4025 4016 4006 4007 4017 4007 4022 4027 4000
4068 4068 5353 5457 5504 5353 5497 4067 5397 5397 5497 5466 5240 5250 5323 2358 5240 5250 5323 5434 5438 5446 2409 2459 2495 2358 5240 5250 5323 5434 5438 5446 2409 2459 2495 4047 5301 4068 5301 5240 5443 4068 5240 5250 5323 5540 5444 6137 6138 5466 4068 5353 5288 5495 4058 5466 4068 4067 5537 4068 5485 5466 4068 5493 5523 5523 5513 4049 5301
ILOI-SETJVCKATHREINKOSCOMLASATLIFELIFESATLIFETEC
LGLITEONLOGIKLOGISATLORENTZENLOEWELUXORMAPLINMARMITEK OCTOPUSMARNEDMEDION
MICROELECTRONICMICROMAXX
MICROSTAR
MORETVNEUF TELECOMNEUF TVNORTEKONNPACEPACKARD BELLPANASONICPHILIPSPHOCUSPINNACLEPIONEERPRO2
PROCASTERRADIXSAGEMSAMSUNGSCHAUB LORENZSCHWAIGER
2409 5540 2460 5491 5481 5457 5466 5467 2495 5240 5250 5323 2358 5240 5250 5323 5434 5438 5446 2409 2459 2495 2514 2513 2495 2409 4069 5497 5466 1571 4068 4068 5440 5485 2514 2513 5520 2358 5240 5250 5323 5434 5438 5446 2409 24592459 5453 2493 5478 2495 5497 2358 5240 5250 5323 5434 5438 5446 2409 2459 5453 2495 2358 5240 5250 5323 5434 5438 5446 2409 2459 2495 5434 5446 5478 4074 4074 2409 4068 5495 5353 4033 2441 2340 2505 2501 3119 4073 5439 2426 2358 5240 5250 5323 5434 5438 5446 2409 2459 2358 5462 5397 4052 6164 2490 5485 5497 5467 5466 5462 5448 5323
Codelist_SFB 10.1 B2 - IAN-75092.indd 28 03.05.2012 11:24:37

- 29 -
SETONESHARPSIEMENSSKARDINSKYSKY DIGITALSKY+SKYMASTER
SKYPEXSKYVISIONSMARTSM ELECTRONIC
SONYTARGATCMTECHNIKATECHNOTRENDTECHWOODTELEFONICATELEFUNKENTEVION
THOMSON
TITANTIVOTONBURYTOPFIELDTOSHIBATVONICSUNIVERSUMVESTELWHARFEDALEWYSIYAKUMO
DVBACOUSTIC SOLUTIONSADECQAKURAALBAARCOMBOSTONBRAIN WAVEBUBH
CANAL+CGVCROWN
5240 5540 4068 5467 5469 5461 5353 5353 4072 5536 1355 5530 5527 5472 5469 5468 5317 5240 5466 5497 5509 5508 4072 5536 1355 5530 5527 5472 5469 5468 5317 5240 2436 2437 2438 2493 2495 5480 5240 5250 5323 4068 5496 4068 6148 5538 2344 2358 5240 5250 5323 5434 5438 5446 2409 2453 2459 24954042 3119 3186 5466 2464 5540 3119 5468 5484 5482 5317 2432 2489 4069 5466 4068 4068 5466 2358
4032 4064 4068 4068 4032 2343 4066 4061 5475 4035 4067 5475 4047 4032 1345 4057 4062 4032
CYBERMAXXCYTRONDENVERDIGENIUSDIGIFUSIONDIGIHOMEDIGILOGICDIGIO2DIGIPALDIGITABOXDMTDUALDURABRANDECHOSTAREMTECHEVESHAMFREEBOXFREEVIEW
GBSATGERICOMGOODMANS
GOODWAYGRUNDIG
HAUPPAUGEHB
HITACHIHOMECASTHUMAXINTERSTARINVIONJEPSSENJVCKATHREINKENDOLABGEARLASATLIDCOMLIFETECLODOSLOGIKLUXORM&SMARKS & SPENCERMAPLINMARMITEK OCTOPUSMATSUIMAXIMUMMEDIONMICOMICROELECTRONICSMICROMAXX
4045 5436 4045 5436 4062 4045 4047 4068 4032 4053 4063 1313 5240 4068 4040 4032 5442 4035 4068 4058 4031 4032 4033 4034 4036 4037 4038 4039 4040 4042 4043 4046 4047 5435 4048 4049 4035 4030 4068 4067 4040 4032 4054 4055 4068 5475 5474 4037 4032 4036 1540 4060 4062 4035 4068 4040 4032 4035 4049 4035 4061 4035 4040 5481 4062 4038 5466 4032 4045 5436 4032 4069 4032 4068 4040 4040 4068 5440 4048 4040 4032 4061 4045 5436 4050 4065 5454 5449 4045 5436
Codelist_SFB 10.1 B2 - IAN-75092.indd 29 03.05.2012 11:24:37

- 30 -
MICROSTARNOKIANOOSOCEANICOGGLEON-DIGITALONNOPTEXOPTICUMORBITECHPACEPACIFICPANASONICPHILIPSPIONEERPREMIEREPRO BASICPROLINEPRO2REBOXSAGEMSCHAUB LORENZ
SCHWAIGER
SEGSHARPSKARDINSKYMASTER
SMART
SM ELECTRONIC
SONYTCMTECHNIKATECHNISATTECHNOSONICTECHNOTRENDTECHWOODTELESTARTELE SYSTEMTELEVESTEVIONTHOMSONTOPFIELDTOP-UP TVTVONICSVESTELVIVAXVISTRONWHARFEDALEWORLDSATYUNG FU
4045 5436 4039 4041 4059 1540 4051 5330 4041 4044 4068 4032 5441 4061 4063 4033 5330 4040 1383 2340 4043 4034 4044 4043 4039 4062 4032 4045 5436 5285 5435 4052 1540 4060 4061 4062 4035 5466 4070 5475 5425 4040 4068 1372 5441 4072 4071 1285 4056 5472 4055 4054 5454 5441 5240 5510 4075 4066 5472 5449 4072 4071 1285 4056 5472 4055 4054 5454 5441 5240 4031 1575 1546 1557 4068 4063 5475 5475 4068 4032 4063 4054 5441 4035 5475 5436 4045 5254 4042 5483 5317 5330 4041 5442 4069 4068 4061 4062 4068 4032 4035 4056
DTV Setup BoxPanasonic
SatelliteAB SAT
ADECQAGSAKAIALBA
ALDES
ALLSAT
ALLSONIC
ALLTECHALPHAALTAIAMITRONICAAMPERE
AMSTRAD
ANGLOANKARO
ANTTRON
APOLLOARCOMARCON
ARENAARIONARMSTRONGARNIONASAASATASCIASLF
5001
5161 5189 5190 5199 5539 5189 5093 5122 5351 5051 5052 5053 5054 5081 5095 5131 5144 5190 5319 5360 55415235 5053 5054 5055 5126 5131 5236 5237 5056 5075 5093 5112 5121 5122 5280 5238 5351 5054 5060 5126 5182 5236 5255 5147 5190 5122 5133 5190 5058 5133 5177 5249 5057 5094 5010 5125 5129 5133 5149 5151 5155 5162 5177 51835190 5194 5195 5382 5353 5341 5243 5244 5245 5247 5190 5054 5060 5123 5126 5182 5190 5236 5255 5251 5051 5054 5121 5144 5541 5235 5051 5541 5476 5472 5251 5281 5464 5058 5059 5076 5153 5177 5243 5249 5465 54575463 5492 5504 5057 5122 5247 5460 5134 5093 5122 5351 5452 5190
Codelist_SFB 10.1 B2 - IAN-75092.indd 30 03.05.2012 11:24:37
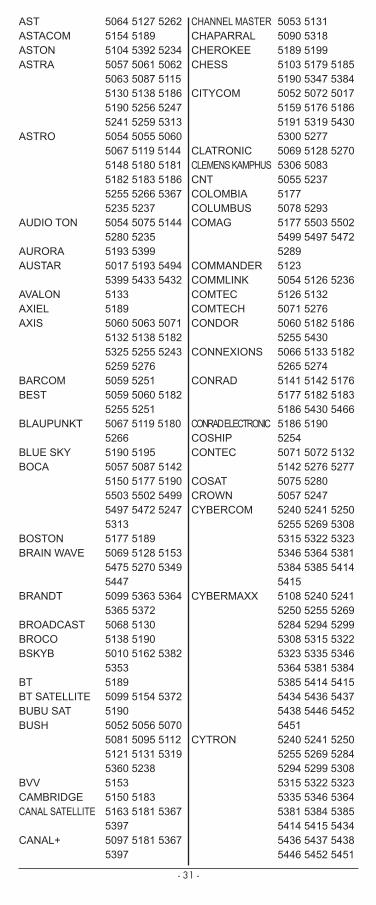
- 31 -
ASTASTACOMASTONASTRA
ASTRO
AUDIO TON
AURORAAUSTAR
AVALONAXIELAXIS
BARCOMBEST
BLAUPUNKT
BLUE SKYBOCA
BOSTONBRAIN WAVE
BRANDT
BROADCASTBROCOBSKYB
BTBT SATELLITEBUBU SATBUSH
BVVCAMBRIDGECANAL SATELLITE
CANAL+
5064 5127 5262 5154 5189 5104 5392 5234 5057 5061 5062 5063 5087 5115 5130 5138 5186 5190 5256 52475241 5259 5313 5054 5055 5060 5067 5119 5144 5148 5180 5181 5182 5183 51865255 5266 5367 5235 5237 5054 5075 5144 5280 5235 5193 5399 5017 5193 5494 5399 5433 5432 5133 5189 5060 5063 5071 5132 5138 5182 5325 5255 5243 5259 5276 5059 5251 5059 5060 5182 5255 5251 5067 5119 5180 5266 5190 5195 5057 5087 5142 5150 5177 5190 5503 5502 5499 5497 5472 52475313 5177 5189 5069 5128 5153 5475 5270 5349 5447 5099 5363 5364 5365 5372 5068 5130 5138 5190 5010 5162 5382 5353 5189 5099 5154 5372 5190 5052 5056 5070 5081 5095 5112 5121 5131 5319 5360 5238 5153 5150 5183 5163 5181 5367 5397 5097 5181 5367 5397
CHANNEL MASTERCHAPARRALCHEROKEECHESS
CITYCOM
CLATRONICCLEMENS KAMPHUSCNTCOLOMBIACOLUMBUSCOMAG
COMMANDERCOMMLINKCOMTECCOMTECHCONDOR
CONNEXIONS
CONRAD
CONRAD ELECTRONICCOSHIPCONTEC
COSATCROWNCYBERCOM
CYBERMAXX
CYTRON
5053 5131 5090 5318 5189 5199 5103 5179 5185 5190 5347 5384 5052 5072 5017 5159 5176 5186 5191 5319 5430 5300 5277 5069 5128 5270 5306 5083 5055 5237 5177 5078 5293 5177 5503 5502 5499 5497 5472 5289 5123 5054 5126 5236 5126 5132 5071 5276 5060 5182 5186 5255 5430 5066 5133 5182 5265 5274 5141 5142 5176 5177 5182 5183 5186 5430 5466 5186 5190 5254 5071 5072 5132 5142 5276 5277 5075 5280 5057 5247 5240 5241 5250 5255 5269 5308 5315 5322 5323 5346 5364 53815384 5385 5414 5415 5108 5240 5241 5250 5255 5269 5284 5294 5299 5308 5315 53225323 5335 5346 5364 5381 5384 5385 5414 5415 5434 5436 54375438 5446 5452 5451 5240 5241 5250 5255 5269 5284 5294 5299 5308 5315 5322 53235335 5346 5364 5381 5384 5385 5414 5415 5434 5436 5437 54385446 5452 5451
Codelist_SFB 10.1 B2 - IAN-75092.indd 31 03.05.2012 11:24:38
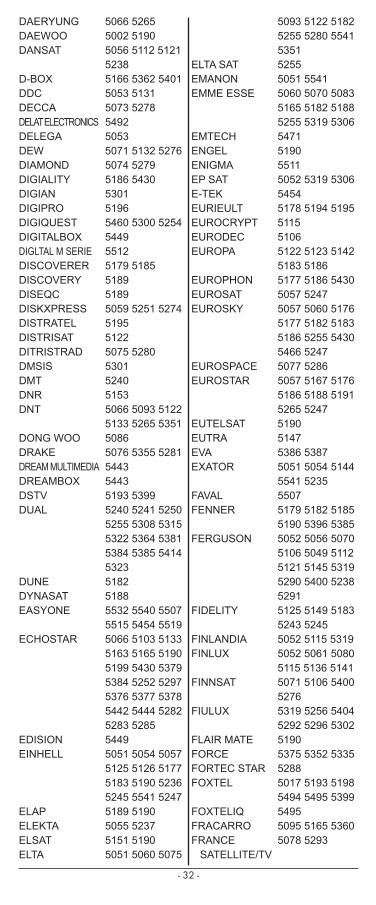
- 32 -
DAERYUNGDAEWOODANSAT
D-BOXDDCDECCADELAT ELECTRONICSDELEGADEWDIAMONDDIGIALITYDIGIANDIGIPRODIGIQUESTDIGITALBOXDIGLTAL M SERIEDISCOVERERDISCOVERYDISEQCDISKXPRESSDISTRATELDISTRISATDITRISTRADDMSISDMTDNRDNT
DONG WOODRAKEDREAM MULTIMEDIADREAMBOXDSTVDUAL
DUNEDYNASATEASYONE
ECHOSTAR
EDISIONEINHELL
ELAPELEKTAELSATELTA
5066 5265 5002 5190 5056 5112 5121 5238 5166 5362 5401 5053 5131 5073 5278 5492 5053 5071 5132 5276 5074 5279 5186 5430 5301 5196 5460 5300 5254 5449 5512 5179 5185 5189 5189 5059 5251 5274 5195 5122 5075 5280 5301 5240 5153 5066 5093 5122 5133 5265 5351 5086 5076 5355 5281 5443 5443 5193 5399 5240 5241 5250 5255 5308 5315 5322 5364 5381 5384 5385 54145323 5182 5188 5532 5540 5507 5515 5454 5519 5066 5103 5133 5163 5165 5190 5199 5430 5379 5384 5252 52975376 5377 5378 5442 5444 5282 5283 5285 5449 5051 5054 5057 5125 5126 5177 5183 5190 5236 5245 5541 52475189 5190 5055 5237 5151 5190 5051 5060 5075
ELTA SATEMANONEMME ESSE
EMTECHENGELENIGMAEP SATE-TEKEURIEULTEUROCRYPTEURODECEUROPA
EUROPHONEUROSATEUROSKY
EUROSPACEEUROSTAR
EUTELSATEUTRAEVAEXATOR
FAVALFENNER
FERGUSON
FIDELITY
FINLANDIAFINLUX
FINNSAT
FIULUX
FLAIR MATEFORCEFORTEC STARFOXTEL
FOXTELIQFRACARROFRANCE SATELLITE/TV
5093 5122 5182 5255 5280 5541 5351 5255 5051 5541 5060 5070 5083 5165 5182 5188 5255 5319 5306 5471 5190 5511 5052 5319 5306 5454 5178 5194 5195 5115 5106 5122 5123 5142 5183 5186 5177 5186 5430 5057 5247 5057 5060 5176 5177 5182 5183 5186 5255 5430 5466 5247 5077 5286 5057 5167 5176 5186 5188 5191 5265 5247 5190 5147 5386 5387 5051 5054 5144 5541 5235 5507 5179 5182 5185 5190 5396 5385 5052 5056 5070 5106 5049 5112 5121 5145 5319 5290 5400 52385291 5125 5149 5183 5243 5245 5052 5115 5319 5052 5061 5080 5115 5136 5141 5071 5106 5400 5276 5319 5256 5404 5292 5296 5302 5190 5375 5352 5335 5288 5017 5193 5198 5494 5495 5399 5495 5095 5165 5360 5078 5293
Codelist_SFB 10.1 B2 - IAN-75092.indd 32 03.05.2012 11:24:38

- 33 -
FREECOM
FREESATFTE
FTEMAXIMALFUBA
FUGIONKYOFUNTACHGALAXYGALAXIGALAXIS
GALAXISATGARDINERGLOBECASTGLOBO
GMIGOLDBOXGOLDSTARGOODINGGOODMANSGRANADAGRANDINGRANVISIONGROTHUSEN
GRUNDIG
G-SATHANDANHANREATIC
5051 5082 5180 5183 5541 5304 5147 5194 5058 5084 5142 5150 5249 5310 5182 5190 5051 5059 5060 5062 5066 5067 5078 5080 5093 5115 5133 51765180 5182 5348 5266 5255 5265 5541 5251 5258 5293 5296 53515196 5385 5251 5059 5054 5060 5063 5071 5075 5081 5101 5017 5126 5132 5138 51645176 5182 5193 5325 5255 5236 5280 5294 5299 5300 5335 53805381 5399 5415 5259 5276 5127 5191 5455 5470 5466 5452 5447 5057 5247 5163 5181 5367 5082 5304 5184 5298 5052 5081 5319 5061 5115 5256 5113 5178 5501 5500 5051 5082 5541 5304 5052 5054 5067 5070 5094 5105 5010 5029 5031 5032 5034 50435118 5119 5129 5156 5158 5162 5180 5183 5184 5193 5195 55375534 5474 5447 5266 5263 5298 5309 5319 5344 5287 5399 53825235 5350 5121 5347 5473 5315 5089 5143
HANSEL & GRETELHANTOR
HANURIHASE & IGELHAUPPAUGEHB
HEADHELIOCOMHELIUMHINARIHIRSCHMANN
HISAWAHITACHI
HNEHOMECASTHOUSTIONHOUSTONHUMAX
HUTH
HYPSONHYUNDAIID DIGITALIMEXIMPERIAL
INGELENINNOVATION
INTERNATIONALINTERSTARINTERTRONICINTERVISION
5185 5177 5186 5051 5069 5086 5128 5270 5541 5055 5237 5153 5025 5044 5471 5241 5485 5486 5487 5516 5515 5514 5058 5186 5249 5186 5053 5121 5131 5067 5083 5030 5119 5133 5134 5135 5137 5141 5180 5182 51835186 5189 5194 5325 5266 5328 5347 5348 5466 5472 5476 53025303 5306 5356 5069 5128 5270 5052 5070 5319 5337 5177 5492 5493 5471 5123 5075 5280 5100 5009 5017 5024 5026 5229 5523 5522 5521 5513 5300 53265380 5054 5057 5068 5069 5071 5075 5083 5123 5126 5128 5130 51325142 5177 5186 5197 5236 5239 5270 5280 5247 5306 5178 5301 5017 5300 5178 5081 5095 5490 5489 5447 5360 5194 5060 5089 5101 5103 5108 5255 5308 5315 5322 5381 5384 53855414 5177 5196 5057 5247 5075 5146 5186 5280
Codelist_SFB 10.1 B2 - IAN-75092.indd 33 03.05.2012 11:24:38

- 34 -
IRDETOi-SET
ITT/NOKIA
JOHANSSONJOKJSRJVCKAMMKAONKATELCOKATHREIN
KATHREIN EUROSTARKEY WESTKLAPKONIGKOSCOMKOSMOS
KR
KREILING
KREISELMEYER
K-SATKYOSTAR
L&S ELECTRONICLASAT
LEMONLENCO
5399 5532 5540 5507 5515 5454 5519 5115 5134 5141 5166 5256 5319 5348 5345 5302 5337 5061 50705052 5069 5128 5270 5152 5154 5189 5075 5280 5184 5298 5190 5460 5325 5067 5072 5084 5090 5093 5003 5008 5012 5021 5022 5023 50265119 5122 5137 5144 5148 5159 5169 5176 5180 5189 5190 51915199 5491 5481 5447 5349 5413 5426 5403 5429 5266 5277 53105318 5351 5176 5177 5189 5186 5457 5082 5083 5084 5137 5304 5306 5310 5054 5144 5147 5235 5349 5426 5451 5498 5067 5119 5180 5266 5190 5051 5144 5177 5541 5177 5182 5055 5060 5085 5086 5087 5132 5150 5176 5177 5179 5182 51865255 5363 5364 5365 5425 5466 5467 5237 5313 5153 5051 5082 5088 5123 5138 5153 5176 5182 5186 5190 5541 53045314
LENGLENNOXLENSONLEXUSLGLIFELIFESAT
LIFETEC
LIONLOGISAT
LORENZEN
LORRAINELUPUSLUXOR
LYONNAISEM&BM&B1MACABMANATA
MANHATTAN
MARANTZMARMITEKMARMITEK OCTOPUSMARNEDMASCOMMASPRO
MATSUI
5069 5270 5075 5280 5079 5183 5295 5122 5082 5304 5101 5381 5060 5089 5101 5103 5108 5143 5177 5179 5182 5185 5190 52405241 5250 5255 5269 5308 5315 5322 5323 5346 5364 5381 53845385 5445 5415 5060 5089 5101 5103 5108 5284 5294 5299 5308 5315 5322 53235240 5241 5250 5255 5269 5385 5414 5415 5434 5436 5437 54385335 5346 5364 5381 5384 5446 5452 5451 5077 5286 5503 5502 5499 5497 5472 5123 5153 5155 5177 5186 5447 5466 5082 5304 5060 5182 5255 5061 5115 5129 5141 5166 5183 5245 5256 5348 5337 5106 5143 5185 5106 5400 5154 5177 5178 5189 5190 5052 5055 5070 5075 5154 5189 5280 5319 5355 5427 5248 52375093 5351 5431 5440 5485 5055 5137 5237 5052 5070 5090 5114 5119 5147 5153 5156 5180 5184 5190 52985319 5318 5356 5099 5119 5131
Codelist_SFB 10.1 B2 - IAN-75092.indd 34 03.05.2012 11:24:38
- 35 -
MAXMAX COMMUNICATIONMB
MBOXMEDIABOXMEDIACOMMEDIAMARKTMEDIASAT
MEDION
MEDISONMEGAM-ELECTRONICMETRONIC
METRONIC
METZ
MICROMICRO ELECT-RONIC
MICRO TECH-NOLOGYMICROMAXX
MICROSTAR
5154 5180 5184 5189 5298 5372 5186 5531 5089 5143 5185 5315 5269 5163 5181 5367 5317 5057 5247 5063 5138 5163 5181 5183 5367 5259 5060 5089 5101 5103 5108 5177 5182 5190 5284 5294 5299 53085521 5520 5488 5240 5241 5250 5255 5269 5385 5414 5415 54345315 5322 5323 5335 5346 5364 5381 5384 5453 5452 5451 54785436 5437 5438 5446 5190 5093 5122 5351 5191 5051 5054 5055 5059 5113 5126 5144 5159 5178 5190 5191 51955236 5373 5408 5409 5410 5411 2341 5237 5251 5541 5235 5067 5119 5180 5266 5183 5186 5190 5190 5518 5512 5503 5497 5454 5452 5449 5077 5138 5190 5286 5060 5089 5101 5103 5108 5182 5294 5299 5308 5315 5322 53235240 5241 5250 5255 5269 5284 5414 5415 5434 5436 5437 54385335 5346 5364 5381 5384 5385 5446 5453 5452 5451 5060 5089 5101
MICROTECMINERVA
MITSUBISHI
MITSUMIMORETV
MORGAN SYDNEYMORGAN‘S
MOTOROLAMULTICHOICEMULTISTARMULTITEC
MURATTOMUSTEKMYSATNANOXXNAVEXNEC
NEOTIONNETWORKNEUHAUS
NEUSATNEXT WAVE
NIKKONOKIA
NOMEXNORDMENDE
5103 5108 5284 5294 5299 5308 5315 5322 53235240 5241 5250 5255 5269 5385 5414 5415 5434 5436 5437 54385335 5346 5364 5381 5384 5446 5452 5451 5190 5067 5184 5298 5266 5052 5067 5099 5319 5266 5372 5087 5313 5434 5250 5446 5478 5107 5408 5057 5087 5093 5122 5142 5150 5177 5190 5407 5247 5313 53515192 5105 5193 5399 5084 5086 5310 5103 5179 5384 5385 5065 5082 5127 5264 5304 5449 5190 5517 5449 5069 5128 5270 5091 5120 5320 5321 5452 5121 5063 5075 5079 5123 5138 5142 5153 5183 5186 5190 5280 52955259 5153 5190 5102 5197 5242 5383 5057 5190 5247 5052 5061 5070 5015 5019 5033 5115 5134 5141 5166 5170 51755542 5362 5252 5256 5319 5348 5361 4041 5274 5302 5401 5109 5417 5051 5052 5053 5055 5106 5128 5131 5145 5349
Codelist_SFB 10.1 B2 - IAN-75092.indd 35 03.05.2012 11:24:38
- 36 -
NOVANOVISOAKOCEANIC
OCTAGON
OKANO
ONDIGITALOPENBOXOPENTELOPTEX
OPTUS
ORBITORBITECH
ORIGOOSATOTTO VERSANDPACE
PACIFICPACKSATPALCOM
PALLADIUM
PALSATPALTECPANASATPANASONIC
PANDA
PANSATPANTECHPATRIOTPBIPHILIPS
5290 5319 54005541 5237 5193 5069 5128 5270 5251 5074 5077 5279 5286 5051 5054 5071 5123 5132 5144 5541 5235 5276 5057 5083 5084 5247 5306 5310 5116 5117 5124 5457 5241 5072 5075 5280 5277 5441 5181 5193 5197 5494 5399 5064 5262 5051 5139 5140 5142 5179 5181 5183 5490 5489 5541 5077 5286 5054 5129 5235 5067 5266 5052 5056 5067 5070 5081 5094 5010 5040 5047 5112 5121 51245157 5162 5189 5199 5382 5353 5266 5357 5330 5319 5238 54135495 5074 5279 5189 5053 5062 5078 5079 5131 5295 5258 5293 5057 5183 5184 5298 5247 5179 5183 5062 5258 5187 5193 5052 5070 5094 5010 5162 5382 5319 5342 5052 5056 5112 5115 5180 5186 5319 5238 5305 5389 5177 5189 5452 5052 5070 5093 5039 5041 5116 5117 5119 5121
PHOENIX
PHONOTREND
PILOTIMEPINNACLEPIONEERPOLLINPOLSATPOLYTRONPREDKIPREISNER
PREMIERPREMIERE
PREMIUMXPRIESNER
PRO2
PROFIPROFILEPROMAXPROSAT
PROSONICPROTEKPROVISIONPYEQUADRAL
5122 5123 51425144 5154 5156 5158 5159 5163 5169 5180 5181 5184 5189 51915490 5479 5312 5351 5263 5298 5308 5309 5319 5343 5261 53675372 5402 5414 5275 5359 5350 5276 5324 5401 5071 5081 5121 5132 5276 5052 5054 5075 5083 5126 5164 5236 5280 5306 5437 5397 5439 5163 5181 5367 5466 5106 5400 5072 5277 5069 5128 5270 5133 5142 5150 5177 5181 5367 5075 5097 5017 5163 5181 5447 5401 5367 5362 5342 5300 52805269 5450 5057 5503 5449 5271 5247 5240 5241 5250 5255 5269 5284 5294 5299 5308 5315 5322 53235335 5346 5364 5381 5384 5385 5414 5415 5434 5436 5437 54385446 5452 5451 5088 5314 5189 5052 5319 5053 5054 5081 5095 5126 5131 5146 5236 5360 5155 5074 5279 5055 5237 5184 5053 5054 5060 5126 5131 5142 5146 5154 5182 5189 5199 5236
Codelist_SFB 10.1 B2 - IAN-75092.indd 36 03.05.2012 11:24:38
- 37 -
QUELLE
QUIERORADIOLARADIX
RAINBOW
RED STARREDIFFUSIONREDPOINTREDSTARRFT
ROADSTARROCHROVERRUEFACHSAB
SABA
SABRESAGEMSAKURA
SALORA
SAMSUNG
SAT
SAT CRUISER
SAT TEAMSAT+SATCOM
SATEC
SATELCOSATFORD
5255 5067 5125 5176 5186 5266 5245 5106 5400 5093 5122 5351 5066 5011 5018 5037 5133 5147 5168 5171 5174 5194 5425 52652341 5462 5054 5144 5147 5235 5182 5091 5321 5063 5138 5259 5060 5255 5054 5093 5122 5123 5126 5139 5236 5351 5190 5178 5146 5182 5190 5088 5314 5451 5457 5458 5459 5460 5055 5070 5077 5095 5121 5145 5152 5153 5154 5176 5186 51895195 5290 5319 5343 5354 5360 5363 5369 5370 5371 5372 53735237 5286 5052 5319 5106 5160 5368 5401 5397 5400 5435 5071 5081 5132 5276 5061 5091 5115 5256 5330 5320 5327 5051 5006 5007 5016 5028 5253 5541 5317 5053 5064 5065 5127 5149 5183 5460 5197 5183 5190 5346 5451 5068 5089 5130 5143 5185 5186 5430 5315 5329 5070 5121 5190 5319 5182 5068 5130
SATLINESATMASTERSATPARTNER
SATPLUSSCHACKESCHAUB LO-RENZSCHNEIDER
SCHWAIGER
SCSSEDEA ELECTRONSEEMANN
SEG
SELECOSEPTIMOSERVI SATSETONE
SIEMENS
SILVASILVERCREST
SKANTIN
5146 5068 5130 5051 5054 5055 5069 5082 5083 5128 5270 5541 5235 5237 53045306 5179 5144 5460 5471 5485 5486 5487 5060 5101 5103 5108 5158 5179 5189 5255 5275 5317 5322 53815384 5385 5414 5072 5074 5089 5100 5102 5121 5142 5143 5177 5179 5185 51865195 5503 5502 5499 5497 5467 5466 5448 5365 5363 5255 52375518 5240 5241 5254 5257 5260 5267 5315 5319 5325 5364 53715239 5374 5375 5380 5323 5381 5383 5385 5396 5412 5425 54265373 5429 5448 5449 5460 5462 5476 5277 5427 5176 5177 5196 5057 5063 5066 5138 5265 5247 5259 5051 5060 5069 5089 5128 5143 5155 5182 5185 5255 5270 53155341 5426 5428 5541 5075 5165 5280 5195 5178 5190 5532 5540 5507 5515 5454 5519 5067 5119 5150 5180 5447 5467 5266 5082 5304 5222 5223 5224 5225 5226 5227 5228 5230 5233 5190 5063 5138
Codelist_SFB 10.1 B2 - IAN-75092.indd 37 03.05.2012 11:24:38
- 38 -
SKINSATSKRSKTSKYPEXSKYSKY DIGITALSKY HDSKY ITALIASKY+SKYMASTER
SKYMAXSKYPLUSSKYSAT
SKYVISION
SLSM ELECTRONIC
SMART
SONY
SR
STAR TRAKSTARBOXSTARLANDSTARRING
5259 5384 5346 5469 5183 5190 5466 5466 5192 5452 5094 5382 5353 5461 5382 5353 5353 5054 5089 5103 5004 5020 5126 5143 5146 5167 5179 5185 51905536 5533 5232 5530 5529 5528 5527 5526 5525 5524 5524 54735471 5470 5469 5468 5454 5452 5273 5416 5390 5389 5388 53875386 5385 5384 5346 5316 5315 5240 5236 5093 5122 5351 5452 5179 5183 5185 5186 5190 5075 5503 5502 5499 5497 5472 5280 5153 5177 5466 5179 5190 5385 5530 5529 5528 5527 5526 5525 5524 5524 54735536 5533 5469 5468 5454 5452 5273 5416 5390 5389 5388 53875471 5470 5384 5346 5316 5315 5240 5236 5386 5176 5177 5190 5194 5508 5507 5506 5505 5500 5476 5472 54495512 5511 5510 5509 5094 5181 5382 5367 5246 5272 5057 5087 5177 5290 5247 5313 5541 5254 5103 5190 5384 5069 5128 5270
START TRAKSTRONG
STVISUMIDASUNNY SOUNDSUNSATSUNSTARSUPER SAT
SUPERMAXSYSTECTANDBERGTANDYTANTECTARGA
TATUNGTCM
TECHNIHALLTECHNILANDTECHNISAT
TECHNOLOGYTECHNOMATETECHNOSATTECHNOTREND
TECHNOWELTTECO
TELANORTELASAT
TELECIEL
5051 5051 5054 5060 5082 5095 5182 5193 5196 5470 5413 5360 52555399 5345 5274 5304 5541 5235 5178 5057 5247 5182 5138 5190 5057 5087 5177 5182 5330 5247 5313 5188 5197 5177 5106 5400 5054 5235 5052 5070 5078 5079 5319 5295 5293 5221 5480 5073 5278 5060 5089 5101 5103 5108 5205 5206 5207 5208 5209 5210 52115212 5213 5214 5215 5216 5217 5218 5219 5220 5240 5241 52505255 5269 5308 5315 5322 5323 5346 5364 5381 5385 5414 54155384 5244 5068 5130 5066 5079 5000 5013 5014 5027 5111 5122 5139 5140 5172 51735179 5181 5183 5489 5490 5317 5265 5295 5367 5418 5331 53325193 5268 5456 5197 5496 5475 5460 5447 5177 5186 5195 5057 5087 5247 5313 5053 5089 5143 5176 5185 5186 5430 5144
Codelist_SFB 10.1 B2 - IAN-75092.indd 38 03.05.2012 11:24:38

- 39 -
TELECOMTELEDIREKTTELEFUNKEN
TELEKA
TELEMASTERTELEMAXTELESAT
TELESTAR
TELETECHTELEVES
TELEWIRETEMPOTEN HAAFTTEVION
THOMSON
THORENSTHORN
TIOKOTITAN
TIVIDITOKAITONBURYTONNA
5190 5121 5051 5070 5099 5154 5189 5538 5535 5358 5319 5363 5364 53655372 5541 5054 5057 5066 5133 5137 5144 5153 5156 5183 5186 5265 54305235 5247 5055 5237 5085 5089 5143 5185 5183 5315 5079 5179 5181 5193 5490 5489 5452 5295 5367 5167 5052 5107 5177 5183 5319 5406 5407 5075 5280 5197 5250 5060 5089 5101 5103 5108 5190 5294 5299 5308 5315 5322 53235240 5241 5250 5255 5269 5284 5414 5415 5434 5436 5437 54385335 5346 5364 5381 5384 5385 5446 5454 5452 5451 5052 5096 5099 5106 5035 5038 5042 5045 5046 5048 5145 51765181 5186 5189 5190 5307 5319 5358 5366 5367 5400 5254 54665290 5398 5368 5372 5074 5279 5052 5056 5070 5319 5238 5291 5072 5177 5277 5532 5540 5507 5515 5454 5519 5447 5122 5271 5468 5052 5068 5075 5130 5183 5190
TOPFIELD
TPSTPS PLATINUMTRIAD
TRIASAT
TRIAX
TT-MICROTURNSATTVONICSTWINNER
UECUHERUNIDENUNISAT
UNITOR
UNITYDIGITALTVUNIVERSUM
VANTAGEVARIOSATVARIOSTATVECTORVEGAVENTANAVESTELVIA DIGITALVIA SATVISIONICVISIOSAT
VIVAVIVANCOVIVIDVORTECV-TECH
WELAWELLTECHWETEKOM
5346 5319 5280 5484 5483 5482 5311 5316 5317 5098 5368 5477 5064 5065 5082 5127 5262 5264 5333 5304 5080 5136 5183 5296 5067 5079 5136 5176 5177 5183 5190 5266 5295 5363 5405 54155447 5190 5049 5107 5177 5178 5190 5406 5407 5193 5198 5399 5179 5092 5149 5334 5057 5071 5122 5132 5177 5247 5276 5059 5069 5270 5251 5447 5067 5119 5134 5149 5155 5176 5180 5184 5186 5266 5298 54665292 5302 5517 5119 5180 5067 5266 5077 5286 5182 5093 5122 5351 5155 5096 5366 5366 5199 5196 5069 5075 5103 5104 5152 5189 5190 5392 5270 5280 5384 53915393 5394 5395 5123 5110 5336 5419 5198 5051 5124 5541 5064 5127 5152 5159 5264 5262 5324 5337 5319 5065 5191 5142 5179 5179 5183 5185
Codelist_SFB 10.1 B2 - IAN-75092.indd 39 03.05.2012 11:24:38
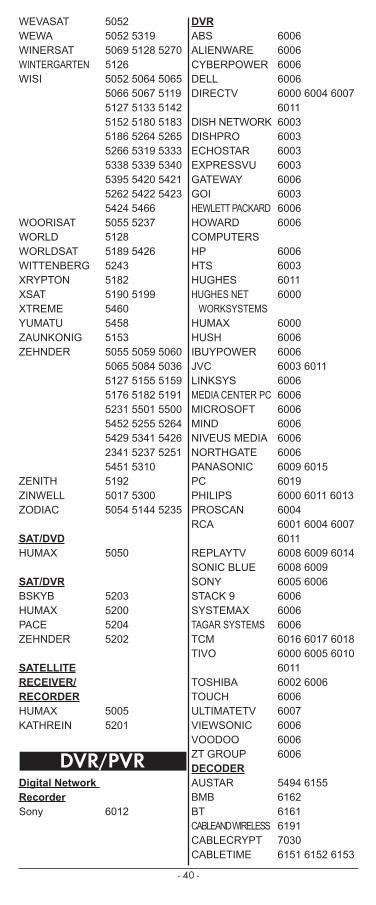
- 40 -
WEVASATWEWAWINERSATWINTERGARTENWISI
WOORISATWORLDWORLDSATWITTENBERGXRYPTONXSATXTREMEYUMATUZAUNKONIGZEHNDER
ZENITHZINWELLZODIAC
SAT/DVDHUMAX
SAT/DVRBSKYBHUMAXPACEZEHNDER
SATELLITE RECEIVER/ RECORDERHUMAXKATHREIN
Digital Network RecorderSony
5052 5052 5319 5069 5128 5270 5126 5052 5064 5065 5066 5067 5119 5127 5133 5142 5152 5180 51835186 5264 5265 5266 5319 5333 5338 5339 5340 5395 5420 54215262 5422 5423 5424 5466 5055 5237 5128 5189 5426 5243 5182 5190 5199 5460 5458 5153 5055 5059 5060 5065 5084 5036 5127 5155 5159 5176 5182 51915231 5501 5500 5452 5255 5264 5429 5341 5426 2341 5237 52515451 5310 5192 5017 5300 5054 5144 5235
5050
5203520052045202
50055201
6012
DVRABSALIENWARECYBERPOWERDELLDIRECTV
DISH NETWORKDISHPROECHOSTAREXPRESSVUGATEWAYGOIHEWLETT PACKARDHOWARDCOMPUTERSHPHTSHUGHESHUGHES NET WORKSYSTEMSHUMAXHUSHIBUYPOWERJVCLINKSYSMEDIA CENTER PCMICROSOFTMINDNIVEUS MEDIANORTHGATEPANASONICPCPHILIPSPROSCANRCA
REPLAYTVSONIC BLUESONYSTACK 9SYSTEMAXTAGAR SYSTEMSTCMTIVO
TOSHIBATOUCHULTIMATETVVIEWSONICVOODOOZT GROUPDECODERAUSTARBMBBTCABLEAND WIRELESSCABLECRYPTCABLETIME
6006 6006 6006 6006 6000 6004 6007 60116003 6003 6003 6003 6006 6003 6006 6006
6006 6003 6011 6000
6000 6006 6006 6003 6011 6006 6006 6006 6006 6006 6006 6009 6015 6019 6000 6011 6013 6004 6001 6004 6007 60116008 6009 6014 6008 6009 6005 6006 6006 6006 6006 6016 6017 6018 6000 6005 6010 60116002 6006 6006 6007 6006 6006 6006
5494 6155 6162 6161 6191 7030 6151 6152 6153
Codelist_SFB 10.1 B2 - IAN-75092.indd 40 03.05.2012 11:24:38
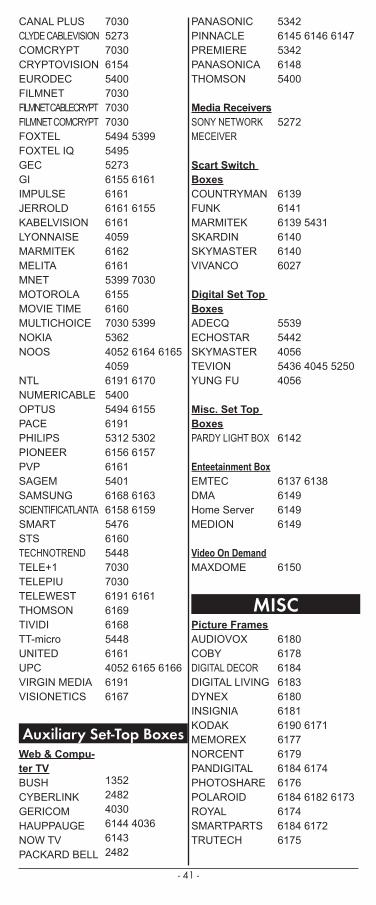
- 41 -
CANAL PLUSCLYDE CABLEVISIONCOMCRYPTCRYPTOVISIONEURODECFILMNETFILMNET CABLECRYPTFILMNET COMCRYPTFOXTELFOXTEL IQGECGIIMPULSEJERROLDKABELVISIONLYONNAISEMARMITEKMELITAMNETMOTOROLAMOVIE TIMEMULTICHOICENOKIANOOS
NTLNUMERICABLEOPTUSPACEPHILIPSPIONEERPVPSAGEMSAMSUNGSCIENTIFICATLANTASMARTSTSTECHNOTRENDTELE+1TELEPIUTELEWESTTHOMSONTIVIDITT-microUNITEDUPCVIRGIN MEDIAVISIONETICS
Auxiliary Set-Top BoxesWeb & Compu-ter TVBUSHCYBERLINKGERICOMHAUPPAUGENOW TVPACKARD BELL
7030 5273 7030 6154 5400 7030 7030 7030 5494 5399 5495 5273 6155 6161 6161 6161 6155 6161 4059 6162 6161 5399 7030 6155 6160 7030 5399 5362 4052 6164 6165 40596191 6170 5400 5494 6155 6191 5312 5302 6156 6157 6161 5401 6168 6163 6158 6159 5476 6160 5448 7030 7030 6191 6161 6169 6168 5448 6161 4052 6165 6166 6191 6167
1352 2482 4030 6144 4036 6143 2482
5342 6145 6146 61475342 6148 5400
5272
613961416139 5431614061406027
5539544240565436 4045 52504056
6142
6137 6138614961496149
6150
6180 6178 6184 6183 6180 6181 6190 6171 6177 6179 6184 6174 6176 6184 6182 61736174 6184 6172 6175
PANASONICPINNACLEPREMIEREPANASONICATHOMSON
Media ReceiversSONY NETWORK MECEIVER
Scart Switch BoxesCOUNTRYMANFUNKMARMITEKSKARDINSKYMASTERVIVANCO
Digital Set Top BoxesADECQECHOSTARSKYMASTERTEVIONYUNG FU
Misc. Set Top BoxesPARDY LIGHT BOX
Enteetainment BoxEMTECDMAHome ServerMEDION
Video On DemandMAXDOME
MISCPicture FramesAUDIOVOXCOBYDIGITAL DECORDIGITAL LIVINGDYNEXINSIGNIAKODAKMEMOREXNORCENTPANDIGITALPHOTOSHAREPOLAROIDROYALSMARTPARTSTRUTECH
Codelist_SFB 10.1 B2 - IAN-75092.indd 41 03.05.2012 11:24:39
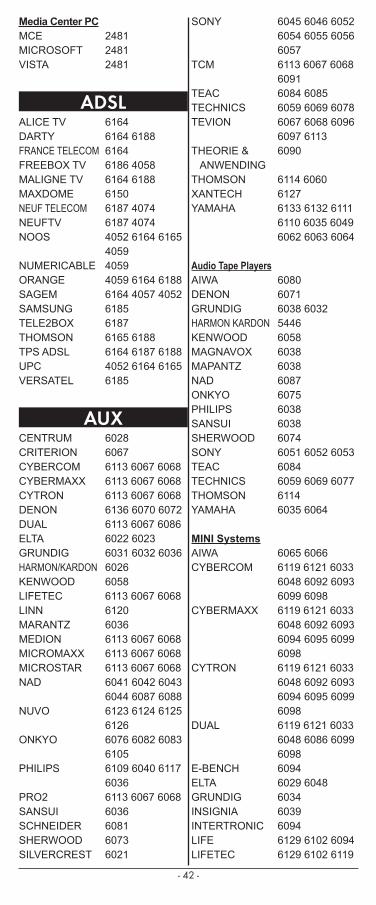
- 42 -
Media Center PCMCEMICROSOFTVISTA
ADSLALICE TVDARTYFRANCE TELECOMFREEBOX TVMALIGNE TVMAXDOMENEUF TELECOMNEUFTVNOOS
NUMERICABLEORANGESAGEMSAMSUNGTELE2BOXTHOMSONTPS ADSLUPCVERSATEL
AUXCENTRUMCRITERIONCYBERCOMCYBERMAXXCYTRONDENONDUALELTAGRUNDIGHARMON/KARDONKENWOODLIFETECLINNMARANTZMEDIONMICROMAXXMICROSTARNAD
NUVO
ONKYO
PHILIPS
PRO2SANSUISCHNEIDERSHERWOODSILVERCREST
2481 2481 2481
6164 6164 6188 6164 6186 4058 6164 6188 6150 6187 4074 6187 4074 4052 6164 6165 40594059 4059 6164 6188 6164 4057 4052 6185 6187 6165 6188 6164 6187 6188 4052 6164 6165 6185
6028 6067 6113 6067 6068 6113 6067 6068 6113 6067 6068 6136 6070 6072 6113 6067 6086 6022 6023 6031 6032 6036 6026 6058 6113 6067 6068 6120 6036 6113 6067 6068 6113 6067 6068 6113 6067 6068 6041 6042 6043 6044 6087 6088 6123 6124 6125 6126 6076 6082 6083 6105 6109 6040 6117 6036 6113 6067 6068 6036 6081 6073 6021
SONY
TCM
TEACTECHNICSTEVION
THEORIE & ANWENDINGTHOMSONXANTECHYAMAHA
Audio Tape PlayersAIWADENONGRUNDIGHARMON KARDONKENWOODMAGNAVOXMAPANTZNADONKYOPHILIPSSANSUISHERWOODSONYTEACTECHNICSTHOMSONYAMAHA
MINI SystemsAIWACYBERCOM
CYBERMAXX
CYTRON
DUAL
E-BENCHELTAGRUNDIGINSIGNIAINTERTRONICLIFELIFETEC
6045 6046 6052 6054 6055 6056 6057 6113 6067 6068 6091 6084 6085 6059 6069 6078 6067 6068 6096 6097 6113 6090
6114 6060 6127 6133 6132 6111 6110 6035 6049 6062 6063 6064
6080 6071 6038 6032 5446 6058 6038 6038 6087 6075 6038 6038 6074 6051 6052 60536084 6059 6069 60776114 6035 6064
6065 6066 6119 6121 6033 6048 6092 6093 6099 6098 6119 6121 6033 6048 6092 6093 6094 6095 6099 6098 6119 6121 6033 6048 6092 6093 6094 6095 6099 6098 6119 6121 6033 6048 6086 6099 6098 6094 6029 6048 6034 6039 6094 6129 6102 6094 6129 6102 6119
Codelist_SFB 10.1 B2 - IAN-75092.indd 42 03.05.2012 11:24:39
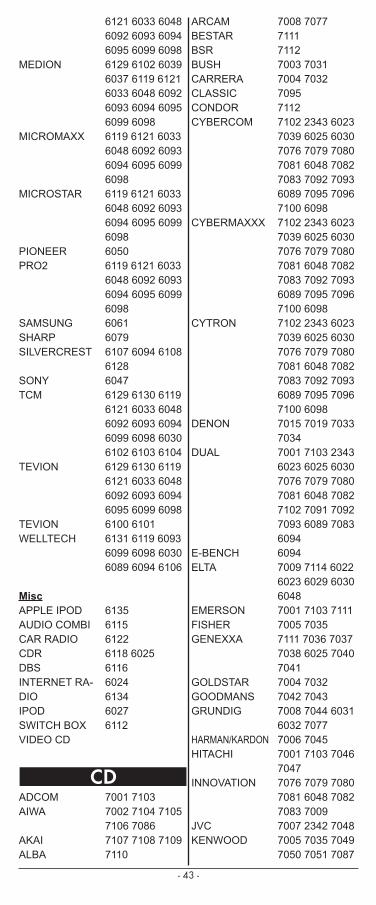
- 43 -
MEDION
MICROMAXX
MICROSTAR
PIONEERPRO2
SAMSUNGSHARPSILVERCREST
SONYTCM
TEVION
TEVIONWELLTECH
MiscAPPLE IPODAUDIO COMBICAR RADIOCDRDBSINTERNET RA-DIOIPODSWITCH BOXVIDEO CD
ADCOMAIWA
AKAIALBA
6121 6033 6048 6092 6093 6094 6095 6099 60986129 6102 6039 6037 6119 6121 6033 6048 6092 6093 6094 60956099 6098 6119 6121 6033 6048 6092 6093 6094 6095 6099 6098 6119 6121 6033 6048 6092 6093 6094 6095 6099 6098 6050 6119 6121 6033 6048 6092 6093 6094 6095 6099 6098 6061 6079 6107 6094 6108 6128 6047 6129 6130 6119 6121 6033 6048 6092 6093 6094 6099 6098 60306102 6103 6104 6129 6130 6119 6121 6033 6048 6092 6093 6094 6095 6099 60986100 6101 6131 6119 6093 6099 6098 6030 6089 6094 6106
6135611561226118 602561166024613460276112
7001 7103 7002 7104 7105 7106 7086 7107 7108 7109 7110
ARCAMBESTARBSRBUSHCARRERACLASSICCONDORCYBERCOM
CYBERMAXXX
CYTRON
DENON
DUAL
E-BENCHELTA
EMERSONFISHERGENEXXA
GOLDSTARGOODMANSGRUNDIG
HARMAN/KARDONHITACHI
INNOVATION
JVCKENWOOD
7008 7077 7111 7112 7003 7031 7004 7032 7095 7112 7102 2343 6023 7039 6025 6030 7076 7079 7080 7081 6048 70827083 7092 7093 6089 7095 7096 7100 6098 7102 2343 6023 7039 6025 6030 7076 7079 7080 7081 6048 70827083 7092 7093 6089 7095 7096 7100 6098 7102 2343 6023 7039 6025 6030 7076 7079 7080 7081 6048 70827083 7092 7093 6089 7095 7096 7100 6098 7015 7019 7033 7034 7001 7103 2343 6023 6025 6030 7076 7079 7080 7081 6048 70827102 7091 7092 7093 6089 7083 6094 6094 7009 7114 6022 6023 6029 6030 6048 7001 7103 7111 7005 7035 7111 7036 7037 7038 6025 7040 7041 7004 7032 7042 7043 7008 7044 6031 6032 7077 7006 7045 7001 7103 7046 7047 7076 7079 7080 7081 6048 7082 7083 7009 7007 2342 7048 7005 7035 7049 7050 7051 7087
Codelist_SFB 10.1 B2 - IAN-75092.indd 43 03.05.2012 11:24:39
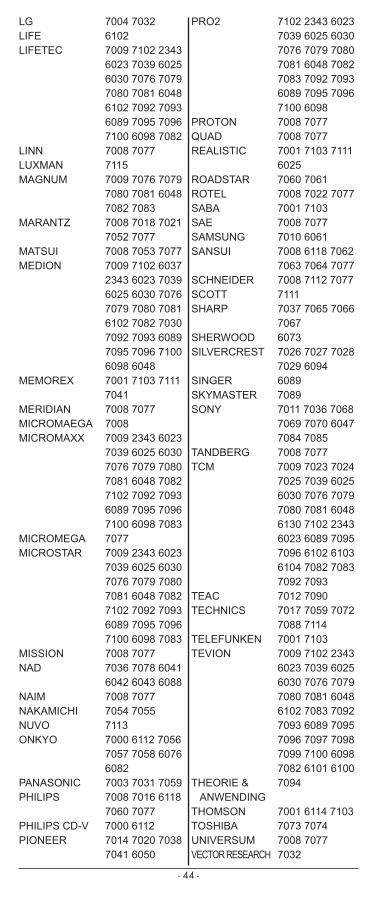
- 44 -
LGLIFELIFETEC
LINNLUXMANMAGNUM
MARANTZ
MATSUIMEDION
MEMOREX
MERIDIANMICROMAEGAMICROMAXX
MICROMEGAMICROSTAR
MISSIONNAD
NAIMNAKAMICHINUVOONKYO
PANASONICPHILIPS
PHILIPS CD-VPIONEER
7004 7032 6102 7009 7102 2343 6023 7039 6025 6030 7076 7079 7080 7081 60486102 7092 7093 6089 7095 7096 7100 6098 7082 7008 7077 7115 7009 7076 7079 7080 7081 6048 7082 7083 7008 7018 7021 7052 7077 7008 7053 7077 7009 7102 6037 2343 6023 7039 6025 6030 7076 7079 7080 70816102 7082 7030 7092 7093 6089 7095 7096 7100 6098 6048 7001 7103 7111 7041 7008 7077 7008 7009 2343 6023 7039 6025 6030 7076 7079 7080 7081 6048 70827102 7092 7093 6089 7095 7096 7100 6098 7083 7077 7009 2343 6023 7039 6025 6030 7076 7079 7080 7081 6048 70827102 7092 7093 6089 7095 7096 7100 6098 7083 7008 7077 7036 7078 6041 6042 6043 6088 7008 7077 7054 7055 7113 7000 6112 7056 7057 7058 6076 6082 7003 7031 7059 7008 7016 6118 7060 7077 7000 6112 7014 7020 7038 7041 6050
PRO2
PROTONQUADREALISTIC
ROADSTARROTELSABASAESAMSUNGSANSUI
SCHNEIDERSCOTTSHARP
SHERWOODSILVERCREST
SINGERSKYMASTERSONY
TANDBERGTCM
TEACTECHNICS
TELEFUNKENTEVION
THEORIE & ANWENDINGTHOMSONTOSHIBAUNIVERSUMVECTOR RESEARCH
7102 2343 6023 7039 6025 6030 7076 7079 7080 7081 6048 70827083 7092 7093 6089 7095 7096 7100 6098 7008 7077 7008 7077 7001 7103 7111 6025 7060 7061 7008 7022 7077 7001 7103 7008 7077 7010 6061 7008 6118 7062 7063 7064 7077 7008 7112 7077 7111 7037 7065 7066 7067 6073 7026 7027 7028 7029 6094 6089 7089 7011 7036 7068 7069 7070 6047 7084 7085 7008 7077 7009 7023 7024 7025 7039 6025 6030 7076 7079 7080 7081 60486130 7102 2343 6023 6089 7095 7096 6102 6103 6104 7082 70837092 7093 7012 7090 7017 7059 7072 7088 7114 7001 7103 7009 7102 2343 6023 7039 6025 6030 7076 7079 7080 7081 60486102 7083 7092 7093 6089 7095 7096 7097 7098 7099 7100 60987082 6101 6100 7094
7001 6114 7103 7073 7074 7008 7077 7032
Codelist_SFB 10.1 B2 - IAN-75092.indd 44 03.05.2012 11:24:39

- 45 -
VICTORVICTOR RESEARCHWELLTECH
YAMAHA
YORX
AmplifierBUSHDENON
GOODMANSGRUNDIGKENWOODLINNMARANTZ
MERIDIANMICROMEGANAIMPHILIPSPIONEER
QUADROTELSILVERCRESTSONY
TEACTECHNICSTHORENSYAMAHA
LCD TV/Radio Tuner ComboPHILIPS
ReceiverPIONEERYAMAHA
Receiver/TunerAIWAAKAIDENON
DK DIGITALELTAXGOLDSTARGOODMANS
7007 7048 7004 6131 7095 6025 6030 7081 6094 6106 6107 7013 7065 7071 7075 6063 7061
8000 8006 8028 8029 8030 8062 8023 8000 8012 8000 8000 8005 8009 8024 8052 8000 8000 8000 8000 8000 8004 8007 8017 8020 80258000 8065 8119 8001 8010 8011 8014 8044 8015 8022 8027 8002 8008 8016 8000 8003 8013 8018 8019 8021 8026
8090
80438018
8084 8112 8036 8062 8072 8073 8074 8076 8077 8078 8079 8080 8082 80838097 8095 8035 8036
GRUNDIGHARMAN/KARDONHITACHIJVCKENWOODLGMARANTZ
MICROMEGAMITSUBISHIOKANOONKYOPANASONIC
PHILIPS
PIONEER
REVOXROTELSAMSUNGSANSUISANYOSHARPSONY
TCM
TEACTECHNICSTHOMSONTHORENSUNIVERSUMYAMAHA
TunerMUSTEKPHILIPSPIONEERSONYYAMAHA
TV/TunerPHILIPS
HOME AUTO-MATIONHOME AUTOMATIONLUTRONX-10 HOME AUTOMATION
8033 8034 8035 8031 8033 8106 8064 8075 8098 8056 8067 8109 8035 8107 8033 8034 8052 8070 8085 8086 8087 8089 8033 8036 8036 8032 8088 8061 8100 8104 8105 8113 8033 8052 8060 8096 8043 8045 8047 8053 8055 8066 8092 8093 8110 8033 8065 8103 8033 8034 8099 8108 8081 8037 8039 8040 8041 8044 8046 8058 8059 8094 8102 8114 8115 8116 8117 8118 8031 8050 8051 8061 8057 8069 8071 8033 8035 8036 8013 8038 8042 8048 8049 8054 8063 8068
81018090 80918092 809381118003
8091
812481238124
Codelist_SFB 10.1 B2 - IAN-75092.indd 45 03.05.2012 11:24:39
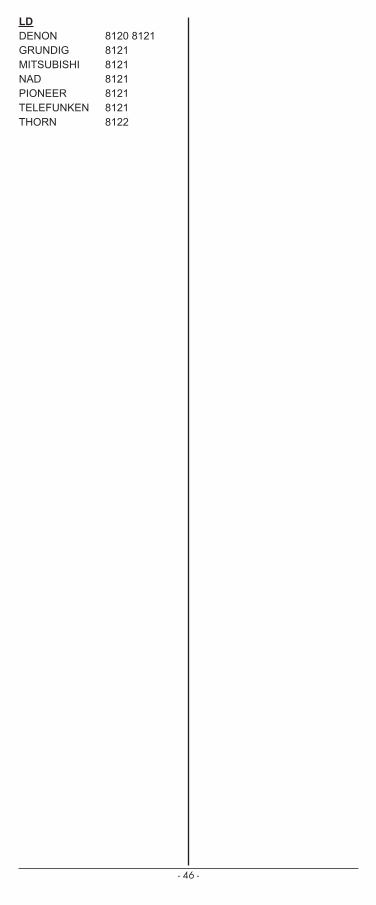
- 46 -
LDDENONGRUNDIGMITSUBISHINADPIONEERTELEFUNKENTHORN
8120 8121812181218121812181218122
Codelist_SFB 10.1 B2 - IAN-75092.indd 46 03.05.2012 11:24:39

- 47 -
Codelist_SFB 10.1 B2 - IAN-75092.indd 47 03.05.2012 11:24:39

- 48 -
Codelist_SFB 10.1 B2 - IAN-75092.indd 48 03.05.2012 11:24:39
Related Documents