HR Query Manual v9.1 December 2, 2011

Welcome message from author
This document is posted to help you gain knowledge. Please leave a comment to let me know what you think about it! Share it to your friends and learn new things together.
Transcript

HR Query Manual v9.1
December 2, 2011

COPYRIGHT & TRADEMARKS
Copyright © 1998, 2009, Oracle and/or its affiliates. All rights reserved.
Oracle is a registered trademark of Oracle Corporation and/or its affiliates. Other names
may be trademarks of their respective owners.
This software and related documentation are provided under a license agreement
containing restrictions on use and disclosure and are protected by intellectual property
laws. Except as expressly permitted in your license agreement or allowed by law, you
may not use, copy, reproduce, translate, broadcast, modify, license, transmit, distribute,
exhibit, perform, publish or display any part, in any form, or by any means. Reverse
engineering, disassembly, or decompilation of this software, unless required by law for
interoperability, is prohibited.
The information contained herein is subject to change without notice and is not warranted
to be error-free. If you find any errors, please report them to us in writing.
If this software or related documentation is delivered to the U.S. Government or anyone
licensing it on behalf of the U.S. Government, the following notice is applicable:
U.S. GOVERNMENT RIGHTS
Programs, software, databases, and related documentation and technical data delivered to
U.S. Government customers are “commercial computer software” or “commercial
technical data” pursuant to the applicable Federal Acquisition Regulation and agency-
specific supplemental regulations. As such, the use, duplication, disclosure, modification,
and adaptation shall be subject to the restrictions and license terms set forth in the
applicable Government contract, and, to the extent applicable by the terms of the
Government contract, the additional rights set forth in FAR 52.227-19, Commercial
Computer Software License (December 2007). Oracle USA, Inc., 500 Oracle Parkway,
Redwood City, CA 94065.
This software is developed for general use in a variety of information management
applications. It is not developed or intended for use in any inherently dangerous
applications, including applications which may create a risk of personal injury. If you use
this software in dangerous applications, then you shall be responsible to take all
appropriate fail-safe, backup, redundancy and other measures to ensure the safe use of
this software. Oracle Corporation and its affiliates disclaim any liability for any damages
caused by use of this software in dangerous applications.
This software and documentation may provide access to or information on content,
products and services from third parties. Oracle Corporation and its affiliates are not
responsible for and expressly disclaim all warranties of any kind with respect to third
party content, products and services. Oracle Corporation and its affiliates will not be
responsible for any loss, costs, or damages incurred due to your access to or use of third
party content, products or services.

Page iii
Table of Contents SOI_PS91_HR Query ....................................................................................................... 1
HR Query .................................................................................................................................... 1 Running HR Queries ............................................................................................................................... 1 HR Creating Simple Queries ................................................................................................................ 16 HR Creating More Complex Queries ................................................................................................... 26
Appendixes................................................................................................................................ 35 Appendix A: Running HR Queries Job Aid......................................................................................... 35 Appendix B: HR Creating Simple Queries Job Aid............................................................................. 39 Appendix C: HR Creating More Complex Queries Job Aid ................................................................ 47


Last Updated: December 2, 2011 Page 1
SOI_PS91_HR Query
HR Query
Running HR Queries
Procedure
Step Action
1. Click the Main Menu button.
2. Point to the Reporting Tools menu.
3. Point to the Query menu.
4. Click the Query Viewer menu.

Last Updated: December 2, 2011 Page 2
Step Action
5. Type the Name of a query you want to run or leave the field blank.
You may also search by the Description of the query.
Enter "soi_sum".
6. Frequently used HR Public Queries SOI_JOBCODE_IN_AGY List of JCs in an agency
SO_E_LEVEL All E-Level EEs sort/salary
SOI_FSSA_ACTIVE_EMPS EFFDT Prompt
7. Click Search.

Last Updated: December 2, 2011 Page 3
Step Action
8. Frequently Used HR Public Queries Your search will return one or more queries. Notice there are several columns
listed:
Query - The name of the query.
Description - A short description of the query.
Owner - To indicate your private queries or public ones that anyone can use.
Folder - The folder used if you placed this query in a query folder.
Run to HTML - Click here to run the query to a web page. A new window will
open up.
Run to Excel - Click here to run the query to a spreadsheet. A new window will
open up.
Schedule - Click here to schedule the query to run later or to run a query that returns
a lot of information.
Add to Favorites - Click here to store the query in your query favorites.
9. We will choose the Run to HTML option which opens a new window with the
query results in a html format.
Click the Run to HTML link.
Step Action
10. Click the Maximize button.

Last Updated: December 2, 2011 Page 4
Step Action
11. Notice the Excel Spreadsheet and CSV Text File links. These let you download all
rows into Excel or into a comma-delimited text file.
You may see the View All link above the first column. If the query returned more
rows than display on the page, you can click this link to see all rows.
12. Notice the navigation buttons above the right columns. These let you see the next
chunk of rows returned. There are links to the First page, < for the previous page, >
for the next page, and the Last page. You will also see which rows you are looking
at and how many rows are returned all together.
Click the Show Next rows button.
13. Click the Close button.
14. Some queries have prompts to limit what is returned.
Some ask you to type in values free-form.
Others may allow you to click on the Magnifying Glass icon to display a list of
valid values or the Calendar icon to pick a date.
Some queries allow a % for a wildcard.
15. We will locate our next query by using the Advanced Search.
Click the Advanced Search link.
16. Notice that you have several options here for locating queries.
17. One option is to search for queries using a particular Field or Record name.
For instance, searching "Record Name containing TRAINING" will find queries
using the Training (history) record.
For this example, we will search on the query Description field.
18. Click the Description list drop-down menu.
19. Click contains.

Last Updated: December 2, 2011 Page 5
Step Action
20. Enter "train" into the Description field.

Last Updated: December 2, 2011 Page 6
Step Action
21. Click Search.
Step Action
22. For this example we will look for the Training Calendar.
Click the Run to HTML link.

Last Updated: December 2, 2011 Page 7
Step Action
23. Click the Maximize button.
24. First, we'll choose a Course Start Date.
Click the Choose a date (ALT+5) button.
25. Click September 1, 2003.

Last Updated: December 2, 2011 Page 8
Step Action
26. Next, we'll choose a Through Date.
Click the Choose a date (Alt+5) button.
27. Click the September 1, 2004.

Last Updated: December 2, 2011 Page 9
Step Action
28. Next we need to choose a Business Unit for this query. Here, it's referred to as
Vendor.
Click the Look up Vender (ALT+5) button.
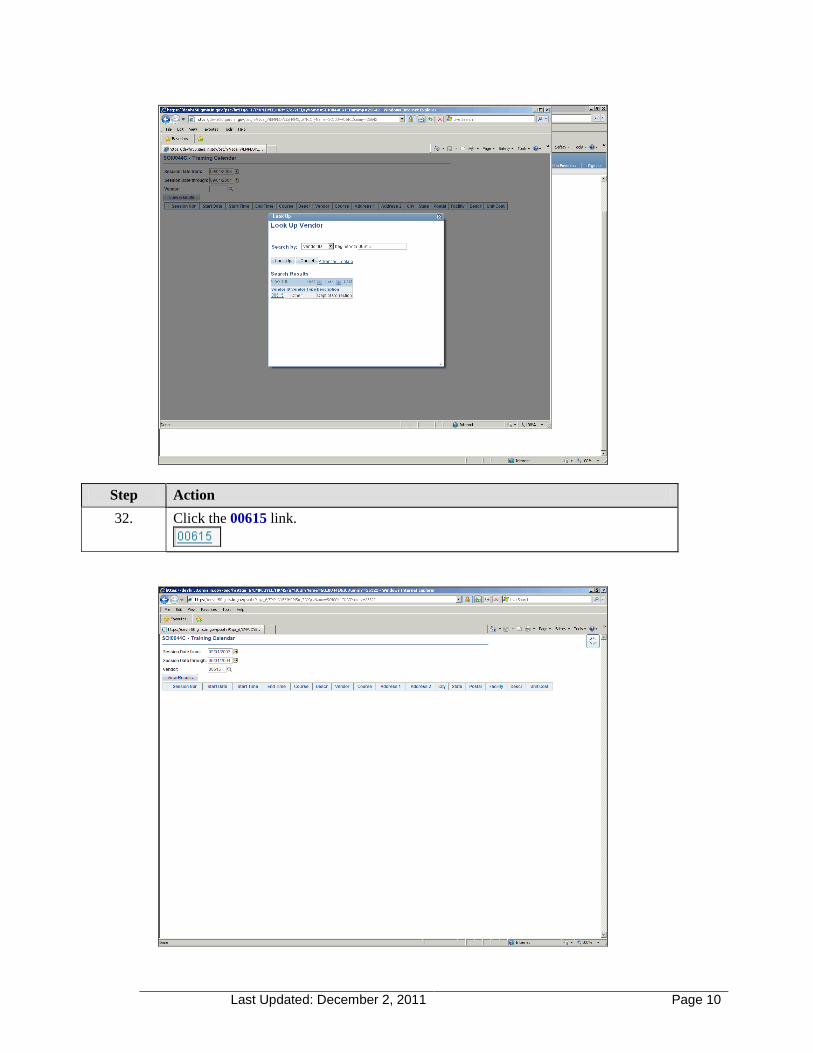
29. Since the query is asking for a Vendor, or Business Unit, this window allows you
the option of locating the business unit of your choice. If you do not know the
Business Unit, you can perform an advanced search.
For this example we will be using the Department of Correction Business Unit
which is "00615"
30. Type "00615" into the search field.
31. Click the Look Up button.
Last Updated: December 2, 2011 Page 10
Step Action
32. Click the 00615 link.

Last Updated: December 2, 2011 Page 11
Step Action
33. Click the View Results button.
34. Click the Close button for this window.
35. Scheduling a query is like scheduling a PeopleSoft Process or Report.
It can be scheduled to run once or on a regular basis by using the Recurrence
option.
Step Action
36. Click the Schedule link.
37. Enter the desired information into the Run Control ID field or add a new one.
Enter "SOI0044C_WEEKLY."

Last Updated: December 2, 2011 Page 12
Step Action
38. Click the Add (ALT+1) button.
39. Fill in the prompt values for this query. These prompt values will be used every
time this query is scheduled to run.
40. Click the Choose a date (ALT+5) button
41. Click to select September 10, 2007 as the beginning range for the session date.
42. Click the Choose a date (ALT+5) button.
43. Click to select September 14, 2007 as the ending range for the session date.

Last Updated: December 2, 2011 Page 13
Step Action
44. Enter "00615" for the Vendor (Business Unit).
45. Click OK.
46. Fill in a Description of the query.
Enter "Weekly Report of Traning Schd".

Last Updated: December 2, 2011 Page 14
Step Action
47. Click OK.

Last Updated: December 2, 2011 Page 15
Step Action
48. Click the Recurrence drop-down menu.
49. Click to Scroll down the list.
50. Click to select Weekly - Friday.
Step Action
51. Click the *Format list drop-down menu.
52. Click XLS.

Last Updated: December 2, 2011 Page 16
Step Action
53. Click OK.
54. You will be returned to the Query Viewer list.
The results of the query will be placed in your Report folder and can be viewed in
the Report Manager.
Navigate to Reporting Tools > Report Manager to see your query results.
55.
End of Procedure.
HR Creating Simple Queries
Procedure
By creating HR queries, you can view and extract many different types of useful information.
In this topic, we will discuss and demonstrate creating a simple query in HR 9.1.

Last Updated: December 2, 2011 Page 17
Step Action
1. Click the Main Menu link.
2. Point to the Reporting Tools menu.
3. Point to the Query menu.
4. Click the Query Manager link.

Last Updated: December 2, 2011 Page 18
Step Action
5. Click the Create New Query link.
6. The Query Designer has several tabs/pages. We begin on the Records tab where
we will select one or more records (a.k.a. data tables) to be queried.
To begin the query, we will select the Employees record. This contains detailed
information on current employees.
Enter the desired information into the begins with field. Enter "employees".

Last Updated: December 2, 2011 Page 19
Step Action
7. Most Used Records
General Note: Most of these Records have the field COMPANY in them. This
shows whether the row is for a State of Indiana or a QUASI type. When creating
queries that exclude QUASIs, use criteria "COMPANY = SOI."
·EMPLOYEES - Consolidated data on active employees.
This is actually a view rather than a record. Information here is refreshed nightly and
comes from more than a dozen records in the HR system. Many of these are shown
below. Querying the Employees table is an easy way to report a wide variety of
data.
·EMPLOYMENT - Employment history of all employees, but only detailed since
01 October 1999.
Important fields here include Initial Hire Date, Last Re-hire Date, Adjusted Hire
Date and Seniority Date.
·JOB - Job history of all employees, but only detailed since 01 October 1999.
Important fields here include Position Number, Job Code and Title, Effective
Dates, Department Name and Number, FTE, Pay Frequency, Rates (hourly,
monthly, annual,) Shift and Physical Location. This also shows promotions
demotions, transfers, and other miscellaneous actions, one row for each action. This
record is effective dated).
·EMPL_CHECKLIST - General purpose checklist, used for tabulating orientation
of new employees, tracking and predicting performance appraisals.
·DIVERSITY - Race codes for EEO reporting.
·PERSON - Birth and death data.
·PERSONAL_DATA - Employee current name only.
·PERS_DATA_EFFDT - Both personal and professional records, effective dated.
·ADDRESSES - Employee home addresses, effective dated.
Last Updated: December 2, 2011 Page 20
Step Action
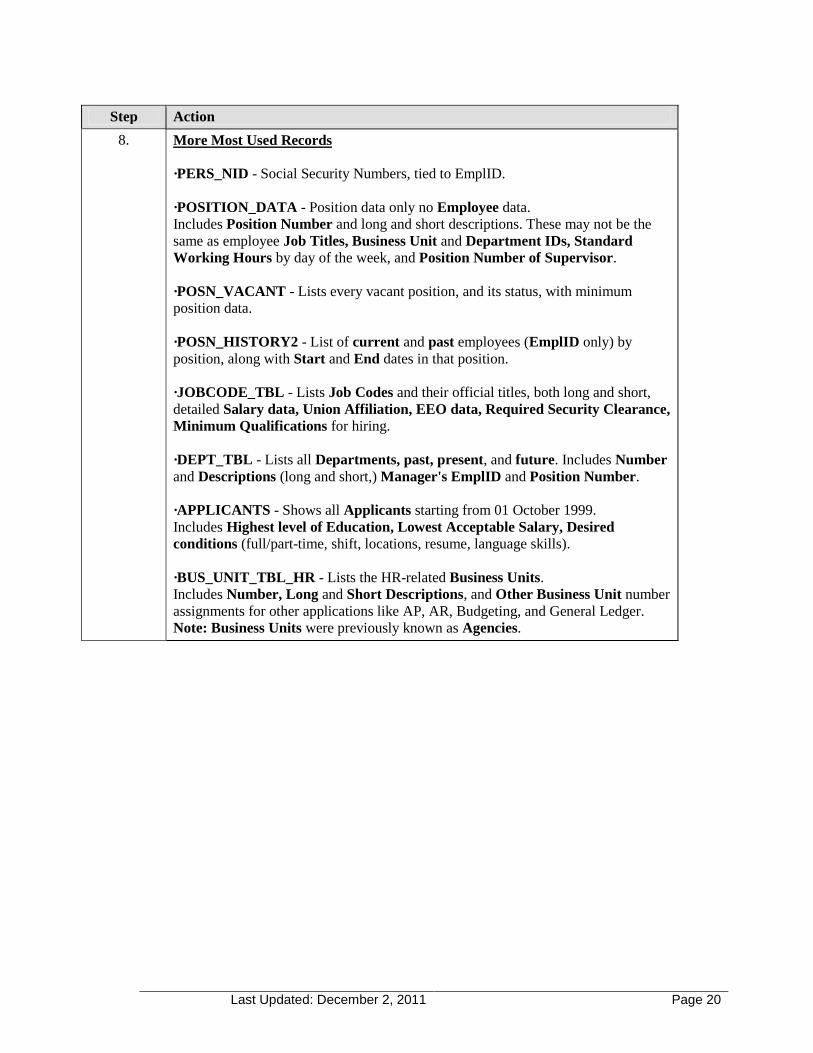
8. More Most Used Records
·PERS_NID - Social Security Numbers, tied to EmplID.
·POSITION_DATA - Position data only no Employee data.
Includes Position Number and long and short descriptions. These may not be the
same as employee Job Titles, Business Unit and Department IDs, Standard
Working Hours by day of the week, and Position Number of Supervisor.
·POSN_VACANT - Lists every vacant position, and its status, with minimum
position data.
·POSN_HISTORY2 - List of current and past employees (EmplID only) by
position, along with Start and End dates in that position.
·JOBCODE_TBL - Lists Job Codes and their official titles, both long and short,
detailed Salary data, Union Affiliation, EEO data, Required Security Clearance,
Minimum Qualifications for hiring.
·DEPT_TBL - Lists all Departments, past, present, and future. Includes Number
and Descriptions (long and short,) Manager's EmplID and Position Number.
·APPLICANTS - Shows all Applicants starting from 01 October 1999.
Includes Highest level of Education, Lowest Acceptable Salary, Desired
conditions (full/part-time, shift, locations, resume, language skills).
·BUS_UNIT_TBL_HR - Lists the HR-related Business Units.
Includes Number, Long and Short Descriptions, and Other Business Unit number
assignments for other applications like AP, AR, Budgeting, and General Ledger.
Note: Business Units were previously known as Agencies.

Last Updated: December 2, 2011 Page 21
Step Action
9. Even More Most Used Records
·JOB_REQUISITION - List of all Job Requisitions.
Includes Business Unit, Position Number, Recruiter ID, Authorizer ID, Opening
and Closing Dates.
·JOB_LABOR - Bargaining Unit and Union-related data.
·TRAINING - Employee Training History table: one row for each class attended
by each employee or contractor.
·CRSE_SESSN_TBL - Schedule of State Course Sessions. Shows Starting and
Ending dates and times.
·COURSE_TBL - Catalog of State Courses.
Cites Course Code and Description, Academic Credits, Duration, Instructor
Qualifications, Minimum and Maximum Number of Students per Session.
·TRN_FACIL_TBL - List of State Training Facilities, Buildings, and Rooms.
·TRN_INSTRCT_TBL - List of Qualified Instructors. Note: Many instructors are
missing from this record.
10. Click the Search button.

Last Updated: December 2, 2011 Page 22
Step Action
11. Tips on table joins to the EMPLOYEES record
The EMPLOYEES Record is not an ordinary database table. It is a View, and
derives its data from ten different Records to save time when you need HR data. But
it only shows ACTIVE CURRENT employees. If you want data about past
employees no longer working here (no matter why they terminated) you have to
search other records.
One example for the history of positions held by someone, you need to look at the
JOB Record. If you wanted to check their dates of employment, you would have to
look at the EMPLOYMENT Record. And neither of these records has the
employee’s Name, SSN, or any other personal data. We have to join records
together, usually by Employee ID (EmplID) to get the correct data.
Another example is a search to find past personnel in a particular position, especially
one with a high turnover rate. Here you need to join the POSN_VACANT record
with the POSN_HISTORY2 Record to discover who has been in a position. This
only gives us the employee IDs. If we want names and addresses, we have to look in
at least two more records for that data as well.
To get a past employee’s complete Job History and their Name and other data, on
the same report, we need to pull data from at least two sources. The JOB Record
gives the actual job history, in detail. PERSONAL_DATA will supply the name
only. DIVERSITY supplies the ETHNIC_GROUP (formerly RACE). A person’s
Social Security Number comes from the PERS_NID Record.
The EMPLOYMENT Record will give us employees’ ORIGINAL_HIRE_DT
and SERVICE_DT. SERVICE_DT is the adjusted hire date, showing longevity of
service. The PERSONAL_DATA Record will give us the current name for each
employee.
12. Click the Add Record link.
13. Click the OK button.
14. The Query tab shows all the records and fields you are selecting. Once you have
made these selections, you may further refine your query by using the other tabs
shown here.
We have chosen the EMPLOYEES record. We must now choose the fields within
that record to display in the query. We will start by simply selecting the Empl ID
field.
Click the EMPLID - Empl ID option.

Last Updated: December 2, 2011 Page 23
Step Action
15. Descriptions of each tab in the Query Designer
Records: This is where the names and the contents of all records are available to
choose for your query.
Query: Shows your chosen record(s) and allows you to select the specific fields to
include in your query. Clicking on the funnel icons to the right of the fields allows
you to enter a field's row selection criteria.
Expressions: User-constructed mathematical statements used as output or part of a
criterion.
Prompts: Shows the prompts used in this query. Prompts allow users to enter
dates or other criteria values each time a query is run.
Fields: Manages displaying the record fields selected for this query.
Criteria: Shows all of the row selection criteria used in this query.
Having: For more complex queries, criteria used on a query's aggregate functions
such as count or average. For example, show rows where average is greater than X.
View SQL: Shows the Structured Query Language (SQL) statements generated
by the query designer and used to query the database. The SQL shown here is read-
only.
Preview: Allows users to run the query and view the results prior to saving the
query. Caution: It is a good practice to save (at least) a temporary copy of a new
query prior to previewing it in case the session fails and loses your query.
16. Click the Fields tab.
17. The Fields tab manages the display characteristics for the record fields you have
selected for this query.
Click the Edit button.

Last Updated: December 2, 2011 Page 24
Step Action
18. Explanations of field display characteristics shown on the Fields tab.
The Fields tab manages the display characteristics for the record fields you've
selected for this query. These characteristics are described below:
Col: Tells us numerically in which column each data element will appear in each
row.
Record.Fieldname: Tells the relative name of each record’s alias and field.
Format: Explains how the data field is set up for use. Some of these are: Char
(Character;) Num (Numeric;) and Date (usually in the form mm/dd/yyyy.) It also
tells how many characters are in the field. This can help to determine printing
requirements.
Ord: A number in this column shows the sequence for sorting the output. The
numbers show the importance of the field(s) when sequencing them. 1 is the highest.
XLAT: When a field has entries in PeopleSoft’s Translate Table, an entry will tell
you if and how the field is translated. (N for No Translation, S for a Short
Translation, L for a Long Translation.)
Agg: Tells you what Aggregate functions are in use. This includes Sum, Count,
Min(imum,) Max(imum,) and Avg (Average).
Heading Text: Shows column heading text for this field..
Add Criteria: The funnel icon in this column allows you to add this field to your
criteria page for adding row selection criteria to it.
Edit: Use the Edit button to change any of the field's characteristics displayed on
this page.
Delete: Click on the minus icon to remove this field from the query's display.
19. Click the Count option.
20. Click the OK button.
21. Click the Run tab.
22. We have performed a count of employees. Now we will include some additional
fields.
Click the Query tab.

Last Updated: December 2, 2011 Page 25
Step Action
23. Click the View 100 link.
24. Click the scrollbar.
25. Click the JOBCODE - Job Code option.
26. Click the scrollbar.
27. Click the SEX - Gender option.
28. Click the scrollbar.
29. Click the Run tab.
30. Now the employee totals are broken down by Jobcode and Sex - Gender.
We want to save the query now, but we cannot save from this tab.
Click the Fields tab.
31. Click the Save As link.
32. Enter the desired information into the Query field. Enter "job_gender_count".
33. Enter the desired information into the Description field. Enter "Total Jobcodes by
Gender".
34. Enter the desired information into the Folder field. Enter "Dept Statistics".
35. Enter the desired information into the Query Definition field. Enter "Counting
agency employees by jobcode and gender. Will run this once a quarter.”
36. Click the OK button.
37.
End of Procedure.

Last Updated: December 2, 2011 Page 26
HR Creating More Complex Queries
Procedure
Step Action
1. Click the Main Menu button.
2. Point to the Reporting Tools menu.
3. Point to the Query menu.
4. Click the Query Manager menu.

Last Updated: December 2, 2011 Page 27
Step Action
5. Click the Create New Query link.
6. First, we'll locate the EMPLOYEES record.
Enter "employees".
7. Click the Search button.
8. Click the Add Record link.
9. Click the OK button.
10. We are going to select several of the Employee record's 206 fields here.
Click the Sort fields alphabetically button to make the fields easier to find.
11. Click to select the Annual Rate field.
12. Click to select the Birthdate field.
13. Click to select Business Unit.

Last Updated: December 2, 2011 Page 28
Step Action
14. Click to Scroll Down.
15. Click to select Company Seniority Date.
16. Click to Scroll Up.
17. Click the Show next row (Alt+.) button.
18. Click to select Ethnic Group.
19. Click the Show next row (Alt+.) button.
20. Click to select Hire Date.
21. Click to select Job Code.
22. Click to select Job Title.
23. Click to Scroll Down.
24. Click to select Name.
25. Click to Scroll Up.
26. Click the Show next row (Alt+.) button.
27. Click to Scroll Down.
28. Click to select Sex - Gender.
29. Click to Scroll Up.
30. Now that we have selected fields from the Employees table, we will join the
Business Unit table to get a description.
Click the Records tab.
31. Enter "busunit".
32. Click the Search button.

Last Updated: December 2, 2011 Page 29
Step Action
33. Here we are selecting our record to join.
Click Join Record for BUSUNIT_HR_VW - HR Business Unit Lang Table.
34. Notice we have 2 options for the type of join we are performing. Generally you
will perform a Standard join.
Click the link to join the record for A=EMPLOYEES - Non terminated
Employees.
35. The system will automatically suggest the most logical join criteria. In this case, by
the Business Unit fields of each record.
Click the Add Criteria button.
36. Click to select Descr - Description checkbox.
37. Click the Fields tab.
38. Click the Reorder / Sort button.
39. From this screen, we will place the numbers in the Column Order fields to order
the columns.
40. Enter "8".
41. Enter "9".
42. Enter "1".
43. Enter "7".
44. Enter "10".
45. Enter "6".
46. Enter "4".
47. Enter "5".
48. Enter "3".
49. Enter "11".
50. Enter "2".
51. Click the OK button.

Last Updated: December 2, 2011 Page 30
Step Action
52. You can now see that the Column order has updated.
Click the Reorder / Sort button.
53. From this screen, numbers can be placed in the New Order By fields to order how
the information is presented.
In addition, information is automatically reported in ascending direction (from least
value to greatest value). You can change the direction to descending (from greatest
value to least value) by marking the checkbox next to the appropriate record field.
54. Enter "1".
55. Enter "2".
56. Enter "3".
57. Click the OK button.
58. Click the Criteria tab.
59. Notice that the Effective Date=Current and Business Unit join criteria are already
here.
Next, we will add criteria to pick specific types of Jobcodes.
This may be done by using the Add Criteria button above or by selecting the field
to be used in the criteria from the Fields tab.
Since the Employees record contains so many fields, it will be easier to use the
Fields tab to select fields for adding criteria.
60. Decision: Please make a selection from the options listed below.
Using the Add Criteria Button
Go to step 61 on page 30
Using the Fields Tab to select fields for adding Criteria
Go to step 113 on page 34
61. Click the Add Criteria button.
62. Click the Select Record and Field button.
63. Click the Show next row (Alt+.) button.
64. Click the Show next row (Alt+.) button.

Last Updated: December 2, 2011 Page 31
Step Action
65. Select Job Code.
66. Click the *Condition Type list.
67. Select like.
68. Since we have chosen the Like condition type, we can use the % wildcard.
Enter "00E%".
69. Click the OK button.
70. To select additional criteria for Jobcode, we will choose that field from the Fields
tab.
Click the Fields tab.
71. Click the Add Criteria button on the JOBCODE row.
72. Click the *Condition Type list.
73. Select like.
74. Enter "001%".
75. Click the OK button.
76. Click the Add Criteria button on the JOBCODE row
77. Click the *Condition Type list.
78. Select like.
79. Enter "002%".
80. Click the OK button.
81. Now that we have selected several types of Jobcodes, we must change the logical
operators between them to OR so that any employees meeting one of these
Jobcodes will be selected.

Last Updated: December 2, 2011 Page 32
Step Action
82. We will make these changes from the Criteria tab.
83. Click on the Logical dropdown list in the fourth row.
84. Select OR.
85. Click on the Logical dropdown list in the last row.
86. Select OR.
87. Now we must group these OR conditions together.
Click the Group Criteria button.
88. Enter "(" in the third empty field down the left-hand side of the Edit Criteria
Grouping box to group the Job Code information..
Click in the Left Paren field.
89. Enter ")" in the last empty field down the right-hand side of the Edit Criteria
Grouping box to group the Job Code information.
90. Click the OK button.
91. Click the Run tab.
92. Here are the results.
Now let's add a Prompt so that we can choose a list exclusively by gender.
Click the Fields tab.
93. Click the Add Criteria button for SEX - Gender row.
94. Let's look at the possible options for gender selection.
Click the Select Constant From List button.

Last Updated: December 2, 2011 Page 33
Step Action
95. We could "hardcode" one of these options, but instead we will add a prompt to
choose gender each time the query is run.
Click the Cancel button.
96. Click the Prompt option.
97. Click the New Prompt link.
98. Click the OK button to accept the Prompt.
99. Click the OK button to accept the new criteria.
100. Finally, let's look at the XLAT values for the last two fields.
Notice the value is currently N. This means that we can edit the fields' display
properties to show a value rather than an undescriptive code for values in these
fields.
101. Click the Edit button for Ethnic Group.
102. You may choose a short or long translate value.
Click the Short option.
103. Click the OK button.
104. Click the Edit button for the Sex - Gender row.
105. Click the Short option.
106. Click the OK button.
107. Click the Run tab.
108. Click the Sex - Gender dropdown list.
109. Click Female from the list.

Last Updated: December 2, 2011 Page 34
Step Action
110. Click the OK button.
111. Notice the translate values in the last two columns.
112. Your query has been completed!
Don't forget to save your queries!!
End of Procedure. Remaining steps apply to other paths.
Step Action
113. Click the Fields tab.
114. Click the Add Criteria button on the JOBCODE row.
Go to step 66 on page 31

Last Updated: December 2, 2011 Page 35
Appendixes
Appendix A: Running HR Queries Job Aid
Step Action
Click the Main Menu button.
Point to the Reporting Tools menu.
Point to the Query menu.
Click the Query Viewer menu.
Type the Name of a query you want to run or leave the field blank.
You may also search by the Description of the query.
Enter a valid value, e.g. "soi_sum".
Frequently used HR Public Queries SOI_JOBCODE_IN_AGY List of JCs in an agency
SO_E_LEVEL All E-Level EEs sort/salary
SOI_FSSA_ACTIVE_EMPS EFFDT Prompt
Click Search.
Frequently Used HR Public Queries Your search will return one or more queries. Notice there are several columns
listed:
Query - The name of the query.
Description - A short description of the query.
Owner - To indicate your private queries or public ones that anyone can use.
Folder - The folder used if you placed this query in a query folder.
Run to HTML - Click here to run the query to a web page. A new window will
open up.
Run to Excel - Click here to run the query to a spreadsheet. A new window will
open up.
Schedule - Click here to schedule the query to run later or to run a query that
returns a lot of information.
Add to Favorites - Click here to store the query in your query favorites.

Last Updated: December 2, 2011 Page 36
Step Action
We will choose the Run to HTML option which opens a new window with the
query results in a html format.
Click the Run to HTML link.
Click the Maximize button.
Notice the Excel Spreadsheet and CSV Text File links. These let you download
all rows into Excel or into a comma-delimited text file.
You may see the View All link above the first column. If the query returned more
rows than display on the page, you can click this link to see all rows.
Notice the navigation buttons above the right columns. These let you see the next
chunk of rows returned. There are links to the First page, < for the previous page,
> for the next page, and the Last page. You will also see which rows you are
looking at and how many rows are returned all together.
Click the Show Next rows button.
Click the Close button.
Some queries have prompts to limit what is returned.
Some ask you to type in values free-form.
Others may allow you to click on the Magnifying Glass icon to display a list of
valid values or the Calendar icon to pick a date.
Some queries allow a % for a wildcard.
Click the Advanced Search link.
Click the Description list drop-down menu.
Click contains.
Enter "train" into the Description field.
Click Search.
For this example we will look for the Training Calendar.
Click the Run to HTML link.
Click the Maximize button.

Last Updated: December 2, 2011 Page 37
Step Action
First, we'll choose a Course Start Date.
Click the Choose a date (ALT+5) button.
Click September 1, 2003.
Next, we'll choose a Through Date.
Click the Choose a date (Alt+5) button.
Click the September 1, 2004.
Next we need to choose a Business Unit for this query. Here, it's referred to as
Vendor.
Click the Look up Vender (ALT+5) button.
Since the query is asking for a Vendor, or Business Unit, this window allows you
the option of locating the business unit of your choice. If you do not know the
Business Unit, you can perform an advanced search.
For this example we will be using the Department of Correction Business Unit
which is "00615"
Type "00615" into the search field.
Click the Look Up button.
Click the 00615 link.
Click the View Results button.
Click the Close button for this window.
Scheduling a query is like scheduling a PeopleSoft Process or Report.
It can be scheduled to run once or on a regular basis by using the Recurrence
option.
Click the Schedule link.

Last Updated: December 2, 2011 Page 38
Step Action
Enter the desired information into the Run Control ID field or add a new one.
Enter a valid value e.g. "SOI0044C_WEEKLY."
Click the Add (ALT+1) button.
Fill in the prompt values for this query. These prompt values will be used every
time this query is scheduled to run.
Click the Choose a date (ALT+5) button
Click to select September 10, 2007 as the beginning range for the session date.
Click the Choose a date (ALT+5) button.
Click to select September 14, 2007 as the ending range for the session date.
Enter "00615" for the Vendor (Business Unit).
Click OK.
Fill in a Description of the query.
Enter a valid value e.g. "Weekly Report of Traning Schd".
Click OK.
Click the Recurrence drop-down menu.
Click to Scroll down the list.
Click to select Weekly - Friday.
Click the *Format list drop-down menu.
Click XLS.
Click OK.
Last Updated: December 2, 2011 Page 39
Step Action
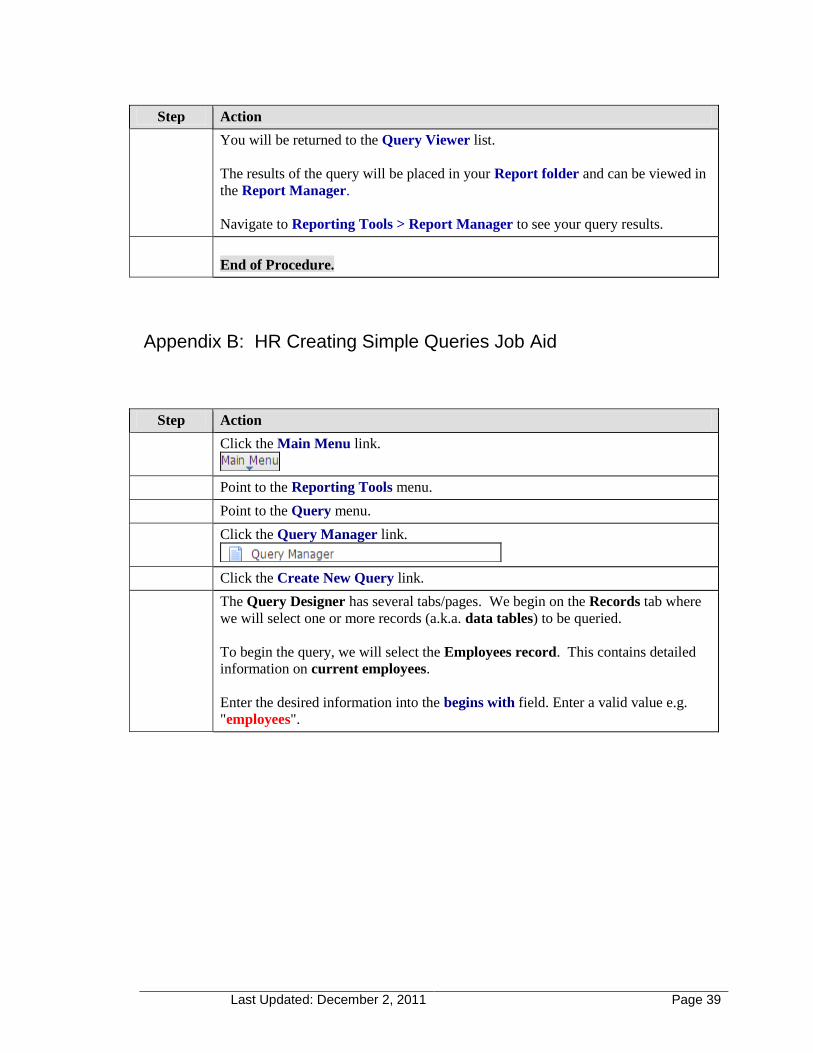
You will be returned to the Query Viewer list.
The results of the query will be placed in your Report folder and can be viewed in
the Report Manager.
Navigate to Reporting Tools > Report Manager to see your query results.
End of Procedure.
Appendix B: HR Creating Simple Queries Job Aid
Step Action
Click the Main Menu link.
Point to the Reporting Tools menu.
Point to the Query menu.
Click the Query Manager link.
Click the Create New Query link.
The Query Designer has several tabs/pages. We begin on the Records tab where
we will select one or more records (a.k.a. data tables) to be queried.
To begin the query, we will select the Employees record. This contains detailed
information on current employees.
Enter the desired information into the begins with field. Enter a valid value e.g.
"employees".

Last Updated: December 2, 2011 Page 40
Step Action
Most Used Records
General Note: Most of these Records have the field COMPANY in them. This
shows whether the row is for a State of Indiana or a QUASI type. When creating
queries that exclude QUASIs, use criteria "COMPANY = SOI."
·EMPLOYEES - Consolidated data on active employees.
This is actually a view rather than a record. Information here is refreshed nightly
and comes from more than a dozen records in the HR system. Many of these are
shown below. Querying the Employees table is an easy way to report a wide
variety of data.
·EMPLOYMENT - Employment history of all employees, but only detailed since
01 October 1999.
Important fields here include Initial Hire Date, Last Re-hire Date, Adjusted
Hire Date and Seniority Date.
·JOB - Job history of all employees, but only detailed since 01 October 1999.
Important fields here include Position Number, Job Code and Title, Effective
Dates, Department Name and Number, FTE, Pay Frequency, Rates (hourly,
monthly, annual,) Shift and Physical Location. This also shows promotions
demotions, transfers, and other miscellaneous actions, one row for each action.
This record is effective dated).
·EMPL_CHECKLIST - General purpose checklist, used for tabulating orientation
of new employees, tracking and predicting performance appraisals.
·DIVERSITY - Race codes for EEO reporting.
·PERSON - Birth and death data.
·PERSONAL_DATA - Employee current name only.
·PERS_DATA_EFFDT - Both personal and professional records, effective dated.
·ADDRESSES - Employee home addresses, effective dated.

Last Updated: December 2, 2011 Page 41
Step Action
More Most Used Records
·PERS_NID - Social Security Numbers, tied to EmplID.
·POSITION_DATA - Position data only no Employee data.
Includes Position Number and long and short descriptions. These may not be the
same as employee Job Titles, Business Unit and Department IDs, Standard
Working Hours by day of the week, and Position Number of Supervisor.
·POSN_VACANT - Lists every vacant position, and its status, with minimum
position data.
·POSN_HISTORY2 - List of current and past employees (EmplID only) by
position, along with Start and End dates in that position.
·JOBCODE_TBL - Lists Job Codes and their official titles, both long and short,
detailed Salary data, Union Affiliation, EEO data, Required Security
Clearance, Minimum Qualifications for hiring.
·DEPT_TBL - Lists all Departments, past, present, and future. Includes
Number and Descriptions (long and short,) Manager's EmplID and Position
Number.
·APPLICANTS - Shows all Applicants starting from 01 October 1999.
Includes Highest level of Education, Lowest Acceptable Salary, Desired
conditions (full/part-time, shift, locations, resume, language skills).
·BUS_UNIT_TBL_HR - Lists the HR-related Business Units.
Includes Number, Long and Short Descriptions, and Other Business Unit
number assignments for other applications like AP, AR, Budgeting, and General
Ledger. Note: Business Units were previously known as Agencies.

Last Updated: December 2, 2011 Page 42
Step Action
Even More Most Used Records
·JOB_REQUISITION - List of all Job Requisitions.
Includes Business Unit, Position Number, Recruiter ID, Authorizer ID,
Opening and Closing Dates.
·JOB_LABOR - Bargaining Unit and Union-related data.
·TRAINING - Employee Training History table: one row for each class attended
by each employee or contractor.
·CRSE_SESSN_TBL - Schedule of State Course Sessions. Shows Starting and
Ending dates and times.
·COURSE_TBL - Catalog of State Courses.
Cites Course Code and Description, Academic Credits, Duration, Instructor
Qualifications, Minimum and Maximum Number of Students per Session.
·TRN_FACIL_TBL - List of State Training Facilities, Buildings, and Rooms.
·TRN_INSTRCT_TBL - List of Qualified Instructors. Note: Many instructors
are missing from this record.
Click the Search button.

Last Updated: December 2, 2011 Page 43
Step Action
Tips on table joins to the EMPLOYEES record
The EMPLOYEES Record is not an ordinary database table. It is a View, and
derives its data from ten different Records to save time when you need HR data.
But it only shows ACTIVE CURRENT employees. If you want data about past
employees no longer working here (no matter why they terminated) you have to
search other records.
One example for the history of positions held by someone, you need to look at the
JOB Record. If you wanted to check their dates of employment, you would have
to look at the EMPLOYMENT Record. And neither of these records has the
employee’s Name, SSN, or any other personal data. We have to join records
together, usually by Employee ID (EmplID) to get the correct data.
Another example is a search to find past personnel in a particular position,
especially one with a high turnover rate. Here you need to join the
POSN_VACANT record with the POSN_HISTORY2 Record to discover who
has been in a position. This only gives us the employee IDs. If we want names and
addresses, we have to look in at least two more records for that data as well.
To get a past employee’s complete Job History and their Name and other data, on
the same report, we need to pull data from at least two sources. The JOB Record
gives the actual job history, in detail. PERSONAL_DATA will supply the name
only. DIVERSITY supplies the ETHNIC_GROUP (formerly RACE). A person’s
Social Security Number comes from the PERS_NID Record.
The EMPLOYMENT Record will give us employees’ ORIGINAL_HIRE_DT
and SERVICE_DT. SERVICE_DT is the adjusted hire date, showing longevity of
service. The PERSONAL_DATA Record will give us the current name for each
employee.
Click the Add Record link.
Click the OK button.
The Query tab shows all the records and fields you are selecting. Once you have
made these selections, you may further refine your query by using the other tabs
shown here.
We have chosen the EMPLOYEES record. We must now choose the fields
within that record to display in the query. We will start by simply selecting the
Empl ID field.
Click the EMPLID - Empl ID option.

Last Updated: December 2, 2011 Page 44
Step Action
Descriptions of each tab in the Query Designer
Records: This is where the names and the contents of all records are available to
choose for your query.
Query: Shows your chosen record(s) and allows you to select the specific fields to
include in your query. Clicking on the funnel icons to the right of the fields allows
you to enter a field's row selection criteria.
Expressions: User-constructed mathematical statements used as output or part of a
criterion.
Prompts: Shows the prompts used in this query. Prompts allow users to enter
dates or other criteria values each time a query is run.
Fields: Manages displaying the record fields selected for this query.
Criteria: Shows all of the row selection criteria used in this query.
Having: For more complex queries, criteria used on a query's aggregate functions
such as count or average. For example, show rows where average is greater than
X.
View SQL: Shows the Structured Query Language (SQL) statements generated
by the query designer and used to query the database. The SQL shown here is read-
only.
Preview: Allows users to run the query and view the results prior to saving the
query. Caution: It is a good practice to save (at least) a temporary copy of a new
query prior to previewing it in case the session fails and loses your query.
Click the Fields tab.
The Fields tab manages the display characteristics for the record fields you have
selected for this query.
Click the Edit button.

Last Updated: December 2, 2011 Page 45
Step Action
Explanations of field display characteristics shown on the Fields tab.
The Fields tab manages the display characteristics for the record fields you've
selected for this query. These characteristics are described below:
Col: Tells us numerically in which column each data element will appear in each
row.
Record.Fieldname: Tells the relative name of each record’s alias and field.
Format: Explains how the data field is set up for use. Some of these are: Char
(Character;) Num (Numeric;) and Date (usually in the form mm/dd/yyyy.) It also
tells how many characters are in the field. This can help to determine printing
requirements.
Ord: A number in this column shows the sequence for sorting the output. The
numbers show the importance of the field(s) when sequencing them. 1 is the
highest.
XLAT: When a field has entries in PeopleSoft’s Translate Table, an entry will tell
you if and how the field is translated. (N for No Translation, S for a Short
Translation, L for a Long Translation.)
Agg: Tells you what Aggregate functions are in use. This includes Sum, Count,
Min(imum,) Max(imum,) and Avg (Average).
Heading Text: Shows column heading text for this field..
Add Criteria: The funnel icon in this column allows you to add this field to your
criteria page for adding row selection criteria to it.
Edit: Use the Edit button to change any of the field's characteristics displayed on
this page.
Delete: Click on the minus icon to remove this field from the query's display.
Click the Count option.
Click the OK button.
Click the Run tab.

Last Updated: December 2, 2011 Page 46
Step Action
We have performed a count of employees. Now we will include some additional
fields.
Click the Query tab.
Click the View 100 link.
Click the scrollbar.
Click the JOBCODE - Job Code option.
Click the scrollbar.
Click the SEX - Gender option.
Click the scrollbar.
Click the Run tab.
Now the employee totals are broken down by Jobcode and Sex - Gender.
We want to save the query now, but we cannot save from this tab.
Click the Fields tab.
Click the Save As link.
Enter the desired information into the Query field. Enter a valid value e.g.
"job_gender_count".
Enter the desired information into the Description field. Enter a valid value e.g.
"Total Jobcodes by Gender".
Enter the desired information into the Folder field. Enter a valid value e.g. "Dept
Statistics".
Enter the desired information into the Query Definition field. Enter a valid value
e.g. "Counting agency employees by jobcode and gender. Will run this once a
quarter.".
Click the OK button.
End of Procedure.

Last Updated: December 2, 2011 Page 47
Appendix C: HR Creating More Complex Queries Job Aid
Step Action
Click the Main Menu button.
Point to the Reporting Tools menu.
Point to the Query menu.
Click the Query Manager menu.
Click the Create New Query link.
First, we'll locate the EMPLOYEES record.
Enter a valid value, e.g. "employees".
Click the Search button.
Click the Add Record link.
Click the OK button.
We are going to select several of the Employee record's 206 fields here.
Click the Sort fields alphabetically button to make the fields easier to find.
Click to select the Annual Rate field.
Click to select the Birthdate field.
Click to select Business Unit.
Click to Scroll Down.
Click to select Company Seniority Date.
Click to Scroll Up.
Click the Show next row (Alt+.) button.

Last Updated: December 2, 2011 Page 48
Step Action
Click to select Ethnic Group.
Click the Show next row (Alt+.) button.
Click to select Hire Date.
Click to select Job Code.
Click to select Job Title.
Click to Scroll Down.
Click to select Name.
Click to Scroll Up.
Click the Show next row (Alt+.) button.
Click to Scroll Down.
Click to select Sex - Gender.
Click to Scroll Up.
Now that we have selected fields from the Employees table, we will join the
Business Unit table to get a description.
Click the Records tab.
Enter a valid value, e.g. "busunit".
Click the Search button.
Here we are selecting our record to join.
Click Join Record for BUSUNIT_HR_VW - HR Business Unit Lang Table.

Last Updated: December 2, 2011 Page 49
Step Action
Notice we have 2 options for the type of join we are performing. Generally you
will perform a Standard join.
Click the link to join the record for A=EMPLOYEES - Non terminated
Employees.
The system will automatically suggest the most logical join criteria. In this case,
by the Business Unit fields of each record.
Click the Add Criteria button.
Click to select Descr - Description checkbox.
Click the Fields tab.
Click the Reorder / Sort button.
From this screen, we will place the numbers in the Column Order fields to order
the columns.
Enter a valid value e.g. "8".
Enter a valid value e.g. "9".
Enter a valid value e.g. "1".
Enter a valid value e.g. "7".
Enter a valid value e.g. "10".
Enter a valid value e.g. "6".
Enter a valid value e.g. "4".
Enter a valid value e.g. "5".
Enter a valid value e.g. "3".
Enter a valid value e.g. "11".
Enter a valid value e.g. "2".
Click the OK button.
You can now see that the Column order has updated.
Click the Reorder / Sort button.
Last Updated: December 2, 2011 Page 50
Step Action
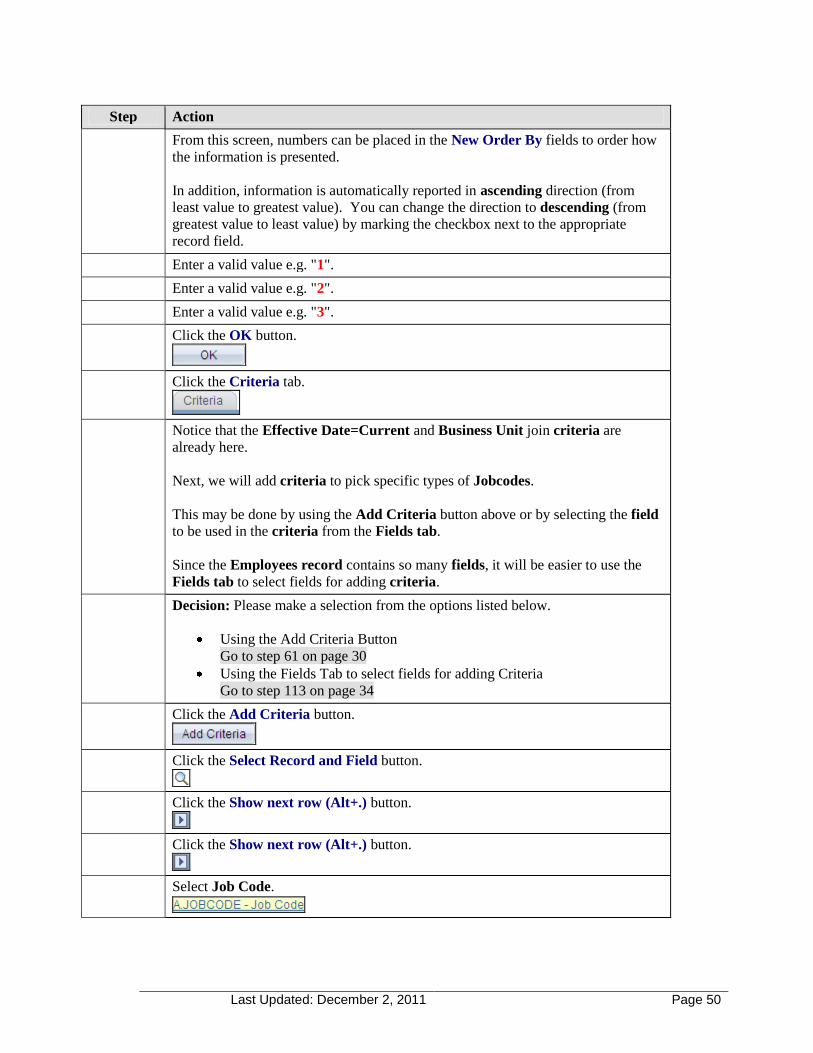
From this screen, numbers can be placed in the New Order By fields to order how
the information is presented.
In addition, information is automatically reported in ascending direction (from
least value to greatest value). You can change the direction to descending (from
greatest value to least value) by marking the checkbox next to the appropriate
record field.
Enter a valid value e.g. "1".
Enter a valid value e.g. "2".
Enter a valid value e.g. "3".
Click the OK button.
Click the Criteria tab.
Notice that the Effective Date=Current and Business Unit join criteria are
already here.
Next, we will add criteria to pick specific types of Jobcodes.
This may be done by using the Add Criteria button above or by selecting the field
to be used in the criteria from the Fields tab.
Since the Employees record contains so many fields, it will be easier to use the
Fields tab to select fields for adding criteria.
Decision: Please make a selection from the options listed below.
Using the Add Criteria Button
Go to step 61 on page 30
Using the Fields Tab to select fields for adding Criteria
Go to step 113 on page 34
Click the Add Criteria button.
Click the Select Record and Field button.
Click the Show next row (Alt+.) button.
Click the Show next row (Alt+.) button.
Select Job Code.

Last Updated: December 2, 2011 Page 51
Step Action
Click the *Condition Type list.
Select like.
Since we have chosen the Like condition type, we can use the % wildcard.
Enter a valid value, e.g. "00E%".
Click the OK button.
To select additional criteria for Jobcode, we will choose that field from the Fields
tab.
Click the Fields tab.
Click the Add Criteria button on the JOBCODE row.
Click the *Condition Type list.
Select like.
Enter a valid value, e.g. "001%".
Click the OK button.
Click the Add Criteria button on the JOBCODE row
Click the *Condition Type list.
Select like.
Enter a valid value, e.g. "002%".
Click the OK button.
We will make these changes from the Criteria tab.
Click on the Logical dropdown list in the fourth row.

Last Updated: December 2, 2011 Page 52
Step Action
Select OR.
Click on the Logical dropdown list in the last row.
Select OR.
Now we must group these OR conditions together.
Click the Group Criteria button.
Enter a valid value, e.g. "(".
Click in the Left Paren field.
Enter a valid value, e.g. ")".
Click the OK button.
Click the Run tab.
Here are the results.
Now let's add a Prompt so that we can choose a list exclusively by gender.
Click the Fields tab.
Click the Add Criteria button for SEX - Gender row.
Let's look at the possible options for gender selection.
Click the Select Constant From List button.
We could "hardcode" one of these options, but instead we will add a prompt to
choose gender each time the query is run.
Click the Cancel button.
Click the Prompt option.
Click the New Prompt link.

Last Updated: December 2, 2011 Page 53
Step Action
Click the OK button to accept the Prompt.
Click the OK button to accept the new criteria.
Click the Edit button for Ethnic Group.
You may choose a short or long translate value.
Click the Short option.
Click the OK button.
Click the Edit button for the Sex - Gender row.
Click the Short option.
Click the OK button.
Click the Run tab.
Click the Sex - Gender dropdown list.
Click Female from the list.
Click the OK button.
Your query has been completed!
Don't forget to save your queries!!
End of Procedure. Remaining steps apply to other paths.
Click the Fields tab.
Click the Add Criteria button on the JOBCODE row.
Go to step 66 on page 31
Related Documents