How to use Picmonkey

How to use Picmonkey
Aug 18, 2015
Welcome message from author
This document is posted to help you gain knowledge. Please leave a comment to let me know what you think about it! Share it to your friends and learn new things together.
Transcript

How to use Picmonkey

Open web browser

Go to “picmonkey.com”

Click “Edit”

Click an image to edit

Click “Open”

Picture is ready for editing

Click “Crop”

Click and drag edges to adjust

Place cursor inside the crop box

Click and drag to move crop box

Click “Apply”

Click “Exposure”

Click “Auto Adjust”

Exposure is Auto-fixed

Click “Apply”

Click for overlays

Scroll down

Click “Banners”

Select banner

Pick color of banner by clicking

Click “X” to close dialogue box

Click to add text

Click to select text style

Click “Add Text”

Move text box to banner

Type text on the text box

Click drop down button to adjust text size

Click for bold format

Select color by clicking

Click “X” to close dialogue box

Click to select text style

Click “Add Text”

Follow previous procedure to add text

Click to add frame

Select frame by clicking

Format frame in the options

Click “Apply”

You now have a frame

Click to combine

Click “Save” when done

Replace file name

Click “Save to my computer”

Click “Save”

Open saved image file

Let’s edit another image to use other tools

Remove the shadow

Select “Geometric”

Click “Ellipse”

Drag to shadow area

Rotate it

Drag corners to adjust size

Click ”Color 2” box

Click to match color

Click the sand to match color

Click “Eraser”

Click and drag to portions to be revealed

Adjust eraser sizes
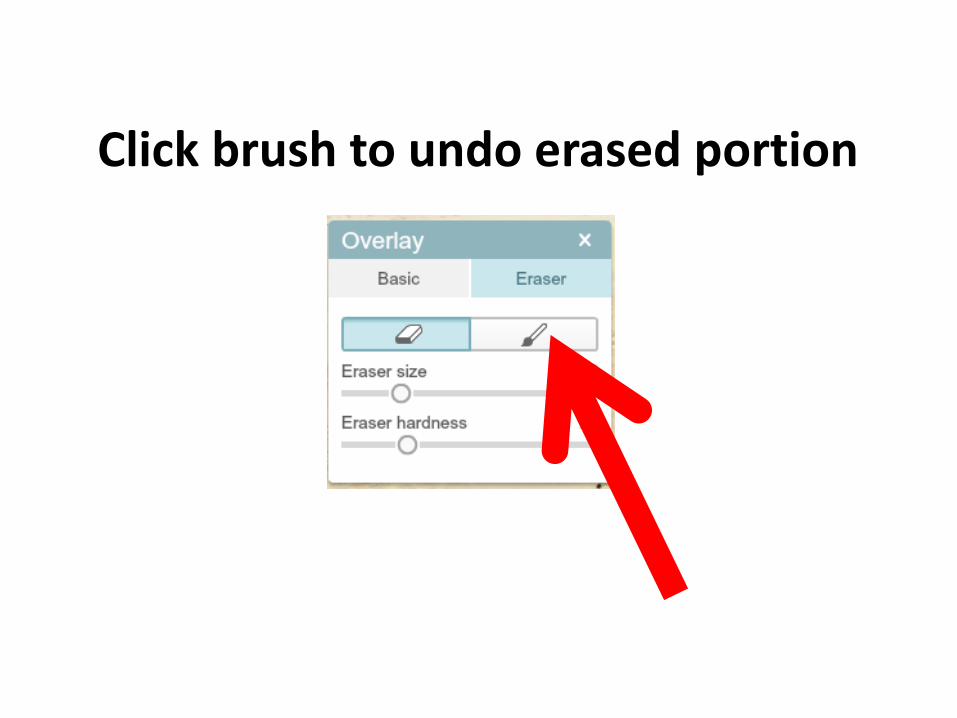
Click brush to undo erased portion

Click “X” when done

Click to combine

Click to add text

Click to select text style

Click “Add Text”

Type text in the box

Click overlays

Select “Geometric”

Click rectangle

Drag rectangle on top corner

Drag corners to adjust size

Click Color 2-box

Pick color

Click “X” to close

Click combine image elements

Click overlays

Click “Your Own”

Select image file

Click “Open”

Drag overlay image

Drag image to desired place

Combine image elements

Add more elements as seen on previous.

Combine image elements when done

Click “Save”

Click “Save to my computer”

Click “Save”

Click “X” when done

Let’s create a collage

Click “Collage”

Select an image file

Click “Open”

Click to choose layout

Click “Square Deal”

Click to select a layout

Selected layout will appear

Click for images

Click “Open Photos”

Click “Open from my computer”

Select 8 more photos, we need 9

Drag each photo to box

This would be the result

Hover mouse on each photo

Click “Edit”

Editing tools will appear

Click “Edit” when done

Click “Open in Editor”

Editing tools will appear

Click “Save” when done

Replace file name if needed

Click “Save to my computer”

Click “Save”

Open file in folder

Click “X” to quit

To learn more about Picmonkey, go to
http://www.picmonkey.com/blog/category/tutorials/

Thank you for your time.
Related Documents