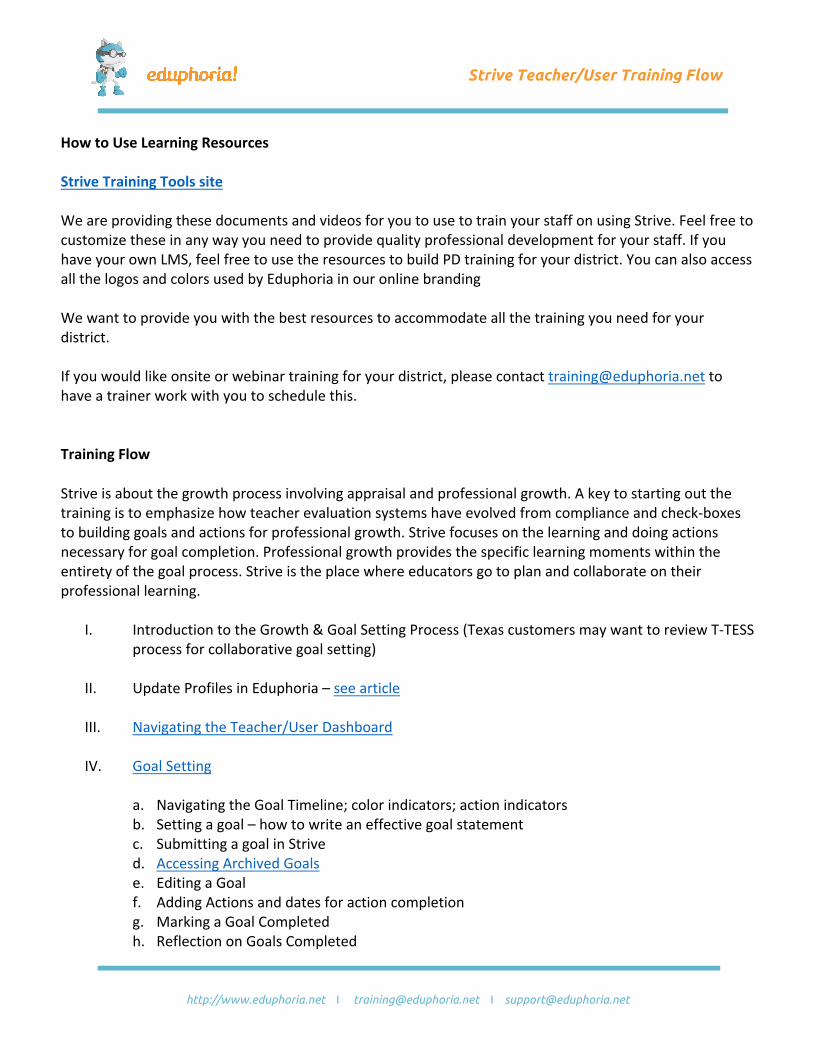
http://www.eduphoria.net I [email protected] I [email protected] Strive Teacher/User Training Flow How to Use Learning Resources Strive Training Tools site We are providing these documents and videos for you to use to train your staff on using Strive. Feel free to customize these in any way you need to provide quality professional development for your staff. If you have your own LMS, feel free to use the resources to build PD training for your district. You can also access all the logos and colors used by Eduphoria in our online branding We want to provide you with the best resources to accommodate all the training you need for your district. If you would like onsite or webinar training for your district, please contact [email protected] to have a trainer work with you to schedule this. Training Flow Strive is about the growth process involving appraisal and professional growth. A key to starting out the training is to emphasize how teacher evaluation systems have evolved from compliance and check-boxes to building goals and actions for professional growth. Strive focuses on the learning and doing actions necessary for goal completion. Professional growth provides the specific learning moments within the entirety of the goal process. Strive is the place where educators go to plan and collaborate on their professional learning. I. Introduction to the Growth & Goal Setting Process (Texas customers may want to review T-TESS process for collaborative goal setting) II. Update Profiles in Eduphoria – see article III. Navigating the Teacher/User Dashboard IV. Goal Setting a. Navigating the Goal Timeline; color indicators; action indicators b. Setting a goal – how to write an effective goal statement c. Submitting a goal in Strive d. Accessing Archived Goals e. Editing a Goal f. Adding Actions and dates for action completion g. Marking a Goal Completed h. Reflection on Goals Completed

Welcome message from author
This document is posted to help you gain knowledge. Please leave a comment to let me know what you think about it! Share it to your friends and learn new things together.
Transcript
http://www.eduphoria.net I [email protected] I [email protected]
Strive Teacher/User Training Flow
HowtoUseLearningResourcesStriveTrainingToolssiteWeareprovidingthesedocumentsandvideosforyoutousetotrainyourstaffonusingStrive.Feelfreetocustomizetheseinanywayyouneedtoprovidequalityprofessionaldevelopmentforyourstaff.IfyouhaveyourownLMS,feelfreetousetheresourcestobuildPDtrainingforyourdistrict.YoucanalsoaccessallthelogosandcolorsusedbyEduphoriainouronlinebrandingWewanttoprovideyouwiththebestresourcestoaccommodateallthetrainingyouneedforyourdistrict.Ifyouwouldlikeonsiteorwebinartrainingforyourdistrict,pleasecontacttraining@eduphoria.nettohaveatrainerworkwithyoutoschedulethis.TrainingFlowStriveisaboutthegrowthprocessinvolvingappraisalandprofessionalgrowth.Akeytostartingoutthetrainingistoemphasizehowteacherevaluationsystemshaveevolvedfromcomplianceandcheck-boxestobuildinggoalsandactionsforprofessionalgrowth.Strivefocusesonthelearninganddoingactionsnecessaryforgoalcompletion.Professionalgrowthprovidesthespecificlearningmomentswithintheentiretyofthegoalprocess.Striveistheplacewhereeducatorsgotoplanandcollaborateontheirprofessionallearning.
I. IntroductiontotheGrowth&GoalSettingProcess(TexascustomersmaywanttoreviewT-TESSprocessforcollaborativegoalsetting)
II. UpdateProfilesinEduphoria–seearticle
III. NavigatingtheTeacher/UserDashboard
IV. GoalSetting
a. NavigatingtheGoalTimeline;colorindicators;actionindicatorsb. Settingagoal–howtowriteaneffectivegoalstatementc. SubmittingagoalinStrived. AccessingArchivedGoalse. EditingaGoalf. AddingActionsanddatesforactioncompletiong. MarkingaGoalCompletedh. ReflectiononGoalsCompleted
http://www.eduphoria.net I [email protected] I [email protected]
Strive Teacher/User Training Flow
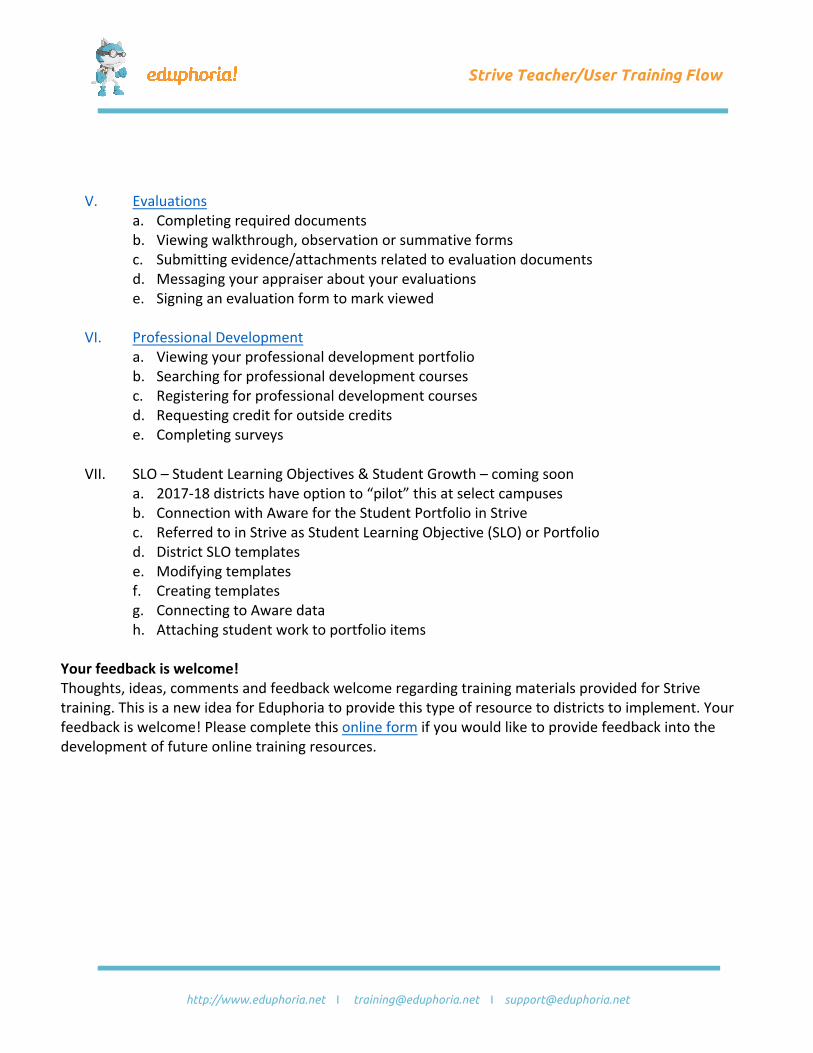
V. Evaluationsa. Completingrequireddocumentsb. Viewingwalkthrough,observationorsummativeformsc. Submittingevidence/attachmentsrelatedtoevaluationdocumentsd. Messagingyourappraiseraboutyourevaluationse. Signinganevaluationformtomarkviewed
VI. ProfessionalDevelopment
a. Viewingyourprofessionaldevelopmentportfoliob. Searchingforprofessionaldevelopmentcoursesc. Registeringforprofessionaldevelopmentcoursesd. Requestingcreditforoutsidecreditse. Completingsurveys
VII. SLO–StudentLearningObjectives&StudentGrowth–comingsoon
a. 2017-18districtshaveoptionto“pilot”thisatselectcampusesb. ConnectionwithAwarefortheStudentPortfolioinStrivec. ReferredtoinStriveasStudentLearningObjective(SLO)orPortfoliod. DistrictSLOtemplatese. Modifyingtemplatesf. Creatingtemplatesg. ConnectingtoAwaredatah. Attachingstudentworktoportfolioitems
Yourfeedbackiswelcome!Thoughts,ideas,commentsandfeedbackwelcomeregardingtrainingmaterialsprovidedforStrivetraining.ThisisanewideaforEduphoriatoprovidethistypeofresourcetodistrictstoimplement.Yourfeedbackiswelcome!Pleasecompletethisonlineformifyouwouldliketoprovidefeedbackintothedevelopmentoffutureonlinetrainingresources.

http://www.eduphoria.net I [email protected] I [email protected]
Strive Training: The Teacher Dashboard
When a user first logs in to Strive, the first view they will see is the Teacher Dashboard. This can also be seen by clicking the Personal View button on the left navigation panel.
In this view, a user can work with his/her goals, evaluation forms, and access their professional development portfolio and course catalog. There are tabs for access to other components in this dashboard: Goals, Evaluations, and Professional Development.
Figure 1 - Personal Dashboard
The white dashes along the goal timeline indicate actions completed by date as part of the goal achievement process.
Figure2-Actionscompletedinagoaltimeline

http://www.eduphoria.net I [email protected] I [email protected]
Strive Training: The Teacher Dashboard
Navigation:
Goals:
Figure3-Goalstabaccess
The Goals tab is for viewing and adding goals, actions, tagging dimensions/standards, and setting the goal completion date. It is also for viewing the progress toward goal completion. The Show Archived Professional Goals button at the bottom of the goal list will bring up previously approved goals that can be copied to new goals.
Goals that appear in this tab are color-coded for their status in the approval process:
Goal is still in edit mode and has not been submitted for approval.
Goal has been submitted for approval and is waiting for approval from the appraiser.
Goal has been approved and is on target for a future completion date. Action items can be added.
Goal has been completed.
The left navigation bar will remain with you as you access the tab elements. Personal View returns you to the Goals tab. The Help section takes you out of Strive and to the Eduphoria online help site specific to Strive. Change Applications takes you to the main Eduphoria login screen to switch to other Eduphoria applications such as HelpDesk, Forethought, Aware, etc. LogOutwilllogyououtofyourEduphoriaaccountandallowyoutologbackin.
http://www.eduphoria.net I [email protected] I [email protected]
Strive Training: The Teacher Dashboard
Evaluations:
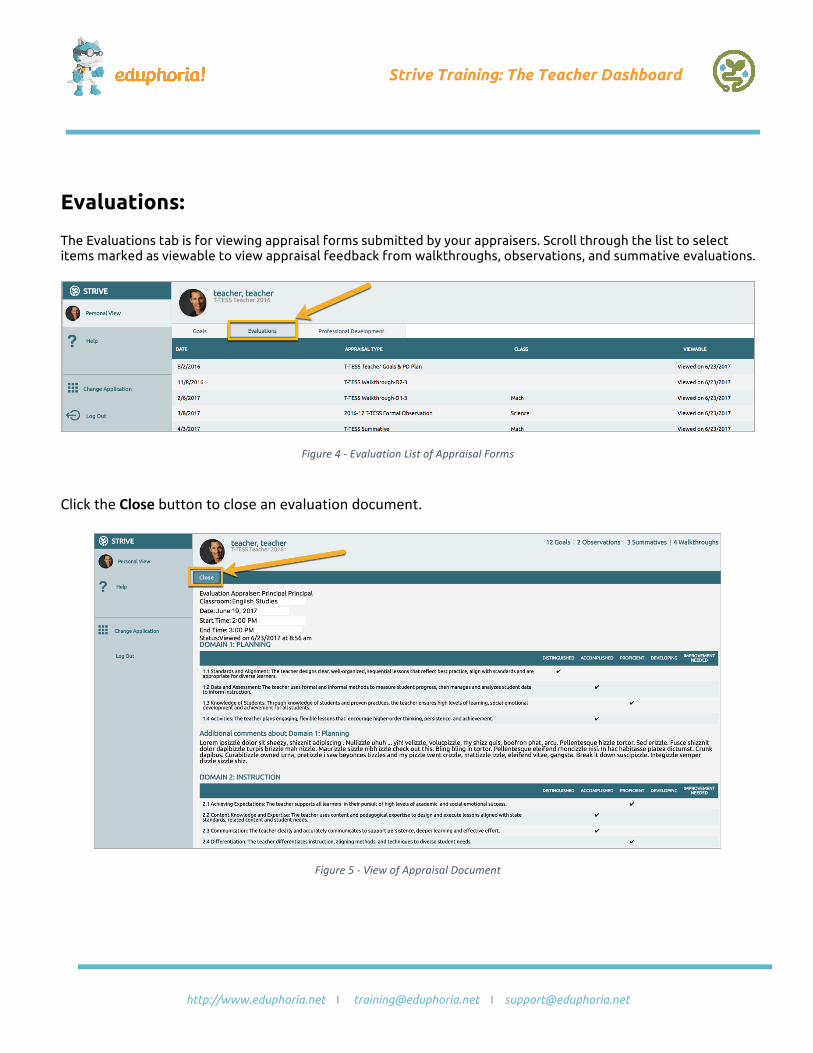
The Evaluations tab is for viewing appraisal forms submitted by your appraisers. Scroll through the list to select items marked as viewable to view appraisal feedback from walkthroughs, observations, and summative evaluations.
Figure4-EvaluationListofAppraisalForms
ClicktheClosebuttontocloseanevaluationdocument.
Figure5-ViewofAppraisalDocument
http://www.eduphoria.net I [email protected] I [email protected]
Strive Training: The Teacher Dashboard
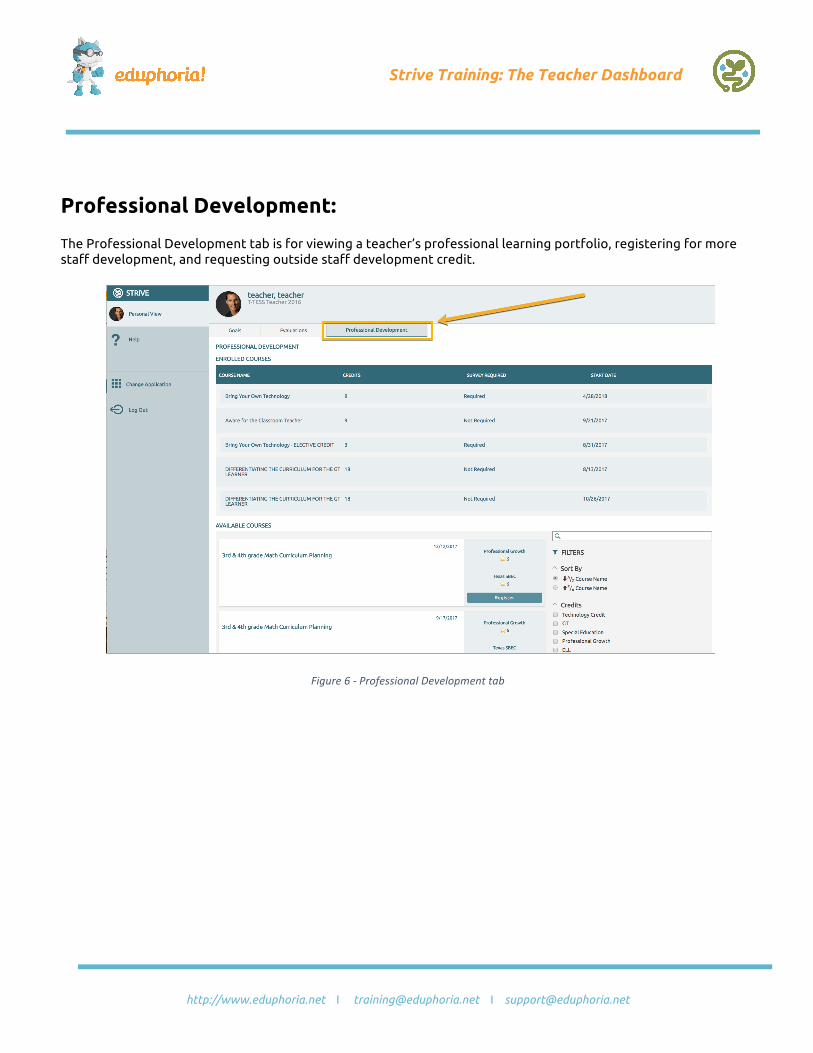
Professional Development:
The Professional Development tab is for viewing a teacher’s professional learning portfolio, registering for more staff development, and requesting outside staff development credit.
Figure6-ProfessionalDevelopmenttab

http://www.eduphoria.net I [email protected] I [email protected]
Strive Training: The Teacher Dashboard
Go to the section marked “Available Courses” and use the filter tools on the right to sort by credit or category type. You can also use the search bar to sort by keyword.
Figure7-PDviewofenrolledandavailablecourses&filteringtool

http://www.eduphoria.net I [email protected] I [email protected]
Strive Training: Add Goals
• On the Teacher Dashboard and in the Goals tab, select the Add New Goal button.
In the New Goal window:
• Enter your New Goal statement. • Select the Standards to attach to the goal. • Click the Add an Action button to add actions with dates for completing each action
step. An Additional Action button appears after entering the initial action. • Choose the Date for the new goal to be completed. Clicking on the date will provide a
calendar to more easily select a specific date. • Click the Save button.

http://www.eduphoria.net I [email protected] I [email protected]
Strive Training: Add Goals
• Once you Save your Goal, it will appear in your Goals list.
Goals that appear in the Goals tab are color-coded for their status in the approval process:
Goal is still in edit mode and has not been submitted for approval.
Goal has been submitted for approval and is waiting for approval from the appraiser.
Goal has been approved and is on target for a future completion date. Action items can be added.
Goal has been completed.
• Click on your newly added goal to open the menu options to Edit, Delete, Copy to New
Goal, or Submit for Approval.
• Click Submit for Approval to send your goal to your appraiser for approval.
http://www.eduphoria.net I [email protected] I [email protected]
Strive Training: Use Archived Goals
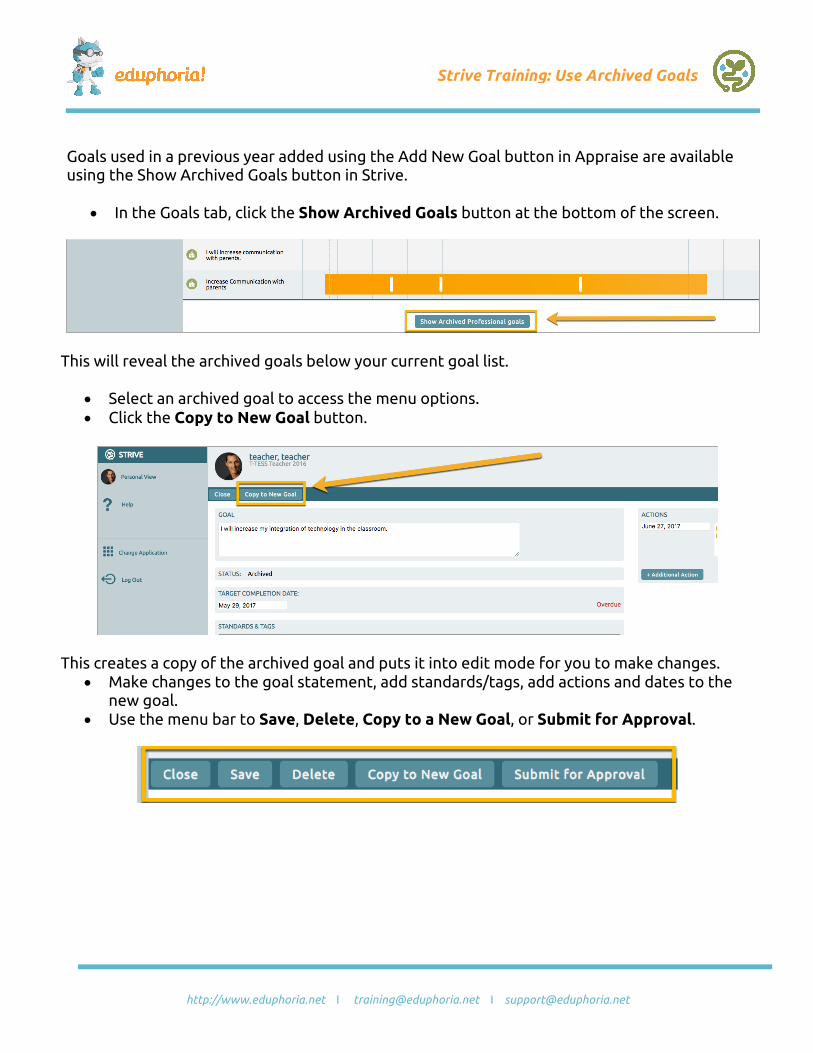
Goals used in a previous year added using the Add New Goal button in Appraise are available using the Show Archived Goals button in Strive.
• In the Goals tab, click the Show Archived Goals button at the bottom of the screen.
This will reveal the archived goals below your current goal list.
• Select an archived goal to access the menu options. • Click the Copy to New Goal button.
This creates a copy of the archived goal and puts it into edit mode for you to make changes.
• Make changes to the goal statement, add standards/tags, add actions and dates to the new goal.
• Use the menu bar to Save, Delete, Copy to a New Goal, or Submit for Approval.
http://www.eduphoria.net I [email protected] I [email protected]
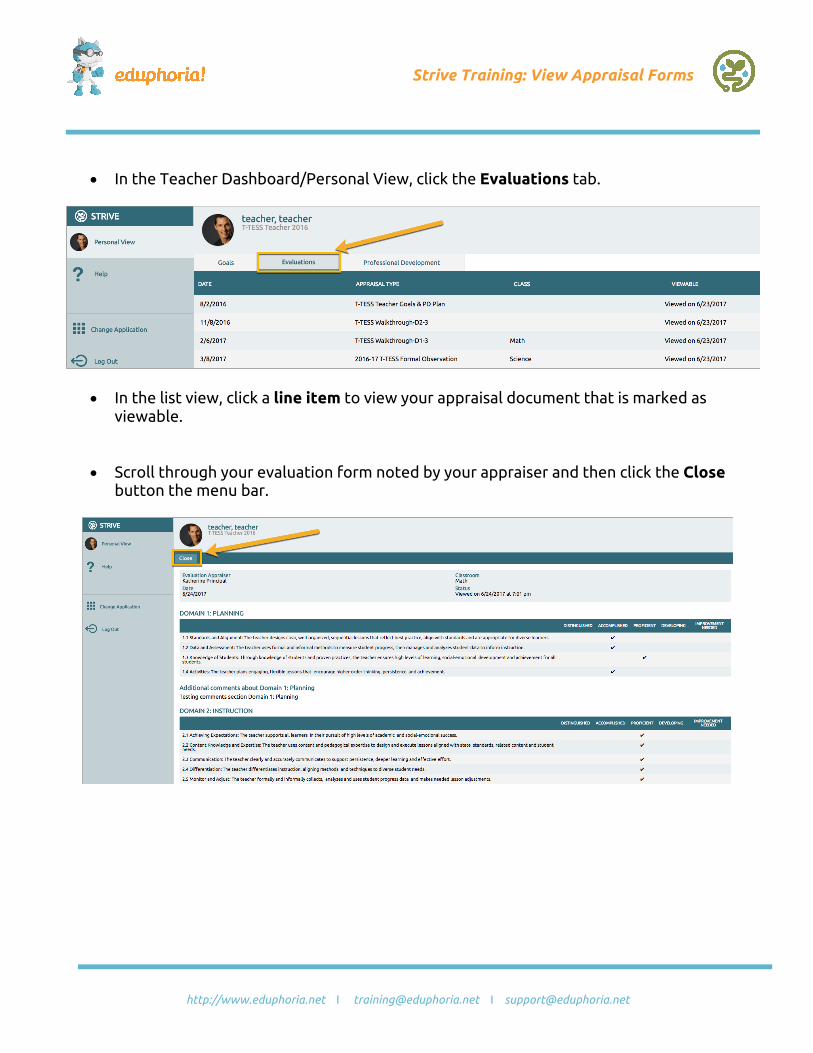
Strive Training: View Appraisal Forms
• In the Teacher Dashboard/Personal View, click the Evaluations tab.
• In the list view, click a line item to view your appraisal document that is marked as viewable.
• Scroll through your evaluation form noted by your appraiser and then click the Close button the menu bar.

http://www.eduphoria.net I [email protected] I [email protected]
Strive Training: Register for Courses
• Click the Professional Development tab.
Courses you are already enrolled in will appear in the top section of the page. The entire course catalog will appear in the Available Courses area under your enrolled courses.
• Use the filter and search box to sort for courses based on title keyword, credit type or category type.

http://www.eduphoria.net I [email protected] I [email protected]
Strive Training: Register for Courses
You can see the types of credits provided by the professional development offering.
• Click the Register button next to a course you would like to attend. This will add the registered item into your Enrolled Courses list.

http://www.eduphoria.net I [email protected] I [email protected]
Strive Teacher Quicksheet
Update your profile at the start of the new school year. Your profile info affects settings in other Eduphoria applications so it is important to keep it updated.
Make sure the following is correct:
• Firstname • Lastname • Email address • Campus – defined as the campus(es) you will work in
most of your time for this school year Image Upload – image viewed in Strive by appraiser. Follow district guidelines for appropriate image.
Primary Role – select the role you serve in your district for the current school year and click Next.
Subject Areas – check the boxes to match the subject areas you will be teaching for the current school year and click Next.
*Be sure to scroll and uncheck any subject areas no longer current.
Grade Levels – Check the boxes to match the grade levels you will teach for the current school year (you can check more than one) and then click the Save Changes button.
*Be sure to scroll through and uncheck any grades no longer current.
Update Your Profile
http://www.eduphoria.net I [email protected] I [email protected]
Strive Teacher Quicksheet
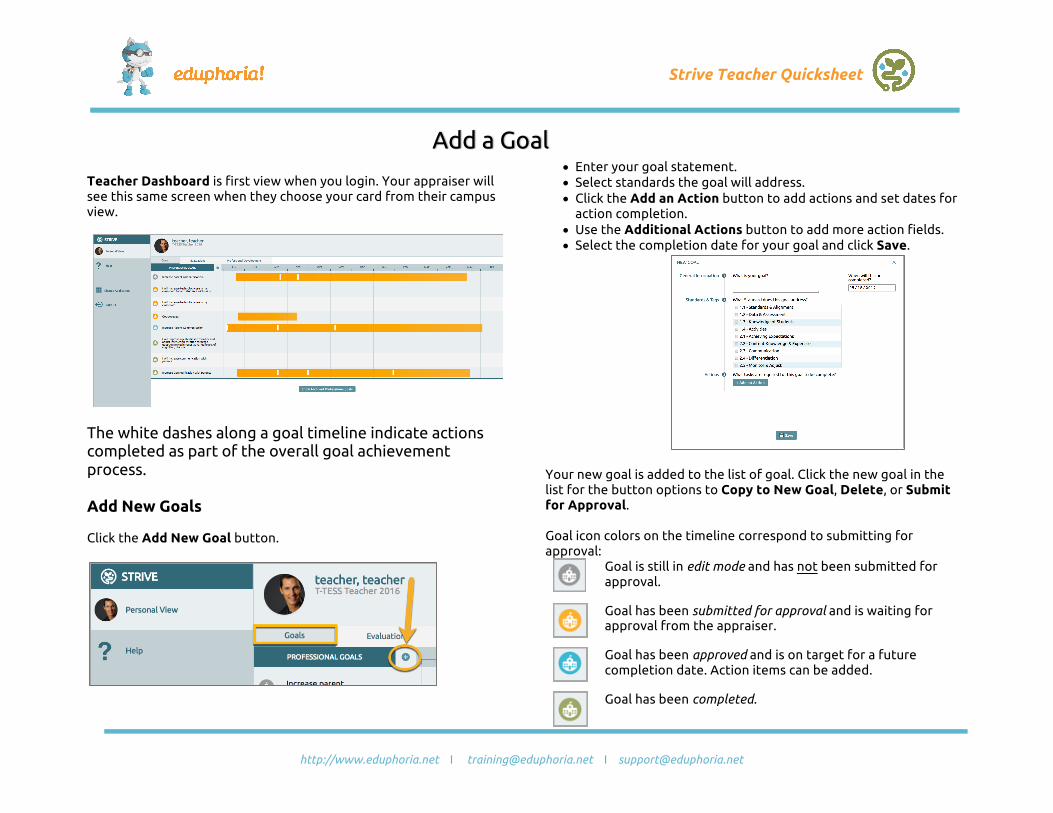
Teacher Dashboard is first view when you login. Your appraiser will see this same screen when they choose your card from their campus view.
The white dashes along a goal timeline indicate actions completed as part of the overall goal achievement process. Add New Goals Click the Add New Goal button.
• Enter your goal statement. • Select standards the goal will address. • Click the Add an Action button to add actions and set dates for
action completion. • Use the Additional Actions button to add more action fields. • Select the completion date for your goal and click Save.
Your new goal is added to the list of goal. Click the new goal in the list for the button options to Copy to New Goal, Delete, or Submit for Approval. Goal icon colors on the timeline correspond to submitting for approval:
Goal is still in edit mode and has not been submitted for approval.
Goal has been submitted for approval and is waiting for approval from the appraiser.
Goal has been approved and is on target for a future completion date. Action items can be added.
Goal has been completed.
Add a Goal

http://www.eduphoria.net I [email protected] I [email protected]
Strive Teacher Quicksheet
• Click the Evaluations tab.
• Click on a viewable evaluation document in the list.
Scroll through the document to view appraisal information. Click Close on the menu bar to return to the evaluation document list.
View Appraisals

http://www.eduphoria.net I [email protected] I [email protected]
Strive Teacher Quicksheet
• Click the Professional Development tab.
• Scroll down to the list of Available Courses.
• Use the filter and search tools to sort alphabetically, by credit type or by category type.
When you find a course you would like to attend, click the Register button. This adds the course to your list of Enrolled Courses at the top of the screen.
View Enrolled Courses You can view all enrolled courses at the top of your screen.
Register for PD Courses
Related Documents