How to Make a Postcard with Photoshop and InDesign Seth Anderson Training Guide 4180.005

Welcome message from author
This document is posted to help you gain knowledge. Please leave a comment to let me know what you think about it! Share it to your friends and learn new things together.
Transcript

How to Make a Postcard with Photoshop and InDesign
Seth Anderson
Training Guide
4180.005
Introduction
For this two-part tutorial, we will be using Photoshop to make a normal image of a city look like a miniature
model, then using that image to make a simple postcard in InDesign. This walkthrough is intended for students
without much prior Photoshop or InDesign knowledge that would like to dip their toes in the art of photograph
manipulation and document design.
Part 1 - Photoshop
1. Choosing an image
It is very important you choose the right image when trying to achieve this effect, as it won’t work with
just any image of a city. The best images are generally from a wide angle and a bird’s eye view and have
enough details to make the end result interesting. It also needs to be high resolution so the blurry areas
of the end result contrast well enough against the in-focus area.
In this case, we’ll be using the image of New Orleans, LA below.
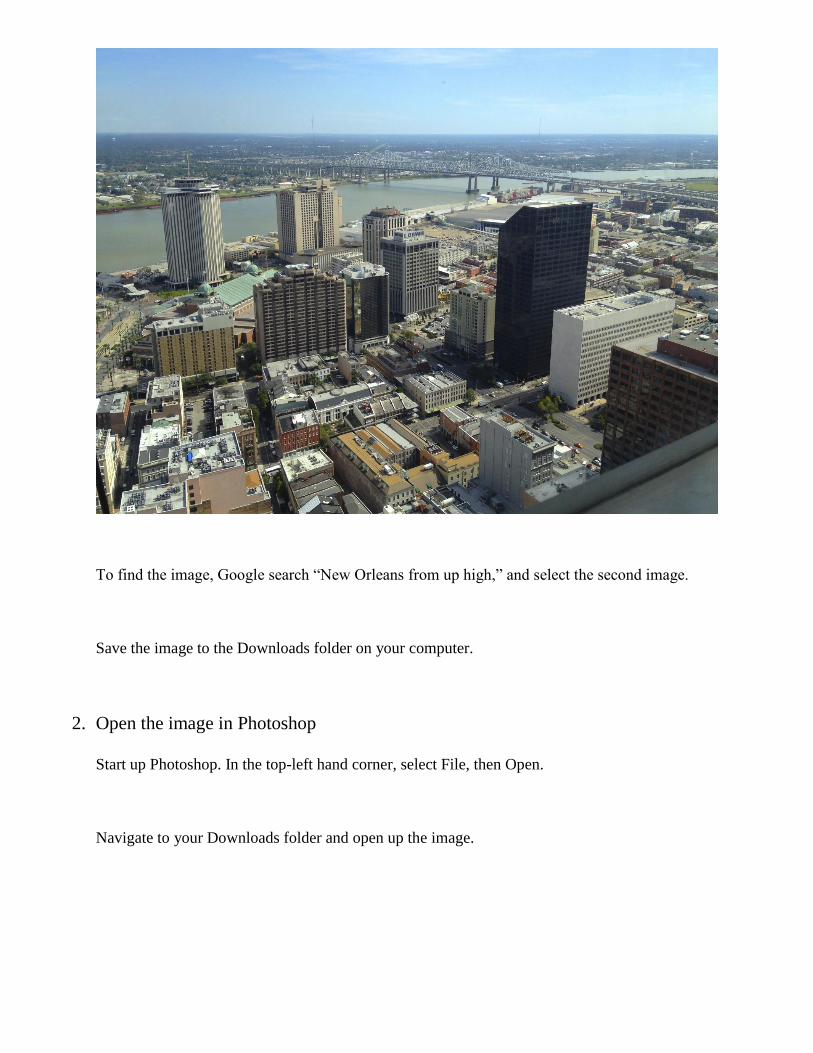
To find the image, Google search “New Orleans from up high,” and select the second image.
Save the image to the Downloads folder on your computer.
2. Open the image in Photoshop
Start up Photoshop. In the top-left hand corner, select File, then Open.
Navigate to your Downloads folder and open up the image.
3. Turn on Quick Mask
Quick Mask is a tool in Photoshop that essentially lets you “mask” areas of the image you’re working on
to protect them from whatever edits you’re about to make to the rest of the image. It automatically
selects the part(s) of the image that will be altered.
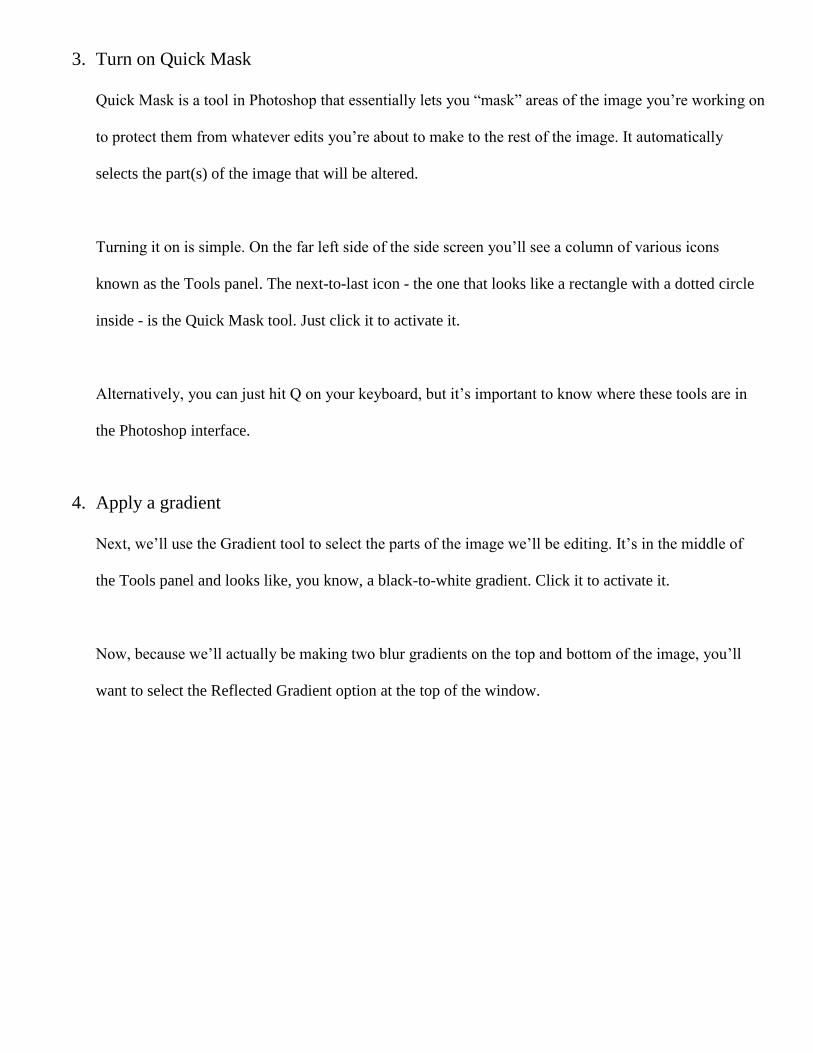
Turning it on is simple. On the far left side of the side screen you’ll see a column of various icons
known as the Tools panel. The next-to-last icon - the one that looks like a rectangle with a dotted circle
inside - is the Quick Mask tool. Just click it to activate it.
Alternatively, you can just hit Q on your keyboard, but it’s important to know where these tools are in
the Photoshop interface.
4. Apply a gradient
Next, we’ll use the Gradient tool to select the parts of the image we’ll be editing. It’s in the middle of
the Tools panel and looks like, you know, a black-to-white gradient. Click it to activate it.
Now, because we’ll actually be making two blur gradients on the top and bottom of the image, you’ll
want to select the Reflected Gradient option at the top of the window.
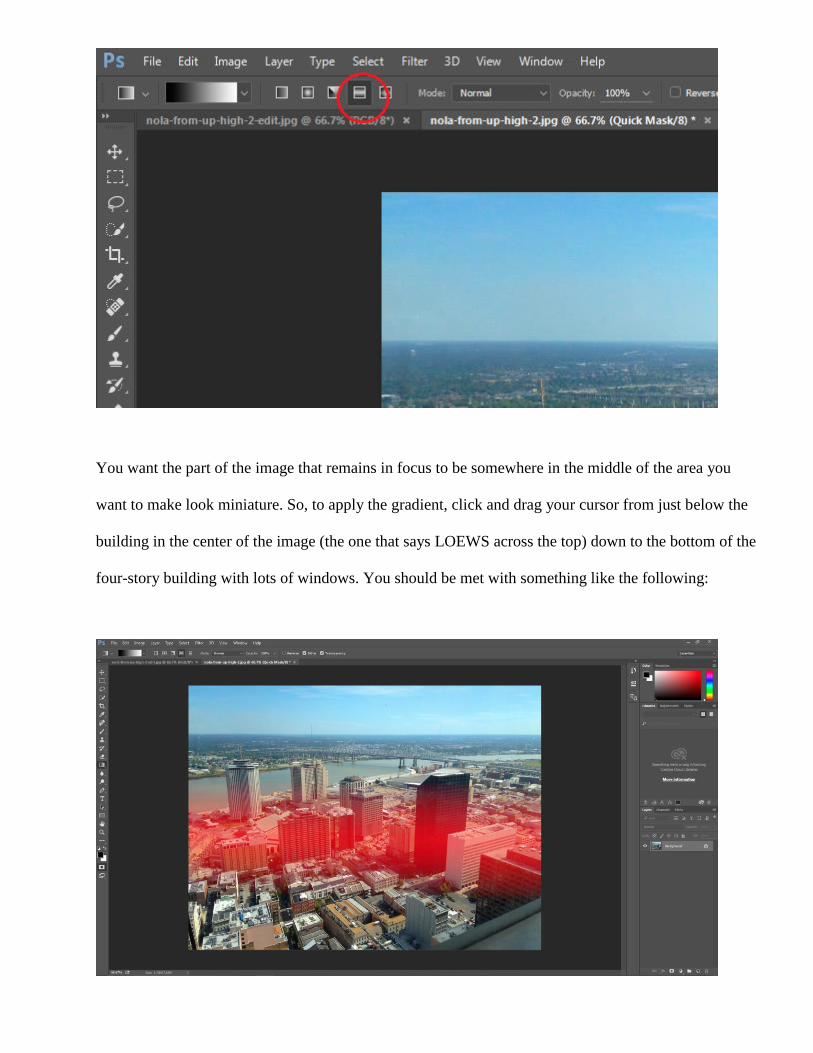
You want the part of the image that remains in focus to be somewhere in the middle of the area you
want to make look miniature. So, to apply the gradient, click and drag your cursor from just below the
building in the center of the image (the one that says LOEWS across the top) down to the bottom of the
four-story building with lots of windows. You should be met with something like the following:
5. Apply blur effect
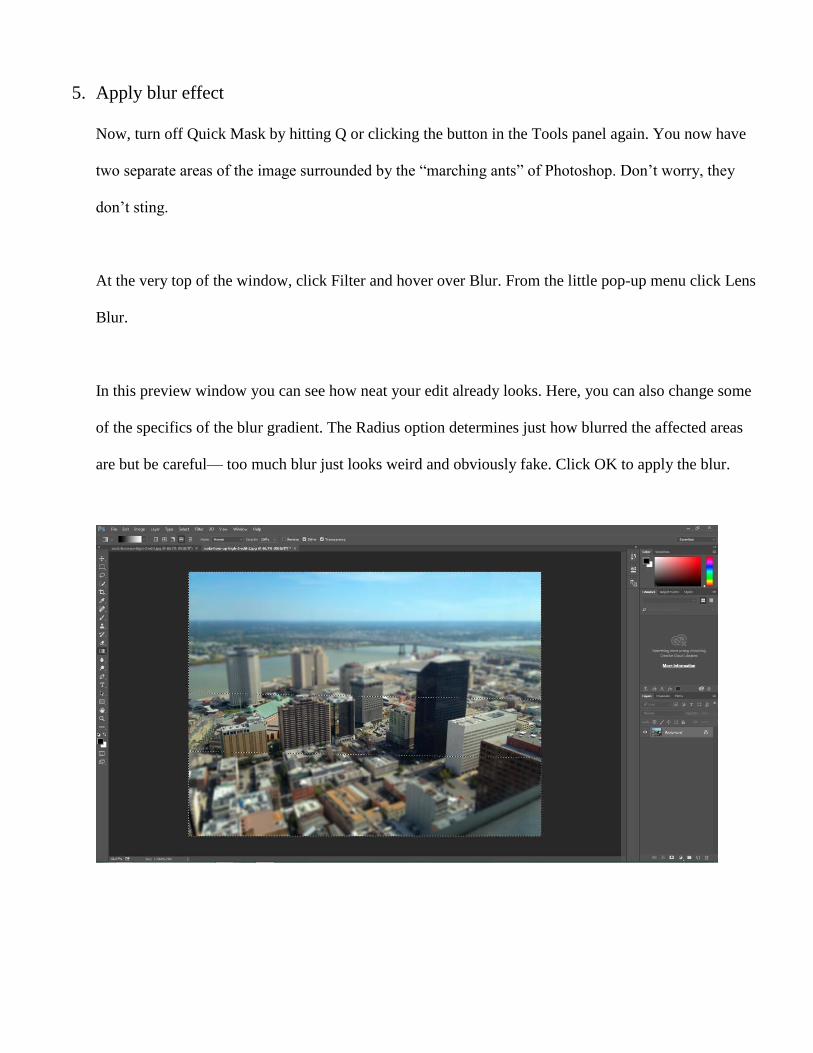
Now, turn off Quick Mask by hitting Q or clicking the button in the Tools panel again. You now have
two separate areas of the image surrounded by the “marching ants” of Photoshop. Don’t worry, they
don’t sting.
At the very top of the window, click Filter and hover over Blur. From the little pop-up menu click Lens
Blur.
In this preview window you can see how neat your edit already looks. Here, you can also change some
of the specifics of the blur gradient. The Radius option determines just how blurred the affected areas
are but be careful— too much blur just looks weird and obviously fake. Click OK to apply the blur.
6. Deselect selection
Here on out, we’ll be making edits to the whole image, so to turn off the marching ants, hit Select at the
top of the screen, then Deselect.
Or just hit Ctrl+D.
7. Adjust saturation
Model cities are usually a bit more colorful than the real thing, so to achieve that effect, click Image at
the top and open the Adjustments pop-up menu, then click Hue/Saturation.
This is a pretty dull image, color-wise, so we’ll crank the Saturation up to +40, and click OK.
8. Adjust contrast
Finally, to make the lighting just a tad less natural, and thus make the city more like a model, we’ll make
a slight change to the contrast.
To do this, once again go to Image-Adjustments up at the top. This time though, click Curves. Yeah,
we’re giving this pic a bit more thicc-ness.
In the preview window alter the line ever so slightly to make a gentle S curve, as shown:
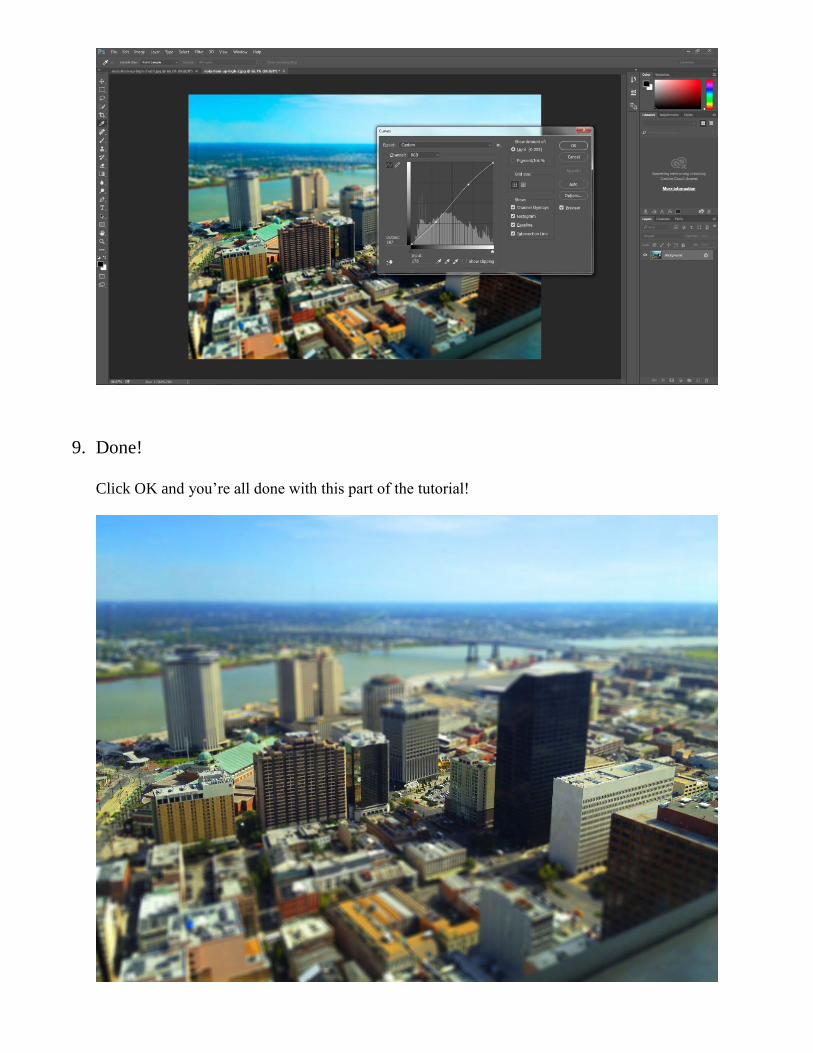
9. Done!
Click OK and you’re all done with this part of the tutorial!
Part 2 - InDesign
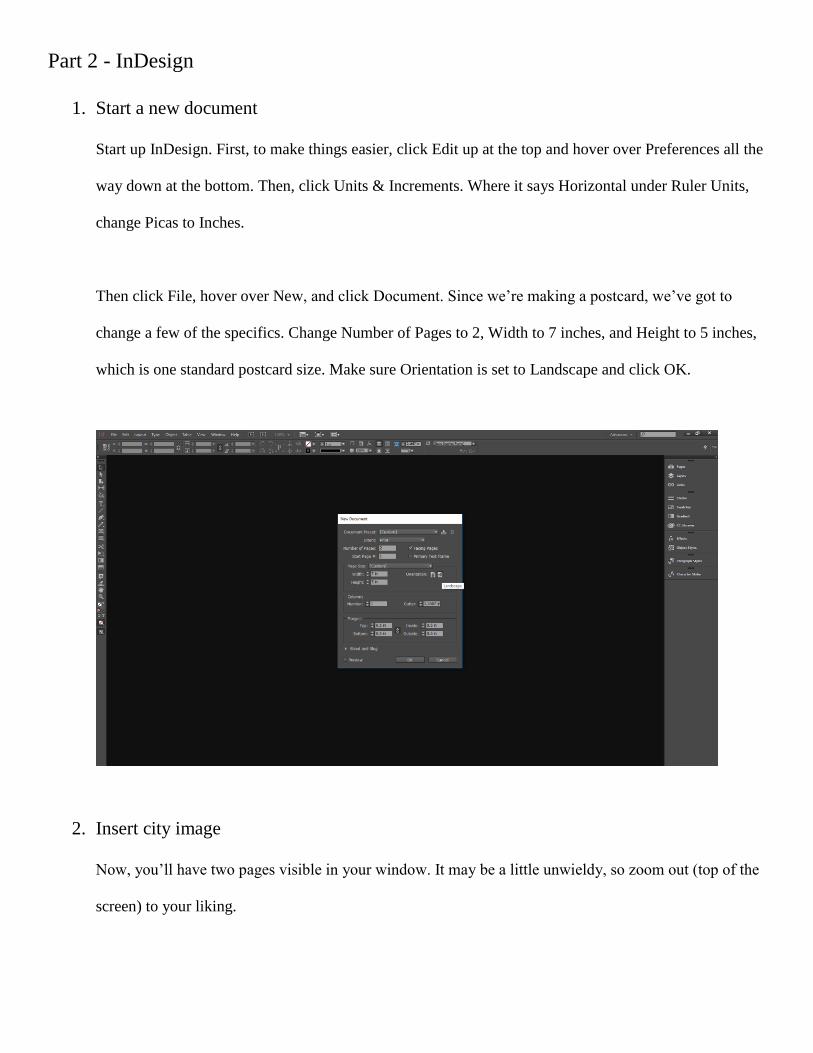
1. Start a new document
Start up InDesign. First, to make things easier, click Edit up at the top and hover over Preferences all the
way down at the bottom. Then, click Units & Increments. Where it says Horizontal under Ruler Units,
change Picas to Inches.
Then click File, hover over New, and click Document. Since we’re making a postcard, we’ve got to
change a few of the specifics. Change Number of Pages to 2, Width to 7 inches, and Height to 5 inches,
which is one standard postcard size. Make sure Orientation is set to Landscape and click OK.
2. Insert city image
Now, you’ll have two pages visible in your window. It may be a little unwieldy, so zoom out (top of the
screen) to your liking.
Click File, then Place, and open your edited city image. Click on the first page to place the image
initially. Click and drag the image so that its bottom-left corner lines up with the page’s. Now, click and
hold the top-right transformation box on the image and drag it so it also lines up with the top-right
corner of the page. This will automatically crop the image as well.
You may notice that the image is blurry. Not to worry, this is just to keep the program running smoothly.
To change, just click View, hover over Display Performance, and switch it to High Quality Display.
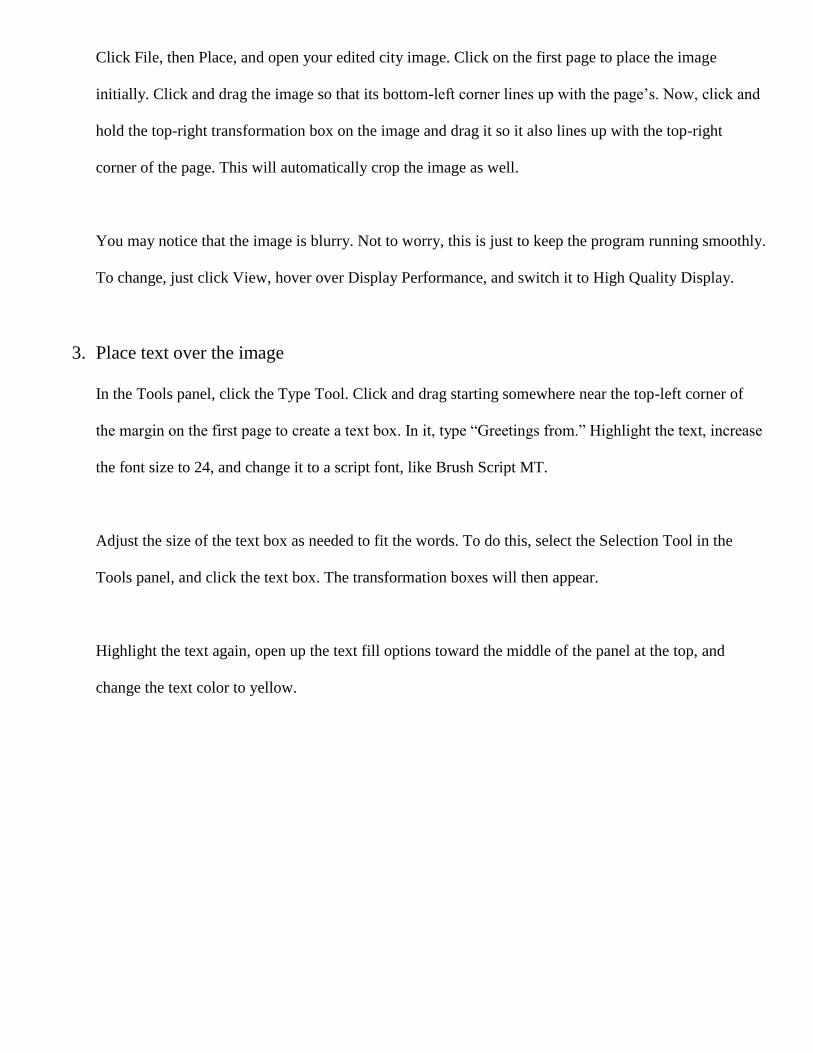
3. Place text over the image
In the Tools panel, click the Type Tool. Click and drag starting somewhere near the top-left corner of
the margin on the first page to create a text box. In it, type “Greetings from.” Highlight the text, increase
the font size to 24, and change it to a script font, like Brush Script MT.
Adjust the size of the text box as needed to fit the words. To do this, select the Selection Tool in the
Tools panel, and click the text box. The transformation boxes will then appear.
Highlight the text again, open up the text fill options toward the middle of the panel at the top, and
change the text color to yellow.
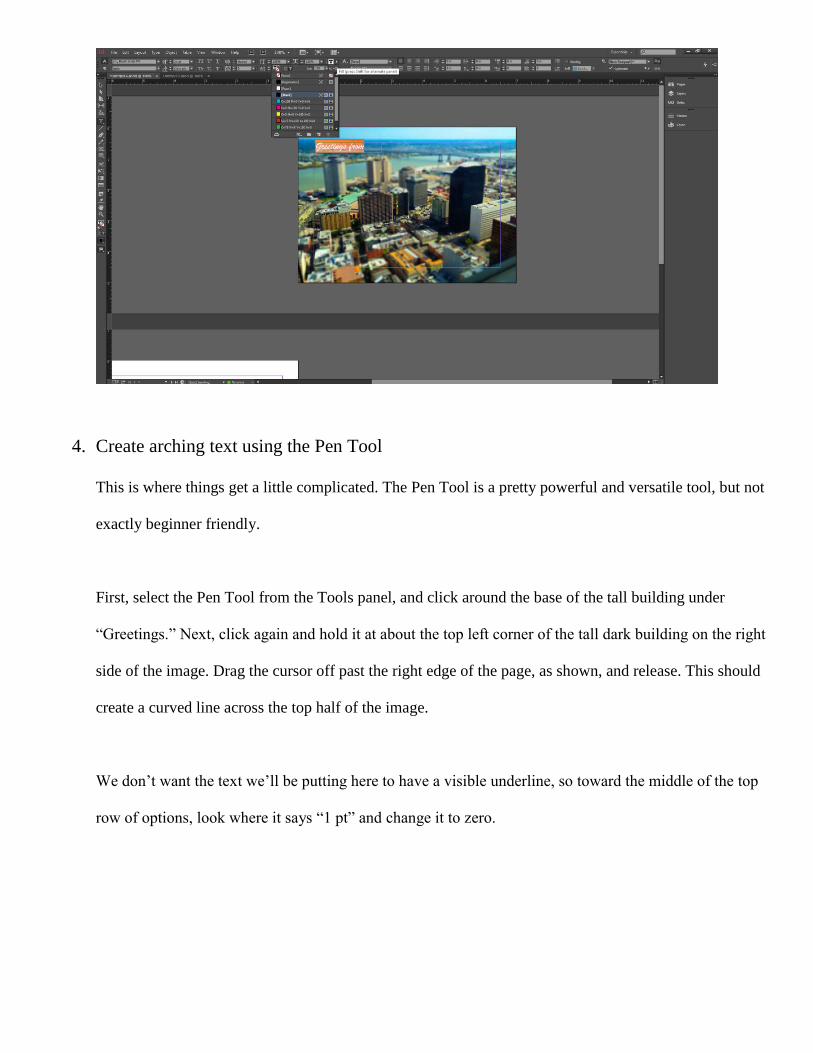
4. Create arching text using the Pen Tool
This is where things get a little complicated. The Pen Tool is a pretty powerful and versatile tool, but not
exactly beginner friendly.
First, select the Pen Tool from the Tools panel, and click around the base of the tall building under
“Greetings.” Next, click again and hold it at about the top left corner of the tall dark building on the right
side of the image. Drag the cursor off past the right edge of the page, as shown, and release. This should
create a curved line across the top half of the image.
We don’t want the text we’ll be putting here to have a visible underline, so toward the middle of the top
row of options, look where it says “1 pt” and change it to zero.
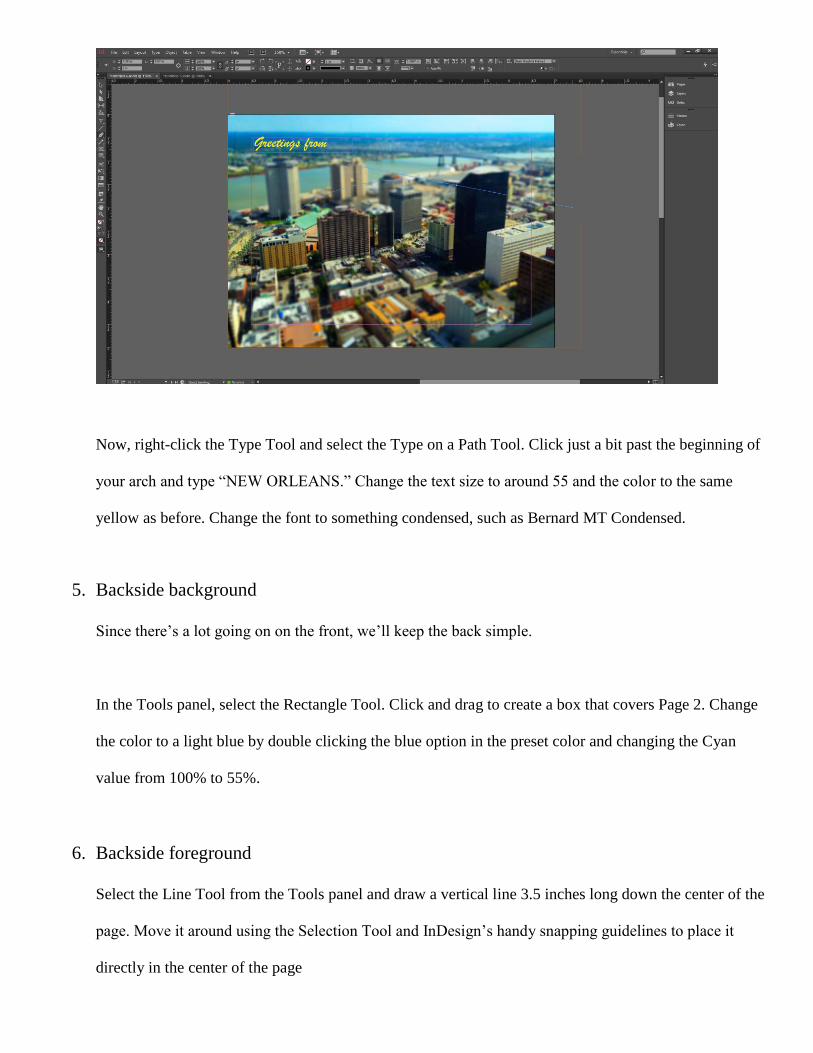
Now, right-click the Type Tool and select the Type on a Path Tool. Click just a bit past the beginning of
your arch and type “NEW ORLEANS.” Change the text size to around 55 and the color to the same
yellow as before. Change the font to something condensed, such as Bernard MT Condensed.
5. Backside background
Since there’s a lot going on on the front, we’ll keep the back simple.
In the Tools panel, select the Rectangle Tool. Click and drag to create a box that covers Page 2. Change
the color to a light blue by double clicking the blue option in the preset color and changing the Cyan
value from 100% to 55%.
6. Backside foreground
Select the Line Tool from the Tools panel and draw a vertical line 3.5 inches long down the center of the
page. Move it around using the Selection Tool and InDesign’s handy snapping guidelines to place it
directly in the center of the page
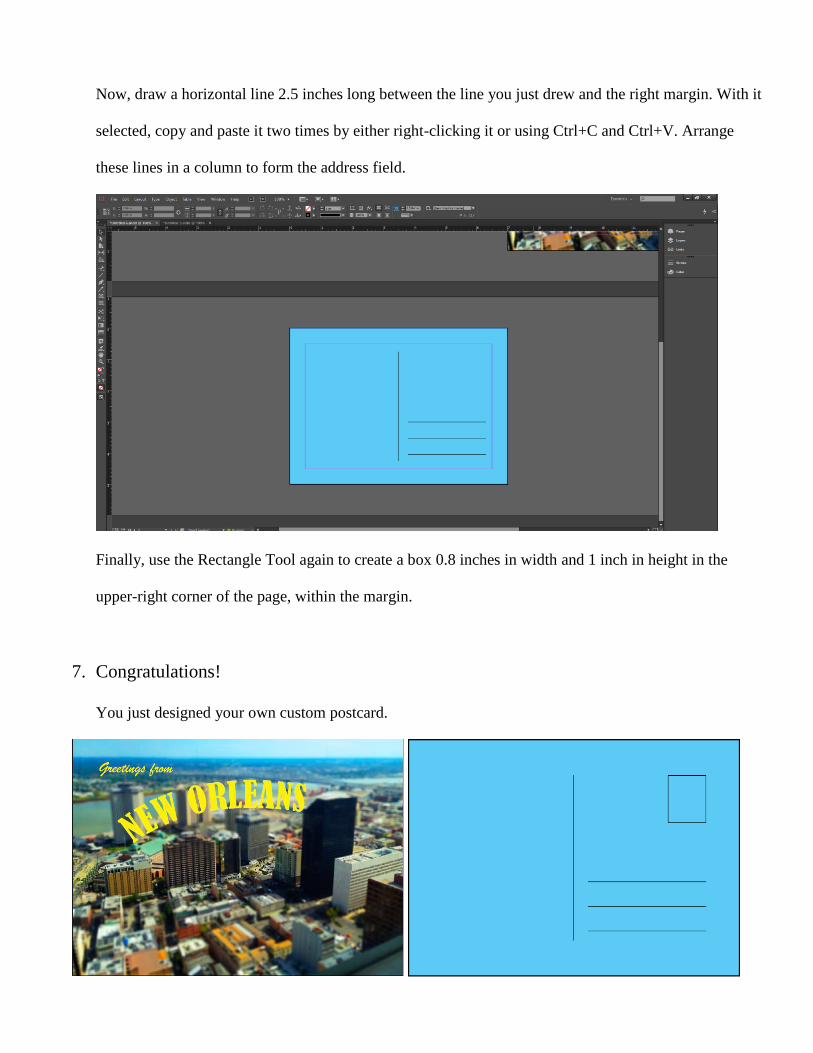
Now, draw a horizontal line 2.5 inches long between the line you just drew and the right margin. With it
selected, copy and paste it two times by either right-clicking it or using Ctrl+C and Ctrl+V. Arrange
these lines in a column to form the address field.
Finally, use the Rectangle Tool again to create a box 0.8 inches in width and 1 inch in height in the
upper-right corner of the page, within the margin.
7. Congratulations!
You just designed your own custom postcard.
Related Documents