HOPE- Hands On Practical Electronics Lesson 1: Introduction and Voltage, Current, and Resistance

HOPE- Hands On Practical Electronics Lesson 1: Introduction and Voltage, Current, and Resistance.
Dec 22, 2015
Welcome message from author
This document is posted to help you gain knowledge. Please leave a comment to let me know what you think about it! Share it to your friends and learn new things together.
Transcript
HOPE- Hands On Practical Electronics
Lesson 1: Introduction and Voltage, Current, and Resistance

HOPE Is Brought To You By: The SEC
Student Engineers’ Council Check Out Their Website at
http://www.sec.vt.edu/ Next GAM:
IEEE Student Branch @ Berkeley

This Week
Today’s Goals are: Discuss underlying principles such as Voltage,
Current, and Resistance Become Familiar with some basic EE components Build 2 simple circuits

History Lesson
The Common Units: Volts, Amps, Ohms, Coulombs are all named after people
Volta Ampere Ohm Coulomb

Voltage: Introduction
Units: Volts (V) 1 V = 1 Joules per Coulomb (J/C)
Definition: Difference of electrical potential between two points of an electrical circuit
Example: The electrical potential difference between the + and – ends of a battery is 9 V

Voltage: Sources
Two Ways to Represent a Voltage Source
Current flows from + to -
9V

Voltage: Ground
We will assign a point on our circuits to have 0 Volts
We will call this ground We will use this symbol to represent ground
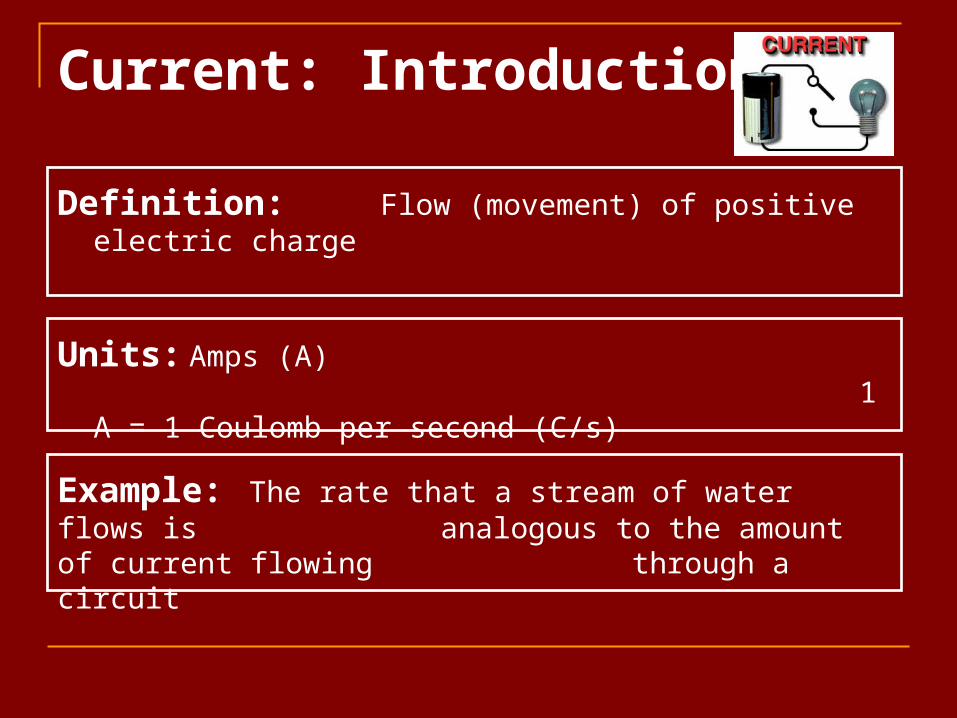
Current: Introduction
Definition: Flow (movement) of positive electric charge
Units: Amps (A) 1 A = 1 Coulomb per second (C/s)
Example: The rate that a stream of water flows is analogous to the amount of current flowing through a circuit

Coulombs
Symbol: Q Unit: Coulomb 1 coulomb is the amount of electrical charge
in 6.241×10¹⁸ electrons Amps = C/s, current is the amount of
electrical charge flowing per second We will revisit Coulombs when we study
Capacitors
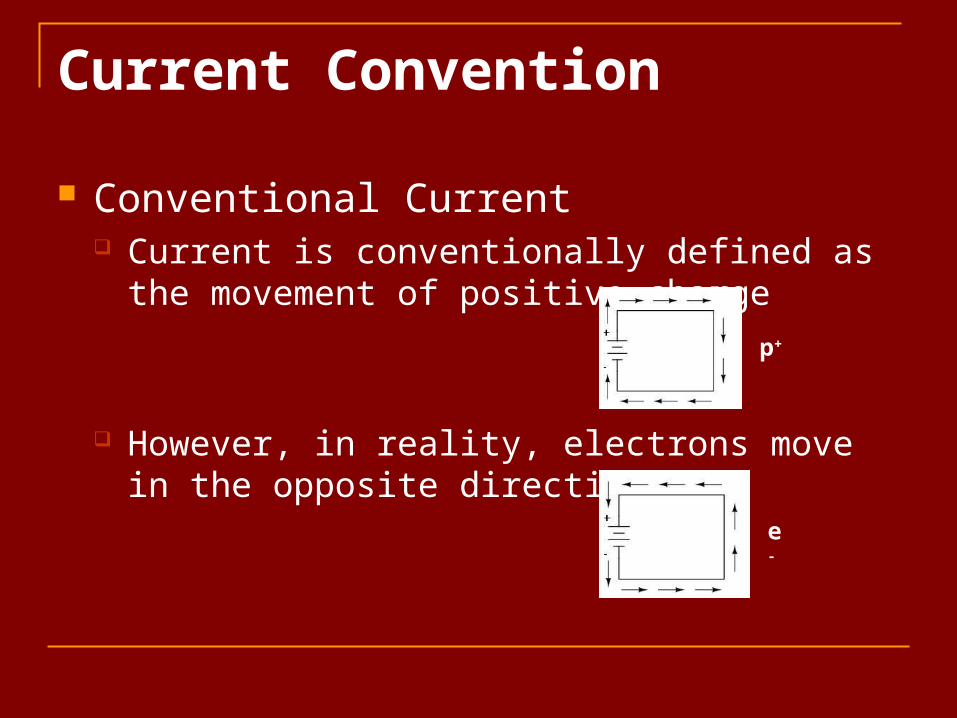
Current Convention
Conventional Current Current is conventionally defined as the
movement of positive charge
However, in reality, electrons move in the opposite direction!
p+
e-

Conventional Current (Cont.) It doesn’t matter which way we define current
flow Current behaves the same regardless of
convention But, it is important to use the same convention
consistently

Resistance: Introduction
Definition: Measure of the degree to which an object opposes the passage of an electrical current
Units: Ohms (Ω) 1 Ω = 1 Volt per Ampere (V/A)
Example: Hurdles serve as an obstacle to a runner, so it requires more energy to overcome them

Circuit Symbols
Battery Resistor LED
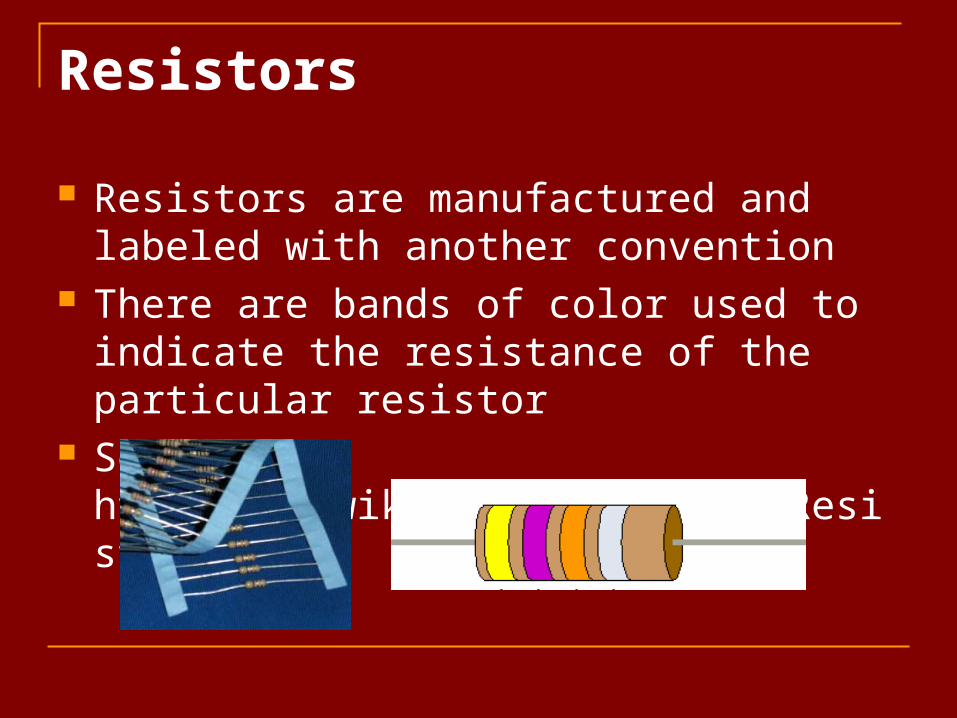
Resistors
Resistors are manufactured and labeled with another convention
There are bands of color used to indicate the resistance of the particular resistor
See: http://en.wikipedia.org/wiki/Resistor

Calculating Resistance
It’s possible to calculate resistance of a resistor using the color bands on it AB represent a 2 digit number C represents the magnitude Resistance = AB * 10C + D
However, we will mainly be measuring resistances with a multimeter

Example: Calculating Resistance The first two bands
correspond to 4 and 7. The third band tells you the number of zeros following.
47*103 = 47,000 Ω + 10%

Example Resistor Usage
LEDs are designed to work for approximately 1-2 Volts of power
Too much voltage across the LED will cause it to burn out from overheating
Always put a resistor before (or after) an LED to limit the current

LED: Introduction
LED = Light Emitting Diode Lights up when current flows through it LEDs only allow current to go through it in
one directionCurrent Flows LED’s have 1 lead
that is longer than the other. The longer lead is thepositive side. Current flows from the longer lead to the shorter lead.

Putting It All Together
Battery provides energy to the charges so that they can travel through the circuit
Resistor opposes the movement of these charges, thus slowing them down
Current through the LED provides energy to the LED, which transforms into light.

Circuits
Closed loop – There is a path for the current to flow back to the other end of the battery
Circuits will only work if there is a closed loop The following circuit diagram contains a closed loop starting
from the battery to the resistor, through the first LED and then back to the battery
9 Volts
1 or 2 Resistors in Series (a line) LEDs...up to 5 ….

Circuit Example 1: Tonight’s Lab 1
i
i
9V
9V
1V
1V
0V
1V drop
8V drop

Circuit Example 2
DC
0V
0V
i2
9V
9V 1V
9V
8V 1V
i3

Digital Multimeter (DMM)
Combination of Ammeter: measures current Voltmeter: measures voltage Ohmmeter: measures resistance
A Digital Multimeter is a measurement device commonly used as a diagnostic tool
Fancier multimeters can measure more quantities such as frequency, temperature, conductance, inductance, capacitance and so on

Using The Multimeter
To measure voltage:
-Turn on multimeter by turning dial to “20V”
-Touch one of the wires to the first point in the circuit to measure
-Touch the other wire to a point across the circuit element
To measure current:
-Turn dial to “20mA”
-OPEN the current circuit
-Complete the circuit with the two wires of the multimeter
To measure resistance:
-Turn dial to “2K”
-Touch the 2 wires of the multimeter to the two ends of the resistor

Everyday Use
Multimeters are used to measure voltages and currents at different points on the circuit
They are used to diagnose a circuit to see if current is flowing or not (potentially an open circuit or short draining the current)

Breadboards
A reusable, solderless device used to build a prototype of an electric circuit
Power and Ground Busses on either sides Horizontal connections (terminal strips) with
break in center We will learn more with practice

Move the battery around to see where the current flows. The LEDs will turn on when current flows through them.
Test what happens when you connect 1 lead of the battery to the first LED, the 2nd LED etc.
Questions to consider: Will the first LED light up? Will the second?
Connect the battery lead behind the 2nd LED. Does it light up?
Today’s Lab: Circuit 1
9 Volts
1 or 2 Resistors in Series (a line) LEDs...up to 5 ….

Today’s Lab: Circuit 2
Build the following circuit that consists of 1 battery, 2 resistors and 6 LEDs:
Related Documents