Home Templates Blog Custom Services Free Resources Contact WEBSITE TEMPLATES FLASH WEBSITES CMS TEMPLATES Flash Tutorials & Resources Dreamweaver Tutorials Fireworks Tutorials & Resources Photoshop Tutorials Web Design Tutorials & Resources CSS Tutorials CorelDraw Tutorials You are here : : Home > Free Resources > CorelDraw Tutorials > 3D Boxes CorelDraw Tutorials 3D Boxes 3D Effect Abstract Illustration Anime Cartoon Drawing Awesome Social Icon Design Banner Design Brochure Design Search

Welcome message from author
This document is posted to help you gain knowledge. Please leave a comment to let me know what you think about it! Share it to your friends and learn new things together.
Transcript
HomeTemplatesBlogCustom Services
Free ResourcesContact
WEBSITE TEMPLATES FLASH WEBSITES CMS TEMPLATES
Flash Tutorials& Resources Dreamweaver Tutorials Fireworks Tutorials & Resources Photoshop Tutorials Web Design Tutorials & Resources CSS Tutorials CorelDraw Tutorials
You are here : : Home > FreeResources > CorelDraw Tutorials > 3D Boxes
CorelDraw Tutorials
3D Boxes 3D Effect Abstract Illustration Anime Cartoon Drawing Awesome Social Icon Design Banner Design Brochure Design
Search

Business Card Design CD Cover Design Christmas Card Design Classic Flyer Design Classic Logo Design Female Illustration Floral Logo Design Folder Design Graffiti Text Effects Heart Chocolate Box Liquid Text Effect New Year Wallpaper Party Poster Design Popstyle Poster Design Simple Layout Design Techno Flyer Design Typography Design Wallpaper Design Web Layout Design Website Design
Free CorelDraw Resources
Business Cards Coreldraw Brochure Template Downloads Logos
Useful Articles, Tips & Ideas
Brochure Design Tips & Ideas Logo Design Ideas New! Logo Design Tips
More Free Stuff
Website Buttons Website Headers New! Website Backgrounds
Create 3D Boxes in Corel Draw
163

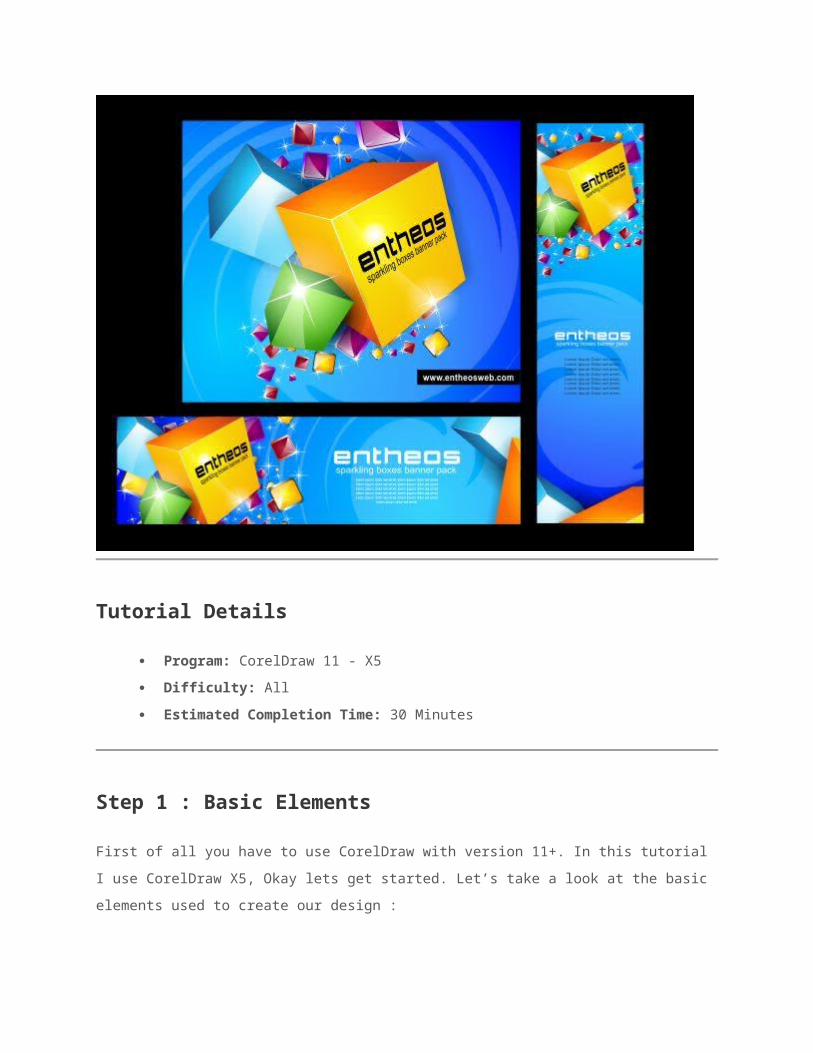
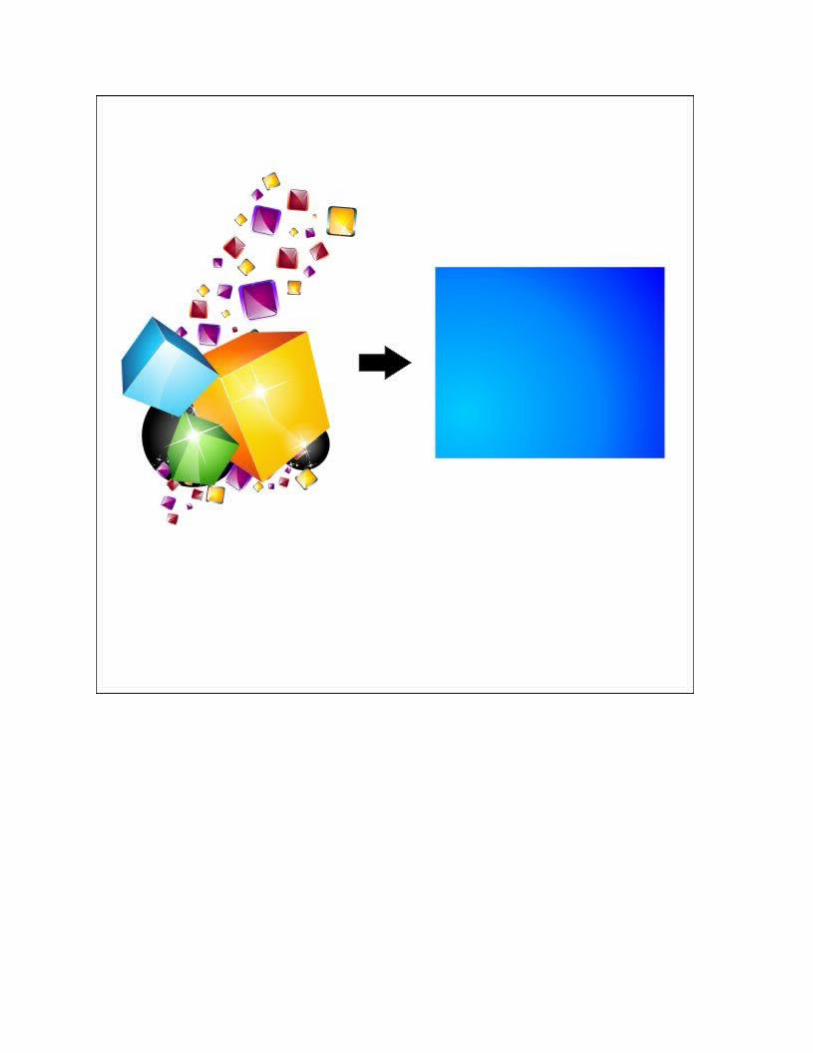
Learn how to create 3D boxes with sparkling effects using Corel Draw. You can use this design to create stunning banner ads as seen below. The source file for this design can be downloaded at the end of the tutorial.
Tutorial Details
Program: CorelDraw 11 - X5 Difficulty: All Estimated Completion Time: 30 Minutes
Step 1 : Basic Elements
First of all you have to use CorelDraw with version 11+. In this tutorial I use CorelDraw X5, Okay lets get started. Let’s take a look at the basic elements used to create our design :

Step 2 : Creating Worksheet
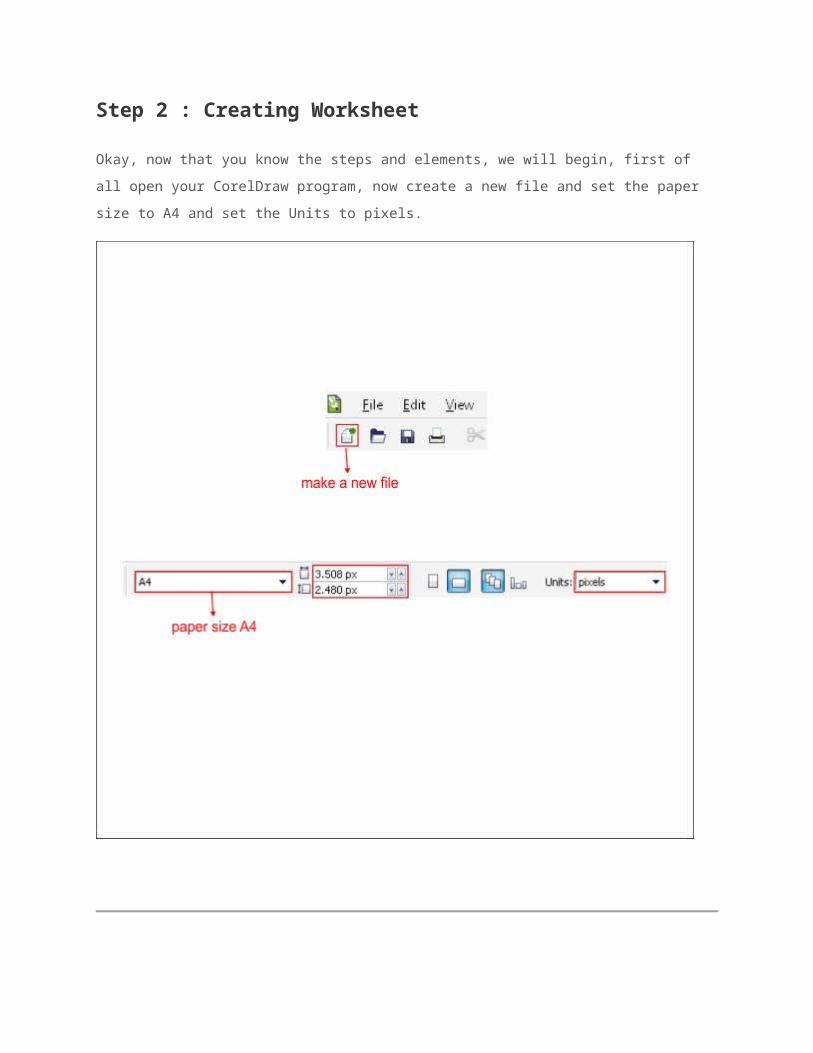
Okay, now that you know the steps and elements, we will begin, first of all open your CorelDraw program, now create a new file and set the paper size to A4 and set the Units to pixels.

Step 3 : Creating the Main Boxes
Now that we have our worksheet set, now we will begin to create the Main Boxes, first go to the " Rectangle Tool ", you can found it on the left toolbar, make a Box shape and resized it to 115 x 115 px.
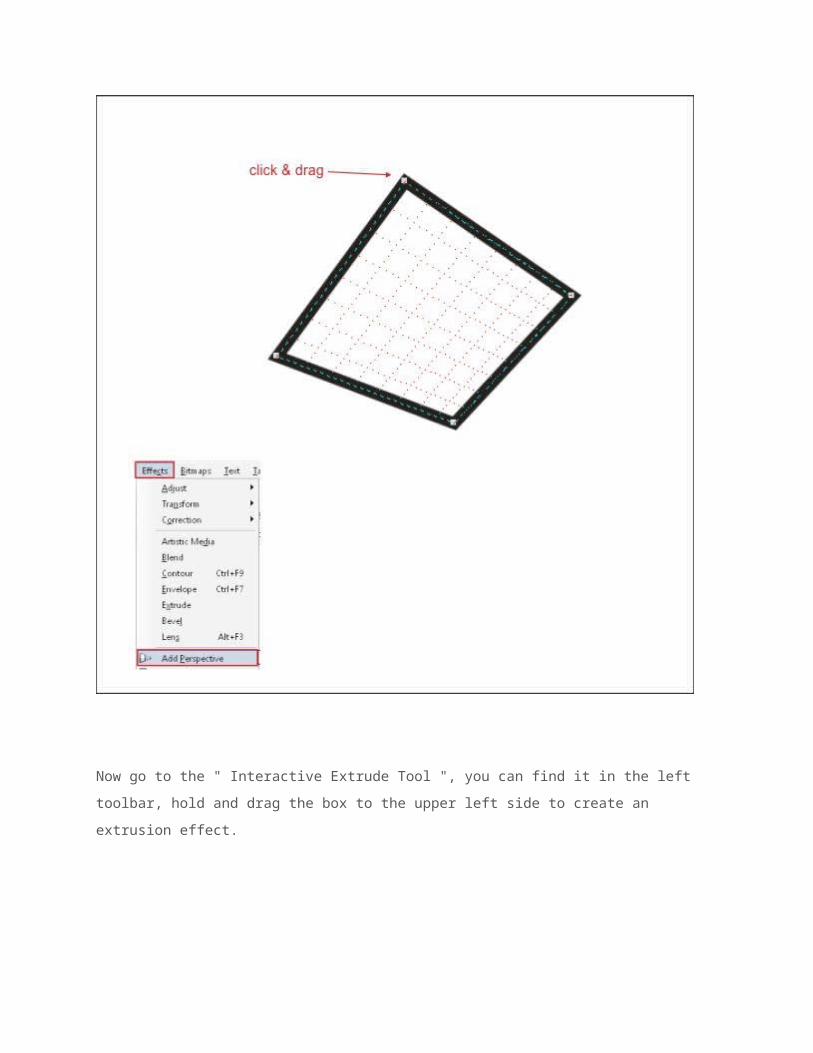
After that select the box and go to the upper toolbar and find Effects > Add Perspective, now you will see that there is a box frame inside the

boxes, click and drag the corner to apply the perspective similar like below.
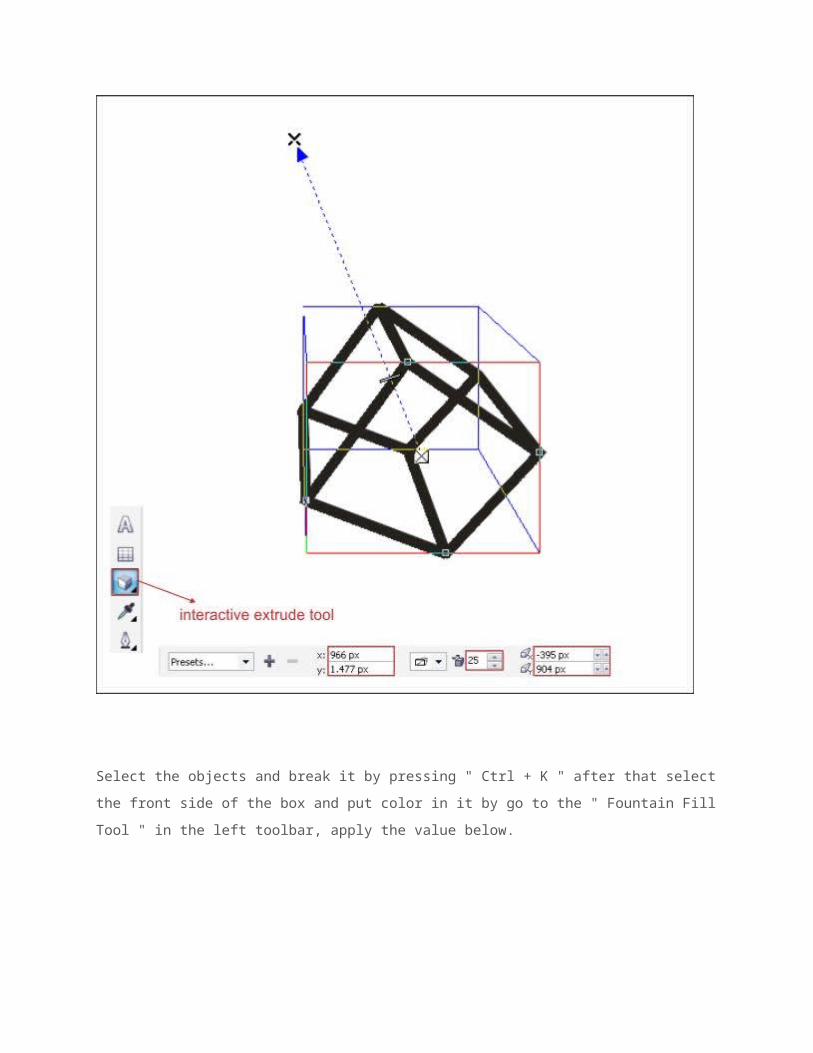
Now go to the " Interactive Extrude Tool ", you can find it in the left toolbar, hold and drag the box to the upper left side to create an extrusion effect.

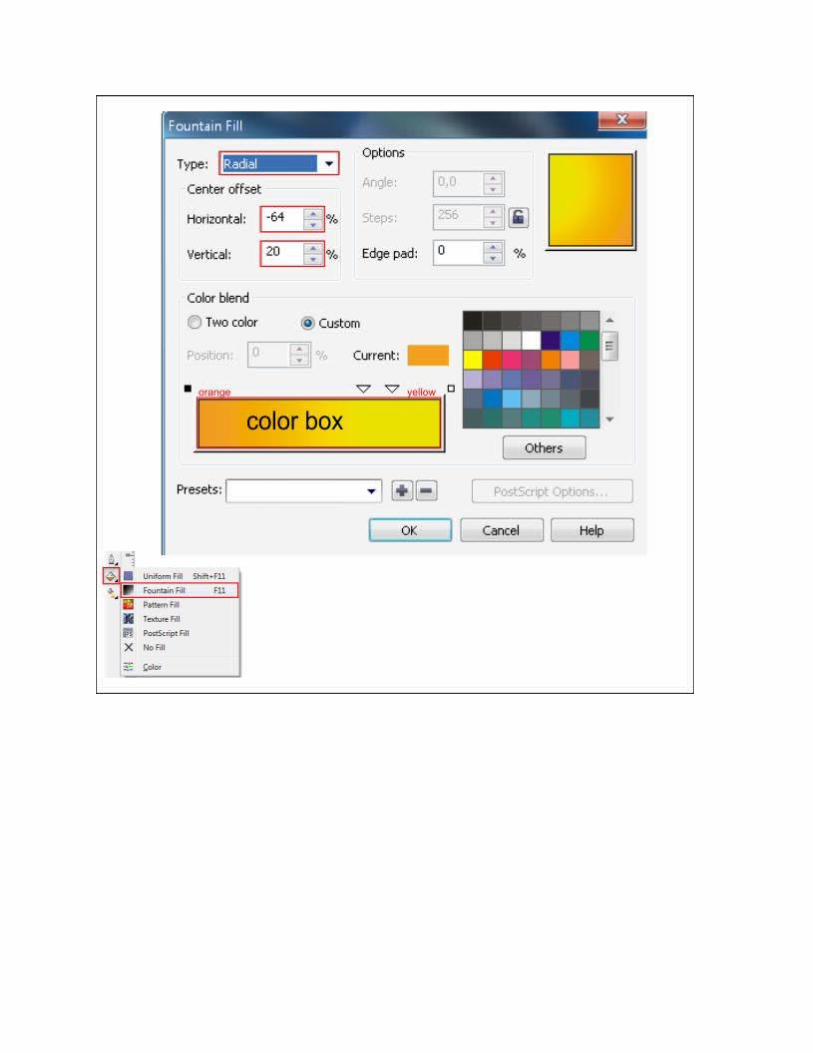
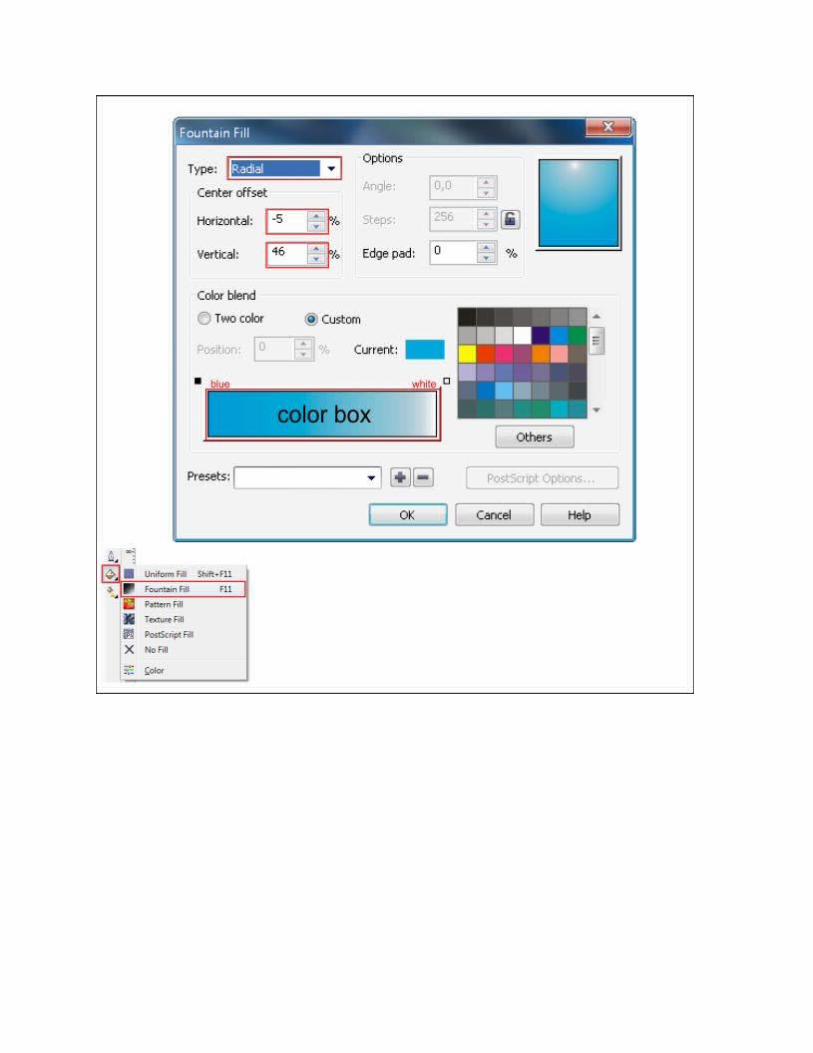
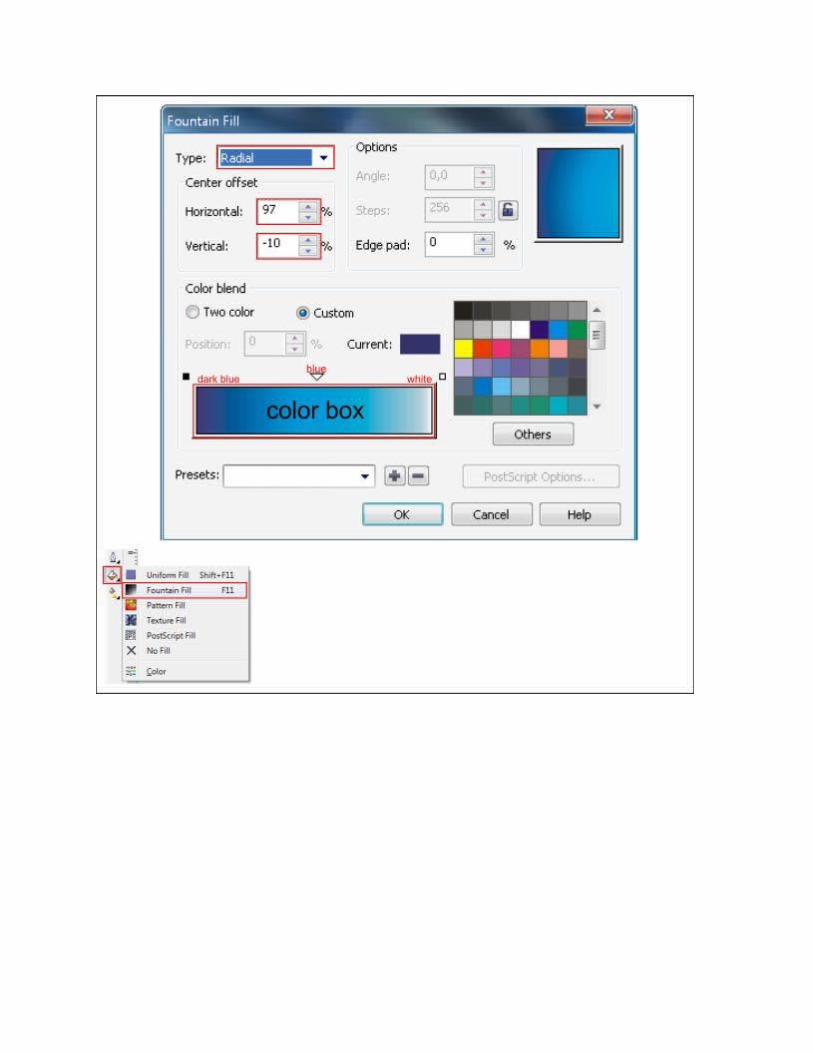
Select the objects and break it by pressing " Ctrl + K " after that selectthe front side of the box and put color in it by go to the " Fountain FillTool " in the left toolbar, apply the value below.

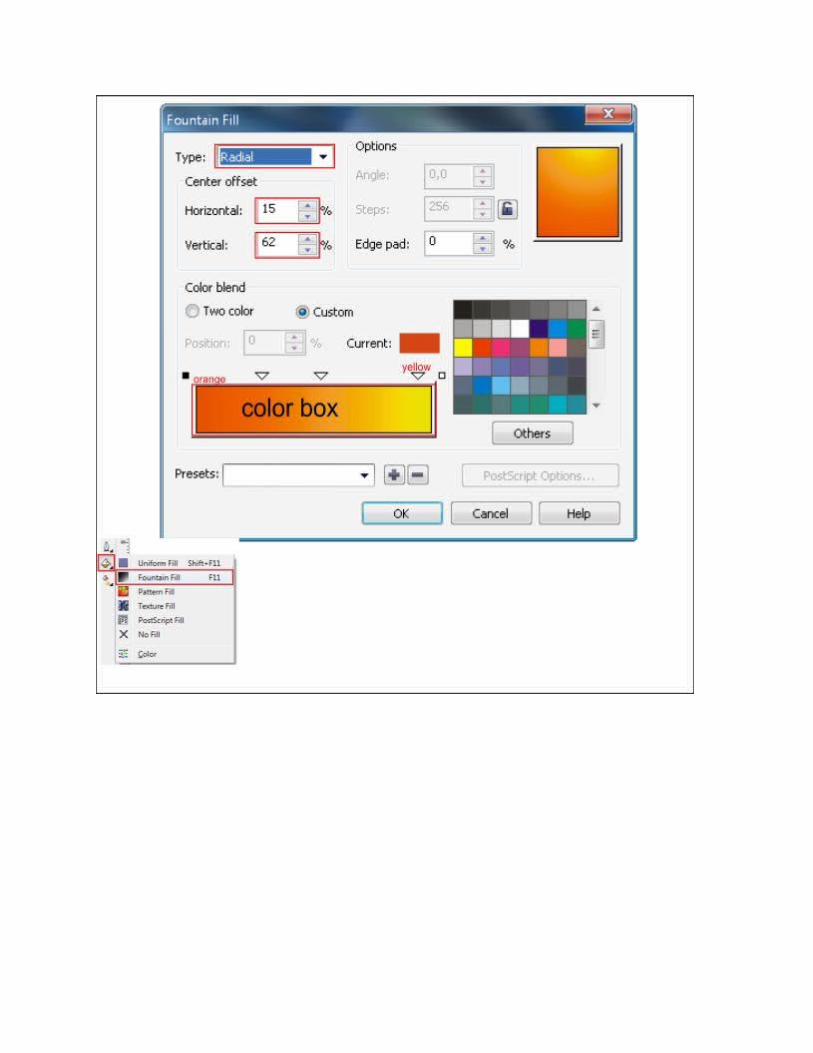
Now select the left and the top side of the Box, and put color in it by gothe " Fountain Fill Tool " in the left toolbar, and apply the value below.
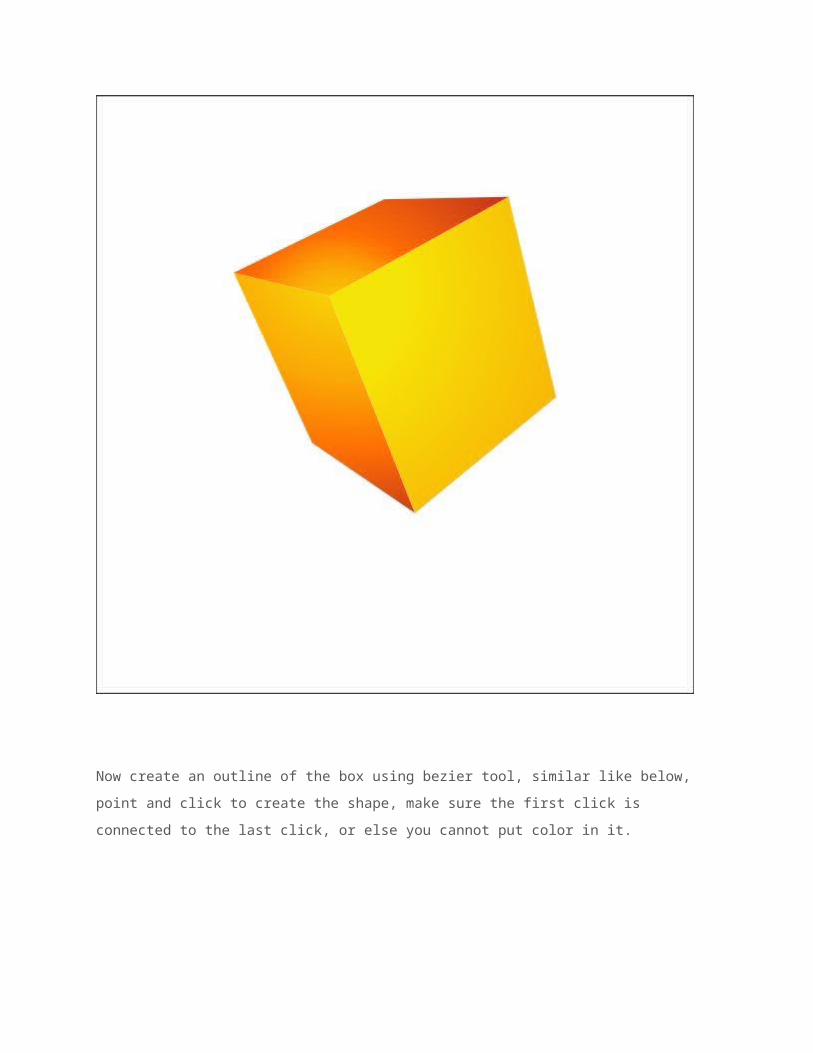
Now create an outline of the box using bezier tool, similar like below, point and click to create the shape, make sure the first click is connected to the last click, or else you cannot put color in it.
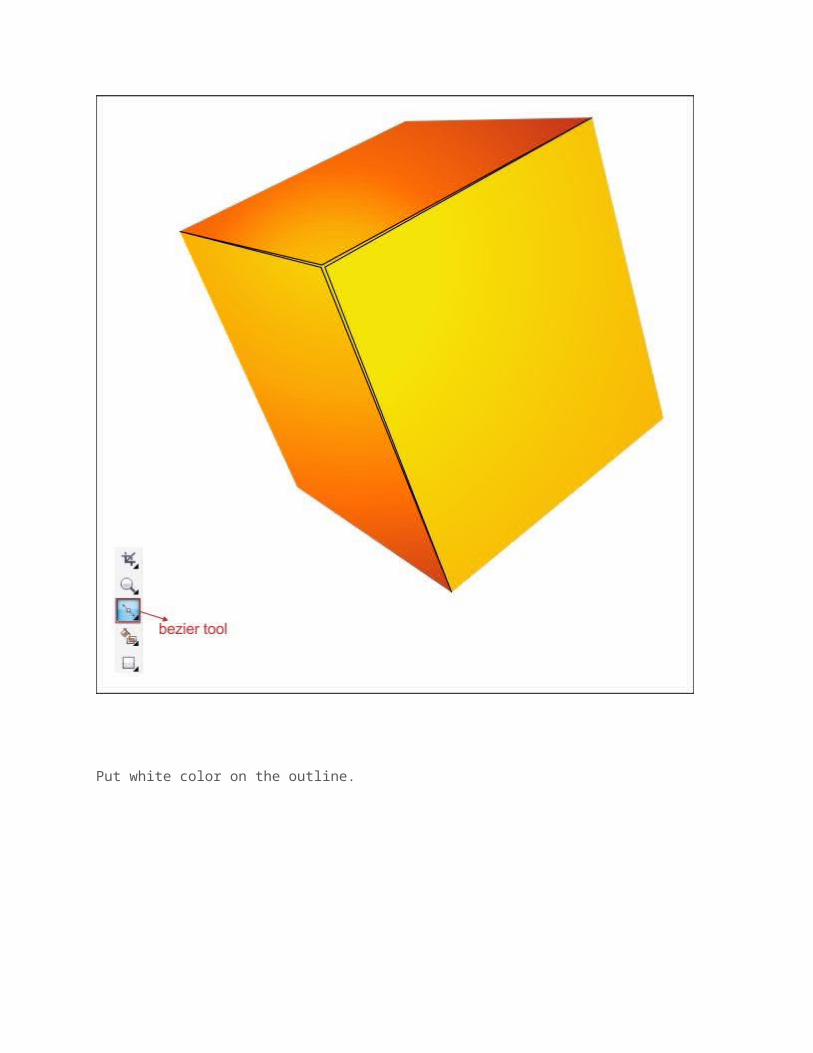
Put white color on the outline.
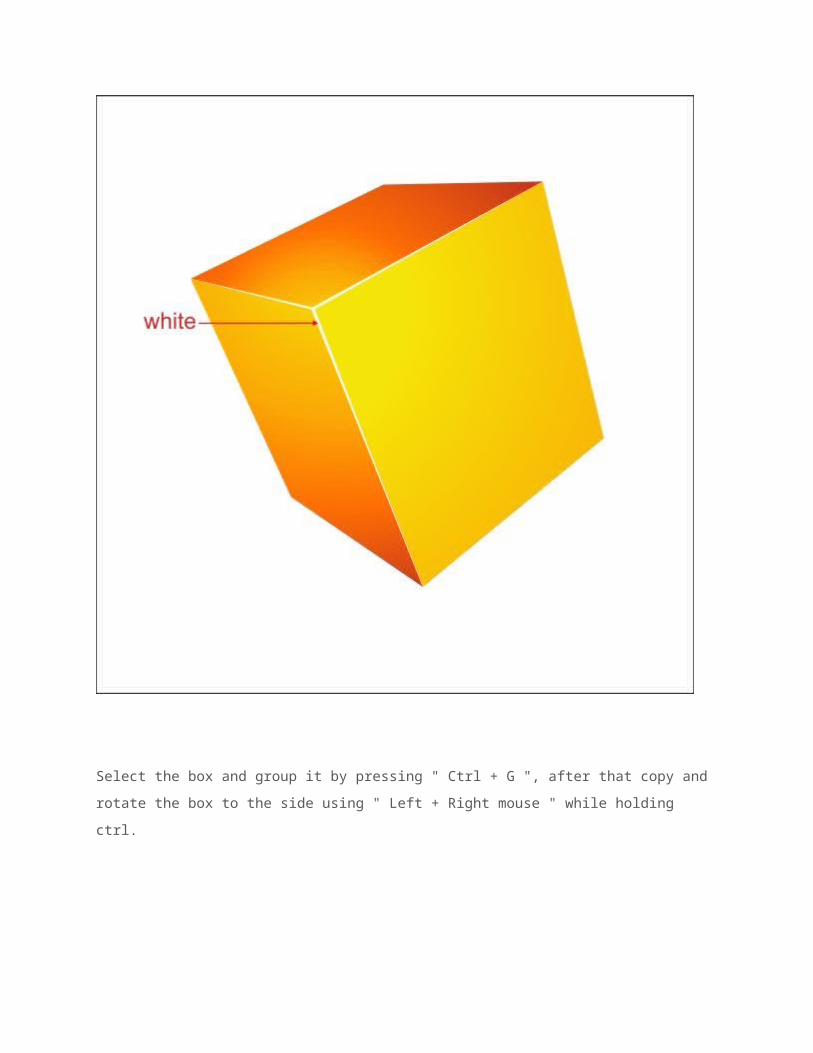
Select the box and group it by pressing " Ctrl + G ", after that copy and rotate the box to the side using " Left + Right mouse " while holding ctrl.
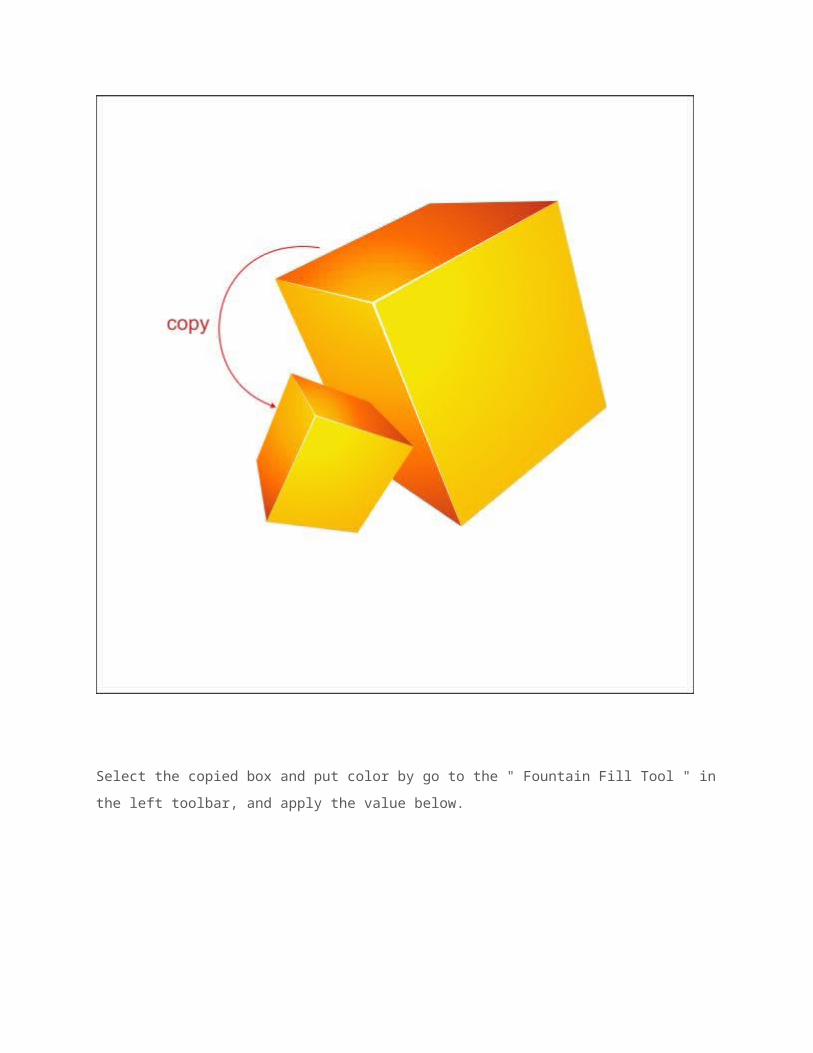
Select the copied box and put color by go to the " Fountain Fill Tool " inthe left toolbar, and apply the value below.

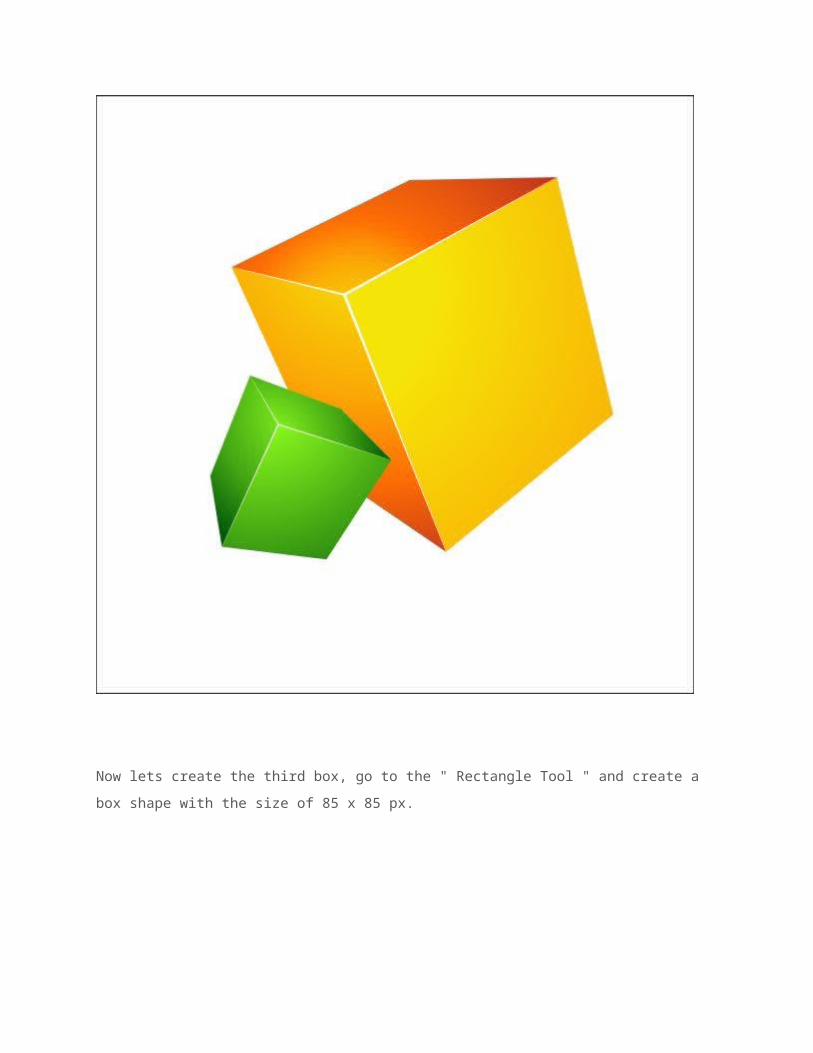
Now lets create the third box, go to the " Rectangle Tool " and create a box shape with the size of 85 x 85 px.

After that select the box and go to the upper toolbar and find Effects > Add Perspective, now you will see that there is a box frame inside the boxes, click and drag the corner to apply the perspective similar like below.
Now go to the " Interactive Extrude Tool ", you can find it in the left toolbar, hold and drag the box to the upper left side to create an extrusion effect.
Select the objects and break it by pressing " Ctrl + K " after that selectthe front side of the box and put color in it by go to the " Fountain FillTool " in the left toolbar, apply the value below.

Now select the left and the top side of the Box, and put color in it by gothe " Fountain Fill Tool " in the left toolbar, and apply the value below.
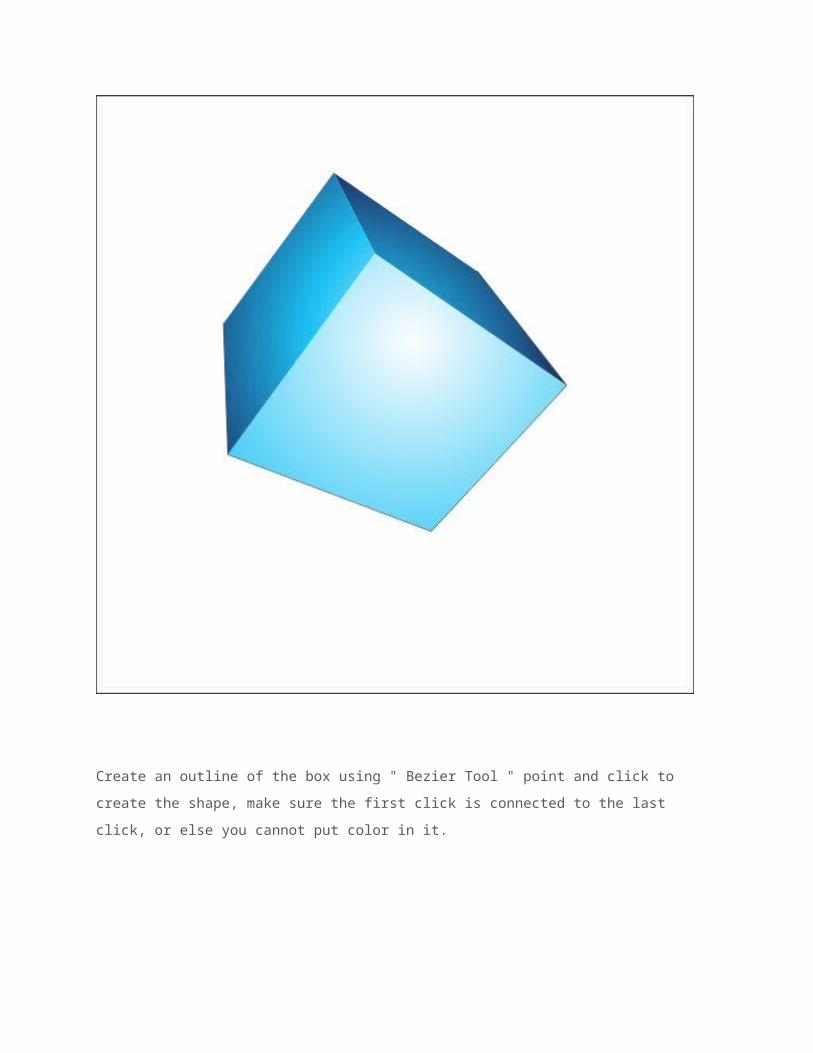
Create an outline of the box using " Bezier Tool " point and click to create the shape, make sure the first click is connected to the last click, or else you cannot put color in it.

Put white color for the ouline.
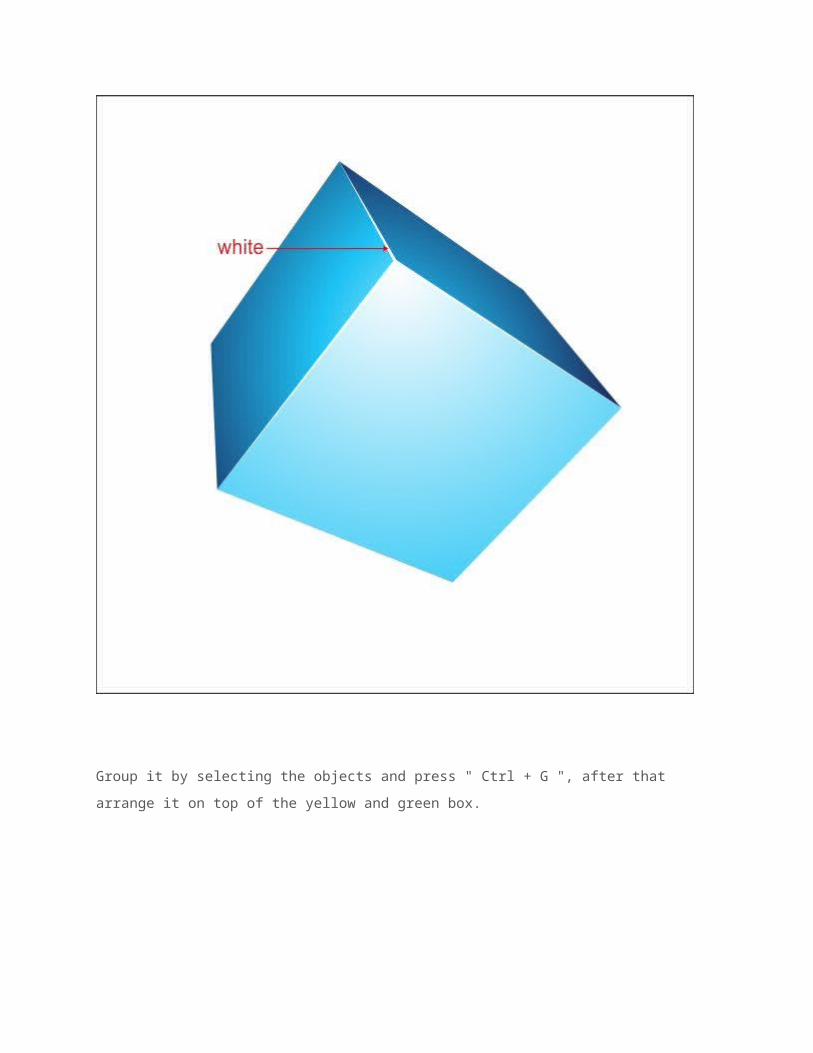
Group it by selecting the objects and press " Ctrl + G ", after that arrange it on top of the yellow and green box.
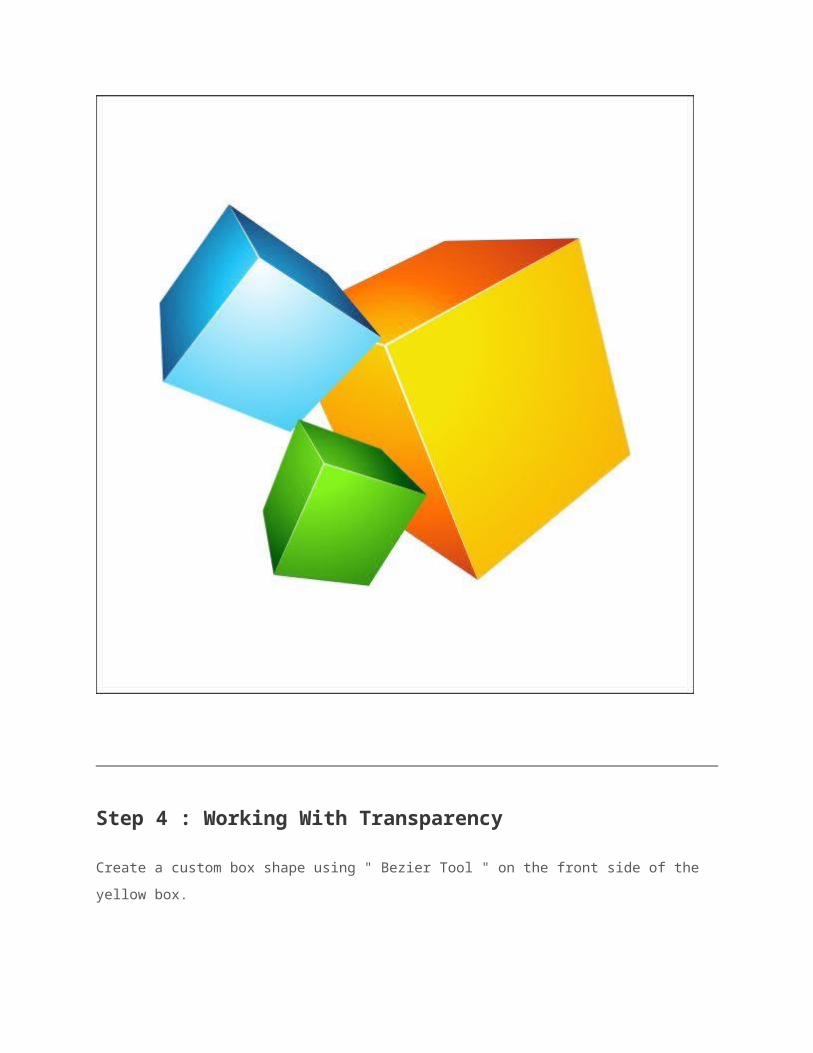
Step 4 : Working With Transparency
Create a custom box shape using " Bezier Tool " on the front side of the yellow box.

We are going to make the custom box shape transparent by go to the " Interactive Transparency Tool " in the left toolbar, drag it from right top to the left bottom to create a linear transparency effect.
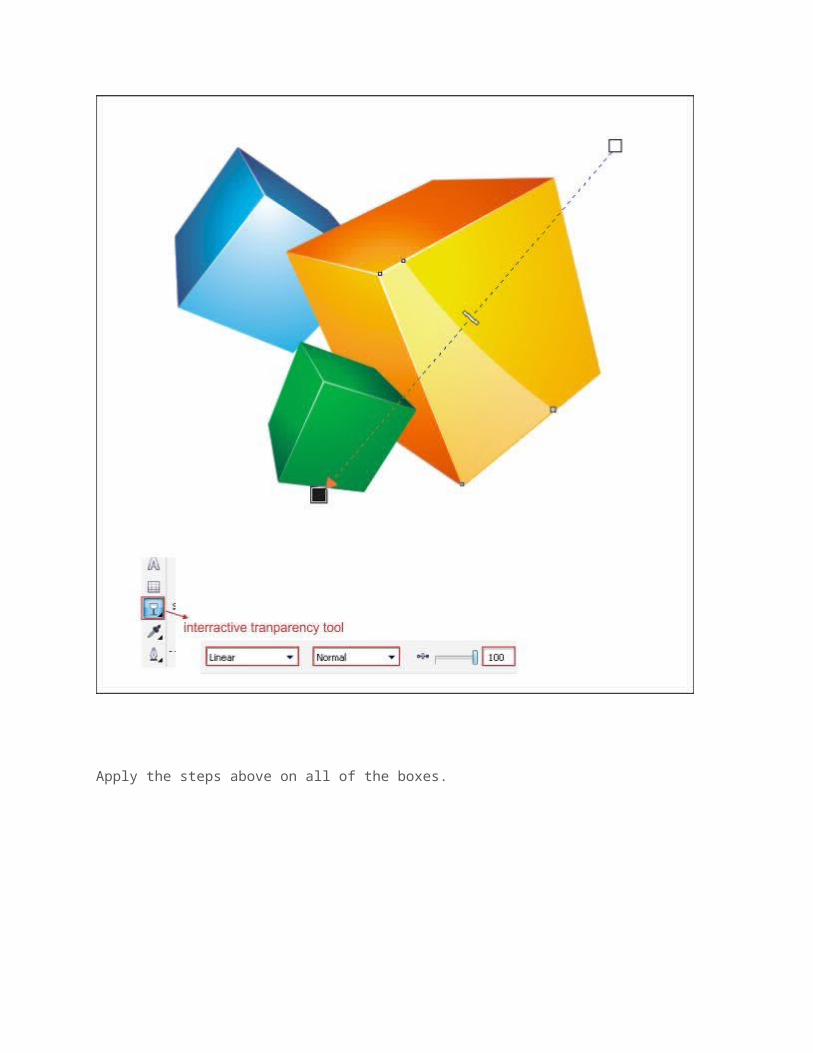
Apply the steps above on all of the boxes.
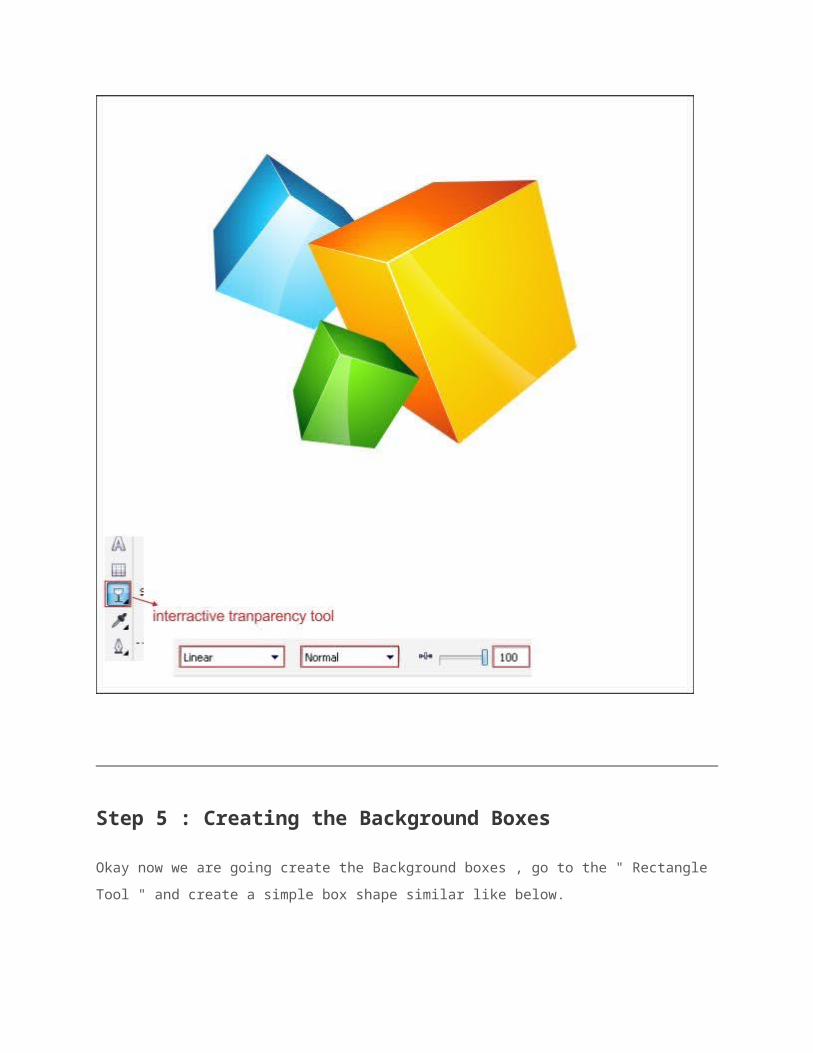
Step 5 : Creating the Background Boxes
Okay now we are going create the Background boxes , go to the " Rectangle Tool " and create a simple box shape similar like below.
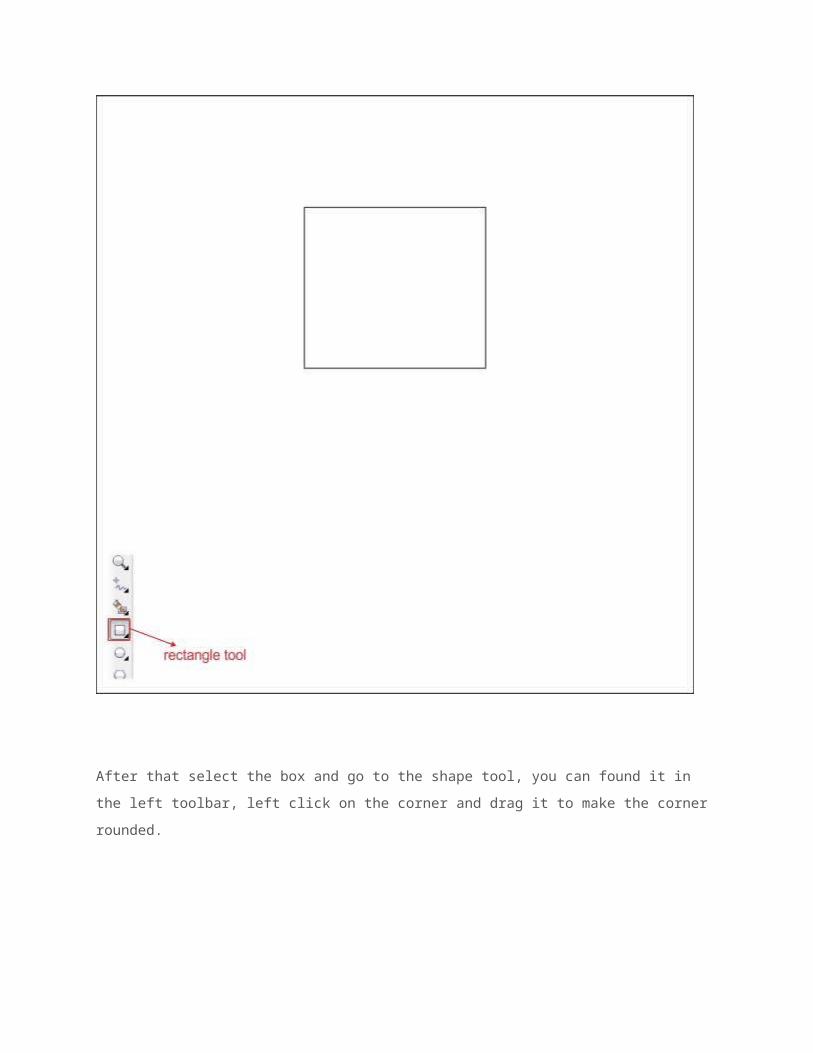
After that select the box and go to the shape tool, you can found it in the left toolbar, left click on the corner and drag it to make the corner rounded.
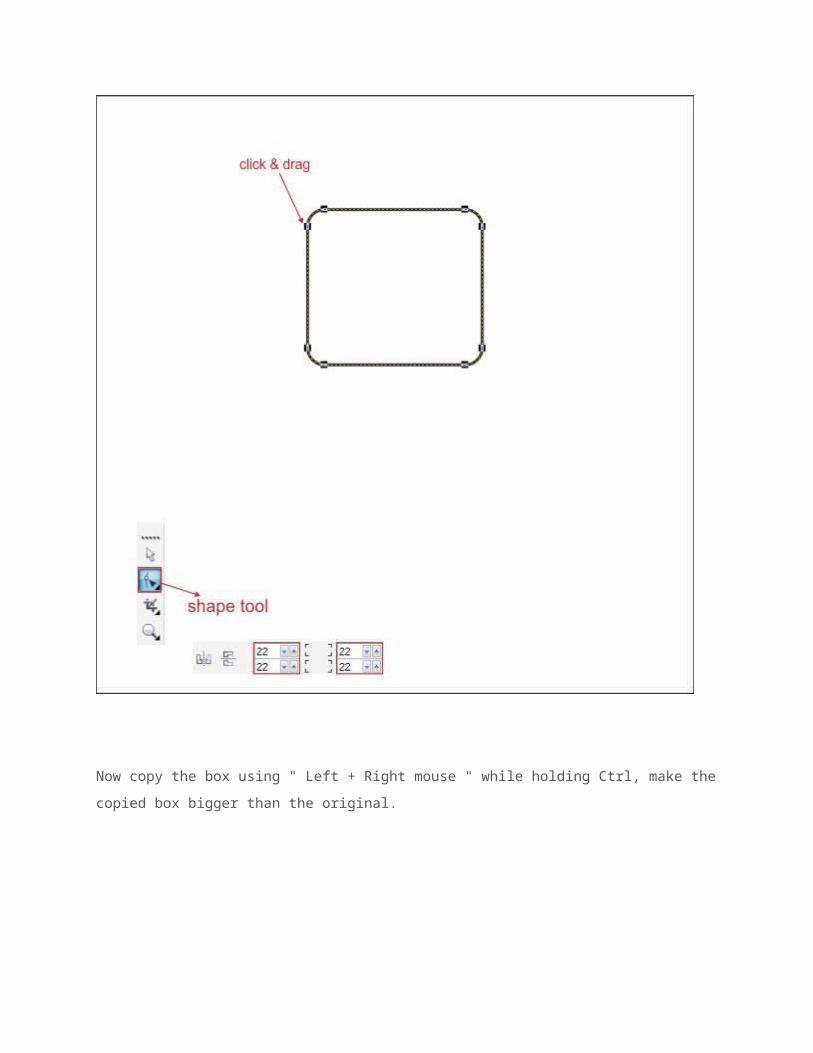
Now copy the box using " Left + Right mouse " while holding Ctrl, make thecopied box bigger than the original.
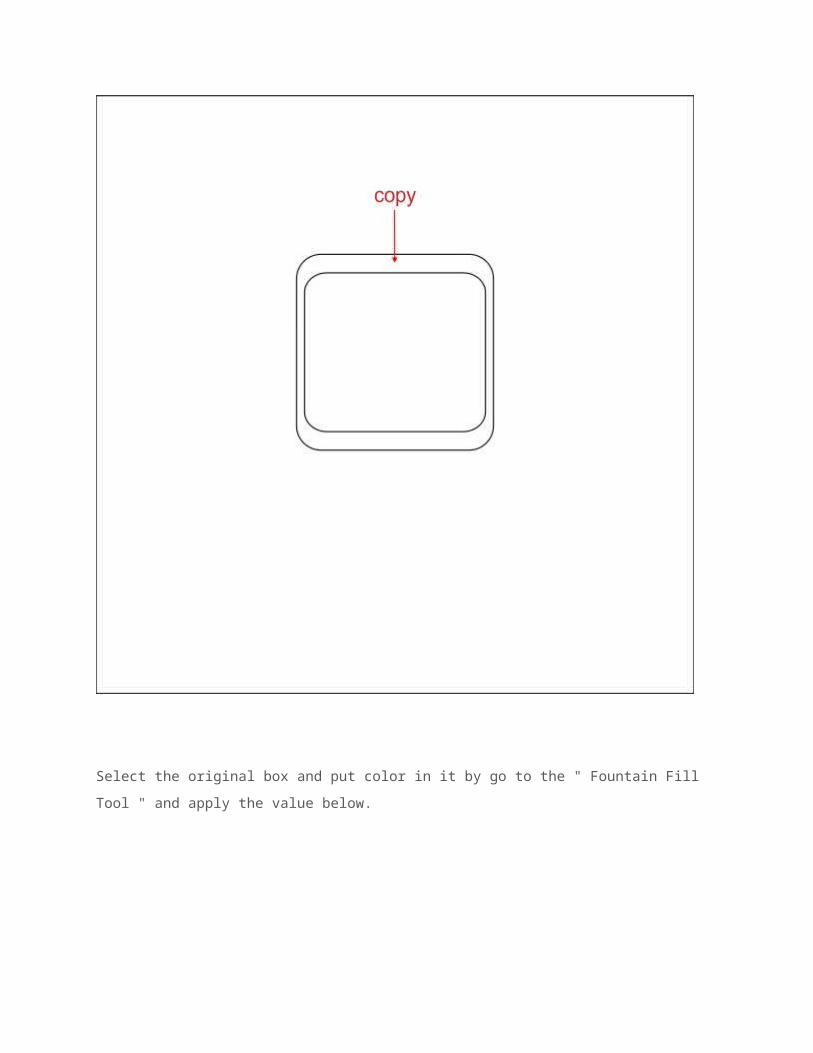
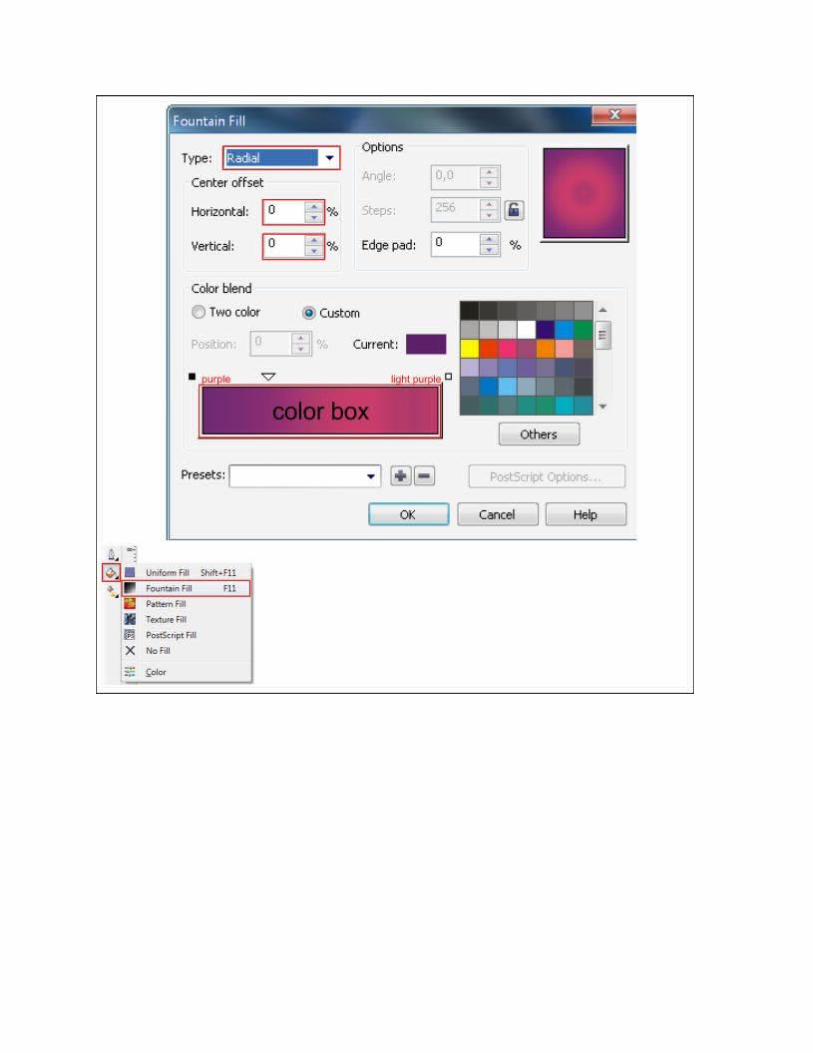
Select the original box and put color in it by go to the " Fountain Fill Tool " and apply the value below.
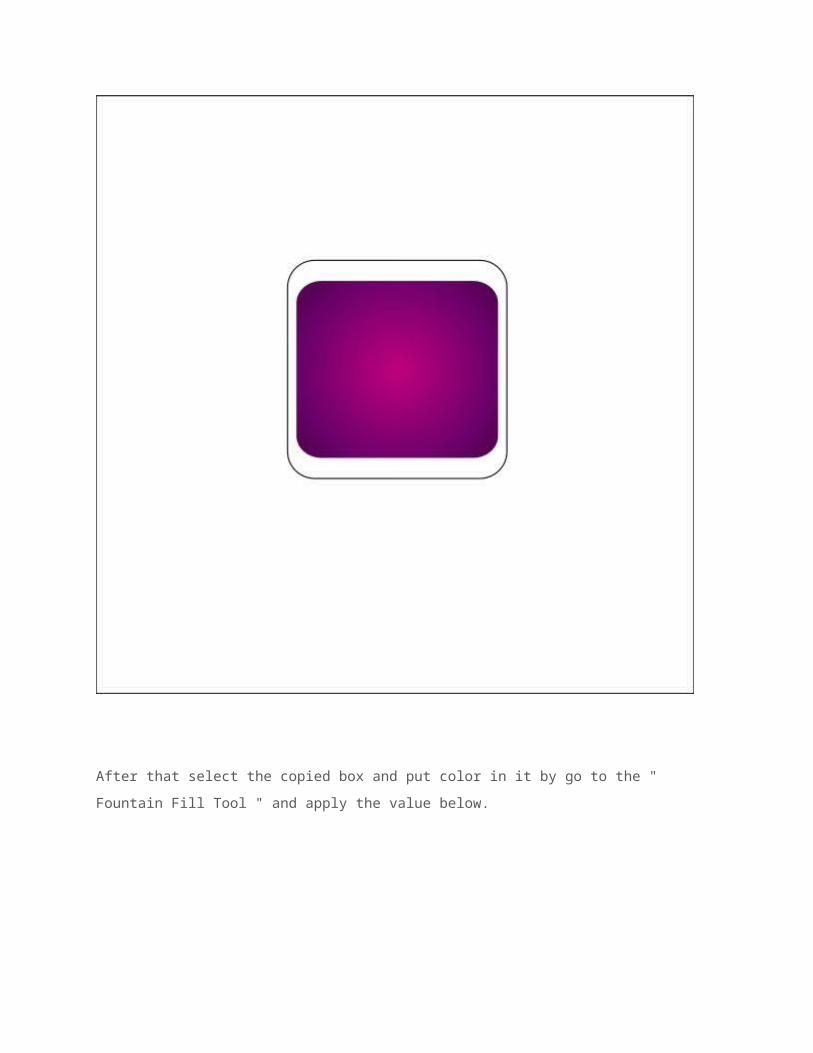
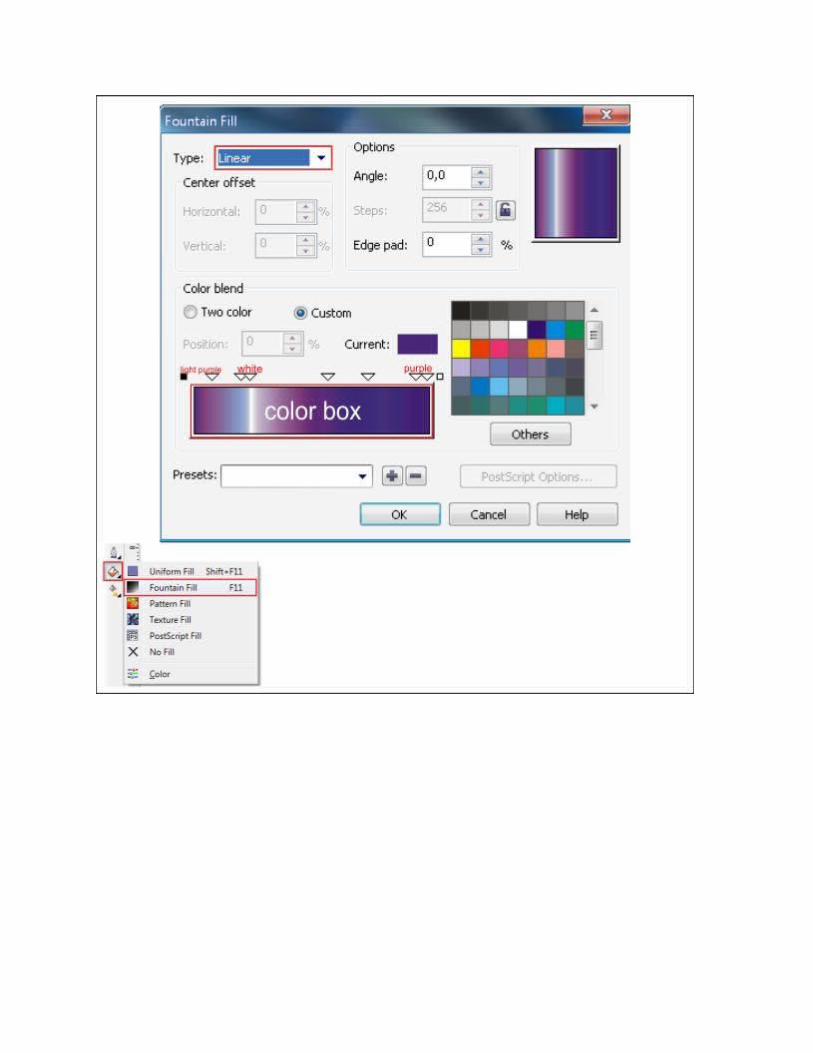
After that select the copied box and put color in it by go to the " Fountain Fill Tool " and apply the value below.
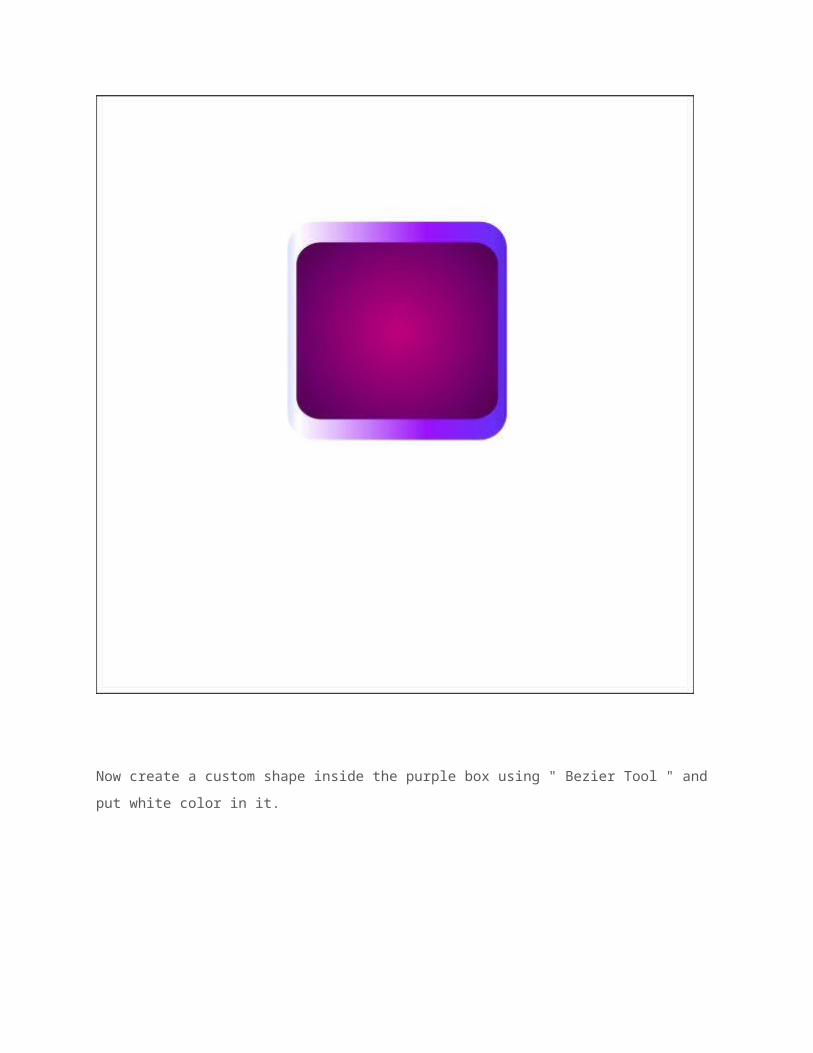
Now create a custom shape inside the purple box using " Bezier Tool " and put white color in it.
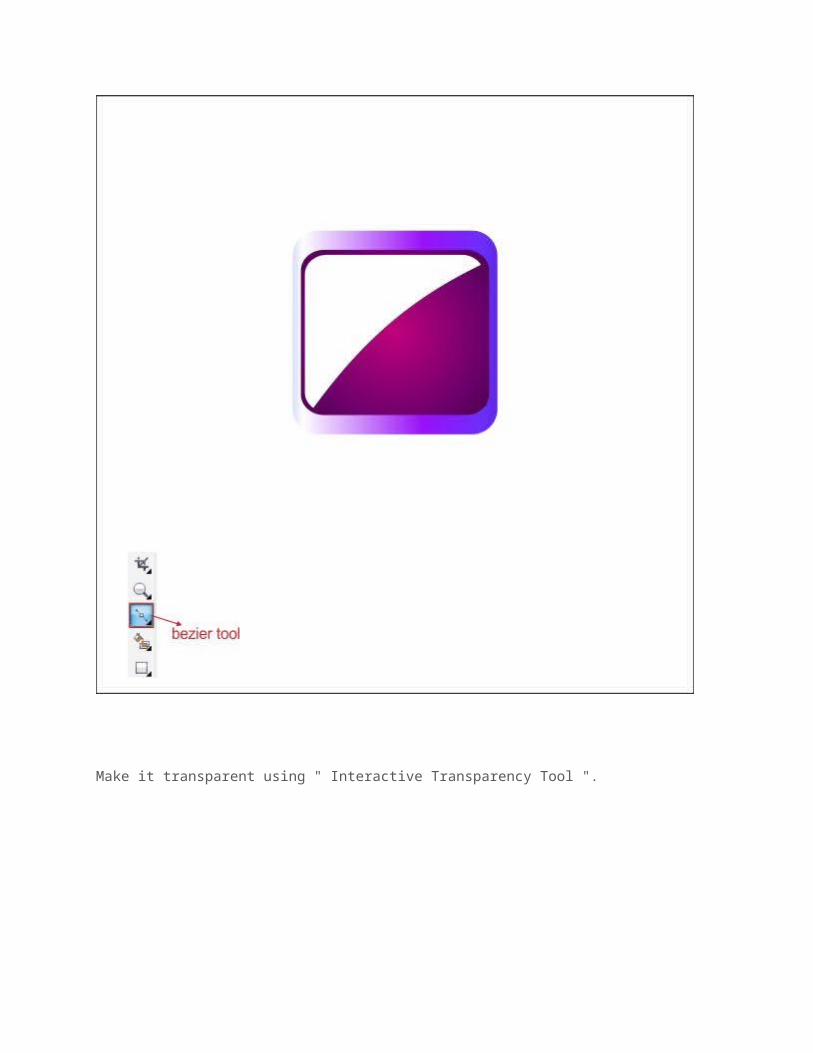
Make it transparent using " Interactive Transparency Tool ".
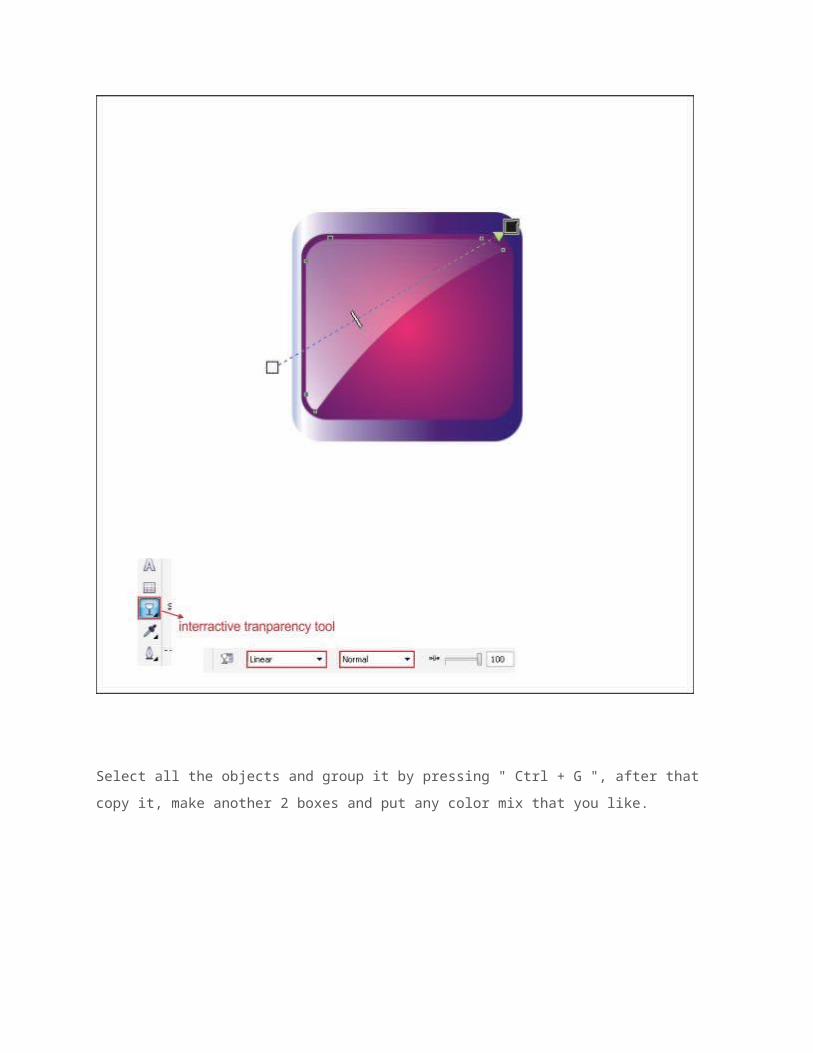
Select all the objects and group it by pressing " Ctrl + G ", after that copy it, make another 2 boxes and put any color mix that you like.

Now Copy, Rotate and Resize the Boxes to randomize similar like below.

Group all the boxes by selecting all of them and press " Ctrl + G ", afterthat arrange it behind the Main Boxes that we previously create.

After that copy and resize the Background boxes and arrange it on the bottom of the Main Boxes.
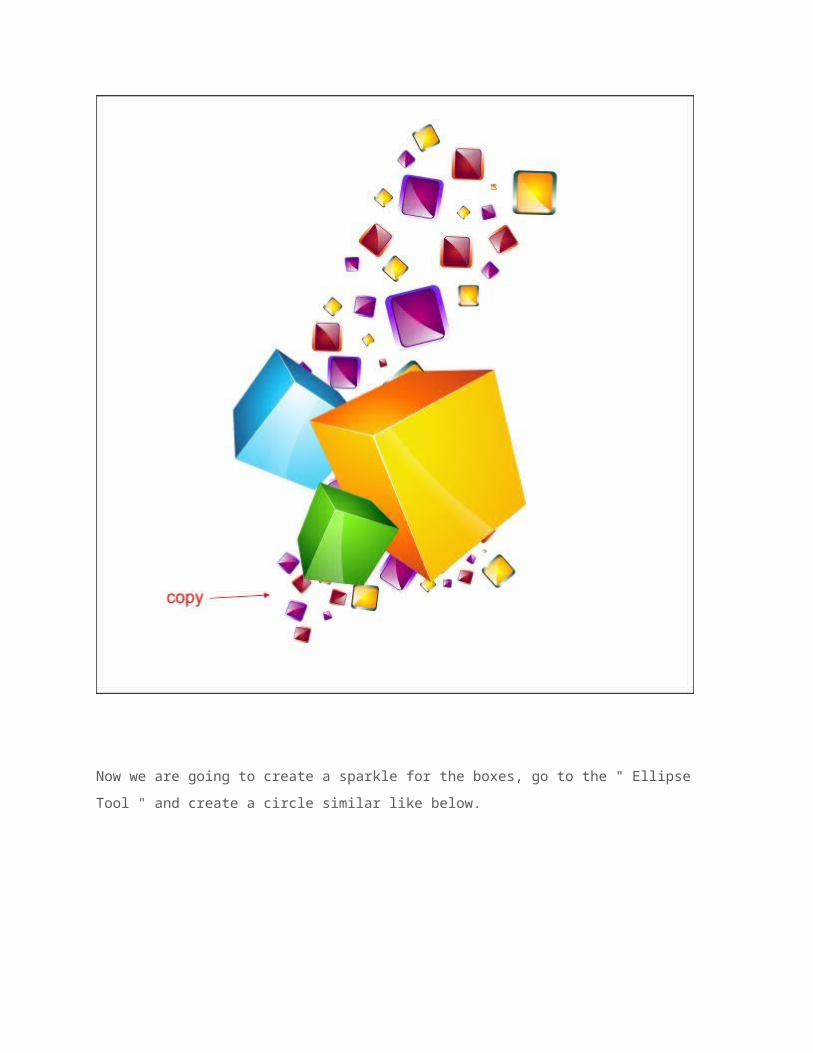
Now we are going to create a sparkle for the boxes, go to the " Ellipse Tool " and create a circle similar like below.

After that go to the " Interactive Shadow Tool " drag the circle into the objects to create a shadow, change the shadow color to white and apply thevalue below to create similar.
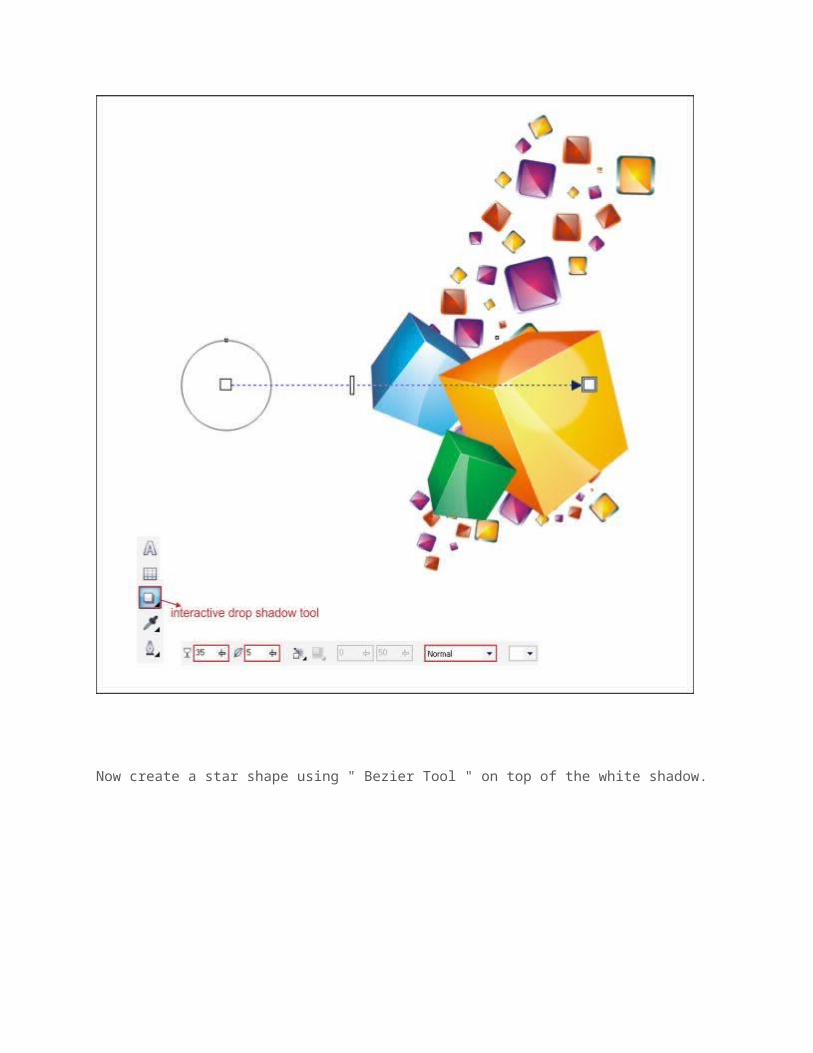
Now create a star shape using " Bezier Tool " on top of the white shadow.

Put a white color on the star shape.
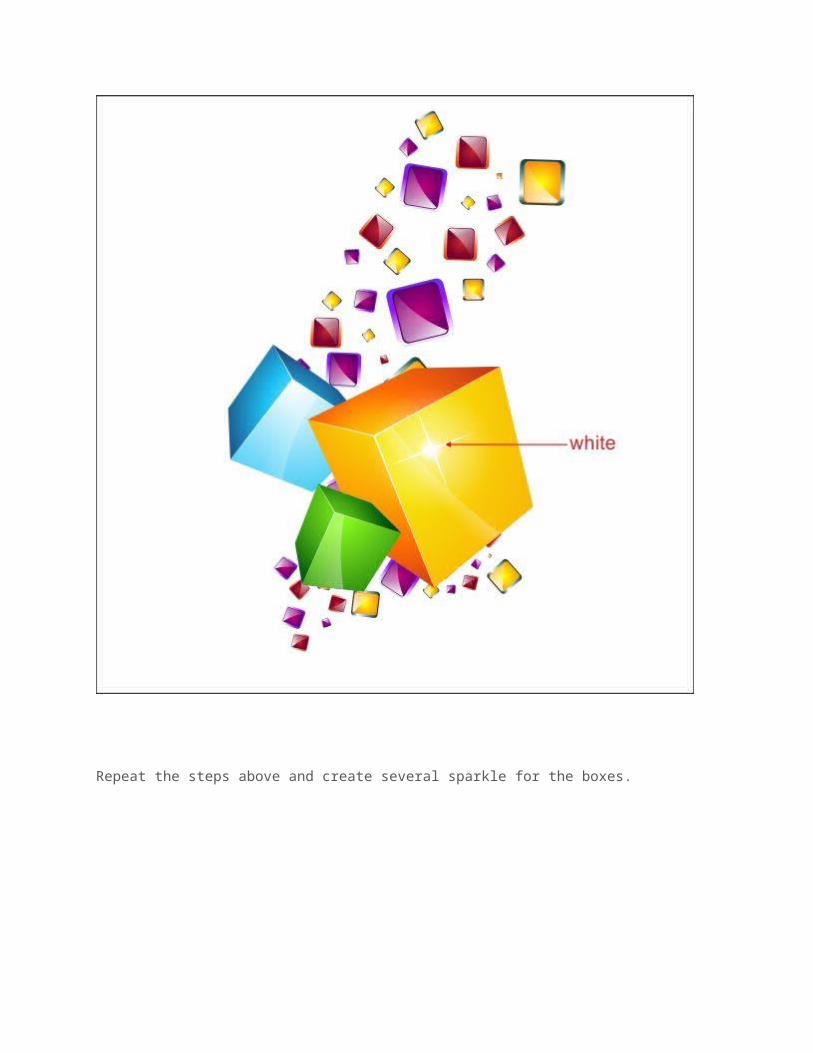
Repeat the steps above and create several sparkle for the boxes.

Step 6 : Creating the Main Frame
Okay now we are going to create the Main Frame, go to the " Rectangle Tool" and create a box shape with the size 300 x 250 px.
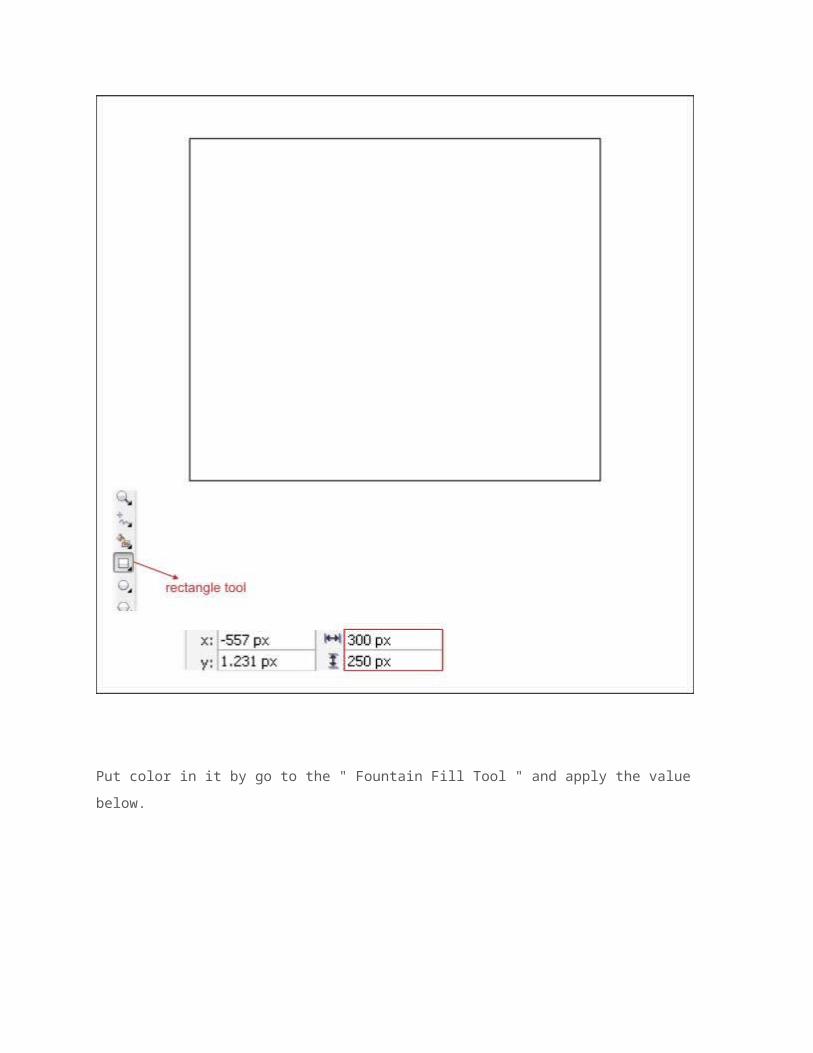
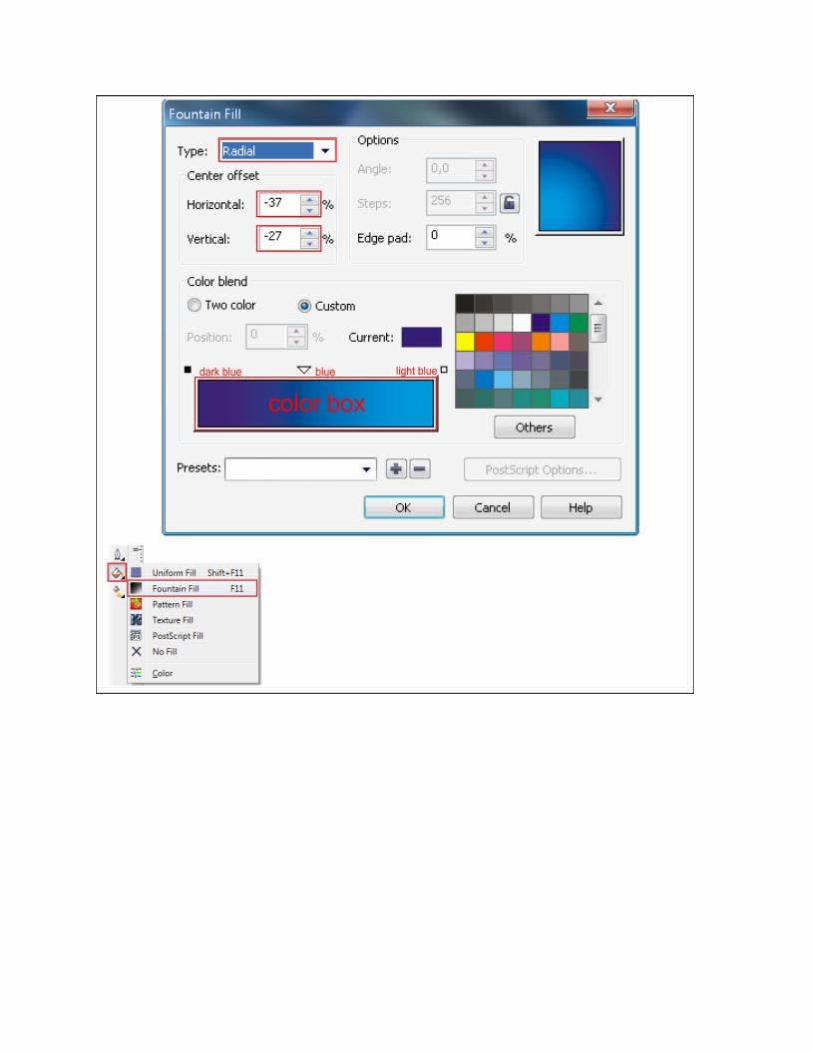
Put color in it by go to the " Fountain Fill Tool " and apply the value below.

After that, we are going to insert the Objects into the Main Frame using "PowerClip", left-click the Objects and then go to the top toolbar and findEffect > Powerclip > Place Inside Container, then you will see a black arrow, Left-click it to the Main Frame, and now you will see that the Object is inside the Main Frame, you can go "inside" or "outside" the container by holding Ctrl while double-clicking it.
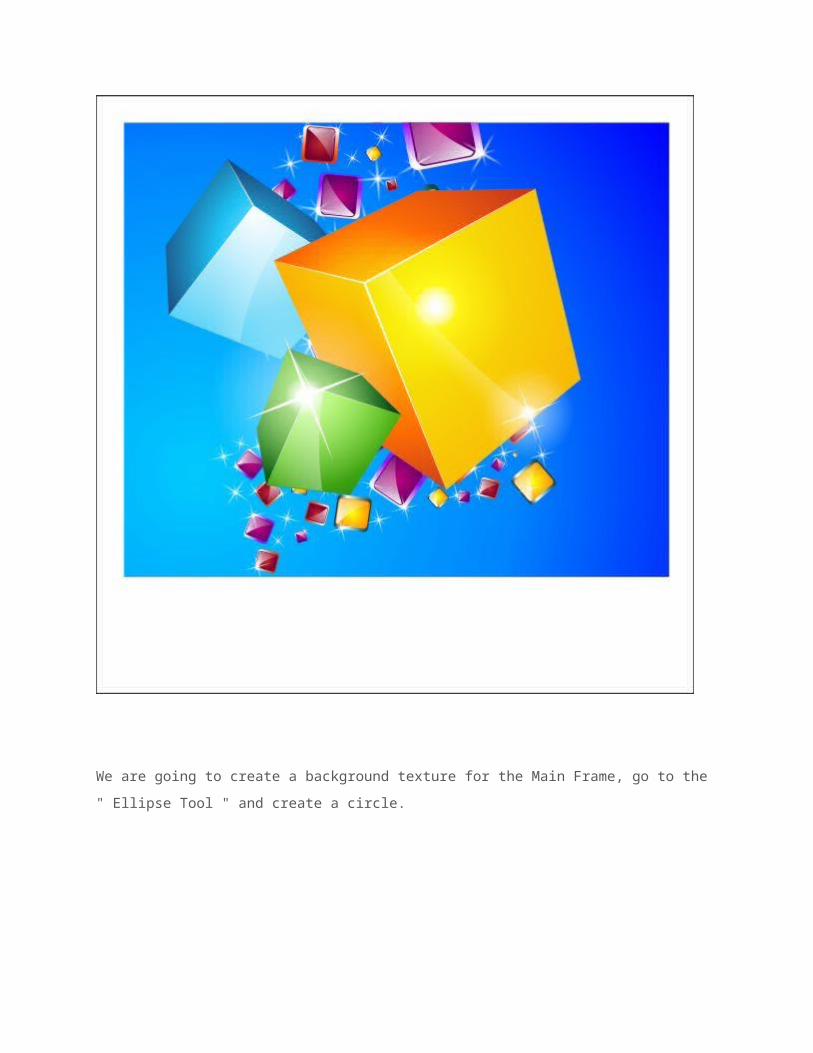
We are going to create a background texture for the Main Frame, go to the " Ellipse Tool " and create a circle.
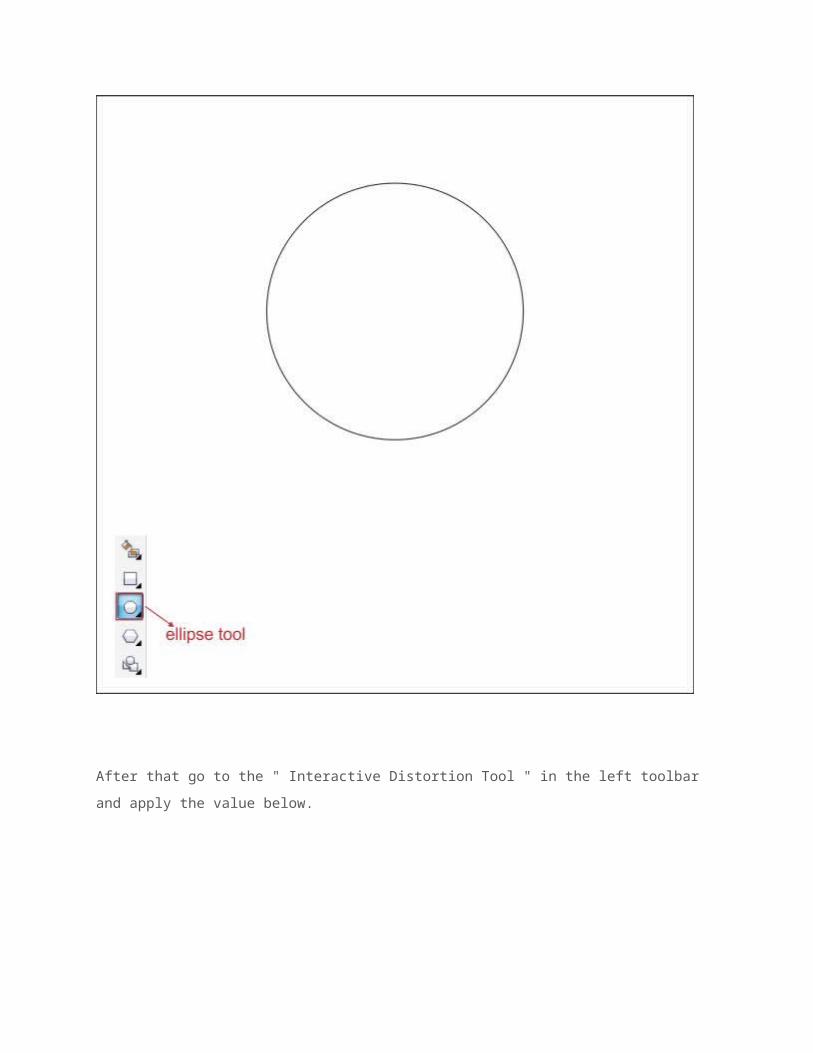
After that go to the " Interactive Distortion Tool " in the left toolbar and apply the value below.
Make it transparent using " Interactive Transparency Tool ".
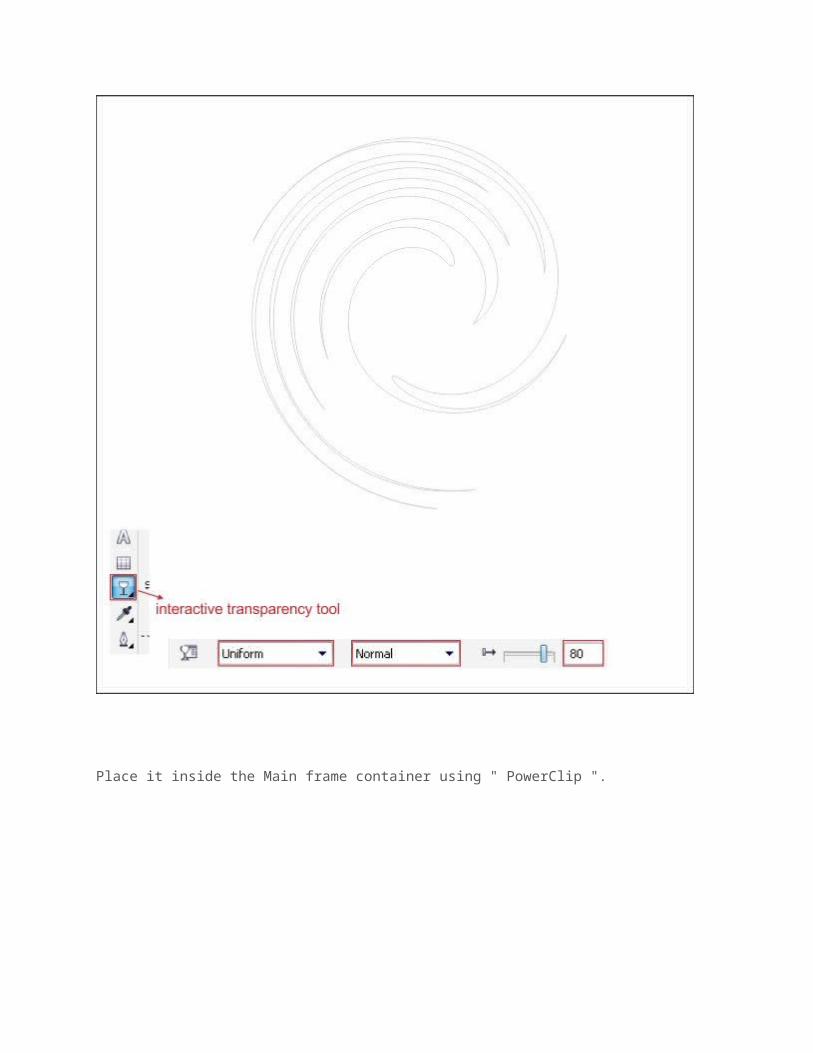
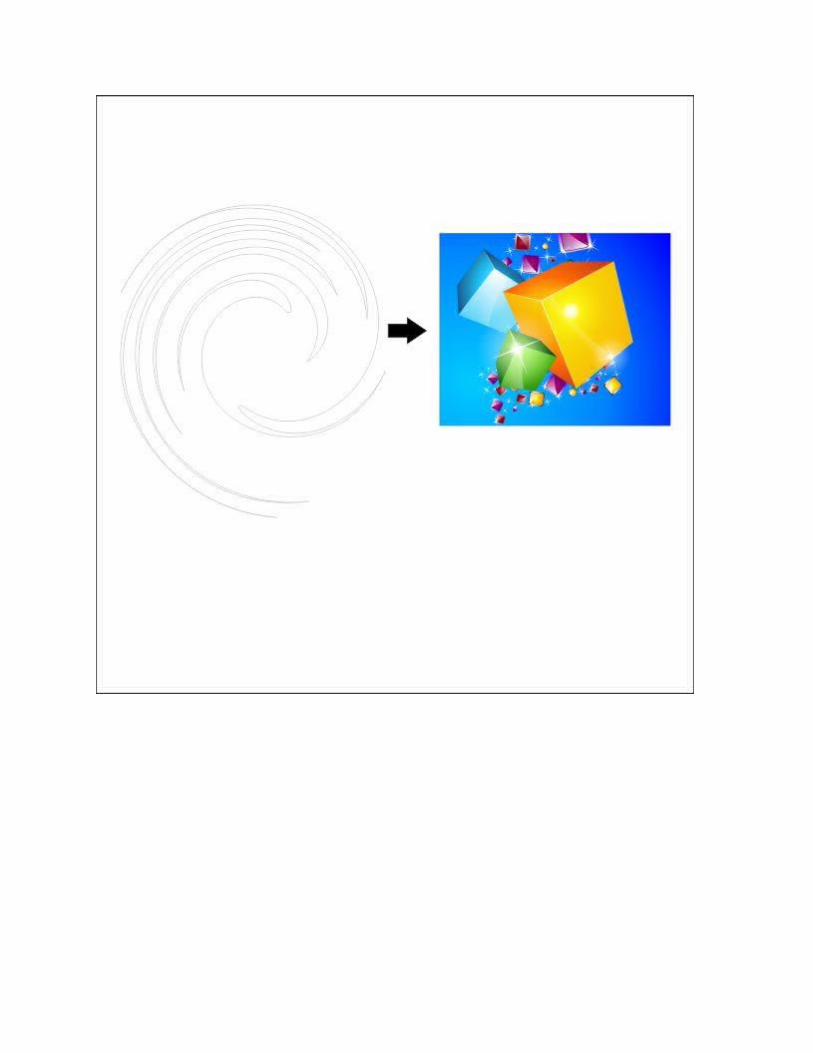
Place it inside the Main frame container using " PowerClip ".
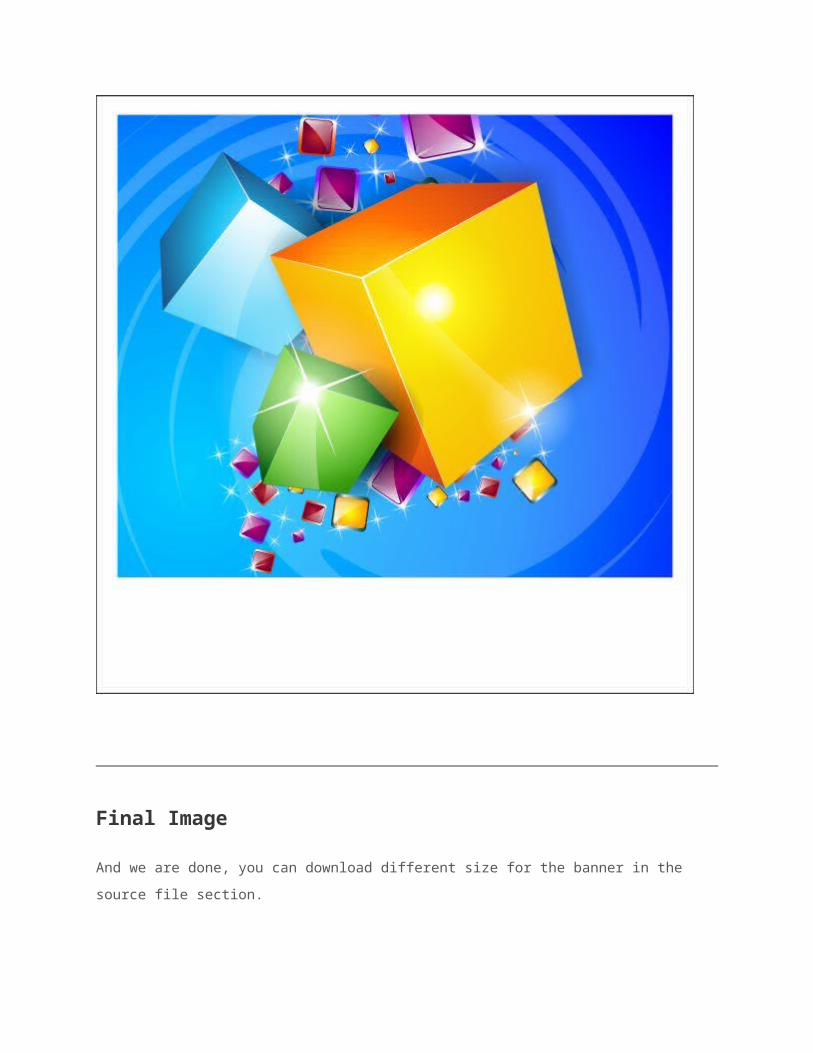
Final Image
And we are done, you can download different size for the banner in the source file section.

Download Source File
Source File ( .cdr )
Now building a website is as easy as 1-2-3!
BUY and download a website template. Choose from thousands of readymade designs!
CUSTOMIZE with your own images and text. Or use our template customization services – just $499.
UPLOAD your finished website to your hosting provider. We recommend Hostgator, host for Entheos.

Please Like, Tweet, Share or Comment on this page if you found thistutorial/resource useful!
163
No portion of these materials may be reproduced in any manner whatsoever, without the express written consent of Entheos. Any unauthorized use, sharing, reproduction or distribution of these materials by any means, electronic, mechanical, or otherwise is strictly prohibited.
Looking for high-quality Logo Design?Contact us forcustom logo design!
Featured Template
Template# 37734
Type: WordPress Price: $68
Home About us Portfolio Testimonials Prices
Low Cost Solutions Contact Website Templates CSS Flash Animated Full Package Full Site JS Animated Full Flash Website Templates Dynamic Flash Dynamic Flash Photo Galleries Flash 8 XML Flash Site Flash Cms Templates Free Tutorials CorelDraw Tutorials CSS Tutorials Dreamweaver Tutorials Design Inspiration Fireworks Tutorials Flash Tutorials Photoshop Tutorials Web Design Tutorials Free Resources Brochures Photo Galleries Website Templates Custom Services Brochure Design Content Writing Dynamic Website Develpment Logo Design Stationary Design Template Customization Flash Animation Website Design Logos & Corporate Identities Corporate Identity Logotype Template Power Point Templates
Ecommerce Templates Creloaded Magento Templates OSCommerce Zen Cart Virtuemart Templates PrestaShop Templates CMS & Blog Templates Drupal Joomla Wordpress Blog Tutorials Ideas & Inspiration Best Resources Freebies Illustrator Facebook Logo Design Web Design
Related Documents