PREPARED BY: DEBBRA MARCEL, VRI, 2011

Welcome message from author
This document is posted to help you gain knowledge. Please leave a comment to let me know what you think about it! Share it to your friends and learn new things together.
Transcript

PREPARED BY: DEBBRA MARCEL, VRI, 2011

“’’
1. Post Mortem 2. Fixation 3. Tissue Trimming 4. Tissue Processing 5. Embedding 6. Sectioning 7. Slide preparation 8. Staining 9. Mounting 10.Observing

“’’
A) Cut carcass to get the necessary organ according to the case/ intended test (to be done ASAP) to minimize post-mortem changes

“’’
Organ fixed into 10% formalin solution at least 24hr before proceed to the next step -To maintain the morphology/structure of tissues as per received. Other fixation agent = Zenker’s solution & Bouin’s solution
*CAUTION: CARCINOGENIC!!
Hypotonic=pH:6.8
“’’
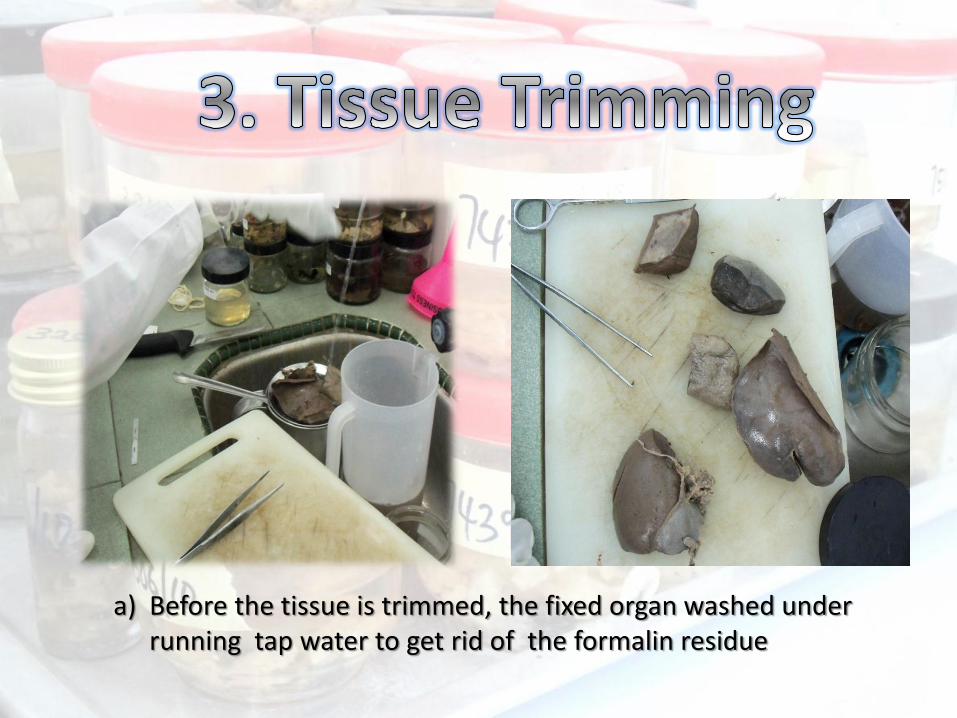
a) Before the tissue is trimmed, the fixed organ washed under running tap water to get rid of the formalin residue

“’’
b) Trimming organs into tissues ( >3mm thickness) • While selecting tissue, a brief description of the nature of tissue & site of origin should be recorded appropriately • Choose the lesion & non-lesion part for easy observation
“’’
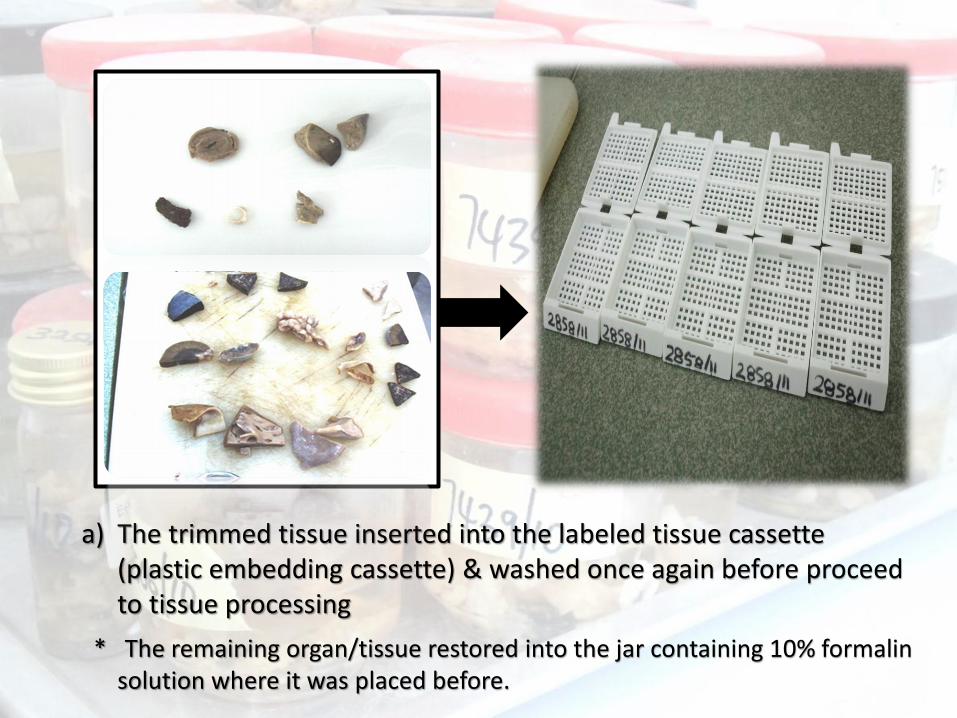
a) The trimmed tissue inserted into the labeled tissue cassette (plastic embedding cassette) & washed once again before proceed to tissue processing
* The remaining organ/tissue restored into the jar containing 10% formalin solution where it was placed before.

“’’
Histokinette (Automatic Tissue Processor)
Process (3 main process)
70% alkohol 1-2 jam Alkohol 1 1-2 jam Alkohol 2 1-2 jam Alkohol 3 1-2 jam Alkohol 4 1-2 jam Alkohol 5 1-2 jam Alkohol 6 1-2 jam Alkohol 7 1-2 jam Chloroform 1 1-2 jam Chloroform 2 1-2 jam Wax 1 1-2 jam Wax 2 1-2 jam (vacuum bath) Next, tissue is ready to the next step… “embedding”
Dehydration
Clearing
Wax Infiltration

“’’
a.k.a “The tissue waxing process”
Tissue cassettes then placed inside aluminum metal tray on hotplate containing melted crystal wax *crystal wax melting point=54-56°c

“’’
Then tissues is taken out from cassettes & transferred into a stainless steel base mould

“’’
From hotplate, the mould is then meticulously transferred onto the coldplate , topped with crystal wax until almost full & covered with cassette

“’’
After several minutes, the frozen waxed tissues is then taken out from the mould

“’’
TARAA…
The tissue blocks is done!

“’’
The tissue block is soaked in an iced cold distilled water to densify the block
“’’
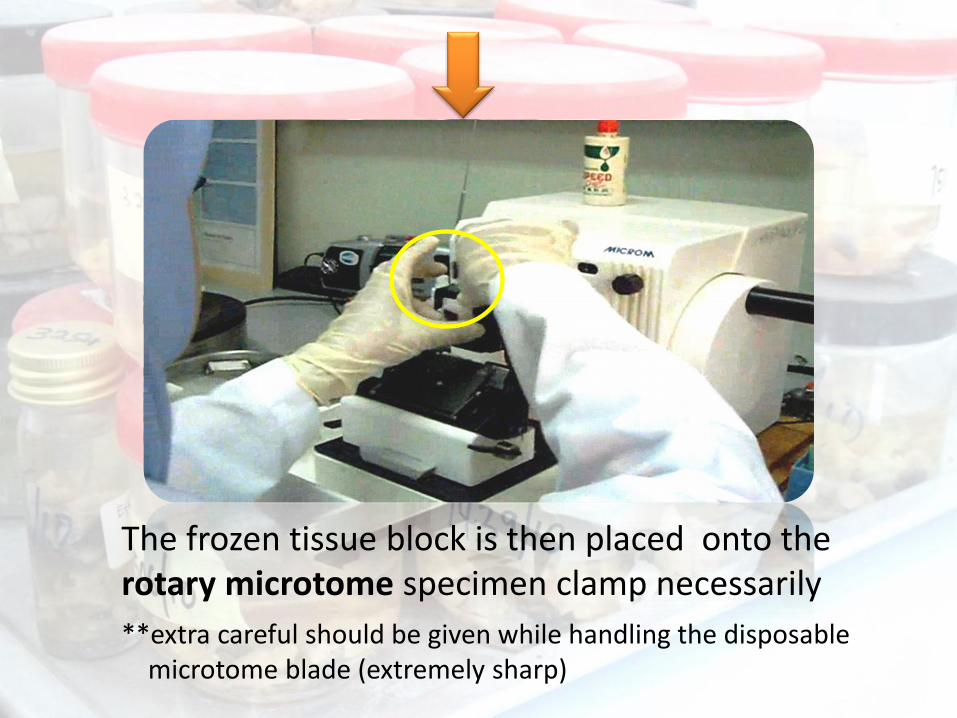
The frozen tissue block is then placed onto the rotary microtome specimen clamp necessarily
**extra careful should be given while handling the disposable microtome blade (extremely sharp)

“’’
Adjusting hand-wheel & cutting thickness (in this case, we had set to 5µm cutting )

“’’
Frozen waxed tissue meticulously cut using rotary microtome by making 2 or 3 copies per block (so that when one of the tissues accidently ruined, we’ll have some spares for it!)
Block should be trimmed first before cutting section

“’’
The fine layer of waxed tissue is then laid onto a warm waterbath (40°c-42°c) to remove wrinkles
FLOATING THE FROZEN SECTION

“’’
Adhesived slides – glass slide should be coated with albumin solution before placing the tissue section onto the slide

“’’
Placing the tissue section onto the slide carefully • Submerge the glass slide 90° then emerge the slide from the tissue section underneath • Make sure the section is not crumple

“’’
Draining slides for a few minutes then place into the incubator at 37°c at least for ½ hour

“’’ 1
6 5 4 3 2
9 8 7 10 11 12
“’’
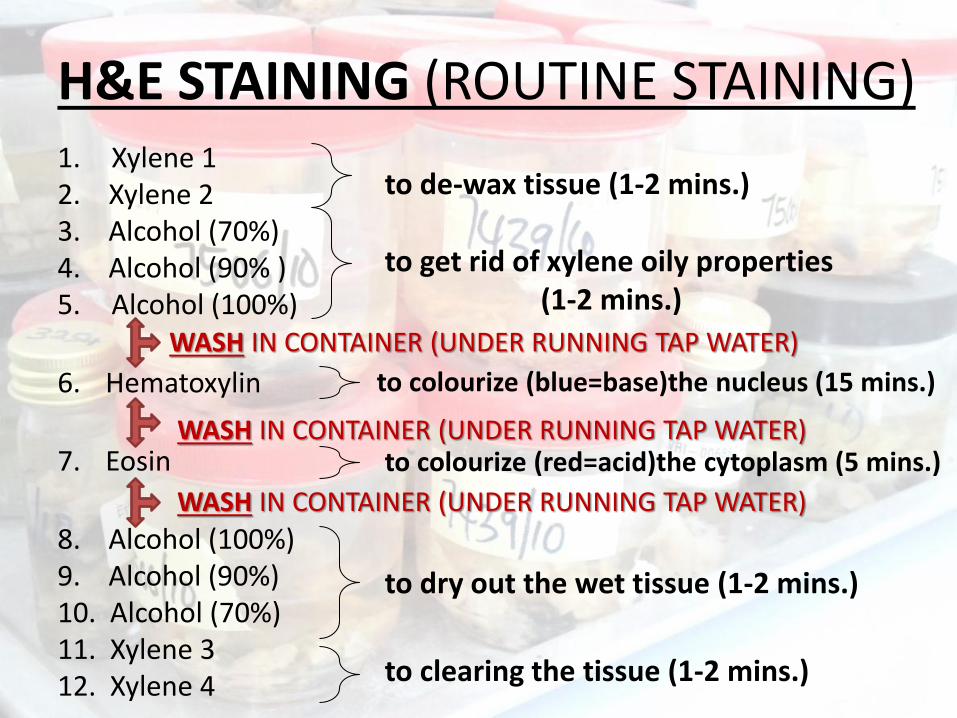
H&E STAINING (ROUTINE STAINING)
1. Xylene 1 2. Xylene 2 3. Alcohol (70%) 4. Alcohol (90% ) 5. Alcohol (100%)
6. Hematoxylin
7. Eosin
8. Alcohol (100%) 9. Alcohol (90%) 10. Alcohol (70%) 11. Xylene 3 12. Xylene 4
to de-wax tissue (1-2 mins.)
to get rid of xylene oily properties (1-2 mins.)
to colourize (blue=base)the nucleus (15 mins.)
to colourize (red=acid)the cytoplasm (5 mins.)
to dry out the wet tissue (1-2 mins.)
to clearing the tissue (1-2 mins.)
WASH IN CONTAINER (UNDER RUNNING TAP WATER)
WASH IN CONTAINER (UNDER RUNNING TAP WATER)
WASH IN CONTAINER (UNDER RUNNING TAP WATER)

“’’
1 2
Mount the slide with mounting glue (e.g synthetc resin medium) & cover with coverslip

“’’
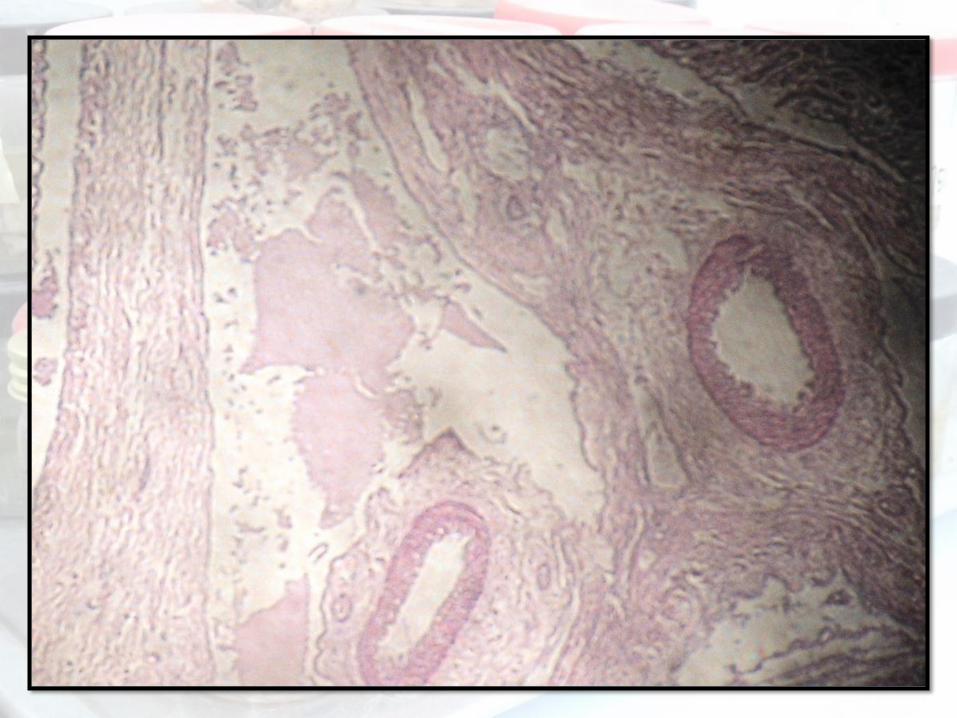
The slide is now ready to be observed under microscope ? X objective
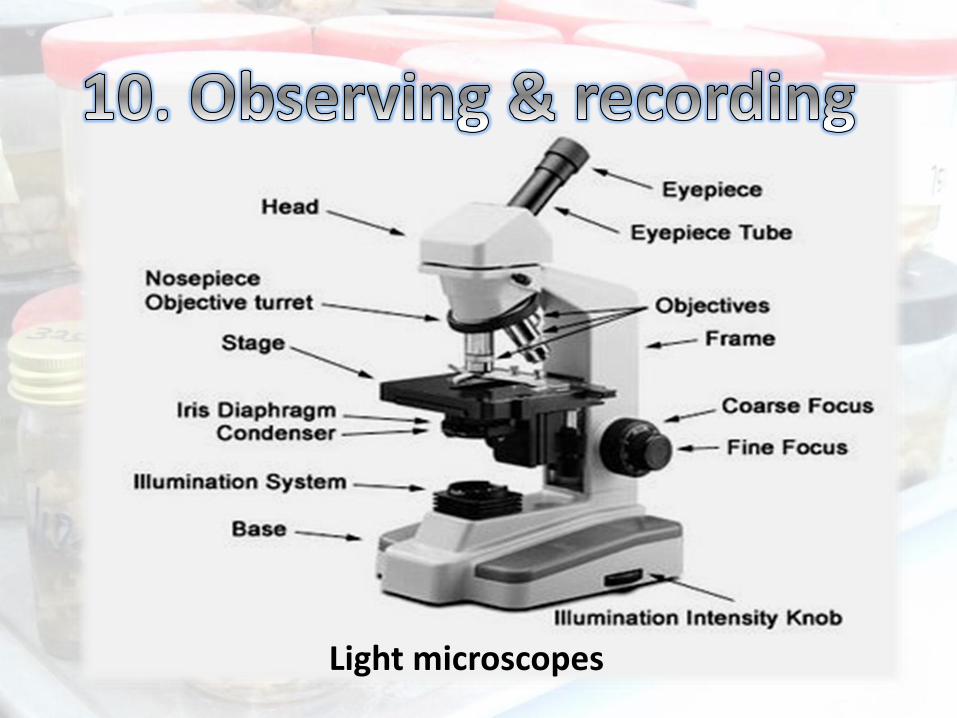
“’’
Light microscopes

“’’
“’’

“’’

“’’

“’’

“’’
Related Documents