HDR EFFECT MATHEW COMPTON

HDR Effect Presentation
Jul 29, 2015
Welcome message from author
This document is posted to help you gain knowledge. Please leave a comment to let me know what you think about it! Share it to your friends and learn new things together.
Transcript
HDR EFFECTMATHEW COMPTON

What is a HDR effect?
HDR – HIGH DYNAMIC RANGE
High Dynamic Range, or HDR, is a digital photography technique whereby multiple exposures of the same scene are layered and merged using image editing software to create a more realistic image, or a dramatic effect.
The combined exposures can display a wider range of tonal values than what the digital camera is capable of recording in a single image.
When is it used?
A HDR effect is often used to enhance many different images. These are a few common shots which often have the effect added.
Landscapes: Big landscape photos usually have a lot of contrast between the sky and land, which is difficult for your camera to deal with in just one photo. With HDR, you can capture the sky's detail without making the land look too dark, and vice versa.
Portraits in Sunlight: We all know that lighting is one of the most important aspects of a good photo, but too much lighting on someone's face—like harsh sunlight—can cause dark shadows, bright glare, and other unflattering characteristics. HDR can even that all out and make your subject look better.
Low-Light and Backlit Scenes: If your photo is looking a little too dark—which often happens if your scene has too much backlight—HDR can brighten up the foreground without washing out the well-lit portions of your photo.

Examples

The Original

How to create a HDR effect.
Step ONE
The most important step is the first, it is the bases of the HDR Photoshop effect.
Use command image > adjustment > shadow/highlight
Set values to:
Shadows amount: 50%, tonal width 45%, radius 41 px
High-light amount 83%, tonal width 76%, radius 1120px

Example

How to create a HDR effect.
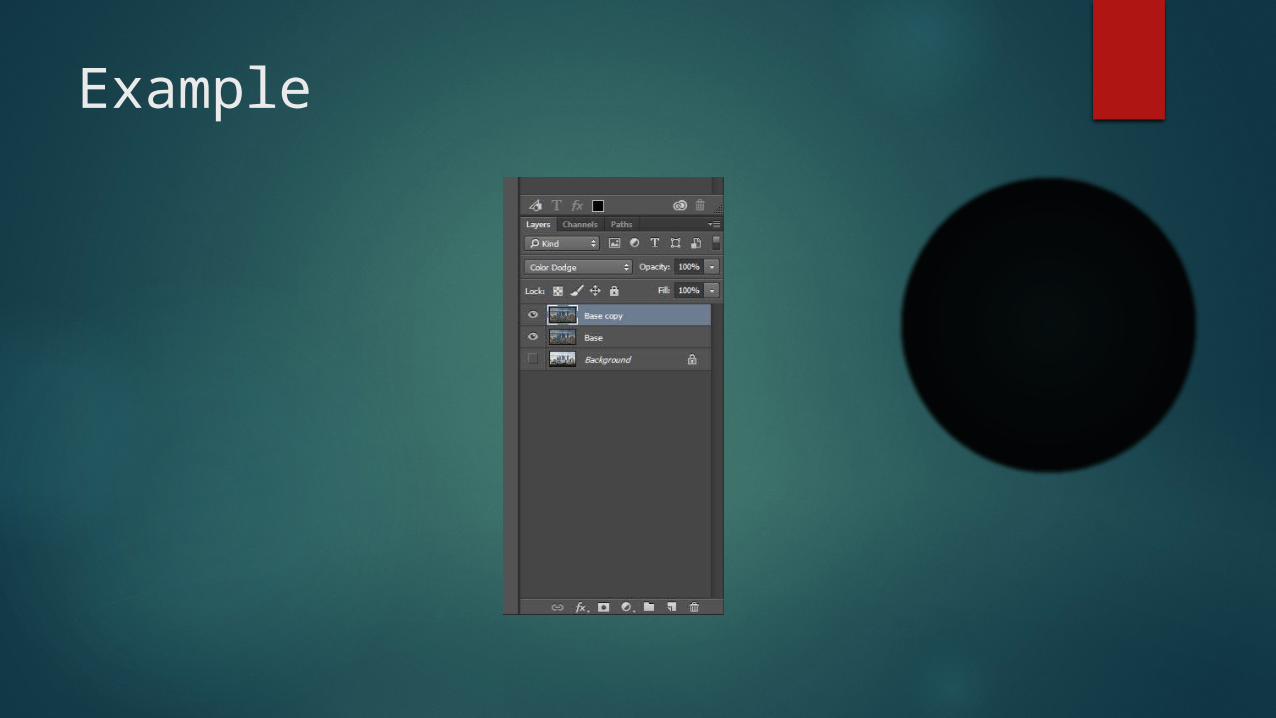
Step TWO
Duplicate the layer "base" and set it’s layer blending to Colour Dodge.
This blending gives the picture vibrant colours and causes the light areas turn pure white.
In next step it will be repaired by another layer blending.
Example

How to create a HDR effect.
Step THREE
Do the same thing as in the second step, but set layer blending to Linear Burn.
Then use command select > colour range, un-tick invert option (we want everything except black parts), fuzziness should be set to around 100.
Now click on the mask icon, a new layer mask will be added and black will disappear.
If there are any artefacts in the picture. Remove them by clicking on the layer mask and addong a Gaussian blur filter.

Example

How to create a HDR effect.
Step FOUR
The fourth step is straight forward, it uses most of the elements from the third step.
Just duplicate the layer with the "linear Burn“ setting and set its blending to Overlay. Select layer mask and press ctrl+i (invert).
Remember: This blending option darkens light shadows and raises contrast. Adding layers and blending makes this a very powerful tool.

Example

How to create a HDR effect.
Step FIVE
Now it's time to adjust the pictures look. Experiment with layer opacity.
Optimal values are approximately 40% for the layer using "Overlay" and 55% for the layer using = "Linear Burn".
Adding an HDR effect in Adobe Photoshop relies on experimentation.

Example

How to create a HDR effect.
Step SIX
Use command select > colour range with fuzziness set around 100.
"Crawling ants" will appear around light areas.
Duplicate the "base" layer and move it to the top, then click on the icon add layer mask.
Then, select layer mask and soften it by Gaussian blur filter.

Example

How to create a HDR effect.
Step SEVEN
The last step - colourise picture into red tones. Click on the new layer icon, and add a gradient map.
After you are completed with the gradient map, load the selection from the layer mask of layer “Base copy 5“ and invert it (select > invert) Set the blending options to hard light.
Finally set the opacity of the gradient map according to how much colour is needed.
In this example I have set the opacity at 72% to clearly show what the effect looks like. You can use any colour gradient map depending on what you are using the image for.

Example
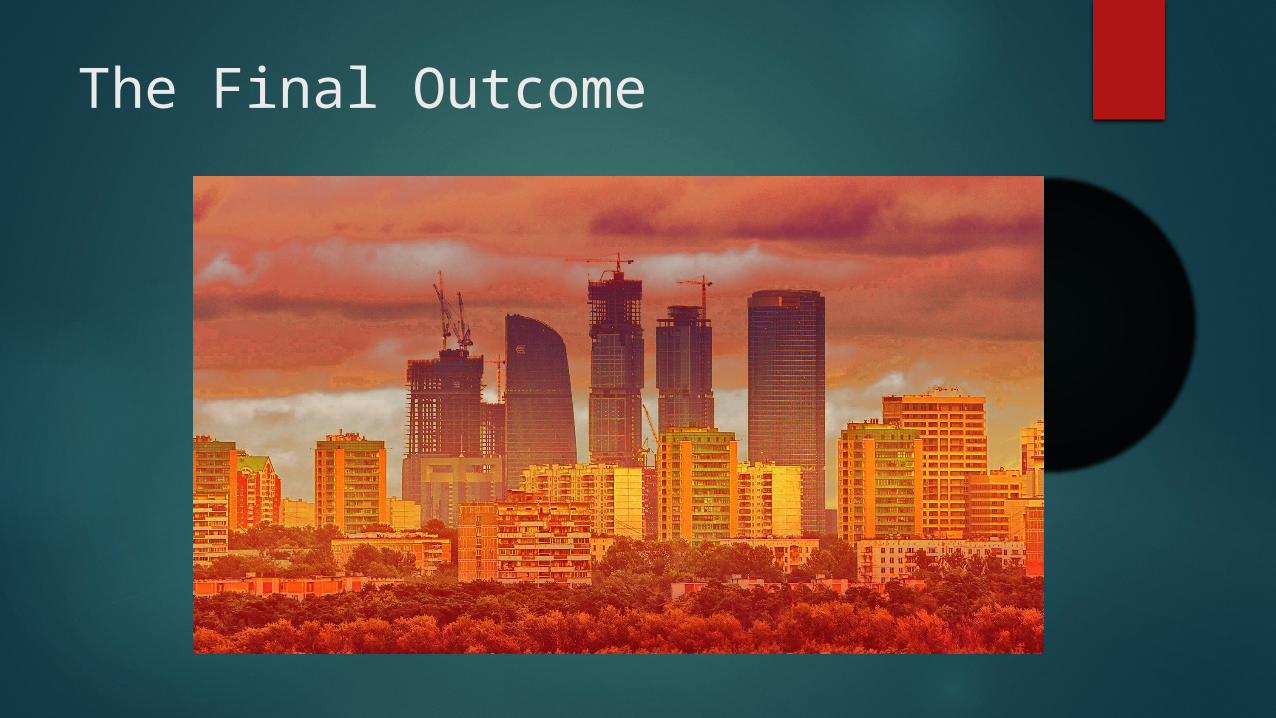
The Final Outcome

Implementing into a design.
This effect can be added to photography for magazines, flyers, posters and many other promotional material.
I have put together an example of an opening page in a booklet. This has been used as a template to develop with clients.

Thanks for listening!Does anyone have any questions?
Related Documents
![Hdr 20072008 Presentation[1]](https://static.cupdf.com/doc/110x72/559a02c91a28abbd5c8b45fb/hdr-20072008-presentation1.jpg)

![[Presentation] The Megaphone Effect](https://static.cupdf.com/doc/110x72/577cd4d21a28ab9e78993673/presentation-the-megaphone-effect.jpg)


