H.264 Quick Start Guide Version 1.0 the world in my eyes R

Welcome message from author
This document is posted to help you gain knowledge. Please leave a comment to let me know what you think about it! Share it to your friends and learn new things together.
Transcript
H.264 Quick Start Guide
Version 1.0
the world in my eyes
R
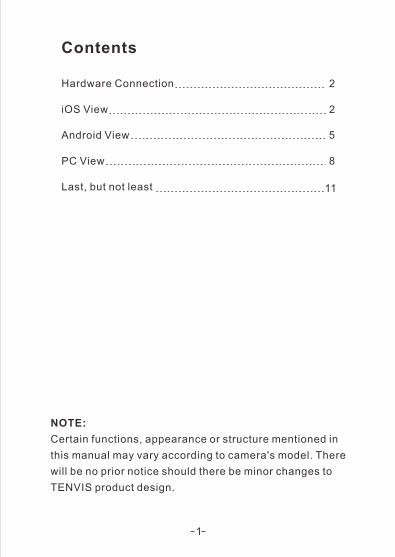
Contents
Hardware Connection 2
iOS View 2
Android View 5
PC View 8
Last, but not least 11
1
NOTE:
Certain functions, appearance or structure mentioned in
this manual may vary according to camera's model. There
will be no prior notice should there be minor changes to
TENVIS product design.

Hardware Connection
1. Screw the antenna into the back of the unit. Tilt it up to an up
right position.
2
2. Connect the power cable and wait for the camera to initialize.
Link the camera to the router using the supplied network cable.
iOS View
1. Download TENVIS P2P from the App Store.
2. Tap on the icon.Add Camera
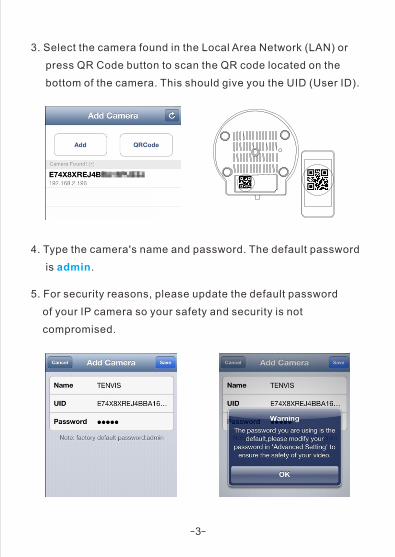
3. Select the camera found in the Local Area Network (LAN) or
press QR Code button to scan the QR code located on the
bottom of the camera. This should give you the UID (User ID).
3
4. Type the camera's name and password. The default password
is .admin
5. For security reasons, please update the default password
of your IP camera so your safety and security is not
compromised.
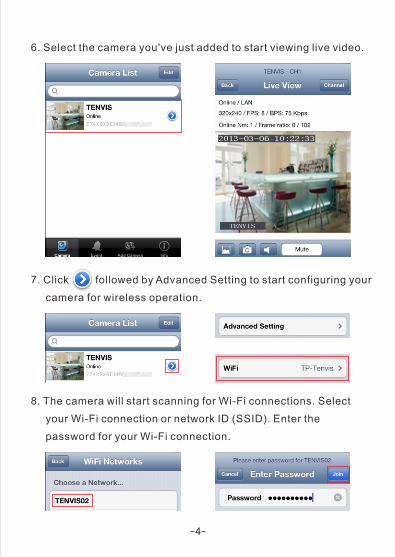
6. Select the camera you've just added to start viewing live video.
4
7. Click followed by Advanced Setting to start configuring your
camera for wireless operation.
8. The camera will start scanning for Wi-Fi connections. Select
your Wi-Fi connection or network ID (SSID). Enter the
password for your Wi-Fi connection.
9. When the Wi-Fi is successfully configured, you can now remove
the network cable from your camera and start using your camera
as a wireless device.
5
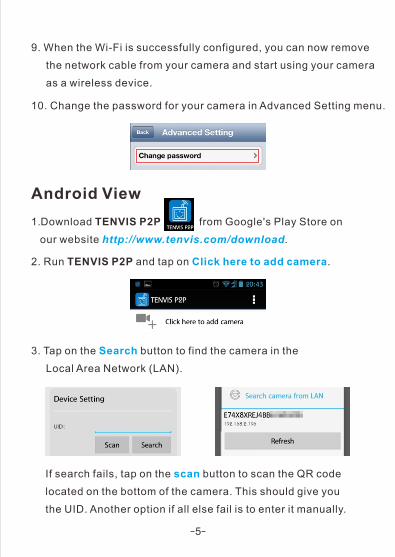
10. Change the password for your camera in Advanced Setting menu.
Android View
1.Download TENVIS P2P from Google's Play Store on
our website .http://www.tenvis.com/download
2. Run TENVIS P2P and tap on .Click here to add camera
3. Tap on the button to find the camera in the
Local Area Network (LAN).
Search
If search fails, tap on the button to scan the QR code
located on the bottom of the camera. This should give you
the UID. Another option if all else fail is to enter it manually.
scan
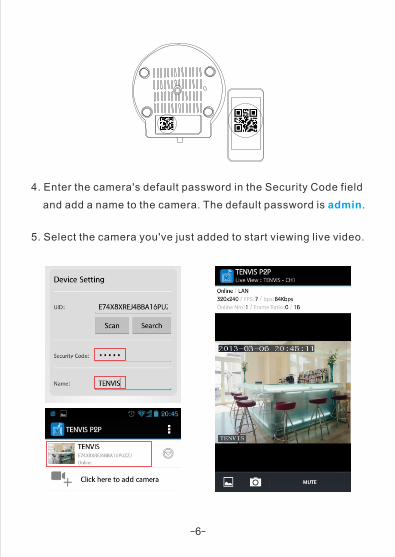
4. Enter the camera's default password in the Security Code field
and add a name to the camera. The default password is .admin
6
5. Select the camera you've just added to start viewing live video.
7
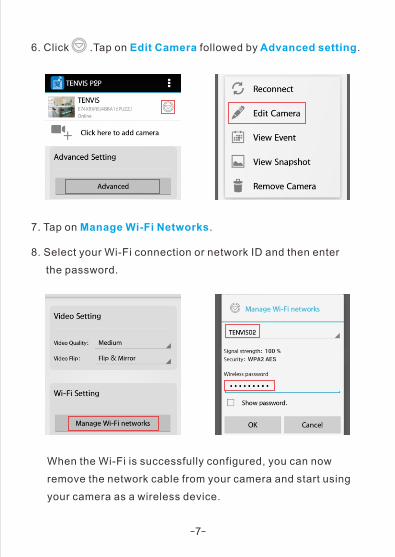
7. Tap on .Manage Wi-Fi Networks
6. Click .Tap on followed by .Edit Camera Advanced setting
8. Select your Wi-Fi connection or network ID and then enter
the password.
When the Wi-Fi is successfully configured, you can now
remove the network cable from your camera and start using
your camera as a wireless device.
8
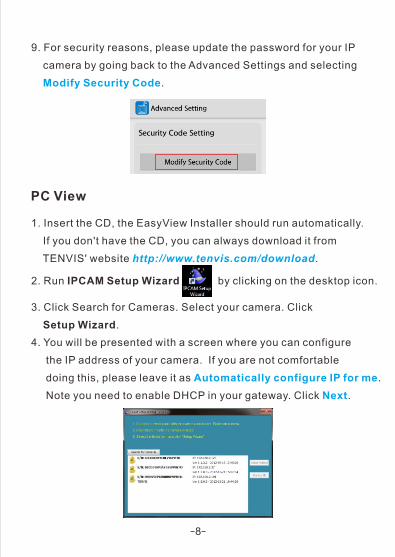
1. Insert the CD, the EasyView Installer should run automatically.
If you don't have the CD, you can always download it from
TENVIS' website .http://www.tenvis.com/download
9. For security reasons, please update the password for your IP
camera by going back to the Advanced Settings and selecting
. Modify Security Code
PC View
2. Run IPCAM Setup Wizard by clicking on the desktop icon.
3. Click Search for Cameras. Select your camera. Click
Setup Wizard.
4. You will be presented with a screen where you can configure
the IP address of your camera. If you are not comfortable
doing this, please leave it as .
Note you need to enable DHCP in your gateway. Click .
Automatically configure IP for me
Next
9
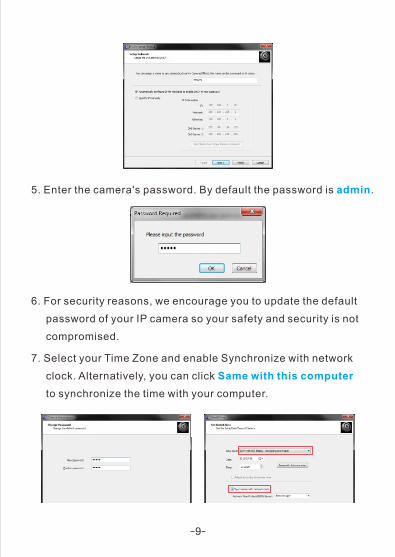
5. Enter the camera's password. By default the password is .admin
6. For security reasons, we encourage you to update the default
password of your IP camera so your safety and security is not
compromised.
7. Select your Time Zone and enable Synchronize with network
clock. Alternatively, you can click
to synchronize the time with your computer.
Same with this computer
10
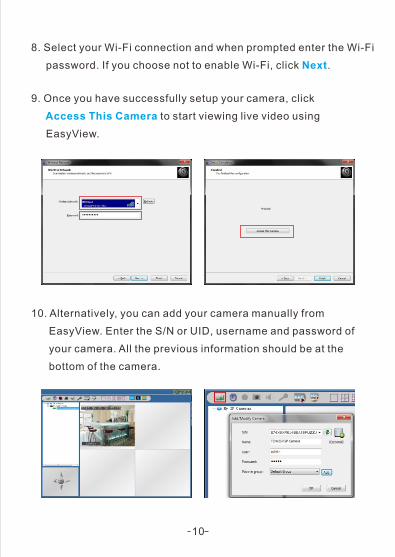
8. Select your Wi-Fi connection and when prompted enter the Wi-Fi
password. If you choose not to enable Wi-Fi, click .Next
9. Once you have successfully setup your camera, click
to start viewing live video using
EasyView.
Access This Camera
10. Alternatively, you can add your camera manually from
EasyView. Enter the S/N or UID, username and password of
your camera. All the previous information should be at the
bottom of the camera.
11
You can find more information, watch demos and learn more
about TENVIS IP Camera at .www.tenvis.com
Time: 9:00-18:00 Beijing Time (UTC+8) Monday-Friday
Telephone #: 0086-0755-89732479
E-mail: [email protected]
E-mail: [email protected]
Last, but not least
Learn more
Support
Should you have any problem with the camera settings, please
find help by the detailed user manual in the CD or from TENVIS
download website. .
If you still have any problem, please visit our forum to search
your problem or post thread for help. .
http://www.tenvis.com/download
http://forum.tenvis.com
Customer Service
Related Documents