Getting started Creating a TCP-IP protocol Client application

Welcome message from author
This document is posted to help you gain knowledge. Please leave a comment to let me know what you think about it! Share it to your friends and learn new things together.
Transcript

Getting started Creating a TCP-IP protocol Client application

Getting started - Creating a TCP-IP protocol Client application 2
Document revision
Date Edition Comments
03/12/2009 1.0 -
Sielco Sistemi srl
via Roma, 24
I-22070 Guanzate (CO)
http://www.sielcosistemi.com

Getting started - Creating a TCP-IP protocol Client application 3
1. Introduction
In this guide we propose, as an example, the design of a simple Client supervision application TCP/IP protocol
based; this example is a little step towards the design of more complex SCADA applications, but it can be useful for
anybody who approaches for the first time to a SCADA, and in particular to Winlog Pro software, to quickly
understand the potential related to Client/Server structures over intranet and internet networks.
Suppose that you want to realise a TCP/IP protocol based Client that replies the supervision interface of a previously
created Server application thas is connected to its field devices using any supported protocol.
Let’s start using one of the example applications described in the following guides:
- Getting started - Creating a simple Siemens Modbus protocol application
- Getting started - Creating a simple Siemens Omron SYSMAC protocol application
- Getting started - Creating a simple Siemens PPI protocol application
- Getting started - Creating a simple Siemens MPI protocol application
We will use one of these examples as Server

Getting started - Creating a TCP-IP protocol Client application 4
2. Server application configuration
To modify an existing supervision project, it is necessary to use Project Manager, the Winlog Pro integrated
development environment that provides different tools (Gate Builder, Template Builder, Code Builder).
Run Project Manager selecting own icon from Start menu.
Create Test project as described in the previous guides
Then select Rename from Project menu and insert Test Server as new project name.
Server project
Between Configuration folder elements select Options.
In TCP/IP select Run Time with TCP/IP Server.
TCP/IP Server configuration
This application must be installed ed executed on the Server station (es. SERVER - IP Address: 192.168.1.10)

Getting started - Creating a TCP-IP protocol Client application 5
3. Client application configuration
Use again the same Test project created as described in the previous guides
Then select Rename from Project menu and insert Test Client as new project name.
Client project
Between Configuration folder elements select Options.
In TCP/IP deselect Run Time with TCP/IP Server.
TCP/IP Client configuration

Getting started - Creating a TCP-IP protocol Client application 6
Between Configuration folder elements select Channels.
Define the logic channel 1 to communicate using TCP/IP Client protocol.
Protocol configuration
It is also necessary to configure TCP/IP connection specifying s Sever IP address e Timeout (an example
is shown in the picture).
Protocol configuration
This application must be installed ed executed on the Clientstation (es. CLIENT - IP Address: 192.168.1.1)

Getting started - Creating a TCP-IP protocol Client application 7
4. Creating variables database
It is possible to configure Client application to read historical files (variables database and Alarm/Events database)
from local archive or from Sever application archive.
In case your network is provided with Microsoft support, between Configuration folder elements, select
Options and in Client select Use Client for Microsoft network
Network configuration
As example we can create a template for variables historical analysis (Trends).
From Project Manager select Template folder and create a new template, selecting the item New>File from
Edit menu. Rename the just created template using the name Trends, do this selecting it and then using Rename
item from Edit menu.
The next step is to insert into the created template a chart; select Chart object among the ones on the upper bar
( ), then click into the template choosing the right size. To enable the option the allows to download historical
files from a Server station, use Property Editor, click alongside of the property Show Server Button and select
True.

Getting started - Creating a TCP-IP protocol Client application 8
Trends template creating
Now run the project Test Client, in Project Manager select Execute... from Project menu.
Now we are entering in the "run-time" phase that is application execution mode. Winlog Pro Client samples Sever
variables using TCP/IP .
At project startup, main template will appear automatically.
From Supervision menu recall Trends template (Templates...) in which it will be possible to choose
pressing Server button, to use local historical data or Server station historical data for charts.
Trends template

Getting started - Creating a TCP-IP protocol Client application 9
As example we can create a template for alarms historical analysis (Alarms).
From Project Manager select Template folder and create a new template, selecting the item New>File from
Edit menu. Rename the just created template using the name Alarms, do this selecting it and then using Rename
item from Edit menu.
The next step is to insert into the created template an alarm table; select Histview object among the ones on the
upper bar ( ), then click into the template choosing the right size. To enable the option the allows to download
historical files from a Server station, use Property Editor, click alongside of the property Show Server Button
and select True.
Alarms template creating
Now run again the project Test Client and from Supervision menu recall Alarms template (Templates...) in
which it will be possible to choose pressing Server button, to use local historical data or Server station historical
data.
Getting started - Creating a TCP-IP protocol Client application 10
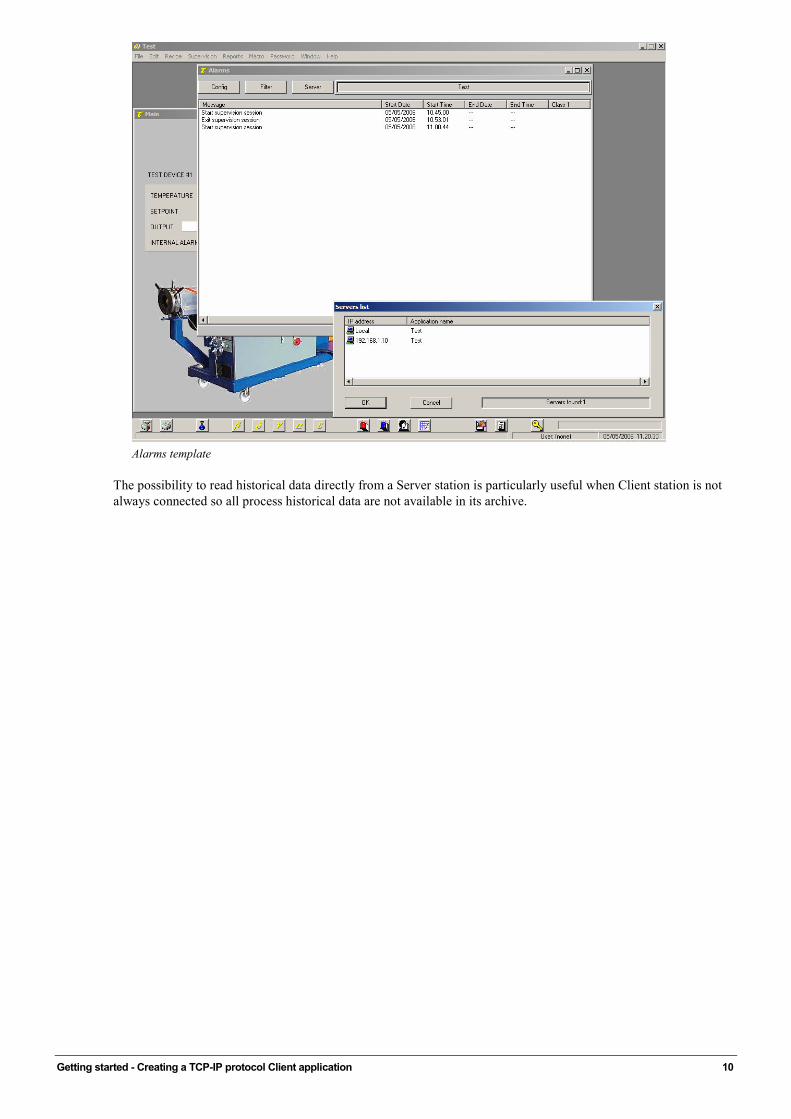
Alarms template
The possibility to read historical data directly from a Server station is particularly useful when Client station is not
always connected so all process historical data are not available in its archive.

Getting started - Creating a TCP-IP protocol Client application 11
5 Client/Server link examples
In this example we have created a Client application that simply repeats the user interface available on the Server
station.
One Client – one Server configuration
Obviously it is not obligatory to create, as described in the example, a Client application just alike to the Server one;
it is possible to read and write even only a subset of the variables available on the Server and to create different
templates to analyse process variables; furthermore a Client application can be even Server, so it is possible to create
more complex network architectures (see the following examples).
One Client – N Servers configuration
The same Client application can be connected, using different logical channel (from 1 to N), to N Server stations
each one connected to its peripheral devices; in this case, for each Server, must be defined on Client station a
TCP/IP protocol logical channel configured with the Server station IP address.

Getting started - Creating a TCP-IP protocol Client application 12
N Client – one Server configuration
N Client stations can be connected to the same Server station; in this case, for each Client station, must be defined a
TCP/IP protocol logical channel configured with the Server station IP address.
One Client/Server – one Client/Server configuration
Two or more Server stations connected to their devices (for example using logical channel 2), can be even Clients;
for each Client station, must be defined a TCP/IP protocol logical channel (for example logical channel 1)
configured with the Server station IP address.