TEACHER INSTRUCTIONS Glass Bead on a Wire Objective: To demonstrate that glass can be a “phase of matter” rather than a particular material and to examine the unique ability of glasses to absorb other ions during thermal treatments. Background Information: Glasses are amorphous solids, meaning that they have no long-range order of their atoms. Crystalline materials have an orderly arrangement of atoms within their structure (Figure 1). Several materials that can be used to create a glass begin as a crystalline or semi-crystalline material. This indicates that glass can, at times, be a “phase of matter” rather than just a particular material. Figure 1. Crystalline and amorphous atomic arrangements For example, Borax crystals are typically found deep in the ground and are mined as large “chunks” (Figure 2a). Borax is actually sodium borate decahydrate (Na2B4O7 • 10H2O). These chunks can be ground into a powder, which is sold in many grocery and convenience stores as a natural laundry booster that helps clean your clothes (Figure 2b). The powdered form of Borax is also a crystalline material, although the crystals are much smaller than the Borax that was originally mined. Figure 2. (a) Borax crystals as mined in California and (b) powdered Borax crystals typically purchased as a household laundry booster.

Welcome message from author
This document is posted to help you gain knowledge. Please leave a comment to let me know what you think about it! Share it to your friends and learn new things together.
Transcript

TEACHER INSTRUCTIONS
Glass Bead on a Wire
Objective: To demonstrate that glass can be a “phase of matter” rather than a particular material
and to examine the unique ability of glasses to absorb other ions during thermal treatments.
Background Information: Glasses are amorphous solids, meaning that they have no long-range
order of their atoms. Crystalline materials have an orderly arrangement of atoms within their
structure (Figure 1). Several materials that can be used to create a glass begin as a crystalline or
semi-crystalline material. This indicates that glass can, at times, be a “phase of matter” rather
than just a particular material.
Figure 1. Crystalline and amorphous atomic arrangements
For example, Borax crystals are typically found deep in the ground and are mined as large
“chunks” (Figure 2a). Borax is actually sodium borate decahydrate (Na2B4O7 • 10H2O). These
chunks can be ground into a powder, which is sold in many grocery and convenience stores as a
natural laundry booster that helps clean your clothes (Figure 2b). The powdered form of Borax is
also a crystalline material, although the crystals are much smaller than the Borax that was
originally mined.
Figure 2. (a) Borax crystals as mined in California and (b) powdered Borax crystals typically purchased as a household laundry booster.

The natural form of Borax contains a large amount of water, which is held in the crystalline
structure of the material. When Borax is heated to temperatures high enough to start removing
this water, the crystalline arrangement of the atoms in Borax begins to change. The Borax
crystals will begin to swell as the water is being removed from the crystalline structure and then
shrink as the water is being boiled off from the heat. This removal of water causes the crystalline
structure of Borax to lose its orderly arrangement of atoms, leaving a transparent, glassy solid
behind.
Powdered Borax crystals can be changed to a glassy form by heating with a Bunsen burner or a
propane torch. Most Bunsen burners have the ability to control gas and air flow into the burner,
which subsequently control the height and intensity of the flame produced. The oxidizing region
of the Bunsen flame is produced with very high amounts of oxygen. This corresponds to the
outer region of the Bunsen flame as this portion of the flame is in contact with high amounts of
oxygen from the air. If the burner is turned up high, this flame is a purple color (Figure 3). The
reducing region of the flame is produced with low amounts of oxygen. This corresponds to the
inner region of the Bunsen flame.
Figure 3. Bunsen burner flame with oxidizing and reducing regions
When heating powdered Borax, the transition of its atomic arrangement from crystalline to
amorphous as the water is being removed during heating allows for metal ions to be substituted
into the Borax atomic structure and form bonds with the oxygen atoms. The amount of oxygen
available when this takes place (dependent on what part of the Bunsen flame you are using for
heating) also affects how the metal ions will be incorporated in the structure and bond with
oxygen atoms, which ultimately determines the color of glass that will be formed during this
process. Borax glass is normally colorless, but different metal ions can be added to it during

heating to produce different colors (Figure 4). See the Introductory Presentation for examples of
how this phenomenon is used in real-world applications.
Figure 4. Borax beads formed with copper wire (blue bead)
and nichrome wire (green bead)
Lab Description: In this lab, students will use copper and nichrome (nickel-chrome) wire to
perform a Borax bead test and determine what color beads are produced from each type of wire
under different heating conditions. The bead test has traditionally been used to test for the
presence of certain metals. The Borax bead test is one of the oldest versions of the bead test and
was developed by Jöns Jacob Berzelius in 1812! The Borax bead test consists of making a small
loop at the end of a wire and heating it in a Bunsen flame until red hot. The loop is then dipped
in powdered Borax and placed back in the Bunsen flame. The solid powder adheres to the hot
wire and swells up as it loses its water of crystallization (the water found in the crystalline
framework of a material – without this water, Borax cannot maintain a crystal structure). It then
shrinks, forming a transparent glass-like bead. The bead’s color is dependent on the metal ions
that were present in the wire.
Keywords:
· amorphous – non-crystalline solid that lacks a long-range order of atoms.
· oxidation – the addition of oxygen to a material.
· reduction – the removal of oxygen from a material.
· borax bead test – a heat-induced transition of borax from a crystalline state to an amorphous
state which is typically used to test for the presence of certain metals.
· water of crystallization – water that is found in the crystalline structure of a material
Materials List:
Items provided in the kit
· 20 feet copper wire (18-gauge)
· 20 feet nichrome wire (20-gauge)

Items to be purchased/provided by the teacher
· Powdered Borax (available for purchase as a laundry booster from stores such as Walmart®)
· Bunsen burners (preferably should have one burner for every student, but students can share if
needed)
· Needle nose pliers/tongs/corks (to hold the wires while heating)
· Watch glass or heat-resistant container, e.g. short water glasses or ceramic bowls (need one per
table – several students can share one container)
· Plastic sandwich baggies - OPTIONAL (if students want to take home their wires/beads)
Safety Precautions: Safety glasses should be worn during this lab. The wires will get very hot
when placed in the Bunsen burner flame. Use pliers/tongs/corks to hold the wires while heating.
Borax is toxic to humans if ingested in large quantities, so students should avoid skin contact
with the powder to reduce the risk of accidental ingestion. The glass beads can fall off the wire,
so caution students not to “flick” the wire when they have a hot bead.
Instructions:
1. Cut two pieces of copper wire and two pieces of nichrome wire, each about 12 cm long.
2. Place a small amount of Borax (about a teaspoon) in a watch glass or other heat-resistant
container.
3. Use the pliers to form a small loop on the end of each wire. The loop should be slightly
larger than the eraser on the end of a pencil (Figure 5).
Figure 5. Wire with an appropriate size loop formed at one end
4. Using a Bunsen burner, heat the loop at the end of one of the copper wires until it gets red
hot. Be sure to use the pliers to hold the wire while heating. Be sure that the Bunsen
burner is turned up high – you should be able to clearly see the reducing region and
oxidizing region of the flame.

5. Dip the hot end of the wire into the Borax.
6. Carefully heat the Borax on the wire until it is melted and the loop fills in by placing the
loop in the purple-colored outer flame (also called the oxidizing region of the flame).
When the bead has a transparent color with very few air bubbles, you may add more
Borax if you would like to make a larger bead. This process can be repeated to form a
spherical bead if desired, but it is also ok to make a flat bead (this typically only takes
one Borax treatment). This bead should have a sky blue color.
7. Repeat steps 4-6 with the other copper wire, but during step 6, hold the Borax-covered
wire loop in the blue inner flame (also called the reducing region of the flame). Keep it
red hot for 10-15 seconds, then cool it for 10 seconds by lowering it into the darker blue
flame just above the Bunsen. The color of this bead should be red.
8. Repeat steps 4-6 with one of the nichrome wires. The bead produced should be a shade of
green. Nichrome wire is typically composed of nickel, chromium, and sometimes a small
amount of iron. Nickel produces a bead that is red to violet in color when heated in the
oxidizing portion of the flame. Chromium produces a yellowish-green bead, and iron a
yellowish-orange bead. Depending on how much of each element is present in the wire,
the color of the bead will vary.
9. Repeat steps 4, 5, and 7 with the other nichrome wire. The bead produced should be a
shade of green as well. Nickel turns grey when heated using the reducing flame.
Chromium turns green, and iron turns green as well. Depending on how much of each
element is present in the wire, the shade of green will vary.
10. Once you are satisfied with the size and color of the bead, allow the bead/wire to cool
completely before placing the bead/wire in a plastic bag to take home.
11. You can try to remove the beads from the wire by reheating the bead and then plunging
the loop into cold water. This works best with spherical beads.
Demo Delivery Hints:
1. It can be difficult to create a bead that is actually spherical. Many times, it is just easier to
try to fill in the loop with the glass. Students tend to use too much Borax when trying to
make a large bead and they don’t take the time to get all of the gases (bubbles) out. This
makes the bead look like a gray, foamy blob. Patience is required to successfully make a
large, colorful bead. However, a spherical bead can be made if a student is patient and
gradually adds more Borax while heating thoroughly in-between each addition.

Figure 6. Beads that have a gray, milky color rather than a transparent, bright
color due to the gas bubbles that remain trapped in the amorphous Borax
2. Borax is a deca-hydrate, which means there is a lot of water vapor to drive off as the
Borax melts. This process can take quite a bit of heating and patience to get all of the
bubbles out of the glass. Students often get impatient and take the wire/bead out of the
flame every few seconds to check it. It will take longer to get good results this way – the
wire/bead needs to be left in the flame in order for the reaction to properly occur.
3. The Borax glass beads are hygroscopic, meaning that they will absorb moisture from the
air. As a result, the beads will become “cloudy” after several days or weeks. The bead
can be reheated to drive off the moisture and return the color clarity to the bead.
Troubleshooting:
1. If the loop is too large, the melted Borax can fall or drip from the loop. Be sure to keep
the size of the loop just a little larger than the end of a pencil eraser.
2. It is possible to heat the wire for too long in the flame. In this case, the wire will melt.
Care should be taken to monitor how long the wire glows red hot while it is in the flame.
3. At times, students may get impatient and not take the time to melt the Borax crystals
completely. This will affect the color of bead that they are able to obtain. Encourage them
to be patient when forming their bead.
Cleanup/Replacement parts: Turn off the Bunsen burners and allow them to cool completely
before putting them away. Allow all the wires and beads to completely cool. Students should
place the beads/wire in a plastic baggie to take home. Place any unused wire back in the kit.
When it is time to replenish the wire supply, copper and nichrome wire can be ordered from a
variety of suppliers, such as McMaster Carr (http://www.mcmaster.com). It is recommended that
18-gauge copper wire and 20-gauge nichrome wire be used for this lab. Dispose of any unused
powdered Borax that has been removed from the original container. The original container of
Borax can be stored for further use as long as it is kept dry. Powdered Borax is commonly
available at Walmart® under the name “20 Mule Team Borax”.

TEACHER DISCUSSION QUESTIONS
Glass Bead on a Wire
Discussion Questions to Ask Before the Demo
1. What is an amorphous solid and what is a crystalline solid?
Discussion: Crystalline solids have an orderly arrangement of atoms, while amorphous
solids have no long-range order of atoms (see Figure 1 in the Teacher Instructions).
2. Can crystalline materials become amorphous? Why?
Discussion: Ask this question to see what the students will say. Regardless of whether
they answer yes or no, ask them why they think their answer is true. Try to facilitate as
much discussion about this as possible. Essentially, this lab is transforming a crystalline
material into an amorphous material using thermal treatment. Many students will not
think this is possible because it seems that the crystalline structure should always be
crystalline (and for many materials, it is). Most crystalline materials, such as metals,
retain their crystalline atomic structure during heat treatment. Some movement
(rearranging) of atoms or dislocations can occur, but the overall crystalline structure is
still preserved. However, materials like Borax have the ability to move from a crystalline
structure to an amorphous structure during heat treatment due to water removal from the
atomic structure that rearranges the atoms. Quartz sand (i.e. silica) is a key ingredient in
commercial glass production and undergoes a similar crystalline to amorphous transition
during heat treatment.
3. What are the two parts of a Bunsen flame and why are they different?
Discussion: Most Bunsen burners have the ability to control gas and air flow into the
burner, which subsequently control the height and intensity of the flame produced. The
oxidizing region of the Bunsen flame is produced with very high amounts of oxygen.
This corresponds to the outer region of the Bunsen flame as this portion of the flame is in
contact with high amounts of oxygen from the air. If the burner is turned up ‘roaring hot,’
this flame is a purple color. The reducing region of the flame is produced with low
amounts of oxygen. This corresponds to the inner region of the Bunsen flame. If the
burner is turned up to high, the flame is a blue color.

Discussion Questions to Ask During the Demo
1. Ask students to identify the oxidizing and reducing region of their Bunsen flame.
Discussion: The oxidizing region (outer part of the flame) should be a purple color, and
the reducing region (inner part of the flame) should be a blue color. By asking this
question, you also ensure that the students have the appropriate amount of gas and air
flow for their Bunsen flame. Having the gas/air flow too low will result in a flame that is
yellow, and flow that is too high will result in a flame that is just blue and makes a loud
roaring sound.
2. Before testing the first copper wire, ask students to make a prediction about what color
bead they think they will get.
Discussion: Students will most likely pick something close to the original color of the
copper wire, or you will get a range of color guesses. This is to be expected, and part of
what makes this lab fun is that the color of the bead does not correspond to the original
color of the wire, but to the metal ion and amount of oxygen that transitions into the
structure of the Borax during heating. This is next to impossible to guess, unless it is just
a lucky guess. The point is to facilitate discussion about what the students have seen and
what they think is going to happen.
3. Before testing the second copper wire, ask students to make a prediction about the color
of bead they think they will get from this wire. Emphasize that they are going to be
heating this bead in a different region of the Bunsen flame.
Discussion: Students will most likely be stumped this time. After making the first bead,
they will realize that the color of the bead doesn’t have anything to do with the original
color of the wire. Some will probably guess the same color as the first bead, but some of
them will try to figure out how heating the bead differently is going to impact the color.
Encourage discussion, and the fact that there is not necessarily one right answer. No two
students are going to heat the bead exactly the same which means that some of the beads
may be varying shades of the same color or a different color altogether.
4. Before testing both of the nichrome wires, ask students to make a prediction about the
color of bead that they think they will get.
Discussion: By this point, they will have seen the influence of different heating methods
on the color of bead, but now they are switching to a completely different kind of wire.
Color guesses will most likely be all over the place. Students most likely will not guess

the colors correctly. That’s ok, the point is to facilitate discussion about what they have
seen and what they think is going to happen.
Discussion Questions to Ask After the Demo
1. Ask the students what they learned about the Borax bead test.
Discussion: Emphasize why the Borax is able to incorporate metal ions into its atomic
structure during heating (see explanation in the Background Information section about
transition between crystalline and amorphous solids due to water loss during heating).
Emphasize that the color of the bead is due to the type of metal ion and the amount of
oxygen (aka the part of the Bunsen flame used for heating) that can be incorporated into
the Borax atomic structure. This is why the copper wires produced different color beads
than the nichrome wires, and also why a single type of wire could produce two different
colors of beads depending on how it was heated. There are many other metals that can be
tested using this type of bead test. Each produces a different color of bead. Searching
‘Borax bead test’ on the internet will provide charts of the various metals and
corresponding color of bead that is produced. Feel free to expand this lab to include other
metals, especially if you have older students that can perform these heating steps more
efficiently and quickly than younger students.
STUDENT LAB HANDOUT
Glass Bead on a Wire
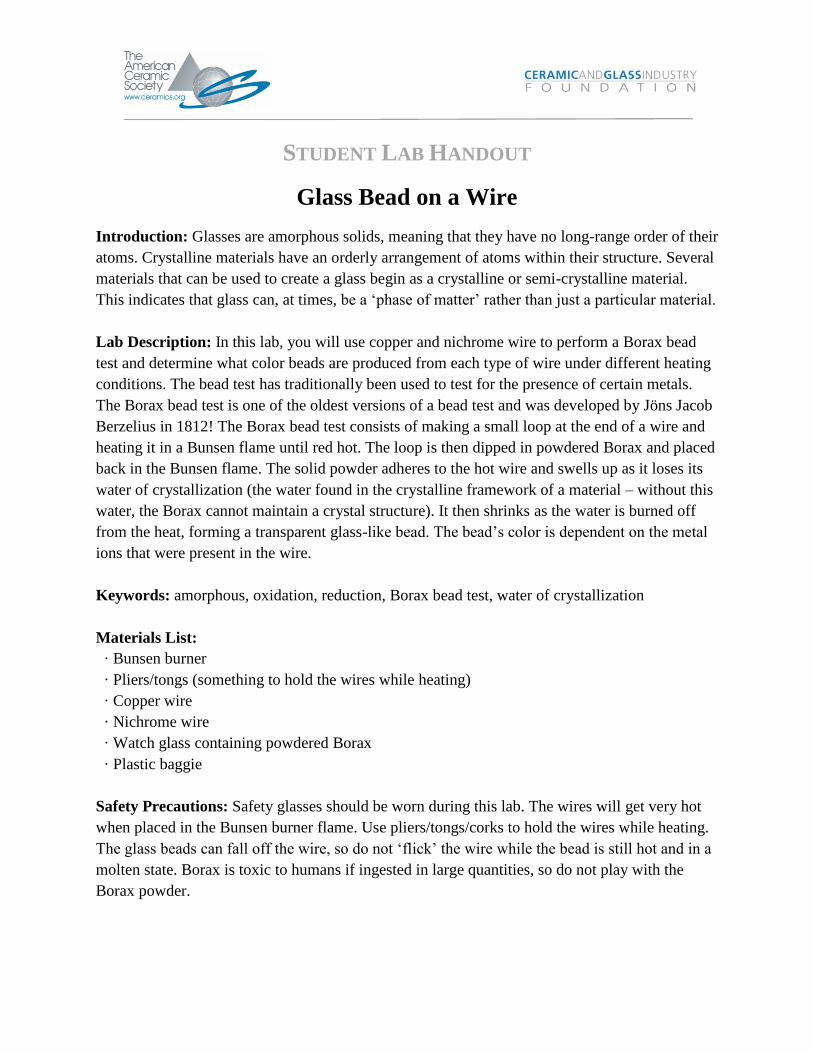
Introduction: Glasses are amorphous solids, meaning that they have no long-range order of their
atoms. Crystalline materials have an orderly arrangement of atoms within their structure. Several
materials that can be used to create a glass begin as a crystalline or semi-crystalline material.
This indicates that glass can, at times, be a ‘phase of matter’ rather than just a particular material.
Lab Description: In this lab, you will use copper and nichrome wire to perform a Borax bead
test and determine what color beads are produced from each type of wire under different heating
conditions. The bead test has traditionally been used to test for the presence of certain metals.
The Borax bead test is one of the oldest versions of a bead test and was developed by Jöns Jacob
Berzelius in 1812! The Borax bead test consists of making a small loop at the end of a wire and
heating it in a Bunsen flame until red hot. The loop is then dipped in powdered Borax and placed
back in the Bunsen flame. The solid powder adheres to the hot wire and swells up as it loses its
water of crystallization (the water found in the crystalline framework of a material – without this
water, the Borax cannot maintain a crystal structure). It then shrinks as the water is burned off
from the heat, forming a transparent glass-like bead. The bead’s color is dependent on the metal
ions that were present in the wire.
Keywords: amorphous, oxidation, reduction, Borax bead test, water of crystallization
Materials List:
· Bunsen burner
· Pliers/tongs (something to hold the wires while heating)
· Copper wire
· Nichrome wire
· Watch glass containing powdered Borax
· Plastic baggie
Safety Precautions: Safety glasses should be worn during this lab. The wires will get very hot
when placed in the Bunsen burner flame. Use pliers/tongs/corks to hold the wires while heating.
The glass beads can fall off the wire, so do not ‘flick’ the wire while the bead is still hot and in a
molten state. Borax is toxic to humans if ingested in large quantities, so do not play with the
Borax powder.

Instructions:
1. Cut 2 pieces of copper wire and 2 pieces of nichrome wire, each about 12 cm long.
2. Use the pliers to form a small loop on the end of each wire. The loop should be slightly
larger than the eraser on the end of a pencil.
3. Place a small amount of Borax (about a teaspoon) in a watch glass or other heat-resistant
container.
4. Using a Bunsen burner, heat the loop at the end of one of the copper wires until it gets red
hot. Be sure to use the pliers to hold the wire while heating. Be sure that the Bunsen
burner is turned up high – you should be able to clearly see the reducing region and
oxidizing region of the flame.
5. Dip the hot end of the wire into the Borax.
6. Carefully heat the Borax on the wire until it is melted and the loop fills in by placing the
loop in the purple-colored outer flame (also called the oxidizing region of the flame).
When the bead has a transparent color with very few air bubbles, you may add more
Borax if you would like to make a larger bead. This process can be repeated to form a
spherical bead if desired, but it is also ok to make a flat bead (this typically only takes
one Borax treatment).
7. Repeat steps 4-6 with the other copper wire, but during step 6, hold the Borax-covered
wire loop in the blue inner flame (also called the reducing region of the flame). Keep it
red hot for 10-15 seconds, then cool it for 10 seconds by lowering it into the darker blue
flame just above the Bunsen.
8. Repeat steps 4-6 with one of the nichrome wires.
9. Repeat steps 4, 5, and 7 with the other nichrome wire.
10. Once you are satisfied with the size and color of the beads, allow the beads/wire to cool
completely before placing the beads/wire in a plastic bag to take home with you.
11. You can try to remove the beads from the wire by reheating the bead and then plunging
the loop into cold water, but this usually only works with spherical beads.
Clean Up: Turn off the Bunsen burners and allow them to cool completely before putting them
away. Allow all the wires and beads to completely cool before placing in a plastic baggie to take
home with you. Dispose of any extra Borax remaining in the watch glass, and rinse the watch
glass with soap and warm water.

STUDENT QUESTION HANDOUT
Glass Bead on a Wire
1. Compare the nichrome and copper wires. What is different about them? What is the
same?
2. Draw a picture of the Bunsen flame. Where is the oxidizing region of the flame? The
reducing region? Why are these two regions different?
3. What happens to the Borax when it is heated on the hot wire? Why?
4. What color bead did you make when heating the copper wire and Borax in the oxidizing
flame? The reducing flame? Why are these two different?
5. What color bead did you make when heating the nichrome wire and Borax in the
oxidizing flame? The reducing flame? Why are these two different?
6. Compare the bead colors obtained from the copper wire vs. the nichrome wire. Are they
different? Why?
Related Documents