1 | Page Geocode Street Addresses with Google Earth and ArcGIS You are going to geocode Dairy Queen (DQ) store locations and display them in ArcMap. You will need Google Earth 6.0 and ArcGIS 10.0. These stores are located in Waterloo Region in Ontario, Canada. The tutorial has two parts: create a KML file in Google Earth and then convert the KML file into a shapefile in ArcMap. Part I: Create a KML file in Google Earth Add a new folder in My Places 1. Open Google Earth by navigating to Start -> ALL Programs -> Google Earth (folder) -> Google earth (icon). 2. You are going to add a new folder in My Places to store the DQ locations. Go to Add menu then click Folder. 3. Assign a name DQ_Waterloo to the new folder and then click OK to finish.

Welcome message from author
This document is posted to help you gain knowledge. Please leave a comment to let me know what you think about it! Share it to your friends and learn new things together.
Transcript
1 | P a g e
Geocode Street Addresses with Google Earth and ArcGIS
You are going to geocode Dairy Queen (DQ) store locations and display them in ArcMap. You
will need Google Earth 6.0 and ArcGIS 10.0. These stores are located in Waterloo Region in
Ontario, Canada. The tutorial has two parts: create a KML file in Google Earth and then convert
the KML file into a shapefile in ArcMap.
Part I: Create a KML file in Google Earth
Add a new folder in My Places
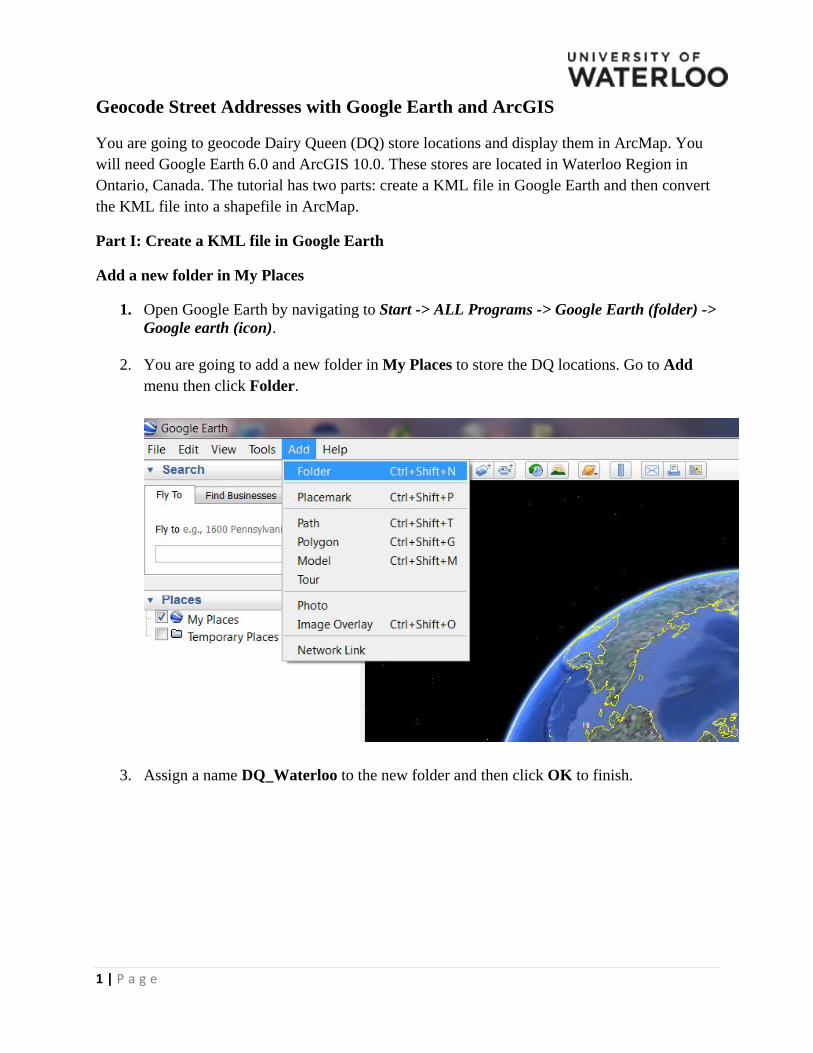
1. Open Google Earth by navigating to Start -> ALL Programs -> Google Earth (folder) ->
Google earth (icon).
2. You are going to add a new folder in My Places to store the DQ locations. Go to Add
menu then click Folder.
3. Assign a name DQ_Waterloo to the new folder and then click OK to finish.
2 | P a g e
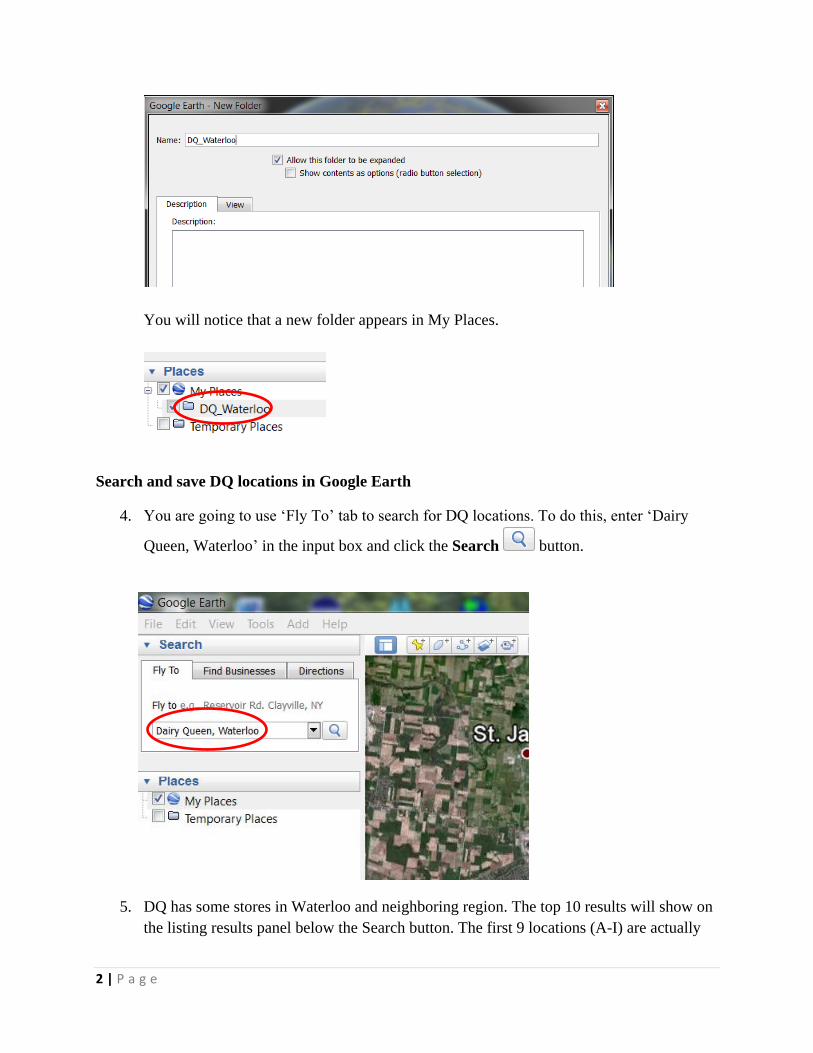
You will notice that a new folder appears in My Places.
Search and save DQ locations in Google Earth
4. You are going to use ‘Fly To’ tab to search for DQ locations. To do this, enter ‘Dairy
Queen, Waterloo’ in the input box and click the Search button.
5. DQ has some stores in Waterloo and neighboring region. The top 10 results will show on
the listing results panel below the Search button. The first 9 locations (A-I) are actually

3 | P a g e
located in Waterloo Region (cities of Waterloo, Kitchener and Cambridge), while the 10th
location located in the City of Guelph is not.
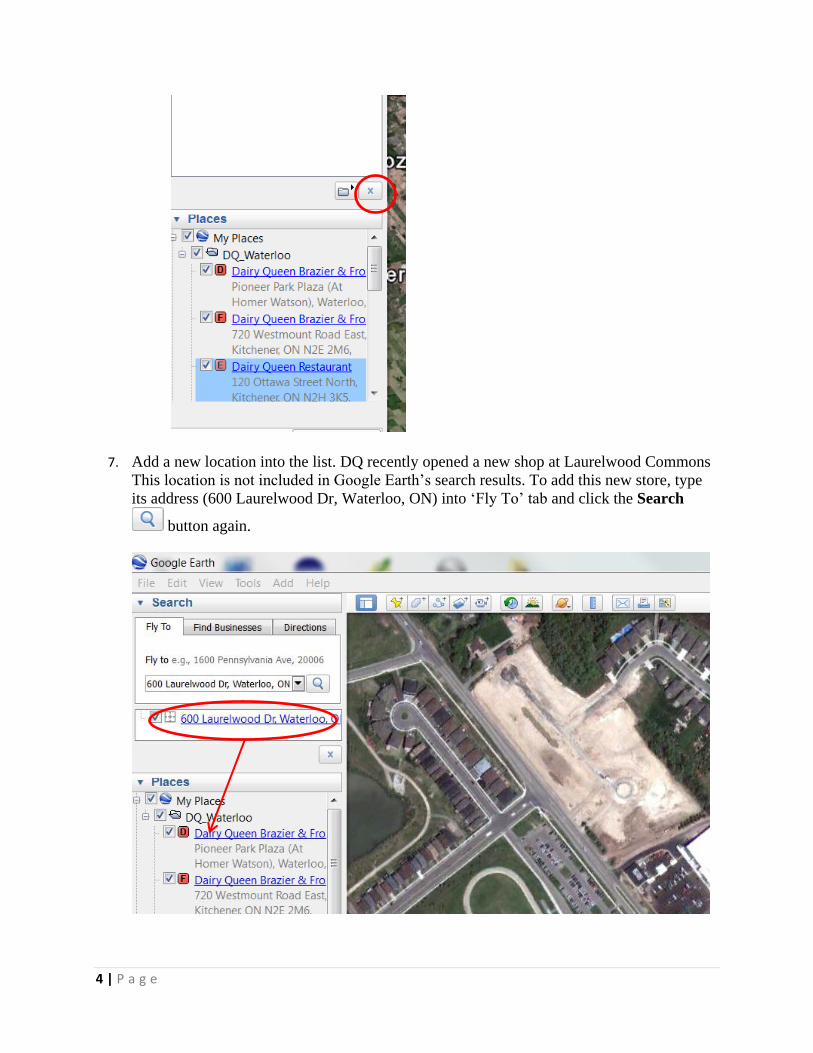
6. Save the Search Results. Drag and drop DQ A location from the listing results panel to
the DQ_Waterloo folder in My Places. Repeat the same procedure for locations B to I.
When you finish, clear the search results by clicking the x in the red circle.
4 | P a g e
7. Add a new location into the list. DQ recently opened a new shop at Laurelwood Commons
This location is not included in Google Earth’s search results. To add this new store, type
its address (600 Laurelwood Dr, Waterloo, ON) into ‘Fly To’ tab and click the Search
button again.

5 | P a g e
8. Now you will save the new search result. Drag and drop the DQ new location from the
search results panel to the DQ_Waterloo folder in My Places.
Export all DQ locations out as a KML file
9. You are going to save all DQ store locations under DQ_Waterloo folder as a new KML
file. To do that, right click under DQ_Waterloo folder and then select Save Place As
6 | P a g e
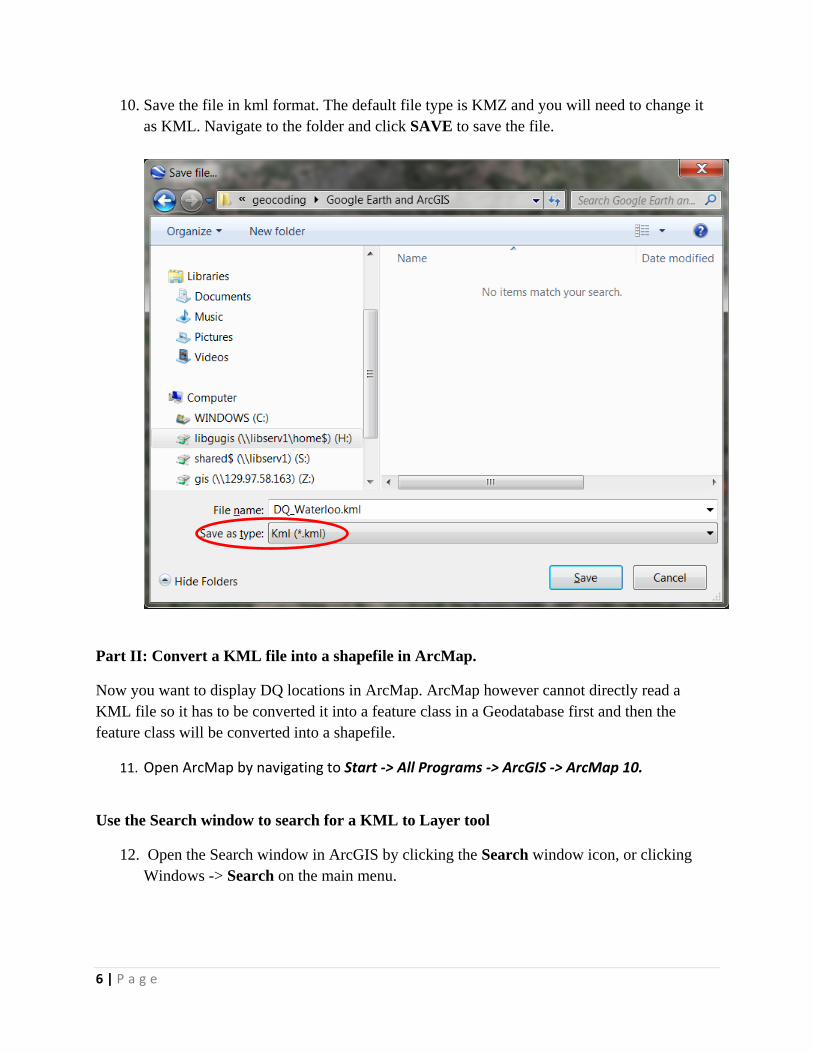
10. Save the file in kml format. The default file type is KMZ and you will need to change it
as KML. Navigate to the folder and click SAVE to save the file.
Part II: Convert a KML file into a shapefile in ArcMap.
Now you want to display DQ locations in ArcMap. ArcMap however cannot directly read a
KML file so it has to be converted it into a feature class in a Geodatabase first and then the
feature class will be converted into a shapefile.
11. Open ArcMap by navigating to Start -> All Programs -> ArcGIS -> ArcMap 10.
Use the Search window to search for a KML to Layer tool
12. Open the Search window in ArcGIS by clicking the Search window icon, or clicking
Windows -> Search on the main menu.
7 | P a g e
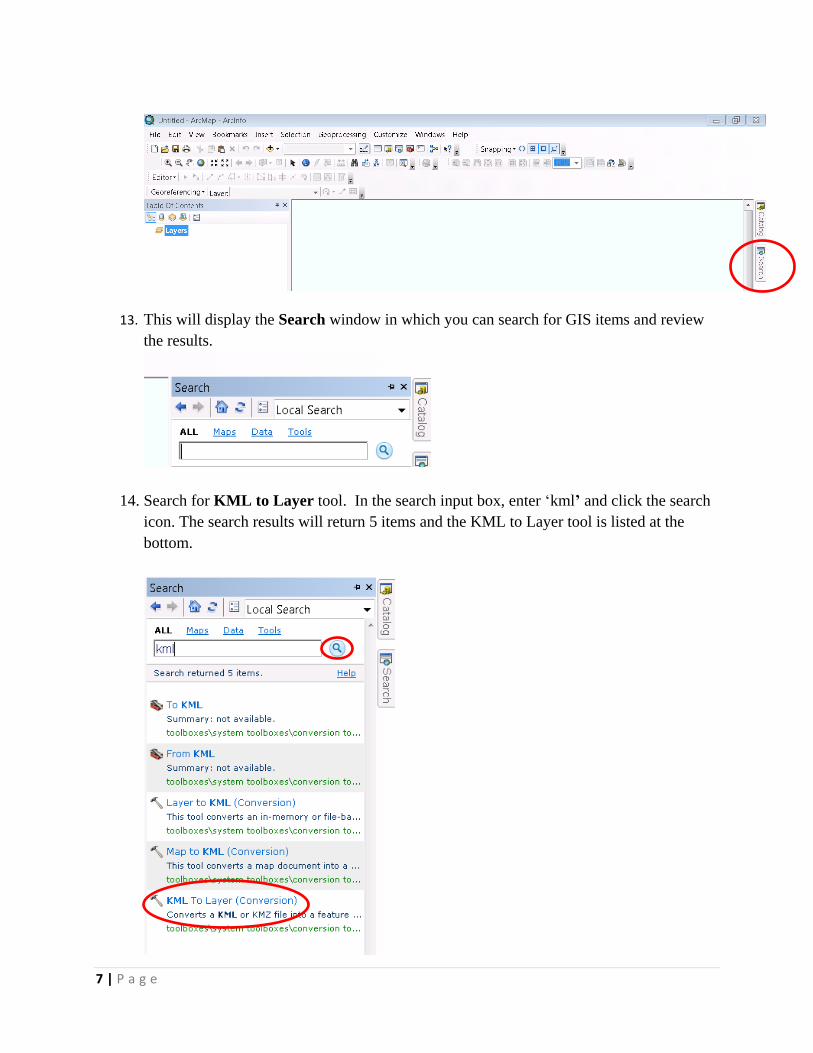
13. This will display the Search window in which you can search for GIS items and review
the results.
14. Search for KML to Layer tool. In the search input box, enter ‘kml’ and click the search
icon. The search results will return 5 items and the KML to Layer tool is listed at the
bottom.

8 | P a g e
Convert the KML file into a layer
15. You are going to convert the KML file into a feature class stored in a geodatabase.
Clicking on KML to Layer tool will open it for execution. In the Input KML File field,
navigate to the folder where the KML file is located and select the kml file
(DQ_Waterloo.kml). In the Output Location, set a destination folder for the output
geodatabase. The last step is to give the output data a name. Click OK to execute the
conversion.
16. The KML to layer conversion may take 1 or 2 minutes to finish. When the conversion is
over, only a DQ location is displayed in ArcMap which does not look right.

9 | P a g e
Display DQ locations in ArcMap
17. You are going to add all DQ store locations in ArcMap. Click Add Data button and
navigate to folder where the geodatabase (DQ_Waterloo3) is located. Select the
geodatabase.
10 | P a g e
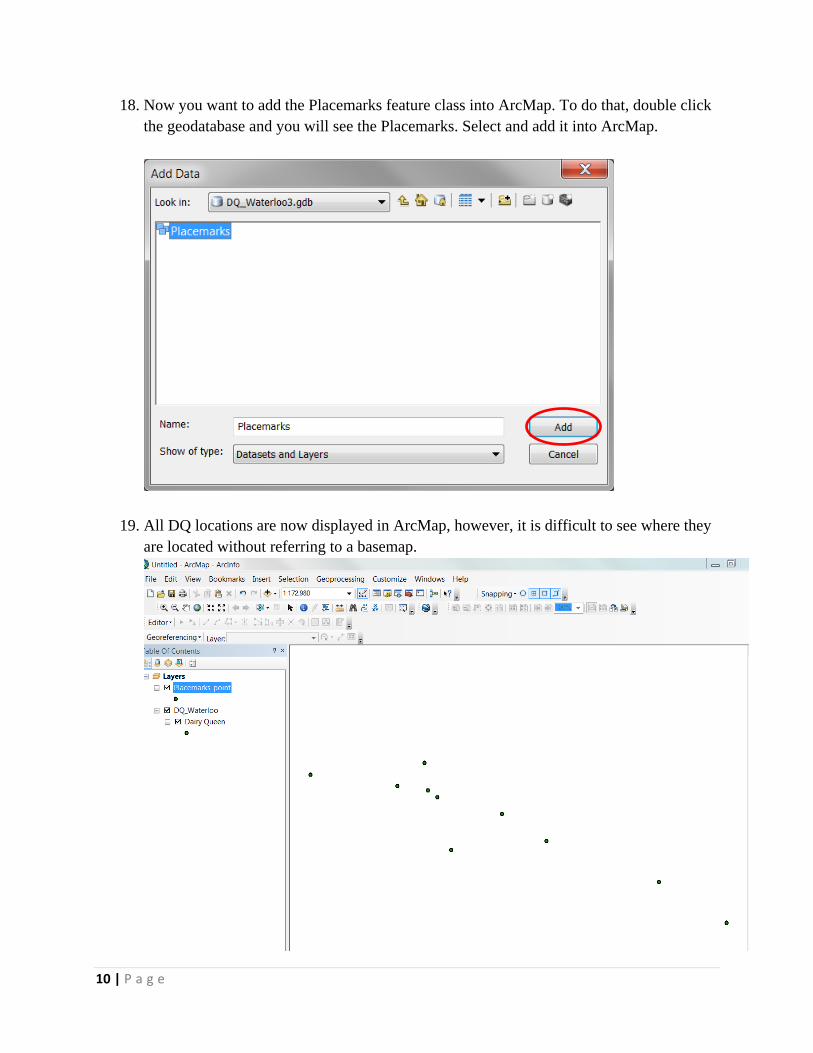
18. Now you want to add the Placemarks feature class into ArcMap. To do that, double click
the geodatabase and you will see the Placemarks. Select and add it into ArcMap.
19. All DQ locations are now displayed in ArcMap, however, it is difficult to see where they
are located without referring to a basemap.
11 | P a g e
Add a basemap into ArcMap
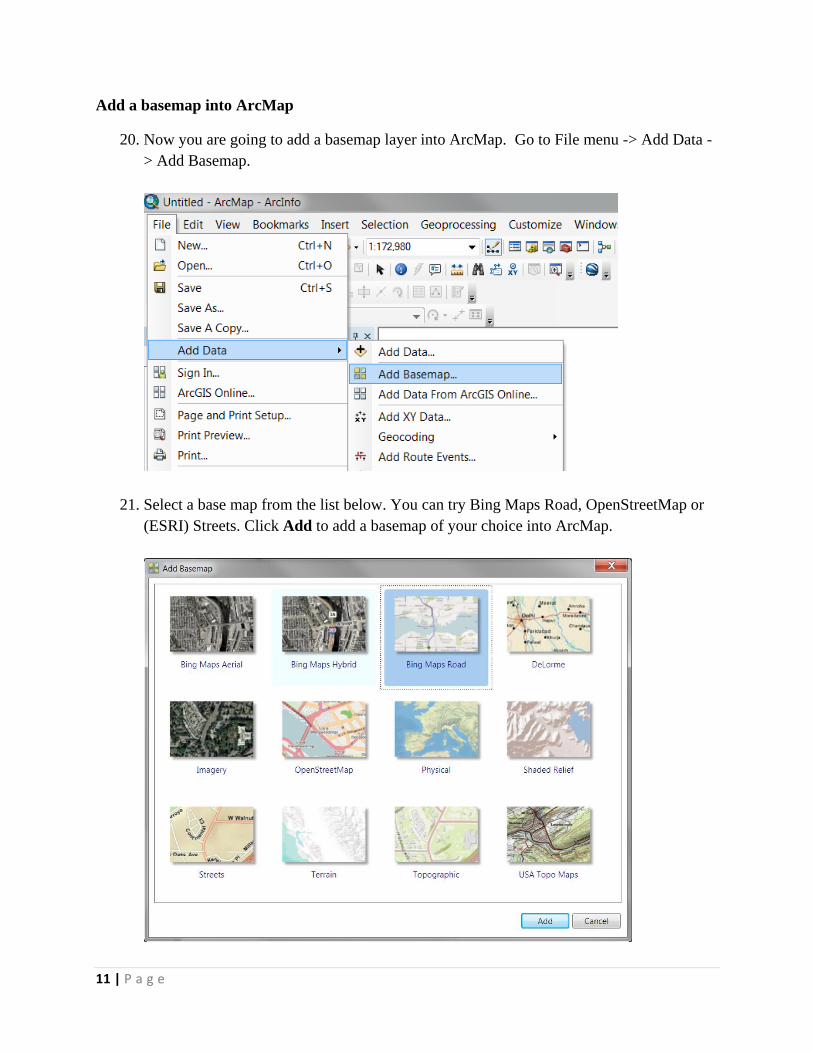
20. Now you are going to add a basemap layer into ArcMap. Go to File menu -> Add Data -
> Add Basemap.
21. Select a base map from the list below. You can try Bing Maps Road, OpenStreetMap or
(ESRI) Streets. Click Add to add a basemap of your choice into ArcMap.
12 | P a g e
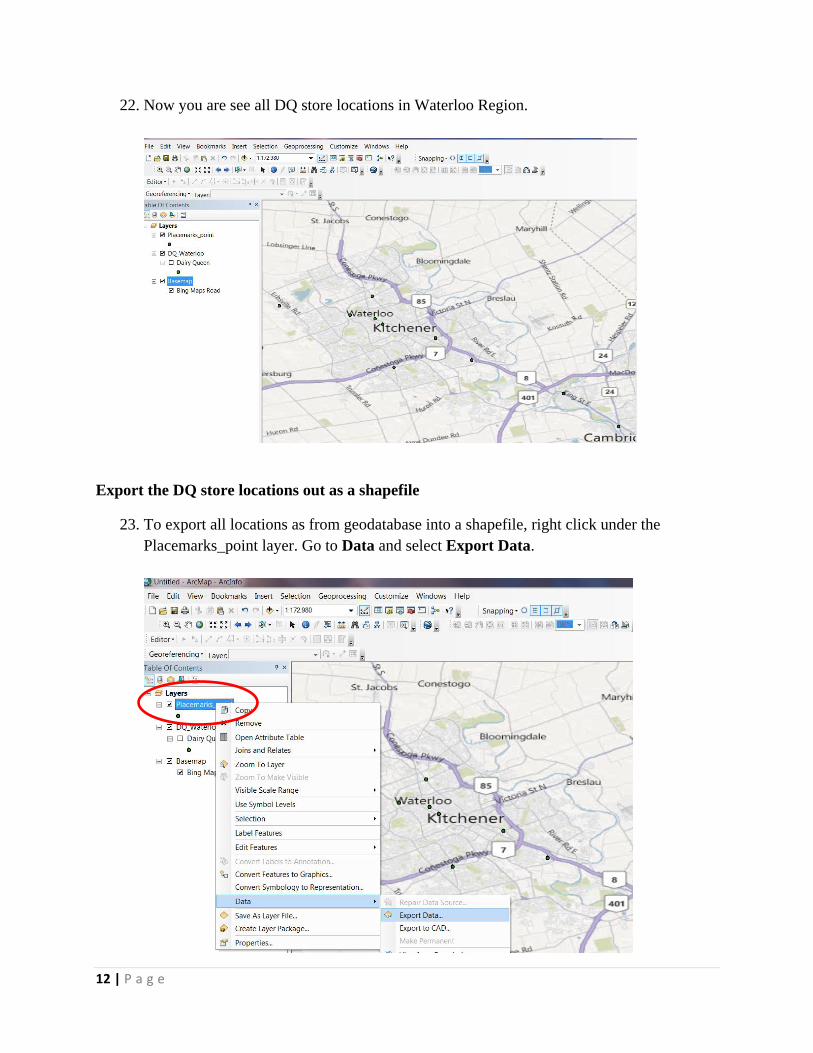
22. Now you are see all DQ store locations in Waterloo Region.
Export the DQ store locations out as a shapefile
23. To export all locations as from geodatabase into a shapefile, right click under the
Placemarks_point layer. Go to Data and select Export Data.
13 | P a g e
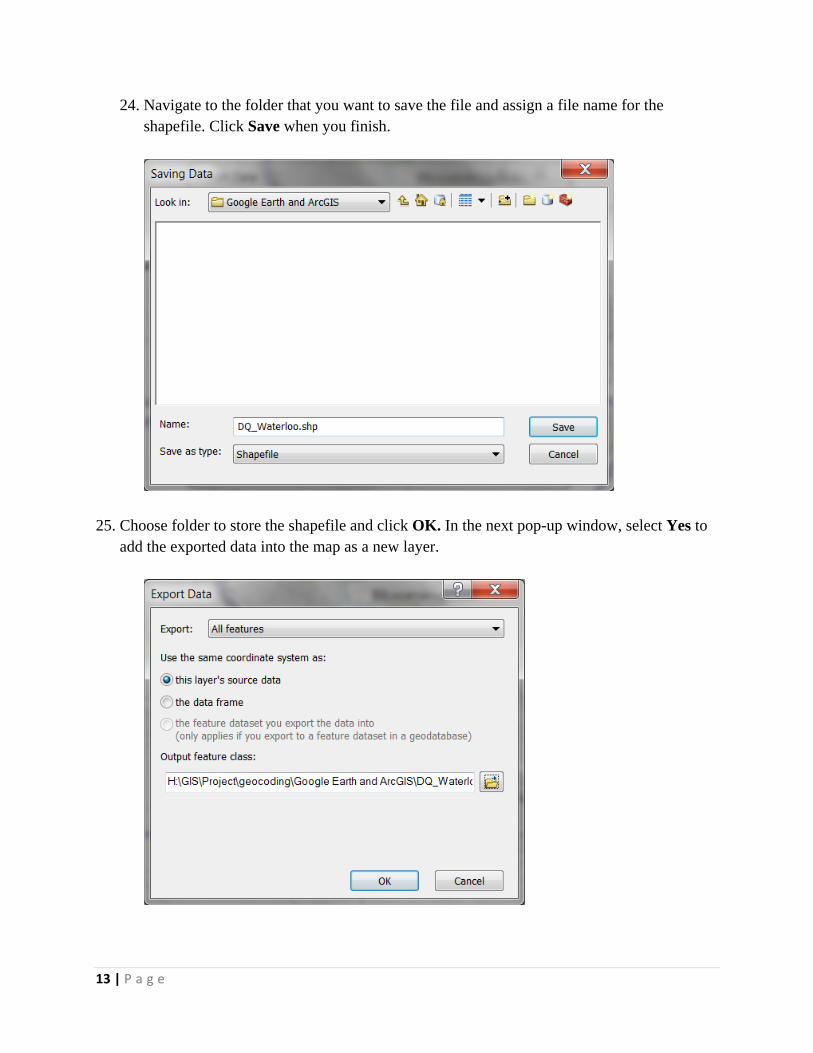
24. Navigate to the folder that you want to save the file and assign a file name for the
shapefile. Click Save when you finish.
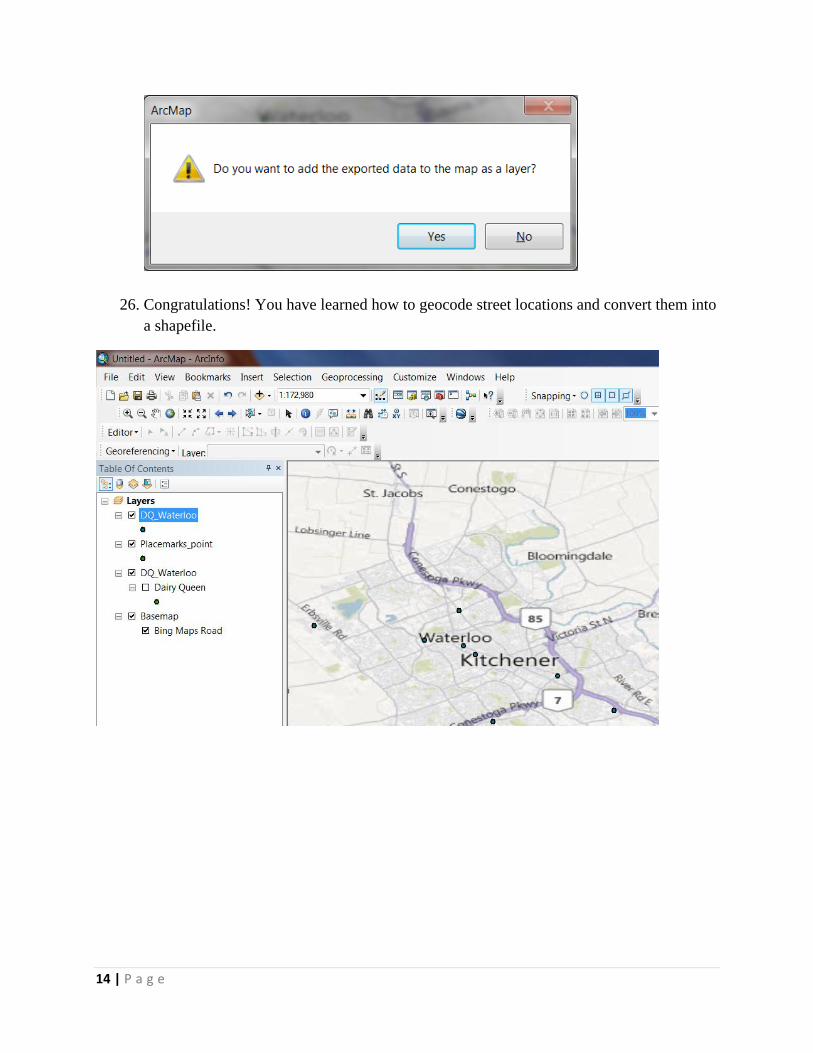
25. Choose folder to store the shapefile and click OK. In the next pop-up window, select Yes to
add the exported data into the map as a new layer.
14 | P a g e
26. Congratulations! You have learned how to geocode street locations and convert them into
a shapefile.
Related Documents