CHAPTER 2-1 Cisco Content Services Switch Command Reference OL-5654-01 2 CLI Commands This chapter provides detailed information for the following types of CSS CLI commands: • General commands are commands you can enter after you log in to the CSS as a User or SuperUser. • Configuration mode commands are commands you can enter after you log in to the CSS as a SuperUser, and then access global configuration mode and its subset of modes. The description for each command includes: • The syntax for the command • Any related commands, when appropriate Note CSS software is available in a Standard or optional Enhanced feature set. The Enhanced feature set includes the commands of the Standard feature set, and the commands for Network Address Translation (NAT) Peering, Domain Name System (DNS), Demand-Based Content Replication (Dynamic Hot Content Overflow), Content Staging and Replication, and Network Proximity DNS. Proximity Database and the Secure Management option (including Secure Shell Host and SSL strong encryption for the Device Management software) are optional features. For details about activating a CSS software option, refer to the Cisco Content Services Switch Administration Guide.

Welcome message from author
This document is posted to help you gain knowledge. Please leave a comment to let me know what you think about it! Share it to your friends and learn new things together.
Transcript

Cisco ContenOL-5654-01
C H A P T E R 2
CLI CommandsThis chapter provides detailed information for the following types of CSS CLI commands:
• General commands are commands you can enter after you log in to the CSS as a User or SuperUser.
• Configuration mode commands are commands you can enter after you log in to the CSS as a SuperUser, and then access global configuration mode and its subset of modes.
The description for each command includes:
• The syntax for the command
• Any related commands, when appropriate
Note CSS software is available in a Standard or optional Enhanced feature set. The Enhanced feature set includes the commands of the Standard feature set, and the commands for Network Address Translation (NAT) Peering, Domain Name System (DNS), Demand-Based Content Replication (Dynamic Hot Content Overflow), Content Staging and Replication, and Network Proximity DNS.
Proximity Database and the Secure Management option (including Secure Shell Host and SSL strong encryption for the Device Management software) are optional features. For details about activating a CSS software option, refer to the Cisco Content Services Switch Administration Guide.
2-1t Services Switch Command Reference

Chapter 2 CLI CommandsGeneral Commands
General CommandsGeneral commands are commands available to you immediately after you log in to a CSS. The commands you can run depends on your permission level. If you have:
• User permissions, the CSS limits you to the following general commands and any associated no forms in User mode:
These commands, except enable, prompt, and terminal, are also available in all configuration modes.
• SuperUser permissions, all general commands and SuperUser commands are available to you. You can also access global configuration mode and its commands. For more information on global configuration mode commands, see the “Global Configuration Mode Commands” section.
The descriptions of the general commands in this section indicate whether you can use the command in User or SuperUser mode or both, and if the command is available in all modes.
• cls
• echo
• enable
• endbranch
• exit
• function
• help
• if
• input
• modify
• pause
• ping
• prompt
• set
• show
• terminal
• traceroute
• var-shift
• version
• while
• zero dos statistics
• zero ip-fragment-stats
• zero ip statistics
• zero reporter state-transitions
• zero service
2-2Cisco Content Services Switch Command Reference
OL-5654-01
Chapter 2 CLI CommandsGeneral Commands
admin-shutdownTo shut down all interfaces simultaneously, use the admin-shutdown command. This command provides a quick way to shut down all physical devices in the CSS. Use the no form of the command to restart all interfaces.
admin-shutdown
no admin-shutdown
Command Modes SuperUser
Usage Guidelines To shut down an individual interface, use the (config-if) admin-shutdown command.
Caution Shutting down the physical interfaces on the CSS terminates all activity on them.
Related Commands show interface(config-if) admin-shutdown(config-if) shut
aliasTo create an alias for one or more commands, use the alias command. Assign the alias to a specific mode. If you want to assign the alias to all modes, use the all keyword. Use the no form of this command to delete the alias from a mode.
alias mode alias_name “CLI_command{;CLI_command;CLI_command...}”
no alias mode alias_name
2-3Cisco Content Services Switch Command Reference
OL-5654-01
Chapter 2 CLI CommandsGeneral Commands
Syntax Description
Command Modes All modes
Usage Guidelines You can include an alias as a session-based configuration parameter for a profile script.
Related Commands show aliases
archiveTo archive files, use the archive command. Archiving is useful when you update software and want to save a script, log, or startup-config file from a previous release of software. An archive directory on the CSS disk stores the archive files.
archive [[startup-config|log log_filename|script script_filename] {archive_filename}|running-config archive_filename]
Syntax Description
mode Mode that you want to assign to the alias.To view all available CSS modes, enter:
# alias ?
alias_name Name for the new alias command. Enter an unquoted text string with no spaces and a maximum length of 32 characters.
CLI_command One or more CLI commands to be aliased. Enter the command, its options, and variables exactly. Enclose the command text string in quotes (“”). When entering multiple CLI commands, insert a semicolon (;) character to separate each command.
startup-config Archives the startup configuration file.
log Archives a log file.
script Archives a script file.
2-4Cisco Content Services Switch Command Reference
OL-5654-01
Chapter 2 CLI CommandsGeneral Commands
Command Modes All modes
Usage Guidelines The archive directory resides on the CSS hard drive. If you booted your CSS from a network-mounted system and your hard drive is not working, archive- and restore-related functions are suspended.
Related Commands copyrestorescriptshow
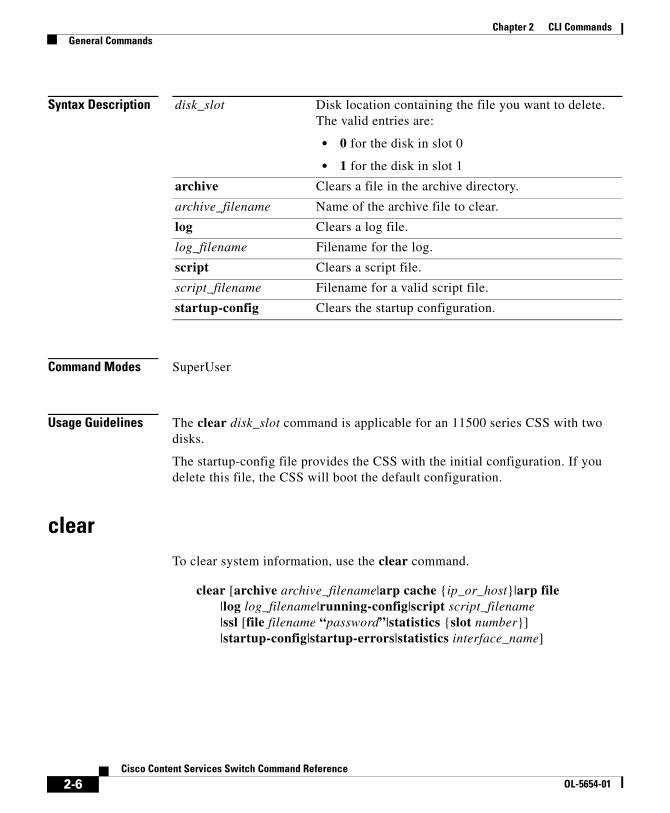
clear disk_slotTo delete the startup configuration file or specific log, script, or archive file stored on a disk in the CSS, use the clear disk_slot command.
clear disk_slot [archive archive_filename|log log_filename|startup-config|script script_filename]
log_filename Filename of the log to archive. To see a list of log files, enter the archive log ?command.
script_filename Filename of the script to archive. To see a list of script files, enter the archive script ? command.
running-config Archives the running configuration.
archive_filename Name you want to assign to the archive file. Enter an unquoted text string with a maximum length of 32 characters.
2-5Cisco Content Services Switch Command Reference
OL-5654-01
Chapter 2 CLI CommandsGeneral Commands
Syntax Description
Command Modes SuperUser
Usage Guidelines The clear disk_slot command is applicable for an 11500 series CSS with two disks.
The startup-config file provides the CSS with the initial configuration. If you delete this file, the CSS will boot the default configuration.
clearTo clear system information, use the clear command.
clear [archive archive_filename|arp cache {ip_or_host}|arp file|log log_filename|running-config|script script_filename|ssl [file filename “password”|statistics {slot number}]|startup-config|startup-errors|statistics interface_name]
disk_slot Disk location containing the file you want to delete. The valid entries are:
• 0 for the disk in slot 0
• 1 for the disk in slot 1
archive Clears a file in the archive directory.
archive_filename Name of the archive file to clear.
log Clears a log file.
log_filename Filename for the log.
script Clears a script file.
script_filename Filename for a valid script file.
startup-config Clears the startup configuration.
2-6Cisco Content Services Switch Command Reference
OL-5654-01

Chapter 2 CLI CommandsGeneral Commands
Syntax Description archive archive_filename
Clears the specified file in the archive directory. The archive_filename is the name of the archive file to clear. To list the archive files, enter:
# clear archive ?
arp cache Deletes all of the dynamic entries from the ARP cache.
ip_or_host Address for the single ARP entry you want to remove from the ARP cache. Enter the address in either dotted-decimal IP notation (for example, 192.168.11.1) or mnemonic host-name format (for example, myhost.mydomain.com).
arp file Clears the file containing the host addresses that the ARP module on the CSS resolved for the ARP table at initialization or boot time.
log log_filename Clears a log file. The log_filename variable is the filename for the log. To see a list of log files, enter:
# clear log ?
running-config Clears the running configuration.
script script_filename Clears a script file. The script_filename variable is the filename for a valid script file. To see a list of script files, enter:
# clear script ?
ssl Clears SSL files on the CSS or statistics on the SSL module.
file filename “password”
Clears SSL certificates and private keys from the CSS that are no longer valid. Note that the clear ssl file command does not function if the file currently has an association with it. The association must be removed first.
• The filename variable is the name of the certificate, key pair, or Diffie-Hellman parameter file that you want to remove from the CSS.
• The password variable is the password used to DES (Data Encryption Standard) encode the file when it was originally imported or generated by the CSS. This password must be an exact match or the file cannot be cleared.
2-7Cisco Content Services Switch Command Reference
OL-5654-01
Chapter 2 CLI CommandsGeneral Commands
Command Modes SuperUser
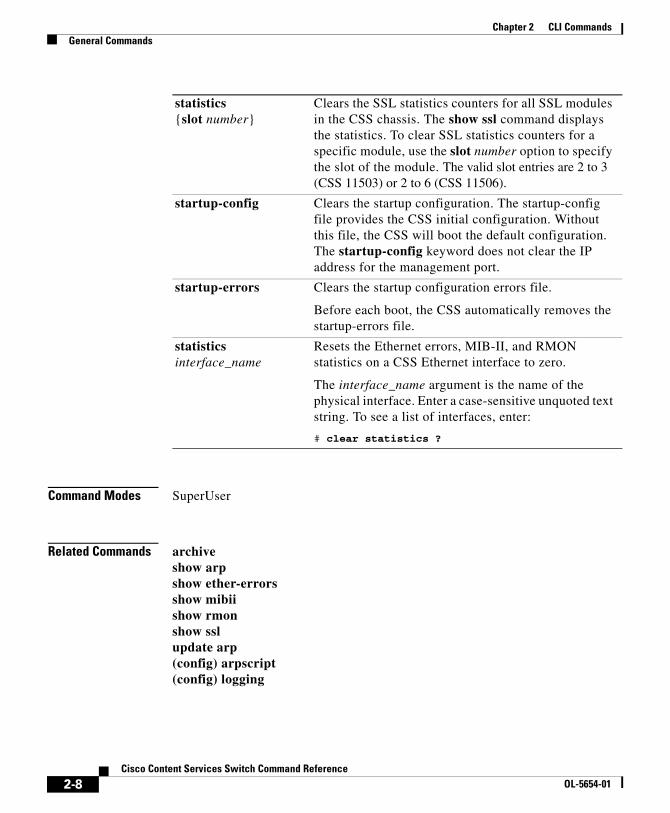
Related Commands archiveshow arpshow ether-errorsshow mibiishow rmonshow sslupdate arp(config) arpscript(config) logging
statistics {slot number}
Clears the SSL statistics counters for all SSL modules in the CSS chassis. The show ssl command displays the statistics. To clear SSL statistics counters for a specific module, use the slot number option to specify the slot of the module. The valid slot entries are 2 to 3 (CSS 11503) or 2 to 6 (CSS 11506).
startup-config Clears the startup configuration. The startup-config file provides the CSS initial configuration. Without this file, the CSS will boot the default configuration. The startup-config keyword does not clear the IP address for the management port.
startup-errors Clears the startup configuration errors file.
Before each boot, the CSS automatically removes the startup-errors file.
statistics interface_name
Resets the Ethernet errors, MIB-II, and RMON statistics on a CSS Ethernet interface to zero.
The interface_name argument is the name of the physical interface. Enter a case-sensitive unquoted text string. To see a list of interfaces, enter:
# clear statistics ?
2-8Cisco Content Services Switch Command Reference
OL-5654-01

Chapter 2 CLI CommandsGeneral Commands
cliLogMessage subsystemTo define a log message for a subsystem at a logging level, use the cliLogMessage subsystem command.
cliLogMessage subsystem name “message” level level
Syntax Description name Name of a CSS subsystem. Enter one of the following subsystem names:
• acl - Access control lists
• all - All subsystems
• app - Application Peering Protocol (APP)
• boomerang - DNS Content Routing Agent
• buffer - Buffer Manager
• cpd - Cisco Discovery Protocol (CDP)
• chassis - Chassis Manager
• circuit - Circuit Manager
• csdpeer - Content Server Database (CSD) Peer
• dhcp - Dynamic Host Configuration Protocol (DHCP)
• dql - Domain qualifier list (DQL)
• fac - Flow Admission Control (FAC)
• flowagent - Flow Agent
• flowmgr - Flow Manager
• fp-driver - Fathpath Driver
• hfg - Header field group (HFG)
• ipv4 - Internet Protocol version 4
• keepalive - Keepalive
• natmgr - NAT Manager
2-9Cisco Content Services Switch Command Reference
OL-5654-01

Chapter 2 CLI CommandsGeneral Commands
name (cont.)
• netman - Network Management
• nql - Network qualifier list (NQL)
• ospf - OSPF
• pcm - Proximity CAPP Messaging (PCM)
• portmapper - PortMapper
• proximity - Proximity
• publish - Publish
• radius - Remote Authentication Dial-In User Server (RADIUS)
• replicate - Replication
• redundancy - CSS Redundancy
• rip - RIP
• security - Security Manager
• slr - Session Level Redundancy
• sntp - Simple Network Time Protocol (SNTP)
• ssl-accel - Secure Socket Layer (SSL) Acceleration
• syssoft - System software
• urql - Uniform resource qualifier list
• vlanmgr - VLAN Manager
• vpm - Virtual Pipe Manager
• vrrp - Virtual Router Redundancy Protocol
• wcc - Web Conversation Control
To see a list of subsystems, enter:
# cliLogMessage subsystem ?
2-10Cisco Content Services Switch Command Reference
OL-5654-01
Chapter 2 CLI CommandsGeneral Commands
Command Modes All modes
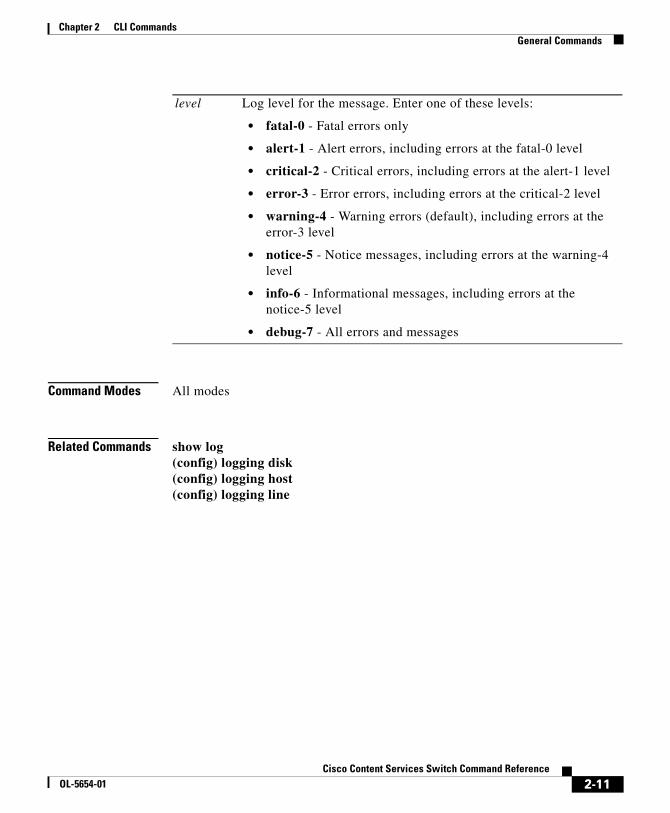
Related Commands show log(config) logging disk(config) logging host(config) logging line
level Log level for the message. Enter one of these levels:
• fatal-0 - Fatal errors only
• alert-1 - Alert errors, including errors at the fatal-0 level
• critical-2 - Critical errors, including errors at the alert-1 level
• error-3 - Error errors, including errors at the critical-2 level
• warning-4 - Warning errors (default), including errors at the error-3 level
• notice-5 - Notice messages, including errors at the warning-4 level
• info-6 - Informational messages, including errors at the notice-5 level
• debug-7 - All errors and messages
2-11Cisco Content Services Switch Command Reference
OL-5654-01
Chapter 2 CLI CommandsGeneral Commands
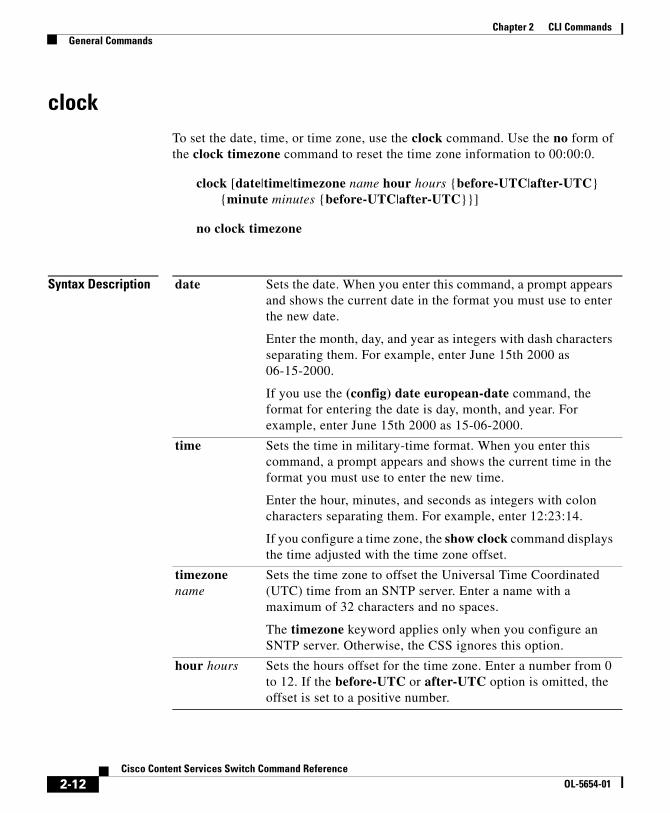
clockTo set the date, time, or time zone, use the clock command. Use the no form of the clock timezone command to reset the time zone information to 00:00:0.
clock [date|time|timezone name hour hours {before-UTC|after-UTC} {minute minutes {before-UTC|after-UTC}}]
no clock timezone
Syntax Description date Sets the date. When you enter this command, a prompt appears and shows the current date in the format you must use to enter the new date.
Enter the month, day, and year as integers with dash characters separating them. For example, enter June 15th 2000 as 06-15-2000.
If you use the (config) date european-date command, the format for entering the date is day, month, and year. For example, enter June 15th 2000 as 15-06-2000.
time Sets the time in military-time format. When you enter this command, a prompt appears and shows the current time in the format you must use to enter the new time.
Enter the hour, minutes, and seconds as integers with colon characters separating them. For example, enter 12:23:14.
If you configure a time zone, the show clock command displays the time adjusted with the time zone offset.
timezone name
Sets the time zone to offset the Universal Time Coordinated (UTC) time from an SNTP server. Enter a name with a maximum of 32 characters and no spaces.
The timezone keyword applies only when you configure an SNTP server. Otherwise, the CSS ignores this option.
hour hours Sets the hours offset for the time zone. Enter a number from 0 to 12. If the before-UTC or after-UTC option is omitted, the offset is set to a positive number.
2-12Cisco Content Services Switch Command Reference
OL-5654-01
Chapter 2 CLI CommandsGeneral Commands
Command Modes SuperUser
Usage Guidelines You cannot use the backspace key for the clock date or time command.
Related Commands show clock(config) date european-date(config) sntp
clsTo clear the terminal screen, use the cls command.
cls
Command Modes All modes
configureTo enter global configuration mode, use the configure command. Configuration commands apply to the system as a whole.
config
before-UTC (Optional) Sets the offset as a negative number. For example, if the hour offset is 12, the before-UTC keyword sets it to -12.
after-UTC (Optional) Sets the offset as a positive number. This is the default offset.
minute minutes
(Optional) Sets the minutes offset for the time zone. Enter a number from 0 to 59. If the before-UTC or after-UTC option is omitted, the offset is set to a positive number.
2-13Cisco Content Services Switch Command Reference
OL-5654-01

Chapter 2 CLI CommandsGeneral Commands
Command Modes SuperUser
Usage Guidelines When you use the configure command to enter global configuration mode, the CLI prompt changes to (config).
From this mode, you can also enter these configuration modes:
• ACL
• Boot
• Circuit and IP
• DQL
• EQL
• Group
• Header-field group
• Interface and VLAN
• Keepalive
• NQL
• Owner and Content
• RMON alarm, RMON event, and RMON history
• Service
• SSL-proxy-list
• URQL
For information about the commands available in these modes, see the “Global Configuration Mode Commands” section.
To exit the current configuration mode, enter exit.
To exit any configuration mode and return to SuperUser mode, press Ctrl-Z.
2-14Cisco Content Services Switch Command Reference
OL-5654-01

Chapter 2 CLI CommandsGeneral Commands
copy source_disk_slotTo copy all of the contents or specified startup configuration, core dumps, logs, scripts, archive, and boot image files from the source disk to the destination disk in the CSS, use the copy source_disk_slot command. The CSS software creates the software directory and hierarchy on the destination disk.
copy source_disk_slot {archive filename {destination_filename}|archives|boot-image filename|core filename {destination_filename}|cores|log filename {destination_filename}|logs|script filename {destination_filename}|scripts|startup-config}
Syntax Description source_disk_slot Designates the disk as the source location containing the files. The other disk is designated as the destination disk. The valid entries are:
• 0 for the disk in slot 0
• 1 for the disk in slot 1
archive filename (Optional) Copies the specified archive filename to the destination disk.
destination_filename (Optional) Name you want to assign to the file on the destination disk.
archives (Optional) Copies all archive files to the destination disk.
boot-image filename (Optional) Copies the specified ADI (ArrowPoint Distribution Image) of the boot-image to the destination disk.
core filename (Optional) Copies the specified core dump file to the destination disk.
cores (Optional) Copies all core dump files to the destination disk.
log filename (Optional) Copies the specified log file to the destination disk.
logs (Optional) Copies all log files to the destination disk.
script filename (Optional) Copies the specified script to the destination disk.
2-15Cisco Content Services Switch Command Reference
OL-5654-01
Chapter 2 CLI CommandsGeneral Commands
Command Modes SuperUser
Usage Guidelines You can use the copy disk_slot command only on an 11500 series SCM (System Control Module) with two disks. Make sure that an equivalent release of CSS software is present on the destination disk before you copy files to it. If necessary, copy the boot-image to the destination disk before copying a startup-config, log, or script file.
Related Commands scriptshow installed-software(config) logging
scripts (Optional) Copies all scripts from the specified disk to the destination disk.
startup-config (Optional) Copies the startup configuration to the destination disk.
2-16Cisco Content Services Switch Command Reference
OL-5654-01
Chapter 2 CLI CommandsGeneral Commands
copyTo copy files to and from File Transfer Protocol (FTP) and Trivial File Transfer Protocol (TFTP) servers, use the copy command. The keywords for this command are:
• copy core - Copies a core dump file
• copy ftp - Copies from an FTP server
• copy log - Copies a log file
• copy profile - Copies the running profile
• copy running-config - Copies the running configuration
• copy script - Copies a script file
• copy ssl - Imports or exports certificates and private keys from or to the CSS
• copy ssl - Copies the startup configuration
• copy tftp - Copies from a TFTP server
For information about these commands and any associated options, see the copy commands in this section.
Command Modes SuperUser
2-17Cisco Content Services Switch Command Reference
OL-5654-01

Chapter 2 CLI CommandsGeneral Commands
copy core
To copy a core dump file from the CSS to an FTP or TFTP server, use the copy core command.
copy core core_filename [ftp ftp_record|tftp ip_or_host] filename
Syntax Description
Command Modes SuperUser
Usage Guidelines Before you copy a core dump file from the CSS to an FTP server, you must create an FTP record file containing the FTP server IP address, username, and password. See the (config) ftp-record command for more information.
Related Commands (config) ftp-record
core_filename Name of the core dump file on the CSS. Enter an unquoted text string with the appropriate capitalization, no spaces, and a maximum length of 32 characters. To see a list of core dump files, enter:
# copy core ?
ftp ftp_record Copies a core dump file to an FTP server. The name of the FTP record file contains the FTP server IP address, username, and password. Enter an unquoted text string with no spaces. To create an FTP record, see the (config) ftp-record command.
tftp ip_or_host Copies a core dump file to a TFTP server. Enter an IP address in dotted-decimal notation (for example, 192.168.11.1) or in mnemonic host-name format (for example, myhost.mydomain.com).
filename Name you want to assign to the file on the server. Include the full path to the file. Enter an unquoted text string with no spaces and a maximum length of 32 characters.
2-18Cisco Content Services Switch Command Reference
OL-5654-01

Chapter 2 CLI CommandsGeneral Commands
copy ftp
To copy an ArrowPoint Distribution Image (ADI), script file, or startup configuration file from an FTP server to the CSS, use the copy ftp command.
copy ftp ftp_record filename [boot-image|script script_filename|startup-config]
Syntax Description ftp_record Name of the FTP record file that contains the FTP server IP address, username, and password. Enter an unquoted text string with no spaces. To create an FTP record, see the (config) ftp-record command.
filename Name of the file on the FTP server that you want to copy to the CSS. Include the full path to the file. Enter an unquoted text string with no spaces and a maximum length of 32 characters.
If you are using the boot-image keyword to copy an ADI file from an FTP server to the CSS, include the full path to the file including the file extension. Enter an unquoted text string with no spaces and a maximum length of 32 characters.
You can also copy a GZIP-compressed version of the ADI file. The CSS uncompresses the file. If there is not enough disk space available, the CSS provides a message.
boot-image Copies an ADI file from an FTP server. The ADI file contains the CSS software including boot files and logging and archiving directories. To unpack the CSS software in the ADI file, use the (config-boot) unpack command.
When you use the boot-image keyword, the file you copy to the CSS must be an ADI file. Otherwise, the CSS rejects it.
2-19Cisco Content Services Switch Command Reference
OL-5654-01
Chapter 2 CLI CommandsGeneral Commands
Command Modes SuperUser
Usage Guidelines Before using this command, you must use the (config) ftp-record command to create an FTP record file containing the FTP server IP address, username, and password.
Related Commands script(config) ftp-record(config-boot) unpack
script script_file Copies an FTP file to the script directory. To assign a name to the script file on the CSS, enter an unquoted text string with no spaces and a maximum length of 32 characters.
startup-config Copies the startup configuration and overwrites the existing configuration file.
2-20Cisco Content Services Switch Command Reference
OL-5654-01
Chapter 2 CLI CommandsGeneral Commands
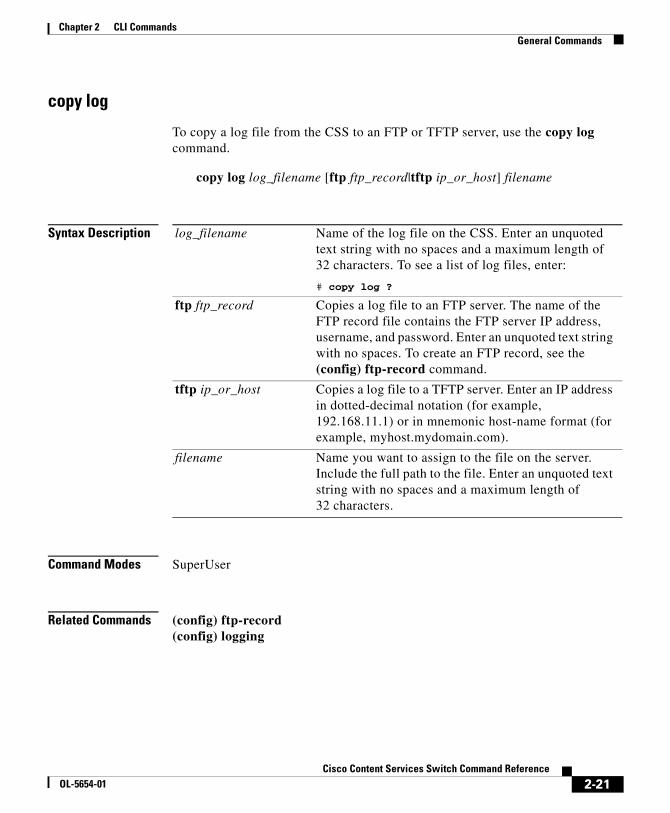
copy log
To copy a log file from the CSS to an FTP or TFTP server, use the copy log command.
copy log log_filename [ftp ftp_record|tftp ip_or_host] filename
Syntax Description
Command Modes SuperUser
Related Commands (config) ftp-record(config) logging
log_filename Name of the log file on the CSS. Enter an unquoted text string with no spaces and a maximum length of 32 characters. To see a list of log files, enter:
# copy log ?
ftp ftp_record Copies a log file to an FTP server. The name of the FTP record file contains the FTP server IP address, username, and password. Enter an unquoted text string with no spaces. To create an FTP record, see the (config) ftp-record command.
tftp ip_or_host Copies a log file to a TFTP server. Enter an IP address in dotted-decimal notation (for example, 192.168.11.1) or in mnemonic host-name format (for example, myhost.mydomain.com).
filename Name you want to assign to the file on the server. Include the full path to the file. Enter an unquoted text string with no spaces and a maximum length of 32 characters.
2-21Cisco Content Services Switch Command Reference
OL-5654-01
Chapter 2 CLI CommandsGeneral Commands
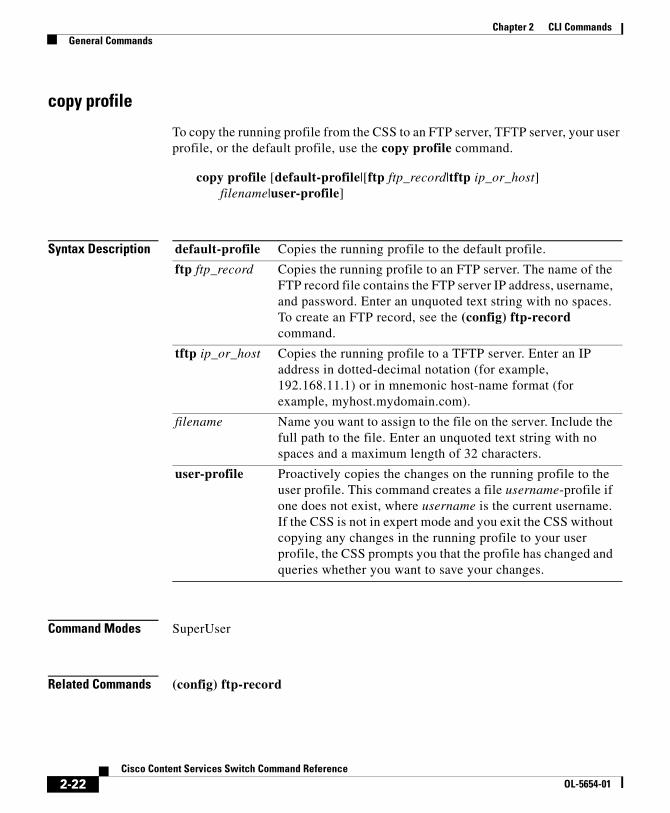
copy profile
To copy the running profile from the CSS to an FTP server, TFTP server, your user profile, or the default profile, use the copy profile command.
copy profile [default-profile|[ftp ftp_record|tftp ip_or_host] filename|user-profile]
Syntax Description
Command Modes SuperUser
Related Commands (config) ftp-record
default-profile Copies the running profile to the default profile.
ftp ftp_record Copies the running profile to an FTP server. The name of the FTP record file contains the FTP server IP address, username, and password. Enter an unquoted text string with no spaces. To create an FTP record, see the (config) ftp-record command.
tftp ip_or_host Copies the running profile to a TFTP server. Enter an IP address in dotted-decimal notation (for example, 192.168.11.1) or in mnemonic host-name format (for example, myhost.mydomain.com).
filename Name you want to assign to the file on the server. Include the full path to the file. Enter an unquoted text string with no spaces and a maximum length of 32 characters.
user-profile Proactively copies the changes on the running profile to the user profile. This command creates a file username-profile if one does not exist, where username is the current username. If the CSS is not in expert mode and you exit the CSS without copying any changes in the running profile to your user profile, the CSS prompts you that the profile has changed and queries whether you want to save your changes.
2-22Cisco Content Services Switch Command Reference
OL-5654-01

Chapter 2 CLI CommandsGeneral Commands
copy running-config
To copy the running configuration to an FTP or TFTP server or to the startup configuration file on the CSS disk, use the copy running-config command.
copy running-config [[ftp ftp_record|tftp ip_or_host] filename|startup-config]
Syntax Description
Command Modes SuperUser
Related Commands (config) ftp-record
ftp ftp_record Copies the running configuration to an FTP server. The name of the FTP record file contains the FTP server IP address, username, and password. Enter an unquoted text string with no spaces. To create an FTP record, see the (config) ftp-record command.
tftp ip_or_host Copies the running configuration to a TFTP server. Enter an IP address in dotted-decimal notation (for example, 192.168.11.1) or in mnemonic host-name format (for example, myhost.mydomain.com).
filename Name you want to assign to the file on the server. Include the full path to the file. Enter an unquoted text string with no spaces and a maximum length of 32 characters.
startup-config Copies the running configuration to the startup configuration file on the CSS disk. In the event of the CSS rebooting, if you do not save changes in the running-config file to the startup-config file, these changes are lost.
2-23Cisco Content Services Switch Command Reference
OL-5654-01
Chapter 2 CLI CommandsGeneral Commands
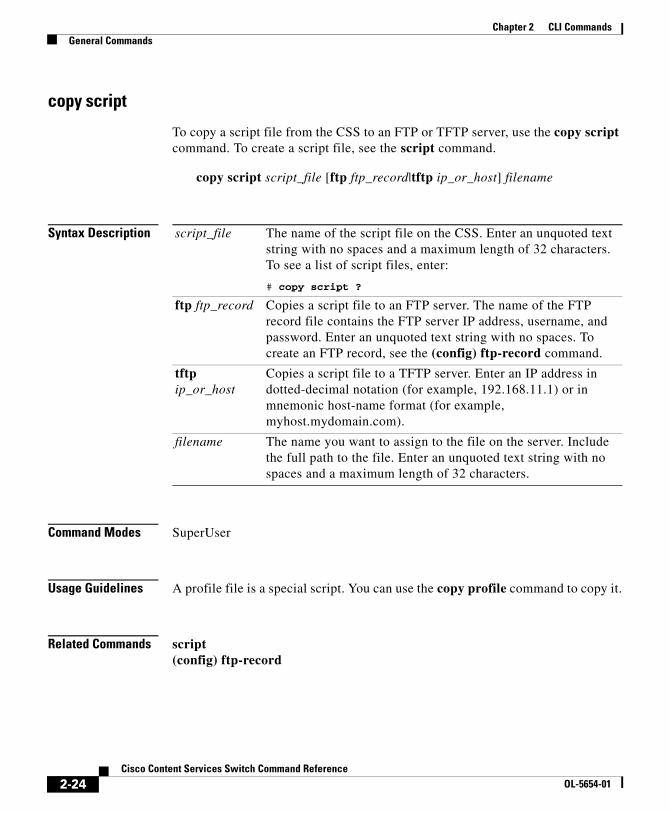
copy script
To copy a script file from the CSS to an FTP or TFTP server, use the copy script command. To create a script file, see the script command.
copy script script_file [ftp ftp_record|tftp ip_or_host] filename
Syntax Description
Command Modes SuperUser
Usage Guidelines A profile file is a special script. You can use the copy profile command to copy it.
Related Commands script(config) ftp-record
script_file The name of the script file on the CSS. Enter an unquoted text string with no spaces and a maximum length of 32 characters. To see a list of script files, enter:
# copy script ?
ftp ftp_record Copies a script file to an FTP server. The name of the FTP record file contains the FTP server IP address, username, and password. Enter an unquoted text string with no spaces. To create an FTP record, see the (config) ftp-record command.
tftp ip_or_host
Copies a script file to a TFTP server. Enter an IP address in dotted-decimal notation (for example, 192.168.11.1) or in mnemonic host-name format (for example, myhost.mydomain.com).
filename The name you want to assign to the file on the server. Include the full path to the file. Enter an unquoted text string with no spaces and a maximum length of 32 characters.
2-24Cisco Content Services Switch Command Reference
OL-5654-01
Chapter 2 CLI CommandsGeneral Commands
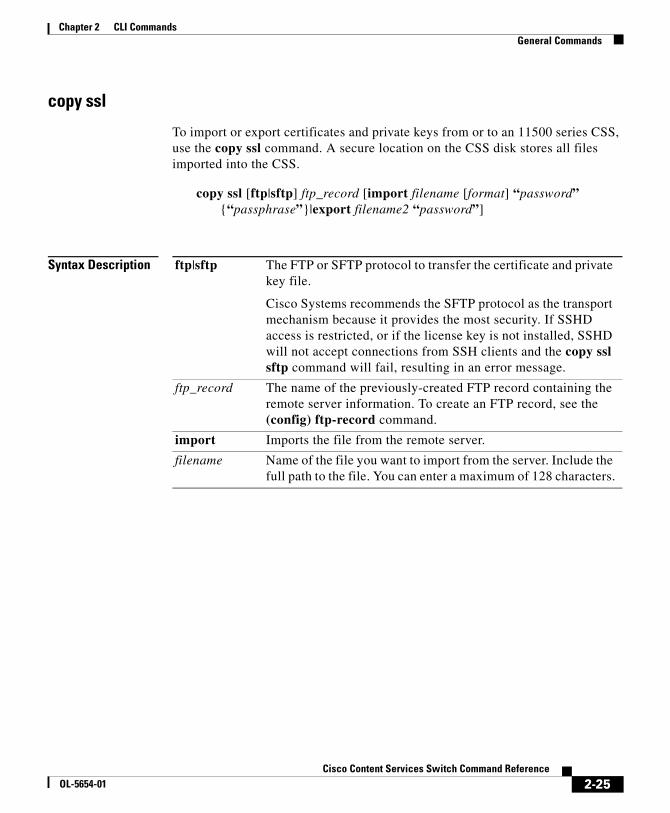
copy ssl
To import or export certificates and private keys from or to an 11500 series CSS, use the copy ssl command. A secure location on the CSS disk stores all files imported into the CSS.
copy ssl [ftp|sftp] ftp_record [import filename [format] “password” {“passphrase”}|export filename2 “password”]
Syntax Description ftp|sftp The FTP or SFTP protocol to transfer the certificate and private key file.
Cisco Systems recommends the SFTP protocol as the transport mechanism because it provides the most security. If SSHD access is restricted, or if the license key is not installed, SSHD will not accept connections from SSH clients and the copy ssl sftp command will fail, resulting in an error message.
ftp_record The name of the previously-created FTP record containing the remote server information. To create an FTP record, see the (config) ftp-record command.
import Imports the file from the remote server.
filename Name of the file you want to import from the server. Include the full path to the file. You can enter a maximum of 128 characters.
2-25Cisco Content Services Switch Command Reference
OL-5654-01

Chapter 2 CLI CommandsGeneral Commands
Command Modes SuperUser
format File format of the certificate to be imported. Once the certificate file is converted to PEM format and DES encoded, it is stored on the CSS SCM in a special (and secure) directory. The valid import file formats are:
• DER - Binary format encoding of the certificate file in ASN.1 using the Distinguished Encoding Rules (DER-encoded X509 certificate). For example, an imported certificate from a Microsoft Windows NT IIS 4.0 server.
• PEM - Privacy Enhanced Mail, a base64 encoding of the certificate file (PEM-encoded X509 certificate). For example, an imported certificate from an Apache/SSL UNIX server.
• PKCS12 - Standard from RSA Data Security, Inc. for storing certificates and private keys. For example, an imported certificate from a Microsoft Windows 2000 IIS 5.0 server.
“password” Password used to DES (Data Encryption Standard) encode the imported certificate or private key. Encoding the imported file prevents unauthorized access to the certificate or private key on the CSS. Enter the password as a quoted string. The password appears in the CSS running configuration as a DES-encoded string.
“passphrase” (Optional) Passphrase used to encrypt the certificate or key being imported into the CSS. Some certificates or keys may have had a passphrase assigned to encrypt them prior to being imported into the CSS. Enter the passphrase as a quoted text string.
export Exports the file to the remote server.
filename2 Name you want to assign to the file on the server. Include the full path to the file. Enter an unquoted text string with no spaces and a maximum length of 32 characters.
2-26Cisco Content Services Switch Command Reference
OL-5654-01
Chapter 2 CLI CommandsGeneral Commands
Usage Guidelines An imported file can contain certificates, RSA or DSA key pairs, or Diffie-Hellman parameters. You must distinguish whether the files contain certificates, privates keys, or Diffie-Hellman parameters by associating the specific contents to a filename.
Related Commands (config) ftp-record
copy startup-config
To copy the startup configuration to an FTP or TFTP server or to the running configuration, use the copy startup-config command.
copy startup-config [[ftp ftp_record|tftp ip_or_host] filename|running-config]
Syntax Description ftp ftp_record Copies the startup configuration to an FTP server. The name of the FTP record file contains the FTP server IP address, username, and password. Enter an unquoted text string with no spaces. To create an FTP record, see the (config) ftp-record command.
tftp ip_or_host Copies the startup configuration to a TFTP server. Enter an IP address in dotted-decimal notation (for example, 192.168.11.1) or in mnemonic host-name format (for example, myhost.mydomain.com).
filename Name you want to assign to the file on the server. Include the full path to the file. Enter an unquoted text string with no spaces and a maximum length of 32 characters.
running-config Copies the startup configuration and merges with the running configuration file on the CSS disk.
2-27Cisco Content Services Switch Command Reference
OL-5654-01
Chapter 2 CLI CommandsGeneral Commands
Command Modes SuperUser
Related Commands (config) ftp-record
copy tftp
To copy files from a TFTP server to the script directory or overwrite the startup configuration on the CSS, use the copy tftp command.
copy tftp ip_or_host filename [script script_file|startup-config]
Syntax Description
Command Modes SuperUser
Related Commands script
ip_or_host IP address or host name of the TFTP server to receive the file. Enter an IP address in dotted-decimal notation (for example, 192.168.11.1) or in mnemonic host-name format (for example, myhost.mydomain.com).
filename Name for the file on the TFTP server. Include the full path to the file. Enter an unquoted text string with no spaces.
script script_file Copies a TFTP file to the script directory. To assign a name to the script file on the CSS, enter an unquoted text string with no spaces and a maximum length of 32 characters.
startup-config Copies a TFTP file to and overwrites the startup configuration.
2-28Cisco Content Services Switch Command Reference
OL-5654-01
Chapter 2 CLI CommandsGeneral Commands
disableTo access User mode, use the disable command to exit SuperUser mode. In User mode, you can monitor and display CSS parameters, but not change them.
disable
Command Modes SuperUser
Usage Guidelines To log in as a SuperUser from User mode, use the enable command.
Related Commands enableexit
disconnectTo disconnect a connected session or line, use the disconnect command.
disconnect session
Syntax Description
Command Modes SuperUser
session The Telnet or console session. To see a list of sessions, enter:
# disconnect ?
2-29Cisco Content Services Switch Command Reference
OL-5654-01
Chapter 2 CLI CommandsGeneral Commands
dns resolveTo resolve a host name by querying the configured DNS server on the CSS, use the dns resolve command.
dns resolve host_name
Syntax Description
Command Modes All modes
dns-boomerang client zeroTo clear the statistics for a configured domain displayed through the show dns-boomerang client command, use the dns-boomerang client zero command.
dns-boomerang client zero
Command Modes SuperUser and all configuration modes
Related Commands show dns-boomerang client
host_name The name of the host you want to resolve. Enter the host name in mnemonic host-name format (for example, myhost.mydomain.com).
2-30Cisco Content Services Switch Command Reference
OL-5654-01
Chapter 2 CLI CommandsGeneral Commands
echoTo enable terminal echo and optionally echo a message with or without a line feed, use the echo command. This is useful when creating scripts and controlling output. Typical use of this command is in a script file. Use the no form of this command to disable terminal echo.
echo {-n} {“message”}
no echo
Syntax Description
Command Modes All modes
Related Commands inputsetshow variable
-n (Optional) Echo the message to the terminal without a line feed.
message (Optional) Echo the message to the terminal with a line feed. Enter a quoted text string, user-defined argument, or status variable. You can include the \n characters in the message to produce line feeds.
2-31Cisco Content Services Switch Command Reference
OL-5654-01

Chapter 2 CLI CommandsGeneral Commands
enableTo log in as a SuperUser in User mode, use the enable command.
enable
Command Modes User
Usage Guidelines The enable command prompts you for a valid username and password.
After you log in with a username that has SuperUser privileges, you can access the full set of CLI commands, including those in User mode. SuperUser commands let you change parameters and configure the CSS. To set SuperUser usernames and passwords, use the (config) username command.
Related Commands disableexit
endbranchTo terminate a branch block initiated by an if or while command, use the endbranch command. Typical use of this command is in a script file. For more information on scripts, refer to the Cisco Content Services Administration Guide.
endbranch
Command Modes All modes
Related Commands ifwhile
2-32Cisco Content Services Switch Command Reference
OL-5654-01

Chapter 2 CLI CommandsGeneral Commands
exitUse the exit command to exit from:
• The current mode and return to the previous mode. If you are in User or SuperUser mode, this command ends the CLI session and disconnects the line.
• An upper-branch block.
• A current script.
exit {branch|script {status}}
Syntax Description
Command Modes All modes
Usage Guidelines If you are in User or SuperUser mode when you use the exit command to exit the current mode, you will exit the session. When you exit a mode, the prompt changes accordingly.
Typically, you use the exit branch and exit script commands in script files. For more information on scripts, refer to the Cisco Content Services Administration Guide.
Related Commands script
branch (Optional) Exits the upper-branch block.
script (Optional) Exits the current script.
status (Optional) Integer value placed in the STATUS variable when a script completes execution. If you do not define the STATUS variable, with the exception of the grep command, an exit status of 0 indicates that a command was successful. A non-zero value indicates a failure. This value is set automatically by the CLI after each command completes its execution.
2-33Cisco Content Services Switch Command Reference
OL-5654-01
Chapter 2 CLI CommandsGeneral Commands
expertTo turn on expert mode, use the expert command. In expert mode, the CLI does not ask for confirmation before you execute commands that could delete or radically change operating parameters. Expert mode is off by default. Use the no form of this command to reset expert mode to its default setting of off.
expert
no expert
Command Modes SuperUser
Usage Guidelines Your user profile contains the expert mode setting when you log in to the CSS. If you change this setting during a CSS session, you can permanently save the setting in your profile by using the copy running-config command. Or when you exit a CLI session, you can respond with a y when the CSS prompts you that the profile has changed and queries whether you want to save the changes to the user profile.
find ip addressTo search the CSS configuration for the specified IP address, use the find ip address command. You can include a netmask for subnet (wildcard) searches. This search can help you avoid IP address conflicts when you configure the CSS.
When you use this command, it checks services, source groups, content rules, ACLs, the management port, syslog, APP sessions, and local interfaces for the specified address. If the address is found, the locations of its use are displayed. If no addresses are found, you are returned to the command prompt.
find ip address ip_or_host {subnet_mask|range number}
2-34Cisco Content Services Switch Command Reference
OL-5654-01

Chapter 2 CLI CommandsGeneral Commands
Syntax Description
Command Modes All modes
ip_or_host IP address you want to find. Enter an IP address in dotted-decimal notation (for example, 192.168.11.1) or in mnemonic host-name format (for example, myhost.mydomain.com).
subnet_mask (Optional) IP subnet mask. Enter the mask either:
• As a prefix length in CIDR bitcount notation (for example, /24). Do not enter a space to separate the IP address from the prefix length.
• In dotted-decimal notation (for example, 255.255.255.0).
If you enter a mask of 0.0.0.0, the CSS finds all addresses.
range number (Optional) Defines how many IP addresses that you want to find, starting with the ip_or_host address. Enter a number from 1 to 65535. The default is 1.
For example, if you enter an IP address of 203.1.1.1 with a range of 10, the CSS tries to find the addresses from 203.1.1.1 through 203.1.1.10.
2-35Cisco Content Services Switch Command Reference
OL-5654-01
Chapter 2 CLI CommandsGeneral Commands
flow statisticsTo display statistics on currently allocated flows or inactive redundant flows, use the flow statistics command.
flow statistics {dormant}
Syntax Description
Usage Guidelines The flow statistics command displays the UDP and TCP flows per second, the hits per seconds, and the flow information for each port.
The flow statistics dormant command display summary information about redundant dormant flows.
For information about the fields in the flow statistics dormant command output, refer to the Cisco Content Services Switch Content Load-Balancing Configuration Guide.
Command Modes ACL, global, group, interface, owner, content, service, SuperUser, and User
dormant (Optional) Displays the statistics on inactive redundant flows in an Adaptive Session Redundancy (ASR) configuration on the CSS.
2-36Cisco Content Services Switch Command Reference
OL-5654-01

Chapter 2 CLI CommandsGeneral Commands
formatTo format a disk in the CSS, use the format command.
format disk_slot {quick}
Syntax Description
Command Modes SuperUser
Usage Guidelines When you enter the format command, the CSS queries you about formatting the disk.
Formatting the disk results in all disk data being permanently erased.Are you sure you want to continue? (yes,no):
Enter either of the following:
• yes to reformat the disk.
• no to abort the reformat function. If the disk has unrecoverable errors and you do not reformat it, be aware that the file system may be corrupt and functionality is compromised.
disk_slot Disk you want to format. Enter 0 for the disk in slot 0, or 1 for the disk in slot 1.
quick (Optional) Reformats the disk without performing cluster verification. Only use the quick format when you are certain of the disk integrity.
2-37Cisco Content Services Switch Command Reference
OL-5654-01
Chapter 2 CLI CommandsGeneral Commands
functionTo create a function and call it within a script, use the function command.
function name [begin|end|call {“values ...”}|return {“values ...”}]
Syntax Description
Command Modes All modes
Usage Guidelines The function command allows you to define the function once within the script and then call it by its name one or more times to perform its functions. You can define the function either before or after you call it within the script. For more information on scripts, refer to the Cisco Content Services Administration Guide.
Related Commands endbranchifinputsetshow variable
name Name of the function. Enter a text string with a maximum of 32 characters.
begin Starts the definition of the function.
end Ends the definition of the function.
call Calls the function.
return Exits the function and optionally sets the value in the RETURN variable.
“values” (Optional) One or more optional alphanumeric values you want to pass into the function or set a value in the RETURN variable. Enter the value(s) in a quoted string.
2-38Cisco Content Services Switch Command Reference
OL-5654-01
Chapter 2 CLI CommandsGeneral Commands
helpTo display CLI help on all or a specified topic, use the help command. The CLI also provides other forms of context-sensitive help. See the “Getting CLI Help” section in Chapter 1, Using the Command-Line Interface
help [commands|configuration|keys|modes|variables]
Syntax Description
Command Modes All modes
history lengthTo modify the history buffer length, use the history length command. The command-line history buffer stores the most recent CLI commands that you have entered. Use the no form of this command to restore the history buffer to the default of 20 lines.
history length buffer_length
no history length
Syntax Description
Command Modes SuperUser
commands Displays help on entering commands.
configuration Displays help on configuration files.
keys Displays help on keyboard shortcuts.
modes Displays help on configuration modes.
variables Displays help on variables.
buffer_length The number of lines in the command-line history buffer. Enter an integer from 0 to 256. The default is 20. To disable the history function, enter 0.
2-39Cisco Content Services Switch Command Reference
OL-5654-01
Chapter 2 CLI CommandsGeneral Commands
ifTo initiate conditional branch execution of a branch block, use the if command. This branch construct is available with an interactive session or within a script. Typically, you use this command in a script. You can nest any number of commands in a branch block including nested branch blocks.
if [constant|variable_name] {“operator(s)” “operand(s)”}
Syntax Description constant Numeric constant. Enter an integer or user-defined variable.
variable_name Character string representing a variable. Enter a name with a maximum length of 32 characters.
“operator” (Optional) One or more operations on the operand. Enter a quoted string of one or more of the following operators. Separate multiple operators with a space.
• OR — Simple OR operator
• > — Greater than operator
• AND — Simple AND operator
• * — Multiplication operator
• MOD — Modulus operator
• / — Division operator
• >= — Greater than or equal to operator
• < — Less than operator
• <= — Less than or equal to operator
• == — Equality operator
• + — Add to variable
• - — Subtract from variable
• -- — Decrement variable
• ++ — Increment variable
Numeric value operators are handled one at a time from left to right, using the list of operands from the list as needed. Operators, such as -- and ++, do not require an operand.
2-40Cisco Content Services Switch Command Reference
OL-5654-01

Chapter 2 CLI CommandsGeneral Commands
Command Modes All modes
Usage Guidelines For more information on scripts, refer to the Cisco Content Services Administration Guide.
Related Commands endbranchfunctioninputsetshow variable
“operand” (Optional) One or more strings or arguments, as follows:
• For character operators, enter a quoted string of either a string constant or a character argument.
• For numeric operators, enter a quoted string of one or more integers or numeric argument. Separate multiple operands with a space.
2-41Cisco Content Services Switch Command Reference
OL-5654-01
Chapter 2 CLI CommandsGeneral Commands
inputTo create a variable for the command line or script that prompts a user for a value to assign to a variable, use the input command. Typically, you use this command in a script. When the user enters the value and enters the carriage return, the value is assigned to the variable.
input variable_name directory_level
Syntax Description
Command Modes All modes
licenseTo enter the software license key, use the license command.
license
At the prompt for a license key, enter the number.
Command Modes SuperUser
variable_name Character string representing the variable. Enter a string with a maximum length of 32 characters.
directory_level Directory level for the variable. Enter one of these options:
• archive - Default archive directory
• log - Default log directory
• script - Default script directory based on the boot image
• top - Root level directory
2-42Cisco Content Services Switch Command Reference
OL-5654-01
Chapter 2 CLI CommandsGeneral Commands
lockTo lock the terminal and CLI session, use the lock command. Locking the terminal allows you to prevent access to your terminal while maintaining the connection to a CLI session.
lock
When you enter the lock command, the screen displays this message:
*** Session is locked. Press any key to provide unlock authentication ***
To unlock the terminal, press any key. Enter your username and password at the appropriate prompt.
Command Modes SuperUser
loginTo log in to the CSS with a different user identity, use the login command.
login
This command prompts you for a valid username and password. To set SuperUser usernames and passwords, see the (config) username command.
Command Modes SuperUser
Related Commands enableexit
2-43Cisco Content Services Switch Command Reference
OL-5654-01

Chapter 2 CLI CommandsGeneral Commands
mapTo map the primary and secondary boot record, logging output, archive files, or core dumps to a disk in the CSS (located in slot 0 or slot 1), use the map command. Use the no form of this command to reset the default mapping for a boot record to the disk in slot 0, or the log output or core dumps to the disk from which the CSS booted.
map [core|log|primary-boot|secondary-boot] disk_slotno map core|log|primary-boot|secondary-boot
Syntax Description
Command Modes SuperUser
Usage Guidelines The map command is applicable for an 11500 series CSS with two disks.
Related Commands show map
core Maps the core dumps.
log Maps the logging output.
primary-boot Maps the primary boot record.
secondary-boot Maps the secondary boot record.
disk_slot The slot number for the disk. Enter one of the following:
• 0 - The disk in slot 0
• 1 - The disk in slot 1
2-44Cisco Content Services Switch Command Reference
OL-5654-01

Chapter 2 CLI CommandsGeneral Commands
modifyTo change the value of any numeric variable, use the modify command. Typically, you use this command in a script.
modify variable_name “operator(s)” {“operand(s)”}
Syntax Description variable_name A character string representing a variable. Enter a name with a maximum length of 32 characters.
“operator” (Optional) One or more operations on the operand. Enter a quoted string of one or more of the following operators. Separate multiple operators with a space.
• OR — Simple OR operator
• > — Greater than operator
• AND — Simple AND operator
• * — Multiplication operator
• MOD — Modulus operator
• / — Division operator
• >= — Greater than or equal to operator
• < — Less than operator
• <= — Less than or equal to operator
• == — Equality operator
• + — Add to variable
• - — Subtract from variable
• -- — Decrement variable
• ++ — Increment variable
Numeric value operators are handled one at a time from left to right, using the list of operands from the list as needed. Operators, such as -- and ++, do not require an operand.
2-45Cisco Content Services Switch Command Reference
OL-5654-01

Chapter 2 CLI CommandsGeneral Commands
Command Modes All modes
Usage Guidelines For more information on scripts, refer to the Cisco Content Services Administration Guide.
Related Commands functioninputsetshow variable
“operand” (Optional) One or more integers or numeric arguments. Enter a quoted string. Separate multiple operands with a space.
2-46Cisco Content Services Switch Command Reference
OL-5654-01
Chapter 2 CLI CommandsGeneral Commands
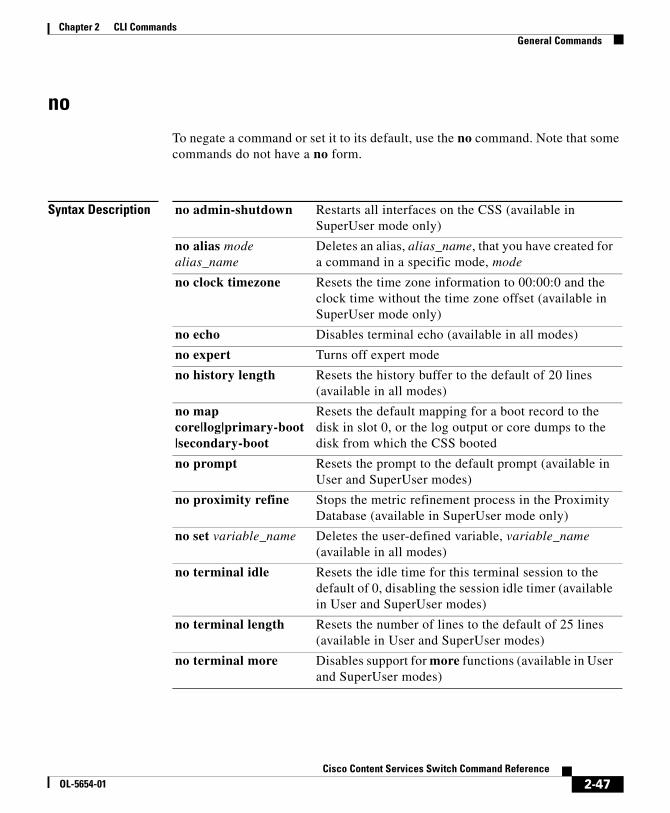
noTo negate a command or set it to its default, use the no command. Note that some commands do not have a no form.
Syntax Description no admin-shutdown Restarts all interfaces on the CSS (available in SuperUser mode only)
no alias mode alias_name
Deletes an alias, alias_name, that you have created for a command in a specific mode, mode
no clock timezone Resets the time zone information to 00:00:0 and the clock time without the time zone offset (available in SuperUser mode only)
no echo Disables terminal echo (available in all modes)
no expert Turns off expert mode
no history length Resets the history buffer to the default of 20 lines (available in all modes)
no map core|log|primary-boot|secondary-boot
Resets the default mapping for a boot record to the disk in slot 0, or the log output or core dumps to the disk from which the CSS booted
no prompt Resets the prompt to the default prompt (available in User and SuperUser modes)
no proximity refine Stops the metric refinement process in the Proximity Database (available in SuperUser mode only)
no set variable_name Deletes the user-defined variable, variable_name (available in all modes)
no terminal idle Resets the idle time for this terminal session to the default of 0, disabling the session idle timer (available in User and SuperUser modes)
no terminal length Resets the number of lines to the default of 25 lines (available in User and SuperUser modes)
no terminal more Disables support for more functions (available in User and SuperUser modes)
2-47Cisco Content Services Switch Command Reference
OL-5654-01
Chapter 2 CLI CommandsGeneral Commands
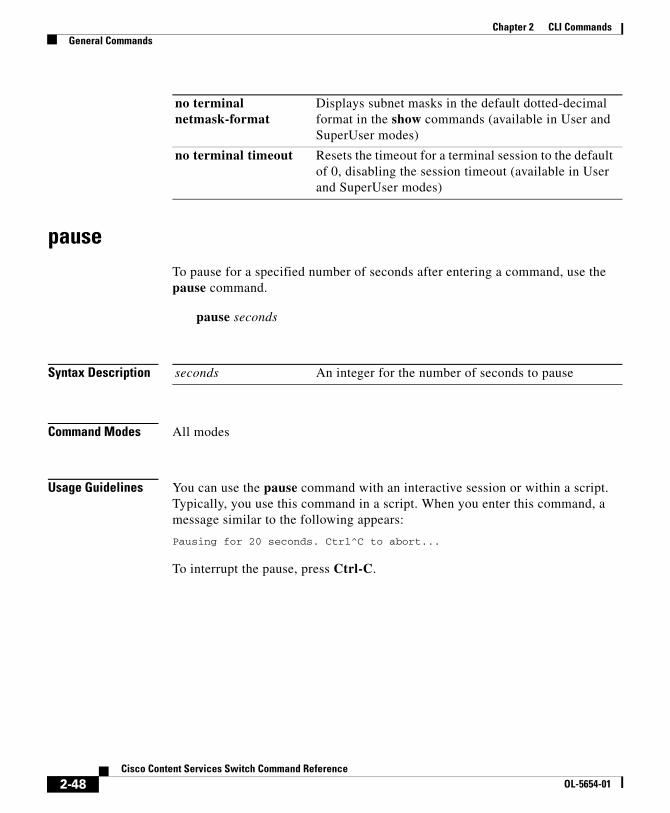
pauseTo pause for a specified number of seconds after entering a command, use the pause command.
pause seconds
Syntax Description
Command Modes All modes
Usage Guidelines You can use the pause command with an interactive session or within a script. Typically, you use this command in a script. When you enter this command, a message similar to the following appears:
Pausing for 20 seconds. Ctrl^C to abort...
To interrupt the pause, press Ctrl-C.
no terminal netmask-format
Displays subnet masks in the default dotted-decimal format in the show commands (available in User and SuperUser modes)
no terminal timeout Resets the timeout for a terminal session to the default of 0, disabling the session timeout (available in User and SuperUser modes)
seconds An integer for the number of seconds to pause
2-48Cisco Content Services Switch Command Reference
OL-5654-01

Chapter 2 CLI CommandsGeneral Commands
pingTo send Internet Control Message Protocol (ICMP) echo requests to test network connectivity, use the ping command.
ping ip_or_host {number} {delay}
Syntax Description
Command Modes All modes
ip_or_host IP address for the host you want to test. Enter an IP address in dotted-decimal notation (for example, 192.168.11.1) or in mnemonic host-name format (for example, myhost.mydomain.com).
number (Optional) Number of ping messages to send. Enter an integer from 1 to 1000. The default is 1.
delay (Optional) Delay time between ping messages, in milliseconds. Enter an integer from 1 to 65535. The default is 100.
2-49Cisco Content Services Switch Command Reference
OL-5654-01
Chapter 2 CLI CommandsGeneral Commands
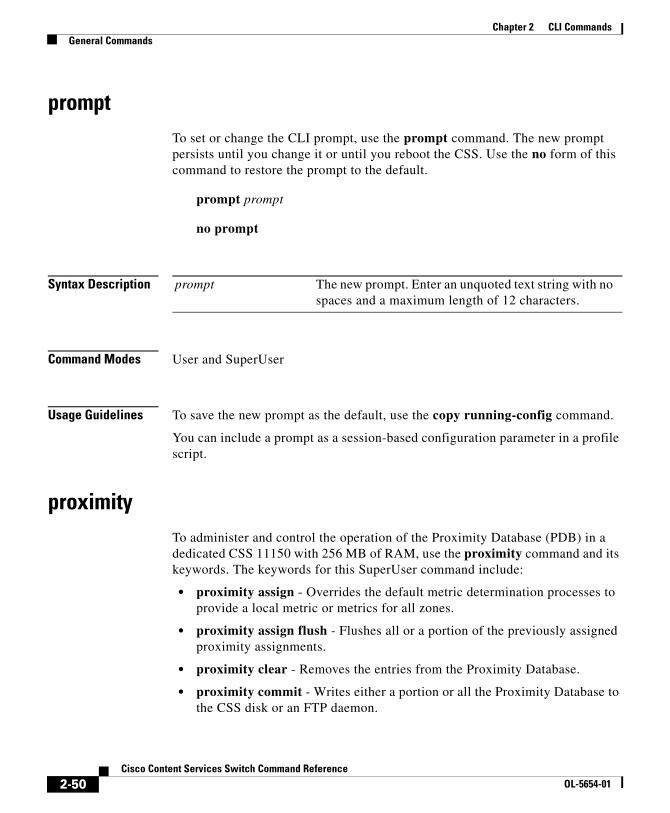
promptTo set or change the CLI prompt, use the prompt command. The new prompt persists until you change it or until you reboot the CSS. Use the no form of this command to restore the prompt to the default.
prompt prompt
no prompt
Syntax Description
Command Modes User and SuperUser
Usage Guidelines To save the new prompt as the default, use the copy running-config command.
You can include a prompt as a session-based configuration parameter in a profile script.
proximityTo administer and control the operation of the Proximity Database (PDB) in a dedicated CSS 11150 with 256 MB of RAM, use the proximity command and its keywords. The keywords for this SuperUser command include:
• proximity assign - Overrides the default metric determination processes to provide a local metric or metrics for all zones.
• proximity assign flush - Flushes all or a portion of the previously assigned proximity assignments.
• proximity clear - Removes the entries from the Proximity Database.
• proximity commit - Writes either a portion or all the Proximity Database to the CSS disk or an FTP daemon.
prompt The new prompt. Enter an unquoted text string with no spaces and a maximum length of 12 characters.
2-50Cisco Content Services Switch Command Reference
OL-5654-01

Chapter 2 CLI CommandsGeneral Commands
• proximity refine - Begins periodic refinement of metric entries within the Proximity Database.
• proximity reprobe - Forces a reprobe of existing IP addresses.
• proximity retrieve - Loads a database file from the CSS disk or an FTP daemon.
For information about these commands and any associated options, see the proximity commands in this section.
proximity assign
To override the default metric determination processes and provide a metric or metrics for all zones, use the proximity assign command. All CSSs in the Proximity Database mesh share assigned information. When you use this command, Network Proximity does not perform active probing of the assigned block.
proximity assign ip_address prefix_length [“local_metric”|”metric_list”]
Syntax Description ip_address IP address you want to associate with the metric information. Enter the address in dotted-decimal format (for example, 192.168.11.1).
prefix_length IP prefix length used with the IP address. This prefix allows you to assign metrics over a range of IP addresses. Enter the prefix as either:
• A prefix length in CIDR bitcount notation (for example, /24).
• A subnet mask in dotted-decimal notation (for example, 255.255.255.0).
“local_metric” Single metric to represent the zone where this command is issued. Enter the metric as a quoted number.
“metric_list” List of metrics, in ascending zone order, that represent all zones. Enter the metric list as a string of numbers enclosed in quotes.
2-51Cisco Content Services Switch Command Reference
OL-5654-01
Chapter 2 CLI CommandsGeneral Commands
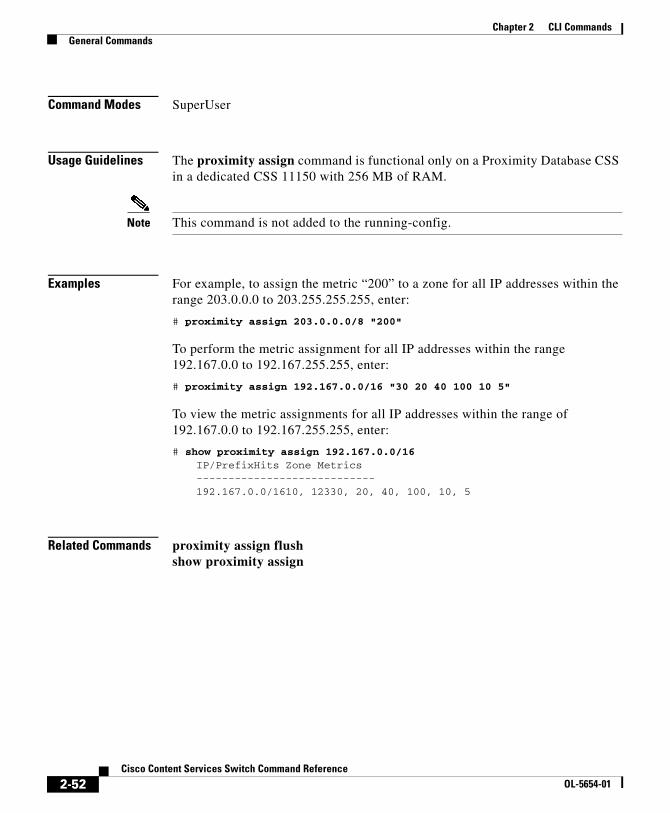
Command Modes SuperUser
Usage Guidelines The proximity assign command is functional only on a Proximity Database CSS in a dedicated CSS 11150 with 256 MB of RAM.
Note This command is not added to the running-config.
Examples For example, to assign the metric “200” to a zone for all IP addresses within the range 203.0.0.0 to 203.255.255.255, enter:
# proximity assign 203.0.0.0/8 "200"
To perform the metric assignment for all IP addresses within the range 192.167.0.0 to 192.167.255.255, enter:
# proximity assign 192.167.0.0/16 "30 20 40 100 10 5"
To view the metric assignments for all IP addresses within the range of 192.167.0.0 to 192.167.255.255, enter:
# show proximity assign 192.167.0.0/16 IP/PrefixHits Zone Metrics----------------------------192.167.0.0/1610, 12330, 20, 40, 100, 10, 5
Related Commands proximity assign flushshow proximity assign
2-52Cisco Content Services Switch Command Reference
OL-5654-01
Chapter 2 CLI CommandsGeneral Commands
proximity assign flush
To remove all or specific existing proximity assignments configured with the proximity assign command, use the proximity assign flush command.
proximity assign flush {ip_address ip_prefix}
Syntax Description
Command Modes SuperUser
Usage Guidelines The proximity assign flush command is functional only on a Proximity Database CSS in a dedicated CSS 11150 with 256 MB of RAM.
ip_address ip_prefix (Optional) IP address and IP prefix length for the assignments you want to remove. Enter the address in dotted-decimal format (for example, 192.168.11.1).
Enter the prefix as either:
• A prefix length in CIDR bitcount notation (for example, /24).
• A subnet mask in dotted-decimal notation (for example, 255.255.255.0).
2-53Cisco Content Services Switch Command Reference
OL-5654-01
Chapter 2 CLI CommandsGeneral Commands
proximity clear
To remove all or specified entries from the proximity database, use the proximity clear command.
proximity clear {ip_address ip_prefix}
Syntax Description
Command Modes SuperUser
Usage Guidelines The proximity clear command is functional only on a Proximity Database CSS in a dedicated CSS 11150 with 256 MB of RAM.
ip_address ip_prefix (Optional) IP address and IP prefix length for the assignments you want to remove. Enter the address in dotted-decimal format (for example, 192.168.11.1).
Enter the prefix as either:
• A prefix length in CIDR bitcount notation (for example, /24).
• A subnet mask in dotted-decimal notation (for example, 255.255.255.0).
2-54Cisco Content Services Switch Command Reference
OL-5654-01

Chapter 2 CLI CommandsGeneral Commands
proximity commit
To write either a portion or all of the Proximity Database to a file in the log directory on the CSS disk or a file on an FTP server, use the proximity commit command. The database output contains metrics for all zones, the current advertisement state, and hit counts. You can retrieve this database by using the proximity retrieve command.
proximity commit {ip_address ip_prefix|entire-db {ftp ftp_record ftp_filename {bin}|log filename {bin}}}
Syntax Description ip_address ip_prefix (Optional) IP address and IP prefix length for the assignments you want to remove. Enter the address in dotted-decimal format (for example, 192.168.11.1).
Enter the prefix as either:
• A prefix length in CIDR bitcount notation (for example, /24).
• A subnet mask in dotted-decimal notation (for example, 255.255.255.0).
entire-db (Optional) Commits the entire Proximity Database when you want to use additional options to:
• Assign a specific name to the database file written to the disk other than the default filename, proximity.db.
• Write the database file to an FTP server. By default, the file is written to the CSS disk.
• Save the database in binary format. By default, the file is in XML-format.
ftp ftp_record ftp_filename
(Optional) Writes a specified file to an FTP server. Enter the name of an existing FTP record for an FTP server. The FTP record file contains the FTP server IP address, username, and password. To create an FTP record, use the (config) ftp-record command.
Also enter the filename to use when storing the Proximity Database to an FTP server.
2-55Cisco Content Services Switch Command Reference
OL-5654-01

Chapter 2 CLI CommandsGeneral Commands
Command Modes SuperUser
Usage Guidelines By default, when you enter the proximity commit command without any of its options, it writes the entire database to an XML-formatted file named proximity.db in the log directory on the CSS disk. You can optionally have the database encoded using compact binary encoding. You can also have the database written to a file on an FTP server.
Note A binary-encoded database occupies approximately one-third less space than an XML-formatted database.
The proximity commit command is functional only on a Proximity Database CSS in a dedicated CSS 11150 with 256 MB of RAM.
Related Commands proximity retrieve
log filename (Optional) Writes a specified file to the log directory on the CSS disk. Enter a filename with a maximum of 32 characters. By default, the filename is proximity.db.
bin (Optional) Stores the database file in compact binary format to disk or an FTP server.
2-56Cisco Content Services Switch Command Reference
OL-5654-01
Chapter 2 CLI CommandsGeneral Commands
proximity refine
To initiate automatic or manual refinement of metric entries in the Proximity Database, use the proximity refine command. The refinement process updates the metric entries for all clients in the database. To view the automatic probe rates on the CSS, use the show proximity refine command. Use the no form of this command to stop the automatic refinement process.
proximity refine {once}
no proximity refine
Syntax Description
Command Modes SuperUser
Usage Guidelines The proximity refine command is functional only on a Proximity Database CSS in a dedicated CSS 11150 with 256 MB of RAM.
Related Commands show proximity refine
once (Optional) Initiates the refinement process of metric entries manually. The refinement process occurs only once.
2-57Cisco Content Services Switch Command Reference
OL-5654-01
Chapter 2 CLI CommandsGeneral Commands
proximity reprobe
To reprobe existing IP addresses, use the proximity reprobe command. You can use this command to perform an immediate refresh of information contained within the database.
proximity reprobe ip_address {ip_prefix}
Syntax Description
Command Modes SuperUser
Usage Guidelines The proximity reprobe command is functional only on a Proximity Database CSS in a dedicated CSS 11150 with 256 MB of RAM.
Note IP addresses configured with the proximity assign command are not eligible for reprobing.
ip_address IP address to reprobe. Enter the address in dotted-decimal format (for example, 192.168.11.1).
ip_prefix (Optional) IP prefix to associate with ip_address to perform probing for a block of addresses. Enter the prefix as either:
• A prefix length in CIDR bitcount notation (for example, /24).
• A subnet mask in dotted-decimal notation (for example, 255.255.255.0).
2-58Cisco Content Services Switch Command Reference
OL-5654-01
Chapter 2 CLI CommandsGeneral Commands
proximity retrieve
To load a Proximity Database file from the CSS disk or an FTP server, use the proximity retrieve command. The proximity metrics from the database file replace any overlapping existing entries and supplement any non-overlapping entries.
proximity retrieve {ftp ftp_record ftp_filename|log filename}
Syntax Description
Command Modes SuperUser
Usage Guidelines By default, when you enter the proximity retrieve command without any of its options, it loads the proximity.db database file from the CSS disk. Optionally, you can load a specific database file from the disk or from an FTP server. This command can distinguish between XML and binary database formats automatically.
The proximity retrieve command is functional only on a Proximity Database CSS in a dedicated CSS 11150 with 256 MB of RAM.
ftp ftp_record ftp_filename
(Optional) Retrieves a file to an FTP server. Enter the name of an existing FTP record for an FTP server. The FTP record file contains the FTP server IP address, username, and password. To create an FTP record, use the (config) ftp-record command.
Also enter the Proximity Database filename locates on the FTP server.
log filename (Optional) Retrieves a specified file other than the proximity.db file from the log directory on the CSS disk.
2-59Cisco Content Services Switch Command Reference
OL-5654-01
Chapter 2 CLI CommandsGeneral Commands
rcmdTo issue remote CLI commands to a CSS peer, use the rcmd command.
rcmd ip_or_host “CLI_command {;CLI_command...}” {timeout_response} {script_filename}
Syntax Description
Command Modes SuperUser
ip_or_host IP address for the peer. Enter the address in dotted-decimal format (for example, 192.168.11.1) or mnemonic host-name format (for example, myname.mydomain.com).
“CLI_command” One or more CLI commands you want to issue to the peer. Enter the command, its options, and variables exactly. Enclose the command text string in quotes (“”). When entering multiple CLI commands, insert a semicolon (;) character to separate each command.
timeout_reponse (Optional) Amount of time, in seconds, to wait for the output command response from the peer. Enter an integer from 3 to 300 (5 minutes). The default is 3 seconds.
script_filename (Optional) Script filename where you want the output to direct when you enter the rcmd command. Enter an unquoted text string with no spaces and a maximum of 32 characters. The CSS saves the script in the /scripts directory on the CSS.
If you do not include a filename, the CSS directs the output to the screen where you entered the rcmd command.
2-60Cisco Content Services Switch Command Reference
OL-5654-01

Chapter 2 CLI CommandsGeneral Commands
Usage Guidelines By default, the APP session is configured to allow the CSS to send remote commands to a CSS peer. If this function is disabled, use the (config) app session command to enable it.
You cannot issue grep, grep within a script command, or redirect commands through the rcmd command.
Related Commands (config) app
redundancy force-masterTo force the backup CSS to be the master CSS, use the redundancy force-master command.
redundancy force-master
Command Modes SuperUser
Usage Guidelines You can enter the redundancy force-master command on the backup CSS if you did not explicitly designate the master CSS by using the (config) ip redundancy master command. If you did, you must unassign the master CSS by using the (config) no ip redundancy master command before you can enter the redundancy force-master command.
The forced-master CSS remains the master until it goes down and comes back up as the backup, or you manually make the other CSS the master.
The redundancy force-master configuration information is not saved to the running configuration.
If you want to designate the other CSS as the master, enter either of the following commands on the current backup CSS:
• Enter the redundancy force-master command if you want the current backup CSS to be a negotiated master. If a negotiated master CSS goes down, the backup CSS automatically becomes the master. When the former master CSS comes up again, it becomes the backup CSS.
2-61Cisco Content Services Switch Command Reference
OL-5654-01

Chapter 2 CLI CommandsGeneral Commands
• Enter the ip redundancy master command if you want the current backup to be the designated master. If the designated master CSS goes down and then comes up again, it regains its master status. For example, when the designated master CSS goes down, the backup CSS becomes the master. When the designated master CSS comes up again, it becomes the master again.
Related Commands show redundancy(config) ip redundancy
replicateTo start replicating between a publisher and all associated subscribers, use the replicate command.
replicate publisher_name {subscriber_name {force}}
Syntax Description
Command Modes SuperUser
publisher_name (Optional) Name of an existing publisher service. Resynchronizes any changes to content between the specified publisher and its subscriber services. If the content has not changed, no resynchronization occurs.
subscriber_name (Optional) Name of the subscriber service associated with the publisher service. Resynchronizes any changes to content between the specified publisher and the specified subscriber service. If the content has not changed, no resynchronization occurs.
force (Optional) Resynchronizes all content between the specified publisher and the specified subscriber service, whether or not content changes have occurred.
2-62Cisco Content Services Switch Command Reference
OL-5654-01
Chapter 2 CLI CommandsGeneral Commands
Usage Guidelines You can use the replicate command to replicate content to new subscribers or force resynchronization immediately.
When you configure content replication and staging, you must configure an URL in a content rule to define which files you want replicated. Add the subscriber services to the content rule.
Note If you want all files in all directories replicated, you do not need to create a content rule. Create a content rule to specify only those files you want replicated.
Related Commands (config-owner-content) url(config-service) publisher(config-service) subscriber
restoreTo restore a log, script, or startup configuration files that were previously archived on the CSS, use the restore command. The archive directory on the CSS disk stores the archive files.
restore archive_filename [log {log_filename}|script {script_filename}|startup-config]
Syntax Description archive_filename Name of the archived file. Enter an unquoted text string. To see a list of archived files, enter:
# restore ?
log Restores an archived file to the log directory.
log_filename (Optional) Name you want to assign to the restored log file. Enter an unquoted text string with a maximum length of 32 characters.
script Restores an archived file to the script directory.
2-63Cisco Content Services Switch Command Reference
OL-5654-01
Chapter 2 CLI CommandsGeneral Commands
Command Modes All modes
Usage Guidelines The archive directory resides on the CSS hard drive. If you booted your CSS from a network-mounted system and your hard drive is not functional, then archive- and restore-related functions are suspended.
Related Commands archivecopyscript(config) logging
script_filename (Optional) Name you want to assign to the script file. Enter an unquoted text string with a maximum length of 32 characters.
startup-config Restores an archived file to the startup configuration. The restored file overwrites the startup configuration.
2-64Cisco Content Services Switch Command Reference
OL-5654-01
Related Documents