Welcome message from author
This document is posted to help you gain knowledge. Please leave a comment to let me know what you think about it! Share it to your friends and learn new things together.
Transcript


2
Contents
Contents ................................................................................................................................. 2
Section 1: Getting started ............................................................................................................... 3
Support and resources ........................................................................................................... 3
Getting signed up ................................................................................................................... 4
Section 2: Conventions ................................................................................................................... 6
Section 3: Creating your business .................................................................................................. 7
Initial business details ............................................................................................................ 7
User preferences .................................................................................................................... 7
Section 4: Setting up Gatekeeper................................................................................................... 8
The Setup module .................................................................................................................. 8
Businesses and holdings ........................................................................................................ 9
Farms .................................................................................................................................... 10
Fields .................................................................................................................................... 11
Personnel ............................................................................................................................. 16
Equipment ............................................................................................................................ 18
Activities ............................................................................................................................... 19
Products ............................................................................................................................... 20
Section 5: Data Entry .................................................................................................................... 24
Jobs ...................................................................................................................................... 24
Inspections ........................................................................................................................... 27
Manage seasons ................................................................................................................... 28

3
Section 1: Getting started
This guide is designed to help you through the first stages of using your new Gatekeeper
application. Don’t worry if you are not able to set everything up at once, you can always add
or edit information at a later date.
You can refer to the different sections of this guide for help in the initial setup tasks that you
will need to carry out. These can be done all at once, or bit by bit as necessary.
Some sections of this guide may not apply to the version of Gatekeeper you are currently
subscribed to. For further information about the different versions of the application, please
contact Farmplan sales on 01594 545000.
Support and resources
For more detailed instructions on the use of Gatekeeper, or support for users, we have a
number of solutions to help you get the most out of the application.
Training
There is no substitute for personalised one-to-one training. We have a number of Farmplan
trainers around the country and we can arrange for someone who is local to you to visit you
at your business.
If you prefer training outside of your office, you can come to our offices in Norfolk,
Herefordshire or Sussex.
For shorter sessions on specific tasks or areas we can also log onto your computer remotely
and take you through training via the phone.
Help notes
Throughout the application you will find a ‘Help’ icon. Selecting this icon will open
the relevant help text in a new tab.
Farmplan support line – 01594 545022
Our dedicated customer support line is manned from 9am to 5pm, Monday to Friday, by
experienced and knowledgeable staff who can talk you through any queries that you may
have. It will help us to locate your details quickly if you have your customer number to hand
before you phone.
Alternatively, email us your question and customer number to [email protected] and
we will respond as soon as possible. Our inbox is checked regularly throughout the working
day.

4
Farmplan website – www.farmplan.co.uk
Keep an eye on our website for news and answers to frequently asked questions.
Application updates
Updates are released at intervals during the year and may contain new features, changes
and enhancements. You will receive a notification when a significant update has been
made but you will not need to do anything as it will be available to you automatically.
Getting signed up
Welcome email
You will receive an email shortly after your Gatekeeper account has been activated. This will
explain how to access your Gatekeeper subscription.
You can either setup a new password by using the link provided or use an existing Farmers
Weekly subscription which uses the same email address as your Gatekeeper subscription.
During your setup process, you will see information regarding cookies and your licence
agreement. If you have any queries about these policies, please contact Farmplan.

5
If you chose to setup a new password, the form below will be shown, allowing you to
choose a new password.
Once you have setup your new password, you will be required to enter this information to
log in to Gatekeeper.

6
Section 2: Conventions
Throughout Gatekeeper there are a number of symbols which have specific meanings:
*
Data entry is mandatory
Indicates something is editable
Will save the information
Will close the current form
Allows you to select
Shows something is selected
Allows you to deselect
Will delete the information
Allows you to filter the visible list by a criteria
Allows you to pick from a selector
Takes you to the next screen

7
Section 3: Creating your business
Initial business details
The first time that you use Gatekeeper you will need to enter a few basic details to create
your business.
Enter your Trading Name, Farm Name and CPH (holding) number. The current season will
be entered automatically as the Starting Season. You can move between seasons before
starting data entry.
N.B. For more information on seasons in Gatekeeper, see page 28.
User preferences
The first time that you use Gatekeeper you will also be asked to indicate if you are happy to
receive communications from us and our parent company, Proagrica. You may change
these details at a later date if you change your mind.

8
Section 4: Setting up Gatekeeper
The Setup module
Having completed the on-boarding process, you will be taken to the Setup module.
This module can be accessed at any point by selecting the Setup icon from the
sidebar.
The Setup module looks like this, but depending on your subscription level you may not see
all the icons below:
Before continuing, you can check that you are in the correct season. Seasons relate the
operations on a field to the crop that is being harvested. As an example, a wheat crop sown
in autumn 2018 and harvested in summer 2019, is regarded as the 2019 crop and season.
The season is displayed in the top right corner of your screen. If it
is not correct, you can adjust your season by selecting the arrow
next to the year displayed.
N.B. For more information on seasons in Gatekeeper, see page 28.

9
Businesses and holdings
Setup > Businesses is where your business details can be added and edited.
Businesses control their own stock centres and product pricing. Each business can have
multiple holdings or farms connected to it. You will also need to add holdings and farms as
required – the structure is shown above.
Your business name will have been entered during the on-boarding process. You will need
to add your business address and holding information.
To add a business
From the Setup module:
1. Select the Businesses icon
2. Select the + New Business button
3. Enter the required information and press the tick
4. Select the required business from the list and add the Address details
Please note, the ability to add additional businesses is dependent upon your Gatekeeper
version. If you need to add additional businesses but do not have the ability please call
Farmplan sales on 01594 545000 to upgrade.
To edit business details
From the Setup module:
1. Select the Businesses icon
2. Select the required business from the list
3. A drawer will appear showing the business details
4. Click on the form to edit the details
Farms
Holding
(CPH number)
Business
(Trading Name)Smith and
Son Ltd
12/345/6789
Home Farm
Church Farm
98/765/4321
Bullers Farm

10
Enter or edit the information found in the following sections:
Details Business name - The first business name is assigned during the on-
boarding process but can be amended if necessary in this form
Address Enter the business details as required
Holdings See below
To add a holding within a business
Holdings allow you to group farms and fields under the appropriate CPH number. You may
need to add additional holdings if your business has multiple CPH numbers.
To add the holding details, from the Setup module:
1. Open the business name you want to add a holding to
2. Click into the Holdings pane on the right hand side
3. Click + Add Holding
4. Enter the holding name and CPH number, and select a land parcel identification
option (for customers in the UK this will be ‘Map Sheep / NG number’, except for
Scottish customers who should select ‘Scottish LPID’).
Farms
Setup > Farms is where the farm details are held.
Farms allow you to group fields. You may wish to just have one farm, or to add multiple
farms to represent different groups of fields. When a field is setup, it is always assigned to a
specific farm.
Farms
Holding
(CPH number)
Business
(Trading Name)
Smith and Son
Ltd
12/345/6789
Home Farm
Church Farm
98/765/4321
Bullers Farm

11
To add a farm
From the Setup module:
1. Select the Farms icon
2. Select the + New Farm button
3. Enter the farm name
4. Select the business the farm belongs to
5. Select the holding the farm belongs to
6. By default the business address will be used. If you require a different address,
untick ‘Use business address’ and enter the required address
7. Click the tick to save
To edit a farm
Farms may be edited at any time. To do this, select the required record from within the
Farms module and update the relevant information before saving.
Fields
Setup > Fields is where you can setup the field details such as name, full area (ha), soil type
or NVZ region. These details are relevant to the field across all seasons. Within each field
record you can then allocate cropping for each season. Once cropping is entered for a
season, the field will then be available to record information.
To add a field
1. Select Fields from the sidebar or Fields from the Setup module
2. Select the + New Field button
3. A ‘New Field’ form will appear

12
Enter the information below:
4. Field Name
5. Farm
6. Holding – a holding will automatically be picked based on the farm selected but if
your business has more than one holding, you may need to change this selection
7. Full area (ha) – the total area of the field including any field margins etc.
8. Workable area (ha) – The area of the field that is croppable. This may be the same
figure as the full area, or if there are grass margins or uncropped areas of the field it
may be different. Please note, the actual cropped area for each season is setup later
and may include whole or split fields
9. NVZ region
10. Click the tick to save
If you are adding multiple fields, you may wish to tick the option ‘Add another’ after step 6
above. This will take you directly into another ‘New Field’ form after saving.
N.B. If you choose to ‘Add another’ at this point you will need to add the cropping before any
jobs can be recorded. For more information, see page 13.
After saving, a drawer will appear, showing the details you have added. To add further
information against a field, including soil information or a field boundary, click the
appropriate edit icon. Entering an NG or LPID number will cause the map to zoom to your
field location.

13
Allocating a crop to a field
Once a field is added, it must be activated within a season so that jobs and records may be
made against it. This is done by allocating a crop and working area to the field.
A field may be cropped as a whole field with a single crop, or with multiple crops, in which
case the field will need to be split to reflect the different crops. Field cropping can be split
to allow you to manage multiple production crops in a field or to record other areas such as
game cover or environmental schemes. Before adding any cropping information please
ensure you are in the correct cropping season.
N.B. For more information on seasons in Gatekeeper, see page 28.
To allocate a single crop to a whole field
1. Select the field from the Fields module
2. Check that you are within the tab
3. Move down to the Cropping form, and click Setup Areas
4. In the form that appears, enter a suffix if required. This is optional and will appear
after the field name if entered
5. Enter the area cropped. This is often different to the full area, for example, a field
with a full area of 12ha, might only have a cropped area of 11.5ha due to area
within tracks, field margins or uncroppable areas
6. Click the tick to continue. In the new form, select the correct land use option:
Crop Production For a field that is growing a crop for production, for example
wheat, potatoes, etc (in other words a crop that will be sold)
Fallow For a field that is fallow (not growing anything)
Other For a field that is growing something not for production or that
is part of a scheme or other land use, for example game cover,
environmental scheme

14
7. For crop production fields:
a. Select a crop by clicking into the list or typing to search
b. Select a variety using the same method
c. Enter any other information required (this will depend on the crop selected)
For other field uses, select a use from the menu.
To allocate multiple crops to a field
1. Select the field from the Fields module
2. Check that you are within the tab
3. Move down to the cropping form, and click Setup Areas
4. Enter a Suffix for the first part of the field (for example, ‘A’) and enter the working
area of the first part
5. Click + Add Part Field and enter a Suffix and Area. Repeat 4 and 5 as required.
6. Click the tick to continue. In the new form, select the correct land use option and
cropping information (see above), and use the arrows at the bottom of the form to
move on to the next part of the field

15
To view field information
Within the Fields module, fields are listed in alphabetical order.
The field list may be filtered to show the fields by usage categories. By selecting a filter from
the right hand side above the list, the visible list may be narrowed down to show ‘All fields’,
‘Fallow fields’, ‘Other land uses’, ‘Production crops’ and ‘Unused fields’.
For users with multiple businesses, the list may also be filtered by business.
To view information about a field, select it from the list and a drawer will appear. This
drawer may have multiple tabs that each provide different information about the selected
field. To view, click the relevant tab in the top left corner:
Details – for key information about a field, this year’s cropping and a previous
cropping history
Jobs summary – for a list of completed jobs
Nutrients – to see nutrients applied through fertiliser jobs
Sampling – to view the results of any soil analysis entered
Margin – to view the field’s margin figures
N.B. Tabs will only be visible if the relevant information exists.

16
To delete a field
Fields can only be deleted if the field is uncropped and has no records. If a field is deleted it
will be deleted for all seasons. If you only wish to delete a crop in a particular season, do not
try to delete the field – see deleting a crop below.
To delete a field;
1. Within the Fields module, find the field in the list
2. Click the delete icon, located on the right hand side of the page
3. A warning message will appear asking if you are sure that you want to delete the
Field - select Delete to confirm.
Deleting a crop from a field
A crop cannot be deleted from a field if it has any jobs or inspections associated with it. If a
crop is deleted it will be deleted from the season.
To remove the cropping information:
1. Make sure that the correct season is selected
2. Select the field from the Fields module
3. Under the Details tab at the top, select Setup in the Cropping section
4. Select the delete icon located on the right-hand side of the form
5. Click the tick to save
6. The form will be refreshed taking you back to the Field Details form
Personnel
Setup > Personnel is where details can be held for anyone who may be operating machinery
or dealing with chemicals, for example, your agronomist, tractor driver or sprayer operator.
These details can then be used for jobs and relevant reports.

17
To add a personnel record
From the Setup module:
1. Select the Personnel icon
2. Select the + New Personnel button
Enter the information below:
1. First Name
2. Last Name
3. E-mail
4. Roles – select the appropriate box that best describes the individual
5. Qualifications (including BASIS and FACTS number if Advisor role is selected)
6. Address
7. Town
8. County
9. Postcode
10. Country
11. Landline Phone Number
12. Mobile Phone Number
To view a personnel record
All personnel are listed on the personnel section, accessed through the Setup module. If you
need to view a particular personnel’s full details select the desired personnel record.
To edit a personnel record
Personnel records may be edited at any time. To do this, select the required record from
within the personnel section of the Setup module and update the relevant information
before saving.
To delete a personnel record
Personnel records can be deleted, providing they have not been used within a record.
From the Setup module:
1. Click Personnel
2. Find the person you wish to delete
3. Click the delete icon, located on the right hand side of the page
4. A warning message will appear asking if you are sure that you want to delete the
personnel - select Delete to confirm.

18
Equipment
Setup > Equipment is where implements and machines that are used in Jobs should be
added.
To add equipment
From the Setup module:
1. Select the Equipment icon
2. Select the + New Equipment button
Enter the information below:
1. Equipment Name
2. Type – use the drop-down list to select the appropriate equipment type
3. Reference – for example, the machine’s model, make or serial number
4. If you have another piece of equipment to add this can be done by ticking ‘Add
another’ before you save
To view equipment
Your equipment is listed on the Equipment section, accessed through the Setup module. If
you need to view a particular equipment’s full details select the desired piece of equipment.
To edit equipment
Equipment records may be edited at any time. To do this, select the required record from
within the Equipment section of the Setup module and update the relevant information
before saving.
To delete equipment
Equipment records can be deleted, providing they have not been used within a record.

19
From the Setup module:
1. Click Equipment
2. Find the equipment you wish to delete
3. Click the delete icon, located on the right hand side of the page
4. A warning message will appear asking if you are sure that you want to delete the
equipment - select Delete to confirm.
Activities
Setup > Activities is where tasks that are carried out on a field are managed. They allow you
to record a task taking place and also to associate a cost with that task. Examples of
activities would include ploughing, spraying, and rolling.
An activity must be associated with an activity type and may be given a unit price per ha.
An activity is selected when creating a job and allows you to see how much the activity will
cost, based upon the fields selected and their target area (ha).
Some activity types require a product to be selected in the same job, whereas others do
not. For example, an activity type of spraying must have at least one product selected in a
job, whereas an activity type of tillage does not require a product to be selected in a
job. You will also be able to select the equipment needed to carry out the job.
To add an activity
From the Setup module:
1. Select the Activities icon
2. Select the + New Activity button
Enter the information below:
1. Activity Name

20
2. Type of Activity
3. Press the tick to proceed
4. In the price section, enter the cost per hectare. If you have multiple businesses, you
can add a different price for different businesses.
To view an activity
All activities are listed on the Activities section, accessed through Setup module. If you need
to view a particular activities full details select the desired activity record.
To edit an activity
Activity records may be edited at any time. To do this, select the required record from
within the Activities section of the Setup module and update the relevant information
before saving.
To delete an activity
Activity records can be deleted, providing they have not been used within a record.
From the Setup module:
1. Click Activities
2. Find the activity you wish to delete
3. Click the delete icon, located on the right hand side of the page
4. A warning message will appear asking if you are sure that you want to delete the
activity - select Delete to confirm.
Products
Setup > Products allows you to create a list of products that will be used on fields when you
record jobs.
Product information can be added prior to entering the job, in the Setup module, or while
creating a job.

21
To add a pesticide product
Pesticide products are selected from our pesticide database. This enables us to provide
information such as active ingredient and MAPP number.
From the Setup module:
1. Select the Products icon
2. Select + New Product button
3. Select Pesticide. The ‘Add Pesticide from Sentinel’ pane will open
4. Start typing in the text bar to search for the product you wish to add (on the line that
reads Filter Text)
5. When the list below the ‘filter text’ bar populates with product options, select the
product you wish to add. You will note the product is now highlighted and the add
symbol has now changed to a minus symbol
6. If no product name appears, make sure the ‘Filter by’ dropdown is set to ‘All
Pesticides’
N.B. Take care to make sure the correct MAPP number has been selected along with the
correct product name.
7. Click the tick and in the new drawer that opens:
8. Enter a default rate for this product – this is optional. A product with a default rate
will display this rate any time it is selected into a job, although it also can be edited in
the job if required.
9. Enter a unit price. For Gatekeeper Express customers, this unit price is the cost that
will be allocated to fields when this product is used. For Express Plus and Advanced
customers, the price entered will only be used until an average unit price can be
calculated from the trading information entered.

22
To edit pesticide products
Only the information that is manually entered can be edited. The information that is pre-
populated from our pesticide list cannot be edited.
Manually entered details can be edited by selecting the required product from within the
Product module and updating the relevant information before saving.
If the wrong product has been setup you will need to delete it and add the correct product.
For deleting products, please see page 23.
To add other products
This method is used to add any other product used on a field that isn’t a registered plant
protection product – for example, trace elements, fertilisers or seed.
From the Setup module:
1. Select the Products icon
2. Select the + New Product button
3. Select Other and in the ‘New Product’ pane:
a. Enter a Product Name
b. Select a Product Type
c. Select a Unit Type
d. Select a Unit
e. For organic manure product types only: select a manure type
f. Enter a Default Rate if required
4. Click the tick to save. In the new drawer that opens:
5. Enter a default rate for this product – this is optional. A product with a default rate
will display this rate any time it is selected into a job, although it can also be edited in
the job if required.
6. Enter a unit price. For Gatekeeper Express customers, this unit price is the cost that
will be allocated to fields when this product is used. For Express Plus and Advanced
customers, the price entered will only be used until an average unit price can be
calculated from the trading information entered.
7. For fertiliser products and organic manures:
a. Select the Nutrients section
b. Select nutrients in your fertiliser product from the list on the left
c. Enter the nutrient percentage on the right
To edit other products
Other Products can be edited at any time. To do this, select the required record from within
the Products module and update the relevant information before saving.
23
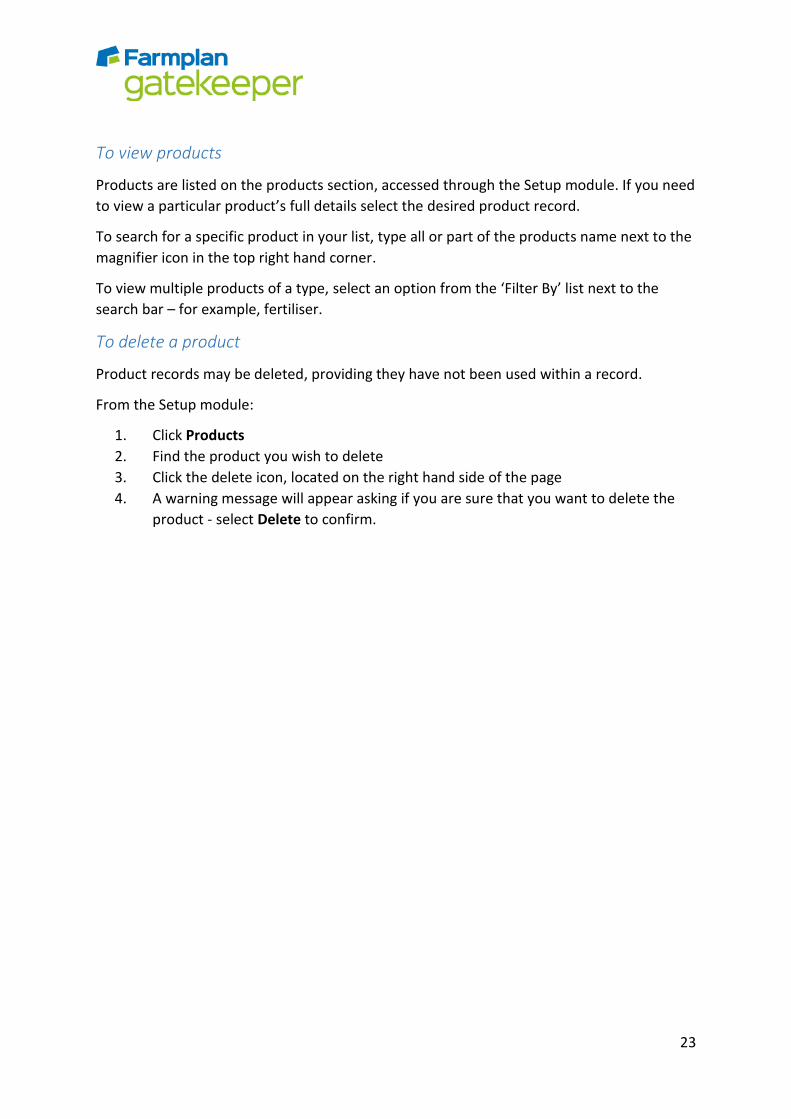
To view products
Products are listed on the products section, accessed through the Setup module. If you need
to view a particular product’s full details select the desired product record.
To search for a specific product in your list, type all or part of the products name next to the
magnifier icon in the top right hand corner.
To view multiple products of a type, select an option from the ‘Filter By’ list next to the
search bar – for example, fertiliser.
To delete a product
Product records may be deleted, providing they have not been used within a record.
From the Setup module:
1. Click Products
2. Find the product you wish to delete
3. Click the delete icon, located on the right hand side of the page
4. A warning message will appear asking if you are sure that you want to delete the
product - select Delete to confirm.
24
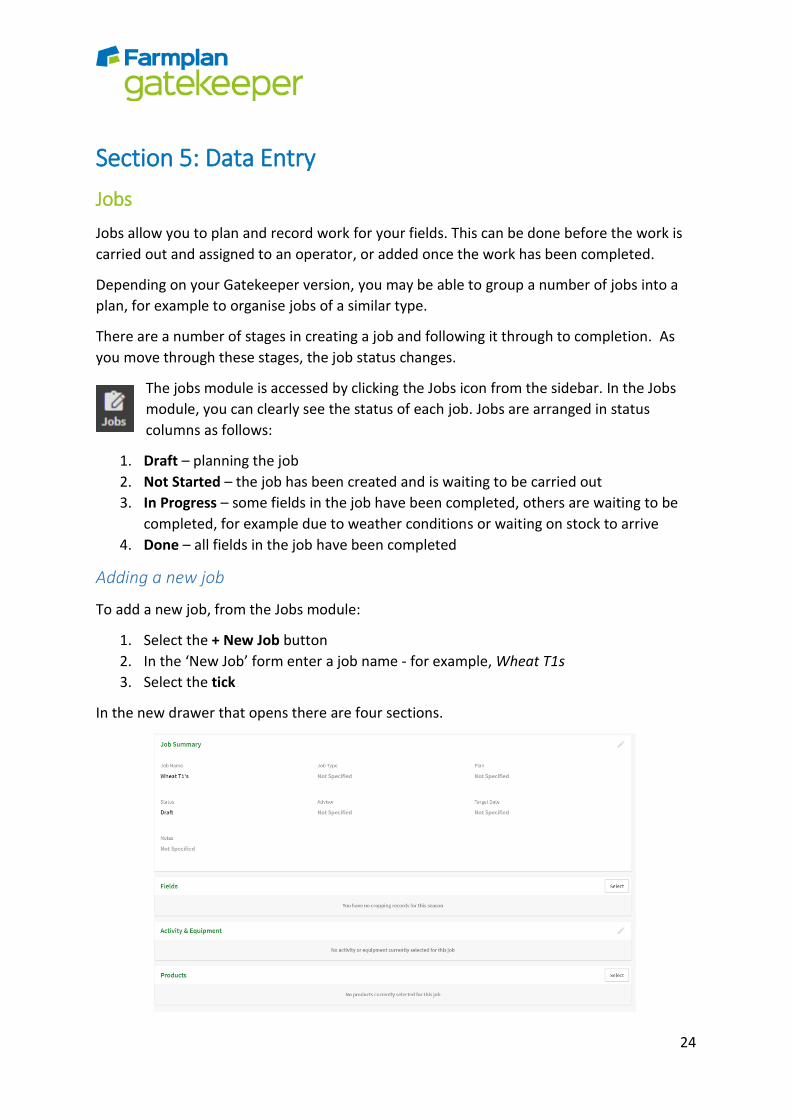
Section 5: Data Entry
Jobs
Jobs allow you to plan and record work for your fields. This can be done before the work is
carried out and assigned to an operator, or added once the work has been completed.
Depending on your Gatekeeper version, you may be able to group a number of jobs into a
plan, for example to organise jobs of a similar type.
There are a number of stages in creating a job and following it through to completion. As
you move through these stages, the job status changes.
The jobs module is accessed by clicking the Jobs icon from the sidebar. In the Jobs
module, you can clearly see the status of each job. Jobs are arranged in status
columns as follows:
1. Draft – planning the job
2. Not Started – the job has been created and is waiting to be carried out
3. In Progress – some fields in the job have been completed, others are waiting to be
completed, for example due to weather conditions or waiting on stock to arrive
4. Done – all fields in the job have been completed
Adding a new job
To add a new job, from the Jobs module:
1. Select the + New Job button
2. In the ‘New Job’ form enter a job name - for example, Wheat T1s
3. Select the tick
In the new drawer that opens there are four sections.

25
In the Job Summary section (all actions optional):
1. Select a Job Type
2. For Express Plus or Advanced users only: select a Plan if required
3. Select an Advisor
4. Select a Target Date
5. Add a Note
In the Fields section:
1. Click Select to open the field selector. All fields are listed alphabetically.
2. If required, filter the list by selecting the filter parameter and typing the filter you
want to use – for example, select filter type ‘Crop type’ and enter the filter ‘Wheat’.
The fields list will now show only fields with a crop of wheat.
3. Select fields required for the job or use the Select all button to select all visible
fields.
4. To remove any fields from the ‘Selected Fields’ list, click the deselect icon or use the
Remove all button to deselect all fields.
5. To add the selected fields to the Job click the tick.
6. Notes can be added to the field by clicking on it within the Fields form. A pop-up will
appear where you can add notes or edit the target area.
In the Activity & Equipment section:
1. Select an Activity
2. Select an Operator
3. If the activity type selected was a spraying type, in the settings section:
a. Enter a Water Rate
b. Select a Nozzle Rating
c. Select a Spray Quality
4. Select a piece of equipment
If you do not have the correct activity or piece of equipment already setup, you can
shortcut to the appropriate setup section by clicking on the plus.
In the Products section:
1. Click Select to open the product selector. All products are listed alphabetically.
2. If required, filter the list by selecting the filter parameter and typing the filter you
want to use – for example, select filter type ‘Fungicide’. The list will now only show
fungicide products.
3. Select products required for the job
4. For each selected product, enter a rate/ha or total quantity to use
5. To add the selected products to the Job click the tick

26
6. Notes can be added to a product by clicking on it within the Products form. A pop up
will appear where you can add notes or the rate and total quantity of the selected
product.
If you do not have the correct product already setup, you can shortcut to the appropriate
setup section by clicking on + Add New Product
The job is now complete with information. To come back to this job at a later date, you can
close it and leave it as a ‘Draft’ job waiting to be carried out.
If you are ready to carry out the work in the job, select Ready. The job will be moved from
‘Draft’ to ‘Not Started’ status. You can now print a worksheet to give to an operator - see
‘Job worksheet’ below.
If you have already completed the work in the job you can now record the work done and
job observations – see ‘Adding work done to a job’ below.
Job worksheet
Worksheets can be printed to give to an operator. Worksheets provide clear instructions
but also give the operator a form that they can use to collect information including:
Total amount of product used
Date and time of application
Observed weather conditions
The information on the completed worksheet can then be used to record the actual work
done in Gatekeeper.
Creating a worksheet
If a worksheet is needed, select the PDF Create Worksheet icon located in the top
right hand corner of the job. A message will appear asking if you would like to view
the PDF and it will open in a new browser tab.
Adding work done to a job
The status of a job will remain as ‘Not started’ until at least one field has completed job area
and date entered.
If one or more fields are completed, then the job status will be ‘In Progress’.
To record the work done for a job, from the Jobs module:
1. Select the job from either the ‘Not Started’ or ‘In Progress’ status columns
2. Click in the ‘Time and Observations’ section and in the form that opens enter the
information as required. Actual area and completed date are compulsory fields
3. To enter data for the next field, tick ‘Go to next field’
4. Click the tick to save/continue
27
5. If required, HSE checklist information can be recording by clicking into the ‘HSE
Checklist’ section and ticking boxes as required
6. If required, the total product may be adjusted from the original planned amount by
opening the ‘Products’ section
7. Once all job details have been entered, select the Complete Job button located in
the bottom right hand corner of the form
You will be taken back to the jobs form and the job will now be categorised as ‘Done’.
Once a job has been completed, it is possible to edit time and observations fields, water rate
and equipment used, and total product used. This is done by selecting the job from the Jobs
module.
To delete a job
Job records may be deleted at any stage.
From the Jobs module:
1. Identify the job to remove
2. Click the delete icon, located on the right hand side of the page
3. A warning message will appear asking if you are sure that you want to delete the Job
- select Delete to confirm.
It is not possible to reinstate a job that has been incorrectly deleted.
Inspections
Inspections are used to record observation information against fields, including a field
inspection or the results of soil sampling.
Inspections can be viewed in the Inspections module. Soil sampling results will
also be visible against the appropriate fields.
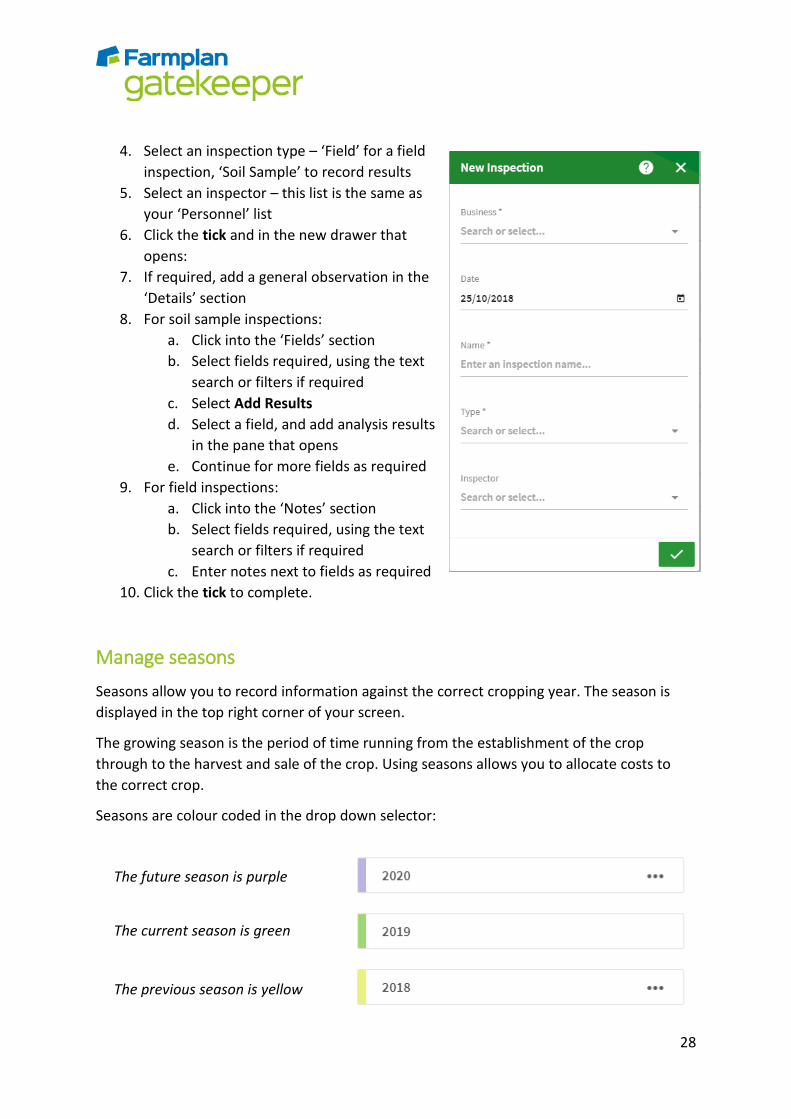
To add an inspection
From the Inspections module:
1. Select the + New Inspection button. A New Inspection form will appear
2. If you have multiple businesses, select the business required
3. Enter an inspection name
28
4. Select an inspection type – ‘Field’ for a field
inspection, ‘Soil Sample’ to record results
5. Select an inspector – this list is the same as
your ‘Personnel’ list
6. Click the tick and in the new drawer that
opens:
7. If required, add a general observation in the
‘Details’ section
8. For soil sample inspections:
a. Click into the ‘Fields’ section
b. Select fields required, using the text
search or filters if required
c. Select Add Results
d. Select a field, and add analysis results
in the pane that opens
e. Continue for more fields as required
9. For field inspections:
a. Click into the ‘Notes’ section
b. Select fields required, using the text
search or filters if required
c. Enter notes next to fields as required
10. Click the tick to complete.
Manage seasons
Seasons allow you to record information against the correct cropping year. The season is
displayed in the top right corner of your screen.
The growing season is the period of time running from the establishment of the crop
through to the harvest and sale of the crop. Using seasons allows you to allocate costs to
the correct crop.
Seasons are colour coded in the drop down selector:
The future season is purple
The current season is green
The previous season is yellow

29
Gatekeeper will default to the active season when it is opened.
To move between existing seasons
1. Select the year in the top right corner
2. Select the year you wish to view
All the field records displayed will now be relevant to the selected season.
To add a new season
1. Select the year in the top right corner
2. Select the icon
3. Select the icon
4. Select the year you wish to add from the available years
The new season will be added to your season selector list.
To make a season the active season
When you are ready to change the current season, i.e. to start planning or recording Jobs to
a new season you will need to make that year the Active Season.
1. Select the year in the top right corner
2. Select Manage Seasons
3. Next to the year you wish to make active, select the three dot icon
4. Select Active Growing Season to start a new season without carrying forward any
pricing from the previous season. You will then need to enter all prices for the new
season.
Select Active Growing Season (with previous season prices) to bring forward pricing
from the previous season. You will still be able to edit any prices that are brought
forward from the previous season.
5. When finished press Done
Changing the active season does not affect any field details or job information in the years
affected by the change.

30
Farmplan Computer Systems
Alton House
Alton Road
Ross-on-Wye
Herefordshire
HR9 5BP
Phone: 01594 545022
Fax: 01594 545012
www.farmplan.co.uk
Related Documents