FREEZER - MODEL FZA34, FZM34-FZA36P-FZA36G INSTRUCTIONS FOR INSTALLATION & USE GETTING STARTED: To ensure that your freezer runs reliably and efficiently follow these steps. Choose a location for your freezer, away from any heat sources and allow adequate ventilation - 30mm (1 1 /4 inches) gap above. Level the freezer by adjusting the front feet. This will stop rocking or vibration and keep the door aligned. Plug in and switch on. Allow the freezer to cool before placing food inside. The high temperature light will stay on until the freezer has cooled down. All food in the freezer should be covered. Move the freezer into position, using the sides of the cabinet. Take care to avoid damaging the refrigerant circuit pipe work on the rear. Before plugging in and switching on, leave the freezer in its final location for at least 15 minutes to allow it to settle. If you are freezing fresh food, turn on fast freeze by pressing the switch 24 hours before placing the food inside. Place the fresh food inside. Read the rest of these instructions to get the best from your appliance and remember to fill in your guarantee registration. Keep this Book in a safe place for quick reference. STEP 1 STEP 2 STEP 3 STEP 4 STEP 5 STEP 6 SAFETY & INSTALLATION CONTROLS USEFUL ADVICE CLEANING & MAINTENANCE TROUBLESHOOTING SERVICE & GUARANTEE Your freezer is now working. If after 24 hours your freezer is not operating as you want, refer to the TROUBLESHOOTING section. STEP 7 NB. The spanner is for illustration only and is not supplied with the freezer. Remember to turn fast freeze off after 24 hours, however if you forget to do so it will automatically cancel after 48 hours.

Welcome message from author
This document is posted to help you gain knowledge. Please leave a comment to let me know what you think about it! Share it to your friends and learn new things together.
Transcript

FREEZER - MODEL FZA34, FZM34-FZA36P-FZA36G
INSTRUCTIONS FOR INSTALLATION & USE
GETTING STARTED: To ensure that your freezer runs reliably and efficiently follow these steps.
Choose a location for yourfreezer, away from any
heat sources and allowadequate ventilation -
30mm (11/4 inches) gap above.
Level the freezer byadjusting the front feet.This will stop rocking or
vibration and keep thedoor aligned.
Plug in and switch on.Allow the freezer to cool
before placing foodinside.
The high temperaturelight will stay on until thefreezer has cooled down.
All food in the freezershould be covered.
Move the freezer intoposition, using the sidesof the cabinet. Take careto avoid damaging therefrigerant circuit pipework on the rear.
Before plugging in andswitching on, leave thefreezer in its final location for at least 15minutes to allow it to settle.
If you are freezing freshfood, turn on fast freeze bypressing the switch 24hours before placing thefood inside.Place the fresh foodinside.
Read the rest of these instructions to get the best from your appliance and remember to fill in your guarantee registration.
Keep this Book in a safe place for quick reference.
STEP 1 STEP 2
STEP 3 STEP 4
STEP 5 STEP 6
SAFETY &
IN
STALLA
TION
CO
NTR
OLS
USEFU
L AD
VIC
EC
LEAN
ING
&M
AIN
TENA
NC
ETRO
UBLESH
OO
TING
SERV
ICE &
GU
AR
AN
TEE
Your freezer is nowworking.If after 24 hours yourfreezer is not operating asyou want, refer to theTROUBLESHOOTINGsection.
STEP 7
NB. The spanner is for illustrationonly and is not supplied with the
freezer.
Remember to turn fast freeze offafter 24 hours, however if youforget to do so it will automaticallycancel after 48 hours.
For Your Safety
For your safety, read the following advice:
The freezer cooling system contains a small amount of gas which is environmentallyfriendly but flammable. To avoid any risk :-
● Install the freezer following the installation instructions and ensure that ventilation openings are kept clear of obstruction.
● Take care when installing or moving the freezer to avoid damaging the pipes on the rear.
● If you suspect a leak, do not switch on the freezer, but open the windows and doors to ventilate the room.
● Do not use any electrical devices inside the freezer, for instance for defrosting.
● Do not use any mechanical devices for defrosting other than any which may have been supplied with the freezer, as they may cause damage.
● Only use this freezer for storing domestic foodstuffs.
When installing your freezer :-
● Ensure that the mains cable is not trapped underneath or behind the freezer when you install or move it.
● Do not stack any other appliance on top of this freezer as they may damage the freezer or become unstable.
When using your freezer :-
● Do not sit or stand on top of your freezer.● Do not store poisonous, flammable or dangerous substances in your freezer.● Do not use aerosol sprays for defrosting or cleaning your freezer.
If you sell the freezer, pass on this booklet to the new owner.
2
SAFE
TY &
IN
STA
LLA
TIO
N
Installation
Location & Air Circulation
Locate your freezer away from sources of heat e.g.cookers, radiators, direct sunlight as extreme temperaturewill affect its performance.
Allow a minimum 30mm (11/4 inches) between the top ofthe freezer and the underside of the worktop.
Providing you follow the recommended ventilation requirements you will :-● Prolong the life of the freezer.● Minimise the risk of condensation on the outside of the freezer.● Minimise the running costs.● Minimise operating sounds caused by vibration.
3
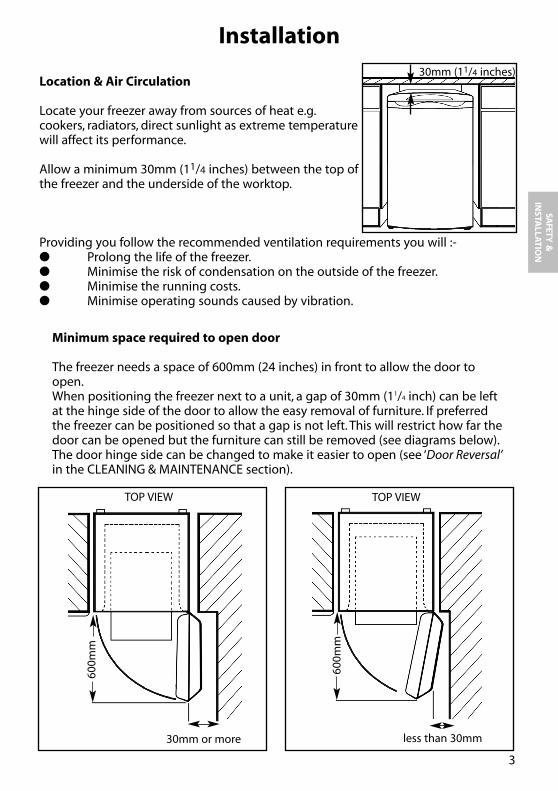
Minimum space required to open door
The freezer needs a space of 600mm (24 inches) in front to allow the door toopen.When positioning the freezer next to a unit, a gap of 30mm (11/4 inch) can be leftat the hinge side of the door to allow the easy removal of furniture. If preferredthe freezer can be positioned so that a gap is not left. This will restrict how far thedoor can be opened but the furniture can still be removed (see diagrams below).The door hinge side can be changed to make it easier to open (see ‘Door Reversal’in the CLEANING & MAINTENANCE section).
SAFETY &
IN
STALLA
TION
TOP VIEW TOP VIEW
less than 30mm30mm or more
600m
m
600m
m
30mm (11/4 inches)
Installation
Levelling:Level the freezer when it is in its final location by adjusting the front feet, until firmcontact is made with the floor. This will stop rocking or vibration and keep the dooraligned which helps the freezer run reliably and efficiently.
Note: Before plugging in and switching on, leave the freezer standing in its final location for at least 15 minutes to allow it to settle.
Fitting a Freezer under a Work TopTo minimise running costs Hotpoint recommend fitting a vent to the rear of yourworktop, which is available from Hotpoint Genuine Parts & Accessories Mail OrderHotline (see KEY CONTACTS, back page).
WARNING: If there is less than 30mm (11/4 inches) clearance above the freezer, aVent must be fitted to provide adequate ventilation above your freezer.
4
SAFE
TY &
IN
STA
LLA
TIO
N
Installation
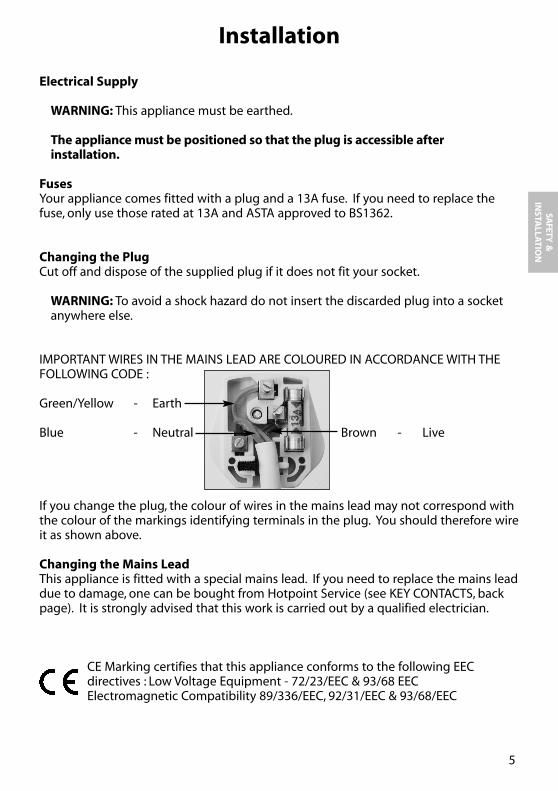
Electrical Supply
WARNING: This appliance must be earthed.
The appliance must be positioned so that the plug is accessible afterinstallation.
FusesYour appliance comes fitted with a plug and a 13A fuse. If you need to replace thefuse, only use those rated at 13A and ASTA approved to BS1362.
Changing the PlugCut off and dispose of the supplied plug if it does not fit your socket.
WARNING: To avoid a shock hazard do not insert the discarded plug into a socketanywhere else.
IMPORTANT WIRES IN THE MAINS LEAD ARE COLOURED IN ACCORDANCE WITH THEFOLLOWING CODE :
Green/Yellow - Earth
Blue - Neutral Brown - Live
If you change the plug, the colour of wires in the mains lead may not correspond withthe colour of the markings identifying terminals in the plug. You should therefore wireit as shown above.
Changing the Mains LeadThis appliance is fitted with a special mains lead. If you need to replace the mains leaddue to damage, one can be bought from Hotpoint Service (see KEY CONTACTS, backpage). It is strongly advised that this work is carried out by a qualified electrician.
CE Marking certifies that this appliance conforms to the following EECdirectives : Low Voltage Equipment - 72/23/EEC & 93/68 EECElectromagnetic Compatibility 89/336/EEC, 92/31/EEC & 93/68/EEC
5
SAFETY &
IN
STALLA
TION
Controls
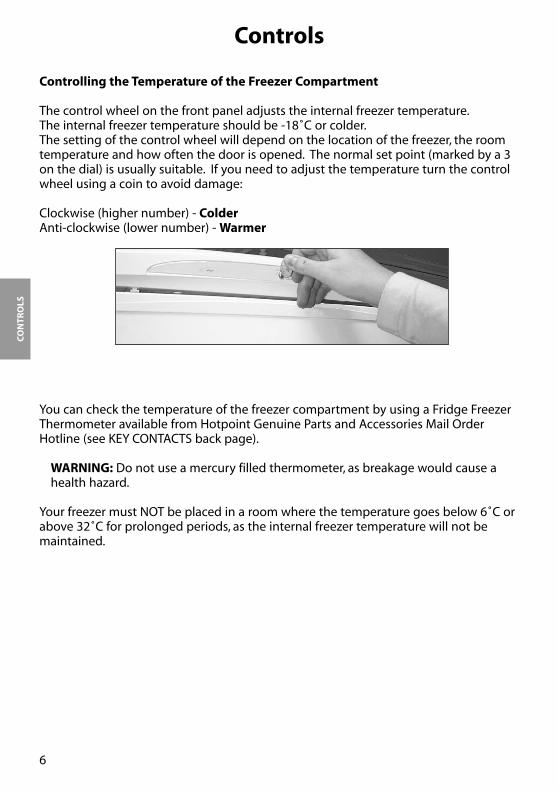
Controlling the Temperature of the Freezer Compartment
The control wheel on the front panel adjusts the internal freezer temperature.The internal freezer temperature should be -18˚C or colder.The setting of the control wheel will depend on the location of the freezer, the roomtemperature and how often the door is opened. The normal set point (marked by a 3on the dial) is usually suitable. If you need to adjust the temperature turn the controlwheel using a coin to avoid damage:
Clockwise (higher number) - ColderAnti-clockwise (lower number) - Warmer
6
You can check the temperature of the freezer compartment by using a Fridge FreezerThermometer available from Hotpoint Genuine Parts and Accessories Mail OrderHotline (see KEY CONTACTS back page).
WARNING: Do not use a mercury filled thermometer, as breakage would cause ahealth hazard.
Your freezer must NOT be placed in a room where the temperature goes below 6˚C orabove 32˚C for prolonged periods, as the internal freezer temperature will not bemaintained.
CO
NTR
OLS
Controls
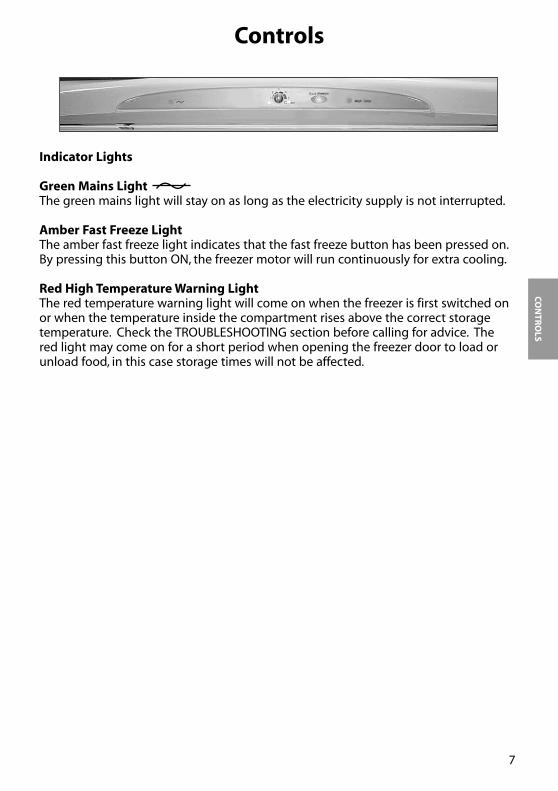
Indicator Lights
Green Mains LightThe green mains light will stay on as long as the electricity supply is not interrupted.
Amber Fast Freeze LightThe amber fast freeze light indicates that the fast freeze button has been pressed on.By pressing this button ON, the freezer motor will run continuously for extra cooling.
Red High Temperature Warning LightThe red temperature warning light will come on when the freezer is first switched onor when the temperature inside the compartment rises above the correct storagetemperature. Check the TROUBLESHOOTING section before calling for advice. Thered light may come on for a short period when opening the freezer door to load orunload food, in this case storage times will not be affected.
77
CO
NTR
OLS
Controls
8
CO
NTR
OLS
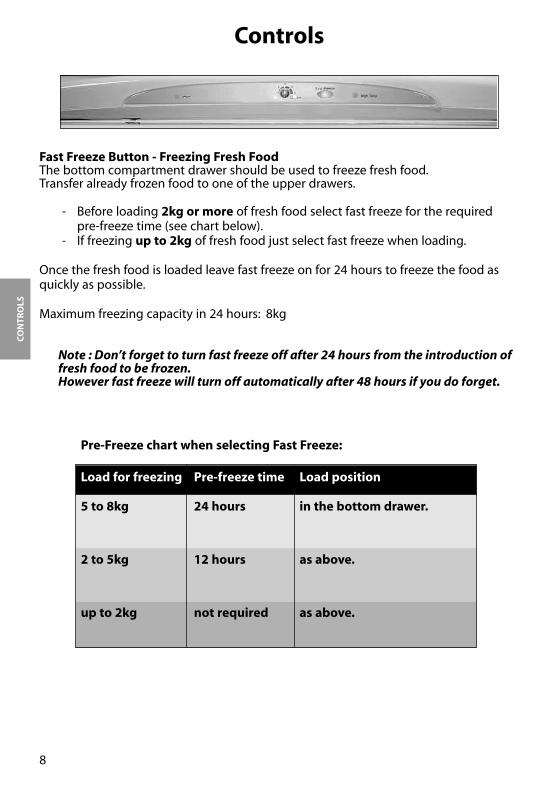
Fast Freeze Button - Freezing Fresh FoodThe bottom compartment drawer should be used to freeze fresh food.Transfer already frozen food to one of the upper drawers.
- Before loading 2kg or more of fresh food select fast freeze for the required pre-freeze time (see chart below).
- If freezing up to 2kg of fresh food just select fast freeze when loading.
Once the fresh food is loaded leave fast freeze on for 24 hours to freeze the food asquickly as possible.
Maximum freezing capacity in 24 hours: 8kg
Note : Don’t forget to turn fast freeze off after 24 hours from the introduction of fresh food to be frozen.However fast freeze will turn off automatically after 48 hours if you do forget.
Pre-Freeze chart when selecting Fast Freeze:
Load for freezing Pre-freeze time Load position
5 to 8kg 24 hours in the bottom drawer.
2 to 5kg 12 hours as above.
up to 2kg not required as above.
Useful Advice
9
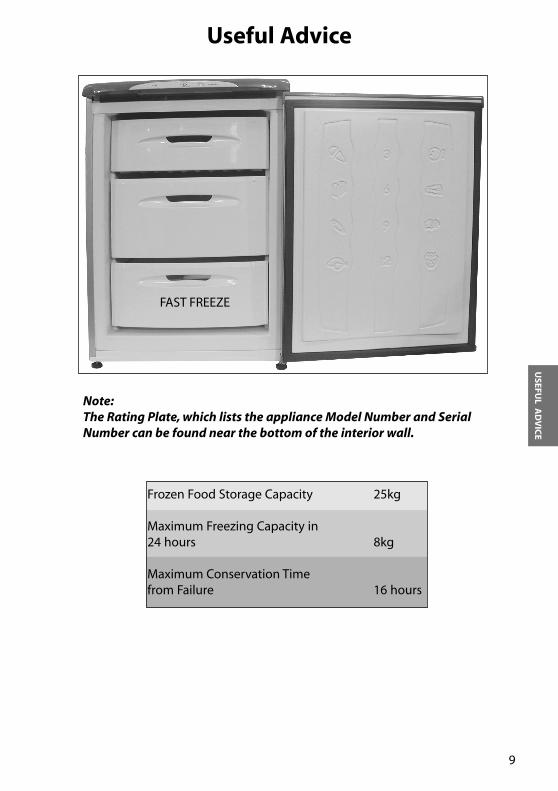
Note:The Rating Plate, which lists the appliance Model Number and SerialNumber can be found near the bottom of the interior wall.
Frozen Food Storage Capacity 25kg
Maximum Freezing Capacity in24 hours 8kg
Maximum Conservation Timefrom Failure 16 hours
USEFU
L AD
VIC
E
FAST FREEZE

Useful Advice
10
Making the best use of your Freezer
Note : Always use the handle provided to open the freezer door.To ensure that your freezer operates as efficiently as possible :● Follow food packaging “best before/use by” instructions or your suppliers
advice on a suitable maximum storage time.● Keep foods tightly covered to retain moisture and prevent flavour/odour
transference. Plastic bags, aluminium foil, plastic stretch wrap and containerswith lids are ideal.
● Select chilled and frozen food last when shopping, transport in a ‘cool bag’and place in freezer as soon as possible after arriving home.
● Avoid opening the door unnecessarily or for longer than needed.● Allow hot or warm food to cool down in covered containers before placing in
the freezer, as placing hot food inside reduces efficiency.● Prepare fresh foods for freezing in small quantities to ensure that the food
freezes quickly and so that its quality does not deteriorate.● Ensure that packets/containers of food are dry before freezing otherwise
they may freeze together.
USE
FUL
AD
VIC
E
How Frost Free works
The frost free system completely eliminates the need for defrosting.
A fan circulates air around the freezer. This helps to remove moisture from thecompartment, therefore preventing the build up of ice.It is normal to hear the fan when the freezer is cooling.
Additional benefits of the frost free system include:● More even temperatures throughout the freezer.● Faster cooling times.
Useful Advice
11
USEFU
L AD
VIC
E
Storing Food in a Freezer● Freeze and store either fresh food or long
term commercially frozen foods.● Generally speaking long term storage means
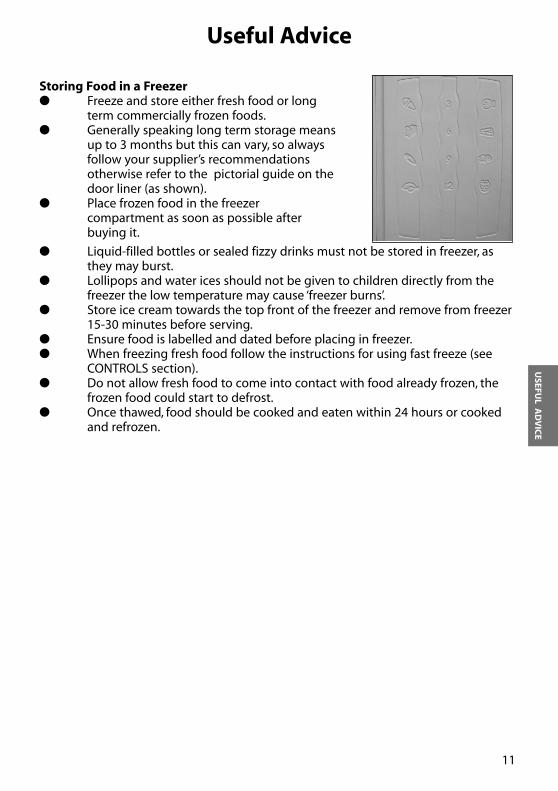
up to 3 months but this can vary, so always follow your supplier’s recommendations otherwise refer to the pictorial guide on the door liner (as shown).
● Place frozen food in the freezer compartment as soon as possible after buying it.
● Liquid-filled bottles or sealed fizzy drinks must not be stored in freezer, as they may burst.
● Lollipops and water ices should not be given to children directly from the freezer the low temperature may cause ‘freezer burns’.
● Store ice cream towards the top front of the freezer and remove from freezer 15-30 minutes before serving.
● Ensure food is labelled and dated before placing in freezer.● When freezing fresh food follow the instructions for using fast freeze (see
CONTROLS section).● Do not allow fresh food to come into contact with food already frozen, the
frozen food could start to defrost.● Once thawed, food should be cooked and eaten within 24 hours or cooked
and refrozen.
Useful Advice
12
USE
FUL
AD
VIC
E
Advice on Using Freezer DrawersThe freezer compartments must be used with the drawers.
The storage drawers can be easily removed. Pull the drawer towards you until itreaches it’s stop position. Hold securely on both sides, lift the front of the drawer torelease and remove. For cleaning advice see CLEANING & MAINTENANCE section.
Ensure that the frozen food storage drawer are pushed back fully before closing thedoor.Food can be separated into different storage drawers for easy identification.
When lifting or removing the large deep drawer it is important to hold the sidehandles and not the front handle.
WARNING: The freezer drawers can become heavy when fully loaded with food. Caremust be taken if attempting to lift or carry a full freezer drawer. It is recommended toremove the required food, rather than the whole freezer drawer.
Note : It is important not to touch or move any of the freezer drawers/parts with wet hands as it may cause freezer burn or discomfort.
Ice TrayWhen making ice, always use the tray with the lid provided. Take care not to overfillwith water.Uncovered food should not be placed near the ice tray as it can affect the flavour ofthe ice.
Note : Empty, wash and refill the ice tray periodically to ensure freshness.
Cleaning
13
Cleaning
WARNING: Switch off electrical supply and pull out mains plug before cleaning.
Interior
WARNING: Do not use abrasive powder, household cleaner, bleach or wax polish to clean the interior, they will leave a smell in the freezer.
1. Remove stored food, wrap or cover it and place into insulated containers to keep frozen whilst cleaning.
2. Remove drawers from each compartment. Wash in warm water and washingup liquid using a soft cloth, dry thoroughly.
3. Wipe the interior and fittings with a clean cloth wrung out in a solution of either one teaspoon of bicarbonate of soda to one pint of water or Milton™ sterilising fluid, diluted according to the manufacturer’s instructions.
4. Dry the interior thoroughly with a clean cloth before replacing fittings and food.Note : It is important to ensure that cleaned drawers are thoroughly dried before refitting into the freezer compartment.
Exterior
WARNING: Do not use abrasive powder, household cleaner or bleach, they can damage the exterior of your freezer.
1. Use a clean soft cloth wrung out in warm water and washing up liquid to wipe the exterior surface, dry thoroughly.
2. Use a soft brush or vacuum cleaner to remove dust from underneath the freezer and from the compressor and condenser situated at the back of the freezer.
WARNING: Do not damage the pipework.
Door SealUse warm water and a clean soft cloth to wipe along and in between the creases ofthe door seal, dry thoroughly. Take care not to damage the seal and avoid usingsharp objects.
WARNING: Do not use detergent, it will damage the seal.
Going AwayIf you are going away and don’t want to use your freezer, switch off the electricitysupply and pull out the mains plug. Remove food and follow the cleaninginstructions above.
Note : Leave the door ajar to prevent an accumulation of odours.
CLEA
NIN
G &
MA
INTEN
AN
CE
Door Reversal
14
CLE
AN
ING
&M
AIN
TEN
AN
CE
You will need a selection of small hand tools, screwdrivers, spanners etc. to carry outthis procedure.Our Service Department can arrange for an Engineer to do the conversion for you buta charge will be made.
WARNING: Switch off electrical supply and pull out the mains plug.
Remove loose items/fittings from inside the freezer.
If you have previously set up and used the freezer and since decided to reverse thedoors, you must remove stored food, wrap or cover and place into insulatedcontainers to keep frozen whilst carrying out this operation.
1. Open the door as wide as possible.Note : You may require assistance to do this:
2. Support the door and using a screwdriver, remove the screw securing the top hinge
3. Carefully tilt the door to remove the hinge from the cabinet and lift the door off the bottom hinge.
4. Remove the top hinge from the door and remove the spacing washers from the bottom hinge.Note : You may require assistance to do this:
5. Using the packaging from the appliance or a suitable substitute to supportthe back of the appliance. Lay the appliance on it’s back ensuring the pipework at the back is not damaged or bent. Be careful that the appliancedoes not run away from you when the wheels touch the floor.
6. Unscrew the foot plate and hinge bracket fitted to the bottom right hand side of the appliance. Unscrew the foot and footplate fitted to the bottomleft hand side of the appliance.
7. Refit the hinge bracket and the footplate to the opposite sides of theappliance. Screw in the feet until there is approximately 35mm projecting from the bottom front edge of the appliance.
8. Lift the appliance onto it’s feet. You may require assistance to do this:Lift the appliance from the rear of the tabletop and stand it on it’s feet andwheels. Be careful that the appliance does not run away from you when the wheels touch the floor.
9. Using a thin blunt instrument, remove the hinge bush cap from the top left of the door and refit on the top right.
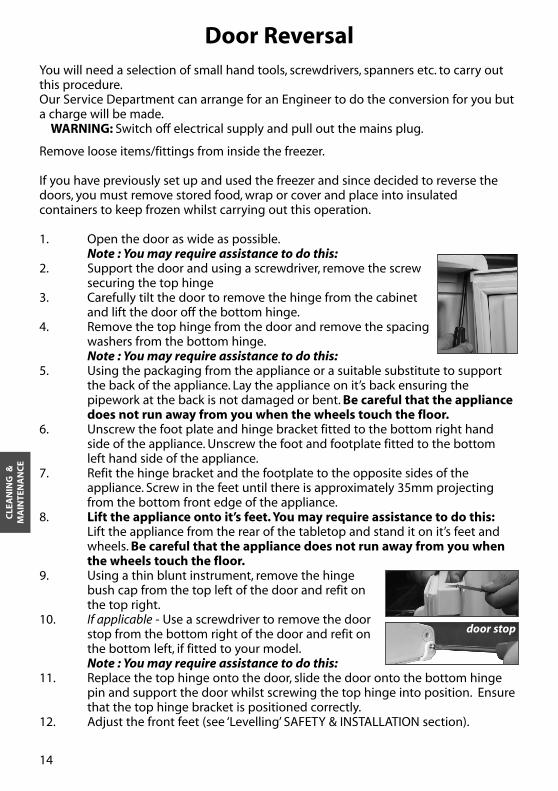
10. If applicable - Use a screwdriver to remove the door stop from the bottom right of the door and refit on the bottom left, if fitted to your model.Note : You may require assistance to do this:
11. Replace the top hinge onto the door, slide the door onto the bottom hinge pin and support the door whilst screwing the top hinge into position. Ensurethat the top hinge bracket is positioned correctly.
12. Adjust the front feet (see ‘Levelling’ SAFETY & INSTALLATION section).
Note : Let the freezer stand upright in it’s final location for at least 15 minutes before plugging in and switching on the electricity supply.
door stop
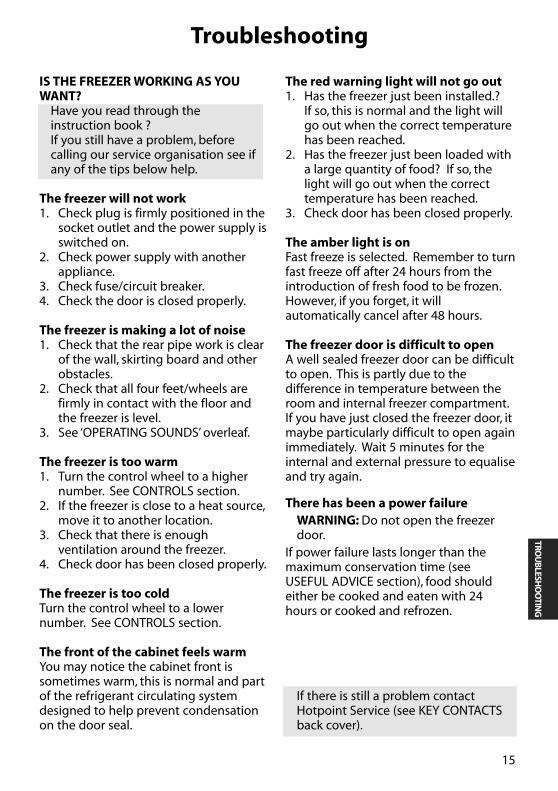
Troubleshooting
IS THE FREEZER WORKING AS YOUWANT?
Have you read through theinstruction book ?If you still have a problem, beforecalling our service organisation see ifany of the tips below help.
The freezer will not work1. Check plug is firmly positioned in the
socket outlet and the power supply isswitched on.
2. Check power supply with another appliance.
3. Check fuse/circuit breaker.4. Check the door is closed properly.
The freezer is making a lot of noise 1. Check that the rear pipe work is clear
of the wall, skirting board and other obstacles.
2. Check that all four feet/wheels are firmly in contact with the floor and the freezer is level.
3. See ‘OPERATING SOUNDS’ overleaf.
The freezer is too warm1. Turn the control wheel to a higher
number. See CONTROLS section.2. If the freezer is close to a heat source,
move it to another location.3. Check that there is enough
ventilation around the freezer.4. Check door has been closed properly.
The freezer is too coldTurn the control wheel to a lowernumber. See CONTROLS section.
The front of the cabinet feels warmYou may notice the cabinet front issometimes warm, this is normal and partof the refrigerant circulating systemdesigned to help prevent condensationon the door seal.
The red warning light will not go out1. Has the freezer just been installed.?
If so, this is normal and the light will go out when the correct temperature has been reached.
2. Has the freezer just been loaded with a large quantity of food? If so, the light will go out when the correct temperature has been reached.
3. Check door has been closed properly.
The amber light is onFast freeze is selected. Remember to turnfast freeze off after 24 hours from theintroduction of fresh food to be frozen.However, if you forget, it willautomatically cancel after 48 hours.
The freezer door is difficult to openA well sealed freezer door can be difficultto open. This is partly due to thedifference in temperature between theroom and internal freezer compartment.If you have just closed the freezer door, itmaybe particularly difficult to open againimmediately. Wait 5 minutes for theinternal and external pressure to equaliseand try again.
There has been a power failureWARNING: Do not open the freezerdoor.
If power failure lasts longer than themaximum conservation time (seeUSEFUL ADVICE section), food shouldeither be cooked and eaten with 24hours or cooked and refrozen.
If there is still a problem contactHotpoint Service (see KEY CONTACTSback cover).
15
TROU
BLESHO
OTIN
G
Troubleshooting
16
OPERATING SOUNDS OF A FREEZERThese are the normal types of sound that your freezer will make.
The motor (compressor) makes a buzzing or humming sound when it isrunning. This can be louder when it first switches on. This sound willreduce over the first few months.
Gases flowing through the pipes can produce gurgling, bubbling,roaring or humming noises.
Expansion and contraction of parts inside the freezer can produce acracking noise as they rapidly change temperature.
The circulating fan in the freezer can make a whirring or buzzing soundas it blows cold air around the compartment.
●
●
●
●
TRO
UBL
ESH
OO
TIN
G

Notes
17
SER
VIC
E &
GU
AR
AN
TEE
PLEASE PHONE US TO REGISTER YOUR APPLIANCE AND ACTIVATE YOUR 5 YEAR PARTS GUARANTEE ON 08448 24 24 24
Guarantee12 Months Parts and Labour Guarantee
Your appliance has the benefit of our manufacturer’s guarantee, which covers the cost of breakdownrepairs for twelve months from the date of purchase.
This gives you the reassurance that if, within that time, your appliance is proven to be defective becauseof either workmanship or materials, we will, at our discretion, either repair or replace the appliance at no
cost to you.
This guarantee is subject to the following conditions:
- The appliance has been installed and operated correctly and in accordance with ouroperating and maintenance instructions.
- The appliance is used only on the electricity or gas supply printed on the rating plate.- The appliance has been used for normal domestic purposes only.- The appliance has not been altered, serviced, maintained, dismantled, or otherwise
interfered with by any person not authorised by us.- Any repair work must be undertaken by us or our appointed agent.- Any parts removed during repair work or any appliance that is replaced become our property.- The appliance is used in the United Kingdom or Republic of Ireland.
The guarantee does not cover:
- Damage resulting from transportation, improper use, neglect or interference or as a result ofimproper installation.
- Replacement of any consumable item or accessory . These include but are not limited to: plugs,cables, batteries, light bulbs, fluorescent tubes and starters, covers and filters.
- Replacement of any removable parts made of glass or plastic.
THIS GUARANTEE WILL NOT APPLY IF THE APPLIANCE HAS BEEN USED IN COMMERCIALOR NON-DOMESTIC PREMISES.
5 Year Parts Guarantee
Hotpoint also offers you a free 5 year parts guarantee. This additional guarantee is conditional on youregistering your appliance with us and the parts being fitted by one of our authorised engineers. Therewill be a charge for our engineer's time. To activate the extra parts warranty on your appliance, simply
call our registration line on 08448 24 24 24 (ROI 01 230 0233).
Extended Guarantees
We offer a selection of repair protection plans that enable you to fully cover yourself against the expenseof repair bills for the life of your policy. To find the ideal plan for you please call our advice line on 0 8448
226 226 (ROI 01 230 0233).
Helpdesk Service
We have a dedicated team who can provide free advice and assistance with your appliance if youexperience any technical difficulties within the first 90 days of ownership. Simply call our Hotpoint
Service Hotline on 08448 224 224 (ROI 01 230 0233) for telephone assistance, or, where necessary, toarrange for an engineer to call. If we cannot resolve the technical problem we will replace your machine
or, if you prefer, give you your money back.
18
SERV
ICE &
GU
AR
AN
TEE
PLEASE PHONE US TO REGISTER YOUR APPLIANCE AND ACTIVATE YOUR 5 YEAR PARTS GUARANTEE ON 08448 24 24 24
After Sales ServiceNo one is better placed to care for your Hotpoint appliance during the course of its working life than us -
the manufacturer.
Essential Contact InformationHotpoint Service
We are the largest service team in Europe offering you access to 400 skilled telephone advisors and1000 fully qualified engineers on call to ensure you receive fast, reliable, local service.
UK: 08448 24 24 24Republic of Ireland: 0818 313 413
www.hotpointservice.co.uk
Please note: Our advisors will require the following information:
Model number:
Serial number:
Parts and Accessories
We supply a full range of genuine replacement parts as well as accessory products that protect andhygienically clean your appliance to keep it looking good and functioning efficiently throughout its life.
UK: 08448 225 225Republic of Ireland: 0818 313 413
www.hotpointservice.co.uk
Appliance Registration
We want to give you additional benefits of Hotpoint ownership. To activate your free 5 year parts guaranteeyou must register your appliance with us.
UK: 08448 24 24 24Republic of Ireland: 01 230 0800
www.hotpointservice.co.uk
Indesit Company UK Ltd. Morley Way, Peterborough, PE2 9JBIndesit Company Unit 49 Airways Industrial Estate,Dublin 17
Recycling & Disposal InformationAs part of Hotpoint's continued commitment to helping the environment, Hotpoint reserves the right to usequality, recycled components to keep down customer costs and minimise material wastage.Please dispose of packaging and old appliances carefully. Please see section “Precautions and tips” fordetails about disposal legislation. To minimise the risk of injury to children, remove the door, plug and cutthe mains cable off flush with the appliance. Dispose of these parts separately to ensure that the appliancecan no longer be plugged into a mains socket, and the door cannot be locked shut.
19
PLEASE PHONE US TO REGISTER YOUR APPLIANCE AND ACTIVATE YOUR 5 YEAR PARTS GUARANTEE ON 08448 24 24 24
195051335.0103/2012
20
Related Documents