FermiGrid High Availability Installation & Configuration Guides Dan Yocum Fermi National Accelerator Laboratory Last Edited on Apr 3, 2008 Introduction This set of guides is meant to be a concise set of recipes to install and configure the FermiGrid High Availability authentication and authorization middleware system. They are not meant to be detailed guides that cover every possible alternative method of installation and configuration. The goal of these guides is produce a Highly Available, Fault Tolerant system in the shortest amount of time with the least amount of effort. If more detail is required than what is provided herein, that exercise is left to the user. For your convenience, links to those external guides are provided. The latest version of this document can always be found here: http://docs.google.com/Doc?id=ddszv68g_19d88pzv

Welcome message from author
This document is posted to help you gain knowledge. Please leave a comment to let me know what you think about it! Share it to your friends and learn new things together.
Transcript
FermiGrid High Availability Installation & Configuration GuidesDan Yocum
Fermi National Accelerator Laboratory
Last Edited on Apr 3, 2008
Introduction
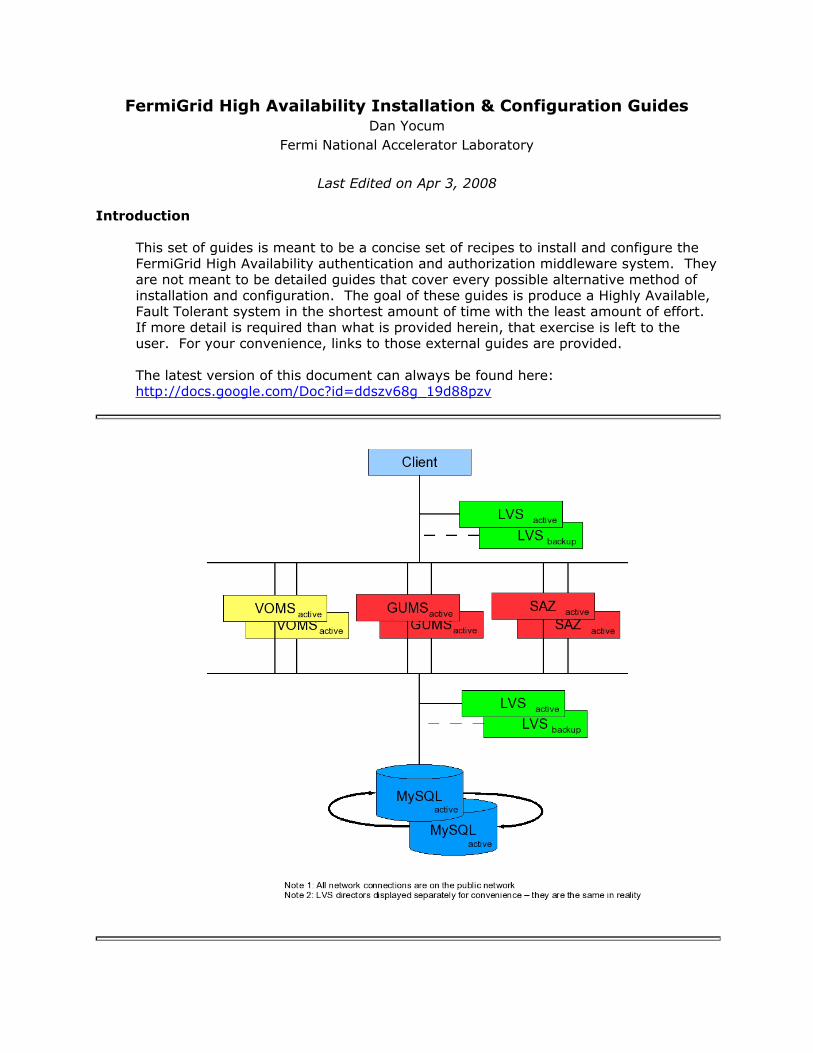
This set of guides is meant to be a concise set of recipes to install and configure theFermiGrid High Availability authentication and authorization middleware system. Theyare not meant to be detailed guides that cover every possible alternative method ofinstallation and configuration. The goal of these guides is produce a Highly Available,Fault Tolerant system in the shortest amount of time with the least amount of effort.If more detail is required than what is provided herein, that exercise is left to theuser. For your convenience, links to those external guides are provided.
The latest version of this document can always be found here:http://docs.google.com/Doc?id=ddszv68g_19d88pzv

Acknowldegements
Work supported by the U.S. Department of Energy under contract No.DE-AC02-07CH11359.
Table of Contents
• Xen Installation & Configuration• Scientific Linux v5 Installation• Xen Installation• Xen Configuration
Circularly Replicated MySQL Installation & Configuration• Master Installation
• Recovery from Server or Replication Error• Slave Installation• Restart Procedure after Unclean Shutdown• Logrotate mysqld.conf• Configure iptables• MySQL Upgrade Procedure• Troubleshooting an Upgrade
• Piranha Linux Virtual Server Installation & Configuration• LVS Installation• Configure iptables• Configure Virtual Servers
• VOMS Installation & Configuration• VOMS Installation• Configure iptables
Configure web servers• Configure sysctl.conf
• GUMS Installation & Configuration• GUMS Installation• Configure iptables
• SAZ Installation & Configuration• SAZ Installation
• Troubleshooting• IP Migration (Fermi Specific)• Fault Tolerance and Performance Testing
• MySQL Testing• VOMS Testing• GUMS Testing• SAZ Testing• LVS Testing
• Future Work• Appendix
• iptables for MySQL• iptables for LVS• iptables for VOMS• iptables for GUMS• iptables for SAZ• LVS lvs.cf file• LVS Check MySQL script

• LVS Check VOMS Admin script• LVS Check GUMS script
Xen Installation and Configuration
This section describes the procedures to install and configure Xen v3.1.0 on a
Scientific Linux v5 system.
Scientific Linux Fermi 5 Installation and Configuration
Download a CD boot.iso image from ftp://linux.fnal.gov/linux/slf51/x86_64/sites/Fermi/
images/boot.iso.
Burn the CD using the command cdrecord -v driveropts=burnfree -tao -speed=4 -eject
-dev=ATA:1,0,0 -pad -padsize 30s boot.iso
Insert the CD into the CD Rom drive of the computer and boot it.
At the prompt, enter "http text" This will automatically make sure you install Scientific
Linux Fermi
(as opposed to Scientific Linux) from the right server.
Network: Enable IPV4, manual IP configuration. Disable IPV6
Partitioning: The / partition should be 10GB, the swap be at least 8 GB, and one extra
partition of 10GB should be
made in the base instance for /linux32. If space is available, a 10GB /usr/local and/or a
10GB /var partition can be made.
All other disk should be made into an LVM partition (type 8E) and you can assign the
sub-partitions once you get the
system up.
Workgroup: Choose "FermiGrid workgroup install"
Grub Password: You should include a grub password, make it the same as the root
password.
For the HA systems, we do not select the virtualization package, instead we bring our own
along after the base install is done.
The install will proceed apace. After it is done, it will reboot and it will come up to a text
firstboot menu.

On this menu, you need to go into firewall configurations, disable the firewall, and turn off
SELinux. You should
also go through the authentication menu although it is not usually necessary to change
anything.
Once firstboot is done, you get to a login prompt. Log in to the system and do the following:
1) copy the stock passwd, group, auto.master, auto.home, auto.grid, and auto.ilc files from
fermigrid1.
2) copy the /root/.k5login file from fermigrid1
3) copy the kerberos keytab from the stock tree on fermigrid0 where all keytabs are stored,
into /etc/krb5.keytab.
4) Be sure sshd is running, verify that you can log into the machine.
5) Add the extra rpms with yum: (eventually they'll be incorporated into the FermiGrid
workgroup)
bridge-utils
rusers
rusers-server
openssl097a
openssl097a.i386
6) Now we set up the /linux32 partition. This is used to be the base OS for the 32-bit xen
instances we will
set up. The first time this was done, we actually went through a second installation on
fermigrid5, installing
a full 32-bit linux SL5 distro to that partition. Since that time we have rsynced it or copied
it to the other machines.
7) Install Dell Openmanage. The rpms have been copied off the cd to /usr/local/
openmanage directory on fermigrid2
and Fermigrid3. (More details here).
Xen Installation
Now we are ready to install the base Xen installation. Due to the requirement thatFermiGrid has for 64-bit domain0 and32-bit domU, we cannot use the xen or the kernel-xen that comes with Scientific Linux 4.6,
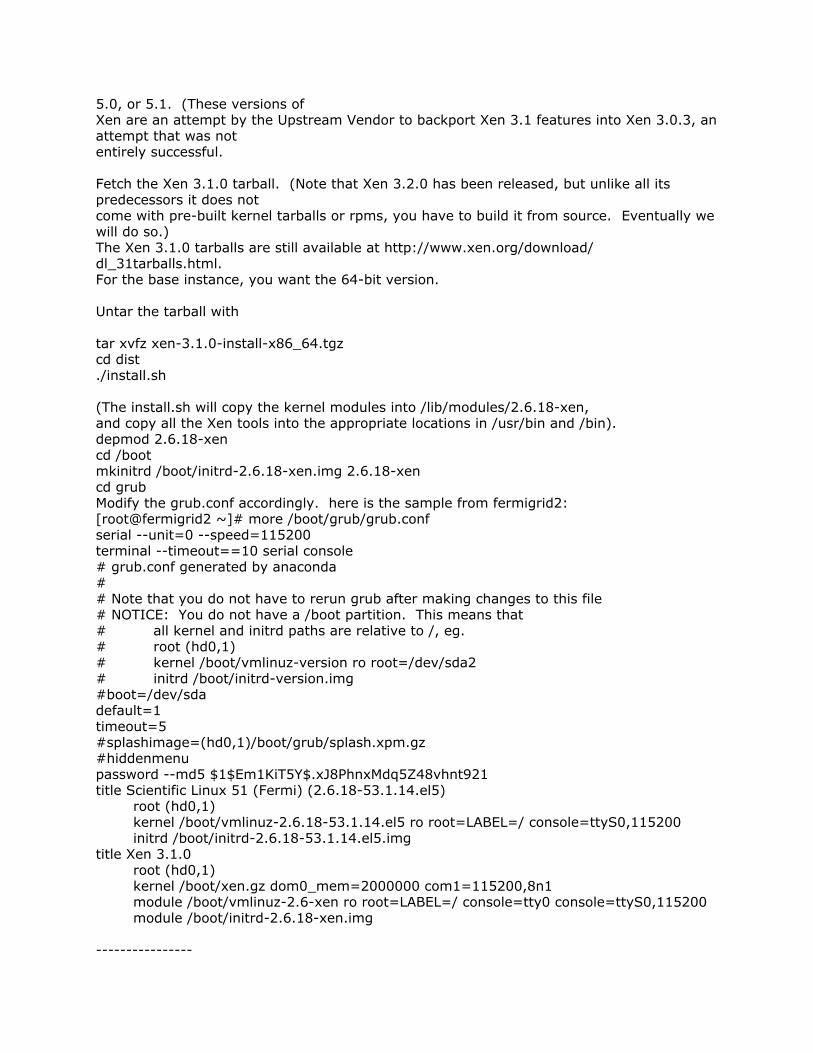
5.0, or 5.1. (These versions ofXen are an attempt by the Upstream Vendor to backport Xen 3.1 features into Xen 3.0.3, anattempt that was notentirely successful.
Fetch the Xen 3.1.0 tarball. (Note that Xen 3.2.0 has been released, but unlike all itspredecessors it does notcome with pre-built kernel tarballs or rpms, you have to build it from source. Eventually wewill do so.)The Xen 3.1.0 tarballs are still available at http://www.xen.org/download/dl_31tarballs.html.For the base instance, you want the 64-bit version.
Untar the tarball with
tar xvfz xen-3.1.0-install-x86_64.tgzcd dist./install.sh
(The install.sh will copy the kernel modules into /lib/modules/2.6.18-xen,and copy all the Xen tools into the appropriate locations in /usr/bin and /bin).depmod 2.6.18-xencd /bootmkinitrd /boot/initrd-2.6.18-xen.img 2.6.18-xencd grubModify the grub.conf accordingly. here is the sample from fermigrid2:[root@fermigrid2 ~]# more /boot/grub/grub.confserial --unit=0 --speed=115200terminal --timeout==10 serial console# grub.conf generated by anaconda## Note that you do not have to rerun grub after making changes to this file# NOTICE: You do not have a /boot partition. This means that# all kernel and initrd paths are relative to /, eg.# root (hd0,1)# kernel /boot/vmlinuz-version ro root=/dev/sda2# initrd /boot/initrd-version.img#boot=/dev/sdadefault=1timeout=5#splashimage=(hd0,1)/boot/grub/splash.xpm.gz#hiddenmenupassword --md5 $1$Em1KiT5Y$.xJ8PhnxMdq5Z48vhnt921title Scientific Linux 51 (Fermi) (2.6.18-53.1.14.el5)
root (hd0,1)kernel /boot/vmlinuz-2.6.18-53.1.14.el5 ro root=LABEL=/ console=ttyS0,115200initrd /boot/initrd-2.6.18-53.1.14.el5.img
title Xen 3.1.0root (hd0,1)kernel /boot/xen.gz dom0_mem=2000000 com1=115200,8n1module /boot/vmlinuz-2.6-xen ro root=LABEL=/ console=tty0 console=ttyS0,115200module /boot/initrd-2.6.18-xen.img
----------------
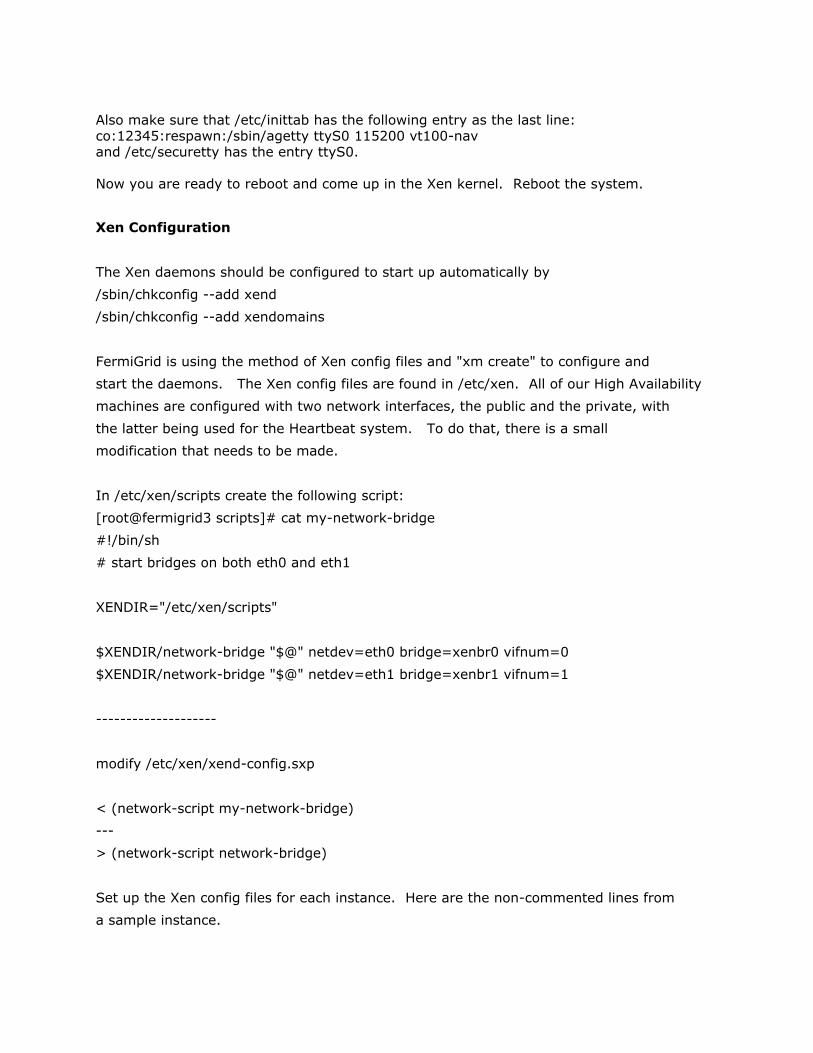
Also make sure that /etc/inittab has the following entry as the last line:co:12345:respawn:/sbin/agetty ttyS0 115200 vt100-navand /etc/securetty has the entry ttyS0.
Now you are ready to reboot and come up in the Xen kernel. Reboot the system.
Xen Configuration
The Xen daemons should be configured to start up automatically by
/sbin/chkconfig --add xend
/sbin/chkconfig --add xendomains
FermiGrid is using the method of Xen config files and "xm create" to configure and
start the daemons. The Xen config files are found in /etc/xen. All of our High Availability
machines are configured with two network interfaces, the public and the private, with
the latter being used for the Heartbeat system. To do that, there is a small
modification that needs to be made.
In /etc/xen/scripts create the following script:
[root@fermigrid3 scripts]# cat my-network-bridge
#!/bin/sh
# start bridges on both eth0 and eth1
XENDIR="/etc/xen/scripts"
$XENDIR/network-bridge "$@" netdev=eth0 bridge=xenbr0 vifnum=0
$XENDIR/network-bridge "$@" netdev=eth1 bridge=xenbr1 vifnum=1
--------------------
modify /etc/xen/xend-config.sxp
< (network-script my-network-bridge)
---
> (network-script network-bridge)
Set up the Xen config files for each instance. Here are the non-commented lines from
a sample instance.

kernel = "/linux32/boot/vmlinuz-2.6-xen"
ramdisk = "/linux32/boot/initrd-2.6.18-xen.img"
memory = 2000
name = "fg3x1"
vif = [ 'mac=00:16:3e:05:03:01, bridge=xenbr0', 'mac=00:16:3e:05:03:0a,
bridge=xenbr1' ]
disk = [ 'phy:LG0/LV5,sda1,w','phy:LG0/LV10,sda2,w','phy:LG0/LV15,sda3,w' ]
netmask= "255.255.255.0"
gateway= "131.225.107.200"
hostname= "fg3x1.fnal.gov"
root = "/dev/sda1 ro"
extra = "4"
----------------------
Some notes on the conventions we use: All machines in the FermiGrid HA complex are
using 00:16:3E:05: as the
first four bytes of all their virtual MAC addresses. 00:16:3E is the stock MAC prefix that all
Xen instances should be
using at Fermilab. The Gratia Xen instances lead with 00:16:3E:04. The fifth byte is the
number of the machine,
i.e. all those on fermigrid5 will have 05, all on fermigrid6 will have 06, and so forth. The
6th byte is the
number of the Xen instance itself. Thus fg5x1 is 00:16:3E:05:05:01. For eth1 the MAC
address is shifted up by 8,
for example 00:16:3E:05:05:09. We register all MACs with MISNET under the base
machine fermigrid5 for
for the base domain and all its Xens.
For disk partitioning, most of our Xen instances have three partitions exported to them and
have the same fstab.
The first partition is /, the second is swap, and the third is /usr/local
The partitions are laid out using LVM.
Given a 10GB partition /dev/LG0/LV1 that will be the / partition for a xen instance, you do
the following:
mount /dev/LG0/LV1 /mnt/xen1
cd /linux32
rsync -avDx * /mnt/xen1

cd /mnt/xen1
(can chroot if you want)
Change /etc/hosts to include the host name and IP of this xen instance.
Change /etc/sysconfig/network to include the new host name.
copy /etc/krb5.keytab from /usr/local/admin/keytab on fermigrid0
Copy the host certificates into /etc/grid-security, if you have any.
modify /etc/sysconfig/network-scripts/ifcfg-eth0 and /etc/sysconfig/network-scripts/
ifcfg-eth1
to reflect the same IP's and MAC addresses that you have in the cfg file.
Change out of the /mnt/xen1 directory
umount /mnt/xen1
***Important***fsck /dev/LG0/LV1Now, ready to start up the xen instance
xm create xen1.cfg
You can watch the virtual console as the xen console comes up, and will often need to doso.xm cons fg3x1(use whatever the domain name is in the xen config file). We frequently see on the firstboot of a Xen instance that /etc/sysconfig/network-scripts/ifcfg* files get moved toifcfg*.bak files.So you have to log in on the serial console (If you followed the steps above, the passwordwillautomatically be the same as the root password of the base machine), and copy these filesback,and then restart the network.
Note--by installing either the 32-bit 2.6.18 xen kernel in the 32-bit tarball in a Xen instance,or the 2.6.9-based kernel-xenU that comes with Sci. Linux Fermi LTS 4.6 it is possible toconvert an existing SLF4 standalone machine into a Xen instance. But this should only bedoneif absolutely necessary. Better to convert to SLF5 now.
You can list all the Xen domains running with "xm list".
Finally, to have certain Xen daemons start in boot, make a symlink in the /etc/xen/autodirectory to theconfig file which is in the /etc/xen directory, and these daemons will start on bootautomatically.
Xen Note for future
If you are doing a pure 64-on-64 Xen system or 32-on-32 Xen system, the Xen as
distributed with SLF5.1 works
just fine. If you select "virtualization" package in the install, the ground-based kernel-xen
gets installed and booted
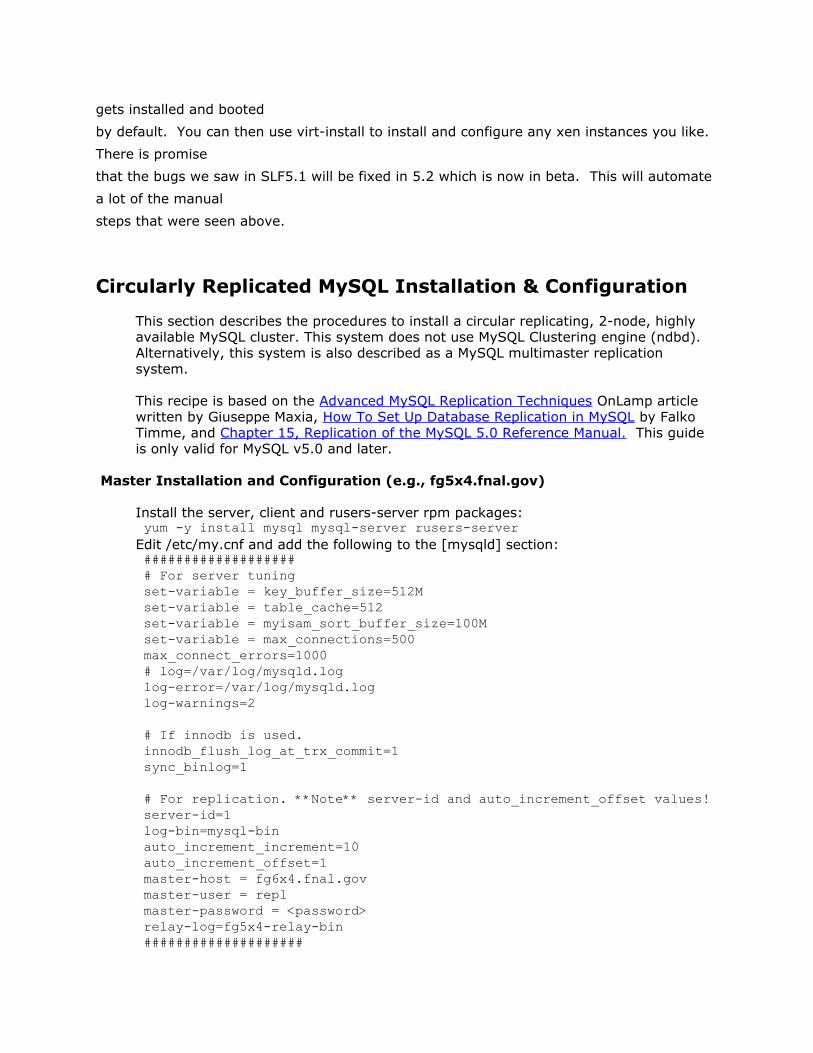
by default. You can then use virt-install to install and configure any xen instances you like.
There is promise
that the bugs we saw in SLF5.1 will be fixed in 5.2 which is now in beta. This will automate
a lot of the manual
steps that were seen above.
Circularly Replicated MySQL Installation & Configuration
This section describes the procedures to install a circular replicating, 2-node, highlyavailable MySQL cluster. This system does not use MySQL Clustering engine (ndbd).Alternatively, this system is also described as a MySQL multimaster replicationsystem.
This recipe is based on the Advanced MySQL Replication Techniques OnLamp articlewritten by Giuseppe Maxia, How To Set Up Database Replication in MySQL by FalkoTimme, and Chapter 15, Replication of the MySQL 5.0 Reference Manual. This guideis only valid for MySQL v5.0 and later.
Master Installation and Configuration (e.g., fg5x4.fnal.gov)
Install the server, client and rusers-server rpm packages:yum -y install mysql mysql-server rusers-server
Edit /etc/my.cnf and add the following to the [mysqld] section:#################### For server tuningset-variable = key_buffer_size=512Mset-variable = table_cache=512set-variable = myisam_sort_buffer_size=100Mset-variable = max_connections=500max_connect_errors=1000# log=/var/log/mysqld.loglog-error=/var/log/mysqld.loglog-warnings=2
# If innodb is used.innodb_flush_log_at_trx_commit=1sync_binlog=1
# For replication. **Note** server-id and auto_increment_offset values!server-id=1log-bin=mysql-binauto_increment_increment=10auto_increment_offset=1master-host = fg6x4.fnal.govmaster-user = replmaster-password = <password>relay-log=fg5x4-relay-bin####################
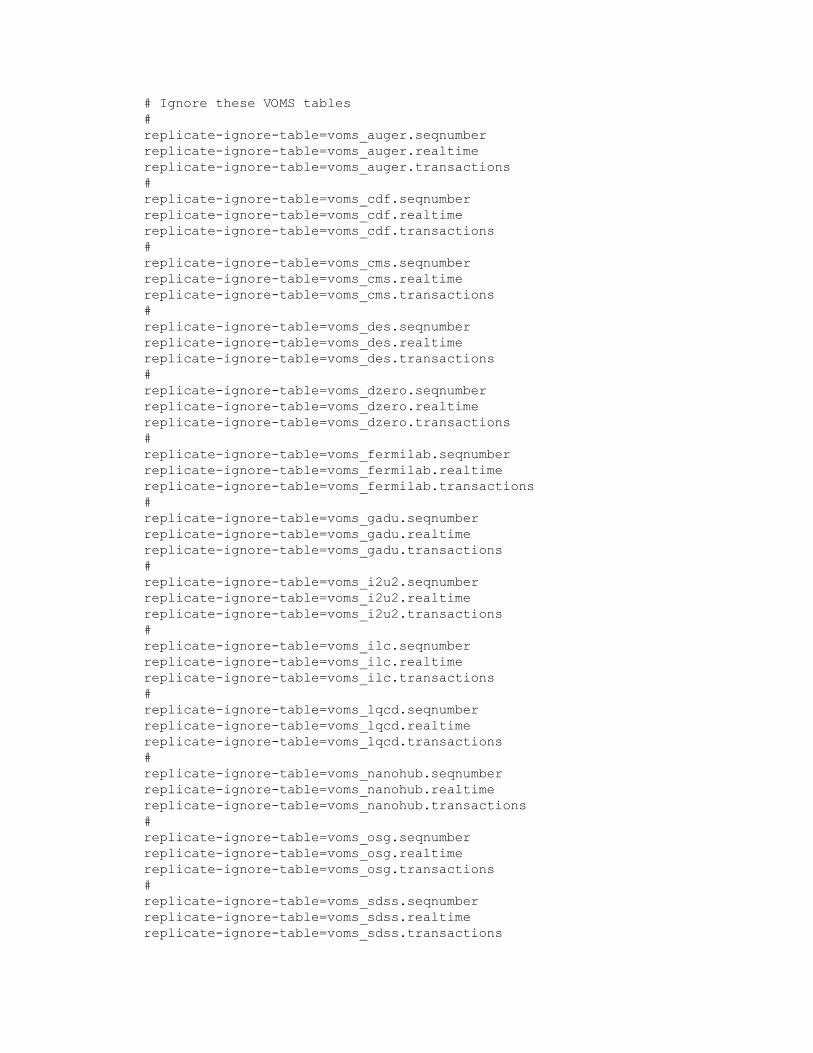
# Ignore these VOMS tables#replicate-ignore-table=voms_auger.seqnumberreplicate-ignore-table=voms_auger.realtimereplicate-ignore-table=voms_auger.transactions#replicate-ignore-table=voms_cdf.seqnumberreplicate-ignore-table=voms_cdf.realtimereplicate-ignore-table=voms_cdf.transactions#replicate-ignore-table=voms_cms.seqnumberreplicate-ignore-table=voms_cms.realtimereplicate-ignore-table=voms_cms.transactions#replicate-ignore-table=voms_des.seqnumberreplicate-ignore-table=voms_des.realtimereplicate-ignore-table=voms_des.transactions#replicate-ignore-table=voms_dzero.seqnumberreplicate-ignore-table=voms_dzero.realtimereplicate-ignore-table=voms_dzero.transactions#replicate-ignore-table=voms_fermilab.seqnumberreplicate-ignore-table=voms_fermilab.realtimereplicate-ignore-table=voms_fermilab.transactions#replicate-ignore-table=voms_gadu.seqnumberreplicate-ignore-table=voms_gadu.realtimereplicate-ignore-table=voms_gadu.transactions#replicate-ignore-table=voms_i2u2.seqnumberreplicate-ignore-table=voms_i2u2.realtimereplicate-ignore-table=voms_i2u2.transactions#replicate-ignore-table=voms_ilc.seqnumberreplicate-ignore-table=voms_ilc.realtimereplicate-ignore-table=voms_ilc.transactions#replicate-ignore-table=voms_lqcd.seqnumberreplicate-ignore-table=voms_lqcd.realtimereplicate-ignore-table=voms_lqcd.transactions#replicate-ignore-table=voms_nanohub.seqnumberreplicate-ignore-table=voms_nanohub.realtimereplicate-ignore-table=voms_nanohub.transactions#replicate-ignore-table=voms_osg.seqnumberreplicate-ignore-table=voms_osg.realtimereplicate-ignore-table=voms_osg.transactions#replicate-ignore-table=voms_sdss.seqnumberreplicate-ignore-table=voms_sdss.realtimereplicate-ignore-table=voms_sdss.transactions

Make the [mysql.server] section look like this
user=mysqlbasedir=/var/liblog=/var/log/mysqld.loglog-error=/var/log/mysqld.loglog-warnings=2Enable and start the server:
Make the [mysqld_safe] section look like this:
log=/var/log/mysqld.logerr-log=/var/log/mysqld.loglog-error=/var/log/mysqld.logpid-file=/var/run/mysqld/mysqld.pid
Start the server:chkconfig mysqld onservice mysqld start
Start the mysql client and issue these commands:mysql> grant replication slave, replication client on *.*
-> to 'repl'@'fg6x4.fnal.gov' identified by '<password>';mysql> grant replication slave, replication client on *.*
-> to 'repl'@'fg5x4.fnal.gov' identified by '<password>';
In the instance of a catastrophic single server or replication failure, start from here.Log into the good mysql database server and start the client.
mysql> FLUSH TABLES WITH READ LOCK;mysql> show master status;
Record the values of File and Position. These will be used in the slave installation,later.
Remain logged into the mysql client to maintain the lock, then from another terminaldo this:cd /var/lib/mysqltar -cvf /tmp/master-mysql-snapshot.tar \--exclude=*relay-bin* \--exclude=mysql-bin.* \--exclude=*.info \.
scp /tmp/master-mysql-snapshot.tar fg6x4:/var/tmpUnlock the tables:mysql> UNLOCK TABLES;
Slave Installation and Configuration (fg6x4.fnal.gov):
Install the server, client and rusers-server software:yum install mysql mysql-server rusers-server
Untar the databases from the master:cd /var/lib/mysqltar -xvf /var/tmp/master-mysql-snapshot.tar

Edit /etc/my.cnf and add these lines to the [mysqld] section:##################### For server tuningkey_buffer_size=512Mtable_cache=512myisam_sort_buffer_size=100Mmax_connections=500max_connect_errors=1000# log=/var/log/mysqld.loglog-error=/var/log/mysqld.loglog-warnings=2
# If innodb is used.innodb_flush_log_at_trx_commit=1sync_binlog=1
# For replication. **Note** server-id and auto_increment_offset values!server-id=2log-bin=mysql-binauto_increment_increment=10auto_increment_offset=2master-host = fg5x4.fnal.govmaster-user = replmaster-password = <password>relay-log=fg6x4-relay-bin##################### Ignore these VOMS tables#replicate-ignore-table=voms_auger.seqnumberreplicate-ignore-table=voms_auger.realtimereplicate-ignore-table=voms_auger.transactions#replicate-ignore-table=voms_cdf.seqnumberreplicate-ignore-table=voms_cdf.realtimereplicate-ignore-table=voms_cdf.transactions#replicate-ignore-table=voms_cms.seqnumberreplicate-ignore-table=voms_cms.realtimereplicate-ignore-table=voms_cms.transactions#replicate-ignore-table=voms_des.seqnumberreplicate-ignore-table=voms_des.realtimereplicate-ignore-table=voms_des.transactions#replicate-ignore-table=voms_dzero.seqnumberreplicate-ignore-table=voms_dzero.realtimereplicate-ignore-table=voms_dzero.transactions#replicate-ignore-table=voms_fermilab.seqnumberreplicate-ignore-table=voms_fermilab.realtimereplicate-ignore-table=voms_fermilab.transactions#replicate-ignore-table=voms_gadu.seqnumber
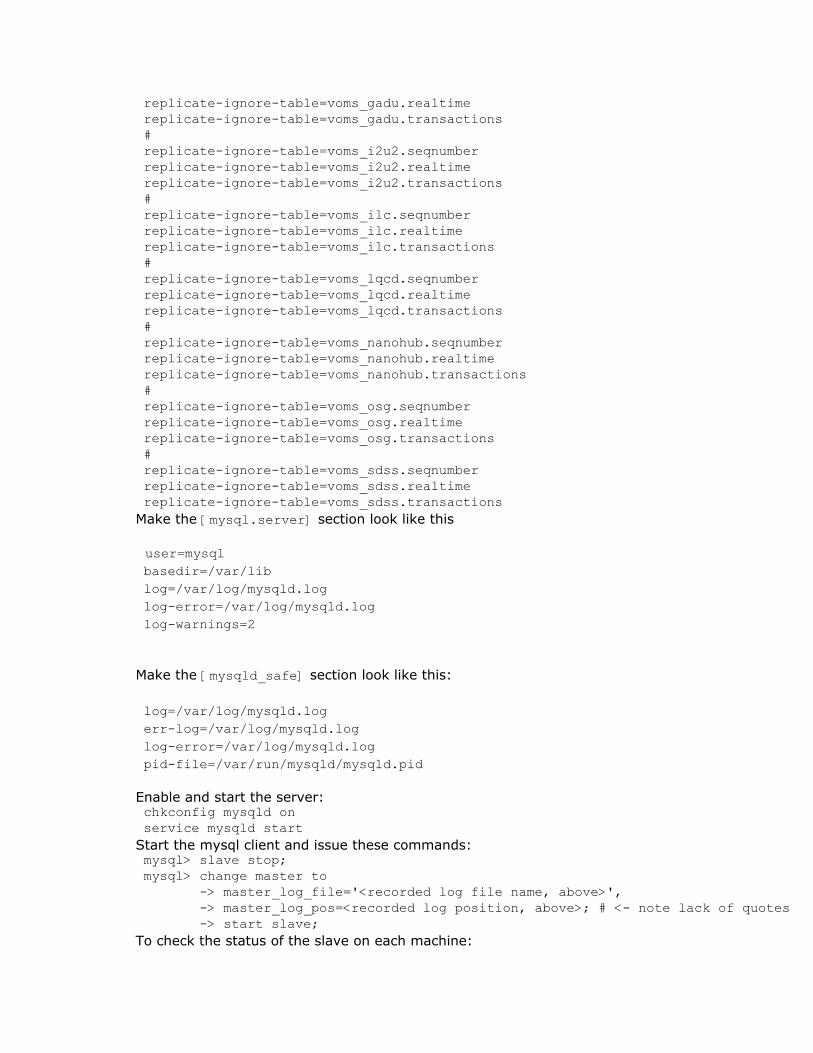
replicate-ignore-table=voms_gadu.realtimereplicate-ignore-table=voms_gadu.transactions#replicate-ignore-table=voms_i2u2.seqnumberreplicate-ignore-table=voms_i2u2.realtimereplicate-ignore-table=voms_i2u2.transactions#replicate-ignore-table=voms_ilc.seqnumberreplicate-ignore-table=voms_ilc.realtimereplicate-ignore-table=voms_ilc.transactions#replicate-ignore-table=voms_lqcd.seqnumberreplicate-ignore-table=voms_lqcd.realtimereplicate-ignore-table=voms_lqcd.transactions#replicate-ignore-table=voms_nanohub.seqnumberreplicate-ignore-table=voms_nanohub.realtimereplicate-ignore-table=voms_nanohub.transactions#replicate-ignore-table=voms_osg.seqnumberreplicate-ignore-table=voms_osg.realtimereplicate-ignore-table=voms_osg.transactions#replicate-ignore-table=voms_sdss.seqnumberreplicate-ignore-table=voms_sdss.realtimereplicate-ignore-table=voms_sdss.transactions
Make the [mysql.server] section look like this
user=mysqlbasedir=/var/liblog=/var/log/mysqld.loglog-error=/var/log/mysqld.loglog-warnings=2
Make the [mysqld_safe] section look like this:
log=/var/log/mysqld.logerr-log=/var/log/mysqld.loglog-error=/var/log/mysqld.logpid-file=/var/run/mysqld/mysqld.pid
Enable and start the server:chkconfig mysqld onservice mysqld start
Start the mysql client and issue these commands:mysql> slave stop;mysql> change master to
-> master_log_file='<recorded log file name, above>',-> master_log_pos=<recorded log position, above>; # <- note lack of quotes-> start slave;
To check the status of the slave on each machine:
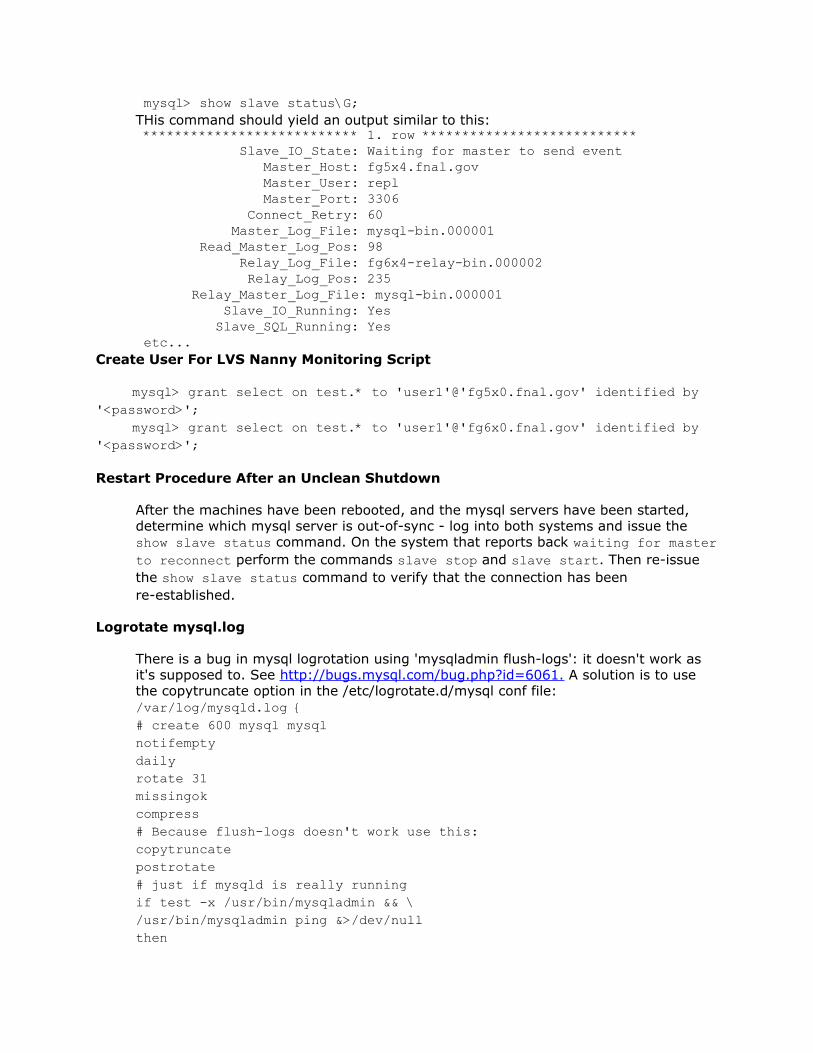
mysql> show slave status\G;THis command should yield an output similar to this:*************************** 1. row ***************************
Slave_IO_State: Waiting for master to send eventMaster_Host: fg5x4.fnal.govMaster_User: replMaster_Port: 3306
Connect_Retry: 60Master_Log_File: mysql-bin.000001
Read_Master_Log_Pos: 98Relay_Log_File: fg6x4-relay-bin.000002Relay_Log_Pos: 235
Relay_Master_Log_File: mysql-bin.000001Slave_IO_Running: Yes
Slave_SQL_Running: Yesetc...
Create User For LVS Nanny Monitoring Script
mysql> grant select on test.* to 'user1'@'fg5x0.fnal.gov' identified by'<password>';
mysql> grant select on test.* to 'user1'@'fg6x0.fnal.gov' identified by'<password>';
Restart Procedure After an Unclean Shutdown
After the machines have been rebooted, and the mysql servers have been started,determine which mysql server is out-of-sync - log into both systems and issue theshow slave status command. On the system that reports back waiting for masterto reconnect perform the commands slave stop and slave start. Then re-issuethe show slave status command to verify that the connection has beenre-established.
Logrotate mysql.log
There is a bug in mysql logrotation using 'mysqladmin flush-logs': it doesn't work asit's supposed to. See http://bugs.mysql.com/bug.php?id=6061. A solution is to usethe copytruncate option in the /etc/logrotate.d/mysql conf file:/var/log/mysqld.log {# create 600 mysql mysqlnotifemptydailyrotate 31missingokcompress# Because flush-logs doesn't work use this:copytruncatepostrotate# just if mysqld is really runningif test -x /usr/bin/mysqladmin && \/usr/bin/mysqladmin ping &>/dev/nullthen
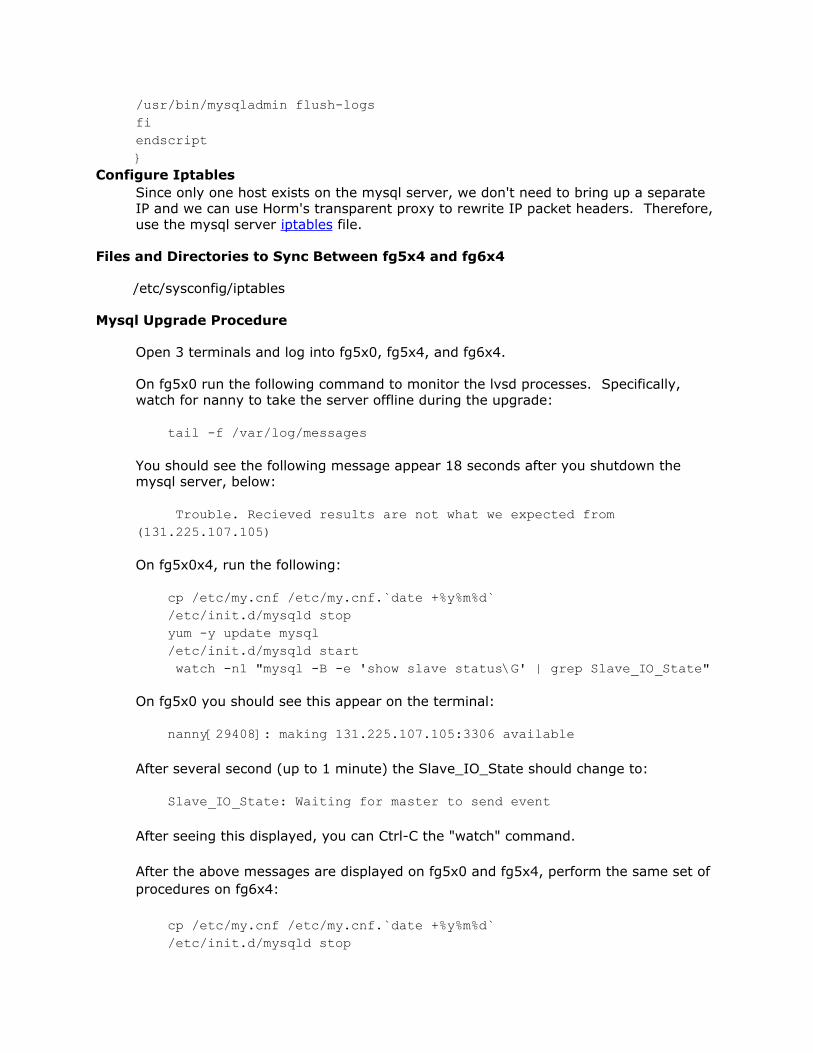
/usr/bin/mysqladmin flush-logsfiendscript}
Configure IptablesSince only one host exists on the mysql server, we don't need to bring up a separateIP and we can use Horm's transparent proxy to rewrite IP packet headers. Therefore,use the mysql server iptables file.
Files and Directories to Sync Between fg5x4 and fg6x4
/etc/sysconfig/iptables
Mysql Upgrade Procedure
Open 3 terminals and log into fg5x0, fg5x4, and fg6x4.
On fg5x0 run the following command to monitor the lvsd processes. Specifically,watch for nanny to take the server offline during the upgrade:
tail -f /var/log/messages
You should see the following message appear 18 seconds after you shutdown themysql server, below:
Trouble. Recieved results are not what we expected from(131.225.107.105)
On fg5x0x4, run the following:
cp /etc/my.cnf /etc/my.cnf.`date +%y%m%d`/etc/init.d/mysqld stopyum -y update mysql/etc/init.d/mysqld startwatch -n1 "mysql -B -e 'show slave status\G' | grep Slave_IO_State"
On fg5x0 you should see this appear on the terminal:
nanny[29408]: making 131.225.107.105:3306 available
After several second (up to 1 minute) the Slave_IO_State should change to:
Slave_IO_State: Waiting for master to send event
After seeing this displayed, you can Ctrl-C the "watch" command.
After the above messages are displayed on fg5x0 and fg5x4, perform the same set ofprocedures on fg6x4:
cp /etc/my.cnf /etc/my.cnf.`date +%y%m%d`/etc/init.d/mysqld stop

yum -y update mysql/etc/init.d/mysqld startwatch -n1 "mysql -B -e 'show slave status\G' | grep Slave_IO_State"
On fg5x0 you should see this appear on the terminal:
nanny[29408]: making 131.225.107.109:3306 available
After several second (up to 1 minute) the Slave_IO_State should change to:
Slave_IO_State: Waiting for master to send event
Troubleshooting an Upgrade
If, after several minutes, the "waiting for master to send event" message is notdisplayed, start the mysql client and run 'show slave status\G' to determine what isfailing. As a first attempt to re-establish the connection, run 'slave stop' and 'slavestart'. If that fails to re-establish the connection, resort to reading Chapter 15,Replication of the MySQL 5.0 Reference Manual.
Piranha Linux Virtual Server Installation & Configuration
This section describes the steps to install and configure the Linux Virtual Server (LVS)using the Red Hat piranha package. It is meant to be a concise recipe, not acomprehensive HOWTO. The following table describes the virtual and real servernames, as well as their IP addresses. Use this information to fill out the ConfigureVirtual Server section, below.
Virtual Server name Virtual IP Real Server 1hostname
Real IP 1 Real Server 2hostname
Real IP 2
LVS director and backup NA fg5x0.fnal.gov 131.225.107.146 fg6x0.fnal.gov 131.225.107.147
voms.fnal.gov 131.225.107.140 fg5x1.fnal.gov 131.225.107.102 fg6x1.fnal.gov 131.225.107.106
voms.opensciencegrid.org 131.225.107.138 fg5x1.fnal.gov 131.225.107.102 fg6x1.fnal.gov 131.225.107.106
gums.fnal.gov 131.225.107.139 fg5x2.fnal.gov 131.225.107.103 fg6x2.fnal.gov 131.225.107.107
saz.fnal.gov 131.225.107.126 fg5x3.fnal.gov 131.225.107.104 fg6x3.fnal.gov 131.225.107.108
fg-mysql.fnal.gov 131.225.107.124 fg5x4.fnal.gov 131.225.107.105 fg6x4.fnal.gov 131.225.107.109
LVS Installation
Generate and install host certificates. These will be used by the nanny monitoringscripts, described later.
On the master LVS node perform the following as root:
yum install piranhayum install rusers
yum install mysql
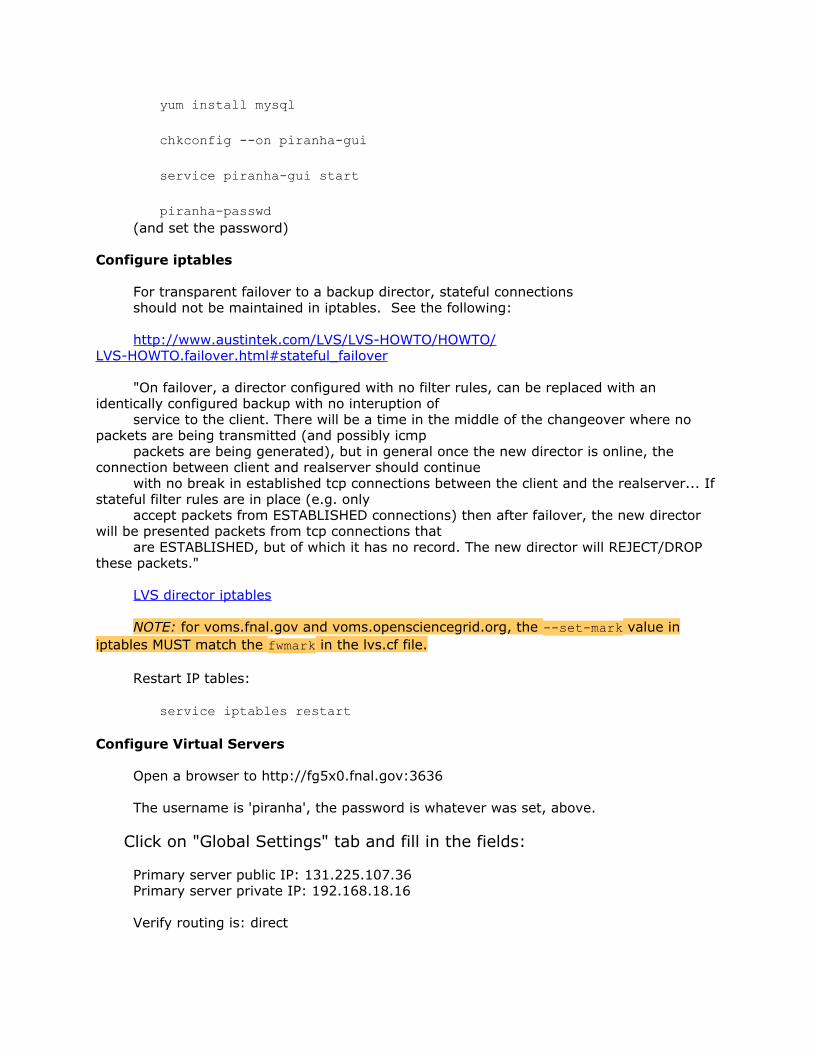
chkconfig --on piranha-gui
service piranha-gui start
piranha-passwd(and set the password)
Configure iptables
For transparent failover to a backup director, stateful connectionsshould not be maintained in iptables. See the following:
http://www.austintek.com/LVS/LVS-HOWTO/HOWTO/LVS-HOWTO.failover.html#stateful_failover
"On failover, a director configured with no filter rules, can be replaced with anidentically configured backup with no interuption of
service to the client. There will be a time in the middle of the changeover where nopackets are being transmitted (and possibly icmp
packets are being generated), but in general once the new director is online, theconnection between client and realserver should continue
with no break in established tcp connections between the client and the realserver... Ifstateful filter rules are in place (e.g. only
accept packets from ESTABLISHED connections) then after failover, the new directorwill be presented packets from tcp connections that
are ESTABLISHED, but of which it has no record. The new director will REJECT/DROPthese packets."
LVS director iptables
NOTE: for voms.fnal.gov and voms.opensciencegrid.org, the --set-mark value iniptables MUST match the fwmark in the lvs.cf file.
Restart IP tables:
service iptables restart
Configure Virtual Servers
Open a browser to http://fg5x0.fnal.gov:3636
The username is 'piranha', the password is whatever was set, above.
Click on "Global Settings" tab and fill in the fields:
Primary server public IP: 131.225.107.36Primary server private IP: 192.168.18.16
Verify routing is: direct

IMPORTANT!!!! --> Click "Accept"
Click on the "Redundancy" tab and fill in the fields:
Redundant server public IP: 131.225.107.76Redundant server private IP: 192.168.18.19
Heartbeat interval: 6Assume dead after: 18Heartbeat runs on port: 539Monitor NIC links for failures: [X]
IMPORTANT!!!! --> Click "Accept"
Click on the "Virtual Servers" tab.
Click "Add"
Click the radio button next to the new unnamed service and click "Edit"
Fill in the fields:
Name: SERVICE_NAME:<port number>Application port: <port number>Protocol: tcpVirtual IP Address: <IP of system associated with service>Virtual IP Network Mask: 255.255.255.0Firewall Mark: <port number> <- for convenience, only used for voms-admin servicesDevice: eth0:<N> <- where N is a unique number not held by another interfaceRe-entry Time: 15Service timeout: 6Quiesce server: YesLoad monitoring tool: rupScheduling: weighted least-connectionsPersistence: (only used if using fwmark)Persistence Network Mask: Unused
IMPORTANT!!!! --> Click "Accept"
Click on the "Real Server" tab
Click "Add"
Select the radio button next to the new, unnamed server and click "Edit"
Fill in the fields:
Name: <short name of the *first* real server hosting the service>Address: <IP of this real server hosting the service>Weight: <number of CPUS * speed of CPUs (in MHz) * speed of
network (in Mbps)/1M>
IMPORTANT!!!! --> Click "Accept"

Click on the "Real Server" tab, again.
Click "Add"
Select the radio button next to the new, unnamed server and click "Edit"
Fill in the fields:
Name: <short name of the *second* real server hosting the service>Address: <IP of this real server hosting the service>Weight: <number of CPUS * speed of CPUs (in MHz) * speed of network (in Mbps)/
1M>
IMPORTANT!!!! --> Click "Accept"
Click on the "Monitoring Scripts" tab.
Fill in the fields. If the service is an non-ssl enabled web server,the defaults are fine. If not, then either the path to a custom"Sending Program" will be needed or a custom "Expect" string is required.
The following list of scripts go into /usr/local/bin/ and the fullpath must be specified when calling the script. If the service isavailable, then the string "up" is issued and this is what the"Expect" field should contain.
lvs-ha-check-voms-admin.shlvs-ha-check-mysql.shlvs-ha-check-gums.sh
IMPORTANT!!!! Don't forget to add the "%h" to the end of the "SendingProgram" field.
IMPORTANT!!!! --> Click "Accept"
After completing the above for each service, you should have a file that looks likelvs.cf.
At this point, restart the LVS service:
service pulse restart
Files and directories to sync between fg5x0 and fg6x0:
/etc/sysctl.conf/etc/sysconfig/iptables/etc/sysconfig/ha/usr/local/bin/
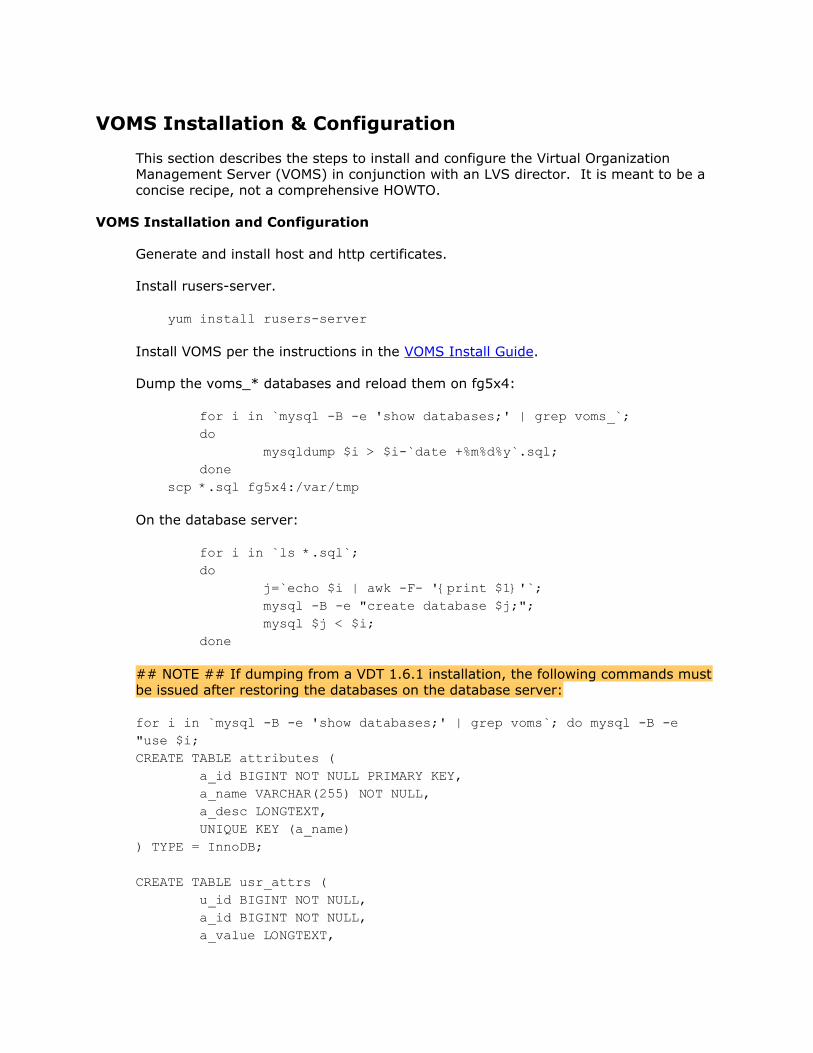
VOMS Installation & Configuration
This section describes the steps to install and configure the Virtual OrganizationManagement Server (VOMS) in conjunction with an LVS director. It is meant to be aconcise recipe, not a comprehensive HOWTO.
VOMS Installation and Configuration
Generate and install host and http certificates.
Install rusers-server.
yum install rusers-server
Install VOMS per the instructions in the VOMS Install Guide.
Dump the voms_* databases and reload them on fg5x4:
for i in `mysql -B -e 'show databases;' | grep voms_`;do
mysqldump $i > $i-`date +%m%d%y`.sql;done
scp *.sql fg5x4:/var/tmp
On the database server:
for i in `ls *.sql`;do
j=`echo $i | awk -F- '{print $1}'`;mysql -B -e "create database $j;";mysql $j < $i;
done
## NOTE ## If dumping from a VDT 1.6.1 installation, the following commands mustbe issued after restoring the databases on the database server:
for i in `mysql -B -e 'show databases;' | grep voms`; do mysql -B -e"use $i;CREATE TABLE attributes (
a_id BIGINT NOT NULL PRIMARY KEY,a_name VARCHAR(255) NOT NULL,a_desc LONGTEXT,UNIQUE KEY (a_name)
) TYPE = InnoDB;
CREATE TABLE usr_attrs (u_id BIGINT NOT NULL,a_id BIGINT NOT NULL,a_value LONGTEXT,
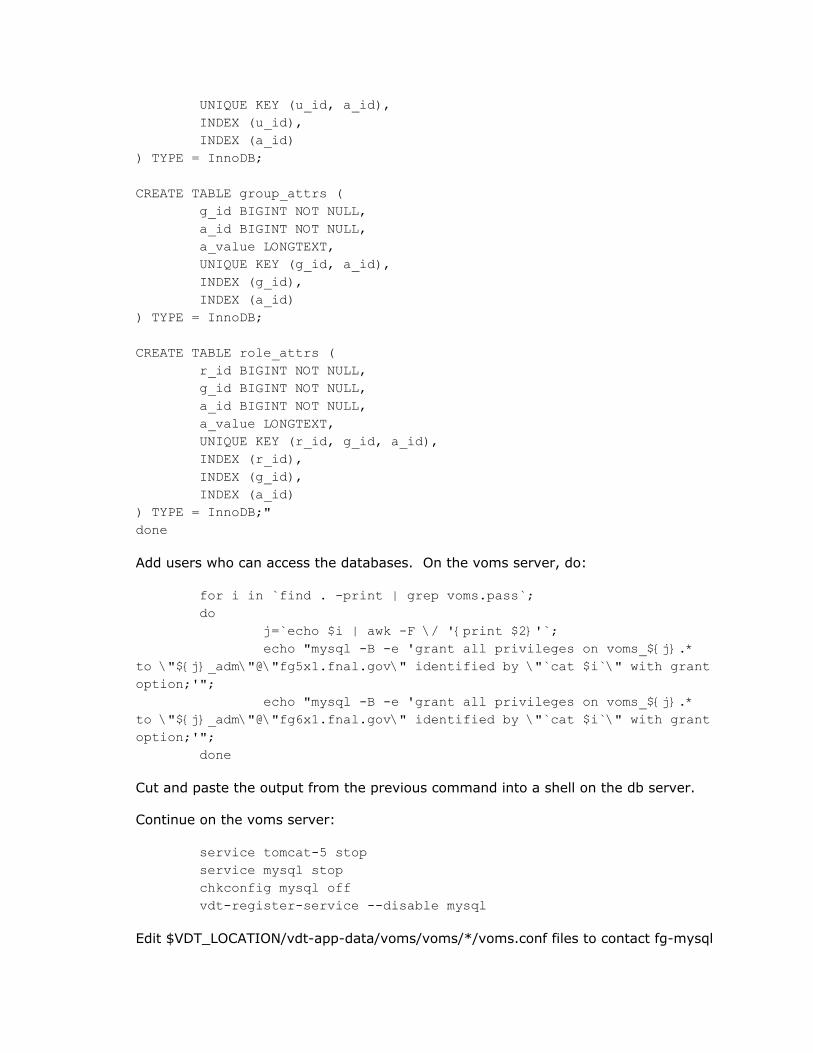
UNIQUE KEY (u_id, a_id),INDEX (u_id),INDEX (a_id)
) TYPE = InnoDB;
CREATE TABLE group_attrs (g_id BIGINT NOT NULL,a_id BIGINT NOT NULL,a_value LONGTEXT,UNIQUE KEY (g_id, a_id),INDEX (g_id),INDEX (a_id)
) TYPE = InnoDB;
CREATE TABLE role_attrs (r_id BIGINT NOT NULL,g_id BIGINT NOT NULL,a_id BIGINT NOT NULL,a_value LONGTEXT,UNIQUE KEY (r_id, g_id, a_id),INDEX (r_id),INDEX (g_id),INDEX (a_id)
) TYPE = InnoDB;"done
Add users who can access the databases. On the voms server, do:
for i in `find . -print | grep voms.pass`;do
j=`echo $i | awk -F \/ '{print $2}'`;echo "mysql -B -e 'grant all privileges on voms_${j}.*
to \"${j}_adm\"@\"fg5x1.fnal.gov\" identified by \"`cat $i`\" with grantoption;'";
echo "mysql -B -e 'grant all privileges on voms_${j}.*to \"${j}_adm\"@\"fg6x1.fnal.gov\" identified by \"`cat $i`\" with grantoption;'";
done
Cut and paste the output from the previous command into a shell on the db server.
Continue on the voms server:
service tomcat-5 stopservice mysql stopchkconfig mysql offvdt-register-service --disable mysql
Edit $VDT_LOCATION/vdt-app-data/voms/voms/*/voms.conf files to contact fg-mysql

add --contactstring=fg-mysql.fnal.govchange --port=3306
Edit $VDT_LOCATION/vdt-app-data/voms/voms/dzero/voms.conf and change thevomsextended attribute timeout to 15 days. Add this line:
--timeout=1296000
Edit $VDT_LOCATION/glite/var/etc/voms-admin/*/voms.database.propertieschange jdbc:mysql://fg-mysql.fnal.gov:3306/voms_<VO>i.e.,
cd $VDT_LOCATION/glite/var/etc/voms-admin/for i in `ls */voms.database.properties`
do perl -pe 's/localhost:49155/fg-mysql.fnal.gov:3306/g;' -i $i
doneservice tomcat-5 restart
Configure iptables
Since we're bringing up real IP addresses for the different voms servers(voms.fnal.gov and voms.opensciencegrid.org) and not mangling IP packet headersusing Horm's Transparent Proxy, no special iptables are necessary. The one additionthat is necessary is the range of ports that the voms servers run on must beaccessible to outside the fnal.gov domain. See the VOMS iptables section in theappendix.
Configure Web Servers
Edit $VDT_LOCATION/apache/conf/extra/httpd-ssl.conf and add the following bits:
On fg5x1:
Listen 131.225.107.102:8443
On fg6x1:
Listen 131.225.107.106:8443
On both:
Listen 131.225.107.112:8443 # this will change to the real IP aftertestingListen 131.225.107.114:8443 # this will change to the real IP aftertesting
and these VirtualHost directives:
NOTE - the first VirtualHost directive should be this line:
One fg5x1:
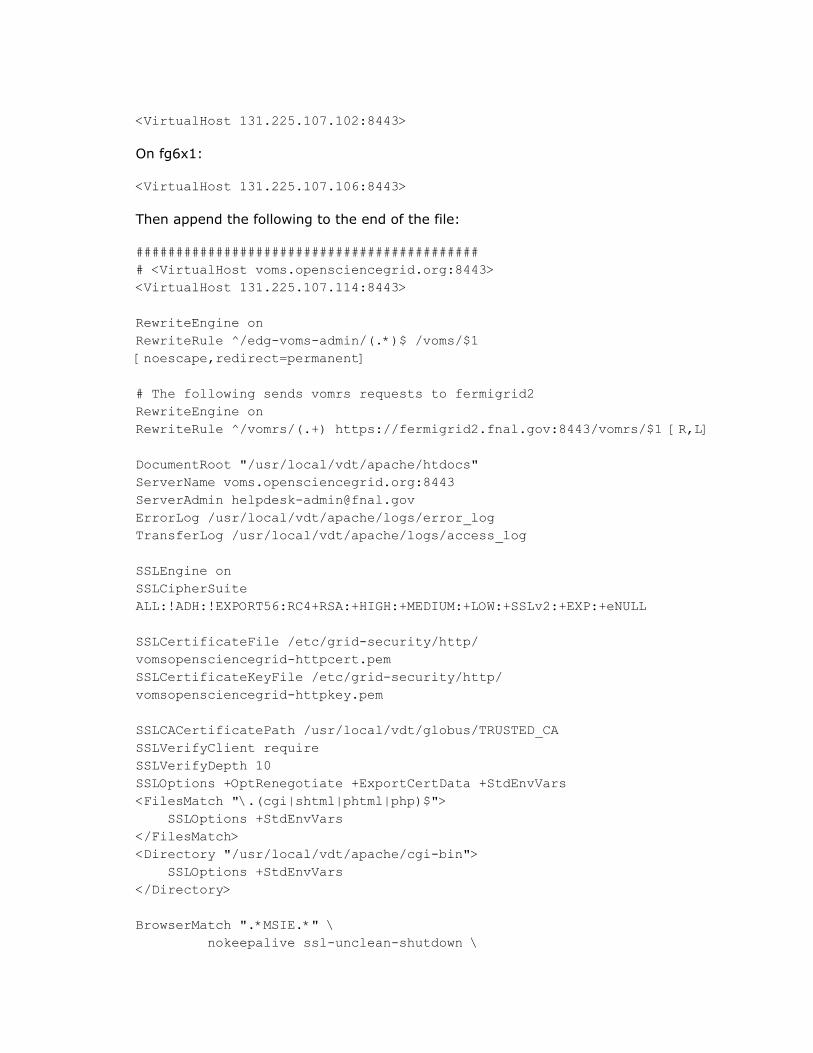
<VirtualHost 131.225.107.102:8443>
On fg6x1:
<VirtualHost 131.225.107.106:8443>
Then append the following to the end of the file:
############################################ <VirtualHost voms.opensciencegrid.org:8443><VirtualHost 131.225.107.114:8443>
RewriteEngine onRewriteRule ^/edg-voms-admin/(.*)$ /voms/$1[noescape,redirect=permanent]
# The following sends vomrs requests to fermigrid2RewriteEngine onRewriteRule ^/vomrs/(.+) https://fermigrid2.fnal.gov:8443/vomrs/$1 [R,L]
DocumentRoot "/usr/local/vdt/apache/htdocs"ServerName voms.opensciencegrid.org:8443ServerAdmin [email protected] /usr/local/vdt/apache/logs/error_logTransferLog /usr/local/vdt/apache/logs/access_log
SSLEngine onSSLCipherSuiteALL:!ADH:!EXPORT56:RC4+RSA:+HIGH:+MEDIUM:+LOW:+SSLv2:+EXP:+eNULL
SSLCertificateFile /etc/grid-security/http/vomsopensciencegrid-httpcert.pemSSLCertificateKeyFile /etc/grid-security/http/vomsopensciencegrid-httpkey.pem
SSLCACertificatePath /usr/local/vdt/globus/TRUSTED_CASSLVerifyClient requireSSLVerifyDepth 10SSLOptions +OptRenegotiate +ExportCertData +StdEnvVars<FilesMatch "\.(cgi|shtml|phtml|php)$">
SSLOptions +StdEnvVars</FilesMatch><Directory "/usr/local/vdt/apache/cgi-bin">
SSLOptions +StdEnvVars</Directory>
BrowserMatch ".*MSIE.*" \nokeepalive ssl-unclean-shutdown \

downgrade-1.0 force-response-1.0
CustomLog /usr/local/vdt/apache/logs/ssl_request_log \"%t %h %{SSL_PROTOCOL}x %{SSL_CIPHER}x \"%r\" %b"
</VirtualHost>
# <VirtualHost voms.fnal.gov:8443><VirtualHost 131.225.107.112:8443>
RewriteEngine onRewriteRule ^/edg-voms-admin/(.*)$ /voms/$1[noescape,redirect=permanent]
# The following sends vomrs requests to fermigrid2RewriteEngine onRewriteRule ^/vomrs/(.+) https://fermigrid2.fnal.gov:8443/vomrs/$1 [R,L]
DocumentRoot "/usr/local/vdt/apache/htdocs"ServerName voms.fnal.gov:8443ServerAdmin [email protected] /usr/local/vdt/apache/logs/error_logTransferLog /usr/local/vdt/apache/logs/access_log
SSLEngine onSSLCipherSuiteALL:!ADH:!EXPORT56:RC4+RSA:+HIGH:+MEDIUM:+LOW:+SSLv2:+EXP:+eNULL
SSLCertificateFile /etc/grid-security/http/vomsfnal-httpcert.pemSSLCertificateKeyFile /etc/grid-security/http/vomsfnal-httpkey.pem
SSLCACertificatePath /usr/local/vdt/globus/TRUSTED_CASSLVerifyClient requireSSLVerifyDepth 10SSLOptions +OptRenegotiate +ExportCertData +StdEnvVars<FilesMatch "\.(cgi|shtml|phtml|php)$">
SSLOptions +StdEnvVars</FilesMatch><Directory "/usr/local/vdt/apache/cgi-bin">
SSLOptions +StdEnvVars</Directory>
BrowserMatch ".*MSIE.*" \nokeepalive ssl-unclean-shutdown \downgrade-1.0 force-response-1.0
CustomLog /usr/local/vdt/apache/logs/ssl_request_log \"%t %h %{SSL_PROTOCOL}x %{SSL_CIPHER}x \"%r\" %b"
</VirtualHost>
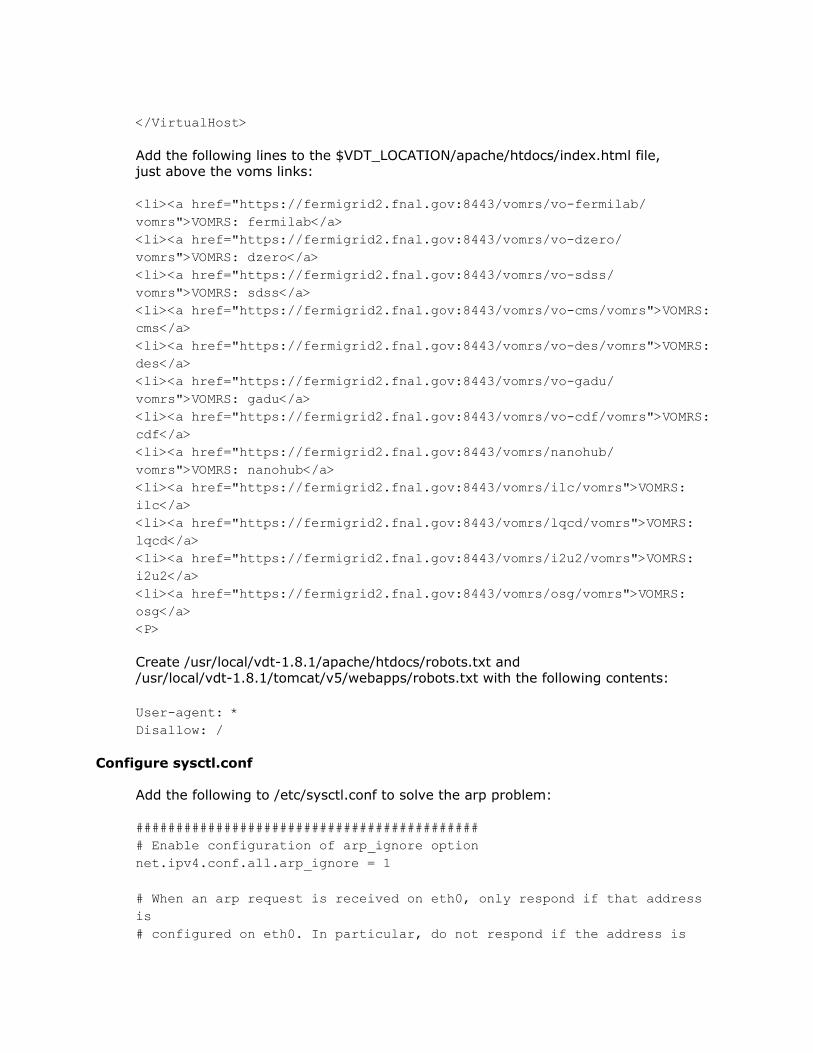
Add the following lines to the $VDT_LOCATION/apache/htdocs/index.html file,just above the voms links:
<li><a href="https://fermigrid2.fnal.gov:8443/vomrs/vo-fermilab/vomrs">VOMRS: fermilab</a><li><a href="https://fermigrid2.fnal.gov:8443/vomrs/vo-dzero/vomrs">VOMRS: dzero</a><li><a href="https://fermigrid2.fnal.gov:8443/vomrs/vo-sdss/vomrs">VOMRS: sdss</a><li><a href="https://fermigrid2.fnal.gov:8443/vomrs/vo-cms/vomrs">VOMRS:cms</a><li><a href="https://fermigrid2.fnal.gov:8443/vomrs/vo-des/vomrs">VOMRS:des</a><li><a href="https://fermigrid2.fnal.gov:8443/vomrs/vo-gadu/vomrs">VOMRS: gadu</a><li><a href="https://fermigrid2.fnal.gov:8443/vomrs/vo-cdf/vomrs">VOMRS:cdf</a><li><a href="https://fermigrid2.fnal.gov:8443/vomrs/nanohub/vomrs">VOMRS: nanohub</a><li><a href="https://fermigrid2.fnal.gov:8443/vomrs/ilc/vomrs">VOMRS:ilc</a><li><a href="https://fermigrid2.fnal.gov:8443/vomrs/lqcd/vomrs">VOMRS:lqcd</a><li><a href="https://fermigrid2.fnal.gov:8443/vomrs/i2u2/vomrs">VOMRS:i2u2</a><li><a href="https://fermigrid2.fnal.gov:8443/vomrs/osg/vomrs">VOMRS:osg</a><P>
Create /usr/local/vdt-1.8.1/apache/htdocs/robots.txt and/usr/local/vdt-1.8.1/tomcat/v5/webapps/robots.txt with the following contents:
User-agent: *Disallow: /
Configure sysctl.conf
Add the following to /etc/sysctl.conf to solve the arp problem:
############################################ Enable configuration of arp_ignore optionnet.ipv4.conf.all.arp_ignore = 1
# When an arp request is received on eth0, only respond if that addressis# configured on eth0. In particular, do not respond if the address is
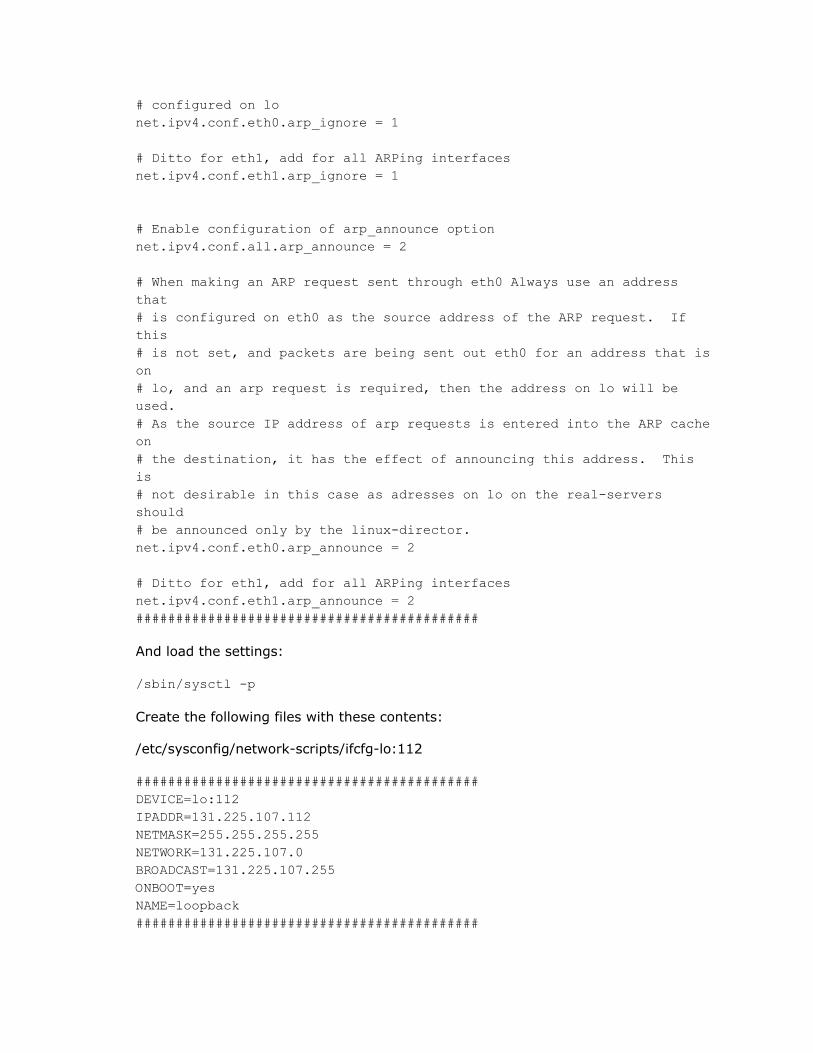
# configured on lonet.ipv4.conf.eth0.arp_ignore = 1
# Ditto for eth1, add for all ARPing interfacesnet.ipv4.conf.eth1.arp_ignore = 1
# Enable configuration of arp_announce optionnet.ipv4.conf.all.arp_announce = 2
# When making an ARP request sent through eth0 Always use an addressthat# is configured on eth0 as the source address of the ARP request. Ifthis# is not set, and packets are being sent out eth0 for an address that ison# lo, and an arp request is required, then the address on lo will beused.# As the source IP address of arp requests is entered into the ARP cacheon# the destination, it has the effect of announcing this address. Thisis# not desirable in this case as adresses on lo on the real-serversshould# be announced only by the linux-director.net.ipv4.conf.eth0.arp_announce = 2
# Ditto for eth1, add for all ARPing interfacesnet.ipv4.conf.eth1.arp_announce = 2###########################################
And load the settings:
/sbin/sysctl -p
Create the following files with these contents:
/etc/sysconfig/network-scripts/ifcfg-lo:112
###########################################DEVICE=lo:112IPADDR=131.225.107.112NETMASK=255.255.255.255NETWORK=131.225.107.0BROADCAST=131.225.107.255ONBOOT=yesNAME=loopback###########################################

/etc/sysconfig/network-scripts/ifcfg-lo:138
###########################################DEVICE=lo:138IPADDR=131.225.107.138NETMASK=255.255.255.255NETWORK=131.225.107.0BROADCAST=131.225.107.255ONBOOT=yesNAME=loopback###########################################
Bring up the interfaces:
ifup lo:112ifip lo:114
Bring up apache:
service apache start
Files and directories to sync between fg5x1 and fg6x1:
/etc/sysctl.conf/etc/sysconfig/iptables/etc/sysconfig/network-scripts/ifcfg-lo:112 #names will change when IPs do/etc/sysconfig/network-scripts/ifcfg-lo:138/etc/grid-security/usr/local/vdt-1.8.1 # except for apache, voms, and tomcat logs
GUMS Installation & Configuration
This guide describes the steps to install and configure the Grid Users ManagementServer (GUMS) in conjunction with an LVS director. It is meant to be a conciserecipe, not a comprehensive HOWTO.
GUMS Installation and Configuration
On fg5x2 and fg6x2, install the host and http certificates and keys.
Install rusers-server.
yum install rusers-server
Install vdt_181_cache:GUMS per the instructions in the GUMS Installation Guide. Stopthe tomcat server and disable the mysql server:
service tomcat-5 stopservice mysql stopchkconfig mysql off

vdt-register-service --disable mysql
Dump the GUMS_1_1 database from fermigrid2, copy to a database server andreload:
mysqldump GUMS_1_1 > gums.sqlscp gums.sql fg5x4:/var/tmp
On fg5x4:
mysql < gums.sql
Add gums user on fg5x4:
mysql> grant all on GUMS_1_1.* to [email protected] identified by'<password>';mysql> grant all on GUMS_1_1.* to [email protected] identified by'<password>';
Edit $VDT_LOCATION/vdt-app-data/gums/config/gums.config file to contact fg-mysql:
change: jdbc:mysql://fg-mysql.fnal.gov:3306/GUMS_1_1
Restart the tomcat server and enable gums-host-cron:
service tomcat-5 start/usr/local/vdt-1.8.1/vdt/sbin/vdt-register-service -name gums-host-cron--enable/usr/local/vdt-1.8.1/vdt/sbin/vdt-control --on gums-host-cron
Edit $VDT_LOCATION/tomcat/v55/webapps/gums/WEB-INF/web.xml on fg5x2 tochangeupdate time to 1 hr, and edit the same file on fg6x2 to change update time to17 years. To make sure these changes aren't overwritten accidentally, change the fileattribute to imuutable on fg6x3:
if [ `hostname -s` -eq fg6x3 ]; thenchattr -i $VDT_LOCATION/tomcat/v55/webapps/gums/WEB-INF/web.xml
fi
On each node, edit $VDT_LOCATION/tomcat/v55/webapps/gums/WEB-INF/config/gums.config.local and change the following line to point at the mysql server and port:
change: hibernate.connection.url="jdbc:mysql://fg-mysql.fnal.gov:3306/GUMS_1_1"
Create sym links in /var/log to the tomcat logs.
ln -s $VDT_LOCATION/tomcat/v55/logs /var/log/tomcat
Edit $VDT_LOCATION/tomcat/v55/webapps/gums/WEB-INF/classes/log4j.properties
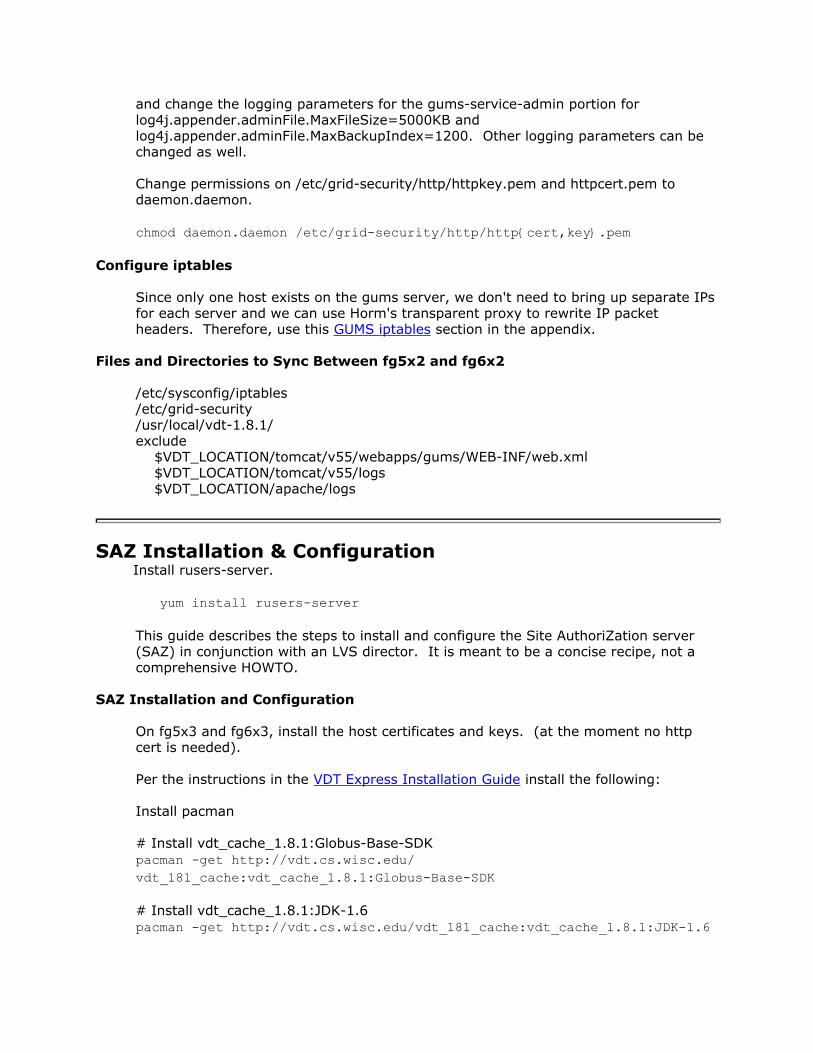
and change the logging parameters for the gums-service-admin portion forlog4j.appender.adminFile.MaxFileSize=5000KB andlog4j.appender.adminFile.MaxBackupIndex=1200. Other logging parameters can bechanged as well.
Change permissions on /etc/grid-security/http/httpkey.pem and httpcert.pem todaemon.daemon.
chmod daemon.daemon /etc/grid-security/http/http{cert,key}.pem
Configure iptables
Since only one host exists on the gums server, we don't need to bring up separate IPsfor each server and we can use Horm's transparent proxy to rewrite IP packetheaders. Therefore, use this GUMS iptables section in the appendix.
Files and Directories to Sync Between fg5x2 and fg6x2
/etc/sysconfig/iptables/etc/grid-security/usr/local/vdt-1.8.1/exclude
$VDT_LOCATION/tomcat/v55/webapps/gums/WEB-INF/web.xml$VDT_LOCATION/tomcat/v55/logs$VDT_LOCATION/apache/logs
SAZ Installation & ConfigurationInstall rusers-server.
yum install rusers-server
This guide describes the steps to install and configure the Site AuthoriZation server(SAZ) in conjunction with an LVS director. It is meant to be a concise recipe, not acomprehensive HOWTO.
SAZ Installation and Configuration
On fg5x3 and fg6x3, install the host certificates and keys. (at the moment no httpcert is needed).
Per the instructions in the VDT Express Installation Guide install the following:
Install pacman
# Install vdt_cache_1.8.1:Globus-Base-SDKpacman -get http://vdt.cs.wisc.edu/vdt_181_cache:vdt_cache_1.8.1:Globus-Base-SDK
# Install vdt_cache_1.8.1:JDK-1.6pacman -get http://vdt.cs.wisc.edu/vdt_181_cache:vdt_cache_1.8.1:JDK-1.6
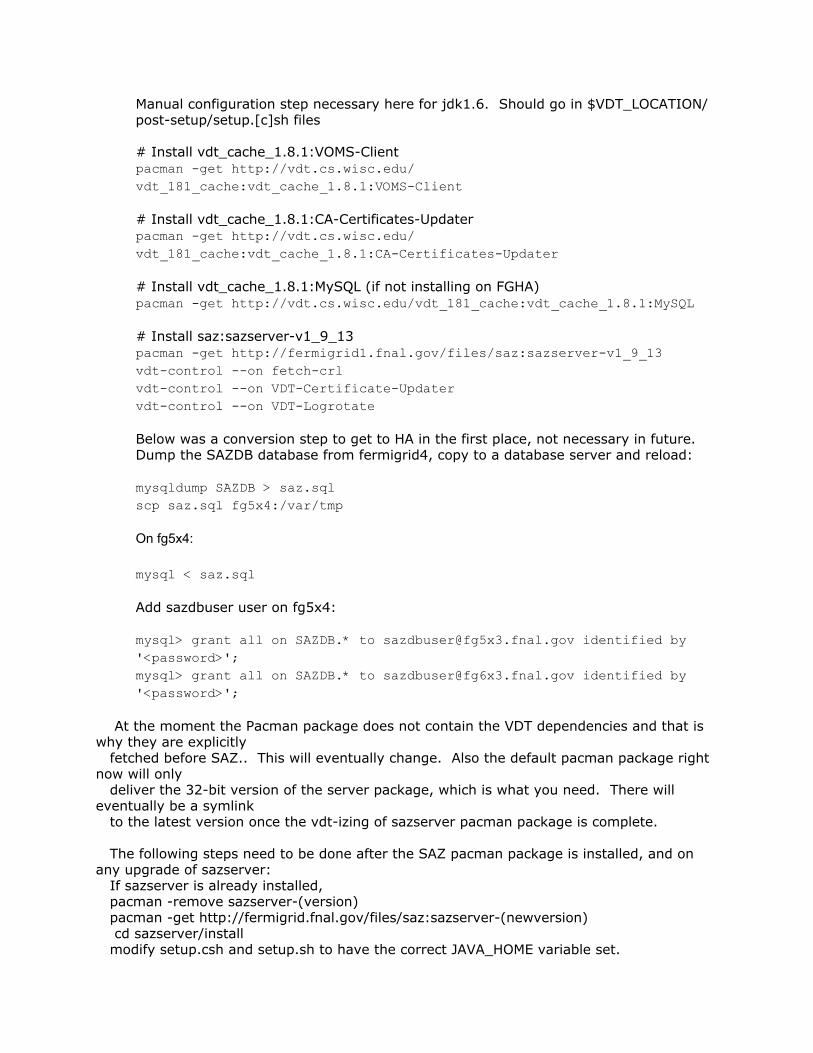
Manual configuration step necessary here for jdk1.6. Should go in $VDT_LOCATION/post-setup/setup.[c]sh files
# Install vdt_cache_1.8.1:VOMS-Clientpacman -get http://vdt.cs.wisc.edu/vdt_181_cache:vdt_cache_1.8.1:VOMS-Client
# Install vdt_cache_1.8.1:CA-Certificates-Updaterpacman -get http://vdt.cs.wisc.edu/vdt_181_cache:vdt_cache_1.8.1:CA-Certificates-Updater
# Install vdt_cache_1.8.1:MySQL (if not installing on FGHA)pacman -get http://vdt.cs.wisc.edu/vdt_181_cache:vdt_cache_1.8.1:MySQL
# Install saz:sazserver-v1_9_13pacman -get http://fermigrid1.fnal.gov/files/saz:sazserver-v1_9_13vdt-control --on fetch-crlvdt-control --on VDT-Certificate-Updatervdt-control --on VDT-Logrotate
Below was a conversion step to get to HA in the first place, not necessary in future.Dump the SAZDB database from fermigrid4, copy to a database server and reload:
mysqldump SAZDB > saz.sqlscp saz.sql fg5x4:/var/tmp
On fg5x4:
mysql < saz.sql
Add sazdbuser user on fg5x4:
mysql> grant all on SAZDB.* to [email protected] identified by'<password>';mysql> grant all on SAZDB.* to [email protected] identified by'<password>';
At the moment the Pacman package does not contain the VDT dependencies and that iswhy they are explicitly
fetched before SAZ.. This will eventually change. Also the default pacman package rightnow will only
deliver the 32-bit version of the server package, which is what you need. There willeventually be a symlink
to the latest version once the vdt-izing of sazserver pacman package is complete.
The following steps need to be done after the SAZ pacman package is installed, and onany upgrade of sazserver:
If sazserver is already installed,pacman -remove sazserver-(version)pacman -get http://fermigrid.fnal.gov/files/saz:sazserver-(newversion)cd sazserver/install
modify setup.csh and setup.sh to have the correct JAVA_HOME variable set.

For VDT 1.8.1 and greater it should look like this:setup.sh
export JAVA_HOME=/usr/local/vdt/jdk1.6setup.csh
setenv JAVA_HOME /usr/local/vdt/jdk1.6
cd ../conf
[root@fg5x3 conf]# more saz.conf<?xml version="1.0"?><saz>
<SAZ_USER_TRUSTED>"Y"</SAZ_USER_TRUSTED><SAZ_USER_ENABLED>N</SAZ_USER_ENABLED><SAZ_DB_HOST>fg-mysql</SAZ_DB_HOST><SAZ_DB_PORT>3306</SAZ_DB_PORT><SAZ_DB>SAZDB</SAZ_DB><SAZ_DB_PASS>12345</SAZ_DB_PASS><SAZ_DB_USER>sazdbuser</SAZ_DB_USER><SAZ_SERVER_PORT>8888</SAZ_SERVER_PORT><SAZ_SERVER_LOG>log/saz.log</SAZ_SERVER_LOG><SAZ_SERVER_CERT>/etc/grid-security/hostcert.pem</SAZ_SERVER_CERT><SAZ_SERVER_KEY>/etc/grid-security/hostkey.pem</SAZ_SERVER_KEY><CA_DIR>/etc/grid-security/certificates</CA_DIR><AI_SERVER_PORT>9999</AI_SERVER_PORT><AI_SERVER_LOG>log/aclient.log</AI_SERVER_LOG><PERMITTED_PRINCIPAL_DOMAIN>FNAL.GOV</PERMITTED_PRINCIPAL_DOMAIN><ALLOWED_CA>/DC=org/DC=DOEGrids/OU=Certificate Authorities/CN=DOEGrids C
A 1</ALLOWED_CA><ALLOWED_CA>/DC=gov/DC=fnal/O=Fermilab/OU=Certificate Authorities/CN=Ker
berized CA</ALLOWED_CA></saz>
(Note, syntax of saz.conf will change in next release 1.9.14).
cd ..mv log oldlogln -s /var/log/saz log
Check /var/log/saz/log4j.saz.properties, last line should look like this:
log4j.appender.R.File=/usr/local/vdt/saz/server/log/sazserver.log
Make sure the directory /usr/local/vdt/sazexists, and that in that directory, there are symlinksto server and sazserver pointing to /usr/local/vdt/sazserver
Stop the old saz
/etc/rc.d/init.d/sazserver stop
Wait 5 sec for old saz to stop, then start the new saz
/etc/rc.d/init.d/sazserver start

Look at /var/log/saz/sazserver.log to makesure records are getting processed. Any unusual exceptions will be in /var/log/saz/sazstartup.err
Troubleshooting
Note:
When using Horm's Transparent Proxy, the VIPs much match in the iptables on theLVS director and on the real servers.For instance on the director (fg5x0) this line exists:
-A PREROUTING -d 131.225.107.124/32 -p tcp -m tcp --dport 3306 -j MARK--set-mark 3306
On the real servers the corresponding line is this:
-A PREROUTING -d 131.225.107.124 -p tcp --dport 3306 -j REDIRECT
Note:
On the director, in the iptables file the --set-mark value must match thevalue fwmark in the lvs.cf. For instance, using the same line from above:
-A PREROUTING -d 131.225.107.124/32 -p tcp -m tcp --dport 3306 -j MARK--set-mark 3306
In the lvs.cf file this value must be set:
fwmark = 3306
Note:
On director and voms-admin real servers, enable access to port 8443 fromoutside fnal.gov, *but* only to the destination VIP (not all IPs).
Note:
Something is wrong with arptables, don't use it. Use arp_announce and arp_ignore.For more details, read the following:
http://www.ultramonkey.org/3/topologies/hc-ha-lb-eg.html
Note:

There is a bug in mysql logrotation using 'mysqladmin flush-logs': it doesn't work asit's supposed to. See http://bugs.mysql.com/bug.php?id=6061. A solution is to usethe copytruncate option in the /etc/logrotate.d/mysql conf file:/var/log/mysqld.log {
# create 600 mysql mysqlnotifemptydailyrotate 31missingokcompress# Because flush-logs doesn't work use this:copytruncate
postrotate# just if mysqld is really runningif test -x /usr/bin/mysqladmin && \
/usr/bin/mysqladmin ping &>/dev/nullthen
/usr/bin/mysqladmin flush-logsfi
endscript}
Note:
On mysql servers, to clear the "too many failed connections" error message in /var/log/mysqld use 'mysqladmin flush-hosts' command on fg5x4 and fg6x4.
IP Migration (Fermi Specific)
# ******************************# Use this either as a script or as a guideline to manually# migrate the voms.fnal.gov, voms.opensciencegrid.org, and# gums.fnal.gov hostnames to the FermiGrid HA system.## The following is an outline of what this script will do:## migrate gums and saz dbs# set gums db on fg3 to never update from voms servers# point vomrs at new voms# change iptables on director# change lvs.cf on director# change iptables on real servers# change http-ssl.conf on real servers# change host cert/keys on real servers# sync gums and saz databases back to fermigrid3 and fermigrid4, respectively.# disable the old, unresolved IPs on fermigrid2 and fermigrid3## On the day before, re-assign the hostnames to new IPs, start those# new IPs on the LVS and let the DNS take care of the migration.
# Should test this in this order:

# voms.opensciencegrid.org - successfully completed Nov 29, 2007# voms.fnal.gov - successfully completed Dec 18, 2007# gums.fnal.gov - successfully completed Dec 18, 2007
# ******************************
export DATE=`date +%y%m%d`export NEW_OSG_IP=131.225.107.138export NEW_VOMS_IP=131.225.107.140export NEW_GUMS_IP=131.225.107.139export SHORT_OSG_IP=`echo $NEW_OSG_IP | awk -F. '{print $NF}'`export SHORT_VOMS_IP=`echo $NEW_VOMS_IP | awk -F. '{print $NF}'`export SHORT_GUMS_IP=`echo $NEW_GUMS_IP | awk -F. '{print $NF}'`export VDT_LOCATION=/usr/local/vdt
# On the day before the DNS servers get updated, the following changes must be# made:
# Initially, point the vomrs servers on fermigrid2 to the voms server on# fg5x1. After the IPs have been migrated to the LVS director, point vomrs at# the voms.fnal.gov hostname.#
############################### Edit all /opt/vomrs-1.3/var/etc/*/vomrs.xml files##############################
OLD_VOMS_HOSTNAME=fg5x1.fnal.govNEW_VOMS_HOSTNAME=voms.fnal.gov
if [ `hostname -s` = fermigrid2 ]; thenfor i in `ls /opt/vomrs-1.3/var/etc/*/vomrs.xml`do
echo $icp $i $i.$DATEperl -pe
"s#<vomsUrl>https://$OLD_VOMS_HOSTNAME:8443#<vomsUrl>https://$NEW_VOMS_HOSTNAME:8443#g;"-i $i
donefi
############################### Restart vomrs##############################
service vomrs restart
# Changes on GUMS server (fermigrid3)
if [ `hostname -s` = fermigrid3 ]; then
############################### dump the gums database##############################
mysqldump GUMS_1_1 > /var/tmp/gums-$DATE.sql
############################### scp the database to fg5x4, to be reloaded later##############################
scp /var/tmp/gums-$DATE.sql fg5x4:/var/tmp
############################### change gums update time to 17 years##############################
cp $VDT_LOCATION/tomcat/v5/webapps/gums/WEB-INF/web.xml$VDT_LOCATION/tomcat/v5/webapps/gums/WEB-INF/web.xml.$DATE
perl -pe's#<env-entry-value>60</env-entry-value>#<env-entry-value>8935200</env-entry-value>#;'-i \
$VDT_LOCATION/tomcat/v5/webapps/gums/WEB-INF/web.xml
############################### restart tomcat##############################
/etc/init.d/tomcat-5 restart
fi
# Changes on the SAZ server (fermigrid4)
if [ `hostname -s` = fermigrid4 ]; then
############################### dump the saz database##############################
mysqldump SAZDB > /var/tmp/saz-$DATE.sql
############################### scp the database to fg5x4, to be reloaded later##############################
scp /var/tmp/saz-$DATE.sql fg5x4:/var/tmp
fi

# Reload GUMS and SAZ database on fg5x4
if [ `hostname -s` = fg5x4 ]; then
############################### reload gums database##############################
mysql GUMS_1_1 < /var/tmp/gums-$DATE.sql
############################### reload the saz database##############################
mysql SAZDB < /var/tmp/saz-$DATE.sql
# Changes on the director:
if [ `hostname -s` -eq fg5x0 -o `hostname -s` -eq fg6x0 ]; then
############################### Edit /etc/sysconfig/iptables##############################
cp /etc/sysconfig/iptables /etc/sysconfig/iptables.$DATE
# change IP for voms-fg5x1 to voms.fnal.govperl -pe "s/112/$SHORT_VOMS_IP/g;" -i /etc/sysconfig/iptables
# change IP for voms.opensciencegrid.orgperl -pe "s/114/$SHORT_OSG_IP/g;" -i /etc/sysconfig/iptables
# change IP for gums-fg5x2 to gums.fnal.govperl -pe "s/113/$SHORT_GUMS_IP/g;" -i /etc/sysconfig/iptables
############################### Edit /etc/sysconfig/ha/lvs.cf##############################
cp /etc/sysconfig/ha/lvs.cf /etc/sysconfig/ha/lvs.cf.$DATE
# rename lvs rules appropriatelyperl -pe "s/voms-fg5x1/voms/g;" -i /etc/sysconfig/ha/lvs.cfperl -pe "s/osg-voms-saz-fg5x1/voms-osg/g;" -i /etc/sysconfig/
ha/lvs.cfperl -pe "s/gums-fg5x2/gums/g;" -i /etc/sysconfig/ha/lvs.cf
# change IP for voms-fg5x1 to voms.fnal.govperl -pe "s/131.225.107.112/$NEW_VOMS_IP/g;" -i /etc/sysconfig/

ha/lvs.cfperl -pe "s/eth0:112/eth0:$SHORT_VOMS_IP/g;" -i /etc/sysconfig/
ha/lvs.cfperl -pe "s/112/$SHORT_VOMS_IP/g;" -i /etc/sysconfig/ha.lvs
# change IP for saz-fg5x1 to voms.opensciencegrid.orgperl -pe "s/114/$SHORT_OSG_IP/g;" -i /etc/sysconfig/ha/lvs.cfperl -pe "s/eth0:114/eth0:$SHORT_OSG_IP/g;" -i /etc/sysconfig/
ha/lvs.cf
# change IP for gums-fg5x2 to gums.fnal.govperl -pe "s/131.225.107.113/$NEW_GUMS_IP/g;" -i /etc/sysconfig/
ha/lvs.cfperl -pe "s/eth0:113/eth0:$SHORT_GUMS_IP/g;" -i /etc/sysconfig/
ha/lvs.cf
############################### Restart iptables and pulse##############################
service iptables restartservice pulse restart
fi
# Changes on voms real servers:
if [ `hostname -s` = fg5x1 -o `hostname -s` = fg6x1 ]; then
############################### Edit /etc/sysconfig/iptables##############################
# cp /etc/sysconfig/iptables /etc/sysconfig/iptables.$DATE
# change IP for voms-fg5x1 to voms.fnal.gov# perl -pe "s/131.225.107.112/$NEW_VOMS_IP/g;" -i /etc/sysconfig/iptables
# change IP for saz-fg5x3 to voms.opensciencegrid.org# perl -pe "s/131.225.107.114/$NEW_OSG_IP/g;" -i /etc/sysconfig/iptables
############################### change IPs brought up on the lo device##############################
ifdown lo:112ifdown lo:114
# for voms.opensciencegrid.orgmv /etc/sysconfig/network-scripts/ifcfg-lo:114 /etc/sysconfig/
network-scripts/ifcfg-lo:$SHORT_OSG_IP

perl -pe "s/114/$SHORT_OSG_IP/g;" -i /etc/sysconfig/network-scripts/ifcfg-lo:$SHORT_OSG_IP
# for voms.fnal.govmv /etc/sysconfig/network-scripts/ifcfg-lo:112 /etc/sysconfig/
network-scripts/ifcfg-lo:$SHORT_VOMS_IPperl -pe "s/112/$SHORT_VOMS_IP/g;" -i /etc/sysconfig/
network-scripts/ifcfg-lo:$SHORT_VOMS_IP
############################### Bring up the lo interfaces##############################
ifup lo:$SHORT_VOMS_IPifup lo:$SHORT_OSG_IP
############################### Edit /usr/local/vdt/apache/conf/extra/httpd-ssl.conf##############################
cp $VDT_LOCATION/apache/conf/extra/httpd-ssl.conf $VDT_LOCATION/apache/conf/extra/httpd-ssl.conf.$DATE
# change IP for voms.fnal.govperl -pe "s/131.225.107.112/$NEW_VOMS_IP/g;" -i $VDT_LOCATION/
apache/conf/extra/httpd-ssl.conf
# change IP for voms.opensciencegrid.orgperl -pe "s/131.225.107.114/$NEW_OSG_IP/g;" -i $VDT_LOCATION/
apache/conf/extra/httpd-ssl.conf
############################### Restart iptables and apache##############################
# service iptables restartservice apache restart
fi
# Changes on gums real servers:
if [ `hostname -s` = fg5x2 -o `hostname -s` = fg6x2 ]; then
############################### Edit /etc/sysconfig/iptables##############################
cp /etc/sysconfig/iptables /etc/sysconfig/iptables.$DATE
# change IP for gums-fg5x2 to gums.fnal.govperl -pe "s/131.225.107.113/$NEW_GUMS_IP/g;" -i /etc/sysconfig/
iptables
############################### Re-link the httpcert and httpkey sym links to the cert/key that# contain the gums.fnal.gov hostnames##############################
if [ -L /etc/grid-security/http/httpcert.pem -a -L /etc/grid-security/http/httpkey.pem ]; then
rm -f /etc/grid-security/http/httpcert.pem /etc/grid-security/http/httpkey.pem
ln -s /etc/grid-security/http/gumshttpcert.pem /etc/grid-security/http/httpcert.pem
ln -s /etc/grid-security/http/gumshttpkey.pem /etc/grid-security/http/httpkey.pem
fi
############################### Restart iptables and apache##############################
service iptables restartservice apache restart
fi
# Changes on mysql real servers:
if [ `hostname -s` -eq fg5x4 ]; then
############################### Install gums and saz db dump script and cronjob to do this hourly##############################
# TODO - here
fi
# Changes on old gums server:
if [ `hostname -s` -eq fermigrid3 ]; then
############################### Install gums and saz db dump script and cronjob to do this hourly##############################
# TODO - here
fi
# Changes on integration gums server:
if [ `hostname -s` -eq fgtest3 ]; then
############################### Install gums and saz db dump script and cronjob to do this hourly##############################
# TODO - here
fi# Changes on old saz server:
if [ `hostname -s` -eq fermigrid4 ]; then
############################### Install gums and saz db dump script and cronjob to do this hourly##############################
# TODO - here
fi
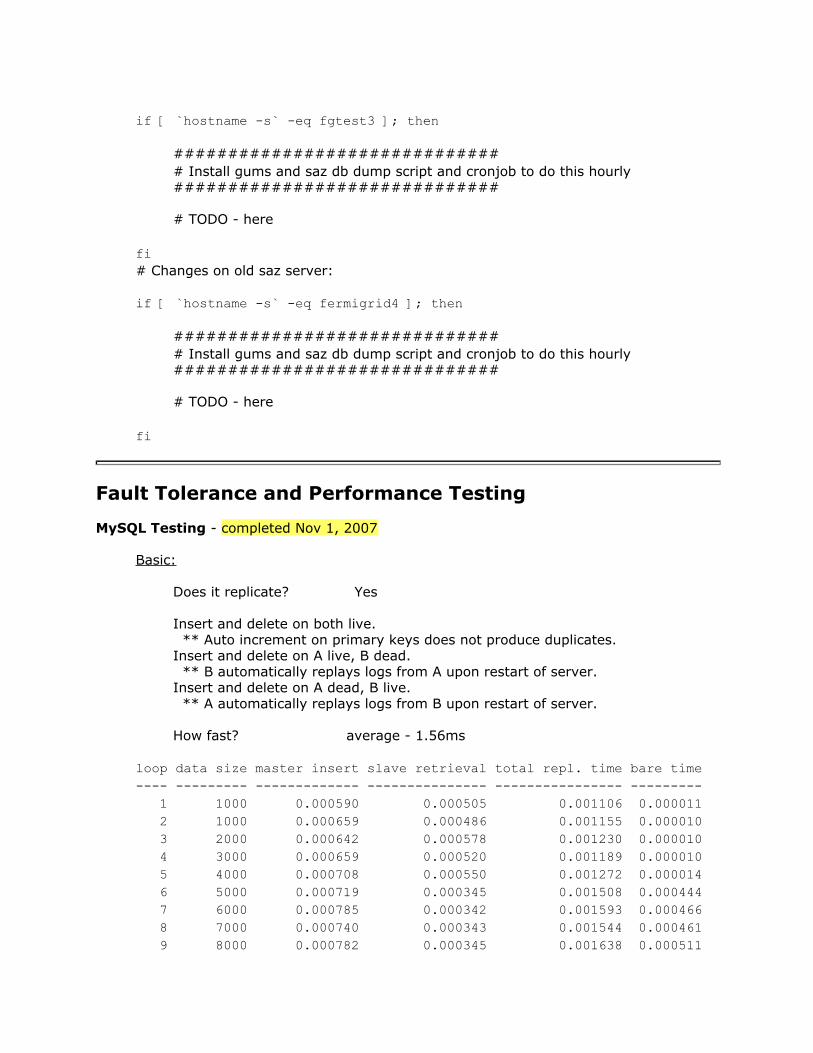
Fault Tolerance and Performance Testing
MySQL Testing - completed Nov 1, 2007
Basic:
Does it replicate? Yes
Insert and delete on both live.** Auto increment on primary keys does not produce duplicates.
Insert and delete on A live, B dead.** B automatically replays logs from A upon restart of server.
Insert and delete on A dead, B live.** A automatically replays logs from B upon restart of server.
How fast? average - 1.56ms
loop data size master insert slave retrieval total repl. time bare time---- --------- ------------- --------------- ---------------- ---------
1 1000 0.000590 0.000505 0.001106 0.0000112 1000 0.000659 0.000486 0.001155 0.0000103 2000 0.000642 0.000578 0.001230 0.0000104 3000 0.000659 0.000520 0.001189 0.0000105 4000 0.000708 0.000550 0.001272 0.0000146 5000 0.000719 0.000345 0.001508 0.0004447 6000 0.000785 0.000342 0.001593 0.0004668 7000 0.000740 0.000343 0.001544 0.0004619 8000 0.000782 0.000345 0.001638 0.000511
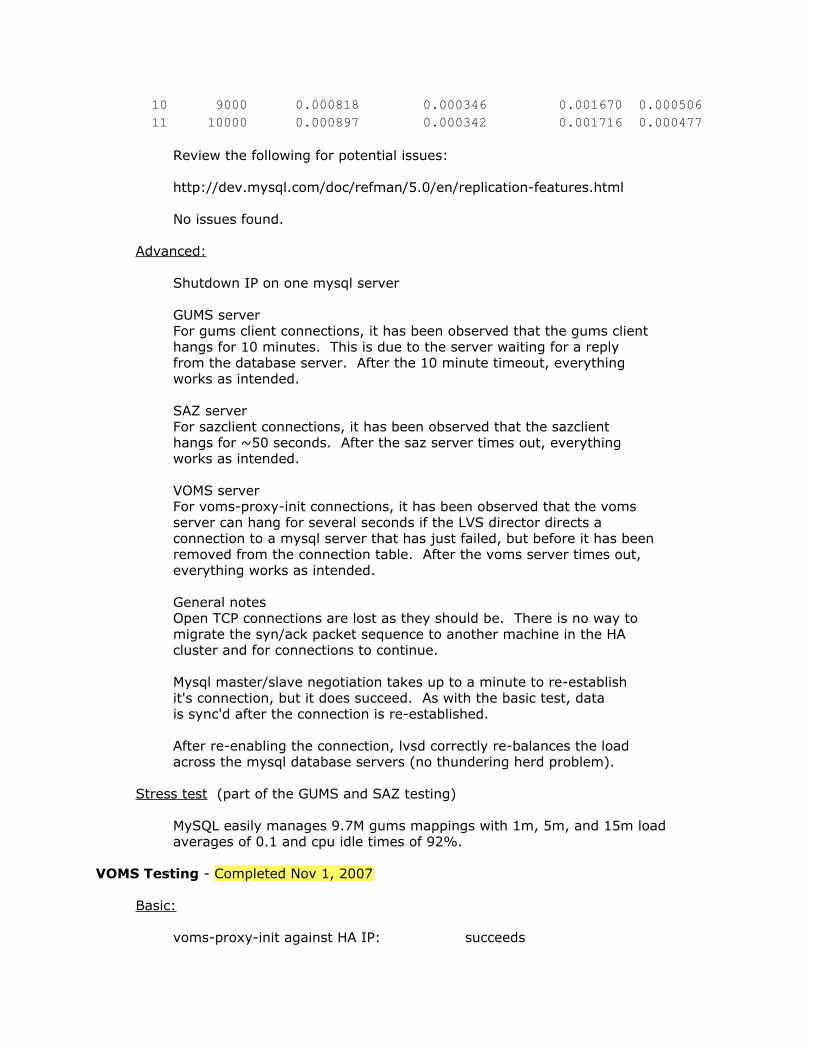
10 9000 0.000818 0.000346 0.001670 0.00050611 10000 0.000897 0.000342 0.001716 0.000477
Review the following for potential issues:
http://dev.mysql.com/doc/refman/5.0/en/replication-features.html
No issues found.
Advanced:
Shutdown IP on one mysql server
GUMS serverFor gums client connections, it has been observed that the gums clienthangs for 10 minutes. This is due to the server waiting for a replyfrom the database server. After the 10 minute timeout, everythingworks as intended.
SAZ serverFor sazclient connections, it has been observed that the sazclienthangs for ~50 seconds. After the saz server times out, everythingworks as intended.
VOMS serverFor voms-proxy-init connections, it has been observed that the vomsserver can hang for several seconds if the LVS director directs aconnection to a mysql server that has just failed, but before it has beenremoved from the connection table. After the voms server times out,everything works as intended.
General notesOpen TCP connections are lost as they should be. There is no way tomigrate the syn/ack packet sequence to another machine in the HAcluster and for connections to continue.
Mysql master/slave negotiation takes up to a minute to re-establishit's connection, but it does succeed. As with the basic test, datais sync'd after the connection is re-established.
After re-enabling the connection, lvsd correctly re-balances the loadacross the mysql database servers (no thundering herd problem).
Stress test (part of the GUMS and SAZ testing)
MySQL easily manages 9.7M gums mappings with 1m, 5m, and 15m loadaverages of 0.1 and cpu idle times of 92%.
VOMS Testing - Completed Nov 1, 2007
Basic:
voms-proxy-init against HA IP: succeeds

access voms-admin interface using HA IP: succeeds
Advanced:
Shutdown IP on one voms server.
Open TCP connections are lost as they should be. There is no way tomigrate the syn/ack packet sequence to another machine in the HAcluster and for connections to continue.
The voms-proxy-init hangs for ~54 seconds before timing out and failing togenerate a voms-proxy certificate. After the timeout, everything worksas intended.
GUMS Testing - completed Oct 31, 2007
Basic:
Point CE at HA gums server: succeeds
Advanced:
Point 25 CEs at HA saz server at 2Hz succeeds - 4.3M mappings/daygums servers: 2mysql servers: 1load on gums: ~1.2load on mysql: 0.1cpu idle on gums: 60%cpu idle on mysql: 92%mappings/day: 4.3M (extrapolated)
Point 25 CEs at HA saz server at 4.5Hz succeeds - 9.7M mappings/daygums servers: 2mysql servers: 2load on gums: ~9.5load on mysql: 0.1cpu idle on gums: 15%cpu idle on mysql: 92%mappings/day: 9.7M (extrapolated)
Shutdown IP on one gums server
Open TCP connections are lost as they should be. There is no way tomigrate the syn/ack packet sequence to another machine in the HAcluster and for connections to continue.
The gums client hangs for ~54 seconds before timing out and failing tomap a user.
SAZ Testing - completed Oct 31, 2007
Basic:
Point CE at HA gums server: succeeds
Advanced:
Point 25 sazclients at HA saz server at 2Hz: 1.1M
saz servers: 2mysql servers: 2load on saz servers: ~12load on mysql servers: 0.1cpu idle on saz servers: 0%cpu idle on mysql servers: 98%authorizations/day: 1.1M (extrapolated)
Shutdown IP on one saz server
Open TCP connections are lost as they should be. There is no way tomigrate the syn/ack packet sequence to another machine in the HAcluster and for connections to continue.
The sazclient hangs for ~50 seconds before timing out and failing toauthorize a user.
LVS Testing - completed Nov 2, 2007
Basic:
Shutdown LVS on master.
How long to failover IPs and connections to the backup?
~6 seconds.
Are active connections migrated per the following:http://www.austintek.com/LVS/LVS-HOWTO/HOWTO/
LVS-HOWTO.failover.html#stateful_failover?
Yes.
Future Work
This is a list of projects should would enhance LVS in general and the FermiGrid HAsystem in particular.
Item 1Add the ability to control lvs from piranha web UI with sudo.
Item 2
Add the ability to control individual lvs services from piranha web UI without having touse the system rc script to stopt/start all services at the same time. A nice DHTMLinterface.
Appendix
iptables for mysql servers (click to download)
# mysql iptables# horm's tranparent proxy for LVS*nat:PREROUTING ACCEPT [7:786]:POSTROUTING ACCEPT [0:0]:OUTPUT ACCEPT [0:0]# The following IP must be the floating IP address from the LVS director-A PREROUTING -d 131.225.107.124 -p tcp --dport 3306 -j REDIRECTCOMMIT
*filter:INPUT ACCEPT [35:5488]:FORWARD ACCEPT [0:0]:OUTPUT ACCEPT [22:1588]-A INPUT -m state --state RELATED,ESTABLISHED -j ACCEPT
# Accept all from localhost-A INPUT -s 127.0.0.1/255.255.255.255 -j ACCEPT
# Accept all from fg{5,6}x[1-4] to port 3306, *only*-A INPUT -s 131.225.107.36/255.255.255.255 -p tcp -m tcp --dport 3306 -jACCEPT-A INPUT -s 131.225.107.102/255.255.255.255 -p tcp -m tcp --dport 3306-j ACCEPT-A INPUT -s 131.225.107.103/255.255.255.255 -p tcp -m tcp --dport 3306-j ACCEPT-A INPUT -s 131.225.107.104/255.255.255.255 -p tcp -m tcp --dport 3306-j ACCEPT-A INPUT -s 131.225.107.105/255.255.255.255 -p tcp -m tcp --dport 3306-j ACCEPT-A INPUT -s 131.225.107.76/255.255.255.255 -p tcp -m tcp --dport 3306 -jACCEPT-A INPUT -s 131.225.107.106/255.255.255.255 -p tcp -m tcp --dport 3306-j ACCEPT-A INPUT -s 131.225.107.107/255.255.255.255 -p tcp -m tcp --dport 3306-j ACCEPT-A INPUT -s 131.225.107.108/255.255.255.255 -p tcp -m tcp --dport 3306-j ACCEPT
-A INPUT -s 131.225.107.109/255.255.255.255 -p tcp -m tcp --dport 3306-j ACCEPT
# Accept all from within 131.225.0.0-A INPUT -s 131.225.0.0/255.255.0.0 -j ACCEPT
# Allow ssh-A INPUT -p tcp -m tcp --dport 22 -j ACCEPT-A INPUT -p udp -m udp --dport 22 -j ACCEPT
# Allow kerberized telnet-A INPUT -p tcp -m tcp --dport 23 -j ACCEPT-A INPUT -p udp -m udp --dport 23 -j ACCEPT
# Allow klogin-A INPUT -p tcp -m tcp --dport 543 -j ACCEPT-A INPUT -p udp -m udp --dport 543 -j ACCEPT
# Allow kshell-A INPUT -p tcp -m tcp --dport 544 -j ACCEPT-A INPUT -p udp -m udp --dport 544 -j ACCEPT
# Allow eklogin-A INPUT -p tcp -m tcp --dport 2105 -j ACCEPT-A INPUT -p udp -m udp --dport 2105 -j ACCEPT
# drop everything else-A INPUT -j DROP
COMMIT
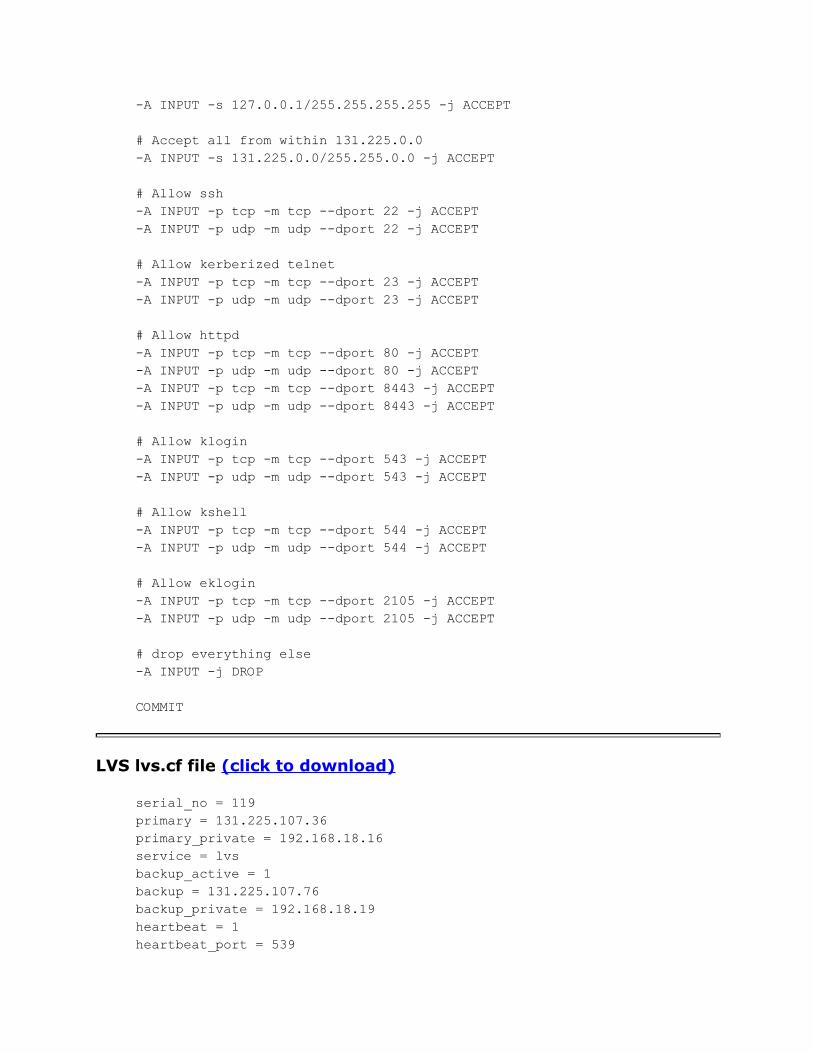
iptables for LVS Director and Backup (click to download)
# LVS director iptables*mangle:PREROUTING ACCEPT [407:41667]:INPUT ACCEPT [407:41667]:FORWARD ACCEPT [0:0]:OUTPUT ACCEPT [278:22960]:POSTROUTING ACCEPT [280:23232]
# For VOMS-A PREROUTING -d 131.225.107.112/32 -p tcp -m tcp --dport 8443 -j MARK--set-mark 11280-A PREROUTING -d 131.225.107.138/32 -p tcp -m tcp --dport 8443 -j MARK--set-mark 13880COMMIT
*filter:INPUT ACCEPT [35:5488]:FORWARD ACCEPT [0:0]:OUTPUT ACCEPT [22:1588]
# Accept all from localhost-A INPUT -s 127.0.0.1/255.255.255.255 -j ACCEPT
# Accept all from within 131.225.0.0-A INPUT -s 131.225.0.0/255.255.0.0 -j ACCEPT
# Allow ssh-A INPUT -p tcp -m tcp --dport 22 -j ACCEPT-A INPUT -p udp -m udp --dport 22 -j ACCEPT
# Allow kerberized telnet-A INPUT -p tcp -m tcp --dport 23 -j ACCEPT-A INPUT -p udp -m udp --dport 23 -j ACCEPT
# Allow httpd-A INPUT -p tcp -m tcp --dport 80 -j ACCEPT-A INPUT -p udp -m udp --dport 80 -j ACCEPT
# Allow VOMS ports-A INPUT -p tcp -m tcp --dport 15001:15030 -j ACCEPT
# Allow https to voms.fnal.gov VOMS servers-A INPUT -d 131.225.107.112 -p tcp -m tcp --dport 8443 -j ACCEPT-A INPUT -d 131.225.107.112 -p udp -m udp --dport 8443 -j ACCEPT
# Allow https to voms.opensciencegrid.org VOMS servers-A INPUT -d 131.225.107.138 -p tcp -m tcp --dport 8443 -j ACCEPT-A INPUT -d 131.225.107.138 -p udp -m udp --dport 8443 -j ACCEPT
# Allow klogin-A INPUT -p tcp -m tcp --dport 543 -j ACCEPT-A INPUT -p udp -m udp --dport 543 -j ACCEPT
# Allow kshell-A INPUT -p tcp -m tcp --dport 544 -j ACCEPT-A INPUT -p udp -m udp --dport 544 -j ACCEPT
# Allow eklogin-A INPUT -p tcp -m tcp --dport 2105 -j ACCEPT-A INPUT -p udp -m udp --dport 2105 -j ACCEPT
# Allow MySQL

# -A INPUT -p tcp -m tcp --dport 3306 -j ACCEPT# -A INPUT -p udp -m udp --dport 3306 -j ACCEPT
# Allow VOMS ports-A INPUT -p tcp -m tcp --dport 15001:15030 -j ACCEPT
# drop everything else-A INPUT -j DROPCOMMIT
iptables for VOMS servers (click to download)
# iptables for VOMS real servers
*filter:INPUT ACCEPT [35:5488]:FORWARD ACCEPT [0:0]:OUTPUT ACCEPT [22:1588]-A INPUT -m state --state RELATED,ESTABLISHED -j ACCEPT
# Accept all from localhost-A INPUT -s 127.0.0.1/255.255.255.255 -j ACCEPT
# Accept all from within 131.225.0.0-A INPUT -s 131.225.0.0/255.255.0.0 -j ACCEPT
# Allow ssh-A INPUT -p tcp -m tcp --dport 22 -j ACCEPT-A INPUT -p udp -m udp --dport 22 -j ACCEPT
# Allow kerberized telnet-A INPUT -p tcp -m tcp --dport 23 -j ACCEPT-A INPUT -p udp -m udp --dport 23 -j ACCEPT
# Allow httpd-A INPUT -p tcp -m tcp --dport 80 -j ACCEPT-A INPUT -p udp -m udp --dport 80 -j ACCEPT-A INPUT -p tcp -m tcp --dport 8443 -j ACCEPT-A INPUT -p udp -m udp --dport 8443 -j ACCEPT
# Allow klogin-A INPUT -p tcp -m tcp --dport 543 -j ACCEPT-A INPUT -p udp -m udp --dport 543 -j ACCEPT
# Allow kshell-A INPUT -p tcp -m tcp --dport 544 -j ACCEPT-A INPUT -p udp -m udp --dport 544 -j ACCEPT

# Allow eklogin-A INPUT -p tcp -m tcp --dport 2105 -j ACCEPT-A INPUT -p udp -m udp --dport 2105 -j ACCEPT
# Allow MySQL# -A INPUT -p tcp -m tcp --dport 3306 -j ACCEPT# -A INPUT -p udp -m udp --dport 3306 -j ACCEPT
# Allow VOMS ports-A INPUT -p tcp -m tcp --dport 15001:15030 -j ACCEPT
# drop everything else-A INPUT -j DROP
COMMIT
iptables for GUMS servers (click to download)
# iptables for GUMS real server# horm's tranparent proxy for LVS*nat:PREROUTING ACCEPT [7:786]:POSTROUTING ACCEPT [0:0]:OUTPUT ACCEPT [0:0]-A PREROUTING -d 131.225.107.113 -p tcp --dport 8443 -j REDIRECTCOMMIT
*filter:INPUT ACCEPT [35:5488]:FORWARD ACCEPT [0:0]:OUTPUT ACCEPT [22:1588]-A INPUT -m state --state RELATED,ESTABLISHED -j ACCEPT
# Accept all from localhost-A INPUT -s 127.0.0.1/255.255.255.255 -j ACCEPT
# Accept all from within 131.225.0.0-A INPUT -s 131.225.0.0/255.255.0.0 -j ACCEPT
# Allow ssh-A INPUT -p tcp -m tcp --dport 22 -j ACCEPT-A INPUT -p udp -m udp --dport 22 -j ACCEPT
# Allow kerberized telnet-A INPUT -p tcp -m tcp --dport 23 -j ACCEPT

-A INPUT -p udp -m udp --dport 23 -j ACCEPT
# Allow httpd-A INPUT -p tcp -m tcp --dport 80 -j ACCEPT-A INPUT -p udp -m udp --dport 80 -j ACCEPT-A INPUT -p tcp -m tcp --dport 8443 -j ACCEPT-A INPUT -p udp -m udp --dport 8443 -j ACCEPT
# Allow klogin-A INPUT -p tcp -m tcp --dport 543 -j ACCEPT-A INPUT -p udp -m udp --dport 543 -j ACCEPT
# Allow kshell-A INPUT -p tcp -m tcp --dport 544 -j ACCEPT-A INPUT -p udp -m udp --dport 544 -j ACCEPT
# Allow eklogin-A INPUT -p tcp -m tcp --dport 2105 -j ACCEPT-A INPUT -p udp -m udp --dport 2105 -j ACCEPT
# Allow MySQL-A INPUT -p tcp -m tcp --dport 3306 -j ACCEPT-A INPUT -p udp -m udp --dport 3306 -j ACCEPT
# drop everything else-A INPUT -j DROP
COMMIT
iptables for SAZ servers (click to download)
# iptables for SAZ real server# horm's tranparent proxy for LVS*nat:PREROUTING ACCEPT [7:786]:POSTROUTING ACCEPT [0:0]:OUTPUT ACCEPT [0:0]-A PREROUTING -d 131.225.107.126 -p tcp --dport 8888 -j REDIRECTCOMMIT
*filter:INPUT ACCEPT [35:5488]:FORWARD ACCEPT [0:0]:OUTPUT ACCEPT [22:1588]-A INPUT -m state --state RELATED,ESTABLISHED -j ACCEPT
# Accept all from localhost
-A INPUT -s 127.0.0.1/255.255.255.255 -j ACCEPT
# Accept all from within 131.225.0.0-A INPUT -s 131.225.0.0/255.255.0.0 -j ACCEPT
# Allow ssh-A INPUT -p tcp -m tcp --dport 22 -j ACCEPT-A INPUT -p udp -m udp --dport 22 -j ACCEPT
# Allow kerberized telnet-A INPUT -p tcp -m tcp --dport 23 -j ACCEPT-A INPUT -p udp -m udp --dport 23 -j ACCEPT
# Allow httpd-A INPUT -p tcp -m tcp --dport 80 -j ACCEPT-A INPUT -p udp -m udp --dport 80 -j ACCEPT-A INPUT -p tcp -m tcp --dport 8443 -j ACCEPT-A INPUT -p udp -m udp --dport 8443 -j ACCEPT
# Allow klogin-A INPUT -p tcp -m tcp --dport 543 -j ACCEPT-A INPUT -p udp -m udp --dport 543 -j ACCEPT
# Allow kshell-A INPUT -p tcp -m tcp --dport 544 -j ACCEPT-A INPUT -p udp -m udp --dport 544 -j ACCEPT
# Allow eklogin-A INPUT -p tcp -m tcp --dport 2105 -j ACCEPT-A INPUT -p udp -m udp --dport 2105 -j ACCEPT
# drop everything else-A INPUT -j DROP
COMMIT
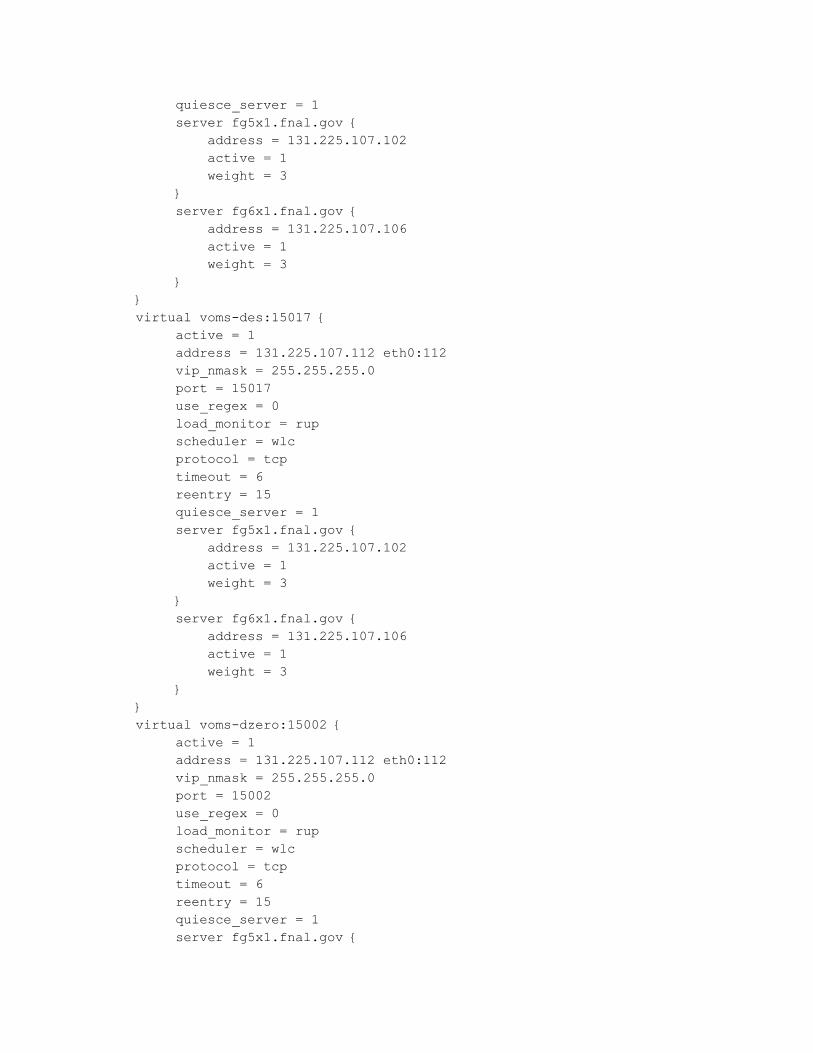
LVS lvs.cf file (click to download)
serial_no = 119primary = 131.225.107.36primary_private = 192.168.18.16service = lvsbackup_active = 1backup = 131.225.107.76backup_private = 192.168.18.19heartbeat = 1heartbeat_port = 539

keepalive = 6deadtime = 18network = directdebug_level = NONEmonitor_links = 1virtual MYSQL:3306 {
active = 1address = 131.225.107.124 eth0:124vip_nmask = 255.255.255.0port = 3306expect = "up"use_regex = 0send_program = "/usr/local/bin/lvs-ha-check-mysql.sh %h"load_monitor = rupscheduler = wlcprotocol = tcptimeout = 6reentry = 15quiesce_server = 1server fg5x4 {
address = 131.225.107.105active = 1weight = 3
}server fg6x4 {
address = 131.225.107.109active = 1weight = 3
}}virtual SAZ:8888 {
active = 1address = 131.225.107.126 eth0:126vip_nmask = 255.255.255.0port = 8888send = "quit"use_regex = 0load_monitor = rupscheduler = wlcprotocol = tcptimeout = 6reentry = 15quiesce_server = 1server fg5x3 {
address = 131.225.107.104active = 1weight = 3
}

server fg6x3 {address = 131.225.107.108active = 1weight = 3
}}virtual voms-fg5x1:8443 {
active = 1address = 131.225.107.112 eth0:112vip_nmask = 255.255.255.0fwmark = 11280port = 8443persistent = 600pmask = 255.255.255.0expect = "up"use_regex = 0send_program = "/usr/local/bin/lvs-ha-check-voms-admin.sh %h"load_monitor = rupscheduler = wlcprotocol = tcptimeout = 6reentry = 15quiesce_server = 1server fg5x1.fnal.gov {
address = 131.225.107.102active = 1weight = 3
}server fg6x1.fnal.gov {
address = 131.225.107.106active = 1weight = 3
}}virtual voms-osg:8443 {
active = 1address = 131.225.107.138 eth0:138vip_nmask = 255.255.255.0fwmark = 13880port = 8443persistent = 600pmask = 255.255.255.0expect = "up"use_regex = 0send_program = "/usr/local/bin/lvs-ha-check-voms-admin.sh %h"load_monitor = rupscheduler = wlcprotocol = tcp

timeout = 6reentry = 15quiesce_server = 1server fg5x1.fnal.gov {
address = 131.225.107.102active = 1weight = 3
}server fg6x1.fnal.gov {
address = 131.225.107.106active = 1weight = 3
}}virtual gums-fg5x2:8443 {
active = 1address = 131.225.107.113 eth0:113vip_nmask = 255.255.255.0port = 8443expect = "up"use_regex = 0send_program = "/usr/local/bin/lvs-ha-check-gums.sh %h"load_monitor = rupscheduler = wlcprotocol = tcptimeout = 6reentry = 15quiesce_server = 1server fg5x2.fnal.gov {
address = 131.225.107.103active = 1weight = 3
}server fg6x2.fnal.gov {
address = 131.225.107.107active = 1weight = 3
}}virtual voms-auger:15007 {
active = 1address = 131.225.107.112 eth0:112vip_nmask = 255.255.255.0port = 15007use_regex = 0load_monitor = rupscheduler = wlcprotocol = tcp

timeout = 6reentry = 15quiesce_server = 1server fg5x1.fnal.gov {
address = 131.225.107.102active = 1weight = 3
}server fg6x1.fnal.gov {
address = 131.225.107.106active = 1weight = 3
}}virtual voms-cdf:15020 {
active = 1address = 131.225.107.112 eth0:112vip_nmask = 255.255.255.0port = 15020use_regex = 0load_monitor = rupscheduler = wlcprotocol = tcptimeout = 6reentry = 15quiesce_server = 1server fg5x1.fnal.gov {
address = 131.225.107.102active = 1weight = 3
}server fg6x1.fnal.gov {
address = 131.225.107.106active = 1weight = 3
}}virtual voms-cms:15015 {
active = 1address = 131.225.107.112 eth0:112vip_nmask = 255.255.255.0port = 15015use_regex = 0load_monitor = rupscheduler = wlcprotocol = tcptimeout = 6reentry = 15
quiesce_server = 1server fg5x1.fnal.gov {
address = 131.225.107.102active = 1weight = 3
}server fg6x1.fnal.gov {
address = 131.225.107.106active = 1weight = 3
}}virtual voms-des:15017 {
active = 1address = 131.225.107.112 eth0:112vip_nmask = 255.255.255.0port = 15017use_regex = 0load_monitor = rupscheduler = wlcprotocol = tcptimeout = 6reentry = 15quiesce_server = 1server fg5x1.fnal.gov {
address = 131.225.107.102active = 1weight = 3
}server fg6x1.fnal.gov {
address = 131.225.107.106active = 1weight = 3
}}virtual voms-dzero:15002 {
active = 1address = 131.225.107.112 eth0:112vip_nmask = 255.255.255.0port = 15002use_regex = 0load_monitor = rupscheduler = wlcprotocol = tcptimeout = 6reentry = 15quiesce_server = 1server fg5x1.fnal.gov {
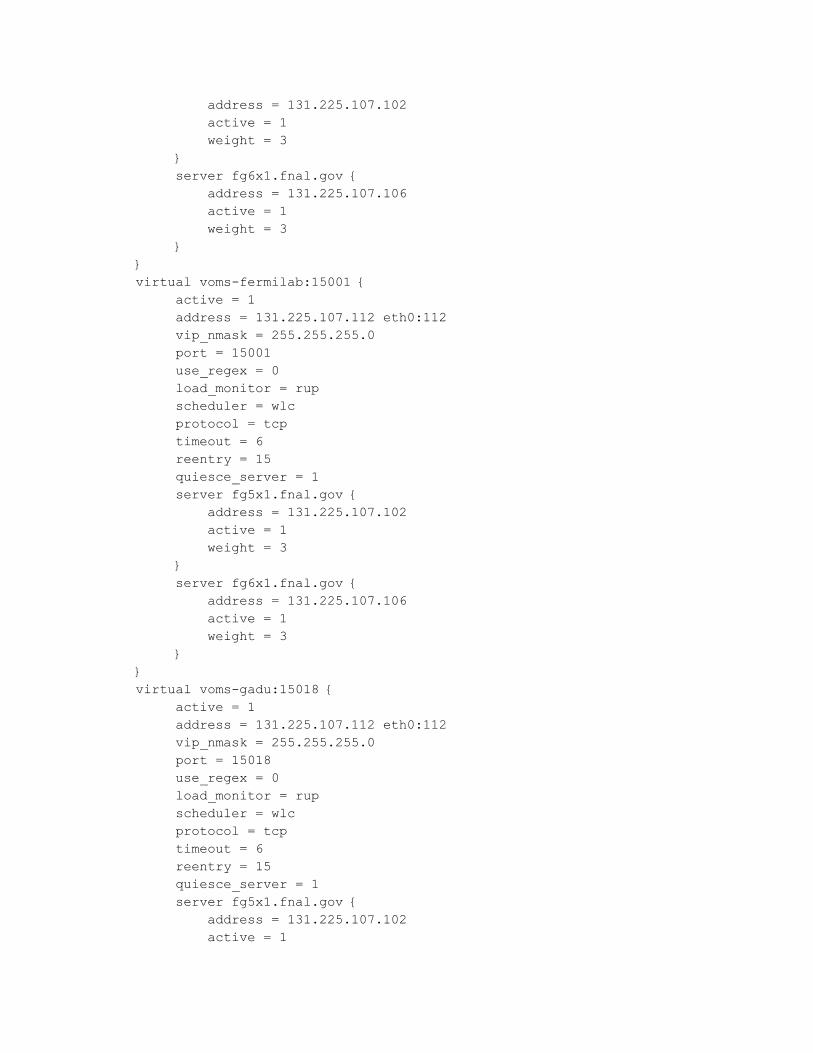
address = 131.225.107.102active = 1weight = 3
}server fg6x1.fnal.gov {
address = 131.225.107.106active = 1weight = 3
}}virtual voms-fermilab:15001 {
active = 1address = 131.225.107.112 eth0:112vip_nmask = 255.255.255.0port = 15001use_regex = 0load_monitor = rupscheduler = wlcprotocol = tcptimeout = 6reentry = 15quiesce_server = 1server fg5x1.fnal.gov {
address = 131.225.107.102active = 1weight = 3
}server fg6x1.fnal.gov {
address = 131.225.107.106active = 1weight = 3
}}virtual voms-gadu:15018 {
active = 1address = 131.225.107.112 eth0:112vip_nmask = 255.255.255.0port = 15018use_regex = 0load_monitor = rupscheduler = wlcprotocol = tcptimeout = 6reentry = 15quiesce_server = 1server fg5x1.fnal.gov {
address = 131.225.107.102active = 1

weight = 3}server fg6x1.fnal.gov {
address = 131.225.107.106active = 1weight = 3
}}virtual voms-i2u2:15026 {
active = 1address = 131.225.107.112 eth0:112vip_nmask = 255.255.255.0port = 15026use_regex = 0load_monitor = rupscheduler = wlcprotocol = tcptimeout = 6reentry = 15quiesce_server = 1server fg5x1.fnal.gov {
address = 131.225.107.102active = 1weight = 3
}server fg6x1.fnal.gov {
address = 131.225.107.106active = 1weight = 3
}}virtual voms-ilc:15023 {
active = 1address = 131.225.107.112 eth0:112vip_nmask = 255.255.255.0port = 15023use_regex = 0load_monitor = rupscheduler = wlcprotocol = tcptimeout = 6reentry = 15quiesce_server = 1server fg5x1.fnal.gov {
address = 131.225.107.102active = 1weight = 3
}
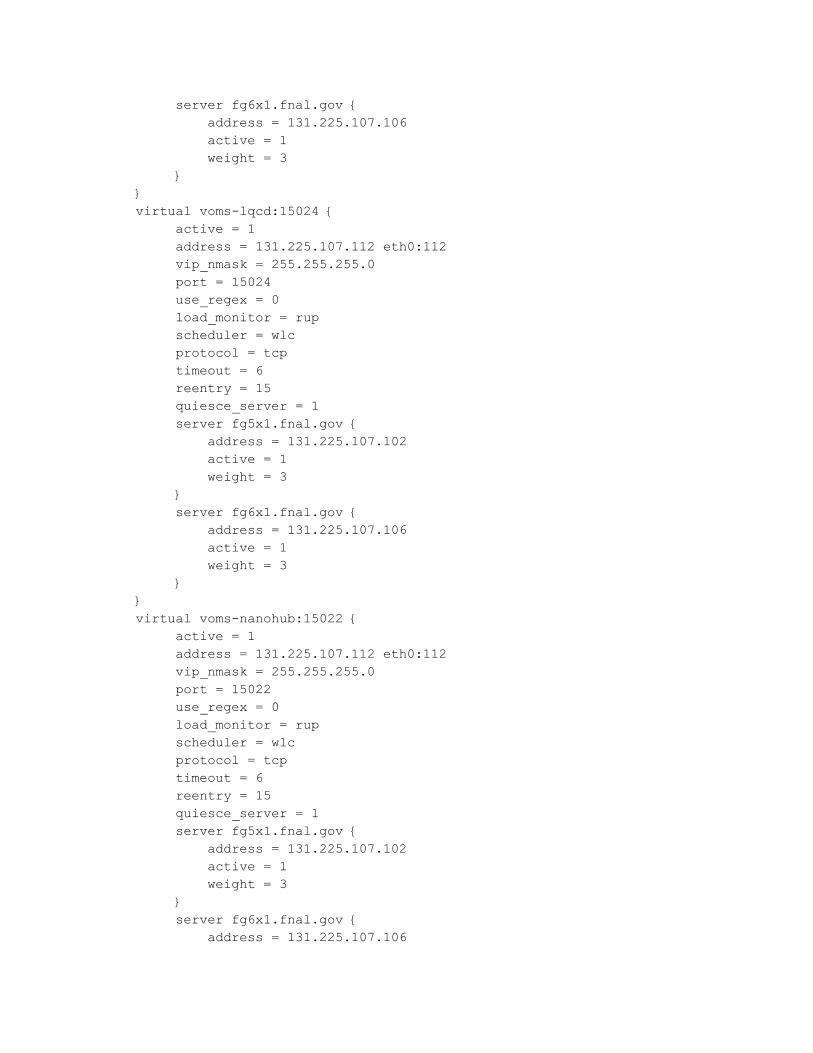
server fg6x1.fnal.gov {address = 131.225.107.106active = 1weight = 3
}}virtual voms-lqcd:15024 {
active = 1address = 131.225.107.112 eth0:112vip_nmask = 255.255.255.0port = 15024use_regex = 0load_monitor = rupscheduler = wlcprotocol = tcptimeout = 6reentry = 15quiesce_server = 1server fg5x1.fnal.gov {
address = 131.225.107.102active = 1weight = 3
}server fg6x1.fnal.gov {
address = 131.225.107.106active = 1weight = 3
}}virtual voms-nanohub:15022 {
active = 1address = 131.225.107.112 eth0:112vip_nmask = 255.255.255.0port = 15022use_regex = 0load_monitor = rupscheduler = wlcprotocol = tcptimeout = 6reentry = 15quiesce_server = 1server fg5x1.fnal.gov {
address = 131.225.107.102active = 1weight = 3
}server fg6x1.fnal.gov {
address = 131.225.107.106
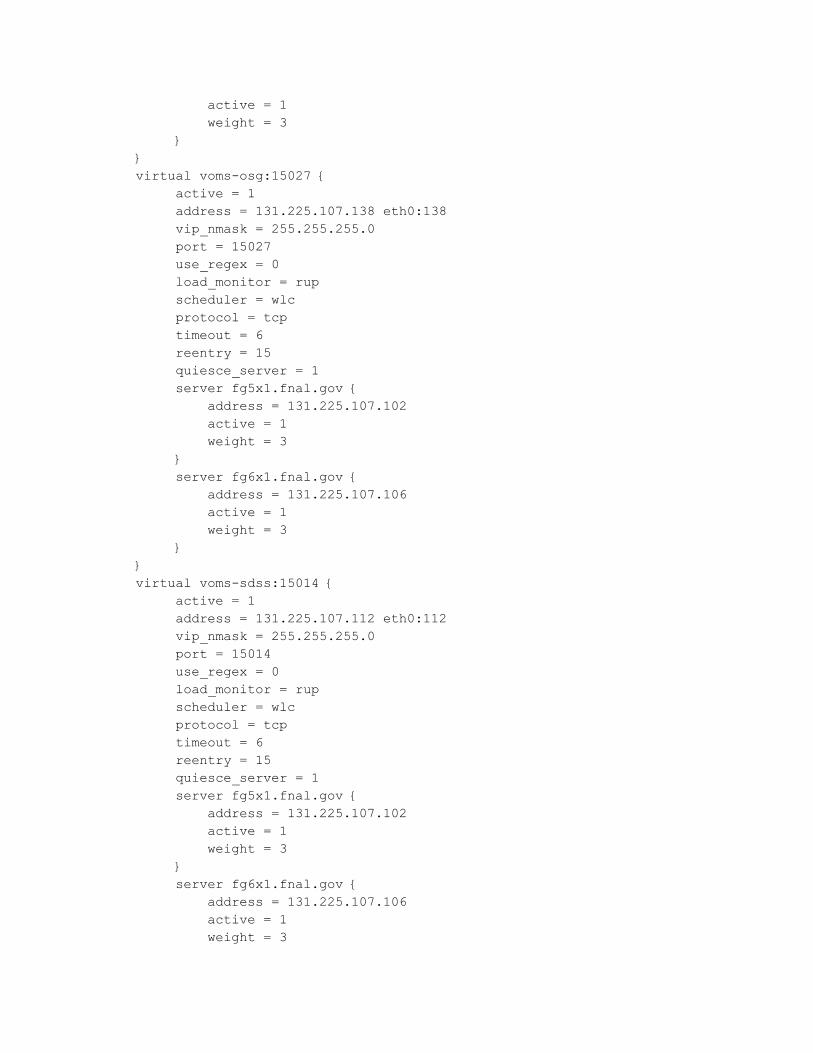
active = 1weight = 3
}}virtual voms-osg:15027 {
active = 1address = 131.225.107.138 eth0:138vip_nmask = 255.255.255.0port = 15027use_regex = 0load_monitor = rupscheduler = wlcprotocol = tcptimeout = 6reentry = 15quiesce_server = 1server fg5x1.fnal.gov {
address = 131.225.107.102active = 1weight = 3
}server fg6x1.fnal.gov {
address = 131.225.107.106active = 1weight = 3
}}virtual voms-sdss:15014 {
active = 1address = 131.225.107.112 eth0:112vip_nmask = 255.255.255.0port = 15014use_regex = 0load_monitor = rupscheduler = wlcprotocol = tcptimeout = 6reentry = 15quiesce_server = 1server fg5x1.fnal.gov {
address = 131.225.107.102active = 1weight = 3
}server fg6x1.fnal.gov {
address = 131.225.107.106active = 1weight = 3

}}
LVS Check Mysql script (click to download)
#!/bin/bash#lvs_ha_check_mysql.sh
if [ $# -eq 0 ]; thenecho "host not specified"exit 1
fi
/usr/bin/mysql test -h $1 -u user1 --password=pass1 -B -e 'show tables;'&> /dev/null
if [ $? -eq 0 ]; thenecho "up"
elseecho "down"
fi
LVS Check VOMS Admin script (click to download)
#!/bin/bash#lvs-ha-check-voms-admin.sh
if [ $# -eq 0 ]; thenecho "host not specified"exit 1
fi
curl -s --insecure --cert /etc/grid-security/hostcert.pem --key /etc/grid-security/hostkey.pem https://${1}:8443 | grep "Virtual Data Toolkit" &> /dev/null
if [ $? -eq 0 ]; thenecho "up"
elseecho "down"
fi

LVS Check GUMS script (click to download)
#!/bin/bash# lvs-ha-check-gums.sh
if [ $# -eq 0 ]; thenecho "host not specified"exit 1
fi
curl -s --insecure --cert /etc/grid-security/hostcert.pem --key /etc/grid-security/hostkey.pem https://${1}:8443/gums/services/GUMSAuthorizationServicePort | grep "Hi there" &> /dev/null
if [ $? -eq 0 ]; thenecho "up"
elseecho "down"
fi
Related Documents