Failures of individual restorations, and their management Prof. Ahmad El Hejazi

Welcome message from author
This document is posted to help you gain knowledge. Please leave a comment to let me know what you think about it! Share it to your friends and learn new things together.
Transcript
Failures of individual restorations, and their management
Prof. Ahmad El Hejazi
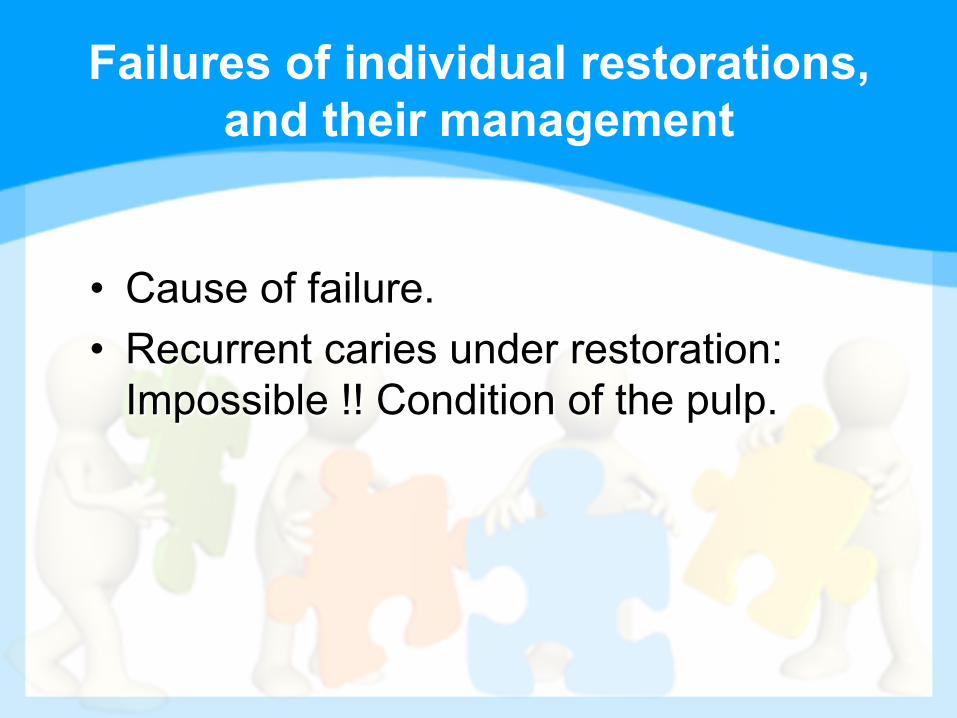
Failures of individual restorations, and their management
• Cause of failure. • Recurrent caries under restoration:
Impossible !! Condition of the pulp.
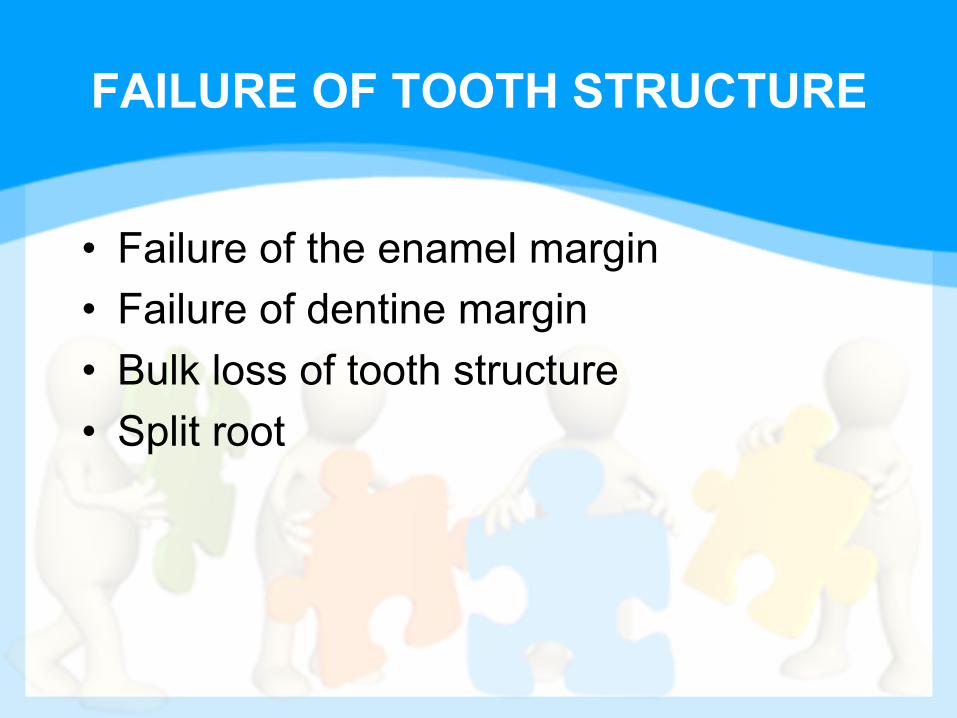
FAILURE OF TOOTH STRUCTURE
• Failure of the enamel margin • Failure of dentine margin • Bulk loss of tooth structure • Split root
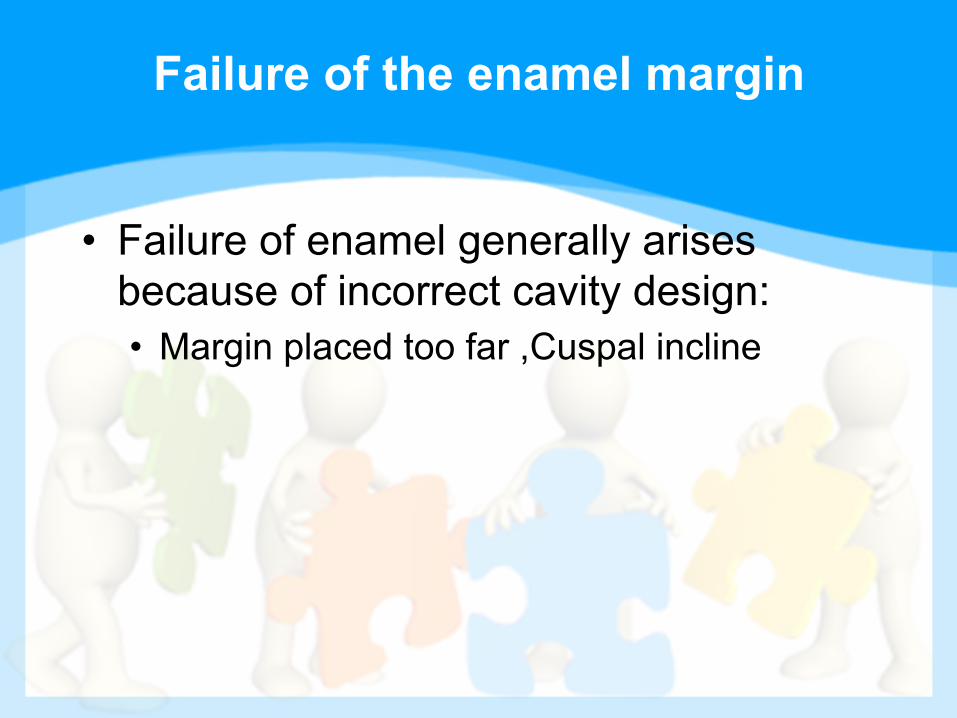
Failure of the enamel margin
• Failure of enamel generally arises because of incorrect cavity design: • Margin placed too far ,Cuspal incline
Failure of dentine margin
• Generally the gingival margin of a restoration that is imbedded in dentine
• Problem: detection of a fault and it is repair – Failure to adapt or condense the restoration – Over hanging margin will lead to root caries
gingival recession 1. Repair the margin or replace the restoration 2. Access to the lesion
Bulk loss of tooth structure
• Loss of an entire cusp is distressing to the patient
– Dentist has failed to take into account the weakened nature of the remaining tooth structure
– Failed to provide some form of protective restoration (monitor occlusal wear).

Split root and Loss of vitality
• Non vital tooth restore with post crown • Death of the pulp
– Shift of color and translucency.
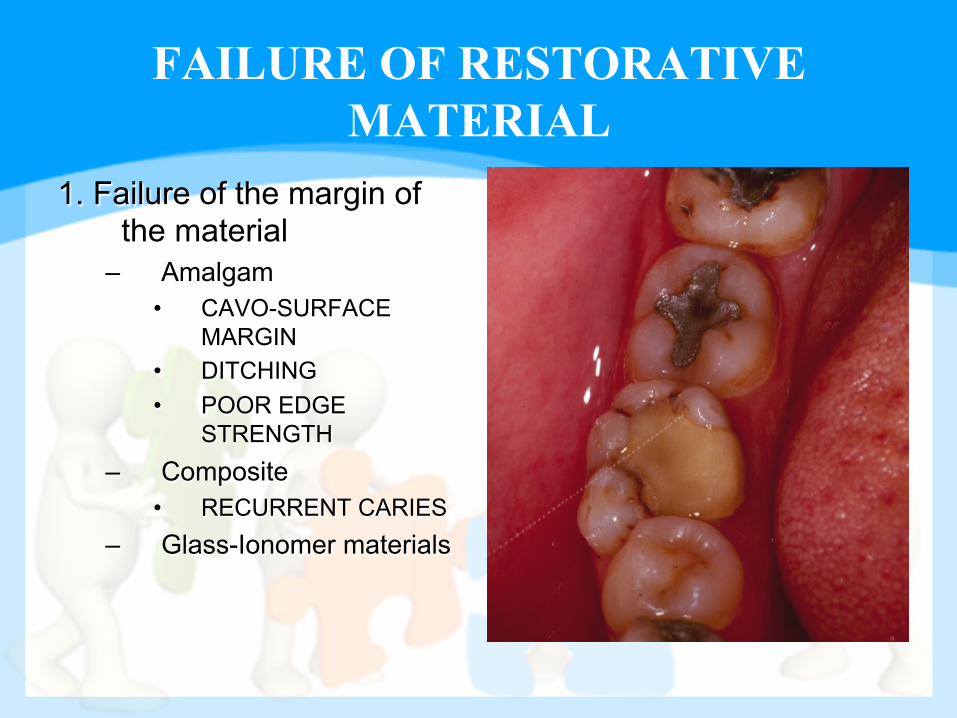
FAILURE OF RESTORATIVE MATERIAL
1. Failure of the margin of the material
– Amalgam • CAVO-SURFACE
MARGIN • DITCHING • POOR EDGE
STRENGTH – Composite
• RECURRENT CARIES – Glass-Ionomer materials
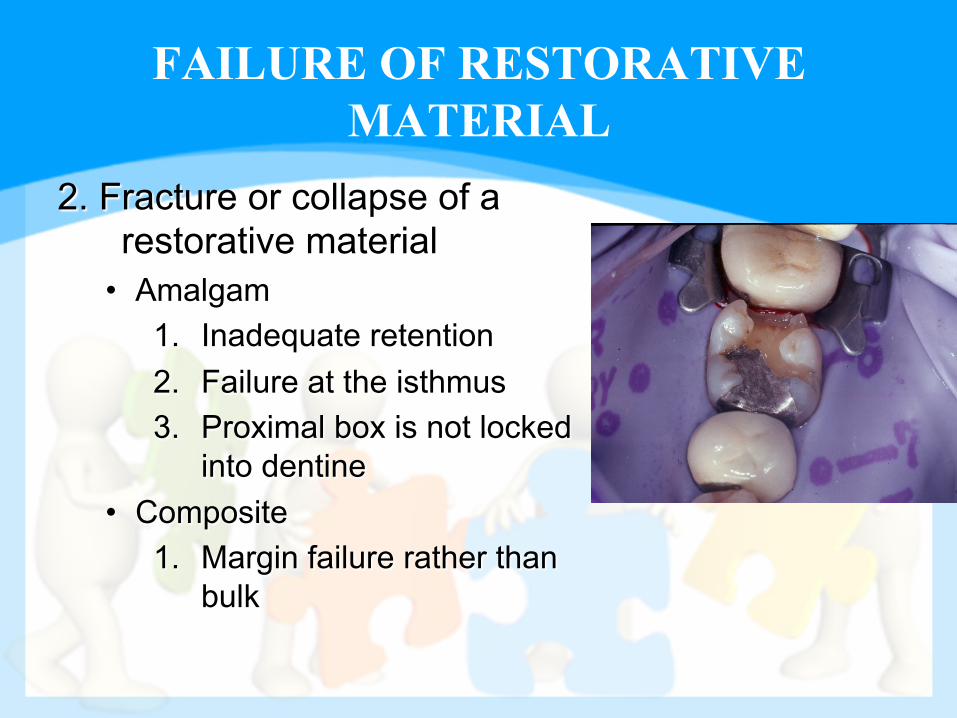
FAILURE OF RESTORATIVE MATERIAL
2. Fracture or collapse of a restorative material
• Amalgam 1. Inadequate retention 2. Failure at the isthmus 3. Proximal box is not locked
into dentine • Composite
1. Margin failure rather than bulk
Total loss of a restoration
1. Rigid restorations – Loss of cement. – Incorrect cavity design.
2. Direct plastic restorations 1. Amalgam rarely disappear. 2. Glass-Ionomer and composite may be lost
from erosion lesions without leaving a trace.
INTRODUCTION
• Clean mirrors • Sharp probes (explorers)
• Dry dental surfaces
• Good lighting Ø Are pre-requisites for making
reliable diagnoses.
Why do we repair an old restoration?
• Recontouring and (Restoration repair) procedures are carried out to prevent further loss of natural hard dental tissues.
• The complete replacement of large defective restorations is time consuming, technically difficult, and may be potentially damaging to the pulp.
INTRODUCTION
• Restoration Repair: – Is defined as the removal of part of an
existing restoration and preparing a cavity within that restoration.
• The bulk of the restoration is left intact • The “cavity” is restored with fresh restoration
(amalgam or composite resins)
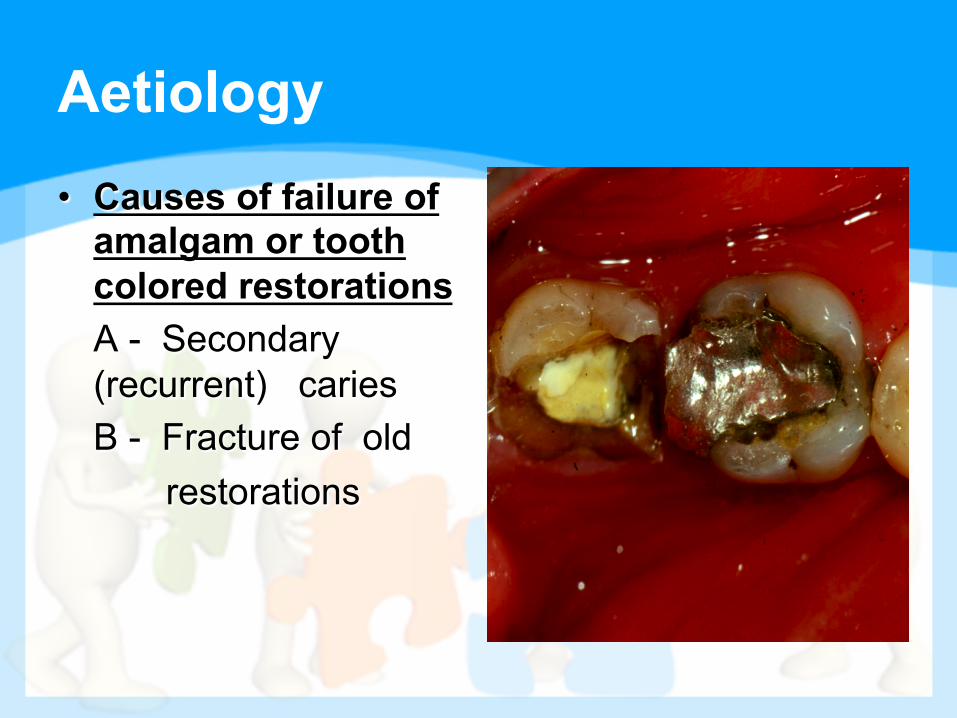
Aetiology • Causes of failure of
amalgam or tooth colored restorations
A - Secondary (recurrent) caries B - Fracture of old restorations
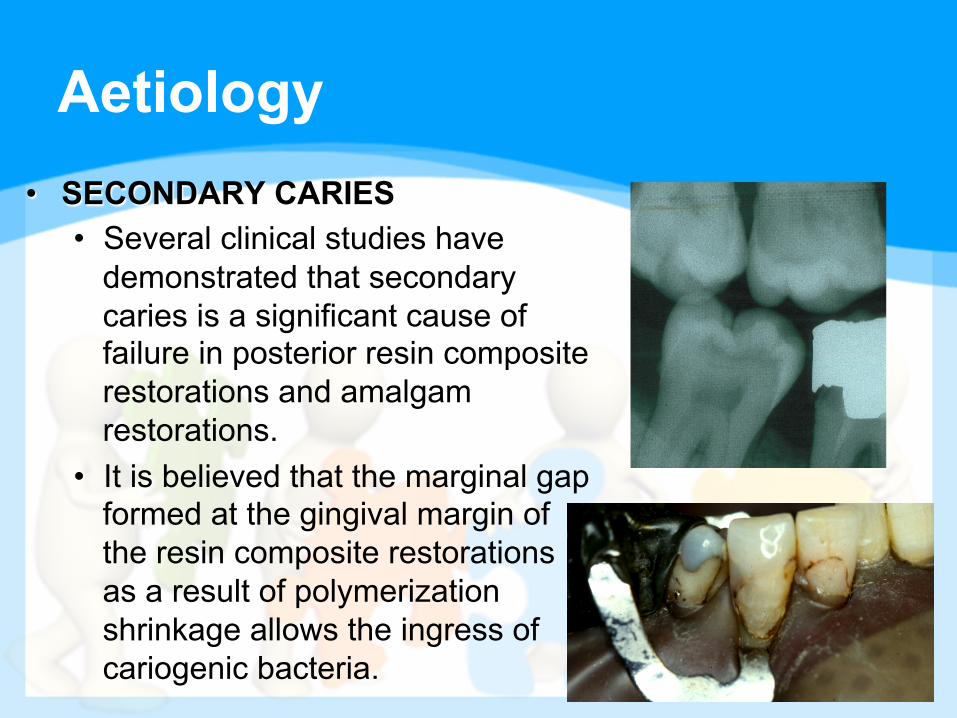
Aetiology • SECONDARY CARIES
• Several clinical studies have demonstrated that secondary caries is a significant cause of failure in posterior resin composite restorations and amalgam restorations.
• It is believed that the marginal gap formed at the gingival margin of the resin composite restorations as a result of polymerization shrinkage allows the ingress of cariogenic bacteria.
Aetiology
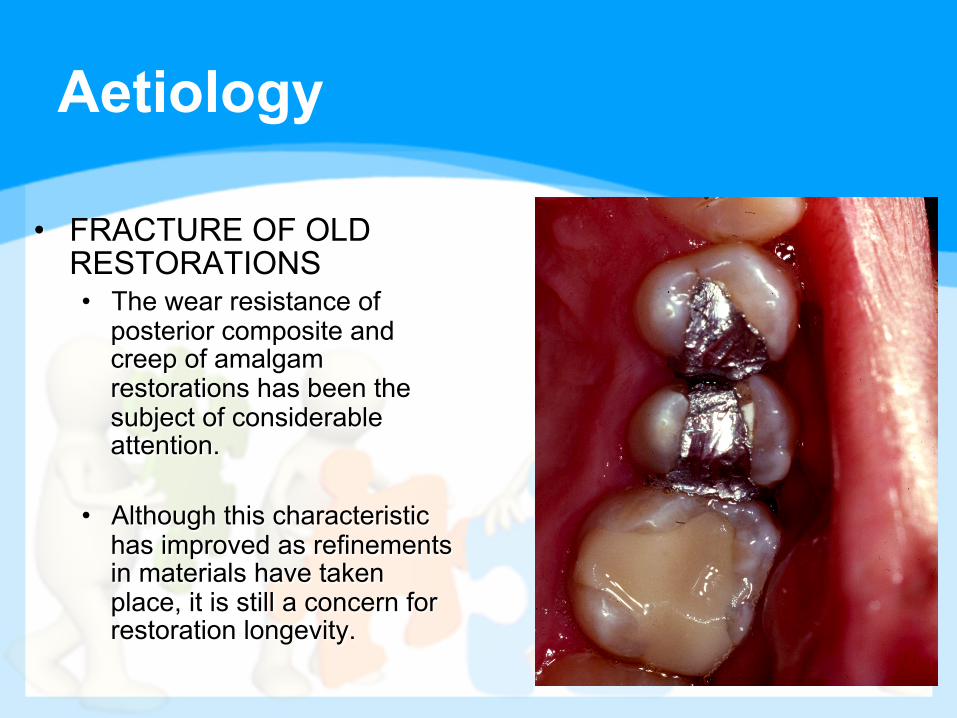
• FRACTURE OF OLD RESTORATIONS • The wear resistance of
posterior composite and creep of amalgam restorations has been the subject of considerable attention.
• Although this characteristic has improved as refinements in materials have taken place, it is still a concern for restoration longevity.

Aetiology
• FRACTURE OF OLD RESTORATIONS • Composite wear results from the
combination of chemical damage to the surface of the material and mechanical breakdown.
• Although many factors influence margin breakdown of amalgam restorations, CREEP, which is the change in dimension under a constant load is most closely associated.
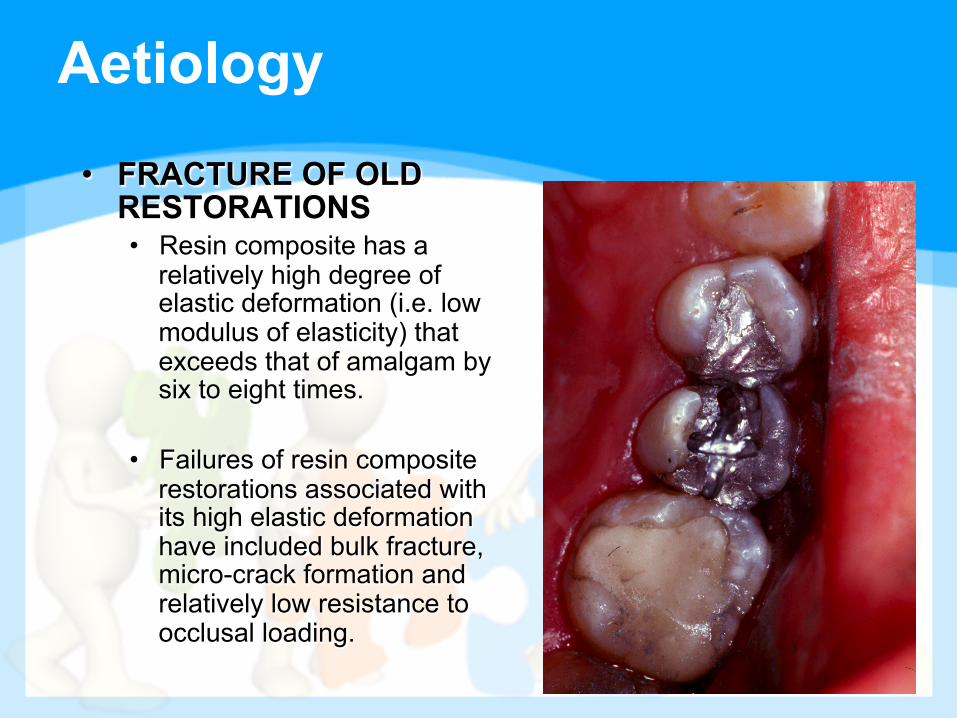
Aetiology • FRACTURE OF OLD
RESTORATIONS • Resin composite has a
relatively high degree of elastic deformation (i.e. low modulus of elasticity) that exceeds that of amalgam by six to eight times.
• Failures of resin composite restorations associated with its high elastic deformation have included bulk fracture, micro-crack formation and relatively low resistance to occlusal loading.
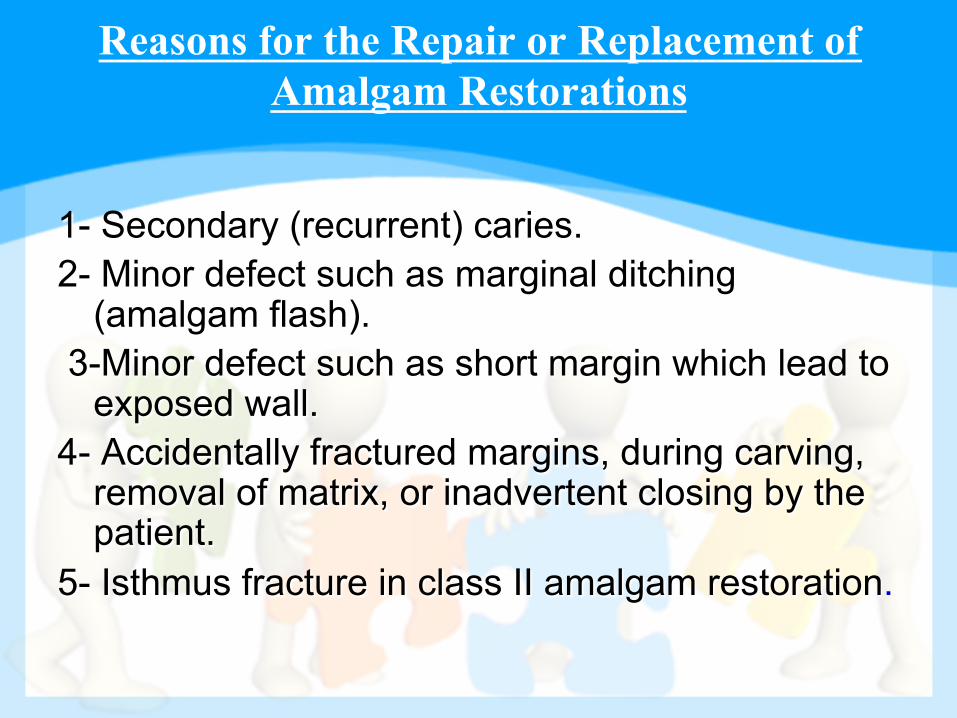
Reasons for the Repair or Replacement of Amalgam Restorations
1- Secondary (recurrent) caries. 2- Minor defect such as marginal ditching
(amalgam flash). 3-Minor defect such as short margin which lead to
exposed wall. 4- Accidentally fractured margins, during carving,
removal of matrix, or inadvertent closing by the patient.
5- Isthmus fracture in class II amalgam restoration.
Management of failed amalgam restoration
Management
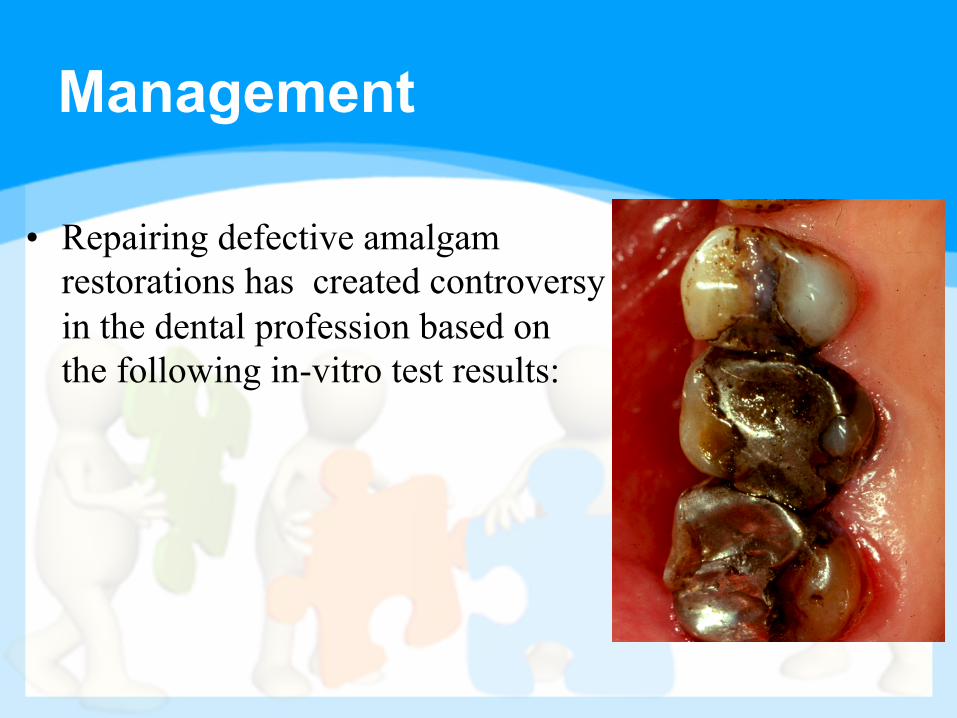
• Repairing defective amalgam restorations has created controversy in the dental profession based on the following in-vitro test results:
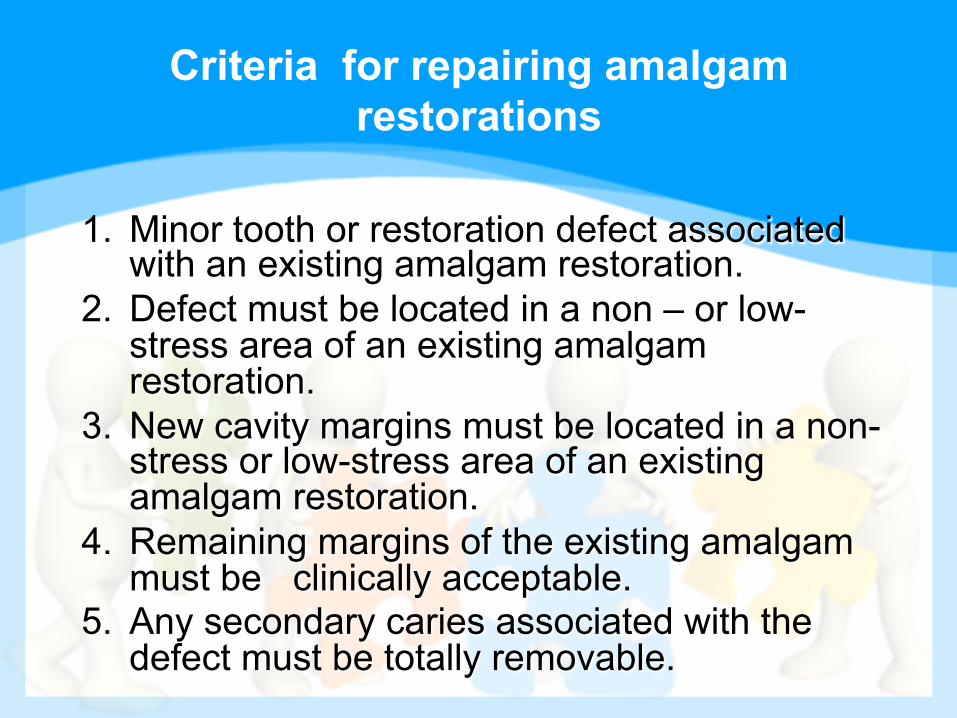
Criteria for repairing amalgam restorations
1. Minor tooth or restoration defect associated with an existing amalgam restoration.
2. Defect must be located in a non – or low-stress area of an existing amalgam restoration.
3. New cavity margins must be located in a non-stress or low-stress area of an existing amalgam restoration.
4. Remaining margins of the existing amalgam must be clinically acceptable.
5. Any secondary caries associated with the defect must be totally removable.
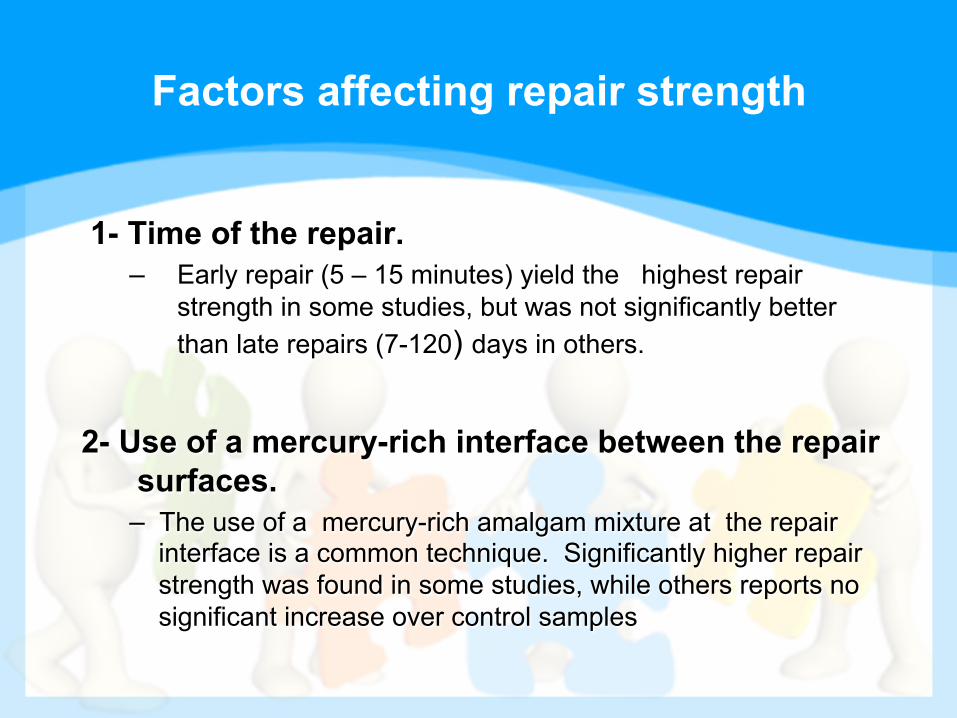
Factors affecting repair strength
1- Time of the repair. – Early repair (5 – 15 minutes) yield the highest repair
strength in some studies, but was not significantly better than late repairs (7-120) days in others.
2- Use of a mercury-rich interface between the repair surfaces.
– The use of a mercury-rich amalgam mixture at the repair interface is a common technique. Significantly higher repair strength was found in some studies, while others reports no significant increase over control samples
Factors affecting repair strength
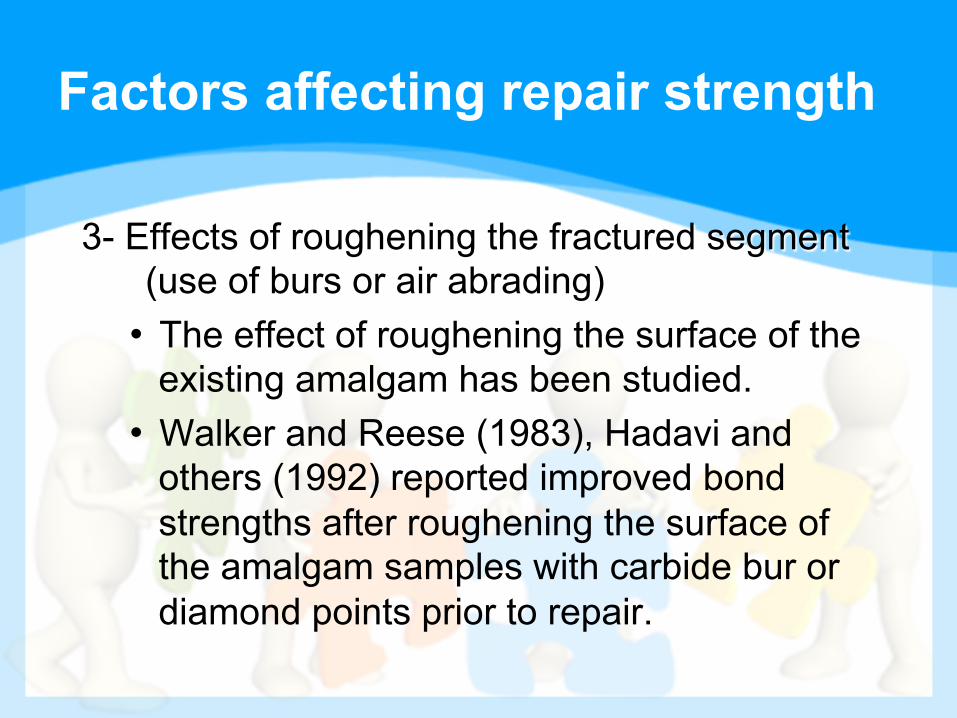
3- Effects of roughening the fractured segment (use of burs or air abrading)
• The effect of roughening the surface of the existing amalgam has been studied.
• Walker and Reese (1983), Hadavi and others (1992) reported improved bond strengths after roughening the surface of the amalgam samples with carbide bur or diamond points prior to repair.
Factors affecting repair strength
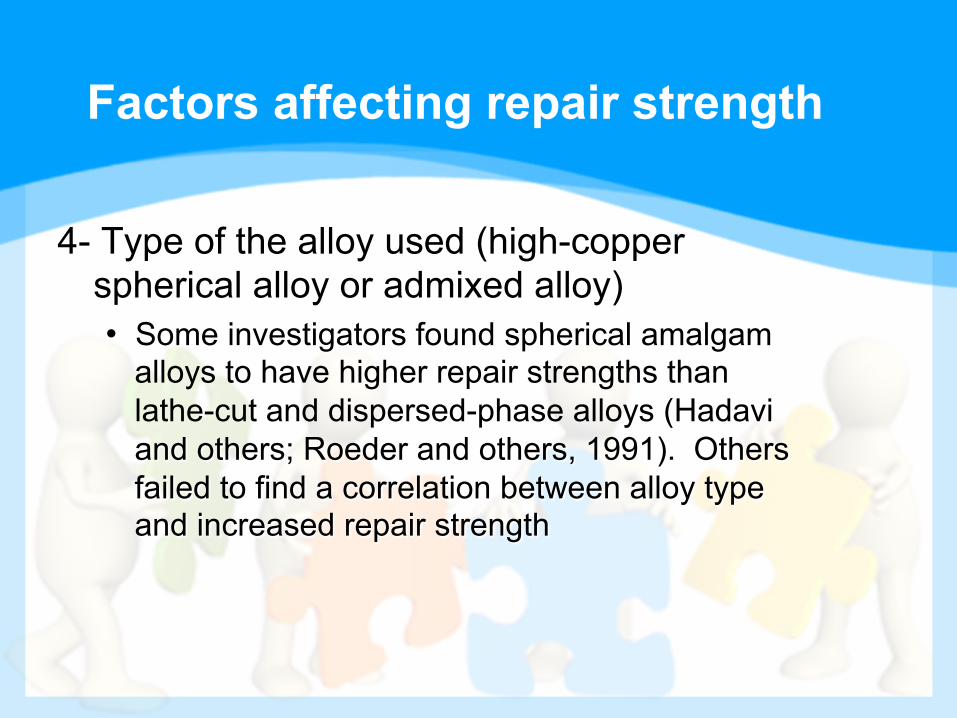
4- Type of the alloy used (high-copper spherical alloy or admixed alloy) • Some investigators found spherical amalgam
alloys to have higher repair strengths than lathe-cut and dispersed-phase alloys (Hadavi and others; Roeder and others, 1991). Others failed to find a correlation between alloy type and increased repair strength
Factors affecting repair strength
5- The use of adhesive resins, (dentin bonding, 4-META, methacryloxethyl trimelliate anhydride). • Research concerning the use of adhesive resins to
facilitate amalgam repair has consistently found either:
• No improvement in repair strength (Hadavi and others, 1991; Lacy and others, 1992)
• Decrease in repair strength (Lacy and others, 1989; Roeder and others, 1991; Carr-Hosie and others, 1992)
• Leelawat and others, 1992, were the only investigators to find a significant Increase in repair strength utilizing resin adhesives
Removing the Old Restoration or Part of it for Repair
• Amalgam restorations
• Composite restorations
• Glass Ionomer restorations
Amalgam Restoration
• In case of amalgam restorations, always put in mind that: • Amalgam restoration is adapted to the walls
of the cavities (corrosive elements between the restoration and the walls)
• It does not adhere to the tooth surface walls.

Amalgam Restoration
• The following procedure is suggested to remove the old badly broken amalgam restorations or part of it.
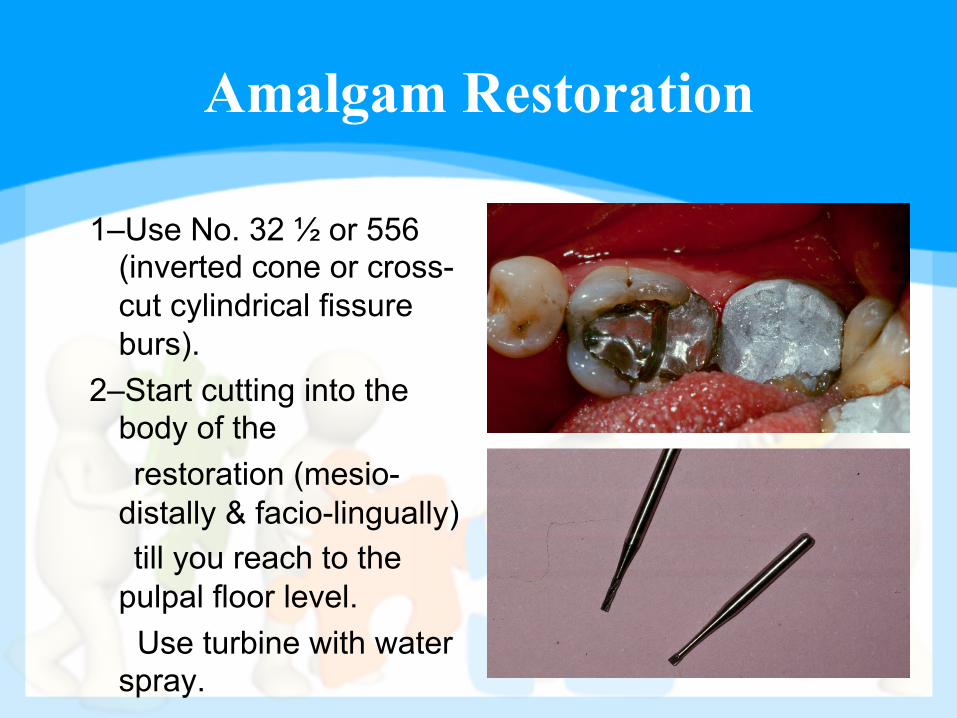
Amalgam Restoration
1–Use No. 32 ½ or 556 (inverted cone or cross-cut cylindrical fissure burs).
2–Start cutting into the body of the
restoration (mesio-distally & facio-lingually)
till you reach to the pulpal floor level. Use turbine with water spray.
Amalgam Restoration
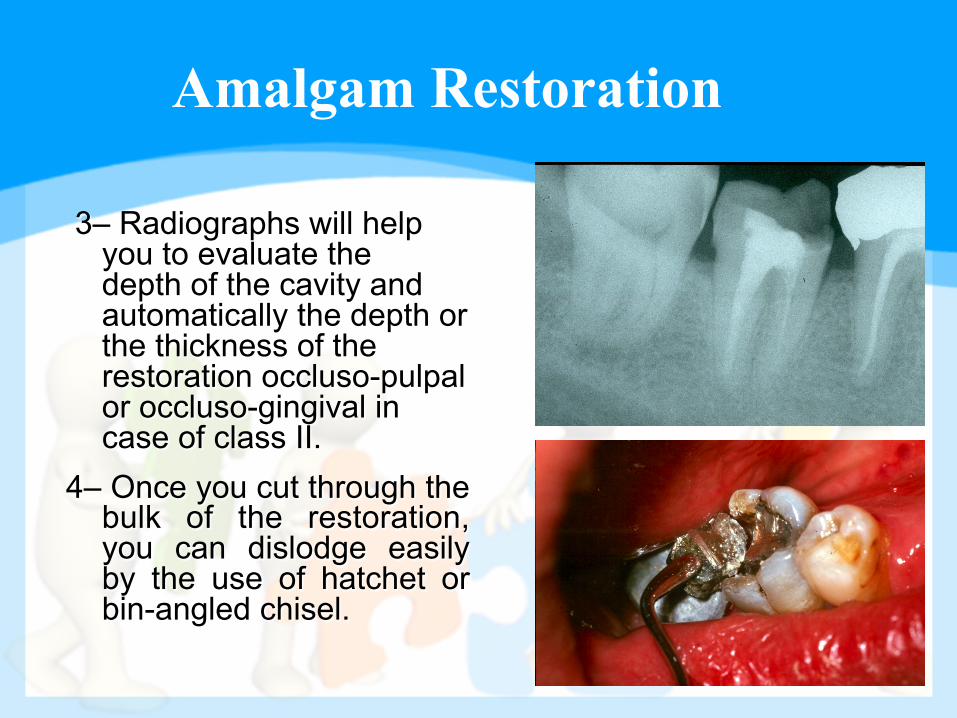
3– Radiographs will help you to evaluate the depth of the cavity and automatically the depth or the thickness of the restoration occluso-pulpal or occluso-gingival in case of class II.
4– Once you cut through the bulk of the restoration, you can dislodge easily by the use of hatchet or bin-angled chisel.
Amalgam Restoration
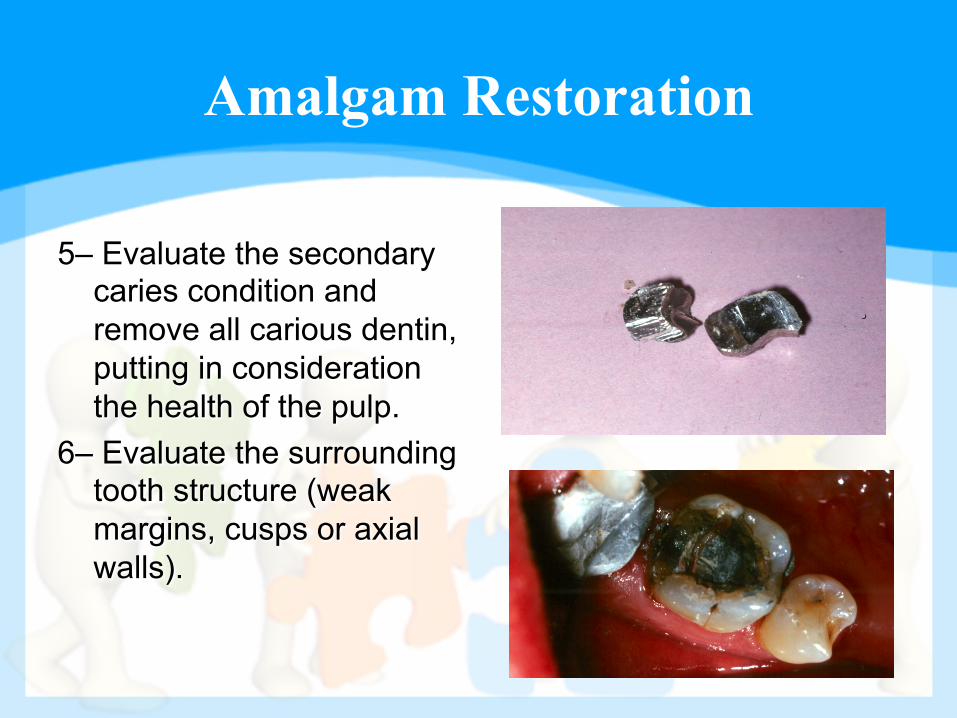
5– Evaluate the secondary caries condition and remove all carious dentin, putting in consideration the health of the pulp.
6– Evaluate the surrounding tooth structure (weak margins, cusps or axial walls).
In case of Minor Defective Margins on the Occlusal Surface of an Old Amalgam
• In case of minor defective margins on the occlusal surface of an old amalgam restoration, the following procedure are recommended:
Amalgam Repair
1-Good radiograph and clinical examination to exclude any secondary caries lesions.
2-Use No. ¼ or ½ round bur at the gap between the tooth margin and the amalgam restoration (make sure you have enough tooth structure at the margins).
Amalgam Repair
3- Clean the margin areas with pumice and water, etch the enamel margins, wash, bonding and fill the gab with fissure sealant, resins or GICs, finish and polish.
4- Follow-up routinely for at least three (3) years.
Composite Repair
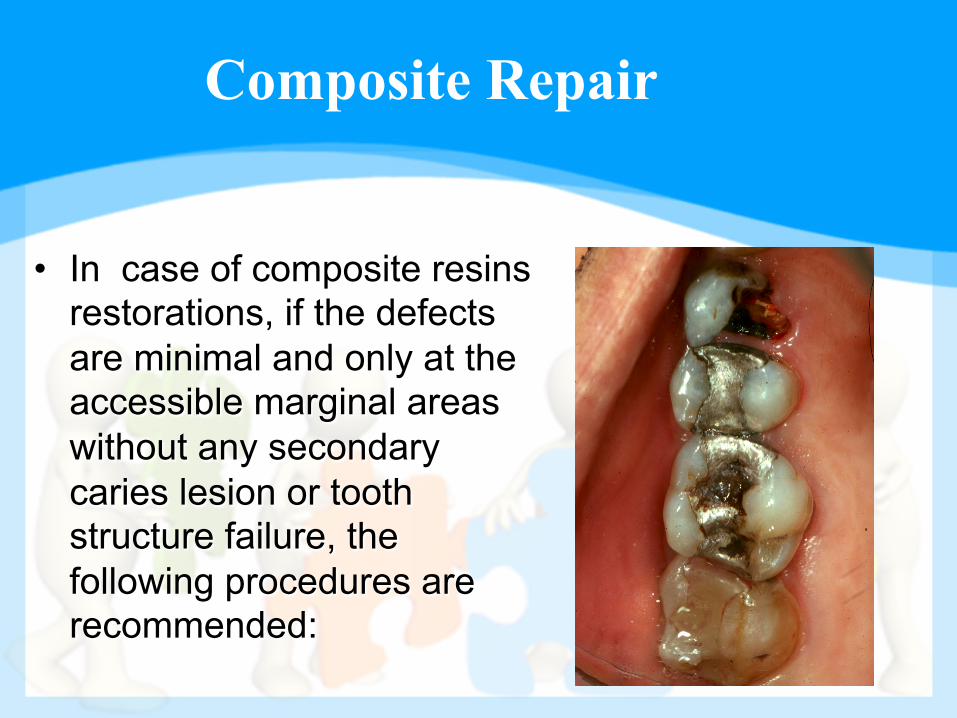
• In case of composite resins restorations, if the defects are minimal and only at the accessible marginal areas without any secondary caries lesion or tooth structure failure, the following procedures are recommended:

Dr. H. Saeed
Composite Repair
1- Use 329 (pear carbide bur) 2- Always use magnifying loops. 3- Clean and polish the areas to be
repaired. 4- Use sharp explorer ( tactile
evaluation) to detect the defective margins of the restoration.
5- Dry the area to clarify the tooth/restoration interface area, etch, the enamel margin apply bonding agent and fill the gab with resin.
Composite Repair
• In case of defective accessible margins with secondary caries: 1 - Evaluate the caries lesion, make sure to excavate and remove all carious dentin.
2 - Evaluate the enamel margins tooth structure.
3 - Follow the previous procedures in repairing the defect margins.
Composite Repair
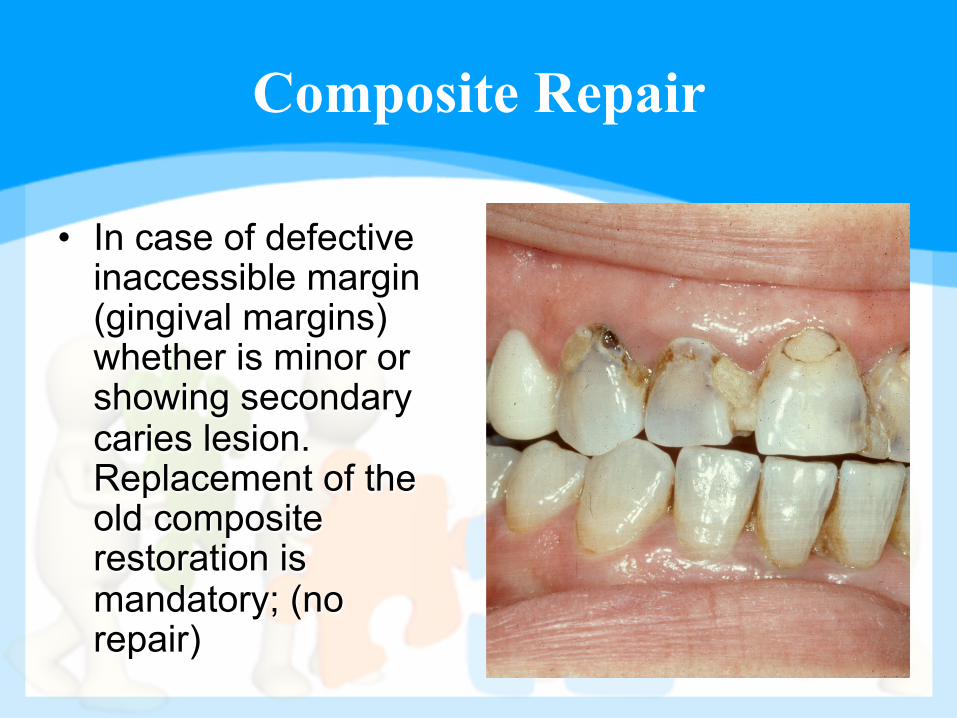
• In case of defective inaccessible margin (gingival margins) whether is minor or showing secondary caries lesion. Replacement of the old composite restoration is mandatory; (no repair)
Composite Repair
l The major problem in removing an old failed composite restoration is the difficulty in recognizing the interface junction between the enamel margins and well shade selected and contoured composite resin.
l Old composite restoration in case of replacement due to failure, should be removed from all margins specially the gingival.
Composite Repair
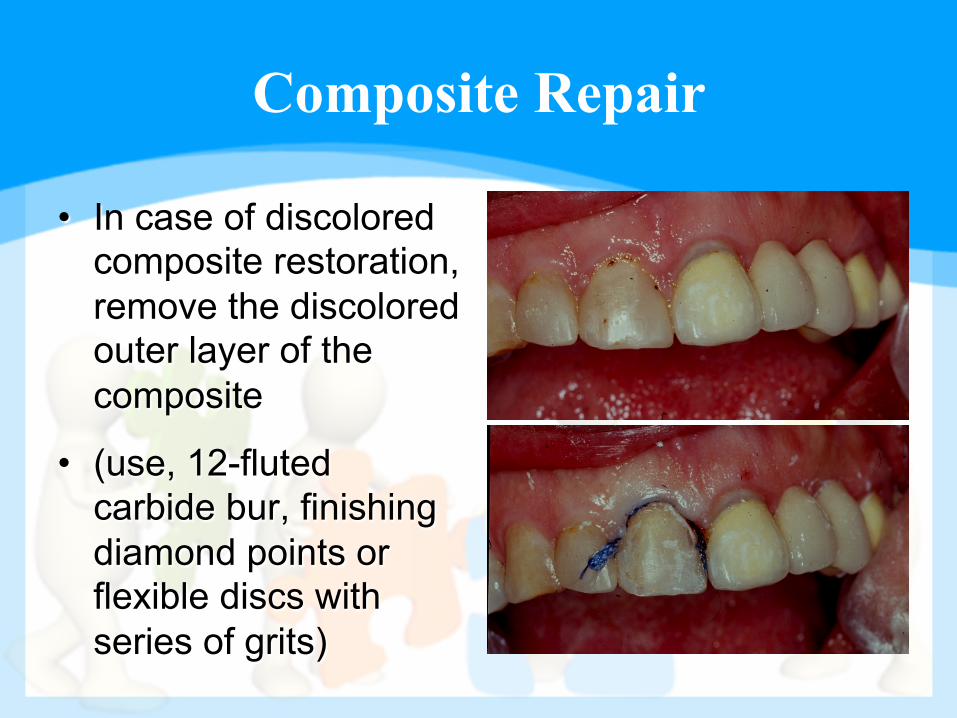
• In case of discolored composite restoration, remove the discolored outer layer of the composite
• (use, 12-fluted carbide bur, finishing diamond points or flexible discs with series of grits)
Composite Repair
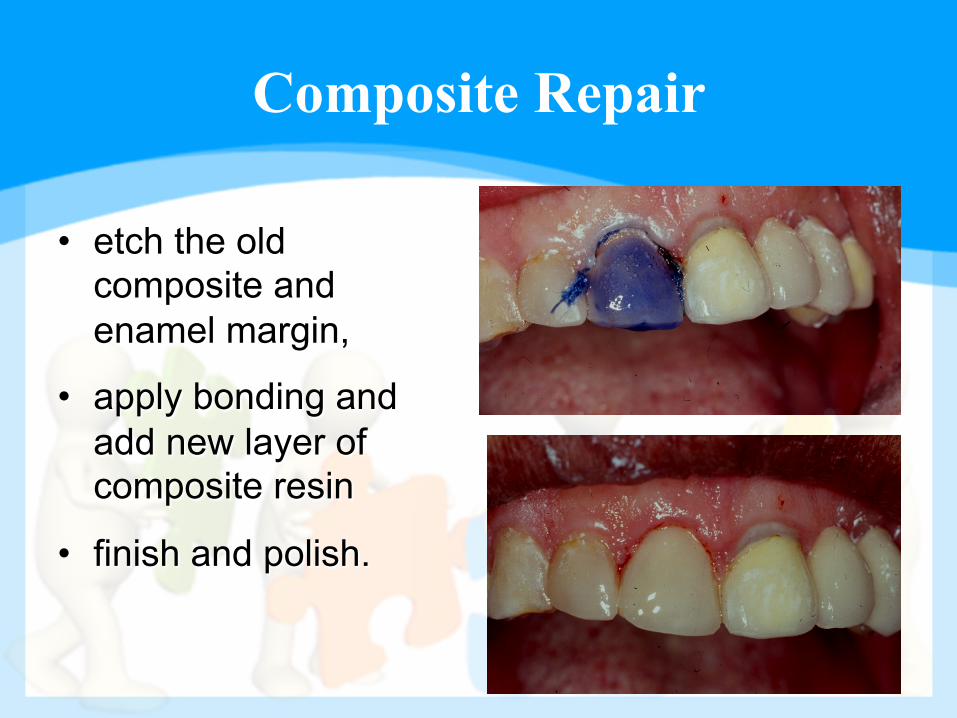
• etch the old composite and enamel margin,
• apply bonding and add new layer of composite resin
• finish and polish.
Glass Ionomer Repairs
• Many glass-Ionomer restorations failed because of bulk fracture due to their low mechanical strength
• In contrast to expectation and despite the release of fluoride ions
• Secondary caries has surprisingly been found to be the main reason for the clinical failure of glass-Ionomer restorations
Glass Ionomer Repair
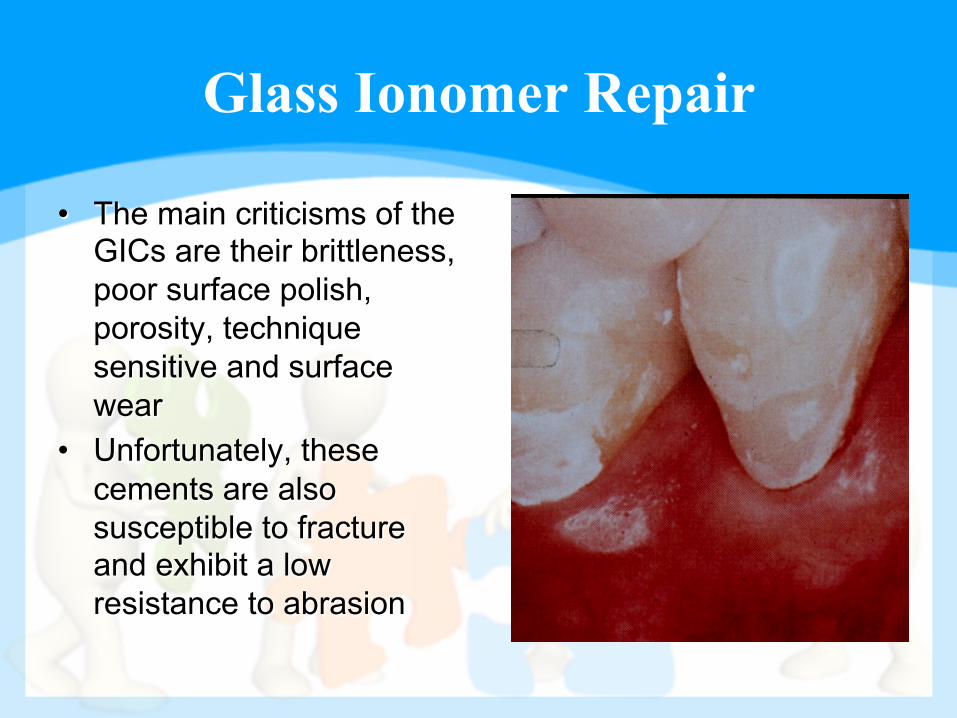
• The main criticisms of the GICs are their brittleness, poor surface polish, porosity, technique sensitive and surface wear
• Unfortunately, these cements are also susceptible to fracture and exhibit a low resistance to abrasion
Glass Ionomer Repair
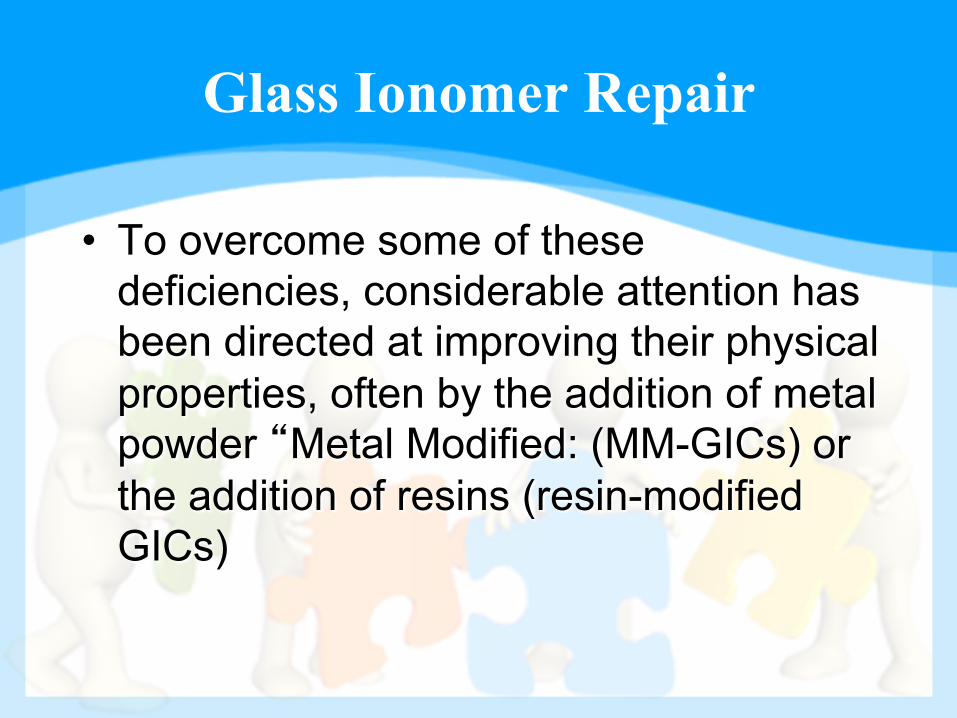
• To overcome some of these deficiencies, considerable attention has been directed at improving their physical properties, often by the addition of metal powder “Metal Modified: (MM-GICs) or the addition of resins (resin-modified GICs)
Glass Ionomer Repair
• Because of the relatively low tensile strength of the GICs, failure of the union will normally occur within the cement (cohesive failure) rather than the interface between the cement and the tooth)
Glass Ionomer Repair
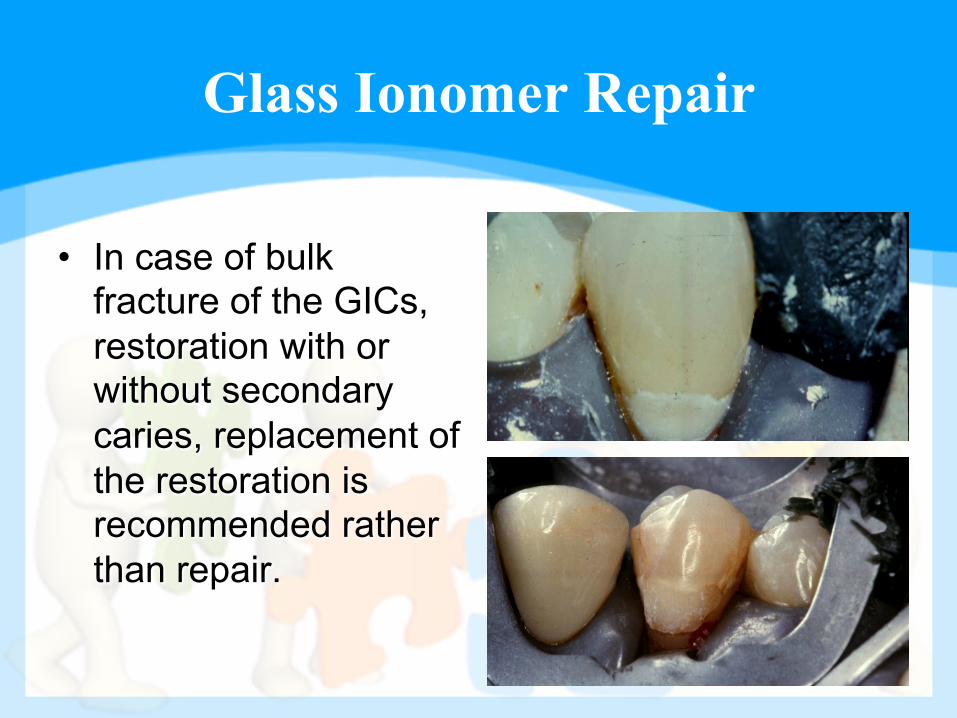
• In case of bulk fracture of the GICs, restoration with or without secondary caries, replacement of the restoration is recommended rather than repair.

Glass Ionomer Repair
• In case of minimal marginal defects, wearing or change of color, the following procedure is suggested. 1- Clean and polish the area of the restoration to be repaired. 2- Use 329 (pear-shaped) carbide bur to remove the outer layer of the discolored restoration. 3- Finish and polish with white alpine stone or flexible aluminum oxide coated discs. 4- Acid etching, wash, apply bonding and add new layer of resins.

Thank You!
Any Questions?
Related Documents