EZ PRO ™ Jr. Instructions Zone Chart 1 2 3 4 5 6 7 8 9 10 11 12 Rev 5-03

Welcome message from author
This document is posted to help you gain knowledge. Please leave a comment to let me know what you think about it! Share it to your friends and learn new things together.
Transcript
EZ PRO™ Jr. InstructionsZone Chart1
2
3
4
5
6
7
8
9
10
11
12
Rev 5-03

EZ Pro™ Jr.Installation and Programming GuideFor EZ ProTM Jr. models:
8304 83748306 83768309 83798312 8382

3
THANK YOU for purchasing the EZ Pro™ Jr. 8300 Series electronicirrigation controller. The EZ Pro™ Jr. 8300 Series is so “EZ”, you’llprobably be able to install and program this feature-packed controllerwithout instructions. However, before installing and programming thecontroller, we recommend you read these instructions carefully to takefull advantage of all the EZ Pro™ Jr. 8300 Series has to offer.
If you have questions, problems or comments on your new EZ Pro™ Jr.8300 Series, please call our Technical Services Department toll-free at1-888-NELSON8, or by visiting us on our website at LRNelson.com.
Leaders in Turf Irrigation Since 1911
NOTE: In our efforts to continually improve and update our products, featuresand specifications in this manual may change without notice.

4
TABLE OF CONTENTSFeatures 5Installation 6-10
Terminal Strip 9Connecting Master Valve or Pump-Start Relay 9Connecting Rain/Moisture Sensor 9Connecting Battery & Starting Controller 10
Programming the EZ Pro™ Jr. 11-21Programming Overview 11Front Panel Layout 12-13Set Time of Day 14Set Today's Date 14Set Current Day 14Select Zones and Set Their Run Times 14Set Start Times 15Set % Water Budget 15-16Set % Water Budget by Month 16Scheduling 16-17Set Water Days Scheduling Option 17Set Odd/Even Day Scheduling Option 18Set Interval Scheduling Option 18Set Event Day Scheduling Option 19Program Review 19Set Master Valve or Pump 20Set Rain Delay 20Turning the Controller Off 21
Advanced Features 22-23Run a Zone Manually 22Run a Program Cycle Manually 23
Technical Data/Specifications 24-26Troubleshooting/Service 27FCC Rules 28

FEATURES• Nelson exclusive SELECT&ADJUST™ programming• Lithium battery back-up stores programs without AC or Battery power (AA)• Programmable delay between zones• Three independent programs• Three start times per program (9 total starts)• Stacking start times• Three scheduling options to suit the needs of plant material or to comply
with watering restrictions (days of the week, 1-30 day interval, trueodd/even)
• Event days programming per program• Rain Sensor bypass option• Leap year compatible-automatically includes Feb 29th every four years• Water budget option reduces or increases watering 0-200 percent• Advanced water budget to set water budget for each month of the year• Two test cycles (Manual with ManualAdvance™ feature and Cycle)• Programmable run times from one minute to 1 hour 59 minutes• Poly-fuse self resetting circuit protection
5

INSTALLATION INSTRUCTIONSThe EZ Pro™ Jr. 8300 Series can be mounted indoors or outdoors. Find a
location near a 120V wiring source (230/240V for 8374, 8376, 8379, and 8382models). Install the EZ Pro™ Jr. near eye level if possible. Use the suppliedtemplate to mark and pre-drill pilot holes in the wall. Insert screws through theholes in the case and screw each into the corresponding pilot hole in the wall.Wiring the Transformer
120 VAC in United States, Canada and Mexico; 230 VAC in Europe, and240 VAC in Australia and South AfricaNOTE: Refer to and follow local codes if different from these instructions.
CAUTION: Disconnect 120V (230/240V for 8374, 8376, 8379, and 8382 models) powersource before wiring transformer. Complete all wiring and installationbefore connecting the transformer to power source. This will avoidaccidental shorting which could damage the controller.
Power supply cables and cords used for connections are to be of ordinaryduty or greater. Low voltage output cables should be enclosed in conduit affixedto the controller with a suitable adapter. Remove the two screws and lift out thetransformer cover to provide access to the internal transformer, bring 120V (or230/240 for 8374, 8376, 8379, and 8382 models) wires up through 1/2" conduithole in the bottom of the case. (For field connection, AC wires must have aninsulation rated at 75° C minimum). Conduit should be secured to the case(follow local codes).
6

INSTALLATION INSTRUCTIONSFor models 8304, 8306, 8309, 8312 (see figure 1)
Remove the transformer cover by loosening the two screws. Attach AC wiresto transformer wires using wire nuts. Also, ensure earth ground wire isattached to green with yellow stripe ground wire. Please check local codes forthe grounding requirements in your area. Bundle wire within cable tie loop andtighten cable tie to prevent loose wiring from touching secondary circuits. Thetransformer is now wired. Replace the transformer cover and the two screws.DO NOT turn on power yet.NOTE: Failure to ground unit properly may cause severe damage to the
controller and/or personal property and will void warranty.
Figure 1
7

INSTALLATION INSTRUCTIONSFor models 8354, 8356, 8359, 8362 (see figure 2)
Remove the transformer cover by loosening the two screws. Route AC wiresto connector provided. Cut and trim wires to install in chassis mountconnector. Tighten the screws. (For Australia an extra clamp has beenprovided.) Observe proper polarity of wires as you install them (ie. L1, L2 andground). The transformer is now wired. Replace the transformer cover and thetwo screws. DO NOT turn on power yet.NOTE: Failure to ground unit properly may cause severe damage to the
controller and/or personal property and will void warranty.
Figure 2
8

INSTALLATION INSTRUCTIONSTerminal Strip
All zone, pump and sensor wire connections made inside the EZ Pro™ Jr. utilizescrew type connectors that require a small screwdriver. The terminal strips inthe controller accept 12 AWG (2.1mm) wire or smaller.
Connecting Master Valve or Pump-Start RelayThe EZ Pro™ Jr. is equipped with a shared circuit to operate either a pump-start relay or a master valve. Connect one wire from the pump-start relay toCOM (common) on terminal strip, the other to PMP/MV (pump/master valve)on the terminal strip. Refer to the pump-start relay manufacturer’s instructionsfor specific installation details.
Connecting Rain/Moisture SensorThe EZ Pro™ Jr. is equipped to operate a sensor with normally-closed leads.To install a sensor, remove the factory-installed jumper wire from the sensorconnector on the terminal strip and insert the sensor wires. Refer to thesensor manufacturer’s instructions for specific installation details.(See figure 2)If a sensor has suspended watering, the sensor indicator segment willappear on the LCD. The symbol will go off when the sensor has dried out. TheEZ Pro™ Jr. will resume operation based on the selected program.NOTE: Manual operations will ignore the rain sensor
9

INSTALLATION INSTRUCTIONSConnecting the batteries and starting the controller
Remove the terminal panel under the LCD of the unit by pushing up on the tab.Insert two new AA Alkaline (LR6 in Europe) batteries into the battery clips in thepocket directly above the terminal strip. The AA batteries enable the EZ Pro™ Jr.to be programmed without AC power and maintain the programs and real timeclock in the event of a power outage. If the batteries are not installed, and theLithium battery has not been activated, the controller will lose real time andprograms in the event of a power outage. The batteries should be replaced everyfive years, or when low battery symbol appears.
CAUTION: Use AA alkaline batteries only. NiCad batteries may leak orexplode causing personal injury or property damage.
Lithium Battery BackupThe EZ Pro™ Jr. controllers come with a lithium battery back-up, so you willnot lose program settings or time during a power failure - even if there is nobattery installed. There will be no visual indication that this backup is working,or when this battery is going dead. Please keep fresh Alkaline AA batteries inthe unit for the main backup battery. To activate the Lithium Battery backup,remove the tab marked “PULL” located under the AA battery compartment.Attach the battery/wiring cover, being sure not to damage wires. If wires arestiff, you may find it helpful to pre-bend them. Turn on the power source.
You’re now ready to start programming!
10

PROGRAMMING INSTRUCTIONSProgramming Overview
The EZ Pro™ Jr. can be programmed under AC power or powered from the twoAA alkaline batteries. Before programming the EZ Pro™ Jr., it may be helpful tobecome familiar with some general programming guidelines:
• If a segment(s) on the LCD is flashing, it means that it can be changed bythe user.
• When using keys, hold the button three seconds to start a fast scroll.• Be sure the appropriate program letter is displayed when you are
programming; program changes are specific to the program letterdisplayed on the LCD.
• There is no “ENTER” key. Key-presses and dial settings are storedautomatically for you.
• If you make a programming change while a program is running, theprogram terminates immediately. The new program starts at the next starttime scheduled.
• When not running, the controller displays the current time and the current day.• During manual operations, there is a 5-second delay before the operation
begins. During this time, you can change your settings. Each time youmake a change, the delay resets to 5 seconds.
• MANUAL and CYCLE procedures only operate with the Program dial set inthe AUTO position.
• After a test procedure runs, the controller reverts back to the AUTOprocedure and runs the next program scheduled.
• The test procedures ignore the sensor connection; this allows you towater or run your program even if the sensor has suspended operation.
• To clear all programs and start over, press and hold SELECT ‘–’ andADJUST ‘–’ for three seconds
11

PROGRAMMING INSTRUCTIONSFront Panel Layout
Looking at the front panel (see figure 3), you see a large LCD, 4 rubberbuttons, one large rotary dial, and two small rotary dials. The rubber buttonsare marked SELECT and ADJUST and are the core of Nelson’s exclusiveSELECT&ADJUST™ programming. The keys are identified with ‘+’ or ‘–’ forincreasing or decreasing the segment you’re working on.SELECT&ADJUST™ works on the principle that you first SELECT what youwant to set, and ADJUST the variables of what you selected. For example, ifyou want a run time of 10 minutes on zone 5, you would use the SELECT keysto select zone 5 and, once on zone 5, you would use the ADJUST keys to setthe run time to 10 minutes.There are instances when only SELECT or only ADJUST are required. They willbe explained in this guide where appropriate.
12

PROGRAMMING INSTRUCTIONSFIGURE 3
NOTE: The MODE dial must be in the PROGRAM position.NOTE: Every time the ‘+’ or ‘–’ key is pressed, the display will increase or
decrease one unit. Hold the ‘+’ or ‘–’ key for three seconds toinitiate a fast scroll.
NOTE: Please refer to the Technical Data section for an explanation of theLCD segments.
13

PROGRAMMING INSTRUCTIONS - PROGRAM MODESet Time of Day
Turn the large dial to the TIME position. Press SELECT to select betweenhours, minutes, and 12/24 hour mode. Press ADJUST to scroll to the correcttime or adjust between 12/24 mode. ‘A.M.’ will not appear on the LCD when inA.M. mode; ‘P.M.’ will appear on the LCD when in P.M. mode.NOTE: In 24 hour mode, calendar is in D/M/Y format instead of M/D/Y
Set Today’s Date and Current Day of the WeekTurn the large dial to the DATE position. Press SELECT keys to select betweenday, month and year positions. Press ADJUST keys to scroll to the currentdate. The correct day of the week will automatically show on LCD screen whentoday’s date is adjusted. The EZ Pro™ Jr. controller is leap year compliant.
Select Zones and Set Their Run TimesA zone run time determines the duration a zone will run. Turn the large dial to theZONE/RUN TIME position. Turn PROGRAM dial to choose program A, B or C.Press SELECT to choose the zone you want for the selected program (A, B, or C).With the zone number displayed on the LCD, press ADJUST to adjust the RUNTIME for that zone. RUN TIMES can be set from 1 minute to 1 hour 59 minutes.Continue selecting zones and adjusting their run times until you have all thezones you want in the selected program.After the last zone and before the first zone, a RUN TIME summation is provided.This is useful for determining the total run time for a program. The LCD displaysthe letters “ALL” and a total RUN TIME is displayed. The time displayed is asummation of all the RUN TIMES for the selected program (100% water budget).(ex. A program has a run time of 5 minutes on zone 1; 12 minutes on zone 2; and6 minutes on zone 4. The display at this position displays ALL and a run time of23 minutes).
14

PROGRAMMING INSTRUCTIONS - PROGRAM MODESet Start Times
A START TIME is the time of day a program will start running. The EZ Pro™ Jr.allows three start times per program.Turn the large dial to the START TIMES position. Press SELECT to select thestart time you want to set (1, 2, or 3). Press ADJUST to set the time of day theprogram will start. Repeat as needed.
Start Time StackingThe EZ Pro™ Jr. will stack start times if your program watering times overlapanother start time. The additional start time will begin when the first cycle finishes.
Set % Water Budget% WATER BUDGET changes the duration of run times in a program by thepercentage entered 0 - 200% (i.e., a 10 minute run time at 50% water budgetwill run 5 minutes). This feature is useful when changes in weather occur. If itis unusually dry, you may want to extend your run time for each zone in aprogram. With % Water Budget, you can change one number, and all runtimes in the program are adjusted. If 24 hours of run time is exceeded 24 hrwill flash on the LCD.Turn the large dial to the % WATER BUDGET position. A % symbol will appearon the LCD to let you know you are working on the % Water Budget amount.Press ADJUST to choose the desired percentage amount.
15

PROGRAMMING INSTRUCTIONS - PROGRAM MODEIf % WATER BUDGET is set for 110% or greater, the EZ Pro™ Jr. will split therun time in half to reduce runoff. Half of the calculated run time will operatefor each zone in that program, followed by the second half of the run time foreach zone.NOTE: % WATER BUDGET is changeable by program. If you have
programming in A, B, and C, you must enter three water budgetvalues if you want every program to be changed.
Set Water Budget by Month (Advanced feature)The EZ Pro™ Jr. allows you to set % WATER BUDGET by month. This featureallows you to customize your program by month over the year to allow for hotdry months and cooler wetter months.Turn the large dial to the % WATER BUDGET position. Press both SELECT ‘+’and SELECT ‘–’ together. Use the SELECT to select months 1-12. Use theADJUST to choose the desired percentage amount from 0-200%. If 0% ischosen, no watering will take place in that month.
Set the Watering Schedule (A quick note on scheduling and the EZ Pro™ Jr.…)The EZ Pro™ Jr. controller has three scheduling options plus the option forEvent Days Programming:
• WATER DAYS, or daily, lets you choose which days of the week you wantto water (i.e., Monday, Wednesday, Friday only).
• ODD/EVEN tells the controller to water on either the odd or even days ofthe month (i.e., the controller will water on the 31st and the 1st when anODD schedule is chosen).
16

PROGRAMMING INSTRUCTIONS - PROGRAM MODE• INTERVAL waters every X number of days (from 1 to 30 days) (i.e., water
every 3 days, waters every 10 days, etc.). A value of 1 in an intervalschedule means to water every day. When using the interval option, youhave the flexibility to tell the controller what day to start the intervalprogram on (up to 30 days out).
• EVENT DAYS allows each program to block any specific day(s) fromwatering, regardless of the scheduling option (odd/even, interval, or daily).
The LCD will display the currently scheduled program (default is all WATERDAYS.) The SELECT keys will scroll the LCD display through each of thescheduling positions WATER DAYS, ODD, EVEN, INTERVAL, and INTERVALSTART DATE. Be sure the PROGRAM dial is set on the program you want tochange (A, B, or C) and that you want to change the current schedule. Ascheduling option is chosen after you press a button, either SELECT orADJUST. The old schedule is replaced with the new one. It’s easy to programa schedule with the following procedures.
Set Water Days Scheduling OptionTurn the large dial to the SCHEDULE position. Use the SELECT till the raindropsappear above the days of the week. Press the ADJUST ‘+’ button to select thatday for watering or press ADJUST ‘–’ for non-watering days. A flashing indicatorappears over the day you’re about to set. Raindrops appear over selected days towater. The indicator automatically moves one day to the right after an ADJUST ‘+’or ‘–’ key press. Continue selecting or deselecting the days you want thecontroller to water until you have your 7-day calendar set.
17

PROGRAMMING INSTRUCTIONS - PROGRAM MODENOTE: Programming a WATER DAYS schedule deletes any other schedule
for the selected program.Set Odd/Even Day Scheduling Option
Turn the large dial to the SCHEDULE position. The last scheduling optionchosen for the current program appears on the LCD. To set either an ODD oran EVEN schedule press the SELECT button till an arrow appears on the LCDnext to the appropriate schedule (ODD or EVEN). A DATE must be set forodd/even watering). The SELECT buttons act as toggle keys and will togglebetween odd or even.NOTE: Programming an ODD/EVEN schedule deletes any other schedule for
the selected program.Set Interval Scheduling Option
Turn the large dial to the SCHEDULE position. The last scheduling optionchosen for the current program appears on the LCD. Press SELECT to scroll tothe interval days position. An arrow will appear on the LCD next to INT(Interval). Use the ADJUST to choose interval days between watering (1-30).The date displayed is day one of the interval schedule. (Today’s date if one hasbeen set). To change day 1 date use SELECT to go to the interval start dateposition. As needed, change the date for day one of the interval schedule withADJUST (can only be set up to 30 days out).NOTE: Programming an INTERVAL schedule deletes any other schedule for
the selected program.
18

PROGRAMMING INSTRUCTIONS - PROGRAM MODESet Event Days Programming (Optional)
Turn the large dial to the SCHEDULE position. The last scheduling optionchosen for the current program appears on the LCD. Press both the SELECT ‘+’and SELECT ‘–’ together. A flashing indicator will appear next to Event Days onthe LCD. Use the ADJUST ‘+’ button to select that day for watering or pressADJUST ‘–’ for non watering days. A flashing indicator appears over the dayyou’re about to set. Raindrops appear over selected days to water. Theindicator automatically moves one day to the right after an ADJUST ‘+’ or ‘–’key press. Continue selecting or deselecting the days you want the controller towater until you have your 7 day calender set. NOTE: Programming an EVENT DAYS schedule does NOT delete any other
schedule for the selected program.Repeat the above procedures for each program (A, B, or C), as you require.That’s it! Your EZ Pro™ Jr. is now programmed. Turn the MODE dial to the AUTO position to run the program you entered.
PROGRAM REVIEWTo review the current program, turn the MODE dial to the PROGRAM positionand turn the large dial to the setting you wish to review (i.e., turn the large dialto TIME to review the time set for the controller). When you need to viewdifferent zones or run times (1, 2, 3), use the SELECT buttons only.NOTE: Since you are in the program mode, the potential exists to change
the program accidentally.
19

PROGRAMMING INSTRUCTIONS - PROGRAM MODESet Master Valve or Pump Delay
You can delay the time between when the Master Valve/Pump turns on and thetime the zones start. Turn the large dial to Zone Run Times. Press both theSELECT ‘+’ and SELECT ‘–’ keys together. Use the ADJUST ‘+’ or ‘–’ key toadjust the time delay. The LCD will show the time of the delay (Adjustablebetween 1 second – 30 minutes) with “del” underneath. To return to settingthe Zone Run Times, press both the SELECT ‘+’ and SELECT ‘–’ keys together. NOTE: The Master Valve/Pump Delay will be the same for all 3 programs
(A, B, and C).
PROGRAMMING INSTRUCTIONS - AUTO MODESet the Rain Sensor Bypass
The EZ Pro™ Jr. is equipped with a Rain Sensor Bypass. This will cause thecontroller to water even if the rain sensor is tripped. To activate bypass thecontroller must be in AUTO Mode. While in Auto Mode press both the SELECT‘+’ and SELECT ‘–’ keys together. The Sensor Suspend symbol will flash. Todeactivate Press both the SELECT ‘+’ and SELECT ‘–’ keys together, while inAUTO Mode. This will cause the Sensor symbol to stop flashing and show thecurrent rain sensor status.NOTE: Rain Sensor Bypass will remain on until it is deactivated.
20

PROGRAMMING INSTRUCTIONS - OFF MODETurning the Controller Off
Turn the MODE dial to the OFF position. This suspends all watering operations(including manual/test procedures) from operating. The clock continues tomaintain the current time and date and your program(s) is retained until youwant to run your program(s) again. To run your program, turn the MODE dialback to the AUTO position.
21
ADVANCED FEATURES - AUTO MODEThe EZ Pro™ Jr. incorporates two manual/test procedures for checking thefunction of the controller or allowing you to bypass the current program towater immediately. The following section will show you how to set up thecontroller to:
• Run a zone manually• Run a program manually
NOTE: All test procedures are run with the MODE dial in the AUTO position.This allows the controller to reset to the AUTO setting after running amanual/test procedure. It also allows you the ability to walk awayfrom the controller after setting up a manual/test procedure and nothave to come back to reset the controller to AUTO.
NOTE: All manual/test procedures ignore the sensor connection. Therefore,you can water utilizing one of the manual/test procedures even if thesensor has suspended your scheduled program.
Run a Zone ManuallyTurn the large dial to the MANUAL position. The default of zone 01 and 00:10minutes will be flashing (recall that this means you can change them). PressSELECT to select the zone number that you want to run. Press ADJUST to setthe run time for the selected zone. The controller will delay 5 seconds beforestarting the zone.
22

ADVANCED FEATURES - AUTO MODEThe EZ Pro™ Jr. incorporates Nelson’s ManualAdvance™ feature in theMANUAL procedure. ManualAdvance™ allows you to cease the currentlyrunning zone and immediately advance to any new zone you select. With theMANUAL or CYCLE procedure running a zone, Press SELECT to advance to anew zone. The last entered run time will be displayed. Press ADJUST to entera new run time for the new zone (the controller will delay 5 seconds beforestarting the new zone).NOTE: Once the zone has started running, the run time cannot be adjusted
without deselecting and reselecting the zone.Run a Program Cycle Manually
Turn the large dial to the CYCLE position. The current program letter will flash.To change to a different program, turn the PROGRAM dial to the desiredprogram (A, B, or C). The controller will delay five seconds before starting theselected program. After running, the controller resets to the AUTO procedure.NOTE: CYCLE runs your current program immediately.
Can ManualAdvance™ through the zones.
23

TECHNICAL DATA1. Transformer
24 VAC internal transformer; 20 VA, .83A for zones and logic. Thetransformer can run a pump or master valve and one zone valve, maximum.
2. Surge Protection600 watts TVS on zone outputs9J Mov on secondaries. (see Circuit Breaker below)
3. Sensor OperationThe EZ Pro™ Jr. is configured to operate the controller with or without asensor. Sensors must have normally closed connections (leads). Thefactory-installed jumper wire must be in place if no sensor is used.
4. Zone LinesThe EZ Pro™ Jr. will operate a maximum of two (2) solenoids concurrently,providing one is the pump/master valve. Each zone output can operate oneor two solenoids.
I inrush .52A maxI hold .33A max
5. Temperature RangeOperating: -20° to +55° C (23° to 131° Fahrenheit)Storage: -30° to +85° C (-22° to 185° Fahrenheit)
24

TECHNICAL DATA6. Display
7. BatteriesTwo (2) AA (LR6 in Europe) Alkaline batteries are required. Do not use NiCadbatteries. One (1) CR2032 Lithium Coin Cell battery, included with controller.
8. Program RetentionLithium battery is used to retain time and programs when battery and ACpower are lost.NOTE: Tab must be removed in order to activate lithium battery backup.
9. Case Dimensions (approx.)8" H x 10" W x 4" D (lid is removable without tools)
25
Time, Date, Start Time,Run Time, Basic Date,Water Budget Month
Rain Sensor suspendwatering symbol
No AC symbol
Low battery warning
Program letter A, B or C
AM PM indicator
Year, Interval Days, WaterBudget, Zone number
Odd
Even
Interval
Event
Su M T W Th F S
ProblemIndicator
Zone ## of zones
Water days,Day of week

TECHNICAL DATA10. Default Settings (12 hour mode)
12:00 A.M.SundayDate is 01/01 2003No Run Times (zone 01, —:—)No Start Times (start number 01, —:—)100% Water BudgetEvery day watering schedule Mode dial is at OFF positionProgram dial is on A program5 second delay between zones
11. Circuit BreakerAn electronic poly-switch is incorporated on the interconnect PCB of thecontroller. This type of circuit breaker does not require resetting orreplacement by the user.
26

TROUBLESHOOTING/SERVICESYMPTOM POSSIBLE CAUSE SOLUTIONNo output to zone, pump, master • AC disconnected • Check AC source, if AC is notvalve or no AC indicator lit detected by the controller, the no
AC indicator will be litNo AC and blank display • No battery or dead battery • Replace battery and press resetLCD is blank • No AC and no battery • Install battery to regain use of
display, check AC to ensureoutput to field
“M-X” appears on the LCD when • MODE dial is in program position • Position the MODE dial in thetrying to run a zone manually AUTO position to run a zone
manually“C-X” appears on the LCD when • MODE dial is in program position • Position the MODE dial in thetrying to CYCLE a program AUTO position to cycle a programP with a zone number appears • Wires not connected or short in • Check field wiring, checkon LCD wires or solenoid solenoid, replace solenoid
• More than 2 solenoids connectedto a zone
• TVS damaged due to lightning • Remove zone wire if Pxxz stillor improper grounding shows when run manually or
automatically, unit needsservice/replacement
ALL 24HR flashing on LCD • Greater than 24 hours of run time • Check zone run times andprogrammed % WATER BUDGET
Rain Sensor symbol on • Rain sensor is activated or if no • Check to see if jumper is installedrain sensor installed, the jumper if there is no rain sensoris missing
Controller not responding to any • Unit needs reset • Screwdriver across padsdial/key press marked ResetNo output to a single zone • Wiring issues or bad solenoid • Check wiring and/or solenoidNo output to any zone • Broken on disconnected common • Check common wire
• RS wired into common wire isopen or disconnected
27

FCC RULESThis electronic irrigation controller generates and uses radio frequencyenergy and if not installed and used properly, that is, in strict accordance with themanufacturer’s instructions, may cause interference to radio and television reception. Ithas been type tested and found to comply with the limits for a Class B computing devicein accordance with the specifications in Subpart J of Part 15 of FCC Rules, which aredesigned to provide reasonable protection against such interference in a residentialinstallation. However, there is no guarantee that interference will not occur in a particularinstallation. If this controller does cause interference to radio or television reception,which can be determined by turning the controller off and on, the user is encouraged totry to correct the interference by one or more of the following measures:
Reorient the receiving antennaRelocate the controller with respect to the receiverMove the controller away from the receiverPlug the controller into a different outlet so that the controller and receiver are on
different branch circuitsIf necessary, the user should consult the dealer or an experienced radio/televisiontechnician for additional suggestions. The user may find the following booklet prepared bythe Federal Communications Commission helpful:“How to Identify and Resolve Radio-TV Interference Problems”This booklet is available from the U.S. Government Printing Office, Washington, DC20402. Stock No. 004-000-00345-4.
CANADIAN RADIO INTERFERENCE REGULATIONSNOTE: This digital apparatus does not exceed the Class B limits for radio noise
emissions from digital apparatus set out in the radio interference regulationsof the Canadian Department of Communications.
28

Mode d'emploi du EZ PRO™ Jr.Graphique des Zones1
2
3
4
5
6
7
8
9
10
11
12
976-60342 Rev 5-03

EZ Pro™ Jr.Manuel d'Installation et de Programmation Des modèles EZ PROTM Jr. :
8304 83748306 83768309 83798312 8382

3
NOUS VOUS REMERCIONS d'avoir fait l'acquisition du contrôleur électroniqued'irrigation EZ PRO™ Jr. 8300 Série. Le EZ PRO™ Jr. 8300 Série est d'une utilisationtellement “ÉZée” que vous arriverez probablement à installer et à programmer cecontrôleur doté de caractéristiques multiples sans avoir recours au mode d'emploi.Toutefois, avant d'installer et de programmer ce contrôleur, nous vousrecommandons de lire attentivement ce mode d'emploi afin de tirer pleinement profittout ce que le EZ PRO™ Jr. 8300 Série est en mesure d'offrir.
Si vous avez des questions, des problèmes ou des commentaires concernantvotre nouveau EZ PRO™ Jr. 8300 Série, veuillez contacter notre Départementdes Services Techniques en appelant gratuitement le 1-888-NELSON8 ou envous rendant sur le site web à l'adresse LRNelson.com.
Numéro 1 de l'Irrigation du Gazon depuis 1911.
REMARQUE : Étant donné que nous améliorons et mettons à jour nosproduits continuellement, les accessoires et lescaractéristiques qui apparaissent dans ce manuel peuvent

4
TABLE DES MATIÈRESCaractéristiques 5Installation 6-10
Réglette à bornes de raccordement de câbles 9Connexion de la Valve Maîtresse ou du Relais
de Déclenchement de la Pompe 9Connexion du Détecteur de Pluie / Humidité 9Connexion de la Batterie & Mise en Fonction du Contrôleur 10
Programmation du EZ PRO™ Jr. 11-21Vue d'ensemble de la Programmation 11Présentation du Panneau Avant 12-13Régler l'Heure du Jour 14Régler la Date d'Aujourd'hui 14Régler le Jour en cours 14Sélectionner les Zones et Régler leur Durée d'Exécution 14Régler les Heures de Déclenchement 15Régler le % du Budget d'Eau 15-16Régler le % du Budget d'Eau par Mois 16Programmer 16-17Régler l'Option de Programmation des Jours d'Eau 17Régler l'Option de Programmation des Jours Pairs / Impairs 18Régler l'Option de Programmation des Intervalles 18Régler l'Option de Programmation de Jours à Évènement 19Revue du Programme 19Régler la Valve Maîtresse ou la Pompe 20Régler le Délai de Pluie 20Éteindre le Contrôleur 21
Caractéristiques Avancées 22-23Exécuter une Zone Manuellement 22Exécuter un Cycle de Programme Manuellement 23
Données Techniques / Caractéristiques 24-26Détection de problèmes / Entretien 27Règles FCC 28

CARACTÉRISTIQUES
• L'exclusivité Nelson : programmation “SELECT&ADJUST™ ” (Sélectionner et Régler)• Le soutien de la batterie au lithium sauvegarde les programmes sans alimentation
AC ou Pile (AA)• Délai programmable entre zones• Trois programmes indépendants• Trois heures de déclenchement par programme (un total de 9 déclenchements)• Mise en attente des heures de déclenchement• Trois options de planification pour s'adapter aux besoins des plantes ou pour se
conformer aux restrictions portant sur l'irrigation (jours de la semaine, intervalle 1 – 30 jours, réel pair / impair)
• Programmation de jours-évènements par programme• Option de contournement du Détecteur de Pluie• Compatible années bissextiles – inclut automatiquement le 29 février tous les quatre ans• L'option de budget d'eau diminue ou augmente l'arrosage de 0 à 200 pour cent.• Option budget d'eau avancée pour régler le budget d'eau pour chaque mois de l'année.• Deux cycles d'essai (Manuel avec la caractéristique ManualAdvance™ et Cycle)• Temps d'exécution programmables de une minute à 1 heure 59 minutes• Protection de circuit à fusibles multiples et réinitialisation automatique
5

INSTRUCTIONS D'INSTALLATION
Le EZ Pro™ Jr. 8300 Série peut être assemblé à l'intérieur ou à l'extérieur. Trouvez unemplacement situé à proximité d'une source d'installation électrique 120V (230/240Vpour les modèles 8374, 8376, 8379 et 8382). Installez le EZ Pro™ Jr. à hauteur des yeux,si cela est possible. Utilisez le gabarit qui fourni pour marquer et pré-forer des trous-guides dans le mur. Introduisez les vis à travers les trous du boîtier et vissez chacuned'entre elles dans le trou-guide correspondant dans le mur.
Connecter le Transformateur120 VAC aux États-Unis, au Canada et au Mexique; 230 VAC en Europe, et240 VAC en Australie et en Afrique du sud
REMARQUE : Référez-vous à et suivez les codes locaux s'ils sont différents de cequi est indiqué dans ces instructions.
ATTENTION : Déconnectez la source d'alimentation 120V (230/240V pour les modèles8374, 8376, 8379, et 8382) avant de connecter le transformateur.Réalisez toutes les connexions et l'installation avant de brancher letransformateur sur la source d'alimentation. Cela permettra d'éviter toutcourt-circuit accidentel qui pourrait endommager le contrôleur.
Les câbles d'alimentation et les fils utilisés pour les connexions doivent être derésistance ordinaire ou supérieure. Les câbles de sortie de basse tension devront êtreentourés d'une gaine électrique fixée sur le contrôleur à l'aide d'un adaptateur adéquat.Retirez les deux vis et sortez le couvercle du transformateur pour avoir accès autransformateur interne, amenez les fils 120V (ou 230/240 pour les modèles 8374, 8376,8379 et 8382) à travers le trou 1/2" situé dans le bas du boîtier. (Pour la connexion dansun champ, les câbles AC doivent être dotés d'isolation d'au moins 75° C). La gaineélectrique devra être bien fixée au boîtier (suivre les codes locaux).
6

INSTRUCTIONS D'INSTALLATION
Pour les modèles 8304, 8306, 8309, 8312 (voir figure 1)Retirez le couvercle du transformateur en desserrant les deux vis. Relier les fils AC auxfils du transformateur en utilisant des écrous à fil. Aussi, veillez à ce que le fil de mise àla terre soit relié au fil de mise à la terre doté de la bande jaune. Veuillez vérifier lescodes locaux pour les conditions à satisfaire en matière de mise à la terre dans votrerégion. Rangez les fils à l'aide d'une attaché à câbles à serrez-la pour empêcher que lecâblage vienne en contact avec des circuits secondaires. A présent, le transformateurest connecté. Remettez en place le couvercle du transformateur ainsi que les deux vis. NE mettez PAS encore sur courant.
REMARQUE : La mise à la terre incorrecte peut endommager sérieusement lecontrôleur et/ou des biens privés et annulera la garantie.
Figure 1
7

INSTRUCTIONS D'INSTALLATION
Pour les modèles 8354, 8356, 8359, 8362 (voir figure 2)Retirez le couvercle du transformateur en desserrant les deux vis. Amenez les fils ACau connecteur fourni. Coupez et raccourcissez les fils pour les monter sur leconnecteur. Serrez les vis. (Pour l'Australie, un système d'attache supplémentaire estfourni.) Veillez à bien respecter la polarité des fils pendant que vous les installez (c'est-à-dire, L1, L2 et mise à la terre). A présent, le transformateur est connecté. Remettezen place le couvercle du transformateur ainsi que les deux vis. NE mettez PAS encoresur courant.
REMARQUE : La mise à la terre incorrecte peut endommager sérieusement lecontrôleur et/ou des biens privés et annulera la garantie.
Figure 2
8

INSTRUCTIONS D'INSTALLATION
Réglette à bornes de raccordement de câblesToutes les connexions de fils concernant les zones, la pompe et le détecteur qui sonteffectuées à l'intérieur du EZ Pro™ Jr. utilisent des connecteurs à vis qui nécessitent unpetit tournevis. Les réglettes à bornes de raccordement de câbles dans le contrôleuracceptent des fils 12 AWG (2.1mm) ou plus petit.
Connexion de la Valve Maîtresse ou du Relais de Déclenchement de la PompeLe EZ Pro™ Jr. est équipé d'un circuit partagé pour faire fonctionner un relais dedéclenchement de pompe ou une valve maîtresse. Connectez un fil du relais dedéclenchement de la pompe à COM (commun) sur la réglette à bornes deraccordement de câbles et connectez l'autre fil à PMP/MV (pompe/valve maîtresse) dela réglette. Référez-vous aux instructions du constructeur du relais de déclenchementde la pompe pour obtenir des détails spécifiques sur l'installation.
Connexion du Détecteur de Pluie / HumiditéLe EZ Pro™ Jr. est équipé de manière à faire fonctionner un détecteur à filsnormalement fermés. Pour installer un détecteur, retirez le cavalier installé à l'usine duconnecteur du détecteur à la réglette à bornes de raccordement et insérez les fils dudétecteur. Référez-vous aux instructions du constructeur du détecteur pour obtenir desdétails spécifiques sur l'installation. (voir Figure 2)
Si un détecteur a suspendu l'arrosage, le segment indicateur du détecteur apparaîtra sur l'écran LCD. Le symbole s'éteindra lorsque le détecteur est sec. Le EZ Pro™
Jr. reprendra l'opération en fonction du programme sélectionné.
REMARQUE : Les opérations effectuées manuellement ne prendront pas en comptele détecteur de pluie.
9

INSTRUCTIONS D'INSTALLATION
Connexion des piles et mise en fonction du contrôleurRetirez le panneau à bornes sous l'écran LCD de l'unité en poussant et faisant remonterla languette. Placez deux nouvelles piles AA Alcalines (LR6 en Europe) entre les clips àpiles dans le compartiment situé juste au-dessus de la réglette à bornes deraccordement. Les piles AA permettent au EZ Pro™ Jr. d'être programmé sans courantAC et de maintenir les programmes et l'horloge à temps réel, en cas de panne decourant. Si les piles ne sont pas installées et que la pile au Lithium n'a pas été activée,le contrôleur perdra le temps réel et les programmes, en cas de panne de courant. Lespiles doivent être remplacées tous les cinq ans ou bien lorsque le symbole indiquantque les piles faiblissent apparaît.
ATTENTION : Utilisez uniquement des piles AA alcalines. Les piles NiCad peuventprésenter des fuites ou exploser, provoquant ainsi des blessures auxpersonnes ou des dommages à des biens privés.
Pile de soutien au LithiumLes contrôleurs EZ Pro™ Jr. sont accompagnés d'une pile de soutien au lithium; ainsivous ne perdrez pas les réglages des programmes ou l'heure en cas de panne decourant –même s'il n'y a pas de piles installées sur le contrôleur. Il n'y aura pasd'indication visuelle vous informant sur le fonctionnement de ce soutien ni sur le faitque la pile est presque plate. Veuillez maintenir des piles Alcalines AA fraîches dansl'unité, pour que le principal système de soutien soit toujours en état de fonctionner.Pour activer la pile au Lithium, retirez la languette qui port l'indication “PULL”,située en dessous du compartiment à piles AA.Remettez en place le couvercle des piles/fils, en prenant soin de ne pas endommagerdes fils. Si les fils sont durs, il serait peut-être bon de les plier auparavant. Allumez lasource d'alimentation.
A présent, vous êtes prêt pour commencer à programmer!
10

INSTRUCTIONS DE PROGRAMMATION
Vue d'ensemble de la ProgrammationLe EZ Pro™ Jr. peut être programmé en fonctionnant sur courant AC ou en étant alimentépar les deux piles alcalines AA. Avant de programmer le EZ Pro™ Jr., cela pourrait vousêtre utile de vous familiariser avec quelques éléments de programmation généraux :• Si un segment de l'écran LCD clignote, cela signifie qu'il peut être modifié par l'utilisateur.• Lorsque vous utilisez des touches, appuyez sur le bouton pendant trois secondes
pour initier un déroulement rapide.• Vérifiez que la lettre de programmation correcte est affichée, lorsque vous
programmez. Les modifications de programme concernent spécifiquement leprogramme dont la lettre est affichée sur l'écran LCD.
• Il n'y aps de touché “ENTRER”. Les pressions sur les touches et les réglages ducadran sont automatiquement sauvegardés en mémoire.
• Si vous introduisez une modification de programmation au moment où unprogramme est exécuté, le programme s'arrête immédiatement. Le nouveauprogramme sera déclenché à l'heure programmée de déclenchement suivante.
• Lorsque le contrôleur n'exécute pas de programme, il affiche l'heure et le jour courants.• Au cours des opérations manuelles, il y a un délai de 5 secondes avant que l'opération
ne commence. Pendant ce délai, vous pouvez modifier vos réglages. Chaque fois quevous introduisez une modification, le délai revient automatiquement à 5 secondes.
• Les procédures MANUELLE et CYCLE ne peuvent fonctionner que lorsque le cadrantde Programmation est sur la position AUTO.
• Après une procédure de fonctionnement d'essai, le contrôleur revient à la procédureAUTO et exécute le programme planifié suivant.
• Les procédures d'essai ne tiennent pas compte de la connexion détecteur; cela vous permetd'arroser ou d'exécuter votre programme même si le détecteur a suspendu l'opération.
• Pour effacer tous les programmes et recommencer, appuyez et maintenez la pressionsur SELECT ‘–’ et ADJUST ‘–’ pendant trois secondes.
11

INSTRUCTIONS DE PROGRAMMATION
Présentation du Panneau AvantSi vous regardez le panneau avant (voir figure 3), vous voyez un large écran LCD, 4boutons en caoutchouc, un grand sélecteur rotatif et deux plus petits sélecteursrotatifs. Les boutons en caoutchouc portent les indications SELECT et ADJUST etconstituent le noyau du système de programmation SELECT&ADJUST ™ (Sélectionneret Régler) qui est une exclusivité Nelson. Les touches sont marquées d'un ‘+’ ou d'un‘–’ pour agrandir ou réduire le segment sur lequel vous travaillez.
Le système SELECT&ADJUST ™ s'appuie sur le principe suivant : vous SÉLECTIONNEZd'abord ce que vous désirez régler et, ensuite, vous RÉGLEZ les paramètres de ce quevous avez sélectionné. Par exemple, si vous souhaitez une durée d'exécution de 10minutes sur la zone 5, vous utiliserez les touches SELECT pour sélectionner la zone 5et, une fois sur la zone 5, vous utiliserez les touches ADJUST pour régler le tempsd'exécution sur 10 minutes.
Parfois, il ne sera nécessaire d'utiliser que SELECT ou ADJUST. Ces cas serontexpliquée dans ce manuel au moment utile.
12
INSTRUCTIONS DE PROGRAMMATION
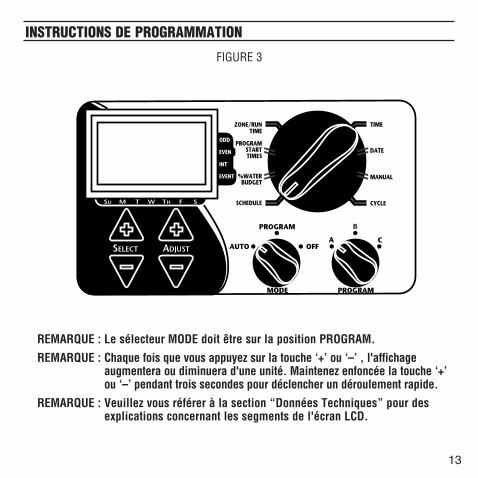
FIGURE 3
REMARQUE : Le sélecteur MODE doit être sur la position PROGRAM.
REMARQUE : Chaque fois que vous appuyez sur la touche ‘+’ ou ‘–’ , l'affichageaugmentera ou diminuera d'une unité. Maintenez enfoncée la touche ‘+’ou ‘–’ pendant trois secondes pour déclencher un déroulement rapide.
REMARQUE : Veuillez vous référer à la section “Données Techniques” pour desexplications concernant les segments de l'écran LCD.
13

INSTRUCTIONS DE PROGRAMMATION – MODE PROGRAMME
Régler l'Heure du JourTournez le grand sélecteur sur la position TIME. Appuyez sur SELECT pour sélectionnerles heures, les minutes et le mode d'affichage de l'heure sur 12 ou 24. Appuyez surADJUST pour faire se dérouler l'affichage jusqu'à l'heure correcte ou pour réglerl'affichage 12/24. ‘A.M’ n'apparaîtra pas sur l'écran LCD lorsque l'on est en MODEA.M.; ‘P.M.’ apparaîtra sur l'écran LCD lorsque l'on est en mode P.M.REMARQUE : En mode 24 heures, le calendrier est en format J/M/A au lieu de M/J/A.
Régler la Date d'Aujourd'hui et le Jour courant de la SemaineTournez le grand sélecteur sur la position DATE. Appuyez sur les touches SELECT poursélectionner parmi les positions du jour, du mois et de l'année. Appuyez sur lestouches ADJUST pour un déroulement rapide jusqu'à la date courante. Le jour correctde la semaine apparaîtra automatiquement sur l'écran LCD lorsque la dated'aujourd'hui est réglée. Le contrôleur EZ Pro™ Jr. s'adapte aux années bissextiles.
Sélectionner les Zones et Régler leur Durée d'ExécutionLa durée d'exécution d'une zone définit pendant combien de temps la zone seraexécutée. Tournez le grand sélecteur sur la position ZONE/RUN TIME. Tournez lesélecteur PROGRAM pour choisir le programme A, B ou C. Appuyez sur SELECT pourchoisir la zone que vous voulez pour le programme sélectionné (A, B ou C). Le numérode la zone étant affiché sur l'écran LCD, appuyez sur ADJUST pour régler la DURÉED'EXÉCUTION (“RUN TIME”) de la zone en question. Les DURÉES D'EXÉCUTIONpeuvent être réglées de 1 minute à 1 heure 59 minutes. Poursuivez a sélection dezones et le réglage de leur durée d'exécution jusqu'à ce que vous ayez toutes les zonesque vous souhaitez dans le programme sélectionné.Après la dernière zone et avant la première zone, un total des DURÉES D'EXÉCUTIONvous est fourni. Cela est utile pour déterminer le temps total d'exécution d'unprogramme. L'écran LCD affiche les lettres “ALL” et une DURÉE totale d'EXÉCUTIONest affichée. Le temps affiché est la somme de toutes les DURÉES D'EXÉCUTION pourle programme sélectionné (100% du budget d'eau). (par exemple, Un programme aune durée d'exécution de 5 minutes en zone 1; 12 minutes en zone 2, et 6 minutes enzone 4. L'écran, à cette position, affiche ALL et une durée d'exécution de 23 minutes.)14

INSTRUCTIONS DE PROGRAMMATION – MODE PROGRAMME
Régler les Heures de DéclenchementUne HEURE DE DÉCLENCHEMENT est l'heure à laquelle le programme commencera àêtre exécuté. Le EZ Pro™ Jr. permet de régler trois heures de déclenchement parprogramme.Tournez le grand sélecteur sur la position START TIMES. Appuyez sur SELECT poursélectionner l'heure de déclenchement que vous souhaitez régler (1, 2 ou 3). Appuyezsur ADJUST pour régler l'heure du jour à laquelle le programme sera lancé. Répétez enfonction du besoin.
Mise en attente des heures de déclenchementLe EZ Pro™ Jr. mettra en attente des heures de déclenchement si les heures d'irrigationde votre programme coïncident avec une autre heure de déclenchement. Le moment dedéclenchement supplémentaire commencera lorsque le premier cycle est complété.
Régler le % du Budget d'EauLe % du BUDGET D'EAU (WATER BUDGET) modifie la durée des temps d'exécutiond'un programme selon le pourcentage introduit et qui varie entre 0 et 200% (c'est-à-dire, une durée d'exécution de 10 minutes à 50% du budget d'eau sera exécutéependant 5 minutes.) Cette option est utile lorsque des changements de temps seproduisent. S'il est exceptionnellement sec, vous voudrez peut-être allonger la duréed'exécution de chacune des zones d'un programme. Grâce au % du Budget d'Eau, vouspouvez modifier un chiffre et toutes les durées d'exécution du programme concernéseront adaptées. Si la durée d'exécution de 24 heures est dépassée, “24 hr” clignoterasur l'écran LCD.
Tournez le grand sélecteur sur la position % WATER BUDGET (% BUDGET D'EAU). Lesymbole “%” apparaîtra sur l'écran LCD pour vous informer que vous travaillez sur laquantité du % du Budget d'Eau. Appuyez sur ADJUST pour choisir le pourcentagesouhaité.
15

INSTRUCTIONS DE PROGRAMMATION – MODE PROGRAMME
Si le % DE BUDGET D'EAU est réglé sur 110% ou plus, le EZ Pro™ Jr. divisera la duréed'exécution en moitiés pour réduire l'écoulement. La moitié de la durée calculéed'exécution sera appliquée pour chacune des zones du programme concerné, suivie dela seconde moitié de la durée d'exécution de chacune des zones.
REMARQUE : Le % du BUDGET D'EAU peut être modifié par programmation. Si vousavez programmé en A, B ou C, vous devez introduire trois valeurs debudget d'eau si vous souhaitez modifier chacun des trois programmes.
Régler le % du Budget d'Eau par Mois (Caractéristique avancée)Le EZ Pro™ Jr. vous permet de régler le % du BUDGET D'EAU par mois. Cette optionvous permet de personnaliser votre programme par mois sur l'année et l'adapter auxmois chauds et secs ainsi qu'aux mois plus froids et plus humides.
Tournez le grand sélecteur sur la position % WATER BUDGET (% BUDGET D'EAU).Appuyez sur SELECT ‘+’ et SELECT ‘–’ en même temps. Utilisez SELECT pour sélectionnerles mois de 1) 12. Utilisez ADJUST pour choisir le pourcentage souhaité, de 0 à 200%. Sivous sélectionnez 0%, il n'y aura pas d'irrigation au cours du mois concerné.
Régler le Calendrier d'Arrosage (une brève note sur la manière d'établir un calendrier et le EZ Pro™ Jr….)Le contrôleur EZ Pro™ Jr. propose trois options de calendrier ainsi que l'option dePlanification des Jours à Évènement :
• JOURS D'ARROSAGE (WATER DAYS), ou quotidiennement, vous permet dechoisir les jours de la semaine où vous souhaitez arroser (par exemple,uniquement les lundi, mercredi, vendredi).
• PAIR/IMPAIR (“ODD/EVEN”) indique au contrôleur d'arroser les jours impairs oules jours pairs du mois (ainsi, le contrôleur arrosera le 31 et le 1er du mois, sivous avez choisi le plan IMPAIR (“ODD”).
16

INSTRUCTIONS DE PROGRAMMATION – MODE PROGRAMME• INTERVAL arrose tous les X jours (de 1 à 30 jours) (par exemple, il arrose tous
les 3 jours, tous les 10 jours, etc). Une valeur de 1 dans un plan à intervallessignifie que l'on arrosera tous les jours. Lorsque vous utilisez l'option “intervalle”,vous avez la possibilité d'indiquer au contrôleur à partir de quel jour il doitcommencer le programme à intervalles (jusqu'à 30 jours).
• Les JOURS A ÉVÉNEMENT (EVENT DAYS) permettent à chaque programme debloquer l'arrosage d'un (des) jour(-s) spécifique(-s), indépendamment de l'optionde planification (pair/impair, intervalle ou quotidien).
L'écran LCD affichera le programme qui est couramment planifié (le plan réglé pardéfaut est WATER DAYS – Jours d'arrosage). Les touches SELECT permettront de fairese dérouler sur l'écran LCD toutes les positions de planification JOURS D'ARROSAGE,IMPAIR, PAIR, INTERVALLE et DATE DE DÉCLENCHEMENT DE L'INTERVALLE(WATER DAYS, ODD, EVEN, INTERVAL, et INTERVAL START DATE). Vérifiez que lesélecteur PROGRAM est bien positionné sur le programme que vous souhaitez modifier(A, B ou C) et que vous souhaitez modifier le plan courant. Une option de planificationest choisie si vous appuyez sur un bouton, que ce SELECT ou ADJUST. L'ancien planest remplacé par le nouveau. Il est facile de programmer un plan en suivant lesprocédures ci-dessous.
Régler l'Option de Programmation des Jours d'EauTournez le grand sélecteur sur la position SCHEDULE. Utilisez SELECT jusqu'à ce quedes gouttes de pluie apparaissent au-dessus des jours de la semaine. Appuyez sur lebouton ADJUST ‘+’ pour sélectionner le jour d'arrosage ou sur ADJUST ‘–’ pour lesjours où il n'y aura pas d'arrosage. Une indication clignotante apparaîtra au-dessus dujour que vous allez régler. Des gouttes de pluie apparaissent au-dessus des joursd'arrosage sélectionnés. L'indication se déplace automatiquement d'un jour à droiteaprès une pression sur la touche ADJUST ‘+’ ou ‘–’. Poursuivez la sélection ou ladésélection des jours où vous souhaitez que le contrôleur arrose jusqu'à ce que vousayez fixé votre calendrier de 7 jours.
17

INSTRUCTIONS DE PROGRAMMATION – MODE PROGRAMME
REMARQUE : Si vous programmez un plan de JOURS D'ARROSAGE (WATER DAYS),cela efface tout autre plan pour le programme sélectionné.
Régler l'Option de Programmation des Jours Pairs / ImpairsTournez le grand sélecteur sur la position SCHEDULE. La dernière option deplanification choisie pour le programme courant s'affiche sur l'écran LCD. Pour réglerun plan IMPAIR (ODD) ou PAIR (EVEN) appuyez sur le bouton SELECT jusqu'à cequ'uune flèche apparaisse sur l'écran LCD à côté du plan approprié (ODD-impair ouEVEN-pair). Il faut fixer une DATE pour l'arrosage impair/pair. Les boutons SELECTagissent comme touches à bascule et alterneront entre impair et pair.
REMARQUE : Si vous programmez un plan IMPAIR/PAIR, cela efface tout autre planpour le programme sélectionné.
Régler l'Option de Programmation des IntervallesTournez le grand sélecteur sur la position SCHEDULE. La dernière option deplanification choisie pour le programme courant s'affiche sur l'écran LCD. Appuyez surSELECT pour faire défiler l'affichage jusqu'à la position jours d'intervalle (intervaldays). Une flèche apparaîtra sur l'écran LCD, à côté de INT (Intervalle). Utilisez ADJUSTpour choisir les jours intervalle entre arrosages (1-30). La date affichée est le jour “un”du plan à intervalles. (La date d'aujourd'hui, si elle a été réglée). Pour changer de jour“1”, utilisez SELECT pour aller sur la position date de début de l'intervalle. Selon lebesoin, modifier la date du jour “1” du plan à intervalles à l'aide de ADJUST (ne peutêtre réglé que jusqu'à 30 jours).
REMARQUE : Si vous programmez un plan à INTERVALLES, cela efface tout autreplan pour le programme sélectionné.
18

INSTRUCTIONS DE PROGRAMMATION – MODE PROGRAMME
Programmation de Jours-Évènements par programme (En option)Tournez le grand sélecteur sur la position SCHEDULE. La dernière option de planificationchoisie pour le programme courant s'affiche sur l'écran LCD. Appuyez en même temps surSELECT ‘+’ et SELECT ‘–’. Une indication clignotante apparaîtra à côté de Jours-Evènements(EVENT DAYS) sur l'écran LCD. Utilisez le bouton ADJUST ‘+’ pour sélectionner le jourd'arrosage ou sur ADJUST ‘–’ pour les jours ou il n'y aura pas d'arrosage. Une indicationclignotante apparaîtra au-dessus du jour que vous allez régler. Des gouttes de pluieapparaissent au-dessus des jours d'arrosage sélectionnés. L'indication se déplaceautomatiquement d'un jour à droite après une pression sur la touche ADJUST ‘+’ ou ‘–’.Poursuivez la sélection ou la désélection des jours où vous souhaitez que le contrôleurarrose jusqu'à ce que vous ayez fixé votre calendrier de 7 jours.
REMARQUE : Si vous programmez un plan JOURS-ÉVÈNEMENTS, cela N'efface PASles autres plans pour le programme sélectionné.
Répétez la procédure décrite ci-dessus pour chacun des programmes (A, B ou C),selon vos besoins.
Et voilà ! Votre EZ Pro™ Jr. est à présent programmé. Tournez le sélecteur MODEsur la position AUTO pour lancer le programme que vous avez introduit.
REVUE DE PROGRAMMESPour voir le programme courant, tournez le sélecteur MODE sur la position PROGRAMet tournez le grand sélecteur sur le réglage que vous souhaitez revoir (par exemple,tournez le grand sélecteur sur TIME (TEMPS) pour revoir l'heure qui a été réglée sur lecontrôleur). Si vous avez besoin de revoir différentes zones ou durées d'exécution (1, 2, 3), utilisez uniquement les boutons SELECT.
REMARQUE : Étant donné que vous êtes en mode “programme”, il est possible quevous modifiiez le programme par accident.
19

INSTRUCTIONS DE PROGRAMMATION – MODE PROGRAMME
Régler la Valve Maîtresse ou la PompeVous pouvez introduire un délai entre le moment où la Valve Maîtress/Pompe est miseen fonction et celui où la durée des zones commence. Tournez le grand sélecteur sur laposition ZONE/RUN TIMES. Appuyez en même temps sur SELECT ‘+’ et SELECT ‘–’.Utilisez la touche ADJUST ‘+’ ou ‘–’ pour régler le délai. L'écran LCD affichera la duréedu délai (Réglable entre 1 seconde – 30 minutes) tandis que l'indication “del”apparaîtra en dessous. Pour revenir au réglage des Durées d'Exécution de Zone,appuyez en meme temps sur SELECT ‘+’ et SELECT ‘–’.
REMARQUE : Le Délai Valve Maîtresse/Pompe sera le même pour les 3 programmes(A, B et C).
INSTRUCTIONS DE PROGRAMMATION – MODE AUTO
Régler l'Option de Contournement du Détecteur de PluieLe EZ Pro™ Jr. est équipé d'un dispositif de contournement du Détecteur de Pluie. Lerésultat en sera que le contrôleur arrosera même est déclenché. Pour activer lecontournement, le contrôleur doit être en Mode AUTO. En étant en Mode Auto, appuyez enmême temps sur SELECT ‘+’ et SELECT ‘–’. Le symbole de Suspension du Détecteurclignotera. En étant en Mode Auto, appuyez en même temps sur SELECT ‘+’ et SELECT ‘–’,pour désactiver. Ainsi, le symbole du Détecteur arrêtera de clignoter et indiquera l'étatcourant du détecteur de pluie.
REMARQUE : Le Contournement du Détecteur de Pluie demeurera en fonctionjusqu'à ce qu'il soit désactivé.
20

INSTRUCTIONS DE PROGRAMMATION – MODE OFF
Éteindre le ContrôleurTournez le sélecteur MODE sur la position OFF. Cela suspend toutes les opérationsd'arrosage (y compris les procédures manuelles/ d'essai) qui ne sont plus lancées.L'horloge continue à indiquer l'heure courante et la date tandis que votre (vos)programme (-s) sont retenus jusqu'au moment où vous souhaiterez lancer votre (vos)programme(-s) à nouveau. Pour lancer votre programme, ramenez le sélecteur MODEsur la position AUTO.
21

CARACTÉRISTIQUES AVANCÉES – MODE AUTO
Le EZ Pro™ Jr. comprend deux procédures manuelle/essai incorporées pour vérifier lefonctionnement du contrôleur ou pour vous permettre de contourner le programmecourant et arroser immédiatement. La section qui suit vous présentera la manière derégler le contrôleur afin de :
• Exécuter une zone manuellement• Exécuter un programme manuellement
REMARQUE : Toutes les procédures d'essai sont exécutées le sélecteur MODE étanten position AUTO. Cela permet au contrôleur de revenir sur le réglageAUTO après avoir exécuté une procédure manuelle/d'essai. Cela vouspermet également de vous éloigner du contrôleur après avoir régléune procédure manuelle/d'essai et de ne pas avoir à revenir pourrégler à nouveau le contrôleur sur AUTO.
REMARQUE : Toutes les procédures manuelle/d'essai ne tiennent pas compte de laconnexion détecteur. Par conséquent, vous pouvez arroser en utilisantune des procédures manuelle/d'essai, même si le détecteur asuspendu le programme que vous aviez planifié.
Exécuter une Zone ManuellementTournez le grand sélecteur sur la position MANUAL. Les indications de réglage pardéfaut de la zone 01 et 00:10 minutes clignoteront (souvenez-vous que cela signifie quevous pouvez les modifier). Appuyez sur SELECT pour choisir le numéro de la zone quevous voulez lancer. Appuyez sur ADJUST pour régler la durée d'exécution de la zonesélectionnée. Le contrôleur introduira un délai de 5 secondes avant de lancer la zone.
22

CARACTÉRISTIQUES AVANCÉES – MODE AUTO
Le EZ Pro™ Jr. comprend l'option ManualAdvance™ de Nelson dans la procédureMANUAL. ManualAdvance™ vous permet d'interrompre la zone couramment exécutéeet d'avancer immédiatement à la nouvelle zone que vous sélectionnerez. Pendant que laprocédure MANUAL ou CYCLE exécutent une zone, appuyez sur SELECT pour avancervers une nouvelle zone. La dernière durée d'exécution introduite sera affichée. Appuyezsur ADJUST pour introduire une nouvelle durée d'exécution pour la nouvelle zone (lecontrôleur introduira un délai de 5 secondes avant de lancer la nouvelle zone).
REMARQUE : Une fois la zone lancée, la durée d'exécution ne peut pas être régléesans désélectionner et re-sélectionner la zone.
Exécuter un Cycle de Programme ManuellementTournez le grand sélecteur sur la position CYCLE. La lettre correspondant auprogramme courant clignotera. Pour aller sur un programme différent, tournez lesélecteur PROGRAM sur le programme souhaité (A, B ou C). Le contrôleur introduiraun délai de cinq secondes avant de lancer le programme sélectionné. Après l'exécutiondu programme, le contrôleur revient sur la procédure AUTO.
REMARQUE : CYCLE lance et exécute immédiatement votre programme courant.Vous pouvez avancer manuellement (ManualAdvance™) d’une zone àune autre
23

DONNÉES TECHNIQUES
1. TransformateurTransformateur interne 24 VAC ; 20 VA, .83A pour les zones et la logique. Letransformateur peut soutenir le fonctionnement d'une pompe ou d'une valvemaîtresse et d'une valve de zone, au maximum.
2. Protection contre la surtension600 watts TVS aux sorites des zones9J Mov sur les secondaires. (voir Disjoncteur, ci-dessous)
3. Opération du DétecteurLe EZ Pro™ Jr. est configuré de manière à faire fonctionner le contrôleur avec ousans détecteur. Les détecteurs doivent avoir des connexions normalement fermées(fils). Le cavalier installé à l'usine doit être installé, s'il n'y a pas de détecteur utilisé.
4. Lignes des ZonesLe EZ Pro™ Jr. soutiendra simultanément au maximum deux (2) solénoïdes, àcondition que l'un soit la valve maîtresse/pompe. Chaque sortie de zone peut fairefonctionner un ou deux solénoïdes.
I irruption .52A maxI attente .33A max
5. Gamme de TempératuresDe fonctionnement : -20° à +55° C (23° à 131° Fahrenheit)De stockage : -30° à +85° C (-22° à 185° Fahrenheit)
24

DONNÉES TECHNIQUES
6. Écran
7. PilesDeux (2) Piles Alcalines AA (LR6 en Europe) sont requises. Ne pas utiliser des pilesNiCad. Une (1) pile bouton CR2032 au Lithium, accompagne le contrôleur.
8. Sauvegarde des ProgrammesLa pile au Lithium est utilisée pour garder en mémoire l'heure et les programmeslorsque l'alimentation provenant des piles alcalines et du secteur n'est pasdisponible.
REMARQUE : La languette doit être retirée afin d'activer la pile de soutien aulithium.
9. Dimensions du Boîtier (approx.)8" H x 10" L x 4" P (le couvercle peut être retire sans outils)
25
Heure de mise en marche,Durée de fonctionnement,Date de base, Mois deprovision d’eau
Capteur de pluie, symbole de suspensiond’arrosage
Pas de symbole CA
Indicateur piles vides
Programme A, B ou C
Indicateur AM PM
Année, jours d’intervalle,Provision d’eau, numérode zone
Impair
Pair
Intervalle
Événement
Su M T W Th F S
Indicateur deproblèmes
Zone ## de Zones
Jours d’arrosage,Jours de la semaine

DONNÉES TECHNIQUES
10. Réglage par Défaut (mode 12 heures)12:00 A.M.DimancheLa date est 01/01 2003Pas de Durées d'Exécution (zone 01, —:—)Pas d'Heures de Déclenchement (numéro de déclenchement 01, —:—)Budget d'Eau 100%Plan d'arrosage Quotidien Le sélecteur MODE est en position OFFLe sélecteur "Program" est sur le programme ADélai de 5 secondes entre zones
11. DisjoncteurUn interrupteur électronique multiple est incorporé sur l'interconnexion PCB ducontrôleur. Ce type de disjoncteur ne nécessite pas d'être réinitialisé ou remplacé parl'utilisateur.
26

DÉTECTION DE PROBLÈMES / ENTRETIENPROBLÈME CAUSE PROBABLE SOLUTIONPas de sortie vers zone, valve • AC déconnecté • Vérifiez la source AC, si AC n'estpompe maîtresse ou indicateur pas détecté par le contrôleur“no AC” allumé l'indication "no AC" sera alluméePas de AC et écran vide • Pas de pile ou pile plate • Remplacez la pile et appuyez sur resetÉcran LCD vide • Pas de AC et pas de pile • Installez les piles pour récupérer
l'utilisation de l'écran, vérifiez le AC pourvous assurez de la sortie vers le champ
“M-X” apparaît sur l'écran LCD • Le sélecteur MODE est en • Tournez le sélecteur MODE en lorsque vous essayez d'exécuter position PROGRAM position AUTO pour exécuter une zone manuellement une zone manuellement“C-X” apparaît sur l'écran LCD • Le sélecteur DIAL est en • Tournez le sélecteur MODE sur lorsque vous essayez d'appliquer position Programme la position AUTO pour appliquer CYCLE à un programme CYCLE à un programme“P” apparaît sur l'écran LCD • Fils non connectés ou manqué • Vérifiez le câblage de champ, lesassocié à un numéro de zone de fils ou de solénoïde solénoïdes, remplacez le solénoïde
• Plus de 2 solénoïdes connectés à une zone
• Le TVS est endommagé suite à • Retirez le fil de zone si Pxxz continue un tonnerre ou à une mise à la d'apparaître lorsque vous lancez terre incorrecte manuellement ou automatiquement,
l'unité doit être entretenue ou remplacée.“ALL 24HR” clignote sur • Durée d'exécution supérieure • Vérifiez les durées d'exécution de zonel'écran LCD à 24 heures et le % de BUDGET D'EAU programméLe symbole du détecteur de • Le détecteur de pluie est activé • Vérifiez si le cavalier est installé, pluie est allumé ou, s'il n'y a pas de détecteur s'il n'y a pas de détecteur
de pluie installé, le cavalier de pluie installén'est pas en place
Le contrôleur ne réagit pas lorsque • L'unité doit être réinitialisée • Tournevis dans la cellulevous appuyez sur les touches ou marquée “reset” (réinitialiser)vous manipulez les sélecteursPas de sortie sur une • Problème de câblage ou • Vérifiez le câblage et/ou le zone unique solénoïde en mauvais état solénoïdeAbsence de sortie vers toutes • Commun coupé ou déconnecté • Vérifiez le câble communles zones • Le RS branché sur le fil commun
est ouvert ou déconnecté27

NORMES FCC
Ce contrôleur d'irrigation électronique génère et utilise de l'énergie de radiofréquences et, s'il n'est pasinstallé et utilisé de manière appropriée, c'est à dire de manière strictement conforme aux instructionsdu fabricant, il peut provoquer des interférences dans la réception de la radio et de la télévision. Ceproduit a été soumis à des essais standards et a été trouvé conforme aux prescriptions relatives auxappareils digitaux de la Classe B, selon les prescriptions techniques précisées au paragraphe J de laPartie 15 des Normes FCC; celles-ci visent à fournir une protection raisonnable contre desinterférences de ce type, dans le cadre d'une installation domestique. Toutefois, il ne peut être garantiqu'il n'y aura pas d'interférence dans le cas d'une installation précise. Si ce contrôleur produiteffectivement des interférences à la réception radio ou télévision – ce qui peut être déterminé enmettant le contrôleur sous tension et, ensuite, hors tension – il est recommandé à l'utilisateurd'essayer de corriger cette interférence en mettant en œuvre une ou plusieurs des mesures suivantes :
Orientez l'antenne de réception de manière différenteModifiez l'emplacement du contrôleur par rapport au récepteur concernéAugmentez la distance entre le contrôleur et le récepteurBranchez le contrôleur sur une prise de courant différente de manière à ce que le contrôleur et le
récepteur soient branchés sur des branches différentes du circuit électriqueSi nécessaire, l'utilisateur pourra contacter le distributeur spécialisé ou un technicien expérimenté enappareil radio/télévision pour obtenir des conseils supplémentaires. L'utilisateur peut égalementtrouver utile de consulter le livret suivant qui a été élaboré par le Comité Fédéral sur lesCommunications :“Comment Identifier et Résoudre des problèmes d'Interférence Radio-TV”Ce livret est disponible auprès de l'Agence de l'Imprimerie de l'État des États-Unis, Washington, DC20402., No. 004-000-00345-4.
RÉGLEMENTATION CANADIENNE EN MATIÈRE D'INTERFÉRENCES RADIOREMARQUE : Cet appareil digital ne dépasse les limites prescrites pour la Classe B quant à
l'émission de bruits radio provenant d'appareils digitaux et qui sont fixées dansla réglementation en matière d'interférences radio du Département Canadien desCommunications.
28

Instrucciones para el EZ PRO™ Jr. Gráfico de Zona 1
2
3
4
5
6
7
8
9
10
11
12
976-60341 Rev 5-03

EZ Pro™ Jr.Instalación y Guía de ProgramaciónPara modelos EZ ProTM Jr.:
8304 83748306 83768309 83798312 8382

3
GRACIAS por comprar la Serie de programadores de riego electrónico EZ Pro™ Jr.8300. La Serie EZ Pro™ Jr. 8300 es tan fácil de usar, que probablemente podráinstalar y programar este programador completo usted sólo sin instruccionesprevias. Sin embargo, antes de instalar y de programar el programador, lerecomendamos leer detenidamente estas instrucciones para sacar ventaja de todo loque le ofrece la Serie EZ Pro™ Jr. 8300.
Si le surgiera alguna pregunta, problema o comentario a nuestra nueva Serie EZ Pro™ Jr. 8300, le rogamos llame al numero gratuito 1-888-NELSON8 denuestro Departamento de Servicio Técnico o simplemente visite nuestra páginaweb LRNelson.com.
Líderes en el Riego de Césped desde 1911
NOTA: En nuestros esfuerzos para mejorar continuamente y poner al día susproductos, las características y especificaciones que aparecen eneste manual pueden variar sin previo aviso.

4
INDICECaracterísticas 5Instalación 6-10
Lengüeta terminal 9Conectar Válvula General o Relé de Bomba de Arranque 9Conectar Sensor Lluvia / Humedad 9Conectar Batería y Puesta en Marcha del Programador 10
Programando el EZ Pro™ Jr. 11-21Revisión de Programas 11Distribución del Panel Frontal 12-13Fijar Hora del Día 14Fijar Fecha Actual 14Fijar Día de la Semana 14Seleccionar Zonas y Fijar la Duración del Riego 14Fijar Tiempos de Arranque 15Fijar % Provisión de Agua 15-16Fijar % Provisión de Agua por Mes 16Instrucciones de Programación 16-17Fijar Opción Programación Días de Riego 17Fijar Opción Programación Días Pares/Impares 18Fijar Opción Programación a Intervalos 18Fijar Opción Programación Días Específicos 19Revisión Programa 19Fijar Válvula General o Bomba 20Fijar Pausas por Lluvia 20Desactivando el Programador 21
Características Avanzadas 22-23Puesta en Marcha Manual de Zona 22Puesta en Marcha Manual de Ciclo de Programa 23
Especificaciones Técnicas 24-26Detección de Problemas/Servicio 27Normas FCC 28

CARACTERISTICAS
• Programador exclusivo Nelson SELECT&ADJUST™ programming• La pila de Litio de Reserva almacena programas sin corriente eléctrica o pilas• Pausa programable entre zonas• Tres programas independientes• Tres tiempos de arranque por programa (9 arranques en total)• Almacenaje de tiempos de arranque • Tres opciones de programación para cubrir las necesidades de las plantas o para
cumplir con las restricciones de agua (días de la semana, intervalos de días 1 a 30,par / impar)
• Programación de Día Específico por Programa• Opción Desviación Sensor de Lluvia• Automáticamente compatible con año bisiesto, incluye Feb. 29 cada cuatro anos• Opción provisión de agua reduce o aumenta el riego del 0 al 200 por ciento• Provisión de Agua avanzada para fijar la cantidad de agua para cada mes del año• Dos ciclos de prueba (Manual con característica ManualAdvance™ and Cycle)• Periodos de riego programables entre 1 minuto y 1 hora 59 minutos• Protección de circuito multifusible con auto borrado
5

INSTALACIÓN
La Serie EZ Pro™ Jr. 8300 puede ser montada en el interior o en el exterior. Busque unemplazamiento cerca de un enchufe de 120V (Modelos 230/240V para 8374, 8376, 8379,y 8382). Instalar el EZ Pro™ Jr., si fuera posible, cerca del nivel ocular. Utilizar la plantillaadjuntada para marcar y preparar los agujeros pilotos en la pared. Insertar los tornillos através de los agujeros de la carcasa y atornillar en la pared cada uno en el agujero pilotocorrespondiente.
Conectando el Transformador120 V en Estados Unidos, Canadá y Méjico; 230 V en Europa, y240 V en Australia y Sudáfrica.
NOTA: Tenga en cuenta y utilice los códigos locales si fueran diferentes de losmencionados en estas instrucciones.
PRECAUCION: Desconectar la fuente de suministro de 120V (230/240V para losmodelos 8374, 8376, 8379 y 8382) antes de conectar el transformador.Completar todas las conexiones e instalaciones antes de conectar eltransformador a la fuente de suministro eléctrico. Esto evitará un cortocircuito accidental que podría dañar el programador.
Los cables de suministro utilizados para conexiones deben de ser de uso normal omayor. Los cables de salida de bajo voltaje deben de ser insertados con el adaptadoradecuado en el conducto acoplado al programador. Para acceder al trasformador interno,retire los dos tornillos y quite la tapa del transformador, pasar hacia arriba los cables de120V (o 230/240V para los modelos 8374, 8376, 8379, y 8382) a través del agujero delconducto del fondo de la carcasa (para conexión a tierra, los cables AC tienen que tenerun nivel de aislamiento mínimo del 75° C). El conducto deberá ser fijado a la carcasa(seguir los códigos locales).
6

INSTALACIÓN
Para los modelos 8304, 8306, 8309, 8312 (ver figura 1)Quite la tapa del transformador soltando los dos tornillos. Junte los cables de toma decorriente al transformador utilizando los enganches. Asegúrese también de que el cablede toma de tierra esté sujeto con el cable verde con raya amarilla. Le rogamos reviselos códigos locales para los requerimientos para toma de tierra en su área. Ate el cablecon el ajuste para cables y sujételo bien para evitar que los cables flojos toquencircuitos secundarios. El transformador ya esta conectado. Vuelva a colocar la tapa deltransformador y los dos tornillos. NO encender todavía.
NOTA: Una toma de tierra incorrecta podría provocar graves daños al programadory/o a la propiedad personal y se invalidaría la garantía.
Figura 1
7

INSTALACIÓN
Para modelos 8354, 8356, 8359, 8362 (ver figura 2)Quite la tapa del trasformador soltando los dos tornillos. Lleve los cables de conexiónal conector suministrado. Corte y pele los cables para instalarlos en el conector de labase del chasis. Apriete los tornillos (para Australia se suministra un enganche extra).Observar la correcta polarización de los cables en el momento de su instalación (Ej. L1,L2 y toma de tierra). El transformador ya está conectado. Vuelva a poner la tapa deltransformador y los dos tornillos. NO encender todavía.
NOTE: Una toma de tierra incorrecta puede provocar graves daños al programadory/o propiedad personal y se invalidaría la garantía.
Figura 2
8

INSTALACIÓN
Lengüeta TerminalLas conexiones de los cables del sensor, zona, y bomba realizadas en el EZ Pro™ Jr. sehacen con conectores de tipo tornillo que requieren un pequeño destornillador. Lasbandas terminales del programador aceptan cables AWG (2.1mm) o menores.
Conectar Válvula General o Relé de Bomba de ArranqueEl EZ Pro™ Jr. está equipado con un circuito compartido que opera un relé de bombade arranque o una válvula general. Conecte un cable del relé de la bomba de arranqueal COM (común) en la banda terminal, el otro al PMP/MV (válvula bomba/general) en labanda terminal. Mire las instrucciones del fabricante en lo referente al relé bomba-comienzo para detalles concretos sobre su instalación.
Conectar Sensor Lluvia / HumedadEl EZ Pro™ Jr. está equipado para manejar un sensor con los conductos normalmentecerrados. Para instalar el sensor, quite los cables de arranque del conector del sensoren la banda terminal e inserte los cables del sensor. Mire las instrucciones delfabricante del sensor para detalles concretos sobre su instalación.(Ver figura 2)
Si un sensor ha suspendido el riego, la parte indicativa del sensor aparecerá en lapantalla. El símbolo se apagara cuando el sensor se haya secado. El EZ Pro™ Jr. dejará defuncionar sobre la base del programa seleccionado.
NOTA: Las operaciones manuales ignorarán el sensor de lluvia.
9

INSTALACIÓN
Conectar Batería y Puesta en Marcha del ProgramadorQuite el panel terminal bajo la pantalla de la unidad empujando la tapa hacia arriba.Inserte dos nuevas pilas AA Alcalinas (LR6 en Europa) en su lugar encima de la bandaterminal. Dichas pilas permiten programar el EZ Pro™ Jr. sin suministro eléctrico ymantener los programas y el reloj en tiempo real si hubiera un corte de suministro. Silas pilas no estuvieran instaladas y la batería de Litio no hubiera sido activada, en elcaso de un corte de suministro eléctrico el programador perdería el tiempo real y losprogramas. Las pilas deberán ser sustituidas cada cinco años, o cuando aparezca elsímbolo indicativo de escasa batería.
PRECAUCIÓN: Utilice solamente pilas alcalinas AA. Las pilas NiCad pueden gotear oexplotar causando daños personales o materiales.
Batería de Litio de ReservaLos programadores EZ Pro™ Jr. vienen con una pila de litio de apoyo, por lo quedurante un fallo de corriente no perderán los programas o las horas fijadas – incluso sino estuviera instalada la pila. No aparecerá ningún indicativo visual que nos informesobre el funcionando de este apoyo, o cuando dicha batería esté a punto de agotarse.Le rogamos mantenga las pilas alcalinas para la batería de reserva principal. Paraactivar la pila de Litio de apoyo, quite la lengüeta que marca “PULL” situada bajoel compartimento de las pilas AA.Añadir la tapa de la pila / cable, asegurándose de no dañar los cables. Si los cablesestán rígidos le puede resultar útil el doblarlos de antemano. Encienda el aparato.
Puede ya iniciar su programación!
10

INSTRUCCIONES DE PROGRAMACION
Revisión de ProgramasEl EZ Pro™ Jr. puede ser programado con corriente eléctrica o con las pilas alcalinas.Antes de programar el EZ Pro™ Jr., podría ser de ayuda el familiarizarse con algunospuntos de programación general:• Si parpadea una parte(s) de la pantalla, esta parte puede ser cambiada por el usuario.• Cuando utilice las teclas, mantenga pulsada la tecla durante tres segundos para
comenzar un rápido desplazamiento.• Asegúrese de que cuando esté programando aparezca la letra del programa
adecuado; los cambios son específicos de la letra del programa que aparezca en lapantalla.
• No hay tecla “ENTER”. Se almacenan los datos de forma automática cuando sepulsan teclas o se programa con los mandos.
• Si realiza algún cambio en la programación mientras funciona un programa, dichoprograma termina inmediatamente. El nuevo programa comienza en el próximotiempo de arranque programado.
• Cuando no está funcionando, el programador muestra la hora y día actuales.• Durante operaciones manuales, hay 5 segundos de pausa antes de que comience su
funcionamiento. Durante dicho tiempo puede usted cambiar sus programaciones.Cada vez que haga un cambio, la pausa vuelve a ser de 5 segundos.
• Las opciones MANUAL y CYCLE solo funcionan con el mando de Programa en laposición AUTO.
• Una vez comenzado el procedimiento de prueba (test), el programador vuelve alprograma AUTO y comienza el siguiente programa establecido.
• El procedimiento de prueba ignora la conexión del sensor; esto le permite regar oponer en marcha su programa incluso si el sensor ha dejado de funcionar.
• Para borrar todos los programas y comenzar de nuevo, presione y mantengapresionado SELECT ‘–’ and ADJUST ‘–’ durante tres segundos.
11

INSTRUCCIONES DE PROGRAMACIÓN
Distribución del Panel FrontalSi mira al panel frontal (ver figura 3) vera una gran pantalla, 4 teclas de goma, un granmando giratorio y dos mandos giratorios pequeños. Las teclas de goma estánmarcadas SELECT y ADJUST, y son el centro del programador exclusivo NelsonSELECT&ADJUST™. Las teclas están identificadas con ‘+’ o ‘–’ para subir o bajar laparte en el que esta trabajando.
SELECT&ADJUST™ funciona seleccionando primero “SELECT” lo que quiera establecery luego ajusta “ADJUST” las variables que seleccione. Por ejemplo, si quiere quefuncione durante 10 minutos en la zona 5, utilizara la tecla SELECT para seleccionar lazona 5 y, una vez este en la zona 5, utilizará la tecla ADJUST para fijar el tiempo defuncionamiento en 10 minutos.
Hay momentos que solo se necesita SELECT o solo ADJUST. Se explicará en esta guíaen su momento.
12

INSTRUCCIONES DE PROGRAMACIÓN
FIGURA 3
NOTA: La tecla MODE debe de estar en la posición PROGRAM.
NOTA: Cada vez que se pulsa la tecla “+” ó “–”, la visualización incrementará odisminuirá en una unidad. Mantener la tecla “+”ó “–” pulsada durante tressegundos para iniciar un desplazamiento rápido.
NOTA: Vaya a la sección de Datos Técnicos para una explicación de las partes de lapantalla.
13

INSTRUCCIONES DE PROGRAMACION – MODO PROGRAMA
Fijar Hora del DíaGire la esfera grande a la posición TIME. Pulse SELECT para seleccionar horas, minutosy modo de hora 12/24 horas. Pulse ADJUST para desplazarse a la hora correcta oajustar el modo a 12 o 24 horas. ‘A.M.’ no aparecerá en la pantalla LCD cuando este enel modo a.m.; ‘P.M.’ aparecerá en la pantalla cuando este en el modo p.m.NOTA: En el modo 24 horas, el calendario esta en el formato D/M/Y (dia/mes/año)
en lugar de M/D/Y.Fijar Fecha Actual y Día de la Semana
Gire el mando grande a la posición DATE. Pulse la tecla SELECT para seleccionar en lasposiciones de día, mes y año. Pulse la tecla ADJUST para desplazarse a la fecha actual.Una vez ajustada la fecha actual, aparecerá en su pantalla el día de la semana actual. Elprogramador EZ Pro™ Jr. incluye año bisiesto.
Seleccionar Zonas y Fijar la Duración del RiegoLa duración del riego de una zona determina el tiempo que va a funcionar en esa zona.Gire el mando grande a la posición ZONE/RUN TIME. Gire el mando PROGRAM paraelegir el programa A, B o C. Pulse SELECT para elegir la zona que desee para elprograma seleccionado (A, B o C). Una vez aparezca el número de la zona en lapantalla, pulse ADJUST para ajustar la RUN TIME para dicha zona. La duración de losriegos podrá variar entre 1 minuto y 1 hora y 59 minutos. Continúe seleccionandozonas y ajustando la duración de los riegos hasta que tenga todas las zonas que quieraen el programa seleccionado.Después de la ultima zona y antes de la primera, aparece una suma de la duración delriego. Esto sirve para determinar el total de tiempo de riego para un programa. Lapantalla muestra las letras “ALL” y el total de horas de riego. El tiempo que se muestraes la suma de todos los RUN TIMES para el programa seleccionado (100% provisiónde agua). (Ej. Un programa tiene una duración de 5 minutos en la zona 1, 12 minutosen la zona 2 y 6 minutos en la zona 4. La pantalla en esta posición muestra ALL y unaduración del riego de 23 minutos).
14

INSTRUCCIONES DE PROGRAMACION – MODO PROGRAMA
Fijar Tiempos de ArranqueUn START TIME es la hora del día en la que empieza a funcionar un programa. El EZ Pro™ Jr. permite tres tiempos de arranque por programa.Gire el gran mando a la posición START TIMES. Pulse SELECT para seleccionar la horade arranque que desee establecer (1,2 ó 3). Pulse ADJUST para ajustar la hora del díaen la que comenzara el programa. Repítalo cuantas veces sea necesario.
Almacenando Tiempos de ArranqueEl EZ Pro™ Jr. almacenará los tiempos de arranque en el caso de que las horas de riegode un programa coincidan con otro tiempo de arranque. El tiempo de arranqueadicional comenzará una vez termine el primer ciclo.
Fijar % Provisión de AguaEl porcentaje de WATER BUDGET cambia la duración del riego en un programa segúnel porcentaje introducido, del 0 a 200% (Ej. El riego durante 10 minutos al 50% deprovisión de agua durará 5 minutos). Esta característica es útil si ocurren cambios enel tiempo. Si es más seco de lo normal, puede ser que quiera ampliar la duración delriego para cada zona en un programa. Con el porcentaje de Provisión de Agua, puedecambiar un número y se ajustarán todos los demás tiempos de funcionamiento dentrodel programa. Si se exceden las 24 horas de duración del riego, parpadeará en supantalla un 24 hr.
Gire el mando grande a la posición % WATER BUDGET. Un símbolo % aparecerá en lapantalla para indicarle que está trabajando con la cantidad del porcentaje de Provisiónde Agua. Pulse ADJUST para seleccionar el porcentaje deseado.
15
INSTRUCCIONES DE PROGRAMACION – MODO PROGRAMA
Si % WATER BUDGET esta establecido en 110% o es mayor, el EZ Pro™ Jr. dividirá laduración del riego a la mitad para reducir su consumo. Funcionará para cada zona endicho programa la mitad del tiempo de riego calculado, seguido por la segunda mitaddel tiempo de funcionamiento para cada zona.
NOTA: % WATER BUDGET se pueden cambiar en cada programa. Si tieneprogramados A, B y C, debe de meter tres valores de provisión de agua siquiere cambiarlo en cada programa.
Fijar Provisión de Agua por Mes (función Avanzada)El EZ Pro™ Jr. le permite establecer el porcentaje de Provisión de Agua por mes. Estafunción le permite personalizar su programa por meses a lo largo del año, para losmeses calientes y secos, y los fríos y húmedos.
Gire el mando grande a la posición % WATER BUDGET. Pulse SELECT ‘+’ y SELECT ‘–’ ala vez. Utilice el mando SELECT para seleccionar los meses 1 a 12. Utilice el ADJUST paraelegir el porcentaje deseado de 0 a 200%. Si se elige el 0% no se regará ese mes.
Fijar el Esquema de Regado (Una rápida nota en regulación y el EZ Pro™ Jr.…)El programador EZ Pro™ Jr. tiene tres opciones de programación además de la opciónpara Programación de Días Específicos:
• WATER DAYS, o daily (diariamente), le permite elegir entre los días de la semanaque quiera regar (Ej. Lunes, Miércoles y Viernes solamente).
• ODD/EVEN (PAR / IMPAR) da la orden al programador de regar bien en día par o enimpar del mes (Ej. El programador regará el 31 y el 1 cuando sea elegido impar).
16

INSTRUCCIONES DE PROGRAMACION – MODO PROGRAMA• INTERVAL riega cada “x” numero de días (de 1 a 30 días) (Ej. riega cada 3 días, riega
cada 10 días, etc.). Un valor de 1 en un esquema de intervalo significa que regarácada día. Cuando utilice la opción de intervalo, tiene la flexibilidad de decir alprogramador que día va a comenzar el programa de intervalo (hasta 30 días).
• EVENT DAYS permite a cada programa bloquear un día(s) especifico de riego, sintener en cuenta la opción elegida (odd/even, interval, or daily).
La pantalla mostrará el programa actualmente establecido (por defecto apareceráWATER DAYS). El mando SELECT desplazara la pantalla a través de las posicionesprogramadas WATER DAYS, ODD, EVEN, INTERVAL y INTERVAL START DATE.Asegúrese de que el mando PROGRAMA sea fijado en el programa que quiera cambiar(A, B o C) y de que desea cambiar la programación actual. Presionando SELECT oADJUST se elige una opción de programación. La programación anterior es sustituidapor la nueva. Es fácil programar un esquema de esta manera.
Fijar Opción Programación Días de RiegoGire el mando grande a la posición SCHEDULE. Pulse SELECT hasta que aparezcan lasgotas de lluvia sobre los días de la semana. Pulse la tecla ADJUST ‘+’ para seleccionardicho día de riego o pulse ADJUST ‘–’ para días sin riego. Un indicador parpadeanteaparece sobre el día que va a programar. Las gotas de lluvia aparecen sobre los díaselegidos para riego. El indicador se mueve de forma automática un día después depulsado ADJUST ‘+’ o ‘–’. Continúe seleccionando o cancelando los días que quiere queel programador riegue hasta que tenga establecidos los 7 días del calendario.
17

INSTRUCCIONES DE PROGRAMACION – MODO PROGRAMA
NOTA: Al programar un esquema para WATER DAYS se borra cualquier otraprogramación para el programa seleccionado.
Fijar Opción Programación Días Pares/ImparesGire el mando grande a la posición SCHEDULE. Aparece en la pantalla la última opciónprogramada elegida por el actual programa. Para fijar PAR o IMPAR pulse la teclaSELECT hasta que la flecha aparezca en la pantalla al lado del programa adecuado(ODD or EVEN). Se tendrá que poner las fechas (DATE) para riego par/impar. Elcomando SELECT actúa como teclas llave y se moverá entre par e impar.
NOTA: Al programar PAR/IMPAR se borra cualquier otra programación para elprograma seleccionado.
Establecer Opción de Programación a IntervalosGire el mando grande a la posición SCHEDULE. Aparece en la pantalla la última opciónprogramada elegida para el programa actual. Pulse SELECT para desplazarse a laposición intervalo de días. Aparecerá en la pantalla una flecha al lado del INT(Intervalo). Utilice el ADJUST para elegir el intervalo de días entre los riegos (1 a 30).La fecha que se muestra es el día uno del programa de intervalo. (La fecha de hoy si seha establecido una). Para cambiar el día 1 utilice SELECT para ir a la posición de fechade inicio de intervalo. Si fuera necesario, cambie la fecha para el primer día delprograma de intervalos con ADJUST (sólo puede ser fijado para 30 días).
NOTA: Al programar INTERVAL se borra cualquier otra programación para elprograma seleccionado.
18

INSTRUCCIONES DE PROGRAMACIÓN – MODO PROGRAMA
Establecer Programación Días Específicos (Opcional)Gire el mando grande a la posición SCHEDULE. Aparece en la pantalla la última opciónde programación elegida por el programa actual. Pulsar SELECT ambos teclas ‘+’ y ‘–’.aparecerá un indicador parpadeante en la pantalla al lado del Event Days. Utilice la teclaADJUST ‘+’ para seleccionar el día de riego o pulsar ADJUST ‘–’ para los días sin riego.Un indicador parpadeante aparecerá sobre el día que quiera fijar. Aparecerán gotas delluvia sobre los días seleccionados para riego. El indicador se mueve de formaautomática un día a la derecha después de pulsar la tecla ADJUST ‘+’ o ‘–’. Continúeseleccionando o borrando los días que quiera que riegue el programador hasta quetenga establecido el calendario de 7 días.
NOTA: El programar un esquema de EVENT DAYS no borra otras programacionespara el programa seleccionado.
Repetir los procedimientos arriba indicados para cada programa (A,B o C), según sunecesidad.
!Ya esta! Su EZ Pro™ Jr. esta ya programado. Gire el mando MODE a la posiciónAUTO para que comience el programa elegido.
REVISIÓN DEL PROGRAMAPara revisar el programa actual, gire el mando MODE a la posición PROGRAM y elmando grande al ajuste que quiera revisar (Ej. gire el mando grande a TIME pararevisar la hora establecida por el programador). Cuando necesite ver diferentes zonas otiempos de funcionamiento (1,2,3) utilice sólo los mandos SELECT.
NOTA: Como se encuentra en el modo Programa, existe posibilidad de cambiar elprograma de forma accidental.
19

INSTRUCCIONES DE PROGRAMACION – MODO PROGRAMA
Fijar Válvula General o BombaPuede fijar la hora entre que se enciende la Valvula/Bomba General y la hora en quecomienzan las zonas. Gire el mando grande a la zona Run Times. Pulse a la vez lasteclas SELECT ‘+’ y SELECT ‘–’. Utilice la tecla ADJUST ‘+’ y ‘–’ para ajustar la pausa detiempo. La pantalla mostrará el tiempo de pausa (ajustable entre 1 segundo y 30minutos) con “del” debajo. Para volver a programar la duración de riego en las zonas,pulse las teclas SELECT ‘+’ y SELECT ‘–’ a la vez.
NOTA: La pausa de la Válvula / bomba General será la misma para los 3 programas(A, B y C).
INSTRUCCIONES DE PROGRAMACION – MODO AUTOMATICO
Fijar Pausa por LluviaEl EZ Pro™ Jr. está equipado con un Sensor de Desviación por Lluvia. Esto tendrá comoefecto que el programador riegue incluso estando desconectado el sensor de lluvia. Paraactivar la Desviación el programador debe de estar en el modo AUTO. Mientras esté en elModo Auto pulse SELECT ‘+’ y SELECT ‘–’ a la vez. El símbolo de Suspensión del Sensorparpadeará. Para desactivarlo pulse SELECT ‘+’ y SELECT ‘–’ a la vez mientras esta en elmodo AUTO. Esto hará que el símbolo Sensor deje de parpadear y muestre el estatusactual del sensor de lluvia.
NOTA: El Sensor de Desviación por Lluvia quedará activado hasta que seadesactivado.
20

INSTRUCCIONES DE PROGRAMACIÓN – MODO APAGADO
Desactivando el ProgramadorGire el mando MODE a la posición OFF. Esto suspende todas las operaciones de riego(incluyendo procedimientos manuales/prueba). El reloj continúa manteniendo la horaactual y la fecha, y su(s) programa(s) son retenidos hasta que quiera que comience suprograma(s) de nuevo. Para iniciar su programa, gire el mando MODE de nuevo a laposición AUTO.
21

CARACTERISTICAS AVANZADAS – MODO AUTOMATICO
El EZ Pro™ Jr. incorpora dos procedimientos manuales/pruebas para probar elfuncionamiento del programador o permitir desviar su programa actual para regar en esemomento. La siguiente sección le mostrará como establecer el programador para que:
• Funcione una zona de forma manual • Funcione un programa de forma manual
NOTA: Todos los procedimientos de prueba funcionan con el mando MODE en laposición AUTO. Ello permite al programador volver al programa AUTOdespués de manejar un procedimiento manual/prueba.
NOTA: Todos los procedimientos manuales / de prueba, ignoran la conexión delsensor. Por lo tanto, puede regar utilizando uno de los procedimientosmanuales / de prueba incluso si el sensor ha suspendido su programaseleccionado.
Puesta en Marcha Manual de ZonaGire el mando grande a la posición MANUAL. La zona por defecto 01 y 00:10 minutosparpadearán (le recordamos que esto significa que los puede cambiar). Pulse SELECTpara seleccionar el número de zona que quiere poner en funcionamiento. Pulse ADJUSTpara fijar la hora de funcionamiento para la zona seleccionada. El programador tardará 5segundos en comenzar la zona.
22

CARACTERÍSTICAS AVANZADAS – MODO AUTOMATICO
El EZ Pro™ Jr. incorpora la característica de Nelson ManualAdvance™ en elprocedimiento Manual. ManualAdvance™ le permite cesar la zona actual defuncionamiento y avanzar de forma inmediata a cualquier nueva zona que seleccione.Con el procedimiento MANUAL o CYCLE funcionando en una zona, pulse SELECT paraavanzar a una zona nueva. Se mostrará la ultima zona de funcionamiento insertada.Pulse ADJUST para meter un nuevo tiempo de riego para la zona nueva (el controladortardará 5 segundos en comenzar la zona nueva).
NOTA: Una vez que se haya puesto en funcionamiento la zona, el tiempo defuncionamiento no puede ser ajustado sin borrar y volver a seleccionar lazona.
Puesta en Marcha Manual de Ciclo de ProgramaGire el mando grande a la posición CYCLE. Parpadeará la letra del programa actual.Para cambiar a otro programa diferente, gire el mando PROGRAM al programadeseado (A, B o C). El programador tardará cinco segundos en comenzar el programaseleccionado. Una vez en funcionamiento, el programador vuelve a la posición AUTO.
NOTA: CYCLE inicia su programa actual de forma inmediata.Puede Avanzar Manualmente entre las zonas.
23

ESPECIFICACIONES TÉCNICAS
1. Transformador24 VAC transformador interno; 20 VA, .83A para zonas y lógico. El transformador puedehacer funcionar una bomba o válvula general y una válvula de una zona, máximo.
2. Protección contra Subidas de Tensión600 Vatios TVS en zona de salida9J Mov en secundarios (ver más abajo Corto Circuito)
3. Operador de SensorEl EZ Pro™ Jr. está configurado para operar el programador con o sin sensor. Lossensores tendrán normalmente conexiones cerradas (cables). El cable de arranquepreinstalado en fabrica tendrá que estar en su sitio en el caso de no utilizar sensores.
4. Líneas de ZonaEl EZ Pro™ Jr. operará un máximo de dos solenoides (2) a la vez, siempre que unode ellos sea la válvula de bombeo/general. Cada zona de salida puede operar uno odos solenoides.
I inrush .52A maxI hold .33A max
5. Rango de temperaturas Operando: -20° a +55° C (23° a 131° Fahrenheit)Almacenadas: -30° a +85° C (-22° a 185° Fahrenheit)
24

ESPECIFICACIONES TÉCNICAS
6. Visualización
7. BateríasNecesita dos (2) pilas alcalinas AA (LR6 en Europa). No utilizar pilas NiCad. Seincluye con el programador una (1) pila de Litio Coin Cell CR2032.
8. Programa de RetenciónSe utiliza una batería de Litio para mantener el tiempo y los programas cuando seagota la pila y se pierde la conexión eléctrica.
NOTA: Hay que quitar la lengueta para activar la bateria de litio de reserva.
9. Dimensiones de la Carcasa (aprox.)8" Al x 10" An x 4" fondo (la tapa se quita sin necesidad de herramientas)
25
Hora, fecha, hora de inicio,duración, fecha básica,consumo de agua mensual
Símbolo de suspensión del riego por el sensor de lluvia
Símbolo de falta dealimentación eléctrica
Aviso de pilas gastadas
Letra A B o C del programa
Indicator AM PM
Año, días de intervalo,consumo de agua,número de zona
Impar
Par
Intervalo
Evento
Su M T W Th F S
Indicador deproblemas
Nº de zonaNúmero dezonas
Días de riego, día de la semana

DATOS TÉCNICOS
10. Ajustes por Defecto (modo 12 horas)12:00 A.M.DomingoLa fecha es 01/01 2003Sin Tiempos de Riego (zona 01, —:—)Sin Tiempos de Arranque (numero inicial 01, —:—)100% Provisión de AguaEsquema de riego diario El mando MODE apagado (posición OFF)El mando PROGRAM en el programa A 5 segundos de pausa entre zonas
11. CortocircuitoSe incorpora un multifusible electrónico en el interconectador PCB del programador.Este tipo de cortocircuitos no requiere reajuste o sustitución por el usuario.
26

DETECCIÓN DE PROBLEMAS / SERVICIOSÍNTOMA CAUSA POSIBLE SOLUCIÓNSin salida a zona, bomba, válvula • Desconectado de la corriente • Revisar la conexión eléctrica, si maestra o indicador de eléctrica el programador no detecta la corriente corriente sin luz no se encenderá ninguna luz.Sin corriente • Sin batería o pila desgastada • Cambiar la pila y pulsar resetSin corriente o pila • Sin corriente o pila • Instalar pila para volver a poner en
marcha el monitor, comprobar la tomade corriente.
Aparece “M-X” en la pantalla al • El mando MODE está en • Poner el mando MODE en la intentar poner en marcha la posición PROGRAM posición AUTO para acceder una zona de forma manual manualmente a una zonaAparece “C-X” en la pantalla • El mando MODE está en • Mover el mando MODE en cuando se trata de poner la posición PROGRAMA la posición AUTO para poner en Ciclo un programa en Ciclo un programaAparece en la pantalla la letra • Los cables o solenoides no • Revise la toma de tierra y el solenoide.P con un número de zona están conectados Cambie el solenoide.
• 2 o más solenoides conectados a una zona
• TVS dañado a causa de un rayo • Quitar el cable si Pxxz sigue apareciendoo toma de corriente indebida al usarlo de forma manual o automática;
la unidad necesita reparación/sustituciónALL 24 hrs parpadea en la pantalla • Programadas más de 24 • Compruebe la duración de riego en cada
horas de riego zona y % de Provisión de AguaSímbolo de Sensor de Lluvia • El Sensor de Lluvia está • Si no estuviera activado el sensor deEncendido activado o, si no lo estuviera, lluvia, compruebe si el cable de
falta el cable de arranque arranque está instaladoEl programador no responde a • La unidad necesita reinicializarse • Desatornille allí donde indica RESETninguno de los mandos o teclaspulsadasNo hay potencia de salida a • Asunto de cable o de • Revisar cables y/o solenoide una zona solenoide en mal estadoNo hay potencia de salida a • Cable común roto o desconectado • Revisar el cable comúnninguna zona • El RS conectado al cable común
está abierto o desconectado
27

NORMAS FCC
Este programador de riego automático genera y utiliza energía de radio frecuencia, y en el caso de queno se instalara y se utilizara adecuadamente, esto es, estrictamente conforme a las instrucciones delfabricante, podría causar interferencias en la recepción de la radio y la televisión. Se ha probado quecumple los límites de un aparato computerizado de Clase B según las especificaciones de las ReglasFCC, Apartado J de la Parte 15, y que han sido designadas para dar una protección razonable contradichas interferencias en instalaciones residenciales. Sin embargo, no existe garantía de que noaparecerán interferencias en la instalación por un particular. Si el programador causara interferenciaen la recepción de radio o televisión, que se puede determinar encendiendo y apagando elprogramador, se recomienda al usuario el tratar de corregir la interferencia utilizando una o más de lassiguientes medidas:
Reorientar la antena receptoraRecolocar el programador respecto al recibidor.Mover el programador lejos del receptorEnchufar el programador en un enchufe diferente para que el programador y el receptor estén endiferentes circuitos
En caso necesario, el usuario debería consultar al distribuidor o a un técnico experimentado enradio/televisión para consejos adicionales. El usuario puede encontrar útil el siguiente folletopreparado por la Comisión Federal de Comunicaciones:“How to Identify and Resolve Radio-TV Interference Problems”
Dicho folleto lo encontrará en el U.S. Government Printing Office, Washington, DC 20402. Stock No.004-000-00345-4.
REGULACIONES CANADIENSES PARA INTERFERENCIAS DE RADIONOTA: Este aparato digital no excede los límites de la Clase B para emisiones de ruido en
radios desde aparatos digitales establecidos en las regulaciones para interferencias deradio del Departamento de Comunicaciones Canadiense.
28

Instruções do EZ PRO™ Jr. Plano das Áreas 1
2
3
4
5
6
7
8
9
10
11
12
976-60343 Rev 5-03

EZ Pro™ Jr.Guia de Instalação e ProgramaçãoPara os modelos EZ Pro™ Jr.:
8304 83748306 83768309 83798312 8382

3
MUITO OBRIGADO por adquirir o controlador de irrigação electrónica EZ Pro™ Jr.Série 8300. O modelo EZ Pro™ Jr. Série 8300 é tão fácil que, provavelmente,conseguirá instalar e programar este controlador de funcionalidades sem instruções.No entanto, antes de instalar e programar o controlador, aconselhamos que leiaatentamente estas instruções para obter todas as vantagens que o EZ Pro™ Jr. Série8300 tem para lhe oferecer.
Se tiver dúvidas, problemas ou comentários sobre o seu novo EZ Pro™ Jr. Série8300, é favor telefonar o nosso Departamento de Serviços Técnicos através dalinha grátis, para 1-888-NELSON8, ou fazendo-nos uma visita no nosso websiteem LRNelson.com.
Líderes em Irrigação de Relva Desde 1911
OBSERVAÇÃO: Nos nossos esforços para melhorar e actualizarcontinuamente os nossos produtos, as funcionalidades ecaracterísticas técnicas neste manual poderão sermodificadas sem aviso prévio.

4
ÍNDICEFuncionalidades 5Instalação 6-10
Fita do Terminal 9Ligação da Válvula Principal ou da Relé de
Arranque da Bomba 9Ligação do Sensor de Chuva/Humidade 9Ligação das Pilhas e Arranque do Controlador 10
Programação do EZ Pro™ Jr. 11-21Panorâmica da Programação 11Alçado do Painel Frontal 12-13Acertar a Hora do Dia 14Acertar a Data 14Acertar o Dia Actual 14Seleccionar as Áreas e Definir os Seus Tempos
de Funcionamento 14Definir os Tempos de Arranque 15Definir a % do Consumo de Água 15-16Definir a % do Consumo Mensal de Água 16Programação 16-17Definir a Opção Programação de Dias de Rega 17Definir Opção Programação Dia Impar/Par 18Definir Opção Programação de Intervalo 18Definir Opção Programação Dias Especiais 19Revisão do Programa 19Fixar a Válvula Principal ou Bomba 20Fixar o Retardamento da Chuva 20Desligar o Controlador 21
Funcionalidades Avançadas 22-23Funcionamento Manual de uma Área 22Funcionamento Manual de um Ciclo de Programa 23
Dados/Características Técnicas 24-26Resolução de Problemas/Manutenção 27Regras FCC 28

CARACTERÍSTICAS TÉCNICAS
• Programação exclusiva SELECT&ADJUST™ da Nelson• Pilha de lítio de reserva armazena programas sem CA ou energia da Pilha (AA)• Retardamento programável entre as áreas• Três programas independentes• Três tempos de arranque por programa (9 arranques totais)• Ordenamento dos tempos de arranque• Três opções de programação adaptáveis às necessidades do material das plantas ou para
obedecer a restrições de rega (dias da semana, intervalo dias 1 a 30, verdadeiro impar/par)• Programação dos dias especiais por programa• Opção bypass do Sensor da Chuva• Compatível com ano bissexto inclui automaticamente o dia 29 de Fevereiro de quatro
em quatro anos• Opção consumo de água reduz ou aumenta a rega de 0 a 200 porcento• Consumo de água avançado para fixar o consumo de água para cada mês do ano• Dois ciclos de teste (Manual com a funcionalidade ManualAdvance™ e Ciclo)• Tempos de funcionamento programáveis desde um minuto até 1 hora e 59 minutos• Protecção do circuito de reposição automática poli-fusíveis
5

INSTRUÇÕES DE INSTALAÇÃO
O EZ Pro™ Jr. Série 8300 pode ser montado no interior ou no exterior. Procure umalocalização perto de uma instalação eléctrica de 120V (230/240V para os modelos 8374,8376, 8379 e 8382). Instale, se possível, o EZ Pro™ Jr. ao nível da vista. Utilize o modelofornecido para marcar e perfure previamente os orifícios piloto na parede. Introduzaparafusos através dos orifícios na caixa e aparafuse cada um no orifício pilotocorrespondente na parede.
Instalação Eléctrica do Transformador120 VCA nos EUA, Canadá e México; 230 VCA na Europa e240 VCA na Austrália e África do Sul
OBSERVAÇÃO: Consulte e siga os códigos locais se estes forem diferentes destasinstruções.
ATENÇÃO: Desligue a fonte de energia de 120V (230/240V para os modelos 8374,8376, 83579 e 8382) antes de fazer a instalação eléctrica do transformador.Termine toda a instalação e as ligações antes de ligar o transformador àfonte de energia. Isto evitará um curto-circuito acidental que poderiadanificar o controlador.
Os cabos e os fios da energia eléctrica utilizados para as ligações devem ser do tiponormal ou superior. Os cabos de saída de baixa tensão devem ser fechados numa caixade derivação fixada ao controlador com um adaptador adequado. Retire os dois parafusose levante a tampa do transformador para permitir o acesso ao transformador interno,puxe os fios de 120V (ou 230/240 para os modelos 8374, 8376, 8379 e 8382) através doorifício de 1/2" da caixa de derivação, no fundo da caixa. (Para ligação no campo, os fiosde CA devem ter um isolamento estimado em 75° C mínimo). A caixa de derivação deveser fixada à caixa (siga os códigos locais).
6

INSTRUÇÕES DE INSTALAÇÃO
Para os modelos 8304, 8306, 8309, 8312 (ver figura 1)Retire a tampa do transformador desapertando os dois parafusos. Ligue os fios da CAaos fios do transformador utilizando porcas de aço. Verifique também se o fio terraestá ligado ao fio terra às riscas verdes e amarelas. Verifique os códigos locais sobreos requisitos de ligação à terra na sua área. Ate os fios dentro do laço da braçadeira decabos e aperte a braçadeira para evitar que os fios soltos toquem os circuitossecundários. O transformador está agora ligado. Volte a colocar a tampa dotransformador e os dois parafusos. NÂO ligue ainda a energia.
OBSERVAÇÃO: Se o aparelho não ficar bem ligado à terra, pode causar graves danosao controlador e/ou propriedade pessoal e tornará a garantia nula.
Figura 1
7

INSTRUÇÕES DE INSTALAÇÃO
Para os modelos 8354, 8356, 8359, 8362 (ver figura 2)Retire a tampa do transformador desapertando os dois parafusos. Encaminhe os fiosCA para o dispositivo de ligação fornecido. Corte e acerte os fios a instalar nodispositivo de ligação montado no chassis. Aperte os parafusos. (Para a Austrália foiprovidenciado um grampo extra.) Observe a polaridade correcta dos fios quando osinstalar (isto é, L1, L2 e terra). O transformador está agora ligado. Volte a colocar atampa do transformador e os dois parafusos. NÂO ligue ainda a energia.
OBSERVAÇÃO: Se o aparelho não ficar bem ligado à terra, pode causar graves danosao controlador e/ou propriedade pessoal e tornará a garantia nula.
Figura 2
8

INSTRUÇÕES DE INSTALAÇÃO
Fita do TerminalTodas as ligações de fios das áreas, bomba e sensor feitas dentro do EZ Pro™ Jr.Utilize dispositivos de ligação com rosca que exigem uma pequena chave de parafusos.As fitas do terminal no controlador aceitam fio 12 AWG (2.1mm) ou mais pequeno.
Ligação da Válvula Principal ou da Relé de Arranque da BombaO EZ Pro™ Jr. está equipado com um circuito partilhado para operar uma relé dearranque da bomba ou uma válvula principal. Ligue um fio da relé de arranque dabomba ao COM (comum) na fita do terminal, o outro ao PMP/MV (bomba/válvulaprincipal) na fita do terminal. Consulte as instruções do fabricante da relé de arranqueda bomba sobre os pormenores de instalação específicos.
Ligação do Sensor de Chuva/HumidadeO EZ Pro™ Jr. está equipado para operar um sensor com fios condutores fechadosnormalmente. Para instalar um sensor, retire o fio de ligação directa (jumper) instaladode fábrica do dispositivo de ligação do sensor na fita do terminal e introduza os fios dosensor. Consulte as instruções do fabricante do sensor sobre os pormenores deinstalação específicos.(Ver figura 2)
Se um sensor suspendeu a rega, o segmento do indicador do sensor aparecerá noLCD. O símbolo apaga-se quando o sensor secar. O EZ Pro™ Jr. voltará a funcionarbaseado no programa seleccionado.
OBSERVAÇÃO: As operações manuais ignorarão o sensor de chuva.
9

INSTRUÇÕES DE INSTALAÇÃO
Ligação das pilhas e arranque do controladorRetire o painel do terminal sob o LCD do aparelho empurrando a patilha para cima.Introduza duas pilhas novas Alcalinas AA (LR6 na Europa) nos grampos das pilhas nabolsa directamente por cima da fita do terminal. As pilhas AA permitem que o EZ Pro™
Jr. seja programado sem energia de CA e manter os programas e o relógio das horas,no caso de uma falha de energia. Se as pilhas não estiverem instaladas, e a pilha deLítio não foi activada, o controlador perderá o tempo real e os programas, em caso defalha de energia. As pilhas devem ser substituídas todos os cinco anos, ou quandoaparece o símbolo de pilha fraca.
ATENÇÃO: Use apenas pilhas alcalinas AA. As pilhas NiCad podem verter ou explodircausando ferimentos pessoais ou danos na propriedade.
Pilha de Lítio de ReservaOs controladores EZ Pro™ Jr. vêm com uma pilha de lítio de reserva, pelo que não seperderão as configurações dos programas ou as horas durante uma falha de energia –mesmo que não haja qualquer pilha instalada. Não há indicação visual de que estaprotecção está a funcionar, nem de quando esta pilha se esgota. Mantenha pilhasAlcalinas AA novas no aparelho para a principal pilha de reserva. Para activar a Pilhade Lítio de reserva, retire a patilha marcada “PULL” (PUXAR) localizada sob ocompartimento das pilhas AA.Fixe a tampa da pilha/instalação eléctrica, sem danificar os fios. Se os fios forem rijos,será melhor dobrá-los previamente. Liga a fonte de energia.
Pode agora começar a programação!
10
INSTRUÇÕES DE PROGRAMAÇÃO
Panorâmica da ProgramaçãoO EZ Pro™ Jr. pode ser programado em energia CA ou activado através de duas pilhasalcalinas AA. Antes de programar o EZ Pro™ Jr., será aconselhável familiarizar-se comalgumas das directrizes de programação geral:• Se um segmento(s) no LCD estiver a piscar, significa que pode ser modificado pelo
utilizador.• Quando utilizar as teclas, mantenha o botão premido durante três segundos para se
deslocar rapidamente.• Verifique se é apresentada a letra de programa apropriada quando está a programar;
as alterações de programa são específicas da letra de programa apresentada no LCD.• Não há a tecla “ENTER”. As pressões de teclas e as configurações do mostrador são
guardadas automaticamente.• Se efectuar uma alteração de programação enquanto estiver a funcionar um
programa, o programa termina imediatamente. O novo programa arranca no tempode arranque seguinte programado.
• Quando não está a funcionar, o controlador indica a hora e o dia actuais.• Durante operações manuais, há um retardamento de 5-segundos antes da operação
se iniciar. Durante este tempo, pode alterar as configurações. De cada vez queefectua uma alteração, o retardamento reinicia para 5 segundos.
• Os processos MANUAL e CICLO só funcionam com o mostrador de Programascolocado na posição AUTO (AUTOMÁTICO).
• Depois da execução de um processo de teste, o controlador volta ao processo AUTOe executa o programa seguinte programado.
• Os processos de teste ignoram a ligação do sensor; e isto permite-lhe regar ouexecutar o seu programa mesmo que o sensor tenha suspendido o funcionamento.
• Para limpar todos os programas e voltar ao início, prima e mantenha premidoSELECT (SELECCIONAR) ‘–’ e ADJUST (REGULAR) ‘–’ durante três segundos.
11

INSTRUÇÕES DE PROGRAMAÇÃO
Alçado do Painel FrontalAo olhar para o painel frontal (ver figura 3), verá um LCD grande, 4 botões em borracha,um mostrador rotativo grande, e dois mostradores rotativos pequenos. Os botões emborracha têm as marcas SELECT (SELECCIONAR) e ADJUST (REGULAR) e são o núcleoda programação SELECT&ADJUST™ exclusiva da Nelson. As teclas estão identificadascom ‘+’ ou ‘–’ para aumentar ou diminuir o segmento em que está a trabalhar.
A programação SELECT&ADJUST™ trabalha sob o princípio que, primeiro, vocêSELECCIONA o que quer definir, e REGULA as variáveis do que seleccionou. Porexemplo, se desejasse um tempo de funcionamento de 10 minutos na área 5, utilizaria asteclas SELECT /SELECCIONAR) para seleccionar a área 5 e, uma vez na área 5, utilizariaas teclas ADJUST (REGULAR) para definir o tempo de funcionamento para 10 minutos.
Há momentos em que somente SELECCIONAR ou REGULAR são necessárias. Estasserão explicadas neste guia, no momento oportuno.
12

INSTRUÇÕES DE PROGRAMAÇÃO
FIGURA 3
OBSERVAÇÃO: O mostrador MODO deve estar na posição PROGRAMA.
OBSERVAÇÃO: Sempre que a tecla ‘+’ ou ‘–’ é premida, o visor aumentará oudiminuirá uma unidade. Mantenha premida a tecla ‘+’ ou ‘–’ durantetrês segundos para iniciar um deslocamento rápido.
OBSERVAÇÃO: É favor consultar a secção dos Dados Técnicos para uma explicaçãosobre os segmentos do LCD.
13

INSTRUÇÕES DE PROGRAMAÇÃO – MODO PROGRAMA
Acertar a Hora do DiaRode o mostrador grande para a posição TIME (HORAS). Prima SELECT(SELECCIONAR) para seleccionar entre as horas, minutos e o modo 12/24 horas. PrimaADJUST (REGULAR) para se deslocar para as horas correctas ou para regular entre omodo 12/24. A designação ‘A.M.’ não aparecerá no LCD quando estiver no modo A.M.;mas ‘P.M.’ aparecerá no LCD quando estiver no modo P.M..OBSERVAÇÃO: No modo 24 horas, o calendário está no formato D/M/A em vez de M/D/A.
Acertar a Hora do Dia e o Dia da SemanaRode o mostrador grande para a posição DATE (DATA). Prima as teclas SELECT(SELECCIONAR) para seleccionar entre as posições dia, mês e ano. Prima as teclasADJUST (REGULAR) para se deslocar para a data actual. O dia correcto da semanaaparecerá automaticamente no visor LCD quando a data actual for regulada. Ocontrolador EZ Pro™ Jr. obedece ao ano bissexto.
Seleccionar as Áreas e Definir os Seus Tempos de FuncionamentoO tempo de funcionamento de uma área determina a duração do funcionamento dessaárea. Rode o mostrador grande para a posição ZONE/RUN TIME (ÁREA/TEMPO DEFUNCIONAMENTO). Rode o mostrador PROGRAM (PROGRAMA) para escolher oprograma A, B ou C. Prima SELECT (SELECCIONAR) para escolher a área que desejapara o programa seleccionado (A, B ou C). Com o número de área indicado no LCD,prima ADJUST (REGULAR) para regular o TEMPO DE FUNCIONAMENTO para essaárea. Os TEMPOS DE FUNCIONAMENTO podem ser fixados desde 1 minuto até 1 horae 59 minutos. Continue a seleccionar áreas e a regular os seus tempos defuncionamento até que tenha todas as áreas que deseja no programa seleccionado.Após a última área e antes da primeira área, é fornecido um total do TEMPO DEFUNCIONAMENTO. Este é útil para determinar o tempo de funcionamento total para umprograma. O LCD indica as letras “ALL” (TODOS) e é indicado o TEMPO DEFUNCIONAMENTO total. O tempo indicado é um total de todos os TEMPOS DEFUNCIONAMENTO para o programa seleccionado (consumo de água a 100%). (ex. Umprograma tem um tempo de funcionamento de 5 minutos na área 1; 12 minutos naárea 2; e 6 minutos na área 4. O visor nesta posição indica ALL (TODOS) e um tempode funcionamento de 23 minutos.)
14

INSTRUÇÕES DE PROGRAMAÇÃO – MODO PROGRAMA
Definir os Tempos de ArranqueUm TEMPO DE ARRANQUE é a hora do dia em que um programa começará afuncionar. O EZ Pro™ Jr. permite três tempos de arranque por programa.Rode o mostrador grande para a posição START TIMES (TEMPOS DE ARRANQUE).Prima SELECT (SELECCIONAR) para seleccionar o tempo de arranque que pretendefixar (1, 2 ou 3). Prima ADJUST (REGULAR) para fixar a hora do dia em que oprograma começará. Repita conforme for necessário.
Ordenamento dos Tempos de ArranqueO EZ Pro™ Jr. ordenará os tempos de arranque se os seus tempos do programa derega se sobrepuserem a outro tempo de arranque. O tempo de arranque adicionalcomeçará quando terminar o primeiro ciclo.
Definir a % do Consumo de ÁguaA % do CONSUMO DE ÁGUA altera a duração dos tempos de funcionamento numprograma, através da percentagem introduzida de 0 a 200% (ou seja, um tempo defuncionamento de 10 minutos com um consumo de água de 50% funcionará durante 5minutos). Esta funcionalidade é útil quando ocorrem alterações na temperaturaatmosférica. Se estiver excessivamente seco, poderá desejar aumentar o tempo defuncionamento para cada área num programa. Com a % do Consumo de Água, podealterar um número, e todos os tempos de funcionamento no programa serão regulados.Se as 24 horas de funcionamento forem excedidas, o sinal 24 hr piscará no LCD.
Rode o mostrador grande para a posição % WATER BUDGET (% CONSUMO DEÁGUA). Aparecerá o símbolo % no LCD para lhe dar a conhecer que está a trabalhar nomontante de % do Consumo de Água. Prima ADJUST (REGULAR) para escolher omontante da percentagem desejado.
15

INSTRUÇÕES DE PROGRAMAÇÃO – MODO PROGRAMA
Se a % do CONSUMO DE ÁGUA for fixada para 110% ou superior, o EZ Pro™ Jr.dividirá o tempo de funcionamento em metade para reduzir o afluxo. Metade do tempode funcionamento calculado funcionará para cada área nesse programa, seguido pelasegunda metade do tempo de funcionamento para cada área.
OBSERVAÇÃO: A % do CONSUMO DE ÁGUA é alterável por programa. Se tiver umaprogramação em A, B e C, deve introduzir três valores de consumode água se pretender que todos os programas sejam alterados.
Definir a % do Consumo Mensal de Água (Funcionalidade avançada)O EZ Pro™ Jr. permite-lhe definir mensalmente a % do CONSUMO DE ÁGUA. Estafuncionalidade permite-lhe personalizar o seu programa mensalmente, durante o ano,para fazer face aos meses secos e quentes e aos meses mais frescos e chuvosos.
Rode o mostrador grande para a posição % WATER BUDGET (% CONSUMO DE ÁGUA).Prima ao mesmo tempo SELECT ‘+’ e SELECT ‘–’. Utilize SELECT (SELECCIONAR) paraseleccionar os meses de 1 a 12. Utilize ADJUST (REGULAR) para escolher o montante depercentagem pretendido, desde 0 a 200%. Se for escolhido 0%, nesse mês não seráefectuada qualquer rega.
Definir a Programação de Rega (Uma rápida observação sobre programação e o EZ Pro™ Jr.…)O controlador EZ Pro™ Jr. tem três opções de programação mais a opção para aProgramação em Dias Especiais:
• Os WATER DAYS (DIAS DE REGA),ou diariamente, permite-lhe escolher quais osdias da semana em que pretende regar (isto é, Segunda, Quarta e Sexta apenas).
• ODD/EVEN (ÍMPAR/PAR) indica ao controlador para regar ou nos dias ímpares oupares do mês (ou seja, o controlador regará nos dias 31 e 1 quando for escolhidoo programa ODD (IMPAR)).
16

INSTRUÇÕES DE PROGRAMAÇÃO – MODO PROGRAMA• INTERVAL (INTERVALO) rega um determinado número de dias (desde 1 a 30
dias) (ou seja, rega todos os 3 dias, rega todos os 10 dias, etc.). O valor de 1num programa de intervalos significa regar todos os dias. Quando se utiliza aopção intervalo, você tem a flexibilidade de dizer ao controlador em que dia devearrancar o programa de intervalos (até 30 dias).
• EVENT DAYS (DIAS ESPECIAIS) permite que cada programa bloqueie a rega emqualquer dia(s) específico(s), independentemente da opção de programação(ímpar/par, intervalo ou diária).
O LCD apresentará o programa actualmente seleccionado (predefinido estão todos osWATER DAYS.) As teclas SELECT (SELECCIONAR) deslocarão o visor LCD através decada uma das posições de programação, WATER DAYS, ODD, EVEN, INTERVAL, eINTERVAL START DATE (DATA DE INÍCIO DO INTERVALO). Verifique se o mostradorPROGRAM (PROGRAMA) está colocado no programa que pretende alterar (A, B ou C) eque deseja alterar o programa actual. É escolhida uma opção de programação depois dese premir um botão, quer SELECT (SELECCIONAR) ou ADJUST (REGULAR). O programaantigo é substituído pelo novo. É fácil programar através dos seguintes processos.
Definir a Opção Programação de Dias de RegaRode o mostrador grande para a posição SCHEDULE (PROGRAMAR). Utilize SELECT(SELECCIONAR) até que os pingos de chuva apareçam por cima dos dias da semana.Prima o botão ADJUST ‘+’ (AJUSTAR +) para seleccionar esse dia para a rega ou primaADJUST ‘–’ (REGULAR -) para os dias sem rega. Aparece uma luz indicadora a piscarpor cima do dia que vai definir. Aparecem pingos de chuva por cima dos dias de regaseleccionados. A luz indicadora movimenta-se automaticamente um dia para a direitadepois de se premir a tecla ADJUST ‘+’ ou ‘–’. Continue a seleccionar ou a anular aselecção dos dias em que pretende que o controlador regue, até ter o seu calendário de7 dias definido.
17

INSTRUÇÕES DE PROGRAMAÇÃO – MODO PROGRAMA
OBSERVAÇÃO: Programar os DIAS DE REGA elimina qualquer outro programapara oprograma seleccionado.
Definir Opção Programação Dia Impar/ParRode o mostrador grande para a posição SCHEDULE (PROGRAMAR). Aparece no LCDa última opção de programação escolhida para o actual programa. Para definir umprograma ODD (ÍMPAR) ou EVEN (PAR). prima o botão SELECT (SELECCIONAR) atéaparecer uma seta no LCD junto do programa apropriado (ÍMPAR ou PAR). Deve serdefinida uma DATA para a rega ímpar/par). Os botões SELECT actuam como teclas decomutação e alternarão entre ímpar e par.
OBSERVAÇÃO: Programar ODD/EVEN (ÍMPAR/PAR) elimina qualquer outro programapara o programa seleccionado.
Definir Opção Programação de IntervaloRode o mostrador grande para a posição SCHEDULE (PROGRAMAR). Aparece no LCDa última opção de programação escolhida para o actual programa. Prima SELECT(SELECCIONAR) para se deslocar para a posição dias de intervalo. Aparecerá uma setano LCD junto de INT (Intervalo). Utilize ADJUST (REGULAR) para escolher os dias deintervalo entre regas (1 a 30). A data indicada é o dia um do programa de intervalo. (Adata de hoje se definiu um). Para alterar o dia 1 utilize SELECT (SELECCIONAR) para irpara a posição da data de arranque do intervalo. Conforme for necessário, altere a datapara o dia um do programa de intervalos com ADJUST (REGULAR) (só pode serdefinido até 30 dias).
OBSERVAÇÃO: Programar INTERVAL (INTERVALO) elimina qualquer outro programapara o programa seleccionado.
18

INSTRUÇÕES DE PROGRAMAÇÃO – MODO PROGRAMA
Definir Opção Programação Dias Especiais (Opcional)Rode o mostrador grande para a posição SCHEDULE (PROGRAMAR) Aparece no LCDa última opção de programação escolhida para o actual programa. Prima ao mesmotempo SELECT ‘+’ e SELECT ‘–’. Aparece uma luz indicadora a piscar junto de DiasEspeciais (Event Days) no LCD. Utilize o botão ADJUST ‘+’ para seleccionar esse diapara a rega ou prima ADJUST ‘–’ para os dias sem rega. Aparece uma luz indicadora apiscar por cima do dia que vai definir. Aparecem pingos de chuva por cima dos dias derega seleccionados. A luz indicadora movimenta-se automaticamente um dia para adireita depois de se premir a tecla ADJUST ‘+’ ou ‘–’. Continue a seleccionar ou aanular a selecção dos dias em que pretende que o controlador regue, até ter o seucalendário de 7 dias definido.
OBSERVAÇÃO: Programar EVENT DAYS (DIAS ESPECIAIS) NÃO elimina qualqueroutro programa para o programa seleccionado.
Repita os processos acima para cada programa (A, B ou C), conforme desejar.
E pronto! O seu EZ Pro™ Jr. encontra-se programado. Rode o mostrador MODE(MODO) para a posição AUTO para que o programa que introduziu possa funcionar.
REVISÃO DO PROGRAMAPara rever o actual programa, rode o mostrador MODE para a posição PROGRAM(PROGRAMA) e rode o mostrador grande para a configuração que pretende rever (ouseja, rode o mostrador grande para TIME (HORAS) para rever a hora definida para ocontrolador). Quando precisar de ver áreas ou tempos de funcionamento diferentes (1, 2, 3), utilize apenas os botões SELECT (SELECCIONAR).
OBSERVAÇÃO: Como está no modo programa, há a possibilidade de alteraracidentalmente o programa.
19

INSTRUÇÕES DE PROGRAMAÇÃO – MODO PROGRAMA
Fixar a Válvula Principal ou a Relé da BombaPode retardar a hora entre a ligação da Válvula Principal/Bomba e a hora em que asáreas começam. Rode o mostrador grande para Horas de Funcionamento das Áreas(Zone Run Times). Prima ao mesmo tempo as teclas SELECT ‘+’ e SELECT ‘–’. Utilize atecla ADJUST ‘+’ ou ‘–’ para regular o retardamento de tempo. O LCD indicará o tempode retardamento (Ajustável entre 1 segundo e 30 minutos) com “del” por debaixo. Paravoltar a configurar as Horas de Funcionamento das Áreas, prima ao mesmo tempo asteclas SELECT ‘+’ e SELECT ‘–’.
OBSERVAÇÃO: A Válvula Principal/Relé da Bomba serão as mesmas para todos os 3programas (A, B e C).
INSTRUÇÕES DE PROGRAMAÇÃO – MODO AUTOMÁTICO
Definir o Bypass do Sensor da ChuvaO EZ Pro™ Jr. está equipado com um Bypass do Sensor de Chuva. Este fará com que ocontrolador regue mesmo que o sensor de chuva dispare. Para activar o bypass ocontrolador deve estar no Modo AUTO (AUTOMÁTICO). No Modo Automático prima aomesmo tempo as teclas SELECT ‘+’ e SELECT ‘–’ (SELECCIONAR). O símbolo de SensorSuspenso piscará. Para desactivar prima ao mesmo tempo as teclas SELECT ‘+’ eSELECT ‘–’, enquanto estiver no Modo AUTO (AUTOMÁTICO). Isto fará com que osímbolo Sensor pare de piscar e mostrar o actual estado do sensor de chuva.
OBSERVAÇÃO: O Bypass do Sensor da Chuva permanecerá até ser desactivado.
20

INSTRUÇÕES DE PROGRAMAÇÃO – MODO DESLIGADO
Desligar o ControladorRode o mostrador MODE (MODO) para a posição OFF (DESLIGADO). Esta acçãosuspende o funcionamento de todas as operações de rega (incluindo os processosmanual/teste). O relógio continua a manter a hora e data actuais e o seu programa(s) ésuspenso até que queira fazê-lo funcionar novamente. Para fazer funcionar o seuprograma, rode o mostrador MODE (MODO) novamente para a posição AUTO(AUTOMÁTICO).
21

FUNCIONALIDADES AVANÇADAS – MODO AUTOMÁTICO
O EZ Pro™ Jr. incorpora dois processos manual/teste para verificar a função docontrolador ou para lhe permitir que desactive o programa actual para regarimediatamente. A secção seguinte mostrar-lhe-á como deve configurar o controlador para:
• Executar uma área manualmente• Executar um programa manualmente
OBSERVAÇÃO: Todos os processos de teste são executados com o mostrador MODOna posição AUTO (AUTOMÁTICO). Isto permite ao controladorreiniciar para a configuração AUTO depois de executar um processomanual/teste. Também dá a si a possibilidade de abandonar ocontrolador depois de configurar um processo manual/teste e não terde voltar para reiniciar o controlador para AUTO.
OBSERVAÇÃO: Todos os processos manual/teste ignoram a ligação do sensor.Assim, pode regar utilizando um dos processos manual/teste,mesmo que o sensor tenha suspenso o seu programa seleccionado.
Funcionamento Manual de uma ÁreaRode o mostrador grande para a posição MANUAL. A predefinição da área 01 e 00:10minutos piscará (lembre-se que isto significa que as pode alterar). Prima SELECT(SELECCIONAR) para seleccionar o número da área que pretende fazer funcionar. PrimaADJUST (REGULAR) para definir a hora de funcionamento para a área seleccionada. Ocontrolador retardará 5 segundos antes de iniciar a área.
22

FUNCIONALIDADES AVANÇADAS – MODO AUTOMÁTICO
O EZ Pro™ Jr. incorpora a funcionalidade ManualAdvance™ da Nelson no processoMANUAL. A funcionalidade ManualAdvance™ permite-lhe terminar a actual área defuncionamento e avançar imediatamente para qualquer nova área que seleccione. Como processo MANUAL ou CICLO funcionando numa área, prima em SELECT(SELECCIONAR) para avançar para uma área nova. Será apresentado o último tempode funcionamento introduzido. Prima ADJUST (REGULAR) para introduzir um novotempo de funcionamento para a área nova (o controlador retardará 5 segundos antesde iniciar a área nova).
OBSERVAÇÃO: Logo que uma área comece a funcionar, o tempo de funcionamentonão pode ser regulado sem anular a selecção e voltar a seleccionar aárea.
Funcionamento Manual de um Ciclo de ProgramaRode o mostrador grande para a posição CYCLE (CICLO). A letra do programa actualpiscará. Para mudar para um programa diferente, rode o mostrador PROGRAM(PROGRAMA) para o programa desejado (A, B ou C). O controlador retardará cincosegundos antes de iniciar o programa seleccionado. Após o funcionamento, ocontrolador reiniciará para o processo AUTO (AUTOMÁTICO).
OBSERVAÇÃO: O CICLO executa imediatamente o seu programa actual.Pode Avançar ManualAdvance™ através das áreas.
23

DADOS TÉCNICOS
1. TransformadorTransformador interno 24 VCA; 20 VA, .83A para áreas e lógica. O transformador podefazer funcionar uma bomba ou válvula principal e uma válvula de área, máximo.
2. Protecção contra picos de corrente600 watts TVS nas saídas das áreas9J Mov sobre secundários. (ver Disjuntor abaixo)
3. Funcionamento do SensorO EZ Pro™ Jr. está configurado para operar o controlador com ou sem um sensor. Ossensores devem ter, normalmente, ligações fechadas (fios condutores). Se não forutilizado um sensor, o fio de ligação provisória instalado de fábrica deve estar colocado.
4. Linhas de ÁreasO EZ Pro™ Jr. operará um máximo de dois (2) solenóides simultaneamente, desdeque um seja a válvula da bomba/principal. Cada saída de área pode operar um oudois solenóides.
irrupção I .52A máx.retenção I .33A máx.
5. Amplitude de TemperaturasFuncionamento: -20° a +55° C (23° a 131° Fahrenheit)Armazenagem: -30° a +85° C (-22° a 185° Fahrenheit)
24

DADOS TÉCNICOS
6. Visor
7. PilhasDevem-se ser utilizadas duas (2) pilhas alcalinas AA (LR6 na Europa). Não utilizarpilhas NiCad. Uma pilha de lítio com células em liga de cobre CR2032, incluída com ocontrolador.
8. Retenção de ProgramasA pilha de lítio é utilizada para reter o tempo e os programas quando a pilha e aenergia CA falham.
OBSERVAÇÃO: A patilha deve ser retirada para activar a pilha de reserva említio.
9. Dimensões da Caixa (aprox.)8" H x 10" W x 4" D (a tampa pode ser retirada sem ferramentas)
25
Hora, Data, Hora de Início,Tempo de Funcionamento,Data de Base, Mês daProvisão de Água
Símbolo de regainterrompida no Sensor de Chuva
Sem símbolo de CA
Aviso de bateria fraca
Letra do Programa A, B ou C
Indicador de AM PM
Ano, Dias de Intervalo,Provisão de Água,Número da Zona
Ímpar
Par
Intervalo
Evento
Su M T W Th F S
Indicador deproblemas
N.º de ZonaN.º de zonas
Dias com água, Dia da semana

DADOS TÉCNICOS
10. Configurações Predefinidas (modo 12 horas)12:00 A.M.DomingoA data é 01/01 2003Sem Tempos de Funcionamento (área 01, —:—)Sem Tempos de Arranque (número de arranque 01, —:—)Consumo de Água 100%Programa de rega diário O mostrador dos modos está na posição OFF (DESLIGADO)O mostrador dos programas está no programa ARetardamento de 5 segundos entre áreas
11. DisjuntorUm multi-interruptor electrónico está incorporado no PCB do controlador inserido nocircuito. Este tipo de disjuntor não requer reiniciação ou substituição pelo utilizador.
26

RESOLUÇÃO DE PROBLEMAS/MANUTENÇÃO
27
SINTOMASem saída para área, bomba,válvula principal ou luz indicadorade sem CA acesaSem CA e visor em brancoLCD em branco
Aparece “M-X” no LCD quandotenta executar manualmente umaáreaAparece “C-X” no LCD quandotenta um programa em CICLOAparece P com um número deárea na LCD
TODAS as 24 hr piscam no LCD
Símbolo do Sensor da Chuvaligado
O controlador não responde aqualquer pressão do mostrador/teclaNenhuma saída para uma únicaáreaNenhuma saída para qualquer área
POSSÍVEL CAUSA• CA desligada
• Sem pilha ou pilha descarregada• Sem CA e sem pilha
• O mostrador MODO está naposição programa
• O mostrador MODO está naposição programa
• Fios não ligados ou curto-circuitonos fios ou solenóide
• Mais do que 2 solenóides ligadosa uma área
• TVS danificado devido a faísca oumá ligação terra
• Tempo programado superior a24 hr
• O sensor da chuva está activadoou se este não está instalado,falta a ligação provisória (jumper)
• O aparelho precisa de serreiniciado
• Descargas eléctricas ou solenóidefraco
• Fio comum partido ou desligado• RS ligado no fio comum está
aberto ou desligado
SOLUÇÃO• Verifique a fonte CA, se a CA não for
detectada pelo controlador, a luzindicadora de sem CA estará acesa
• Substitua a bateria e prima reiniciar• Instale a pilha para que o visor volte a
funcionar, verifique a CA para assegurara saída para o campo
• Posicione o mostrador MODO naposição AUTO para executar a áreamanualmente
• Posicione o mostrador MODO naposição AUTO para ciclar o programa
• Verifique a instalação eléctrica docampo, solenóide, substitua o solenóide
• Remova o fio da área se, ao trabalharmanual ou automaticamente, aparecerainda Pxxz. O aparelho precisa deassistência/substituição
• Verifique os tempos de execução dasáreas e a %CONSUMO DE ÁGUA
• Veja se o jumper está instalado se nãohouver sensor da chuva
• Chave de parafusos através doseléctrodos marcados Reiniciar (Reset)
• Verifique a instalação eléctrica e/ousolenóide
• Verifique o fio comum

REGRAS FCC
Este controlador electrónico de irrigação produz e utiliza energia de frequência de rádio e,se não for instalado e utilizado correctamente, ou seja, estritamente de acordo com as instruções dofabricante, poderá causar interferência na recepção de sinais de rádio e televisão. Foi efectuado o testede homologação de tipo e foi considerado como cumprindo com os limites para um dispositivoinformático da Classe B, de acordo com as características técnicas na Sub-parte J da Parte 15 dasRegras FCC, que são concebidas para fornecer uma razoável protecção contra tais interferências numainstalação residencial. No entanto, não há garantia que não ocorrerão interferências numa instalaçãoparticular. Se este controlador causar interferência na recepção de rádio ou televisão, o que pode serverificado ao ligar e desligar o controlador, o utilizador deve tentar corrigir a interferência através deuma ou mais das seguintes medidas:
Reorientar a antena de recepçãoRecolocar o controlador em relação ao receptorAfastar o controlador do receptorLigar o controlador numa tomada diferente de forma que o controlador e o receptor estejam emramais diferentes
Se necessário, o utilizador deve consultar o revendedor ou um técnico de rádio/televisão experientepara obter uma opinião adicional. O utilizador poderá achar útil consultar o seguinte folheto preparadopela Federal Communications Commission (Comissão Federal de Comunicações):“How to Identify and Resolve Radio-TV Interference Problems”Este folheto encontra-se disponível no U.S. Government Printing Office, Washington, DC 20402. StockNº. 004-000-00345-4.
REGULAMENTAÇÕES CANADIANAS SOBRE INTERFERÊNCIAS DE RÁDIOOBSERVAÇÃO: Este aparelho digital não excede os limites da Classe B para as emissões de
ruído de rádio dos aparelhos digitais, definidos nas regulamentações deinterferência de rádio do Canadian Department of Communications.
28

Istruzioni EZ PRO™ Jr. Tabella delle zone 1
2
3
4
5
6
7
8
9
10
11
12
976-60344 Rev 5-03

EZ Pro™ Jr.Guida all’installazione e alla programmazionedei modelli EZ Pro™ Jr.:
8304 83748306 83768309 83798312 8382

3
Grazie per aver acquistato la centralina elettronica per irrigazione EZ Pro™ Jr.Serie 8300. Questo modello spicca per l’estrema facilità d’uso, tanto che saretein grado di installarlo e programmarlo senza ricorrere alle istruzioni. In ognicaso, prima di procedere all’installazione e alla programmazione, è consigliataun’attenta lettura delle seguenti istruzioni, in modo da poter usufruire al megliodelle proprietà dell’EZ Pro™ Jr. Serie 8300.
Per qualsiasi chiarimento, problema o commento riguardante il nuovo EZ Pro™ Jr.Serie 8300, rivolgersi al nostro Servizio di Assistenza Tecnica al numero verde1-888-NELSON8, o visitare il nostro sito all’indirizzo LRNelson.com.
Azienda leader nel settore dell’irrigazione dal 1911
ATTENZIONE: Al fine di garantire un costante miglioramento e aggiornamentodei nostri prodotti, le caratteristiche e le specifiche descritte nelpresente manuale possono subire variazioni senza previa notifica.

4
INDICECaratteristiche 5Istruzioni per l’installazione 6-10
Morsettiera 9Connessione della valvola master o del relè di avvio pompa 9Connessione del sensore pioggia/umidità 9Connessione della batteria e avvio della centralina 10
Istruzioni per la programmazione dell’EZ Pro™ Jr. 11-21Introduzione alla programmazione 11Disposizione del pannello frontale 12-13Impostazione ora del giorno 14Impostazione data odierna 14Impostazione data 14Selezione zone e impostazione tempi di azione 14Impostazione orari di avvio 15Impostazione percentuale di disponibilità acqua 15-16Impostazione percentuale di disponibilità acqua mensile 16Programmi 16-17Impostazione opzione giorni d’irrigazione 17Impostazione opzione giorni pari/dispari 18Impostazione opzione intervallo 18Impostazione opzione giorni particolari 19Revisione dei programmi 19Impostazione valvola master o pompa 20Impostazione disattivazione sensore pioggia 20Spegnimento della centralina 21
Funzioni avanzate 22-23Attivazione manuale di una zona 22Attivazione manuale di un ciclo programmi 23
Dati tecnici e specifiche 24-26Risoluzione di problemi/Manutenzione 27Norme della FCC 28

CARATTERISTICHE
• Programmazione con l’esclusivo sistema Nelson SELECT&ADJUST™
• Batteria al litio di riserva in assenza di corrente elettrica o batteria AA• Ritardo programmabile tra zone• Tre programmi indipendenti• Tre orari di avvio differenziati per ciascun programma (per un totale di 9 orari diversi
di avvio)• Accumulo degli orari di avvio• Tre opzioni di programmazione per rispondere alle esigenze della vegetazione o alle
normative locali sull’irrigazione (giorni della settimana, intervallo 1-30 giorni, giornipari/dispari)
• Programmazione di giorni particolari per ciascun programma• Opzione di disattivazione del sensore pioggia• Il calendario programmato comprende l’inserimento dell’anno bisestile ogni quattro anni• L’opzione disponibilità acqua riduce o aumenta la portata d’acqua da 0 a 200 per cento• Un sistema avanzato calcola la disponibilità d’acqua per ogni singolo mese dell’anno• Due cicli di prova (manuale con ManualAdvance™ e Cycle)• Tempi di irrigazione programmabili da 1 minuto a un’ora e 59 minuti• Protezione del circuito mediante un sistema di fusibili multipli per un riavvio automatico
5

ISTRUZIONI PER L’INSTALLAZIONE
L’EZ Pro™ Jr. Serie 8300 può essere installata sia in interni che in esterni. È necessarioavere la disponibilità di una presa elettrica da 120V (230/240V per i modelli 8374, 8376,8379 e 8382). Se possibile, è consigliabile installare l’EZ Pro™ Jr. all’altezza degli occhi.Basandosi sui fori presenti nel contenitore, segnare sulla parete i punti in cui applicare leviti e praticare dei fori pilota col trapano. Inserire le viti nei fori del contenitore e avvitarlenei corrispondenti fori sulla parete.
Cablaggio del trasformatore120 V CA in Canada, Messico e Stati Uniti d’America; 230 V CA in Europa e 240 V CA in Australia e Sudafrica
NOTA BENE: Se differiscono dalle presenti istruzioni, è necessario attenersi allenormative locali.
ATTENZIONE: Disinserire la corrente elettrica a 120V (230/240V per i modelli 8374,8376, 8379 e 8382) prima di procedere al cablaggio del trasformatore.Prima di collegare il trasformatore all’alimentazione, assicurarsi diaverne completato il cablaggio e l’installazione. Questo accorgimentoeviterà possibili corto circuiti che danneggerebbero la centralina.
I cavi di collegamento alla rete e i fili utilizzati per il cablaggio devono essere previstiper servizio ordinario o superiore. I cavi di uscita a basso voltaggio dovrebbero esserefatti passare per un tubo protettivo collegato alla centralina con un adattatore apposito.Togliere le due viti e sollevare il pannello del trasformatore per accedere al trasformatoreinterno; far passare i fili da 120V (o da 230/240V per i modelli 8374, 8376, 8379 e 8382)attraverso il foro del tubo che si trova nella parte inferiore del contenitore (per icollegamenti di campo, i fili della corrente alternata – CA – devono avere un isolamentominimo di 75° C). Il tubo protettivo deve essere saldamente collegato al contenitore(seguire le normative locali).
6

ISTRUZIONI PER L’INSTALLAZIONE
Per i modelli 8304, 8306, 8309 e 8312 (vedi illustrazione 1)Togliere il pannello del trasformatore svitando le due viti. Collegare i cavi CA a quelli deltrasformatore usando i dadi di supporto. Assicurarsi inoltre che il filo di terra siaattaccato al filo di terra di colore verde a strisce gialle. Consultare le normative localirelativamente ai requisiti di messa a massa nella propria zona. Raccogliere il filoinserendolo nella fascetta, stringendola bene onde evitare che i fili pendenti tocchino icircuiti secondari. A questo punto il trasformatore è collegato. Ricollocare il pannello eserrare le due viti. NON è ancora il momento di accendere il dispositivo.
ATTENZIONE: Un errato procedimento della messa a terra può causare danniirreparabili alla centralina e/o a oggetti circostanti, e inficia lavalidità della garanzia.
Illustrazione 1
7

ISTRUZIONI PER L’INSTALLAZIONE
Per modelli 8354, 8356, 8359, 8362 (vedi illustrazione 2)Togliere il pannello del trasformatore svitando le due viti. Collegare i fili CA alconnettore in dotazione. Tagliare i fili per adattarli al collegamento con dettoconnettore. Serrare le due viti (i modelli per l’Australia sono dotati di un morsetto inpiù). Osservare la corretta polarità dei fili (L1, L2 e filo di terra) durante l’installazione.Il trasformatore, a questo punto, è collegato. Ricollocare il pannello del trasformatore eserrare le due viti. NON è ancora il momento di accendere il dispositivo.
ATTENZIONE: Un errato procedimento della messa a terra può causare danniirreparabili alla centralina e/o a oggetti circostanti, e inficia lavalidità della garanzia.
Illustrazione 2
8

ISTRUZIONI PER L’INSTALLAZIONE
Morsettiera Tutti i cablaggi dei fili di zona, pompa e sensore utilizzati nell’EZ Pro™ Jr. fanno uso diconnettori a vite per i quali è necessario un piccolo cacciavite. Le morsettiere dellacentralina utilizzano fili di 12 AWG (2,1 mm) o inferiori.
Connessione della valvola master o del relè di avvio pompaL’EZ Pro™ Jr. è dotata di un circuito condiviso che attiva alternativamente il relè di avviodella pompa o una valvola master. Collegare un filo del relè di avvio pompa a COM(comune) e l’altro a PMP/MV (pompa/valvola master), entrambi sulla morsettiera. Perulteriori dettagli sull’installazione del relè avvio pompa fare riferimento alle istruzionifornite dal produttore.
Connessione del sensore pioggia/umiditàL’EZ Pro™ Jr. è programmata per attivare un sensore con conduttori normalmentechiusi. Per installare il sensore, togliere il ponticello preinstallato dal connettoreall’interno della morsettiera ed inserire i fili del sensore. Per ulteriori dettaglisull’installazione del sensore fare riferimento alle istruzioni fornite dal produttore.(vedi illustrazione 2)
Quando un sensore sospende l’irrigazione, sul LCD appare il segnale di riferimentodel sensore. Tale indicatore si spegne quando il sensore si è asciugato completamente.L’EZ Pro™Jr. riprenderà quindi le operazioni di irrigazione in base al programmaselezionato.
ATTENZIONE: Le procedure manuali ignorano la connessione con il sensore.
9

ISTRUZIONI PER L’INSTALLAZIONE
Connessione della batteria e avvio della centralinaTogliere il pannello del terminale sotto il LCD del dispositivo spingendo la linguettaverso l’alto. Collegare due batterie alcaline nuove di tipo AA (LR6 in Europa) agliappositi connettori nella cavità soprastante la morsettiera. Le batterie AA permettono laprogrammazione dell’EZ Pro™ Jr. senza ricorrere alla corrente CA e il mantenimento deiprogrammi e dell’ora impostata nel caso di un’interruzione improvvisa di alimentazionedell’energia elettrica. Se le batterie non sono installate e la batteria al litio non è stataattivata, in caso di interruzione di corrente la centralina perderà tutte le impostazioni diprogrammi ed orari. Le batterie andrebbero cambiate ogni cinque anni, o in ogni casoquando compare il segnale di batterie esauste.
ATTENZIONE: Utilizzare solo ed esclusivamente batterie alcaline AA. Le batterie NiCadpossono avere delle perdite o esplodere, causando danni a cose opersone.
Batteria al litio di riservaLe centraline EZ Pro™ Jr. sono dotate di una batteria al litio di riserva in modo dagarantire le programmazioni impostate in caso di interruzione di corrente elettrica -anche quando non è installata nessuna batteria. Non essendoci indicatori che segnalinoil funzionamento della batteria di riserva o l’esaurimento della stessa, si consiglia disostituire periodicamente le batterie alcaline AA per assicurare la copertura energeticaalla batteria principale. Per attivare la riserva della batteria al litio, togliere lalinguetta con la scritta “PULL” che si trova sotto lo scomparto delle batterie AA.Rimettere infine il pannello delle batterie e del cablaggio, facendo attenzione a nondanneggiare i fili. Se questi risultassero troppo rigidi, è consigliabile piegarli primadell’utilizzo. Accendere l’interruttore di corrente.
A questo punto siete pronti per iniziare la programmazione della vostra centralina!
10

ISTRUZIONI PER LA PROGRAMMAZIONE
Introduzione alla programmazioneL’EZ Pro™ Jr. può essere programmata utilizzando la corrente elettrica alternata ol’energia erogata dalle batterie alcaline AA. Prima di procedere alla programmazionedell’EZ Pro™ Jr. è bene conoscere alcune linee guida generali:• Se uno o più segmenti sul LCD lampeggiano, l’utente può procedere alla loro
sostituzione. • Utilizzando i tasti, tenere premuto il pulsante per far partire uno scorrimento rapido. • Assicurarsi che la lettera corrispondente al programma desiderato appaia sul display
durante la programmazione; le modifiche al programma sono infatti specifiche per lalettera del programma visualizzata sul display.
• Non esiste il comando “ENTER”. I comandi inviati premendo i tasti e le impostazionidelle manopole vengono memorizzati automaticamente.
• Se si effettua una modifica al programma mentre questo è in funzione, l’applicazioneterminerà immediatamente, mentre il programma modificato partirà all’oraprestabilita.
• Quando la centralina non è attiva, sullo schermo si leggono solo l’ora e la data delgiorno corrente.
• Le operazioni effettuate manualmente partono con un ritardo di 5 secondi. In questolasso di tempo le impostazioni possono essere ulteriormente modificate. Ogni voltache si effettuano modifiche il ritardo ritorna a 5 secondi.
• Le procedure MANUAL e CYCLE funzionano solo quando la manopola PROGRAM èsulla posizione AUTO.
• Dopo aver fatto partire un procedimento di prova, la centralina ritorna in posizioneAUTO e avvia il programma successivo.
• I procedimenti di prova non tengono conto del sensore; questo è per permettere diirrigare o comunque di far partire il programma anche qualora il sensore avessesospeso le operazioni.
• Per annullare tutte le impostazioni e ricominciare, tenere premuti i tasti SELECT ‘–’ eADJUST ‘–’ per tre secondi.
11

ISTRUZIONI PER LA PROGRAMMAZIONE
Disposizione del pannello frontaleGuardando il pannello frontale (vedi illustrazione 3), si nota il grande display a cristalliliquidi (LCD), quattro tasti di gomma, una manopola girevole grande e due manopolegirevoli più piccole. I tasti in gomma riportano la scritta SELECT e ADJUST erappresentano il fulcro del sistema esclusivo Nelson SELECT&ADJUST™. I tasti ‘+’ e ‘–’servono per aumentare o ridurre il segmento su cui si desidera lavorare.
Il sistema SELECT&ADJUST™ si basa sul principio che prima si seleziona (SELECT)l’impostazione desiderata, e poi si regolano (ADJUST) le varianti selezionate secondo leproprie esigenze. Per esempio, se si desidera un’operazione di 10 minuti sulla zona 5,basta premere il tasto SELECT per selezionare la zona 5 e, una volta sulla zona 5, con iltasto ADJUST si regola la durata dell’operazione su 10 minuti.
A volte l’operazione desiderata richiede solamente l’utilizzo di uno dei due tasti. Talifunzioni verranno spiegate più avanti in questo manuale.
12

ISTRUZIONI PER LA PROGRAMMAZIONE
Illustrazione 3
ATTENZIONE: La manopola MODE deve essere in posizione PROGRAM.
ATTENZIONE: Ogni volta che si preme il tasto ‘+’ o ‘–’, il display aumenterà odiminuirà il comando di una unità. Tenere premuto il tasto ‘+’ o ‘–’per tre secondi per uno scorrimento più rapido.
ATTENZIONE: Fare riferimento alla sezione Dati Tecnici per una spiegazione deisegmenti del LCD.
13

ISTRUZIONI PER LA PROGRAMMAZIONE – MODALITÀ DI PROGRAMMAZIONE
Impostazione ora del giornoGirare la manopola grande in posizione TIME e selezionare le ore, i minuti e la modalità12/24 ore con il tasto SELECT. Premere il tasto ADJUST per scorrere fino all’ora corrente oper selezionare la modalità 12/24 ore. Quando la modalità ore è impostata su AM, il displaynon la segnala, mentre quando è impostata su PM sul display apparirà la scritta ‘PM’.ATTENZIONE: Nella modalità 24 ore, il calendario è impostato automaticamente
sull’ordine gg/mm/aa invece che sull’ordine mm/gg/aa.Impostazione data odierna
Girare la manopola più grande in posizione DATE. Premere il tasto SELECT per selezionaredata, mese e anno e ADJUST per scorrere fino alla data odierna. Il giorno della settimanacorretto apparirà automaticamente sullo schermo, una volta selezionata la data. L’EZ Pro™
Jr. è impostata inoltre per aggiornarsi regolarmente anche negli anni bisestili.Selezione zone e impostazione tempi di azione
Il tempo d’azione di una zona indica la durata dell’operazione in quella determinatazona. Girare la manopola più grande in posizione ZONE/RUN TIME. Mediante lamanopola PROGRAM selezionare il programma A, B o C e premere SELECT perselezionare la zona sulla quale si desidera applicare tale programma. Quando compareil numero di zona sul display, premere ADJUST per regolare il tempo di azione (RUNTIME) per quella zona. I tempi di azione possono andare da 1 minuto a un’ora e 59minuti. Continuare a selezionare le zone interessate ed i rispettivi tempi di azione fino aquando tutte le zone desiderate saranno coperte dal programma selezionato. Dopo l’ultima zona e prima della prima zona, il sistema calcola la somma dei tempi diazione (RUN TIME), che può risultare utile per determinare il tempo totale di azione diun dato programma. Sul display appare dunque la scritta ‘ALL’ (tutti) e la somma deitempi di azione, che indica tutti i RUN TIMES del programma selezionato (100%disponibilità di acqua). Per esempio, se un programma agisce 5 minuti sulla zona 1, 12minuti sulla zona 2 e 6 minuti sulla zona 4, il display in questa posizione visualizza lascritta ALL e la somma dei tempi di azione, equivalente a 23 minuti).
14

ISTRUZIONI PER LA PROGRAMMAZIONE – MODALITÀ DI PROGRAMMAZIONE
Impostazione orari di avvioL’orario di avvio –START TIME- indica l’ora di avvio del programma selezionato. L’EZ Pro™ Jr. permette di impostare un massimo di tre avvii giornalieri per programma. Girare la manopola più grande in posizione START TIMES e premere SELECT perselezionare l’orario di avvio prescelto (1, 2 o 3) e ADJUST per impostare l’ora delgiorno in cui partirà il programma. Ripetere l’operazione per tutte le volte necessarie.
Accumulo degli orari di avvioL’EZ Pro™ Jr. procederà ad accumulare gli orari di avvio nel caso in cui si è impostatoun orario d’avvio irrigazione che si accavalla con un altro orario di avvio. Il secondoorario di avvio partirà al termine del primo ciclo.
Impostazione percentuale di disponibilità acquaLa percentuale di disponibilità di acqua modifica la durata dei tempi di azione di unprogramma in base alla percentuale impostata, tra 0 e 200. Per esempio, un tempod’azione di 10 minuti impostato al 50% della disponibilità dell’acqua agirà effettivamenteper 5 minuti. Tale funzione risulta particolarmente utile nei cambiamenti climatici. Se iltempo è insolitamente secco, è possibile estendere il tempo d’azione su ogni zonaselezionata in un determinato programma. Grazie all’impostazione della percentuale didisponibilità dell’acqua, è possibile rettificare tutti tempi di azione di un programmasemplicemente cambiando un numero. Quando si superano le 24 ore, sul displayapparirà la scritta ‘24 hr’.
Girare la manopola più grande in posizione % WATER BUDGET. Il simbolo % apparesullo schermo, per confermare che si sta intervenendo sulla percentuale di disponibilitàdell’acqua. Premere ADJUST per selezionare la percentuale desiderata.
15

ISTRUZIONI PER LA PROGRAMMAZIONE – MODALITÀ DI PROGRAMMAZIONE
Se la percentuale impostata supera il 110%, l’EZ Pro™ Jr. divide automaticamente iltempo di azione in due parti, per limitare il deflusso superficiale. Il tempo d’azionecalcolato agirà quindi in due tranche uguali e consecutive su ciascuna zona selezionataper quel dato programma.
ATTENZIONE: La percentuale di disponibilità d’acqua è modificabile per ciascunprogramma. Se si desidera agire nei tre programmi A, B e C ènecessario impostare tre valori.
Impostazione percentuale di disponibilità acqua mensile (Funzioni avanzate)L’EZ Pro™ Jr. vi permette di impostare la percentuale di disponibilità d’acqua anche subase mensile. Grazie a tale funzione è possibile programmare l’erogazione dell’acquaper mese, adeguandosi così alle differenze tra mesi caldi e mesi freddi o umidi.
Girare la manopola più grande in posizione % WATER BUDGET. Premerecontemporaneamente i tasti SELECT ‘+’ e SELECT ‘–’. Utilizzare SELECT per selezionare imesi da 1 a 12. Con ADJUST scegliere la percentuale desiderata tra 0 e 200%. Impostandola scelta 0%, l’irrigazione in quel mese non sarà attivata.
Impostazione del programma di irrigazione (breve nota sui programmi e EZ Pro™ Jr.)La centralina EZ Pro™ Jr. è dotata di tre diverse opzioni di programmazione più unaopzione per la programmazione di giorni particolari.
• WATER DAYS – (giorni di irrigazione) permette di impostare i giorni dellasettimana in cui si desidera irrigare (per esempio, solo nei giorni di lunedì,mercoledì e venerdì)
• ODD/EVEN – (dispari/pari) la centralina imposta l’irrigazione solo nei giorni pari onei giorni dispari (per esempio, scegliendo il programma ODD, dispari, lacentralina attiverà l’irrigazione sia il 31 del mese che il 1° del mese successivo).
16

ISTRUZIONI PER LA PROGRAMMAZIONE – MODALITÀ DI PROGRAMMAZIONE• INTERVAL – (intervallo) procede all’irrigazione ogni x numero di giorni (da 1 a 30;
per esempio, ogni 3 giorni, ogni 10 giorni, ecc.). Il valore 1 significa che l’irrigazioneavrà luogo quotidianamente. Usando l’opzione intervallo, è possibile comunicare alsistema ogni quanto iniziare il programma (fino a un massimo di 30 giorni).
• EVENT DAYS – (giorni particolari) permette di bloccare l’irrigazione in giornispecifici, senza tener conto dell’opzione in programma (pari/dispari, intervallo,giorni di irrigazione).
Il display visualizzerà il programma in corso (impostato per default su WATER DAYS,irrigazione tutti i giorni). Il tasto SELECT scorrerà tutte le opzioni di programmazione:WATER DAYS, ODD, EVEN, INTERVAL e INTERVAL START DATE. Dopo aver deciso dimodificare l’impostazione corrente, assicurarsi che la manopola PROGRAM siaposizionata sul programma che si desidera modificare (A, B o C). L’opzione diprogrammazione viene selezionata premendo il relativo tasto, SELECT o ADJUST. Laprogrammazione precedente sarà sostituita da quella appena impostata. Con questeprocedure, l’impostazione dei programmi risulterà estremamente facile.
Impostazione opzione giorni di irrigazioneGirare la manopola più grande in posizione SCHEDULE e premere SELECT fino aquando le goccioline appaiono sui rispettivi giorni della settimana. Premere il tastoADJUST ‘+’ per selezionare il giorno desiderato per l’irrigazione o il tasto ADJUST ‘–’per selezionare i giorni in cui non si desidera irrigare. Un indicatore lampeggianteapparirà sul giorno che state per selezionare. Le gocce di pioggia appaiono sopraciascun giorno selezionato per l’irrigazione. L’indicatore si sposta automaticamente diun giorno verso destra dopo aver premuto il tasto ADJUST ‘+’ o ‘–’. Proseguire laselezione o deselezione dei giorni interessati dall’irrigazione fino ad aver completatol’impostazione del calendario settimanale.
17

ISTRUZIONI PER LA PROGRAMMAZIONE – MODALITÀ DI PROGRAMMAZIONE
ATTENZIONE: La programmazione dei giorni di irrigazione cancella tutte le altreimpostazioni per il programma selezionato.
Impostazione opzione giorni pari/dispariGirare la manopola più grande in posizione SCHEDULE. Sullo schermo apparirà l’ultimaopzione di impostazione selezionata per il programma in corso. Per impostare lafunzione giorni pari (EVEN)/dispari (ODD) premere il tasto SELECT fino a quandocompare una freccia sul display accanto all’impostazione prescelta (ODD o EVEN). Perl’irrigazione a giorni pari/dispari è necessario inoltre immettere una data. I tasti SELECTfungono da pulsanti a scelta per passare da dispari a pari e viceversa.
ATTENZIONE: La programmazione della funzione pari/dispari annulla qualsiasi altraimpostazione precedente sul programma selezionato.
Impostazione opzione intervalloGirare la manopola più grande in posizione SCHEDULE. Sul display apparirà l’ultimaopzione selezionata per il programma in corso. Premere SELECT per scorrere fino allaposizione intervallo. Accanto alla scritta INT (intervallo), sul display apparirà unafreccia. Con il tasto ADJUST selezionare i giorni di intervallo tra un’irrigazione e l’altra(-30). La data visualizzata rappresenta il 1° giorno del programma intervallo (oggi se siè impostato il numero 1). Per cambiare l’opzione giorno 1 usare SELECT per spostarsisulla posizione di data inizio intervallo. A seconda delle esigenze, è possibile cambiarela data per il giorno 1 della programmazione a intervalli mediante ADJUST (fino a unmassimo di 30 giorni).
ATTENZIONE: La programmazione dell’opzione intervallo annulla qualsiasi altraimpostazione precedente sul programma selezionato.
18

ISTRUZIONI PER LA PROGRAMMAZIONE – MODALITÀ DI PROGRAMMAZIONE
Impostazione programmazione giorni particolari (opzionale)Girare la manopola più grande in posizione SCHEDULE. Sullo schermo apparirà l’ultimaopzione impostata per il programma in corso. Premere contemporaneamente i tastiSELECT ‘+’ E SELECT ‘–’. Un indicatore lampeggiante apparirà accanto alla voce EVENTDAYS (giorni particolari). Con il tasto ADJUST ‘+’ si seleziona il giorno di irrigazione econ ADJUST ‘–’ si deselezionano i giorni non desiderati. Accanto al giorno che si staper selezionare appare un indicatore lampeggiante. Le goccioline di pioggia segnalano igiorni selezionati per l’irrigazione. L’indicatore automaticamente si sposta di un giornoverso destra dopo la pressione del tasto ADJUST ‘+’ o ‘–’. Proseguire la selezione o ladeselezione dei giorni interessati dall’irrigazione fino ad aver completato l’impostazionedel calendario settimanale.
ATTENZIONE: La programmazione dei giorni di irrigazione particolari (EVENT DAYS)NON cancella le altre impostazioni del programma selezionato.
Ripetere le procedure sopraindicate per ciascun programma (A, B e C) in base alle esigenze.
Ecco fatto! Ora la vostra centralina EZ Pro™ è programmata. Girare la manopolaMODE in posizione AUTO per avviare il programma selezionato.
REVISIONE DEI PROGRAMMIPer rivedere il programma in corso, girare la manopola MODE in posizione PROGRAMe girare la manopola più grande sull’impostazione che si desidera rivedere (peresempio, spostare la manopola grande su TIME per rivedere il tempo impostato per lacentralina). Se è necessario visualizzare due zone o tempi d’azione diversi (1, 2, 3)ricorrere soltanto al tasto SELECT.
ATTENZIONE: Trovandosi in modalità di programmazione, fare attenzione a noncambiare accidentalmente le impostazioni.
19

ISTRUZIONI PER LA PROGRAMMAZIONE – MODALITÀ DI PROGRAMMAZIONE
Impostazione ritardo valvola master o pompa È possibile posticipare il tempo che intercorre tra l’avvio della valvola master o dellapompa e il tempo di avvio di irrigazione delle zone. Girare la manopola più grande suZONE RUN TIMES (tempi d’azione zone). Premere contemporaneamente SELECT ‘+’ eSELECT ‘–’. Con il tasto ADJUST ‘+’ e ‘–’ regolare il ritardo desiderato. Sul display verràvisualizzato l’intervallo di ritardo (regolabile tra 1 secondo e 30 minuti) con la scritta‘del’ (ritardo) in basso. Per tornare all’impostazione dei tempi di azione delle zonepremere contemporaneamente i tasti SELECT ‘+’ e SELECT ‘–’.
ATTENZIONE: Il ritardo della valvola master/pompa sarà lo stesso per i treprogrammi (A, B e C).
ISTRUZIONI PER LA PROGRAMMAZIONE – MODALITÀ AUTO
Impostazione disattivazione sensore pioggiaL’EZ Pro™ Jr. è dotata di un disattivatore (bypass) del sensore pioggia. Questo permettealla centralina di assicurare l’irrigazione anche nel caso in cui il sensore pioggia siascattato. Per attivare il bypass la centralina deve trovarsi in modalità AUTO: premerequindi i tasti SELECT ‘+’ e ‘–’ contemporaneamente. Il simbolo di disattivazione delsensore lampeggerà. Per disattivare la funzione premere contemporaneamente i tastiSELECT ‘+’ e ‘–’ mentre si è in modalità AUTO. In tal modo il simbolo del sensoresmetterà di lampeggiare e indicherà lo stato corrente del sensore della pioggia.
ATTENZIONE: Il bypass del sensore pioggia rimarrà attivo fino alla suadisattivazione.
20

ISTRUZIONI PER LA PROGRAMMAZIONE – MODALITÀ OFF
Spegnimento della centralinaGirare la manopola MODE in posizione OFF. In questo modo, verranno sospese tutte leoperazioni di irrigazione, comprese le procedure manuali e di prova. L’orologiocontinuerà ad indicare l’ora e la data corrente, ed il programma impostato verràmantenuto fino al momento in cui si desidera riattivare il sistema. Per riattivarlo, girarela manopola MODE di nuovo in posizione AUTO.
21

FUNZIONI AVANZATE – MODALITÀ AUTO
L’EZ Pro™ Jr. incorpora due procedure manuali/di prova per il controllo delle funzioni dellacentralina o per l’abilitazione della sospensione del programma in corso per procedere aduna irrigazione immediata. La presente sezione illustrerà come impostare la centralina perle seguenti funzioni:
• Attivazione manuale di una zona• Attivazione manuale di un ciclo programmi
ATTENZIONE: Tutte le procedure di prova sono attivate mettendo la manopola MODEin posizione AUTO. In tal modo la centralina può tornareall’impostazione AUTO dopo aver avviato una procedura manuale/diprova. Ciò permette inoltre di potersi allontanare dopo aver installatouna procedura manuale/di prova senza dover tornare ad impostare lacentralina su AUTO.
ATTENZIONE: Le procedure manuali/di prova non tengono conto della connessioneal sensore. Perciò è possibile procedere all’irrigazione utilizzandouna di tali procedure anche nel caso in cui il sensore abbia sospeso ilprogramma impostato.
Attivazione manuale di una zonaGirare la manopola più grande in posizione MANUAL. La zona di default 01 el’indicazione 00:10 relativa ai minuti lampeggerà, permettendovi così di inserire i nuovidati. Premere SELECT per selezionare il numero di zona su cui si desidera intervenire eADJUST per impostare il tempo d’azione per la zona selezionata. L’impostazionediventerà operativa entro 5 secondi.
22

FUNZIONI AVANZATE – MODALITÀ AUTO
L’EZ Pro™ Jr. include la funzione ManualAdvance™ di Nelson nella procedura MANUAL.Tale funzione permette di interrompere l’azione in corso in una determinata zona e dispostarsi immediatamente su un’altra zona selezionata. Premere SELECT per passare auna nuova zona che si desidera attivare in modalità MANUAL o CYCLE. Sullo schermoverrà visualizzato l’ultimo tempo d’azione impostato. Premere ADJUST per inserire ilnuovo tempo d’azione che si desidera impostare sulla zona selezionata. L’impostazionediventerà operativa entro 5 secondi.
ATTENZIONE: Una volta attivata la zona in questione, il tempo d’azione non puòessere regolato senza prima deselezionare e riselezionare la zona.
Attivazione manuale di un ciclo programmiGirare la manopola più grande in posizione CYCLE. La lettera corrispondente alprogramma in corso inizierà a lampeggiare; per selezionare un programma diverso,spostare la manopola PROGRAM sul programma desiderato (A, B o C), che diventeràattivo entro cinque secondi. Dopo aver attivato il programma, la centralina sireimposterà automaticamente sulla procedura AUTO.
ATTENZIONE: La funzione CYCLE attiva il programma con decorrenza immediata.Utilizzare ManualAdvance™ per applicarla su tutte le zone.
23

DATI TECNICI
1. TrasformatoreTrasformatore interno 24 V CA; 20 VA, .83A per zone e logica. Il trasformatore puòattivare contemporaneamente al massimo una pompa o una valvola master e unavalvola di zona.
2. Protezione contro le sovratensioni600 watt TVS su uscite di zona9J Mov su secondarie (vedasi Interruttore, più avanti)
3. Operazione SensoreL’EZ Pro™ è configurata in modo che la centralina funzioni con o senza sensore. Isensori devono avere connessioni normalmente chiuse (conduttori). Se non si utilizza ilsensore, il ponticello preinstallato deve trovarsi al suo posto.
4. Linee della zonaL’EZ Pro™ Jr. attiverà contemporaneamente un massimo di due (2) solenoidi, unodei quali è rappresentato dalla pompa/valvola master. Ciascuna uscita della zona èoperativa con uno o due solenoidi.
I punta .52A maxI tenuta .33A max
5. Gamma di temperaturaOperativa: da -20°C a -55°C (da 23°F a 131°F)Non operativa: da -30°C a +85°C (da -22°F a 185°F)
24

DATI TECNICI
6. Schermo
7. BatterieDue (2) batterie alcaline di tipo AA (LR6 in Europa). Non utilizzare batterie NiCad.Lithium Coin Cell CR2032 inclusa.
8. Memoria del programmaLa batteria al litio è necessaria per conservare in memoria la data e i programmi neicasi in cui la batteria integrata sia esausta o vi sia un’interruzione di correnteelettrica.
ATTENZIONE: Togliere la linguetta per attivare la batteria al litio di riserva
9. Dimensioni (approssimative) del contenitore della centralina20 cm H x 25,5 cm L x 10 cm P (il pannello è rimovibile senza strumenti)
25
Ora, Data, Orario di inizio,Orario di avvio, data base,mese di erogazioned’acqua
Simbolo del sensorepioggia che sospendel’irrigazione
Nessun simbolo CA
Indicatore batteria scarica
Programma A, B o C
Indicatore di orari
Anno, giorni di intervallo,erogazione acqua,numero zona
Dispari
Pari
Intervallo
Event
Su M T W Th F S
Indicatoredi problemi
Zona ## di zone
Giorni di irrigazione,giorno della settimana

DATI TECNICI
10. Impostazioni di default (modalità 12 ore)12:00 A.M DomenicaData 01/01/2003Nessun tempo d’azione impostato (zona 01, —:—)Nessun orario d’avvio impostato (numero d’avvio 01, —:—)Disponibilità d’acqua 100%Programmazione per irrigazione giornalieraManopola MODE in posizione OFFManopola PROGRAM posizionata sul programma AAvvio con 5 secondi di ritardo tra una zona e l’altra
11. InterruttoreNella scheda di interconnessione della centralina è incorporato un interruttoremultiplo elettronico. Questo tipo di interruttore non richiede il ripristino o lasostituzione da parte dell’utente.
26

RISOLUZIONE DI PROBLEMI/MANUTENZIONE
27
SINTOMOEnergia non erogata alla zona,alla pompa o alla valvola mastero accensione della spia chesegnala la mancanza di corrente Non c’è corrente ed il displayrimane spentoDisplay spento
Sullo schermo appare la scritta“M-X” quando si tenta di agiremanualmente su una zonaSullo schermo appare la scritta“C-X” quando si tenta di agire suun programma in modalità CYCLESullo schermo, insieme alnumero di una zona compare lalettera P
Sullo schermo lampeggiano lescritte ALL 24 HR ed il simbolodel sensore pioggiaAccensione del sensore pioggia
La centralina non risponde aicomandi impartiti con i tasti ocon le manopoleEnergia non erogata a unasingola zonaEnergia non erogata a nessunazona
POSSIBILI CAUSE• Corrente elettrica non collegata
• Non c’è la batteria oppure èesausta
• Non c’è né corrente né batteria
• La manopola MODE si trova inposizione PROGRAM
• La manopola MODE si trova inposizione PROGRAM
• Fili non collegati o mancanza difili o del solenoide, oppure
• Più di due solenoidi sonocollegati a una zona, oppure
• TVS danneggiato da un fulmineo da una messa a massascorretta
• Il tempo d’azione inprogramma supera le 24 ore
• Il sensore pioggia è attivo o, senon è installato, manca ilponticello
• Riavviare il sistema
• Problemi alla connessione deifili o solenoide difettoso
• Fili in comune danneggiati osconnessi
• RS sui fili in comune aperto osconnesso
SOLUZIONE• Controllare l’alimentatore di corrente;
se la centralina non riceve corrente,si accende la spia che segnalal’assenza di corrente
• Sostituire la batteria e premereRESET
• Installare la batteria per riattivare ildisplay e controllare la correnteelettrica in uscita
• Spostare la manopola in posizioneAUTO per attivare una zonamanualmente
• Spostare la manopola in posizioneAUTO per avviare CYCLE
• Controllare i collegamenti dei fili,controllare ed eventualmentesostituire il solenoide
• Rimuovere il filo di zona se all’avviomanuale o automatico appare ancoraPxxz. L’unità richiede manutenzioneo sostituzione
• Controllare i tempi d’azione e%WATER BUDGET
• Se manca il sensore pioggia,controllare l’integrità del ponticello
• Intervenire sui comandi RESET conun cacciavite
• Controllare la connessione dei fili e ilsolenoide
• Controllare i fili in comune

NORME FCC (Federal Communications Commission)
La presente centralina elettronica per irrigazione genera e utilizza energia a frequenze radio e, in casodi installazione o utilizzo impropri, vale a dire, che non seguano precisamente le istruzioni delproduttore, può provocare interferenze con la ricezione di radio e televisione. L’apparecchio è statotestato ed è conforme ai requisiti di un apparecchio computerizzato di classe B in base alle specifichedi cui al sottoparagrafo J della sezione 15 delle norme FCC, istituite appositamente per fornireadeguata protezione contro tali interferenze in un’installazione ad uso privato. Tuttavia, non è possibilegarantire in modo assoluto l’assenza di interferenze in particolari installazioni. Se la presente centralinadovesse provocare interferenze alla radio o alla televisione, il che può essere verificato spegnendo eaccendendo la centralina, l’utente potrà provare a porre fine alle interferenze in uno dei seguenti modi:
riorientando l’antenna riceventecambiando la posizione della centralina rispetto al ricevitoreallontanando la centralina dal ricevitorecollegando la centralina a un’altra presa in modo che si trovi su un circuito diverso rispetto al ricevitore
Se necessario, l’utente può rivolgersi al rivenditore o ad un elettrotecnico esperto di radio/TV per ulterioriistruzioni. L’utente può inoltre trovare indicazioni a riguardo nel seguente manuale distribuito dallaFederal Communications Commission: “How to Identify and Resolve Radio-TV Interference Problems”.Il manuale può essere richiesto all’U.S. Government Printing Office, Washington, DC 20402, USA,riferimento n. 004-000-00345-4.
NORMATIVE CANADESI SULLE INTERFERENZE RADIOATTENZIONE: Il presente dispositivo digitale è conforme ai requisiti della classe B concernenti
i radiodisturbi delle apparecchiature digitali, stabiliti nelle normative sulleinterferenze radio del Ministero delle Telecomunicazioni canadese.
28

EZ PRO™ Jr. AnleitungZone Chart1
2
3
4
5
6
7
8
9
10
11
12
Rev 4-03

EZ Pro™ Jr.Anleitung für die Installation und ProgrammierungFür EZ Pro Jr. Modelle:
8304 83748306 83768309 83798312 8382

3
DANKE, dass Sie das elektronische EZ Pro™ Jr. 8300 SeriesBewässerungsgerät gewählt haben. Der EZ Pro™ Jr. 8300 Series ist so ein-fach zu bedienen, dass Sie ihn wahrscheinlich ohne Anleitung installierenund programmieren können. Dennoch empfehlen wir Ihnen noch vor derProgrammierung und Installation diese Anweisungen genau zu lesen, damitSie alle Vorzüge, die das Gerät bietet, auch nutzen können.
Wenn Sie Fragen, Probleme oder Anmerkungen zu unserem neuen EZ Pro™Jr. 8300 Series haben, rufen Sie bitte kostenfrei die Abteilung für technis-che Serviceleistungen unter 1-888-NELSON8 an oder besuchen Sie unsereWebseite unter LRNelson.com.
Führend für Bewässerungsanlagen seit 1911
HINWEIS: Da wir ständig darum bemüht sind, unsere Produkte zu verbessern undzu modernisieren, kann es vorkommen, dass Funktionen und Spezifizierungen in
diesem Handbuch ohne zusätzliche Hinweise geändert wurden.

4
INHALTSVERZEICHNISFunktionen 5Installierung 6-10
Anschlussleiste 9Anschluss des Hauptabsperrventils oder des Pump-Start-Relais 9Anschluss des Regen/Feuchtigkeits-Sensors 9Anschluss der Batterie und des Start-Controllers 10
Programmierung des EZ Pro™ Jr. 11-21Programmübersicht 11Aufbau der Vorderseite 12-13Einstellung der Tageszeit 14Einstellung des Datums 14Einstellung des Wochentages 14Auswahl des Bereichs und der Betriebszeit 14Startzeit einstellen 15Einstellung % Wasservorrat 15-16Einstellung % Wasservorrat / Monat 16Programmierung 16-17Option Einstellung der Bewässerungstage 17Option Einstellung ungerade/gerade Tage 18Option Einstellung Intervallschaltung 18Option Einstellung Ausnahmetage 19Programmüberprüfung 19Einstellung des Hauptabsperrventils oder der Pumpe 20Einstellung Regen-Verzögerung 20Ausschalten des Controllers 21
Fortgeschrittene Funktionen 22-23Manueller Betrieb eines Bereichs 22Manueller Betrieb eines Programmzyklus 23
Technische Daten und Spezifizierungen 24-26Behebung von Störungen / Service 27FCC Regeln 28Garantie 29

FUNKTIONEN• Nelsons exklusives Programm für Auswahl und Einstellung™ • Durch das Back-Up der Lithium-Batterien werden Programme auch ohne Strom-
oder Batteriezufuhr gespeichert• Programmierbare Verzögerungen zwischen verschiedenen Bereichen• Drei unabhängige Programme• Drei Startzeiten pro Programm (9 Starts insgesamt)• Zusammenfassung von Startzeiten• Drei Programmoptionen zur Anpassung an die speziellen Bedürfnisse von
Pflanzen oder an Bewässerungsvorgaben (Wochentage, 1-30 Tagesintervalle,ungerade/gerade)
• Programmierung von Ausnahmetagen in jedem Programm• Regen-Sensor Bypass• Schaltjahr-kompatibel, inkl. 29. Februar alle vier Jahre• Option Wasservorrat reduziert oder erhöht die Wasserzufuhr um 0-200 Prozent• Die fortgeschrittene Funktion für Wasservorrat programmiert diesen für jeden
einzelnen Monat• Zwei Testläufe (Manuell mit der ManualAdvance™-Funktion und zyklisch)• Programmierbare Betriebszeiten von einer Minute bis zu 1 Stunde, 59 Minuten• Schutz gegen Kurzschluss durch automatische Mehrfachsicherung
5

INSTALLIERUNGS-ANWEISUNGENDer EZ Pro™ Jr. 8300 Series kann drinnen und draußen angeschlossen werden.
Er muss sich nur in der Nähe eines Anschlusses mit 120V befinden (230/240V für 8354,8356, 8359 und 8362-Modelle). Installieren Sie den EZ Pro™ Jr. möglichst in Augenhöhe.Verwenden Sie die mitgelieferte Vorlage, um in der Wand Vorbohrungen zu markieren undvorzunehmen. Bringen Sie die Schrauben in den dafür vorgesehenen Vorbohrungen inder Wand an.
Anschluss des Transformators120 VAC in den Vereinigten Staaten, Kanada und Mexiko; 230 VAC in Europa und240 VAC in Australien und Südafrika
HINWEIS: Befolgen Sie die Vorgaben vor Ort, wenn diese nicht den vorliegendenAnweisungen entsprechen.
ACHTUNG: Bevor Sie den Transformator anschließen, müssen Sie den 120V (230/240V für8354, 8356, 8359 und 8362 Modelle)-Anschluss ausstecken. Erst wenn alle Kabel eingestecktsind und die Installierung beendet ist, sollten Sie den Transformator ans Stromnetz anschließen.Dadurch verhindern Sie ungewollte Kurzschlüsse, die dem Gerät schaden können.
Die Kabel für die Stromverbindungen müssen hinsichtlich Betriebsart und Größegenormt sein. Ausgangs-Kabel mit Niederspannung müssen mittels eines Kabelkanals isoliertwerden und am Controller mit einem geeigneten Adapter eingesteckt werden. Entfernen Sie diezwei Schrauben und die Abdeckung des Transformators, um Zugang zum internenTransformator zu bekommen. Stecken Sie die 120V-Kabel (oder 230/240 für 8354, 8356, 8359und 8362-Modelle) durch eine Öffnung von 1/2” am Boden des Kastens als Kabelkanal (BeiAußenanschlüssen müssen die Stromkabel eine Isolierung bis mindestens 75°C aufweisen).Der Kabelkanal muss am Kasten gut befestigt werden (befolgen Sie dazu die lokalen Vorgaben).
6

INSTALLIERUNGS-ANWEISUNGENFür die Modelle 8304, 8306, 8309, 8312 (siehe Abbildung 1)
Entfernen Sie die Abdeckung des Transformators, indem Sie die zwei Schraubenlösen. Verbinden Sie die Zuleitungskabel mit den Kabeln des Transformators durchKabelnieten. Vergewissern Sie sich, dass die Erdungskabel mit den anderenErdungskabeln in grüner Farbe mit gelben Streifen verbunden sind. Bitte prüfen Siedie lokalen Vorgaben für die Erdung. Bündeln Sie die Kabel in einer Kabelschlaufeund ziehen Sie diese fest, um zu verhindern, dass lose Kabel Kontakt zu weiterenStromkreisläufen bekommen. Der Transformator ist nun angeschlossen. SchließenSie wieder den Deckel und ziehen Sie die beiden Schrauben fest. Stellen Sie dasGerät NOCH NICHT an.
HINWEIS: Fehler bei der Erdung können ernsthafte Schäden am Gerät und / oderan Personen verursachen und führen zu einem Verfall der Garantie.
Abbildung 1
7

INSTALLIERUNGS-ANWEISUNGENFür die Modelle 8354, 8356, 8359, 8362 (siehe Abbildung 2)
Entfernen Sie die Abdeckung des Transformators, indem Sie die zwei Schraubenlösen. Die Führungsleitungen für den Anschluss werden mitgeliefert. Kürzen Sie dieKabel auf die richtige Größe, um den dort befestigten Steckverbinder zu installieren.Ziehen Sie die Schrauben fest (Für Australien wird eine extra Klemmschaltung mit-geliefert.) Bei der Installierung der Kabel müssen Sie genauestens auf die Polaritätenachten (z.B. L1, L2 und Erde). Der Transformator ist nun angeschlossen. SchließenSie den Deckel wieder und ziehen Sie die beiden Schrauben fest. Stellen Sie dasGerät NOCH NICHT an.
HINWEIS: Fehler bei der Erdung können ernsthafte Schäden am Controller und /oder an Personen verursachen und führen zu einem Verfall derGarantie.
Abbildung 2
8

INSTALLIERUNGS-ANWEISUNGENAnschlussleiste
Bei allen Kabelverbindungen der Bereiche, der Pumpe oder der Sensoren im EZ Pro™Jr. müssen Sie solche Schraubanschlüsse verwenden, die einen kleinenSchraubenzieher erfordern. Die Anschlussleisten erfordern 12 AWG (2.1mm)-Kabeloder kleinere.
Anschluss des Hauptabsperrventils oder des Pump-Start RelaisDer EZ Pro™ Jr. ist mit einer doppelten Leitung ausgestattet, so dass gleichzeitig dasPump-Start-Relais oder das Hauptabsperrventil betrieben werden können. SchließenSie ein Kabel des Pump-Start Relais am COM (common) auf der Anschlussleiste an,das andere am PMP/MV (Pumpe/Hauptabsperrventil) auf der Anschlussleiste.Weitere Informationen zum Pump-Start-Relais finden Sie in den Hinweisen desHerstellers.
Anschluss des Regen/Feuchtigkeits-SensorsDer EZ Pro™ Jr. ist so ausgestattet, dass ein Sensor mit normal geschlossenenAnschlüssen. Um einen Sensor zu installieren, müssen Sie das vom Hersteller ange-brachte Verbindungskabel, das sich am Sensoranschluss auf der Anschlussleistebefindet, ausstecken und das Sensorkabel dort einstecken. Weitere Informationenerhalten Sie in den Anweisungen des Herstellers.(Siehe Abbildung 2)
Wenn der Sensor die Wasserzufuhr unterbricht, erscheint auf dem Bildschirm dasentsprechende Symbol dafür. Das Symbol verschwindet erst wieder, wenn derWasserzulauf beendet ist. Der EZ Pro™ Jr. beginnt den Vorgang erneut.
HINWEIS: Bei manuellem Betrieb funktioniert der Regensensor nicht
9

INSTALLIERUNGS-ANWEISUNGENEinlegen der Batterien und Start des Controllers
Entfernen Sie die Abdeckung unterhalb des Bildschirms, indem Sie die Abdeckung auf-schieben. Legen Sie zwei neue Alkaline-Batterien (LR6 in Europa) in das Batteriefachgleich über der Anschlussleiste ein. Durch die Alkaline-Batterien funktioniert das Gerätauch ohne Stromzufuhr und behält Programme und die Zeiteinstellungen auch dannbei, wenn keine Stromzufuhr mehr erfolgt. Sind die Batterien nicht eingelegt und dieLithium-Batterie nicht aktiviert, können Daten wie Zeit und Programmierung im Falleines Stromausfalls verloren gehen. Die Batterien müssen alle 5 Jahre erneuert werdenbzw. wenn das Symbol für niedrigen Batteriebetrieb aufleuchtet.
ACHTUNG: Verwenden Sie nur Alkaline-Batterien. NiCad-Batterien können auslaufenoder explodieren, so dass Personen- oder Sachschäden entstehen können.
Back-Up für Lithium-BatterienDas EZ Pro™ Jr. Gerät wird mit einem Back-Up für Lithium-Batterien geliefert, sodass keine Programm- oder Zeiteinstellungen verloren gehen, wenn keineStromzufuhr erfolgt oder sogar keine Batterie eingelegt ist. Das Gerät zeigt nicht an,wenn das Back-Up arbeitet bzw. wenn die Batterie fast leer ist. Es ist deshalb ratsam,stets neue Alkaline-Batterien für das Haupt-Back-Up im gleichen Behältnis aufzube-wahren. Um das Back-Up für Lithium-Batterien zu aktivieren, müssen Sie denDeckel, der sich unter dem Batteriefach befindet und der mit “ZIEHEN” gekennze-ichnet ist, öffnen.
Schließen Sie immer den Deckel, damit keine Schäden an den Kabeln entstehenkönnen. Wenn die Kabel nur schwer biegsam sind, ist es evtl. hilfreich, diese vorhereigenhändig richtig zu biegen. Schließen Sie das Gerät dann ans Stromnetz an.
Jetzt können Sie die Programmierung starten!10

PROGRAMMIERUNGS-HINWEISEProgrammübersichtDer EZ Pro™ Jr. kann per Stromnetz oder Alkaline-Batterien programmiert werden. Bevor Sie den EZPro™ Jr. programmieren, ist es hilfreich, sich mit einigen allgemeinen Richtlinien für dieProgrammierung vertraut zu machen:
• Wenn ein Segment auf dem LCD-Bildschirm aufleuchtet, heißt das, dass es vom Benutzerverändert werden kann.
• Wenn Sie mit den Tasten arbeiten, halten Sie diese während drei Sekunden gedrückt, umeinen Schnelldurchlauf zu starten.
• Vergewissern Sie sich, dass der gezeigte Buchstabe der jeweiligen Programmierungentspricht; Programmänderungen entsprechen immer einem bestimmten Buchstaben aufdem Bildschirm.
• Es gibt keine “EINGABE”-Taste. Die Tasteneingaben und Wähleinstellungen werden automa-tisch für Sie gespeichert.
• Bei einer Programmänderung während des Betriebs endet das laufende Programm sofort.Das neue Programm startet zur vorgegebenen Zeit.
• Außerhalb des Betriebs zeigt das Gerät die aktuelle Zeit und den aktuellen Wochentag an.• Während des manuellen Betriebs gibt es eine Zeitverzögerung von 5 Sekunden vor Beginn
des Betriebs. Während dieser Zeit können Sie die Einstellungen ändern. Jedes Mal, wenn Sieeine Einstellung ändern, gibt es eine Zeitverzögerung von 5 Sekunden.
• MANUELLE und ZYKLISCHE Vorgänge arbeiten nur mit der Wähleinheit, wenn dasProgramm auf AUTO gestellt wurde.
• Nach einem Testlauf geht der Controller zurück zu AUTO und nimmt dann das nächstegeplante Programm in Betrieb.
• Währen der Testläufe funktioniert der Sensor nicht; dadurch können Sie die Bewässerungoder das Programm in Betrieb zu nehmen, auch wenn der Sensor nicht in Betrieb ist.
• Um alle Programme zu löschen und neu zu starten, drücken Sie während drei SekundenAUSWAHL ‘–’ und EINSTELLUNG ‘–’
11

PROGRAMMIERUNGS-HINWEISEAufbau der Vorderseite
Auf dem vorderen Bildschirm (siehe Abbildung 3) sehen sie einen großen LCD-Bildschirm, 4 Gummitasten, einen großen und zwei kleinere Wählscheiben. DieGummitasten sind markiert mit AUSWAHL und EINSTELLUNG and stellen den Kernvon Nelsons exklusiver AUSWAHL&EINSTELLUNG™ Programmierung dar. DieTasten sind gekennzeichnet mit ‘+’ oder ‘–’, um das jeweilige Segment zu erhöhenoder zu reduzieren.
AUSWAHL&EINSTELLUNG™ basiert auf dem Prinzip, dass Sie zunächstAUSWÄHLEN, was Sie einstellen wollen und dann die ausgewählten Variablen ein-stellen. Beispiel: Wenn Sie eine Betriebszeit von 10 Minuten in Bereich 5 wünschen,wählen Sie mit der AUSWAHL-Taste den Bereich 5 und sobald Sie dort angelangtsind, benutzen Sie die EINSTELLUNGS-Taste, um die Zeit auf 10 Minuteneinzustellen.
In bestimmten Fällen ist nur die Betätigung der Taste AUSWAHL oder EINSTELLUNGerforderlich. Dies wird an gegebener Stelle genauer erläutert.
12

PROGRAMMIERUNGS-HINWEISEABBILDUNG 3
HINWEIS: Der Wähl-MODUS muss sich in der Position PROGRAMM befinden.HINWEIS: Jedes Mal, wenn Sie die ‘+’ oder ‘–’ –Taste drücken, erhöht oder
reduziert das Display eine Einheit. Um einen Schnelldurchlauf zustarten, halten Sie die ‘+’ oder ‘–’ –Taste während drei Sekundengedrückt.
HINWEIS: Eine Aufschlüsselung der Bildschirmsegmente erhalten Sie imAbschnitt Technische Daten.
13

PROGRAMMIERUNG – PROGRAMM-MODUSTageszeit einstellen
Stellen Sie die große Wählscheibe auf ZEIT. Drücken Sie AUSWAHL, um die Stunden,Minuten und den 12/24-Stunden-Modus zu aktivieren. Drücken Sie EINSTELLUNG,um zur richtigen Zeit zu gelangen oder den 12/24-Modus einzustellen. ‘A.M.’erscheint nicht auf dem Bildschirm, wenn der A.M.-Modus eingestellt wurde; ‘P.M.’erscheint, wenn P.M.-Modus eingestellt wurde.
HINWEIS: Im 24-Stunden-Modus, erscheint der Kalender in einem T/M/J-Formatanstatt eines M/T/J-Formates.
Einstellung des Tagesdatums und des aktuellen WochentagesStellen Sie die große Wählscheibe auf die Position DATUM. Drücken Sie AUSWAHL,um zwischen den Tagen, Monaten und Jahren auszuwählen. Drücken Sie EINSTEL-LUNG, um das aktuelle Datum einzustellen. Der richtige Wochentag wird automatischauf dem LCD-Bildschirm gezeigt, wenn das Tagesdatum eingestellt wurde. Der EZPro™ Jr. Controller stellt sich automatisch auf Schaltjahre ein.
Auswahl der Bereiche und der zugehörigen BetriebszeitenHiermit legen Sie die Betriebszeit für die einzelnen Bereiche fest. Stellen Sie dazu die großeWählscheibe auf BEREICH/BETRIEBS-ZEIT. Wählen Sie aus PROGRAMM das richtigeProgramm A, B oder C aus. Drücken Sie AUSWAHL, um den Bereich auszuwählen, dem Siedas ausgewählte Programm (A, B, oder C) zuweisen wollen. Mit der entsprechendenNummer, die Sie auf dem Bildschirm sehen, gehen Sie auf EINSTELLUNG, um so dieBETRIEBSZEIT für diesen Bereich einzustellen. BETRIEBSZEITEN können von einer Minute biszu einer Stunde, 59 Minuten gehen. Fahren Sie mit der Auswahl fort und stellen Sie dieBetriebszeiten ein, bis Sie alle Bereiche programmiert haben.
14

PROGRAMMIERUNG – PROGRAMM-MODUSNach dem letzten und vor dem ersten Bereich wird die Gesamt-BETRIEBSZEITangegeben. Dies ist bei der Bestimmung der Gesamtlaufzeit des Programmes sehrhilfreich. Auf dem Bildschirm sehen Sie dann die Buchstaben “ALLE” und diegesamte BETRIEBSZEIT wird angegeben. Diese Zeit ist die Summe aller BETRIEB-SZEITEN für das ausgewählte Programm (100% Wasservorrat). (z.B.: Ein Programmhat eine Betriebsdauer von 5 Minuten in Bereich 1, 12 Minuten in Bereich 2; 6Minuten in Bereich 4. Der Bildschirm zeigt nun ALLE and eine Betriebszeit von 23Minuten an).
Einstellung der StartzeitenDie STARTZEIT ist die Tageszeit, zu der ein Programm startet. Der EZ Pro™ Jr. ges-tattet drei Startzeiten pro Programm.
Stellen Sie die große Wählscheibe auf die Position STARTZEITEN. Drücken SieAUSWAHL, um die gewünschte Startzeit auszuwählen (1, 2, oder 3). Drücken SieAUSWAHL, um die Tageszeit für das gewünschte Programm einzustellen.Wiederholen Sie diesen Vorgang, falls erforderlich.
Startzeiten bündelnDer EZ Pro™ Jr. kann die Startzeiten bündeln, wenn eine einprogrammierteBewässerungszeit eine andere Startzeit überlappt. Die zusätzliche Startzeit stellt sichein, wenn der erste Zyklus zu Ende ist.
15

PROGRAMMIERUNG – PROGRAMM-MODUSEinstellung des % Wasservorrates
Mit % WASSERVORRAT stellen Sie die Dauer der Bewässerungszeit innerhalb einesProgrammes entsprechend des eingegebenen Prozentsatzes 0 - 200% ein (z.B. wirdbei einer Betriebszeit von 10 Minuten und einem Wasservorrat von 50% die Zeit auf5 Minuten reduziert). Diese Funktion ist hilfreich bei Wetterveränderungen. Wenn esungewöhnlich trocken ist, wollen Sie vielleicht die Bewässerungszeit für jede Zoneerhöhen. Mit dem % Wasservorrat können Sie durch die Veränderung einer Zahl alleBetriebszeiten innerhalb des Programmes ändern. Wenn die 24 Stunden Betriebszeitüberschritten sind, blinkt das Feld 24 h auf dem Bildschirm.
Stellen Sie die große Wähleinscheibe auf % WASSERVORRAT. Ein %-Symbolerscheint auf dem Bildschirm, damit Sie wissen, dass Sie hiermit die %Wassermenge bestimmen können. Drücken Sie EINSTELLUNG, um den gewünschtenProzentsatz auszuwählen.
Wenn der % WASSERVORRAT auf 110% oder mehr gestellt wurde, teilt der EZ Pro™Jr. die Betriebszeit in zwei Teile, um so den Gesamtabfluss der Wassermenge zureduzieren. In jedem Bereich wird erst die Hälfte der errechneten Zeit bewässert undnach Durchlauf aller Bereiche die zweite Hälfte.
HINWEIS: % WASSERVORRAT kann je nach Programm verändert werden. WennSie in den drei Programmen A, B und C den Wasservorrat bestimmthaben, müssen Sie auch drei einzelne Werte dafür angeben (insofern Sieeine Änderung aller Programme wünschen).
16

PROGRAMMIERUNG - PROGRAMM MODUSEinstellung des Wasservorrates nach Monaten (Fortgeschrittene Funktion)Der EZ Pro™ Jr. gestattet Ihnen die Einstellung des % WASSERVORRATES nach Monaten.Dadurch können Sie Ihr Programm den heißeren und trockeneren sowie kühlerenMonaten anpassen.
Stellen Sie die große Wählscheibe auf die Position % WASSERVORRAT. Drücken Siegleichzeitig AUSWAHL ‘+’ und ‘–’. Benutzen Sie die AUSWAHL-Taste, um die Monate1-12 zu wählen. Mit der Taste EINSTELLUNG wählen Sie dann den gewünschtenProzentsatz zwischen 0 und 200% aus. Wenn 0% ausgewählt wurde, wird in diesemMonat nicht künstlich bewässert.
Programmierung der Bewässerung (Ein kurzer HINWEIS zur Programmierung und zum EZ Pro™ Jr.…)
Der EZ Pro™ Jr. Controller bietet drei Programmeinstellungen plus dieProgrammierung für Ausnahmetage:
• Auswahl von BEWÄSSERUNGSTAGEN oder tägliche Bewässerung: Sie wählenaus, an welchen Tagen bewässert werden soll (z.B. nur Montag, Mittwoch,Freitag).
• UNGERADE/GERADE sagt dem Controller, dass er entweder an den geraden oderungeraden Tagen des Monats bewässern soll (z.B. am 31. und am 1., wennUNGERADE ausgewählt wurde).
• INTERVALL bewässert jeden x-ten Tag (von 1 bis 30 Tage) (z.B. alle drei, alle 10etc. Tage). Der Wert von 1 in der Intervall-Programmierung bedeutet eineBewässerung jeden Tag. Wenn die Intervall-Funktion gewählt wurde, haben Siedie Möglichkeit, dem Controller mitzuteilen, an welchem Tag das Intervall-Programm gestartet werden soll (bis zu 30 Tage).
• Durch AUSNAHMETAGE könne Sie die Bewässerung an bestimmten Tagen aussetzen,unabhängig vom sonstigen Zeitplan (ungerade/gerade, Intervall oder täglich).
17

PROGRAMMIERUNG - PROGRAMM MODUSDer Bildschirm zeigt das aktuelle Programm (die Standard-Einstellung ist alle BEWÄSSERUNGSTAGE.) Die AUSWAHL-Taste führt die Bildschirmoberfläche zuallen Positionen: BEWÄSSERUNGSTAGE, UNGERADE, GERADE, INTERVALL undINTERVALL START-DATUM. Vergewissern Sie sich, dass die PROGRAMM-Wahl aufdas Programm gestellt wurde, das Sie zu ändern wünschen (A, B oder C) und dassSie die aktuelle Einstellung ändern wollen. Eine Programm-Option ist dann aus-gewählt, nachdem Sie entweder die Taste AUSWAHL oder EINSTELLUNG gedrückthaben. Die frühere Programmierung wird dann durch eine neue ersetzt. Auf folgendeWeise können Sie ganz einfach programmieren:
Einstellung der BewässerungstageStellen Sie die große Wählscheibe auf PROGRAMMIERUNGS. Verwenden Sie dieAUSWAHL-Taste, bis die Regentropfen unterhalb der Wochentage erscheinen. DrückenSie EINSTELLUNG ‘+’, um die jeweiligen Tage auszuwählen oder drücken Sie EINSTEL-LUNG ‘–’, um die Bewässerung an den jeweiligen Tagen zu unterdrücken. Ein blink-endes Zeichen erscheint oberhalb des Tages, den Sie gerade einstellen. DieRegentropfen erscheinen über den ausgewählten Bewässerungstagen. Diese Anzeigegeht automatisch von links nach rechts von einem Tag zum anderen, nachdem Sie EIN-STELLUNG ‘+’ oder ‘–’ gedrückt haben. Fahren Sie fort in der Auswahl der Tage, andenen bewässert werden soll, bis Sie alle 7 Tage eingestellt haben.
HINWEIS: Wenn Sie die BEWÄSSERUNGSTAGE einstellen, löschen Sie damitvorherige Einstellungen.
18

PROGRAMMIERUNG - PROGRAMM MODUSEinstellung Ungerade/Gerade Tage
Stellen Sie die große Wählscheibe auf PROGRAMMIERUNG. Die zuletzt gewählteOption für das aktuelle Programm erscheint auf dem Bildschirm. Um UNGERADEoder GERADE Tage einzustellen, drücken Sie die Taste AUSWAHL, bis ein Pfeil nebender entsprechenden Liste erscheint (UNGERADE oder GERADE). Das DATUM für dieBewässerung an ungeraden/geraden Tagen muss eingestellt werden). Die AUSWAHL-Tasten funktionieren wie Umschalttasten und springen zwischen ungerade und ger-ade.
HINWEIS: Wenn Sie UNGERADE/GERADE einprogrammieren, löschen Sie damitjede andere Einstellung für das laufende Programm.
Einstellung der Intervall-FunktionStellen Sie die große Wählscheibe auf PROGRAMMIERUNGS. Die für das aktuelle
Programm zuletzt gewählte Option erscheint auf dem Bildschirm. Drücken SieAUSWAHL, um zur Funktion Intervall zu gelangen. Ein Pfeil erscheint auf demBildschirm neben INT (Intervall). Verwenden Sie die Taste EINSTELLUNG, um dieIntervalle zwischen den einzelnen Bewässerungen auszuwählen (1-30). Dasangezeigte Datum ist Tag 1 des Intervallzeitraumes. (Dies ist, sofern so eingestellt,das heutige Datum). Um das Datum von Tag 1 zu ändern, verwenden Sie die TasteAUSWAHL, um zu dem Datum zu gelangen, an dem die Intervall-Funktion beginnensoll. Wenn nötig, können Sie das Datum für Tag 1 mittels der Taste EINSTELLUNGändern (dies kann nur für bis zu 30 Tage eingestellt werden).
HINWEIS: Die Programmierung der INTERVALL-Funktion löscht andereFunktionen des ausgewählten Programmes.
19

PROGRAMMIERUNG - PROGRAMM MODUSProgrammierung von besonderen Ausnahmetagen (Optional)
Stellen Sie die große Wählscheibe auf PROGRAMMIERUNG. Die für das laufendeProgramm zuletzt gewählte Option erscheint auf dem Bildschirm. Drücken Sie gleichzeitigAUSWAHL ‘+’ und ‘–’. Ein blinkender Hinweis erscheint neben den Ausnahmetagen.Verwenden Sie die Taste EINSTELLUNG ‘+’, um Bewässerungstage auszuwählen oder EIN-STELLUNG ‘–’ für Tage, an denen nicht bewässert werden soll. Ein blinkendes Zeichenzeigt den Tag an, der gerade eingestellt wird. Oberhalb der Tage, an denen bewässert wer-den soll, werden nach der Programmierung Regentropfen sichtbar. Der Anzeiger gehtautomatisch von links nach rechts von Tag zu Tag, wenn Sie die Taste EINSTELLUNG ‘+’oder ‘–’ gedrückt haben. Fahren Sie fort mit der Auswahl von Tagen, an denen bewässertwerden soll, bis alle 7 Tage zugeordnet sind.
HINWEIS: Die Programmierung von Ausnahmetagen löscht NICHT andereProgrammierungen.
Wiederholen Sie die obigen Vorgänge für jedes Programm (A, B oder C), ganz wieSie es wünschen.
Das ist alles! Ihr EZ Pro™ Jr. ist jetzt programmiert. Stellen Sie die MODUS-Wählscheibe auf AUTO, um das eingegebene Programm zu starten.
PROGRAMMPRÜFUNGUm das aktuelle Programm zu überprüfen, stellen Sie die MODUS-Wählscheibe auf PRO-GRAMM und die große Wählscheibe auf die Einstellung, die Sie zu prüfen wünschen (z.B.stellen Sie die große Wählscheibe auf ZEIT, um die Zeiteinstellungen des Gerätes zu über-prüfen). Bei einer Überprüfung von verschiedenen Bereichen oder Betriebszeiten (1, 2, 3),verwenden Sie nur die AUSWAHL-Tasten.
20

PROGRAMMIERUNG - PROGRAMM MODUSHINWEIS: Wenn Sie sich im Programm-Modus befinden, kann es zu
ungewollten Programmänderungen kommen.
Einstellung der Verzögerung für das Hauptabsperrventil oder die PumpeSie können die Zeitspanne zwischen dem Starten des Hauptabsperrventils / derPumpe und der Bewässerung der einzelnen Bereiche verzögern. Stellen Sie die großeWählscheibe auf die Zeiteinstellung für die Bereiche. Drücken Sie gleichzeitigAUSWAHL ‘+’ und ‘–’. Benutzen Sie die Taste EINSTELLUNG ‘+’ oder ‘–’, um dieZeitverzögerung einzugeben. Der Bildschirm zeigt Ihnen unterhalb des „del“ die jew-eilige Zeitverzögerung an (einstellbar zwischen 1 Sekunde und 30 Minuten). Um zurEinstellung der Betriebszeiten für die einzelnen Bereiche zurückzukehren, drücken Siegleichzeitig AUSWAHL ‘+’ und ‘–’.
HINWEIS: Das Verzögerung für das Hauptabsperrventil / die Pumpe ist füralle drei Programme gleich (A, B und C).
PROGRAMMIERUNGS-HINWEISE - AUTO MODUS Einstellung des Regen-Sensor Bypasses
Der EZ Pro™ Jr. verfügt über einen Regen-Sensor Bypass. Dadurch kann das Geräteine Bewässerung durchführen, auch wenn der Regensensor nicht funktionsfähig ist.Um den Bypass zu aktivieren, muss das Gerät auf AUTO gestellt werden. In dieserPosition drücken Sie gleichzeitig AUSWAHL ‘+’ und ‘–’. Daraufhin blinkt das Symbol,das den Ausfall des Sensors anzeigt. Zur Deaktivierung drücken Sie im AUTO-Modus gleichzeitig die Tasten AUSWAHL ‘+’ und ‘–’. Das Sensor-Symbol hört nunauf zu blinken und der aktuelle Status des Regen-Sensors wird angezeigt.
HINWEIS: Der Bypass für den Regen-Sensor bleibt aktiv, bis er deaktiviert wird.
21

PROGRAMMIERUNGS – OFF-MODUSAUSSTELLEN DES GERÄTES
Stellen Sie die MODUS-Wählscheibe auf OFF. Damit unterbrechen Sie alleBewässerungsvorgänge (auch manuelle und Testläufe). Die aktuelle Zeiteinstellung sowiedie eingestellten Programme bleiben jedoch erhalten, bis Sie das Gerät erneut in Betriebnehmen. Dazu müssen Sie die MODUS-Wählscheibe wieder auf AUTO stellen.
FORTGESCHRITTENE FUNKTIONEN - AUTO MODUSDer EZ Pro™ Jr. verfügt über zwei manuelle bzw. Testdurchgänge, um zu prüfen, ob das Gerät funktioniert oder um unabhängig von der Programmierungeine sofortige Bewässerung durchzuführen. Der folgende Abschnitt zeigt Ihnen, wieSie das Gerät einstellen auf:
• Manuellen Betrieb eines Bereichs• Manuellen Betrieb eines Programmes
HINWEIS: Für alle Tests müssen Sie die MODUS-Wählscheibe auf AUTO stellen.Dadurch kehrt das Gerät nach dem manuellen Betrieb oder Testlaufautomatisch zurück zur Einstellung AUTO gehen. Außerdem können Siedadurch das Gerät nach dem manuellen Betrieb oder Test verlassen,ohne es noch auf AUTO zurückstellen zu müssen.
HINWEIS: Der Sensor arbeitet bei manuellem Betrieb oder bei Tests nicht. Somitist eine Bewässerung auch dann möglich, wenn der Sensor eigentlichIhre Programmeinstellungen ausgesetzt hätte.
22

AFORTGESCHRITTENE FUNKTIONEN - AUTO MODUSManueller Betrieb eines Bereiches
Stellen Sie die große Wählscheibe auf MANUELL. Die Standardeinstellung des Bereiches 01 und00:10 Minuten leuchten nun auf (dies bedeutet, dass Sie diese ändern können). Drücken SieAUSWAHL, um die Nummer des gewünschten Bereichs auszuwählen. Drücken Sie EINSTEL-LUNG, um die Zeit für den ausgewählten Bereich einzustellen. Das Gerät arbeitet mit einerZeitverzögerung von 5 Sekunden, bevor der Bereich gestartet wird.
Der EZ Pro™ Jr. umfasst die Nelsons ManualAdvance™ Funktion für MANUELLE Vorgänge.Durch das ManualAdvance™ kann der Bereich, in dem gerade bewässert wird, übersprungenwerden, um augenblicklich zu einem weiteren Bereich überzugehen. Arbeitet das Gerät geradeim Modus MANUELL oder ZYKLISCH, müssen Sie zum Wechsel des Bereichs auf AUSWAHLgehen. Hier wird Ihnen die zuletzt eingegebene Betriebszeit angezeigt. Drücken Sie EINSTEL-LUNGEN, um eine neue Zeitvorgabe für den neu ausgewählten Bereich einzugeben (das Gerätnimmt eine Zeitverzögerung von 5 Sekunden vor, bevor es startet).
HINWEIS: Sobald die Bewässerung in einem Bereich gestartet hat, kann dieBetriebszeit nicht mehr eingestellt werden, ohne vorher den Bereichneu auszuwählen.
Manueller Betrieb eines ProgrammzyklusStellen Sie die großen Wählscheibe auf ZYKLUS. Der Buchstabe für das aktuelleProgramm fängt an zu blinken. Um zu einem anderen Programm zu wechseln, müssenSie die PROGRAMM-Taste auf das gewünschte Programm stellen (A, B oder C). Das Gerätstartet das gewünschte Programm mit einer Zeitverzögerung von 5 Sekunden. Nach Endeder Betriebszeit schaltet es automatisch wieder auf AUTO.
HINWEIS: ZYKLUS bedeutet einen sofortigen Start Ihres aktuellen Programmes.Geht manuell von einem Bereich zum anderen.
23

TECHNISCHE DATEN1. Transformator
24 VAC interner Transformator; 20 VA, .83A für Bereiche und System. DerTransformator kann maximal gleichzeitig die Pumpe oder das Hauptabsperrventil unddas Absperrventil für eine Zone in Betrieb nehmen.
2. Überspannungsschutz 600 Watt TVS Abgabeleistung der Bereiche9J Sekundärstromkreis (siehe auch unter „Schalter“)
3. SensorDer EZ Pro™ Jr. ist so eingestellt, dass das Gerät mit oder ohne Sensor arbeitenkann. Sensoren müssen mit normal geschlossenen Kabeln versehen sein(Anschlussdrähte). Wird kein Sensor verwendet, müssen sich die vom Herstellerinstallierten Verbindungskabel am richtigen Platz befinden.
4. BetriebsgrenzeDer EZ Pro™ Jr. arbeitet mit maximal zwei (2) Solenoids, davon ist eines ist diePumpe / das Hauptabsperrventil. Die Arbeitsleistung jedes Bereichs beträgt ein oderzwei Solenoids.
I Einschaltung .52A maximalI Halteposition .33A maximal
5. TemperaturbereichWährend des Betriebs: -20° bis +55° C (23° bis 131° Fahrenheit)Außerhalb des Betriebs: -30° bis +85° C (-22° bis 185° Fahrenheit)
24

TECHNISCHE DATEN6. Display
7. BatterienEs sind zwei (2) AA (LR6 in Europa) Alkaline-Batterien erforderlich. Verwenden Siekeine NiCad-Batterien. Eine CR2032-Lithiumzelle wird im Steuergerät mitgeliefert.
8. Das Programm erhaltenDie Lithium-Batterie wird verwendet, um Zeiteinstellungen und Programme beizube-halten, auch wenn keine Batterie oder keine Stromzufuhr vorhanden ist.HINWEIS: DAS BACK-UP DER LITHIUM-BATTERIEN WIRD NUR AKTIVIERT, WENN
DER DECKEL ENTFERNT WIRD. BACK-UP DER BATTERIE
9. Maße des Gerätes (ca.)8” H x 10” W x 4” D (der Deckel kann ohne Werkzeuge geöffnet werden)
25
Time, Date, Start Time,Run Time, Basis Date,Water Budget Month
Rain Sensor suspendwatering symbol
No AC symbol
Low battery warning
Program letter A, B or C
AM PM indicator
Year, Interval Days, WaterBudget, Zone number
Odd
Even
Interval
Event
Su M T W Th F S
ProblemIndicator
Zone ## of zones
Water days,Day of week
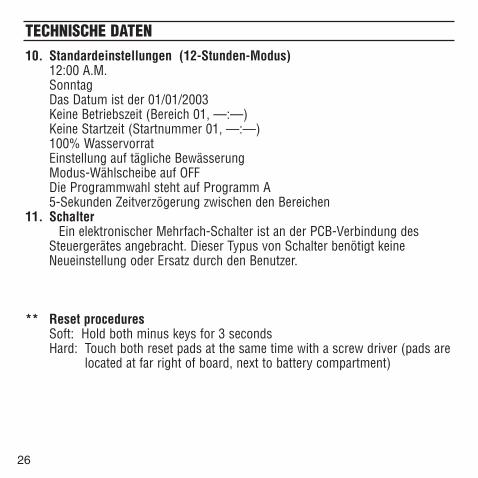
TECHNISCHE DATEN10. Standardeinstellungen (12-Stunden-Modus)
12:00 A.M.SonntagDas Datum ist der 01/01/2003Keine Betriebszeit (Bereich 01, —:—)Keine Startzeit (Startnummer 01, —:—)100% WasservorratEinstellung auf tägliche Bewässerung Modus-Wählscheibe auf OFFDie Programmwahl steht auf Programm A 5-Sekunden Zeitverzögerung zwischen den Bereichen
11. Schalter Ein elektronischer Mehrfach-Schalter ist an der PCB-Verbindung des
Steuergerätes angebracht. Dieser Typus von Schalter benötigt keineNeueinstellung oder Ersatz durch den Benutzer.
** Reset proceduresSoft: Hold both minus keys for 3 secondsHard: Touch both reset pads at the same time with a screw driver (pads are
located at far right of board, next to battery compartment)
26

STÖRUNGSBEHEBUNG/SERVICESYMPTOM MÖGLICHE URSACHE LÖSUNGKeine Verbindung zu Bereich, • Stromzufuhr unterbrechen • Prüfen der Stromverbindung,Pumpe oder Hauptabsperrventil bei fehlender Verbindung, / Anzeige zeigt keine Stromzufuhr leuchtet eine Anzeige aufkein Strom, leeres Display • keine oder leere Batterie • Erneuerung der Batterie, Reset
drückenBildschirm ist leer • kein Strom oder leere Batterie • Einlegen einer neuen Batterie,
Prüfung der Stromzufuhr, um Verbindung nach außen zu sichern
“M-X” erscheint auf dem • MODUS-Wählscheibe steht • Stellen der MODUS-Bildschirm bei manuellem auf PROGRAMM Wählscheibe auf AUTO für Betrieb manuellen Betrieb“C-X” erscheint auf dem • MODUS-Wählscheibe steht • Stellen der MODUS-Bildschirm bei ZYKLUS auf PROGRAMM Wählscheibe auf AUTOP plus Nummer eines • Kabel nicht angeschlossen • Überprüfung der Außenkabel Bereiches erscheint oder kurzgeschlossen und der Bildschirm-Kabel oder
Solenoids, Solenoid ersetzen• Mehr als 2 Solenoids sind an
teinen Bereich angeschlossen• TVS ist durch Belichtung • Entfernen des Kabels zum
oder unzulässige Erdung jeweiligen Bereich, falls P plus geschädigt xxx auch bei manuellem oder
automatischem Betrieb noch erscheint, ist eine Reparatur / Erneuerung des Teils nötig
ALLE 24HR leuchtet auf dem • Betriebszeit von mehr als 24 h • Prüfen der Betriebszeit in den LCD auf Bereichen und Einprogrammierung
des % WASSERVORRATESSymbol für Regen-Sensor • Regen-Sensor ist aktiviert. Falls • Prüfen, ob das Verbindungskabelerscheint nicht, fehlt das angebracht ist, falls kein
Verbindungskabel Regen-Sensor vorhanden Gerät reagiert nicht auf • Erneutes Reset nötig • Schraubenzieher über dem Tastendruck Bildschirm bedeutet ResetKeine Verbindung zu einzelnem Bereich • Kabel einstecken oder falscher Solenoid • Kabel und / oder Solenoid prüfenKeine Verbindung nach außen • Defektes oder nicht • Einfachkabel prüfen
angeschlossenes Einfachkabel • RS am Einfachkabel ist offen oder nicht eingesteckt 27

FCC REGELNDieses elektronische Bewässerungsgerät arbeitet mit Radiowellen. Wenn Sie das Gerät nicht ordnungsgemäß installiert haben und benutzen, so wie es der Herstellervorgeschrieben hat, können beim Empfang von Radio und Fernsehen Interferenzenentstehen. Der Gerätetypus wurde getestet und erfüllt die Bestimmungen für Computerder Klasse B in Übereinstimmung mit den Spezifikationen im Unterabschnitt J desAbschnitts 15 des FCC Regelwerkes, die dazu dienen, Interferenzen in Wohnhäusernvorzubeugen. Im Einzelfall kann keine Garantie abgegeben werden. Verursacht das GerätInterferenzen beim Empfang von Radio oder TV beim An- und Ausschalten, sollte derBenutzer die richtige Interferenz einstellen, indem er eine oder mehrere der folgendenMaßnahmen ergreift:
Neuausrichtung der AntenneVeränderung des Standortes des Gerätes in Bezug auf den ReceiverHerstellung einer größeren räumlichen Distanz zwischen Gerät und ReceiverEinstecken der Gerätekabel in eine andere Buchse, so dass Gerät und Receiver an
verschiedene Stromkreise angeschlossen sindFalls erforderlich, muss der Benutzer seinen Händler oder einen erfahrenen Techniker fürRadio und TV um Rat fragen. Ggf. kann das folgende Buch, das von der FederalCommunications Commission verfasst wurde, hilfreich sein:“How to Identify and Resolve Radio-TV Interference Problems”Dieses Buch erhalten Sie beim Printing-Office der US-Regierung, Washington, DC 20402.Stock No. 004-000-00345-4.
KANADISCHE BESTIMMUNGEN FÜR RADIO INTERFERENZENHINWEIS: Dieser digitale Apparat entspricht den Bestimmungen der Klasse B
für Funkwellen von digitalen Apparaten im Regelwerk für Radio-Interferenzen des kanadischen Ministeriums fürKommunikationswesen.
28

GARANTIEBeschränkte GarantieDie L.R. Nelson Corporation (“Nelson”) vergibt bei allen elektronischen Produkten eine zweijährige Garantie abVerkaufsdatum und garantiert damit, dass das Material oder die Verarbeitung keine Mängel aufweisen. Sollten sichdennoch Mängel zeigen, repariert oder ersetzt Nelson das Produkt oder das mangelhafte Teil.Diese Garantie bezieht sich nicht auf Schäden, die ein Produkt oder der Teil eines Produktes von Nelson sowie dasäußere Erscheinungsbild oder die Farbe eines Produktes durch Unfall, Missbrauch, Veränderungen, Nachlässigkeit,falsche Installation oder gewöhnliche Abnutzung erfahren haben. Die Garantie erstreckt sich nur auf den Original-Benutzer des Nelson-Produktes.Sollten sich Mängel bei einem Produkt oder dem Teil eines Produktes noch während der Garantiezeit zeigen, setzenSie sich bitte mit dem Unternehmen, Einzelhändler oder Vertreiber bzw. direkt mit der L.R. Nelson Corporation untereiner der folgenden Adressen in Kontakt:
One Sprinkler Lane 4780 Eucalyptus Ave.Peoria, IL 61615 Chino, CA 91710(309) 690-2200 (800) 800-0993Fax (309) 692-9152 Fax (909) 631-5025
Nelson darf verlangen, dass das Produkt oder der Teil des Produktes an die Verkaufsstelle oder den Einzelhändler bzw.Vertreiber zurückgegeben wird. Nelson entscheidet dann, ob der Defekt unter die Garantie fällt oder nicht. Im Garantiefallwird das Produkt repariert oder ersetzt. Sie müssen mit 4 bis 6 Wochen Wartezeit für die Reparatur oder Ersatzbeschaffungund Rückgabe des Produktes oder Teiles rechnen. Wird ein Produkt ersetzt, gilt die nun verbleibende Garantiezeit nur nochfür den Rest des Originalproduktes bzw. die Zeit wird nicht neu angerechnet.Die Garantie gibt Ihnen spezifische legale Rechte, die von Land zu Land unterschiedlich sein können. Die L.R. NelsonCorporation gestattet niemandem, eigens für sein Land Rechte und Pflichten in Verbindung mit den Nelson-Produkten zuerschaffen.DIE FÜR DIE NELSON-PRODUKTE GESETZLICH VORGESCHRIEBENE GARANTIEZEIT UNTERLIEGT DEN HIERNIEDERGESCHRIEBENEN AUSFÜHRUNGEN ZUR GARANTIE. WEDER DIE L.R. NELSON CORPORATION NOCH IHREVERTREIBER ODER HÄNDLER HAFTEN FÜR ZEITLICHE VERLUSTE, UNANNEHMLICHKEITEN, FINANZIELLE VERLUSTEODER ZUFÄLLIGE ODER BEABSICHTIGTE SCHÄDEN, DIE AUS DEM VERKAUF ODER DEM VERTRIEB DER NELSON-PRO-DUKTE HERVORGEHEN ODER FÜR DIE VERLETZUNG DER GARANTIE AUS NACHLÄSSIGKEIT ODER AUS UNER-LAUBTEN HANDLUNGEN. Einige Länder gestatten keine Einschränkungen bzgl. der Dauer einer impliziten Garantie - abge-sehen von zufälligen oder willentlichen Beschädigungen - so dass hier obige Einschränkungen nicht gelten. Sollten SieFragen zur Garantie oder ihrer Reichweite haben, schreiben Sie bitte an die L.R. Nelson Corporation, One Sprinkler Lane,Peoria, Illinois 61615, U.S.A. Wichtig: Kundendienst (Customer Service).POLICE FÜR DEFEKTE WARENProdukte, die an den Einzelhändler oder Vertreiber zurückgegeben und für mangelhaft befunden werden, müssen durcheine für den Verkauf zuständige Person der Firma Nelson hinsichtlich ihrer Garantie überprüft werden. Wird die Garantiezuerkannt, wird ein Produkt repariert oder ersetzt bzw. eine Gutschrift mit dem Netto-Preis ausgehändigt.
29
Related Documents


