Copyright © 2016 Pearson Education, Inc. 5 Exercise 2—Windows to a Microscopic World Preparation Notes 1. Supply lists are based on a class size of 24 students. In situations where class size varies, adjust supplies accordingly. 2. Asterisks (*) next to materials or supplies indicate a nonstandard or special order item. Specific details for obtaining these items can be found in the “Ordering Information” section for each exercise. 3. The times listed to complete activities are conservative estimates of the time required. In our community college classes (with three hours of lab per week), we’re usually able to complete all the activities in an exercise and still have time for short quizzes, introductory remarks, and summarizing important concepts at the end of the class period. Materials and Supplies Equipment Quantity dissecting microscopes 12 compound microscopes 24 glass stacking dishes, medium (*) 14 disposable pipettes 14 blank microscope slides 1 box blank depression microscope slides 1 box microscope cover slips 1 box lens paper booklets 8 blunt metal probes 14 squirt bottles (*) 8 long gripping tongs (*) 1 Living Materials Quantity large brown planaria (*) 16 daphnia (*) 50 snails (*) 9 aquarium with fish, snails, and algae 1 box of slides with algal colonies 1 M02_BRES7815_04_SE_C02.indd 5 19/03/15 10:55 pm

Welcome message from author
This document is posted to help you gain knowledge. Please leave a comment to let me know what you think about it! Share it to your friends and learn new things together.
Transcript
Copyright © 2016 Pearson Education, Inc.
5
Exercise 2—Windows to a Microscopic World
Preparation Notes
1. Supply lists are based on a class size of 24 students. In situations where class size varies, adjust supplies accordingly.
2. Asterisks (*) next to materials or supplies indicate a nonstandard or special order item. Specific details for obtaining these items can be found in the “Ordering Information” section for each exercise.
3. The times listed to complete activities are conservative estimates of the time required. In our community college classes (with three hours of lab per week), we’re usually able to complete all the activities in an exercise and still have time for short quizzes, introductory remarks, and summarizing important concepts at the end of the class period.
Materials and Supplies
Equipment Quantity
dissecting microscopes 12compound microscopes 24glass stacking dishes, medium (*) 14disposable pipettes 14blank microscope slides 1 boxblank depression microscope slides 1 boxmicroscope cover slips 1 boxlens paper booklets 8blunt metal probes 14squirt bottles (*) 8long gripping tongs (*) 1
Living Materials Quantity
large brown planaria (*) 16daphnia (*) 50snails (*) 9aquarium with fish, snails, and algae 1box of slides with algal colonies 1
M02_BRES7815_04_SE_C02.indd 5 19/03/15 10:55 pm
6
Copyright © 2016 Pearson Education, Inc.
Chemicals Quantity
dropper bottles, iodine or methylene blue 16dropper bottles, physiological saline 16dropper bottles, methyl cellulose (*) 8squirt bottles, pond water 8
Microscope Slides, Prepared Quantity
letter “e” with large letter e (*) 25
Miscellaneous Supplies Quantity
individually wrapped toothpicks (*) 25clean, shiny pennies of the old design (showing the Lincoln Memorial on the back)
12
aquarium tank 1
Preparation Instructions
1. Activity 6: Mix up the stock solutions and place them in the appropriate containers.
2. Activity 7: Set up a filtered aquarium with fish, aquatic plants, and snails. Fish are needed for nutrient cycling to the algae and provide a nice atmosphere in the classroom.
Cover the bottom of the tank with gravel. An undergravel filter works best, but a side-mounted filter is adequate for a small number of organisms.
To maximize algal growth, the tank should have an overhead light or be placed near a window. Algae growth is best if aquaria are set up with the glass slides at least 60 days before they’ll be needed in the classroom.
Arrange open boxes containing blank microscope slides on the gravel across the bottom of the tank. In the boxes, slides should not be stacked and should be arranged for maximal light exposure.
The slides will eventually develop a colony of algae and various pond organisms. These slides will be removed during Activity 7 and examined by the students.
Covered, portable plastic aquaria are available and work quite well for use at satellite locations. Fish, snails, and slide boxes covered with algae can be easily transferred from permanent aquaria for use at other locations.
Setup Instructions
1. No special setup is needed for most activities. Items should be placed in the classroom in convenient locations for easy access by students.
M02_BRES7815_04_SE_C02.indd 6 19/03/15 10:55 pm
7
Copyright © 2016 Pearson Education, Inc.
2. Activities 2 and 6: Rotate the jars of planaria and daphnia between sections so stressed animals can recover.
Metal probes must be thoroughly cleaned before use with living material.
3. Activity 7: Place the long tongs next to the aquarium for easy removal of slide boxes.
Ordering Information (*)
1. Long tongs—Fisher, #15-207, 21 inches long
2. Large brown planaria—Wards, #87-W-2500
3. Daphnia magna—Wards, #87-W-5210
4. Mystery snails—Wards, #87-W-412
5. Letter “e” slides—Triarch, #6-Z1-1
6. Methyl cellulose (ProtoSlo®)—Carolina Biological, #P7-88-5141
7. Aquarium, covered, portable—Carolina Biological, #P7-67-4337C
8. Glass stacking dishes, medium—Carolina Biological, #74-1004, 4 1/2 inches diameter
9. Squirt bottles—Fisher, #03-409-16, 500 ml
10. Aquarium starter kit—Carolina Biological, #P7-L-1256, 20 gallons
Suggestions for Specific Activities
1. Activity 2: Planaria observations
When placing the planaria in the glass dish for viewing, try to keep the pond water concentrated in the center of the dish. When liquid is concentrated in the center, it prevents the planaria from moving up the sides of the petri plate.
When viewing planaria, experiment with light from different directions and various illumination levels to get a good view of various body parts. Start on low power and zoom up for a closer look.
Don’t stain living material. This will kill the organisms.
Planaria should be returned to the stock container when Activity 2 has been completed. If planaria are left on the microscope stage with the light on for too long, they’ll overheat and die.
M02_BRES7815_04_SE_C02.indd 7 19/03/15 10:55 pm
8
Copyright © 2016 Pearson Education, Inc.
2. Activity 6: Cheek cell wet mount
Cheek cells on the unstained slide can be viewed only in very dim light. Students frequently think that there are no cells on their slide, but usually a scraping yields many cells for observation.
3. Activity 6: Daphnia observations
The daphnia will be viewed with depression slides. The depression slides should be kept separate from the other blank slides. For easier cleanup, ask your students to return the slides to the appropriate box.
When using a depression slide, a cover slip isn’t necessary. If a student should lower the lens into the water, ask him or her to dry it thoroughly with lens paper.
A small drop of methyl cellulose (ProtoSlo®) is helpful to slow the daphnia’s movements and make observations easier.
If you have the ability to project from a dissecting microscope onto a screen in the classroom, that’s really helpful. If you have computer access in the classroom, there are several excellent YouTube Websites of daphnia viewed through the microscope, even some of the daphnia giving birth.
4. Activity 7: Aquarium experiment
In the aquaria, you will place plastic boxes of microscope slides (see Preparation Instructions). Because it’s impractical to have everyone stick an arm into the tank and scrape the glass wall, these will substitute.
Use the long tongs to carefully lift a plastic slide box out of the tank. Each group can have a slide. Dry off the back side of the slide (the side with least algal growth) before placing it on the microscope stage.
If a video microscope is available, the entire class can view an exceptionally good slide. Aquarium slides can be viewed with both the dissecting and compound microscopes for comparison.
To avoid potential contamination issues, don’t replace slides in the aquarium after they’ve been viewed on the microscope.
Approximate Time to Complete Activities
Activities 1 and 2 45 minutesActivities 3 and 5 45 minutesActivity 6 30 minutesActivity 7 30 minutes
M02_BRES7815_04_SE_C02.indd 8 19/03/15 10:55 pm
9
Copyright © 2016 Pearson Education, Inc.
Answer Key to Questions
Activity 1
4. Yes, you should see Lincoln in the memorial.
Activity 2
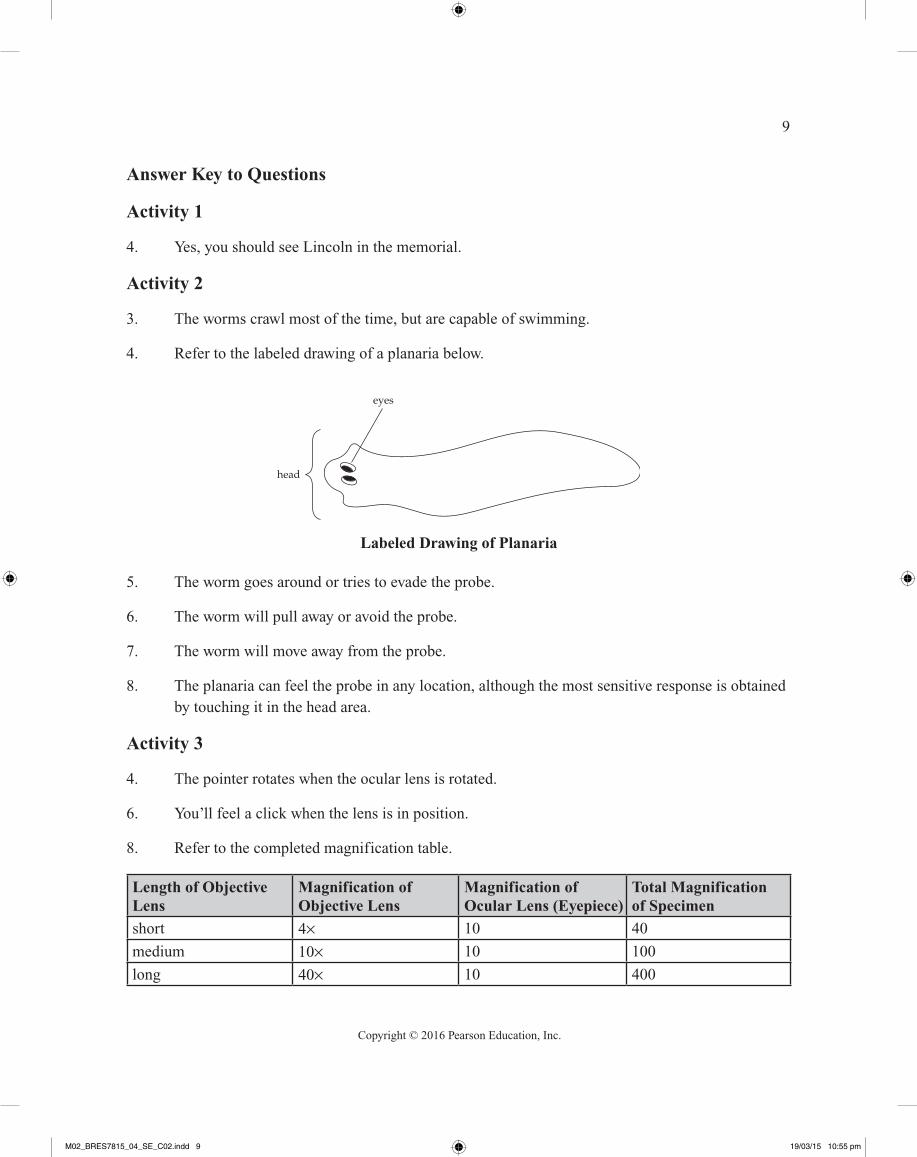
3. The worms crawl most of the time, but are capable of swimming.
4. Refer to the labeled drawing of a planaria below.
5. The worm goes around or tries to evade the probe.
6. The worm will pull away or avoid the probe.
7. The worm will move away from the probe.
8. The planaria can feel the probe in any location, although the most sensitive response is obtained by touching it in the head area.
Activity 3
4. The pointer rotates when the ocular lens is rotated.
6. You’ll feel a click when the lens is in position.
8. Refer to the completed magnification table.
Length of Objective Lens
Magnification of Objective Lens
Magnification of Ocular Lens (Eyepiece)
Total Magnification of Specimen
short 4× 10 40
medium 10× 10 100
long 40× 10 400
Labeled Drawing of Planaria
eyes
head
M02_BRES7815_04_SE_C02.indd 9 19/03/15 10:55 pm

10
Copyright © 2016 Pearson Education, Inc.
12. When you move the level in one direction, the light gets brighter. When you move the level in the opposite direction, the light dims.
Activity 4
Refer to the completed diagram in Figure 2-5.
ocular lens(eyepiece)
objective lens
coarse focus
fine focus
stage controlknobs
mechanicalstage
irisdiaphragm
light
revolvingnosepiece
Figure 2-5 Parts of the Compound MicroscopeCelestron International
Activity 5
Comprehension Check
1. Adjust the iris diaphragm (open it more).
2. Objective lens = 4.Ocular lens = 10.Total magnification (4 × 10) = 40.
M02_BRES7815_04_SE_C02.indd 10 19/03/15 10:55 pm

11
Copyright © 2016 Pearson Education, Inc.
3. Letter e diagram:
4. Upside down and backward.
5. To the right.Toward you.To the left and toward you.
8. Yes.No.The letter “e” will probably need adjustment.The illumination level will probably need adjustment.Larger and more details are visible.
9. No.
10. Smaller. When the field of view decreases, less of the letter “e” is visible at one time. As you increase the magnification, you see less of the specimen.
11. 400×Total magnification = 40 × 10 (ocular) = 400.
Activity 6
Human Epithelial Cells
7. Refer to the following completed diagram of one human cheek cell:
Labeled Drawing of Cheek Cell
cytoplasm
nucleus
cell membrane
M02_BRES7815_04_SE_C02.indd 11 19/03/15 10:55 pm

12
Copyright © 2016 Pearson Education, Inc.
9. Examples include a Pap smear, which removes epithelial cells from the cervix, removal of cheek cells for DNA analysis, and skin cells with abnormal appearances in various body locations.
10. Yes. The cytoplasm, nucleus, and nucleolus are seen more clearly.
Daphnia—An Aquatic Organism
3. Refer to the completed diagram of a daphnia in Figure 2-6 below:
Figure 2-6 Labeled Drawing of Daphnia
bottom of intestine
eggs
heart
brain
eye
M02_BRES7815_04_SE_C02.indd 12 19/03/15 10:55 pm
13
Copyright © 2016 Pearson Education, Inc.
Activity 7
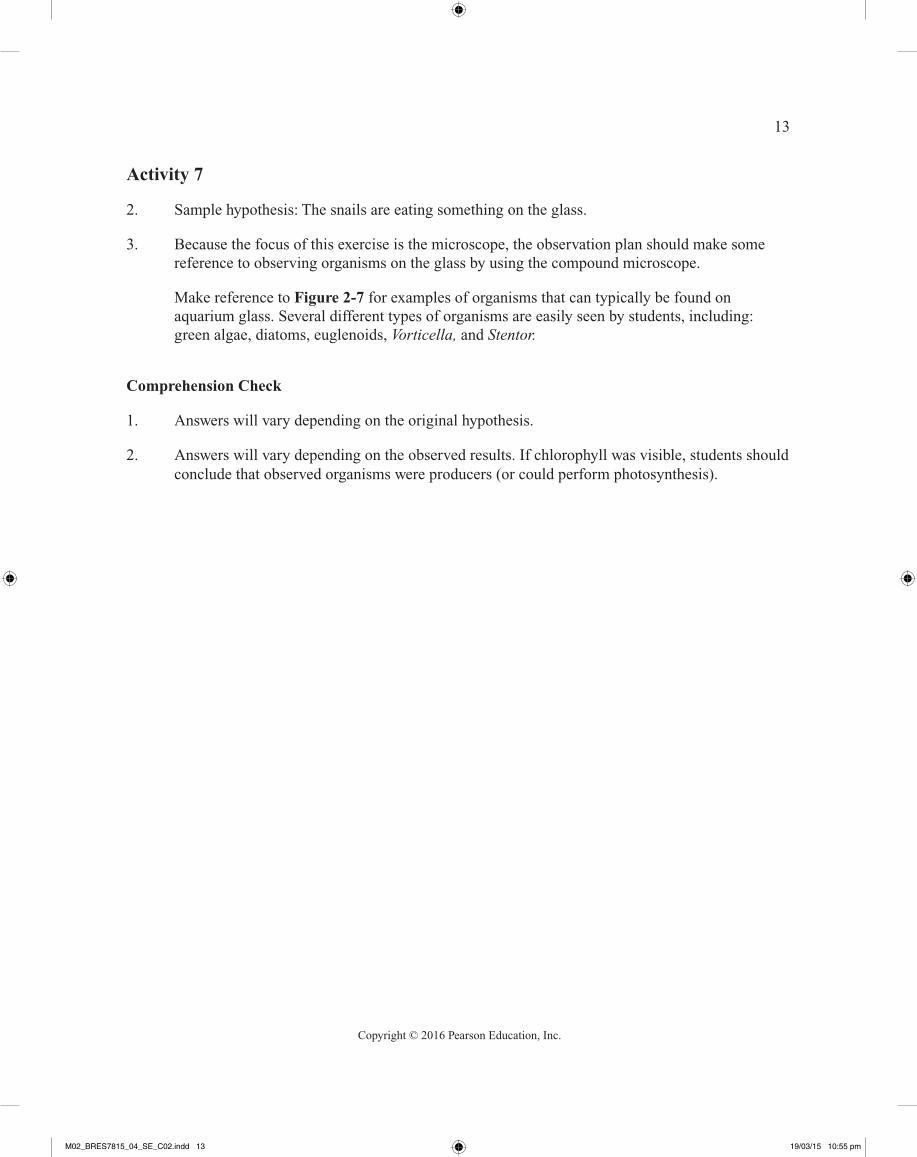
2. Sample hypothesis: The snails are eating something on the glass.
3. Because the focus of this exercise is the microscope, the observation plan should make some reference to observing organisms on the glass by using the compound microscope.
Make reference to Figure 2-7 for examples of organisms that can typically be found on aquarium glass. Several different types of organisms are easily seen by students, including: green algae, diatoms, euglenoids, Vorticella, and Stentor.
Comprehension Check
1. Answers will vary depending on the original hypothesis.
2. Answers will vary depending on the observed results. If chlorophyll was visible, students should conclude that observed organisms were producers (or could perform photosynthesis).
M02_BRES7815_04_SE_C02.indd 13 19/03/15 10:55 pm
Related Documents