Examples Add Roof Details Example 1: Mission Tile Example 2: Mission Tile Edges Only Example 3: Shingle Hips & Ridges Example 4: Metal Standing Seam Example 5: Sheet Metal Hips & Ridges 1

Welcome message from author
This document is posted to help you gain knowledge. Please leave a comment to let me know what you think about it! Share it to your friends and learn new things together.
Transcript

Examples Add Roof Details
Example 1: Mission Tile Example 2: Mission Tile Edges Only Example 3: Shingle Hips & Ridges Example 4: Metal Standing Seam Example 5: Sheet Metal Hips & Ridges
1
Example 1: Mission Tile Details
1. Create a roof using Instant Roof. Double click a roof top face to open the group for editing. Select the roof faces, ridges, hips and rake edges where tile is to be applied. (An alternative is to window-select everything in the group. The script will sort out which edges and faces to place tiles)
2. Choose “Plugins/ Instant Roof/ Add Roof Details”.
3. In the “Roof Details Options” menu, choose “Mission Tile” and choose “OK” to generate the roof tiles:
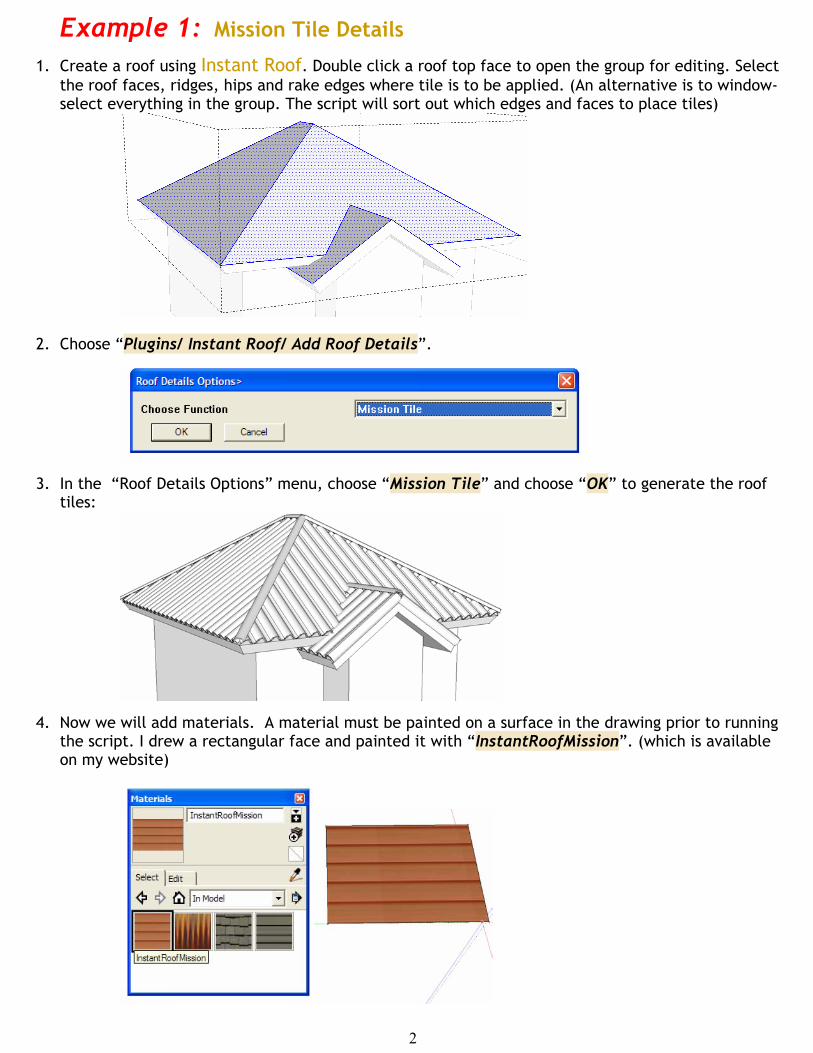
4. Now we will add materials. A material must be painted on a surface in the drawing prior to running the script. I drew a rectangular face and painted it with “InstantRoofMission”. (which is available on my website)
2

When the script applies materials, it aligns the textures. This is useful because it can be tedious to align textures manually. The material should have horizontal bands such as “Wood_Deck” or “Cladding_Siding_Tan” .
5. Select the group that contains the roof tiles, but don’t open it for editing.
6. Choose “Plugins/ Instant Roof/ Add Roof Details”.
7. In the “Roof Details Options” menu, choose “Apply Materials…” and choose “OK”
8. In the “Roof Materials” menu, choose the material from step 4 and choose “OK”
3

Example 2: Mission Tile Edges
1. Create a roof as in the previous example, but add 1” wide x 3” high fascia trim. Double click a roof top face to open the group for editing. Window-select everything in the group.
2. Choose “Plugins/ Instant Roof/ Add Roof Details”.
3. In the “Roof Details Options” menu, choose “Mission Tile Edges with Materials” and choose “OK”
4. In the “Roof Materials” menu pops up, choose “InstantRoofMission” and choose “OK”.
4
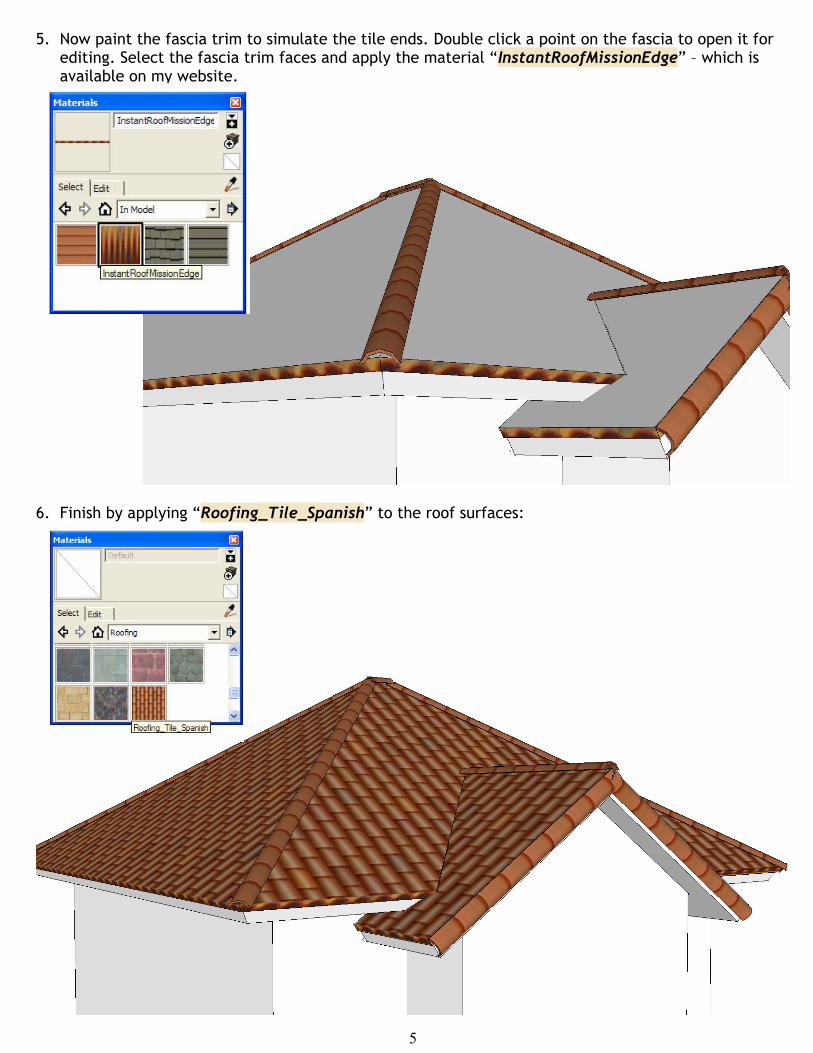
5. Now paint the fascia trim to simulate the tile ends. Double click a point on the fascia to open it for
editing. Select the fascia trim faces and apply the material “InstantRoofMissionEdge” – which is available on my website.
5
6. Finish by applying “Roofing_Tile_Spanish” to the roof surfaces:

Example 3: Shingle Hips and Ridges
1. Create a roof as in the previous example, but make the fascia trim 1” wide x 1” high. Double click a roof top face to open the group for editing. Window-select everything in the group.
2. Paint the selection with a roofing material such as “Roofing_Slate_Red”
3. Choose “Plugins/ Instant Roof Add Roof Details”.
4. In the “Roof Details Options” menu, choose “Shingle Hips and Ridges with Materials” and press “OK”
5. In the “Roof Materials” menu pops up, choose “Roofing_Slate_Red” choose “OK”.
6

Example 4: Metal Standing Seam 1. Create a roof as in Example 1. Double click a roof top face to open the group for editing. Window-
select everything in the group.
2. Choose “Plugins/ Instant Roof/ Add Roof Details”.
3. In the “Roof Details Options” menu, choose “Metal Standing Seam” and press “OK”
7
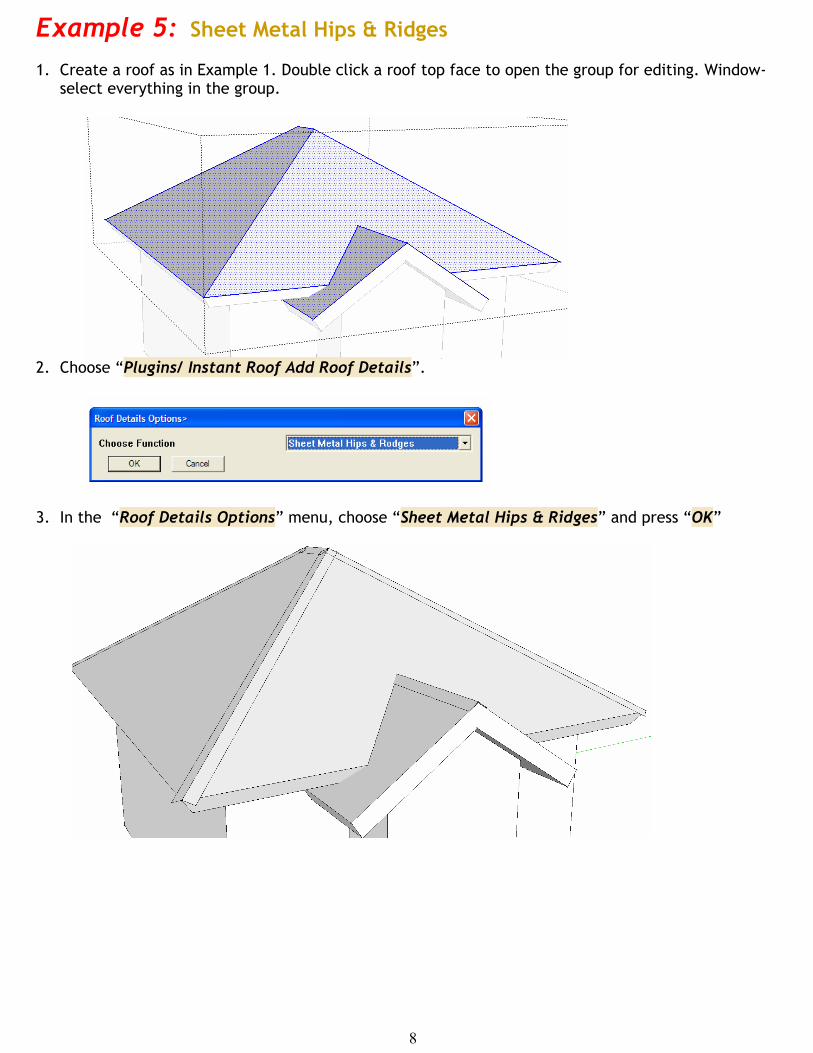
Example 5: Sheet Metal Hips & Ridges 1. Create a roof as in Example 1. Double click a roof top face to open the group for editing. Window-
select everything in the group.
2. Choose “Plugins/ Instant Roof Add Roof Details”.
3. In the “Roof Details Options” menu, choose “Sheet Metal Hips & Ridges” and press “OK”
8
Related Documents