ENGLISH 4 14 HQ460

Welcome message from author
This document is posted to help you gain knowledge. Please leave a comment to let me know what you think about it! Share it to your friends and learn new things together.
Transcript

ENGLISH 4
14H
Q46
0
Important
Read these instructions for use carefully beforeusing the appliance and save them for futurereference.
◗ The appliance is equipped with an automaticvoltage selector and is suitable for mainsvoltages ranging from 100 to 240 volts.
◗ Charge, store and use the appliance at atemperature between 5cC and 35cC.
◗ Do not recharge the shaver in a closed pouch.C ◗ Keep the appliance dry.
Charging
Make sure the appliance is switched off beforeyou start charging it.
When you charge the shaver for the first time orafter a long period of disuse, let it chargecontinuously for 12 hours. Charging normallytakes approx. 8 hours.
Do not leave the appliance connected to themains for more than 24 hours.
Charging the appliance
Charge the appliance when the motor stops orstarts running slower.
Do not recharge the shaver in a closed pouch.
ENGLISH4
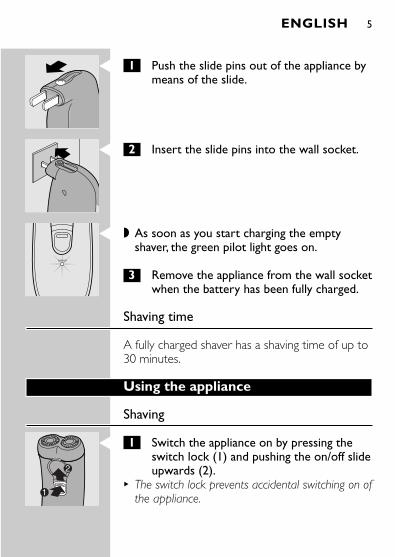
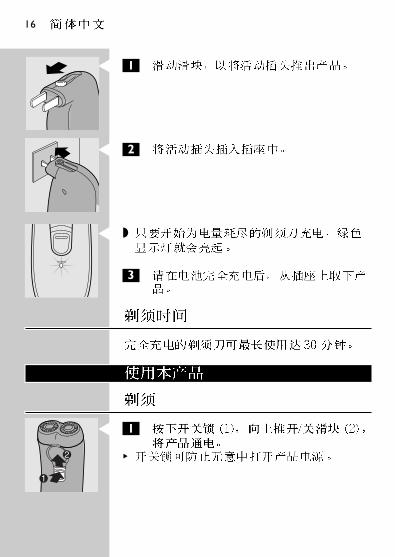
C 1 Push the slide pins out of the appliance bymeans of the slide.
C 2 Insert the slide pins into the wall socket.
C ◗ As soon as you start charging the emptyshaver, the green pilot light goes on.
3 Remove the appliance from the wall socketwhen the battery has been fully charged.
Shaving time
A fully charged shaver has a shaving time of up to30 minutes.
Using the appliance
Shaving
C 1 Switch the appliance on by pressing theswitch lock (1) and pushing the on/off slideupwards (2).
B The switch lock prevents accidental switching on ofthe appliance.
ENGLISH 5
CHARGE
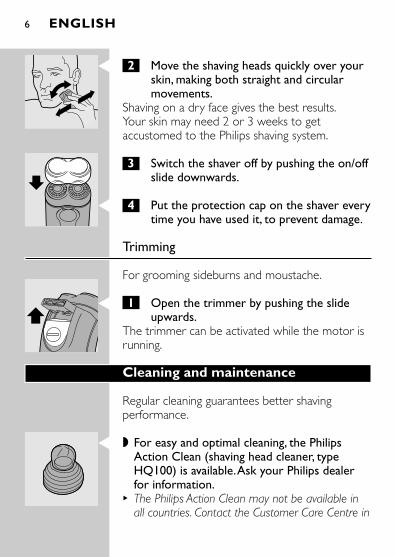
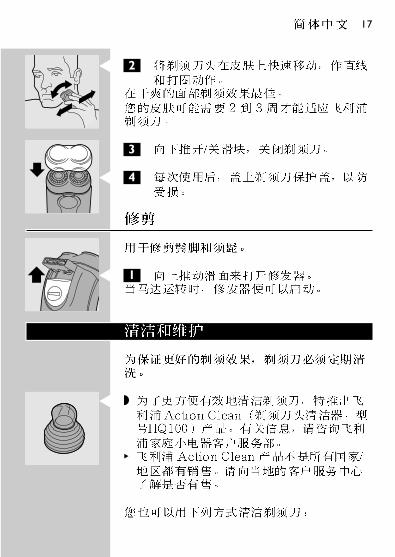
C 2 Move the shaving heads quickly over yourskin, making both straight and circularmovements.
Shaving on a dry face gives the best results.Your skin may need 2 or 3 weeks to getaccustomed to the Philips shaving system.
3 Switch the shaver off by pushing the on/offslide downwards.
C 4 Put the protection cap on the shaver everytime you have used it, to prevent damage.
Trimming
For grooming sideburns and moustache.
C 1 Open the trimmer by pushing the slideupwards.
The trimmer can be activated while the motor isrunning.
Cleaning and maintenance
Regular cleaning guarantees better shavingperformance.
C ◗ For easy and optimal cleaning, the PhilipsAction Clean (shaving head cleaner, typeHQ100) is available.Ask your Philips dealerfor information.
B The Philips Action Clean may not be available inall countries. Contact the Customer Care Centre in
ENGLISH6
your country about the availability of thisaccessory.
You can also clean the shaver in the followingway:
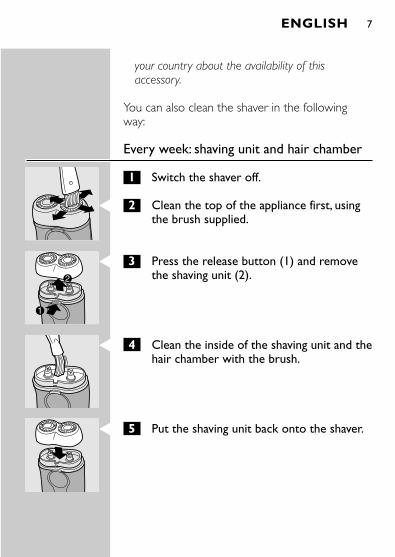
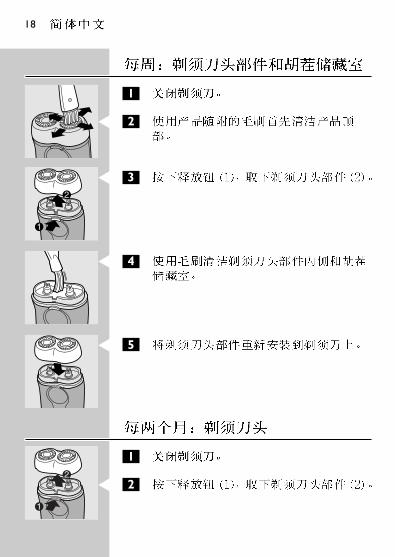
Every week: shaving unit and hair chamber
1 Switch the shaver off.
C 2 Clean the top of the appliance first, usingthe brush supplied.
C 3 Press the release button (1) and removethe shaving unit (2).
C 4 Clean the inside of the shaving unit and thehair chamber with the brush.
C 5 Put the shaving unit back onto the shaver.
ENGLISH 7

Every two months: shaving heads
1 Switch the shaver off.
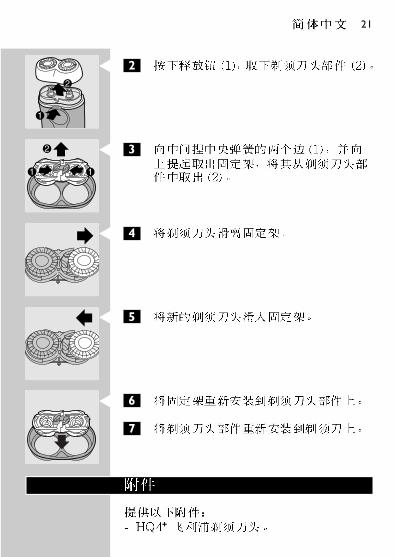
C 2 Press the release button (1) and removethe shaving unit (2).
C 3 Remove the retaining frame by pushing thesides of the central spring towards eachother (1) and lifting the retaining frame outof the shaving unit (2).
C 4 Slide the shaving heads out of the retainingframe and clean them one by one.
Do not mix up the cutters and the guards.This is essential since each cutter has beenground with its corresponding guard for optimalperformance. If you accidentally mix the sets up, itcould take several weeks before optimal shavingperformance is restored.
C 5 Clean the cutter with the short-bristledside of the brush.
Brush carefully in the direction of the arrow.
C 6 Brush the guard.
ENGLISH8
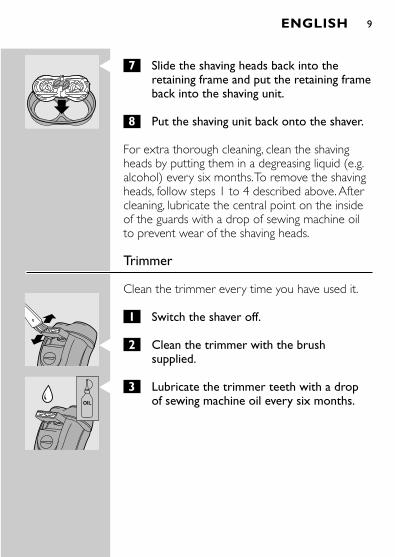
C 7 Slide the shaving heads back into theretaining frame and put the retaining frameback into the shaving unit.
8 Put the shaving unit back onto the shaver.
For extra thorough cleaning, clean the shavingheads by putting them in a degreasing liquid (e.g.alcohol) every six months.To remove the shavingheads, follow steps 1 to 4 described above.Aftercleaning, lubricate the central point on the insideof the guards with a drop of sewing machine oilto prevent wear of the shaving heads.
Trimmer
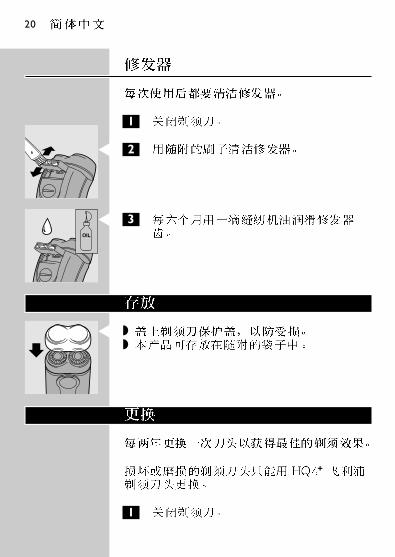
Clean the trimmer every time you have used it.
1 Switch the shaver off.
C 2 Clean the trimmer with the brushsupplied.
C 3 Lubricate the trimmer teeth with a dropof sewing machine oil every six months.
ENGLISH 9

Storage
C ◗ Put the protection cap on the shaver toprevent damage.
◗ The appliance can be stored in the pouchsupplied.
Replacement
Replace the shaving heads every two years foroptimal shaving results.
Replace damaged or worn shaving heads withHQ4« Philips shaving heads only.
1 Switch the shaver off.
C 2 Press the release button (1) and removethe shaving unit (2).
C 3 Remove the retaining frame by pushing thesides of the central spring towards eachother (1) and lifting the retaining frame outof the shaving unit (2).
C 4 Slide the shaving heads out of the retainingframe.
ENGLISH10
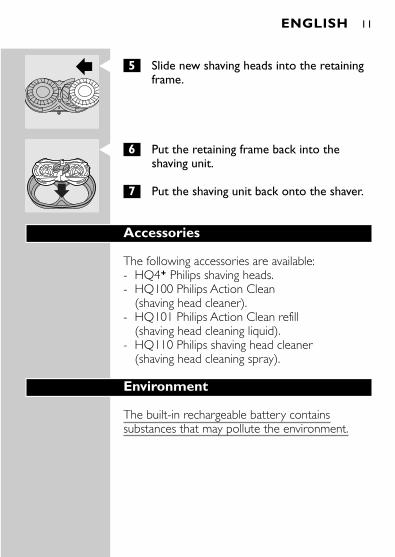
C 5 Slide new shaving heads into the retainingframe.
C 6 Put the retaining frame back into theshaving unit.
7 Put the shaving unit back onto the shaver.
Accessories
The following accessories are available:- HQ4« Philips shaving heads.- HQ100 Philips Action Clean
(shaving head cleaner).- HQ101 Philips Action Clean refill
(shaving head cleaning liquid).- HQ110 Philips shaving head cleaner
(shaving head cleaning spray).
Environment
The built-in rechargeable battery containssubstances that may pollute the environment.
ENGLISH 11
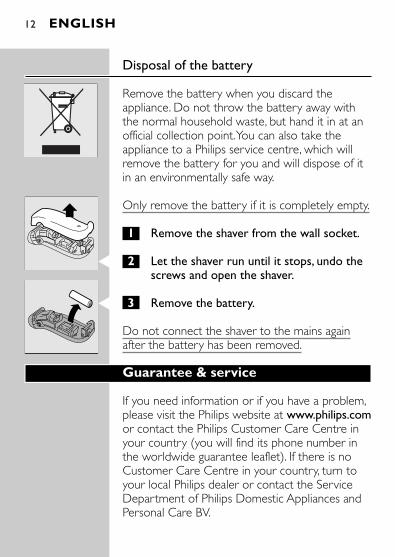
Disposal of the battery
Remove the battery when you discard theappliance. Do not throw the battery away withthe normal household waste, but hand it in at anofficial collection point.You can also take theappliance to a Philips service centre, which willremove the battery for you and will dispose of itin an environmentally safe way.
Only remove the battery if it is completely empty.
1 Remove the shaver from the wall socket.
C 2 Let the shaver run until it stops, undo thescrews and open the shaver.
C 3 Remove the battery.
Do not connect the shaver to the mains againafter the battery has been removed.
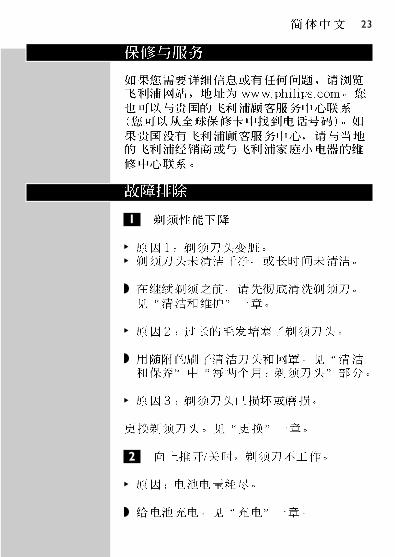
Guarantee & service
If you need information or if you have a problem,please visit the Philips website at www.philips.comor contact the Philips Customer Care Centre inyour country (you will find its phone number inthe worldwide guarantee leaflet). If there is noCustomer Care Centre in your country, turn toyour local Philips dealer or contact the ServiceDepartment of Philips Domestic Appliances andPersonal Care BV.
ENGLISH12
Troubleshooting
1 Reduced shaving performance
B Cause 1: the shaving heads are dirty.
B The shaver has not been cleaned well enough orhas not been cleaned for a long time.
◗ Clean the shaver thoroughly before youcontinue shaving. See chapter 'Cleaning andmaintenance'.
B Cause 2: long hairs are obstructing the shavingheads.
◗ Clean the cutters and guards with the brushsupplied. See chapter 'Cleaning andmaintenance', section 'Every two months:shaving heads'.
B Cause 3: the shaving heads are damaged or worn.
Replace the shaving heads. See chapter'Replacement'.
2 The shaver does not work when the on/offslide is pushed upwards.
B Cause: the battery is empty.
◗ Recharge the battery. See chapter 'Charging'.
ENGLISH 13

14

15
◗
◗c c
◗
C ◗
16
C 1
C 2
C ◗
3
C 1
B
CHARGE
17
C 2
3
C 4
C 1
C ◗
B
18
1
C 2
C 3
C 4
C 5
1
C 2

19
C 3
C 4
C 5
C 6
C 7
8
20
1
C 2
C 3
C ◗◗
«
1
21
C 2
C 3
C 4
C 5
C 6
7
«

22
1
C 2
C 3
1
B
B
◗
B
◗
B
2
B
◗
23

24
2006/01/04

25

26
4222 002 42286
Related Documents


