E 7160 E 7260 Evolution ® Radial Gas Engines GAS/PETROL

Welcome message from author
This document is posted to help you gain knowledge. Please leave a comment to let me know what you think about it! Share it to your friends and learn new things together.
Transcript
E7160E7260
Evolution® Radial Gas EnginesGAS/PETROL
EN
2
NOTICE
All instructions, warranties and other collateral documents are subject to change at the sole discretion of Horizon Hobby, Inc. For up-to-date product literature, visit horizonhobby.com and click on the support tab for this product.
The following terms are used throughout the product literature to indicate various levels of potential harm when operating this product:
NOTICE: Procedures, which if not properly followed, create a possibility of physical property damage AND a little or no possibility of injury.
CAUTION: Procedures, which if not properly followed, create the probability of physical property damage AND a possibility of serious injury.
WARNING: Procedures, which if not properly followed, create the probability of property damage, collateral damage, serious injury or death OR create a high probability of superficial injury.
Meaning of Special Language
WARNING: Read the ENTIRE instruction manual to become familiar with the features of the product before operating. Failure to operate the product correctly can result in damage to the product, personal property and cause serious injury.
This is a sophisticated hobby product and NOT a toy. It must be operated with caution and common sense and requires some basic mechanical ability. Failure to operate this Product in a safe and responsible manner could result in injury or damage to the product or other property. This product is not intended for use by children without direct adult supervision. Do not attempt disassembly, use with incompatible components or augment product in any way without the approval of Horizon Hobby, Inc. This manual contains instructions for safety, operation and maintenance. It is essential to read and follow all the instructions and warnings in the manual, prior to assembly, setup or use, in order to operate correctly and avoid damage or serious injury.
CAUTION: This product can become extremely hot when in use, which could lead to burns.
Age Recommendation: Not for children under 14 years. This is not a toy.
Safety Warnings
Model engines produce a substantial amount of power, which can create unsafe situations if not used correctly. Always use common sense and observe all safety precautions when operating, handling or performing any procedure involving your engine. Failure to follow safety precautions could result in serious injury and property damage.
• Always ensure spectators, especially children, are at least 30 feet away when running the engine.
• Always ensure that the propeller is securely attached to the engine shaft and all retaining fasteners are tightened properly before EACH flight. Use of blue threadlock to tighten nuts is advisable.
• Always keep small parts out of the reach of children as they can be choking hazards.
• Always secure the airplane before powering the engine.
• Always keep your face and body away from the path of the propeller blades when starting or running your engine.
• Always stand behind the propeller when making carburetor adjustments.
• Always wear safety glasses or goggles when starting and running your engine.
• Always keep your fuel in a safe place away from sparks, heat or anything that can ignite.

EN
3
• Always ensure the aircraft is secure and will not move once the engine is started.
• Always rebind your transmitter to your receiver(s) after setup and before first flight.
• Always ensure the throttle failsafe is set to low throttle in your transmitter.
• Always perform a range check prior to flight.
• Always cut off the fuel supply (pinch or disconnect the fuel line to the carburetor) or use the throttle linkage to shut off the air in order to stop the engine.
• Never use hands, fingers, or any other body part to stop the propeller.
• Never throw any object into a propeller to stop it.
• Never run the engine in the vicinity of loose small objects, such as gravel or sand, to avoid the propeller uncontrollably throwing such materials.
• Never wear loose clothing or a loose neckstrap when operating your model engine as these items could become entangled in the propeller.
• Never have loose objects such as screwdrivers, pencils, etc. in your pockets when operating your model engine. These could fall into the propeller.
• Never allow fuel to come into contact with eyes or mouth. Gasoline and other fuels used in model engines are poisonous.
• Always ensure gasoline and fuel are stored in a clearly marked container away from the reach of children.
Precautionary Guidelines
• Always mount the engine securely on a bench mount or high-quality engine mount.
• Always use the correct size and pitch of propeller for your engine. Refer to the Propeller Chart in this manual.
• Always confirm proper balance of your propeller prior to installation of the engine. Failure to do so could result in damage to the engine and/or airframe.
• Always utilize an electric starter to start your engine.
• Always discard any propeller that is nicked, scratched, cracked or damaged in any way.
• Always run your model engine in a well-ventilated area. Model engines can produce possibly harmful carbon monoxide fumes.
• Always store your fuel safely in a sealed, water-resistant container.
• Always store fuel in a cool, dry location. Do not allow fuel containers to come in direct contact with concrete, as the fuel may absorb moisture.
• Always responsibly discard fuel if there is condensation and/or water inside the fuel container.
• Never return unused fuel from the fuel tank back into the fuel container.
• Never attempt to repair or modify a propeller beyond its intended use.
• Never handle model engines, mufflers and/or tuned pipes until they have had time to cool. They can become extremely hot when in use.

EN
IntroductionThank you for purchasing an Evolution® radial engine, one of the finest engines in the market-place today. Evolution is committed to you having a positive experience and a lifetime of great operation with your new engine.
It is important that you read the engine manual before starting the engine for the first time. Evolution radial engines have different requirements than engines that you may have operated in the past. The manual provides important information for installing the engine, selecting the correct propeller, fuel requirements and proper engine break-in procedures.
Engine Specifications
Engine EVOE7160 EVOE7260
type spark ignition spark ignition
cylinders 7 7
capacity 9.8 cu. in (160.0cc) 15.9 cu. in (260.0cc)
capacity per cylinder 1.40 cu. in (22.9cc) 2.26 cu. in (37.1cc)
bore 1.19 in (30.2mm) 1.41 in (35.7mm)
stroke 1.26 in (32.0mm) 1.47 in (37.0mm)
power 10.6 hp 15.6 hp
RPM range 1000–6000 1000–5500
maximum RPM 6300 6000
engine diameter 11.0 in (28 cm) 12.6 in (32 cm)
engine length 10.2 in (26 cm) 10.6 in (27 cm)
weight 10.6 lb (4.8 kg) 14.8 lb (6.7 kg)
fuel usage (approx.) 1.1 oz (30 ml) per minute 1.75 oz (50 ml) per minute
propellers 2-Blade: 27 x 10–28 x 12 3-Blade: 26 x 12
2-Blade: 32 x 12, 32 x 14, 34 x 16 3-Blade: 30 x 12, 30 x 16, 30 x 18
Needed to Complete• 2-stroke oil • Engine baffles
• Propeller • Electronic ignition battery (2S 7.4V Li-Po or 6V Ni-MH)
• Fuel line (3.5mm ID) • Electronic ignition switch
• Engine mounting screws
Installing the Engine in the AirframeProperly installing the engine to either the airframe or an engine test stand for break-in is crucial to getting the most power and longest life from your engine.
WARNING: Always attach the engine mounting ring to a flat plate surface, such as 6–8mm plywood or carbon fiber plate.
WARNING: Never use a standoff between the firewall and the mounting ring. Vibration between the standoff and the mounting ring will damage the mounting ring and cause the engine to separate from the airframe.

EN
5
2. Use four steel screws (not included) to attach the engine mounting ring to the firewall. The size of the mounting ring screws will vary depending on the aircraft. Always use the largest size screw that will fit through the mounting ring.
To keep the engine from coming loose in flight:
Firewall with blind nuts installed: Always use split washers between the mounting ring screws and the mounting ring.
Firewall with through bolts installed: Always use nylon locking nuts with bolts through the firewall.
1. Install the engine on the airframe with Cylinder #1 in the top (12:00) position (Cylinder #1 is above the Evolution Engines logo). You can modify this position if you are using the optional collector ring and you want the exhaust to exit the cowl in a specific direction.
EVOLUTION
2
3
45
6
7
1
3. Make sure the fuel tank is no farther than 200mm (8 in) from the back of the firewall. • Always use a fuel filter inside the fuel tank.
• We recommend using large (3.5mm) inner diameter fuel line.
• Make sure there are no sharp bends in the fuel line between the fuel tank and the engine.
4. Attach the throttle servo linkage to the throttle bellcrank on the engine.
5. Add your choice of activation mechanism (manually operated rod or servo operated pushrod) for the choke lever.
Installing the Electronic Ignition
NOTICE: Always observe proper polarity when connecting the ignition battery to the ignition unit. The ignition unit does not include reverse polarity protection. Ignition unit damage caused by reverse polarity is not covered under warranty.
An electronic ignition is included with your engine. The spark plug wires are labeled for each cylinder—ensure the spark plug wires are connected to the correct cylinders. Connecting the spark plug wires to the incorrect cylinders will change the firing order and the engine will not run correctly.

EN
The electronic ignition requires a 6—7.4V 2500mAh battery. For the best performance, we recommend a 7.4V 2S Li-Po battery (minimum 2500mAh) and a suitable switch (JRPA001). A voltage regulator is not required for use with a 7.4V 2S Li-Po battery.
Engine Cooling RequirementsIt is very important to consider adequate cooling inside the airplane cowl. Engines require a cooling airflow exhaust:intake ratio of 3:1 to 5:1. A large open cowl may lead you to believe there is adequate cooling; however, you must make sure air is flowing through the cowl and the cylinder head fins. Achieving the proper ratio typically requires cowl and/or engine baffles to reduce the open intake area.
1. Ensure there is adequate cooling air moving through the cylinder head cooling fins. The intake air tends to move through the path of least resistance (between the cylinders) instead of through the cylinder cooling fins.
2. If necessary, add baffles to the engine to prevent air from moving between the cylinders. Engine baffles force cool air through the cooling fins and greatly reduce the intake area in the front of the cowl.
3. Add cooling baffles to the engine cowl between the top of the cylinder heads and the inside of the cowl.
4. Do not cover the engine exhaust tube with the baffle. The exhaust tube requires direct air cooling to prevent damage to the exhaust valve.
Propeller SelectionPropeller selection is critical for proper engine operation. You can find recommended propel-lers and operating RPM ranges in the specification chart. Evolution radial engines have a lower operating RPM range and greater torque within that range that require more blade pitch and increased in-air pitch speed for your airplane.
To increase climbing and acceleration: Increase propeller diameter and decrease blade pitch.
To increase top speed: Decrease propeller diameter and increase blade pitch.
Make sure the propeller is securely mounted to the crankshaft before attempting to start the engine.
1. Remove the wire circlip from the crankshaft in front of the propeller nut.
2. Install the propeller on the crankshaft.
3. Secure the propeller with the hexagonal nut.
4. Securely fasten the circlip on the outside of the hexagonal nut.
WARNING: NEVER start the engine without the circlip securely fastened. Doing so may result in serious injury, as the propeller may become loose once the engine is started.
Fuel SelectionBreak-in Fuel Normal Flying Fuel
gasoline:2-stroke oil 32:1 40:1
Engine Break-In ProcessA good break-in process is essential to the longevity and performance of your Evolution radial engine. You can complete the break-in process by either mounting the engine on a test stand or on an airframe. If you choose to mount the engine on an airframe, remove the cowl during break-in to ensure adequate cooling.

EN
7
Specific fuel is required for the break-in process. Please refer to the chart above for the proper fuel. Break-in fuel contains additional oil compared to fuel you will use for everyday flying. The additional oil is critical for cooling and removing break-in debris from the engine.
Run the engine through four tanks of fuel (32 oz/1000mL) for 3—4 minutes at a time, allowing the engine to cool between runs. Vary the throttle between idle and ¾ throttle for the first 30 minutes of engine run time. Do not exceed ¾ throttle during the break-in. The engine break-in process is complete after the first four tanks of fuel and you can begin tuning the engine for normal flying.
Checking for a Flooded CylinderBecause of the nature of radial engines, it is not uncommon for the lower cylinders to accumulate excess fuel or oil either in storage or during the priming process. Before beginning the starting process be sure to:
1. Rotate the propeller by hand. During the rotation, if you encounter a point where there is serious resistance to the rotation, STOP. This is an indication of a flooded cylinder and what you are feeling is hydraulic lock. Any further attempts to force the rotation of the engine can result in damage to the cylinder or conrod.
2. If you encountered hydraulic lock, remove the spark plug from the lower two cylinders and the engine should rotate freely. Continue to rotate until all the excess fluid has been removed from the cylinder.
3. Reinstall the spark plug and continue with the starting process.
Starting the EngineUse a high quality gear oil to lubricate the outer parts of the valve train at the beginning of each flying day.
1. Fill the fuel tank with fuel.
2. Power off the electronic ignition.
3. Make sure the fuel lines are properly connected to the carburetor.
4. Open the throttle to full open. The carburetor barrel should be fully opened.
5. Place the choke lever over the carburetor opening.
6. Rotate the propeller 3 or 4 times until you see fuel moving through the fuel lines.
7. Remove the choke lever from the carburetor opening and move the throttle stick to ¼ throttle.
8. Power on the electronic ignition. Make sure the battery is fully charged.
Engine TuningThe break-in settings for the carburetor needles are:
High-speed needle: 1 3/4 turns open
Low-speed needle: 1 3/4 turns open
Use a tachometer (HAN111 or HAN156) to tune the engine based on RPM.
WARNING: Always adjust the carburetor from behind the propeller. Keep all loose items away from the propeller at all times. Never reach over or around the propeller.
1. Start the engine.
2. Move the throttle stick up until the engine is running at approximately 2,000 rpm.
3. If you are using separate exhaust pipes, use a temperature gun to make sure hot exhaust is exiting all engine cylinders. If you are using a collector ring, use a temperature gun to make sure all the cylinder temperatures are similar and firing smoothly.
EN
8
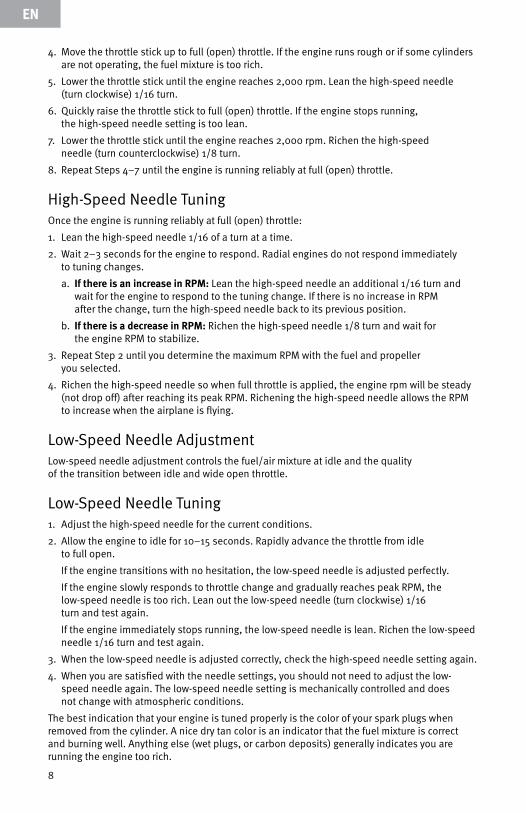
4. Move the throttle stick up to full (open) throttle. If the engine runs rough or if some cylinders are not operating, the fuel mixture is too rich.
5. Lower the throttle stick until the engine reaches 2,000 rpm. Lean the high-speed needle (turn clockwise) 1/16 turn.
6. Quickly raise the throttle stick to full (open) throttle. If the engine stops running, the high-speed needle setting is too lean.
7. Lower the throttle stick until the engine reaches 2,000 rpm. Richen the high-speed needle (turn counterclockwise) 1/8 turn.
8. Repeat Steps 4–7 until the engine is running reliably at full (open) throttle.
High-Speed Needle TuningOnce the engine is running reliably at full (open) throttle:
1. Lean the high-speed needle 1/16 of a turn at a time.
2. Wait 2–3 seconds for the engine to respond. Radial engines do not respond immediately to tuning changes.
a. If there is an increase in RPM: Lean the high-speed needle an additional 1/16 turn and wait for the engine to respond to the tuning change. If there is no increase in RPM after the change, turn the high-speed needle back to its previous position.
b. If there is a decrease in RPM: Richen the high-speed needle 1/8 turn and wait for the engine RPM to stabilize.
3. Repeat Step 2 until you determine the maximum RPM with the fuel and propeller you selected.
4. Richen the high-speed needle so when full throttle is applied, the engine rpm will be steady (not drop off) after reaching its peak RPM. Richening the high-speed needle allows the RPM to increase when the airplane is flying.
Low-Speed Needle AdjustmentLow-speed needle adjustment controls the fuel/air mixture at idle and the quality of the transition between idle and wide open throttle.
Low-Speed Needle Tuning1. Adjust the high-speed needle for the current conditions.
2. Allow the engine to idle for 10–15 seconds. Rapidly advance the throttle from idle to full open.
If the engine transitions with no hesitation, the low-speed needle is adjusted perfectly.
If the engine slowly responds to throttle change and gradually reaches peak RPM, the low-speed needle is too rich. Lean out the low-speed needle (turn clockwise) 1/16 turn and test again.
If the engine immediately stops running, the low-speed needle is lean. Richen the low-speed needle 1/16 turn and test again.
3. When the low-speed needle is adjusted correctly, check the high-speed needle setting again.
4. When you are satisfied with the needle settings, you should not need to adjust the low-speed needle again. The low-speed needle setting is mechanically controlled and does not change with atmospheric conditions.
The best indication that your engine is tuned properly is the color of your spark plugs when removed from the cylinder. A nice dry tan color is an indicator that the fuel mixture is correct and burning well. Anything else (wet plugs, or carbon deposits) generally indicates you are running the engine too rich.

EN
9
MaintenanceThere are a few things you must do to ensure proper operation of your Evolution radial engine.
1. Use a high quality gear oil to lubricate the outer parts of the valve train at the beginning of each flying day.
2. Occasionally, you will need to adjust the valves. Adjust the valves the first time after one hour of engine run time. After the first hour, monitor the valve lash and adjust the valves as needed. Adjust the valves when the engine is cool. The lash is set at 0.1mm–0.25mm at the factory.
Evolution Radial Valve Adjustment Guidelines
1. Place the engine in a position (on or off your airplane) that allows you easy access to the valves on all the cylinders.
2. Remove the spark plugs from all the cylinders. It is much easier to determine Top Dead Center (TDC) without the compression caused by installed spark plugs.
3. Attach a propeller or other turning device (such as a short block of wood with the appropriate hole for the crankshaft) to the crankshaft and tighten it so you can easily rotate the crankshaft throughout this process.
4. Start with the number 1 cylinder (this should be the upright cylinder above the Evolution logo).
a. Rotate the crankshaft counter-clockwise and observe the pushrod movement.
b. Note when you see the exhaust and then the intake pushrod move up to open the valves. This will occur during one rotation of the crankshaft.
c. When the piston reaches the top of the cylinder during the next rotation, you are at the TDC of the compression/firing stroke.
d. Position the piston at TDC of the compression/firing stroke. It is helpful to place a short piece of wooden dowel. (Don’t use steel, as you can mar the inner surface of the cylinder.)
5. Use a feeler gauge to check the valve lash between the rocker arm and the top of the valve.
a. We recommend setting the valve lash as close to 0.1mm as possible. If the valve lash is between 0.1 and 0.15mm (.004–.006”), you do not need to adjust the valve lash. The settings for the intake and exhaust valves are the same.
b. If adjustment is needed, adjust the valves by loosening the locking nut and adjusting the screw until you can just feel the drag of the .1mm (.004”) feeler gauge as you pull it between the valve and rocker arm.
c. Tighten the locking nut and recheck the valve clearance. Sometimes when tightening the nut the adjustment will change slightly.
6. Because the cam gear of our engines is a shared cam gear with all the cylinders and rotates at a 1:6 ratio, there are actually 6 different positions on the cam gear that need to be checked. Repeat step 4 & 5 above four more times to check each of these positions, rotating the crankshaft two full revolutions between each check. If you find that the valve lash is smaller, then readjust that valve. If it is greater, do not readjust the valve. A little loose is safer than too tight.
7. Now move onto the next cylinder in a counter-clockwise direction and repeat steps 4 through 6. Do this for all 7 cylinders.
Congratulations. You have now completed the valve adjustment process. This maintenance should not be required again for another 10 hours of running time.

EN
10
Replacement Parts
NOTICE: If a repair outside of normal maintenance as noted in the manual is required, you MUST send the engine to an authorized Horizon Service Center for repair. Any repair work performed outside of an authorized Horizon Service Center will void the warranty.
EVOE7160 EVOE7260
Propeller Washer EVO716001 EVO726001
Propeller Drive EVO716002 EVO726002
Propeller Nut EVO716029 EVO726029
Prop Drive Lock Cone EVO716035 EVO726035
Countersunk screw (Propeller washer) EVO716060 EVO726060
Push Rod Sub-Assembly EVO716016A EVO726016A
Rocker Arm Sub-Assembly EVO716027A EVO726027A
Inlet & Exhaust Sub-Assembly EVO716034A EVO726034A
Ignition Unit EVO726053 EVO726053
Spark plug EVO7260103 EVO7260103
Silencer Ring EVO7160114 EVO7260114
Carburetor Sub-Assembly EVO7160102A EVO7260102A

EN
11
Exploded View
Silencer Ring
Rocker Arm Sub-Assembly
Intake and Exhaust Pipe Sub-Assembly
Push Rod and Pin Prop Drive Lock Cone
Propeller Drive
Propeller Washer
Propeller Nut

EN
12
1 Year Limited WarrantyWhat this Warranty CoversHorizon Hobby, Inc., (Horizon) warranties that the Products purchased (the “Product”) will be free from defects in materials and work-manship for a period of 1 year from the date of purchase by the Purchaser.
What is Not CoveredThis warranty is not transferable and does not cover (i) cosmetic damage, (ii) damage due to acts of God, accident, misuse, abuse, neg-ligence, commercial use, or due to improper use, installation, operation or maintenance, (iii) modification of or to any part of the Prod-uct, (iv) attempted service by anyone other than a Horizon Hobby authorized service center, or (v) Products not purchased from an authorized Horizon dealer.
OTHER THAN THE EXPRESS WARRANTY ABOVE, HORIZON MAKES NO OTHER WARRANTY OR REPRESENTATION, AND HEREBY DISCLAIMS ANY AND ALL IMPLIED WARRANTIES, INCLUD-ING, WITHOUT LIMITATION, THE IMPLIED WAR-RANTIES OF NON-INFRINGEMENT, MERCHANT-ABILITY AND FITNESS FOR A PARTICULAR PURPOSE. THE PURCHASER ACKNOWLEDGES THAT THEY ALONE HAVE DETERMINED THAT THE PRODUCT WILL SUITABLY MEET THE REQUIREMENTS OF THE PURCHASER’S INTENDED USE.
Purchaser’s RemedyHorizon’s sole obligation and purchaser’s sole and exclusive remedy shall be that Horizon will, at its option, either (i) service, or (ii) replace, any Product determined by Horizon to be defective. Horizon reserves the right to in-spect any and all Product(s) involved in a war-ranty claim. Service or replacement decisions are at the sole discretion of Horizon. Proof of purchase is required for all warranty claims. SERVICE OR REPLACEMENT AS PROVIDED UNDER THIS WARRANTY IS THE PURCHASER’S SOLE AND EXCLUSIVE REMEDY.
Limitation of LiabilityHORIZON SHALL NOT BE LIABLE FOR SPECIAL, INDIRECT, INCIDENTAL OR CONSEQUENTIAL DAMAGES, LOSS OF PROFITS OR PRODUCTION OR COMMERCIAL LOSS IN ANY WAY, REGARD-LESS OF WHETHER SUCH CLAIM IS BASED IN CONTRACT, WARRANTY, TORT, NEGLIGENCE, STRICT LIABILITY OR ANY OTHER THEORY OF LI-ABILITY, EVEN IF HORIZON HAS BEEN ADVISED
OF THE POSSIBILITY OF SUCH DAMAGES. Fur-ther, in no event shall the liability of Horizon exceed the individual price of the Product on which liability is asserted. As Horizon has no control over use, setup, final assembly, modi-fication or misuse, no liability shall be as-sumed nor accepted for any resulting damage or injury. By the act of use, setup or assembly, the user accepts all resulting liability. If you as the purchaser or user are not prepared to accept the liability associated with the use of the Product, purchaser is advised to return the Product immediately in new and unused condition to the place of purchase.
LawThese terms are governed by Illinois law (without regard to conflict of law principals). This warranty gives you specific legal rights, and you may also have other rights which vary from state to state. Horizon reserves the right to change or modify this warranty at any time without notice.
Warranty Services
Questions, Assistance, and ServicesYour local hobby store and/or place of pur-chase cannot provide warranty support or service. Once assembly, setup or use of the Product has been started, you must contact Horizon directly. This will enable Horizon to better answer your questions and service you in the event that you may need any as-sistance. For questions or assistance, please direct your email to [email protected], or call 877.504.0233 toll free to speak to a Product Support representative. You may also find information on our website at www.horizonhobby.com.
Inspection or ServicesIf this Product needs to be inspected or ser-viced, please use the Horizon Online Service Request submission process found on our website or call Horizon to obtain a Return Merchandise Authorization (RMA) number. Pack the Product securely using a shipping carton. Please note that original boxes may be included, but are not designed to withstand the rigors of shipping without additional protection. Ship via a carrier that provides tracking and insurance for lost or damaged parcels, as Horizon is not responsible for mer-chandise until it arrives and is accepted at our

EN
13
facility. An Online Service Request is available at http://www.horizonhobby.com under the Support tab. If you do not have internet access, please contact Horizon Product Support to obtain a RMA number along with instructions for submitting your product for service. When calling Horizon, you will be asked to provide your complete name, street address, email address and phone number where you can be reached during business hours. When sending product into Horizon, please include your RMA number, a list of the included items, and a brief summary of the problem. A copy of your original sales receipt must be included for warranty consideration. Be sure your name, address, and RMA number are clearly written on the outside of the shipping carton.
NOTICE: Do not ship LiPo batteries to Horizon. If you have any issue with a LiPo battery, please contact the appropriate Horizon Product Support office.
Warranty RequirementsFor Warranty consideration, you must include your original sales receipt verifying the proof-of-purchase date. Provided warranty conditions have been met, your Product will be serviced or replaced free of charge. Service or replacement decisions are at the sole discretion of Horizon.
Non-Warranty ServiceShould your service not be covered by war-ranty service will be completed and payment will be required without notification or estimate of the expense unless the expense exceeds 50% of the retail purchase cost. By submitting the item for service you are agree-ing to payment of the service without notifica-tion. Service estimates are available upon request. You must include this request with your item submitted for service. Non-warranty service estimates will be billed a minimum of ½ hour of labor. In addition you will be billed for return freight. Horizon accepts money orders and cashiers checks, as well as Visa, MasterCard, American Express, and Discover cards. By submitting any item to Horizon for service, you are agreeing to Horizon’s Terms and Conditions found on our website http://www.horizonhobby.com/Service/Request/.
Contact Information
Horizon Hobby Address Phone Number/Email Address
United States
Horizon Service Center (Electronics and engines)
4105 Fieldstone Rd Champaign, Illinois 61822 USA
877-504-0233 Online Repair Request: www.horizonhobby.com/service
Horizon Product Support (All other products)
4105 Fieldstone Rd Champaign, Illinois 61822 USA
877-504-0233 [email protected]
United Kingdom
Horizon Hobby Limited
Units 1-4 Ployters Rd Staple Tye Harlow, Essex CM18 7NS United Kingdom
+44 (0) 1279 641 097 [email protected]
Germany Horizon Technischer Service
Christian-Junge-Straße 1 25337 Elmshorn Germany
+49 (0) 4121 2655 100 [email protected]
France Horizon Hobby SAS
14 Rue Gustave Eiffel Zone d’Activité du Réveil Matin 91230 Montgeron
+33 (0) 1 60 47 44 70 [email protected]

EN
14
Steven A. Hall Vice President International Operations and Risk Management Horizon Hobby, Inc.
Compliance Information for the European Union
Declaration of Conformity
(in accordance with ISO/IEC 17050-1)
No. HH2011121002
Product(s): Evolution Gas Radial Engine
Item Number(s): EVOE7260, EVOE7160
The object of declaration described above is in conformity with the requirements of the specifi-cations listed below, following the provisions of the European EMC Directive 2004/108/EC:
EN61000-6-1:2007 EN61000-6-3:2007
Signed for and on behalf of: Horizon Hobby, Inc. Champaign, IL USA December 12, 2011
Instructions for disposal of WEEE by users in the European UnionThis product must not be disposed of with other waste. Instead, it is the user’s responsibility to dispose of their waste equipment by handing it over to a designated collections point for the recycling of waste electrical and electronic equipment. The separate collection and recycling of your waste equipment at the time of disposal will help to conserve natural resources and ensure that it is recycled in a manner that protects human health and the environment. For more infor-mation about where you can drop off your waste equipment for recycling, please contact your local city office, your household waste disposal service or where you purchased the product.

DE
15
HINWEIS
Alle Anweisungen, Garantien und dazugehörigen Dokumente können ohne Ankündigung von Horizon Hobby Inc. geändert werden. Eine aktuelle Version ersehen Sie bitte im Support Feld unter: http://www.horizonhobby.com.
Die folgenden Begriffe werden in der gesamten Produktliteratur verwendet, um auf unterschiedlich hohe Gefahrenrisiken beim Betrieb dieses Produkts hinzuweisen:
HINWEIS: Wenn diese Verfahren nicht korrekt befolgt werden, können sich möglicherweise Sachschäden UND geringe oder keine Gefahr von Verletzungen ergeben.
ACHTUNG: Wenn diese Verfahren nicht korrekt befolgt werden, ergeben sich wahrscheinlich Sachschäden UND die Gefahr von schweren Verletzungen.
WARNUNG: Wenn diese Verfahren nicht korrekt befolgt werden, ergeben sich wahrscheinlich Sachschäden, Kollateralschäden, schwere Verletzungen oder Tod ODER mit hoher Wahrs-cheinlichkeit oberflächliche Verletzungen.
ERKLÄRUNG DER BEGRIFFE
WARNUNG: Lesen Sie die GESAMTE Bedienungsanleitung, um sich vor dem Betrieb mit den Produktfunktionen vertraut zu machen. Wird das Produkt nicht korrekt betrieben, kann dies zu Schäden am Produkt oder persönlichem Eigentum führen oder schwere Verletzungen verursachen.
Dies ist ein hochentwickeltes Hobby-Produkt. Es muss mit Vorsicht und gesundem Menschen-verstand betrieben werden und benötigt gewisse mechanische Grundfähigkeiten. Wird dieses Produkt nicht auf eine sichere und verantwortungsvolle Weise betrieben, kann dies zu Verletzun-gen oder Schäden am Produkt oder anderen Sachwerten führen. Versuchen Sie nicht ohne Genehmigung durch Horizon Hobby, Inc., das Produkt zu zerlegen, es mit inkompatiblen Kompo-nenten zu verwenden oder auf jegliche Weise zu erweitern. Diese Bedienungsanleitung enthält Anweisungen für Sicherheit, Betrieb und Wartung. Es ist unbedingt notwendig, vor Zusammen-bau, Einrichtung oder Verwendung alle Anweisungen und Warnhinweise im Handbuch zu lesen und zu befolgen, damit es bestimmungsgemäß betrieben werden kann und Schäden oder schwere Verletzungen vermieden werden.
ACHTUNG: Dieses Produkt kann bei dem Betrieb extrem heiß werden was zu Verbrennungen führen kann.
Alters Empfehlung: Nicht für Kinder unter 14 Jahren. Dies ist kein Spielzeug.
Sicherheitswarnungen
Modellmotoren haben eine erhebliche Leistung, die bei unsachgemäßer Verwendung eine Ge-fährdung darstellen kann. Nutzen Sie bei dem Betrieb immer den gesunden Menschenverstand und beachten alle Sicherheitshinweise bei dem Umgang mit dem Motor, oder allen Tätigkeiten in diesem Zusammenhang. Das nicht befolgen der Sicherheitsbestimmungen kann zu ernst-haften Personen- und Sachbeschädigungen führen.
• Stellen Sie immer sicher dass Zuschauer, insbesondere Kinder, mindestens 9,90 Meter entfernt sind wenn Sie den Motor laufen lassen.
• Stellen Sie vor JEDEM Flug sicher, dass der Propeller fest mit der Kurbelwelle verbunden ist und alle Halter/Befestigungen sicher angezogen/befestigt sind. Verwenden Sie zum sichern von Schrauben und Muttern blauen Schraubensicherungslack.
• Halten Sie Kleinteile immer aus der Reichweite von Kindern, da diese verschluckt werden können.
• Sichern Sie immer das Flugzeug bevor Sie den Motor starten.

DE
16
• Halten Sie immer das Gesicht und den Körper weg vom Propellerkreis wenn Sie den Motor starten oder wenn er läuft.
• Stellen Sie sich immer hinter den Propeller wenn Sie Einstellungen am Vergaser vornehmen.
• Tragen Sie immer eine Schutzbrille beim Starten oder Laufen lassen des Motors.
• Bewahren Sie ihren Kraftstoff immer an einem sicheren Ort weit weg von möglicher Funkenbildung, Hitze oder zündfähigen Stoffen auf.
• Stellen Sie immer sicher, dass das Luftfahrzeug korrekt gesichert ist und sich bei Motorstart nicht bewegen/anrollen kann.
• Führen Sie nach den Einstellungen vor dem Erstflug den Bindevorgang erneut aus.
• Stellen Sie immer sicher dass die Failsafeeinstellung des Gaskanal auf Motor aus/ Leerlauf steht.
• Führen Sie immer vor dem Flug einen Reichweitentest durch.
• Unterbrechen Sie die Kraftstoffversorgung (durch trennen oder abdrücken der Kraftstoffleitung) oder schließen Sie mit Gasgestänge die Vergaserdrosselklappe um den Motor zu stoppen.
• Gebrauchen Sie niemals Ihre Hände, Finger oder andere Körperteile um den Propeller zu stoppen.
• Werfen Sie niemals etwas in den Propeller um ihn zu stoppen.
• Lassen Sie niemals den Motor über losen Untergrund wie Sand oder Kies laufen, damit nicht die Gefahr besteht dass der Motor kleine Teile unkontrolliert hochschleudert.
• Tragen Sie niemals bei dem Betrieb des Modells lose Kleidung oder ein loses Nackenband/ Umhängegurt, da sich diese Teile im Propeller verfangen können.
• Führen Sie niemals bei Betrieb oder Umgang mit dem Motor lose Gegenstände wie Schraubendreher, Stifte, etc.. in Ihren Taschen. Diese könnten in den Propeller fallen.
• Lassen Sie niemals Kraftstoff in Berührung mit Mund oder Augen kommen da dieser giftig ist.
• Lagern Sie Kraftsoff in eindeutig bezeichneten Behältnissen ausserhalb der Reichweite von Kindern.
Sicherheitsrichtlinien
• Montieren Sie den Motor korrekt auf einer geeigneten Werkbank oder einem qualitativ hochwertigen Motorträger.
• Verwenden Sie immer Propeller mit der richtigen Größe und Steigung. Sehen Sie dazu in die Propellerliste in dieser Anleitung.
• Überprüfen Sie immer vor der Montage des Propellers dass dieser einwandfrei gewuchtet ist. Das nichtbeachten könnte zu Motorschäden oder zu Schäden am Flugzeug führen.
• Verwenden Sie immer falls möglich einen Elektrostarter.
• Verwenden Sie keine Propeller die Knicke, Risse, Brüche oder sonstige Beschädigungen aufweisen.
• Lassen Sie den Motor nur in gut belüfteten Bereichen laufen. Modellmotoren produzieren giftige Kohlenmonoxid Abgase.
• Lagern Sie Kraftstoff nur in kühlen trockenen Orten. Lassen Sie Kraftstoffbehälter nicht in di-rekten Kontakt mit Beton kommen, da der Kraftstoff dadurch Feuchtigkeit aufnehmen könnte.
• Entsorgen Sie immer verantwortungsvoll Kraftstoff der durch Kondensation Feuchtigkeit (Wasser) aufgenommen hat.
• Schütten Sie niemals ungebrauchten Kraftstoff aus dem Tank in den Kanister.
• Modifizieren, verändern und reparieren Sie niemals Propeller.
• Hantieren Sie nicht mit Modellmotoren, Schalldämpfern, Auspuffen oder Resorohren bis diese vollständig abgekühlt sind. Diese können bei Betrieb extrem heiß werden.

DE
EinleitungWir möchten uns sehr herzlich für den Kauf dieses Evolution Sternmotors bedanken. Dieser Motor ist einer der Besten den Sie heute am Markt erhalten können. Wir sind davon überzeugt, dass Sie mit diesem Motor sehr positive Erfahrungen machen werden und lange Freude daran haben.
Bevor Sie den Motor das erste Mal starten ist es wichtig, dass Sie diese Bedienungsanleitung sorgfältig lesen. Evolution Sternmotoren haben andere Anforderungen als andere Motoren die Sie vielleicht in der Vergangenheit betrieben haben. Diese Bedienungsanleitung gibt ihnen wichtige Informationen für den Einbau, die Auswahl des richtigen Propellers und das richtige Einlaufen lassen.
Motorspezifikationen
Motor EVOE7160 EVOE7260
typ Zündung Zündung
Zylinder 7 7
Hubraum 160.0cc 260.0cc
Hubraum per Zylinder 22.9cc 37.1cc
Bohrung 30.2mm 35.7mm
Hub 32.0mm 37.0mm
Leistung 10.6 hp 15.6 hp
Drehzahlbereich 1000–6000 1000–5500
Maximale Drehzahl 6300 6000
Motordurchmesser 28.0 cm 32 cm
Motorlänge 26.0 cm 27 cm
Gewicht 4.8 kg 6.7 kg
Kraftstoffverbrauch 30 ml per minute 50 ml per minute
Propeller 2-Blatt: 27 x 10–28 x 12 3-Blatt: 26 x 12
2-Blatt: 32 x 12, 32 x 14, 34 x 16 3-Blatt: 30 x 12, 30 x 16, 30 x 18
Sie benötigen noch• 2 Takt Öl
• Propeller
• Kraftstoffschlauch 3,5mm Durchmesser
• Motorhalterschrauben
• Motorbleche
• Zündakku 2S 7,4V LiPo oder 6V NiMH
• Elektronischer Zündschalter
Einbau des Motors im RumpfMontieren Sie den Motor zum Einlaufen lassen korrekt im Rumpf oder auf einem Motorprüfstand um die beste Leistung und Langlebigkeit zu erhalten.
WARNUNG: Schrauben Sie den Motormontagering immer auf eine flache Oberfläche wie 6 - 8mm Sperrholz oder eine Kohlefaserplatte.
WARNUNG: Verwenden Sie zwischen Motormontagering und Motorspant keine Distanzhülsen. Die Vibrationen zwischen Distanzhülse und Montagering beschädigen den Ring und trennen den Motor vom Rahmen.

DE
18
2. Verwenden Sie vier Stahlschrauben (nicht im Lieferumfang) um den Motorhalter an das Brandschott zu schrauben. Die Größe der Schrauben variieren abhängig vom Flugzeug. Verwenden Sie immer die größte Schrauben-größe die durch den Ring paßt.
Um den Motor am lösen zu hindern:
Brandschott mit Einschlagmuttern: Verwenden Sie immer Federringe zwischen Schrauben und Montagering.
Brandschott mit Bolzen: Verwenden Sie immer Nylon Stopmuttern mit Bolzen durch das Brandschott.
1. Montieren Sie den Motor im Rumpf mit dem Zylinder Nr. 1 auf der 12:00 Position (Zylinder Nr. 1 ist über dem Evolution Logo). Sie können diese Postion mit dem optionalen Kollektor-ring modifizieren wenn Sie den Auspuff an einer bestimmen Stelle durch die Cowling (Motorhaube) führen wollen.EVOLUTION
2
3
45
6
7
1
3. Stellen Sie bitte sicher dass der Kraftstofftank nicht weiter als 200mm vom Brandschott entfernt ist. • Verwenden Sie im Tank immer einen Kraftstofffilter.
• Wir empfehlen einen Kraftstoffschlauch mit einem Innendurchmesser von 3,5 mm.
• Stellen Sie bitte sicher dass zwischen Tank und Motor keine scharfen Knicke sind.
4. Schließen Sie das Gasservo an das Gasgestänge an.
5. Montieren Sie Ihre bevorzugte Chokebetätigung (manuell oder per Servo).
Einbau der elektrischen Zündung
HINWEIS: beachten Sie immer die Polarität bei dem Anschließen des Zündakkus. Die Zün-deinheit ist nicht mit einem Verpolungsschutz ausgestattet. Ein Verpolen der Zündeinheit und daraus folgende Beschädigungen fallen nicht unter Garantie.
Die elektronische Zündung die Zündkabel sind für jeden Zylinder beschriftet. Stellen Sie bitte sicher dass Sie die Kabel an die richtigen Zündkerzen/Zylinder anschließen. Schließen Sie die Kabel in falscher Reihenfolge an ändern Sie die Zündfolge und der Motor wird nicht richtig laufen.
DE
19
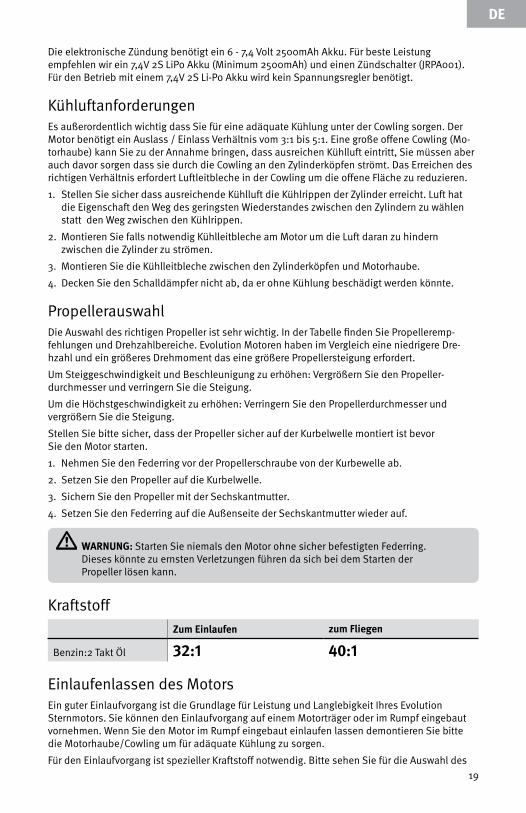
Die elektronische Zündung benötigt ein 6 - 7,4 Volt 2500mAh Akku. Für beste Leistung empfehlen wir ein 7,4V 2S LiPo Akku (Minimum 2500mAh) und einen Zündschalter (JRPA001). Für den Betrieb mit einem 7,4V 2S Li-Po Akku wird kein Spannungsregler benötigt.
KühluftanforderungenEs außerordentlich wichtig dass Sie für eine adäquate Kühlung unter der Cowling sorgen. Der Motor benötigt ein Auslass / Einlass Verhältnis vom 3:1 bis 5:1. Eine große offene Cowling (Mo-torhaube) kann Sie zu der Annahme bringen, dass ausreichen Kühlluft eintritt, Sie müssen aber auch davor sorgen dass sie durch die Cowling an den Zylinderköpfen strömt. Das Erreichen des richtigen Verhältnis erfordert Luftleitbleche in der Cowling um die offene Fläche zu reduzieren.
1. Stellen Sie sicher dass ausreichende Kühlluft die Kühlrippen der Zylinder erreicht. Luft hat die Eigenschaft den Weg des geringsten Wiederstandes zwischen den Zylindern zu wählen statt den Weg zwischen den Kühlrippen.
2. Montieren Sie falls notwendig Kühlleitbleche am Motor um die Luft daran zu hindern zwischen die Zylinder zu strömen.
3. Montieren Sie die Kühlleitbleche zwischen den Zylinderköpfen und Motorhaube.
4. Decken Sie den Schalldämpfer nicht ab, da er ohne Kühlung beschädigt werden könnte.
PropellerauswahlDie Auswahl des richtigen Propeller ist sehr wichtig. In der Tabelle finden Sie Propelleremp-fehlungen und Drehzahlbereiche. Evolution Motoren haben im Vergleich eine niedrigere Dre-hzahl und ein größeres Drehmoment das eine größere Propellersteigung erfordert.
Um Steiggeschwindigkeit und Beschleunigung zu erhöhen: Vergrößern Sie den Propeller-durchmesser und verringern Sie die Steigung.
Um die Höchstgeschwindigkeit zu erhöhen: Verringern Sie den Propellerdurchmesser und vergrößern Sie die Steigung.
Stellen Sie bitte sicher, dass der Propeller sicher auf der Kurbelwelle montiert ist bevor Sie den Motor starten.
1. Nehmen Sie den Federring vor der Propellerschraube von der Kurbewelle ab.
2. Setzen Sie den Propeller auf die Kurbelwelle.
3. Sichern Sie den Propeller mit der Sechskantmutter.
4. Setzen Sie den Federring auf die Außenseite der Sechskantmutter wieder auf.
WARNUNG: Starten Sie niemals den Motor ohne sicher befestigten Federring. Dieses könnte zu ernsten Verletzungen führen da sich bei dem Starten der Propeller lösen kann.
KraftstoffZum Einlaufen zum Fliegen
Benzin:2 Takt Öl 32:1 40:1
Einlaufenlassen des MotorsEin guter Einlaufvorgang ist die Grundlage für Leistung und Langlebigkeit Ihres Evolution Sternmotors. Sie können den Einlaufvorgang auf einem Motorträger oder im Rumpf eingebaut vornehmen. Wenn Sie den Motor im Rumpf eingebaut einlaufen lassen demontieren Sie bitte die Motorhaube/Cowling um für adäquate Kühlung zu sorgen.
Für den Einlaufvorgang ist spezieller Kraftstoff notwendig. Bitte sehen Sie für die Auswahl des

DE
20
Kraftstoffes in die Tabelle. Kraftstoff zum Einlaufen lassen des Motor besitzt im Vergleich zu dem normalen Flugkraftstoff einen größeren Ölanteil. Dieser höhere Ölanteil ist notwendig zur Kühlung und dem entfernen von Verschmutzungen im Motor.
Lassen Sie den Motor 3 Tankfüllungen (1000mL) für 3 -4 Minuten laufen und dann abkühlen. Variieren Sie das Gas zwischen Leerlauf und 3/4 Gas für die ersten 30 Minuten Motorlaufzeit.
Übersteigen Sie nicht 3/4 Gas während des Einlaufens. Der Einlaufvorgang ist nach vier Tankfüllungen beendet und Sie können damit anfangen den Motor für das normale Fliegen einzustellen.
Überprüfung auf gefluteten ZylinderAus der Natur der Sternmotoren ist es nicht ungewöhnlich, dass sich in den unteren Zylindern überschüssiger Kraftstoff oder Öl aus der Lagerung oder während des Primens sammelt. Führen Sie bitte vor dem Startvorgang folgendes durch:
1. Drehen Sie den Propeller mit der Hand. Stellen Sie während des Drehens an einem Punkt einen ernsten Wiederstand fest STOPPEN Sie. Das ein Indikator auf einen gefluteten Zylinder was man als hydraulische Blockade bezeichnen kann. Jeder weitere Versuch den Motor durch zu drehen kann den Zylinder oder Pleuelstange beschädigen.
2. Stellen Sie eine hydraulische Blockade fest entfernen Sie die Zündkerze der beiden unteren Zylinder und der Motor sollte frei drehen. Drehen Sie weiter bis die gesamte Flüssigkeit aus den Zylindern entwichen ist.
3. Schrauben Sie die Zündkerzen wieder rein und fahren mit dem Startvorgang fort.
Starten des MotorsSchmieren Sie die äußeren beweglichen Teile des Ventilgestänges zum Anfang jeden Flugtages.
1. Füllen Sie den Tank mit Kraftstoff.
2. Schalten Sie die Zündung aus.
3. Stellen Sie sicher, dass die Kraftstoffleitungen richtig an den Vergaser angeschlossen sind.
4. Öffnen Sie das Gas ganz. Der Vergaser sollte ganz geöffnet sein.
5. Plazieren Sie den Chokehebel über die Vergaseröffnung.
6. Drehen Sie den Propeller 3 oder 4 Mal bis Sie Kraftstoff durch die Kraftstoffleitungen fließen sehen.
7. Entfernen Sie den Chokehebel vom Vergaser und geben 1/4 Gas.
8. Schalten Sie die Zündung ein. Stellen Sie sicher, dass der Zündungakku richtig geladen ist.
MotoreinstellungDie Einlaufeinstellungen für die Vergaserdüsennadeln sind:
Vollgasnadel: 1 3/4 Drehungen offen
Leerlaufnadel: 1 3/4 Drehungen offen
Verwenden Sie einen Drehzahlmesser (HAN111 oder HAN156) um den Motor auf Drehzahl einzustellen.
WARNUNG: Stellen Sie den Vergaser immer hinter dem Propeller ein. Halten Sie alle losen Gegenstände zu allen Zeiten weg vom Propeller. Greifen Sie niemals um den Propeller herum.
1. Starten Sie den Motor.
2. Geben Sie Gas bis der Motor mit ca. 2.000 Umdrehungen läuft.

DE
21
3. Sollten Sie einen separaten Schalldämpfer verwenden, überprüfen Sie mit einem Thermom-eter ob heiße Abgase aus allen Zylindern austreten. Bei Verwendung eines Kollektorringes überprüfen Sie ob jeder Zylinder die gleiche Temperatur aufweist und damit läuft.
4. Geben Sie Vollgas. Sollte der Motor unsauber laufen oder auf einigen Zylindern nicht laufen, ist das Gemisch zu fett.
5. Reduzieren Sie die Drehzahl auf 2.000 und magern das Gemisch an der Vollgasnadel mit 1/16 Drehung ab.
6. Geben Sie Vollgas. Hört der Motor auf zu laufen ist die Vollgasnadel zu mager eingestellt.
7. Gehen Sie vom Gas bis der Motor 2.000 U/min dreht. Drehen Sie das Gemisch mit der Vollgasnadel gegen den Uhrzeigersinn 1/8 fetter.
8. Wiederholen Sie die Schritte 4 - 7 bis der Motor sauber auf Vollgas läuft.
Einstellen der VollgasnadelLäuft der Motor sauber auf Vollgas:
1. Magern Sie mit der Vollgasnadel den Motor 1/16 ab.
2. Warten Sie 2 bis 3 Sekunden ab bis der Motor reagiert. Sternmotoren reagieren nicht sofort auf Änderungen.
a. Nimmt die Drehzahl zu: Magern Sie mit der Vollgasnadel zusätzlich 1/16s und warten wie der Motor reagiert. Nimmt die Drehzahl nach der Änderung nicht weiter zu, drehen Sie die Nadel zurück in die letzte Position.
b. Nimmt die Drehzahl ab: Machen Sie das Gemisch 1/8 fetter und warten bis sich die Drehzahl stabilisiert.
3. Wiederholen Sie Schritt 2 bis Sie mit gewählten Kraftstoff und Propeller die maximale Drehzahl erreicht haben.
4. Drehen Sie das Gemisch mit der Vollgasnadel fetter solange der Motor noch auf Vollgas sauber läuft. Das Fetter machen des Gemisches mit der Vollgasnadel ermöglicht dem Motor bei dem Fliegen noch schneller zu drehen.
Justieren der LeerlaufnadelDie Einstellungen der Leerlaufnadel bestimmen das Gemisch bei Leerlauf und den Übergang zwischen Leerlauf und weit geöffnetem Vergaser.
Einstellen der Leerlaufnadel1. Stellen Sie die Vollgasnadel auf die Betriebsbedingungen ein.
2. Lassen Sie den Motor für 10 - 15 Sekunden im Leerlauf laufen. Geben Sie dann schnell Vollgas. Wechselt der Motor ohne Verzögerung ist die Leerlaufnadel perfekt eingestellt.
Sollte der Motor nur langsam auf den Gaswechsel reagieren und nur schrittweise die Vollgasdrehzahl erreichen, ist die Leerlaufnadel zu fett eingestellt. Magern Sie mit der Leerlaufnadel 1/16 Umdrehung im Uhrzeigersinn und testen neu.
Sollte der Motor unvermittelt ausgehen ist die Leerlaufnadel zu mager eingestellt. Drehen Sie die Leerlaufnadel 1/16 fetter Umdrehung und testen neu.
3. Ist die Leerlaufnadel richtig eingestellt überprüfen Sie erneut die Einstellung der Vollgasnadel.
4. Sind Sie mit den Nadeleinstellungen zufrieden ist es nicht notwendig die Leerlaufnadel neu einzustellen. Die Einstellungen der Leerlaufnadel sind mechanischer Natur und wechseln nicht mit den atmosphärischen Bedingungen.
Der beste Indikator ist die Farbe der Zündkerzen wenn diese ausgebaut werden. Eine schöne trockene braune Farbe ist der Indikator für eine saubere Verbrennung. Alles andere (nasse Kerzen oder Kohleablagerungen) zeigen generell an dass der Motor zu fett läuft.
DE
22
WartungZur Sicherstellung des einwandfreien Betriebes Ihres Sternmotores müssen Sie folgende Arbeiten durchführen.
1. Schmieren Sie mit einem Hochleistungsgetriebeöl den Ventilgestänge am Anfang jeden Flugtages.
2. Gelegentlich müssen Sie die Ventile einstellen. Das erste Mal sollte Sie diese nach einer Stunde Motorlauf einstellen. Überprüfen Sie bei kalten Motor das Ventilspiel. Das Ventilspiel sollte bei bei 0,1mm - 0,25mm liegen.
Richtlinien zum Ventileinstellen
1. Platzieren Sie den Motor in einer Position in der Sie einfach alle Zylinder erreichen können.
2. Entfernen Sie die Zündkerzen vom Zylinder. Es ist viel einfacher ohne Kerzen den oberen Totpunkt (Top Dead Center TDC) einzustellen.
3. Montieren Sie einen Propeller oder etwas zum drehen wie z.B. ein kurzes Holzstück mit einer Bohrung für die Kurbelwelle um diese zu drehen.
4. Beginnen Sie mit dem 1. Zylinder. Das ist der Zylinder überhalb des Evolution Logos.
a. Drehen Sie die Kurbelwelle gegen den Uhrzeigersinn und beobachten die Gestängebewegung.
b. Achten Sie darauf wenn der Ein- und Auslass sich bewegen um die Ventile zu öffnen. Dieses geschieht einmal während einer Umdrehung.
c. Erreicht der Kolben den oberen Punkt im Zylinder, befindet er sich am oberen Punkt der Kompression/Zündfunke.
d. Positionieren Sie den Kolben am oberen Totpunkt mit Hilfe eines Rundholzes. Verwenden Sie bitte keinen Stahl da dieser den Zylinder beschädigen könnte.
5. Überprüfen Sie mit einer Ventillehre das Spiel zwischen Kipphebel und Ventil.
a. Wir empfehlen ein Ventilspiel so nah an 0,1mm wie möglich. Ist das gemessene Spiel zwischen 0,1mm und 0,15mm brauchen Sie es nicht einzustellen. Die Einstellungen für das Ein- und Auslassventil ist das gleiche.
b. Justieren Sie die Ventil in dem Sie die Stopmutter lösen und die Schraube einstellen bis Sie den Zug von der 0,1mm Ventillehre spüren können.
c. Ziehen Sie die Stopmutter an und überprüfen nochmal das Ventilspiel. Manchmal ändert sich bei dem Anziehen das Spiel.
6. Die Nockenwellensteuerung des Motors ist eine gemeinsame für alle Zylinder die sich im Verhältnis 1:6 dreht. Das heißt es gibt 6 Positionen auf der Nockenwelle die überprüft werden müssen.
Wiederholen Sie die Schritte 4 & 5 vier Mal um jede der Positionen zu prüfen. Finden Sie ein Ventilspiel das kleiner ist, justieren Sie das Spiel. Sollte es größer sein justieren Sie das Spiel nicht. Etwas mehr Spiel ist sicherer als zu fest.
7. Machen Sie jetzt mit dem nächsten Zylinder gegen den Uhrzeigersinn weiter und wiederholen die Schritte 4 bis 6. Führen Sie das für alle Zylinder durch.
Herzlichen Glückwunsch, Sie haben die Ventile eingestellt. Die Wartung sollten nun nach 10 Betriebsstunden wieder durchgeführt werden.
DE
23
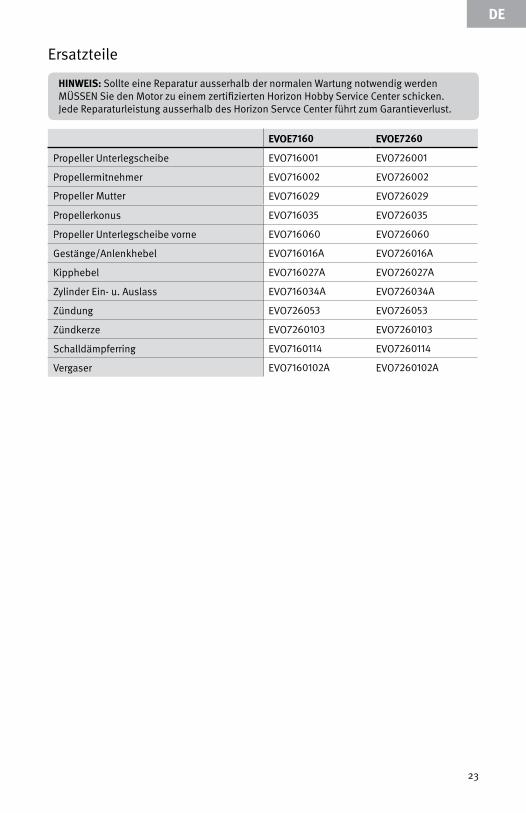
Ersatzteile
HINWEIS: Sollte eine Reparatur ausserhalb der normalen Wartung notwendig werden MÜSSEN Sie den Motor zu einem zertifizierten Horizon Hobby Service Center schicken. Jede Reparaturleistung ausserhalb des Horizon Servce Center führt zum Garantieverlust.
EVOE7160 EVOE7260
Propeller Unterlegscheibe EVO716001 EVO726001
Propellermitnehmer EVO716002 EVO726002
Propeller Mutter EVO716029 EVO726029
Propellerkonus EVO716035 EVO726035
Propeller Unterlegscheibe vorne EVO716060 EVO726060
Gestänge/Anlenkhebel EVO716016A EVO726016A
Kipphebel EVO716027A EVO726027A
Zylinder Ein- u. Auslass EVO716034A EVO726034A
Zündung EVO726053 EVO726053
Zündkerze EVO7260103 EVO7260103
Schalldämpferring EVO7160114 EVO7260114
Vergaser EVO7160102A EVO7260102A
DE
24
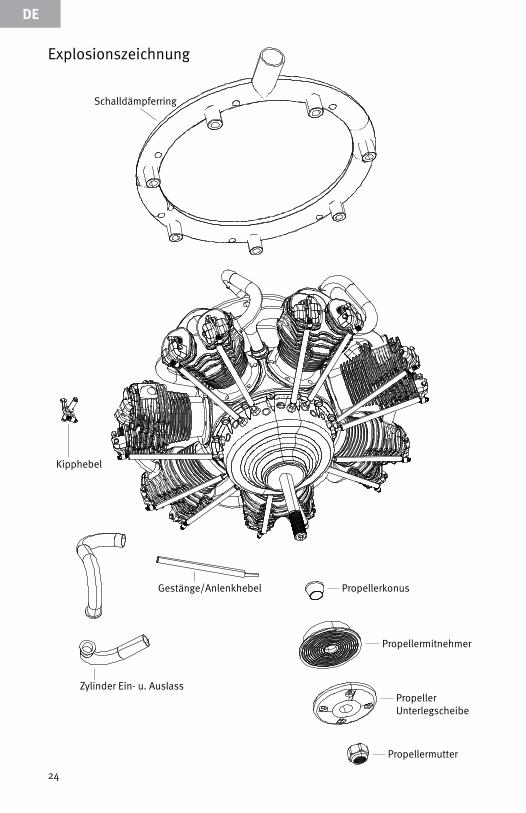
Explosionszeichnung
Schalldämpferring
Kipphebel
Zylinder Ein- u. Auslass
Gestänge/Anlenkhebel Propellerkonus
Propellermitnehmer
Propeller Unterlegscheibe
Propellermutter

DE
25
WarnungEin ferngesteuertes Modell ist kein Spielzeug. Es kann, wenn es falsch eingesetzt wird, zu erheblichen Verletzungen bei Lebewesen und Beschädigungen an Sachgütern führen. Betreiben Sie Ihr RC-Modell nur auf freien Plätzen und beachten Sie alle Hinweise der-Bedienungsanleitung des Modells wie auch der Fernsteuerung.
GarantiezeitraumExklusive Garantie - Horizon Hobby Inc (Ho-rizon) garantiert, dass das gekaufte Produkt (Produkt) frei von Material- und Montage-fehlern ist. Der Garantiezeitraum entspricht den gesetzlichen Bestimmung des Landes, in dem das Produkt erworben wurde. In Deutsch-land beträgt der Garantiezeitraum 6 Monate und der Gewährleistungszeitraum 18 Monate nach dem Garantiezeitraum.
Einschränkungen der Garantie(a) Die Garantie wird nur dem Erstkäufer (Käufer) gewährt und kann nicht übertragen werden. Der Anspruch des Käufers besteht in der Reparatur oder dem Tausch im Rahmen dieser Garantie. Die Garantie erstreckt sich ausschließlich auf Produkte, die bei einem autorisierten Horizon Händler erworben wurden. Verkäufe an dritte werden von dieser Garantie nicht gedeckt. Garantieansprüche werden nur angenommen, wenn ein gültiger Kaufnachweis erbracht wird. Horizon behält sich das Recht vor, diese Garantiebestim-mungen ohne Ankündigung zu ändern oder modifizieren und widerruft dann bestehende Garantiebestimmungen.
(b) Horizon übernimmt keine Garantie für die Verkaufbarkeit des Produktes, die Fähigkeiten und die Fitness des Verbrauchers für einen bestimmten Einsatzzweck des Produktes. Der Käufer allein ist dafür verantwortlich, zu prüfen, ob das Produkt seinen Fähig-keiten und dem vorgesehenen Einsatzzweck entspricht.
(c) Ansprüche des Käufers ¬ Es liegt aus-schließlich im Ermessen von Horizon, ob das Produkt, bei dem ein Garantiefall festgestellt wurde, repariert oder ausgetauscht wird. Dies sind die exklusiven Ansprüche des Käufers, wenn ein Defekt festgestellt wird.
Horizon behält sich vor, alle eingesetzten Komponenten zu prüfen, die in den Garantief-
all einbezogen werden können. Die Entsche-idung zur Reparatur oder zum Austausch liegt nur bei Horizon. Die Garantie schließt kosme-tische Defekte oder Defekte, hervorgerufen durch höhere Gewalt, falsche Behandlung des Produktes, falscher Einsatz des Produktes, kommerziellen Einsatz oder Modifikationen irgendwelcher Art aus.
Die Garantie deckt Schäden, die durch falschen Einbau, falsche Handhabung, Un-fälle, Betrieb, Service oder Reparaturversuche, die nicht von Horizon ausgeführt wurden, aus. Rücksendungen durch den Käufer direkt an Horizon oder eine seiner Landesvertretung bedürfen der schriftlichen.
SchadensbeschränkungHorizon ist nicht für direkte oder indirekte Folgeschäden, Einkommensausfälle oder kommerzielle Verluste, die in irgendeinem Zusammenhang mit dem Produkt stehen nicht verantwortlich, unabhängig ab ein Anspruch im Zusammenhang miteinem Vertrag, der Garantie oder der Gewährleistung erhoben werden. Horizon wird darüber hinaus keine Ansprüche aus einem Garantiefall akzep-tieren, die über den individuellen Wert des Produktes hinaus gehen. Horizon hat keine Einfluss auf den Einbau, die Verwendung oder die Wartung des Produktes oder etwaiger Produktkombinationen, die vom Käufer gewählt werden. Horizon übernimmt keine Garantie und akzeptiert keine Ansprüche für in der folge auftretende
Verletzungen oder Beschädigungen. Mit der Verwendung und dem Einbau des Produktes akzeptiert der Käufer alle aufgeführten Garan-tiebestimmungen ohne Einschränkungen und Vorbehalte.
Wenn Sie als Käufer nicht bereit sind, diese Bestimmungen im Zusammenhang mit der Benutzung des Produktes zu akzeptieren, werden Sie gebeten, dass Produkt in unbe-nutztem Zustand in der Originalverpackung vollständig bei dem Verkäufer zurückzugeben.
SicherheitshinweiseDieses ist ein hochwertiges Hobby Produkt und kein Spielzeug. Es muss mit Vorsicht und Umsicht eingesetzt werden und erfordert einige mechanische wie auch mentale Fähig-keiten. Ein Versagen, das Produkt sicher und umsichtig zu betreiben kann zu Verletzungen von Lebewesen und Sachbeschädigungen
Garantie und Service Informationen

DE
26
erheblichen Ausmaßes führen. Dieses Produkt ist nicht für den Gebrauch durch Kinder ohne die Aufsicht eines Erziehungsberechtigten vorgesehen. Die Anleitung enthält Sicherhe-itshinweise und Vorschriften sowie Hinweise für die Wartung und den Betrieb des Produk-tes. Es ist unabdingbar, diese Hinweise vor der ersten Inbetriebnahme zu lesen und zu verstehen. Nur so kann der falsche Umgang verhindert und Unfälle mit Verletzungen und Beschädigungen vermieden werden.
Fragen, Hilfe und ReparaturenIhr lokaler Fachhändler und die Verkaufstelle können eine Garantiebeurteilung ohne Rück-sprache mit Horizon nicht durchführen. Dies gilt auch für Garantiereparaturen. Deshalb kontaktieren Sie in einem solchen Fall den Händler, der sich mit Horizon kurz schließen wird, um eine sachgerechte Entscheidung zu fällen, die Ihnen schnellst möglich hilft.
Wartung und ReparaturMuss Ihr Produkt gewartet oder repariert werden, wenden Sie sich entweder an Ihren Fachhändler oder direkt an Horizon. Packen Sie das Produkt sorgfältig ein. Beachten Sie, dass der Originalkarton in der Regel nicht ausreicht, um beim Versand nicht beschädigt zu werden. Verwenden Sie einen Paketdien-stleister mit einer Tracking Funktion und Ver-sicherung, da Horizon bis zur Annahme keine Verantwortung für den Versand des Produktes übernimmt.
Bitte legen Sie dem Produkt einen Kaufbeleg bei, sowie eine ausführliche Fehlerbesch-reibung und eine Liste aller eingesendeten Einzelkomponenten. Weiterhin benötigen wir die vollständige Adresse, eine Telefonnummer für Rückfragen, sowie eine Email Adresse.
Garantie und ReparaturenGarantieanfragen werden nur bearbeitet, wenn ein Originalkaufbeleg von einem auto-risierten Fachhändler beiliegt, aus dem der
Käufer und das Kaufdatum hervorgeht. Sollte sich ein Garantiefall bestätigen wird das Produkt repariert oder ersetzt. Diese Entsche-idung obliegt einzig Horizon Hobby.
Kostenpflichtige ReparaturenLiegt eine kostenpflichtige Reparatur vor, er-stellen wir einen Kostenvoranschlag, den wir Ihrem Händler übermitteln. Die Reparatur wird erst vorgenommen, wenn wir die Freigabe des Händlers erhalten. Der Preis für die Reparatur ist bei Ihrem Händler zu entrichten. Bei kostenpflichtigen Reparaturen werden mindestens 30 Minuten Werkstattzeit und die Rückversandkosten in Rechnung gestellt. Sollten wir nach 90 Tagen keine Einverständ-niserklärung zur Reparatur vorliegen haben, behalten wir uns vor, das Produkt zu vernich-ten oder anderweitig zu verwerten.
ACHTUNG: Kostenpflichtige Repara-turen nehmen wir nur für Elektronik und Motoren vor. Mechanische Reparaturen, besonders bei Hubschraubern und RC-Cars sind extrem aufwendig und müssen deshalb vom Käufer selbst vorgenommen werden.
Sicherheit und WarnungenAls Anwender des Produktes sind Sie verant-wortlich für den sicheren Betrieb aus dem eine Gefährdung für Leib und Leben sowie Sachgüter nicht hervorgehen soll. Befolgen Sie sorgfältig alle Hinweise und Warnungen für dieses Produkt und für alle Komponenten und Produkte, die Sie im Zusammenhang mit diesem Produkt einsetzen. Ihr Modell empfängt Funksignale und wird dadurch ges-teuert. Funksignale können gestört werden, was zu einem Signalverlust im Modell führen würde. Stellen Sie deshalb sicher, dass Sie um Ihr Modell einen ausreichenden Sicher-heitsabstand einhalten, um einem solchen Vorfall vorzubeugen.

DE
27
Garantie und Service Kontaktinformationen
Land des Kauf Horizon Hobby Adresse Telefon/E-mail Adresse
Deutschland Horizon Technischer Service
Christian-Junge-Straße 1 25337 Elmshorn Deutschland
+49 (0) 4121 2655 100 [email protected]
Konformitätshinweise für die Europäische Union
Konformitätserklärung laut Allgemeine Anforderungen (ISO/IEC 17050-1:2004, korrigierte Fassung 2007-06-15); Deutsche und Englische Fassung EN ISO/IEC 17050-1:2010
Declaration of conformity (in accordance with ISO/IEC 17050-1)
Horizon Hobby GmbH Christian-Junge-Straße 1 D-25337 Elmshorn
erklärt das Produkt: Evolution Gas Radial Engines (EVOE7260, EVOE7160) declares the product: Evolution Gas Radial Engines (EVOE7260, EVOE7160)
im Einklang mit den Anforderungen der unten aufgeführten Bestimmungen nach den Bestimmungen der europäischen EMV-Richtlinie 2004/108/EG:
The object of declaration described above is in conformity with the requirements of the specifi-cations listed below, following the provisions of the European EMC Directive 2004/108/EC:
EN61000-6-1:2007 EN61000-6-3:2007
Elmshorn, 12.12.2011
Horizon Hobby GmbH; Hamburger Str. 10; D-25337 Elmshorn HR Pi: HRB 1909; UStIDNr.:DE812678792; Str.Nr.: 1829812324
Geschäftsführer Birgit Schamuhn, Steven A. Hall • Tel.: +49 4121 4619960 • Fax: +49 4121 4619970 eMail: [email protected]; Internet: www.horizonhobby.de
Es gelten unsere allgemeinen Geschäftsbedingungen, die in unseren Geschäftsräumen eingesehen werden können. Ware bleibt bis zur vollständigen Bezahlung Eigentum der Horizon Hobby GmbH
Entsorgung in der Europäischen UnionDieses Produkt darf nicht über den Hausmüll entsorgt werden. Es ist die Verantwortung des Benutzers, dass Produkt an einer registrierten Sammelstelle für Elektroschrott abzugeben diese Verfahren stellt sicher, dass die Umwelt geschont wird und natürliche Ressourcen nicht über die Gebühr beansprucht werden. Dadurch wird das Wohlergehen der menschlichen Gemeinschaft geschützt. Für weitere Informationen, wo der Elektromüll entsorgt werden kann, können Sie Ihr Stadtbüro oder Ihren lokalen Entsorger kontaktieren.
Steven A. Hall Geschäftsführer Managing Director
Birgit Schamuhn Geschäftsführerin Managing Director

FR
28
REMARQUE
La totalité des instructions, garanties et autres documents est sujette à modification à la seule discrétion d’Horizon Hobby, Inc. Pour obtenir la documentation à jour, rendez-vous sur le site www.horizonhobby.com et cliquez sur l’onglet de support de ce produit.
Les termes suivants sont utilisés dans l’ensemble du manuel pour indiquer différents niveaux de danger lors de l’utilisation de ce produit:
REMARQUE: Procédures qui, si elles ne sont pas suivies correctement, peuvent entraîner des dégâts matériels ET potentiellement un risque .
ATTENTION: Procédures qui, si elles ne sont pas suivies correctement, peuvent entraîner des dégâts matériels ET des blessures graves.
AVERTISSEMENT: Procédures qui, si elles ne sont pas suivies correctement, peuvent entraîner des dégâts matériels, des blessures graves ou la mort OU engendrer une probabilité élevée de blessure superficielle.
SIGNIFICATION DE CERTAINS TERMES SPÉCIFIQUES
AVERTISSEMENT: Lisez la TOTALITÉ du manuel d’utilisation afin de vous familiariser avec les caractéristiques du produit avant de le faire fonctionner. Une utilisation incorrecte du produit peut entraîner l’endommagement du produit lui-même, ainsi que des risques de dégâts matériels, voire de blessures graves.
Ceci est un produit de loisirs sophistiqué. Il doit être manipulé avec prudence et bon sens et requiert des aptitudes de base en mécanique. Toute utilisation de ce produit ne respectant pas les principes de sécurité et de responsabilité peut entraîner des dégâts matériels, endommager le produit et provoquer des blessures. N’essayez pas de démonter le produit, de l’utiliser avec des composants incompatibles ou d’en améliorer les performances sans l’accord d’Horizon Hobby, Inc. Ce manuel comporte des instructions relatives à la sécurité, au fonctionnement et à l’entretien. Il est capital de lire et de respecter toutes les instructions et tous les avertisse-ments du manuel avant l’assemblage, le réglage ou l’utilisation afin de manipuler correctement l’appareil et d’éviter tout dégât matériel ainsi que toute blessure grave.
ATTENTION: Ce produit peut atteindre de hautes température durant son fonc-tionnement, risque de brûlure.
Âge recommandé: 14 ans et plus. Ceci n’est pas un jouet.
Précautions relatives à la sécurité
Les moteurs de modèles réduits, délivrent de l’énergie qui peut présenter un danger en cas d’utilisation incorrecte. Toujours faire preuve de bon sens et respecter toutes les consignes de sécurité quand vous manipulez ou utilisez votre moteur. Un non respect des consigne peut entraîner de graves blessures ainsi que des dégâts matériels.
• Toujours vérifier que les spectateurs et surtout les enfants soient éloignés d’au moins 10 m quand le moteur est en fonctionnement.
• Toujours contrôler avant CHAQUE vol,que votre hélice est correctement serrée sur l’arbre du moteur. Si possible, utilisez du frein filet bleu sur le vis et écrous de fixation.
• Toujours tenir les petites pièces hors de la portée des enfants.
• Toujours sécuriser l’avion avant de démarrer le moteur.
• Toujours tenir éloignés de l’hélice votre visage et autres parties du corps quand le moteur est en fonctionnement.
• Toujours resté éloigné de l’hélice quand vous effectuez des réglages de carburateur.
• Toujours porter des lunettes de protection et des gants quand vous utilisez votre moteur.

FR
29
• Toujours stocker le carburant à l’écart de sources de chaleur, de flammes ou tout autre élément pouvant l’enflammer.
• Toujours vérifier que l’avion est bien sécurisé au sol et qu’il ne risque pas d’avancer une fois que le moteur a démarré.
• Toujours ré-affecter votre émetteur après des changement de paramètres ou avant le premier vol.
• Toujours contrôler que le failsafe place bien la commande des gaz au ralenti.
• Toujours effectuer un test de portée avant le vol.
• Toujours couper en premier l’alimentation en carburant (pincez ou débranchez la durite du carburateur) quand vous souhaitez arrêter le moteur.
• Ne jamais tenter d’arrêter l’hélice avec les doigts, les mains ou autre partie du corps.
• Ne jamais faire pas passer des objets dans l’hélice pour la stopper.
• Ne jamais faire fonctionner le moteur à proximité de graviers ou de sable, risque d’endommagement de l’hélice.
• Ne jamais porter de vêtements amples et attachez vos cheveux, ils risqueraient d’être entraînés par l’hélice.
• Ne jamais mettre dans vos poches des objets genre tournevis, pinceau qui pourraient tomber sur l’hélice.
• Ne mettez pas de carburant au contact de vos yeux ou de votre bouche. L’essence et les autres carburants utilisés en modélisme sont poison.
• Toujours stocker le carburant dans un bidon clairement identifié placé hors de portée des enfants.
Précautions d’utilisation
• Toujours utiliser des bâtis moteur de qualité.
• Toujours utiliser une hélice au diamètre et au pas approprié à votre moteur. Référez vous au tableau des hélices de ce manuel.
• Toujours contrôler que votre hélice est parfaitement équilibrée avant de la monter sur le moteur. Si votre hélice n’est pas équilibrée, vous risquez d’endommager votre moteur et la structure de votre appareil.
• Toujours utiliser un démarreur électrique pour mettre le moteur en route.
• Toujours contrôler l’état de l’hélice, si elle est fissurée, ou endommagée, remplacez la.
• Toujours utiliser votre moteur dans une zone bien ventilée. Les moteurs de modèles réduits émettent du monoxyde de carbone.
• Toujours stocker votre carburant dans une bidon étanche fermé hermétiquement.
• Toujours stocker votre votre carburant dans un endroit sec et frais. Ne stockez pas votre bidon posé sur le sol, le carburant absorbe l’humidité.
• Toujours contrôler qu’il n’y a pas de condensation ou d’eau dans le bidon de carburant.
• Ne remettez jamais dans le bidon du carburant inutilisé venant du réservoir.
• Ne tentez jamais de réparer ou de modifier une hélice.
• Ne jamais manipuler le moteur, l’échappement avant de les avoir laissé refroidir. Il peuvent atteindre de très hautes températures durant le fonctionnement.
FR
IntroductionNous vous remercions d’avoir acheté un moteur en étoile Evolution, le plus abouti des moteurs sur le marché. Evolution vous souhaite d’être satisfait et durant longtemps avec votre nouveau moteur.
Il est très important de lire entièrement ce manuel avant la première utilisation de ce moteur. Le moteurs en étoile Evolution ont un mode de fonctionnement différent des autres moteurs que vous avez pu utiliser dans le passé. Ce manuel fourni toutes les informations concernant l’installation, le choix de l’hélice, le choix du carburant et les réglages du moteur.
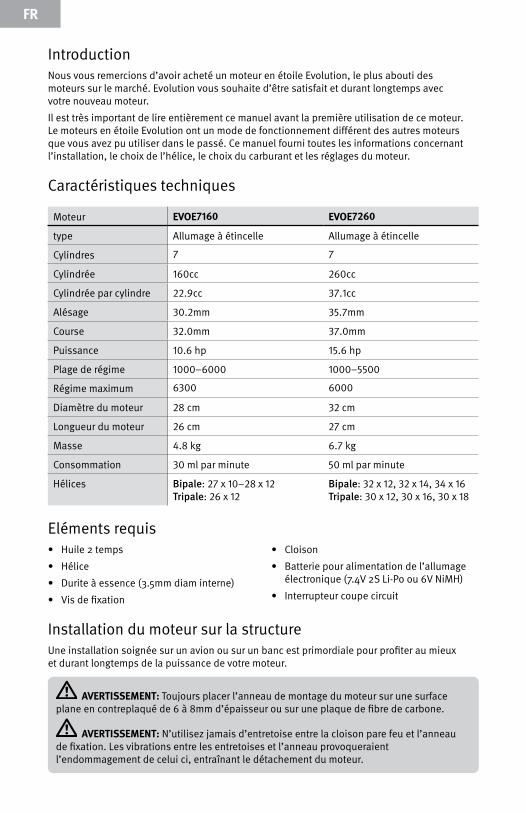
Caractéristiques techniques
Moteur EVOE7160 EVOE7260
type Allumage à étincelle Allumage à étincelle
Cylindres 7 7
Cylindrée 160cc 260cc
Cylindrée par cylindre 22.9cc 37.1cc
Alésage 30.2mm 35.7mm
Course 32.0mm 37.0mm
Puissance 10.6 hp 15.6 hp
Plage de régime 1000–6000 1000–5500
Régime maximum 6300 6000
Diamètre du moteur 28 cm 32 cm
Longueur du moteur 26 cm 27 cm
Masse 4.8 kg 6.7 kg
Consommation 30 ml par minute 50 ml par minute
Hélices Bipale: 27 x 10–28 x 12 Tripale: 26 x 12
Bipale: 32 x 12, 32 x 14, 34 x 16 Tripale: 30 x 12, 30 x 16, 30 x 18
Eléments requis• Huile 2 temps
• Hélice
• Durite à essence (3.5mm diam interne)
• Vis de fixation
• Cloison
• Batterie pour alimentation de l’allumage électronique (7.4V 2S Li-Po ou 6V NiMH)
• Interrupteur coupe circuit
Installation du moteur sur la structureUne installation soignée sur un avion ou sur un banc est primordiale pour profiter au mieux et durant longtemps de la puissance de votre moteur.
AVERTISSEMENT: Toujours placer l’anneau de montage du moteur sur une surface plane en contreplaqué de 6 à 8mm d’épaisseur ou sur une plaque de fibre de carbone.
AVERTISSEMENT: N’utilisez jamais d’entretoise entre la cloison pare feu et l’anneau de fixation. Les vibrations entre les entretoises et l’anneau provoqueraient l’endommagement de celui ci, entraînant le détachement du moteur.

FR
31
2. Utilisez 4 vis en inox (non fournies) pour fixer l’anneau à la cloison pare feu. La longueur des vis est spécifique à chaque avion. Utilisez tou-jours les vis les plus longues que vous pouvez pour traverser l’anneau.
Pour éviter le desserrage du moteur en vol:
Cloison pare feu équipée d’écrous prisonniers: Toujours utiliser une rondelle frein entre chaque tête de vis et l’anneau de fixation.
Cloison pare feu débouchante: Toujours utiliser des écrous auto-freinés sur les vis passant au travers de la cloison.
1. Installez le moteur sur la structure avec le cylindre N°1 à la verticale (12H), ce cylindre est celui situé au dessus du logo Evolution. Vous pouvez changer cette position si vous utilisez le collecteur d’échappement torique optionnel et que vous voulez que les sorties d’échappement sortent dans une direction spécifique.
EVOLUTION
2
3
45
6
7
1
3. Vérifiez que le réservoir à carburant n’est pas éloigné de plus de 20 cm en arrière de la cloison pare feu. • Toujours utiliser un filtre dans le réservoir à carburant.
• Nous vous recommandons d’utiliser de la durite de 3.5mm de diamètre intérieur.
• Contrôlez qu’entre le réservoir et le moteur la durite n’est pas pincée ou écrasée.
4. Reliez la tringlerie du servo de gaz au palonnier du carburateur.
5. Ajoutez le mécanisme de votre choix pour l’activation du starter (manuel ou commandé par servo).
Installation de l’allumage électronique
REMARQUE: Toujours vérifier la polarité quand vous branchez la batterie au module d’allumage. Le module ne possède pas de sécurité contre l’inversion de polarité. Les dommages causés au module d’allumage dus à une inversion de polarité ne sont pas couverts par la garantie.
Un allumage électronique est inclus avec votre moteur. Les câbles de bougies sont étiquetés pour chaque cylindre. Si les câbles ne sont pas correctement branchés, l’ordre d’allumage des cylindres ne sera pas respecté et le moteur ne fonctionnera pas correctement.
FR
32
L’allumage électronique doit être alimenté par une batterie de 6 à 7.4V 2500mAh. Pour des performances optimales nous vous recommandons d’utiliser une batterie Li-Po 7.4V 2S (minimum 2500mA) et un interrupteur (JRPA001). Un régulateur de tension n’est pas nécessaire quand vous utilisez une batterie LI-Po.
Refroidissement du moteurIl est très important d’avoir un refroidissement adéquat à l’intérieur du capot. Les moteurs on besoin d’une évacuation d’air d’un ratio de 3:1 à 5:1 par rapport à l’entrée. Un grand capot très ouvert vous laisse penser que le refroidissement est adéquat; cependant vous devez vous assurer que le flux d’air passe bien par les ailettes de culasses. Pour obtenir un bon ratio vous devrez certainement cloisonner autour du moteur et/ou le capot pour réduire le vide et diriger le flux.
1. Vérifier que les ailettes de culasses sont correctement aérées. L’air qui entre dans le capot se dirige toujours où la résistance est la plus faible (entre les cylindres) au lieu d’aller sur les ailettes de refroidissement.
2. Si nécessaire, ajoutez des cloisons entre les cylindres. Les cloisons vont rediriger l’air frais sur les ailettes. Cela permet de réduire la surface de l’entrée d’air frontale.
3. Ajoutez des cloisons entre le capot et le dessus des culasses à l’intérieur du capot.
4. Ne cloisonnez pas l’échappement, il doit être en contact direct avec l’air, sous peine d’endommager les soupapes d’échappement.
Choix de l’héliceLe choix de l’hélice est très important pour un fonctionnement optimal du moteur. Vous trouverez toutes les informations dans la section spécifique. Les moteurs en étoile Evolution possèdent une plage de régime plus réduite et plus de couple qui nécessite plus de pas et augmente la vitesse de votre avion.
Pour augmenter l’accélération et le taux de montée: Augmentez le diamètre de l’hélice et réduisez le pas.
Pour augmenter la vitesse de pointe: Réduisez le diamètre de l’hélice et augmentez le pas.
Contrôlez que votre hélice est correctement fixée au vilebrequin avant d’effectuer le démarrage.
1. Retirez le circlip du vilebrequin situé devant l’écrou de l’hélice.
2. Glissez l’hélice sur le vilebrequin.
3. Fixez l’hélice à l’aide de l’écrou.
4. Replacez le circlip à l’extérieur de l’écrou.
AVERTISSEMENT: NE JAMAIS démarrer le moteur sans avoir installé le circlip. L’hélice risquerait de se desserrer et de provoquer des blessures graves.
Choix du carburantCarburant pour le rodage Carburant pour l’utilisation courante
Essence sans plomb: Huile 2 temps
32:1 40:1
Processus de rodageUn rodage correctement réalisé est essentiel pour les performances et la longévité de votre moteur en étoile Evolution. Ce rodage peut être effectué sur un banc moteur ou sur l’avion. Si vous choisissez d’effectuer le rodage directement sur l’avion, retirez le capot afin d’assurer un refroidissement optimal.

FR
33
Un mélange spécifique est nécessaire durant le rodage. Référez vous au tableau précédent pour le mélange adapté. Le mélange destiné au rodage est plus riche en huile. L’huile ajoutée est nécessaire pour assurer un meilleur refroidissement et l’évacuation des limailles dues au rodage.
Effectuez le rodage sur 4 pleins (1L par plein) par période de 3-4 minutes en laissant le moteur refroidir entre deux. Faites varier les gaz entre le ralenti et les 3/4 durant les 30 premières minutes de fonctionnement. Ne dépassez jamais 3/4 de gaz durant le rodage. Le rodage sera terminé au bout des 4 premiers réservoirs et maintenant vous pouvez procéder aux réglages pour une utilisation normale.
Recherche d’un cylindre noyéA cause de la nature du moteur en étoile, il est fréquent que les cylindres inférieurs se noient durant le stockage ou l’amorçage à cause d’un excès de carburant accumulé. Effectuez les vérifications suivantes avec d’effectuer le démarrage du moteur:
1. Tournez l’hélice avec votre main. Si durant la rotation vous sentez un point dur qui oppose une sérieuse résistance, STOP. Cela signifie qu’un cylindre est noyé, vous sentez un blocage hydraulique. Si vous tentez de forcer le mouvement, vous pouvez endommager le cylindre ou la bielle.
2. Si vous rencontrez un blocage hydraulique, retirez les bougies des cylindres inférieurs, le moteur doit tourner librement. Continuez la rotation jusqu’a l’évacuation complète du fluide bloquant le cylindre.
3. Replacez les bougies et continuez le processus de démarrage.
Démarrage du moteurA chaque séance de vol, utilisez de l’huile de qualité pour lubrifier les culbuteurs de soupapes.
1. Remplissez le réservoir à carburant.
2. Laissez le module d’allumage hors tension.
3. Contrôlez que les durites sont correctement branchées.
4. Ouvrez les gaz en grand. Le boisseau de carburateur doit être totalement ouvert.
5. Bouchez l’entrée du carburateur avec le starter.
6. Faites 3-4 tours d’hélice, jusqu’à ce que le carburant se déplace dans les durites.
7. Retirez le starter et ouvrez les gaz à 1/4.
8. Mettez le module d’allumage sous tension. Vérifiez que la batterie est totalement chargée.
Réglage du moteurRéglage des pointeaux pour le rodage:
Pointeau Haute vitesse: Ouvert de 1 tour et 3/4
Pointeau Basse vitesse: Ouvert de 1 tour et 3/4
Utilisez un compte tours (HAN111 ou HAN156 pour régler le moteur en se basant sur le régime).
AVERTISSEMENT: Toujours régler le carburateur en arrière de l’hélice. Ne laissez pas d’objets à proximité de l’hélice. Ne passez jamais près de l’hélice.
1. Démarrez le moteur.
2. Déplacez le manche des gaz jusqu’à atteindre environ 2000 tr/min.
3. Si vous utilisez un échappement par cylindre, utilisez un thermomètre infrarouge pour contrôler que tous les cylindres expulsent des gaz chauds. Si vous utilisez le collecteur torique, mesurez la température de chaque cylindre pour contrôler qu’ils sont tous à la même température.

FR
34
4. Ouvrez les gaz à fond. Si le moteur tousse ou que des cylindres ne fonctionnent pas, le mélange est trop riche.
5. Rebaissez les gaz de manière à redescendre à 2000 tr/min. Serrez d’1/16ème de tour le pointeau haute vitesse.
6. Mettez rapidement les gaz à fond. Si le moteur coupe, le réglage est trop pauvre.
7. Rebaissez les gaz de manière à redescendre à 2000 tr/min. Ouvrez le pointeau de haute vitesse de 1/8 de tour pour enrichir.
8. Répétez les étapes de 4 à 7 jusqu’à l’obtention du bon réglage à plein gaz.
Réglage du pointeau haute vitesseUne fois que le moteur fonctionne correctement à haut régime:
1. Serrez le pointeau par incrément de 1/16eme de tour.
2. Patientez 2-3 secondes pour laisser le moteur répondre. Les moteurs en étoile ne répondent pas immédiatement aux modifications des réglages.
a. S’il y a une augmentation de régime: Serrez une fois de plus d’1/16eme de tour le pointeau haute vitesse et attendez la réponse du moteur. S’il n’y a pas de variation de régime après ce changement, revenez au réglage précédent.
b. S’il y a une diminution de régime: Enrichissez le mélange en ouvrant le pointeau haute vitesse d’1/8eme de tour et patientez que le régime se stabilise.
3. Répétez l’étape 2 jusqu’à ce que vous déterminiez le régime maximum avec le carburant et l’hélice que vous avez choisi.
4. Desserrez le pointeau haute vitesse quand vous êtes plein gaz, le régime moteur doit se stabiliser après avoir atteint sont maximum. Le fait d’ouvrir le pointeau haute vitesse permet d’obtenir un régime moteur maxi plus élevé en vol.
Fonction du pointeau basse vitesseCe pointeau gère le mélange air/carburant au ralenti et la qualité de la transition entre le ralenti et plein gaz.
Réglage du pointeau basse vitesse1. Réglez le pointeau haute vitesse pour des conditions d’utilisation courantes.
2. Laissez le moteur au ralenti durant 10 à 15 secondes. mettez rapidement les gaz à fond.
Si le moteur n’a aucune hésitation, le pointeau basse vitesse est correctement réglé.
Si le moteur réponds lentement au changement, le pointeau basse vitesse est réglé trop riche. Appauvrissez le en le serrant d’1/16 de tour, puis recontrôlez.
Si le moteur coupe immédiatement, le réglage du pointeau est trop pauvre. Desserrez le d’1/16 de tour puis refaites un essai.
3. Quand le pointeau basse vitesse est correctement réglé, re-contrôlez les réglages de pointeau haute vitesse.
4. Quand vous êtes satisfait des réglages, vous ne devez pas re-régler le pointeau basse vitesse une nouvelle fois. Le réglage du pointeau basse vitesse est mécaniquement contrôlé et ne varie pas en fonction des conditions atmosphériques.
La meilleure indication concernant le réglage du moteur est donné par la couleur des bougies quand vous les retirez des cylindres. Une jolie couleur brune sèche indique que la combustion est bonne et que le moteur est correctement réglé. Des bougies grasses et des dépots de carbone indiquent que le moteur est réglé trop riche.

FR
35
MaintenanceIl y a quelques opérations que vous devez effectuer afin d’assurer le fonctionnement optimal de votre moteur en étoile Evolution.
1. A chaque séance de vol, utilisez de l’huile de qualité pour lubrifier les culbuteurs de soupapes.
2. De temps en temps vous devrez ajuster le jeu aux soupapes. Le premier réglage doit être effectué après le première heure de fonctionnement. Contrôlez le jeu aux soupapes et réglez si nécessaire. Le réglage doit se faire à froid. Le réglage d’usine est de 0.1mm à 0.25mm.
Conseil pour ajuster le jeu aux soupapes
1. Placez le moteur de façon à avoir un accès facile à toutes les soupapes.
2. Retirez toutes le bougies des cylindres. Il est plus facile de déterminer le point mort haut central (TDC) sans la compression causée par les bougies.
3. Fixez une hélice ou un morceau de bois (avec un perçage pour le glisser sur le vilebrequin) au vilebrequin de façon à pouvoir le faire tourner facilement durant ce processus.
4. Commencez par le cylindre N°1 (le cylindre au dessus du logo Evolution).
a. Faites tourner le vilebrequin dans le sens inverse des aiguille d’une montre et observez le mouvement des tiges de culbuteur.
b. Remarquez que vous voyez les tiges de culbuteurs de soupapes d’admission se soulever pour ouvrir les soupapes d’admission. Cela se produit durant un tour complet du vilebrequin.
c. Quand le piston atteint le haut du cylindre à la rotation suivante, vous êtes au TDC compression/explosion.
d. Dans cette position. Il peut être pratique de glisser un petit morceau de bois. (n’utilisez pas d’acier, vous pourriez endommager l’intérieur du cylindre.)
5. Utilisez des cales de réglage pour contrôler le jeu entre le culbuteur et le haut de la soupape.
a. Nous vous recommandons de régler le jeu à une valeur la plus proche possible de 0.1mm. Si le jeu est compris entre 0.1mm et 0.15mm, vous n’avez pas besoin de l’ajuster. La valeur du jeu est identique pour les soupapes d’admission et les soupapes d’échappement.
b. Si un réglage est nécessaire, desserrez l’écrou du culbuteur et serrez la vis à 0.1mm en glissant une cale de réglage entre le culbuteur et le haut de la soupape.
c. Serrez l’écrou et recontrôlez le jeu. Le réglage peu se modifier légèrement en serrant l’écrou.
6. A cause du partage du pignon de la came avec tous les cylindres qui pivote avec un rap-port de 1:6, il y a 6 positions de la came qui doivent êtres contrôlées. Répetez les étapes 4 et 5 4 fois supplémentaires pour contrôler ces positions en effectuant deux tours de vilebrequin entre chaque contrôle. Si vous trouvez que le jeu est trop faible, re-réglez la soupape. Si le jeu augmente légèrement, n’effectuez pas de réglage. il est préférable d’avoir un peu plus de jeu que d’être trop serré.
7. Maintenant vous pouvez allez au deuxième cylindre dans le sens anti-horaire, et répétez les étapes de 4 à 6. Effectuez cela pour les 7 cylindres.
Félicitations. Vous avez réussi le réglage du jeu aux soupapes. Ce étape ne sera pas à effectuer avant 10 heures de fonctionnement.

FR
36
Pièces de rechange
REMARQUE: Si une réparation autre que la maintenance décrite dans ce manuel doit être effectuée, vous DEVEZ envoyer votre moteur au service technique Horizon Hobby pour réparation.
EVOE7160 EVOE7260
Rondelle d’hélice EVO716001 EVO726001
Plateau d’hélice EVO716002 EVO726002
Ecrou d’hélice EVO716029 EVO726029
Cone d’accouplement EVO716035 EVO726035
Vis à pas inversé (rondelle d’hélice) EVO716060 EVO726060
Tige de culbuteur EVO716016A EVO726016A
Culbuteur EVO716027A EVO726027A
Pipe d’admission et d’échappement EVO716034A EVO726034A
Module d’allumage EVO726053 EVO726053
Bougie EVO7260103 EVO7260103
Silencieux torique EVO7160114 EVO7260114
Carburateur complet EVO7160102A EVO7260102A
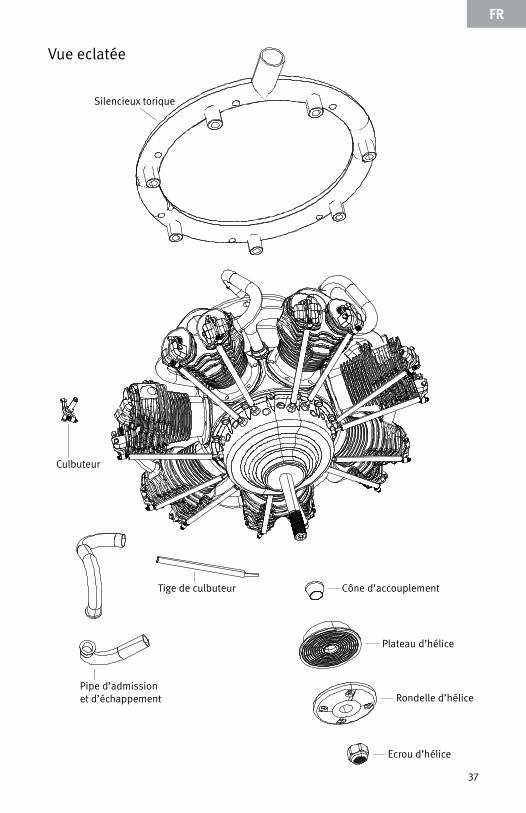
FR
37
Vue eclatée
Silencieux torique
Culbuteur
Pipe d’admission et d’échappement
Tige de culbuteur Cône d’accouplement
Plateau d’hélice
Rondelle d’hélice
Ecrou d’hélice

FR
38
Garantie et RéparationsDurée de la garantieGarantie exclusive - Horizon Hobby, Inc. (Horizon) garantit que le Produit acheté (le « Produit ») sera exempt de défauts maté-riels et de fabrication à sa date d’achat par l’Acheteur. La durée de garantie correspond aux dispositions légales du pays dans lequel le produit a été acquis. La durée de garantie est de 6 mois et la durée d’obligation de ga-rantie de 18 mois à l’expiration de la période de garantie.
Limitations de la garantie(a) La garantie est donnée à l’acheteur initial (« Acheteur ») et n’est pas transférable. Le recours de l’acheteur consiste en la répara-tion ou en l‘échange dans le cadre de cette garantie. La garantie s’applique uniquement aux produits achetés chez un revendeur Horizon agréé. Les ventes faites à des tiers ne sont pas couvertes par cette garantie. Les revendications en garantie seront acceptées sur fourniture d’une preuve d’achat valide uniquement. Horizon se réserve le droit de modifier les dispositions de la présente ga-rantie sans avis préalable et révoque alors les dispositions de garantie existantes.
(b) Horizon n’endosse aucune garantie quant à la vendabilité du produit ou aux capacités et à la forme physique de l’utilisateur pour une utilisation donnée du produit. Il est de la seule responsabilité de l’acheteur de vérifier si le produit correspond à ses capacités et à l’utilisation prévue.
(c) Recours de l’acheteur – Il est de la seule discrétion d‘Horizon de déterminer si un produit présentant un cas de garantie sera réparé ou échangé. Ce sont là les recours exclusifs de l’acheteur lorsqu’un défaut est constaté.
Horizon se réserve la possibilité de vérifier tous les éléments utilisés et susceptibles d’être intégrés dans le cas de garantie. La décision de réparer ou de remplacer le produit est du seul ressort d’Horizon. La garantie exclut les défauts esthétiques ou les défauts provoqués par des cas de force majeure, une manipulation incorrecte du produit, une utilisation incorrecte ou commerciale de ce dernier ou encore des modifications de quelque nature qu’elles soient.
La garantie ne couvre pas les dégâts résultant d’un montage ou d’une manipulation erronés, d’accidents ou encore du fonctionnement ainsi que des tentatives d’entretien ou de réparation non effectuées par Horizon. Les retours effectués par le fait de l’acheteur directement à Horizon ou à l’une de ses représentations nationales requièrent une confirmation écrite.
Limitation des dégâtsHorizon ne saurait être tenu pour responsable de dommages conséquents directs ou indi-rects, de pertes de revenus ou de pertes com-merciales, liés de quelque manière que ce soit au produit et ce, indépendamment du fait qu’un recours puisse être formulé en relation avec un contrat, la garantie ou l’obligation de garantie. Par ailleurs, Horizon n’acceptera pas de recours issus d’un cas de garantie lorsque ces recours dépassent la valeur unitaire du produit. Horizon n’exerce aucune influence sur le montage, l’utilisation ou la mainte-nance du produit ou sur d’éventuelles combi-naisons de produits choisies par l’acheteur. Horizon ne prend en compte aucune garantie et n‘accepte aucun recours pour les blessures ou les dommages pouvant en résulter. En utilisant et en montant le produit, l’acheteur accepte sans restriction ni réserve toutes les dispositions relatives à la garantie figurant dans le présent document. Si vous n’êtes pas prêt, en tant qu’acheteur, à accepter ces dispositions en relation avec l’utilisation du produit, nous vous demandons de restituer au vendeur le produit complet, non utilisé et dans son emballage d’origine.
Indications relatives à la sécuritéCeci est un produit de loisirs perfectionné et non un jouet. Il doit être utilisé avec précaution et bon sens et nécessite quelques aptitudes mécaniques ainsi que mentales. L’incapacité à utiliser le produit de manière sûre et raisonnable peut provoquer des bles-sures et des dégâts matériels conséquents. Ce produit n’est pas destiné à être utilisé par des enfants sans la surveillance par un tuteur. La notice d’utilisation contient des indica-tions relatives à la sécurité ainsi que des indications concernant la maintenance et le fonctionnement du produit. Il est absolument indispensable de lire et de comprendre ces indications avant la première mise en service. C’est uniquement ainsi qu’il sera possible d’éviter une manipulation erronée et des acci-dents entraînant des blessures et des dégâts.

FR
39
Questions, assistance et réparationsVotre revendeur spécialisé local et le point de vente ne peuvent effectuer une estimation d’éligibilité à l’application de la garantie sans avoir consulté Horizon. Cela vaut également pour les réparations sous garantie. Vous voudrez bien, dans un tel cas, contacter le revendeur qui conviendra avec Horizon d’une décision appropriée, destinée à vous aider le plus rapidement possible.
Maintenance et réparationSi votre produit doit faire l’objet d’une maintenance ou d‘une réparation, adressez-vous soit à votre revendeur spécialisé, soit directement à Horizon. Emballez le produit soigneusement. Veuillez noter que le carton d‘emballage d’origine ne suffit pas, en règle générale, à protéger le produit des dégâts pouvant survenir pendant le transport. Faites appel à un service de messagerie proposant une fonction de suivi et une assurance, puisque Horizon ne prend aucune respon-sabilité pour l’expédition du produit jusqu’à sa réception acceptée. Veuillez joindre une preuve d’achat, une description détaillée des défauts ainsi qu’une liste de tous les élé-ments distincts envoyés. Nous avons de plus besoin d’une adresse complète, d’un numéro de téléphone (pour demander des renseigne-ments) et d’une adresse de courriel.
Garantie et réparationsLes demandes en garantie seront unique-ment traitées en présence d’une preuve d’achat originale émanant d’un revendeur spécialisé agréé, sur laquelle figurent le nom de l’acheteur ainsi que la date d’achat. Si le cas de garantie est confirmé, le produit sera réparé Cette décision relève uniquement de Horizon Hobby.
Réparations payantesEn cas de réparation payante, nous établis-sons un devis que nous transmettons à votre revendeur. La réparation sera seulement effectuée après que nous ayons reçu la confir-mation du revendeur. Le prix de la réparation devra être acquitté au revendeur. Pour les réparations payantes, nous facturons au mini-mum 30 minutes de travail en atelier ainsi que les frais de réexpédition. En l’absence d’un accord pour la réparation dans un délai de 90 jours, nous nous réservons la pos-sibilité de détruire le produit ou de l’utiliser autrement.
ATTENTION: nous n’effectuons de répara-tions payantes que pour les composants électroniques et les moteurs. Les répara-tions touchant à la mécanique, en particu-lier celles des hélicoptères et des voitures radiocommandées, sont extrêmement coûteuses et doivent par conséquent être effectuées par l’acheteur lui-même.

FR
40
Steven A. Hall Vice-président Gestion Internationale des Activités et des Risques Horizon Hobby, Inc.
Elimination dans l’Union Européenne Ce produit ne doit pas être éliminé avec les ordures ménagères. Il est de la responsabilité de l‘utilisateur de remettre le produit à un point de collecte officiel des déchets d’équipements électriques. Cette procédure permet de garantir le respect de l’environnement et l’absence de sollicitation excessive des ressources naturelles. Elle protège de plus le bien-être de la communauté humaine. Pour plus d’informations quant aux lieux d’éliminations des déchets d‘équipements électriques, vous pouvez contacter votre mairie ou le service local de traitement des ordures ménagères.
Garantie et service des coordonnées
Pays d’achat Horizon Hobby Adresse Numéro de téléphone/Courriel
France Horizon Hobby SAS
14 Rue Gustave Eiffel Zone d’Activité du Réveil Matin 91230 Montgeron
+33 (0) 1 60 47 44 70 [email protected]
Informations de Conformité pour l’Union Européenne
Déclaration de conformité
(conformément à la norme ISO/IEC 17050-1)
No. HH2011121002
Produit(s): Evolution Gas Radial Engines
Numéro(s) d’article: EVOE7260, EVOE7160
L’objet de la déclaration décrit ci-dessus est en conformité avec les exigences des spécifications énumérées ci-après, suivant les conditions de la directive EMC Directive 2004/108/EC:
EN61000-6-1:2007 EN61000-6-3:2007
Signed for and on behalf of: Horizon Hobby, Inc. Champaign, IL USA 12 décembre 2011

IT
41
AVVISO
Tutte le istruzioni, le garanzie e gli altri documenti pertinenti sono soggetti a cambiamenti a totale discrezione di Horizon Hobby, Inc. Per una documentazione aggiornata sul prodotto, visitare il sito horizonhobby.com e fare clic sulla sezione Support del prodotto.
Nella documentazione relativa al prodotto vengono utilizzati i seguenti termini per indicare i vari livelli di pericolo potenziale durante l’uso del prodotto:
AVVISO: Indica procedure che, se non debitamente seguite, possono determinare il rischio di danni alle cose E il rischio minimo o nullo di lesioni alle persone.
ATTENZIONE: Indica procedure che, se non debitamente seguite, determinano il rischio di danni alle cose E di gravi lesioni alle persone.
AVVERTENZA: Indica procedure che, se non debitamente seguite, determinano il rischio di danni alle cose, danni collaterali, gravi lesioni alle persone o la morte O il rischio elevato di lesioni superficiali alle persone.
SIGNIFICATO DEI TERMINI USATI
AVVERTENZA: Leggere TUTTO il manuale di istruzioni e familiarizzare con le caratteristiche del prodotto prima di farlo funzionare. Un uso improprio del prodotto puo` causare danni al prodotto stesso e alle altre cose e gravi lesioni alle persone.
Questo aeromodello e` un prodotto sofisticato per appassionati di modellismo. Deve essere azionato in maniera attenta e responsabile e richiede alcune conoscenze basilari di meccanica. L’uso improprio o irresponsabile di questo prodotto puo` causare lesioni alle persone e danni al prodotto stesso o alle altre cose. Non tentare di smontare, utilizzare componenti incompati-bili o modificare il prodotto in nessun caso senza previa approvazione di Horizon Hobby, Inc. Questo manuale contiene le istruzioni per la sicurezza, l’uso e la manutenzione del prodotto. E` fondamentale leggere e seguire tutte le istruzioni e le avvertenze del manuale prima di montare, impostare o utilizzare il prodotto, al fine di utilizzarlo correttamente e di evitare di causare danni alle cose o gravi lesioni alle persone.
ATTENZIONE: Questo prodotto diventa estremamente caldo durante il funzionamento e, se toccato, potrebbe procurare ustioni.
Limite minimo di età consigliato: Almeno 14 anni. Non è un giocattolo.
Avvertenze per la sicurezza
I modelli di motore producono una notevole quantità di energia, che potrebbe creare delle situazioni pericolose se non vengono usati correttamente. Usare sempre il buon senso e os-servare tutte le precauzioni di sicurezza quando si opera, si maneggiano o si esegue qualsiasi procedura che coinvolga il motore. La mancata osservanza di queste regole potrebbe causare lesioni gravi e danni alla proprietà.
• Accertarsi sempre che gli spettatori, specialmente i bambini, restino ad una distanza di almeno 10 metri quando il motore è in moto.
• Prima di ogni volo accertarsi sempre che l’elica sia ben fissa all’albero motore e che il sistema di fissaggio sia serrato correttamente. Si raccomanda di usare frenafiletti blu per bloccare i dadi.
• Tenere sempre le minuterie lontano dalla portata dei bambini, perché esiste il rischio di soffocamento.
• Fissare sempre l’aereo prima di avviare il motore.

IT
42
• Quando il motore sta girando o durante l’avviamento, tenere sempre la faccia o le mani a debita distanza dal disco dell’elica.
• Restare sempre dietro al disco dell’elica quando si fa la regolazione del carburatore.
• Indossare sempre occhiali di sicurezza quando il motore è in moto.
• Tenere sempre il carburante in un posto sicuro lontano da scintille, calore o qualsiasi altra cosa che possa incendiarlo.
• Quando il motore è in moto, l’aereo deve essere ben fissato a terra senza possibilità di muoversi.
• Fare sempre il “rebind” fra trasmettitore e ricevitore dopo le impostazioni e prima del primo volo.
• Accertarsi sempre che il fail safe sia impostato sul trasmettitore per avere il motore al minimo.
• Fare sempre una prova di portata prima del volo.
• Per fermare il motore interrompere il tubetto di alimentazione del carburante o usare il comando motore per chiudere l’aria.
• Non usare mai mani, dita o qualsiasi altra parte del corpo per fermare l’elica.
• Non lanciare oggetti vari nell’elica per fermarla.
• Non far girare il motore in vicinanza di piccoli oggetti tipo ghiaia o sabbia, per evitare che l’elica lanci questi materiali tutto intorno.
• Non indossare abiti larghi o una tracolla per il trasmettitore quando si lavora intorno al motore per evitare che questi oggetti rimangano impigliati nell’elica.
• Non tenere oggetti liberi infilati nel taschino, come cacciaviti o penne, quando si lavora intorno al motore. Potrebbero cadere nell’elica in movimento.
• Non permettere al carburante di entrare in contatto con occhi o bocca. I suoi componenti sono velenosi.
• Conservare sempre il carburante e i suoi componenti in contenitori contrassegnati chiaramente, e fuori dalla portata dei bambini.
Consigli per migliorare la sicurezza
• Montare sempre il motore fissandolo saldamente ad un banco di montaggio o a un supporto motore di buona qualità.
• Usare sempre l’elica adatta per questo motore, facendo riferimento alla tabella che si trova su questo manuale.
• Controllare sempre che l’elica sia correttamente bilanciata prima di montarla sul motore. In caso contrario si potrebbero avere dei danni sia al motore che alla struttura dell’aereo.
• Per avviare il motore usare sempre un avviatore elettrico.
• Scartare sempre le eliche segnate, scheggiate, rotte o danneggiate in qualsiasi modo.
• Far girare il motore sempre all’aperto o in un ambiente ben ventilato, poiché produce fumi contenenti monossido di carbonio che è nocivo per la salute.
• Conservare il carburante in un contenitore ermetico e impermeabile.
• Conservare il carburante in un luogo fresco e secco. Il suo contenitore non deve entrare in contatto diretto con il calcestruzzo, perché il carburante potrebbe assorbire umidità.
• Responsabilmente eliminare il carburante contenente acqua di condensazione o di altra provenienza.
• Non rimettere nel contenitore carburante inutilizzato proveniente dal serbatoio del modello.
• Non riparare o modificare un’elica oltre al suo uso previsto.
• Non maneggiare motori, silenziatori o scarichi a risonanza prima che abbiano avuto il tempo di raffreddarsi. Essi diventano molto caldi durante il funzionamento.

IT
IntroduzioneGrazie per aver acquistato un motore radiale Evolution®, il migliore sul mercato odierno. Evolution si impegna a procurare, con questo motore, un’esperienza positiva e una sua lunga durata sempre con ottima funzionalità.
È importante leggere il manuale prima di avviare il motore per la prima volta. I motori radiali Evolution hanno esigenze diverse rispetto ai motori usati prima. Il manuale fornisce informazioni importanti sull’installazione del motore, la scelta dell’elica, il tipo di carburante e le giuste procedure per il rodaggio.
Caratteristiche del motore
Motore EVOE7160 EVOE7260
tipo accensione a scintilla accensione a scintilla
cilindri 7 7
cilindrata 160.0cc 260.0cc
cilindrata ogni cilindro 22.9cc 37.1cc
alesaggio 30.2mm 35.7mm
corsa 32.0mm 37.0mm
potenza 10.6 hp 15.6 hp
RPM 1000–6000 1000–5500
RPM massimo 6300 6000
diametro del motore 28 cm 32 cm
lunghezza del motore 26 cm 27 cm
peso 4.8 kg 6.7 kg
consumo carburante (circa)
1.1 oz (30 ml) al minuto 1.75 oz (50 ml) al minuto
eliche 2-pale: 27 x 10–28 x 12 3-pale: 26 x 12
2-pale: 32 x 12, 32 x 14, 34 x 16 3-pale: 30 x 12, 30 x 16, 30 x 18
Necessari per il completamento• Olio per 2 tempi
• Elica
• Tubetto alimentazione (Ø int. 3,5 mm)
• Viti per il montaggio del motore
• Deflettori motore
• Batteria per accensione elettronica (2S 7.4V Li-Po or 6V Ni-MH)
• Interruttore per accensione elettronica
Montaggio del motore sulla fusolieraInstallare correttamente il motore sulla fusoliera o su un banco motore per il rodaggio, per ottenere dal motore il massimo della potenza e della durata.
AVVERTENZA: Fissare sempre il motore con il suo anello di montaggio, su di una superficie piana come del compensato da 6-8 mm o una piastra in fibra carbonio.
AVVERTENZA: non usare distanziali tra l’ordinata parafiamma e l’anello di montaggio. Le vibrazioni potrebbero danneggiare il supporto e causare il distacco del motore dalla fusoliera.

IT
44
2. Si devono usare 4 viti in acciaio (non incluse) per collegare il supporto anulare per il montag-gio all’ordinata parafiamma. La dimensione delle viti cambia a seconda dell’aereo. Usare sempre le viti più grandi che possono passare attraverso il supporto anulare per il montaggio.
Per fare in modo che il motore non si allenti in volo:
Sull’ordinata parafiamma usare dei dadi ciechi e delle rondelle di sicurezza tra le viti e il supporto anulare per il montaggio.
Sull’ordinata parafiamma usare dei dadi autobloccanti con bulloni attraverso l’ordinata.
1. Fissare il motore alla fusoliera con il cilindro n. 1 posizionato verso l’alto (ore 12) - il cilindro n. 1 è direttamente sopra al logo “Evolution”. Si può modificare questa posizione se si sta usando un collettore di scarico opzionale e si vuole far uscire lo scarico dalla capottina motore in una certa direzione.EVOLUTION
2
3
45
6
7
1
3. Accertarsi che il serbatoio non sia a più di 20 cm dal retro dell’ordinata parafiamma. • Usare sempre un filtro all’interno del serbatoio.
• Raccomandiamo di usare un tubetto di alimentazione con foro interno di 3,5 mm.
• Verificare che non ci siano piegatura nel tubetto di alimentazione tra il serbatoio e il motore.
4. Collegare il rinvio dal servo del motore alla squadretta sul carburatore.
5. Scegliere il metodo per comandare la valvola dell’aria, se con un servo o manualmente.
Installare l’accensione elettronica
AVVISO: collegare sempre la batteria alla centralina dell’accensione elettronica osservando le corrette polarità. Un eventuale danno non sarebbe coperto dalla garanzia.
L’accensione elettronica viene fornita insieme al motore. I cavi per l’accensione hanno un’etichetta con l’indicazione del cilindro a cui vanno collegati, quindi bisogna fare attenzione a collegare il cilindro corretto. In caso contrario si cambierebbe l’ordine di accensione e il motore girerebbe in modo anomalo.
L’accensione elettronica richiede una batteria da 6-7,4V 2500 mAh. Per avere le migliori prestazioni raccomandiamo una batteria LiPo 7,4V 2S con una capacità minima di 2500 mAh e un interruttore adatto (JRPA001). Con questo tipo di batteria (LiPo 7,4V 2S) non è necessario un regolatore di tensione.

IT
Requisiti per il raffreddamento del motoreÈ molto importante prevedere un adeguato raffreddamento all’interno della capottina motore. Il motore richiede un rapporto da 3:1 a 5:1 tra lo scarico del flusso d’aria di raffreddamento e l’ingresso. Un ingresso ampio potrebbe far credere di avere un raffreddamento adeguato, però bisogna essere sicuri che l’aria, oltre ad entrare possa anche uscire passando attraverso le alette sulla testa del cilindro. Per raggiungere il giusto rapporto è necessario avere dei deflettori sulla capottina motore e/o sul motore stesso per ridurre l’apertura dell’area di ingresso.
1. Accertarsi che ci sia un adeguato flusso d’aria che passi attraverso le alette di raffredda-mento della testa motore. L’aria che entra tende a muoversi seguendo il percorso con minore resistenza (in mezzo ai cilindri) invece che attraverso le alette della testa.
2. Se necessario aggiungere dei deflettori che non permettano all’aria di passare tra un cilindro e l’altro. I deflettori sul motore forzano l’aria a passare attraverso le alette della testa motore e riducono di molto la sezione di ingresso dell’aria sulla capottina motore.
3. Aggiungere dei deflettori alla capottina motore tra la parte superiore della testa cilindro e l’interno della capottina.
4. I deflettori non devono coprire i tubi di scarico del motore, perché questi richiedono un flusso d’aria di raffreddamento diretto per evitare che le valvole di scarico si danneggino.
Scelta dell’elicaLa scelta dell’elica è fondamentale per un corretto funzionamento del motore. Nella tabella specifica si possono trovare indicazioni sulle eliche raccomandate in relazione al campo di funzionamento. I motori radiali Evolution girano piano ma hanno una grande coppia per cui si richiede un’elica con più passo per avere la giusta velocità dell’aereo in volo.
Per aumentare il rateo di salita e l’accelerazione: Aumentare il diametro dell’elica e diminuire il passo.
Per aumentare la velocità massima: Diminuire il diametro e aumentare il passo.
Verificare che l’elica sia ben fissata all’albero motore prima di tentare la messa in moto.
1. Togliere l’anello di sicurezza dall’albero motore davanti al dado dell’elica.
2. Inserire l’elica nell’albero motore.
3. Fermare l’elica con il dado esagonale.
4. Rimettere l’anello di sicurezza sulla parte esterna del dado esagonale.
AVVERTENZA: NON avviare mai il motore senza aver fissato saldamente l’anello di sicurezza. In caso contrario il dado si potrebbe allentare dopo che il motore è stato avviato.
Scelta del carburanteCarburante per rodaggio Carburante per l’uso normale
benzina:olio per 2 tempi 32:1 40:1
Procedura per il rodaggioUn buon rodaggio è fondamentale per la vita e le prestazioni del motore radiale Evolution. Il ro-daggio si può fare montando il motore sia su un banco di prova sia direttamente sulla fusoliera. In questo caso bisogna togliere la capottina durante il rodaggio, per garantire un raffredda-mento adeguato.
Per il rodaggio è richiesto un carburante specifico con una maggiore percentuale di olio rispetto al carburante normale, come si evince dalla tabella vista prima. L’olio supplementare è fonda-mentale per il raffreddamento e la rimozione dei detriti di rodaggio dal motore. Far girare il mo-tore con 4 serbatoi di carburante (1000 ml) per 3-4 minuti alla volta per dargli il tempo di raffred-
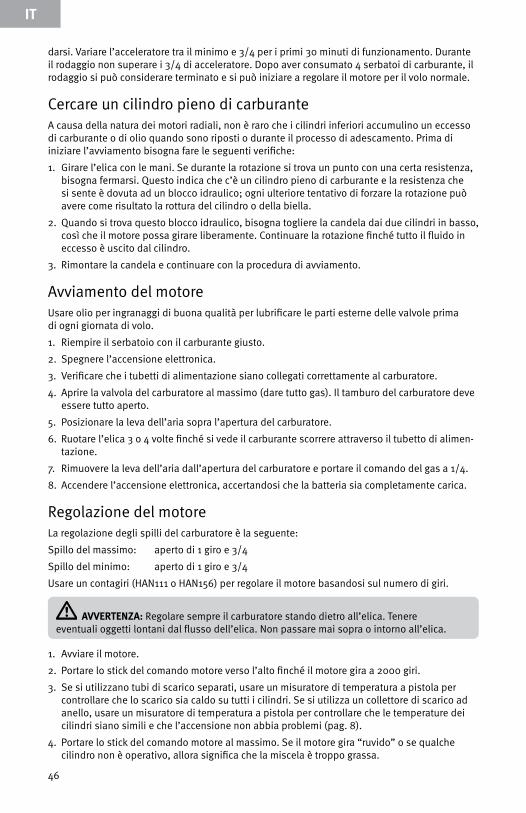
IT
46
darsi. Variare l’acceleratore tra il minimo e 3/4 per i primi 30 minuti di funzionamento. Durante il rodaggio non superare i 3/4 di acceleratore. Dopo aver consumato 4 serbatoi di carburante, il rodaggio si può considerare terminato e si può iniziare a regolare il motore per il volo normale.
Cercare un cilindro pieno di carburanteA causa della natura dei motori radiali, non è raro che i cilindri inferiori accumulino un eccesso di carburante o di olio quando sono riposti o durante il processo di adescamento. Prima di iniziare l’avviamento bisogna fare le seguenti verifiche:
1. Girare l’elica con le mani. Se durante la rotazione si trova un punto con una certa resistenza, bisogna fermarsi. Questo indica che c’è un cilindro pieno di carburante e la resistenza che si sente è dovuta ad un blocco idraulico; ogni ulteriore tentativo di forzare la rotazione può avere come risultato la rottura del cilindro o della biella.
2. Quando si trova questo blocco idraulico, bisogna togliere la candela dai due cilindri in basso, così che il motore possa girare liberamente. Continuare la rotazione finché tutto il fluido in eccesso è uscito dal cilindro.
3. Rimontare la candela e continuare con la procedura di avviamento.
Avviamento del motoreUsare olio per ingranaggi di buona qualità per lubrificare le parti esterne delle valvole prima di ogni giornata di volo.
1. Riempire il serbatoio con il carburante giusto.
2. Spegnere l’accensione elettronica.
3. Verificare che i tubetti di alimentazione siano collegati correttamente al carburatore.
4. Aprire la valvola del carburatore al massimo (dare tutto gas). Il tamburo del carburatore deve essere tutto aperto.
5. Posizionare la leva dell’aria sopra l’apertura del carburatore.
6. Ruotare l’elica 3 o 4 volte finché si vede il carburante scorrere attraverso il tubetto di alimen-tazione.
7. Rimuovere la leva dell’aria dall’apertura del carburatore e portare il comando del gas a 1/4.
8. Accendere l’accensione elettronica, accertandosi che la batteria sia completamente carica.
Regolazione del motoreLa regolazione degli spilli del carburatore è la seguente:
Spillo del massimo: aperto di 1 giro e 3/4
Spillo del minimo: aperto di 1 giro e 3/4
Usare un contagiri (HAN111 o HAN156) per regolare il motore basandosi sul numero di giri.
AVVERTENZA: Regolare sempre il carburatore stando dietro all’elica. Tenere eventuali oggetti lontani dal flusso dell’elica. Non passare mai sopra o intorno all’elica.
1. Avviare il motore.
2. Portare lo stick del comando motore verso l’alto finché il motore gira a 2000 giri.
3. Se si utilizzano tubi di scarico separati, usare un misuratore di temperatura a pistola per controllare che lo scarico sia caldo su tutti i cilindri. Se si utilizza un collettore di scarico ad anello, usare un misuratore di temperatura a pistola per controllare che le temperature dei cilindri siano simili e che l’accensione non abbia problemi (pag. 8).
4. Portare lo stick del comando motore al massimo. Se il motore gira “ruvido” o se qualche cilindro non è operativo, allora significa che la miscela è troppo grassa.
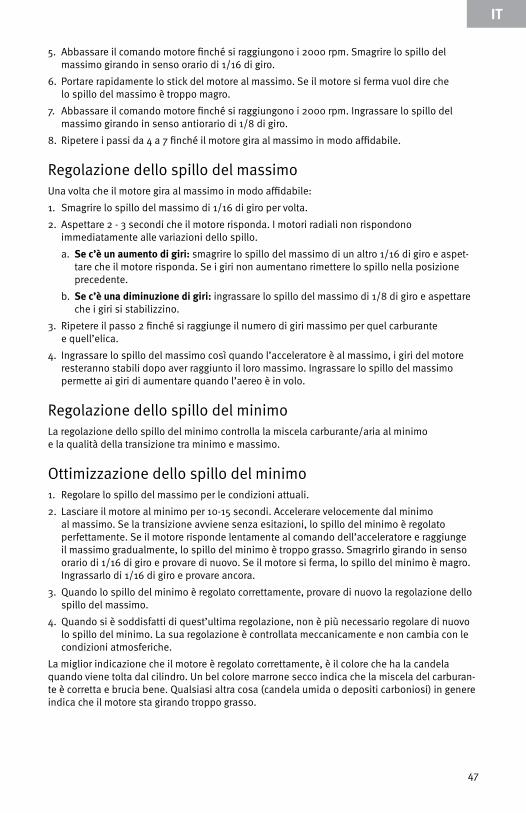
IT
47
5. Abbassare il comando motore finché si raggiungono i 2000 rpm. Smagrire lo spillo del massimo girando in senso orario di 1/16 di giro.
6. Portare rapidamente lo stick del motore al massimo. Se il motore si ferma vuol dire che lo spillo del massimo è troppo magro.
7. Abbassare il comando motore finché si raggiungono i 2000 rpm. Ingrassare lo spillo del massimo girando in senso antiorario di 1/8 di giro.
8. Ripetere i passi da 4 a 7 finché il motore gira al massimo in modo affidabile.
Regolazione dello spillo del massimoUna volta che il motore gira al massimo in modo affidabile:
1. Smagrire lo spillo del massimo di 1/16 di giro per volta.
2. Aspettare 2 - 3 secondi che il motore risponda. I motori radiali non rispondono immediatamente alle variazioni dello spillo.
a. Se c’è un aumento di giri: smagrire lo spillo del massimo di un altro 1/16 di giro e aspet-tare che il motore risponda. Se i giri non aumentano rimettere lo spillo nella posizione precedente.
b. Se c’è una diminuzione di giri: ingrassare lo spillo del massimo di 1/8 di giro e aspettare che i giri si stabilizzino.
3. Ripetere il passo 2 finché si raggiunge il numero di giri massimo per quel carburante e quell’elica.
4. Ingrassare lo spillo del massimo così quando l’acceleratore è al massimo, i giri del motore resteranno stabili dopo aver raggiunto il loro massimo. Ingrassare lo spillo del massimo permette ai giri di aumentare quando l’aereo è in volo.
Regolazione dello spillo del minimoLa regolazione dello spillo del minimo controlla la miscela carburante/aria al minimo e la qualità della transizione tra minimo e massimo.
Ottimizzazione dello spillo del minimo1. Regolare lo spillo del massimo per le condizioni attuali.
2. Lasciare il motore al minimo per 10-15 secondi. Accelerare velocemente dal minimo al massimo. Se la transizione avviene senza esitazioni, lo spillo del minimo è regolato perfettamente. Se il motore risponde lentamente al comando dell’acceleratore e raggiunge il massimo gradualmente, lo spillo del minimo è troppo grasso. Smagrirlo girando in senso orario di 1/16 di giro e provare di nuovo. Se il motore si ferma, lo spillo del minimo è magro. Ingrassarlo di 1/16 di giro e provare ancora.
3. Quando lo spillo del minimo è regolato correttamente, provare di nuovo la regolazione dello spillo del massimo.
4. Quando si è soddisfatti di quest’ultima regolazione, non è più necessario regolare di nuovo lo spillo del minimo. La sua regolazione è controllata meccanicamente e non cambia con le condizioni atmosferiche.
La miglior indicazione che il motore è regolato correttamente, è il colore che ha la candela quando viene tolta dal cilindro. Un bel colore marrone secco indica che la miscela del carburan-te è corretta e brucia bene. Qualsiasi altra cosa (candela umida o depositi carboniosi) in genere indica che il motore sta girando troppo grasso.

IT
48
ManutenzioneCi sono poche cose da fare per garantire un buon funzionamento del motore radiale Evolution.
1. Usare un olio per ingranaggi di buona qualità per lubrificare le parti esterne delle valvole prima di ogni giornata di volo.
2. Ogni tanto bisogna regolare le valvole. La prima regolazione va fatta dopo la prima ora di funzionamento. Verificare quindi il gioco delle valvole e regolarle, se necessario, quando il motore è freddo. Il gioco viene regolato in fabbrica a 0,1 - 0,25 mm.
Guida per la regolazione delle valvole del motore radiale Evolution
1. Piazzare il motore in una posizione che permetta un facile accesso alle valvole di tutti i cilindri.
2. Togliere le candele da tutti i cilindri. È più facile individuare il punto morto superiore senza la compressione che si avrebbe con le candele montate.
3. Montare un’elica, o qualcos’altro di simile, sull’albero motore per poterlo ruotare facil-mente durante questa procedura.
4. Iniziare con il cilindro n.1 che si trova al di sopra del logo Evolution.
a. Girare l’albero motore in senso antiorario e osservare il movimento delle aste.
b. Notare quando le aste dello scarico e dell’aspirazione si muovono verso l’alto per aprire le valvole. Questo avviene durante una rotazione dell’albero motore.
c. Quando il pistone raggiunge la sommità del cilindro durante la prossima rotazione, si trova al punto morto superiore della corsa compressione/scoppio.
d. Posizionare il pistone al punto morto superiore della corsa compressione/scoppio. Può essere di aiuto piazzare un piccolo tassello di legno. (Non usare acciaio perché si può rovinare la superficie interna dl cilindro.)
5. Usare uno spessimetro per misurare il gioco tra il bilanciere e la parte superiore della valvola.
a. Si raccomanda di regolare il gioco il più vicino possibile al valore di 0,1 mm. Se il gioco fosse tra 0,1 e 0,15 mm non è necessario regolarlo. Le regolazioni per la valvola di aspirazione e quella di scarico sono le stesse.
b. Se fosse necessario fare una registrazione delle valvole, bisogna allentare i dadi di bloccaggio delle valvole e regolare la vite finché non si raggiunge l’altezza dello spessimetro da 0,1 mm, avendolo messo tra la valvola e il bilanciere.
c. Stringere il dado di bloccaggio e verificare di nuovo il gioco. Qualche volta, stringendo il dado, la regolazione potrebbe modificarsi leggermente.
6. Poiché l’albero a camme è condiviso da tutti i cilindri e ruota con un rapporto di riduzione di 1:6, ci sono 6 posizioni differenti sull’albero a camme che si devono controllare. Ripetere i passi 4 e 5 per ognuna di esse, facendo fare due rotazioni complete all’albero tra una e l’altra. Se si trova che il gioco è più piccolo del valore indicato prima, allora bisogna registrare la valvola; se invece è più grande si può lasciare così, perché se è un po’ allentato è più sicuro che se fosse troppo stretto.
7. Poi si passa al prossimo cilindro in direzione antioraria ripetendo i passi da 4 a 6. Questo si deve fare per tutti i 7 cilindri.
Congratulazioni. La procedura di regolazione delle valvole è terminata. Bisognerà ripeterla dopo circa 10 ore di funzionamento del motore.

IT
49
Parti di ricambio
AVVISO: Se fosse necessaria una riparazione al di fuori della normale manutenzione indicata in questo manuale, BISOGNA inviare il motore ad un centro assistenza Horizon. Qualsiasi lavoro di riparazione eseguito al di fuori di un centro autorizzato Horizon annulla la garanzia.
EVOE7160 EVOE7260
Rondella elica EVO716001 EVO726001
Rondella di trascinamento elica EVO716002 EVO726002
Dado elica EVO716029 EVO726029
Cono di bloccaggio rondella trascinamento EVO716035 EVO726035
Vite a testa svasata per rondella elica EVO716060 EVO726060
Sottogruppo asta EVO716016A EVO726016A
Sottogruppo bilanciere EVO716027A EVO726027A
Sottogruppo aspirazione & scarico EVO716034A EVO726034A
Unità di accensione EVO726053 EVO726053
Candela EVO7260103 EVO7260103
Anello silenziatore EVO7160114 EVO7260114
Sottogruppo carburatore EVO7160102A EVO7260102A

IT
50
Esploso
Anello silenziatore
Sottoassieme bilanciere
Sottogruppo aspirazione & scarico
Asta e perno Cono di bloccaggio rondella trascinamento
Rondella di trascinamento
Rondella elica
Dado elica
IT
51
GaranziaPeriodo di garanziaGaranzia esclusiva - Horizon Hobby, Inc., (Horizon) garantisce che i prodotti acquistati (il “Prodotto”) sono privi di difetti relativi ai materiali e di eventuali errori di montaggio. Il periodo di garanzia è conforme alle dispo-sizioni legali del paese nel quale il prodotto è stato acquistato. Tale periodo di garanzia ammonta a 6 mesi e si estende ad altri 18 mesi dopo tale termine.
limiti della garanzia(a) La garanzia è limitata all’acquirente originale (Acquirente) e non è cedibile a terzi. L’acquirente ha il diritto a far riparare o a far sostituire la merce durante il periodo di questa garanzia. La garanzia copre solo quei prodotti acquistati presso un rivenditore autorizzato Horizon. Altre transazioni di terze parti non sono coperte da questa garanzia. La prova di acquisto è necessaria per far valere il diritto di garanzia. Inoltre, Horizon si riserva il diritto di cambiare o modificare i termini di questa garanzia senza alcun preavviso e di escludere tutte le altre garanzie già esistenti.
(b) Horizon non si assume alcuna garan-zia per la disponibilità del prodotto, per l’adeguatezza o l’idoneità del prodotto a particolari previsti dall’utente. è sola respon-sabilità dell’acquirente il fatto di verificare se il prodotto è adatto agli scopi da lui previsti.
(c) Richiesta dell’acquirente – spetta soltanto a Horizon, a propria discrezione riparare o sostituire qualsiasi prodotto consid-erato difettoso e che rientra nei termini di garanzia. queste sono le uniche rivalse a cui l’acquirente si può appellare, se un prodotto è difettoso.
Horizon si riserva il diritto di controllare qualsiasi componente utilizzato che viene co-involto nella rivalsa di garanzia. Le decisioni relative alla sostituzione o alla riparazione avvengono solo in base alla discrezione di Horizon. Questa garanzia non copre dei danni superficiali o danni per cause di forza mag-giore, uso errato del prodotto, negligenza, uso ai fini commerciali, o una qualsiasi modifica a qualsiasi parte del prodotto.
Questa garanzia non copre danni dovuti ad una installazione errata, ad un funzionamento errato, ad una manutenzione o un tentativo di riparazione non idonei a cura di soggetti di-versi da Horizon. La restituzione del prodotto
a cura dell’acquirente, o da un suo rappre-sentante, deve essere approvata per iscritto dalla Horizon.
Limiti di dannoHorizon non si riterrà responsabile per danni speciali, diretti, indiretti o consequenziali; perdita di profitto o di produzione; perdita commerciale connessa al prodotto, indip-endentemente dal fatto che la richiesta si basa su un contratto o sulla garanzia. Inoltre la responsabilità di Horizon non supera mai in nessun caso il prezzo di acquisto del prodotto per il quale si chiede la respon-sabilità. Horizon non ha alcun controllo sul montaggio, sull’utilizzo o sulla manutenzi-one del prodotto o di combinazioni di vari prodotti. Quindi Horizon non accetta nessuna responsabilità per danni o lesioni derivanti da tali circostanze. Con l’utilizzo e il montaggio del prodotto l’utente acconsente a tutte le condizioni, limitazioni e riserve di garanzia citate in questa sede.
Qualora l’utente non fosse pronto ad assum-ersi tale responsabilità associata all’uso del prodotto, si suggerisce di restituire il prodotto intatto, mai usato e immediatamente presso il venditore.
Indicazioni di sicurezzaQuesto è un prodotto sofisticato di hob-bistica e non è un giocattolo. Esso deve essere manipolato con cautela, con giudizio e richiede delle conoscenze basilari di mec-canica e delle facoltà mentali di base. Se il prodotto non verrà manipolato in maniera sicura e responsabile potrebbero risultare delle lesioni, dei gravi danni a persone, al prodotto o all’ambiente circostante. Questo prodotto non è concepito per essere usato dai bambini senza una diretta supervisione di un adulto. Il manuale del prodotto contiene le istruzioni di sicurezza, di funzionamento e di manutenzione del prodotto stesso. È fonda-mentale leggere e seguire tutte le istruzioni e le avvertenze nel manuale prima di mettere in funzione il prodotto. Solo così si eviterà un utilizzo errato e di preverranno incidenti, lesioni o danni.
Domande, assistenza e riparazioniIl vostro negozio locale e/o luogo di acquisto non possono fornire garanzie di assistenza o riparazione senza previo colloquio con Horizon. questo vale anche per le riparaz-ioni in garanzia. Quindi in tale casi bisogna interpellare un rivenditore, che si metterà in

IT
52
contatto subito con Horizon per prendere una decisione che vi possa aiutare nel più breve tempo possibile.
Manutenzione e riparazioneSe il prodotto deve essere ispezionato o riparato, si prega di rivolgersi ad un rivendi-tore specializzato o direttamente ad Horizon. il prodotto deve essere Imballato con cura. Bisogna far notare che i box originali soli-tamente non sono adatti per effettuare una spedizione senza subire alcun danno. Bisog-na effettuare una spedizione via corriere che fornisce una tracciabilità e un’assicurazione, in quanto Horizon non si assume alcuna responsabilità in relazione alla spedizione del prodotto. Inserire il prodotto in una busta assieme ad una descrizione dettagliata degli errori e ad una lista di tutti i singoli compo-nenti spediti. Inoltre abbiasmo bisogno di un indirizzo completo, di un numnero di telefono per chiedere ulteriori domande e di un indirizzo e-mail.
Garanzia a riparazioneLe richieste in garanzia verranno elaborate solo se è presente una prova d’acquisto in originale proveniente da un rivenditore specializzato autorizzato, nella quale è ben
visibile la data di acquisto. Se la garanzia viene confermata, allora il prodotto verrà riparato o sostituito. Questa decisione spetta esclusivamente a Horizon Hobby.
Riparazioni a pagamentoSe bisogna effettuare una riparazione a paga-mento, effettueremo un preventivo che verrà inoltrato al vostro rivenditore. La riparazione verrà effettuata dopo l’autorizzazione da parte del vostro rivenditore. La somma per la riparazione dovrà essere pagata al vostro rivenditore. Le riparazioni a pagamento avranno un costo minimo di 30 minuti di lavoro e in fattura includeranno le spese di restituzione. Qualsiasi riparazione non pagata e non richiesta entro 90 giorni verrà considerata abbandonata e verrà gestita di conseguenza.
Attenzione: Le riparazioni a pagamento sono disponibili solo sull’elettronica e sui motori. Le riparazioni a livello meccanico, soprattutto per gli elicotteri e le vetture RC sono molto costose e devono essere effet-tuate autonomamente dall’acquirente.
Garanzia e Revisiona informazioni per i contatti
Stato in cui il prodotto è stato acquistato Horizon Hobby Indirizzo Telefono/Indirizzo E-mail
Germania Horizon Technischer Service
Christian-Junge-Straße 1 25337 Elmshorn Germany
+49 (0) 4121 2655 100 [email protected]
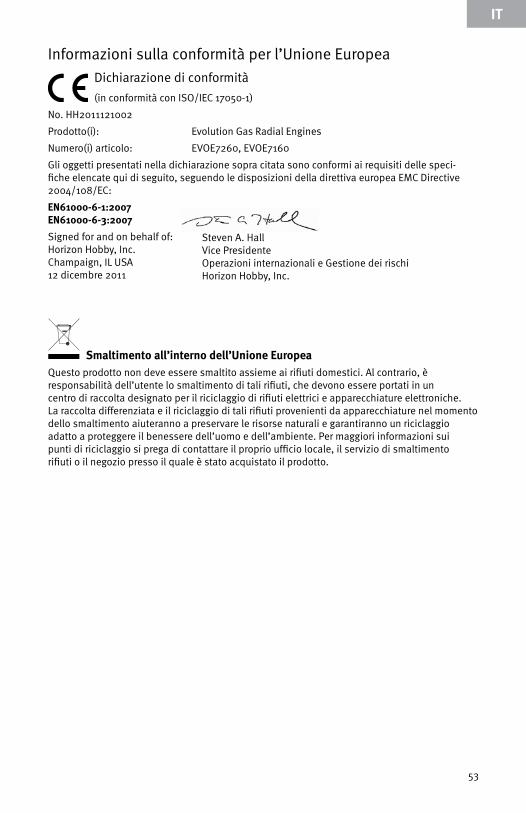
IT
53
Steven A. Hall Vice Presidente Operazioni internazionali e Gestione dei rischi Horizon Hobby, Inc.
Informazioni sulla conformità per l’Unione Europea
Dichiarazione di conformità
(in conformità con ISO/IEC 17050-1)
No. HH2011121002
Prodotto(i): Evolution Gas Radial Engines
Numero(i) articolo: EVOE7260, EVOE7160
Gli oggetti presentati nella dichiarazione sopra citata sono conformi ai requisiti delle speci-fiche elencate qui di seguito, seguendo le disposizioni della direttiva europea EMC Directive 2004/108/EC:
EN61000-6-1:2007 EN61000-6-3:2007
Signed for and on behalf of: Horizon Hobby, Inc. Champaign, IL USA 12 dicembre 2011
Smaltimento all’interno dell’Unione EuropeaQuesto prodotto non deve essere smaltito assieme ai rifiuti domestici. Al contrario, è responsabilità dell’utente lo smaltimento di tali rifiuti, che devono essere portati in un centro di raccolta designato per il riciclaggio di rifiuti elettrici e apparecchiature elettroniche. La raccolta differenziata e il riciclaggio di tali rifiuti provenienti da apparecchiature nel momento dello smaltimento aiuteranno a preservare le risorse naturali e garantiranno un riciclaggio adatto a proteggere il benessere dell’uomo e dell’ambiente. Per maggiori informazioni sui punti di riciclaggio si prega di contattare il proprio ufficio locale, il servizio di smaltimento rifiuti o il negozio presso il quale è stato acquistato il prodotto.

IT
54

IT
55

31864
Printed: 11/2011©2011 Horizon Hobby, Inc. Evolution and the Evolution logo are registered trademarks of Horizon Hobby, Inc. All other trademarks, service marks and logos are the property of their respective owners.
Related Documents