1 Revised May 2018 GRAYSON COLLEGE Course Syllabus DNTA 1305 Dental Radiography I Fall 2018 Dental Assisting Program Lecture hours per week 2 Lab hours per week 4 Clock hours per semester 96 Lecture Room 205 Tuesday 8:00 am – 10:00 am Lab Room 205 Friday 8:00 am – 12:00 pm Professor Contact Information Tonya Hance BAAS, AAS, CDA, RDA (903) 463-8780 email- [email protected] Office Location: Health Science Administrative Offices Room 132 Professor’s Office Hours: Monday 9:00 am -10:00 am & 1:00-4:00 pm Tuesday 10:00 am - 12:00 pm & 1:00-3:00 pm Wednesday 3:00 pm – 4:00 pm Thursday 1:00 pm – 4:00 pm Friday 1:00 pm – 4:00 pm Professor’s Class Schedule: Monday 10:00 am – 12:00 pm Tuesday 8:00 am – 10:00 am & 3:00 pm- 4:00 pm Wednesday 8:00 am – 12:00 pm & 1:00 pm-3:00 pm Thursday 8:00 am – 12:00 pm Friday 8:00 am – 12:00 pm Credit Hours 3.00 Lecture Hours 2.00 Laboratory Hours 4.00 Course Length 16 Weeks Types of Instruction Lecture/Lab Co-requisites DNTA 1311 Dental Science DNTA 1301 Dental Materials DNTA 1345 Preventive Dentistry

Welcome message from author
This document is posted to help you gain knowledge. Please leave a comment to let me know what you think about it! Share it to your friends and learn new things together.
Transcript

1 Revised May 2018
GRAYSON COLLEGE
Course Syllabus
DNTA 1305 Dental Radiography I
Fall 2018
Dental Assisting Program
Lecture hours per week 2
Lab hours per week 4
Clock hours per semester 96
Lecture Room 205 Tuesday 8:00 am – 10:00 am
Lab Room 205 Friday 8:00 am – 12:00 pm
Professor Contact Information
Tonya Hance BAAS, AAS, CDA, RDA
(903) 463-8780
email- [email protected]
Office Location: Health Science Administrative Offices Room 132
Professor’s Office Hours: Monday 9:00 am -10:00 am & 1:00-4:00 pm
Tuesday 10:00 am - 12:00 pm & 1:00-3:00 pm
Wednesday 3:00 pm – 4:00 pm
Thursday 1:00 pm – 4:00 pm
Friday 1:00 pm – 4:00 pm
Professor’s Class Schedule: Monday 10:00 am – 12:00 pm
Tuesday 8:00 am – 10:00 am & 3:00 pm- 4:00 pm
Wednesday 8:00 am – 12:00 pm & 1:00 pm-3:00 pm
Thursday 8:00 am – 12:00 pm
Friday 8:00 am – 12:00 pm
Credit Hours 3.00
Lecture Hours 2.00
Laboratory Hours 4.00
Course Length 16 Weeks
Types of Instruction Lecture/Lab
Co-requisites
DNTA 1311 Dental Science
DNTA 1301 Dental Materials
DNTA 1345 Preventive Dentistry

2 Revised May 2018
DNTA 1315 Chairside Dentistry
DNTA 1202 Communications in the Dental Office
Course Description – (2-4-3) Introduction to radiation: physics, protection, the operation of
radiographic equipment, exposure, processing and mounting of dental radiographs. Specific
federal and state safety and standard practices for the classroom and settings will be practiced.
Student Learning Outcomes (Course Objectives)-
• Describe the theory and principles of radiographic techniques and physics
• Comply with radiation health and safety principles
• Apply radiographic techniques
• Expose, process, and mount radiographs
• Demonstrate quality assurance practices
Course Learning Outcomes
Upon completion of this course the student will be able to:
1. State a brief history of dental radiography.
2. List the properties and characteristics of x-rays.
3. Name and identify the parts of the x-ray unit.
4. Describe the production of x-rays.
5. Describe the biological effects of ionizing radiation.
6. Name the radiation protection measurer utilized in a dental x-ray lab.
7. Name all types of dental x-ray film.
8. Demonstrate and describe the principles of the bisecting angle technique, paralleling
technique, and bitewing techniques of dental radiography.
9. Identify anatomical landmarks.
10. Demonstrate and describe the proper method of processing dental x-ray film, both
manual and automatic.
11. Expose, process, mount and critique any and all dental radiographs.
12. To recognize and solve any problem situations encountered in dental radiology.
Required Textbooks (ISBN # included) and Materials:
1. Iannucci, Joen M.,DDS, MS, and Laura Jansen Howerton, RDH,MS, DENTAL
RADIOGRAPHY PRINCIPLES AND TECHNIQUES, Fifth Edition (2017).
Elesevier/Saunders Publishers (ISBN#978-0-323-29742-4)
2. Bird, Doni L., CDA,RDH,MA, and Debbie S. Robinson, CDA,MS, MODERN
DENTAL ASSISTING, Twelfth Edition (2018). Elsevier/Saunders Publishers
(ISBN#978-0-323-43030-2)
3. Microsoft Office Software
4. Pens, Pencils, Highlighters, Paper, Notebook
5. Student Uniforms
6. Dental Assisting Student ID
3 Revised May 2018
Additional Resources:
• Texas State Board of Dental Examiners website: http://www.tsbde.state.tx.us/
• Dental Assisting National Boards website: http://www.danb.org
Required Assignments & Academic Calendar
In case of inclement weather, emergency closings, or other unforeseen disruptions to
scheduled classes, student must log onto their Canvas accounts for directions on where or
how to continue their coursework.
As a secondary means of communication the app GroupMe will be used. It is not a requirement of the class, but I strongly urge each of you to join the class GroupMe. Any announcements such as inclement weather, class announcement, or in the event class must be cancelled due to instructor illness or emergencies an announcement will be made in Canvas, as well as, GroupMe.
The schedule listed below is subject to change with fair notice from the professor. Changes will
be announced in the classroom and through the Canvas course.
Course Schedule
Week Date Topics, Readings, Assignments, Deadlines
1
Aug. 21
Aug. 24
Lecture: C-16 Introduction to Radiographic Examinations & C-17
Paralleling Technique
• Handout Class Syllabus & Discuss Patient
Requirements/Expectations.
• Classroom Exercise: Identifying Radiographs.
• Classroom Exercise: Demonstrate and Assemble an XCP
• Classroom Exercise: Demonstrate the Proper XCP
Placement using the paralleling technique.
• Assignment/Assessment #1 opens in Canvas (Due 9/3/18
by 11:59pm)
Lab:
• Pass out and go over the Operating and Safety Procedures for
Radiation Safety Policy
• Pass out and go over additional Radiation Safety Handouts
• Dr. Moore Introduction Speech
• Introduction to the lab, clinic, and darkroom procedures.
• Introduction to Radiology infection control procedures-
• Key Terms Handout (C-16 & 17)
• Begin FMS #1 (Anterior PA’s) (Conventional)

4 Revised May 2018
Week Date Topics, Readings, Assignments, Deadlines
• Radiology Infection Control Check-Off Due 8/31/2018 by
Noon
• XCP Assembly Check-Off Due 9/7/18 by Noon
➢ Clean lab, clinic, darkroom & instruments using infection
control protocol
2
Aug. 28
Aug. 31
Lecture: C-18 Bisecting Technique & C- 19 Bite-Wing Technique
• Classroom Exercise: Demonstrate the Proper XCP Placement
using the bisecting technique.
• Classroom Exercise: Demonstrate the Proper XCP Placement
for the Molar and Pre-Molar Bitewings
• Classroom Exercise: Paralleling and the Bisecting Technique
Differences.
• Classroom Exercise: Continue in the groups and play a
classroom game
• Watch video on Dental Radiograph Exposures (if time
allows)
• Test #1 Review
• Assignment/Assessment #1 (C-16, 17, 18, & 19) in Canvas
due 9/3/18 by 11:59 pm
Lab:
• Practice proper XCP placement on a mounted typodont
• Key Terms Handout (C-18 & 19)
• Continue FMS #1 on DXTRR (Posterior PA’s & BW’s)
• Demonstrate Automatic Processing and Infection Control in
the Darkroom (Check-Off Due by Noon 9/14/2018)
• Begin Mounting and Introduction to Interpretation of Dental
X-Rays (Mounting Check-Off Due by Noon 11/9/2018)
➢ Begin having Dr. Moore Grade FMS #1 for a practice grade
(Will not be recorded in Canvas)
➢ It time allows Practice other clinical skills/ homework or
computer lab
➢ Clean lab, clinic, darkroom and instruments using infection
control protocol
3
Sept. 4
Lecture: C-1 Radiation History & C-2 Radiation Physics
• Test #1 (C-16, 17, 18, & 19) in Canvas in the computer lab
• Classroom Exercise: Two-column chart on the board
• Classroom Exercise: Label and discuss Fig. 2-12 Diagram of
dental x-ray tubehead
• Assignment/Assessment #2 opens in Canvas (Due 9/17/18
by 11:59pm

5 Revised May 2018
Week Date Topics, Readings, Assignments, Deadlines
Sept. 7 Lab:
• Practice proper XCP placement on a mounted typodont
• Key Terms Handout (C-1 & 2)
• Finish FMS #1 on DXTRR (if needed)
• Begin FMS #2 (All 18 Exposures) (Digital)
• Practice Mounting
• XCP Assembly Check-Off Due by Noon
➢ Have Dr. Moore Finish Grading FMS # 1 & Begin Grading
FMS #2 (Will be recorded in Canvas)
➢ It time allows Practice other clinical skills/ homework or
computer lab
➢ Clean lab, clinic, darkroom and instruments using infection
control protocol
4
Sept. 11
Sept. 14
Lecture: C-3 Radiation Characteristics
• Classroom Exercise: kVp’s, mA’s, & exposure control panel
exercise in the clinic
• Classroom Exercise: Group mounting exercise
• Test #2 Review
• Assignment/Assessment #2 (C-1, 2, & 3) in Canvas due
9/17/18 by 11:59 pm
Lab:
• Practice proper XCP placement on a mounted typodont
• Key Terms Handout (C-3)
• Finish FMS #2 on DXTRR
• Begin FMS #3 (All 18 Exposures) (Digital)
• FMS #3 WILL BE USED AS YOUR SKILL CHECK-
OFF & MUST BE COMPLETED AND GRADED
BEFORE YOUR 1ST PATIENT.
• Practice Mounting
• Review Patient Chart Assembly, Patient flow. Q & A
session
➢ Have Dr. Moore Finish Grading FMS # 2 & Begin Grading
FMS #3 (Will be recorded in Canvas)
➢ It time allows Practice other clinical skills/ homework or
computer lab
➢ Clean lab, clinic, darkroom and instruments using infection
control protocol
5
Sept. 18
Lecture: C-6 Dental X-ray Equipment
• Test #2 (C-1, 2, & 3) in Canvas in the computer lab

6 Revised May 2018
Week Date Topics, Readings, Assignments, Deadlines
Sept. 21
• Classroom Exercise: Dental X-ray Equipment activity TBA
• Classroom Exercise: Film Mounting
• Assignment/Assessment #3 opens in Canvas (Due 10/1/18
by 11:59pm)
Lab:
FIRST PATIENT DAY (3 patients every hour/ 12 patient’s total)
• Sterilization Tech 1 student every half hour
• Complete Lab Sheet Check-Off (To be signed by Mrs.
Hance, Mrs. Renfro, or Dr. Moore)
• Key Terms Handout (C-6)
• Continue Practicing Competency: Mounting
• Practice other clinical skills (impressions, pour-ups, vitals,
charting, mounting, etc.)
• Finish FMS #3 on DXTRR (OPT. 1 ONLY)
• FMS #1, 2, & 3 DUE by Noon Today
• Practice Mounting
➢ Have Dr. Moore Finish Grading ALL FMS.
➢ It time allows Practice other clinical skills/ homework or
computer lab
➢ Clean lab, clinic, darkroom and instruments using infection
control protocol
6
Sept. 25
Sept. 28
Lecture: C-8 Dental X-Ray Image Characteristics
• Classroom Exercise: kVp’s, mA’s, & exposure control panel
exercise in the clinic
• Test #3 Review
• Key Terms Handout (C-8) (will be given in class to work on
at home. No Lab on Friday.
• Assignment/Assessment #2 (C-6 & 8) in Canvas due
10/1/18 by 11:59 pm
Lab: NO CLASS
PROFESSIONAL DEVELOPMENT DAY
7
Oct. 2
Lecture: C-27 Normal Anatomy: Intraoral Images & C-28 Film
Mounting and Viewing
• Classroom Exercise: Normal Anatomic Landmark activity
• Classroom Exercise: Group mounting exercise
• Test #3 (C-6 & C- 8) in Canvas in the computer lab
• Assignment/Assessment #4 opens in Canvas (Due 10/22/18
by 11:59pm
Lab:

7 Revised May 2018
Week Date Topics, Readings, Assignments, Deadlines
Oct. 5 PATIENT DAY (3 patients every hour/ 12 patient’s total)
• Sterilization Tech 1 student every half hour
• Complete Lab Sheet Check-Off (To be signed by Mrs.
Hance, Mrs. Renfro, or Dr. Moore)
• Key Terms Handout (C-27 & 28)
• Continue Practicing Competency: Mounting
• Practice other clinical skills (impressions, pour-ups, vitals,
charting, mounting, etc.)
➢ Have Dr. Moore Grade Patient FMS.
➢ It time allows Practice other clinical skills/ homework or
computer lab (Not included in Lab Sheet Check-Off)
➢ Clean lab, clinic, darkroom and instruments using infection
control protocol
8
Oct. 9
Oct. 12
Lecture: Catch-up if needed
• Classroom Exercise: TBA
• Assignment/Assessment #4 (C-27, 28, 7 & 9) in Canvas
due 10/22/18 by 11:59 pm
Lab:
PATIENT DAY (3 patients every hour/ 9 patient’s total)
• Expose 4 BW’s- (To be Graded by Dr. More as a Skill
Check-off Due by Noon Today)
• Sterilization Tech 1 student every half hour
• Complete Lab Sheet Check-Off (To be signed by Mrs.
Hance, Mrs. Renfro, or Dr. Moore)
• Continue Practicing Competency: Mounting
• Practice other clinical skills (impressions, pour-ups, vitals,
charting, mounting, etc.)
➢ Have Dr. Moore Grade Patient FMS.
➢ It time allows Practice other clinical skills/ homework or
computer lab (Not included in Lab Sheet Check-Off)
➢ Clean lab, clinic, darkroom and instruments using infection
control protocol
9
Oct. 16
Oct. 19
Lecture: C-7 Dental X-Ray Film & C-9 Film Processing
• Classroom Exercise: Critical Thinking Questions/Role Play
• Classroom Exercise: Video on Film Processing
• Test #4 Review
• Assignment/Assessment #4 (C-27, 28, 7 & 9) in Canvas
due 10/22/18 by 11:59 pm
Lab:

8 Revised May 2018
Week Date Topics, Readings, Assignments, Deadlines
PATIENT DAY (3 patients every hour/ 12 patient’s total)
• Sterilization Tech 1 student every half hour
• Complete Lab Sheet Check-Off (To be signed by Mrs.
Hance, Mrs. Renfro, or Dr. Moore)
• Continue Practicing Competency: Mounting
• Practice other clinical skills (impressions, pour-ups, vitals,
charting, mounting, etc.)
➢ Have Dr. Moore Grade Patient FMS.
➢ It time allows Practice other clinical skills/ homework or
computer lab (Not included in Lab Sheet Check-Off)
➢ Clean lab, clinic, darkroom and instruments using infection
control protocol
10
Oct. 23
Oct. 26
Lecture: C-25 Digital Imaging
• Classroom Exercise: Digital Imaging
Advantages/Disadvantages
• Classroom Exercise: Critical Thinking Question
• Test #4 (C-27, 28, 7, & 9)
• Assignment/Assessment #5 opens in Canvas (Due 11/19/18
by 11:59pm
Lab:
PATIENT DAY (3 patients every hour/ 12 patient’s total)
• Sterilization Tech 1 student every half hour
• Complete Lab Sheet Check-Off (To be signed by Mrs.
Hance, Mrs. Renfro, or Dr. Moore)
• Key Terms Handout (C-25)
• Continue Practicing Competency: Mounting
• Practice other clinical skills (impressions, pour-ups, vitals,
charting, mounting, etc.)
➢ Have Dr. Moore Grade Patient FMS.
➢ It time allows Practice other clinical skills/ homework or
computer lab (Not included in Lab Sheet Check-Off)
➢ Clean lab, clinic, darkroom and instruments using infection
control protocol
11
Oct. 30
Nov. 2
Lecture: C-15 Infection Control and the Dental Radiographer
• Classroom Exercise: Infection Control Exposure Plan
• Assignment/Assessment #5 in Canvas (Due 11/19/18 by
11:59pm
Lab:
PATIENT DAY (3 patients every hour/ 12 patient’s total)
• Sterilization Tech 1 student every half hour

9 Revised May 2018
Week Date Topics, Readings, Assignments, Deadlines
• Complete Lab Sheet Check-Off (To be signed by Mrs.
Hance, Mrs. Renfro, or Dr. Moore)
• Key Terms Handout (C-15)
• Continue Practicing Competency: Mounting
• Practice other clinical skills (impressions, pour-ups, vitals,
charting, mounting, etc.)
➢ Have Dr. Moore Grade Patient FMS.
➢ It time allows Practice other clinical skills/ homework or
computer lab (Not included in Lab Sheet Check-Off)
➢ Clean lab, clinic, darkroom and instruments using infection
control protocol
12
Nov. 6
Nov. 9
Lecture: C-4 Radiation Biology
• Classroom Exercise: Critical Thinking Question/Role Play in
the Clinic
• Assignment/Assessment #5 (C-25, 15, 4 & 5) in Canvas
due 11/19/18 by 11:59 pm
Lab:
LAST PATIENT DAY (3 patients every hour/ 12 patient’s total)
• Sterilization Tech 1 student every half hour
• Complete Lab Sheet Check-Off (To be signed by Mrs.
Hance, Mrs. Renfro, or Dr. Moore)
• Key Terms Handout (C-4)
• Competency: Mounting (Due by Noon Today)
• Practice other clinical skills (impressions, pour-ups, vitals,
charting, mounting, etc.)
➢ Have Dr. Moore Grade Patient FMS.
➢ It time allows Practice other clinical skills/ homework or
computer lab (Not included in Lab Sheet Check-Off)
Clean lab, clinic, darkroom and instruments using infection control
protocol
13
Nov. 13
Nov. 16
Lecture: C-5 Radiation Protection & Discuss the Effects of
Radiation Exposure
• Key Terms Handout (C-5)
• Classroom Exercise: Radiation Effects Discussion
• Test #5 Review
• Assignment/Assessment #5 (C-25, 15, 4 & 5) in Canvas
due 11/19/18 by 11:59 pm
Lab:
➢ Mock Medical Emergencies Day
14
Nov. 20
Lecture:
• Test #5 (C-25, 15, 4, & 5) in Canvas in the computer lab
10 Revised May 2018
Week Date Topics, Readings, Assignments, Deadlines
Nov. 23
Lab: Thanksgiving Holiday
➢ NO CLASS ENJOY YOUR HOLIDAY
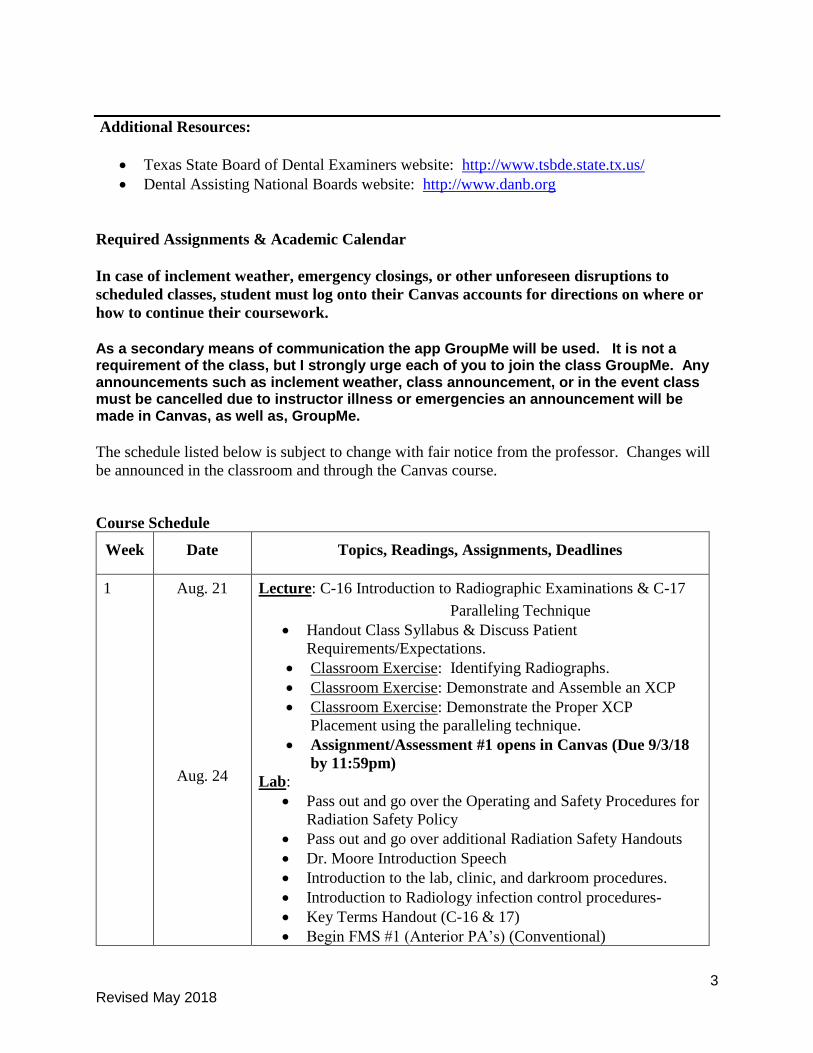
15
Nov. 27
Dec. 1
Lecture: Final Exam Review
Lab:
• Verify all patient charts have been completed, graded, and
locked in the filing cabinet in darkroom
• Clean lab and clinic
• Review for Final Exam
16
Dec.3 • Final Exam 9:00-11:00 am in the Computer Lab
Chapter 16 Introduction to Dental Imaging Examinations
Course Outline:
• Intraoral Imaging Examination
o Types of Intraoral Imaging Examinations
o Complete Mouth Series/Full Mouth Series
o Diagnostic Criteria for Intraoral Images
• Extraoral Imaging Examination
• Prescribing Dental Images
Expected Learning Outcomes (Objectives)
1. Define the key terms associated with dental imaging examinations.
2. List the three types of intraoral imaging examinations.
3. Describe the purpose, the type of receptor, and the technique used for each of the three
types of intraoral imaging examinations.
4. List the various projections that constitute a complete mouth series (CMS).
5. List the general diagnostic criteria for intraoral images.
6. List examples of extraoral imaging examinations.
7. Discuss the prescribing of dental images.
8. Describe when prescribing a CMS for a new patient is warranted.
Chapter 17 Paralleling Technique
Course Outline:
• Basic Concepts
o Terminology
o Principles of Paralleling Technique
o Beam Alignment Devices
o Receptors Used for Paralleling Technique
o Rules for Paralleling Technique
• Step-By-Step Procedures
11 Revised May 2018
o Patient Preparation
o Equipment Preparation
o Exposure Sequence for Receptor Placements
o Receptor Placement for Paralleling Technique
• Modifications in Paralleling Technique
o Shallow Palate
o Bony Growths
o Mandibular Premolar Region
• Advantages and Disadvantages
o Advantages of Paralleling Technique
o Disadvantages of Paralleling Technique
Expected Learning Outcomes (Objectives)
1. Define the key terms associated with the paralleling technique.
2. State the basic principle of the paralleling technique and illustrate the placement of the
receptor, beam alignment device, PID and central ray.
3. Discuss how object-receptor distance affects the radiographic image and how target-
receptor distance is used to compensate for such changes.
4. List the beam alignment devices that can be used with the paralleling technique.
5. Describe why a beam alignment device is necessary with the paralleling technique.
6. Identify and label the parts of the Rinn XCP Instruments.
7. Describe the different sizes of receptors used with the paralleling technique and how each
receptor is placed in the bite-block.
8. State the five basic rules of the paralleling technique.
9. Describe the patient and equipment preparations that are necessary before using the
paralleling technique.
10. Discuss the exposure sequence for 15 periapical receptor placements using the paralleling
technique.
11. Describe each of the 15 periapical receptor placements recommended for use with the
XCP instruments.
12. Explain the modifications in the paralleling technique that are used for a patient with a
shallow palate, bony growths, or a sensitive premolar region.
13. List the advantages and disadvantages of the paralleling technique.
14. Demonstrate exposure sequence for a CMRS using the paralleling technique.
Chapter 18 Bisecting Technique
Course Outline:
• Basic Concepts
o Terminology
o Principles of Bisecting Technique
o Receptor Stabilization
o Receptors Used for Bisecting Technique
o Position-Indicating Device Angulation
o Rules for Bisecting Technique
• Step-By-Step Procedures
o Patient Preparation
12 Revised May 2018
o Equipment Preparation
o Exposure Sequence for Receptor Placements
o Receptor Placement for Bisecting Technique
• Advantages and Disadvantages
o Advantages of Bisecting Technique
o Disadvantages of Bisecting Technique
Expected Learning Outcomes (Objectives)
1. Define the key terms associated with the bisecting technique.
2. State the rule of isometry.
3. State the basic principles of the bisecting technique and illustrate the location of the
receptor, tooth, imaginary bisector, central ray, and position-indicating device (PID).
4. List the beam alignment devices and receptor holders that can be used with the bisecting
technique.
5. Describe the receptor size used with the bisecting technique.
6. Describe correct and incorrect horizontal angulation.
7. Describe correct and incorrect vertical angulation.
8. State each of the recommended vertical angulation ranges used for periapical exposures
in the bisecting technique.
9. State the basic rules of the bisecting technique.
10. Describe patient and equipment preparations necessary before using the bisecting
technique.
11. Discuss the exposure sequence used for the 14 periapical receptor, placements used in the
bisecting technique.
12. Describe each of the 14 periapical receptor placements recommended for use in the
bisecting technique.
13. List the advantages and disadvantages of the bisecting technique.
Chapter 19 Bite-Wing Technique
Course Outline
• Basic Concepts
o Terminology
o Principles of Bite-Wing Technique
o Beam Alignment Device and Bite-Wing Tab
o Bite-Wing Receptors
o Position-Indicating Device Angulation
o Rules for Bite-Wing Technique
• Step-By-Step Procedures
o Patient Preparation
o Equipment Preparation
o Exposure Sequence for Receptor Placements
o Receptor Placement for Bite-Wing Images
• Vertical Bitewings
• Modifications In Bite-Wing Technique
o Edentulous Spaces
o Bony Growths

13 Revised May 2018
Expected Learning Outcomes (Objectives)
1. Define the key terms associated with the bite-wing technique.
2. Describe the purpose and use of the bite-wing image.
3. Describe the appearance of opened and overlapped contact areas on a bite-wing image.
4. State the basic principles of the bite-wing technique.
5. List the two ways a receptor can be stabilized in the bite-wing technique and identify
which one is recommended for bite-wing exposures.
6. List the three receptor sizes that can be used in the bite-wing technique and identify
which size is recommended for exposures in the adult patient.
7. Describe correct and incorrect horizontal angulation.
8. Describe the difference between positive and negative vertical angulation.
9. State the recommended vertical angulation for all bite-wing exposures using bite-wing
tab.
10. State the basic rules for the bite-wing technique.
11. Describe patient and equipment preparations that are necessary before using the bite-
wing technique.
12. Discuss the exposure sequence for a complete mouth series (CMS) that includes both
periapical and bite-wing exposures.
13. Describe the correct pre-molar and molar bite-wing receptor placements.
14. Describe the purpose and use of vertical bite-wing images.
15. List the number of exposures and the size of receptor used in the vertical bite-wing
technique.
16. Discuss modifications in the bite-wing technique for patients who have edentulous spaces
or bony growths.
Chapter 1 Radiation History
Course Outline:
• Dentistry and X-Radiation
o Basic Terminology
o Importance of Dental Radiographs
• Discovery of X-Radiation
o Roentgen and the Discovery of X-rays
o Earlier Experimentation
• Pioneers in Dental X-Radiation
• History of Dental X-ray Equipment
• History of Dental X-ray Film
• History of Dental Radiographic Techniques
Expected Learning Outcomes (Objectives)
1. Define the key words associated with radiation history.
2. Summarize the importance of dental radiographs.
3. List the uses of dental radiographs.
4. Summarize the discovery of x-radiation.
5. Recognize the pioneers in dental x-radiation and their contributions and discoveries.

14 Revised May 2018
6. List the highlights in history of x-ray equipment and film.
7. List the highlights in history of dental radiographic techniques.
Chapter 2 Radiation Physics
Course Outline:
• Fundamental Concepts
o Atomic and Molecular Structure
o Ionization, Radiation and Radioactivity
o Ionizing Radiation
• X-Radiation
• X-Ray Machine
o Component Parts
o X-ray Tube
o X-ray Generating Apparatus
• Production of X-Radiation
o Production of Dental X-rays
o Types of X-Rays Produced
o Definitions of X-Radiation
• Interactions of X-Radiation
o No Interaction
o Absorption of Energy and Photoelectric Effect
o Compton Scatter
o Coherent Scatter
Expected Learning Outcomes (Objectives)
1. Define the key words associated with radiation physics
2. Identify the structure of the atom
3. Describe the process of ionization
4. Discuss the difference between radiation and radioactivity
5. List the two types of ionizing radiation and give examples of each
6. List the characteristics of electromagnetic radiation
7. List the properties of x-radiation
8. Identify the component parts of the x-ray machine
9. Label the parts of the dental x-ray tubehead and the dental x-ray tube
10. Describe in detail how dental x-rays are produced
11. List and describe the possible interactions of x-rays with matter.
Chapter 3 Radiation Characteristics
Chapter Outline:
• X-ray Beam
o Voltage and kilovoltage
o Kilovoltage Peak
o Density and Kilovoltage Peak
o Contrast and Kilovoltage Peak
o Exposure Time and Kilovoltage Peak
• X-Ray Beam Quantity

15 Revised May 2018
o Amperage and Milliamperage
o Millampere-Seconds
o Density and Milliamperage
o Exposure Time and Milliamperage
• X-ray Beam Intensity
o Kilovoltage Peak
o Milliamperage
o Exposure Time
o Distance
o Inverse Square Law
o Half-Value Layer
Expected Learning Outcomes (Objectives)
1. Define the key words associated with radiation characteristics
2. Describe the effect that the kilovoltage peak has on the quality of the x-ray beam
3. Describe how milliamperage influences the quantity of the x-ray beam
4. Identify the range of kilovoltage and milliamperage required for dental radiography
5. Describe how increasing and decreasing exposure factors affect the density and contrast
of the image.
6. State the rules governing kilovoltage, milliamperage, distance, and exposure time that are
used when changing exposure variables.
7. Describe how kilovoltage, milliamperage, exposure time, and source to receptor distance
influences the intensity of the x-ray beam
8. Demonstrate how to calculate an example of radiation intensity using the inverse square
law
9. Demonstrate how the half-value layer determines the penetrating quality of the x-ray
beam.
Chapter 6 Dental X-Ray Equipment
Chapter Outline:
• Dental X-ray Equipment
o Performance Standards
o Types of Machines
o Component Parts
• Dental X-Ray Film Holders and Beam Alignment Devices
o Types of Film Holders
o Types of Beam Alignment Devices
Expected Learning Outcomes (Objectives)
1. Define the key words associated with dental x-ray equipment.
2. Discuss the regulation of dental x-ray machines at the federal, state, and local levels.
3. Recognize dental x-ray machines used for intraoral and extraoral films.
4. Label and Identify the component parts of the dental x-ray machine.
5. Describe the purpose and the use of the dental x-ray film holders and devices.

16 Revised May 2018
6. Identify commonly used dental x-ray film holders and devices.
7. Demonstrate assembly of commonly used dental x-ray film holders and devices.
Chapter 8 Dental X-Ray Image Characteristics
Course Outline:
• Dental X-Ray Image Characteristics
• Visual Characteristics
o Density
o Contrast
• Geometric Characteristics
o Sharpness
o Magnification
o Distortion
Expected Learning Outcomes (Objectives)
1. Define the key words associated with dental x-ray image characteristics
2. Differentiate between radiolucent and radiopaque areas on a dental radiograph
3. Describe a diagnostic dental radiograph
4. List the two visual characteristics of the radiographic image
5. List the factors that influence density and contrast
6. Discuss the difference between high contrast and low contrast
7. Describe film contrast and subject contrast
8. Describe the difference between short-scale contrast and long-scale contrast
9. Identify images of high contrast, low contrast, no contrast, short-scale contrast, and long
– scale contrast.
10. Demonstrate the fabrication of a stepwedge
11. List the three geometric characteristics of the radiograph image
12. List the factors that influence sharpness, magnification, and distortion
Chapter 27 Normal Anatomy: Intraoral Images
Course Outline:
• Definitions of General Terms
o Types of Bones
o Prominences of Bone
o Spaces and Depressions in Bone
o Miscellaneous Terms
• Normal Anatomic Landmarks
o Bony Landmarks of the Maxilla
o Bony Landmarks of the Mandibular
• Normal Tooth Anatomy
o Tooth Structure
o Supporting Structures
Expected Learning Outcomes (Objectives)
1. Define the key terms associated with normal anatomy on intraoral images.
17 Revised May 2018
2. State the difference between cortical and cancellous bone spaces, and depressions in
bone.
3. Define the general terms that describe prominences, spaces and depressions in bone.
4. Identify and describe the normal anatomic landmarks of the maxilla on a human skull and
on dental images.
5. Identify and describe the normal anatomic landmarks of the mandible on a human skull
and on dental images.
6. Identify and describe the appearance of tooth anatomy as viewed on dental images.
7. Identify each normal landmark on the maxilla and the mandible as either radiolucent or
radiopaque on a dental image.
8. Identify each normal anatomic landmark of a tooth as radiolucent or radiopaque as
viewed on a dental image.
Chapter 28 Film Mounting and Viewing
Course Outline:
• Film Mounting
o Basic Concepts
o Normal Anatomy and Film Mounting
o Film Mounting Methods
o Step-By-Step Procedure
• Film Viewing
o Basic Concepts
o Step-By-Step Procedure
Expected Learning Outcomes (Objectives)
1. Define the key terms associated with film mounting and viewing.
2. List the individuals who are qualified to mount and view dental radiographs.
3. Describe when and where films are mounted.
4. List five reason to use a film mount.
5. Describe what information is placed on a film mount.
6. Discuss the importance of a normal anatomy in film mounting.
7. Describe how the identification dot is used to determine film orientation.
8. List and describe two methods of film mounting and identify the preferred method.
9. List and describe the step-by-step procedures for film mounting.
10. List and describe the necessary equipment for film viewing.
11. Discuss the importance of masking extraneous viewbox light seen around a film mount.
12. Describe optimal viewing conditions, as well as when and where images should be
viewed.
13. Explain the importance of examining images in an established viewing sequence.
14. List and describe the step-by-step procedures for film viewing.
15. Explain why multiple viewings of dental images are necessary, and list the areas,
diseases, and abnormalities that must be included in the examinations.
16. Demonstrate mounting a CMRS on a viewbox.
Chapter 7 Dental X-ray Film
Course Outline:

18 Revised May 2018
• Dental X-ray Film Composition and latent image
o Film Composition
o Latent Image Formation
• Types of Dental X-Ray Film
o Intraoral Film
o Extraoral Film
o Duplicating Film
Expected Learning Outcomes (Objectives)
1. Define the key terms associated with dental x-ray film.
2. Describe in detail film composition and latent image formation.
3. List and describe the different types of x-ray film used in dentistry
4. Define intraoral film and describe intraoral film packaging.
5. Identify the types and sizes of intraoral film available.
6. Discuss film speed.
7. Discuss the differences between intraoral and extraoral film.
8. Describe the difference between screen and non-screen films.
9. Describe the use of intensifying screens and cassettes.
10. Demonstrate the duplication of film.
11. Demonstrate proper film storage and protection.
Chapter 9 Dental X-Ray Film Processing
Course Outline:
• Film Processing
o Film Processing
• Manual Film Processing
o Film Processing Steps
o Film Processing Solutions
o Equipment Requirements
o Equipment Accessories
o Step-by-Step Procedures
o Care and Maintenance
• Automatic Film Processing
o Film Processing Steps
o Equipment Requirements
o Step-by-Step Procedures
o Care and Maintenance
• The Darkroom
o Room Requirements
o Location and Size
o Lighting
o Miscellaneous Requirements
o Waste Management
• Film Duplication
o Equipment Requirements
o Step-by-Step Procedures
19 Revised May 2018
• Processing Problems and Solutions
o Time and Temperature
o Chemical Contamination
o Film Handling
o Lighting
Expected Learning Outcomes (Objectives)
1. Define the key words associated with processing of dental x-ray film.
2. Describe in detail how a latent image becomes a visible image.
3. List and discuss the five steps of manual film processing.
4. List and describe the four basic ingredients of the developer solution.
5. List and describe the four basic ingredients of the fixer solution.
6. Discuss the parts of the processing tank; insert tanks, master tank, and lid.
7. List and describe the equipment needed for manual film processing.
8. Discuss the advantages of automatic film processing.
9. Identify the component parts of the automatic film processor.
10. Describe the mechanism of automatic film processing.
11. List the four procedural steps for automatic film processing.
12. Describe the care and maintenance of the automatic film processor and automatic
processing solutions.
13. Discuss the location, size, lighting, and equipment requirements necessary for the
darkroom.
14. Discuss safe lighting.
15. Discuss the equipment requirements and procedural steps for film duplication.
16. Describe film processing problems that result from time and temperature errors.
17. Describe film processing problems that occur from chemical contamination.
18. Describe film processing problems that result from film handling errors.
19. Describe film processing problems that result from lighting errors.
20. Demonstrate proper film processing with automatic processor.
Chapter 25 Digital Imaging
Course Outline
• Basic Concepts
o Terminology
o Purpose and Use
o Fundamentals
o Radiation Exposure
o Equipment
• Types of Digital Imaging
o Direct Digital Imaging
o Indirect Digital Imaging
• Step-By-Step Procedures
o Intraoral Sensor Preparation
o Intraoral Sensor Placement
• Advantages and Disadvantages
o Advantages of Digital Imaging
20 Revised May 2018
o Disadvantages of Digital Imaging
Expected Learning Outcomes(Objectives)
1. Define the key terms associated with digital imaging.
2. Describe the purpose and use of digital imaging.
3. Discuss the fundamentals of digital imaging.
4. Describe radiation exposure in digital imaging.
5. List and describe the equipment used in digital imaging.
6. List and describe the two types of digital imaging.
7. Describe the patient and equipment preparations required for digital imaging.
8. List and discuss the advantages and disadvantages of digital imaging.
Chapter 15 Infection Control and the Dental Radiographer
Course Outline:
• Infection Control Basics
o Rationale for Infection Control
o Infection Control Terminology
• Guidelines For Infection Control Practices
o Personal Protective Equipment
o Hand Hygiene and Care of Hands
o Sterilization and Disinfection of Instruments
o Cleaning and Disinfecting of Dental Unit and Environmental Surfaces
• Infection Control In Dental Radiography
o Infection Control Procedures Used Before Exposure
o Infection Control Procedures Used During Exposure
o Infection Control Procedures Used After Exposure
o Infection Control Procedures Used for Processing
Expected Learning Outcomes(Objectives)
1. Define the key terms associated with infection control.
2. Describe the rationale for infection control.
3. Describe the three possible routes of disease transmission.
4. Describe the conditions that must be present for disease transmission to occur.
5. Discuss personal protective equipment (PPE), hand hygiene, sterilization and disinfection
of instruments, and the cleaning and disinfection of the dental unit and environmental
surfaces.
6. Describe infection control procedures that are necessary BEFORE, DURING and
AFTER exposures.
7. Describe infection control procedures that are necessary for digital imaging.
8. Describe infection control procedures that are necessary for processing.
9. Discuss film handling in the darkroom- with and without barrier envelopes.
10. Discuss film handling without barrier envelopes using the daylight loader of an automatic
processor.

21 Revised May 2018
Chapter 4 Radiation Biology
Chapter Outline:
• Radiation Injury
o Mechanisms of Injury
o Theories of Radiation Injury
o Dose-Response Curve
o Stochastic and No stochastic Radiation Effects
o Sequence of Radiation Injury
o Determining Factors for Radiation Injury
• Radiation Effects
o Short Term and Long Term Effects
o Somatic and Genetic Effects
o Radiation Effects on Cells
o Radiation Effects on Tissues and Organs
• Radiation Measurements
o Units of Measurement
o Exposure Measurement
o Dose Measurement
o Dose Equivalent Measurement
o Measurement Used in Dental Radiography
• Radiation Risks
o Sources of Radiation Exposure
o Risk and Risk Estimates
o Dental Radiation and Exposure Risks
o Patient Exposure and Dose
o Risk Versus Benefit of Dental Radiographs
Expected Learning Outcomes(Objectives)
1. Define the key words associated with radiation injury.
2. Describe the mechanisms, theories, and sequence of radiation injury.
3. Define and discuss the dose-response curve and radiation injury.
4. List the determining factors for radiation injury.
5. Discuss the short-term and long-term effects as well as the somatic and genetic effects of
radiation exposure.
6. Describe the effects of radiation exposure on cells, tissues, and organs.
7. Identify the relative sensitivity of a given tissue to x-radiation.
8. Define the units of measurement used in radiation exposure.
9. List common sources of radiation exposure.
10. Discuss risk and risk estimates for radiation exposure.
11. Discuss dental radiation and exposure risks.
12. Discuss the risk versus benefit of dental radiographs.
Chapter 5 Radiation Protection
Course Outline:
• Patient Protection
o Before Exposure

22 Revised May 2018
o During Exposure
o After Exposure
• Operator Protection
o Protection Guidelines
o Radiation Monitoring
• Radiation Exposure Guidelines
o Radiation Safety Legislation
o Maximum Permissible Dose
o Maximum Accumulated Dose
o ALARA Concept
• Radiation Protection
• Patient Education
Expected Learning Outcomes (Objectives)
1. Define the key words associated with radiation protection.
2. Describe in detail the basics of patient protection before x-ray exposure.
3. Discuss the different types of filtration, and state the recommended total filtration for
dental x-ray machines.
4. Describe the collimator used in dental x-ray machines, and state the recommended
diameter of the useful beam at the patient’s skin.
5. List six ways to protect the patient from excessive radiation during x-ray exposure.
6. Describe the importance of receptor handling and processing after patient exposure to x-
radiation.
7. Discuss operator protection in terms of adequate distance, shielding, and avoidance of the
useful beam.
8. Describe personnel and equipment monitoring devices used to detect radiation.
9. Discuss radiation exposure guidelines, including radiation safety legislation, maximum.
permissible dose, maximum accumulated dose and the ALARA concept.
10. Discuss with the patient what radiation protection steps will be used before, during, and
after exposure to x-radiation.
Methods of Evaluation
Grading
Categories Percentage
5 Major Tests 20%
Assignments/Assessments/
Quizzes
15%
Radiographic
Tech./Competencies
40%
Behavior/
Attendance/Comp. Final
Exam
25%
Total Weighted 100%

23 Revised May 2018
Grade
90-100 A
80-89 B
75-79 C
74-70 D
69 or Below F
Grades will be posted via Canvas
Late Work Policy
NO LATE WORK ACCEPTED. This includes laboratory projects and patient charts.
Individuals arriving late for an exam will not be given additional time for the exam. Also, if any
student has completed the exam and left the room prior to arrival of the late student, the late
student will not be allowed to take the exam.
Extra Credit Policy
NO EXTRA CREDIT WILL BE GIVEN.
Tests
Examinations (cognitive domain) are multiple-choice exams administered electronically via
Canvas in a proctored computer lab setting on the GC campus as scheduled by the professor.
These exams will measure knowledge, application, and synthesis of the course objectives using
content from lectures, discussions, and reading assignments and assessment assignments.
1. Examinations will be graded via Canvas and the grade will post once the student has
submitted the exam.
2. A separate exam will be given to the student who is absent from an exam. Make-up test
are given only for excused absences. Make-up test will be placed in the testing center,
and it will be up to the student to make sure the test is made up. You will have until the
day before the next test is scheduled in this course to complete the make-up test.
3. REFER to the Student Handbook for complete quiz and test policies.
4. Tests fall into the tests category and make up 20% of your grade.
Exam scores will be expressed in whole numbers. The length of time allowed for testing is
based on the number of test items on the exam and will be determined by the professor.
Examinations will begin on time and finish on time. Students who arrive late will be admitted at
the discretion of the professor, and, if admitted, will have only the remaining time available.
Students who are absent from an examination may be eligible for a make-up examination only
when certain circumstances are met and approved by the professor.

24 Revised May 2018
Assignments/ Assessments
1. Homework will be due at 11:59 pm the night before each Test. Refer to the Course
Schedule for individual Assignment due dates.
2. Chapter assignments and quizzes fall into the Homework category and makes up 15 %
of your grade in this class.
Classroom Quizzes (cognitive domain)
Composed of a variety of question types (multiple-choice, fill-in-the-blank, essay, and
others) that are administered at any time during any class period. The student may or may
not be given advance notice of a quiz. The quiz grade will be calculated as the percentage of
total points earned during the semester. A missed quiz is a missed opportunity to earn points;
quizzes are not available for makeup.
Skills Competency (psychomotor Domain)
Fall into the Radiographic Techniques/Competencies consist of the following:
• Assembling the XCP Instrument
• Infection Control During Film Exposure
• Practicing Infection Control in the Darkroom
• Mounting Radiographs
• Practicing Infection Control for Dental Images
• Producing a Full Mouth Radiographic Survey Utilizing Paralleling Technique (Including
4 BW’s)
• Preparing the Patient for Dental Images
• Producing a Full Mouth Radiographic Survey Utilizing the Bisecting Angle Technique
Radiographic Techniques/ Competencies
1. Radiographic skills including check-offs are grading by the program supervising Dentist,
and are graded based on a points system. Students who do not pass skill check-offs with a
grade of a 74.5 or higher will be counseled by the instructor and/or program director.
2. Radiographic techniques and Skill check-offs all fall under the
Competencies/Radiographic Techniques category to make up 40% of your grade.
3. REFER to the Student Handbook for complete Skills Competency Policy.
ADDITIONAL EVALUATION TOOLS MAY BE UTILIZD BY THE PROFESSOR TO
MEASURE STUDENT PROGRESS.
Instructional Methods Face to Face
Methods of Instruction
Methods of instruction include lecture, discussion, required reading, audio and visual aids,
computer aided instruction, skill demonstration, and skill practice.

25 Revised May 2018
Instructor’s Requirements
Students are requested to read the assignment outlined in the syllabus and presentation outlines.
Examination questions will be taken from reading assignments, handouts, and lecture material
and assessment assignments.
The student should not expect that every objective will be lectured or discussed in the classroom.
Success in the course is dependent on mastery of not only the material delivered in the classroom
but also the assigned reading material. Because many assignments and study tools are performed
via Canvas, access to computer hardware with internet connection and software to allow web
navigation is required. Microsoft Office software, Word, PowerPoint, and Excel, is also
required. However, a personal computer is not required. Dental Assisting students may access
several computer lab resources on and off campus to facilitate completion of assignments. If the
student is dependent upon computer resources outside the home, significant time management,
organizational skill, and personal commitment is necessary to be successful.
Laboratory hours for skill demonstration and skill practice are posted to the course calendar.
Skill sessions will be held in the classroom, the skill lab, and the simulation clinic.
In the event of technology failure, the student should contact the GC Help Desk for guidance.
Professional Behavior Grade
The Professional Behavior Grade is observed when in attendance of all classes within the
program. The score you earn will be reflected in each course. In this course the Professional
Behavior Grade Falls into the Behavior/ Attendance/Comp. Final Exam Category and will make
up 25% of your grade. Please refer to the following Rubric for grading criteria.
Professional Behavior Rubric
Behavior Description Points
Ethics
Exhibiting ethical behavior, which includes, but not limited to:
Always practicing high quality standard of care, and following
HIPAA guidelines and protocols.
10
Personal
Characteristics
You should also display loyalty, honesty, trustworthiness,
dependability, reliability, initiative, self-discipline, and self-
responsibility.
10
Teamwork Respects the rights of others, respects confidentiality, is a team
player; is cooperative; is assertive; displays a customer service
attitude; seeks opportunities for continuous learning;
demonstrates mannerly behavior; actively participates in group
projects.
10
Appearance Displays appropriate dress, grooming, hygiene and etiquette.
Follows dress code.
10
Attitude/Demeanor
Demonstrates a positive attitude; a demeanor that exudes
confidence but not cockiness; has realistic expectations of self.
10

26 Revised May 2018
Productivity Follow safety practices; conserves materials; keeps work area
neat and clean; follows directions and procedures; completes
assignments on time, makes up assignments punctually; takes
initiative to actively stay busy and continue practicing all skills
learned to date.
10
Organization Displays skills in prioritizing and management of time and
stress; demonstrates flexibility in handling change.
10
Communication Displays appropriate nonverbal (eye contact, body language)
and oral (listening, telephone/email etiquette, grammar) skills.
10
Cooperation Displays leadership skills; appropriately handles constructive
criticism, conflicts and complaints; demonstrates problem-
solving capability; follows chain of command.
10
Respect Deals appropriately with cultural / racial diversity; does not
engage in harassment of any kind. Respects professors, doctors,
volunteers, and peers at all times, including maintaining
appropriate relationships.
10
Dress Code
The dress code will be strictly enforced. If not followed, it can affect your professional behavior
grade.
REFER to the Student Handbook for complete Dress Code Policy.
ATTENDANCE
Attendance and punctuality are vital components in the learning and evaluation processes.
They are also an important part of your preparation for becoming a dependable employee.
Every workplace has attendance and tardy guidelines, which employees must follow. The Dental
Assisting Program has designed the following policies in order to emphasize the importance of this
aspect of employment according to Grayson College Policy.
Classes begin on the hour as scheduled. Three tardies will equal an absence. Students entering
class after that time disturb other students as well as the instruction. The professor has the option
of locking the classroom door. In this case, student(s) will not be allowed into the classroom
until next break. The student will be counted absent for the time missed.
It is required that you, the student, notify the Program Director if you will not be able to
attend class on a particular day or time, before 9:00 a.m. Contact the Program Director by
email, not personal cell phone.
Tonya Hance- [email protected].
In each course, you will be given a grade based on your attendance to the Program for that semester.
The Grade reflected in each course will be an accumulated attendance grade based on all
absences/tardies (both excused and unexcused absences) throughout the entire program. The grade
you EARN will be the same graded reflected in each course.

27 Revised May 2018
Attendance Grading Rubric
0-2 Total Absences 100
3-4 Total Absences 89
5-6 Total Absences 70
Six or more absences will result in the student being counseled and could result in being dismissed
from the program. However, we understand there are always extenuating circumstances. In the
event a student has six or more absences, a committee consisting of the Dental Faculty and the Dean
of Health Sciences will meet to determine if the absences fall into the extenuating circumstances
category, and what action will be taken.
Excused Absence
Test, practical’s, assignments, or skills
assessments may be made-up (with the
exception of quizzes)
Unexcused Absence
Test, practical’s, assignments, or skills
assessments may not be made-up (quizzes
are never made-up)
Doctor’s note for yourself or a child Illness without a doctor’s note
Death of an immediate Family Member:
spouse, child, parent, sibling, or
grandparent (must bring an Obituary or
Funeral/Memorial Program)
Missing for a trip or vacation
Basically missing for any other reason besides
an illness with a Doctor’s note, or a death of an
immediate family member.
Student Conduct & Discipline
Students are to maintain classroom decorum that includes respect for other students and the
professor.
Disruptive behaviors such as harassment of fellow students and/or professors; persistent talking
in class while lecture is in progress; using electronic equipment without authorization (cell
phone/texting) or repeated tardy arrival to class will not be tolerated. Students will be counseled
initially, but may be dismissed from the classroom for repeated offenses.
We have a Classroom Disruption Policy that is: Each Student will be given one (1) warning
and then dismissed from class for the rest of the day and will not be able to make up any work
missed
Cell phones need to be kept on silent notification at all times and left in the classroom. Cell
phones during Lab, Pre-Clinical or Clinical days can result in lowered behavior grades.
PLEASE REFER TO THE STUDENT HANDBOOK FOR DETAILED RULES AND
POLICIES.
Academic Integrity
28 Revised May 2018
The faculty expects from its students a high level of responsibility and academic honesty.
Because the value of an academic certificate or degree depends upon the absolute integrity of the
work done by the student for that award, it is imperative that a student demonstrate a high
standard of individual honor in his or her scholastic work.
Scholastic Dishonesty, any student who commits an act of scholastic dishonesty is subject to
discipline. Scholastic dishonesty includes but is not limited to cheating, plagiarism, collusion,
submission for credit of any work or materials that are attributable in whole or in part to another
person, taking an examination for another person, any act designed to give unfair advantage to a
student or the attempt to commit such acts.
Plagiarism, especially from the web, from portions of papers for other classes, and from any
other source is unacceptable and will be dealt with under the college’s policy on plagiarism (see
GC Student Handbook for details). Grayson College subscribes to turnitin.com, which allows
faculty to search the web and identify plagiarized material.
Copyright Notice
The copyright law of the United States (Title 17, United States Code) governs the making of
photocopies or other reproductions of copyrighted materials, including music and software.
Copying, displaying, reproducing, or distributing copyrighted works may infringe the copyright
owner’s rights and such infringement is subject to appropriate disciplinary action as well as
criminal penalties provided by federal law. Usage of such material is only appropriate when that
usage constitutes “fair use” under the Copyright Act.
Withdrawal from Class
The administration of this institution has set deadlines for withdrawal from any college-level
courses. These dates and times are published in that semester's schedule of classes.
Administrative procedures must be followed. It is the student's responsibility to handle student
initiated withdrawal requirements from any class. You must do the proper paperwork to ensure
that you will not receive a final grade of "F" in a course if you choose not to attend the class once
you are enrolled (see GC College Catalog for details).
Disability Services
The goal of Disability Services is to provide students with disabilities educational opportunities
equal to those of their non-disabled peers. Disability Services is located in room SC 115 in the
Student Success Center.
The contact information for the Office of Disability Services is:
Jeffri Hodge

29 Revised May 2018
(903) 463-8751 (voice or TTY)
If you anticipate issues related to the format or requirements of this course, please meet with the
Coordinator of Disability Services. The Coordinator is available to discuss ways to ensure your
full participation in the course. If you determine that formal, disability-related accommodations
are necessary, it is very important that you be registered with Disability Services to notify them
of your eligibility for reasonable accommodations. Disability Services can then plan how best to
coordinate your accommodations.
It is the student’s responsibility to notify his or her professors of the need for such an
accommodation. Disability Services provides students with letters to present to faculty members
to verify that the student has a disability and needs accommodations. Individuals requiring
special accommodation should contact the professor after class or during office hours.
Financial Aid
Effective July 1, 2000 students receiving Title IV funds (Pell, Federal Grants, and Student
Loans), who subsequently withdraw from classes, will be required to return a portion of the
federal financial aid received. Only the percentage of aid earned (determined by the percentage
of time attended) will be eligible for retention on the student’s behalf. Any aid that is not earned
must be returned to its source. If there is a student account balance resulting from these
adjustments, the student is responsible for payment. Further details can be obtained from the
Office of Financial Aid.
Drop Rule
Under section 51.907 of the Texas Education Code, “an institution of higher education may not
permit a student to drop more than six courses, including any course a transfer student has
dropped at another institution of higher education.” This statue was enacted by the State of Texas
in spring 2007 and applies to students who enroll in a public institution of higher education as
first-time freshmen in fall 2007 or later. Any course that a student drops is counted toward the
six-course limit if (1) the student drops a course after census date or (2) the student is not
dropping the course in order to withdraw from the institution. Some exemptions for good cause
could allow a student to drop a course without having it counted toward this limit, but it is the
responsibility of the student to establish that good cause before the drop. Students with questions
should contact the Counseling Office or the Office of Admissions & Records for more
information before dropping a course!
TITLE IX
GC policy prohibits discrimination on the basis of age, ancestry, color, disability, gender

30 Revised May 2018
identity, genetic information, national origin, race, religion, retaliation, serious medical
condition, sex, sexual orientation, spousal affiliation and protected veterans status.
Furthermore, Title IX prohibits sex discrimination to include sexual misconduct: sexual violence
(sexual assault, rape), sexual harassment and retaliation.
For more information on Title IX, please contact:
▪ Dr. Regina Organ, Title IX Coordinator (903-463-8714)
▪ Dr. Dava Washburn, Title IX Coordinator (903-463-8634)
▪ Dr. Kim Williams, Title IX Deputy Coordinator- South Campus (903) 415-2506
▪ Mr. Mike McBrayer, Title IX Deputy Coordinator (903) 463-8753
▪ Website: http://www.grayson.edu/campus-life/campus-police/title-ix-policies.html
▪ GC Police Department: (903) 463-8777- Main Campus) (903) 415-2501 - South
Campus)
▪ GC Counseling Center: (903) 463-8730
▪ For Any On-campus Emergencies: 911
Grayson College is not responsible for illness/injury that occurs during the normal
course of classroom/lab/clinical experiences.
These descriptions and timelines are subject to change at the discretion of the Professor.
Grayson College campus-wide student policies may be found on our Current Student Page
on our website: http://grayson.edu/current-students/index.html
Revised: August 23, 2015
Related Documents