Digital Photography Post Processing Kent Messamore 9/8/2013

Welcome message from author
This document is posted to help you gain knowledge. Please leave a comment to let me know what you think about it! Share it to your friends and learn new things together.
Transcript

Digital Photography Post Processing
Kent Messamore
9/8/2013
JKM 9/8/2013 Enhanced Images 2
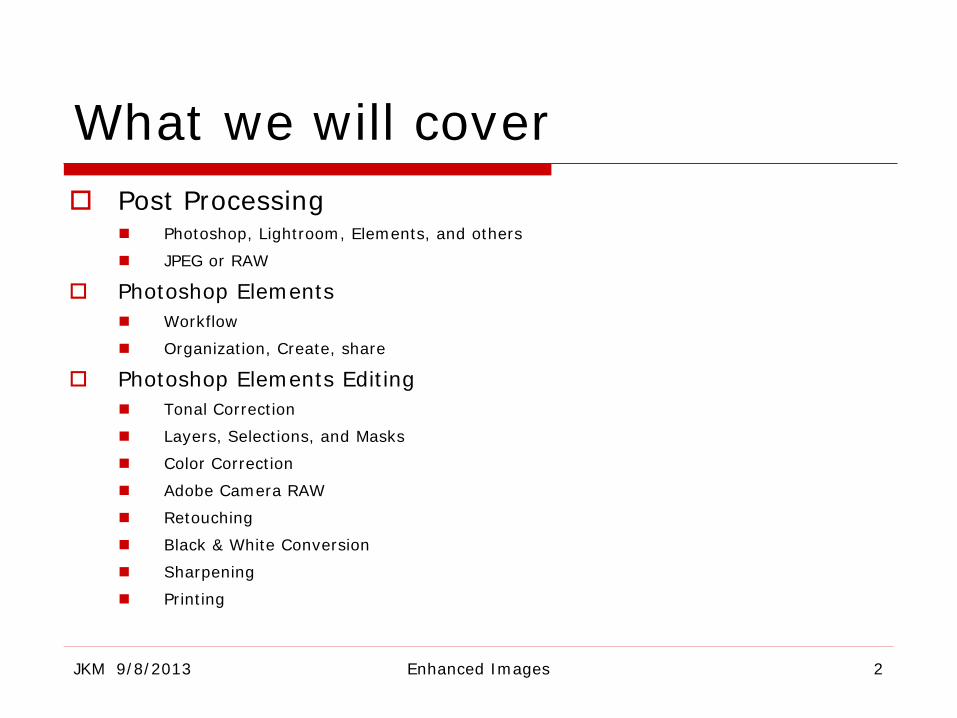
What we will cover Post Processing
Photoshop, Lightroom, Elements, and others
JPEG or RAW
Photoshop Elements Workflow
Organization, Create, share
Photoshop Elements Editing Tonal Correction
Layers, Selections, and Masks
Color Correction
Adobe Camera RAW
Retouching
Black & White Conversion
Sharpening
Printing

JKM 9/8/2013 Enhanced Images 3
Processing software Photoshop is high end – Adobe.com ($622) – Recommended (SD- $335)
Lightroom – PC/MAC - Adobe.com($138) – Recommended (SD -$79)
Adobe Creative Cloud (monthly subscription) – SD $20/Month
Photoshop Elements ($63) - Adobe.com
ACDC Pro ($60)
Paint Shop Pro ($50) - corel.com
Camera Manufacturers software (usually free)
Gimp (free) – gimp.org
Gimpshop (free) – Gimp hacked to resemble Photoshop
Google’s Picasa (free) - picasa.google.com

Photoshop Photoshop is major image editing software for professionals Designed to support Graphic Artists, Photographers, Web
Developers, Prepress, Architects, Medical Imagers, 3D Artists, Videographers, Comic Book Artists
Provides to Photographers, Workflow, Camera Raw Conversion, Tonal Correction, Color Correction, Retouching, Black & White Conversion, Sharpening, and Printing
Offers to Photographers tools such as Layers, Selection, Pen tool (Bezier Curves), Cloning, Curves, Channels, Masks, Blending Modes
Adobe has created an organizing application called “Bridge” to support multiple Adobe Applications.
JKM 9/8/2013 Enhanced Images 4

Bridge – an organizer for Photoshop and other Adobe Applications
JKM 9/8/2013 Enhanced Images 5

Photoshop CS5
JKM 9/8/2013 Enhanced Images 6
Tool Box
Tool Option Bar
Layer Pallet
Image Area

Photoshop CS5 Tools
JKM 9/8/2013 Enhanced Images 7
Hand Tool Forground Color Background Color
Quick Mask
Move Tool
Type Tool
Zoom
Switch Foreground/Background
Set Default

Layers
JKM 9/8/2013 Enhanced Images 8
Link Layers
Add Layer Style Add
Mask Add
Adjustment Layer
Add Layer Group
Create Layer
Delete Layer
Layer Lock
Adjustment Layer
Image Layer
Mask
Mask Link
Opacity
Fill
Menu
Lock: Transparent Pixels Pixels Movement Lock All
Blend Modes
Layer Visibility
switch

JKM 9/8/2013 Enhanced Images 9
Lightroom Application developed specifically for photographers
Photoshop is for graphic artist, photographer, prepress, architect, medical imager, 3D artist, videographer
Combination of Image database and image processor
Will it replace Photoshop? – No, Photoshop will continue to grow.
How does it differ from Photoshop, Bridge, Adobe Camera Raw (ACR)? Bridge is a Browser; LR is a database
PS is a pixel editor; LR is a RAW or JPEG converter
LR processes images but doesn’t have as large a tool set for modifying images as PS does
PS and LR use the same Adobe Camera Raw engine.
LR has good connectivity to/from Photoshop

JKM 9/8/2013 Enhanced Images 10
Lightroom Overview – 70,000 images and growing

JKM 9/8/2013 Enhanced Images 11
Lightroom Develop Module Histogram
Tool Bar: •Cropping Tool •Spot Remover •Red Eye Tool •Graduated Filter •Adjustment Brush Adjustment Pallets •Basic •Tone Curve •HSL/Color/Grayscale •Split Toning •Detail •Vignettes •Camera Calibration
Film Strip

JKM 9/8/2013 Enhanced Images 12
RAW versus JPEG (RAW has much greater Latitude in Post Processing than JPEG)
Photo Lab
Darkroom PhotoShop
With JPEG the Photo Lab is in the Camera. White Point is
set inside the Camera.
With RAW You are getting 100% of the unprocessed raw data that
the Camera can produce
The Photographer is in full control of the process Print
Film Camera Digital Camera
JPEG – •Advantages
•Smaller File sizes •Can shoot faster (Good for Action Photography •Great for snapshots
•Disadvantages •Only 8 bit pixel depth •Must manage processing in Camera at time of shot (Exposure, Tone Curve, White Balance) •Some of the RAW image data is lost as image is processed, therefore you do not have a “negative” master of your image.
RAW – •Advantages
•Give 100% of image data Camera has captured •16 bit pixel depth •Processing can take place in Photoshop or other image software. This processing offers “after image” choices as to how the image will look •Can correct some photographer errors such as poor exposure •Great for Artistic types (Ansel Adams would have loved it)
•Disadvantages •Must Process in Photoshop/other image software •Large File Sizes •You paid a lot of money for that image processor that is built into your camera
JKM 9/8/2013 Enhanced Images 13
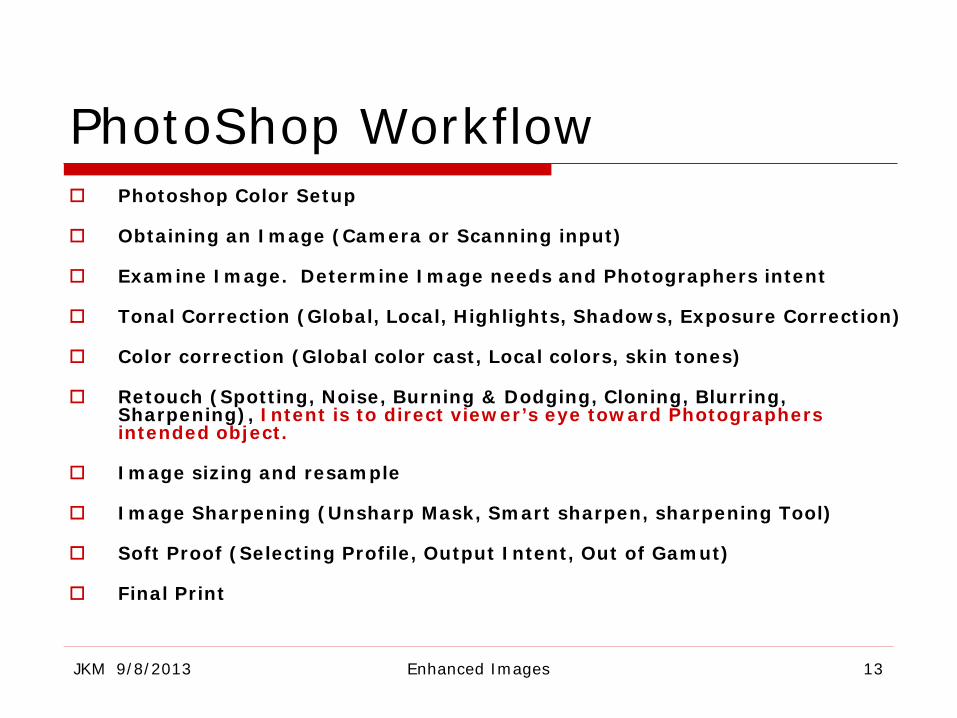
PhotoShop Workflow Photoshop Color Setup
Obtaining an Image (Camera or Scanning input)
Examine Image. Determine Image needs and Photographers intent
Tonal Correction (Global, Local, Highlights, Shadows, Exposure Correction)
Color correction (Global color cast, Local colors, skin tones)
Retouch (Spotting, Noise, Burning & Dodging, Cloning, Blurring, Sharpening), Intent is to direct viewer’s eye toward Photographers intended object.
Image sizing and resample
Image Sharpening (Unsharp Mask, Smart sharpen, sharpening Tool)
Soft Proof (Selecting Profile, Output Intent, Out of Gamut)
Final Print
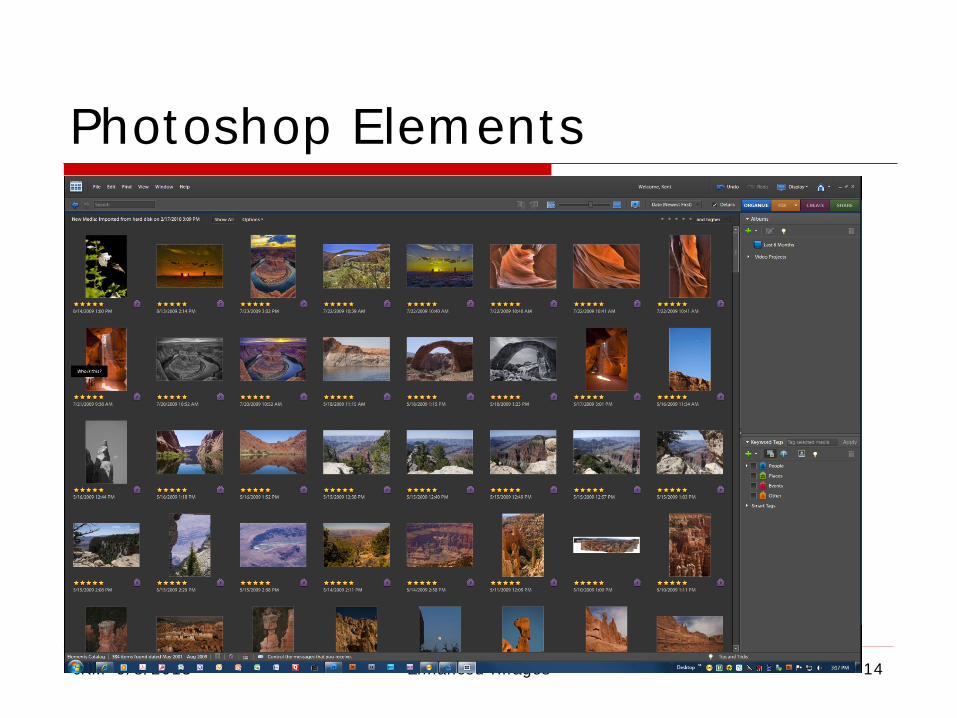
Photoshop Elements
JKM 9/8/2013 Enhanced Images 14
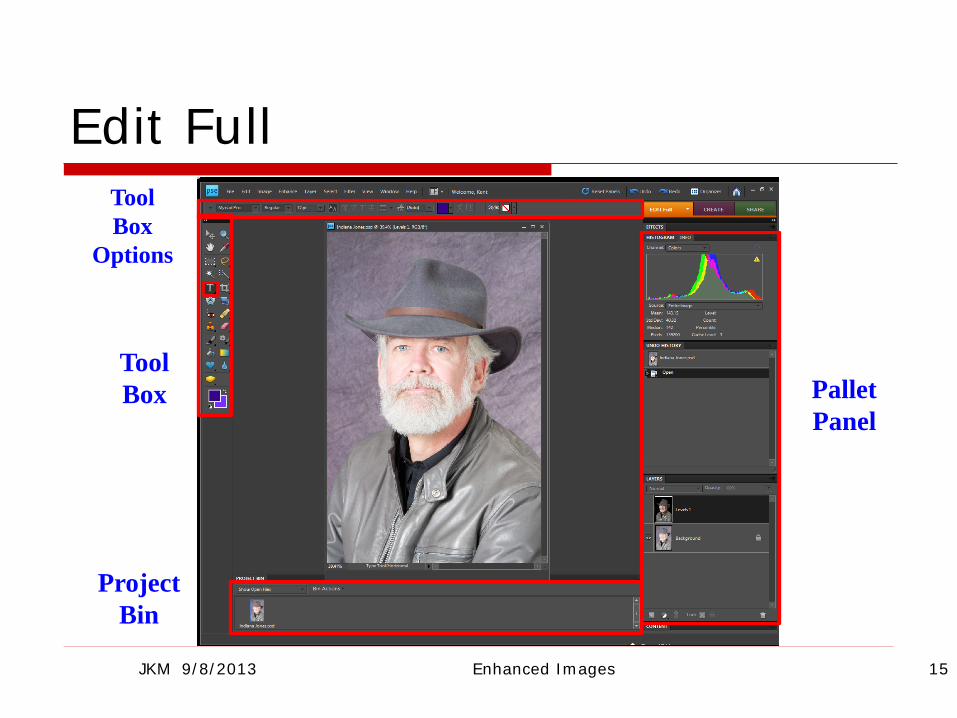
Edit Full
JKM 9/8/2013 Enhanced Images 15
Tool Box
Tool Box
Options
Project Bin
Pallet Panel

JKM 9/8/2013 Enhanced Images 16
Layer Pallet
•Ctrl + O fills page
• + and – key zoom
•Space Bar brings up Hand Tool
•Tab key removes pallets
Layers Menu
Opacity Slider
Adjustment Layers
Duplicate Layer
Background layer (locked - Alt double click unlocks)
Double click on name to rename layer
Eye Icon turns layer on & off
Layer Blend Modes
New Fill or Adjustment Link Lock Lock Delete Layer Layer Layers Transparent All Layer
Adjustment Layers
Image Size
Levels Adjustment Layer
Mask
Move Tool (V) Zoom Tool (Z) Hand Tool (H)
Eye Dropper Tool (I) Elliptical Marquee Tool (M)
Lasso Tool (L) Magic Wand Tool (W) Quick Selection Tool (A)
Horizontal Type Tool (T) Crop Tool (C)
Cookie Cutter Tool (Q) Straighten Tool (P)
Red Eye Removal Tool (Y) Spot Healing Brush Tool (J)
Clone Stamp Tool (S) Eraser Tool (E) Brush Tool (B)
Detail Smart Brush Tool (F) Paint Bucket Tool (K)
Gradient Tool (G) Custom shape Tool (U)
Blur Tool (R) Sponge Tool (O)
Switch Foreground & Background Colors (X)
Histogram Pallet
History Pallet

JKM 9/8/2013 Enhanced Images 17
Layer Blend Modes
Darken Blend Modes
Neutral color - Black
Lighten Blend Modes
Neutral color - White
Contrast Blend Modes
Neutral color – 50% Gray
Compare Blend Modes
• Dissolve – Paints each pixel as a random replacement with base or blend color. • Darken - displays either the bottom or top color which ever is darker. • Multiply - increases density by about one stop. Over Exposed? Think Multiply. • Color Burn – darkens the bottom color to reflect the top color. • Linear Burn – Darkens base color to reflect blend color. White blend is no change • Lighten - displays either the bottom or top color which ever is Lighter • Screen - decreases density by about one stop. Under Exposed? Think Screen. • Color Dodge – brightens base color to reflect blend color by decreasing contrast. • Linear Dodge – brightens base color to reflect blend color by increasing brightness. • Hard Light, Overlay, and Soft Light – lighten the lights and darken the darks, and all three are useful to boost image contrast. Hard Light the most and Soft Light the least. Soft Light is particularly useful for Burn & Dodge layer. Overlay very useful in painting and touching up masks. •Vivid Light – Burns or Dodges colors by increasing/decreasing contrast. • Linear Light – Burns or Dodges colors by increasing/decreasing brightness. •Pin Light – Replaces the colors depending on the blend color. • Hard Mix – Gives a posterized effect depending on the fill opacity of the layers. • Difference – Subtracts blend/base colors depending on which has greater brightness. Excellent for registering images, e.g. stitching panoramas. • Exclusion – Similar to Difference but less contrast. • Hue – Luminance and saturation of base color and hue of blend color. • Saturation – Luminance and hue of base color and saturation of blend color. • Color – Luminance of base color and hue and saturation of blend color. • Luminosity – Hue and saturation of base color and luminance of blend color.
Layers do not have to be images. Could be adjustment layers
Blends can be applied by blending two layers different or by blinding an image with a painting or editing tool. Base Color is the original color in the image. The Blend color is the color being applied with the painting or editing tool. The result color is the color resulting from the blend.

JKM 9/8/2013 Enhanced Images 18
Layer Blend Modes (Cont.)
Original underexposed
image
Screen blend mode, lightens image. Each layer is about 1 f stop
Original overexposed
image
Multiply blend mode, darkens image. Each layer is about 1 f stop
(Opacity Slider can give graduated f stop)
Note: Blended layer doesn’t have to be a duplicate layer. Can use a Levels or curve adjustment layer.

Layer Blend Modes - Screen
JKM 9/8/2013 Enhanced Images 19
When Under Exposed, Think Screen Blend Mode (2 stops)
Darken Blend Modes
Lighten Blend Modes
Contrast Blend Modes
Compare Blend Modes

Layer Blend Modes - Multiply
JKM 9/8/2013 Enhanced Images 20
When Over Exposed, Think Multiply Blend Mode (1/2 stop)
Darken Blend Modes
Lighten Blend Modes
Contrast Blend Modes
Compare Blend Modes

JKM 9/8/2013 Enhanced Images 21
Photoshop Elements Workflow Photoshop Color Setup
Obtaining an Image (Camera or Scanning input)
Examine Image. Determine Image needs and Photographers intent
Tonal Correction (Global, Local, Highlights, Shadows, Exposure Correction)
Color correction (Global color cast, Local colors, skin tones)
Retouch (Spotting, Noise, Burning & Dodging, Cloning, Blurring, Sharpening), Intent is to direct viewer’s eye toward Photographers intended object.
Image sizing and resample
Image Sharpening (Unsharp Mask, Smart sharpen, sharpening Tool)
Final Print

JKM 9/8/2013 Enhanced Images 22
Photoshop Workflow
Photoshop Color Setup Use Adobe RGB (1998) or ColorMatch RGB. Don’t use Adobe default sRGB. Pro Photo RGB is large Gamut (OK if you know what you are doing)
Acquisition - Obtaining an Image (Camera or Scanning input) Camera – Use RAW format if possible. Photoshop CS2 Camera RAW and Bridge are excellent for workflow. Scanner – use highest resolution & bit density scanner can capture, realizing the higher the resolution the more memory space it takes. Convert image to working space. Recommend Adobe RGB 1998
Tonal correction (Levels, Highlights, shadows, Gamma, Contrast, Curves) Examine histogram Use threshold adjustment to find white point and black point Do not use specular highlights (reflections, glare) as white point. Use brightest color neutral point with texture. Set color sampler reference points for white point, black point, and neutral (mid gray tone). Monitor points as you make changes so you don’t lose highlights, shadows, or introduce color casts Use duplicate layer with Multiply blend mode for overexposed images; screen blend mode for underexposure. Shadows and Highlights adjustment in Photoshop CS is excellent
Color correction (Hue, Saturation, Color Balance) Use Hue/Saturation adjustment layer for major color correction; Color Balance for fine tuning. Use Selective Color adjustment layer for global color, white, black, neutral adjustment (monitor reference points) Most images require increased saturation, but don’t saturate to the point it doesn’t look natural.
Retouch (Healing, Cloning Tools) Use separate adjustment layer for cloning. Select “Use all layers” for clone sample New Healing brush in Photoshop CS2 is excellent
Burning & Dodging Use separate 50% Gray Fill layer for Burning and Dodging. Set blend mode to “Soft Light”. And Paint with soft brush at low opacity (10-15%). Use black paint for
burning and white paint for dodging. Image sizing and resample
Select Image size you want as output (larger than final crop size) Set resample or set specific output resolution you want. Resize image. Crop Image to size you want.
Image Sharpening (Unsharp Mask, sharpening Tool) Merge all layers into one (Select new adjustment layer and Alt-Merge visible) Sharpen image. Use Unsharp mask or high pass filter to sharpen edges Nik sharpener Pro is excellent; Smart Sharpen in Photoshop CS2 is outstanding (removes image or motion blur).
Soft Proof (Output intent, Out of Gamut) Use View-Proof setup to select Print profile. Select Proof Colors Turn on “Gamut Warning” to view out of gamut (non printable) color warning
Final Print

Examine the Image Look at the histogram Look at the photo Add a transparent layer and mark up
what needs to be done to it What is your intended use of the
image What size & resolution (Web is low
resolution; Print is high resolution)
JKM 9/8/2013 Enhanced Images 23

Toning the Image Set the Black & White Points to maximize
dynamic range of the image
Adjust Global Exposure
Highlights & shadows
Make Local Selections to tone Local
Burn (Make darker) and Dodge (Make Lighter) to attract viewer’s eyes
JKM 9/8/2013 Enhanced Images 24

Set Black & White Point
JKM 9/8/2013 Enhanced Images 25
Levels Adjustment
Layer
Black Point Dropper White Point Dropper Gray Point Dropper

After Black Point & White Point set
JKM 9/8/2013 Enhanced Images 26

Shadows & Highlights
JKM 9/8/2013 Enhanced Images 27

Color Correction Sample with the Eye
Dropper tool indicates insufficient blue in white wall
The opposite of blue is “Yellow”
This image has a yellow color cast
Cast is due to shooting photo indoors without flash, i.e. tungsten lighting
JKM 9/8/2013 Enhanced Images 28
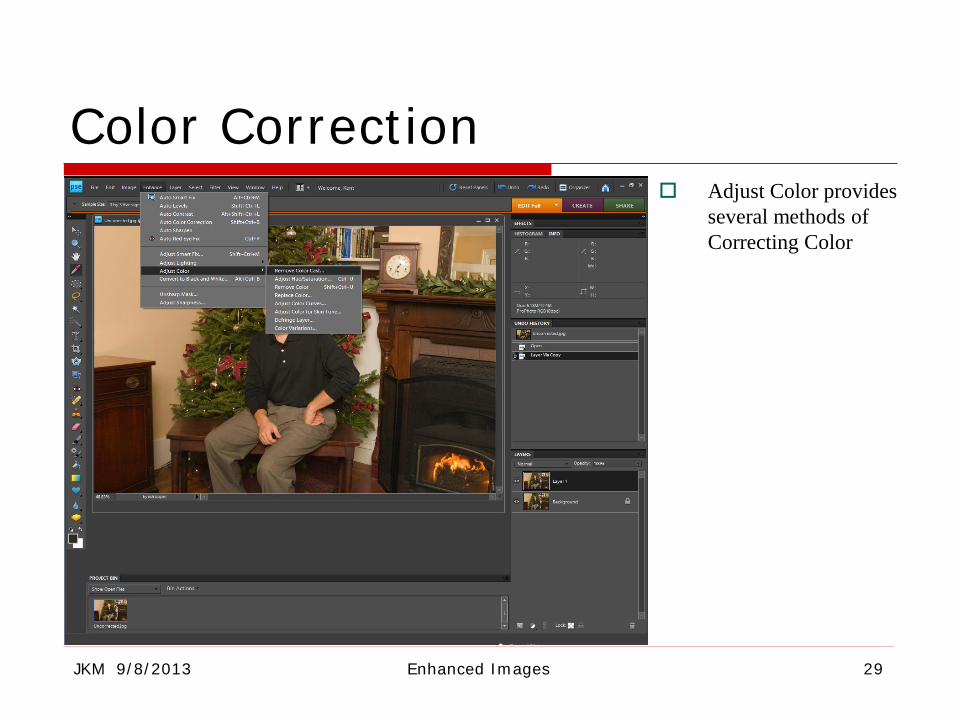
Color Correction
JKM 9/8/2013 Enhanced Images 29
Adjust Color provides several methods of Correcting Color

Color Correction
JKM 9/8/2013 Enhanced Images 30
“Remove Color Cast” has eliminated the color cast from the white wall.
We still could have a color cast in the shadows or in the mid tones.

Replace Color
JKM 9/8/2013 Enhanced Images 31

JKM 9/8/2013 Enhanced Images 32
Photo Filter Adjustments
Photo Filters Available in Menu
Can also add any color using Color Picker

Adobe Camera Raw Elements
JKM 9/8/2013 Enhanced Images 33

Adobe Camera Raw Crop Tool
JKM 9/8/2013 Enhanced Images 34

Masks
JKM 9/8/2013 Enhanced Images 35
Selection
Adjustment LayerMask Mask is selected

Clipping Mask Photoshop Elements
does not support Layer Masks except on Adjustment Layers
It does support Clipping Layers
Open an adjustment layer (which has a Mask)
Place it under layer for which you want a Mask, and select layer
Select Layer -> Create Clipping Mask
JKM 9/8/2013 Enhanced Images 36
Clipping Mask
Layer which is clipped (notice indented icon)

JKM 9/8/2013 Enhanced Images 37
Local Changes – Mask demo (Photoshop Only)
Click on Mask to enable the Mask
Alt Click on Mask to Display the mask
White Reveals;
Black Conceals
Activate the Impact layer by clicking on the eye icon. Reposition the Impact layer with the move tool.
Related Documents