Carlos J. Ochoa Fernández © 2015 Madrid Sound and Signal Flow Recording Acoustic Instruments Parts 1 & 2

Welcome message from author
This document is posted to help you gain knowledge. Please leave a comment to let me know what you think about it! Share it to your friends and learn new things together.
Transcript
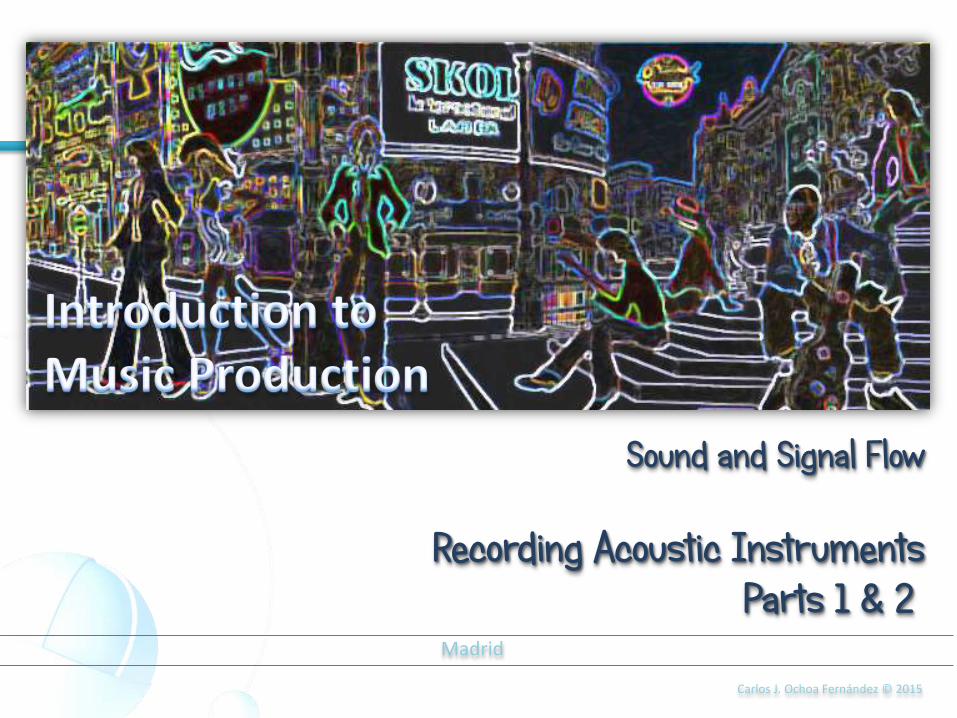
Carlos J. Ochoa Fernández © 2015
Madrid
Sound and Signal Flow
Recording Acoustic Instruments Parts 1 & 2
Carlos J. Ochoa Fernández © 2015
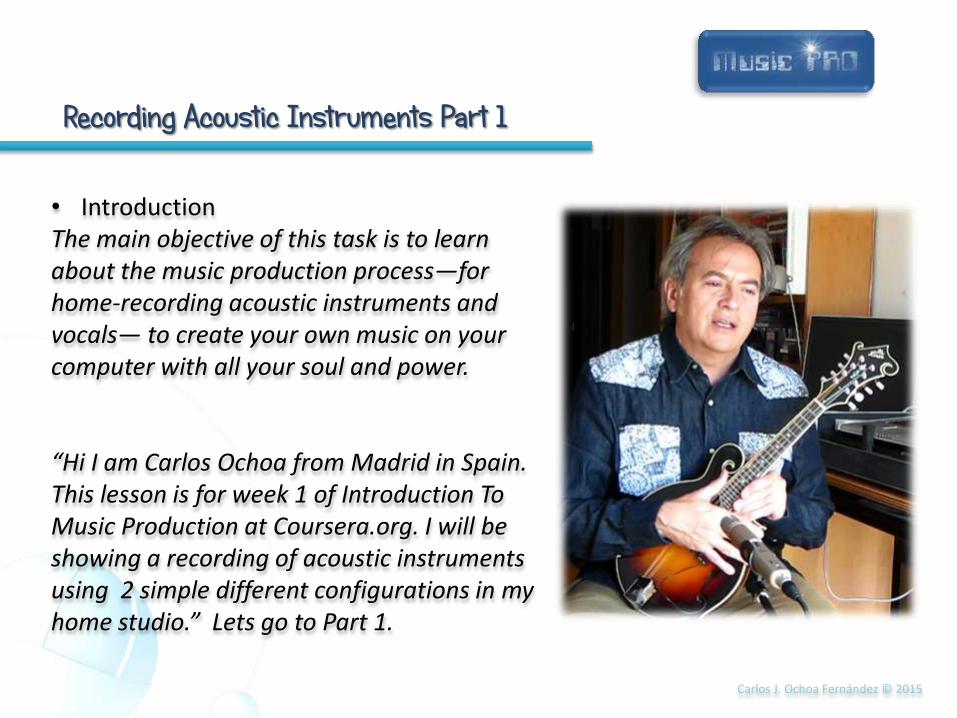
Recording Acoustic Instruments Part 1
• Introduction The main objective of this task is to learn about the music production process—for home-recording acoustic instruments and vocals— to create your own music on your computer with all your soul and power. “Hi I am Carlos Ochoa from Madrid in Spain. This lesson is for week 1 of Introduction To Music Production at Coursera.org. I will be showing a recording of acoustic instruments using 2 simple different configurations in my home studio.” Lets go to Part 1.
Carlos J. Ochoa Fernández © 2015
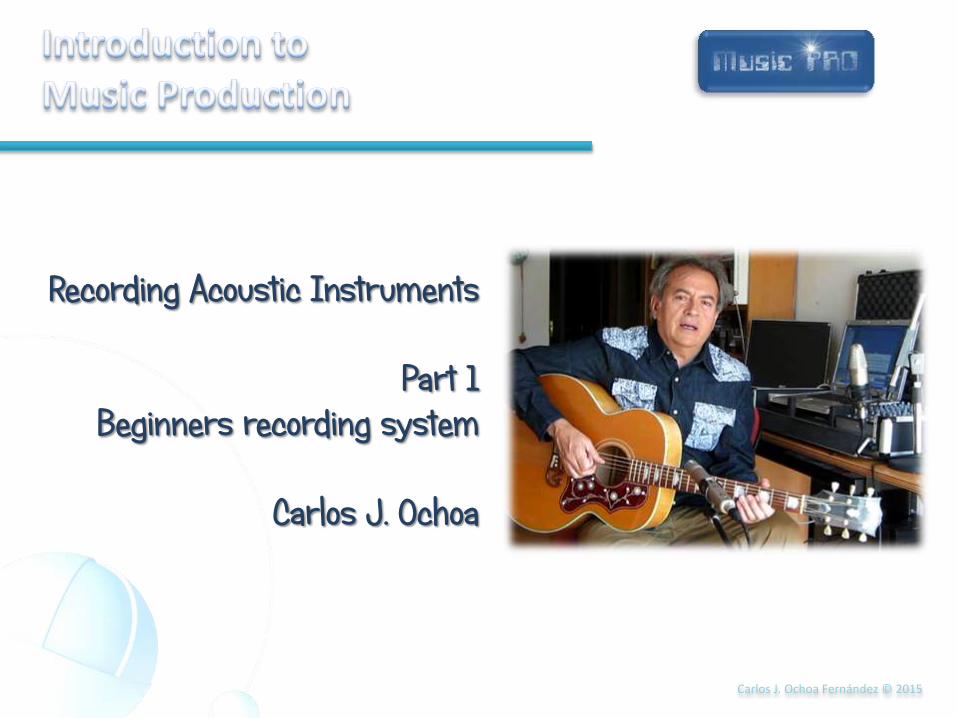
Recording Acoustic Instruments
Part 1 Beginners recording system
Carlos J. Ochoa
Carlos J. Ochoa Fernández © 2015
Recording Acoustic Instruments Part 1
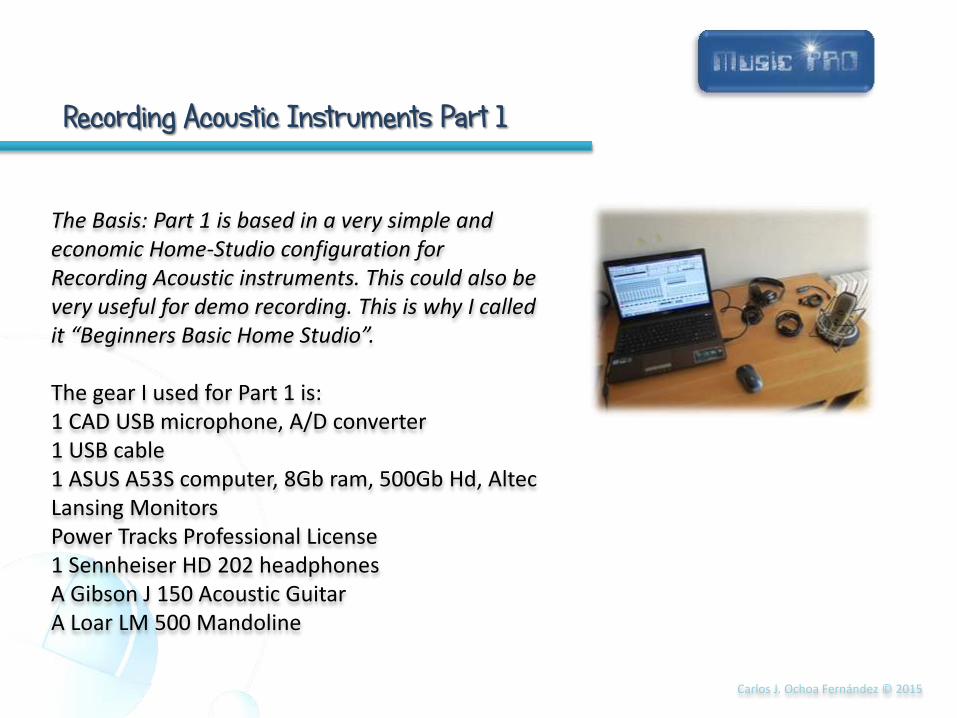
The Basis: Part 1 is based in a very simple and economic Home-Studio configuration for Recording Acoustic instruments. This could also be very useful for demo recording. This is why I called it “Beginners Basic Home Studio”. The gear I used for Part 1 is: 1 CAD USB microphone, A/D converter 1 USB cable 1 ASUS A53S computer, 8Gb ram, 500Gb Hd, Altec Lansing Monitors Power Tracks Professional License 1 Sennheiser HD 202 headphones A Gibson J 150 Acoustic Guitar A Loar LM 500 Mandoline

Carlos J. Ochoa Fernández © 2015
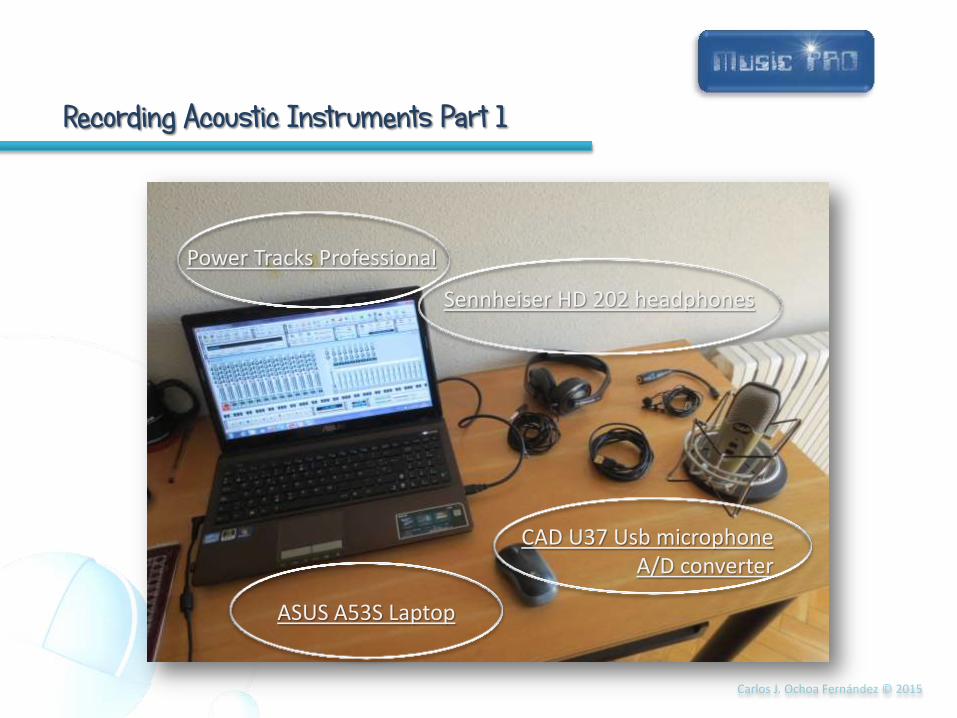
Recording Acoustic Instruments Part 1
CAD U37 Usb microphone A/D converter
Sennheiser HD 202 headphones
ASUS A53S Laptop
Power Tracks Professional
Carlos J. Ochoa Fernández © 2015
Recording Acoustic Instruments Part 1
CAD U37 Usb microphone A/D converter
Sennheiser HD 202 headphones
ASUS A53S Laptop
Power Tracks Professional
Carlos J. Ochoa Fernández © 2015
Recording Acoustic Instruments Part 1
CAD U37 Usb microphone A/D Converter
ASUS A53S Laptop
Power Tracks Professional
Usb cable
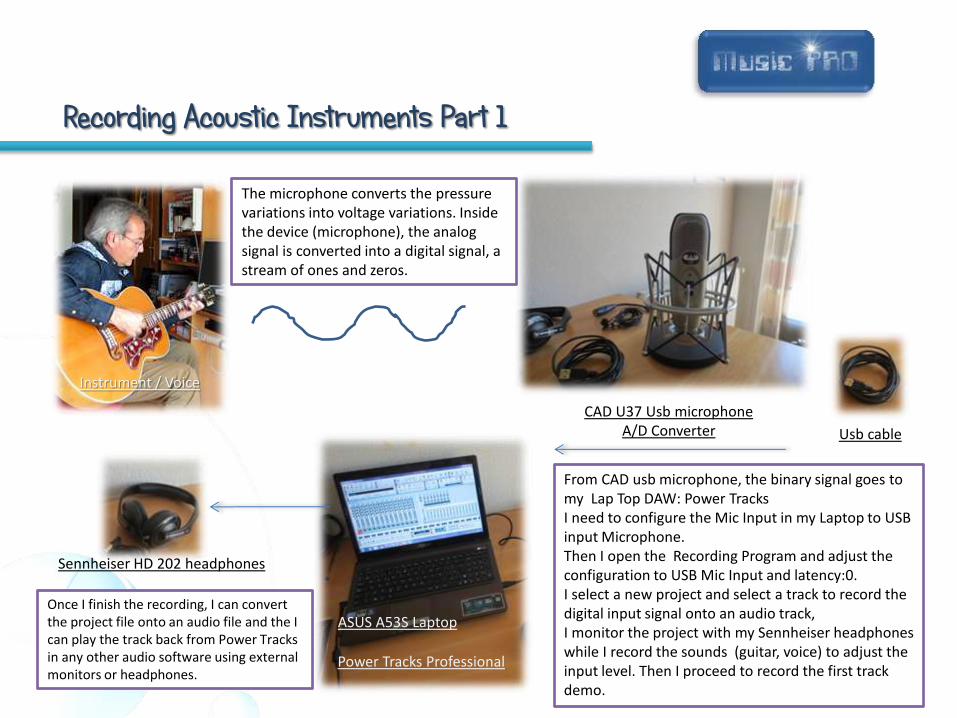
The microphone converts the pressure variations into voltage variations. Inside the device (microphone), the analog signal is converted into a digital signal, a stream of ones and zeros.
Sennheiser HD 202 headphones
Instrument / Voice
From CAD usb microphone, the binary signal goes to my Lap Top DAW: Power Tracks I need to configure the Mic Input in my Laptop to USB input Microphone. Then I open the Recording Program and adjust the configuration to USB Mic Input and latency:0. I select a new project and select a track to record the digital input signal onto an audio track, I monitor the project with my Sennheiser headphones while I record the sounds (guitar, voice) to adjust the input level. Then I proceed to record the first track demo.
Once I finish the recording, I can convert the project file onto an audio file and the I can play the track back from Power Tracks in any other audio software using external monitors or headphones.
Carlos J. Ochoa Fernández © 2015
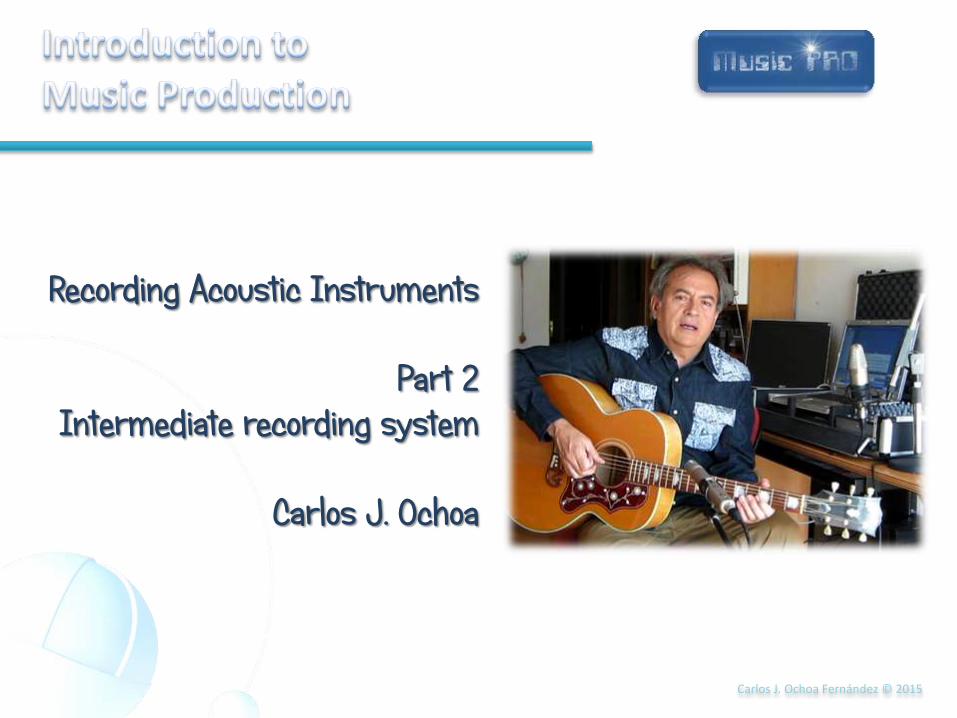
Recording Acoustic Instruments
Part 2 Intermediate recording system
Carlos J. Ochoa
Carlos J. Ochoa Fernández © 2015
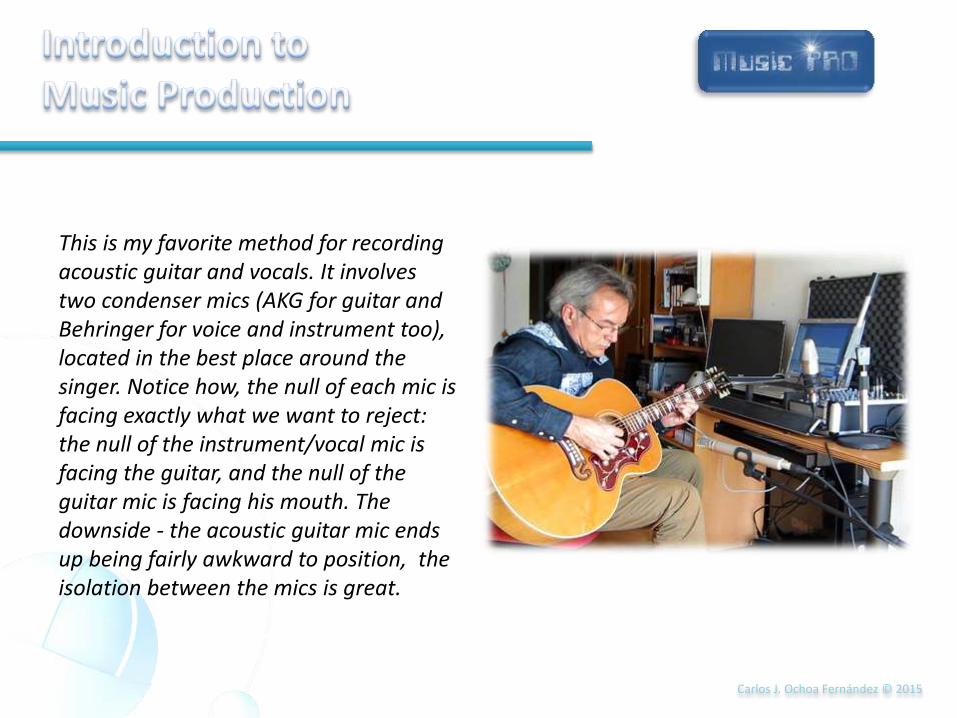
This is my favorite method for recording acoustic guitar and vocals. It involves two condenser mics (AKG for guitar and Behringer for voice and instrument too), located in the best place around the singer. Notice how, the null of each mic is facing exactly what we want to reject: the null of the instrument/vocal mic is facing the guitar, and the null of the guitar mic is facing his mouth. The downside - the acoustic guitar mic ends up being fairly awkward to position, the isolation between the mics is great.
Carlos J. Ochoa Fernández © 2015
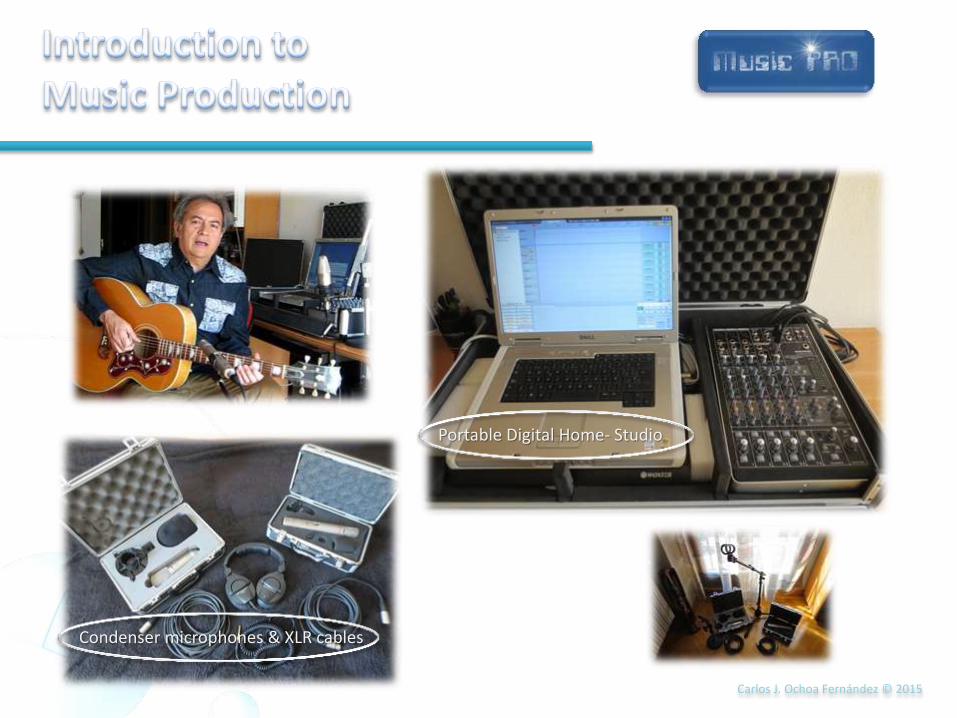
Portable Digital Home- Studio
Condenser microphones & XLR cables
Carlos J. Ochoa Fernández © 2015
Recording Acoustic Instruments Part 2
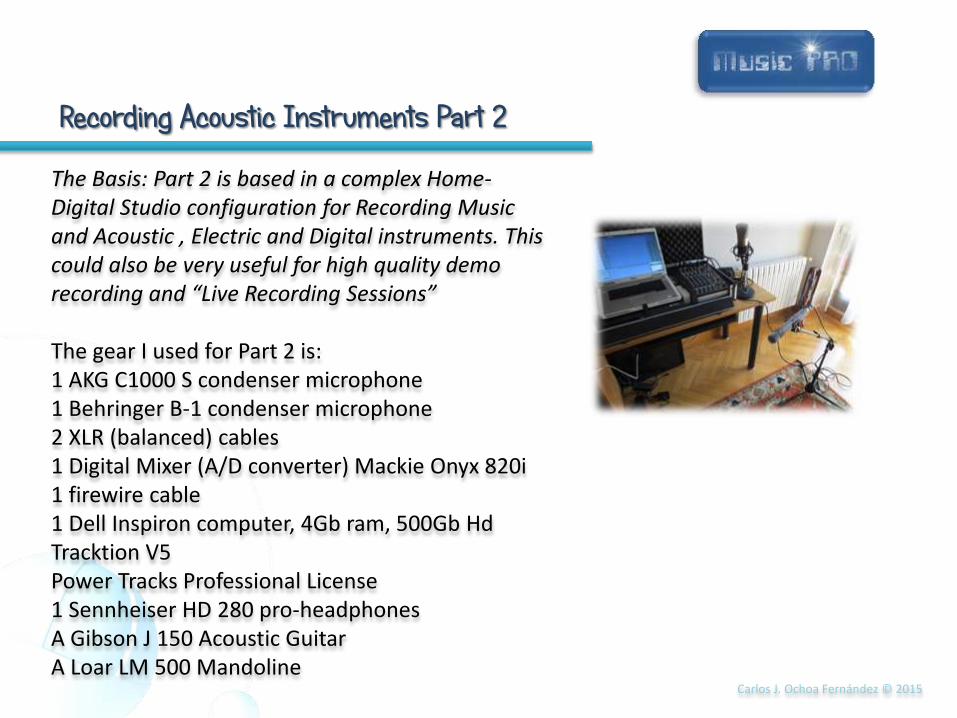
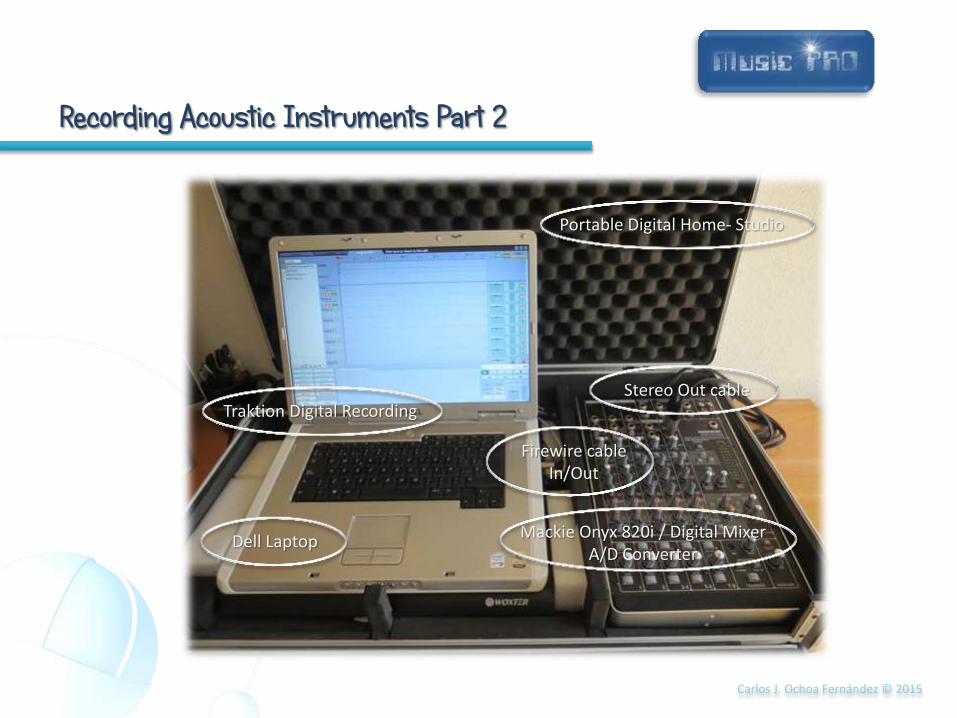
The Basis: Part 2 is based in a complex Home-Digital Studio configuration for Recording Music and Acoustic , Electric and Digital instruments. This could also be very useful for high quality demo recording and “Live Recording Sessions” The gear I used for Part 2 is: 1 AKG C1000 S condenser microphone 1 Behringer B-1 condenser microphone 2 XLR (balanced) cables 1 Digital Mixer (A/D converter) Mackie Onyx 820i 1 firewire cable 1 Dell Inspiron computer, 4Gb ram, 500Gb Hd Tracktion V5 Power Tracks Professional License 1 Sennheiser HD 280 pro-headphones A Gibson J 150 Acoustic Guitar A Loar LM 500 Mandoline
Carlos J. Ochoa Fernández © 2015
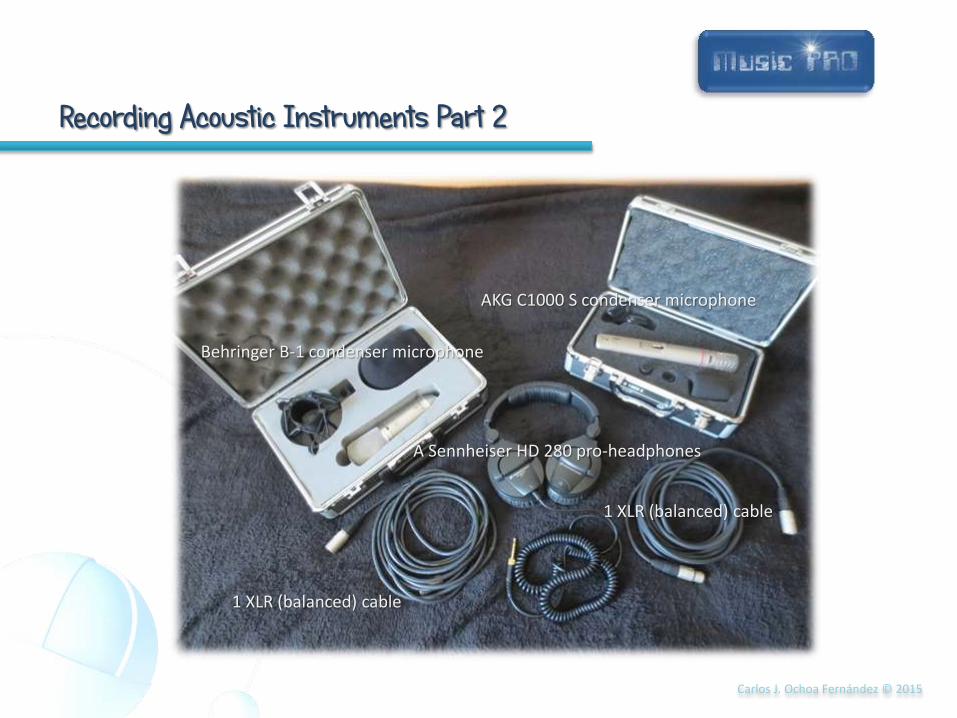
AKG C1000 S condenser microphone
Behringer B-1 condenser microphone
1 XLR (balanced) cable
A Sennheiser HD 280 pro-headphones
1 XLR (balanced) cable
Recording Acoustic Instruments Part 2
Carlos J. Ochoa Fernández © 2015
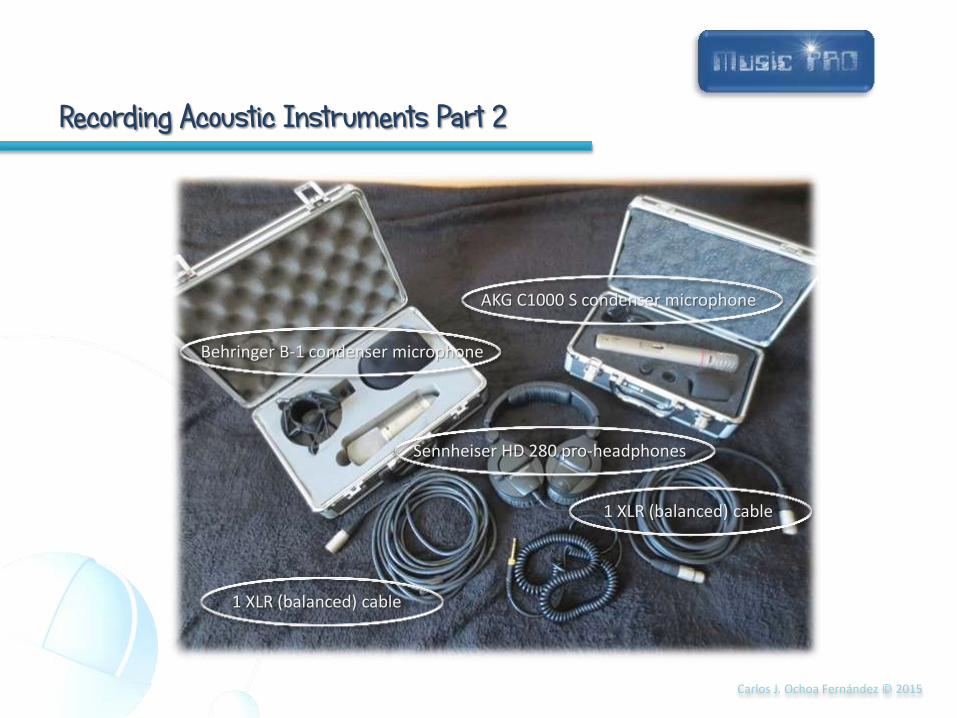
AKG C1000 S condenser microphone
Behringer B-1 condenser microphone
1 XLR (balanced) cable
Sennheiser HD 280 pro-headphones
1 XLR (balanced) cable
Recording Acoustic Instruments Part 2
Carlos J. Ochoa Fernández © 2015
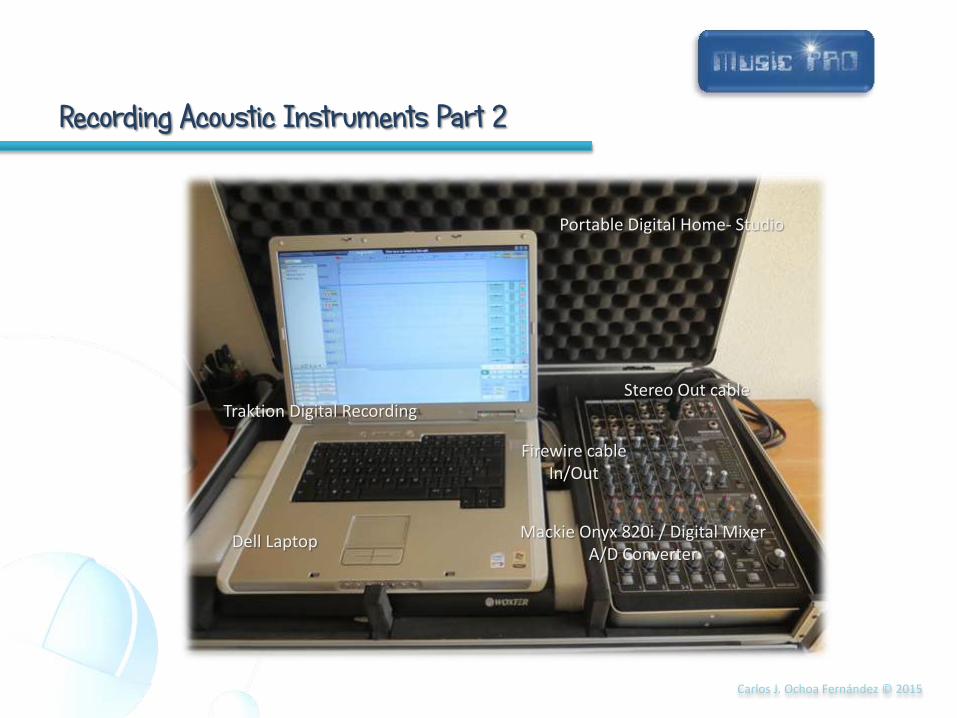
Portable Digital Home- Studio
Traktion Digital Recording
Dell Laptop Mackie Onyx 820i / Digital Mixer
A/D Converter
Firewire cable In/Out
Stereo Out cable
Recording Acoustic Instruments Part 2
Carlos J. Ochoa Fernández © 2015
Portable Digital Home- Studio
Traktion Digital Recording
Dell Laptop Mackie Onyx 820i / Digital Mixer
A/D Converter
Firewire cable In/Out
Stereo Out cable
Recording Acoustic Instruments Part 2
Carlos J. Ochoa Fernández © 2015
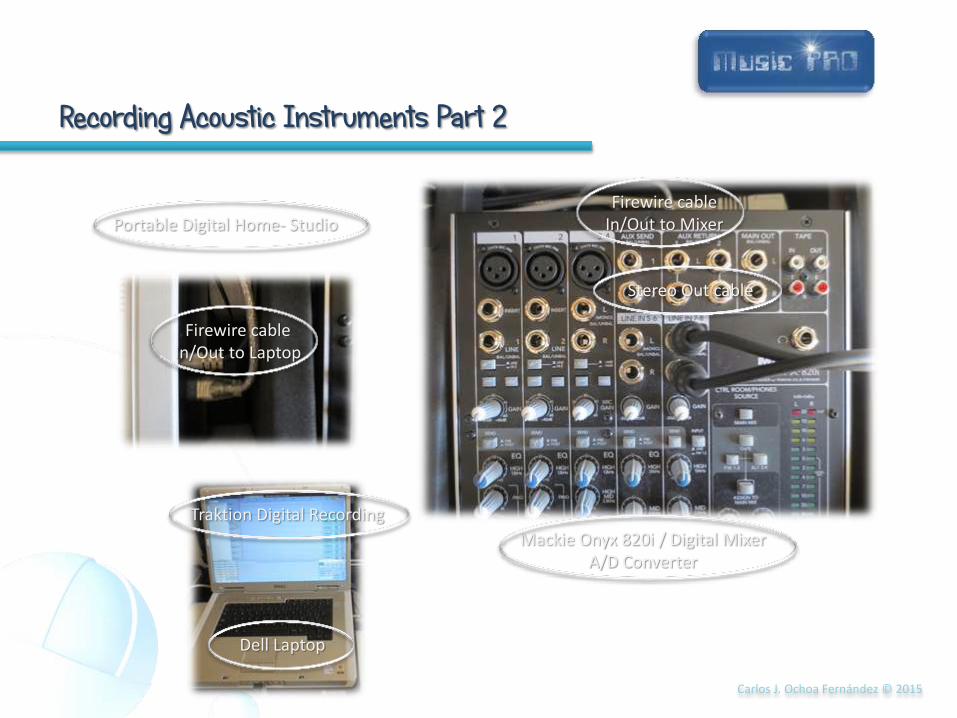
Portable Digital Home- Studio
Mackie Onyx 820i / Digital Mixer A/D Converter
Firewire cable In/Out to Mixer
Stereo Out cable
Firewire cable In/Out to Laptop
Traktion Digital Recording
Dell Laptop
Recording Acoustic Instruments Part 2
Carlos J. Ochoa Fernández © 2015
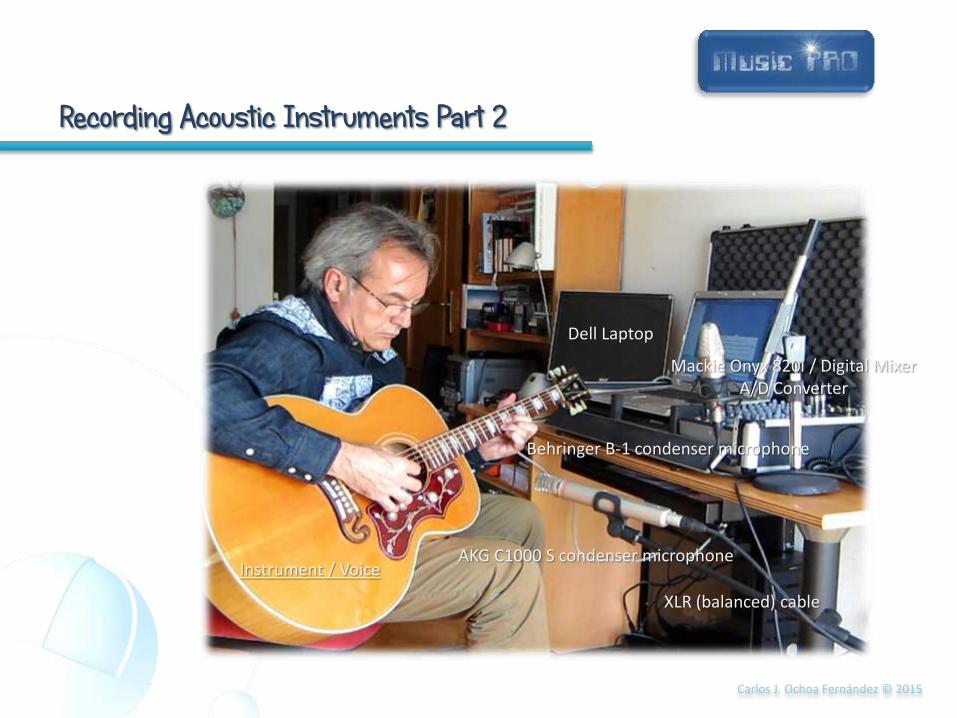
Instrument / Voice AKG C1000 S condenser microphone
Behringer B-1 condenser microphone
Mackie Onyx 820i / Digital Mixer A/D Converter
Dell Laptop
XLR (balanced) cable
Recording Acoustic Instruments Part 2

Carlos J. Ochoa Fernández © 2015
Instrument / Voice
AKG C1000 S condenser microphone
Behringer B-1 condenser microphone
Mackie Onyx 820i / Digital Mixer A/D Converter
Dell Laptop
XLR (balanced) cable
Recording Acoustic Instruments Part 2
Carlos J. Ochoa Fernández © 2015
Recording Acoustic Instruments Part 2
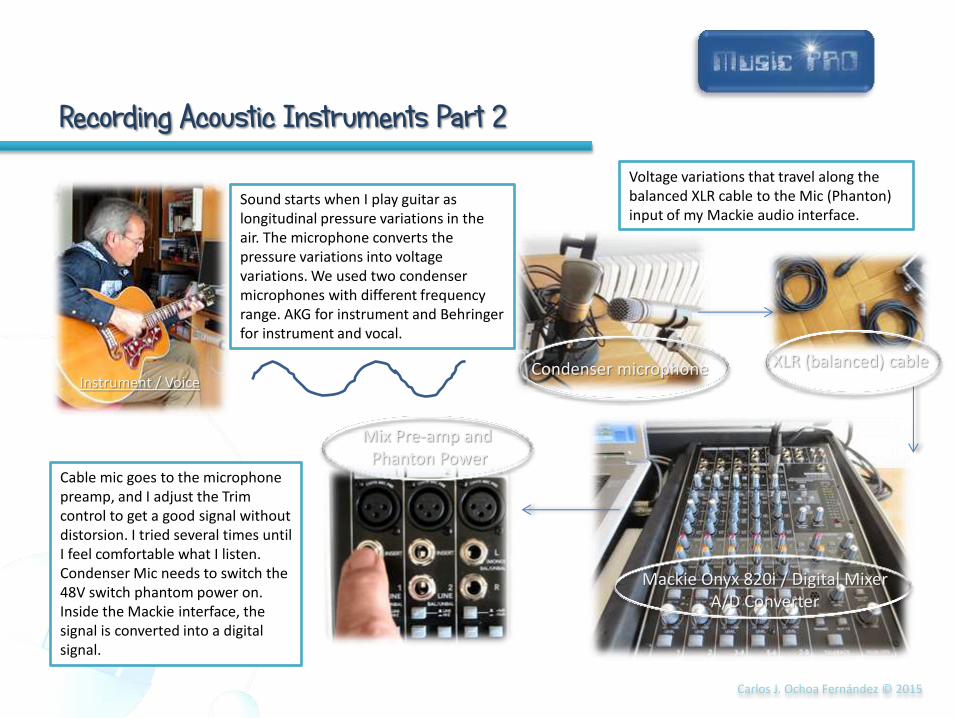
Sound starts when I play guitar as longitudinal pressure variations in the air. The microphone converts the pressure variations into voltage variations. We used two condenser microphones with different frequency range. AKG for instrument and Behringer for instrument and vocal.
Instrument / Voice
Voltage variations that travel along the balanced XLR cable to the Mic (Phanton) input of my Mackie audio interface.
Cable mic goes to the microphone preamp, and I adjust the Trim control to get a good signal without distorsion. I tried several times until I feel comfortable what I listen. Condenser Mic needs to switch the 48V switch phantom power on. Inside the Mackie interface, the signal is converted into a digital signal.
XLR (balanced) cable Condenser microphone
Mix Pre-amp and Phanton Power
Mackie Onyx 820i / Digital Mixer A/D Converter
Carlos J. Ochoa Fernández © 2015
Recording Acoustic Instruments Part 2
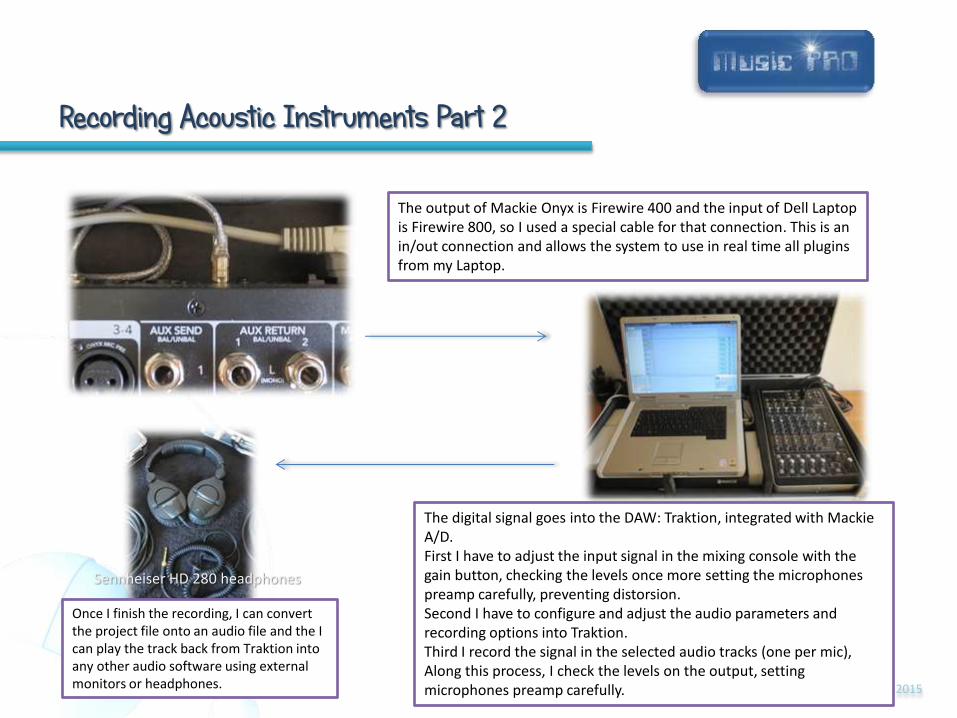
Sennheiser HD 280 headphones
Once I finish the recording, I can convert the project file onto an audio file and the I can play the track back from Traktion into any other audio software using external monitors or headphones.
The output of Mackie Onyx is Firewire 400 and the input of Dell Laptop is Firewire 800, so I used a special cable for that connection. This is an in/out connection and allows the system to use in real time all plugins from my Laptop.
The digital signal goes into the DAW: Traktion, integrated with Mackie A/D. First I have to adjust the input signal in the mixing console with the gain button, checking the levels once more setting the microphones preamp carefully, preventing distorsion. Second I have to configure and adjust the audio parameters and recording options into Traktion. Third I record the signal in the selected audio tracks (one per mic), Along this process, I check the levels on the output, setting microphones preamp carefully.
Carlos J. Ochoa Fernández © 2015
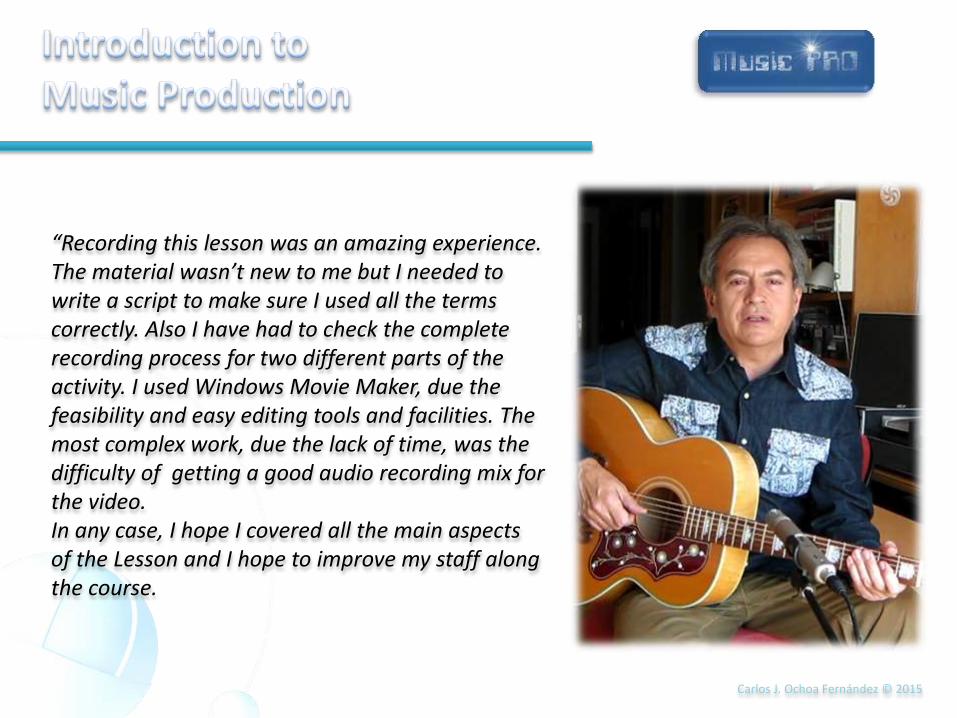
“Recording this lesson was an amazing experience. The material wasn’t new to me but I needed to write a script to make sure I used all the terms correctly. Also I have had to check the complete recording process for two different parts of the activity. I used Windows Movie Maker, due the feasibility and easy editing tools and facilities. The most complex work, due the lack of time, was the difficulty of getting a good audio recording mix for the video. In any case, I hope I covered all the main aspects of the Lesson and I hope to improve my staff along the course.

Carlos J. Ochoa Fernández © 2015
“Believe me when I tell You that I worked hard on this and I would love to know if I got everything right. I did the best I could though my main issue was to be clear, focus, consistent and provide good value to You. Is there anything I missed or could have explained better? What do you think of the acoustic audio recording? Thank you for watching, critiquing, be patient and love music as I do.”

Carlos J. Ochoa Fernández © 2015
Madrid
Sound and Signal Flow
Recording Acoustic Instruments Parts 1 & 2
Related Documents