DIGITAL MINI GUIDE

Welcome message from author
This document is posted to help you gain knowledge. Please leave a comment to let me know what you think about it! Share it to your friends and learn new things together.
Transcript
DIGITAL MINI GUIDE
1
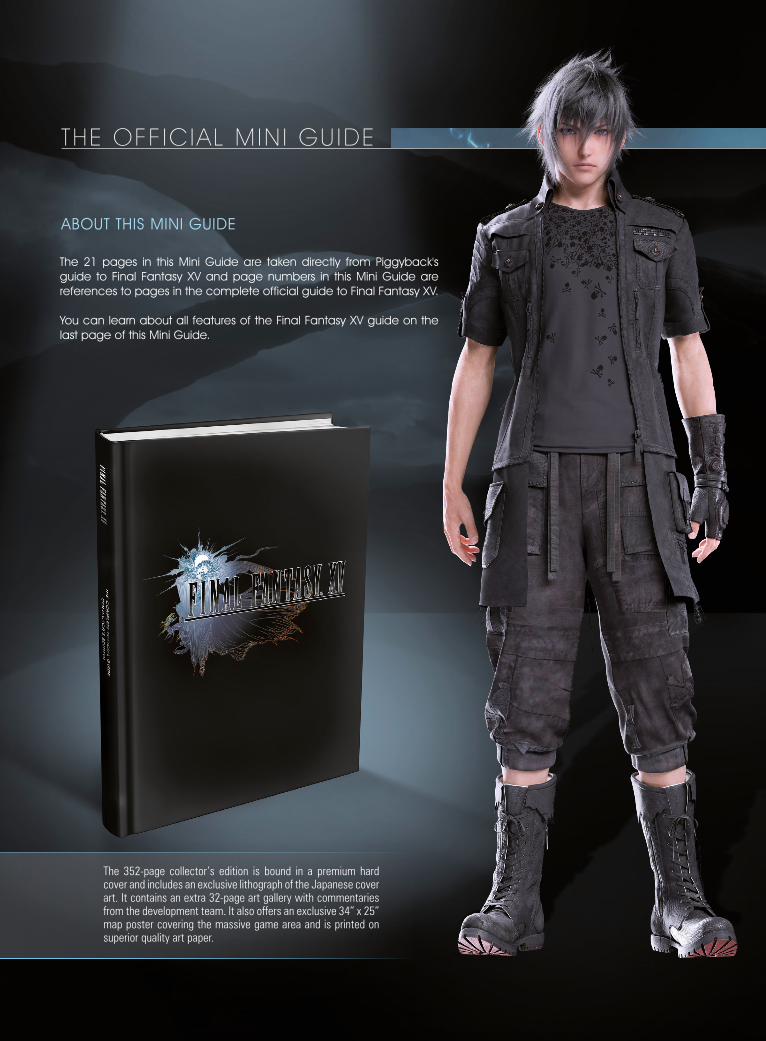
The 352-page collector’s edition is bound in a premium hard cover and includes an exclusive lithograph of the Japanese cover art. It contains an extra 32-page art gallery with commentaries from the development team. It also offers an exclusive 34” x 25” map poster covering the massive game area and is printed on superior quality art paper.
ABOUT THIS MINI GUIDE
The 21 pages in this Mini Guide are taken directly from Piggyback's guide to Final Fantasy XV and page numbers in this Mini Guide are references to pages in the complete official guide to Final Fantasy XV.
You can learn about all features of the Final Fantasy XV guide on the last page of this Mini Guide.
THE OFF IC IAL MIN I GUIDE
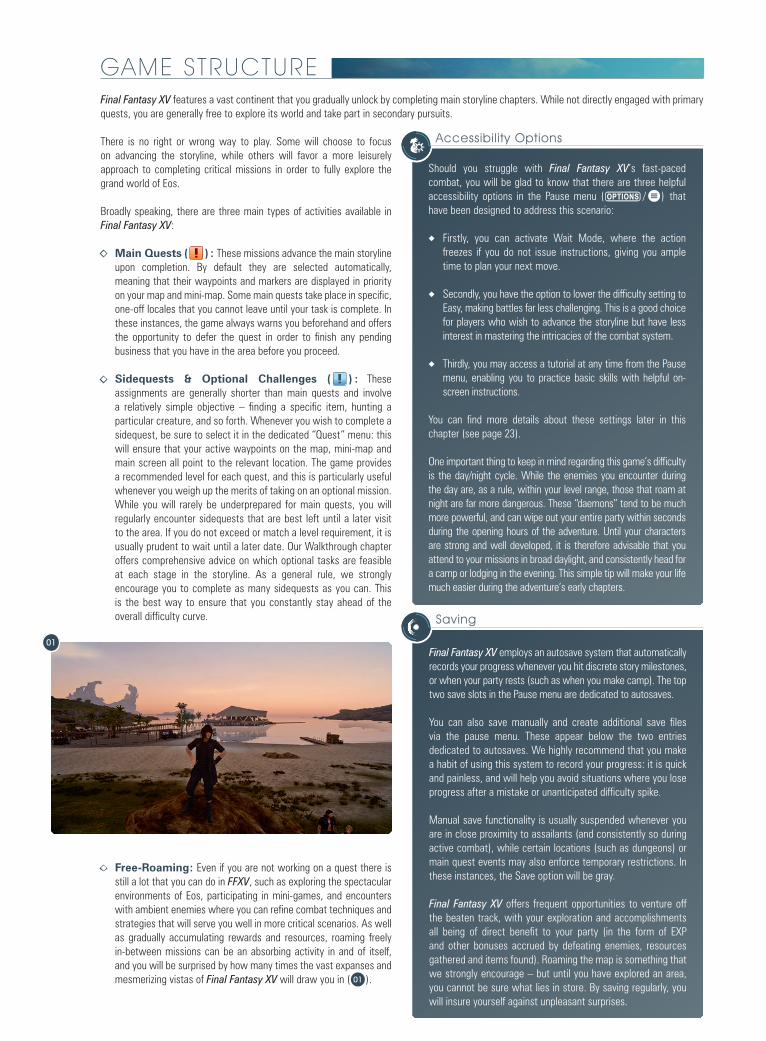
There is no right or wrong way to play. Some will choose to focus on advancing the storyline, while others will favor a more leisurely approach to completing critical missions in order to fully explore the grand world of Eos.
Broadly speaking, there are three main types of activities available in Final Fantasy XV:
Main Quests ( ) : These missions advance the main storyline upon completion. By default they are selected automatically, meaning that their waypoints and markers are displayed in priority on your map and mini-map. Some main quests take place in specific, one-off locales that you cannot leave until your task is complete. In these instances, the game always warns you beforehand and offers the opportunity to defer the quest in order to finish any pending business that you have in the area before you proceed.
Sidequests & Optional Challenges ( ) : These assignments are generally shorter than main quests and involve a relatively simple objective – finding a specific item, hunting a particular creature, and so forth. Whenever you wish to complete a sidequest, be sure to select it in the dedicated “Quest” menu: this will ensure that your active waypoints on the map, mini-map and main screen all point to the relevant location. The game provides a recommended level for each quest, and this is particularly useful whenever you weigh up the merits of taking on an optional mission. While you will rarely be underprepared for main quests, you will regularly encounter sidequests that are best left until a later visit to the area. If you do not exceed or match a level requirement, it is usually prudent to wait until a later date. Our Walkthrough chapter offers comprehensive advice on which optional tasks are feasible at each stage in the storyline. As a general rule, we strongly encourage you to complete as many sidequests as you can. This is the best way to ensure that you constantly stay ahead of the overall difficulty curve.
Free-Roaming: Even if you are not working on a quest there is still a lot that you can do in FFXV, such as exploring the spectacular environments of Eos, participating in mini-games, and encounters with ambient enemies where you can refine combat techniques and strategies that will serve you well in more critical scenarios. As well as gradually accumulating rewards and resources, roaming freely in-between missions can be an absorbing activity in and of itself, and you will be surprised by how many times the vast expanses and mesmerizing vistas of Final Fantasy XV will draw you in ( 01 ).
Final Fantasy XV features a vast continent that you gradually unlock by completing main storyline chapters. While not directly engaged with primary quests, you are generally free to explore its world and take part in secondary pursuits.
01
GAME STRUCTURE
Accessibility Options
Should you struggle with Final Fantasy XV’s fast-paced combat, you will be glad to know that there are three helpful accessibility options in the Pause menu ( / ) that have been designed to address this scenario:
Firstly, you can activate Wait Mode, where the action freezes if you do not issue instructions, giving you ample time to plan your next move.
Secondly, you have the option to lower the difficulty setting to Easy, making battles far less challenging. This is a good choice for players who wish to advance the storyline but have less interest in mastering the intricacies of the combat system.
Thirdly, you may access a tutorial at any time from the Pause menu, enabling you to practice basic skills with helpful on-screen instructions.
You can find more details about these settings later in this chapter (see page 23).
One important thing to keep in mind regarding this game’s difficulty is the day/night cycle. While the enemies you encounter during the day are, as a rule, within your level range, those that roam at night are far more dangerous. These “daemons” tend to be much more powerful, and can wipe out your entire party within seconds during the opening hours of the adventure. Until your characters are strong and well developed, it is therefore advisable that you attend to your missions in broad daylight, and consistently head for a camp or lodging in the evening. This simple tip will make your life much easier during the adventure’s early chapters.
Saving
Final Fantasy XV employs an autosave system that automatically records your progress whenever you hit discrete story milestones, or when your party rests (such as when you make camp). The top two save slots in the Pause menu are dedicated to autosaves.
You can also save manually and create additional save files via the pause menu. These appear below the two entries dedicated to autosaves. We highly recommend that you make a habit of using this system to record your progress: it is quick and painless, and will help you avoid situations where you lose progress after a mistake or unanticipated difficulty spike.
Manual save functionality is usually suspended whenever you are in close proximity to assailants (and consistently so during active combat), while certain locations (such as dungeons) or main quest events may also enforce temporary restrictions. In these instances, the Save option will be gray.
Final Fantasy XV offers frequent opportunities to venture off the beaten track, with your exploration and accomplishments all being of direct benefit to your party (in the form of EXP and other bonuses accrued by defeating enemies, resources gathered and items found). Roaming the map is something that we strongly encourage – but until you have explored an area, you cannot be sure what lies in store. By saving regularly, you will insure yourself against unpleasant surprises.
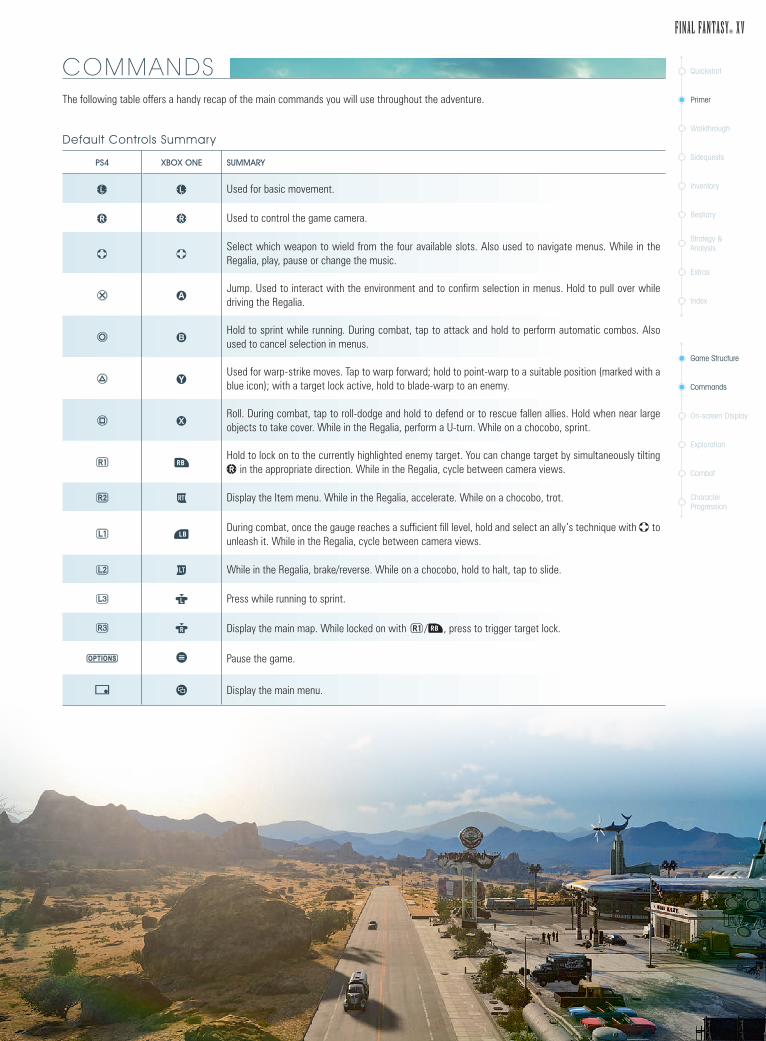
The following table offers a handy recap of the main commands you will use throughout the adventure.
Default Controls Summary
PS4 XBOX ONE SUMMARY
d d Used for basic movement.
f f Used to control the game camera.
t tSelect which weapon to wield from the four available slots. Also used to navigate menus. While in the Regalia, play, pause or change the music.
q AJump. Used to interact with the environment and to confirm selection in menus. Hold to pull over while driving the Regalia.
r SHold to sprint while running. During combat, tap to attack and hold to perform automatic combos. Also used to cancel selection in menus.
e YUsed for warp-strike moves. Tap to warp forward; hold to point-warp to a suitable position (marked with a blue icon); with a target lock active, hold to blade-warp to an enemy.
w XRoll. During combat, tap to roll-dodge and hold to defend or to rescue fallen allies. Hold when near large objects to take cover. While in the Regalia, perform a U-turn. While on a chocobo, sprint.
p rHold to lock on to the currently highlighted enemy target. You can change target by simultaneously tilting f in the appropriate direction. While in the Regalia, cycle between camera views.
ü R Display the Item menu. While in the Regalia, accelerate. While on a chocobo, trot.
i eDuring combat, once the gauge reaches a sufficient fill level, hold and select an ally’s technique with t to unleash it. While in the Regalia, cycle between camera views.
O E While in the Regalia, brake/reverse. While on a chocobo, hold to halt, tap to slide.
o l Press while running to sprint.
P ö Display the main map. While locked on with p/r, press to trigger target lock.
Pause the game.
Display the main menu.
Quickstart
Primer
Walkthrough
Sidequests
Inventory
Bestiary
Strategy & Analysis
Extras
Index
Game Structure
Commands
On-screen Display
Exploration
Combat
Character Progression
COMMANDS
B CF
HG DI
AE
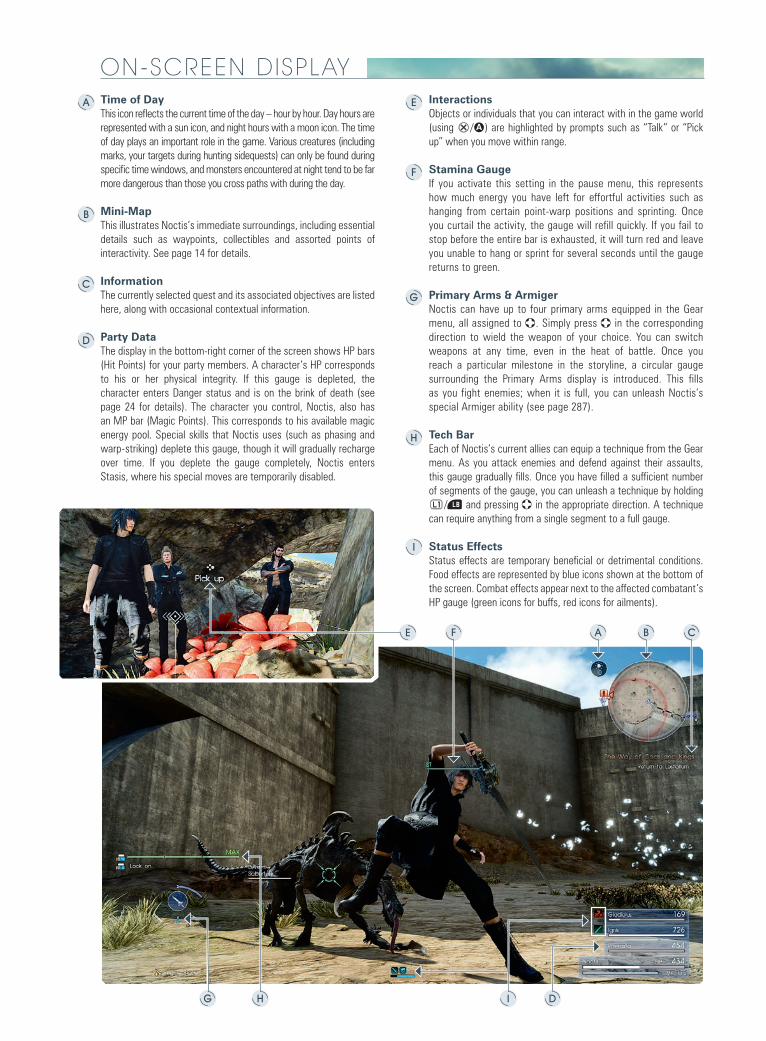
Time of DayThis icon reflects the current time of the day – hour by hour. Day hours are represented with a sun icon, and night hours with a moon icon. The time of day plays an important role in the game. Various creatures (including marks, your targets during hunting sidequests) can only be found during specific time windows, and monsters encountered at night tend to be far more dangerous than those you cross paths with during the day. Mini-MapThis illustrates Noctis’s immediate surroundings, including essential details such as waypoints, collectibles and assorted points of interactivity. See page 14 for details.
InformationThe currently selected quest and its associated objectives are listed here, along with occasional contextual information.
Party DataThe display in the bottom-right corner of the screen shows HP bars (Hit Points) for your party members. A character’s HP corresponds to his or her physical integrity. If this gauge is depleted, the character enters Danger status and is on the brink of death (see page 24 for details). The character you control, Noctis, also has an MP bar (Magic Points). This corresponds to his available magic energy pool. Special skills that Noctis uses (such as phasing and warp-striking) deplete this gauge, though it will gradually recharge over time. If you deplete the gauge completely, Noctis enters Stasis, where his special moves are temporarily disabled.
InteractionsObjects or individuals that you can interact with in the game world (using q/a) are highlighted by prompts such as “Talk” or “Pick up” when you move within range.
Stamina GaugeIf you activate this setting in the pause menu, this represents how much energy you have left for effortful activities such as hanging from certain point-warp positions and sprinting. Once you curtail the activity, the gauge will refill quickly. If you fail to stop before the entire bar is exhausted, it will turn red and leave you unable to hang or sprint for several seconds until the gauge returns to green.
Primary Arms & ArmigerNoctis can have up to four primary arms equipped in the Gear menu, all assigned to t. Simply press t in the corresponding direction to wield the weapon of your choice. You can switch weapons at any time, even in the heat of battle. Once you reach a particular milestone in the storyline, a circular gauge surrounding the Primary Arms display is introduced. This fills as you fight enemies; when it is full, you can unleash Noctis’s special Armiger ability (see page 287).
Tech BarEach of Noctis’s current allies can equip a technique from the Gear menu. As you attack enemies and defend against their assaults, this gauge gradually fills. Once you have filled a sufficient number of segments of the gauge, you can unleash a technique by holding i/e and pressing t in the appropriate direction. A technique can require anything from a single segment to a full gauge.
Status EffectsStatus effects are temporary beneficial or detrimental conditions. Food effects are represented by blue icons shown at the bottom of the screen. Combat effects appear next to the affected combatant’s HP gauge (green icons for buffs, red icons for ailments).
A E
B
F
CG
D
H
I
ON-SCREEN D ISPLAY
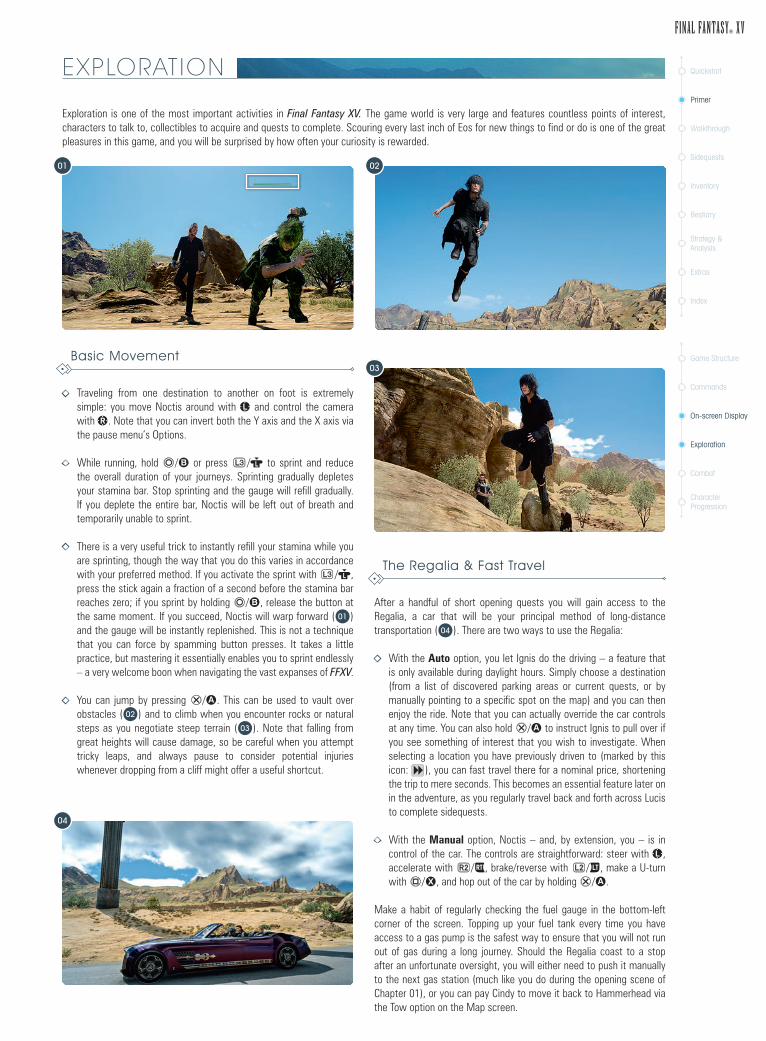
Traveling from one destination to another on foot is extremely simple: you move Noctis around with d and control the camera with f. Note that you can invert both the Y axis and the X axis via the pause menu’s Options.
While running, hold r/s or press o/l to sprint and reduce the overall duration of your journeys. Sprinting gradually depletes your stamina bar. Stop sprinting and the gauge will refill gradually. If you deplete the entire bar, Noctis will be left out of breath and temporarily unable to sprint.
There is a very useful trick to instantly refill your stamina while you are sprinting, though the way that you do this varies in accordance with your preferred method. If you activate the sprint with o/l, press the stick again a fraction of a second before the stamina bar reaches zero; if you sprint by holding r/s, release the button at the same moment. If you succeed, Noctis will warp forward ( 01 ) and the gauge will be instantly replenished. This is not a technique that you can force by spamming button presses. It takes a little practice, but mastering it essentially enables you to sprint endlessly – a very welcome boon when navigating the vast expanses of FFXV.
You can jump by pressing q/a. This can be used to vault over obstacles ( 02 ) and to climb when you encounter rocks or natural steps as you negotiate steep terrain ( 03 ). Note that falling from great heights will cause damage, so be careful when you attempt tricky leaps, and always pause to consider potential injuries whenever dropping from a cliff might offer a useful shortcut.
After a handful of short opening quests you will gain access to the Regalia, a car that will be your principal method of long-distance transportation ( 04 ). There are two ways to use the Regalia:
With the Auto option, you let Ignis do the driving – a feature that is only available during daylight hours. Simply choose a destination (from a list of discovered parking areas or current quests, or by manually pointing to a specific spot on the map) and you can then enjoy the ride. Note that you can actually override the car controls at any time. You can also hold q/a to instruct Ignis to pull over if you see something of interest that you wish to investigate. When selecting a location you have previously driven to (marked by this icon: ), you can fast travel there for a nominal price, shortening the trip to mere seconds. This becomes an essential feature later on in the adventure, as you regularly travel back and forth across Lucis to complete sidequests.
With the Manual option, Noctis – and, by extension, you – is in control of the car. The controls are straightforward: steer with d, accelerate with ü/R, brake/reverse with O/E, make a U-turn with w/X, and hop out of the car by holding q/a.
Make a habit of regularly checking the fuel gauge in the bottom-left corner of the screen. Topping up your fuel tank every time you have access to a gas pump is the safest way to ensure that you will not run out of gas during a long journey. Should the Regalia coast to a stop after an unfortunate oversight, you will either need to push it manually to the next gas station (much like you do during the opening scene of Chapter 01), or you can pay Cindy to move it back to Hammerhead via the Tow option on the Map screen.
Exploration is one of the most important activities in Final Fantasy XV. The game world is very large and features countless points of interest, characters to talk to, collectibles to acquire and quests to complete. Scouring every last inch of Eos for new things to find or do is one of the great pleasures in this game, and you will be surprised by how often your curiosity is rewarded.
04
02
03
01
Quickstart
Primer
Walkthrough
Sidequests
Inventory
Bestiary
Strategy & Analysis
Extras
Index
Game Structure
Commands
On-screen Display
Exploration
Combat
Character Progression
EXPLORAT ION
Basic Movement
The Regalia & Fast Travel
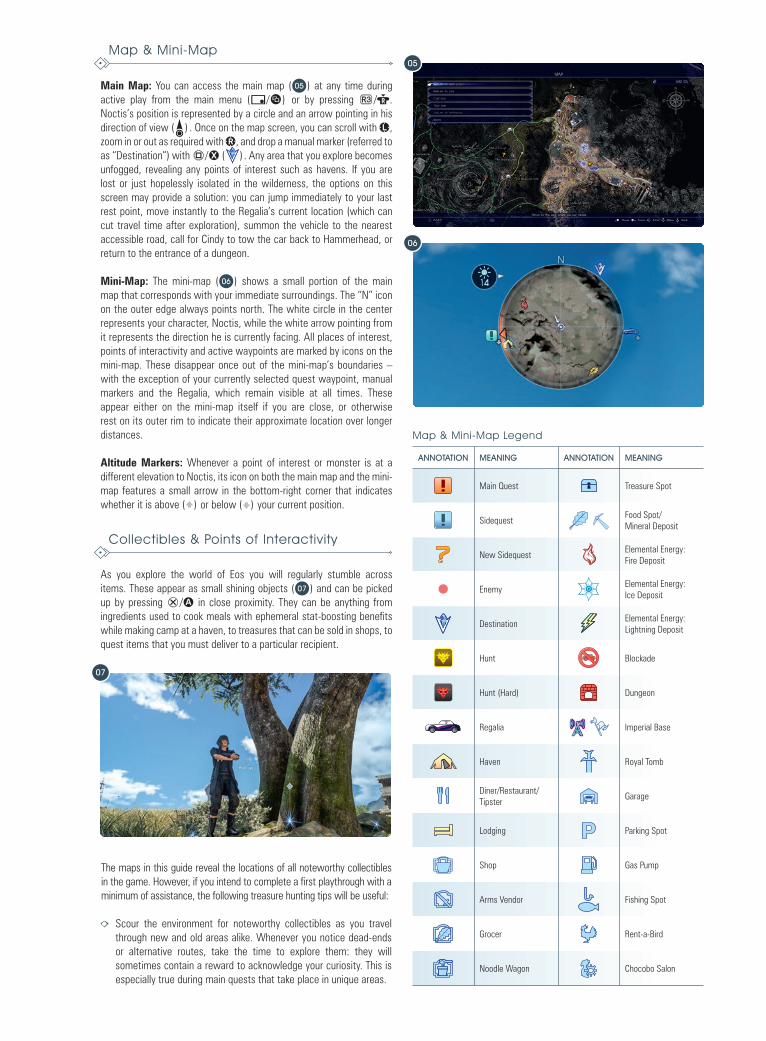
Main Map: You can access the main map ( 05 ) at any time during active play from the main menu ( / ) or by pressing P/ö. Noctis’s position is represented by a circle and an arrow pointing in his direction of view ( ) . Once on the map screen, you can scroll with d, zoom in or out as required with f, and drop a manual marker (referred to as “Destination”) with w/X ( ) . Any area that you explore becomes unfogged, revealing any points of interest such as havens. If you are lost or just hopelessly isolated in the wilderness, the options on this screen may provide a solution: you can jump immediately to your last rest point, move instantly to the Regalia’s current location (which can cut travel time after exploration), summon the vehicle to the nearest accessible road, call for Cindy to tow the car back to Hammerhead, or return to the entrance of a dungeon.
Mini-Map: The mini-map ( 06 ) shows a small portion of the main map that corresponds with your immediate surroundings. The “N” icon on the outer edge always points north. The white circle in the center represents your character, Noctis, while the white arrow pointing from it represents the direction he is currently facing. All places of interest, points of interactivity and active waypoints are marked by icons on the mini-map. These disappear once out of the mini-map’s boundaries – with the exception of your currently selected quest waypoint, manual markers and the Regalia, which remain visible at all times. These appear either on the mini-map itself if you are close, or otherwise rest on its outer rim to indicate their approximate location over longer distances.
Altitude Markers: Whenever a point of interest or monster is at a different elevation to Noctis, its icon on both the main map and the mini-map features a small arrow in the bottom-right corner that indicates whether it is above ( ) or below ( ) your current position.
As you explore the world of Eos you will regularly stumble across items. These appear as small shining objects ( 07 ) and can be picked up by pressing q/a in close proximity. They can be anything from ingredients used to cook meals with ephemeral stat-boosting benefits while making camp at a haven, to treasures that can be sold in shops, to quest items that you must deliver to a particular recipient.
The maps in this guide reveal the locations of all noteworthy collectibles in the game. However, if you intend to complete a first playthrough with a minimum of assistance, the following treasure hunting tips will be useful:
Scour the environment for noteworthy collectibles as you travel through new and old areas alike. Whenever you notice dead-ends or alternative routes, take the time to explore them: they will sometimes contain a reward to acknowledge your curiosity. This is especially true during main quests that take place in unique areas.
Map & Mini-Map Legend
ANNOTATION MEANING ANNOTATION MEANING
Main Quest Treasure Spot
Sidequest Food Spot/Mineral Deposit
New SidequestElemental Energy: Fire Deposit
EnemyElemental Energy: Ice Deposit
DestinationElemental Energy: Lightning Deposit
Hunt Blockade
Hunt (Hard) Dungeon
Regalia Imperial Base
Haven Royal Tomb
Diner/Restaurant/Tipster
Garage
Lodging Parking Spot
Shop Gas Pump
Arms Vendor Fishing Spot
Grocer Rent-a-Bird
Noodle Wagon Chocobo Salon
06
07
Collectibles & Points of Interactivity
Map & Mini-Map05
Deposits are found all over the game world and reward you with various items, including elemental energy required to craft spells, treasures with high resale value, and cooking ingredients. Make a point of collecting these whenever you encounter them to gradually increase your party’s wealth and pool of resources.
While searching for a quest item, do not forget to select the corresponding quest via the main menu. This will ensure that your destination is marked with a clear waypoint.
In addition to collectibles, you will encounter numerous points of interactivity throughout the game world. These include plot-critical devices that must be operated to advance the story, and non-playable characters (NPCs) who can be engaged in brief conversations. To interact with devices or NPCs, press q/a.
Interacting with certain NPCs or collectibles will initiate sidequests. Feel free to accept as many of these as you can. There is no limit to how many you can have active at one time, and no obligation to complete them immediately. When you are ready to undertake a quest, simply select it from the list in the corresponding menu.
Every item that you collect or earn as a reward is automatically transferred to your inventory. You can find the complete list of all items in this guide’s Inventory chapter (see page 200), along with all relevant details and availability conditions.
Weapons, spells, and accessories are battle-oriented items that you can equip from the Gear menu.
Spells have to be synthesized or crafted via the Elemancy menu. They require elemental energy, which you can absorb from deposits most commonly found around havens or by defeating enemies using weapons with energy-absorbing properties, such as Noctis’s default sword.
Treasures are regularly dropped by defeated foes or picked up as collectibles. Most of them are meant either to be sold to shopkeepers (offering a steady source of income) or to be used as catalysts capable of transmuting spells during the crafting process (see page 20). A few of them are required to complete sidequests.
Ingredients are used by Ignis to cook dishes with temporary stat-boosting benefits when you make camp at havens.
Leisure Goods are items tied to mini-games.
Auto Parts are used to customize or upgrade the Regalia.
Key Items are unique, quest-related objects.
Gil is the primary currency in the Final Fantasy universe. You need Gil to make any purchase. Gil can be obtained by completing quests and by selling items that you do not need, particularly treasures.
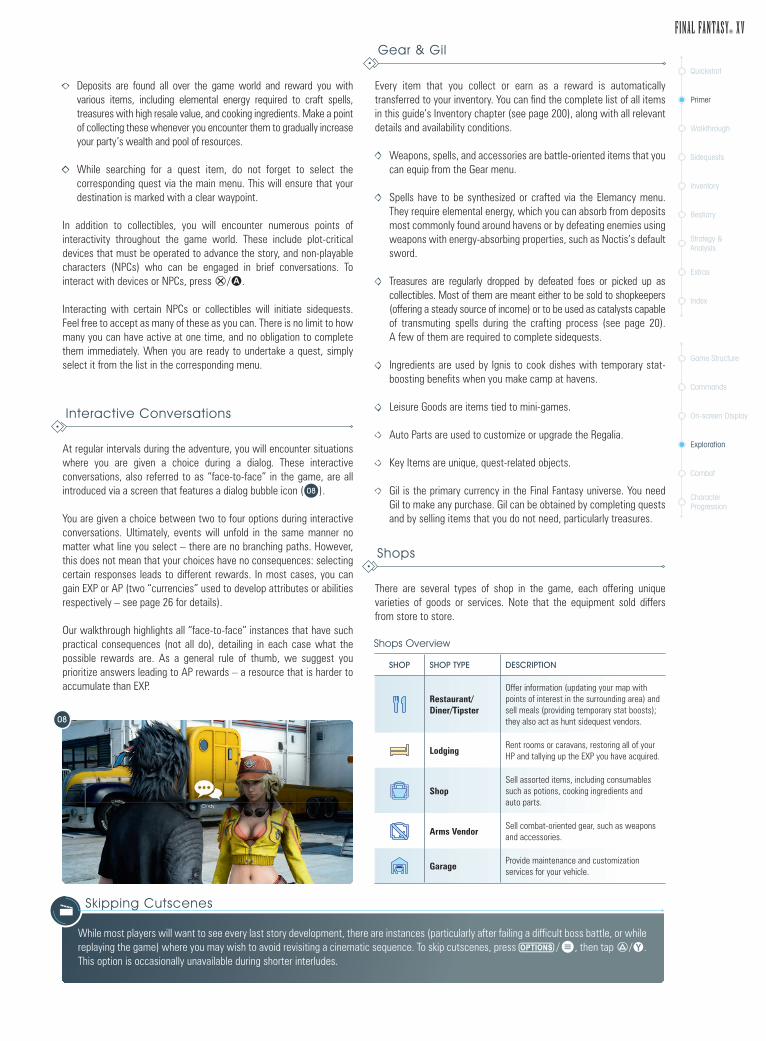
At regular intervals during the adventure, you will encounter situations where you are given a choice during a dialog. These interactive conversations, also referred to as “face-to-face” in the game, are all introduced via a screen that features a dialog bubble icon ( 08 ).
You are given a choice between two to four options during interactive conversations. Ultimately, events will unfold in the same manner no matter what line you select – there are no branching paths. However, this does not mean that your choices have no consequences: selecting certain responses leads to different rewards. In most cases, you can gain EXP or AP (two “currencies” used to develop attributes or abilities respectively – see page 26 for details).
Our walkthrough highlights all “face-to-face” instances that have such practical consequences (not all do), detailing in each case what the possible rewards are. As a general rule of thumb, we suggest you prioritize answers leading to AP rewards – a resource that is harder to accumulate than EXP.
There are several types of shop in the game, each offering unique varieties of goods or services. Note that the equipment sold differs from store to store.
SHOP SHOP TYPE DESCRIPTION
Restaurant/Diner/Tipster
Offer information (updating your map with points of interest in the surrounding area) and sell meals (providing temporary stat boosts); they also act as hunt sidequest vendors.
LodgingRent rooms or caravans, restoring all of your HP and tallying up the EXP you have acquired.
ShopSell assorted items, including consumables such as potions, cooking ingredients and auto parts.
Arms VendorSell combat-oriented gear, such as weapons and accessories.
GarageProvide maintenance and customization services for your vehicle.
Shops Overview
08
Quickstart
Primer
Walkthrough
Sidequests
Inventory
Bestiary
Strategy & Analysis
Extras
Index
Game Structure
Commands
On-screen Display
Exploration
Combat
Character Progression
Skipping Cutscenes
While most players will want to see every last story development, there are instances (particularly after failing a difficult boss battle, or while replaying the game) where you may wish to avoid revisiting a cinematic sequence. To skip cutscenes, press / , then tap e/Y. This option is occasionally unavailable during shorter interludes.
Interactive Conversations
Gear & Gil
Shops
COMBAT
Stealth & Combat Initiative Defensive Moves
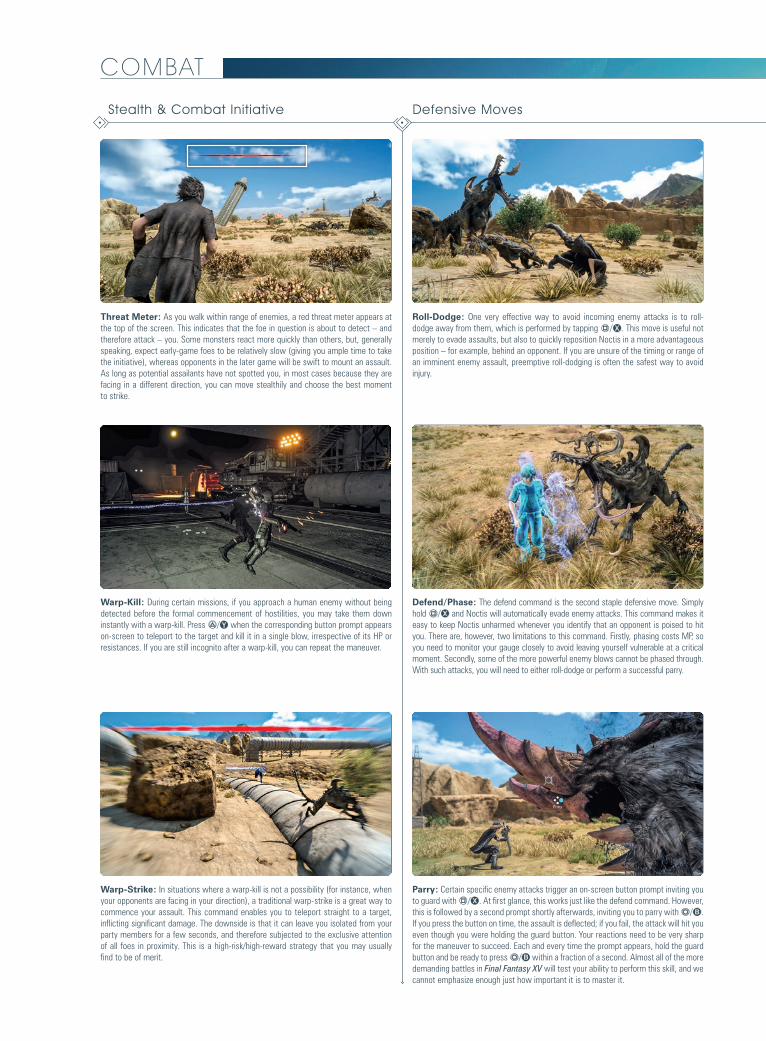
Roll-Dodge: One very effective way to avoid incoming enemy attacks is to roll-dodge away from them, which is performed by tapping w/X. This move is useful not merely to evade assaults, but also to quickly reposition Noctis in a more advantageous position – for example, behind an opponent. If you are unsure of the timing or range of an imminent enemy assault, preemptive roll-dodging is often the safest way to avoid injury.
Warp-Kill: During certain missions, if you approach a human enemy without being detected before the formal commencement of hostilities, you may take them down instantly with a warp-kill. Press e/Y when the corresponding button prompt appears on-screen to teleport to the target and kill it in a single blow, irrespective of its HP or resistances. If you are still incognito after a warp-kill, you can repeat the maneuver.
Defend/Phase: The defend command is the second staple defensive move. Simply hold w/X and Noctis will automatically evade enemy attacks. This command makes it easy to keep Noctis unharmed whenever you identify that an opponent is poised to hit you. There are, however, two limitations to this command. Firstly, phasing costs MP, so you need to monitor your gauge closely to avoid leaving yourself vulnerable at a critical moment. Secondly, some of the more powerful enemy blows cannot be phased through. With such attacks, you will need to either roll-dodge or perform a successful parry.
Warp-Strike: In situations where a warp-kill is not a possibility (for instance, when your opponents are facing in your direction), a traditional warp-strike is a great way to commence your assault. This command enables you to teleport straight to a target, inflicting significant damage. The downside is that it can leave you isolated from your party members for a few seconds, and therefore subjected to the exclusive attention of all foes in proximity. This is a high-risk/high-reward strategy that you may usually find to be of merit.
Parry: Certain specific enemy attacks trigger an on-screen button prompt inviting you to guard with w/X. At first glance, this works just like the defend command. However, this is followed by a second prompt shortly afterwards, inviting you to parry with r/S. If you press the button on time, the assault is deflected; if you fail, the attack will hit you even though you were holding the guard button. Your reactions need to be very sharp for the maneuver to succeed. Each and every time the prompt appears, hold the guard button and be ready to press r/S within a fraction of a second. Almost all of the more demanding battles in Final Fantasy XV will test your ability to perform this skill, and we cannot emphasize enough just how important it is to master it.
Threat Meter: As you walk within range of enemies, a red threat meter appears at the top of the screen. This indicates that the foe in question is about to detect – and therefore attack – you. Some monsters react more quickly than others, but, generally speaking, expect early-game foes to be relatively slow (giving you ample time to take the initiative), whereas opponents in the later game will be swift to mount an assault. As long as potential assailants have not spotted you, in most cases because they are facing in a different direction, you can move stealthily and choose the best moment to strike.
Quickstart
Primer
Walkthrough
Sidequests
Inventory
Bestiary
Strategy & Analysis
Extras
Index
Game Structure
Commands
On-screen Display
Exploration
Combat
Character Progression
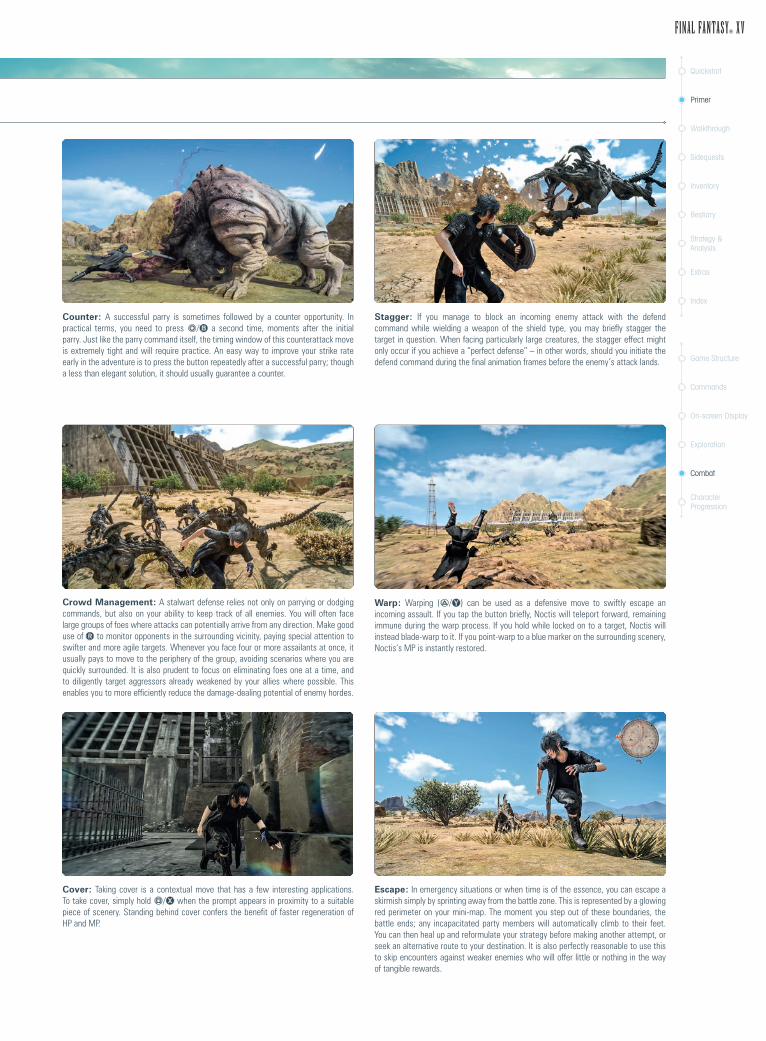
Counter: A successful parry is sometimes followed by a counter opportunity. In practical terms, you need to press r/S a second time, moments after the initial parry. Just like the parry command itself, the timing window of this counterattack move is extremely tight and will require practice. An easy way to improve your strike rate early in the adventure is to press the button repeatedly after a successful parry; though a less than elegant solution, it should usually guarantee a counter.
Warp: Warping (e/Y) can be used as a defensive move to swiftly escape an incoming assault. If you tap the button briefly, Noctis will teleport forward, remaining immune during the warp process. If you hold while locked on to a target, Noctis will instead blade-warp to it. If you point-warp to a blue marker on the surrounding scenery, Noctis’s MP is instantly restored.
Stagger: If you manage to block an incoming enemy attack with the defend command while wielding a weapon of the shield type, you may briefly stagger the target in question. When facing particularly large creatures, the stagger effect might only occur if you achieve a “perfect defense” – in other words, should you initiate the defend command during the final animation frames before the enemy’s attack lands.
Cover: Taking cover is a contextual move that has a few interesting applications. To take cover, simply hold w/X when the prompt appears in proximity to a suitable piece of scenery. Standing behind cover confers the benefit of faster regeneration of HP and MP.
Crowd Management: A stalwart defense relies not only on parrying or dodging commands, but also on your ability to keep track of all enemies. You will often face large groups of foes where attacks can potentially arrive from any direction. Make good use of f to monitor opponents in the surrounding vicinity, paying special attention to swifter and more agile targets. Whenever you face four or more assailants at once, it usually pays to move to the periphery of the group, avoiding scenarios where you are quickly surrounded. It is also prudent to focus on eliminating foes one at a time, and to diligently target aggressors already weakened by your allies where possible. This enables you to more efficiently reduce the damage-dealing potential of enemy hordes.
Escape: In emergency situations or when time is of the essence, you can escape a skirmish simply by sprinting away from the battle zone. This is represented by a glowing red perimeter on your mini-map. The moment you step out of these boundaries, the battle ends; any incapacitated party members will automatically climb to their feet. You can then heal up and reformulate your strategy before making another attempt, or seek an alternative route to your destination. It is also perfectly reasonable to use this to skip encounters against weaker enemies who will offer little or nothing in the way of tangible rewards.

There are many techniques that you can employ to defeat enemies. To truly master combat you’ll not only need to acquire a proficiency in all of them, but also an intuitive grasp of when each move is most appropriate.
Single Attacks: These are performed by pressing r/S. Each button press leads to a unique attack, though these can be repeated in rapid succession to perform combos.
Break: Certain attacks have the ability to “break” the enemy. This system revolves around the fact that enemies have distinct body parts (also referred to as “appendages”). You can discern each distinct bodily target on an enemy by noting the appearance of a reticle; cycle through a foe’s body parts with f while you are locked on to it. Triggering a break on a body part can lead to many different but universally positive effects, though the precise result depends on the enemy in question. You can find a complete analysis of this complex system on page 284.
Finisher: If at any point you stop in the middle of a combo, even after a single attack, there is a brief window during which you may perform a Finisher – a powerful attack that can have special properties. Simply release r/S, then press it again during the Finisher “window”. With most weapons, a Finisher opportunity is indicated by a clear visual cue: Noctis taking a step backward. For swords, you need to press the button when Noctis extends his right arm outward, just as the sword begins to disappear.
Automatic Combos: You can perform fluid combos by holding r/S. This leads to an automatic series of attacks aimed at the currently selected target and concluded with a powerful blow. Note that you can perform directional attacks after the first hit of a combo by tilting d while pressing or holding the attack button. Each weapon category has access to different directional attacks. For example, greatswords can unleash a devastating charged blow if you hold (and eventually release) the attack button while tilting the stick away from your target.
Switch Weapon: You are free to switch weapons in real time during combat by pressing t in the relevant direction. This feature is absolutely essential in that it enables you to exploit enemy weaknesses, as many opponents are actually vulnerable to specific weapon types. When you fight groups, two different species may very well be susceptible to different weapon types – so the ability to switch on the fly is pivotal.
Offensive Moves
Lock On: You can lock on to any highlighted target by holding p/r. Once target lock has been activated, you can move it between adversaries within range with f. Locking on enables you to focus all your efforts on one foe at a time, which negates the need for constant directional adjustments and simplifies the process of thinning enemy numbers whenever you fight groups.
Quickstart
Primer
Walkthrough
Sidequests
Inventory
Bestiary
Strategy & Analysis
Extras
Index
Game Structure
Commands
On-screen Display
Exploration
Combat
Character Progression
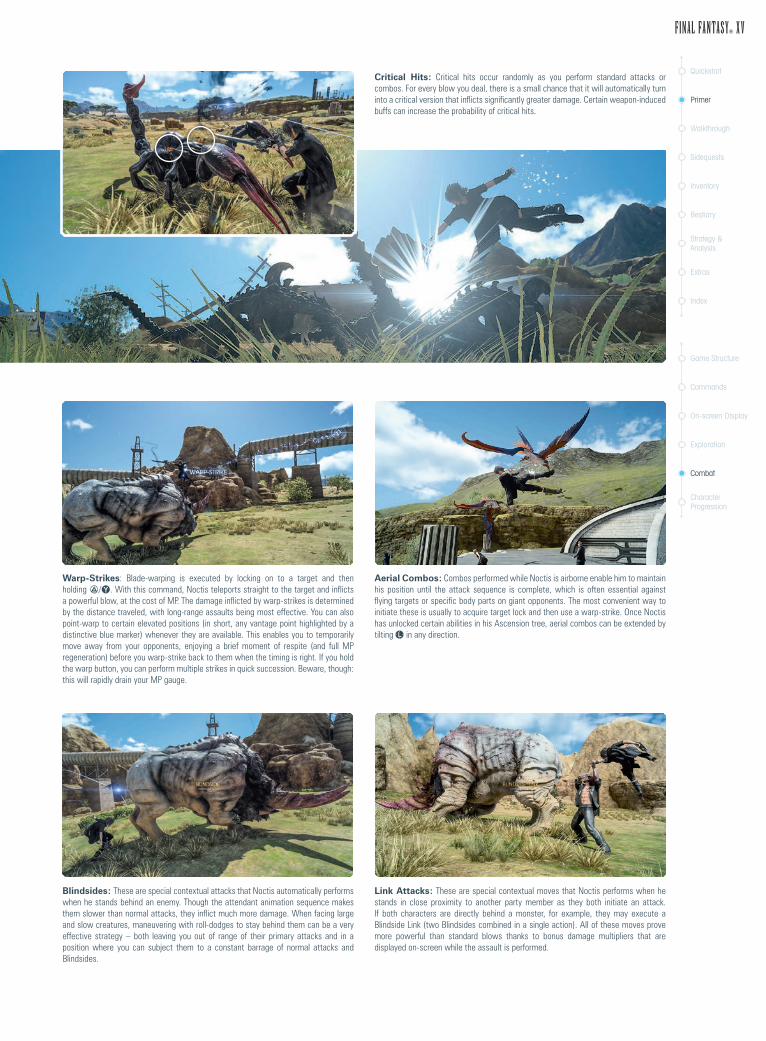
Critical Hits: Critical hits occur randomly as you perform standard attacks or combos. For every blow you deal, there is a small chance that it will automatically turn into a critical version that inflicts significantly greater damage. Certain weapon-induced buffs can increase the probability of critical hits.
Warp-Strikes: Blade-warping is executed by locking on to a target and then holding e/Y. With this command, Noctis teleports straight to the target and inflicts a powerful blow, at the cost of MP. The damage inflicted by warp-strikes is determined by the distance traveled, with long-range assaults being most effective. You can also point-warp to certain elevated positions (in short, any vantage point highlighted by a distinctive blue marker) whenever they are available. This enables you to temporarily move away from your opponents, enjoying a brief moment of respite (and full MP regeneration) before you warp-strike back to them when the timing is right. If you hold the warp button, you can perform multiple strikes in quick succession. Beware, though: this will rapidly drain your MP gauge.
Blindsides: These are special contextual attacks that Noctis automatically performs when he stands behind an enemy. Though the attendant animation sequence makes them slower than normal attacks, they inflict much more damage. When facing large and slow creatures, maneuvering with roll-dodges to stay behind them can be a very effective strategy – both leaving you out of range of their primary attacks and in a position where you can subject them to a constant barrage of normal attacks and Blindsides.
Aerial Combos: Combos performed while Noctis is airborne enable him to maintain his position until the attack sequence is complete, which is often essential against flying targets or specific body parts on giant opponents. The most convenient way to initiate these is usually to acquire target lock and then use a warp-strike. Once Noctis has unlocked certain abilities in his Ascension tree, aerial combos can be extended by tilting d in any direction.
Link Attacks: These are special contextual moves that Noctis performs when he stands in close proximity to another party member as they both initiate an attack. If both characters are directly behind a monster, for example, they may execute a Blindside Link (two Blindsides combined in a single action). All of these moves prove more powerful than standard blows thanks to bonus damage multipliers that are displayed on-screen while the assault is performed.
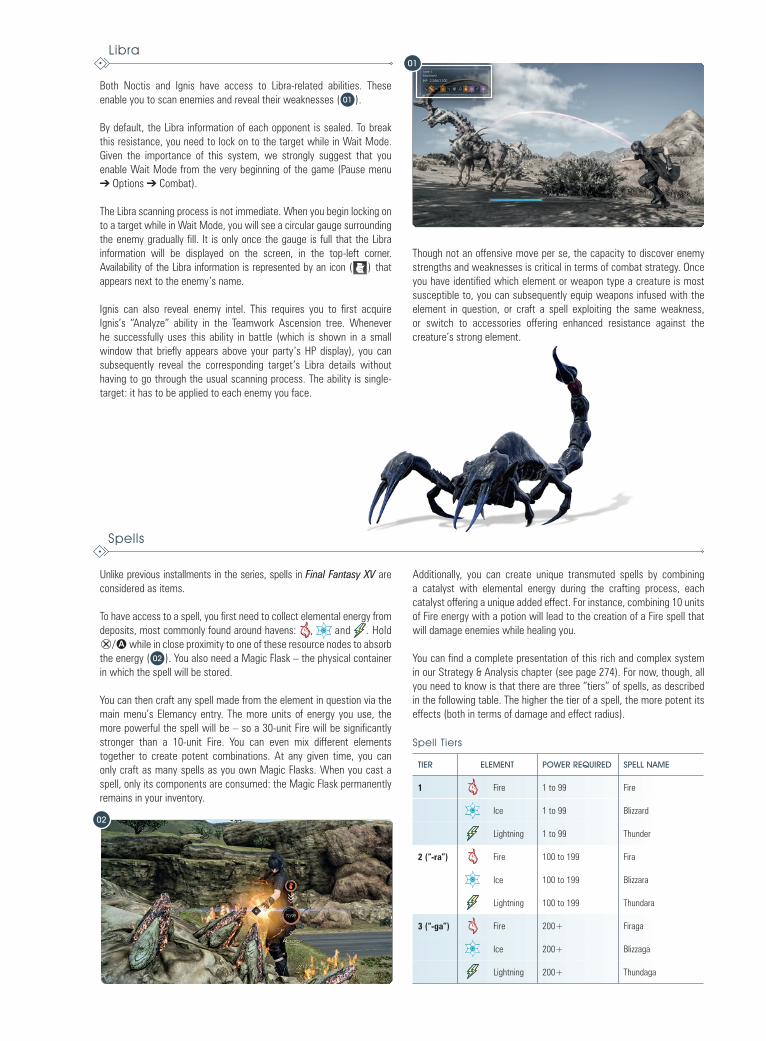
Both Noctis and Ignis have access to Libra-related abilities. These enable you to scan enemies and reveal their weaknesses ( 01 ).
By default, the Libra information of each opponent is sealed. To break this resistance, you need to lock on to the target while in Wait Mode. Given the importance of this system, we strongly suggest that you enable Wait Mode from the very beginning of the game (Pause menu ➔ Options ➔ Combat).
The Libra scanning process is not immediate. When you begin locking on to a target while in Wait Mode, you will see a circular gauge surrounding the enemy gradually fill. It is only once the gauge is full that the Libra information will be displayed on the screen, in the top-left corner. Availability of the Libra information is represented by an icon ( ) that appears next to the enemy’s name.
Ignis can also reveal enemy intel. This requires you to first acquire Ignis’s “Analyze” ability in the Teamwork Ascension tree. Whenever he successfully uses this ability in battle (which is shown in a small window that briefly appears above your party’s HP display), you can subsequently reveal the corresponding target’s Libra details without having to go through the usual scanning process. The ability is single-target: it has to be applied to each enemy you face.
Though not an offensive move per se, the capacity to discover enemy strengths and weaknesses is critical in terms of combat strategy. Once you have identified which element or weapon type a creature is most susceptible to, you can subsequently equip weapons infused with the element in question, or craft a spell exploiting the same weakness, or switch to accessories offering enhanced resistance against the creature’s strong element.
Unlike previous installments in the series, spells in Final Fantasy XV are considered as items.
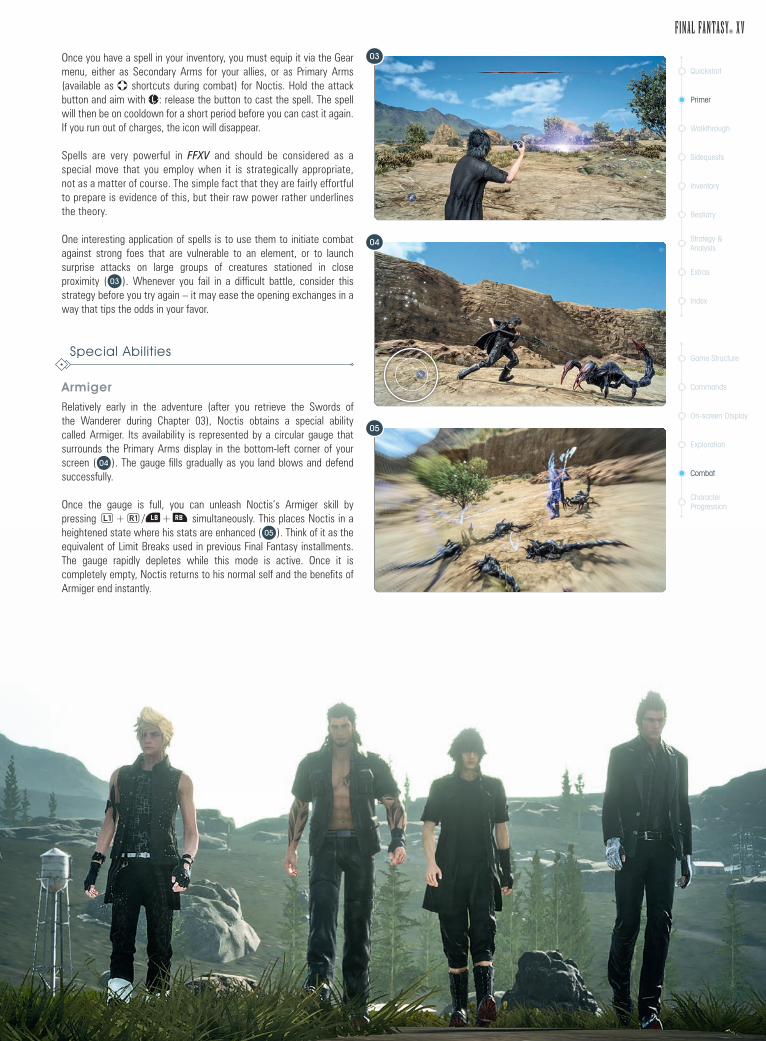
To have access to a spell, you first need to collect elemental energy from deposits, most commonly found around havens: , and . Hold q/A while in close proximity to one of these resource nodes to absorb the energy ( 02 ). You also need a Magic Flask – the physical container in which the spell will be stored.
You can then craft any spell made from the element in question via the main menu’s Elemancy entry. The more units of energy you use, the more powerful the spell will be – so a 30-unit Fire will be significantly stronger than a 10-unit Fire. You can even mix different elements together to create potent combinations. At any given time, you can only craft as many spells as you own Magic Flasks. When you cast a spell, only its components are consumed: the Magic Flask permanently remains in your inventory.
Additionally, you can create unique transmuted spells by combining a catalyst with elemental energy during the crafting process, each catalyst offering a unique added effect. For instance, combining 10 units of Fire energy with a potion will lead to the creation of a Fire spell that will damage enemies while healing you.
You can find a complete presentation of this rich and complex system in our Strategy & Analysis chapter (see page 274). For now, though, all you need to know is that there are three “tiers” of spells, as described in the following table. The higher the tier of a spell, the more potent its effects (both in terms of damage and effect radius).
Spell Tiers
TIER ELEMENT POWER REQUIRED SPELL NAME
1 Fire 1 to 99 Fire
Ice 1 to 99 Blizzard
Lightning 1 to 99 Thunder
2 (“-ra”) Fire 100 to 199 Fira
Ice 100 to 199 Blizzara
Lightning 100 to 199 Thundara
3 (“-ga”) Fire 200+ Firaga
Ice 200+ Blizzaga
Lightning 200+ Thundaga
02
Libra
Spells
01
Once you have a spell in your inventory, you must equip it via the Gear menu, either as Secondary Arms for your allies, or as Primary Arms (available as t shortcuts during combat) for Noctis. Hold the attack button and aim with d: release the button to cast the spell. The spell will then be on cooldown for a short period before you can cast it again. If you run out of charges, the icon will disappear.
Spells are very powerful in FFXV and should be considered as a special move that you employ when it is strategically appropriate, not as a matter of course. The simple fact that they are fairly effortful to prepare is evidence of this, but their raw power rather underlines the theory.
One interesting application of spells is to use them to initiate combat against strong foes that are vulnerable to an element, or to launch surprise attacks on large groups of creatures stationed in close proximity ( 03 ). Whenever you fail in a difficult battle, consider this strategy before you try again – it may ease the opening exchanges in a way that tips the odds in your favor.
Armiger
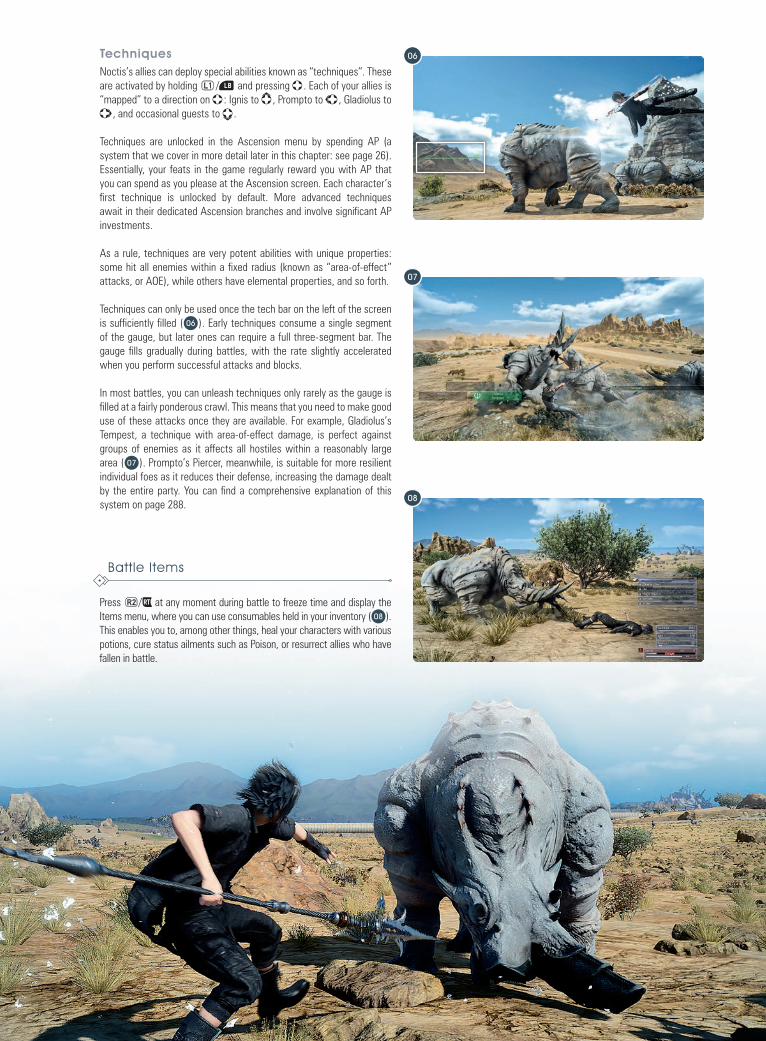
Relatively early in the adventure (after you retrieve the Swords of the Wanderer during Chapter 03), Noctis obtains a special ability called Armiger. Its availability is represented by a circular gauge that surrounds the Primary Arms display in the bottom-left corner of your screen ( 04 ). The gauge fills gradually as you land blows and defend successfully.
Once the gauge is full, you can unleash Noctis’s Armiger skill by pressing i+p/e+r simultaneously. This places Noctis in a heightened state where his stats are enhanced ( 05 ). Think of it as the equivalent of Limit Breaks used in previous Final Fantasy installments. The gauge rapidly depletes while this mode is active. Once it is completely empty, Noctis returns to his normal self and the benefits of Armiger end instantly.
05
Quickstart
Primer
Walkthrough
Sidequests
Inventory
Bestiary
Strategy & Analysis
Extras
Index
Game Structure
Commands
On-screen Display
Exploration
Combat
Character Progression
04
03
Special Abilities
TechniquesNoctis’s allies can deploy special abilities known as “techniques”. These are activated by holding i/e and pressing t . Each of your allies is “mapped” to a direction on t : Ignis to I , Prompto to J , Gladiolus to K , and occasional guests to M .
Techniques are unlocked in the Ascension menu by spending AP (a system that we cover in more detail later in this chapter: see page 26). Essentially, your feats in the game regularly reward you with AP that you can spend as you please at the Ascension screen. Each character’s first technique is unlocked by default. More advanced techniques await in their dedicated Ascension branches and involve significant AP investments.
As a rule, techniques are very potent abilities with unique properties: some hit all enemies within a fixed radius (known as “area-of-effect” attacks, or AOE), while others have elemental properties, and so forth.
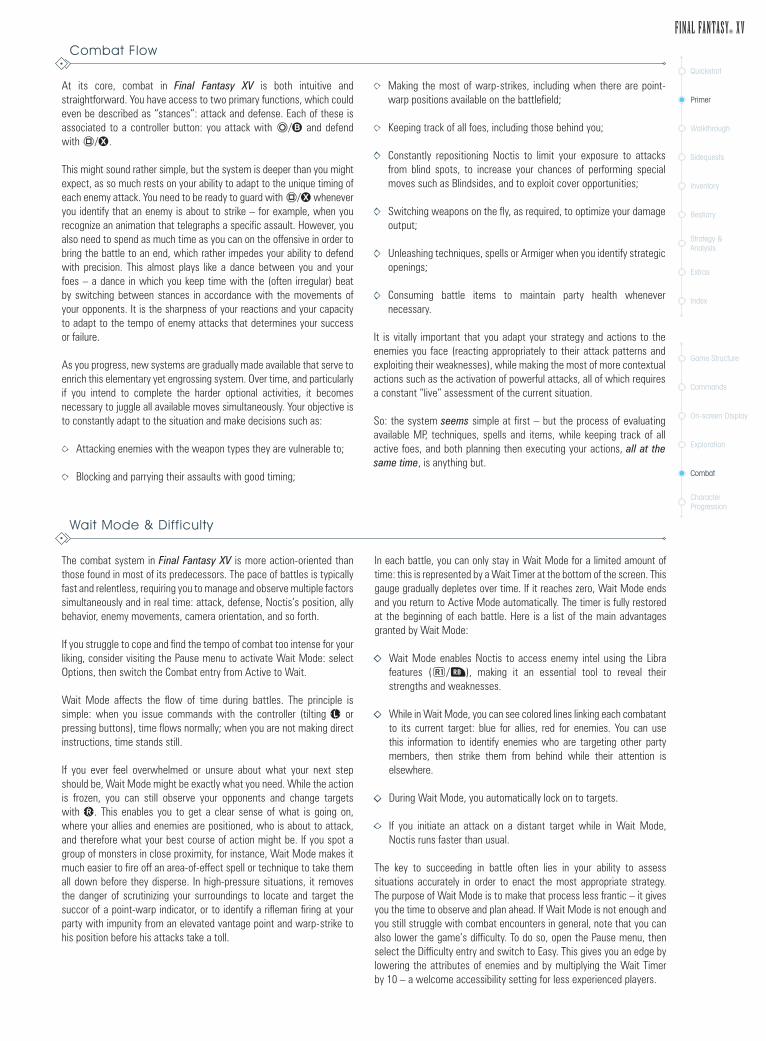
Techniques can only be used once the tech bar on the left of the screen is sufficiently filled ( 06 ). Early techniques consume a single segment of the gauge, but later ones can require a full three-segment bar. The gauge fills gradually during battles, with the rate slightly accelerated when you perform successful attacks and blocks.
In most battles, you can unleash techniques only rarely as the gauge is filled at a fairly ponderous crawl. This means that you need to make good use of these attacks once they are available. For example, Gladiolus’s Tempest, a technique with area-of-effect damage, is perfect against groups of enemies as it affects all hostiles within a reasonably large area ( 07 ). Prompto’s Piercer, meanwhile, is suitable for more resilient individual foes as it reduces their defense, increasing the damage dealt by the entire party. You can find a comprehensive explanation of this system on page 288.
Press ü/R at any moment during battle to freeze time and display the Items menu, where you can use consumables held in your inventory ( 08 ). This enables you to, among other things, heal your characters with various potions, cure status ailments such as Poison, or resurrect allies who have fallen in battle.
07
08
06
Battle Items
At its core, combat in Final Fantasy XV is both intuitive and straightforward. You have access to two primary functions, which could even be described as “stances”: attack and defense. Each of these is associated to a controller button: you attack with r/s and defend with w/X.
This might sound rather simple, but the system is deeper than you might expect, as so much rests on your ability to adapt to the unique timing of each enemy attack. You need to be ready to guard with w/X whenever you identify that an enemy is about to strike – for example, when you recognize an animation that telegraphs a specific assault. However, you also need to spend as much time as you can on the offensive in order to bring the battle to an end, which rather impedes your ability to defend with precision. This almost plays like a dance between you and your foes – a dance in which you keep time with the (often irregular) beat by switching between stances in accordance with the movements of your opponents. It is the sharpness of your reactions and your capacity to adapt to the tempo of enemy attacks that determines your success or failure.
As you progress, new systems are gradually made available that serve to enrich this elementary yet engrossing system. Over time, and particularly if you intend to complete the harder optional activities, it becomes necessary to juggle all available moves simultaneously. Your objective is to constantly adapt to the situation and make decisions such as:
Attacking enemies with the weapon types they are vulnerable to;
Blocking and parrying their assaults with good timing;
Making the most of warp-strikes, including when there are point-warp positions available on the battlefield;
Keeping track of all foes, including those behind you;
Constantly repositioning Noctis to limit your exposure to attacks from blind spots, to increase your chances of performing special moves such as Blindsides, and to exploit cover opportunities;
Switching weapons on the fly, as required, to optimize your damage output;
Unleashing techniques, spells or Armiger when you identify strategic openings;
Consuming battle items to maintain party health whenever necessary.
It is vitally important that you adapt your strategy and actions to the enemies you face (reacting appropriately to their attack patterns and exploiting their weaknesses), while making the most of more contextual actions such as the activation of powerful attacks, all of which requires a constant “live” assessment of the current situation.
So: the system seems simple at first – but the process of evaluating available MP, techniques, spells and items, while keeping track of all active foes, and both planning then executing your actions, all at the same time, is anything but.
The combat system in Final Fantasy XV is more action-oriented than those found in most of its predecessors. The pace of battles is typically fast and relentless, requiring you to manage and observe multiple factors simultaneously and in real time: attack, defense, Noctis’s position, ally behavior, enemy movements, camera orientation, and so forth.
If you struggle to cope and find the tempo of combat too intense for your liking, consider visiting the Pause menu to activate Wait Mode: select Options, then switch the Combat entry from Active to Wait.
Wait Mode affects the flow of time during battles. The principle is simple: when you issue commands with the controller (tilting d or pressing buttons), time flows normally; when you are not making direct instructions, time stands still.
If you ever feel overwhelmed or unsure about what your next step should be, Wait Mode might be exactly what you need. While the action is frozen, you can still observe your opponents and change targets with f. This enables you to get a clear sense of what is going on, where your allies and enemies are positioned, who is about to attack, and therefore what your best course of action might be. If you spot a group of monsters in close proximity, for instance, Wait Mode makes it much easier to fire off an area-of-effect spell or technique to take them all down before they disperse. In high-pressure situations, it removes the danger of scrutinizing your surroundings to locate and target the succor of a point-warp indicator, or to identify a rifleman firing at your party with impunity from an elevated vantage point and warp-strike to his position before his attacks take a toll.
In each battle, you can only stay in Wait Mode for a limited amount of time: this is represented by a Wait Timer at the bottom of the screen. This gauge gradually depletes over time. If it reaches zero, Wait Mode ends and you return to Active Mode automatically. The timer is fully restored at the beginning of each battle. Here is a list of the main advantages granted by Wait Mode:
Wait Mode enables Noctis to access enemy intel using the Libra features (p/r), making it an essential tool to reveal their strengths and weaknesses.
While in Wait Mode, you can see colored lines linking each combatant to its current target: blue for allies, red for enemies. You can use this information to identify enemies who are targeting other party members, then strike them from behind while their attention is elsewhere.
During Wait Mode, you automatically lock on to targets.
If you initiate an attack on a distant target while in Wait Mode, Noctis runs faster than usual.
The key to succeeding in battle often lies in your ability to assess situations accurately in order to enact the most appropriate strategy. The purpose of Wait Mode is to make that process less frantic – it gives you the time to observe and plan ahead. If Wait Mode is not enough and you still struggle with combat encounters in general, note that you can also lower the game’s difficulty. To do so, open the Pause menu, then select the Difficulty entry and switch to Easy. This gives you an edge by lowering the attributes of enemies and by multiplying the Wait Timer by 10 – a welcome accessibility setting for less experienced players.
Quickstart
Primer
Walkthrough
Sidequests
Inventory
Bestiary
Strategy & Analysis
Extras
Index
Game Structure
Commands
On-screen Display
Exploration
Combat
Character Progression
Combat Flow
Wait Mode & Difficulty
The four members of your party each have a maximum HP value – the amount of HP they have when at full health. As a rule, damage does not affect maximum HP: whenever a character sustains damage, only his current HP is lowered (his theoretical maximum HP value remains unchanged). Simply heal an injured character (for example with a consumable potion) or let him gradually recover over time and his current HP will be restored to the maximum HP limit.
There are two situations that can lead a character’s maximum HP to be reduced:
If your current HP gauge is fully depleted by an enemy attack, your character enters Danger status. In this condition, your character’s abilities are impaired: you cannot perform any action other than moving around at a slow pace (though you can still move marginally faster with r/s) and displaying the Items menu to heal with an item. More importantly, in Danger status your maximum HP bar gradually drains, and can be further reduced by any additional damage inflicted by your opponents. To recover from Danger status, you need to use a recovery item, or to be assisted by another party member, or to remain unharmed long enough for your character to recover automatically.
A specific type of enemies, Daemons, deal damage that reduces both your current HP and maximum HP simultaneously, making them particularly dangerous. Daemons typically roam at night and in dark environments such as tombs and tunnels.
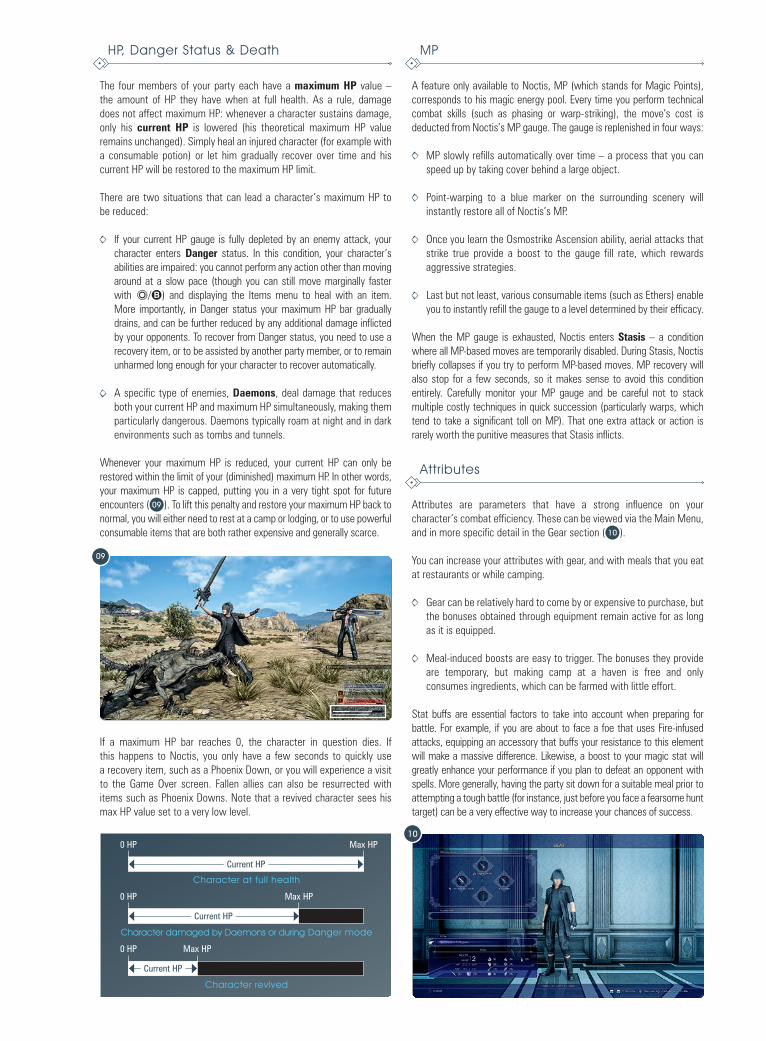
Whenever your maximum HP is reduced, your current HP can only be restored within the limit of your (diminished) maximum HP. In other words, your maximum HP is capped, putting you in a very tight spot for future encounters ( 09 ). To lift this penalty and restore your maximum HP back to normal, you will either need to rest at a camp or lodging, or to use powerful consumable items that are both rather expensive and generally scarce.
Attributes are parameters that have a strong influence on your character’s combat efficiency. These can be viewed via the Main Menu, and in more specific detail in the Gear section ( 10 ).
You can increase your attributes with gear, and with meals that you eat at restaurants or while camping.
Gear can be relatively hard to come by or expensive to purchase, but the bonuses obtained through equipment remain active for as long as it is equipped.
Meal-induced boosts are easy to trigger. The bonuses they provide are temporary, but making camp at a haven is free and only consumes ingredients, which can be farmed with little effort.
Stat buffs are essential factors to take into account when preparing for battle. For example, if you are about to face a foe that uses Fire-infused attacks, equipping an accessory that buffs your resistance to this element will make a massive difference. Likewise, a boost to your magic stat will greatly enhance your performance if you plan to defeat an opponent with spells. More generally, having the party sit down for a suitable meal prior to attempting a tough battle (for instance, just before you face a fearsome hunt target) can be a very effective way to increase your chances of success.
If a maximum HP bar reaches 0, the character in question dies. If this happens to Noctis, you only have a few seconds to quickly use a recovery item, such as a Phoenix Down, or you will experience a visit to the Game Over screen. Fallen allies can also be resurrected with items such as Phoenix Downs. Note that a revived character sees his max HP value set to a very low level.
A feature only available to Noctis, MP (which stands for Magic Points), corresponds to his magic energy pool. Every time you perform technical combat skills (such as phasing or warp-striking), the move’s cost is deducted from Noctis’s MP gauge. The gauge is replenished in four ways:
MP slowly refills automatically over time – a process that you can speed up by taking cover behind a large object.
Point-warping to a blue marker on the surrounding scenery will instantly restore all of Noctis’s MP.
Once you learn the Osmostrike Ascension ability, aerial attacks that strike true provide a boost to the gauge fill rate, which rewards aggressive strategies.
Last but not least, various consumable items (such as Ethers) enable you to instantly refill the gauge to a level determined by their efficacy.
When the MP gauge is exhausted, Noctis enters Stasis – a condition where all MP-based moves are temporarily disabled. During Stasis, Noctis briefly collapses if you try to perform MP-based moves. MP recovery will also stop for a few seconds, so it makes sense to avoid this condition entirely. Carefully monitor your MP gauge and be careful not to stack multiple costly techniques in quick succession (particularly warps, which tend to take a significant toll on MP). That one extra attack or action is rarely worth the punitive measures that Stasis inflicts.
Character at full health
0 HP Max HP
Current HP
Character damaged by Daemons or during Danger mode
0 HP Max HP
Current HP
Character revived
0 HP Max HP
Current HP
09
10
HP, Danger Status & Death MP
Attributes
All attacks in the game are either physical or magical in nature, the former dealing damage based on the Strength attribute (which applies to weapons), and the latter based on the Magic attribute (which applies to spells).
Physical attacks can be either non-elemental (neutral) or elemental – in other words, imbued with an element from a subset of five elemental varieties. Spells are always elemental by nature.
In addition, each weapon type inflicts a specific type of damage.
Status enhancements (also called buffs) are beneficial status effects that improve the defensive or offensive prowess of the user by boosting one or more of his or her attributes. Enhancements are most commonly bestowed by equipping specific pieces of gear (particularly accessories) or by eating meals. They are represented by square-shaped blue or green icons.
Status alterations are detrimental effects that can hamper a combatant’s ability to fight, either by reducing one of more of his stats or by inflicting a debilitating condition. Alterations are represented by red square-shaped icons. When you are assailed by status alterations, you usually need to react quickly. The most common cure is to use a consumable item. There are also a number of accessories that can provide partial or complete protection against particular status alterations.
Final Fantasy XV features a very large number of status effects, each with very specific applications, so this is a topic that we cover in greater detail in our Strategy & Analysis chapter (see page 282).
All enemies have a set of affinities, which determine the amount of damage they sustain from attacks. When you strike, the color of the damage values that appear on your screen indicates the nature of the target’s affinity to the type of damage you’re causing: white means standard damage; orange stands for increased damage (in other words, enemy weakness); purple denotes reduced damage (in other words, enemy resistance). Once you have identified a creature’s weaknesses, it is up to you to adapt your gear accordingly to take advantage of them. For example, if a creature is weak to swords and to the Fire element, equipping a Fire-imbued sword (such as a Flame Tongue) will lead to optimal results.
This “damage type” system is one of the cornerstones of combat in Final Fantasy XV. We cover the properties of every single item and piece of equipment in our Inventory chapter. Though there is no need for you to explore this section of the guide for now, you will certainly come to rely on it for reference once you are further into the adventure.
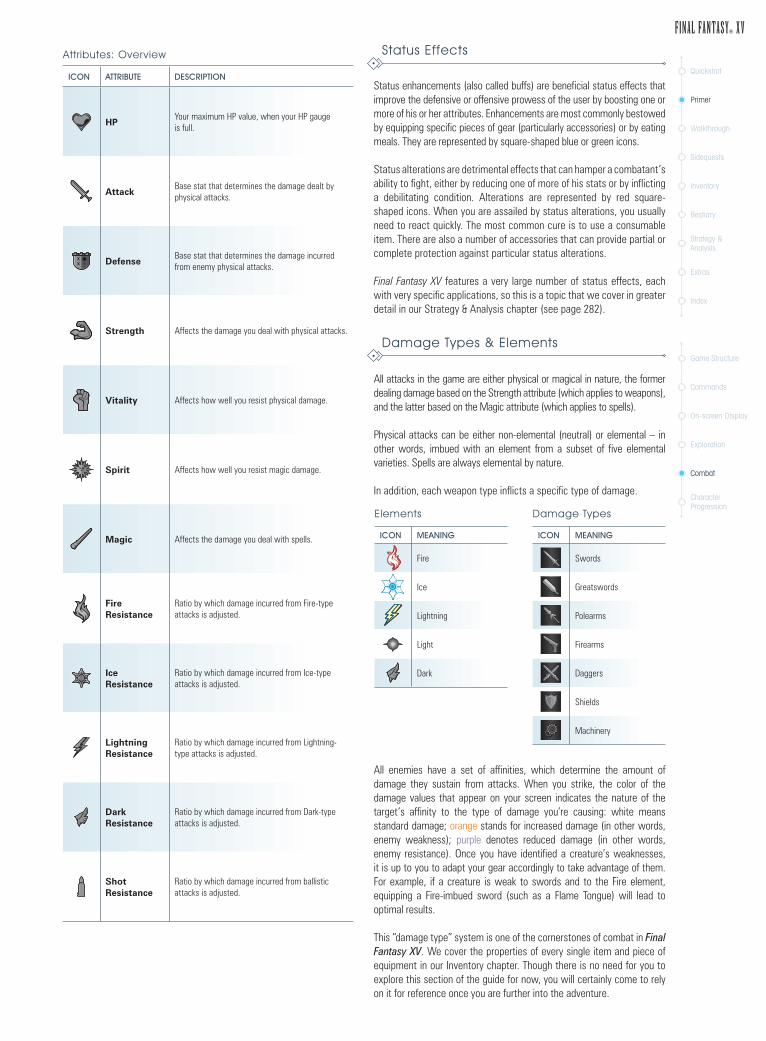
Attributes: Overview
ICON ATTRIBUTE DESCRIPTION
HPYour maximum HP value, when your HP gauge is full.
AttackBase stat that determines the damage dealt by physical attacks.
DefenseBase stat that determines the damage incurred from enemy physical attacks.
Strength Affects the damage you deal with physical attacks.
Vitality Affects how well you resist physical damage.
Spirit Affects how well you resist magic damage.
Magic Affects the damage you deal with spells.
Fire Resistance
Ratio by which damage incurred from Fire-type attacks is adjusted.
Ice Resistance
Ratio by which damage incurred from Ice-type attacks is adjusted.
Lightning Resistance
Ratio by which damage incurred from Lightning-type attacks is adjusted.
Dark Resistance
Ratio by which damage incurred from Dark-type attacks is adjusted.
Shot Resistance
Ratio by which damage incurred from ballistic attacks is adjusted.
Elements
ICON MEANING
Fire
Ice
Lightning
Light
Dark
Damage Types
ICON MEANING
Swords
Greatswords
Polearms
Firearms
Daggers
Shields
Machinery
Quickstart
Primer
Walkthrough
Sidequests
Inventory
Bestiary
Strategy & Analysis
Extras
Index
Game Structure
Commands
On-screen Display
Exploration
Combat
Character Progression
Damage Types & Elements
Status Effects
CHARACTER PROGRESS IONAs you advance through the main storyline, your characters will become stronger and more resilient in many ways. Understanding and optimizing their progression is vital if you are to enjoy the game to its fullest and to remain on par with (or even ahead of) the difficulty curve.
In this section we introduce the handful of systems that character progression revolves around. A more comprehensive analysis is offered in our Strategy & Analysis chapter (see page 294), but it makes sense for you to wait until you have more hands-on experience with the game before you delve into that chapter.
As long as you have the required AP, you can purchase available Ascension nexuses in any order that you wish. The choices that you make will affect how you perform in battle, and overlooking valuable upgrades can put you at a disadvantage. For instance, you have the option to unlock Ignis’s Enhancement technique very early on. This essential command enables you to imbue Noctis’s weapon with the element that your current target is weakest to. Prioritizing this all-important ability over less critical ones can give you an edge at the beginning of the adventure. You can also benefit by unlocking nexuses that provide AP bonuses at an early stage.
As the various development trees open up, your options become more and more numerous. Prioritizing key unlocks that work well with your play style is of utmost importance, so take the time to study the descriptions of each one (and consult our advice) before you invest AP. One of the ways to permanently increase character attributes is via the accumulation
of experience points (EXP). You gather EXP both by defeating enemies in battles and by completing quests. Typically, imposing foes and demanding tasks offer substantially better EXP rewards than the extermination of mangy curs and simple fetch quests. Interactive conversations can also be an additional (though marginal) source of EXP.
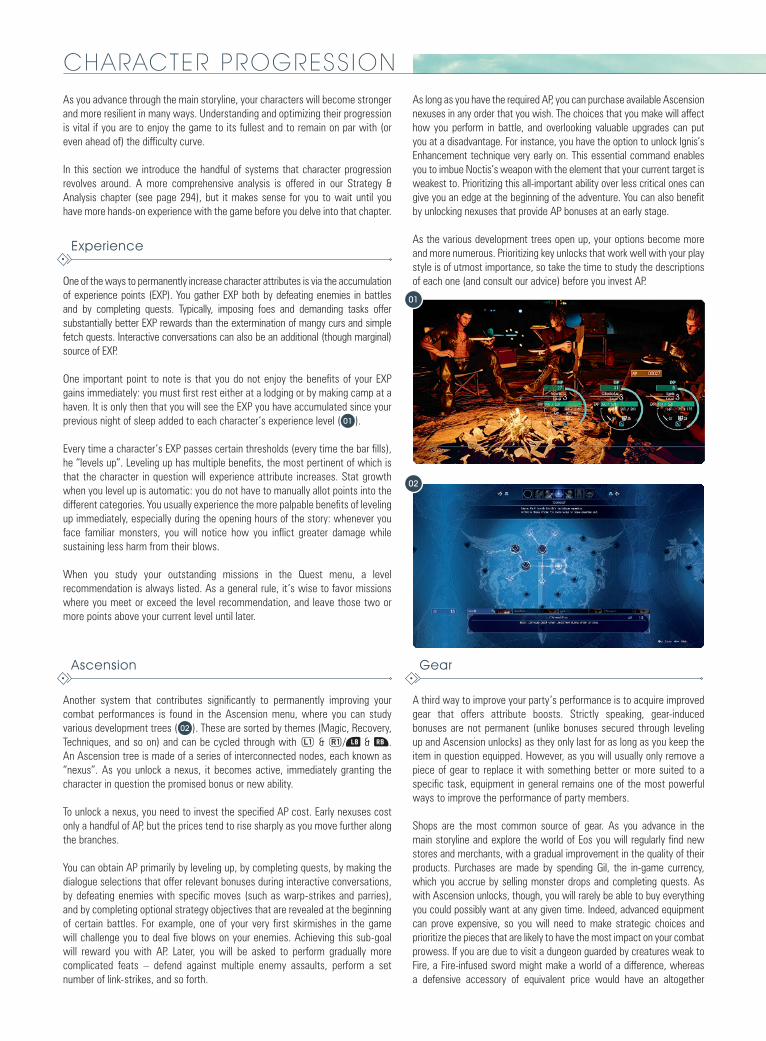
One important point to note is that you do not enjoy the benefits of your EXP gains immediately: you must first rest either at a lodging or by making camp at a haven. It is only then that you will see the EXP you have accumulated since your previous night of sleep added to each character’s experience level ( 01 ).
Every time a character’s EXP passes certain thresholds (every time the bar fills), he “levels up”. Leveling up has multiple benefits, the most pertinent of which is that the character in question will experience attribute increases. Stat growth when you level up is automatic: you do not have to manually allot points into the different categories. You usually experience the more palpable benefits of leveling up immediately, especially during the opening hours of the story: whenever you face familiar monsters, you will notice how you inflict greater damage while sustaining less harm from their blows.
When you study your outstanding missions in the Quest menu, a level recommendation is always listed. As a general rule, it’s wise to favor missions where you meet or exceed the level recommendation, and leave those two or more points above your current level until later.
Another system that contributes significantly to permanently improving your combat performances is found in the Ascension menu, where you can study various development trees ( 02 ). These are sorted by themes (Magic, Recovery, Techniques, and so on) and can be cycled through with i & p/e & r. An Ascension tree is made of a series of interconnected nodes, each known as “nexus”. As you unlock a nexus, it becomes active, immediately granting the character in question the promised bonus or new ability.
To unlock a nexus, you need to invest the specified AP cost. Early nexuses cost only a handful of AP, but the prices tend to rise sharply as you move further along the branches.
You can obtain AP primarily by leveling up, by completing quests, by making the dialogue selections that offer relevant bonuses during interactive conversations, by defeating enemies with specific moves (such as warp-strikes and parries), and by completing optional strategy objectives that are revealed at the beginning of certain battles. For example, one of your very first skirmishes in the game will challenge you to deal five blows on your enemies. Achieving this sub-goal will reward you with AP. Later, you will be asked to perform gradually more complicated feats – defend against multiple enemy assaults, perform a set number of link-strikes, and so forth.
A third way to improve your party’s performance is to acquire improved gear that offers attribute boosts. Strictly speaking, gear-induced bonuses are not permanent (unlike bonuses secured through leveling up and Ascension unlocks) as they only last for as long as you keep the item in question equipped. However, as you will usually only remove a piece of gear to replace it with something better or more suited to a specific task, equipment in general remains one of the most powerful ways to improve the performance of party members.
Shops are the most common source of gear. As you advance in the main storyline and explore the world of Eos you will regularly find new stores and merchants, with a gradual improvement in the quality of their products. Purchases are made by spending Gil, the in-game currency, which you accrue by selling monster drops and completing quests. As with Ascension unlocks, though, you will rarely be able to buy everything you could possibly want at any given time. Indeed, advanced equipment can prove expensive, so you will need to make strategic choices and prioritize the pieces that are likely to have the most impact on your combat prowess. If you are due to visit a dungeon guarded by creatures weak to Fire, a Fire-infused sword might make a world of a difference, whereas a defensive accessory of equivalent price would have an altogether
01
02
Experience
Ascension Gear
more subtle effect. If you are too short of funds to be able to afford a critical item, consider undertaking sidequests (particularly hunts) or “farming” local monsters until you have earned sufficient Gil.
You can find comprehensive analysis of all gear in our Inventory chapter (see page 200), including prices, availability conditions and stat boosts for every single item.
Each of your four party members has a unique skill. You can view their progression in their favored discipline at the level up screen when you rest at camps or lodgings. The following text offers a basic introduction to the system. You can, of course, find a complete presentation (with all related items, parameters and advice) in our Strategy & Analysis chapter on page 303.
FishingAs you explore the vast expanses of Eos, you will gradually discover
fishing spots where Noctis can practice his skill. You encounter the first one in the game’s opening chapter once you reach Galdin Quay.
The fishing mini-game is very straightforward to play, with all available commands listed on the screen. All you need is a line and a lure, and you are all set. Every fish that you catch rewards Noctis with a specific amount of skill points depending on its size and rarity. By leveling up, Noctis improves in various fields, from his actual fishing abilities to the efficiency of his equipment.
SurvivalGladiolus is the party’s survival expert. His skill increases as you run
around in the world of Eos: the more steps you walk, the more skill points he obtains. Leveling up this skill is therefore very easy, and should happen steadily if you explore each region – even more so if you’re happy to go off the beaten track.
Gladiolus’s skill governs the quality and variety of items you obtain at the end of battles, regardless of their outcome. These items are not enemy drops, but special objects “found” by your ally. At low Survival levels, the items you receive are relatively basic (potions, for example), but they become far more valuable at higher levels (in the form of mighty elixirs, or ingots with tremendous resale value).
CookingIgnis is your party’s official cook. Whenever you make camp at
a haven, he will offer to prepare a meal which grants a temporary buff to all allies. Available dishes depend on which recipes he has mastered so far, and the ingredients you currently have in stock.
Ingredients can be dropped by defeated enemies, purchased from shops, and obtained as collectibles scattered around the world of Eos. These are clearly marked with icons on the in-game map ( & ).
Recipes are obtained in a variety of ways, such as eating new dishes in restaurants or by defeating specific enemy types.
Ignis obtains skill points by cooking, with higher totals available for more elaborate dishes. Leveling up enables him to unlock new recipes.
PhotographyPrompto’s skill is photography. Every photo that he takes grants
him skill points. Each standard picture is worth a small amount of skill points while quest-related pictures, such as those taken during “Photo Op” or “Tour” sidequests, are worth far more.
As he levels up, Prompto unlocks various color effects and techniques such as the ability to take selfies. You can review pictures when you rest at camps or lodgings.
Quickstart
Primer
Walkthrough
Sidequests
Inventory
Bestiary
Strategy & Analysis
Extras
Index
Game Structure
Commands
On-screen Display
Exploration
Combat
Character Progression
Skills
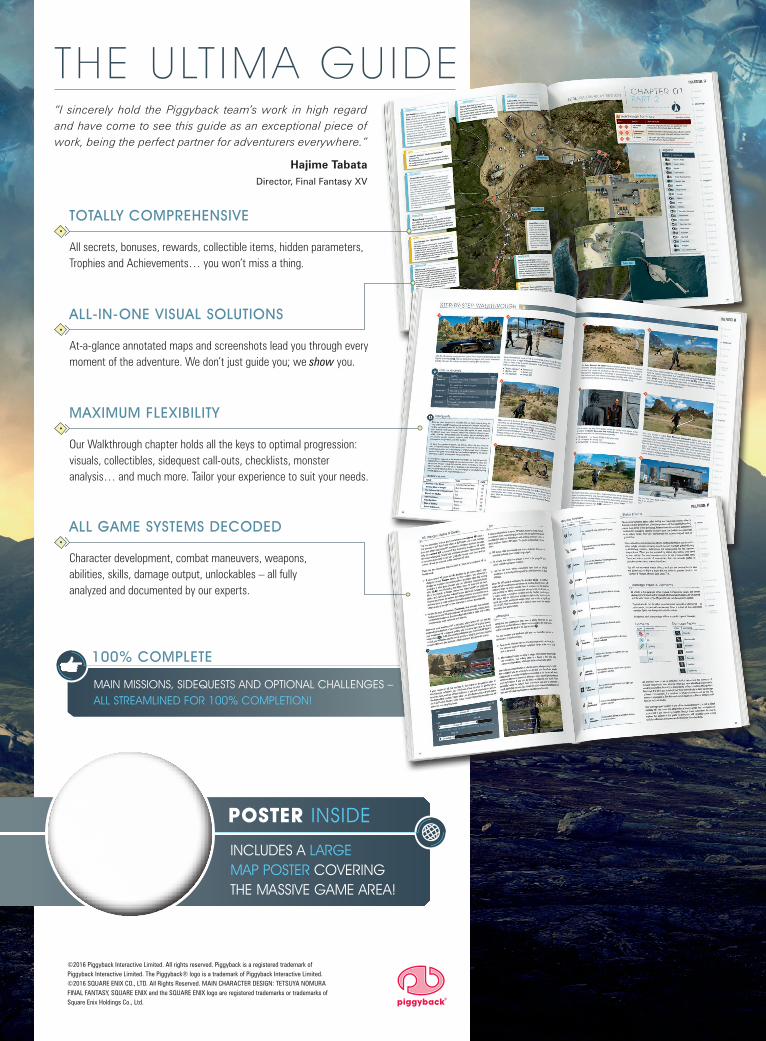
100% COMPLETE
MAIN MISSIONS, SIDEQUESTS AND OPTIONAL CHALLENGES – ALL STREAMLINED FOR 100% COMPLETION!
POSTER INSIDE
INCLUDES A LARGE MAP POSTER COVERING THE MASSIVE GAME AREA!
©2016 Piggyback Interactive Limited. All rights reserved. Piggyback is a registered trademark of Piggyback Interactive Limited. The Piggyback® logo is a trademark of Piggyback Interactive Limited. ©2016 SQUARE ENIX CO., LTD. All Rights Reserved. MAIN CHARACTER DESIGN: TETSUYA NOMURAFINAL FANTASY, SQUARE ENIX and the SQUARE ENIX logo are registered trademarks or trademarks of Square Enix Holdings Co., Ltd.
“I sincerely hold the Piggyback team’s work in high regard and have come to see this guide as an exceptional piece of work, being the perfect partner for adventurers everywhere.”
Hajime TabataDirector, Final Fantasy XV
THE ULT IMA GUIDE
All secrets, bonuses, rewards, collectible items, hidden parameters, Trophies and Achievements… you won’t miss a thing.
TOTALLY COMPREHENSIVE
Our Walkthrough chapter holds all the keys to optimal progression: visuals, collectibles, sidequest call-outs, checklists, monster analysis… and much more. Tailor your experience to suit your needs.
MAXIMUM FLEXIBILITY
Character development, combat maneuvers, weapons, abilities, skills, damage output, unlockables – all fully analyzed and documented by our experts.
ALL GAME SYSTEMS DECODED
At-a-glance annotated maps and screenshots lead you through every moment of the adventure. We don’t just guide you; we show you.
ALL-IN-ONE VISUAL SOLUTIONS
Related Documents