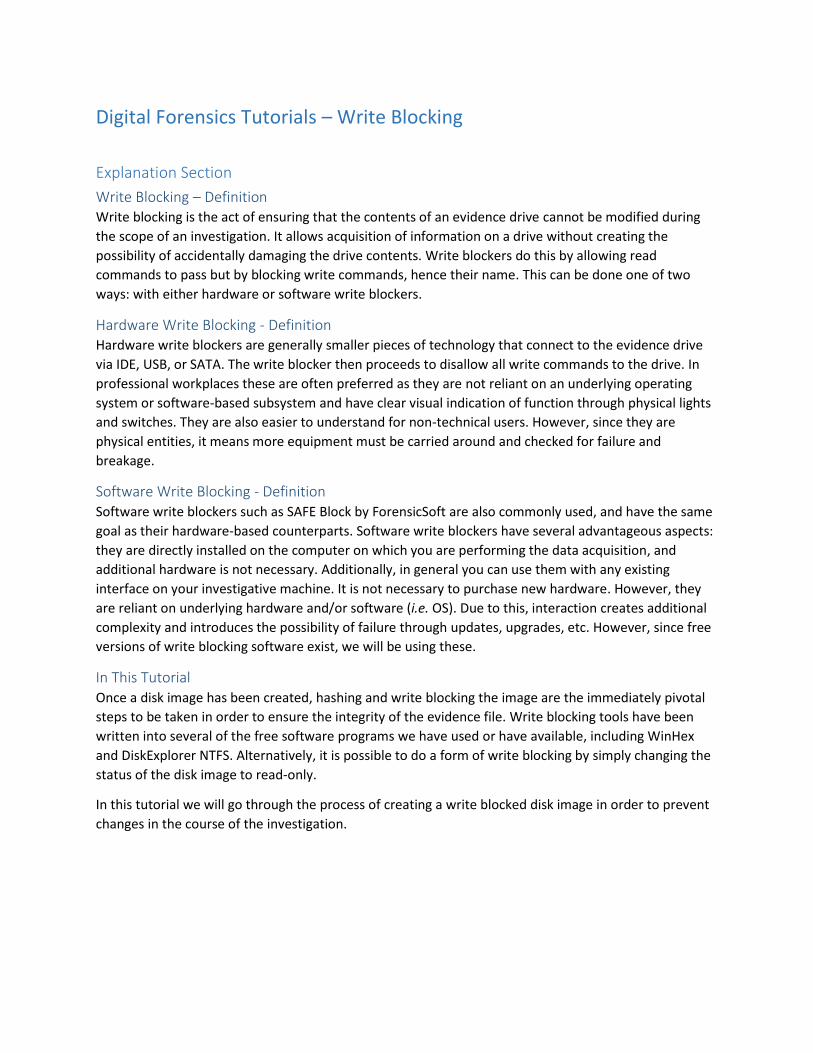
Digital Forensics Tutorials – Write Blocking Explanation Section Write Blocking – Definition Write blocking is the act of ensuring that the contents of an evidence drive cannot be modified during the scope of an investigation. It allows acquisition of information on a drive without creating the possibility of accidentally damaging the drive contents. Write blockers do this by allowing read commands to pass but by blocking write commands, hence their name. This can be done one of two ways: with either hardware or software write blockers. Hardware Write Blocking - Definition Hardware write blockers are generally smaller pieces of technology that connect to the evidence drive via IDE, USB, or SATA. The write blocker then proceeds to disallow all write commands to the drive. In professional workplaces these are often preferred as they are not reliant on an underlying operating system or software-based subsystem and have clear visual indication of function through physical lights and switches. They are also easier to understand for non-technical users. However, since they are physical entities, it means more equipment must be carried around and checked for failure and breakage. Software Write Blocking - Definition Software write blockers such as SAFE Block by ForensicSoft are also commonly used, and have the same goal as their hardware-based counterparts. Software write blockers have several advantageous aspects: they are directly installed on the computer on which you are performing the data acquisition, and additional hardware is not necessary. Additionally, in general you can use them with any existing interface on your investigative machine. It is not necessary to purchase new hardware. However, they are reliant on underlying hardware and/or software (i.e. OS). Due to this, interaction creates additional complexity and introduces the possibility of failure through updates, upgrades, etc. However, since free versions of write blocking software exist, we will be using these. In This Tutorial Once a disk image has been created, hashing and write blocking the image are the immediately pivotal steps to be taken in order to ensure the integrity of the evidence file. Write blocking tools have been written into several of the free software programs we have used or have available, including WinHex and DiskExplorer NTFS. Alternatively, it is possible to do a form of write blocking by simply changing the status of the disk image to read-only. In this tutorial we will go through the process of creating a write blocked disk image in order to prevent changes in the course of the investigation.

Welcome message from author
This document is posted to help you gain knowledge. Please leave a comment to let me know what you think about it! Share it to your friends and learn new things together.
Transcript
Digital Forensics Tutorials – Write Blocking
Explanation Section
Write Blocking – Definition Write blocking is the act of ensuring that the contents of an evidence drive cannot be modified during
the scope of an investigation. It allows acquisition of information on a drive without creating the
possibility of accidentally damaging the drive contents. Write blockers do this by allowing read
commands to pass but by blocking write commands, hence their name. This can be done one of two
ways: with either hardware or software write blockers.
Hardware Write Blocking - Definition Hardware write blockers are generally smaller pieces of technology that connect to the evidence drive
via IDE, USB, or SATA. The write blocker then proceeds to disallow all write commands to the drive. In
professional workplaces these are often preferred as they are not reliant on an underlying operating
system or software-based subsystem and have clear visual indication of function through physical lights
and switches. They are also easier to understand for non-technical users. However, since they are
physical entities, it means more equipment must be carried around and checked for failure and
breakage.
Software Write Blocking - Definition Software write blockers such as SAFE Block by ForensicSoft are also commonly used, and have the same
goal as their hardware-based counterparts. Software write blockers have several advantageous aspects:
they are directly installed on the computer on which you are performing the data acquisition, and
additional hardware is not necessary. Additionally, in general you can use them with any existing
interface on your investigative machine. It is not necessary to purchase new hardware. However, they
are reliant on underlying hardware and/or software (i.e. OS). Due to this, interaction creates additional
complexity and introduces the possibility of failure through updates, upgrades, etc. However, since free
versions of write blocking software exist, we will be using these.
In This Tutorial Once a disk image has been created, hashing and write blocking the image are the immediately pivotal
steps to be taken in order to ensure the integrity of the evidence file. Write blocking tools have been
written into several of the free software programs we have used or have available, including WinHex
and DiskExplorer NTFS. Alternatively, it is possible to do a form of write blocking by simply changing the
status of the disk image to read-only.
In this tutorial we will go through the process of creating a write blocked disk image in order to prevent
changes in the course of the investigation.
Tutorial Section LEARNING OBJECTIVES:
Write block a disk image file using WinHex
Write block a disk image file using DiskExplorer NTFS
Write block a disk image file using file properties and read-only
Part 1 – Write Blocking a Disk Image File Using WinHex
1. Login to the Virtual Lab website (https://v5.unm.edu/cloud/org/ialab), and enter the ‘NEST Digital
Forensics’ vApp. Click on the Windows 8 machine to open the VM.
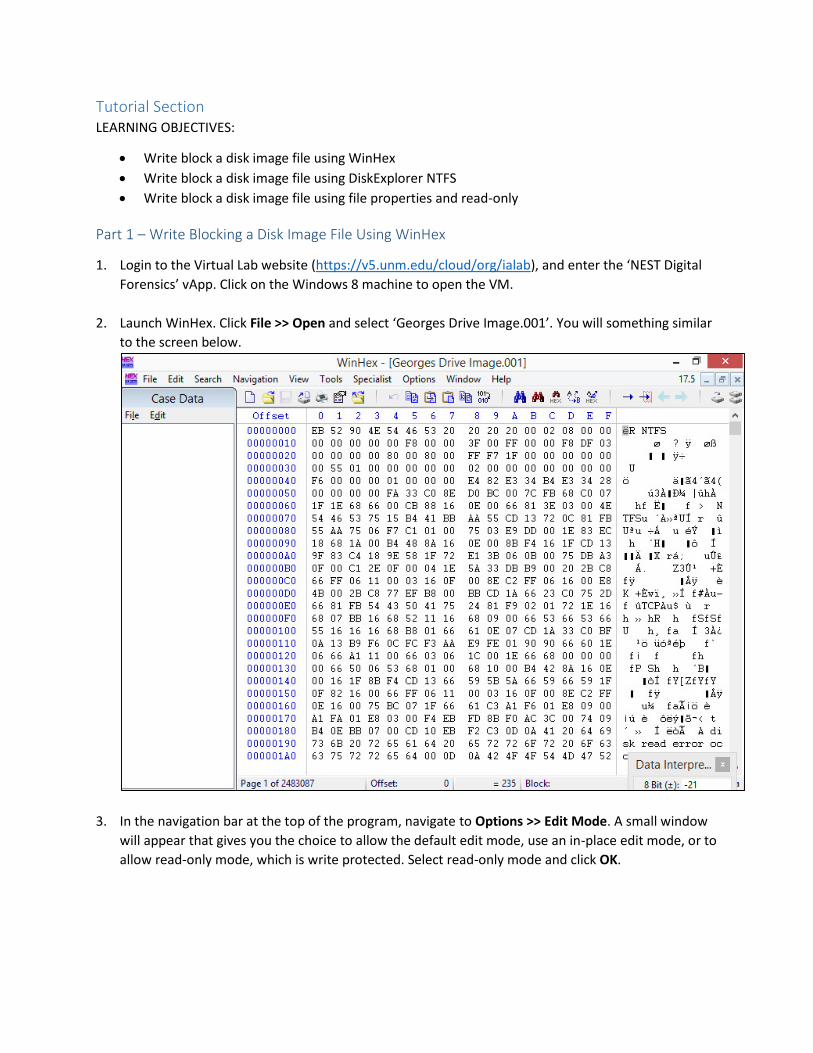
2. Launch WinHex. Click File >> Open and select ‘Georges Drive Image.001’. You will something similar
to the screen below.
3. In the navigation bar at the top of the program, navigate to Options >> Edit Mode. A small window
will appear that gives you the choice to allow the default edit mode, use an in-place edit mode, or to
allow read-only mode, which is write protected. Select read-only mode and click OK.

4. The disk image is now write blocked and cannot be edited within WinHex. If you attempt to change
or overwrite characters in either the hexadecimal or character-based editing areas, changes will not
be populated, as write commands are being blocked. You can rehash the file to verify this.
*Note that once you exit WinHex, the disk image file will no longer be write protected. If you were
to open the disk image file within another program, changes could be made. The write blocking
provide within WinHex is only functional within WinHex itself. However, this feature is highly useful
for analysis of disk image file contents within WinHex.
5. Exit out of WinHex. Note that you are not asked to save any changes since nothing was written to
the file.
Part 2 – Write Blocking a Disk Image File Using DiskExplorer NTFS
1. Launch DiskExplorer for NTFS. Navigate to File >> Image. Find and select the ‘Georges Drive
Image.001’ file. Once the disk image is opened it will appear as below. Note the disk image file name
near the bottom.
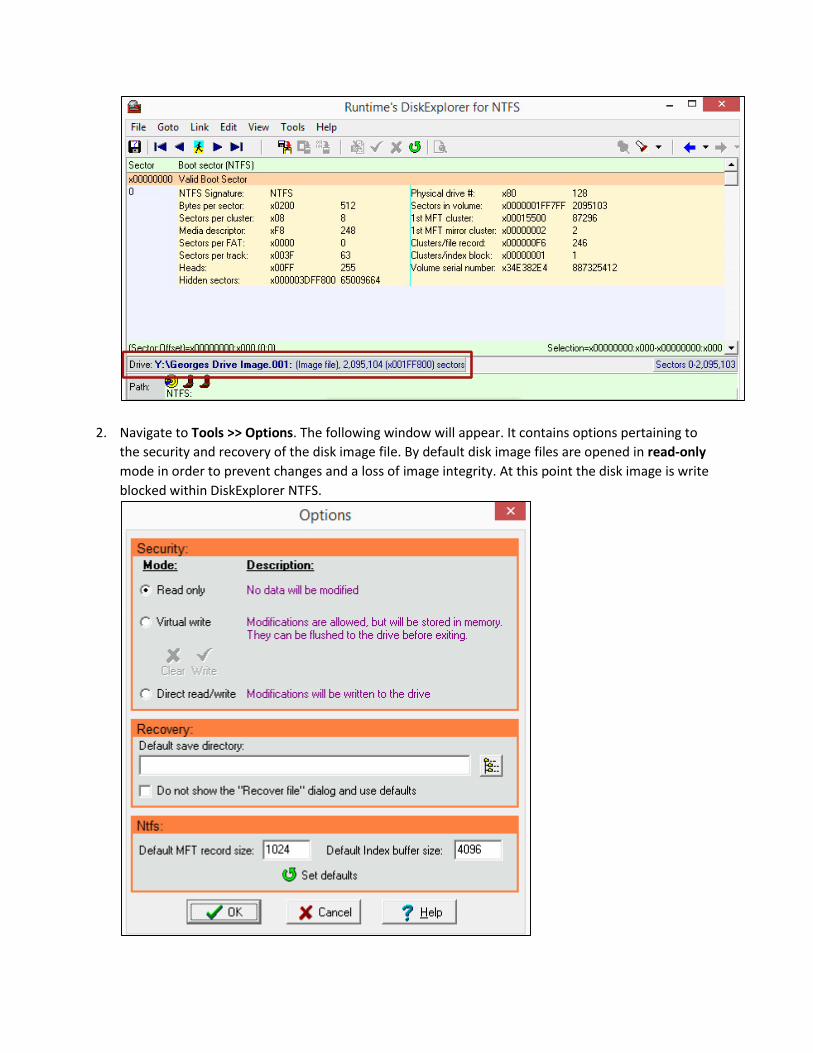
2. Navigate to Tools >> Options. The following window will appear. It contains options pertaining to
the security and recovery of the disk image file. By default disk image files are opened in read-only
mode in order to prevent changes and a loss of image integrity. At this point the disk image is write
blocked within DiskExplorer NTFS.

Options also include direct read/write, which is essentially edit mode; changes can be made to the
disk image. Alternatively you can use virtual write. Changes are stored in memory, but are not saved
until they are either written or cleared. As long as the changes are cleared from the options window,
the hash will not be changed and the disk image will maintain its integrity.
3. The read-only setting within DiskExplorer for NTFS is similar to that within WinHex in that it only
applies to the disk image file while it is open within DiskExplorer. It will not remain in read-only
mode once you have exited out of DiskExplorer. Again, this function is good for analyzing the disk
image contents within DiskExplorer. You can rehash the disk image file to verify it has remained
unaltered.
4. Exit out of DiskExplorer for NTFS.
Part 3 – Write Blocking a Disk Image File Using File Properties
1. For a more global write blocker, it is possible to change the disk image file properties to read-only.
This is a simple but useful step that will not alter the contents of the disk image and will help to
maintain its integrity.
2. Find the ‘Georges Drive Image.001’ disk image file in your Investigative Drive. Right click on the file
and select Properties.
3. Locate the read-only option at the bottom of the Properties window and check the box to the left.
The disk image file is now in read-only mode and cannot be altered. Apply the change and click OK.
Verify the hash in WinHex to see that the hash value has not been changed. Also verify that the file
cannot be edited within WinHex.
*Note that read-only mode is an excellent way to ensure that no accidental changes are made to the
disk image during the investigative process.
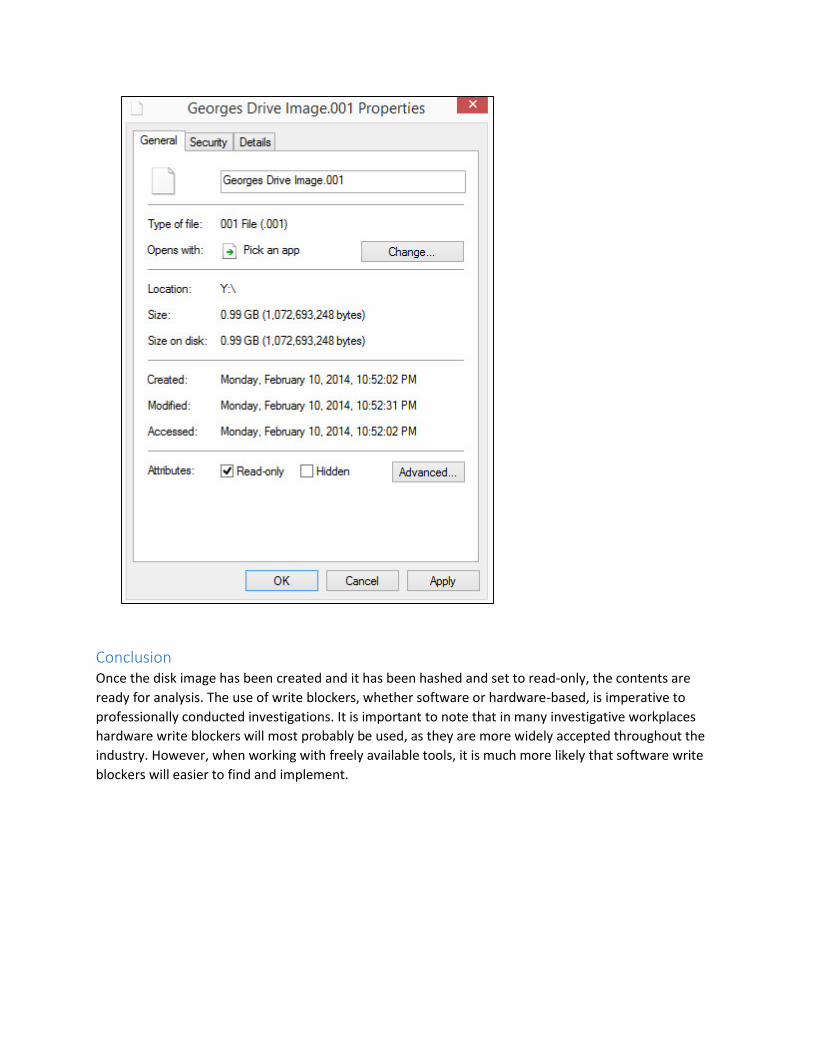
Conclusion Once the disk image has been created and it has been hashed and set to read-only, the contents are
ready for analysis. The use of write blockers, whether software or hardware-based, is imperative to
professionally conducted investigations. It is important to note that in many investigative workplaces
hardware write blockers will most probably be used, as they are more widely accepted throughout the
industry. However, when working with freely available tools, it is much more likely that software write
blockers will easier to find and implement.
Related Documents