Digipak Creation

Welcome message from author
This document is posted to help you gain knowledge. Please leave a comment to let me know what you think about it! Share it to your friends and learn new things together.
Transcript

Digipak Creation

InDesign dimensions
• In order to make a conventional digipak I first needed to find the dimensions of a real digipak and disk to replicate in my project.
• From my research I found that the entire size of the digipak was 432 x 125 mm (432 x 250 mm as inside and outside shown as separate entries) and the disk was 116 mm wide and the inner circle was 24 mm wide.


• To start with I created a document the size of the digipak I was going to create on photoshop (432 x 125 mm)
• Then filled the whole area in black


• I then added a noise filter at 120% and added Gaussian blur at 0.3 pixels


• Then to remove a majority of the noise I adjusted the levels turning sliding up the black input.


• I then replicated this process to add more of the stars before erasing along some lines to make it appear that there were clusters of stars before adding lens flares to simulate brighter stars.


Barcode

• To create the barcode in photoshop, first I created a black rectangle on a white background

Barcode

• I then added a noise filter to the rectangle


• Then by using the one pixel marquee tool I selected a one pixel tall segment of the noise filled rectangle.


• Then by using the transform tool stretched the one pixel tall bar to an appropriate size before removing a section on the bottom to put the numerical data that accompanies barcodes.

Planets

• To create the planet on the disk I first created a sphere and added an appropriate texture. Then using the clone stamp tool filled the sphere with the texture to make it look like a planet.


• Then to create an atmospheric glow I created a new layer (duplicating the initial one) and added inner and outer glow using the layer style section in the layer menu.


• I then added a black sphere to simulate the shadow seen for example on the moon when it appears in its crescent state.
• I added Gaussian blur to the sphere to blend it in with the planet before adjusting the contrast of the image to bring out the orange in the image to show a starker contrast between the planet and the blackness of the background.
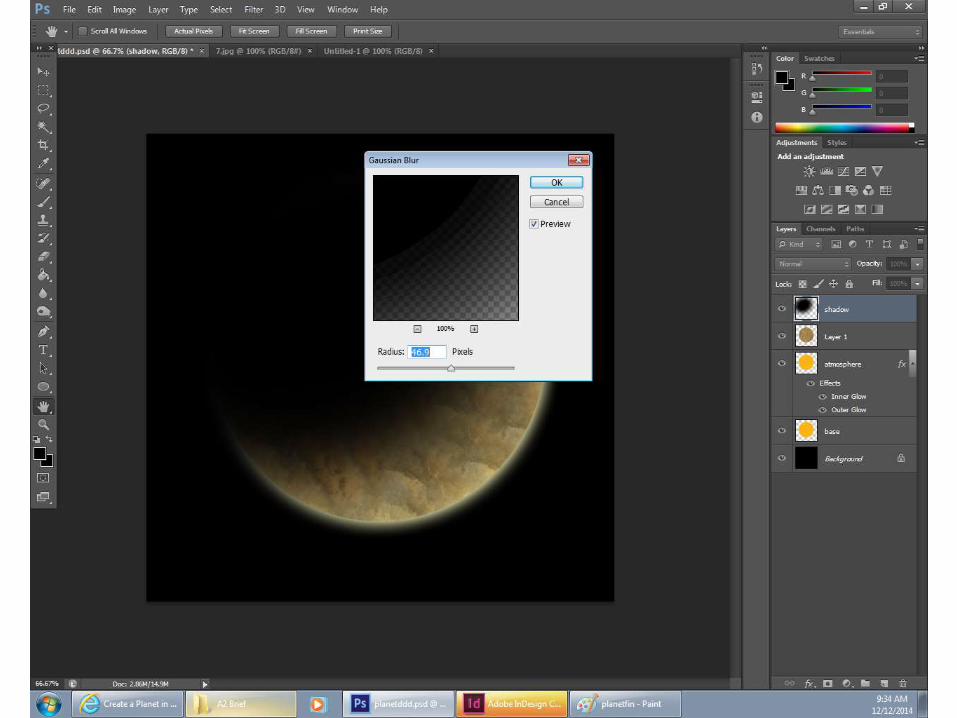
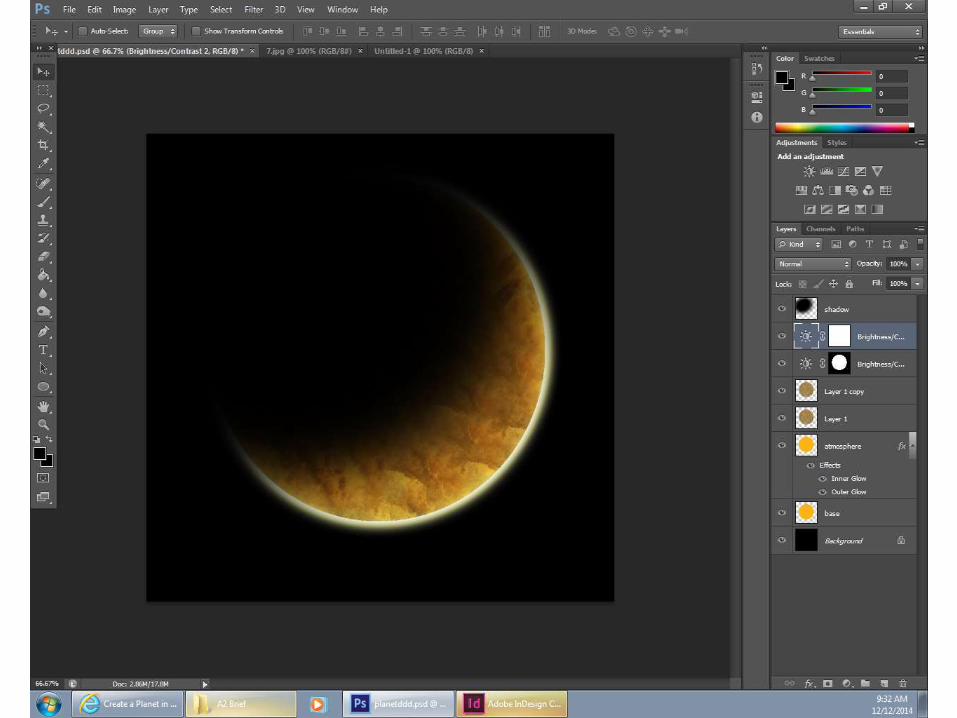

Image manipulation

Firstly I removed the background of the image I wanted to use of the artist. Replacing it with black using the magic wand tool and the paint brush tool for the small details

I then adjusted the levels to create a vaster contrast from the bright and dark portions of the image. I then repeated this process with the image of the child and put them both on the digipak


Related Documents