DEVELOPMENT OF A THIN CLIENT BASED OPERATING SYSTEM WITH ARCH LINUX AND RASPBERRY PI FOR VIRTUAL DESKTOP INFRASTRUCTURE (VDI) SOLUTION By SAMIUL HAQUE SUMAN POST GRADUATE DIPLOMA IN INFORMATION AND COMMUNICATION TECHNOLOGY INSTITUTE OF INFORMATION AND COMMUNICATION TECHNOLOGY BANGLADESH UNIVERSITY OF ENGINEERING AND TECHNOLOGY 2017

Welcome message from author
This document is posted to help you gain knowledge. Please leave a comment to let me know what you think about it! Share it to your friends and learn new things together.
Transcript
DEVELOPMENT OF A THIN CLIENT BASED OPERATING SYSTEM
WITH ARCH LINUX AND RASPBERRY PI FOR VIRTUAL DESKTOP
INFRASTRUCTURE (VDI) SOLUTION
By
SAMIUL HAQUE SUMAN
POST GRADUATE DIPLOMA IN INFORMATION AND COMMUNICATION
TECHNOLOGY
INSTITUTE OF INFORMATION AND COMMUNICATION TECHNOLOGY
BANGLADESH UNIVERSITY OF ENGINEERING AND TECHNOLOGY
2017
ii
The project titled “DEVELOPMENT OF A THIN CLIENT BASED OPERATING
SYSTEM WITH ARCH LINUX AND RASPBERRY PI FOR VIRTUAL
DESKTOP INFRASTRUCTURE (VDI) SOLUTION” submitted by Samiul Haque
Suman, Roll No.: 0412311009, Session: April 2012, has been accepted as satisfactory
in partial fulfillment of the requirement for the degree of Post Graduate Diploma in
Information and Communication Technology on 28 Mar 2017.
BOARD OF EXAMINERS
1. Mohammad Imam Hasan Bin Asad
Assistant Professor
IICT, BUET, Dhaka
Chairman
2. Dr. Md. Liakot Ali
Professor
IICT, BUET, Dhaka
Member
3. Dr. Hossen Asiful Mustafa
Assistant Professor
IICT, BUET, Dhaka
Member

iii
CANDIDATE’S DECLARATION
It is hereby declared that this project or any part of it has not been submitted elsewhere
for the award of any degree or diploma.
SAMIUL HAQUE SUMAN
0412311009
IICT, BUET

iv
DEDICATION
I dedicate my project work to my family especially to wife Arju Arfin who never left
my side and encouraged me.
v
Table of Contents
Board of Examiners…………………………………………………………………. ii
Candidate’s declaration ……………………………………………………………. iii
Dedication …………………………………………………………………………. iv
List of Figures ........................................................................................................... viii
List of Tables…………………………………………………………………………ix
List of Abbreviations of Technical Symbols and Terms ............................................. x
Acknowledgement ...................................................................................................... xi
Abstract ...................................................................................................................... xii
CHAPTER 1 ................................................................................................................ 1
1.1 Introduction ................................................................................................... 1
1.2 Project Objective ........................................................................................... 2
1.3 Organization of the Project Report ................................................................ 3
CHAPTER 2 ................................................................................................................ 4
2.1 Virtualization Concept .................................................................................. 4
2.1.1 Virtualization overview ................................................................................. 4
2.1.2 Working procedure of Virtualization ............................................................ 5
2.1.3 Benefits of Virtualization .............................................................................. 5
2.2 The Virtual Machine ..................................................................................... 6
2.2.1 The Key properties of Virtual Machine ......................................................... 7
2.3 Desktop Virtualization .................................................................................. 7
2.4 VDI Concept .................................................................................................. 8
2.4.1 VDI Architecture ........................................................................................... 8
2.4.2 VDI Configuration......................................................................................... 9
2.4.3 Benefits for Desktop Management ................................................................ 9
2.4.4 VDI Limitations........................................................................................... 10
VI
CHAPTER 3 .............................................................................................................. 11
3.1 Thin Client Overview .................................................................................. 11
3.2 Thin Client Types ........................................................................................ 11
3.2.1 Ultra-Thin Client ......................................................................................... 11
3.2.2 Windows Based Terminals (WBT) ............................................................. 12
3.2.3 Blade PC Architecture ................................................................................ 12
3.2.4 Tubby Clients ............................................................................................. 12
3.3 Available Thin Client Devices ................................................................... 13
3.3.1 Atrust t63 .................................................................................................... 13
3.3.2 Huawei CT3000 .......................................................................................... 13
3.3.3 Dell Wyse 3030 Thin Client ........................................................................ 14
3.4 Comparison of Power Consumption between Desktop based System and Thin
Client based System. .................................................................................................. 15
CHAPTER 4 .............................................................................................................. 16
4.1 Raspberry Pi ................................................................................................ 16
4.2 Raspberry Pi Architecture ........................................................................... 16
4.3 Available version of Raspberry Pi ............................................................... 18
4.4 Raspberry Pi as Thin Client Device ............................................................ 18
CHAPTER 5 .............................................................................................................. 20
5.1 Thin Client Operating System ..................................................................... 20
5.2 Different Types of Thin Client Operating System ...................................... 20
5.2.1 Atrust OS ..................................................................................................... 20
5.2.2 Windows Thin PC ........................................................................................ 21
5.3 Arch Linux ARM ........................................................................................ 22
5.3.1 Arch Linux as a Thin Client OS .................................................................. 22
5.4 VDI Operating System ................................................................................ 23
VII
5.4.1 Citrix Xen Server ........................................................................................ 23
5.4.2 Microsoft Hyper-V Server .......................................................................... 23
CHAPTER 6 .............................................................................................................. 24
6.1 Project Architecture ..................................................................................... 24
6.2 Arch Linux on Raspberry Pi ........................................................................ 25
6.2.1 Installing Arch Linux on Raspberry Pi ........................................................ 25
6.2.2 Configuring Arch Linux on Raspberry Pi ................................................... 27
6.3 Citrix Xen Server Installation and Configuration ....................................... 30
6.4 Development of User Interface ................................................................... 36
6.4.1 Development Procedure .............................................................................. 36
6.4.2 User Interface and VM Interface of Thin Client OS ................................... 39
6.4.3 Sign-out process from Virtual Machine ...................................................... 40
6.5 Comparison between Raspberry Pi and Other Thin Client Devices ........... 41
6.6 Comparison between Arch Linux Thin OS and Others Thin OS ................ 41
6.7 Role of User and System Administrator ...................................................... 42
CHAPTER 7 .............................................................................................................. 43
7.1 Conclusion ................................................................................................... 43
7.2 Suggestion for Future work ......................................................................... 43
Reference ....………………………………………………………………………...44
Appendix A……………………………………………………………………….... 45
Appendix B …………………………………………………………………………46
Appendix C …………………………………………………………………………47
Appendix D …………………………………………………………………………49
Appendix E …………………………………………………………………………50
VIII
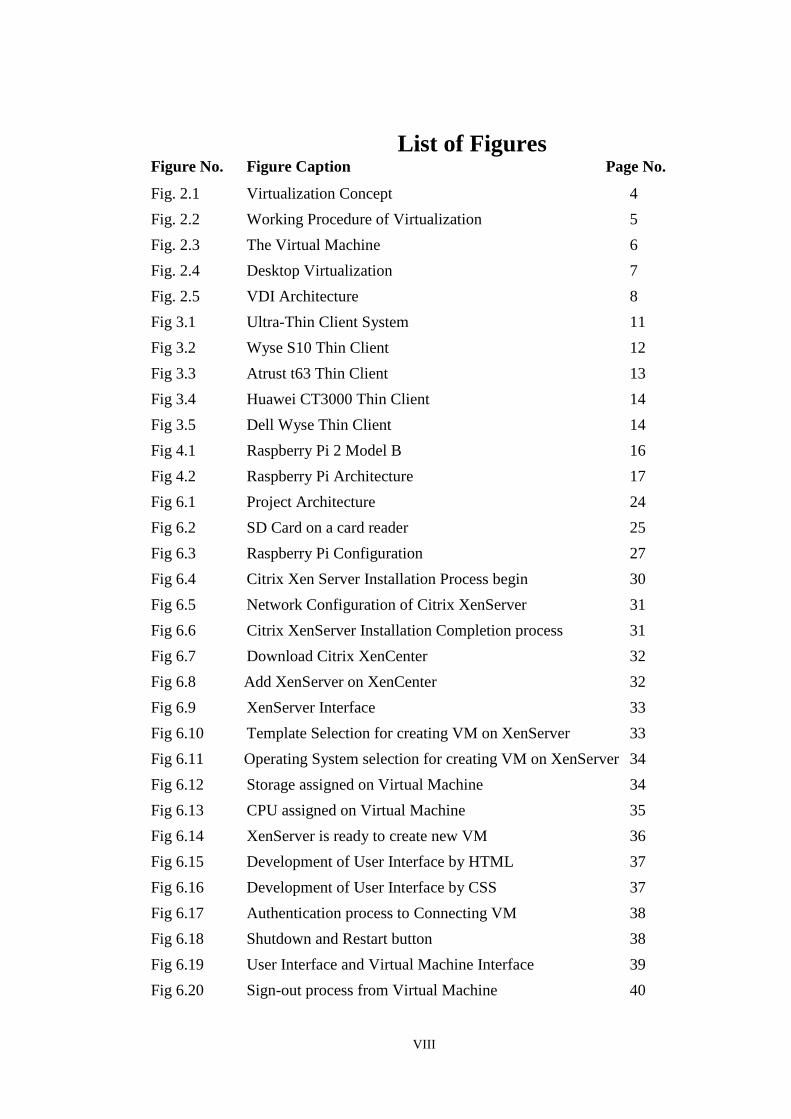
List of Figures Figure No. Figure Caption Page No.
Fig. 2.1 Virtualization Concept 4
Fig. 2.2 Working Procedure of Virtualization 5
Fig. 2.3 The Virtual Machine 6
Fig. 2.4 Desktop Virtualization 7
Fig. 2.5 VDI Architecture 8
Fig 3.1 Ultra-Thin Client System 11
Fig 3.2 Wyse S10 Thin Client 12
Fig 3.3 Atrust t63 Thin Client 13
Fig 3.4 Huawei CT3000 Thin Client 14
Fig 3.5 Dell Wyse Thin Client 14
Fig 4.1 Raspberry Pi 2 Model B 16
Fig 4.2 Raspberry Pi Architecture 17
Fig 6.1 Project Architecture 24
Fig 6.2 SD Card on a card reader 25
Fig 6.3 Raspberry Pi Configuration 27
Fig 6.4 Citrix Xen Server Installation Process begin 30
Fig 6.5 Network Configuration of Citrix XenServer 31
Fig 6.6 Citrix XenServer Installation Completion process 31
Fig 6.7 Download Citrix XenCenter 32
Fig 6.8 Add XenServer on XenCenter 32
Fig 6.9 XenServer Interface 33
Fig 6.10 Template Selection for creating VM on XenServer 33
Fig 6.11 Operating System selection for creating VM on XenServer 34
Fig 6.12 Storage assigned on Virtual Machine 34
Fig 6.13 CPU assigned on Virtual Machine 35
Fig 6.14 XenServer is ready to create new VM 36
Fig 6.15 Development of User Interface by HTML 37
Fig 6.16 Development of User Interface by CSS 37
Fig 6.17 Authentication process to Connecting VM 38
Fig 6.18 Shutdown and Restart button 38
Fig 6.19 User Interface and Virtual Machine Interface 39
Fig 6.20 Sign-out process from Virtual Machine 40
IX
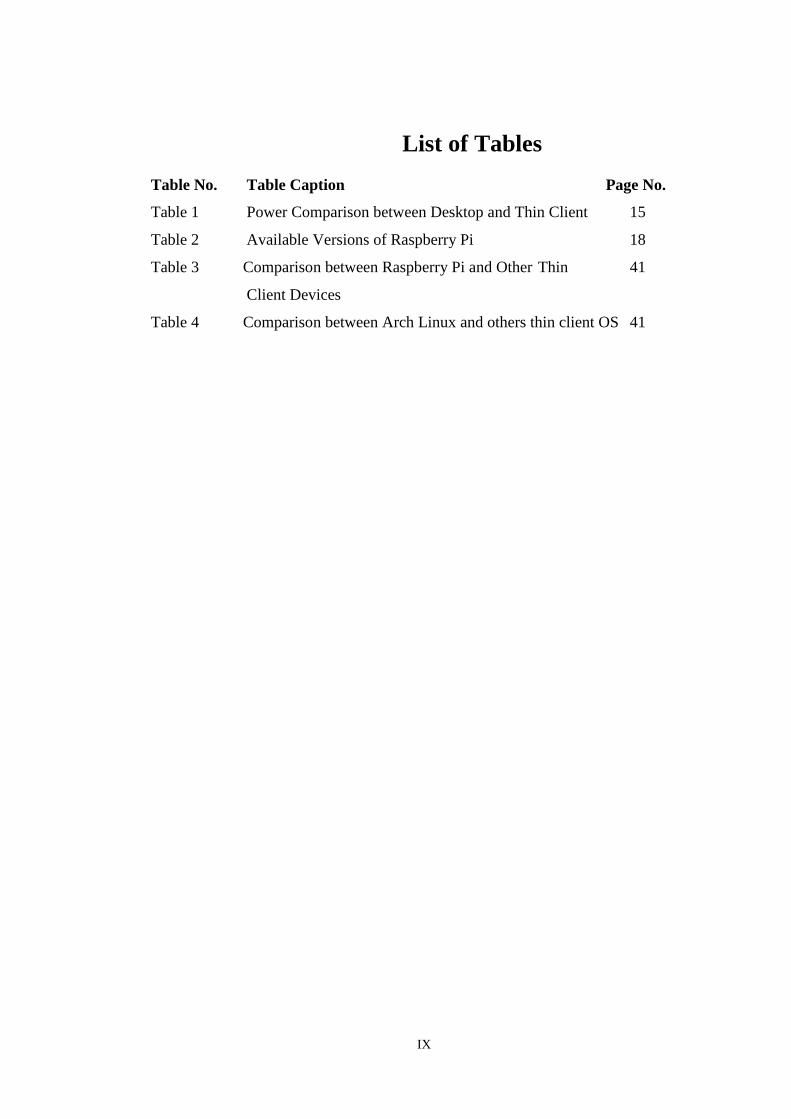
List of Tables
Table No. Table Caption Page No.
Table 1 Power Comparison between Desktop and Thin Client 15
Table 2 Available Versions of Raspberry Pi 18
Table 3 Comparison between Raspberry Pi and Other Thin 41
Client Devices
Table 4 Comparison between Arch Linux and others thin client OS 41
X
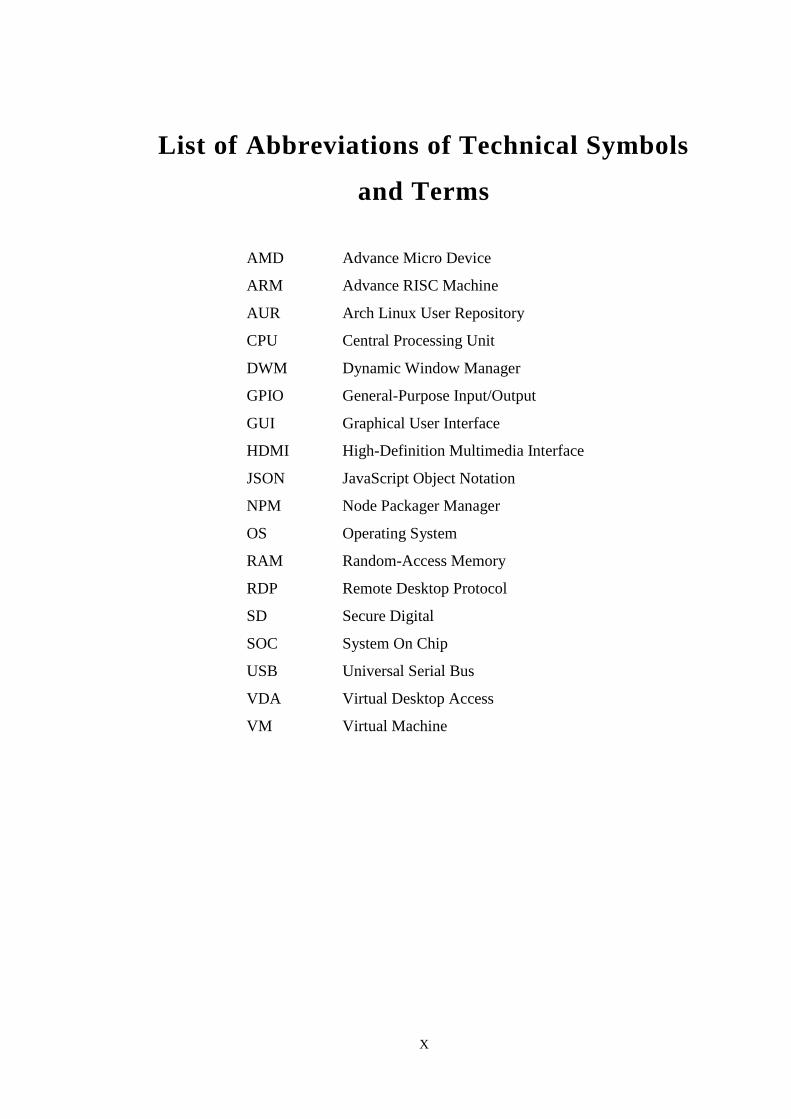
List of Abbreviations of Technical Symbols
and Terms
AMD Advance Micro Device
ARM Advance RISC Machine
AUR Arch Linux User Repository
CPU Central Processing Unit
DWM Dynamic Window Manager
GPIO General-Purpose Input/Output
GUI Graphical User Interface
HDMI High-Definition Multimedia Interface
JSON JavaScript Object Notation
NPM Node Packager Manager
OS Operating System
RAM Random-Access Memory
RDP Remote Desktop Protocol
SD Secure Digital
SOC System On Chip
USB Universal Serial Bus
VDA Virtual Desktop Access
VM Virtual Machine
XI
Acknowledgement
At first, I would like to thank to the Almighty Allah, the most Merciful and Beneficent,
who has given me the capability to complete this project.
I would like to thank my supervisor Mohammad Imam Hasan Bin Asad, Assistant
Professor, IICT, BUET for his guidance and magnificent support. In addition, I would
like to thank Dr. Shah Alam and Mst. Shamima Ara Sawkat for giving valuable advice
during my project work.
Last but not the least, I would like to express my gratitude to my parents for their
support, love and prayers. I dedicate this project to my wife Arju Arafin for her daily
motivation without which I would not be able to complete this project.
XII
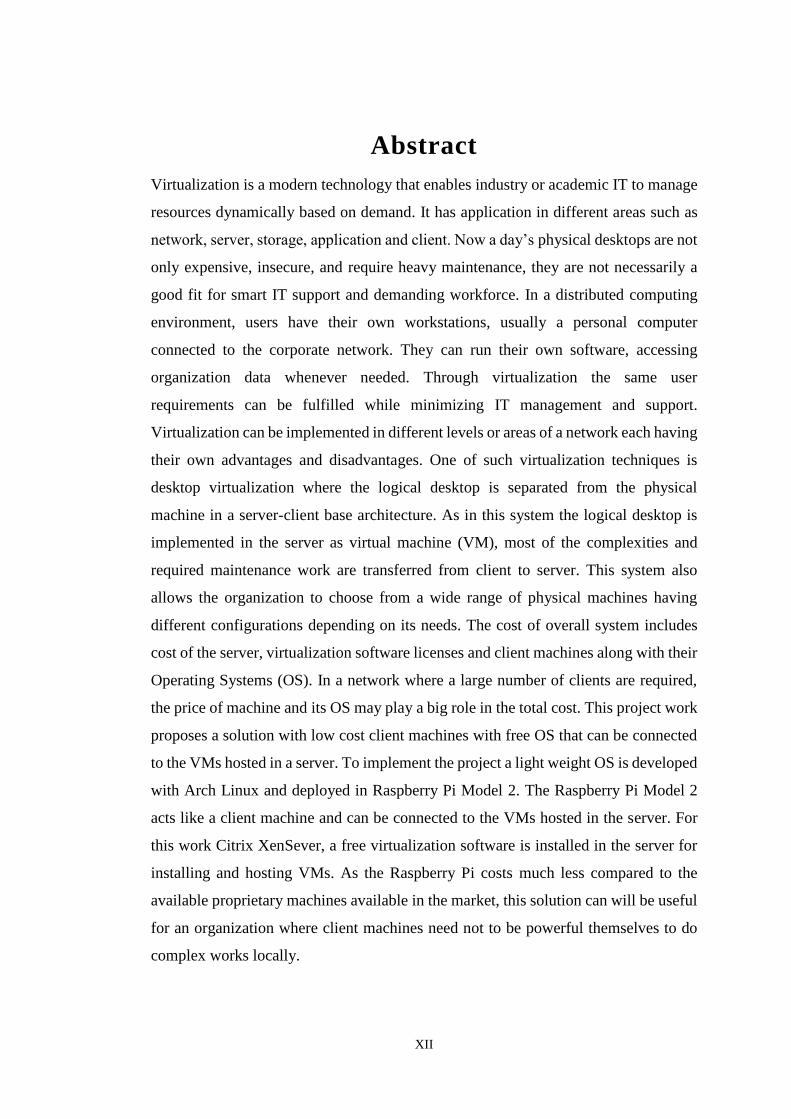
Abstract
Virtualization is a modern technology that enables industry or academic IT to manage
resources dynamically based on demand. It has application in different areas such as
network, server, storage, application and client. Now a day’s physical desktops are not
only expensive, insecure, and require heavy maintenance, they are not necessarily a
good fit for smart IT support and demanding workforce. In a distributed computing
environment, users have their own workstations, usually a personal computer
connected to the corporate network. They can run their own software, accessing
organization data whenever needed. Through virtualization the same user
requirements can be fulfilled while minimizing IT management and support.
Virtualization can be implemented in different levels or areas of a network each having
their own advantages and disadvantages. One of such virtualization techniques is
desktop virtualization where the logical desktop is separated from the physical
machine in a server-client base architecture. As in this system the logical desktop is
implemented in the server as virtual machine (VM), most of the complexities and
required maintenance work are transferred from client to server. This system also
allows the organization to choose from a wide range of physical machines having
different configurations depending on its needs. The cost of overall system includes
cost of the server, virtualization software licenses and client machines along with their
Operating Systems (OS). In a network where a large number of clients are required,
the price of machine and its OS may play a big role in the total cost. This project work
proposes a solution with low cost client machines with free OS that can be connected
to the VMs hosted in a server. To implement the project a light weight OS is developed
with Arch Linux and deployed in Raspberry Pi Model 2. The Raspberry Pi Model 2
acts like a client machine and can be connected to the VMs hosted in the server. For
this work Citrix XenSever, a free virtualization software is installed in the server for
installing and hosting VMs. As the Raspberry Pi costs much less compared to the
available proprietary machines available in the market, this solution can will be useful
for an organization where client machines need not to be powerful themselves to do
complex works locally.
1
CHAPTER 1
Introduction
1.1 Introduction
Today’s IT organizations are struggling to reduce desktop cost while preserving access
to applications and network resources. An increasingly popular solution is replacing
the traditional desktop environment with a Virtual Desktop Infrastructure (VDI) [1].
The VDI solution hosts virtual desktops in the datacenter, providing end users with a
virtual portable PC desktop experience through physical endpoint devices. These
endpoints have a minimal software footprint, are less expensive, easier to administer,
and more secure than traditional PCs. The key benefit of VDI, however, is that each
virtual desktop becomes an endpoint within the enterprise cloud. Moving desktops into
the cloud architecture allows IT administrators to deploy and provision new
applications more quickly and extend application services to external parties while
controlling access to sensitive resources.
As time passed, the mainframe computer was still too expensive while desktop PCs
get more and more powerful and cheaper which caused change from centralized to
distribute computing environment. Recently, the virtualization has changed
perspective on centric computing environment. Many companies are now looking at
the IT resources they operate and realize that there are significant sums of money tied
up in idle resources consuming human resources, power, cooling and management. Th
public and private clouds based on virtualization with all theirs benefits are more
affordable, reliable and powerful than ever [2-3].
In this project VDI solution with low cost client machines is proposed and developed.
In the VDI solution user will have only a simple client machine through which he can
connect to the Virtual Machine. After the connection is established the user will get a
complete Desktop Environment. The Virtual Machines will be situated on a remote
server system.
There are many virtualization management platforms optimized for different
applications, desktop and server virtualization infrastructures [5-6]. In this project
Citrix XenServer has been used because for its License Free Software for basic VDI
2
application. In client-end there are different types of operating system provided by
different vendors. For example, Atrust OS, Windows ThinPC and some other Linux
distributions are most popular Thin Client OS in local and international market [7-9].
Most of the operating systems require license for their deployment. In the proposed
solution, Arch Linux is selected as the operating system of the client machine [10]. As
a client machine, the Raspberry Pi Model 2 is considered because of its relative low
cost and moderate hardware specification [11-13].
Finally, a Thin Client Operating System has been deployed based on Arch Linux and
deployed on Raspberry Pi. Then an authentication system has been developed where
every user is given a Username and Password. User can login to his VM in the server
through the developed client machine and experience fully desktop environment.
1.2 Project Objective
The main objectives of this project are:
1. To build Thin Client based Operating System (OS) on Raspberry Pi for
connecting Virtual Machine (VM).
2. To ensure that user can access the VM from Client Machine only.
3. To make a Light-weight and Cost effective VDI solution.
4. To compare the proposed solution with currently available solutions in the
market.
3
1.3 Organization of the Project Report
Chapter 1: Introduction: Introduction of effective IT management system
Chapter 2: Virtual Desktop Infrastructure (VDI): In this chapter, VDI, how its work
and it benefits are described.
Chapter 3: Thin Client Devices: This chapter introduced different types of thin client
devices available in market with along their comparison
Chapter 4: Raspberry Pi: In this chapter, Raspberry Pi’s discussed briefly and the
reason behind choosing it is mention.
Chapter 5: Thin Client Operating Systems: In this chapter, different types of thin client
operating system are discussed.
Chapter 6: Project Design and Implementation: In this chapter, project development
process is discussed.
Chapter 7: Conclusion and Future Work: Finally, conclusion on the project is made
and some future works are recommended.
4
CHAPTER 2
Virtual Desktop Infrastructure
2.1 Virtualization Concept
2.1.1 Virtualization overview
Virtualization is the process of creating a software-based (or virtual) representation of
something rather than a physical one. Virtualization can apply to application, server,
storage, and network and is the single most effective way to reduce IT expenses while
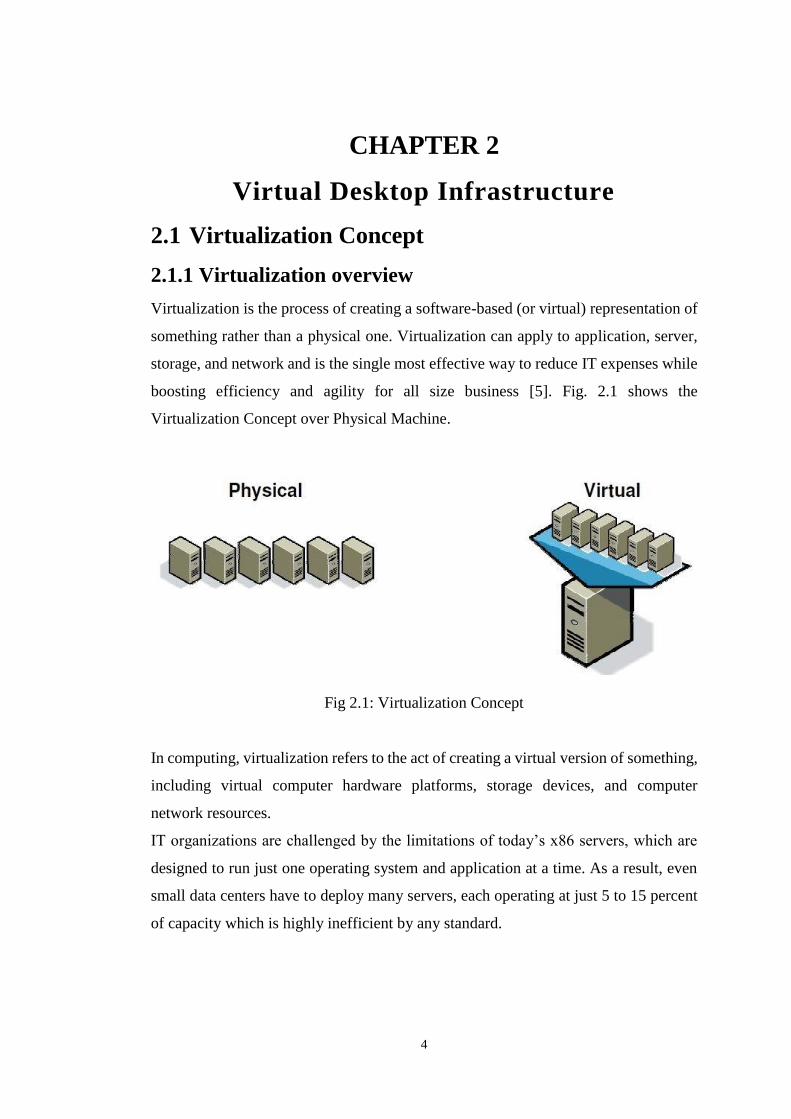
boosting efficiency and agility for all size business [5]. Fig. 2.1 shows the
Virtualization Concept over Physical Machine.
Fig 2.1: Virtualization Concept
In computing, virtualization refers to the act of creating a virtual version of something,
including virtual computer hardware platforms, storage devices, and computer
network resources.
IT organizations are challenged by the limitations of today’s x86 servers, which are
designed to run just one operating system and application at a time. As a result, even
small data centers have to deploy many servers, each operating at just 5 to 15 percent
of capacity which is highly inefficient by any standard.
5
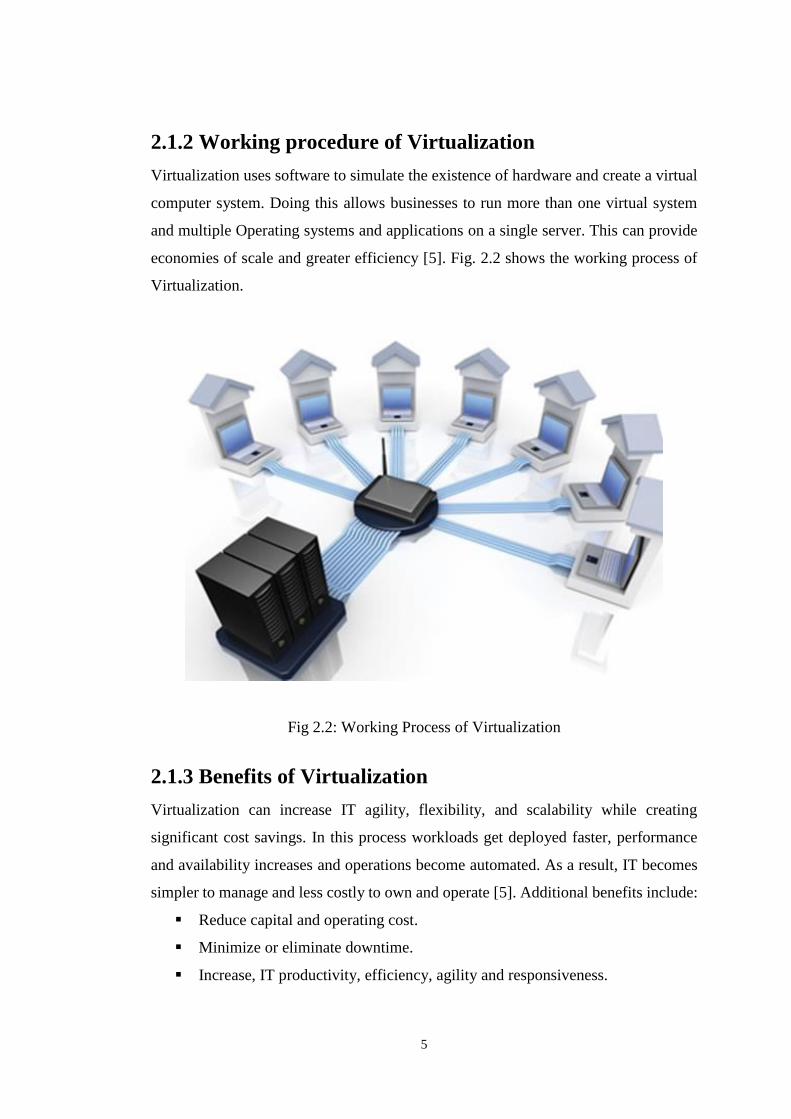
2.1.2 Working procedure of Virtualization
Virtualization uses software to simulate the existence of hardware and create a virtual
computer system. Doing this allows businesses to run more than one virtual system
and multiple Operating systems and applications on a single server. This can provide
economies of scale and greater efficiency [5]. Fig. 2.2 shows the working process of
Virtualization.
Fig 2.2: Working Process of Virtualization
2.1.3 Benefits of Virtualization
Virtualization can increase IT agility, flexibility, and scalability while creating
significant cost savings. In this process workloads get deployed faster, performance
and availability increases and operations become automated. As a result, IT becomes
simpler to manage and less costly to own and operate [5]. Additional benefits include:
▪ Reduce capital and operating cost.
▪ Minimize or eliminate downtime.
▪ Increase, IT productivity, efficiency, agility and responsiveness.
6
▪ Provision application and resources faster.
▪ Enable business continuity and disaster recovery.
▪ Simplify Datacenter management.
▪ Build a true software-defined Datacenter
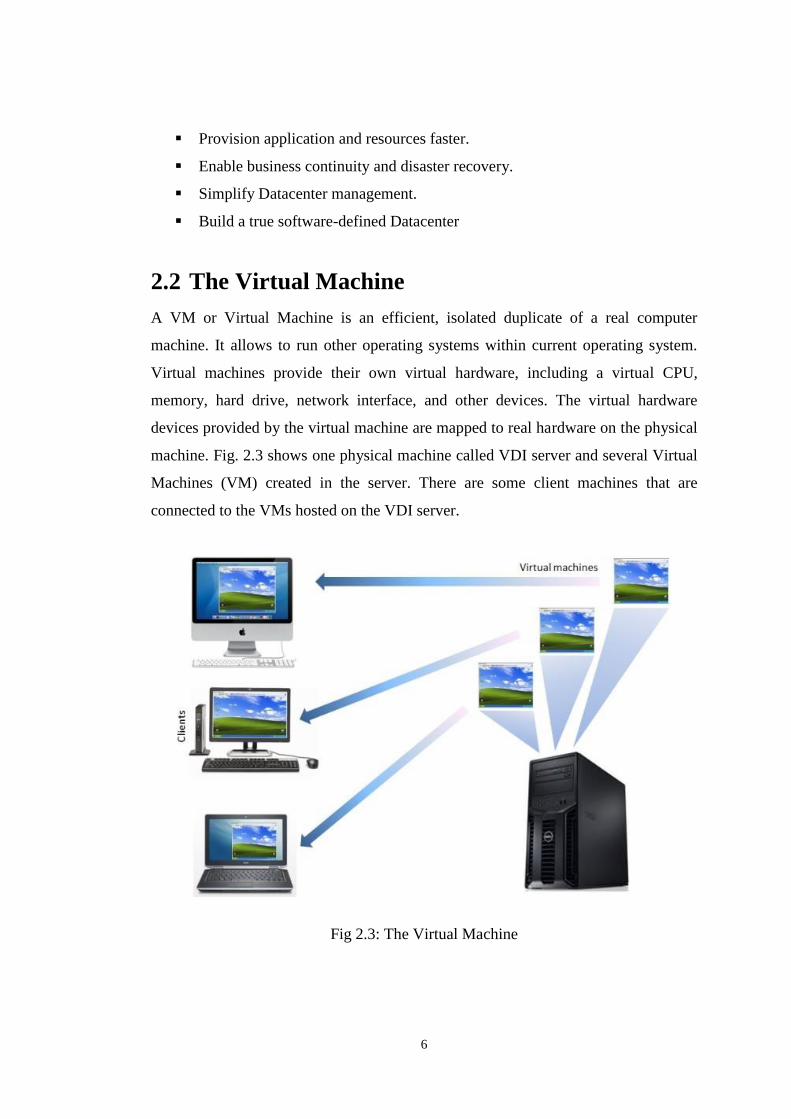
2.2 The Virtual Machine
A VM or Virtual Machine is an efficient, isolated duplicate of a real computer
machine. It allows to run other operating systems within current operating system.
Virtual machines provide their own virtual hardware, including a virtual CPU,
memory, hard drive, network interface, and other devices. The virtual hardware
devices provided by the virtual machine are mapped to real hardware on the physical
machine. Fig. 2.3 shows one physical machine called VDI server and several Virtual
Machines (VM) created in the server. There are some client machines that are
connected to the VMs hosted on the VDI server.
Fig 2.3: The Virtual Machine
7
2.2.1 The Key properties of Virtual Machine
VMs have following characteristics, which offer several benefits.
▪ Run multiple operating system on one physical machine.
▪ Divide system resources between virtual machines.
▪ Provide fault and security isolation at the hardware level.
▪ Preserve performance with advanced resource controls.
▪ Save the entire state of a virtual machine to files.
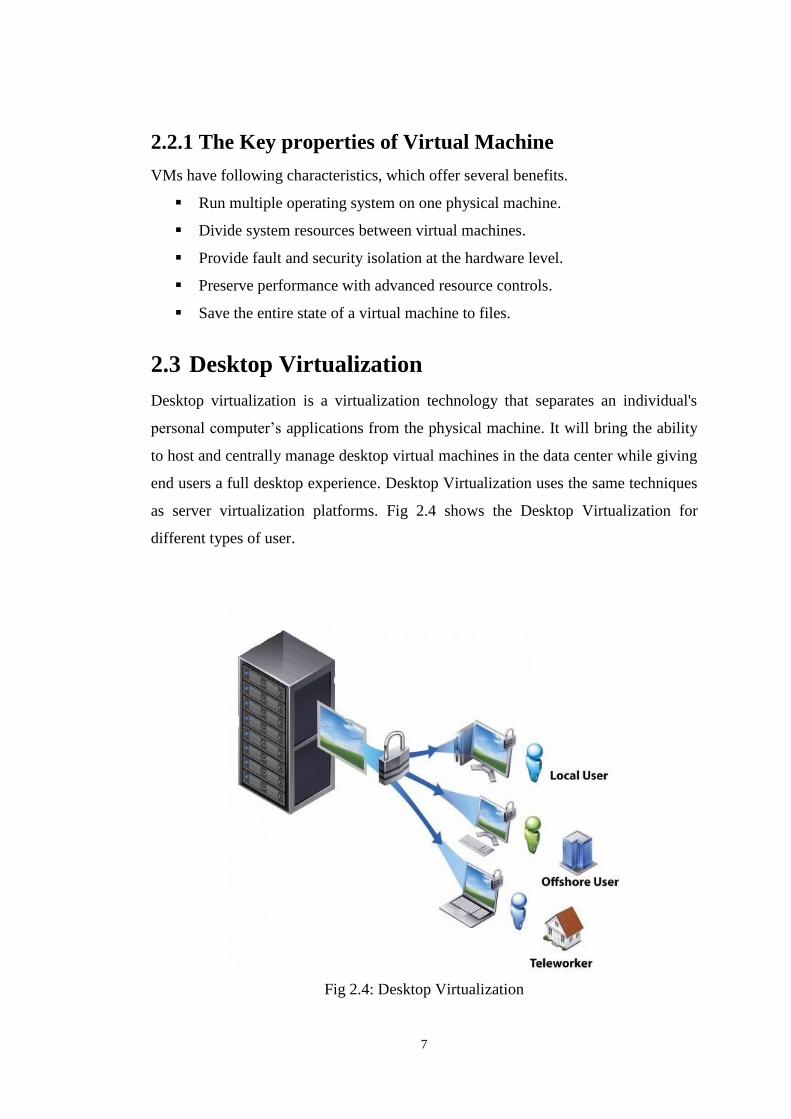
2.3 Desktop Virtualization
Desktop virtualization is a virtualization technology that separates an individual's
personal computer’s applications from the physical machine. It will bring the ability
to host and centrally manage desktop virtual machines in the data center while giving
end users a full desktop experience. Desktop Virtualization uses the same techniques
as server virtualization platforms. Fig 2.4 shows the Desktop Virtualization for
different types of user.
Fig 2.4: Desktop Virtualization
8
2.4 VDI Concept
Virtual Desktop Infrastructure (VDI) is the practice of hosting a desktop operating
system within a virtual machine (VM) running on a centralized server. It's a process
of running a user desktop inside a virtual machine that is hosted on a server in the
datacenter. It’s a powerful form of desktop virtualization because it enables fully
personalized desktops for each user with all the security and simplicity of centralized
management.
VDI enables customers to streamline management and costs by consolidating and
centralizing the desktops while delivering end-users mobility and the freedom to
access virtual desktops anytime, from anywhere, on any device. It’s important to
understand, however, that VDI is only one form of desktop virtualization [5].
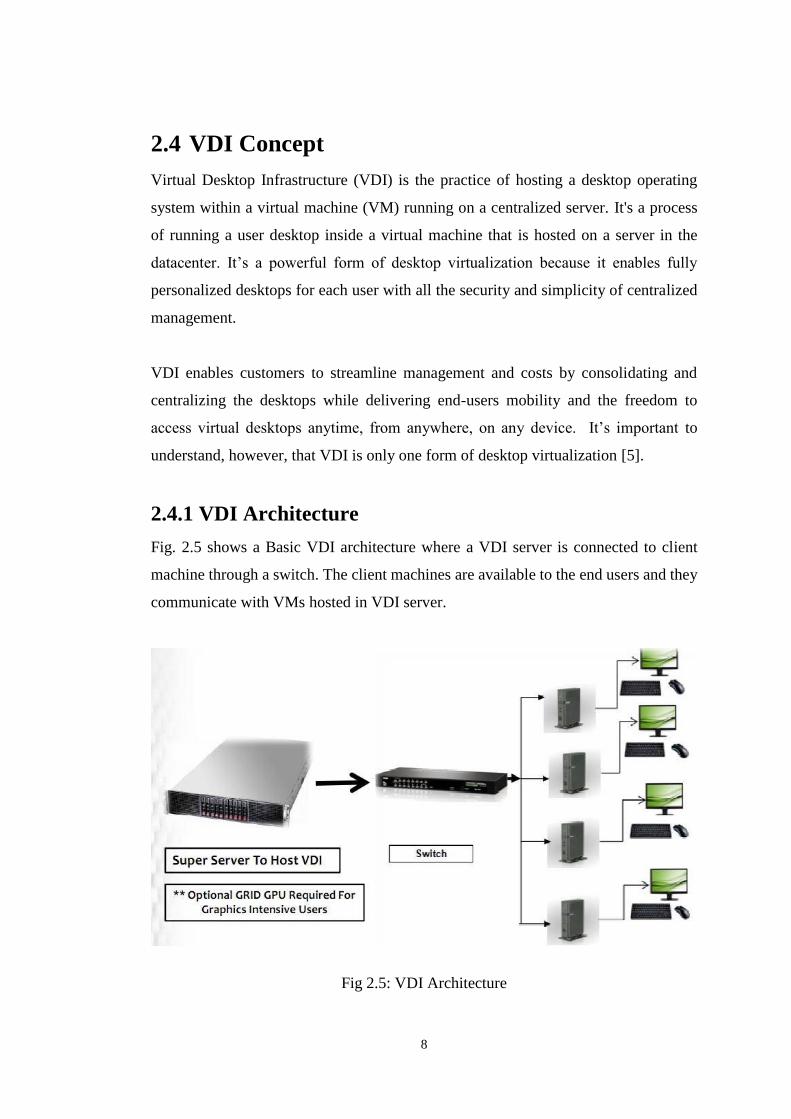
2.4.1 VDI Architecture
Fig. 2.5 shows a Basic VDI architecture where a VDI server is connected to client
machine through a switch. The client machines are available to the end users and they
communicate with VMs hosted in VDI server.
Fig 2.5: VDI Architecture
9
2.4.2 VDI Configuration
Desktop virtualization can be implemented by following steps:
Step-1: Installing VMware or any other Operating System on server.
Step-2: Creating Virtual Machine (VM) with desktop based OS on server
Step-3: Allowing Remote Desktop Protocol (RDP) on VM
Stpe-4: Installing Thin Client Operating System on Thin Client
Step-5: Establishing network connectivity to server and client
2.4.3 Benefits for Desktop Management
As more organizations move to the cloud, the way of handling IT resources or services
also changes. There are key benefits of VDI, including increased access to our network
users' desktops, improved data security, and less expended effort for troubleshooting.
Benefits of this type of infrastructure are described below [14].
▪ Use a smaller amount of bandwidth
One of the benefits of VDI is that it puts all information that ordinarily would be
on a user's computer on a server in a data center. Both time and money can be
saved by making the same data available to all users on the network.
▪ Reduce IT costs up to 30 percent
Updates and patches can be installed once rather than many times. There is only
one system to troubleshoot rather than several individual machines. This helps an
organization to allow its IT staff to focus on important issues instead of engaging
then in redundant work for every computer in the network.
▪ Users can access workstations anywhere
One of the most significant benefits of VDI is users can access their workstations
from all types of devices, from smart phones and iPads, to laptops and desktops
out of the office.
10
▪ Data is more secure
Data is better protected when stored on the server rather than on individual devices.
This helps the organization protect its data and reduce the chance of file corruption
by viruses.
▪ Assign information access according to an employee's security clearance
Users can be provided different levels of access depending on their security
clearance. This provides an organization the ability to establish more control
content and user activities.
▪ The graphics for VDI are better than before
The image quality for graphics and text is vastly superior to previous years. The
user experience for VDI has been greatly improved, and graphics acceleration can
also be added to further enhance the quality.
▪ Save power
If right procedures are put in place, data back can be done without the risk of losing
any files. This reduces costs and allows backups processes more robust, secure and
reliable.
2.4.4 VDI Limitations
▪ The initial cost of VDI hardware exceeds the cost of purchasing new desktops
for all the users of an entire company.
▪ Each approach has unique licensing costs.
▪ Client machine may perform slow because of hardware restriction
▪ VDI security problems are unique and require security management tailored to
its structure
11
CHAPTER 3
Thin Client Device
3.1 Thin Client Overview
A thin client is defined as a desktop appliance that does not contain any moving
component such as a hard drive, floppy drive, or CD-ROM, and executes applications
from a central server instead of a traditional desktop PC.
The concept of thin client is to all user applications on a central server. This allows all
applications to be deployed, managed, supported, and executed from a central location.
3.2 Thin Client Types
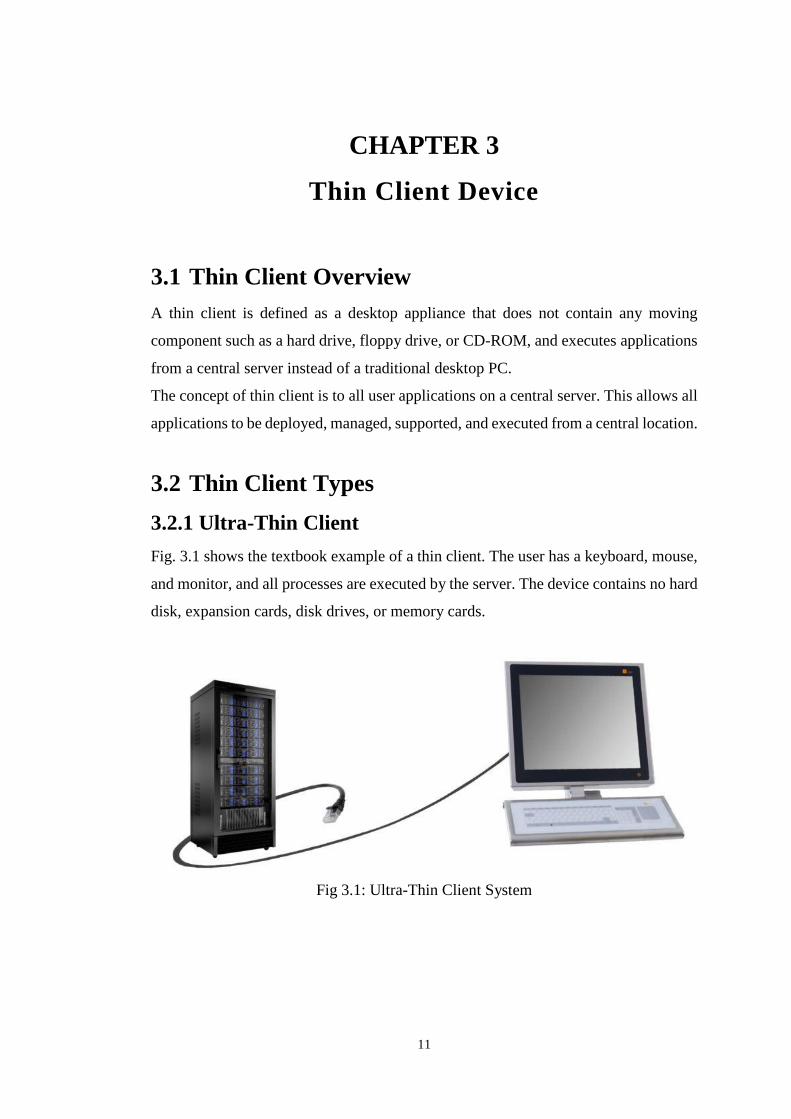
3.2.1 Ultra-Thin Client
Fig. 3.1 shows the textbook example of a thin client. The user has a keyboard, mouse,
and monitor, and all processes are executed by the server. The device contains no hard
disk, expansion cards, disk drives, or memory cards.
Fig 3.1: Ultra-Thin Client System
12
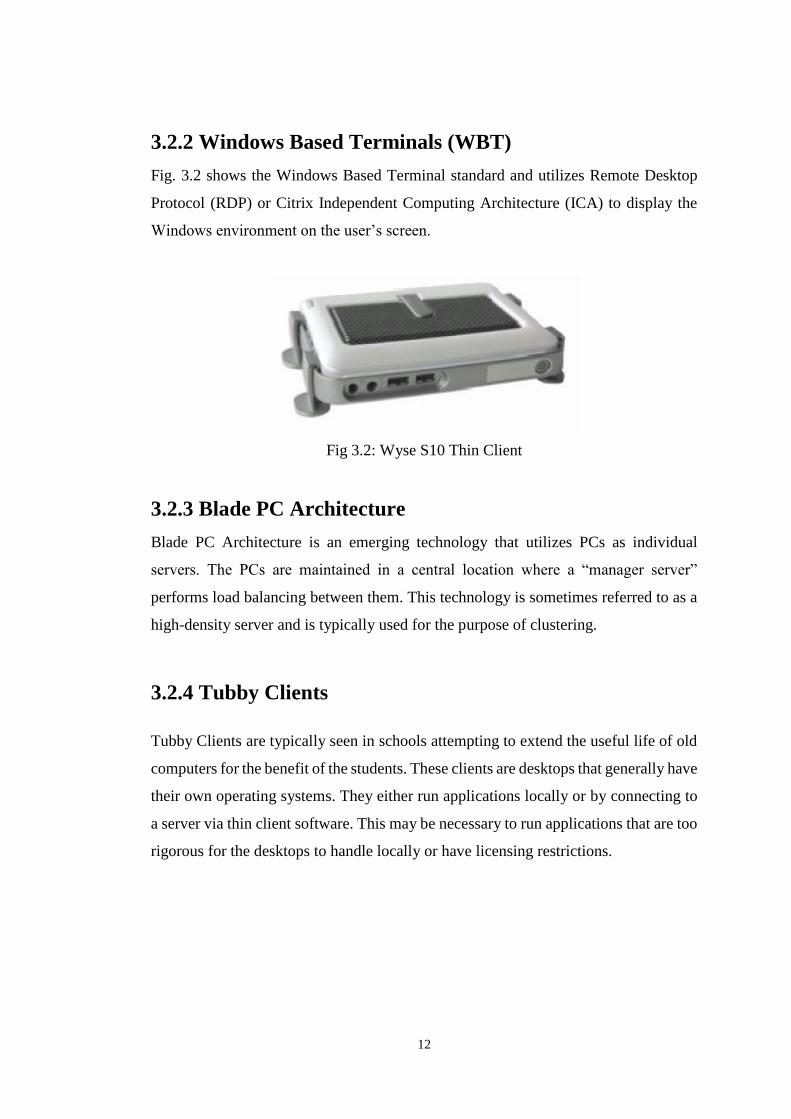
3.2.2 Windows Based Terminals (WBT)
Fig. 3.2 shows the Windows Based Terminal standard and utilizes Remote Desktop
Protocol (RDP) or Citrix Independent Computing Architecture (ICA) to display the
Windows environment on the user’s screen.
Fig 3.2: Wyse S10 Thin Client
3.2.3 Blade PC Architecture
Blade PC Architecture is an emerging technology that utilizes PCs as individual
servers. The PCs are maintained in a central location where a “manager server”
performs load balancing between them. This technology is sometimes referred to as a
high-density server and is typically used for the purpose of clustering.
3.2.4 Tubby Clients
Tubby Clients are typically seen in schools attempting to extend the useful life of old
computers for the benefit of the students. These clients are desktops that generally have
their own operating systems. They either run applications locally or by connecting to
a server via thin client software. This may be necessary to run applications that are too
rigorous for the desktops to handle locally or have licensing restrictions.
13
3.3 Available Thin Client Devices
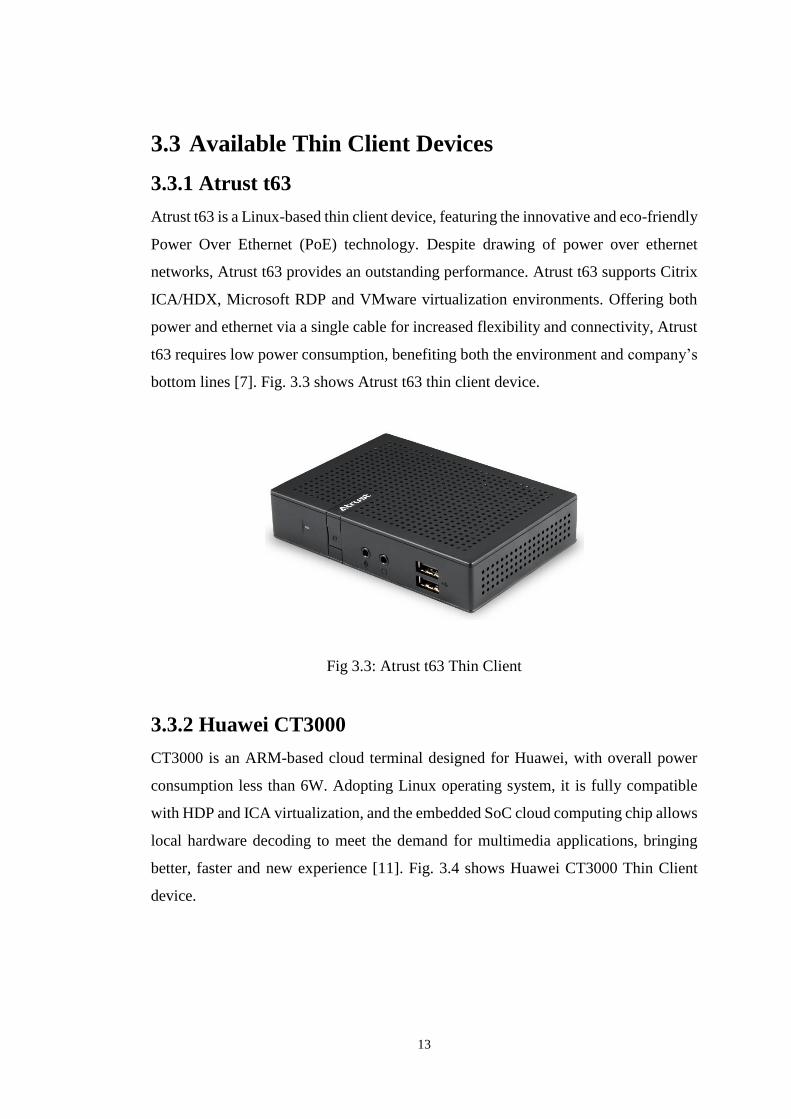
3.3.1 Atrust t63
Atrust t63 is a Linux-based thin client device, featuring the innovative and eco-friendly
Power Over Ethernet (PoE) technology. Despite drawing of power over ethernet
networks, Atrust t63 provides an outstanding performance. Atrust t63 supports Citrix
ICA/HDX, Microsoft RDP and VMware virtualization environments. Offering both
power and ethernet via a single cable for increased flexibility and connectivity, Atrust
t63 requires low power consumption, benefiting both the environment and company’s
bottom lines [7]. Fig. 3.3 shows Atrust t63 thin client device.
Fig 3.3: Atrust t63 Thin Client
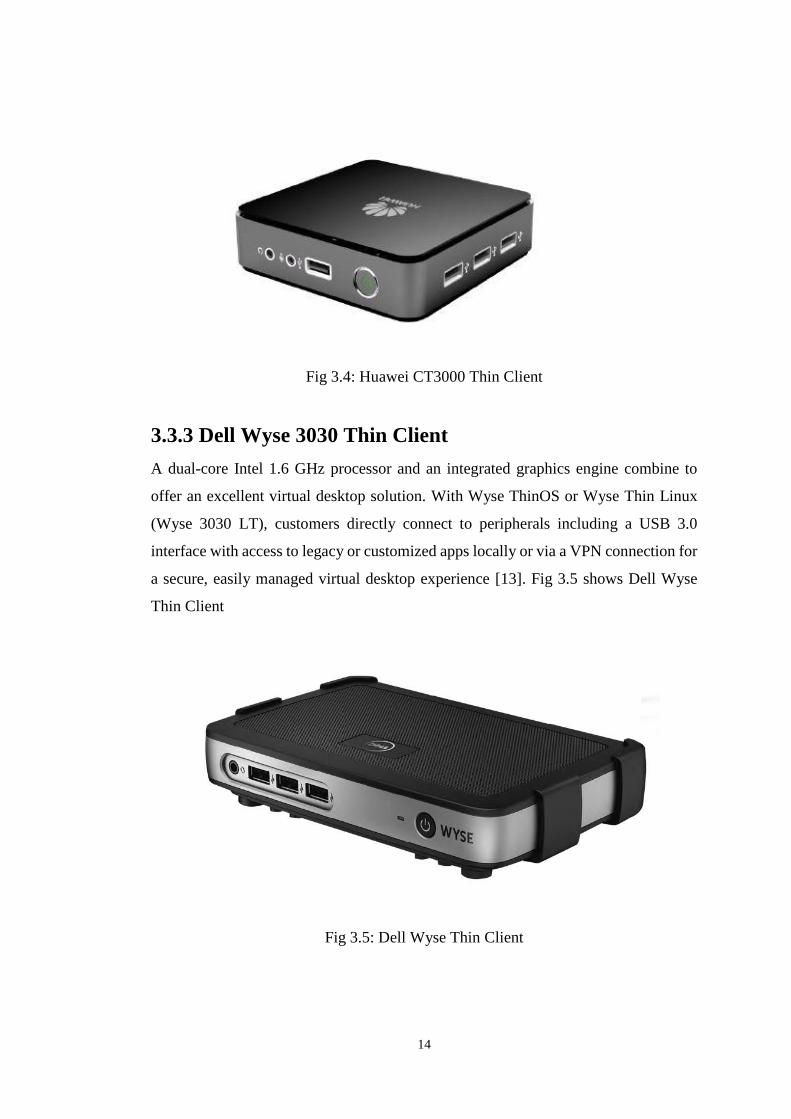
3.3.2 Huawei CT3000
CT3000 is an ARM-based cloud terminal designed for Huawei, with overall power
consumption less than 6W. Adopting Linux operating system, it is fully compatible
with HDP and ICA virtualization, and the embedded SoC cloud computing chip allows
local hardware decoding to meet the demand for multimedia applications, bringing
better, faster and new experience [11]. Fig. 3.4 shows Huawei CT3000 Thin Client
device.
14
Fig 3.4: Huawei CT3000 Thin Client
3.3.3 Dell Wyse 3030 Thin Client
A dual-core Intel 1.6 GHz processor and an integrated graphics engine combine to
offer an excellent virtual desktop solution. With Wyse ThinOS or Wyse Thin Linux
(Wyse 3030 LT), customers directly connect to peripherals including a USB 3.0
interface with access to legacy or customized apps locally or via a VPN connection for
a secure, easily managed virtual desktop experience [13]. Fig 3.5 shows Dell Wyse
Thin Client
Fig 3.5: Dell Wyse Thin Client
15
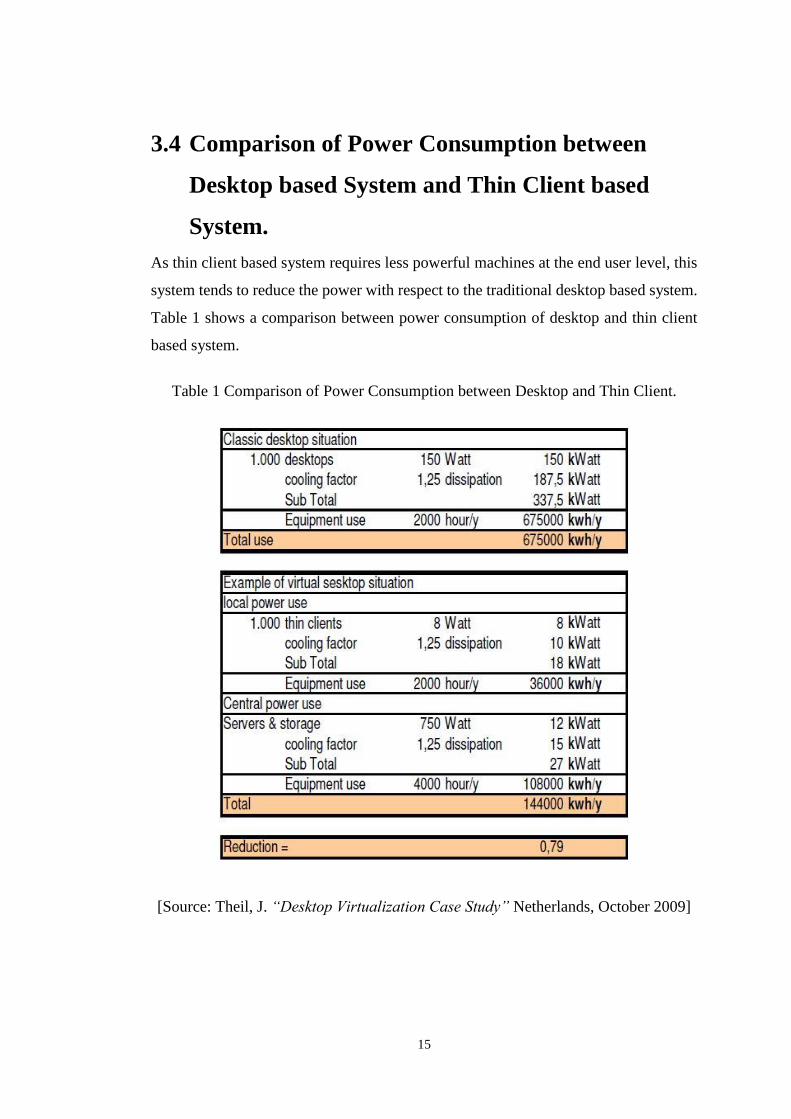
3.4 Comparison of Power Consumption between
Desktop based System and Thin Client based
System.
As thin client based system requires less powerful machines at the end user level, this
system tends to reduce the power with respect to the traditional desktop based system.
Table 1 shows a comparison between power consumption of desktop and thin client
based system.
Table 1 Comparison of Power Consumption between Desktop and Thin Client.
[Source: Theil, J. “Desktop Virtualization Case Study” Netherlands, October 2009]
16
CHAPTER 4
Raspberry Pi as Thin Client Device
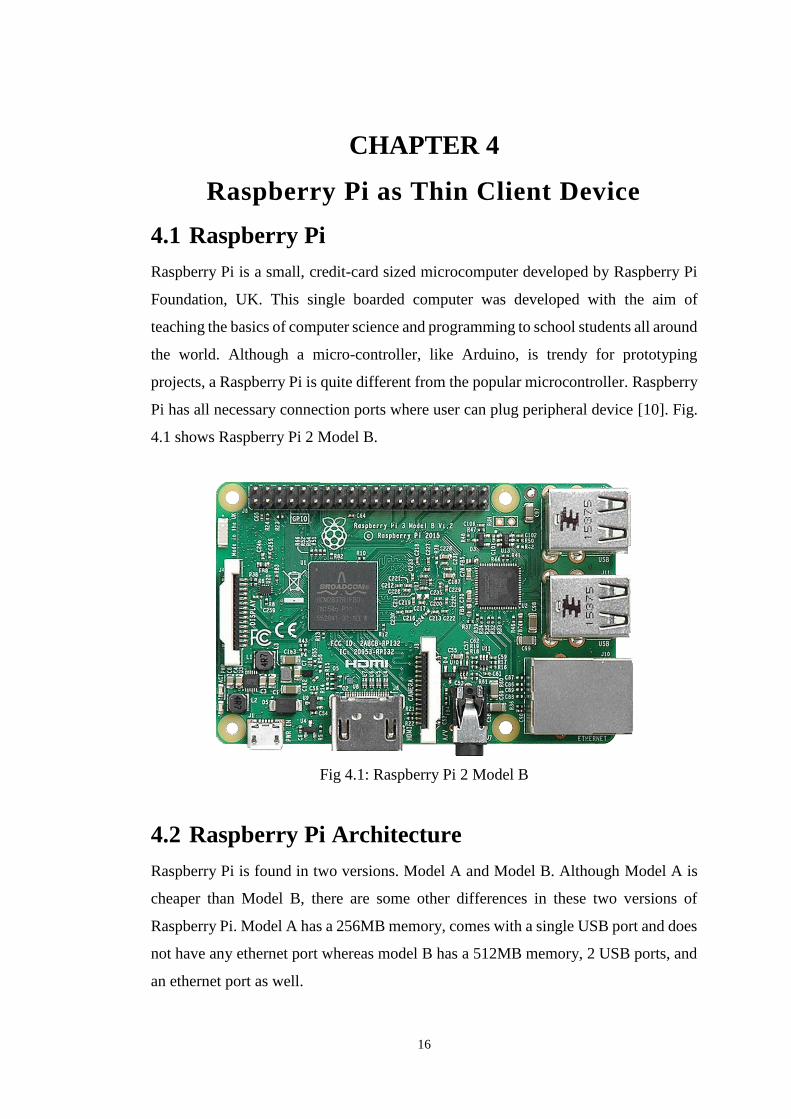
4.1 Raspberry Pi
Raspberry Pi is a small, credit-card sized microcomputer developed by Raspberry Pi
Foundation, UK. This single boarded computer was developed with the aim of
teaching the basics of computer science and programming to school students all around
the world. Although a micro-controller, like Arduino, is trendy for prototyping
projects, a Raspberry Pi is quite different from the popular microcontroller. Raspberry
Pi has all necessary connection ports where user can plug peripheral device [10]. Fig.
4.1 shows Raspberry Pi 2 Model B.
Fig 4.1: Raspberry Pi 2 Model B
4.2 Raspberry Pi Architecture
Raspberry Pi is found in two versions. Model A and Model B. Although Model A is
cheaper than Model B, there are some other differences in these two versions of
Raspberry Pi. Model A has a 256MB memory, comes with a single USB port and does
not have any ethernet port whereas model B has a 512MB memory, 2 USB ports, and
an ethernet port as well.
17
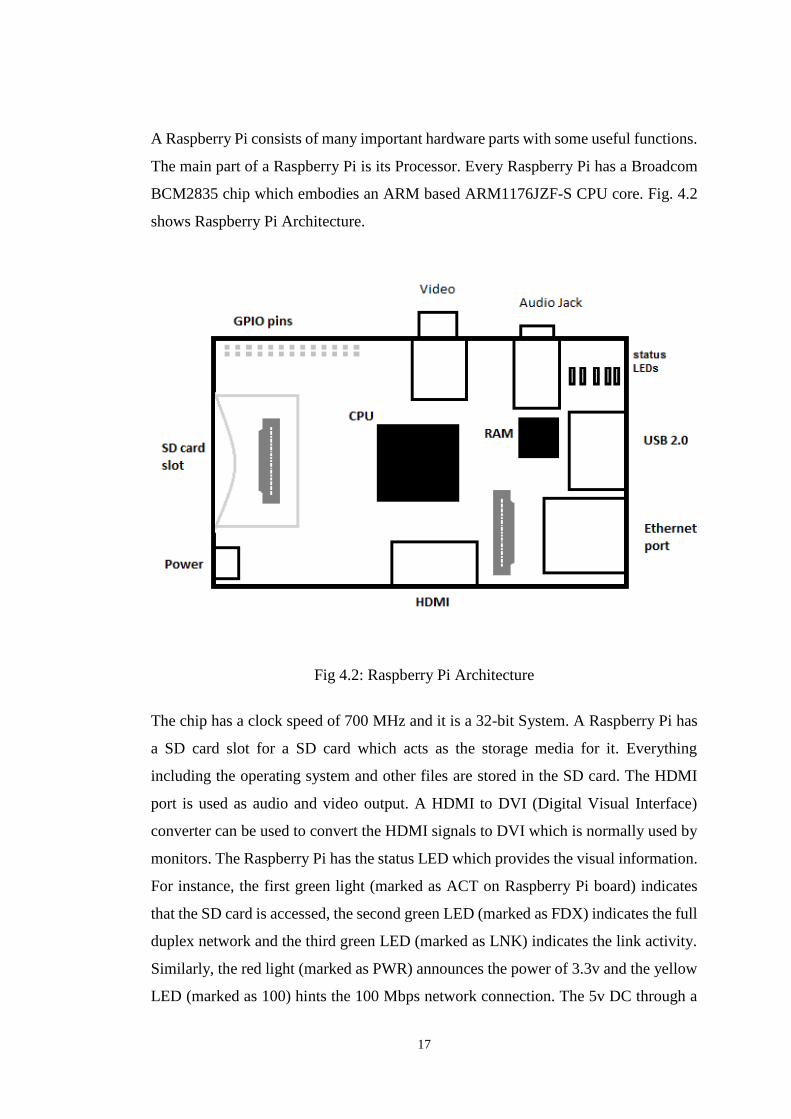
A Raspberry Pi consists of many important hardware parts with some useful functions.
The main part of a Raspberry Pi is its Processor. Every Raspberry Pi has a Broadcom
BCM2835 chip which embodies an ARM based ARM1176JZF-S CPU core. Fig. 4.2
shows Raspberry Pi Architecture.
Fig 4.2: Raspberry Pi Architecture
The chip has a clock speed of 700 MHz and it is a 32-bit System. A Raspberry Pi has
a SD card slot for a SD card which acts as the storage media for it. Everything
including the operating system and other files are stored in the SD card. The HDMI
port is used as audio and video output. A HDMI to DVI (Digital Visual Interface)
converter can be used to convert the HDMI signals to DVI which is normally used by
monitors. The Raspberry Pi has the status LED which provides the visual information.
For instance, the first green light (marked as ACT on Raspberry Pi board) indicates
that the SD card is accessed, the second green LED (marked as FDX) indicates the full
duplex network and the third green LED (marked as LNK) indicates the link activity.
Similarly, the red light (marked as PWR) announces the power of 3.3v and the yellow
LED (marked as 100) hints the 100 Mbps network connection. The 5v DC through a
18
micro USB powers up the Raspberry Pi. This device also has a RCA composite video
connector for video output as well as a 3.5mm stereo jack for audio output. The
Raspberry Pi has 26 GPIO pins which helps a user to connect to any low-level
peripherals and expansion boards.
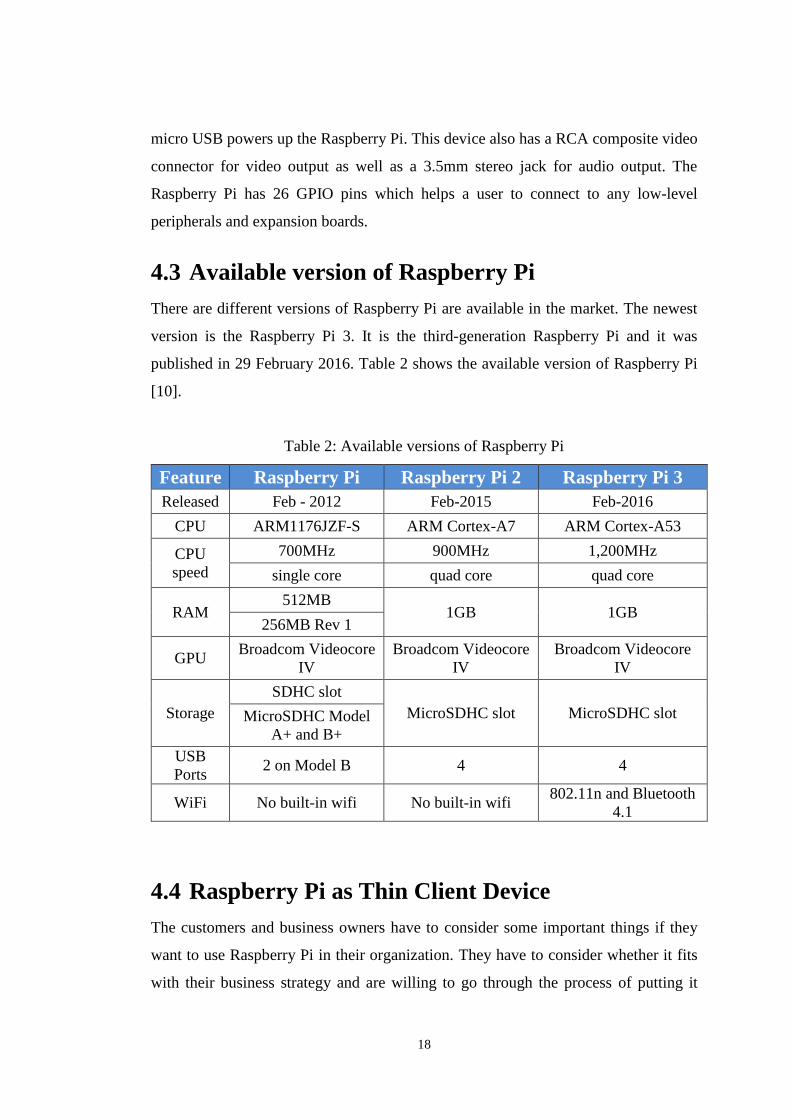
4.3 Available version of Raspberry Pi
There are different versions of Raspberry Pi are available in the market. The newest
version is the Raspberry Pi 3. It is the third-generation Raspberry Pi and it was
published in 29 February 2016. Table 2 shows the available version of Raspberry Pi
[10].
Table 2: Available versions of Raspberry Pi
Feature Raspberry Pi Raspberry Pi 2 Raspberry Pi 3
Released Feb - 2012 Feb-2015 Feb-2016
CPU ARM1176JZF-S ARM Cortex-A7 ARM Cortex-A53
CPU
speed
700MHz 900MHz 1,200MHz
single core quad core quad core
RAM 512MB
1GB 1GB 256MB Rev 1
GPU Broadcom Videocore
IV
Broadcom Videocore
IV
Broadcom Videocore
IV
Storage
SDHC slot
MicroSDHC slot MicroSDHC slot MicroSDHC Model
A+ and B+
USB
Ports 2 on Model B 4 4
WiFi No built-in wifi No built-in wifi 802.11n and Bluetooth
4.1
4.4 Raspberry Pi as Thin Client Device
The customers and business owners have to consider some important things if they
want to use Raspberry Pi in their organization. They have to consider whether it fits
with their business strategy and are willing to go through the process of putting it
19
together and tailoring the product to their own needs. There are several features of
using Raspberry Pi as a thing client device [15]:
• The price of a Raspberry Pie is comparatively low compared to the other
produces available in the market.
• This microcomputer is useful for small or home-based businesses that run on a
smaller budget than bigger companies which does not required to purchase any
special license from the Raspberry Pi Foundation to use their product or if any
new technology that embeds the product. Small business owners can use it to
automate any small task, such as using the Pi to run a website (as long as it
does not have a lot of traffic), or use it as a small database and media server.
Businesses can also save money on buying cooling systems that are required
to cool servers.
• Raspberry Pi does not require the user to have extensive programming
experience since it is aimed for the winger generation to learn about
programming.
• Raspberry Pi also gives a lot of room to experiment. The SD cards on the board
can be easily switched, which allows used to change the functions of the device
without spending a lot of time reinstalling the software.
• Raspberry Pi is perfect for adaptive technology: it is able to display images or
play videos at 1080p high definition resolution for building systems such as
digital jukeboxes or prototyping embedded systems. It is possible to build
complex and effective products at a cheaper price.
• Raspberry Pi is energy efficient and provides a greener ethical alternative to
small businesses. This small credit card sized product makes it easy to recycle
and does not release as much carbon dioxide emissions into the environment,
unlike big servers that require lots of energy and extensive cooling systems.
20
CHAPTER 5
Client-Server Operating Systems
5.1 Thin Client Operating System
The computer desktop is a standalone computer processing unit. It is designed to
perform automation tasks for people. A desktop computer is unique because it does
not require any networks or external components to operate. The client operating
system is the operating system for computer desktops or portable devices. Thin clients
run an operating system locally and carry flash memory rather than a hard disk. This
operating system is typically different from centralized servers because it only
supports one user [16].
Smart phones and small computer devices contain a client operating system. This
operating system manages the components of the device, including printers, monitors,
and cameras. Each computer typically has a specific operating system.
5.2 Different Types of Thin Client Operating System
5.2.1 Atrust OS
Atrust OS is a thin client operating system made for remote or virtual desktop
infrastructure and designed to be secure, easy to use and centrally manageable. This
flexible, Linux-based OS offers abundant remote and virtual desktop solutions that can
meet most IT environment demands. Atrust OS embedded devices are made to work
with Microsoft Remote Desktop, VMware Horizon View, Citrix XenApp or
XenDesktop. Atrust OS is enterprise-ready operating system to support enterprise
needs including smartcard and wireless WPA Enterprise. Atrust OS embedded thin
clients can be managed with Atrust Device Manager (ADM). ADM enables the remote
visibility, control and management of Atrust OS thin clients wherever they are placed.
Customers can enjoy the benefit of auto-setup, configuration and central management
which also lower the total cost of ownership and help organization to optimize the IT
investment [7].
21
5.2.1.1 Atrust features
▪ Linux-bases Operating System
▪ Microsoft RDP, Citrix HDX
▪ VMware Horizon View
▪ Security
▪ Fast boot
▪ Easy Management
5.2.2 Windows Thin PC
Windows Thin PC (WinTPC) is a produce of Microsoft. It provides a low footprint,
locked down version of Windows 7 that enables organizations to repurpose existing
PCs as thin clients, thereby reducing the need for new thin client hardware. And since
these PCs retain their existing SA coverage, they do not need any additional Windows
Virtual Desktop Access (VDA) licensing for VDI. WinTPC offers an excellent thin
client experience by locking down the PC through write filters, while still providing
users with a superior remote desktop experience through Remote FXTM support. IT
can deploy and manage WinTP image to multiple PCs using System Center
Configuration Manager (SCCM), and push updates to these PCs using Windows
Update or Windows Server Update Services (WSUS). Additionally, Win- TPC
leverages Windows Enterprise features such as BitLocker and App Locker TM to
further secure the endpoint [8].
5.2.2.1 Hardware Requirement of WinTPC
WinTPC is a locked down version of Windows 7, and hence, will be able to run on
any device capable of running Windows 7. There commended specifications for
running Windows Thin PC are:
▪ 1 GHz or faster 32-bit (x86) processor
▪ 1 GB RAM, 16 GB available hard disk space
▪ DirectX 9 graphics device with Windows Display Driver Manager
▪ Bootable DVD-ROM drive
22
5.3 Arch Linux ARM
Arch Linux ARM is an ARM based Linux distribution ported from the x86 based
Linux distribution Arch Linux. The Arch Linux philosophy is that users should be in
total control over the operating system, which allows the users to implement it in any
way they like. Therefore, Arch Linux can be used for simple tasks and as well as more
advanced cases. Arch Linux ARM is based directly on Arch Linux and they share
almost all the code which makes Arch Linux ARM a very fast, Unix-like and flexible
Linux distribution.
Arch Linux ARM has adapted the rolling-release update function from the x86-
version. This means that small iteration is made available to the users as soon as they
are ready, instead of the re-leasing larger updates every few months [9].
5.3.1 Arch Linux as a Thin Client OS
Arch Linux is a completely independent distribution where its main principle is to
“Keep IT Short, Simple”. There is no extra package pre-installed, users can install
packages according to their needs.
Arch Linux has the largest software library called “Arch User Repository (AUR)”.
AUR has “Voting System” where users can vote for packages. Most popular packages,
elected by users, are then available in “Arch Official Repository (AOR)”.
Because of being a “Rolling Release Distribution”, once a package is installed, it will
be automatically updated whenever the new version becomes available. Users also get
the latest Kernel update as soon as it is released where users of other Linux
Distributions have to wait for few months.
Another Advantage of Arch Linux is Arch Wiki. It has the biggest and the richest
collection of tutorials and/or documentations. One can also get help from the Arch
Community whenever one faces any problem.
23
The most important thing is that Arch Linux’s users have the full administrative power
over their machines. As there is no “Give and Take” of information, there is no chance
of information leaking.
5.4 VDI Operating System
5.4.1 Citrix Xen Server
Citrix XenServer is a leading virtualization management platform optimized for
application, desktop and server virtualization infrastructures. Consolidation and
containment of workloads on XenServer enables organizations of any vertical or size
to transform their business IT compute infrastructures [6].
The key usages of the Citrix Xen Server are as follows:
▪ Optimization of experience for XenApp and XenDesktop
▪ Consolidation and containing data center service
▪ Delivering high-performance
5.4.2 Microsoft Hyper-V Server
Microsoft Hyper-V Server 2016 is a stand-alone product that contains only the
Windows hypervisor, a Windows Server driver model, and virtualization components.
It provides a simple and reliable virtualization solution to help an organization to
improve server utilization and reduce costs.
The Windows hypervisor technology in Microsoft Hyper-V Server 2016 is the same
as what's in the Hyper-V role on Windows Server 2016. So, much of the content
available for the Hyper-V role on Windows Server 2016 also applies to Microsoft
Hyper-V Server 2016 [8].
24
CHAPTER 6
Project Design and Implementation
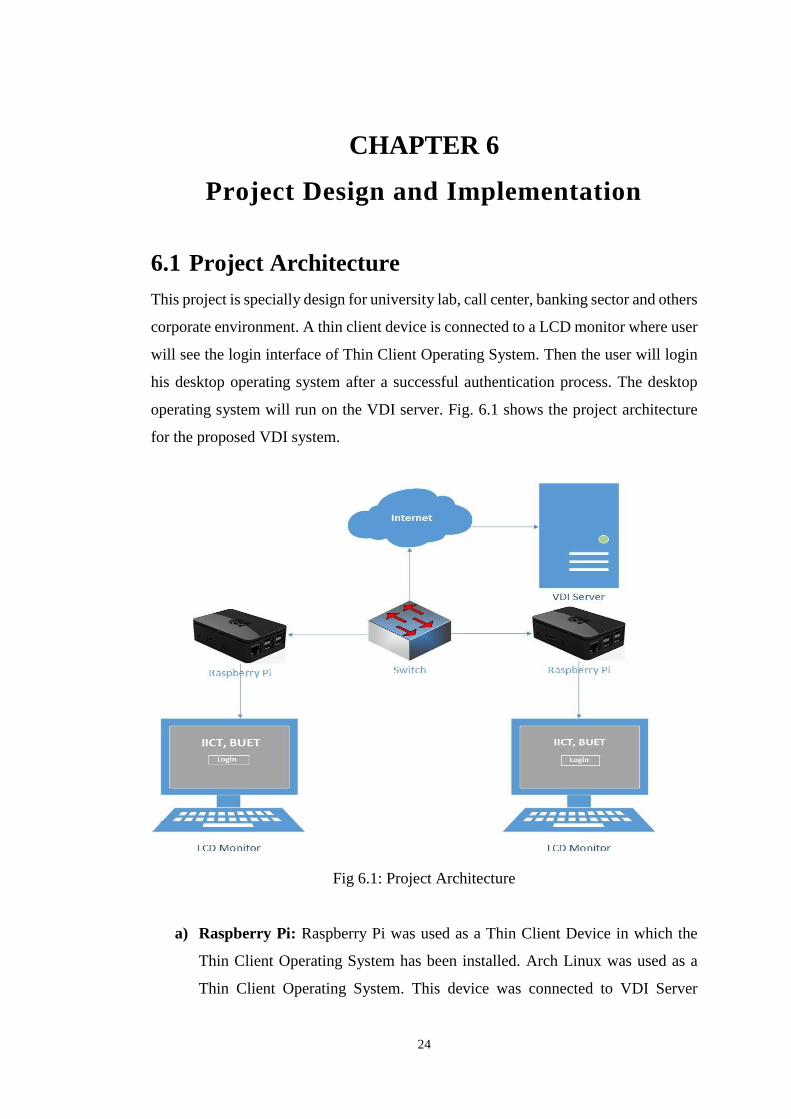
6.1 Project Architecture
This project is specially design for university lab, call center, banking sector and others
corporate environment. A thin client device is connected to a LCD monitor where user
will see the login interface of Thin Client Operating System. Then the user will login
his desktop operating system after a successful authentication process. The desktop
operating system will run on the VDI server. Fig. 6.1 shows the project architecture
for the proposed VDI system.
Fig 6.1: Project Architecture
a) Raspberry Pi: Raspberry Pi was used as a Thin Client Device in which the
Thin Client Operating System has been installed. Arch Linux was used as a
Thin Client Operating System. This device was connected to VDI Server
25
through a Switch. And it was also connected to a LCD monitor through a
HDMI Cable.
b) VDI Server: This server was used for making VDI system where a VDI
Operating System was installed in physical server. Citrix XenServer was
selected as the VDI operating System.
c) Switch: This device was used for network connectivity between VDI server
and Raspberry Pi.
d) Internet: Thin Client devices were connected to the Internet through a switch
whereas the VDI Server was also connected to the Internet.
e) LCD Monitor: A LCD monitor was used for showing Graphical User
Interface (GUI) and interacting with user.
6.2 Arch Linux on Raspberry Pi
6.2.1 Installing Arch Linux on Raspberry Pi
To install Arch Linux on Raspberry Pi following procedure was followed:
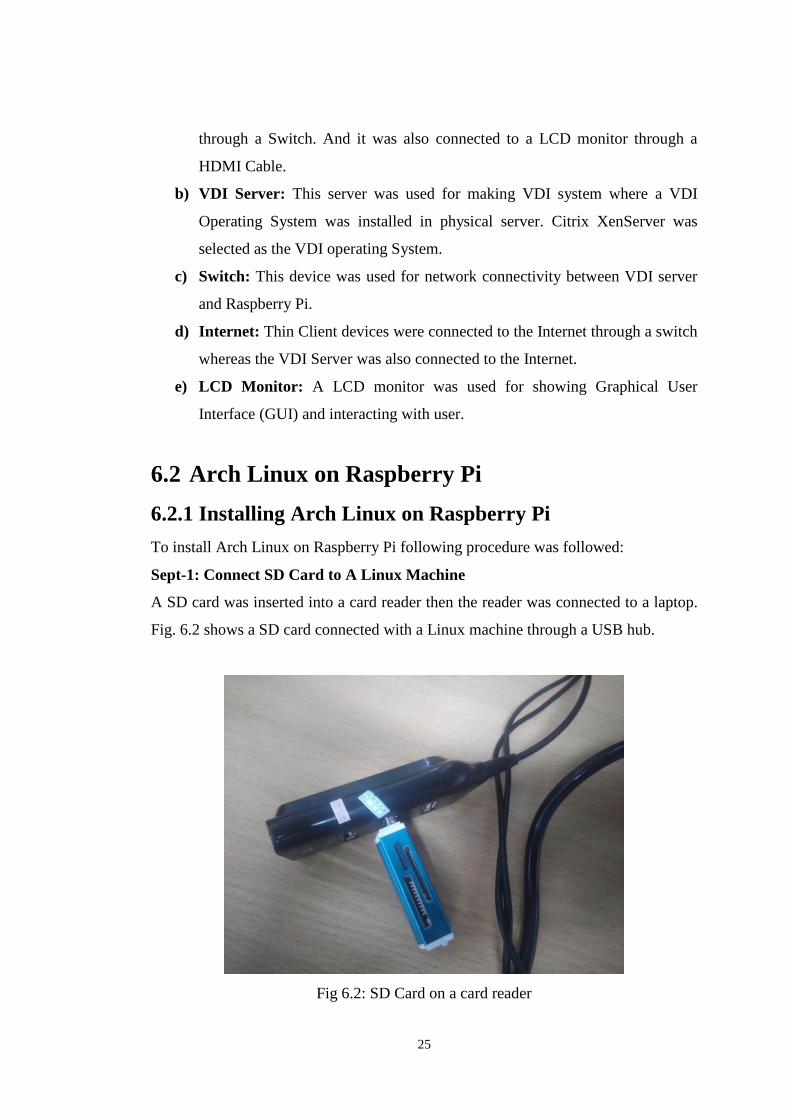
Sept-1: Connect SD Card to A Linux Machine
A SD card was inserted into a card reader then the reader was connected to a laptop.
Fig. 6.2 shows a SD card connected with a Linux machine through a USB hub.
Fig 6.2: SD Card on a card reader
26
Step-2: Partition Disk the SD Card
[root@archie~] # fdisk /dev/sdA
Step-3: Create and mount the FAT filesystem
[root@archie~] #mkfs.vfat /dev/sdA1
[root@archie~] #mkdir boot
Step-4: Create and mount the ext4 filesystem
[root@archie~] # mkfs.ext4 /dev/sdA2
[root@archie~] # mkdir root
[root@archie~] # mount /dev/sdA2 root
Step-5: Install Arch Linux on SD Card
[root@archie~] # wget http://os.archlinuxarm.org/os/ArchLinuxARM-rpi-2-
latest.tar.gz
[root@archie~] # bsdtar -xpf ArchLinuxARM-rpi-2-latest.tar.gz -C root
[root@archie~] # sync
Step-6: Move boot files to the first partition
[root@archie~] # mv root/boot/* boot
Step-7: Unmount the two partitions
[root@archie~] # umount boot root
27
6.2.2 Configuring Arch Linux on Raspberry Pi
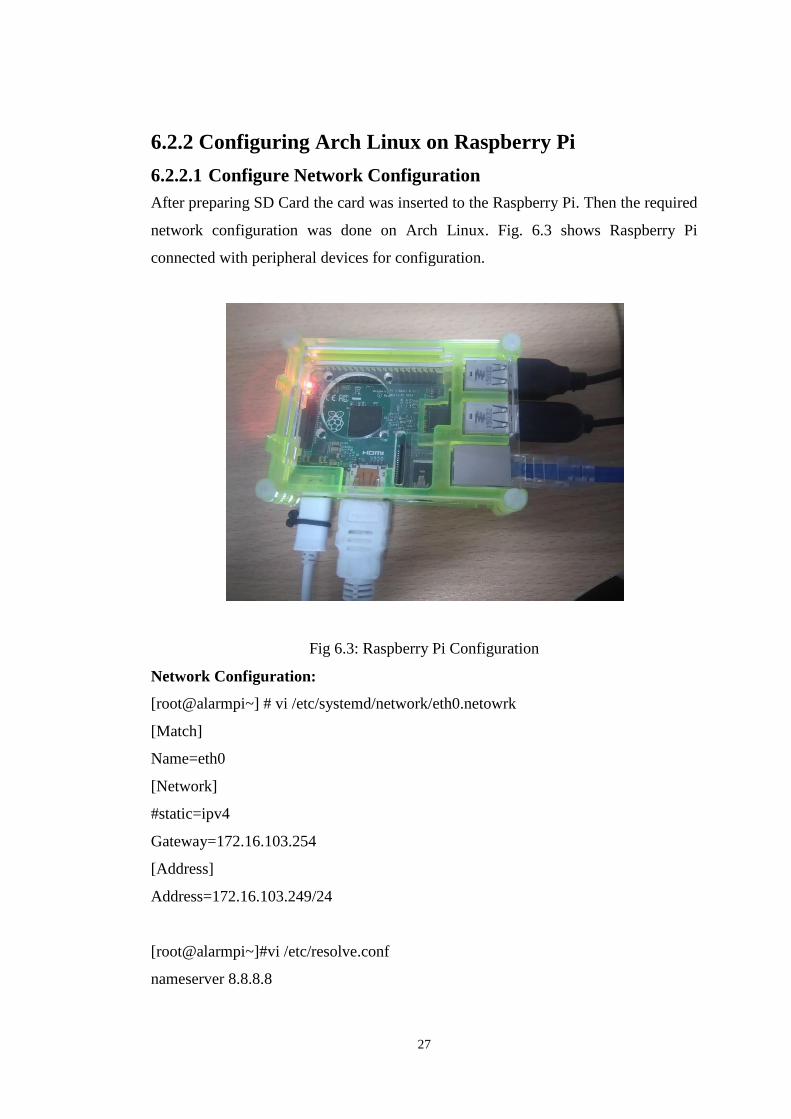
6.2.2.1 Configure Network Configuration
After preparing SD Card the card was inserted to the Raspberry Pi. Then the required
network configuration was done on Arch Linux. Fig. 6.3 shows Raspberry Pi
connected with peripheral devices for configuration.
Fig 6.3: Raspberry Pi Configuration
Network Configuration:
[root@alarmpi~] # vi /etc/systemd/network/eth0.netowrk
[Match]
Name=eth0
[Network]
#static=ipv4
Gateway=172.16.103.254
[Address]
Address=172.16.103.249/24
[root@alarmpi~]#vi /etc/resolve.conf
nameserver 8.8.8.8
28
6.2.2.2 Synchronize and Update Arch Linux
After connecting to the Internet, the first task was to synchronize and update Operating
System. In this case, pacman (package manager) which is one of the major
distinguishing features of Arch Linux was used. The following command has used to
synchronize and update Arch Linux:
[root@alarmpi~]#pacman –Syu
6.2.2.3 Install Remote Desktop Protocol (RDP)
Remote Desktop is a free, open source client for Microsoft's proprietary RDP protocol
released under the General Public License (GNU). freerdp package was used to
connect to Windows 200 0/XP/Vista/Win7/Win10/WinServer2008/2012 RDP server
to remotely administrate the Windows box. The following command was used to
install RDP:
[root@alarmpi~]#pacman -S freerdp
6.2.2.4 Install Window Manager in Arch Linux
A window manager (WM) is system software that controls the placement and
appearance of windows within a windowing system in a Graphical User Interface
(GUI). It can be part of a Desktop Environment (DE) or be used standalone. Prior to
installing a window manager, a functional X server installation is required. For
creating a light-weight Desktop Environment some packages were required that are
discussed below [17]. The following command was used to install Window Manager
in Arch Linux.
[root@alarmpi~]# pacman -S dwm Xorg Xorg-xinit nodejs npm
DWM: DWM is a Dynamic Window Manager for X. It manages windows in tiled,
monocle and floating layouts. All of the layouts can be applied dynamically,
optimizing the environment for the application in use and the task performed.
29
X-Org: The X-Org project provides an open source implementation of the X Window
System. The development work is being done in conjunction with the freedesktop.org
community. X-Org is the most popular display server among Linux users.
Xinit: Xinit is mainly used to execute desktop environments, window managers and
other programs when starting the X server. The xinitrc file is a shell script read by
xinit and by its front-end startx. The xinit program starts the X Window System server
and works as first client program on systems that are not using a display manager.
Node.js: It’s a javascript runtime environment combined with useful libraries. It uses
Google's V8 engine to execute code outside of the browser.
NPM: NPM is the package manager for JavaScript and the world’s largest software
registry. Discover packages of reusable code and assemble them in powerful new
ways.
6.2.2.5 Configure and Initialize Startup Service
After creating desktop environment startup service was configured and initialized. The
service will run after booting up the system.
Configuration of Startup Service:
cd /home/archi
vi .xinitrc
dwm&
./startnode
Initialization of Startup Service:
cd /home/archi
vi startnode
cd vidrb
npm start
30
6.2.2.6 Set Virtual Machine IP Address on Arch Linux
An IP address was required set on the system to connect to the Virtual Machine. This
IP address is the IP Address of Virtual Machine hosted on the server. This address is
placed on Arch Linux home directory.
Setting up of IP Address:
cd /home/archi
vi ip.json
{
"ip": "172.16.103.1"
}
6.3 Citrix Xen Server Installation and Configuration
For the XenServer installation The XenServer ISO image was burned onto a DVD.
The ISO was downloaded from http://www.citrix.com/xenserver/download. The
following step was followed for Xen Server Installation and Configuration.
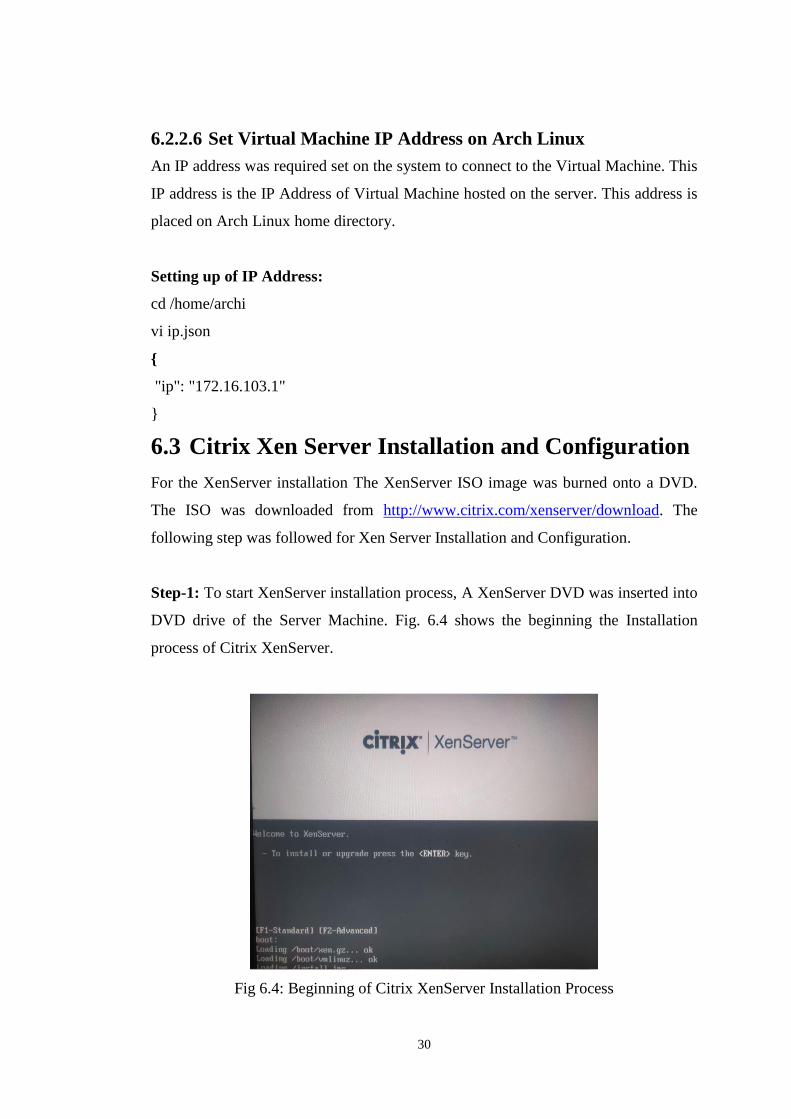
Step-1: To start XenServer installation process, A XenServer DVD was inserted into
DVD drive of the Server Machine. Fig. 6.4 shows the beginning the Installation
process of Citrix XenServer.
Fig 6.4: Beginning of Citrix XenServer Installation Process
31
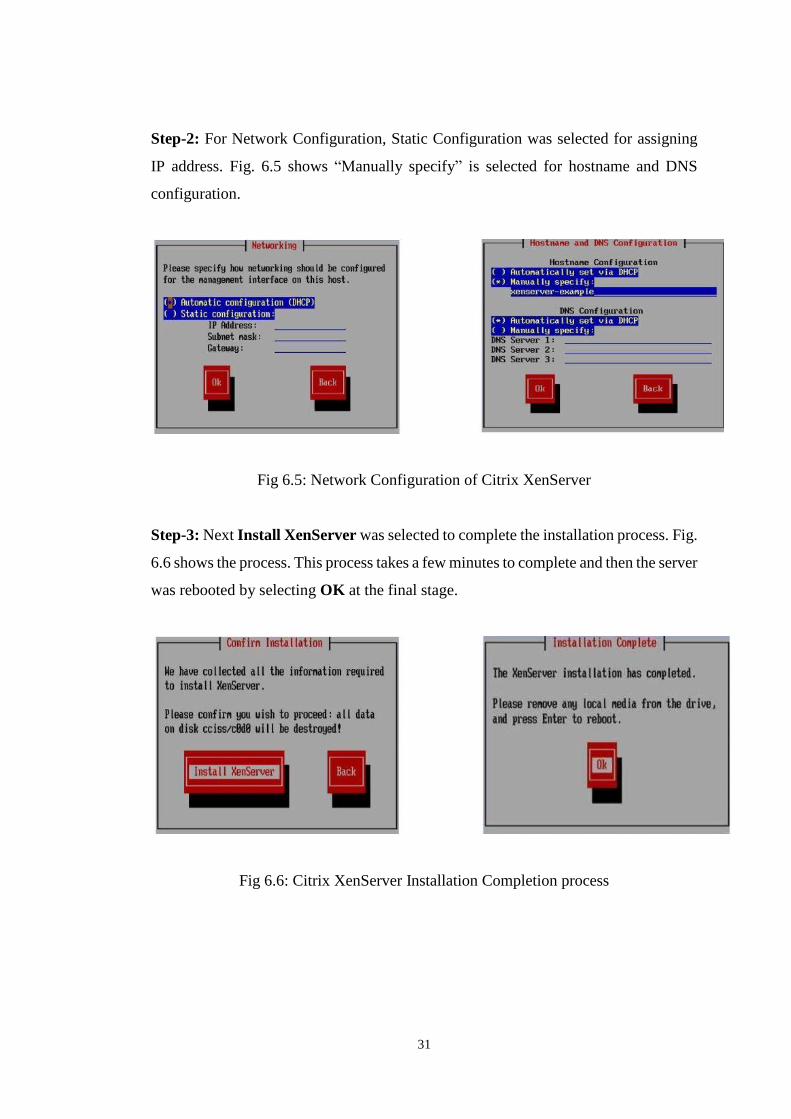
Step-2: For Network Configuration, Static Configuration was selected for assigning
IP address. Fig. 6.5 shows “Manually specify” is selected for hostname and DNS
configuration.
Fig 6.5: Network Configuration of Citrix XenServer
Step-3: Next Install XenServer was selected to complete the installation process. Fig.
6.6 shows the process. This process takes a few minutes to complete and then the server
was rebooted by selecting OK at the final stage.
Fig 6.6: Citrix XenServer Installation Completion process
32
Step-4: For Accessing XenServer, XenCenter installation was required. XenCenter is
the management console for XenServer. Using XenCenter, virtual machines can be
started, stopped, migrated, created, copied and backed up. XenCenter can be installed
on any PC running Windows XP or later. To install XenCenter, IP address of Xen
Server was placed and entered in the address bar of a browser. Fig. 6.7 shows the
downloading process of XenCenter.
Fig 6.7: Download Citrix XenCenter
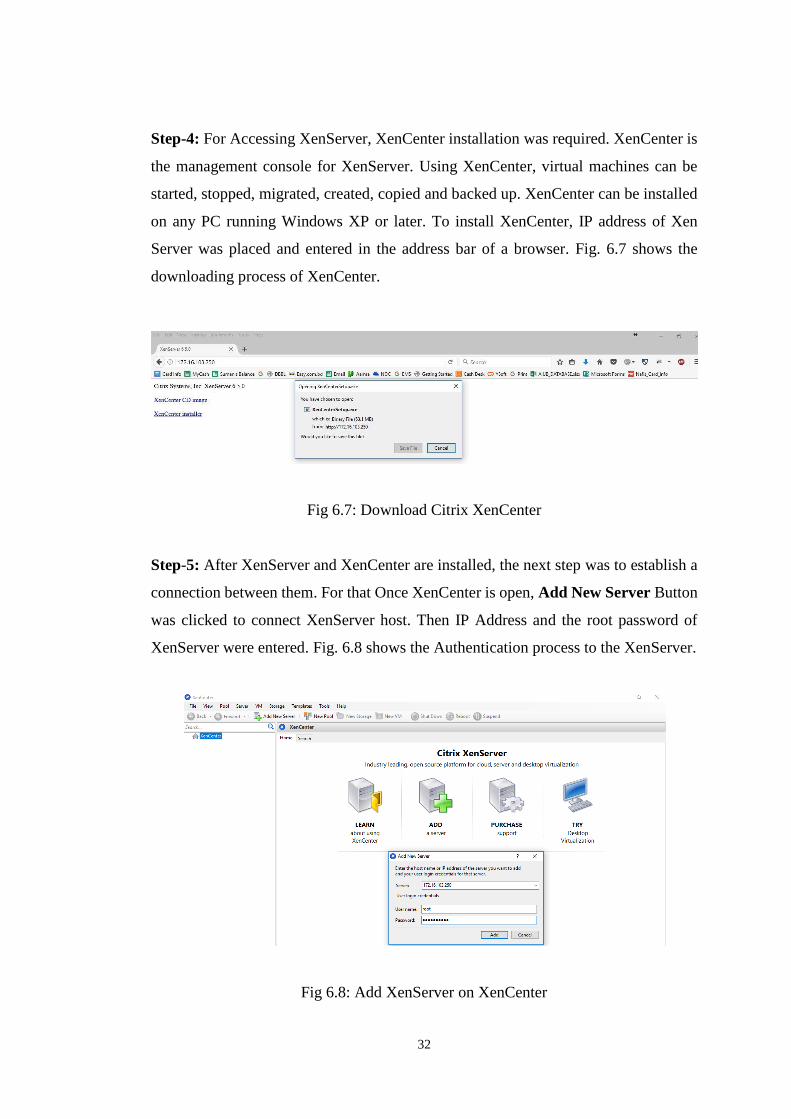
Step-5: After XenServer and XenCenter are installed, the next step was to establish a
connection between them. For that Once XenCenter is open, Add New Server Button
was clicked to connect XenServer host. Then IP Address and the root password of
XenServer were entered. Fig. 6.8 shows the Authentication process to the XenServer.
Fig 6.8: Add XenServer on XenCenter
33
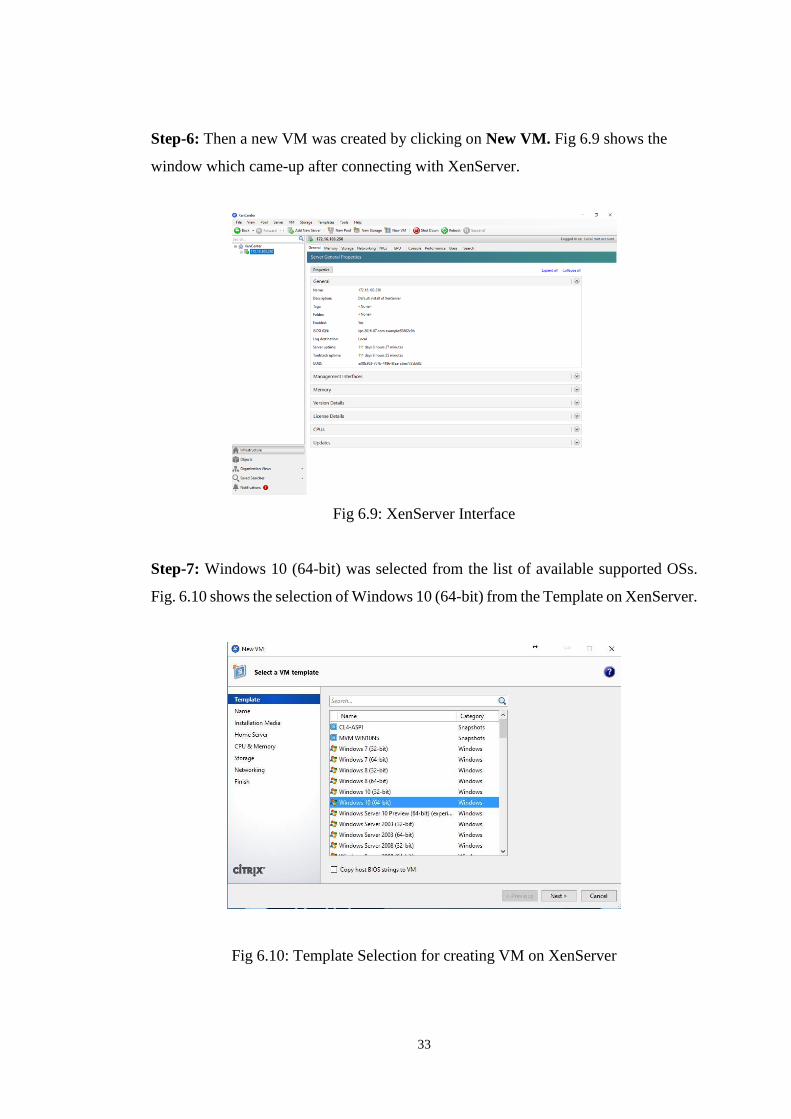
Step-6: Then a new VM was created by clicking on New VM. Fig 6.9 shows the
window which came-up after connecting with XenServer.
Fig 6.9: XenServer Interface
Step-7: Windows 10 (64-bit) was selected from the list of available supported OSs.
Fig. 6.10 shows the selection of Windows 10 (64-bit) from the Template on XenServer.
Fig 6.10: Template Selection for creating VM on XenServer

34
Step-8: Next the Windows 10 ISO was selected which is to be used as VM Operating
System. Fig 6.11 shows the Windows 10 Education version of ISO is selected.
Fig 6.11 Operating System selection for creating VM on XenServer
Step-9: Next the storage of the VM was set. Fig. 6.12 shows 100GB Storage is
assigned on Virtual Machine.
Fig 6.12: Storage assigned on Virtual Machine
35
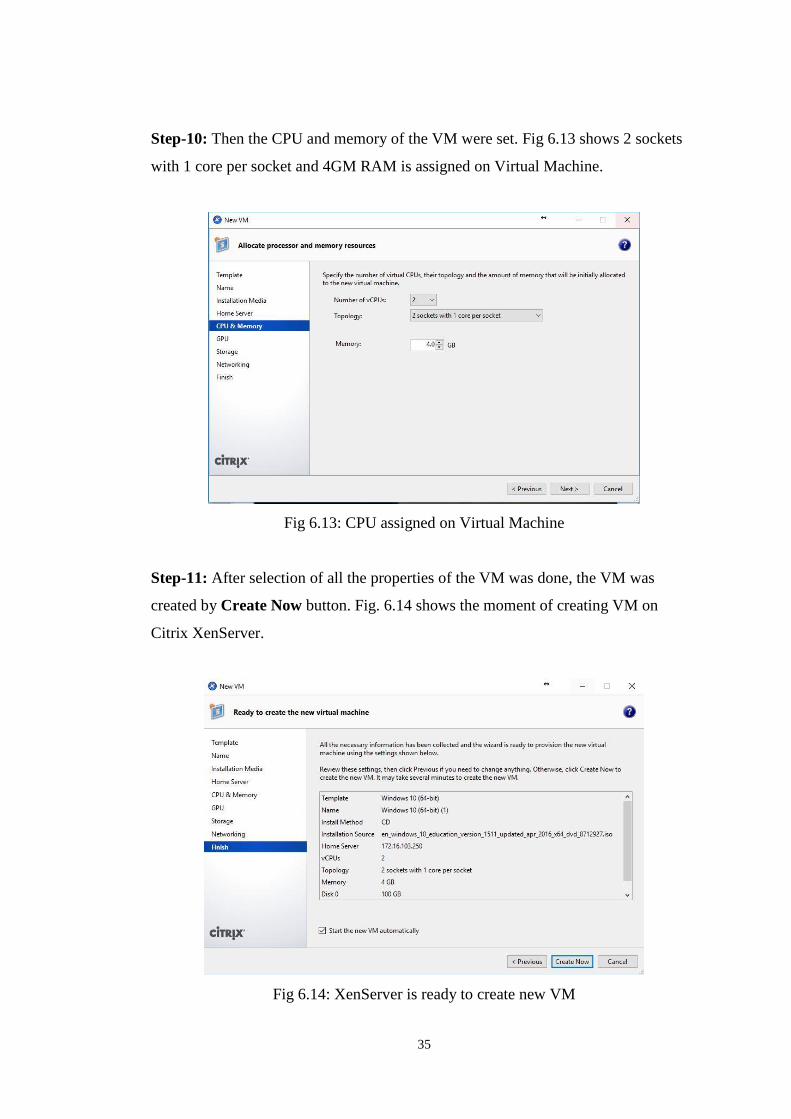
Step-10: Then the CPU and memory of the VM were set. Fig 6.13 shows 2 sockets
with 1 core per socket and 4GM RAM is assigned on Virtual Machine.
Fig 6.13: CPU assigned on Virtual Machine
Step-11: After selection of all the properties of the VM was done, the VM was
created by Create Now button. Fig. 6.14 shows the moment of creating VM on
Citrix XenServer.
Fig 6.14: XenServer is ready to create new VM
36
6.4 Development of User Interface
6.4.1 Development Procedure
The User Interface was developed by using HTML, CSS and ClojureScript. HTML
and CSS were used for developing basic design of Interface. ClojureScript was used
for main deployment with an authentication process and functionality of Shutdown
and Restart button of user interface.
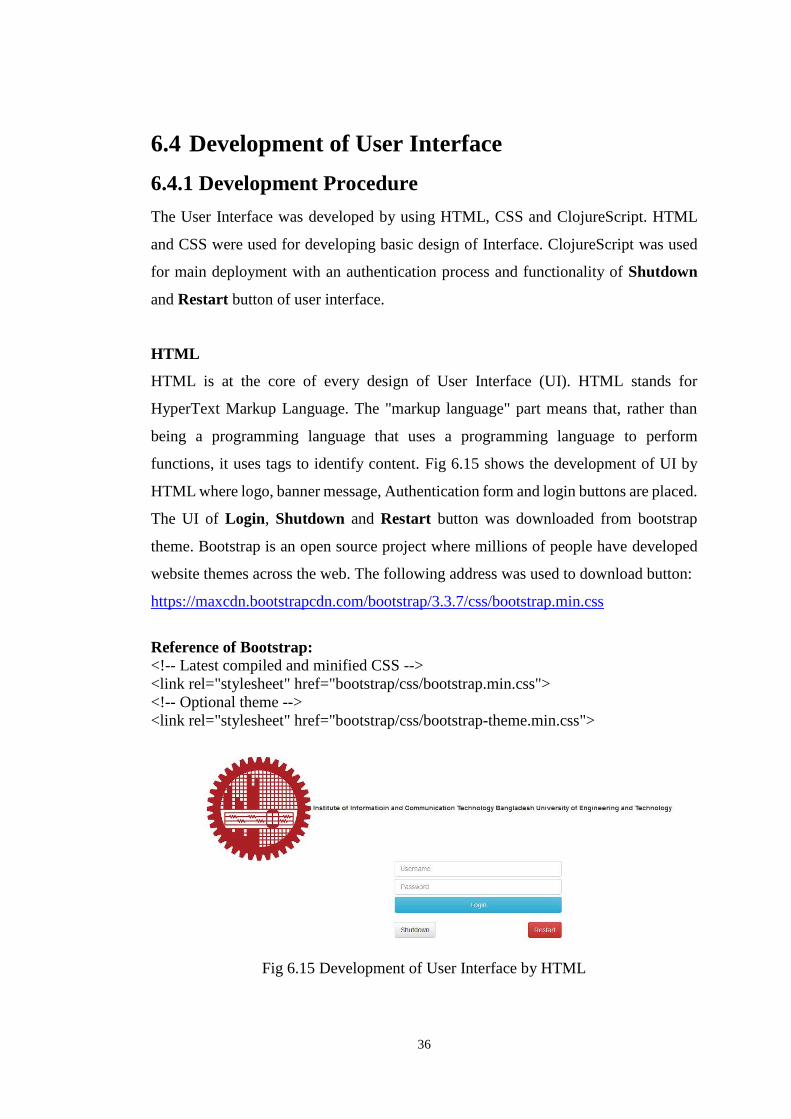
HTML
HTML is at the core of every design of User Interface (UI). HTML stands for
HyperText Markup Language. The "markup language" part means that, rather than
being a programming language that uses a programming language to perform
functions, it uses tags to identify content. Fig 6.15 shows the development of UI by
HTML where logo, banner message, Authentication form and login buttons are placed.
The UI of Login, Shutdown and Restart button was downloaded from bootstrap
theme. Bootstrap is an open source project where millions of people have developed
website themes across the web. The following address was used to download button:
https://maxcdn.bootstrapcdn.com/bootstrap/3.3.7/css/bootstrap.min.css
Reference of Bootstrap:
<!-- Latest compiled and minified CSS -->
<link rel="stylesheet" href="bootstrap/css/bootstrap.min.css">
<!-- Optional theme -->
<link rel="stylesheet" href="bootstrap/css/bootstrap-theme.min.css">
Fig 6.15 Development of User Interface by HTML
37
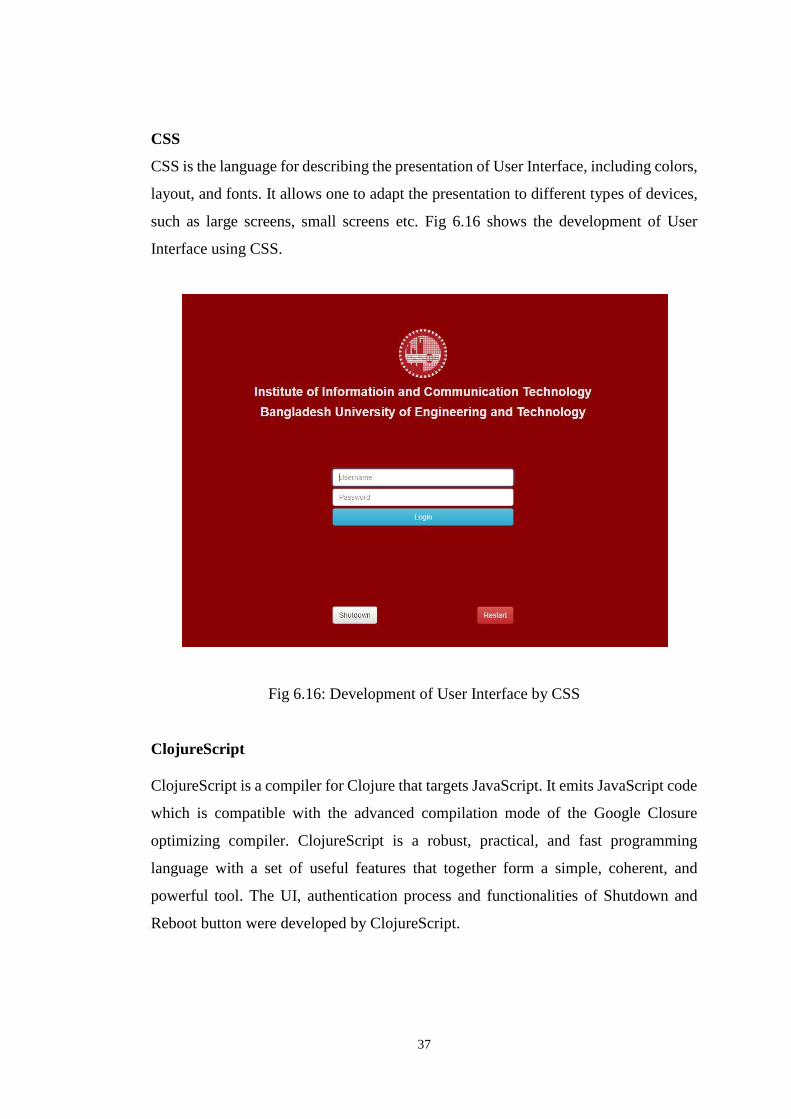
CSS
CSS is the language for describing the presentation of User Interface, including colors,
layout, and fonts. It allows one to adapt the presentation to different types of devices,
such as large screens, small screens etc. Fig 6.16 shows the development of User
Interface using CSS.
Fig 6.16: Development of User Interface by CSS
ClojureScript
ClojureScript is a compiler for Clojure that targets JavaScript. It emits JavaScript code
which is compatible with the advanced compilation mode of the Google Closure
optimizing compiler. ClojureScript is a robust, practical, and fast programming
language with a set of useful features that together form a simple, coherent, and
powerful tool. The UI, authentication process and functionalities of Shutdown and
Reboot button were developed by ClojureScript.
38
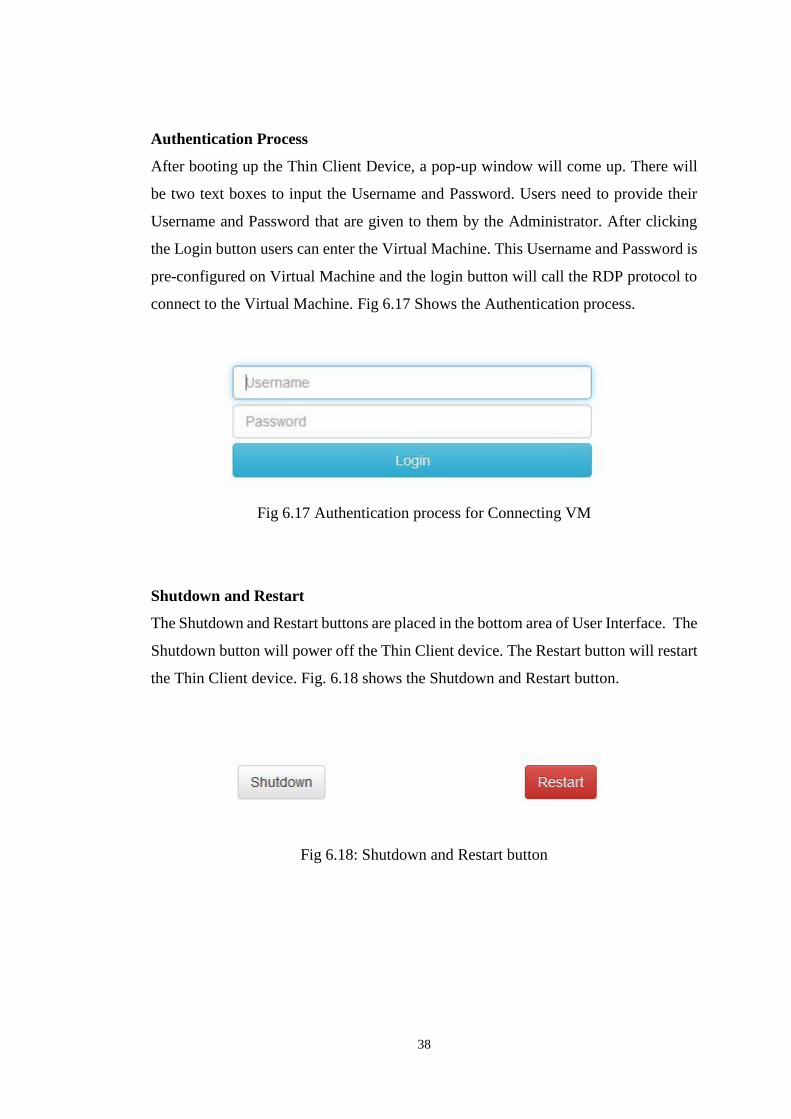
Authentication Process
After booting up the Thin Client Device, a pop-up window will come up. There will
be two text boxes to input the Username and Password. Users need to provide their
Username and Password that are given to them by the Administrator. After clicking
the Login button users can enter the Virtual Machine. This Username and Password is
pre-configured on Virtual Machine and the login button will call the RDP protocol to
connect to the Virtual Machine. Fig 6.17 Shows the Authentication process.
Fig 6.17 Authentication process for Connecting VM
Shutdown and Restart
The Shutdown and Restart buttons are placed in the bottom area of User Interface. The
Shutdown button will power off the Thin Client device. The Restart button will restart
the Thin Client device. Fig. 6.18 shows the Shutdown and Restart button.
Fig 6.18: Shutdown and Restart button
39
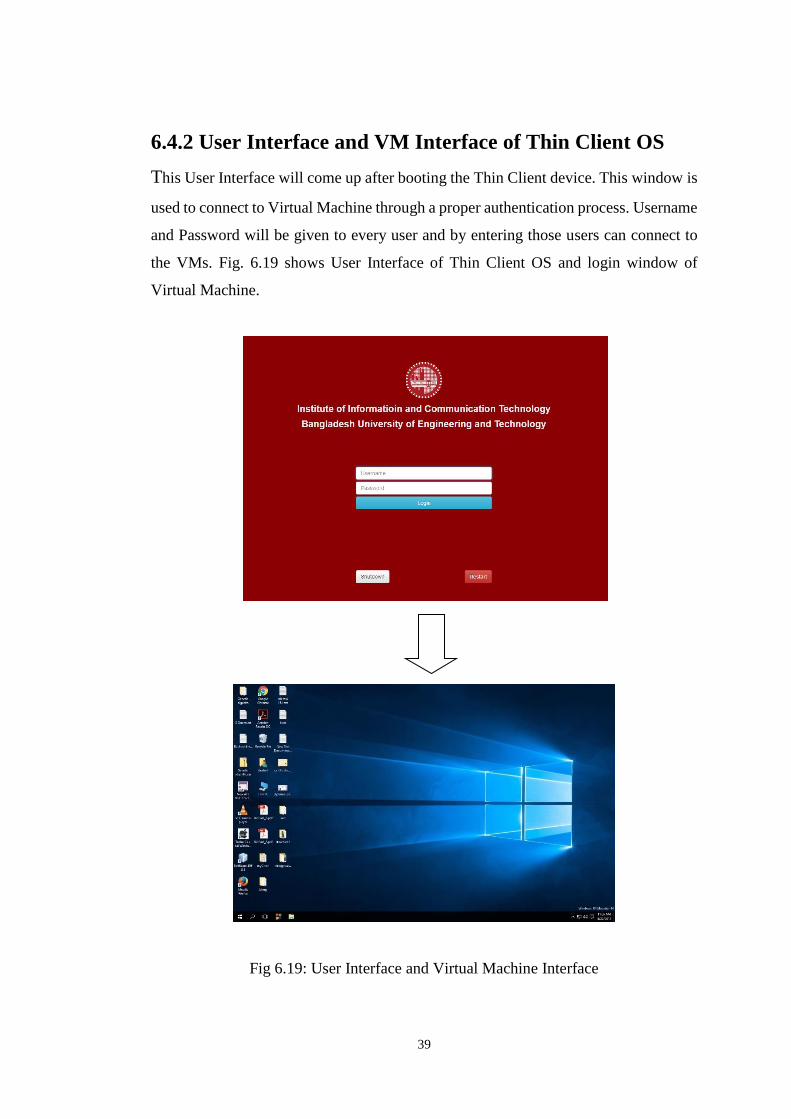
6.4.2 User Interface and VM Interface of Thin Client OS
This User Interface will come up after booting the Thin Client device. This window is
used to connect to Virtual Machine through a proper authentication process. Username
and Password will be given to every user and by entering those users can connect to
the VMs. Fig. 6.19 shows User Interface of Thin Client OS and login window of
Virtual Machine.
Fig 6.19: User Interface and Virtual Machine Interface
40
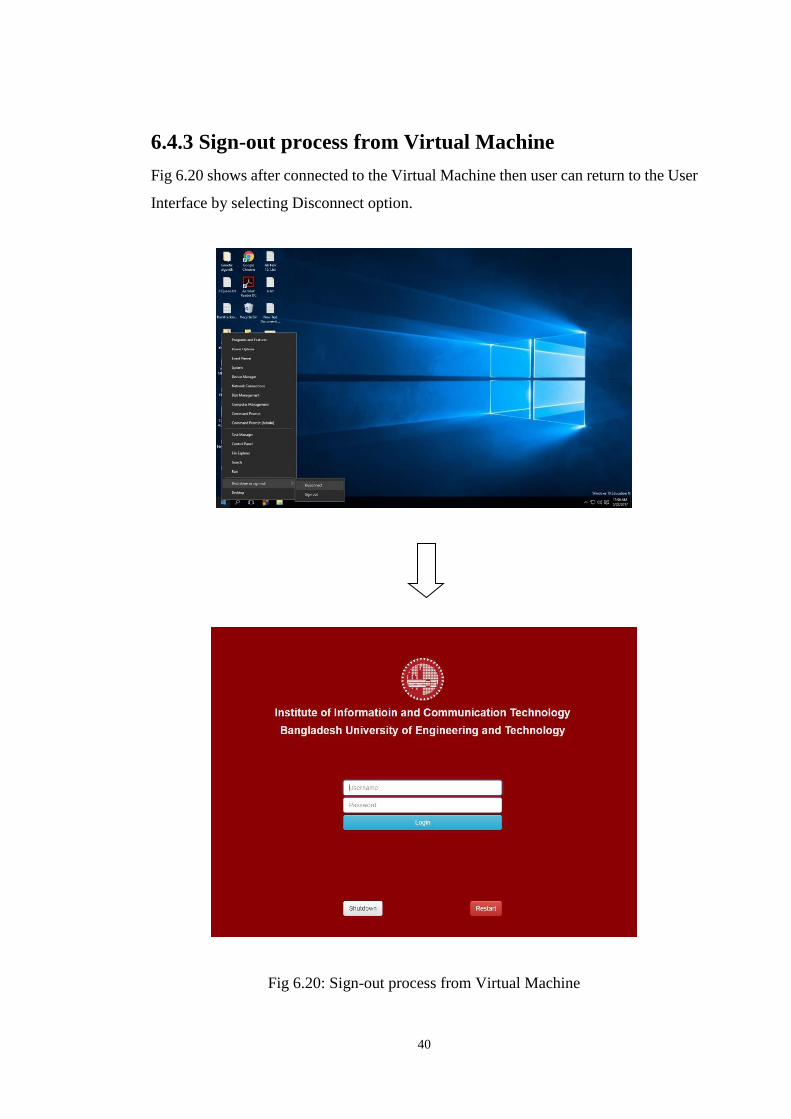
6.4.3 Sign-out process from Virtual Machine
Fig 6.20 shows after connected to the Virtual Machine then user can return to the User
Interface by selecting Disconnect option.
Fig 6.20: Sign-out process from Virtual Machine
41
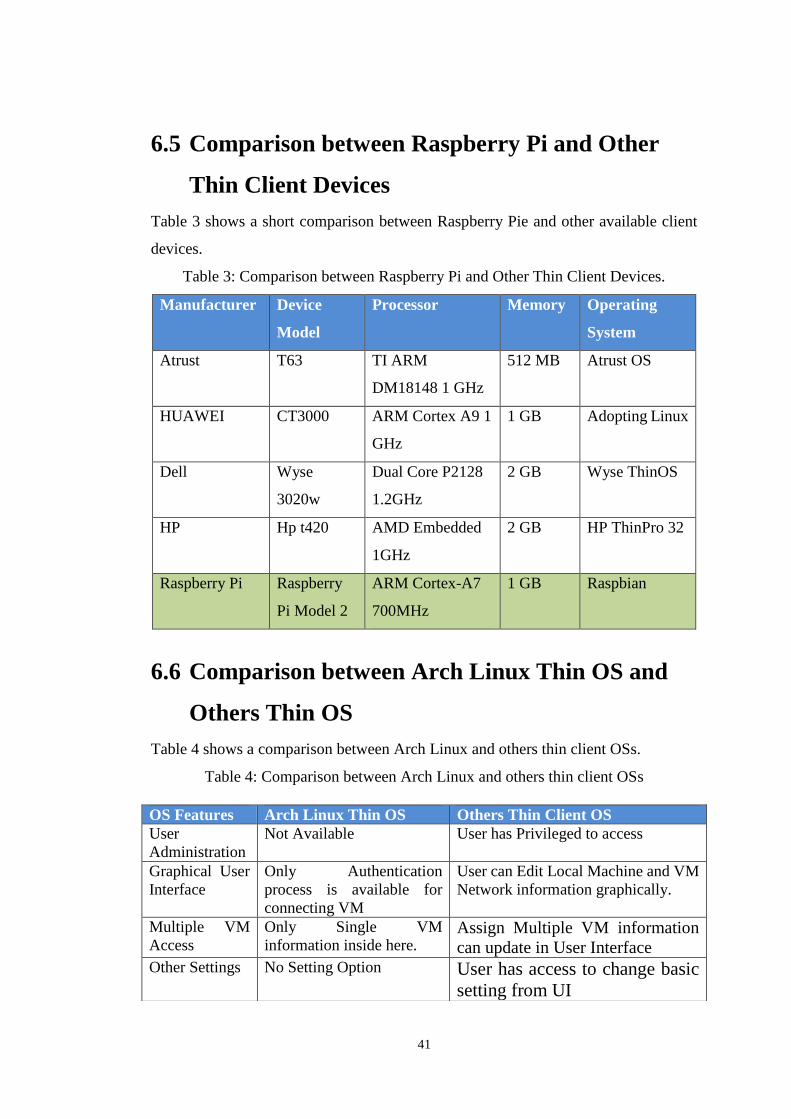
6.5 Comparison between Raspberry Pi and Other
Thin Client Devices
Table 3 shows a short comparison between Raspberry Pie and other available client
devices.
Table 3: Comparison between Raspberry Pi and Other Thin Client Devices.
Manufacturer Device
Model
Processor Memory Operating
System
Atrust T63 TI ARM
DM18148 1 GHz
512 MB Atrust OS
HUAWEI CT3000 ARM Cortex A9 1
GHz
1 GB Adopting Linux
Dell Wyse
3020w
Dual Core P2128
1.2GHz
2 GB Wyse ThinOS
HP Hp t420 AMD Embedded
1GHz
2 GB HP ThinPro 32
Raspberry Pi Raspberry
Pi Model 2
ARM Cortex-A7
700MHz
1 GB Raspbian
6.6 Comparison between Arch Linux Thin OS and
Others Thin OS
Table 4 shows a comparison between Arch Linux and others thin client OSs.
Table 4: Comparison between Arch Linux and others thin client OSs
OS Features Arch Linux Thin OS Others Thin Client OS
User
Administration
Not Available User has Privileged to access
Graphical User
Interface
Only Authentication
process is available for
connecting VM
User can Edit Local Machine and VM
Network information graphically.
Multiple VM
Access
Only Single VM
information inside here. Assign Multiple VM information
can update in User Interface Other Settings No Setting Option User has access to change basic
setting from UI

42
6.7 Role of User and System Administrator
Following is the procedure of avail a desktop environment from the administrator:
Step-1: User will send a request with Hardware and Software requirement to the
System Administrator.
Step-2: System Administrator will create a VM on Citrix XenServer and assign
hardware properties and install all required software on Virtual Machine.
Step-3: System Administrator will also create a username and password on VM and
set IP Address on client machine to connect with Virtual Machine.
Step-4: System Administrator will send the username and password to the user.
Step-5: User will login to client machine with username and password for desired VM.
43
CHAPTER 7
Conclusion and Future Work
7.1 Conclusion
In this project, a Light-Weight Operating System (OS) has been developed based on
Arch Linux and deployed in a Thin Client device for Virtual Desktop Infrastructure
(VDI) solution. Raspberry Pi Model 2 was chosen as the thin client device. For this
the existing Arch Linux packages and libraries were studied. From those packages,
only the ones required for running Raspberry Pi as a client machine for the VDI
solution were installed. This leaded the solution to have minimal features at this point.
A test bed was developed using a Personal Computer (PC) and a Raspberry Pi 2 and
both were connected through a cable. The PC was used as a server where Citrix
XenServer was installed for virtualization structure and to host the virtual machines.
The Raspberry Pi was used as the client machine. A user can use the Raspberry Pi to
connect the virtual machines installed in the server and use all applications installed in
that virtual machine. In the test, several VMs were installed in the Citrix Server. The
Raspberry Pi was configured with the server address. After turning on the Raspberry
Pi, login to the VMs through Raspberry Pi was successful. The desktop environment
was clearly visible and was ready for personal use. A word document was prepared in
the word processor and saved in the virtual machine.
7.2 Future work
There are scopes of improve to make the system more flexible for users. We suggest
improving the Graphical User Interface (UI) where a user can choose his preferable
VM from multiple VMs graphically. A setting option can be included in User Interface
where a user can manage multiple VM information. The client machine and virtual
machine network information may also be configured graphically. A universal clock
can be set on User Interface and where it will get update from the Network Time
Protocol (NTP) server or international time zone.
44
References
[1] Tulloch, M., “Understanding Microsoft Virtualization Solution from The Desktop
to The Datacenter” in 2nd eds., Chap 4, pp. 223-259, Microsoft Press Redmond,
Washington 98052-6399, 2010.
[2] Durairaj, M., and Kannan, P., “A Study on Virtualization Technique and Challenge
in Cloud Computing” in International Journal of Science & Technology Research
volume 3, Issue 11, November 2014.
[3] Shabaitah, A. R., Server-Based Desktop Virtualization, Master of Science in
Network, System and Security Administration (NSSA), Thesis Department of
Networking and System Administration, Rochester Institute of Technology (RIT),
2014.
[4] Theil, J., “Desktop Virtualization Case Study” Netherlands, October 2009
[5] http://www.vmware.com (Last Visited: February 20, 2017)
[6] https://www.citrix.com (Last Visited: February 20, 2017)
[7] http://www.atrustcorp.com/index.php (last visited February 21, 2017)
[8]https://www.microsoft.com/en-us/ (last visited Feb21, 2017)
[9] https://www.archlinuxarm.org/ (last visited February 21, 2017)
[10] https://www.raspberrypi.org/ (last visited February 21, 2017)
[11] http://e.huawei.com/en/( last visited February 21, 2017)
[12] http://www8.hp.com/us/en/thin-clients/desktop/t420.html (last visited February
21, 2017)
[13] http://www.dell.com/us/business/p/wyse-3000-series/pd (last visited February
21, 2017)
[14] http://www.mavenspire.com/blog/top-10-benefits-of-vdi (Last Visited: February
21, 2017)
[15]https://sites.google.com/site/mis237groupprojectraspberrypi/home/what-is-
raspberry-pi/pros-and-cons-of-the-raspberry-pi (last visited February 21, 2017)
[16] http://www.wisegeek.com/what-is-a-client-operating-system.htm (last visited
February 21, 2017)
[17] https://wiki.archlinux.org/ (Last visited March 10, 2017)
[18] http://dwm.suckless.org (Last visited March 10, 2017)
45
Appendix A
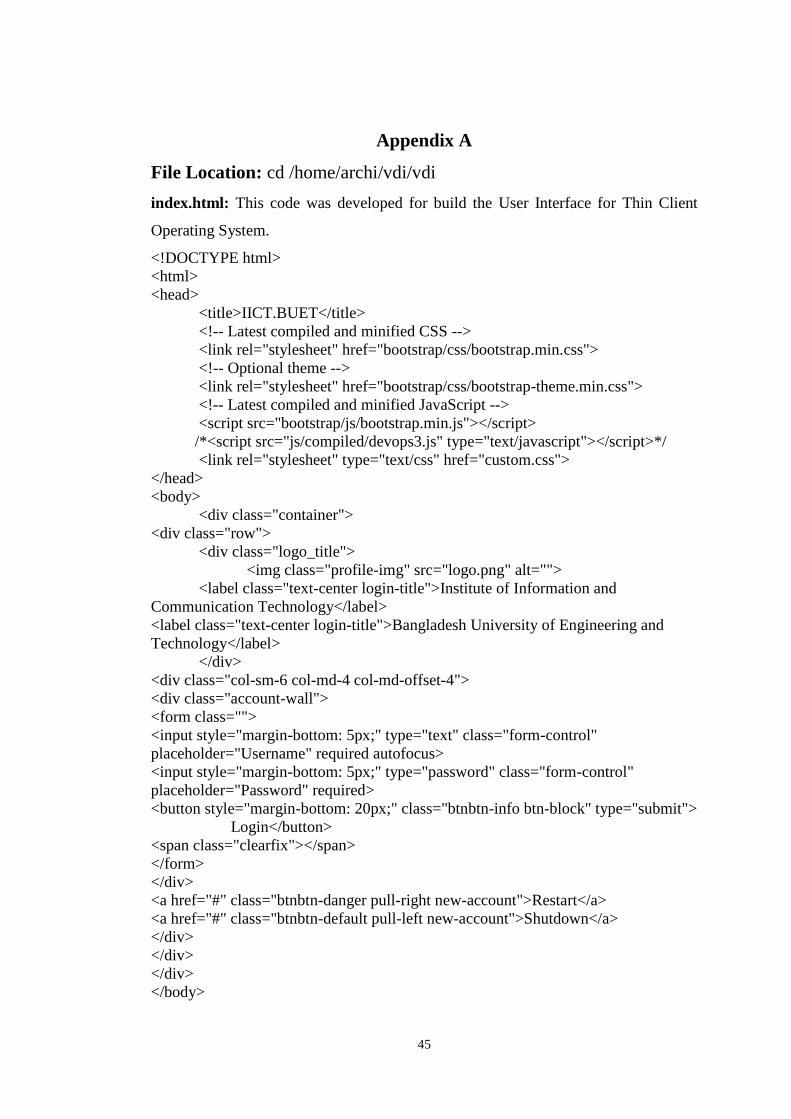
File Location: cd /home/archi/vdi/vdi
index.html: This code was developed for build the User Interface for Thin Client
Operating System.
<!DOCTYPE html>
<html>
<head>
<title>IICT.BUET</title>
<!-- Latest compiled and minified CSS -->
<link rel="stylesheet" href="bootstrap/css/bootstrap.min.css">
<!-- Optional theme -->
<link rel="stylesheet" href="bootstrap/css/bootstrap-theme.min.css">
<!-- Latest compiled and minified JavaScript -->
<script src="bootstrap/js/bootstrap.min.js"></script>
/*<script src="js/compiled/devops3.js" type="text/javascript"></script>*/
<link rel="stylesheet" type="text/css" href="custom.css">
</head>
<body>
<div class="container">
<div class="row">
<div class="logo_title">
<img class="profile-img" src="logo.png" alt="">
<label class="text-center login-title">Institute of Information and
Communication Technology</label>
<label class="text-center login-title">Bangladesh University of Engineering and
Technology</label>
</div>
<div class="col-sm-6 col-md-4 col-md-offset-4">
<div class="account-wall">
<form class="">
<input style="margin-bottom: 5px;" type="text" class="form-control"
placeholder="Username" required autofocus>
<input style="margin-bottom: 5px;" type="password" class="form-control"
placeholder="Password" required>
<button style="margin-bottom: 20px;" class="btnbtn-info btn-block" type="submit">
Login</button>
<span class="clearfix"></span>
</form>
</div>
<a href="#" class="btnbtn-danger pull-right new-account">Restart</a>
<a href="#" class="btnbtn-default pull-left new-account">Shutdown</a>
</div>
</div>
</div>
</body>
46
</html>
Appendix B
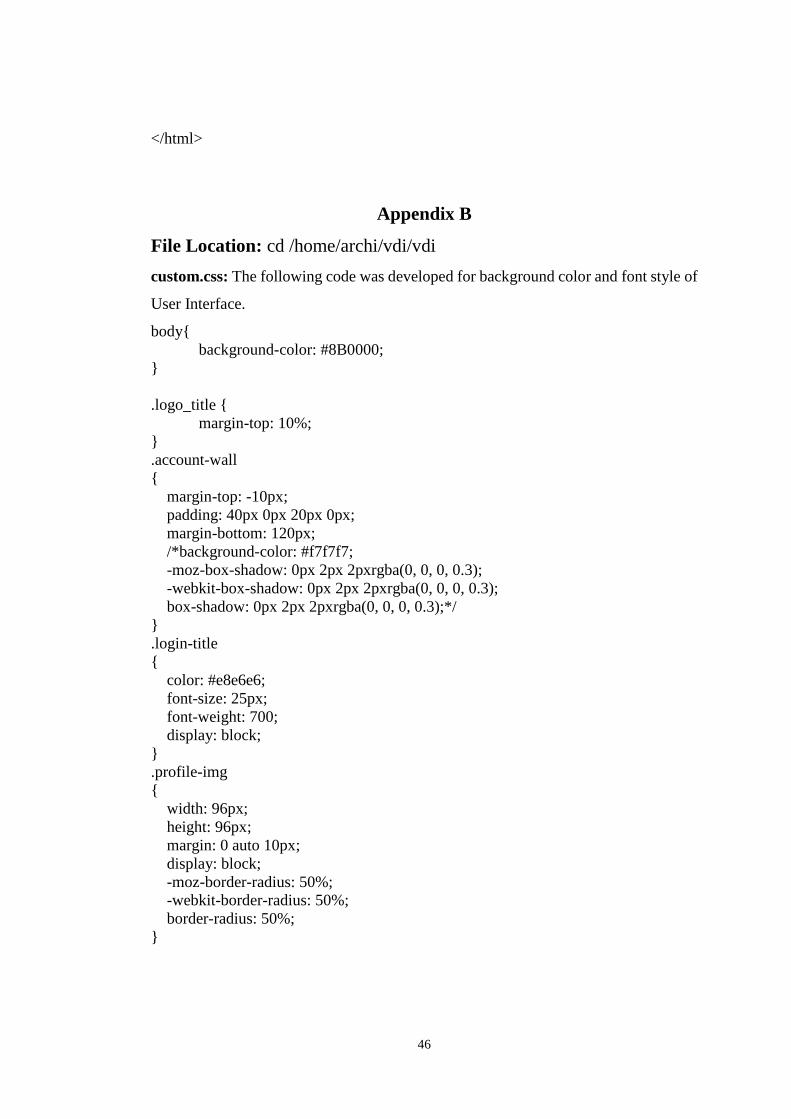
File Location: cd /home/archi/vdi/vdi
custom.css: The following code was developed for background color and font style of
User Interface.
body{
background-color: #8B0000;
}
.logo_title {
margin-top: 10%;
}
.account-wall
{
margin-top: -10px;
padding: 40px 0px 20px 0px;
margin-bottom: 120px;
/*background-color: #f7f7f7;
-moz-box-shadow: 0px 2px 2pxrgba(0, 0, 0, 0.3);
-webkit-box-shadow: 0px 2px 2pxrgba(0, 0, 0, 0.3);
box-shadow: 0px 2px 2pxrgba(0, 0, 0, 0.3);*/
}
.login-title
{
color: #e8e6e6;
font-size: 25px;
font-weight: 700;
display: block;
}
.profile-img
{
width: 96px;
height: 96px;
margin: 0 auto 10px;
display: block;
-moz-border-radius: 50%;
-webkit-border-radius: 50%;
border-radius: 50%;
}
47
Appendix C
File Location: /home/archie/vidrb/resources/public/js/compiled/devops3.js
devops3.js: This code was developed for the Authentication process to connecting
VM, role of Shutdown, Reboot button and finally update the User Interface.
ns devops3.core
(:require
[rum.core :as rum]))
(enable-console-print!)
(defonce username (atom ""))
(defonce password (atom ""))
(defonce proc (js/require "child_process"))
(defnrdp []
(.readFile (js/require "fs")
"/home/archie/ip.json" "utf8"
(fn [error data]
(let [addr(.-ip (js/JSON.parse data))
param ["/f" (str "/u:" @username)
(str "/p:" @password)
"/cert-ignore"
(str "/v:" addr)]
p (.spawn proc "xfreerdp" (clj->jsparam))
]
(.on p "error" #(.log js/console %))
(.on (.-stderr p) "data" #(.log js/console %))
(.on (.-stdout p) "data" #(.log js/console %))
))))
(defnshutdownp []
(.spawn proc "poweroff" ))
(defnrebootp []
(.spawn proc "reboot" ))
(declare logo)
(declare user-auth)
(declare reset)
(rum/defc body []
[:div {:style {:background-color "DarkRed"
:height (str
(str (- (.-height (.-screen js/window)) 20)) "px"
)
:width (str
(str (- (.-width (.-screen js/window)) 20)) "px"
)
:display "flex"
:flex-direction "column"
48
:justify-content "space-around"}}
(logo)
(user-auth)
(reset)
])
(rum/defc reset []
[:div {:style {:display "flex"
:justify-content "space-around"}}
[:button {:type "button"
:on-click shutdownp
} "Shutdown"]
[:button {:type "button"
:on-click rebootp
} "Restart"]])
(rum/defc user-auth []
[:div {
:style {:display "flex"
:flex-direction "column"
:align-items "center"}
}
[:input {:type "text"
:placeholder "Username"
:style {:margin-bottom "10px"
}
:on-change #(reset! username (.. % -target -value))}]
[:input {:type "password"
:placeholder "Password"
:style {:margin-bottom "10px"}
:on-change #(reset! password (.. % -target -value))}]
[:button {:type "button"
:on-click (fn []
(rdp)
)} "Login"]
])
(rum/defc logo []
[:div {
:style
{
:display "flex"
:flex-direction "column"
:align-items "center"
}
}
[:img {
:style {
49
:height "100px"
:width "100px"
:margin "10px 10px10px10px"
:border-radius "50%"
}
:src "logo.png"
}]
[:div {:style {:color "white"
:display "flex"
:flex-direction "column"}}
[:span {:style {:font-family "Constantia, \"Lucida Bright\" , Lucidabright, \"Lucida
Serif\", Lucida, \"DejaVu Serif\", \"Bitstream Vera Serif\", \"Liberation Serif\",
Georgia, serif"
:font-size "20px"}} "Institute of Information and Communication
Technology"]
[:span {:style {:font-family
"Cambria, \"Hoefler Text\", Utopia, \"Liberation Serif\", \"Nimbus
Roman No9 L Regular\", Times, \"Times New Roman\", serif"
:font-size "20px"}} "Bangladesh University of Engineering and
Technology"]]])
(rum/mount (body) (.getElementByIdjs/document "main-app-area"))
Appendix D
This Section has been used to create desktop application that is called Electron.
Generally, an Electron app is structured like this:
your-app/
├── package.json
├── main.js
└── index.html
The format of package.json is exactly the same as that of Node’s modules, and the
script specified by the main field is the startup script of your app, which will run the
main process.
The main.js should create windows and handle system events
Finally, the index.html is the web page you want to show
This app has been downloaded from following link.
https://github.com/electron/electron-quick-start
50
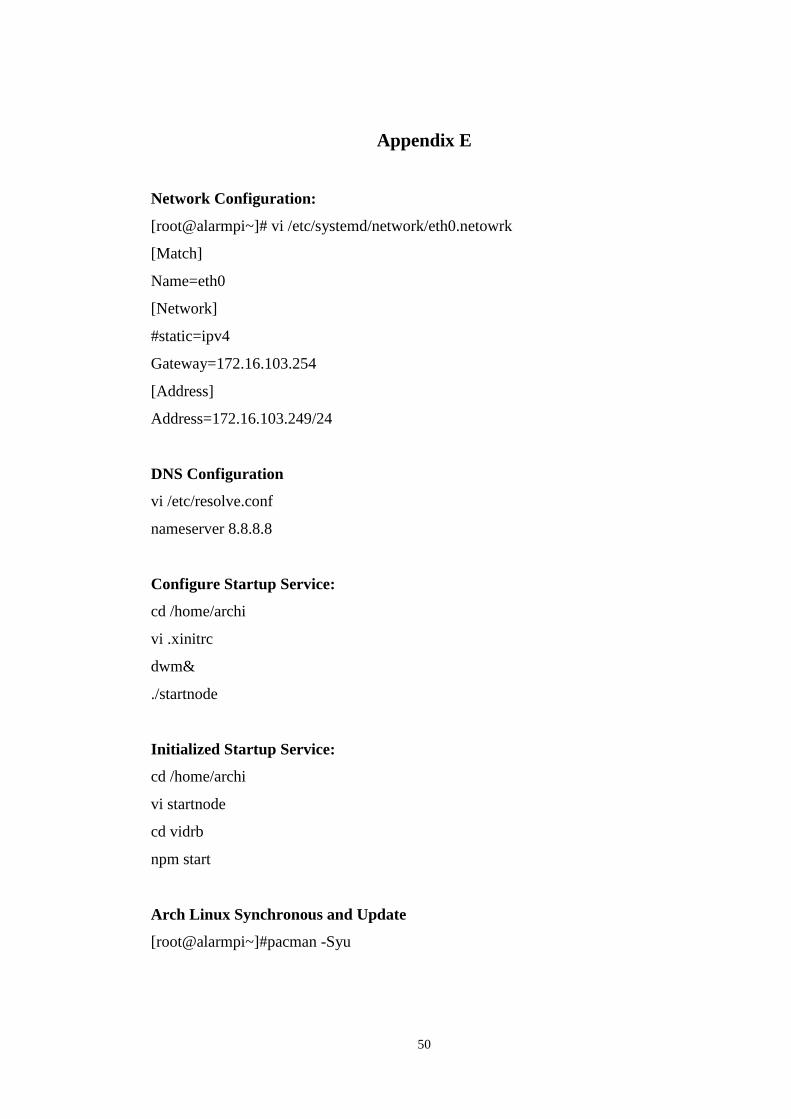
Appendix E
Network Configuration:
[root@alarmpi~]# vi /etc/systemd/network/eth0.netowrk
[Match]
Name=eth0
[Network]
#static=ipv4
Gateway=172.16.103.254
[Address]
Address=172.16.103.249/24
DNS Configuration
vi /etc/resolve.conf
nameserver 8.8.8.8
Configure Startup Service:
cd /home/archi
vi .xinitrc
dwm&
./startnode
Initialized Startup Service:
cd /home/archi
vi startnode
cd vidrb
npm start
Arch Linux Synchronous and Update
[root@alarmpi~]#pacman -Syu
51
Install Remote Desktop Protocol
[root@alarmpi~]#pacman -S freerdp
Install Window Manager
[root@alarmpi~]#pacman -S dwm Xorg Xorg-xinit nodejs npm
VM IP Address on Thin Client OS
cd /home/archi
vi ip.json
{
"ip": "172.16.103.1"
}
Related Documents