Dermatoglyphics Introduction to Fingerprint Identification

Dermatoglyphics Introduction to Fingerprint Identification.
Dec 18, 2015
Welcome message from author
This document is posted to help you gain knowledge. Please leave a comment to let me know what you think about it! Share it to your friends and learn new things together.
Transcript

Dermatoglyphics
Introduction to Fingerprint Identification

Fingerprinting
• A fingerprint is an INDIVIDUAL CHARACTERISTIC– no two have yet been found to possess
identical ridge characteristics.

Fingerprinting
The foundation for its acceptance in court- – the probability that two fingerprints could
match is such a low probability– there is an estimated 64 billion different
individual prints.– This is supported by the millions of individuals
who have had prints taken over the past 90 years in the FBI central system- no two have ever been found to be identical
Fingerprints
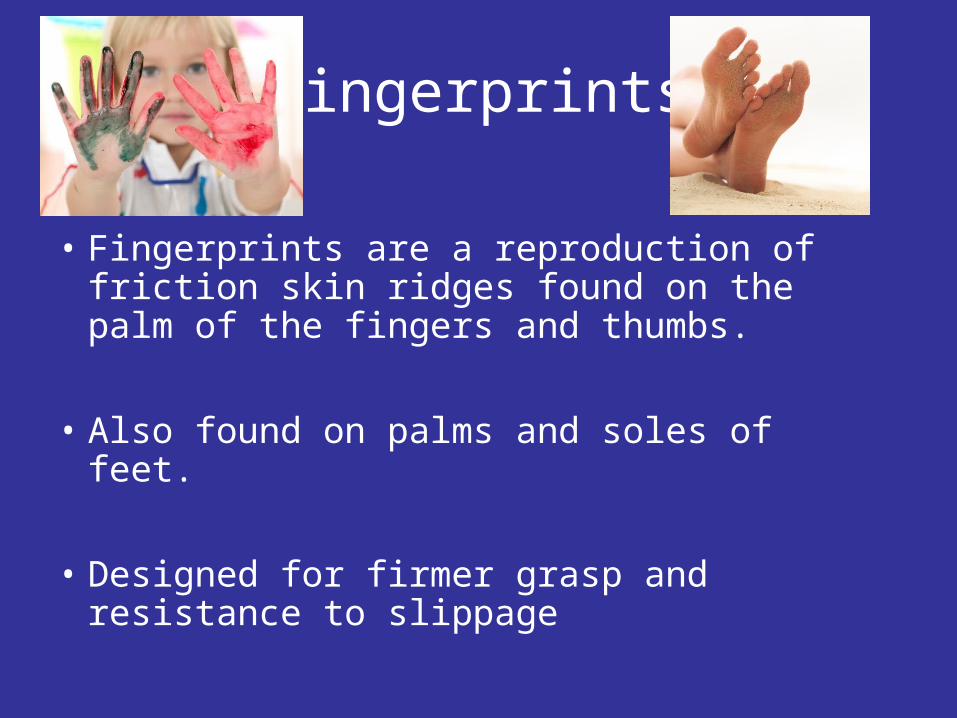
• Fingerprints are a reproduction of friction skin ridges found on the palm of the fingers and thumbs.
• Also found on palms and soles of feet.
• Designed for firmer grasp and resistance to slippage

Fingerprints
• FINGERPRINTS WILL REMAIN UNCHANGED DURING AN INDIVIDUAL’S LIFETIME

Fingerprints
• Series of lines corresponding to hills (ridges) and valleys (grooves).
• It is the shape and form of skin ridges seen as black lines of an inked fingerprint.

Anatomy of the Fingerprint• Skin is composed of layers of
cells:
• Epidermis (outer portion) and dermis as inner skin.
• In a cross section- a boundary of cells separating the epidermis from the dermis is made up of dermal papillae- these determine the form and pattern of ridges on the surface.
• Dermal papillae develop in the fetus and remain unchanged during life.

Latent Prints
• Each skin ridge is populated with a single row of pores—openings for ducts leading from sweat glands– Perspiration and oils are discharged and deposited on surface of
skin.
– When these contact another surface- oils and perspiration are transferred
– Leaves an impression of the finger’s ridge pattern (fingerprint)
– Invisible to the eye and referred to as latent fingerprints

Dermatoglyphics
• Individuality is not determined by general shape or pattern but by a careful study of its ridge characteristics– (also called minutiae)
• Identity- number- and relative location of characteristics that impart individuality.

Sir William Hershel - 1856
• Maybe the first to use fingerprints• An English Chief Magistrate in India who used prints on native contracts

Dr. Henry Foulds• Notices finger marks on prehistoric pottery
• Published an article in “Nature” saying fingerprints could be used for identification

Sir Francis Galton - 1888

Sir Francis Galton - 1888
• Sir Francis Galton, a British anthropologist and a cousin of Charles Darwin, began his observations of fingerprints as a means of identification in the 1880's.
• In 1892, he published his book, "Fingerprints", establishing the individuality and permanence of fingerprints. The book included the first classification system for fingerprints.

Making the Comparison
1. General ridge patterns are used to narrow down the number of suspects
2. Specific details of the ridges are used to make the final match

Types of Prints

Types of Prints
• FINGERPRINTS HAVE GENERAL RIDGE PATTERNS FOR CLASSIFICATION:
• Divided into three classes: – LOOP– WHORL– ARCH
• 60-65% OF POPULATION HAS LOOPS
• 30-35% WHORLS
• AND 5% ARCHES.
Loop
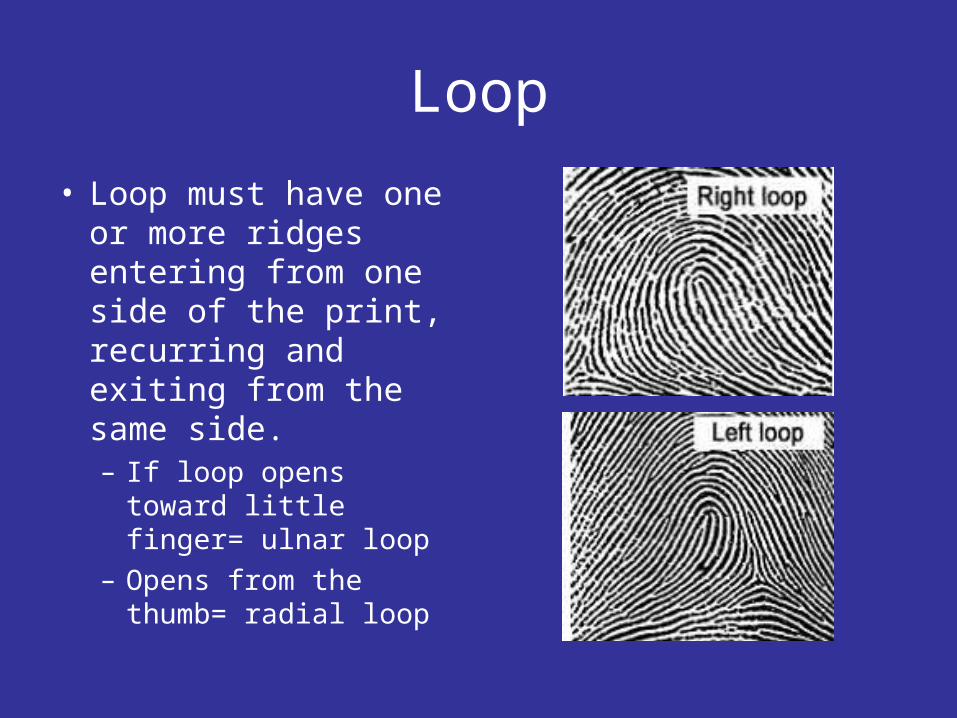
• Loop must have one or more ridges entering from one side of the print, recurring and exiting from the same side. – If loop opens toward
little finger= ulnar loop– Opens from the
thumb= radial loop

Type-lines
• Pattern area of the loop is surrounded by two diverging ridges known as type-lines.

Deltas
• The ridge point nearest the type-line divergence is the DELTA. – Triangular in shape.– ALL LOOPS HAVE ONE DELTA

Core
Core = center of the pattern.

Whorls• Whorls- 4 distinct groups:
– Plain– Central pocket – Double loop– Accidental.
• All whorl patterns have type lines and a minimum of two deltas.
• Plain and central pocket loop whirl have at least one ridge that makes a complete circuit.
• Ridge may be spiral, oval or any variant of a circle

Arches
• Arches- least common has 2 patterns- plain arches and tented
• Do not have:– type lines– deltas – or cores

Making the Comparison
• There are as many as 150 individual ridge characteristics on the average fingerprint.– a vast majority of
prints recovered from crime scenes are partial impressions- showing only a segment of the print.

Making the Comparison
• Expert has to compare small number of ridge characteristics from the recovered print to the known recorded print.
• Criteria of individuality in court requires 8-16 matching characteristics
• 1973 International Association for Identification concluded “it is the responsibility of the examiner- based upon experience and knowledge to establish positive identification.

Minutiae
• Minutiae are the details in a fingerprint.
• With the minutiae a fingerprint identification can be made.
• There are big details like starting lines, splitting lines and line fragments.
• But there are also smaller details like pores, incipient ridges, and line shapes.

Minutiae
• Line-unit, it exists as only one isle with a pore.
• Line-fragment. 2 or more line-units
• A beginning or ending line.

Minutiae
•Bifurcation, a splitting line.
• Eye, two lines splitting and meeting each other shortly after that.
•Hook, a short splitting line.

Minutiae •Pores, details in number, shape and size.
• Line shape, the lines vary breadth.
•Scars, the lines can not recover anymore.
• Incipient ridges, between the papillary lines.

Minutiae
• Creases, also permanent
• Warts, not permanent but also typical.
• Temporary damages. • Deformation, the lines deform and fall apart.

IAFIS
IntegratedAutomatedFingerprintIdentificationSystem

Large database of fingerprint collections- using individual characteristics of fingerprints converted into DIGITAL MINUTIAE: ridge endings, and branching.
Location and relationship of minutiae in a digitally recorded geometric pattern
A computer can make thousands of fingerprint comparisons in a second.

IAFIS does not make final verification of print identity, but rather flags prints with the closest correlation to the search prints.
IT ALLOWS CRIMINAL INVESTIGATORS TO SPEND LESS TIME DEVELOPING SUSPECT LISTS AND MORE TIME INVESTIGATING SUSPECTS GENERATED BY THE COMPUTER.

IAFIS
• The IAFIS maintains the largest biometric database in the world– containing the fingerprints and corresponding
criminal history information for more than 47 million subjects in the Criminal Master File
• The fingerprints and corresponding criminal history information are submitted voluntarily by state, local, and federal law enforcement agencies.

TYPES OF FINGERPRINTS
1. Latent fingerprint - earlier stated was invisible to the eye since just oils and perspiration.
2. Visible Prints- made by fingers touching a surface after ridges have been in contact with colored material: BLOOD, PAINT, GREASE, INK
3. Plastic Prints -are ridge impressions left in soft material- putty, wax, soap, or dust.

METHODS OF DETECTING FINGERPRINTS
• THE METHOD OF CHOICE WILL DEPEND ON THE SURFACE BEING LIFTED OR TESTED.
• Hard and non-absorbent surfaces (glass, mirror, tile, and painted wood) require different approaches than soft and porous- paper, cloth, or cardboard.
• The most challenging thing an examiner faces is finding the location of latent prints.

Ultraviolet Imaging Systems
• Reflected Ultraviolet Imaging System- locates prints on nonabsorbent surfaces without chemical or powder treatments.
• When UV light strikes the fingerprint, light is reflected back to the viewer- differentiating the print from its background surface.
• UV light is converted into visible light by image intensifier.

Ultraviolet Imaging Systems
Latent fingerprint on Painted Wall.Illustration of Contrast Effect due to variation of illumination angle.
Depending on what angle the user holds the light, a print can either appear white or black.

Ultraviolet Imaging Systems
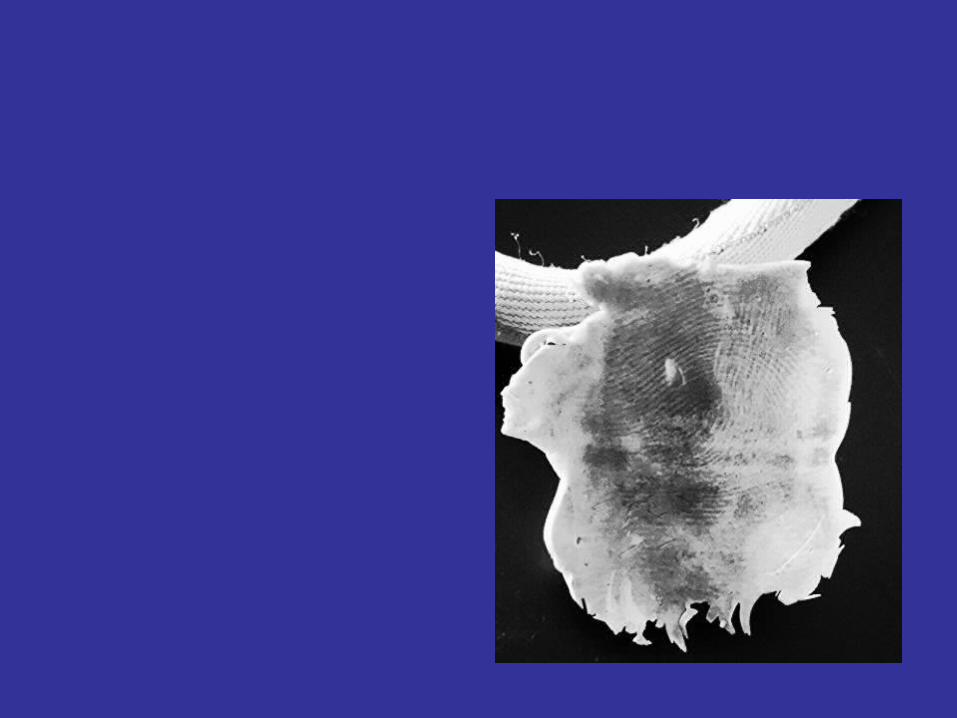
Untreated Oily Print on sticky side of Duct (Duck) tape.
35mm Black and White film.Scene Scope excels at detecting prints on surfaces that a forensic light source would find difficult or impossible.

Ultraviolet Imaging Systems
• Hand held Forensic Light Sources
Fingerprint Powders
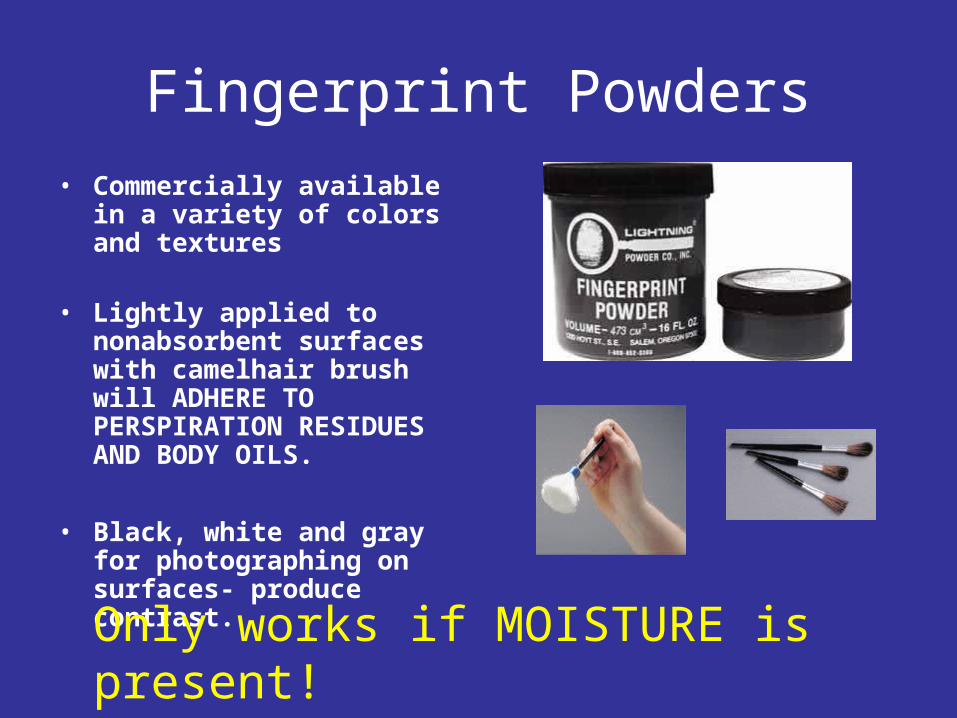
• Commercially available in a variety of colors and textures
• Lightly applied to nonabsorbent surfaces with camelhair brush will ADHERE TO PERSPIRATION RESIDUES AND BODY OILS.
• Black, white and gray for photographing on surfaces- produce contrast.
Only works if MOISTURE is present!

White powder on dark surface


Magnetic Powders
• Magnetic powders- Magna Brush- since there are no bristles there is less chance of destroying print.
• Fluorescent powders that fluoresce under ultraviolet light- used when color or pattern of background obscures visibility of the print. (plaid, newsprint, etc).

Mikrosil
• Lifting dusted prints from irregular or curved objects can be performed with a casting compound called Mikrosil.
Mikrosil

STICKY SIDE POWDER
• Sticky-side powder is used for developing fingerprints found on adhesive surfaces.
• Leaves a black print that can be photographed easily

Cyanoacrylate (Super Glue) Fuming
• Super Glue fuming- works great on nonporous surfaces- metals, leather, plastic bags.
• Created when superglue is placed on cotton and treated with sodium hydroxide.
• Created when heating- produces toxic vapors- cyanide.
• Fumes and object contained within an enclosed chamber for up to 6 hrs.
• Produces white latent print.
Prints can last for years if stored properly!

CHEMICAL METHODS FOR VISUALIZING LATENT PRINTS
new fingerprinting technology

NINHYDRIN
• The most cost effective chemical development method is Ninhydrin
• Ninhydrin is used on paper, cardboard, or other porous surfaces.
• The problem with spraying Ninhydrin solutions is that, since Ninhydrin reacts with amino acids, any exposure to your body, especially to your eyes or lungs, could have serious results. This potentially dangerous exposure is minimized by dipping or painting.
https://www.youtube.com/watch?v=o89J3dmKCHM

Iodine fuming• iodine is a solid crystal that when heated, turns into a vapor without
passing through a liquid phase– this transformation is called Sublimation.
• Suspect material is placed in an enclosed cabinet with iodine crystals
• Once heated, vapors fill the chamber and combine with latent print to make it visible.
• Iodine prints are not permanent and begin to fade once fuming is stopped.– NECESSARY TO PHOTOGRAPH IMMEDIATELY
• Can be fixed with 1% solution of starch in water applied by spraying- this will turn blue and last for several weeks or longer.
https://www.youtube.com/watch?v=SQ9dYQ_OSPg

DFO Chemical Treatment1,2-Diazafluoren-9-ONE (DFO)
• Detection of latent fingerprints on porous or non porous exhibits.
• DFO reacts with the amino acids to produce a light pink colored product that fluoresces yellow under blue/ green light.
• Process requires spraying with DFO, rinsing and drying, then examining with UV light.
• Works well for prints that have no moisture left or can’t be seen with naked eye.

• DFO (1,8-diazafluotrn-9-one) – newer chemical than ninhydrin. It is 2.5 times more sensitive than ninhydrin.

DFO Prints

Silver Nitrate• Silver nitrate development is based on the reaction of
soluble silver nitrate with the sodium chloride (salt) that is present in most latent fingerprints to form silver chloride.
• Exposing the silver chloride to sunlight or an ultraviolet lamp causes the silver chloride to be reduced to metallic silver, making the latent prints visible as black or dark gray traces.
• Very old latent fingerprints retain it and can be developed by silver nitrate. Accordingly, silver nitrate development may work when iodine fuming and ninhydrin fail completely.
• (Note that failure of these other reagents says nothing about the age of the latent prints; even prints that are only hours or days old may respond only to silver nitrate development.)
• Silver Nitrate is destructive, so used as last resort

Other fingerprint chemicals
• Gentian violet (or crystal violet) – used for developing latent prints on the adhesive side of tape. An aqueous solution of crystal violet is sprayed directly onto the adhesive.
• Amido Black – protein dye stain that can develop faint bloody fingerprints on porous and nonporous surfaces.
UNT in partnership with TEA, Copyright ©. All
rights reserved.

Fingerprint Chemicals (continued)
• LCV (Leuco Crystal Violet) – a protein stain spray that can develop faint or invisible bloody fingerprints on non-porous surfaces
56
UNT in partnership with TEA, Copyright ©. All
rights reserved.

PRESERVATION OF DEVELOPED PRINTS
• Once visualized, it must be permanently preserved for future comparison and possible use in court as evidence.
• Camera with close-up lens
• Fixed focus to take photographs on 1:1 scale when lens is held exactly flush against the print surface to avoid distortion.
• Photograph print’s relative location with other evidential items.

Permanent Record of Print• If on small surface- transport without
destroying the print
• Protect with cellophane bag
• If large surface (door, wall, etc) objects that have been developed with a powder can best be preserved by ‘”lifting”.
• Done with broad adhesive tape
• Fingerprint covered with adhesive side and pulled up, the powder will be transferred to the tape.
• Digital imaging may be used to enhance contrast, enlarge detail and compare individual points on prints to others in question.
Related Documents


