Red Hat Enterprise Linux 9 Deploying web servers and reverse proxies A guide to deploying web servers and reverse proxies on Red Hat Enterprise Linux 9 Last Updated: 2022-05-17

Welcome message from author
This document is posted to help you gain knowledge. Please leave a comment to let me know what you think about it! Share it to your friends and learn new things together.
Transcript

Red Hat Enterprise Linux 9
Deploying web servers and reverse proxies
A guide to deploying web servers and reverse proxies on Red Hat Enterprise Linux 9
Last Updated: 2022-05-17


Red Hat Enterprise Linux 9 Deploying web servers and reverse proxies
A guide to deploying web servers and reverse proxies on Red Hat Enterprise Linux 9
Legal Notice
Copyright © 2022 Red Hat, Inc.
The text of and illustrations in this document are licensed by Red Hat under a Creative CommonsAttribution–Share Alike 3.0 Unported license ("CC-BY-SA"). An explanation of CC-BY-SA isavailable athttp://creativecommons.org/licenses/by-sa/3.0/. In accordance with CC-BY-SA, if you distribute this document or an adaptation of it, you mustprovide the URL for the original version.
Red Hat, as the licensor of this document, waives the right to enforce, and agrees not to assert,Section 4d of CC-BY-SA to the fullest extent permitted by applicable law.
Red Hat, Red Hat Enterprise Linux, the Shadowman logo, the Red Hat logo, JBoss, OpenShift,Fedora, the Infinity logo, and RHCE are trademarks of Red Hat, Inc., registered in the United Statesand other countries.
Linux ® is the registered trademark of Linus Torvalds in the United States and other countries.
Java ® is a registered trademark of Oracle and/or its affiliates.
XFS ® is a trademark of Silicon Graphics International Corp. or its subsidiaries in the United Statesand/or other countries.
MySQL ® is a registered trademark of MySQL AB in the United States, the European Union andother countries.
Node.js ® is an official trademark of Joyent. Red Hat is not formally related to or endorsed by theofficial Joyent Node.js open source or commercial project.
The OpenStack ® Word Mark and OpenStack logo are either registered trademarks/service marksor trademarks/service marks of the OpenStack Foundation, in the United States and othercountries and are used with the OpenStack Foundation's permission. We are not affiliated with,endorsed or sponsored by the OpenStack Foundation, or the OpenStack community.
All other trademarks are the property of their respective owners.
Abstract
This document describes how to configure and run web and proxy servers on Red Hat EnterpriseLinux 9: the Apache HTTP server, NGINX, and Squid.
. . . . . . . . . . . . . . . . . . . . . . . . . . . . . . . . . . . . . . . . . . . . . . . . . . . . . . . . . . . . . . . . . . . . . . . . . . . . . . . . . . . . . . . . . . . . . . . . . . . . . . . . . . . . . . . . . . . . . . . . . . . . . . . . . . . . . . . . . . . . . . . . . . . . . . . . . . . . . . . . . . . . . . . . . . . . . . . . . . . . . . . . . . . . . . . . . . . . . . . . . . . . . . . . . . . . . . . . . . . . . . . . . . . . . . . . . . . . . . . . . . . . . . . . . . . . . . . . . . . . . . . . . . . . . . . . . . . . . . . .
. . . . . . . . . . . . . . . . . . . . . . . . . . . . . . . . . . . . . . . . . . . . . . . . . . . . . . . . . . . . . . . . . . . . . . . . . . . . . . . . . . . . . . . . . . . . . . . . . . . . . . . . . . . . . . . . . . . . . . . . . . . . . . . . . . . . . . . . . . . . . . . . . . . . . . . . . . . . . . . . . . . . . . . . . . . . . . . . . . . . . . . . . . . . . . . . . . . . . . . . . . . . . . . . . . . . . . . . . . . . . . . . . . . . . . . . . . . . . . . . . . . . . . . . . . . . . . . . . . . . . . . . . . . . . . . . . . . . . . . .
. . . . . . . . . . . . . . . . . . . . . . . . . . . . . . . . . . . . . . . . . . . . . . . . . . . . . . . . . . . . . . . . . . . . . . . . . . . . . . . . . . . . . . . . . . . . . . . . . . . . . . . . . . . . . . . . . . . . . . . . . . . . . . . . . . . . . . . . . . . . . . . . . . . . . . . . . . . . . . . . . . . . . . . . . . . . . . . . . . . . . . . . . . . . . . . . . . . . . . . . . . . . . . . . . . . . . . . . . . . . . . . . . . . . . . . . . . . . . . . . . . . . . . . . . . . . . . . . . . . . . . . . . . . . . . . . . . . . . . . .
. . . . . . . . . . . . . . . . . . . . . . . . . . . . . . . . . . . . . . . . . . . . . . . . . . . . . . . . . . . . . . . . . . . . . . . . . . . . . . . . . . . . . . . . . . . . . . . . . . . . . . . . . . . . . . . . . . . . . . . . . . . . . . . . . . . . . . . . . . . . . . . . . . . . . . . . . . . . . . . . . . . . . . . . . . . . . . . . . . . . . . . . . . . . . . . . . . . . . . . . . . . . . . . . . . . . . . . . . . . . . . . . . . . . . . . . . . . . . . . . . . . . . . . . . . . . . . . . . . . . . . . . . . . . . . . . . . . . . . . .
. . . . . . . . . . . . . . . . . . . . . . . . . . . . . . . . . . . . . . . . . . . . . . . . . . . . . . . . . . . . . . . . . . . . . . . . . . . . . . . . . . . . . . . . . . . . . . . . . . . . . . . . . . . . . . . . . . . . . . . . . . . . . . . . . . . . . . . . . . . . . . . . . . . . . . . . . . . . . . . . . . . . . . . . . . . . . . . . . . . . . . . . . . . . . . . . . . . . . . . . . . . . . . . . . . . . . . . . . . . . . . . . . . . . . . . . . . . . . . . . . . . . . . . . . . . . . . . . . . . . . . . . . . . . . . . . . . . . . . . .
Table of Contents
MAKING OPEN SOURCE MORE INCLUSIVE
PROVIDING FEEDBACK ON RED HAT DOCUMENTATION
CHAPTER 1. SETTING UP THE APACHE HTTP WEB SERVER1.1. INTRODUCTION TO THE APACHE HTTP WEB SERVER1.2. NOTABLE CHANGES IN THE APACHE HTTP SERVER1.3. THE APACHE CONFIGURATION FILES1.4. MANAGING THE HTTPD SERVICE1.5. SETTING UP A SINGLE-INSTANCE APACHE HTTP SERVER1.6. CONFIGURING APACHE NAME-BASED VIRTUAL HOSTS1.7. CONFIGURING KERBEROS AUTHENTICATION FOR THE APACHE HTTP WEB SERVER
1.7.1. Setting up GSS-Proxy in an IdM environment1.7.2. Configuring Kerberos authentication for a directory shared by the Apache HTTP web server
1.8. CONFIGURING TLS ENCRYPTION ON AN APACHE HTTP SERVER1.8.1. Adding TLS encryption to an Apache HTTP Server1.8.2. Setting the supported TLS protocol versions on an Apache HTTP Server1.8.3. Setting the supported ciphers on an Apache HTTP Server
1.9. CONFIGURING TLS CLIENT CERTIFICATE AUTHENTICATION1.10. INSTALLING THE APACHE HTTP SERVER MANUAL1.11. WORKING WITH MODULES
1.11.1. Loading a module1.11.2. Writing a module
1.12. EXPORTING A PRIVATE KEY AND CERTIFICATES FROM AN NSS DATABASE TO USE THEM IN ANAPACHE WEB SERVER CONFIGURATION1.13. ADDITIONAL RESOURCES
CHAPTER 2. SETTING UP AND CONFIGURING NGINX2.1. INSTALLING AND PREPARING NGINX2.2. CONFIGURING NGINX AS A WEB SERVER THAT PROVIDES DIFFERENT CONTENT FOR DIFFERENTDOMAINS2.3. ADDING TLS ENCRYPTION TO AN NGINX WEB SERVER2.4. CONFIGURING NGINX AS A REVERSE PROXY FOR THE HTTP TRAFFIC2.5. CONFIGURING NGINX AS AN HTTP LOAD BALANCER2.6. ADDITIONAL RESOURCES
CHAPTER 3. CONFIGURING THE SQUID CACHING PROXY SERVER3.1. SETTING UP SQUID AS A CACHING PROXY WITHOUT AUTHENTICATION3.2. SETTING UP SQUID AS A CACHING PROXY WITH LDAP AUTHENTICATION3.3. SETTING UP SQUID AS A CACHING PROXY WITH KERBEROS AUTHENTICATION3.4. CONFIGURING A DOMAIN DENY LIST IN SQUID3.5. CONFIGURING THE SQUID SERVICE TO LISTEN ON A SPECIFIC PORT OR IP ADDRESS3.6. ADDITIONAL RESOURCES
3
4
5556678
101011
121214151617181818
1919
2020
2123242526
27272932353637
Table of Contents
1

Red Hat Enterprise Linux 9 Deploying web servers and reverse proxies
2

MAKING OPEN SOURCE MORE INCLUSIVERed Hat is committed to replacing problematic language in our code, documentation, and webproperties. We are beginning with these four terms: master, slave, blacklist, and whitelist. Because of theenormity of this endeavor, these changes will be implemented gradually over several upcoming releases.For more details, see our CTO Chris Wright’s message .
MAKING OPEN SOURCE MORE INCLUSIVE
3

PROVIDING FEEDBACK ON RED HAT DOCUMENTATIONWe appreciate your input on our documentation. Please let us know how we could make it better.
For simple comments on specific passages:
1. Make sure you are viewing the documentation in the Multi-page HTML format. In addition,ensure you see the Feedback button in the upper right corner of the document.
2. Use your mouse cursor to highlight the part of text that you want to comment on.
3. Click the Add Feedback pop-up that appears below the highlighted text.
4. Follow the displayed instructions.
For submitting feedback via Bugzilla, create a new ticket:
1. Go to the Bugzilla website.
2. As the Component, use Documentation.
3. Fill in the Description field with your suggestion for improvement. Include a link to therelevant part(s) of documentation.
4. Click Submit Bug.
Red Hat Enterprise Linux 9 Deploying web servers and reverse proxies
4

CHAPTER 1. SETTING UP THE APACHE HTTP WEB SERVER
1.1. INTRODUCTION TO THE APACHE HTTP WEB SERVER
A web server is a network service that serves content to a client over the web. This typically means webpages, but any other documents can be served as well. Web servers are also known as HTTP servers, asthey use the hypertext transport protocol (HTTP).
The Apache HTTP Server, httpd, is an open source web server developed by the Apache SoftwareFoundation.
If you are upgrading from a previous release of Red Hat Enterprise Linux, you have to update the httpdservice configuration accordingly. This section reviews some of the newly added features, and guidesyou through the update of prior configuration files.
1.2. NOTABLE CHANGES IN THE APACHE HTTP SERVER
RHEL 9 provides version 2.4.48 of the Apache HTTP Server. Notable changes over version 2.4.37distributed with RHEL 8 include:
Apache HTTP Server Control Interface (apachectl):
The systemctl pager is now disabled for apachectl status output.
The apachectl command now fails instead of giving a warning if you pass additionalarguments.
The apachectl graceful-stop command now returns immediately.
The apachectl configtest command now executes the httpd -t command without changingthe SELinux context.
The apachectl(8) man page in RHEL now fully documents differences from upstream apachectl.
Apache eXtenSion tool (apxs):
The /usr/bin/apxs command no longer uses or exposes compiler optimisation flags asapplied when building the httpd package. You can now use the /usr/lib64/httpd/build/vendor-apxs command to apply the same compiler flags as used tobuild httpd. To use the vendor-apxs command, you must install the redhat-rpm-configpackage first.
Apache modules:
The mod_lua module is now provided in a separate package.
Configuration syntax changes:
In the deprecated Allow directive provided by the mod_access_compat module, acomment (the # character) now triggers a syntax error instead of being silently ignored.
Other changes:
Kernel thread IDs are now used directly in error log messages, making them both accurateand more concise.
CHAPTER 1. SETTING UP THE APACHE HTTP WEB SERVER
5

Many minor enhancements and bug fixes.
A number of new interfaces are available to module authors.
There are no backwards-incompatible changes to the httpd module API since RHEL 8.
Apache HTTP Server 2.4 is the initial version of this Application Stream, which you can install easily as anRPM package.
1.3. THE APACHE CONFIGURATION FILES
When the httpd service is started, by default, it reads the configuration from locations that are listed inTable 1.1, “The httpd service configuration files” .
Table 1.1. The httpd service configuration files
Path Description
/etc/httpd/conf/httpd.conf The main configuration file.
/etc/httpd/conf.d/ An auxiliary directory for configuration files that areincluded in the main configuration file.
/etc/httpd/conf.modules.d/ An auxiliary directory for configuration files whichload installed dynamic modules packaged in Red HatEnterprise Linux. In the default configuration, theseconfiguration files are processed first.
Although the default configuration is suitable for most situations, you can use also other configurationoptions. For any configuration changes to take effect, restart the web server. See Section 1.4,“Managing the httpd service” for more information on how to restart the httpd service.
To check the configuration for possible errors, type the following at a shell prompt:
# apachectl configtestSyntax OK
To make the recovery from mistakes easier, make a copy of the original file before editing it.
1.4. MANAGING THE HTTPD SERVICE
This section describes how to start, stop, and restart the httpd service.
Prerequisites
The Apache HTTP Server is installed.
Procedure
To start the httpd service, enter:
# systemctl start httpd
Red Hat Enterprise Linux 9 Deploying web servers and reverse proxies
6
To stop the httpd service, enter:
# systemctl stop httpd
To restart the httpd service, enter:
# systemctl restart httpd
1.5. SETTING UP A SINGLE-INSTANCE APACHE HTTP SERVER
This section describes how to set up a single-instance Apache HTTP Server to serve static HTMLcontent.
Follow the procedure in this section if the web server should provide the same content for all domainsassociated with the server. If you want to provide different content for different domains, set up name-based virtual hosts. For details, see Configuring Apache name-based virtual hosts .
Procedure
1. Install the httpd package:
# dnf install httpd
2. Open the TCP port 80 in the local firewall:
# firewall-cmd --permanent --add-port=80/tcp# firewall-cmd --reload
3. Enable and start the httpd service:
# systemctl enable --now httpd
4. Optional: Add HTML files to the /var/www/html/ directory.
NOTE
When adding content to /var/www/html/, files and directories must be readableby the user under which httpd runs by default. The content owner can be theeither the root user and root user group, or another user or group of theadministrator’s choice. If the content owner is the root user and root user group,the files must be readable by other users. The SELinux context for all the filesand directories must be httpd_sys_content_t, which is applied by default to allcontent within the /var/www directory.
Verification steps
Connect with a web browser to http://server_IP_or_host_name/.If the /var/www/html/ directory is empty or does not contain an index.html or index.htm file,Apache displays the Red Hat Enterprise Linux Test Page. If /var/www/html/ contains HTMLfiles with a different name, you can load them by entering the URL to that file, such as http://server_IP_or_host_name/example.html.
CHAPTER 1. SETTING UP THE APACHE HTTP WEB SERVER
7

Additional resources
Refer to the Apache manual. See Installing the Apache HTTP Server manual .
See the httpd.service(8) man page.
1.6. CONFIGURING APACHE NAME-BASED VIRTUAL HOSTS
Name-based virtual hosts enable Apache to serve different content for different domains that resolveto the IP address of the server.
The procedure in this section describes setting up a virtual host for both the example.com and example.net domain with separate document root directories. Both virtual hosts serve static HTMLcontent.
Prerequisites
Clients and the web server resolve the example.com and example.net domain to the IPaddress of the web server.Note that you must manually add these entries to your DNS server.
Procedure
1. Install the httpd package:
# dnf install httpd
2. Edit the /etc/httpd/conf/httpd.conf file:
a. Append the following virtual host configuration for the example.com domain:
<VirtualHost *:80> DocumentRoot "/var/www/example.com/" ServerName example.com CustomLog /var/log/httpd/example.com_access.log combined ErrorLog /var/log/httpd/example.com_error.log</VirtualHost>
These settings configure the following:
All settings in the <VirtualHost *:80> directive are specific for this virtual host.
DocumentRoot sets the path to the web content of the virtual host.
ServerName sets the domains for which this virtual host serves content.To set multiple domains, add the ServerAlias parameter to the configuration andspecify the additional domains separated with a space in this parameter.
CustomLog sets the path to the access log of the virtual host.
ErrorLog sets the path to the error log of the virtual host.
NOTE
Red Hat Enterprise Linux 9 Deploying web servers and reverse proxies
8

NOTE
Apache uses the first virtual host found in the configuration also forrequests that do not match any domain set in the ServerName and ServerAlias parameters. This also includes requests sent to the IPaddress of the server.
3. Append a similar virtual host configuration for the example.net domain:
<VirtualHost *:80> DocumentRoot "/var/www/example.net/" ServerName example.net CustomLog /var/log/httpd/example.net_access.log combined ErrorLog /var/log/httpd/example.net_error.log</VirtualHost>
4. Create the document roots for both virtual hosts:
# mkdir /var/www/example.com/# mkdir /var/www/example.net/
5. If you set paths in the DocumentRoot parameters that are not within /var/www/, set the httpd_sys_content_t context on both document roots:
# semanage fcontext -a -t httpd_sys_content_t "/srv/example.com(/.*)?"# restorecon -Rv /srv/example.com/# semanage fcontext -a -t httpd_sys_content_t "/srv/example.net(/.\*)?"# restorecon -Rv /srv/example.net/
These commands set the httpd_sys_content_t context on the /srv/example.com/ and /srv/example.net/ directory.
Note that you must install the policycoreutils-python-utils package to run the restoreconcommand.
6. Open port 80 in the local firewall:
# firewall-cmd --permanent --add-port=80/tcp# firewall-cmd --reload
7. Enable and start the httpd service:
# systemctl enable --now httpd
Verification steps
1. Create a different example file in each virtual host’s document root:
# echo "vHost example.com" > /var/www/example.com/index.html# echo "vHost example.net" > /var/www/example.net/index.html
2. Use a browser and connect to http://example.com. The web server shows the example file fromthe example.com virtual host.
CHAPTER 1. SETTING UP THE APACHE HTTP WEB SERVER
9
3. Use a browser and connect to http://example.net. The web server shows the example file fromthe example.net virtual host.
Additional resources
For further details about configuring Apache virtual hosts, refer to the Virtual Hostsdocumentation in the Apache manual. For details about installing the manual, see Section 1.10,“Installing the Apache HTTP Server manual”.
1.7. CONFIGURING KERBEROS AUTHENTICATION FOR THE APACHEHTTP WEB SERVER
To perform Kerberos authentication in the Apache HTTP web server, RHEL 9 uses the mod_auth_gssapi Apache module. The Generic Security Services API ( GSSAPI) is an interface forapplications that make requests to use security libraries, such as Kerberos. The gssproxy service allowsto implement privilege separation for the httpd server, which optimizes this process from the securitypoint of view.
NOTE
The mod_auth_gssapi module replaces the removed mod_auth_kerb module.
Prerequisites
The httpd, mod_auth_gssapi and gssproxy packages are installed.
The Apache web server is set up and the httpd service is running.
1.7.1. Setting up GSS-Proxy in an IdM environment
This procedure describes how to set up GSS-Proxy to perform Kerberos authentication in the ApacheHTTP web server.
Procedure
1. Enable access to the keytab file of HTTP/<SERVER_NAME>@realm principal by creating theservice principal:
# ipa service-add HTTP/<SERVER_NAME>
2. Retrieve the keytab for the principal stored in the /etc/gssproxy/http.keytab file:
# ipa-getkeytab -s $(awk '/^server =/ {print $3}' /etc/ipa/default.conf) -k /etc/gssproxy/http.keytab -p HTTP/$(hostname -f)
This step sets permissions to 400, thus only the root user has access to the keytab file. The apache user does not.
3. Create the /etc/gssproxy/80-httpd.conf file with the following content:
[service/HTTP] mechs = krb5 cred_store = keytab:/etc/gssproxy/http.keytab
Red Hat Enterprise Linux 9 Deploying web servers and reverse proxies
10
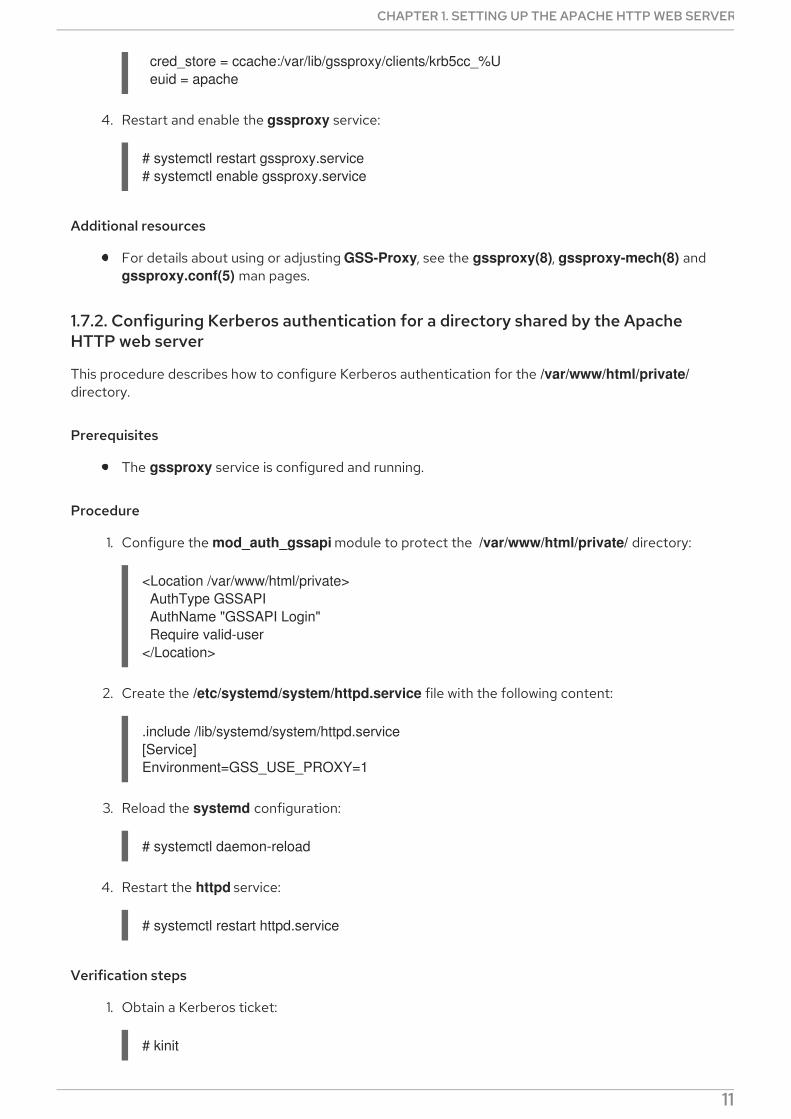
cred_store = ccache:/var/lib/gssproxy/clients/krb5cc_%U euid = apache
4. Restart and enable the gssproxy service:
# systemctl restart gssproxy.service# systemctl enable gssproxy.service
Additional resources
For details about using or adjusting GSS-Proxy, see the gssproxy(8), gssproxy-mech(8) and gssproxy.conf(5) man pages.
1.7.2. Configuring Kerberos authentication for a directory shared by the ApacheHTTP web server
This procedure describes how to configure Kerberos authentication for the /var/www/html/private/directory.
Prerequisites
The gssproxy service is configured and running.
Procedure
1. Configure the mod_auth_gssapi module to protect the /var/www/html/private/ directory:
<Location /var/www/html/private> AuthType GSSAPI AuthName "GSSAPI Login" Require valid-user</Location>
2. Create the /etc/systemd/system/httpd.service file with the following content:
.include /lib/systemd/system/httpd.service[Service]Environment=GSS_USE_PROXY=1
3. Reload the systemd configuration:
# systemctl daemon-reload
4. Restart the httpd service:
# systemctl restart httpd.service
Verification steps
1. Obtain a Kerberos ticket:
# kinit
CHAPTER 1. SETTING UP THE APACHE HTTP WEB SERVER
11

2. Open the URL to the protected directory in a browser.
1.8. CONFIGURING TLS ENCRYPTION ON AN APACHE HTTP SERVER
By default, Apache provides content to clients using an unencrypted HTTP connection. This sectiondescribes how to enable TLS encryption and configure frequently used encryption-related settings onan Apache HTTP Server.
Prerequisites
The Apache HTTP Server is installed and running.
1.8.1. Adding TLS encryption to an Apache HTTP Server
This section describes how to enable TLS encryption on an Apache HTTP Server for the example.comdomain.
Prerequisites
The Apache HTTP Server is installed and running.
The private key is stored in the /etc/pki/tls/private/example.com.key file.For details about creating a private key and certificate signing request (CSR), as well as how torequest a certificate from a certificate authority (CA), see your CA’s documentation.Alternatively, if your CA supports the ACME protocol, you can use the mod_md module toautomate retrieving and provisioning TLS certificates.
The TLS certificate is stored in the /etc/pki/tls/certs/example.com.crt file. If you use a differentpath, adapt the corresponding steps of the procedure.
The CA certificate is stored in the /etc/pki/tls/certs/ca.crt file. If you use a different path, adaptthe corresponding steps of the procedure.
Clients and the web server resolve the host name of the server to the IP address of the webserver.
Procedure
1. Install the mod_ssl package:
# dnf install mod_ssl
2. Edit the /etc/httpd/conf.d/ssl.conf file and add the following settings to the <VirtualHost _default_:443> directive:
a. Set the server name:
ServerName example.com
IMPORTANT
The server name must match the entry set in the Common Name field of thecertificate.
b. Optional: If the certificate contains additional host names in the Subject Alt Names (SAN)
Red Hat Enterprise Linux 9 Deploying web servers and reverse proxies
12
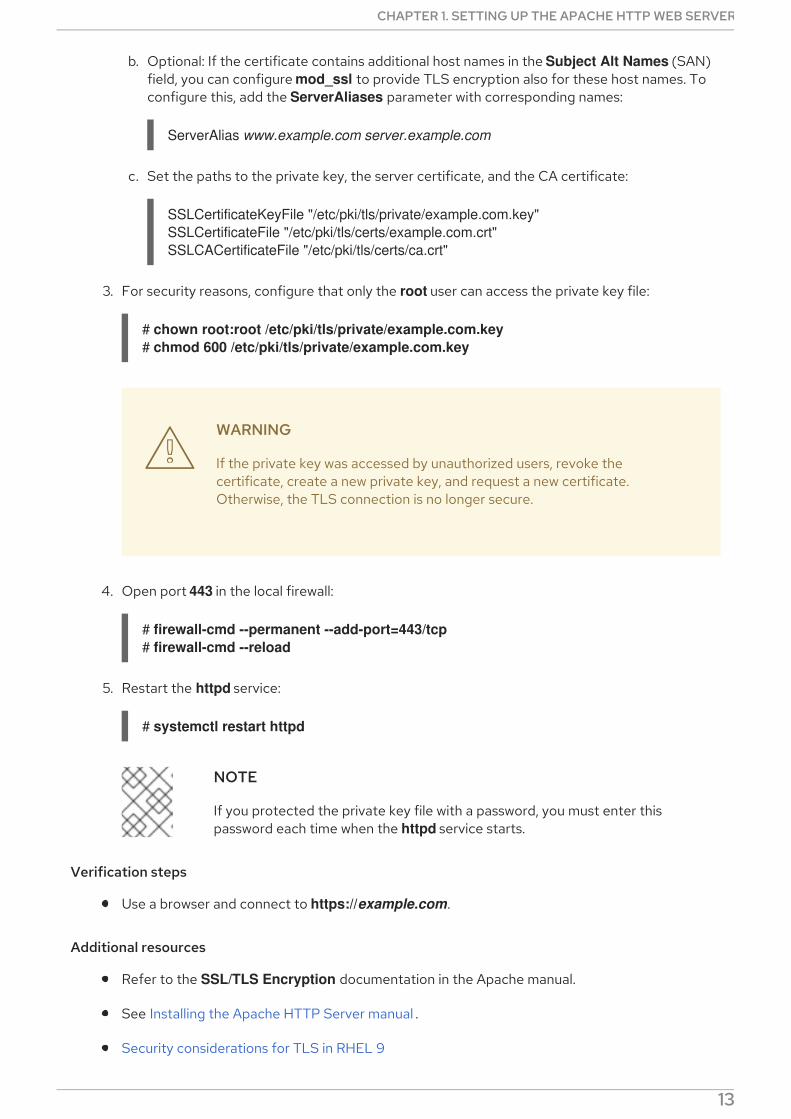
b. Optional: If the certificate contains additional host names in the Subject Alt Names (SAN)field, you can configure mod_ssl to provide TLS encryption also for these host names. Toconfigure this, add the ServerAliases parameter with corresponding names:
ServerAlias www.example.com server.example.com
c. Set the paths to the private key, the server certificate, and the CA certificate:
SSLCertificateKeyFile "/etc/pki/tls/private/example.com.key"SSLCertificateFile "/etc/pki/tls/certs/example.com.crt"SSLCACertificateFile "/etc/pki/tls/certs/ca.crt"
3. For security reasons, configure that only the root user can access the private key file:
# chown root:root /etc/pki/tls/private/example.com.key# chmod 600 /etc/pki/tls/private/example.com.key
WARNING
If the private key was accessed by unauthorized users, revoke thecertificate, create a new private key, and request a new certificate.Otherwise, the TLS connection is no longer secure.
4. Open port 443 in the local firewall:
# firewall-cmd --permanent --add-port=443/tcp# firewall-cmd --reload
5. Restart the httpd service:
# systemctl restart httpd
NOTE
If you protected the private key file with a password, you must enter thispassword each time when the httpd service starts.
Verification steps
Use a browser and connect to https://example.com.
Additional resources
Refer to the SSL/TLS Encryption documentation in the Apache manual.
See Installing the Apache HTTP Server manual .
Security considerations for TLS in RHEL 9
CHAPTER 1. SETTING UP THE APACHE HTTP WEB SERVER
13
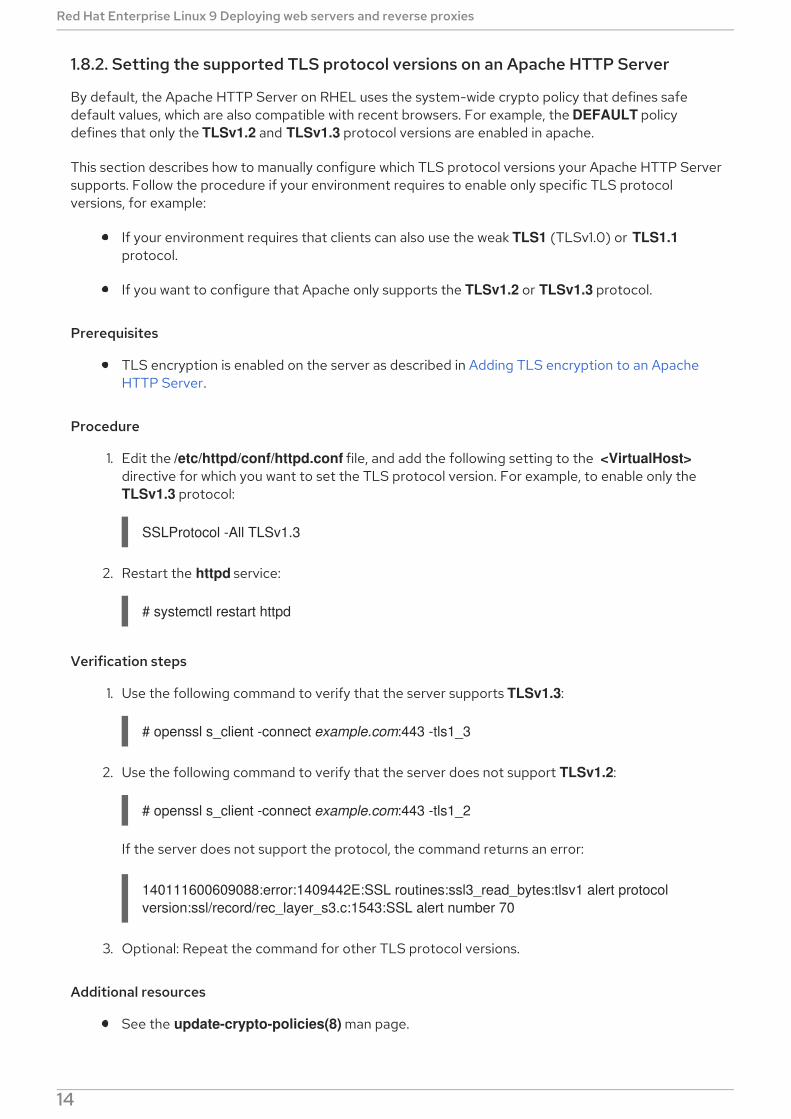
1.8.2. Setting the supported TLS protocol versions on an Apache HTTP Server
By default, the Apache HTTP Server on RHEL uses the system-wide crypto policy that defines safedefault values, which are also compatible with recent browsers. For example, the DEFAULT policydefines that only the TLSv1.2 and TLSv1.3 protocol versions are enabled in apache.
This section describes how to manually configure which TLS protocol versions your Apache HTTP Serversupports. Follow the procedure if your environment requires to enable only specific TLS protocolversions, for example:
If your environment requires that clients can also use the weak TLS1 (TLSv1.0) or TLS1.1protocol.
If you want to configure that Apache only supports the TLSv1.2 or TLSv1.3 protocol.
Prerequisites
TLS encryption is enabled on the server as described in Adding TLS encryption to an ApacheHTTP Server.
Procedure
1. Edit the /etc/httpd/conf/httpd.conf file, and add the following setting to the <VirtualHost>directive for which you want to set the TLS protocol version. For example, to enable only the TLSv1.3 protocol:
SSLProtocol -All TLSv1.3
2. Restart the httpd service:
# systemctl restart httpd
Verification steps
1. Use the following command to verify that the server supports TLSv1.3:
# openssl s_client -connect example.com:443 -tls1_3
2. Use the following command to verify that the server does not support TLSv1.2:
# openssl s_client -connect example.com:443 -tls1_2
If the server does not support the protocol, the command returns an error:
140111600609088:error:1409442E:SSL routines:ssl3_read_bytes:tlsv1 alert protocol version:ssl/record/rec_layer_s3.c:1543:SSL alert number 70
3. Optional: Repeat the command for other TLS protocol versions.
Additional resources
See the update-crypto-policies(8) man page.
Red Hat Enterprise Linux 9 Deploying web servers and reverse proxies
14

See Using system-wide cryptographic policies .
For details about the SSLProtocol parameter, see the mod_ssl documentation in the Apachemanual.
See Installing the Apache HTTP Server manual .
1.8.3. Setting the supported ciphers on an Apache HTTP Server
By default, the Apache HTTP Server uses the system-wide crypto policy that defines safe defaultvalues, which are also compatible with recent browsers. For the list of ciphers the system-wide cryptoallows, see the /etc/crypto-policies/back-ends/openssl.config file.
This section describes how to manually configure which ciphers your Apache HTTP Server supports.Follow the procedure if your environment requires specific ciphers.
Prerequisites
TLS encryption is enabled on the server as described in Adding TLS encryption to an ApacheHTTP Server.
Procedure
1. Edit the /etc/httpd/conf/httpd.conf file, and add the SSLCipherSuite parameter to the <VirtualHost> directive for which you want to set the TLS ciphers:
SSLCipherSuite "EECDH+AESGCM:EDH+AESGCM:AES256+EECDH:AES256+EDH:!SHA1:!SHA256"
This example enables only the EECDH+AESGCM, EDH+AESGCM, AES256+EECDH, and AES256+EDH ciphers and disables all ciphers which use the SHA1 and SHA256 messageauthentication code (MAC).
2. Restart the httpd service:
# systemctl restart httpd
Verification steps
1. To display the list of ciphers the Apache HTTP Server supports:
a. Install the nmap package:
# dnf install nmap
b. Use the nmap utility to display the supported ciphers:
# nmap --script ssl-enum-ciphers -p 443 example.com...PORT STATE SERVICE443/tcp open https| ssl-enum-ciphers:| TLSv1.2:| ciphers:
CHAPTER 1. SETTING UP THE APACHE HTTP WEB SERVER
15
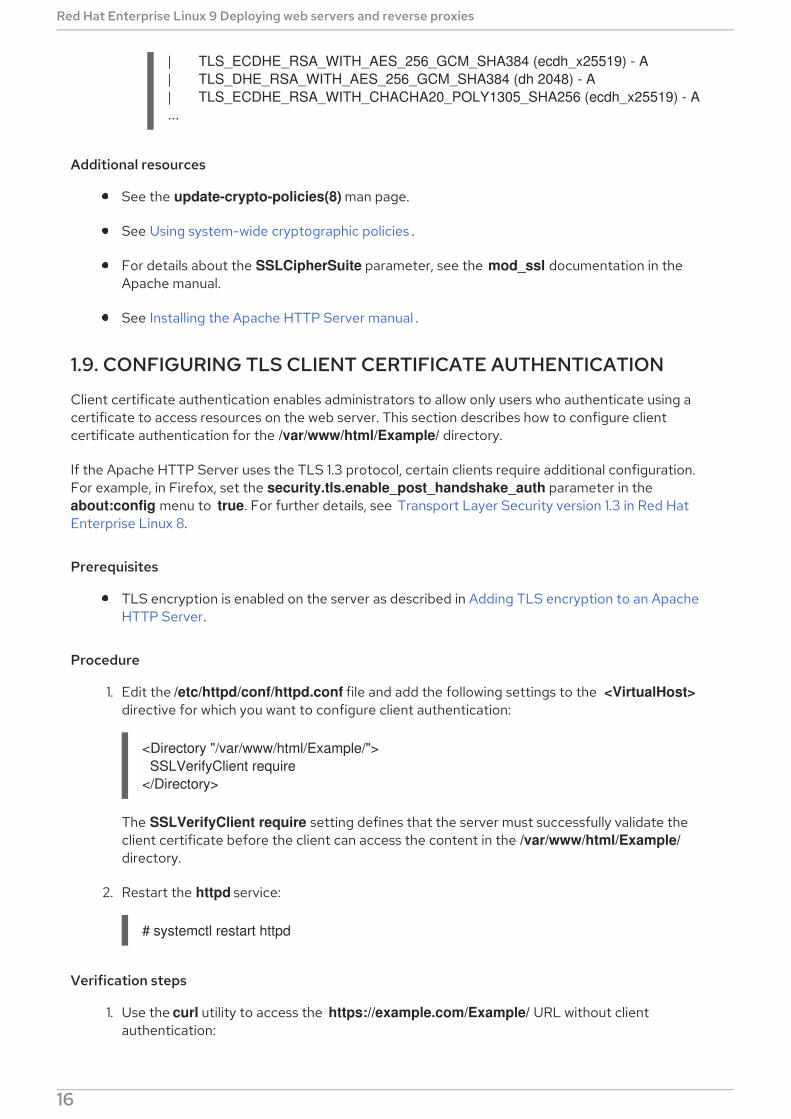
| TLS_ECDHE_RSA_WITH_AES_256_GCM_SHA384 (ecdh_x25519) - A| TLS_DHE_RSA_WITH_AES_256_GCM_SHA384 (dh 2048) - A| TLS_ECDHE_RSA_WITH_CHACHA20_POLY1305_SHA256 (ecdh_x25519) - A...
Additional resources
See the update-crypto-policies(8) man page.
See Using system-wide cryptographic policies .
For details about the SSLCipherSuite parameter, see the mod_ssl documentation in theApache manual.
See Installing the Apache HTTP Server manual .
1.9. CONFIGURING TLS CLIENT CERTIFICATE AUTHENTICATION
Client certificate authentication enables administrators to allow only users who authenticate using acertificate to access resources on the web server. This section describes how to configure clientcertificate authentication for the /var/www/html/Example/ directory.
If the Apache HTTP Server uses the TLS 1.3 protocol, certain clients require additional configuration.For example, in Firefox, set the security.tls.enable_post_handshake_auth parameter in the about:config menu to true. For further details, see Transport Layer Security version 1.3 in Red HatEnterprise Linux 8.
Prerequisites
TLS encryption is enabled on the server as described in Adding TLS encryption to an ApacheHTTP Server.
Procedure
1. Edit the /etc/httpd/conf/httpd.conf file and add the following settings to the <VirtualHost>directive for which you want to configure client authentication:
<Directory "/var/www/html/Example/"> SSLVerifyClient require</Directory>
The SSLVerifyClient require setting defines that the server must successfully validate theclient certificate before the client can access the content in the /var/www/html/Example/directory.
2. Restart the httpd service:
# systemctl restart httpd
Verification steps
1. Use the curl utility to access the https://example.com/Example/ URL without clientauthentication:
Red Hat Enterprise Linux 9 Deploying web servers and reverse proxies
16
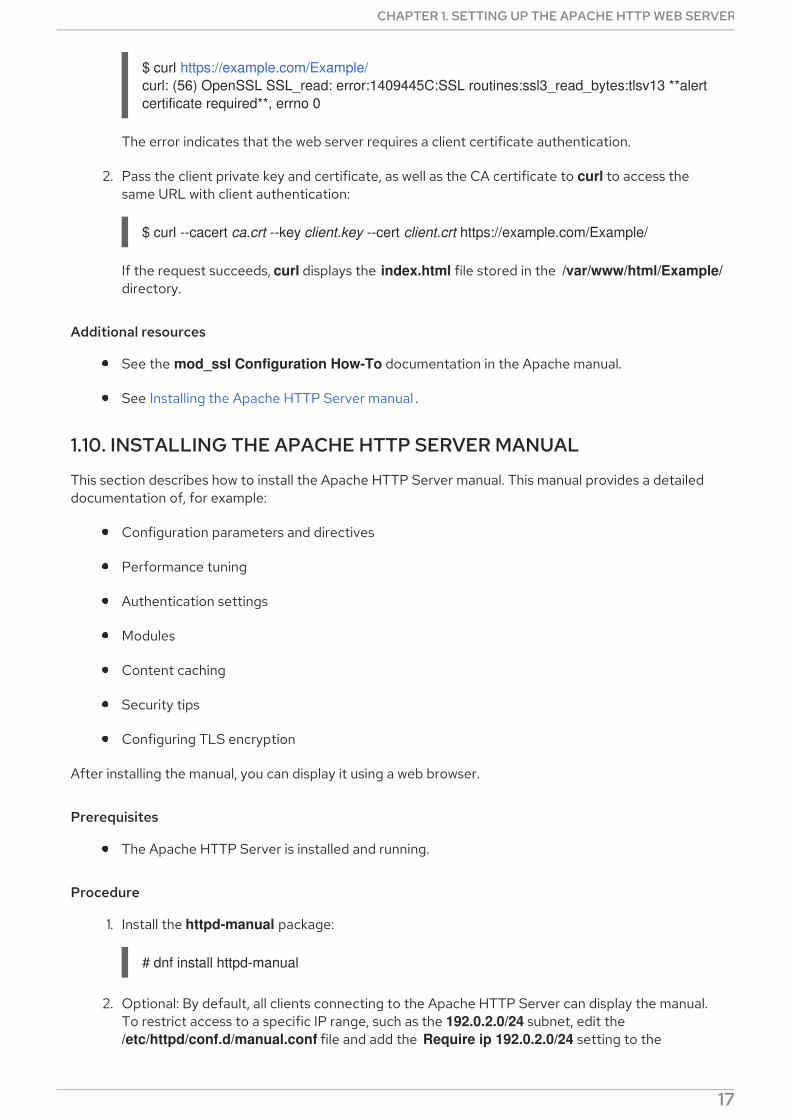
$ curl https://example.com/Example/curl: (56) OpenSSL SSL_read: error:1409445C:SSL routines:ssl3_read_bytes:tlsv13 **alert certificate required**, errno 0
The error indicates that the web server requires a client certificate authentication.
2. Pass the client private key and certificate, as well as the CA certificate to curl to access thesame URL with client authentication:
$ curl --cacert ca.crt --key client.key --cert client.crt https://example.com/Example/
If the request succeeds, curl displays the index.html file stored in the /var/www/html/Example/directory.
Additional resources
See the mod_ssl Configuration How-To documentation in the Apache manual.
See Installing the Apache HTTP Server manual .
1.10. INSTALLING THE APACHE HTTP SERVER MANUAL
This section describes how to install the Apache HTTP Server manual. This manual provides a detaileddocumentation of, for example:
Configuration parameters and directives
Performance tuning
Authentication settings
Modules
Content caching
Security tips
Configuring TLS encryption
After installing the manual, you can display it using a web browser.
Prerequisites
The Apache HTTP Server is installed and running.
Procedure
1. Install the httpd-manual package:
# dnf install httpd-manual
2. Optional: By default, all clients connecting to the Apache HTTP Server can display the manual.To restrict access to a specific IP range, such as the 192.0.2.0/24 subnet, edit the /etc/httpd/conf.d/manual.conf file and add the Require ip 192.0.2.0/24 setting to the
CHAPTER 1. SETTING UP THE APACHE HTTP WEB SERVER
17

<Directory "/usr/share/httpd/manual"> directive:
<Directory "/usr/share/httpd/manual">... **Require ip 192.0.2.0/24**...</Directory>
3. Restart the httpd service:
# systemctl restart httpd
Verification steps
1. To display the Apache HTTP Server manual, connect with a web browser to http://host_name_or_IP_address/manual/
1.11. WORKING WITH MODULES
Being a modular application, the httpd service is distributed along with a number of Dynamic SharedObjects (DSOs), which can be dynamically loaded or unloaded at runtime as necessary. These modulesare located in the /usr/lib64/httpd/modules/ directory.
1.11.1. Loading a module
To load a particular DSO module, use the LoadModule directive. Note that modules provided by aseparate package often have their own configuration file in the /etc/httpd/conf.modules.d/ directory.
Loading the mod_ssl DSO
LoadModule ssl_module modules/mod_ssl.so
After loading the module, restart the web server to reload the configuration. See Section 1.4, “Managingthe httpd service” for more information on how to restart the httpd service.
1.11.2. Writing a module
To create a new DSO module, make sure you have the httpd-devel package installed. To do so, enterthe following command as root:
# dnf install httpd-devel
This package contains the include files, the header files, and the APache eXtenSion (apxs) utilityrequired to compile a module.
Once written, you can build the module with the following command:
# apxs -i -a -c module_name.c
If the build was successful, you should be able to load the module the same way as any other modulethat is distributed with the Apache HTTP Server.
Red Hat Enterprise Linux 9 Deploying web servers and reverse proxies
18

1.12. EXPORTING A PRIVATE KEY AND CERTIFICATES FROM AN NSSDATABASE TO USE THEM IN AN APACHE WEB SERVERCONFIGURATION
Since RHEL 8 we no longer provide the mod_nss module for the Apache web server, and Red Hatrecommends using the mod_ssl module. If you store your private key and certificates in a NetworkSecurity Services (NSS) database, follow this procedure to extract the key and certificates in PrivacyEnhanced Mail (PEM) format.
1.13. ADDITIONAL RESOURCES
httpd(8) — The manual page for the httpd service containing the complete list of its command-line options.
httpd.service(8) — The manual page for the httpd.service unit file, describing how to customizeand enhance the service.
httpd.conf(5) — The manual page for httpd configuration, describing the structure and locationof the httpd configuration files.
apachectl(8) — The manual page for the Apache HTTP Server Control Interface.
For information on how to configure Kerberos authentication on an Apache HTTP server, seeUsing GSS-Proxy for Apache httpd operation . Using Kerberos is an alternative way to enforceclient authorization on an Apache HTTP Server.
Configuring applications to use cryptographic hardware through PKCS #11 .
CHAPTER 1. SETTING UP THE APACHE HTTP WEB SERVER
19

CHAPTER 2. SETTING UP AND CONFIGURING NGINXNGINX is a high performance and modular server that you can use, for example, as a:
Web server
Reverse proxy
Load balancer
This section describes how to NGINX in these scenarios.
2.1. INSTALLING AND PREPARING NGINX
Red Hat uses Application Streams to provide different versions of NGINX. This section describes howto:
Select a stream and install NGINX
Open the required ports in the firewall
Enable and start the nginx service
Using the default configuration, NGINX runs as a web server on port 80 and provides content from the /usr/share/nginx/html/ directory.
Prerequisites
RHEL 9 is installed.
The host is subscribed to the Red Hat Customer Portal.
The firewalld service is enabled and started.
Procedure
1. Install the nginx package:
# dnf install nginx
2. Open the ports on which NGINX should provide its service in the firewall. For example, to openthe default ports for HTTP (port 80) and HTTPS (port 443) in firewalld, enter:
# firewall-cmd --permanent --add-port={80/tcp,443/tcp}# firewall-cmd --reload
3. Enable the nginx service to start automatically when the system boots:
# systemctl enable nginx
4. Optionally, start the nginx service:
# systemctl start nginx
If you do not want to use the default configuration, skip this step, and configure NGINX
Red Hat Enterprise Linux 9 Deploying web servers and reverse proxies
20

If you do not want to use the default configuration, skip this step, and configure NGINXaccordingly before you start the service.
Verification steps
1. Use the dnf utility to verify that the nginx package is installed:
# dnf list installed nginxInstalled Packagesnginx.x86_64 1:1.20.1-4.el9 @rhel-AppStream
2. Ensure that the ports on which NGINX should provide its service are opened in the firewalld:
# firewall-cmd --list-ports80/tcp 443/tcp
3. Verify that the nginx service is enabled:
# systemctl is-enabled nginxenabled
Additional resources
For details about Subscription Manager, see the Using and Configuring Subscription Managerguide.
For details about configuring firewalls, see the Securing networks guide.
2.2. CONFIGURING NGINX AS A WEB SERVER THAT PROVIDESDIFFERENT CONTENT FOR DIFFERENT DOMAINS
By default, NGINX acts as a web server that provides the same content to clients for all domain namesassociated with the IP addresses of the server. This procedure explains how to configure NGINX:
To serve requests to the example.com domain with content from the /var/www/example.com/directory
To serve requests to the example.net domain with content from the /var/www/example.net/directory
To serve all other requests, for example, to the IP address of the server or to other domainsassociated with the IP address of the server, with content from the /usr/share/nginx/html/directory
Prerequisites
NGINX is installed as described in Section 2.1, “Installing and preparing NGINX”.
Clients and the web server resolve the example.com and example.net domain to the IPaddress of the web server.Note that you must manually add these entries to your DNS server.
Procedure
CHAPTER 2. SETTING UP AND CONFIGURING NGINX
21
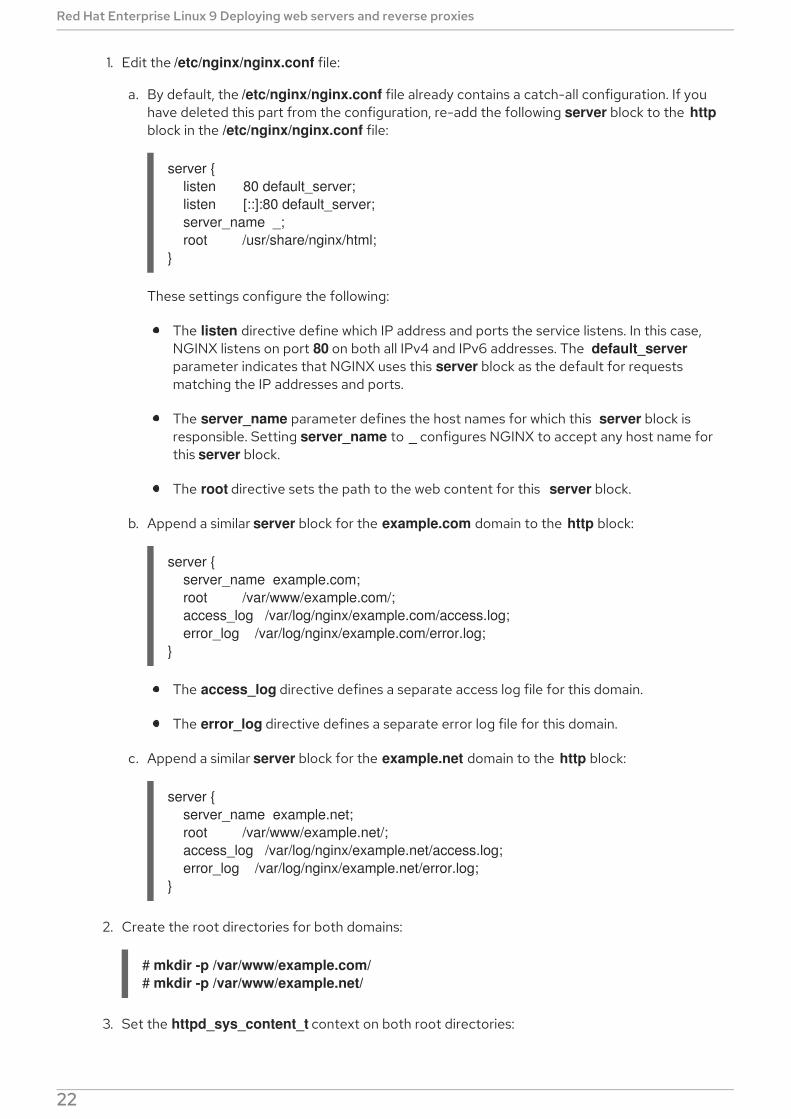
1. Edit the /etc/nginx/nginx.conf file:
a. By default, the /etc/nginx/nginx.conf file already contains a catch-all configuration. If youhave deleted this part from the configuration, re-add the following server block to the httpblock in the /etc/nginx/nginx.conf file:
server { listen 80 default_server; listen [::]:80 default_server; server_name _; root /usr/share/nginx/html;}
These settings configure the following:
The listen directive define which IP address and ports the service listens. In this case,NGINX listens on port 80 on both all IPv4 and IPv6 addresses. The default_serverparameter indicates that NGINX uses this server block as the default for requestsmatching the IP addresses and ports.
The server_name parameter defines the host names for which this server block isresponsible. Setting server_name to _ configures NGINX to accept any host name forthis server block.
The root directive sets the path to the web content for this server block.
b. Append a similar server block for the example.com domain to the http block:
server { server_name example.com; root /var/www/example.com/; access_log /var/log/nginx/example.com/access.log; error_log /var/log/nginx/example.com/error.log;}
The access_log directive defines a separate access log file for this domain.
The error_log directive defines a separate error log file for this domain.
c. Append a similar server block for the example.net domain to the http block:
server { server_name example.net; root /var/www/example.net/; access_log /var/log/nginx/example.net/access.log; error_log /var/log/nginx/example.net/error.log;}
2. Create the root directories for both domains:
# mkdir -p /var/www/example.com/# mkdir -p /var/www/example.net/
3. Set the httpd_sys_content_t context on both root directories:
Red Hat Enterprise Linux 9 Deploying web servers and reverse proxies
22

# semanage fcontext -a -t httpd_sys_content_t "/var/www/example.com(/.*)?"# restorecon -Rv /var/www/example.com/# semanage fcontext -a -t httpd_sys_content_t "/var/www/example.net(/.\*)?"# restorecon -Rv /var/www/example.net/
These commands set the httpd_sys_content_t context on the /var/www/example.com/ and /var/www/example.net/ directories.
Note that you must install the policycoreutils-python-utils package to run the restoreconcommands.
4. Create the log directories for both domains:
# mkdir /var/log/nginx/example.com/# mkdir /var/log/nginx/example.net/
5. Restart the nginx service:
# systemctl restart nginx
Verification steps
1. Create a different example file in each virtual host’s document root:
# echo "Content for example.com" > /var/www/example.com/index.html# echo "Content for example.net" > /var/www/example.net/index.html# echo "Catch All content" > /usr/share/nginx/html/index.html
2. Use a browser and connect to http://example.com. The web server shows the example contentfrom the /var/www/example.com/index.html file.
3. Use a browser and connect to http://example.net. The web server shows the example contentfrom the /var/www/example.net/index.html file.
4. Use a browser and connect to http://IP_address_of_the_server. The web server shows theexample content from the /usr/share/nginx/html/index.html file.
2.3. ADDING TLS ENCRYPTION TO AN NGINX WEB SERVER
This section describes how to enable TLS encryption on an NGINX web server for the example.comdomain.
Prerequisites
NGINX is installed as described in Section 2.1, “Installing and preparing NGINX”.
The private key is stored in the /etc/pki/tls/private/example.com.key file.For details about creating a private key and certificate signing request (CSR), as well as how torequest a certificate from a certificate authority (CA), see your CA’s documentation.
The TLS certificate is stored in the /etc/pki/tls/certs/example.com.crt file. If you use a differentpath, adapt the corresponding steps of the procedure.
The CA certificate has been appended to the TLS certificate file of the server.
CHAPTER 2. SETTING UP AND CONFIGURING NGINX
23

Clients and the web server resolve the host name of the server to the IP address of the webserver.
Port 443 is open in the local firewall.
Procedure
1. Edit the /etc/nginx/nginx.conf file, and add the following server block to the http block in theconfiguration:
server { listen 443 ssl; server_name example.com; root /usr/share/nginx/html; ssl_certificate /etc/pki/tls/certs/example.com.crt; ssl_certificate_key /etc/pki/tls/private/example.com.key;}
2. For security reasons, configure that only the root user can access the private key file:
# chown root:root /etc/pki/tls/private/example.com.key# chmod 600 /etc/pki/tls/private/example.com.key
WARNING
If the private key was accessed by unauthorized users, revoke thecertificate, create a new private key, and request a new certificate.Otherwise, the TLS connection is no longer secure.
3. Restart the nginx service:
# systemctl restart nginx
Verification steps
Use a browser and connect to https://example.com
Additional resources
Security considerations for TLS in RHEL 9
2.4. CONFIGURING NGINX AS A REVERSE PROXY FOR THE HTTPTRAFFIC
You can configure the NGINX web server to act as a reverse proxy for HTTP traffic. For example, youcan use this functionality to forward requests to a specific subdirectory on a remote server. From theclient perspective, the client loads the content from the host it accesses. However, NGINX loads theactual content from the remote server and forwards it to the client.
Red Hat Enterprise Linux 9 Deploying web servers and reverse proxies
24
This procedure explains how to forward traffic to the /example directory on the web server to the URL https://example.com.
Prerequisites
NGINX is installed as described in Section 2.1, “Installing and preparing NGINX”.
Optional: TLS encryption is enabled on the reverse proxy.
Procedure
1. Edit the /etc/nginx/nginx.conf file and add the following settings to the server block thatshould provide the reverse proxy:
location /example { proxy_pass https://example.com;}
The location block defines that NGINX passes all requests in the /example directory to https://example.com.
2. Set the httpd_can_network_connect SELinux boolean parameter to 1 to configure thatSELinux allows NGINX to forward traffic:
# setsebool -P httpd_can_network_connect 1
3. Restart the nginx service:
# systemctl restart nginx
Verification steps
Use a browser and connect to http://host_name/example and the content of https://example.com is shown.
2.5. CONFIGURING NGINX AS AN HTTP LOAD BALANCER
You can use the NGINX reverse proxy feature to load-balance traffic. This procedure describes how toconfigure NGINX as an HTTP load balancer that sends requests to different servers, based on which ofthem has the least number of active connections. If both servers are not available, the procedure alsodefines a third host for fallback reasons.
Prerequisites
NGINX is installed as described in Section 2.1, “Installing and preparing NGINX”.
Procedure
1. Edit the /etc/nginx/nginx.conf file and add the following settings:
http { upstream backend { least_conn;
CHAPTER 2. SETTING UP AND CONFIGURING NGINX
25

server server1.example.com; server server2.example.com; server server3.example.com backup; }
server { location / { proxy_pass http://backend; } }}
The least_conn directive in the host group named backend defines that NGINX sendsrequests to server1.example.com or server2.example.com, depending on which host has theleast number of active connections. NGINX uses server3.example.com only as a backup in casethat the other two hosts are not available.
With the proxy_pass directive set to http://backend, NGINX acts as a reverse proxy and usesthe backend host group to distribute requests based on the settings of this group.
Instead of the least_conn load balancing method, you can specify:
No method to use round robin and distribute requests evenly across servers.
ip_hash to send requests from one client address to the same server based on a hashcalculated from the first three octets of the IPv4 address or the whole IPv6 address of theclient.
hash to determine the server based on a user-defined key, which can be a string, a variable,or a combination of both. The consistent parameter configures that NGINX distributesrequests across all servers based on the user-defined hashed key value.
random to send requests to a randomly selected server.
2. Restart the nginx service:
# systemctl restart nginx
2.6. ADDITIONAL RESOURCES
For the official NGINX documentation see https://nginx.org/en/docs/. Note that Red Hat doesnot maintain this documentation and that it might not work with the NGINX version you haveinstalled.
Configuring applications to use cryptographic hardware through PKCS #11 .
Red Hat Enterprise Linux 9 Deploying web servers and reverse proxies
26

CHAPTER 3. CONFIGURING THE SQUID CACHING PROXYSERVER
Squid is a proxy server that caches content to reduce bandwidth and load web pages more quickly. Thischapter describes how to set up Squid as a proxy for the HTTP, HTTPS, and FTP protocol, as well asauthentication and restricting access.
3.1. SETTING UP SQUID AS A CACHING PROXY WITHOUTAUTHENTICATION
This section describes a basic configuration of Squid as a caching proxy without authentication. Theprocedure limits access to the proxy based on IP ranges.
Prerequisites
The procedure assumes that the /etc/squid/squid.conf file is as provided by the squidpackage. If you edited this file before, remove the file and reinstall the package.
Procedure
1. Install the squid package:
# dnf install squid
2. Edit the /etc/squid/squid.conf file:
a. Adapt the localnet access control lists (ACL) to match the IP ranges that should be allowedto use the proxy:
acl localnet src 192.0.2.0/24acl localnet 2001:db8:1::/64
By default, the /etc/squid/squid.conf file contains the http_access allow localnet rulethat allows using the proxy from all IP ranges specified in localnet ACLs. Note that you mustspecify all localnet ACLs before the http_access allow localnet rule.
IMPORTANT
Remove all existing acl localnet entries that do not match your environment.
b. The following ACL exists in the default configuration and defines 443 as a port that uses theHTTPS protocol:
acl SSL_ports port 443
If users should be able to use the HTTPS protocol also on other ports, add an ACL for eachof these port:
acl SSL_ports port port_number
c. Update the list of acl Safe_ports rules to configure to which ports Squid can establish aconnection. For example, to configure that clients using the proxy can only access
CHAPTER 3. CONFIGURING THE SQUID CACHING PROXY SERVER
27

resources on port 21 (FTP), 80 (HTTP), and 443 (HTTPS), keep only the following acl Safe_ports statements in the configuration:
acl Safe_ports port 21acl Safe_ports port 80acl Safe_ports port 443
By default, the configuration contains the http_access deny !Safe_ports rule that definesaccess denial to ports that are not defined in Safe_ports ACLs.
d. Configure the cache type, the path to the cache directory, the cache size, and further cachetype-specific settings in the cache_dir parameter:
cache_dir ufs /var/spool/squid 10000 16 256
With these settings:
Squid uses the ufs cache type.
Squid stores its cache in the /var/spool/squid/ directory.
The cache grows up to 10000 MB.
Squid creates 16 level-1 sub-directories in the /var/spool/squid/ directory.
Squid creates 256 sub-directories in each level-1 directory.If you do not set a cache_dir directive, Squid stores the cache in memory.
3. If you set a different cache directory than /var/spool/squid/ in the cache_dir parameter:
a. Create the cache directory:
# mkdir -p path_to_cache_directory
b. Configure the permissions for the cache directory:
# chown squid:squid path_to_cache_directory
c. If you run SELinux in enforcing mode, set the squid_cache_t context for the cachedirectory:
# semanage fcontext -a -t squid_cache_t "path_to_cache_directory(/.*)?"# restorecon -Rv path_to_cache_directory
If the semanage utility is not available on your system, install the policycoreutils-python-utils package.
4. Open the 3128 port in the firewall:
# firewall-cmd --permanent --add-port=3128/tcp# firewall-cmd --reload
5. Enable and start the squid service:
# systemctl enable --now squid
Red Hat Enterprise Linux 9 Deploying web servers and reverse proxies
28
Verification steps
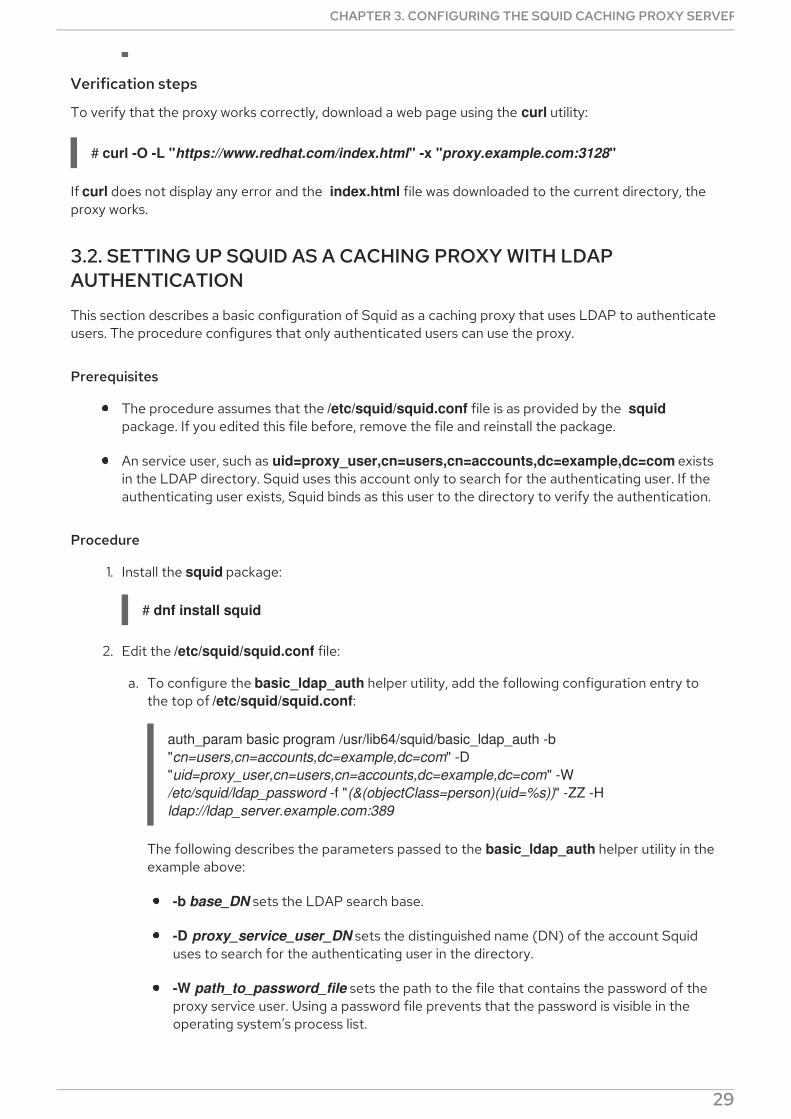
To verify that the proxy works correctly, download a web page using the curl utility:
# curl -O -L "https://www.redhat.com/index.html" -x "proxy.example.com:3128"
If curl does not display any error and the index.html file was downloaded to the current directory, theproxy works.
3.2. SETTING UP SQUID AS A CACHING PROXY WITH LDAPAUTHENTICATION
This section describes a basic configuration of Squid as a caching proxy that uses LDAP to authenticateusers. The procedure configures that only authenticated users can use the proxy.
Prerequisites
The procedure assumes that the /etc/squid/squid.conf file is as provided by the squidpackage. If you edited this file before, remove the file and reinstall the package.
An service user, such as uid=proxy_user,cn=users,cn=accounts,dc=example,dc=com existsin the LDAP directory. Squid uses this account only to search for the authenticating user. If theauthenticating user exists, Squid binds as this user to the directory to verify the authentication.
Procedure
1. Install the squid package:
# dnf install squid
2. Edit the /etc/squid/squid.conf file:
a. To configure the basic_ldap_auth helper utility, add the following configuration entry tothe top of /etc/squid/squid.conf:
auth_param basic program /usr/lib64/squid/basic_ldap_auth -b "cn=users,cn=accounts,dc=example,dc=com" -D "uid=proxy_user,cn=users,cn=accounts,dc=example,dc=com" -W /etc/squid/ldap_password -f "(&(objectClass=person)(uid=%s))" -ZZ -H ldap://ldap_server.example.com:389
The following describes the parameters passed to the basic_ldap_auth helper utility in theexample above:
-b base_DN sets the LDAP search base.
-D proxy_service_user_DN sets the distinguished name (DN) of the account Squiduses to search for the authenticating user in the directory.
-W path_to_password_file sets the path to the file that contains the password of theproxy service user. Using a password file prevents that the password is visible in theoperating system’s process list.
-f LDAP_filter specifies the LDAP search filter. Squid replaces the %s variable with the
CHAPTER 3. CONFIGURING THE SQUID CACHING PROXY SERVER
29

-f LDAP_filter specifies the LDAP search filter. Squid replaces the %s variable with theuser name provided by the authenticating user.The (&(objectClass=person)(uid=%s)) filter in the example defines that the username must match the value set in the uid attribute and that the directory entry containsthe person object class.
-ZZ enforces a TLS-encrypted connection over the LDAP protocol using the STARTTLS command. Omit the -ZZ in the following situations:
The LDAP server does not support encrypted connections.
The port specified in the URL uses the LDAPS protocol.
The -H LDAP_URL parameter specifies the protocol, the host name or IP address, andthe port of the LDAP server in URL format.
b. Add the following ACL and rule to configure that Squid allows only authenticated users touse the proxy:
acl ldap-auth proxy_auth REQUIREDhttp_access allow ldap-auth
IMPORTANT
Specify these settings before the http_access deny all rule.
c. Remove the following rule to disable bypassing the proxy authentication from IP rangesspecified in localnet ACLs:
http_access allow localnet
d. The following ACL exists in the default configuration and defines 443 as a port that uses theHTTPS protocol:
acl SSL_ports port 443
If users should be able to use the HTTPS protocol also on other ports, add an ACL for eachof these port:
acl SSL_ports port port_number
e. Update the list of acl Safe_ports rules to configure to which ports Squid can establish aconnection. For example, to configure that clients using the proxy can only accessresources on port 21 (FTP), 80 (HTTP), and 443 (HTTPS), keep only the following acl Safe_ports statements in the configuration:
acl Safe_ports port 21acl Safe_ports port 80acl Safe_ports port 443
By default, the configuration contains the http_access deny !Safe_ports rule that definesaccess denial to ports that are not defined in Safe_ports ACLs.
f. Configure the cache type, the path to the cache directory, the cache size, and further cache
Red Hat Enterprise Linux 9 Deploying web servers and reverse proxies
30

f. Configure the cache type, the path to the cache directory, the cache size, and further cachetype-specific settings in the cache_dir parameter:
cache_dir ufs /var/spool/squid 10000 16 256
With these settings:
Squid uses the ufs cache type.
Squid stores its cache in the /var/spool/squid/ directory.
The cache grows up to 10000 MB.
Squid creates 16 level-1 sub-directories in the /var/spool/squid/ directory.
Squid creates 256 sub-directories in each level-1 directory.If you do not set a cache_dir directive, Squid stores the cache in memory.
3. If you set a different cache directory than /var/spool/squid/ in the cache_dir parameter:
a. Create the cache directory:
# mkdir -p path_to_cache_directory
b. Configure the permissions for the cache directory:
# chown squid:squid path_to_cache_directory
c. If you run SELinux in enforcing mode, set the squid_cache_t context for the cachedirectory:
# semanage fcontext -a -t squid_cache_t "path_to_cache_directory(/.*)?"# restorecon -Rv path_to_cache_directory
If the semanage utility is not available on your system, install the policycoreutils-python-utils package.
4. Store the password of the LDAP service user in the /etc/squid/ldap_password file, and setappropriate permissions for the file:
# echo "password" > /etc/squid/ldap_password# chown root:squid /etc/squid/ldap_password# chmod 640 /etc/squid/ldap_password
5. Open the 3128 port in the firewall:
# firewall-cmd --permanent --add-port=3128/tcp# firewall-cmd --reload
6. Enable and start the squid service:
# systemctl enable --now squid
Verification steps
CHAPTER 3. CONFIGURING THE SQUID CACHING PROXY SERVER
31

To verify that the proxy works correctly, download a web page using the curl utility:
# curl -O -L "https://www.redhat.com/index.html" -x "user_name:[email protected]:3128"
If curl does not display any error and the index.html file was downloaded to the current directory, theproxy works.
Troubleshooting steps
To verify that the helper utility works correctly:
1. Manually start the helper utility with the same settings you used in the auth_param parameter:
# /usr/lib64/squid/basic_ldap_auth -b "cn=users,cn=accounts,dc=example,dc=com" -D "uid=proxy_user,cn=users,cn=accounts,dc=example,dc=com" -W /etc/squid/ldap_password -f "(&(objectClass=person)(uid=%s))" -ZZ -H ldap://ldap_server.example.com:389
2. Enter a valid user name and password, and press Enter:
user_name password
If the helper utility returns OK, authentication succeeded.
3.3. SETTING UP SQUID AS A CACHING PROXY WITH KERBEROSAUTHENTICATION
This section describes a basic configuration of Squid as a caching proxy that authenticates users to anActive Directory (AD) using Kerberos. The procedure configures that only authenticated users can usethe proxy.
Prerequisites
The procedure assumes that the /etc/squid/squid.conf file is as provided by the squidpackage. If you edited this file before, remove the file and reinstall the package.
The server on which you want to install Squid is a member of the AD domain.
Procedure
1. Install the following packages:
dnf install squid krb5-workstation
2. Authenticate as the AD domain administrator:
# kinit [email protected]
3. Create a keytab for Squid and store it in the /etc/squid/HTTP.keytab file:
# export KRB5_KTNAME=FILE:/etc/squid/HTTP.keytab# net ads keytab CREATE -U administrator
Red Hat Enterprise Linux 9 Deploying web servers and reverse proxies
32

4. Add the HTTP service principal to the keytab:
# net ads keytab ADD HTTP -U administrator
5. Set the owner of the keytab file to the squid user:
# chown squid /etc/squid/HTTP.keytab
6. Optionally, verify that the keytab file contains the HTTP service principal for the fully-qualifieddomain name (FQDN) of the proxy server:
klist -k /etc/squid/HTTP.keytabKeytab name: FILE:/etc/squid/HTTP.keytabKVNO Principal---- ---------------------------------------------------... 2 HTTP/[email protected]...
7. Edit the /etc/squid/squid.conf file:
a. To configure the negotiate_kerberos_auth helper utility, add the following configurationentry to the top of /etc/squid/squid.conf:
auth_param negotiate program /usr/lib64/squid/negotiate_kerberos_auth -k /etc/squid/HTTP.keytab -s HTTP/[email protected]
The following describes the parameters passed to the negotiate_kerberos_auth helperutility in the example above:
-k file sets the path to the key tab file. Note that the squid user must have readpermissions on this file.
-s HTTP/host_name@kerberos_realm sets the Kerberos principal that Squid uses.Optionally, you can enable logging by passing one or both of the following parametersto the helper utility:
-i logs informational messages, such as the authenticating user.
-d enables debug logging.Squid logs the debugging information from the helper utility to the /var/log/squid/cache.log file.
b. Add the following ACL and rule to configure that Squid allows only authenticated users touse the proxy:
acl kerb-auth proxy_auth REQUIREDhttp_access allow kerb-auth
IMPORTANT
Specify these settings before the http_access deny all rule.
c. Remove the following rule to disable bypassing the proxy authentication from IP ranges
CHAPTER 3. CONFIGURING THE SQUID CACHING PROXY SERVER
33

c. Remove the following rule to disable bypassing the proxy authentication from IP rangesspecified in localnet ACLs:
http_access allow localnet
d. The following ACL exists in the default configuration and defines 443 as a port that uses theHTTPS protocol:
acl SSL_ports port 443
If users should be able to use the HTTPS protocol also on other ports, add an ACL for eachof these port:
acl SSL_ports port port_number
e. Update the list of acl Safe_ports rules to configure to which ports Squid can establish aconnection. For example, to configure that clients using the proxy can only accessresources on port 21 (FTP), 80 (HTTP), and 443 (HTTPS), keep only the following acl Safe_ports statements in the configuration:
acl Safe_ports port 21acl Safe_ports port 80acl Safe_ports port 443
By default, the configuration contains the http_access deny !Safe_ports rule that definesaccess denial to ports that are not defined in Safe_ports ACLs.
f. Configure the cache type, the path to the cache directory, the cache size, and further cachetype-specific settings in the cache_dir parameter:
cache_dir ufs /var/spool/squid 10000 16 256
With these settings:
Squid uses the ufs cache type.
Squid stores its cache in the /var/spool/squid/ directory.
The cache grows up to 10000 MB.
Squid creates 16 level-1 sub-directories in the /var/spool/squid/ directory.
Squid creates 256 sub-directories in each level-1 directory.If you do not set a cache_dir directive, Squid stores the cache in memory.
8. If you set a different cache directory than /var/spool/squid/ in the cache_dir parameter:
a. Create the cache directory:
# mkdir -p path_to_cache_directory
b. Configure the permissions for the cache directory:
# chown squid:squid path_to_cache_directory
Red Hat Enterprise Linux 9 Deploying web servers and reverse proxies
34

c. If you run SELinux in enforcing mode, set the squid_cache_t context for the cachedirectory:
# semanage fcontext -a -t squid_cache_t "path_to_cache_directory(/.*)?"# restorecon -Rv path_to_cache_directory
If the semanage utility is not available on your system, install the policycoreutils-python-utils package.
9. Open the 3128 port in the firewall:
# firewall-cmd --permanent --add-port=3128/tcp# firewall-cmd --reload
10. Enable and start the squid service:
# systemctl enable --now squid
Verification steps
To verify that the proxy works correctly, download a web page using the curl utility:
# curl -O -L "https://www.redhat.com/index.html" --proxy-negotiate -u : -x "proxy.ad.example.com:3128"
If curl does not display any error and the index.html file exists in the current directory, the proxy works.
Troubleshooting steps
To manually test Kerberos authentication:
1. Obtain a Kerberos ticket for the AD account:
# kinit [email protected]
2. Optionally, display the ticket:
# klist
3. Use the negotiate_kerberos_auth_test utility to test the authentication:
# /usr/lib64/squid/negotiate_kerberos_auth_test proxy.ad.example.com
If the helper utility returns a token, the authentication succeeded:
Token: YIIFtAYGKwYBBQUCoIIFqDC...
3.4. CONFIGURING A DOMAIN DENY LIST IN SQUID
Frequently, administrators want to block access to specific domains. This section describes how toconfigure a domain deny list in Squid.
Prerequisites
CHAPTER 3. CONFIGURING THE SQUID CACHING PROXY SERVER
35

Squid is configured, and users can use the proxy.
Procedure
1. Edit the /etc/squid/squid.conf file and add the following settings:
acl domain_deny_list dstdomain "/etc/squid/domain_deny_list.txt"http_access deny all domain_deny_list
IMPORTANT
Add these entries before the first http_access allow statement that allowsaccess to users or clients.
2. Create the /etc/squid/domain_deny_list.txt file and add the domains you want to block. Forexample, to block access to example.com including subdomains and to block example.net,add:
.example.comexample.net
IMPORTANT
If you referred to the /etc/squid/domain_deny_list.txt file in the squidconfiguration, this file must not be empty. If the file is empty, Squid fails to start.
3. Restart the squid service:
# systemctl restart squid
3.5. CONFIGURING THE SQUID SERVICE TO LISTEN ON A SPECIFICPORT OR IP ADDRESS
By default, the Squid proxy service listens on the 3128 port on all network interfaces. This sectiondescribes how to change the port and configuring Squid to listen on a specific IP address.
Prerequisites
The squid package is installed.
Procedure
1. Edit the /etc/squid/squid.conf file:
To set the port on which the Squid service listens, set the port number in the http_portparameter. For example, to set the port to 8080, set:
http_port 8080
To configure on which IP address the Squid service listens, set the IP address and port
Red Hat Enterprise Linux 9 Deploying web servers and reverse proxies
36

To configure on which IP address the Squid service listens, set the IP address and portnumber in the http_port parameter. For example, to configure that Squid listens only on the192.0.2.1 IP address on port 3128, set:
http_port 192.0.2.1:3128
Add multiple http_port parameters to the configuration file to configure that Squid listenson multiple ports and IP addresses:
http_port 192.0.2.1:3128http_port 192.0.2.1:8080
2. If you configured that Squid uses a different port as the default (3128):
a. Open the port in the firewall:
# firewall-cmd --permanent --add-port=port_number/tcp# firewall-cmd --reload
b. If you run SELinux in enforcing mode, assign the port to the squid_port_t port typedefinition:
# semanage port -a -t squid_port_t -p tcp port_number
If the semanage utility is not available on your system, install the policycoreutils-python-utils package.
3. Restart the squid service:
# systemctl restart squid
3.6. ADDITIONAL RESOURCES
See the usr/share/doc/squid-<version>/squid.conf.documented file for a list of allconfiguration parameters you can set in the /etc/squid/squid.conf file together with a detaileddescription.
CHAPTER 3. CONFIGURING THE SQUID CACHING PROXY SERVER
37
Related Documents