App-V 5 in Configuration Manager 2012 R2 Deploying Virtual Applications in System Center 2012 R2 Configuration ManagerImplementing App-V 5.0 in System Center 2012 Configuration Manager

Welcome message from author
This document is posted to help you gain knowledge. Please leave a comment to let me know what you think about it! Share it to your friends and learn new things together.
Transcript

App-V 5 in Configuration Manager 2012 R2
Deploying Virtual Applications in System
Center 2012 R2 Configuration
ManagerImplementing App-V 5.0 in System Center
2012 Configuration Manager


This document is for informational purposes only. MICROSOFT MAKES NO WARRANTIES, EXPRESS,
IMPLIED, OR STATUTORY, AS TO THE INFORMATION IN THIS DOCUMENT.
The information contained in this document represents the current view of Microsoft Corporation on the
issues discussed as of the date of publication and is subject to change at any time without notice to you.
This document and its contents are provided AS IS without warranty of any kind, and should not be
interpreted as an offer or commitment on the part of Microsoft, and Microsoft cannot guarantee the
accuracy of any information presented. MICROSOFT MAKES NO WARRANTIES, EXPRESS OR IMPLIED, IN
THIS DOCUMENT.
The descriptions of other companies’ products in this proposal, if any, are provided only as a convenience
to you. Any such references should not be considered an endorsement or support by Microsoft. Microsoft
cannot guarantee their accuracy, and the products may change over time. Also, the descriptions are
intended as brief highlights to aid understanding, rather than as thorough coverage. For authoritative
descriptions of these products, please consult their respective manufacturers.
This deliverable is provided, AS IS without warranty of any kind and MICROSOFT MAKES NO
WARRANTIES, EXPRES OR IMPLIED, OR OTHERWISE.
All trademarks are the property of their respective companies.
Printed in the United States of America
©2007 Microsoft Corporation. All rights reserved.
Microsoft and Windows are either registered trademarks or trademarks of Microsoft Corporation in the
United States and/or other countries.
The names of the actual companies and products mentioned herein may be the trademarks of their
respective owners.

App-V 5 in Configuration Manager 2012 R2 Page 1
Objectives After completing this lab, you will be better able to:
Install the site system roles required for users to access the
Application Catalog
Configure the primary device for a user
Create virtual applications based on App-V 4.6 as well as App-V 5
Install available applications from the Application Catalog
Deploy virtual applications to users
Implement App-V 5 virtual environments
Prerequisites This lab requires an installed and functioning Configuration Manager
2012 R2 site running (Primary1 is the site server virtual machine image).
This lab also requires at least one Configuration Manager 2012 R2 client
that has the Microsoft Application Virtualization (App-V) client version 5
installed (Client1 is the client computer in addition to the site server
virtual machine being installed as a client).
Estimated Time to
Complete This Lab
75 Minutes
Computers used in
this Lab Primary1
Client1
The password for the administrator account on all computers in this lab
is: password.

App-V 5 in Configuration Manager 2012 R2 Page 2
1 INSTALLING THE REQUIRED CONFIGURATION MANAGER SITE
SYSTEM ROLES TO SUPPORT THE APPLICATION CATALOG
In this exercise, you will install the two Application Catalog site system roles in Configuration Manager
2012 R2 to support application deployment via the Application Catalog.
Tasks Detailed steps
Complete the following task on: Primary1
1. Start the Configuration Manager Console
1. On the Start menu, click Configuration Manager Console.
Note: The System Center 2012 R2 Configuration Manager console window
appears displaying the Assets and Compliance workspace Overview page. You
could also start the Configuration Manager console from Start, All Programs, Microsoft System Center 2012 R2, Configuration Manager Console.
2. Install the Application Catalog site system roles
1. Click the Administration workspace.
Note: The Administration workspace appears displaying the Overview page in
the results pane.
2. In the navigation pane, expand Site Configuration, and then click Sites.
Note: The list of sites appears in the results pane. Notice that there is only one site displayed, that being the local site "MCM".
3. In the navigation pane, click Servers and Site System Roles.
Note: The list of site systems appear in the results pane with the installed site system roles displayed in the preview pane. Notice that the site only has one
site system, "Primary1", and that there are no roles related to the "Application
Catalog" deployed. In our lab, we'll install the roles on the site server. In a production environment, you may choose to install the roles on a different
server than the site server.
4. On the Home tab of the Ribbon, click Add Site System Roles.
Note: The Add Site System Roles Wizard General dialog box appears.
Notice that the site is publishing the intranet FQDN of the site server. This
information was collected during Configuration Manger Setup as the site server is also a management point. Notice also that there is no Internet-based FQDN
being published.
5. Click Next.
Note: The Add Site System Roles Wizard Proxy dialog box appears
allowing you to configure a proxy server and account for this site system to access the Internet. The site system roles you will install in this lab do not need
any Internet access, so this is not needed for these roles.
6. Click Next.
Note: The Add Site System Roles Wizard System Role Selection dialog box appears displaying the list of site system roles that can be assigned to this
site system.
7. Under Available roles, click to select both Application Catalog web service point and Application Catalog website point, and then click Next.

App-V 5 in Configuration Manager 2012 R2 Page 3
Note: The Add Site System Roles Wizard Application Catalog web
service point dialog box appears allowing you to configure the general
properties for the Application Catalog web service point. Notice that there are values for the web site, web application name and the protocol and port to be
used. Notice also that the default protocol and port is configured for HTTP and port 80 for our lab environment.
8. Click Next to accept the default values.
Note: The Add Site System Roles Wizard Application Catalog website point dialog box appears allowing you to configure the general properties for
the Application Catalog website point. Notice that there are values for the IIS
website, web application name, NetBIOS name of the host computer, and protocol and port to be used by clients. Notice that the default configuration is
to use HTTP and port 80, which is proper for our lab environment.
9. Click Next to accept the default values.
Note: The Add Site System Roles Wizard Application Catalog
Customizations dialog box appears allowing you to configure the organization
name for display in the Application Catalog, as well as the color scheme to display to the users.
10. In the Organization name box, type Lab Test Environment
11. After Website theme, click Blue.
Note: The Add Site System Roles Wizard Application Catalog Customizations dialog box displays additional color schemes that can be
displayed to the users in the Application Catalog. Notice that you can also use additional colors other than those listed as default themes.
12. Click the color theme that you wish to display in the Application Catalog, and then click Next.
Note: The Add Site System Roles Wizard Summary dialog box appears
indicating that the wizard is ready to install the new site roles.
13. Click Next.
Note: The Add Site System Roles Wizard Completion dialog box appears.
14. Click Close.
Note: The System Center 2012 R2 Configuration Manager console window appears displaying the site systems and roles for the site. Notice that there are
now two site system roles deployed in the site related to the “Application
Catalog”. Also notice that both these roles are installed on the site server "Primary1". In your production environments, you may have site system roles
installed on other computers to offload processing from the site server computer.

App-V 5 in Configuration Manager 2012 R2 Page 4
2 ASSIGNING A PRIMARY DEVICE TO A USER
In this exercise, you will establish a relationship between the user that will be targeted with the
application and the user’s primary system. This process is referred to as creating a User Device Affinity
relationship. This is only required if you want to restrict the application installation to a user’s primary
computer. However, you do need to enable and run Active Directory User Discovery in order to have
users available for application deployment targeting.
Tasks Detailed steps
Complete the following task on: Primary1
1. Discovering user accounts
1. In the navigation pane, expand Hierarchy Configuration, and then click Discovery Methods.
Note: The list of discovery methods for the site appears in the preview pane.
2. In the results pane, click Active Directory User Discovery, and then on the Ribbon, click Properties.
Note: The Active Directory User Discovery Properties dialog box appears
displaying general properties for this discovery method. Notice that the discovery method is not enabled by default.
3. Click to select Enable Active Directory User Discovery, and then click New (the icon resembles a starburst).
Note: The Active Directory Container dialog box appears. Notice that there is no assigned path for the discovery process. Notice that you could manually
enter an LDAP path or you can browse to a location to query.
4. Click Browse.
Note: The Select New Container dialog box appears allowing you to
designate the path to run the discovery from. You could initiate the discovery
from a specific OU or from the root of the domain (as you will do in the lab).
5. Click OK to configure discovery to start at the root of the domain.
Note: The Active Directory Container dialog box appears. Notice that there
is now a path displayed for the discovery process. Notice also that a recursive search will be performed (which is required for a discovery configured to start
at the root of the domain), discovery of objects in groups is excluded, and that
the site server computer account will be used to query Active Directory.
6. Click OK.
Note: The Active Directory User Discovery Properties dialog box appears
displaying general properties for this discovery method. Notice that the discovery method is now enabled and has a path listed. By default, a full
discovery process will occur on a weekly basis, and delta discovery will occur
every five minutes. These schedules can be configured on the Polling Schedule tab.
7. Click OK.
Note: A Configuration Manager message box appears indicating that enabling the discovery method will trigger a full discovery cycle.
8. Click Yes.
Note: The list of discovery methods appears in the results pane and the Active

App-V 5 in Configuration Manager 2012 R2 Page 5
Directory User Discovery method is run. It will take a moment for the discovery
process to complete. You will now need to update the collection to view the
new members, and to assign the user device affinity relationship (if you want to install applications only on user’s primary devices). You will do that in the next
task.
2. Manually configure User Device Affinity
1. Click the Assets and Compliance workspace.
Note: The Assets and Compliance workspace appears displaying the Overview
page in the results pane.
2. In the navigation pane, click User Collections.
Note: The list of user collections appears in the results pane. Notice that there
are three collections available.
3. In the results pane, click All Users and User Groups, and then on the Ribbon, click Show Members.
Note: The "All Users and User Groups" collection is added to the navigation
pane as a sticky node below "Users". Notice that are no members of the collection at this time.
4. On the Collection tab of the Ribbon, click Update Membership.
Note: A Configuration Manager message box appears confirming the
request to update the collection membership of the selected collection. In a production environment, normally you would wait for the default five minute
dynamic collection update cycle, however you will force the update to save that time. The "All Users and User Groups" collection is the parent collection to "All
Users", so until this collection is updated, you will not see any members of the
"All Users" collection.
5. Click Yes, and then Refresh the list of members of the All Users and User Groups collection.
Note: The members of the "All Users and User Groups" collection are displayed
in the results pane. Notice that there are six members of the "All Users and User Groups" collection. If your membership for the collection does not update,
wait another minute, update the collection membership again, and then refresh again. After updating the "All Users and User Groups" collection, you will be
able to view the members in that collection, or the "All Users" collection, which
is limited to the "All Users and User Groups" collection.
6. In the results pane, click ConfigMgrDom\User1.
Note: The available tasks for this user are displayed on Home tab of the
Ribbon. Notice that one of the tasks is to "Edit Primary Devices".
7. On the Home tab of the Ribbon, click Edit Primary Devices.
Note: The Edit Primary Devices dialog box appears allowing you to
configure the primary devices for the selected user (ConfigMgrDom\User1).
Notice that there are no systems listed as primary devices for the user. Notice also that the user has not logged into any computer in the past 90 days.
8. In the Type a search string to search ALL devices box, type client
Note: The Edit Primary Devices dialog box displays all computers that include the string "client" in the name. Notice that multiple computers are
displayed that contain “client” in the computer name.
9. Under Device Name, click Client1, and then click Add.
Note: "Client1" is now listed as a primary device for this user. Notice that the "Affinity Type" displays "Administrator Defined". A user can have multiple

App-V 5 in Configuration Manager 2012 R2 Page 6
primary devices, though you'll only assign one at this time.
10. Click OK.
Note: The members of the "All Users and User Groups" collection appear in the
results pane. You have now successfully assigned a primary device to a user using the Configuration Manager 2012 R2 console. You will use this association
to target the application to the user in this lab. You could also have assigned "User1" as a primary user of the computer "Client1".
In the following procedure, you will force the client computer to retrieve policies. This will force the
download of the policy that sets the user device affinity relationship.
Tasks Detailed steps
Complete the following task on: Client1
1. Force policy retrieval to set user device affinity
1. In Control Panel, click System and Security, and then start Configuration Manager.
Note: The Configuration Manager Properties dialog box
appears displaying general attributes of the client.
2. Click the Actions tab.
Note: The Configuration Manager Properties dialog box
appears displaying the available actions for the client.
2. Click Machine Policy Retrieval & Evaluation Cycle, and then click Run Now.
Note: A Machine Policy Retrieval & Evaluation Cycle
message box appears indicating that the action may take several
minutes to complete.
3. Click OK.
Note: The Configuration Manager Properties dialog box
appears displaying the available actions for the client.
4. Click OK.
Note: Applicable policies are retrieved for the client. The new
policy will set the user device affinity relationship for the client,
stating that "ConfigMgrDom\User1" is a primary user for the computer "Client1". This is required for the rest of the lab to
demonstrate the user device affinity relationship for the application deployment.
In a production environment, you would not have to force policy retrieval, as it should happen within the hour (by default).
However in our lab environment you are manually retrieving
policies so that the policy has been retrieved and implemented prior to use later in this lab.
App-V 5 in Configuration Manager 2012 R2 Page 7
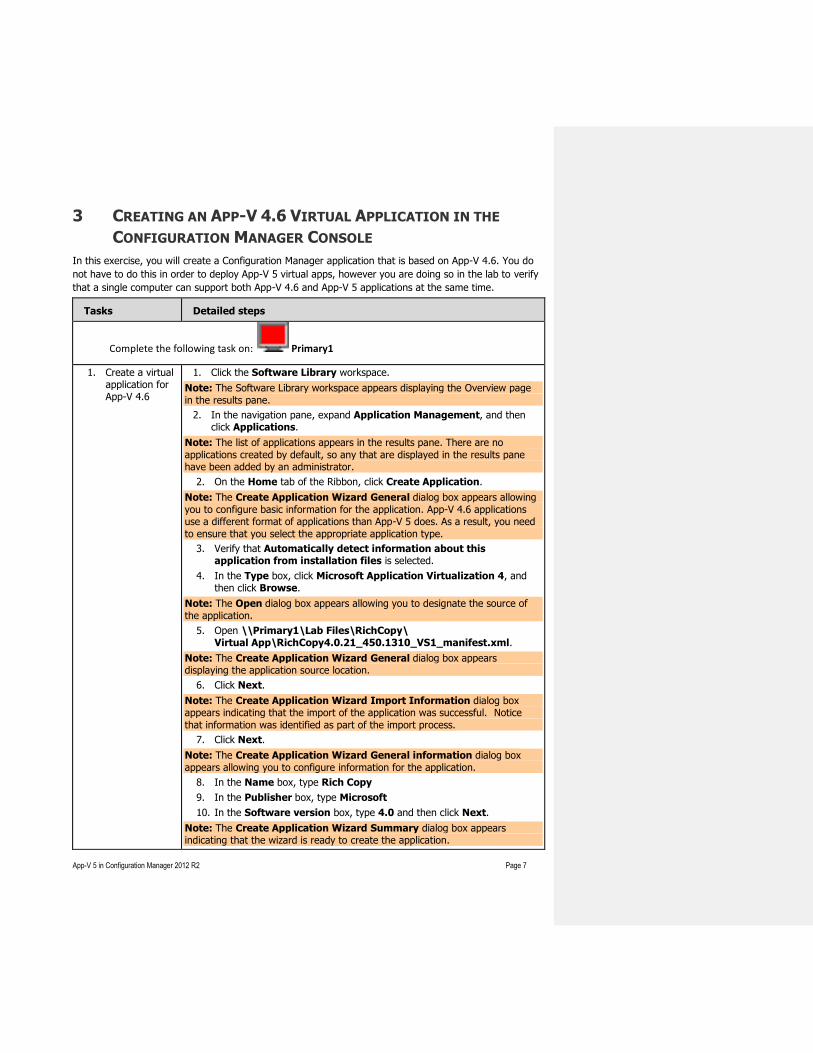
3 CREATING AN APP-V 4.6 VIRTUAL APPLICATION IN THE
CONFIGURATION MANAGER CONSOLE
In this exercise, you will create a Configuration Manager application that is based on App-V 4.6. You do
not have to do this in order to deploy App-V 5 virtual apps, however you are doing so in the lab to verify
that a single computer can support both App-V 4.6 and App-V 5 applications at the same time.
Tasks Detailed steps
Complete the following task on: Primary1
1. Create a virtual application for App-V 4.6
1. Click the Software Library workspace.
Note: The Software Library workspace appears displaying the Overview page
in the results pane.
2. In the navigation pane, expand Application Management, and then click Applications.
Note: The list of applications appears in the results pane. There are no
applications created by default, so any that are displayed in the results pane have been added by an administrator.
2. On the Home tab of the Ribbon, click Create Application.
Note: The Create Application Wizard General dialog box appears allowing
you to configure basic information for the application. App-V 4.6 applications use a different format of applications than App-V 5 does. As a result, you need
to ensure that you select the appropriate application type.
3. Verify that Automatically detect information about this application from installation files is selected.
4. In the Type box, click Microsoft Application Virtualization 4, and then click Browse.
Note: The Open dialog box appears allowing you to designate the source of
the application.
5. Open \\Primary1\Lab Files\RichCopy\ Virtual App\RichCopy4.0.21_450.1310_VS1_manifest.xml.
Note: The Create Application Wizard General dialog box appears displaying the application source location.
6. Click Next.
Note: The Create Application Wizard Import Information dialog box appears indicating that the import of the application was successful. Notice
that information was identified as part of the import process.
7. Click Next.
Note: The Create Application Wizard General information dialog box
appears allowing you to configure information for the application.
8. In the Name box, type Rich Copy
9. In the Publisher box, type Microsoft
10. In the Software version box, type 4.0 and then click Next.
Note: The Create Application Wizard Summary dialog box appears indicating that the wizard is ready to create the application.

App-V 5 in Configuration Manager 2012 R2 Page 8
11. Click Next.
Note: The new application is created. When complete, the Create
Application Wizard Completion dialog box appears indicating that the
wizard has completed successfully the creation of the application.
12. Click Close.
Note: The new application now appears in the results pane of applications.
Notice that the results pane displays the basic properties of the application, including the number of deployment types (we only have one). Also notice that
the preview pane which displays information for the selected package, with tabs for Summary information (the default view), Deployment Types (the App-V
4 based deployment type you just created with the wizard), and Deployments
(of which there are none at this time).
You have now successfully created an application. You will now add requirement rules to this application. Later in this lab, you will deploy the
application to the members of a collection of users.
2. Add Application Catalog metadata and operating system requirements
1. In the results pane of applications, click Rich Copy, and then on the Home tab of the Ribbon, click Properties.
Note: The Rich Copy Properties dialog box appears displaying the general
properties of the application.
2. Click the Application Catalog tab.
Note: The Rich Copy Properties dialog box appears displaying the
Application Catalog properties of the application. These properties will appear in
the Application Catalog when users attempt to run this application.
3. In the Selected language box, verify that English (United States) default is displayed.
4. After User categories, click Edit.
Note: The User Categories dialog box appears displaying the categories for
user filtering. Notice that there are no categories available by default.
5. Click Create.
Note: The Create User Category message box appears.
6. In the Specify the name of the new user category box, type Tools and then click OK.
Note: The User Categories dialog box appears displaying the categories for user filtering. Notice that the new category is listed and automatically selected.
7. Click OK.
Note: The Rich Copy Properties dialog box appears displaying the
Application Catalog properties of the application. Only a few of the properties have been supplied so far, you will complete the rest of them now.
8. In the User documentation box, type http://primary1
Note: The URL specified here could be an intranet site or an Internet-based site where the user could access additional information about the application.
9. In the Link text box, type Click here for more information on this application
10. In the Localized description box, type A graphical tool for copying files
11. In the Keywords box, type file copy and then after Icon, click

App-V 5 in Configuration Manager 2012 R2 Page 9
Browse.
Note: The Open dialog box appears.
12. Open C:\Lab Files\RichCopy\Virtual App\ RichCopy4.0.21_450.1310_VS1 Icons\RichCopy 4.0 4.0.201.0.
Note: The Rich Copy Properties dialog box appears displaying the
Application Catalog properties of the application. All appropriate properties for the lab have now been configured.
13. Click the Deployment Types tab.
Note: The Rich Copy Properties dialog box appears displaying the deployment types designated for the application. Notice that there is one
deployment type created as part of the application creation. Also notice that the deployment type is based on App-V 4.
14. Under Name, click Rich Copy 4.0.21_450.1310_VS1 – Microsoft Application Virtualization 4, and then click Edit.
Note: The Rich Copy 4.0.21_450.1310_VS1 – Microsoft Application
Virtualization 4 Properties dialog box appears displaying general properties for this deployment type. Notice that there are no “Programs” or “Detection
Methods” tab like you would see for a Windows Installer deployment type.
You will change the deployment type name for easier viewing.
15. In the Name box, type App-V 4 Virtual app and then click the Requirements tab.
Note: The Rich Copy 4.0.21_450.1310_VS1 – Microsoft Application
Virtualization 4 Properties dialog box appears displaying the configured requirements for this deployment type. Notice that by default there is one
requirement rule for this deployment type. The “Operating system” requirement rule was imported from the manifest file during the application creation.
16. Under Requirement Type, click Operating system, and then click Edit.
Note: The Edit Requirement dialog box appears displaying the specific operating system requirements for this deployment type. Notice that the
selected operating systems do not include the operating system of our potential
clients, those being a 64-bit version of Windows 7 or a 64-bit version of Windows 8.
17. Under Select all, clear all operating systems other than our two client operating systems, All Windows 7 (64-bit) and All Windows 8 (64-bit), and then click OK.
Note: It is not really important to clear the other operating systems for this lab, only that you do select the correct operating system for the client image
available to you, such as "All Windows 7 (64-bit)". Clearing the others will
simply make it easier to verify that you have the correct one selected on the Requirements tab. The Rich Copy 4.0.21_450.1310_VS1 – Microsoft
Application Virtualization 4 Properties dialog box appears displaying the two requirements for this application deployment type.
Remain at this location in the Rich Copy 4.0.21_450.1310_VS1 – Microsoft Application Virtualization 4 Properties dialog box to begin the
next task.
You are now going to create a requirement rule to require that the application
only runs on the user’s primary device.

App-V 5 in Configuration Manager 2012 R2 Page 10
3. Add a
requirement for user primary device affinity
1. From the Requirements tab of the Rich Copy
4.0.21_450.1310_VS1 – Microsoft Application Virtualization 4 Properties dialog box, click Add.
Note: The Create Requirement dialog box appears allowing you to create requirements for this deployment type.
2. In the Category box, click User.
3. In the Condition box, verify that Primary device is displayed.
4. In the Operator box, verify that Equals is displayed.
5. In the Value box, verify that True is displayed, and then click OK.
Note: The Rich Copy 4.0.21_450.1310_VS1 – Microsoft Application Virtualization 4 Properties dialog box appears displaying the configured
requirements for this deployment type. Notice that both of the requirement
rules for this deployment type are displayed. Both of these requirements must be evaluated as true before the deployment type (this deployment type would
attempt to install the application) will run on the target client.
6. Click OK.
Note: The Rich Copy Properties dialog box appears displaying the one
deployment type for this application.
7. Click OK.
Note: The application appears in the results pane of applications available in the site.
In the following procedure, you will create a Configuration Manager application that is based on the App-
V 4.6 SP2 client. You do not have to do this in order to deploy App-V virtual apps, however it is a good
practice in order to configure a dependency on the appropriate version of the Microsoft Application
Virtualization desktop client to allow the virtual application to run successfully.
Tasks Detailed steps
Complete the following task on: Primary1
1. Create a Microsoft Virtualization Client 4.6 SP2 application
1. On the Home tab of the Ribbon, click Create.
Note: A new menu of actions appears. Notice that you can either create or
import an application.
2. Click Create Application.
Note: The Create Application Wizard General dialog box appears allowing
you to configure basic information for the application.
2. Verify that Automatically detect information about this application from installation files is selected.
3. In the Type box, verify that Windows Installer (*.msi file) is displayed, and then click Browse.
Note: The Open dialog box appears allowing you to designate the source of
the application.
4. Open \\Primary1\Lab Files\Application Virtualization Client\ MSI\x64\Setup.msi.
Formatted: Font: Bold
Formatted: Font: Bold
Formatted: Font: Bold

App-V 5 in Configuration Manager 2012 R2 Page 11
Note: The Create Application Wizard General dialog box appears
displaying the application source location.
5. Click Next.
Note: The Create Application Wizard Import Information dialog box appears indicating that the import of the application was successful.
6. Click Next.
Note: The Create Application Wizard General information dialog box appears allowing you to configure information for the application.
7. In the Name box, verify that Microsoft Application Virtualization Desktop Client is displayed.
8. In the Manufacturer Publisher box, type Microsoft
9. In the Software version box, type 4.6 SP2
10. In the Installation program box, type Setup.exe /S /v/qn
Note: Even though the detection is via a Windows Installer product code, the installation of the actual App-V client should be done through Setup.exe to
validate prerequisites. Note that there is no space between '/v' and '/qn'.
11. Click Next.
Note: The Create Application Wizard Summary dialog box appears indicating that the wizard is ready to create the application.
12. Click Next.
Note: The new application is created. When complete, the Create Application Wizard Completion dialog box appears indicating that the
application was created successfully.
13. Click Close.
Note: The list of applications appears in the results pane. Notice that there are now two applications in the site.
You are now going to create a new deployment type for the Microsoft
Application Virtualization Client application.
We want to add a requirement rule to the Microsoft Application
Virtualization Desktop Client deployment type to be applicable only on our 64-bit clients, which are "All Windows 7 (64-bit)" and "All Windows 8 (64-bit)”
14. Verify that the Microsoft Application Virtualization Client application is selected
On the Deployment Type tab of the Ribbon, select Properties
16. Select the Requirements tab, then click Add
17. In the Category box, select Device.
18. In the Condition box, select Operating System.
19. In the Rule type box, verify that Value is displayed
20. In the Operator box, verify that One of is displayed.
21. Under Select all, expand the list and click the All Windows 7 (64-bit) box and the All Windows 8 (64-bit) box
22. Click OK
Note: The list of requirement type appears in the requirements pane.
Notice that there is now one requirement type indicating the installation
Formatted: Font: Bold
Formatted: Font: Bold
Formatted: Font: Bold
Formatted: Font: Bold
Formatted: Font: Bold
Formatted: Font: Bold
Formatted: Font: Bold
Formatted: Font: Bold
Formatted: Font: Bold
Formatted: Font: Bold
Formatted: Font: Bold
Formatted: Font: Bold
Formatted: Font: Bold
Formatted: Font: Bold
Formatted: Font: Not Bold
Formatted: TechNetCommen

App-V 5 in Configuration Manager 2012 R2 Page 12
requirements for this type of deployment.
23. Click OK
We now want to add a requirement to the 32-bit Microsoft Application
Virtualization Desktop Client deployment type to be applicable only on our potential 32-bit client, which is "Windows XP SP3 (32-bit)".
24. Verify that the Microsoft Application Virtualization Client application is selected
25. On the Home tab of the Ribbon, click Create Deployment Type.
Note: The Create Deployment Type Wizard dialog box appears allowing you to specify settings for this deployment type
26. In the Type box, verify that Windows Installer (*.msi file) is displayed
27. Verify that Automatically detect information about this application from installation files is selected, and then click Browse.
Note: The Open dialog box appears allowing you to designate the source of the application.
28. Open \\Primary1\Lab Files\Application Virtualization Client\MSI\x86\Setup.msi.
Note: The Create Deployment Type Wizard General dialog box appears
displaying the application source location.
29. Click Next.
Note: The Create Deployment Type Wizard Import Information dialog
box appears indicating that the import of the application was successful.
30. Click Next.
Note: The Create Deployment Type Wizard General information dialog
box appears allowing you to configure information for the application.
31. In the Name box, type 32-bit Microsoft Application Virtualization Desktop Client
32. In the Installation program box, type Setup.exe /S /v/qn
33. Click Next.
Note: The Create Deployment Type Wizard Requirements dialog box appears allowing you to configure the requirements for this deployment
type.
34. Click Add.
35. In the Category box, select Device.
36. In the Condition box, select Operating System.
37. In the Rule type box, verify that Value is displayed
38. In the Operator box, verify that One of is displayed.
39. Under Select all, click the Windows XP SP3 (32-bit) box
40. Click OK
Note: The list of requirement type appears in the requirements pane.
Notice that there is now one requirement type indicating the installation requirements for this type of deployment.
41. Click Next.
Note: The Dependencies dialog box appears allowing you to specify
software dependencies requirements for this deployment type.
Formatted: Font: Bold
Formatted: Font: Bold
Formatted: Font: Bold
Formatted: Font: Bold
Formatted: Default Paragraph Font, Font: Not Bold
Formatted: Font: Bold
Formatted: Font: Bold
Formatted: Font: Bold
Formatted: Font: Bold
Formatted: Font: Bold
Formatted: TechNetCommen
Formatted: Font: Not Bold
Formatted: Font: Bold
Formatted: Font: Bold
Formatted: Font: Bold
Formatted: Font: Bold
Formatted: Font: Bold
Formatted: Font: Bold
Formatted: Font: Bold
Formatted: Font: Bold
Formatted: Font: Bold
Formatted: Font: Bold
Formatted: Font: Bold
Formatted: TechNetCommen
Formatted: Font: Bold
Formatted: Font: Not Bold
Formatted: TechNetCommen

App-V 5 in Configuration Manager 2012 R2 Page 13
42. Click Next.
Note: The Create Deployment Type Wizard Summary dialog box
appears indicating that the wizard is ready to create the deployment type.
43. Click Next.
Note: The new deployment type is created. When complete, the Create Deployment Type Wizard Completion dialog box appears indicating that
the application was created successfully.
14. Click CloseCreate a new deployment type for the Microsoft Application Virtualization Client application, using \\Primary1\Lab Files\Application Virtualization Client\MSI\x86\Setup.msi as the source. Name this deployment type "32-bit Microsoft Application Virtualization Desktop Client".
17. Add a requirement rule to the Microsoft Application Virtualization Desktop Client deployment type to be applicable only on our 64-bit clients, which are "All Windows 7 (64-bit)" and "All Windows 8 (64-bit)".
2. Add the App-V client dependency to the Rich Copy application
1. From the results pane of applications, click Rich Copy, and then on the Home tab of the Ribbon, click Properties.
Note: The Rich Copy Properties dialog box appears displaying general
properties for this application.
2. Click the Deployment Types tab.
Note: The Rich Copy Properties dialog box appears displaying the one
deployment type for this application.
3. Under Name, click App-V 4 Virtual app, and then click Edit.
Note: The App-V 4 Virtual app Properties dialog box appears displaying
the general properties for this deployment type.
4. Click the Dependencies tab.
Note: The App-V 4 Virtual app Properties dialog box appears displaying
the dependencies for this deployment type. Notice that there are no
dependencies.
5. Click Add.
Note: The Add Dependency dialog box appears allowing you to add
appropriate dependencies.
6. In the Dependency group name box, type App-V 4 Client Agent and then click Add.
Note: The Specify Required Application dialog box appears displaying the
list of applications in the site.
7. Under Available applications, click Microsoft Application Virtualization Desktop Client.
8. Under Deployment types for selected application, click to select each of the two deployment types for the application, and then click OK.
Note: The Add Dependency dialog box appears displaying the new dependency for this deployment type. Notice that the dependency has two
deployment types.
9. Click OK.
Note: The App-V 4 Virtual app Properties dialog box appears displaying
the dependencies for this deployment type. Notice that there is now one dependency.
Formatted: Outline numbered + Level: 2 + Numbering Style: 1, 2,3, … + Aligned at: 0.2" + Tab after: 0.45" + Indent at: 0.45"
Formatted: Font: Not Bold
Formatted: TechNetCommen, No bullets or numbering
Formatted: Outline numbered + Level: 2 + Numbering Style: 1, 2,3, … + Aligned at: 0.2" + Tab after: 0.45" + Indent at: 0.45"
Formatted: Font: Bold
Formatted: Font: Bold
App-V 5 in Configuration Manager 2012 R2 Page 14
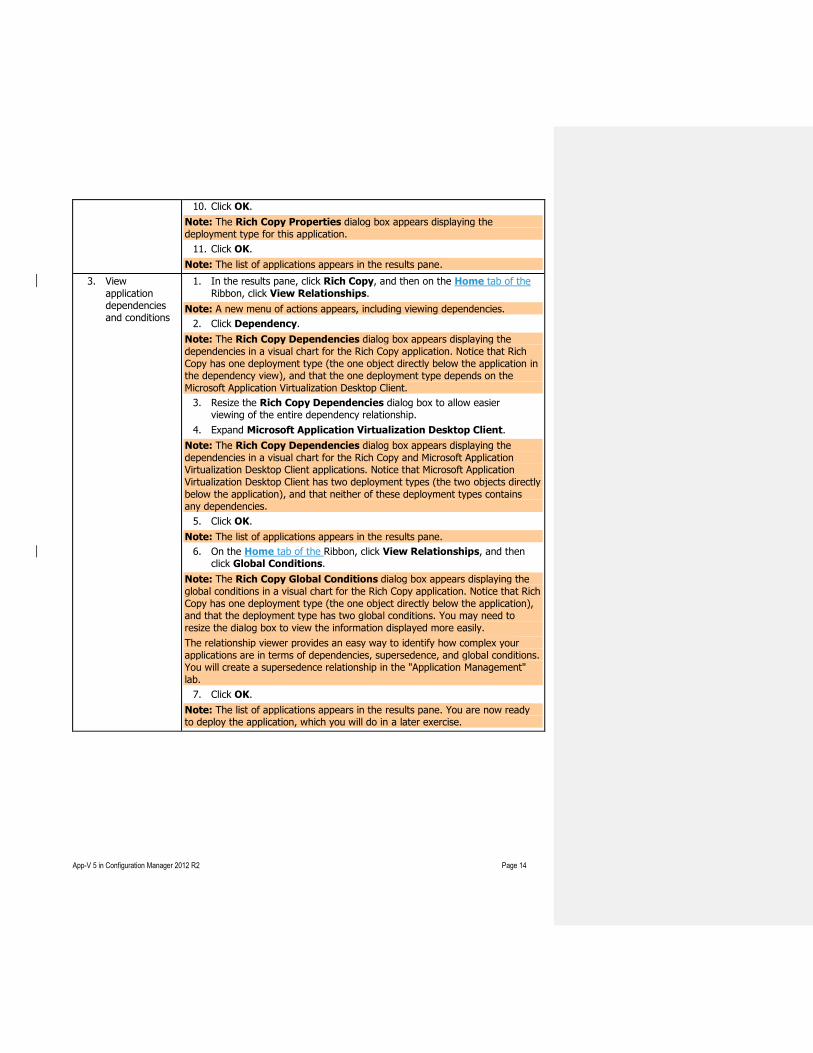
10. Click OK.
Note: The Rich Copy Properties dialog box appears displaying the
deployment type for this application.
11. Click OK.
Note: The list of applications appears in the results pane.
3. View
application dependencies and conditions
1. In the results pane, click Rich Copy, and then on the Home tab of the
Ribbon, click View Relationships.
Note: A new menu of actions appears, including viewing dependencies.
2. Click Dependency.
Note: The Rich Copy Dependencies dialog box appears displaying the
dependencies in a visual chart for the Rich Copy application. Notice that Rich
Copy has one deployment type (the one object directly below the application in the dependency view), and that the one deployment type depends on the
Microsoft Application Virtualization Desktop Client.
3. Resize the Rich Copy Dependencies dialog box to allow easier viewing of the entire dependency relationship.
4. Expand Microsoft Application Virtualization Desktop Client.
Note: The Rich Copy Dependencies dialog box appears displaying the
dependencies in a visual chart for the Rich Copy and Microsoft Application Virtualization Desktop Client applications. Notice that Microsoft Application
Virtualization Desktop Client has two deployment types (the two objects directly
below the application), and that neither of these deployment types contains any dependencies.
5. Click OK.
Note: The list of applications appears in the results pane.
6. On the Home tab of the Ribbon, click View Relationships, and then click Global Conditions.
Note: The Rich Copy Global Conditions dialog box appears displaying the
global conditions in a visual chart for the Rich Copy application. Notice that Rich
Copy has one deployment type (the one object directly below the application), and that the deployment type has two global conditions. You may need to
resize the dialog box to view the information displayed more easily.
The relationship viewer provides an easy way to identify how complex your
applications are in terms of dependencies, supersedence, and global conditions. You will create a supersedence relationship in the "Application Management"
lab.
7. Click OK.
Note: The list of applications appears in the results pane. You are now ready to deploy the application, which you will do in a later exercise.

App-V 5 in Configuration Manager 2012 R2 Page 15
4 CREATING APP-V 5 VIRTUAL APPLICATIONS IN THE
CONFIGURATION MANAGER CONSOLE
In this exercise, you will create two Configuration Manager applications that are based on App-V 5. You
will then deploy them and create a virtual environment for them in later exercises.
Tasks Detailed steps
Complete the following task on: Primary1
1. Create a virtual application for Microsoft Office 2007
1. On the Home tab of the Ribbon, click Create, and then click Create Application.
Note: The Create Application Wizard General dialog box appears allowing
you to configure basic information for the application. App-V 5 applications use
a different format of applications than App-V 4.6 does. As a result, you need to ensure that you select the appropriate application type.
2. Verify that Automatically detect information about this application from installation files is selected.
3. In the Type box, click Microsoft Application Virtualization 5, and then click Browse.
Note: The Open dialog box appears allowing you to designate the source of the application.
4. Open \\Primary1\Lab Files\Office\Microsoft Office 2007.appv.
Note: The Create Application Wizard General dialog box appears
displaying the application source location.
5. Click Next.
Note: The Create Application Wizard Import Information dialog box
appears indicating that the import of the application was successful. Notice that information was identified as part of the import process.
6. Click Next.
Note: The Create Application Wizard General information dialog box
appears allowing you to configure information for the application.
7. In the Name box, type Office 2007
8. In the Publisher box, type Microsoft and then click Next.
Note: The Create Application Wizard Summary dialog box appears
indicating that the wizard is ready to create the application.
9. Click Next.
Note: The new application is created. When complete, the Create
Application Wizard Completion dialog box appears indicating that the wizard has completed successfully the creation of the application.
10. Click Close.
Note: The new application now appears in the results pane of applications.
Notice that the results pane displays the basic properties of the application, including the number of deployment types (we only have one). Also notice that
the preview pane which displays information for the selected package, with tabs for Summary information (the default view), Deployment Types (the App-V

App-V 5 in Configuration Manager 2012 R2 Page 16
5 based deployment type you just created with the wizard), and Deployments
(of which there are none at this time).
You have now successfully created an application. You will now add
requirement rules to this application. Later in this lab, you will deploy the application to the members of a collection of users.
2. Add
Application Catalog metadata and operating system requirements
1. In the results pane of applications, click Office 2007, and then on the
Home tab of the Ribbon, click Properties.
Note: The Office 2007 Properties dialog box appears displaying the general properties of the application.
2. Click the Application Catalog tab.
Note: The Office 2007 Properties dialog box appears displaying the Application Catalog properties of the application. These properties will appear in
the Application Catalog when users attempt to run this application.
3. In the Selected language box, verify that English (United States) default is displayed.
4. After User categories, click Edit.
Note: The User Categories dialog box appears displaying the categories for
user filtering. Notice that there is one category available, that being the “Tools”
category you created for “Rich Copy”.
5. Click Create.
Note: The Create User Category message box appears.
6. In the Specify the name of the new user category box, type Apps and then click OK.
Note: The User Categories dialog box appears displaying the categories for user filtering. Notice that the new category is listed and automatically selected.
7. Click OK.
Note: The Office 2007 Properties dialog box appears displaying the
Application Catalog properties of the application. Only a few of the properties have been supplied so far, you will complete the rest of them now.
8. In the User documentation box, type http://primary1
Note: The URL specified here could be an intranet site or an Internet-based site where the user could access additional information about the application.
9. In the Link text box, type Click here for more information about Office 2007
10. In the Localized description box, type Microsoft Office applications
11. In the Keywords box, type Office Word Excel and then click the Deployment Types tab.
Note: The Office 2007 Properties dialog box appears displaying the deployment types designated for the application. Notice that there is one
deployment type created as part of the application creation. Also notice that
the deployment type is based on App-V 5.
12. Under Name, click Microsoft Office 2007 – Microsoft Application Virtualization 5, and then click Edit.
Note: The Microsoft Office 2007 – Microsoft Application Virtualization
5 Properties dialog box appears displaying general properties for this

App-V 5 in Configuration Manager 2012 R2 Page 17
deployment type. Notice that there are no “Programs” or “Detection Methods”
tab like you would see for a Windows Installer deployment type.
13. Click the Content tab.
Note: The Microsoft Office 2007 – Microsoft Application Virtualization 5 Properties dialog box appears displaying the content configuration for this
deployment type. Notice that the content is not configured to persist in the client cache, that peer-to-peer sharing (BranchCache) is enabled, and that the
content will be downloaded from the distribution point for fast network boundaries. This setting is the more secure option, however, for the lab
environment, will take significantly longer before the user is allowed to run the
program once it has been installed.
For the lab, you will configure the deployment to stream the content instead of downloading, which will allow the user to run the application more quickly.
14. Under Select the deployment option to use when a client is connected within a fast (LAN) network boundary, click Stream content from distribution point.
Note: This option is not as secure as the “Download content from distribution
point and run locally” option, as downloading will validate the content hash to verify that it has not changed from the distribution point version.
You did not need to configure this for the Rich Copy application, as it has very
small content download in comparison to Office 2007.
15. Click the Requirements tab.
Note: The Microsoft Office 2007 – Microsoft Application Virtualization
5 Properties dialog box appears displaying the configured requirements for
this deployment type. Notice that by default there are no requirement rules for this deployment type. No requirement rules are required for this application,
however you will the same two rules that you did for the Rich Copy application.
16. Add a requirement rule to support the two client operating systems, All Windows 7 (64-bit) and All Windows 8 (64-bit).
17. Add a second requirement rule to only allow the application to run on a user’s primary device.
18. Click OK twice to save the changes to the application.
Note: It is not really important to create these two requirement rules for this
lab. Doing so is just a good practice to set appropriate rules as necessary for
your applications.
You will now create a second App-V 5 application for Microsoft Visio 2007.
3. Create an application for the sequenced version of Microsoft Visio 2007
1. Create a new application using the following values:
Type = Microsoft Application Virtualization 5
Location = \\Primary1\Lab Files\Visio\Microsoft Visio
2007.appv
Name = Visio 2007
Publisher = Microsoft
2. Edit the application to supply the following configuration options:
Application Catalog options:
o User category = Apps

App-V 5 in Configuration Manager 2012 R2 Page 18
o User documentation = http://primary1
o Link text = Click here for more information about Visio
2007
o Localized description = Microsoft Visio 2007
o Keywords = Visio
Deployment Types options:
o Content deployment option = Stream content from
distribution point
o Requirement rule = Operating system = All Windows 7
(x64) and All Windows 8 (x64)
o Requirement rule = Primary device = True
Later in this lab, you will create a virtual environment to allow these two
independent virtual applications to interact with each other. In the next procedure, you will create a dependent application for the App-V 5 client.
In the following procedure, you will create a Configuration Manager application that is based on the App-V 5 client. You do not have to do this in order to deploy App-V virtual apps, however it is a good practice in order to configure a dependency on the appropriate version of the Microsoft Application Virtualization desktop client to allow the virtual application to run successfully. As you have already created applications in this lab, you will use the import function to import this application.
Tasks Detailed steps
Complete the following task on: Primary1
1. Create a Microsoft Virtualization Client 5 application
1. On the Home tab of the Ribbon, Create.
Note: A new menu of actions appears. Notice that you can either create or
import an application.
2. Click Import Application.
Note: The Import Application Wizard General dialog box appears allowing
you to configure basic information for the application.
2. In the File box, type \\Primary1\Lab Files\AppV5\Microsoft Application Virtualization Client 5.zip and then click Next.
Note: The Import Application Wizard File Content dialog box appears displaying the global conditions (also known as requirement rules) and
applications that will be created as part of this import process.
3. Click Next.
Note: The Import Application Wizard Summary dialog box appears
indicating that the wizard is ready to import the applications and conditions.
4. Click Next.
Note: The new application is created. When complete, the Import
Application Wizard Completion dialog box appears indicating that the
applications and conditions were created successfully.
5. Click Close.
Note: The list of applications appears in the results pane. Notice that there are

App-V 5 in Configuration Manager 2012 R2 Page 19
multiple applications in the site. You will now add the App-V 5 client application
as a dependency for the Office 2007 and Visio 2007 applications.
2. Add the App-V client dependency to the Office and Visio applications
1. From the results pane of applications, click Office 2007, and then on the Ribbon, click Properties.
Note: The Office 2007 Properties dialog box appears displaying general
properties for this application.
2. Click the Deployment Types tab.
Note: The Office 2007 Properties dialog box appears displaying the one
deployment type for this application.
3. Under Name, click Microsoft Office 2007 – Microsoft Application Virtualization 5, and then click Edit.
Note: The Microsoft Office 2007 – Microsoft Application Virtualization 5 Properties dialog box appears displaying the general properties for this
deployment type.
4. Click the Dependencies tab.
Note: The Microsoft Office 2007 – Microsoft Application Virtualization
5 Properties dialog box appears displaying the dependencies for this deployment type. Notice that there are no dependencies.
5. Click Add.
Note: The Add Dependency dialog box appears allowing you to add
appropriate dependencies.
6. In the Dependency group name box, type App-V 5 Client Agent and then click Add.
Note: The Specify Required Application dialog box appears displaying the
list of applications in the site.
7. Under Available applications, click Microsoft Application Virtualization Client 5.
8. Under Deployment types for selected application, click to select Microsoft Application Virtualization (App-V) 5.0 Client Install from Script, and then click OK.
Note: The Add Dependency dialog box appears displaying the new
dependency for this deployment type.
9. Click OK.
Note: The Microsoft Office 2007 – Microsoft Application Virtualization 5 Properties dialog box appears displaying the dependencies for this
deployment type. Notice that there is now one dependency.
10. Click OK.
Note: The Office 2007 Properties dialog box appears displaying the
deployment type for this application.
11. Click OK.
Note: The list of applications appears in the results pane.
12. Repeat steps 1-11 to add the App-V 5 client as a dependent application for the Visio 2007 application.
Note: The list of applications appears in the results pane.

App-V 5 in Configuration Manager 2012 R2 Page 20
5 DEPLOYING AVAILABLE APPLICATIONS TO USERS
In this exercise, you will deploy the three virtual applications that were created as available applications
for the end user to install. You will use the Application Catalog to install the programs on the client
computer. You will experience simultaneously running App-V 4.6 SP2 and App-V 5 applications on a
single computer.
Tasks Detailed steps
Complete the following task on: Primary1
1. Deploy an
App-V 4 application to users
1. In the results pane of the Applications node, click Rich Copy, and
then on the Ribbon, click Deploy.
Note: The Deploy Software Wizard General dialog box appears. Notice that the “Software” value has been configured from the application highlighted
when the wizard was started.
2. After Collection, click Browse.
Note: The Select Collection dialog box appears displaying the available user
collections. We will use the “All Users” collection for the lab environment,
though in your production environment you'd likely use a different collection than "All Users". Notice that it has six members.
3. Under Name, click All Users, and then click OK.
Note: The Deploy Software Wizard General dialog box appears displaying current settings for the deployment, which include the software and collection
as completed.
4. Click Next.
Note: The Deploy Software Wizard Content dialog box appears allowing you to add distribution points or distribution point groups to receive the
deployed application content.
5. Click Add.
Note: A new menu of recipients appears. As there are no distribution point
groups in the site, you will distribute to a distribution point.
6. Click Distribution Point.
Note: The Add Distribution Points dialog box appears displaying available distribution points. Notice that there is only one distribution point in the site.
7. Under Available distribution points, click to select Primary1.ConfigMgrDom.local, and then click OK.
Note: The Deploy Software Wizard Content dialog box appears displaying the distribution point targeted for content distribution.
9. Click Next.
Note: The Deploy Software Wizard Deployment Settings dialog box appears displaying the current configuration for the deployment. Notice that
the default action is "Install", and the default purpose is “Available”, which
means that the application is optional, and not mandatory to the members of the targeted collection. Also notice that by default, administrator approval is
not required to allow users to install this available application.
10. In the Action box, verify that Install is displayed.

App-V 5 in Configuration Manager 2012 R2 Page 21
11. In the Purpose box, verify that Available is selected, and then click Next.
Note: The Deploy Software Wizard Scheduling dialog box appears
displaying the current schedule for the deployment. Notice that the application
deployment is not scheduled for availability to collection members at a later date and time, which means that it is immediately available.
12. Click Next.
Note: The Deploy Software Wizard User Experience dialog box appears displaying the current configuration for the deployment for user interaction.
Notice that the default configuration is to display in Software Center and to display all user notifications. Maintenance windows are not applicable for
available deployments, as a user would initiate the installation of the software
and any pending restart requests. Notice also that for Windows Embedded devices, the software changes will be committed to the device.
13. Click Next.
Note: The Deploy Software Wizard Alerts dialog box appears allowing you to configure alert generation if the percentage of failed deployments is above a
configured percentage, as well as integration with Microsoft Operations
Manager. You experienced alerts in the "Basic Software Distribution" lab, so will not take the time to generate them in this lab.
14. Click Next to accept the default of no alerts and no integration with Microsoft Operations Manager.
Note: The Deploy Software Wizard Summary dialog box appears indicating that the deployment is ready to be created. Notice the configured
values for software to deploy, the target collection (and members of the target collection), the required intent, and the end user preference values.
15. Click Next.
Note: The Deploy Software Wizard Completion dialog box appears
indicating that the deployment was successfully created.
16. Click Close.
Note: The System Center 2012 Configuration Manager console appears
displaying the results pane of applications in the results pane of the Applications node. Notice that the preview pane displays summary information
about this application, which includes a chart with current deployment
statistics. Also notice that at this time, there are no statistics for this deployment.
17. In the preview pane, click the Deployments tab.
Note: The deployment information for this application is displayed. Notice that this information includes the target collection, intended purpose, scheduled
date, and current percentage of successful executions of this program.
You have now successfully created and deployed an App-V 4.6 based
application using Configuration Manager 2012 R2. The end user will run the deployment in the next procedure, which will use the Application Catalog for
available user-targeted applications.

App-V 5 in Configuration Manager 2012 R2 Page 22
In the following procedure, you will use the Application Catalog to initiate the deployment, as it was
deployed as an available application to users. Available applications targeted to users are available
through the Application Catalog.
Tasks Detailed steps
Complete the following task on: Client1
1. Install the application from Application Catalog
1. Log off as administrator and then log on as Configmgrdom\User1 with a password of password.
2. Start Internet Explorer.
Note: The Internet Explorer window appears.
3. In the Address box, type http://primary1/cmapplicationcatalog and then click Go.
Note: The Application Catalog appears in the Internet Explorer window. Notice the following information in the
Application Catalog:
The color theme is as you configured it during the
Application Catalog website point role
In the lower left corner, the configured organization
name of "Lab Test Environment" is displayed (this was set during the installation of the Application Catalog
website point role)
In the upper right corner, the logged on user
"ConfigMgrDom\User1" is displayed
The middle section displaying available applications, of
which there is only one at this time, "Rich Copy". Recall
that you created two additional applications, however they have not been deployed yet, so they do not appear
in the Application Catalog at this time
The bottom of the Application Catalog display the
description of the application that you previously configured "A graphical tool for copying files"
The left window pane displays the custom category
"Tools"
Tabs are available for:
o "Application Catalog" (default view)
o "My Application Requests" - to view status of application requests
o "My Devices" - to configure the local computer
as a primary device (if allowed by the administrator) and to display any mobile devices
enrolled for this user (none at this time)
4. In the left window pane, under BROWSE BY, click Publisher.
Note: The Application Catalog now displays available publishers,
in our case we only have one - "Microsoft".

App-V 5 in Configuration Manager 2012 R2 Page 23
5. In the Search box, type Word and then click Start search (the icon resembles a magnifying glass).
Note: A message appears indicating that there were no items
matching the search to display.
6. In the Search box, type file and then click Start search.
Note: The Application Catalog displays "Rich Copy" as an application that matches the search criteria.
7. In the bottom section of the Application Catalog window, click Microsoft Rich Copy.
Note: The Application Catalog displays "Microsoft Rich Copy" as an application that matches the search criteria. Notice the
additional information provided, including the category, keywords, and documentation information. Notice also that this
application does not require approval in order to be installed.
8. Click INSTALL.
Note: An APPLICATION INSTALLATION message box appears confirming the request to install the application.
9. Click YES.
Note: After evaluating the application requirement rules, detection method, and dependencies, the application is installed
on the client computer. This should be a very quick software
installation. The Application Catalog displays a message indicating that the application installation was started.
When complete, a Software Center message box appears indicating that "Microsoft Rich Copy 4.0" was successfully
installed. This should be a very quick installation, as the application is very small in size (100MB).
10. Click OK.
Note: The Application Catalog appears.
2. Verify that the application was installed successfully
1. On the Start menu, click All Programs, expand Microsoft Rich Tools, and then click RichCopy 4.0.
Note: The application is started. Notice that the Microsoft
Application Virtualization Desktop Client icon appears as this is a virtual application. When started, the RichCopy window
appears. This is an App-V 4.6 based application. In the next
procedure, you will deploy the two App-V based applications to this same client.
2. Close RichCopy.
Note: The application is closed. You will notice the virtual application shutdown process in the system tray.

App-V 5 in Configuration Manager 2012 R2 Page 24
In the following procedure, you will deploy the two App-V 5 applications to the users to verify that App-V
4 and App-V 5 applications can both run on the same computer.
Tasks Detailed steps
Complete the following task on: Primary1
1. Deploy App-V 5 applications
to users
1. In the results pane of the Applications node, click Office
2007, and then on the Ribbon, click Deploy.
Note: The Deploy Software Wizard General dialog box appears. Notice that the “Software” value has been configured
from the application highlighted when the wizard was started.
2. After Collection, click Browse.
Note: The Select Collection dialog box appears displaying the
available user collections. We will use the “All Users” collection for the lab environment, though in your production environment
you'd likely use a different collection than "All Users". Notice that
it has six members.
3. Under Name, click All Users, and then click OK.
Note: The Deploy Software Wizard General dialog box
appears displaying current settings for the deployment, which include the software and collection as completed.
4. Click Next.
Note: The Deploy Software Wizard Content dialog box
appears allowing you to add distribution points or distribution point groups to receive the deployed application content.
5. Click Add.
Note: A new menu of recipients appears. As there are no distribution point groups in the site, you will distribute to a
distribution point.
6. Click Distribution Point.
Note: The Add Distribution Points dialog box appears
displaying available distribution points. Notice that there is only
one distribution point in the site.
7. Under Available distribution points, click to select Primary1.ConfigMgrDom.local, and then click OK.
Note: The Deploy Software Wizard Content dialog box
appears displaying the distribution point targeted for content distribution.
18. Click Next.
Note: The Deploy Software Wizard Deployment Settings
dialog box appears displaying the current configuration for the deployment. Notice that the default action is "Install", and the
default purpose is “Available”, which means that the application is optional, and not mandatory to the members of the targeted
collection. Also notice that by default, administrator approval is
not required to allow users to install this available application.
19. In the Action box, verify that Install is displayed.

App-V 5 in Configuration Manager 2012 R2 Page 25
20. In the Purpose box, verify that Available is selected, and then click Next.
Note: The Deploy Software Wizard Scheduling dialog box
appears displaying the current schedule for the deployment.
Notice that the application deployment is not scheduled for availability to collection members at a later date and time, which
means that it is immediately available.
21. Click Next.
Note: The Deploy Software Wizard User Experience dialog
box appears displaying the current configuration for the deployment for user interaction. Notice that the default
configuration is to display in Software Center and to display all
user notifications. Maintenance windows are not applicable for available deployments, as a user would initiate the installation of
the software and any pending restart requests. Notice also that for Windows Embedded devices, the software changes will be
committed to the device.
22. Click Next.
Note: The Deploy Software Wizard Alerts dialog box appears allowing you to configure alert generation if the
percentage of failed deployments is above a configured percentage, as well as integration with Microsoft Operations
Manager. You experienced alerts in the "Basic Software Distribution" lab, so will not take the time to generate them in
this lab.
23. Click Next to accept the default of no alerts and no integration with Microsoft Operations Manager.
Note: The Deploy Software Wizard Summary dialog box appears indicating that the deployment is ready to be created.
Notice the configured values for software to deploy, the target collection (and members of the target collection), the required
intent, and the end user preference values.
24. Click Next.
Note: The Deploy Software Wizard Completion dialog box appears indicating that the deployment was successfully created.
25. Click Close.
Note: The System Center 2012 R2 Configuration Manager console appears displaying the results pane of applications in the
results pane of the Applications node. Notice that the preview pane displays summary information about this application, which
includes a chart with current deployment statistics. Also notice
that at this time, there are no statistics for this deployment.
26. Repeat steps 1-25 to deploy Visio 2007.
Note: All three virtual applications have now been deployed to
the members of the “All Users” collection. You previously ran the App-V 4-based application, and in the next procedure, you will
run the two App-V 5-based applications on the same computer.

App-V 5 in Configuration Manager 2012 R2 Page 26
In the following procedure, you will use the Application Catalog run the two App-V 5 applications on the
same client computer you previously ran the App-V 4 application on.
Tasks Detailed steps
Complete the following task on: Client1
1. Install the applications from Application Catalog
Note: The Application Catalog should still be displayed in
Internet Explorer. If you had previously closed the Application Catalog, start it again.
1. In the Application Catalog, click Back to Application Catalog.
Note: The Application Catalog displays three applications. If the Application Catalog only displays “Rich Copy”, it is likely
because the search criteria is still entered.
2. In the Search box, clear the criteria and then click Start Search.
Note: The Application Catalog displays all three applications.
You can search by any of the appropriate keywords configured
for the applications in the metadata you supplied.
Notice that there is still only one “Publisher” listed, that being
“Microsoft”.
3. Under BROWSE BY, click Category.
Note: The Application Catalog displays both “Category”
values, “Apps” and “Tools”.
4. Under Name, click Office 2007, and then click INSTALL.
Note: An APPLICATION INSTALLATION message box appears confirming the request to install the application.
5. Click YES.
Note: After evaluating the application requirement rules, detection method, and dependencies, the application is installed
on the client computer. The Application Catalog displays a
message indicating that the application installation was started. It will take a couple of minutes to install the virtual application
for Office 2007.
When complete, a Software Center message box appears
indicating that "Microsoft Office 2007" was successfully installed. If you have configured the deployment to stream instead of
download, this will be a quick installation. If the deployment was
left configured to download before running, then the installation will take numerous minutes, as the content is over 1GB in size.
6. Click OK.
Note: After evaluating the application requirement rules, detection method, and dependencies, the application is installed
on the client computer. The Application Catalog displays a
message indicating that the application installation was started.
7. Repeat steps 1, and 4-6 to install Visio 2007.

App-V 5 in Configuration Manager 2012 R2 Page 27
Note: The Application Catalog appears. Visio 2007 is also a fairly
large application to install. If the deployment type was configured
stream the content, it will be a quick installation. If the deployment option was left at download before running, it will
take a few minutes to install, as this application is over 600MB in size to download.
2. Open a Microsoft Word
document that has an embedded Microsoft Visio diagram
1. Open C:\App-V Sample Document.docx.
Note: The document appears in Microsoft Word. As Microsoft Word 2007 is part of the Microsoft Office 2007 application that
was deployed to the user as an application, the published Office components are available, such as Microsoft Word.
This is a validation that the deployed virtual application for Microsoft Office 2007 was installed successfully on the client
computer.
If you receive an error upon opening the document, click OK,
and then open the document again.
2. In the document, right-click the diagram.
Note: A new menu appears with actions available for this
diagram. Notice that there is a menu for “Microsoft Visio Drawing
Object”.
3. Click Microsoft Visio Drawing Object.
Note: A new menu appears with actions available for this
diagram. Notice that there is only one menu item “Convert”.
This is a Visio diagram, and even though “Microsoft Visio 2007”
was successfully deployed to the client, it is not available for this document, as these are two unique applications that were not
sequenced together. As a result, neither “virtual bubble” can
access the other.
4. Close the Microsoft Word.
Note: A new feature of Microsoft Application Virtualization 5 is
called “Connection Groups”. Connection groups allow unique applications that were not sequenced together to access each
other. In the next procedure, you will create a connection group
to allow Microsoft Office 2007 and Microsoft Visio 2007 to interact.
3. Verify no connection groups exists
1. On the Start menu, click All Programs, expand Microsoft Application Virtualization Client, and then click Microsoft Application Virtualization Client.
Note: The Microsoft Application Virtualization Client window
appears displaying the Overview page.
2. Click VIRTUAL APPS.
Note: The Microsoft Application Virtualization Client window displays the two virtual applications that are installed on this
client. Notice that both “Microsoft Office 2007” and “Microsoft Visio 2007” are listed as installed.
3. Click APP CONNECTION GROUPS.
Note: The Microsoft Application Virtualization Client window

App-V 5 in Configuration Manager 2012 R2 Page 28
displays any connection groups. Notice that there are no
connection groups configured at this time.
4. Close the Microsoft Application Virtualization Client window to return to the desktop.
In the following procedure, you will create a connection group for the two App-V 5 applications in Configuration Manager 2012 R2. Configuration Manager 2012 R2 uses “virtual environments” to create connection groups.
Tasks Detailed steps
Complete the following task on: Primary1
1. Create a connection group 1. In the navigation pane of the Software Library workspace, click App-V Virtual Environments.
Note: The list of virtual environments for App-V 5 applications
appears in the results pane. Notice that even though you created
two App-V 5-based applications, no virtual environments are created by default.
2. On the Ribbon, click Create Virtual Environment.
Note: The Create Virtual Environment Specify information about the new App-V virtual environment dialog box
appears allowing you to configure the virtual environment.
3. In the Name box, type Office and Visio and then click Add.
Note: The Add Applications Specify the applications that will run in the same Virtual Environment dialog box appears
allowing you to configure the virtual applications that will be added to the virtual environment.
4. In the Group name box, type Office Apps and then click Add.
Note: The Specify Application dialog box appears allowing you to configure the application and deployment type for this
group.
5. Under Available applications, click Office 2007.
6. Under Deployment types for selected application, click to select Microsoft Office 2007 – Microsoft Application Virtualization 5, and then click OK.
Note: The Add Applications Specify the applications that will run in the same Virtual Environment dialog box appears
displaying the one virtual application that will be added to the virtual environment. You will only add one application to this
group.
7. Click OK.
Note: The Create Virtual Environment Specify information about the new App-V virtual environment dialog box
appears displaying the virtual environment. Notice that there is one App-V deployment types added to this virtual environment,

App-V 5 in Configuration Manager 2012 R2 Page 29
and this includes the “Office Apps”.
8. Click Add.
Note: The Add Applications Specify the applications that
will run in the same Virtual Environment dialog box appears allowing you to configure the virtual applications that will be
added to the virtual environment.
9. In the Group name box, type Visio App and then click Add.
Note: The Specify Application dialog box appears allowing
you to configure the application and deployment type for this group.
10. Under Available applications, click Visio 2007.
11. Under Deployment types for selected application, click to select Microsoft Visio 2007 – Microsoft Application Virtualization 5, and then click OK.
Note: The Add Applications Specify the applications that
will run in the same Virtual Environment dialog box appears displaying the virtual application that will be added to the virtual
environment.
12. Click OK.
Note: The Create Virtual Environment Specify information
about the new App-V virtual environment dialog box
appears displaying the two groups and virtual applications that will be added to the virtual environment. Notice that the two
groups are joined with an AND.
13. Click OK.
Note: The list of virtual environments appears in the results
pane. Notice that there is now one virtual environment created, and that this virtual environment includes two members.
Virtual environments are made available to clients through
system policies. You will force the client to retrieve user policies in the next procedure, and then verify that the virtual
environment allows the two virtual applications to interact with each other. You will retrieve user policies as the deployment was
targeted to users and not computers.

App-V 5 in Configuration Manager 2012 R2 Page 30
In the following procedure, you will force the client to retrieve user policies, which will then configure the
connection group on the client. You will then verify that the two virtual applications are allowed to
communicate with each other.
Tasks Detailed steps
Complete the following task on: Client1
1. Retrieve user policies 1. In Control Panel, click System and Security, and then click Configuration Manager.
Note: The Configuration Manager Properties window
appears displaying general properties for the client.
2. Click the Actions tab.
Note: The Configuration Manager Properties window
appears displaying the actions available for the client.
3. Under Actions, click User Policy Retrieval & Evaluation Cycle, and then click Run Now.
Note: A User Policy Retrieval & Evaluation Cycle message
box appears indicating that the action has been initiated and may take a few minutes to complete.
4. Click OK.
Note: The Configuration Manager Properties window
appears displaying available actions for the client. Wait a moment before moving onto the next step.
5. Under Actions, click Application Deployment Evaluation Cycle, and then click Run Now.
Note: An Application Deployment Evaluation Cycle message box appears indicating that the action has been initiated
and may take a few minutes to complete. This action is required
to create the connection group on the client, as it is being created after the two applications were installed on the client.
Normally you would create the virtual environment at the same time as you create the virtual applications, thus this connection
group would have been created before attempting to run the virtual applications. In the lab environment, we created it after so
that you could experience the applications not working together
initially, then working after the virtual environment to allow them to interact. If you do not force this action, it will happen
automatically on a weekly schedule.
6. Click OK, and then close Control Panel.
Note: Users policies are retrieved, which will include the new
virtual environment.
You should see balloon notifications indicating that software is being downloaded and installed. This is the virtual environment
configuration.
2. Open a Microsoft Word document that has an embedded Microsoft Visio
1. Open C:\App-V Sample Document.docx.
Note: The document appears in Microsoft Word. As Microsoft
Word 2007 is part of the Microsoft Office 2007 application that

App-V 5 in Configuration Manager 2012 R2 Page 31
diagram was deployed to the user as an application, the published Office
components are available, such as Microsoft Word.
If you receive an error upon opening the document, click OK,
and then open the document again.
2. In the document, right-click the diagram.
Note: A new menu appears with actions available for this
diagram. This is a Visio diagram, and with the virtual environment (connection group) implemented on the client,
Microsoft Visio is now available for this document. Notice that the
menu item is no longer “Microsoft Visio Drawing Object”, as it was before the connection group was implemented.
3. Click Visio Object, and then click Edit.
Note: The object is opened for editing. The virtual environment from Configuration Manager allows the applications included in
the virtual environment to ‘share’ resources, so documents can
use the configured apps at the same time on the same document.
4. Close the Microsoft Word.
Note: The application is closed, and Widows Explorer appears displaying the document.
3. Verify that the connection
group exists
1. On the Start menu, click Microsoft Application
Virtualization Client.
Note: The Microsoft Application Virtualization Client window appears displaying the Overview page.
2. Click APP CONNECTION GROUPS.
Note: The Microsoft Application Virtualization Client window displays any connection groups. Notice that there is now one
connection groups configured.
3. Close the Microsoft Application Virtualization Client window.
Note: You have now created, and deployed, applications based
on App-V 4 and App-V 5, to the same computer. In Configuration
Manager 2012 R2, a client computer can have both the App-V 4.6 SP2 and App-V 5 client agents installed, and support both
applications on the same computer. You also created a connection group (virtual environment) to allow multiple App-V
5-based applications to interact with each other, when normally
they would not have been able to do so.
Related Documents