ESS System Configuration 1. SLD Creation...................................................................................................................2 2. JCO Creation.................................................................................................................... 6 3. System Objects for Additional Informat ion.................................................................... 7 4.To Deploy Custom Applications - Online leave & Online travel ...................................10 1

Welcome message from author
This document is posted to help you gain knowledge. Please leave a comment to let me know what you think about it! Share it to your friends and learn new things together.
Transcript

8/7/2019 deploy custom applications
http://slidepdf.com/reader/full/deploy-custom-applications 1/12
ESS System Configuration
1. SLD Creation................................................................................................................... 2
2. JCO Creation.................................................................................................................... 6
3. System Objects for Additional Information....................................................................7
4.To Deploy Custom Applications - Online leave & Online travel...................................10
1

8/7/2019 deploy custom applications
http://slidepdf.com/reader/full/deploy-custom-applications 2/12
1. SLD Creation
To access Adaptive RFC (ABAP function module) from java webdynproapplication, create a JCO connection for that application. To create JCO
connection first configure SLD.
Detailed procedure to configure SLD
Create New Technical System
Go to the SLD Home page( http://<name>:port/sld )and click Technical
Landscape link under System Landscape category.
click “New Technical System” Button.
In the pop-up window , select Web AS ABAP as Technical System Type,
press Next button.
2
8/7/2019 deploy custom applications
http://slidepdf.com/reader/full/deploy-custom-applications 3/12

8/7/2019 deploy custom applications
http://slidepdf.com/reader/full/deploy-custom-applications 4/12
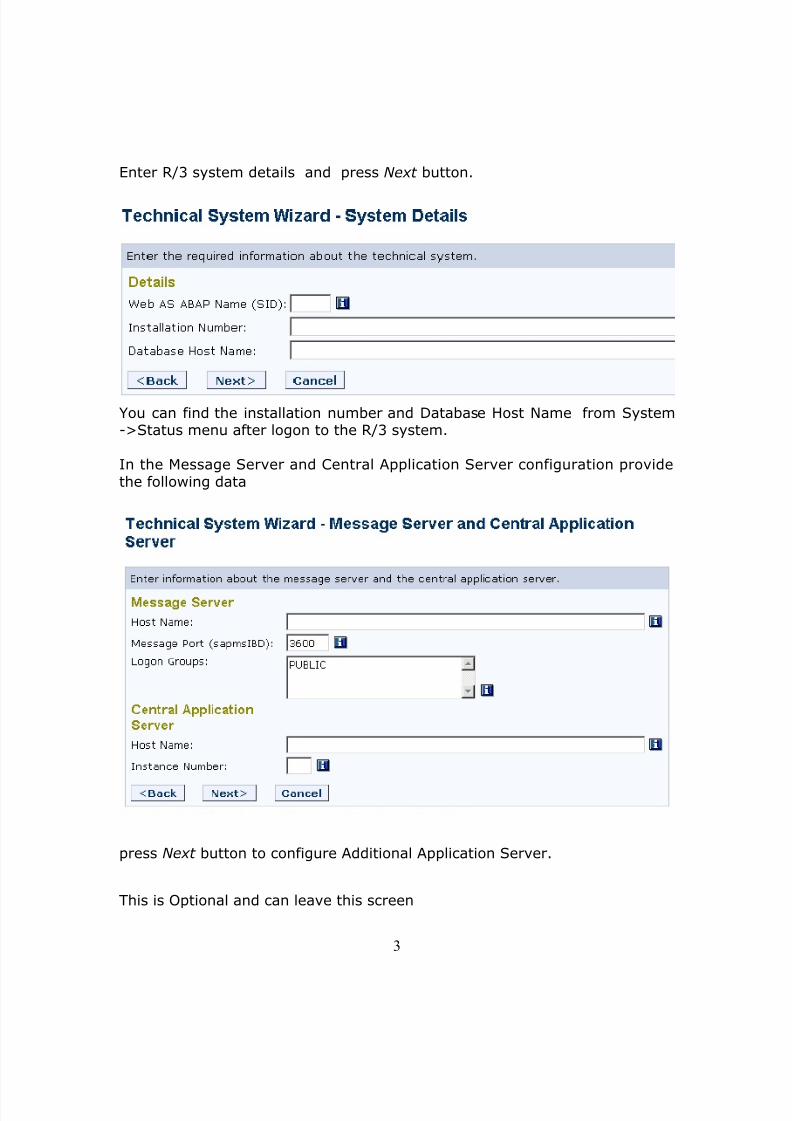
press Next button to select available software product and component.
4
8/7/2019 deploy custom applications
http://slidepdf.com/reader/full/deploy-custom-applications 5/12
8/7/2019 deploy custom applications
http://slidepdf.com/reader/full/deploy-custom-applications 6/12
2. JCO Creation
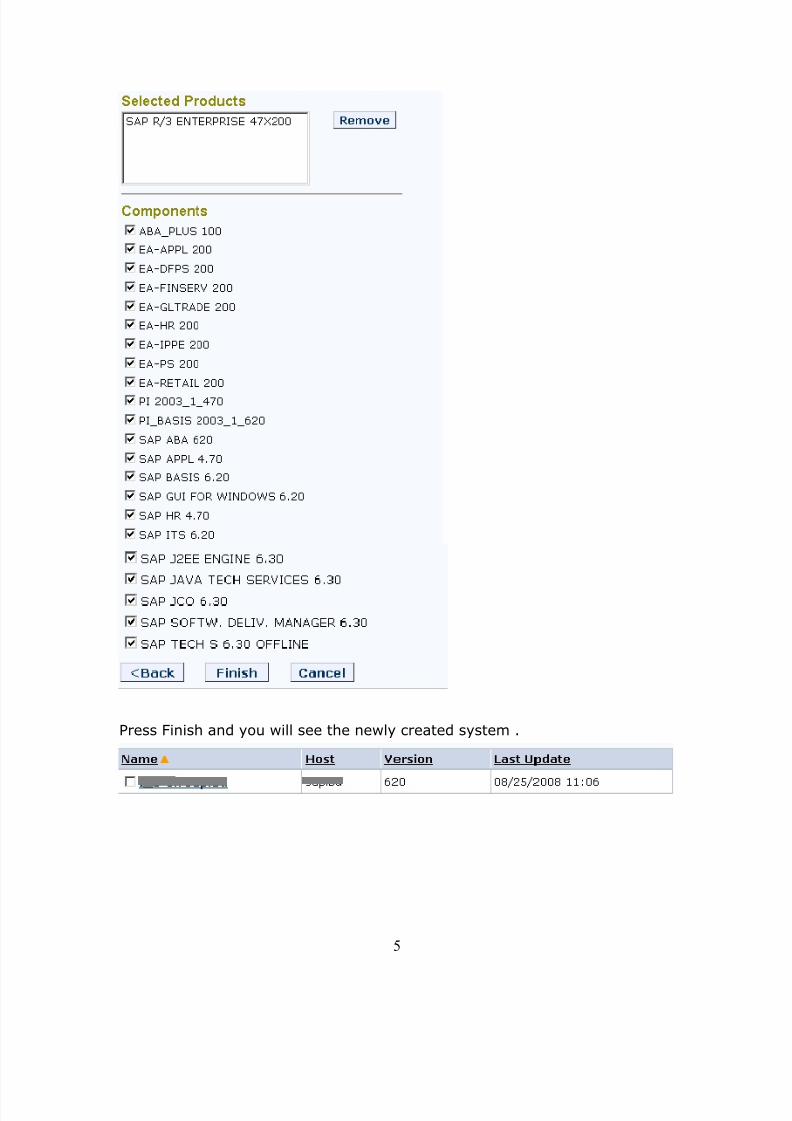
Once the ESS Business Package is deployed onto the Portal , you will see theJCO’s under Content Administration->webdynpro click on Maintain Jco
destination tab. ( Here the status will be red color , now cerate all the JCo’s)
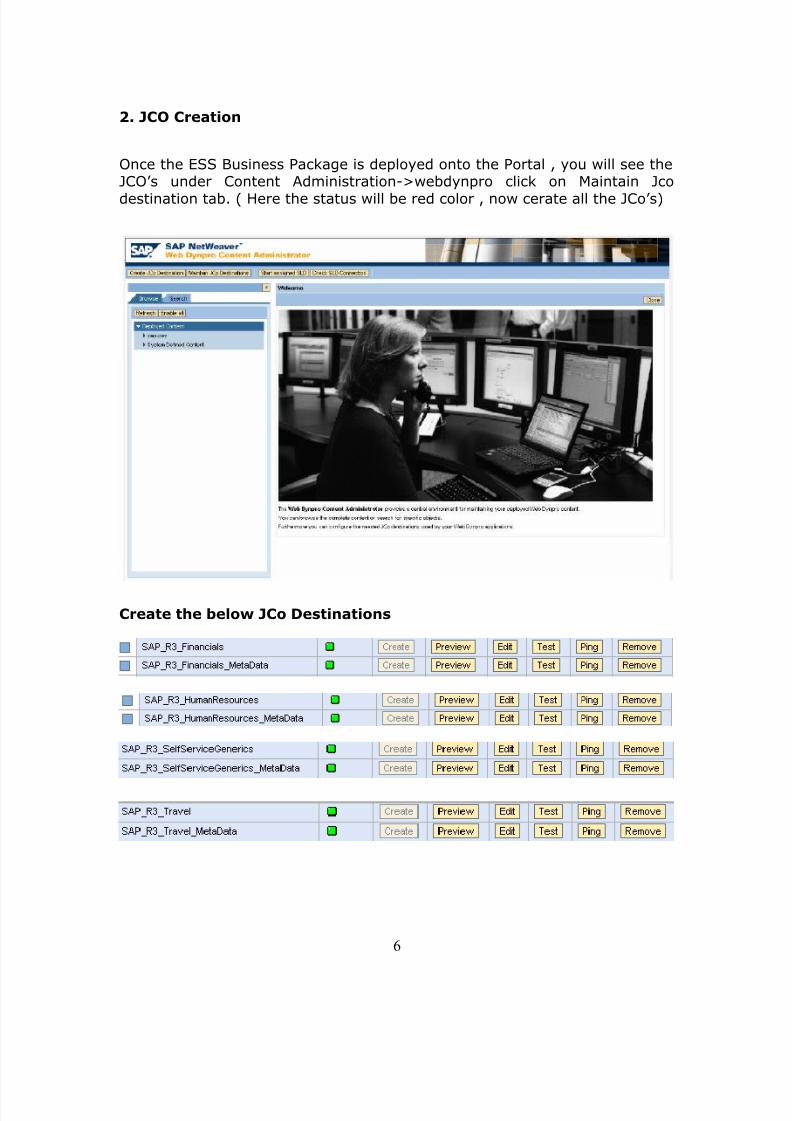
Create the below JCo Destinations
6

8/7/2019 deploy custom applications
http://slidepdf.com/reader/full/deploy-custom-applications 7/12
3. System Objects for Additional Information
Go to -> System Administration ->System Configuration
Right click on the folder Systems and Select New System
System Creation Screen Shots(
Enter System Name , Id and Click on finish .
Open Object for Editing.
Change the Below Properties.
7

8/7/2019 deploy custom applications
http://slidepdf.com/reader/full/deploy-custom-applications 8/12
Connector Properties
ITS
8

8/7/2019 deploy custom applications
http://slidepdf.com/reader/full/deploy-custom-applications 9/12
WAS
Create Alias for the new system , Enter alias Name and press Add .
In All Transactional Iviews enter System as above created systems.
9

8/7/2019 deploy custom applications
http://slidepdf.com/reader/full/deploy-custom-applications 10/12
4.To Deploy Custom Applications - Online leave & Online travel
First copy all the custom application ear files from Source
System(d:\usr\sap\IPD\JC00\SDM\root\origin\local)
Go to Destination systems SDM GUI and Click on Deployment tab.
10

8/7/2019 deploy custom applications
http://slidepdf.com/reader/full/deploy-custom-applications 11/12
11
Cickhere toDeploynew EarFIle
Browse theEar File tobe Deployed
Selected Earfile
8/7/2019 deploy custom applications
http://slidepdf.com/reader/full/deploy-custom-applications 12/12
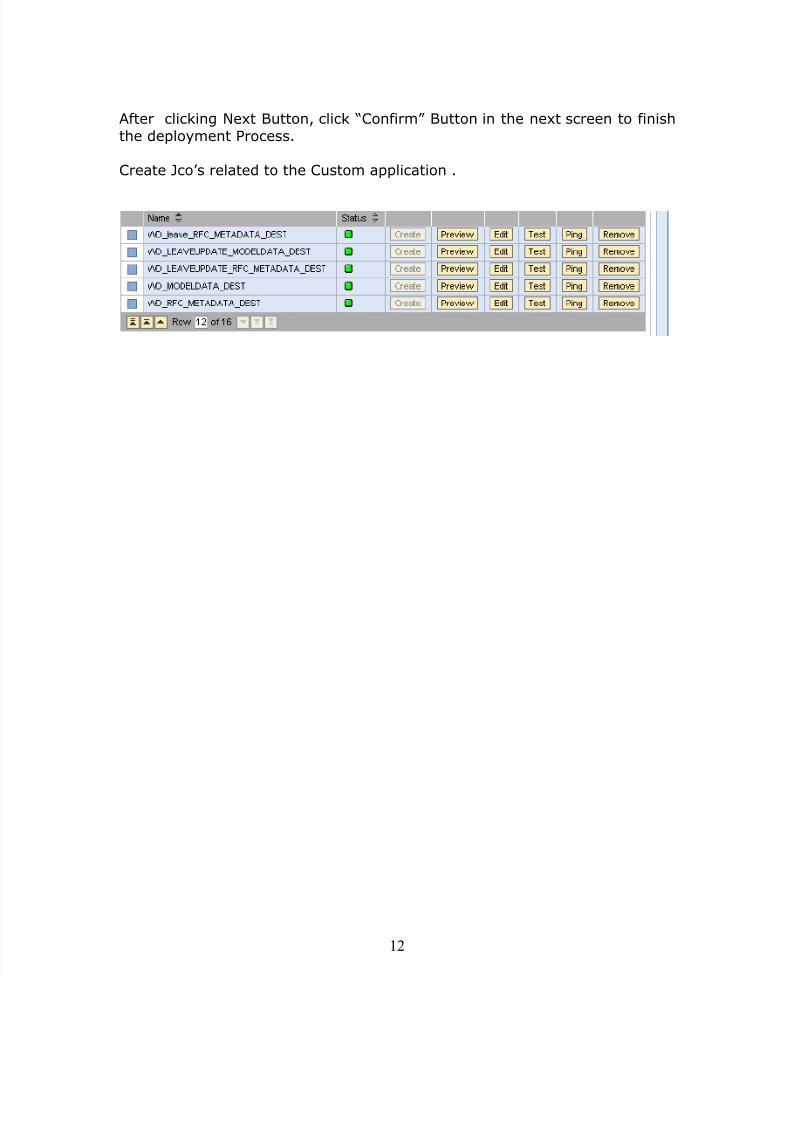
After clicking Next Button, click “Confirm” Button in the next screen to finish
the deployment Process.
Create Jco’s related to the Custom application .
12
Related Documents