Debugging and Menus Part07dbg --- Solving the problem, Debugging in Break time, Menus, Common Dialogs, and User-written methods

Debugging and Menus Part07dbg --- Solving the problem, Debugging in Break time, Menus, Common Dialogs, and User-written methods.
Dec 14, 2015
Welcome message from author
This document is posted to help you gain knowledge. Please leave a comment to let me know what you think about it! Share it to your friends and learn new things together.
Transcript
Debugging and Menus
Part07dbg --- Solving the problem, Debugging in Break time, Menus, Common Dialogs, and
User-written methods

2
Carefully Plan the Solution
• Understand the inputs and outputs of desired solution.• Draw a sketch of proposed solution showing
placement of controls.• Assign meaningful names to controls using 3
character prefixes.• Decide what variables (and appropriate scope) will be
required.• Choose test data and do hand/calculator calculations
so that you know what answers should be produced by the program.
3
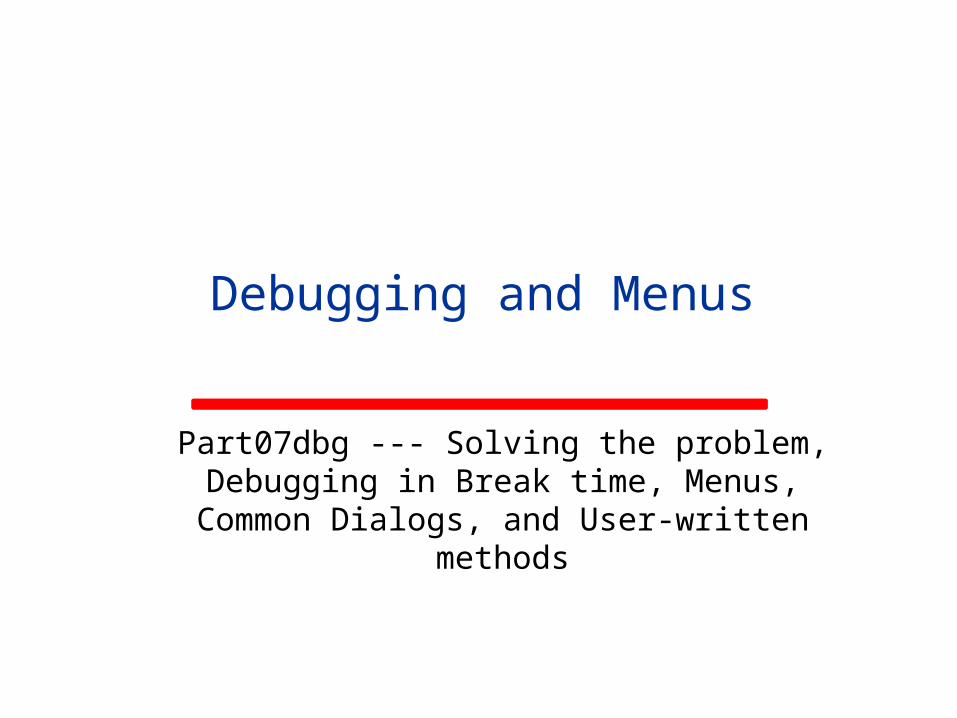
3 Modes of Operation
• Design Time --- before application is run• Run Time --- when application is running• Break Time --- when run time is suspended, for
the purpose of debugging
4
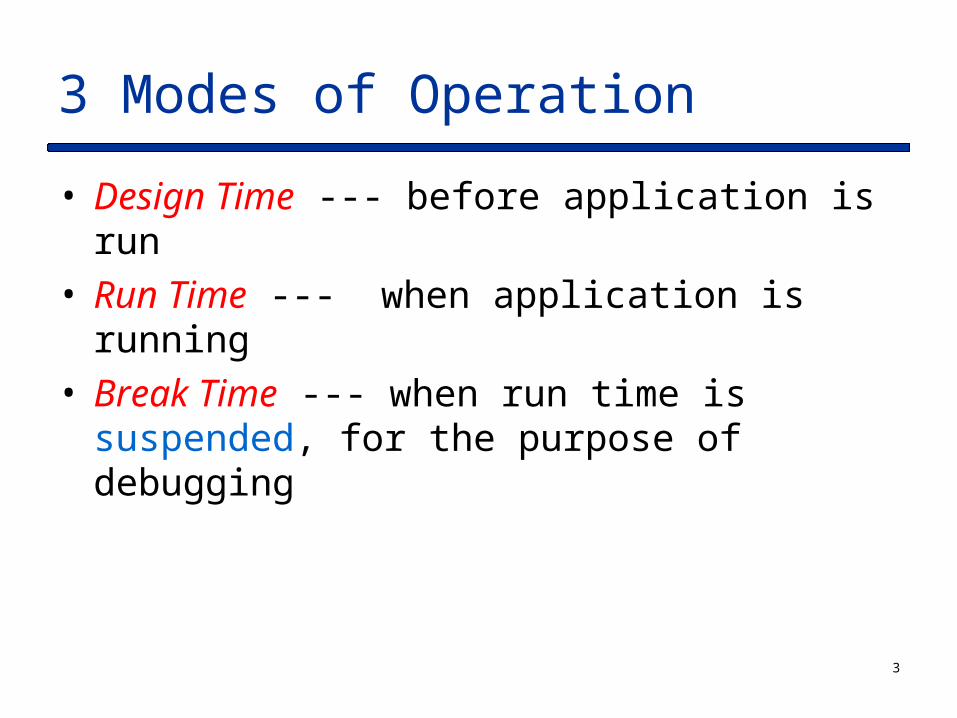
Design Time
• Add controls to form via Designer.• Set/review Property values for controls via
Property Window.• Add code to “handle” various events and
set/change Property values (at runtime) via Code Window.

5
Run Time
• Code executed in event handler methods/functions can– change Property values for controls (Visible,
ForeColor, BackColor, Text).– run methods to reset Focus(), Clear() contents, write
variable/control values to the Output Window (via Debug.Writeline()) etc.
– perform calculations/comparisons of variable values. – display variable values in controls. – handle various events.
6
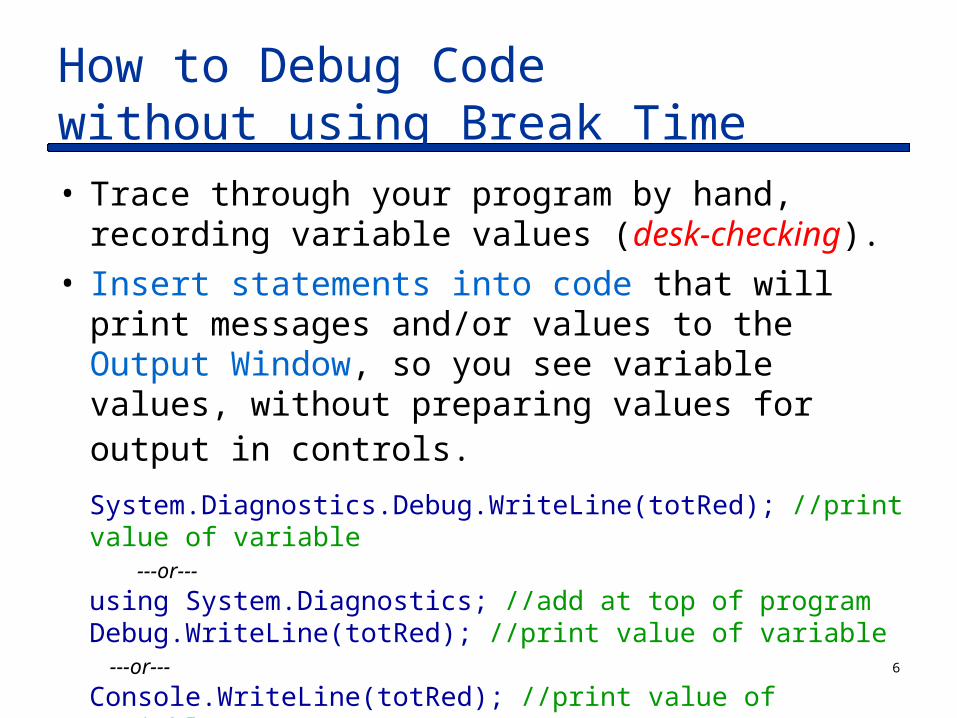
How to Debug Code without using Break Time
• Trace through your program by hand, recording variable values (desk-checking).
• Insert statements into code that will print messages and/or values to the Output Window, so you see variable values, without preparing values for output in controls.
System.Diagnostics.Debug.WriteLine(totRed); //print value of variable ---or---
using System.Diagnostics; //add at top of programDebug.WriteLine(totRed); //print value of variable ---or---
Console.WriteLine(totRed); //print value of variable

Using Visual Studio.NET Debugging Capabilities
Using Break Time
8
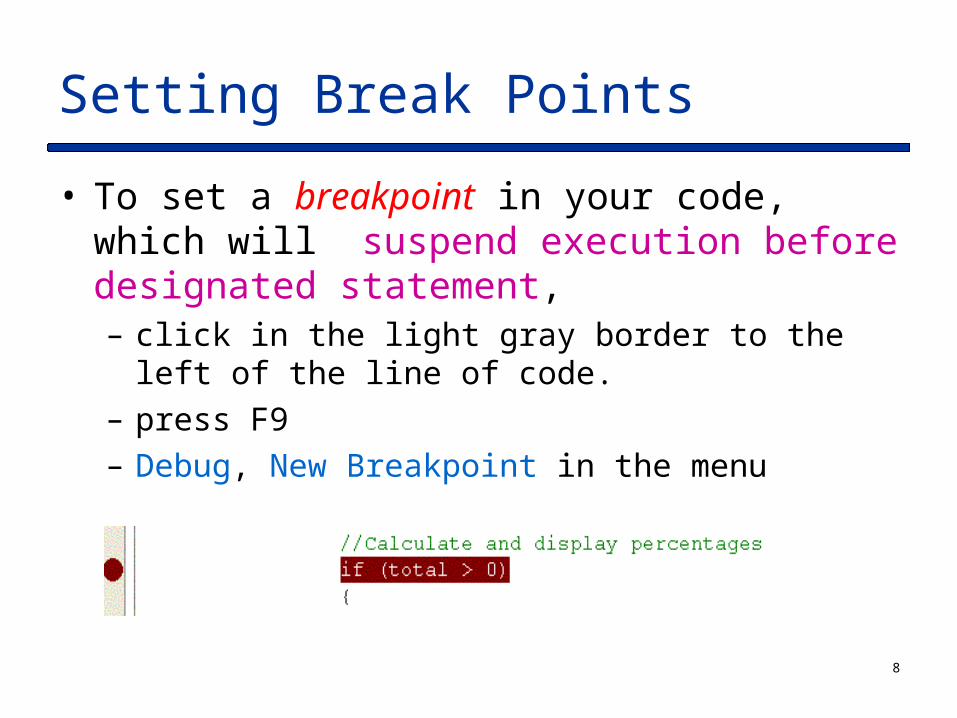
Setting Break Points
• To set a breakpoint in your code, which will suspend execution before designated statement, – click in the light gray border to the left of the line of
code.– press F9– Debug, New Breakpoint in the menu
9
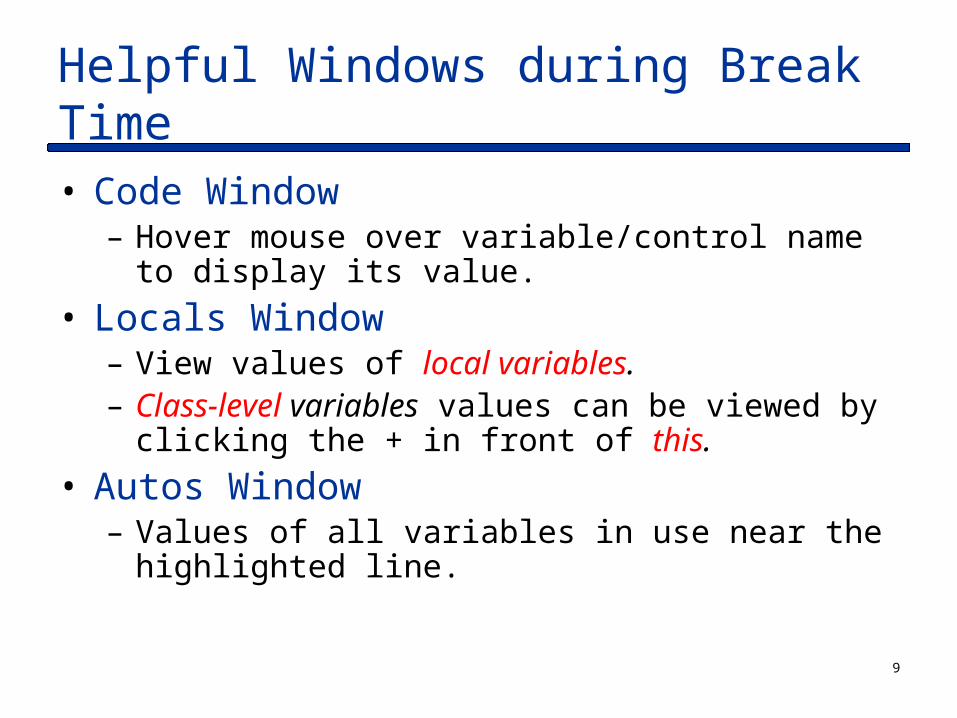
Helpful Windows during Break Time
• Code Window– Hover mouse over variable/control name to display its
value.
• Locals Window– View values of local variables.– Class-level variables values can be viewed by clicking
the + in front of this.
• Autos Window– Values of all variables in use near the highlighted line.
10
Stepping through Code
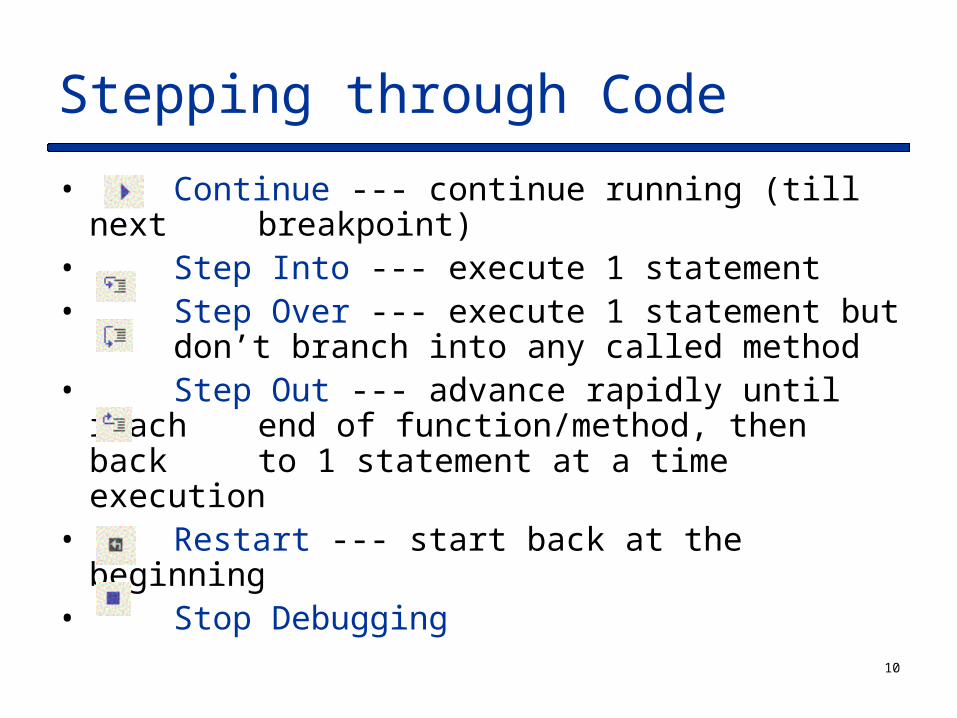
• Continue --- continue running (till next breakpoint)
• Step Into --- execute 1 statement• Step Over --- execute 1 statement but
don’t branch into any called method• Step Out --- advance rapidly until reach
end of function/method, then back to 1 statement at a time execution
• Restart --- start back at the beginning• Stop Debugging
11
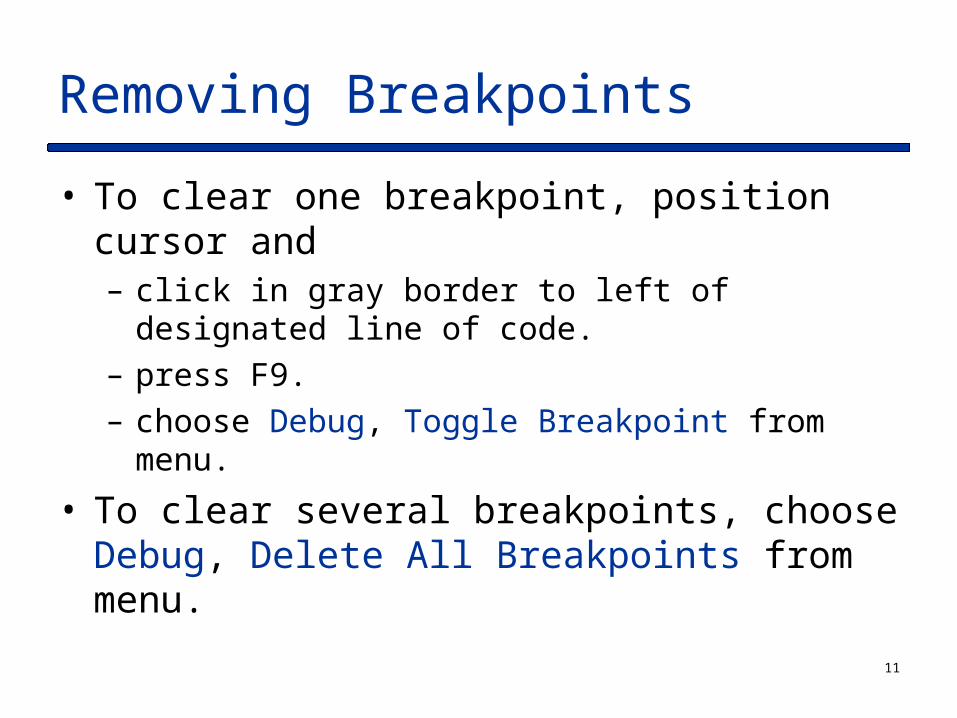
Removing Breakpoints
• To clear one breakpoint, position cursor and – click in gray border to left of designated line of code.– press F9.– choose Debug, Toggle Breakpoint from menu.
• To clear several breakpoints, choose Debug, Delete All Breakpoints from menu.
12
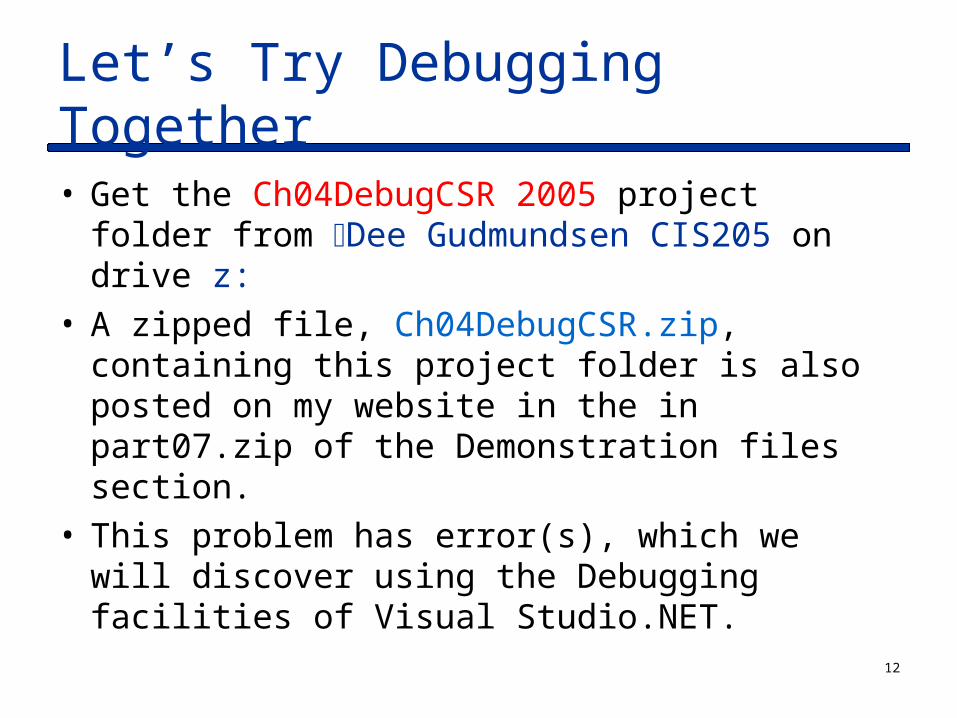
Let’s Try Debugging Together
• Get the Ch04DebugCSR 2005 project folder from Dee Gudmundsen CIS205 on drive z:
• A zipped file, Ch04DebugCSR.zip, containing this project folder is also posted on my website in the in part07.zip of the Demonstration files section.
• This problem has error(s), which we will discover using the Debugging facilities of Visual Studio.NET.
Introduction to Menus
MenuStrip and ContextMenuStrip

14
The MenuStrip Control
• The MenuStrip control can be used to add a menu to the top of a form.
• The MenuStrip control is new in VS.NET 2005. It replaces the MainMenu component in earlier versions of VS.NET.
• MainMenu components did not occupy the client area of the form. The client area of a form is the size of the form, minus the nonclient elements such as scroll bars, borders, and title bars.
• MenuStrip controls do occupy the client area of the form.

15
The Client Area
• The client area, defined by the ClientSize object and its Height and Width properties is that part of the form that can host controls.
ClientSize.Width
Cli
entS
ize.
Hei
gh
t
16
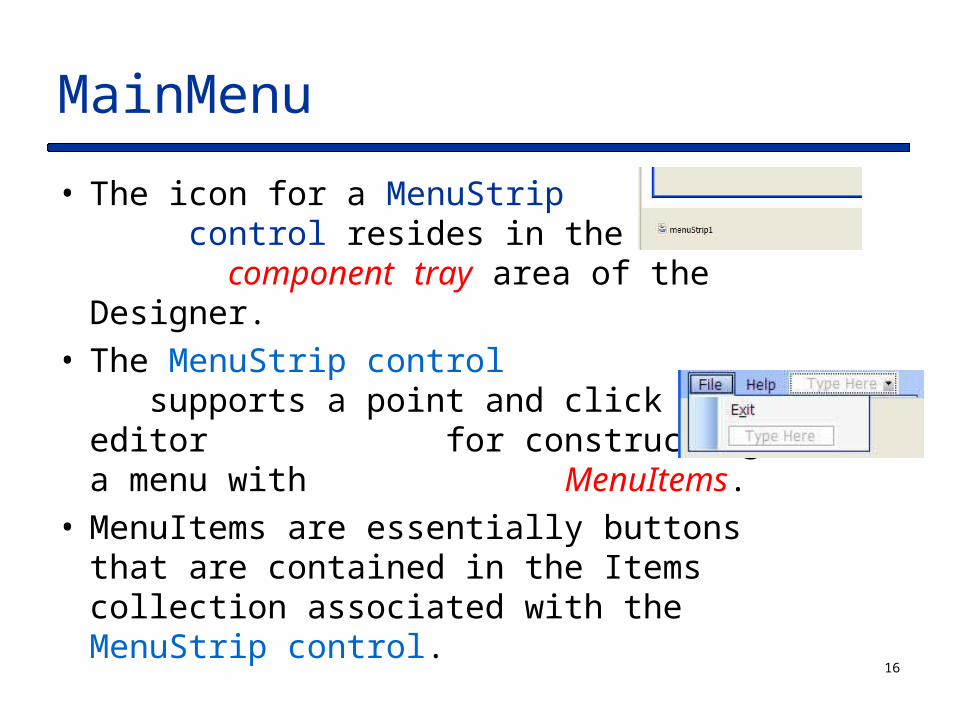
MainMenu
• The icon for a MenuStrip control resides in the component tray area of the Designer.
• The MenuStrip control supports a point and click editor for constructing a menu with MenuItems.
• MenuItems are essentially buttons that are contained in the Items collection associated with the MenuStrip control.
17
MenuItems
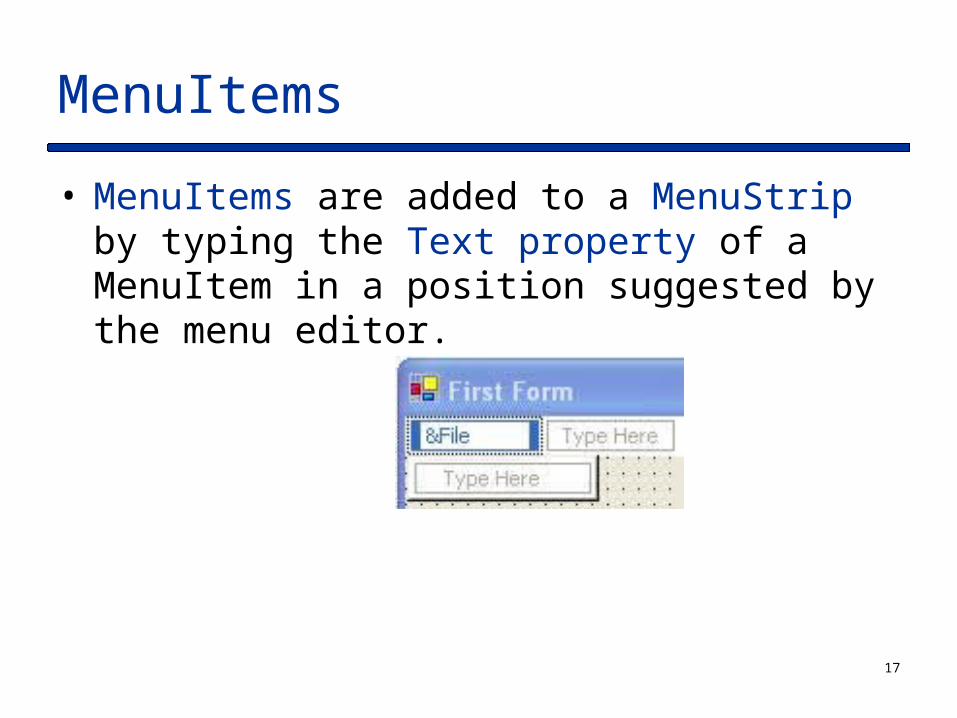
• MenuItems are added to a MenuStrip by typing the Text property of a MenuItem in a position suggested by the menu editor.

18
Renaming Menu Items
• MenuItems are controls and should be given meaningful names.
• A good organizational strategy is to use a compound name consisting of the menu (top line) name and the MenuItem name.
• Use the prefix mnu for MenuItems.

19
Coding Handlers for MenuItems
• The Click event is the default event for MenuItems and their handler functions may be created using the same techniques as with Buttons.
• We will add code to our MenuItem Click handler functions to assign different values to the BackColor property of the form.
SimpleMenu
20
Adding Menu Access () Keys
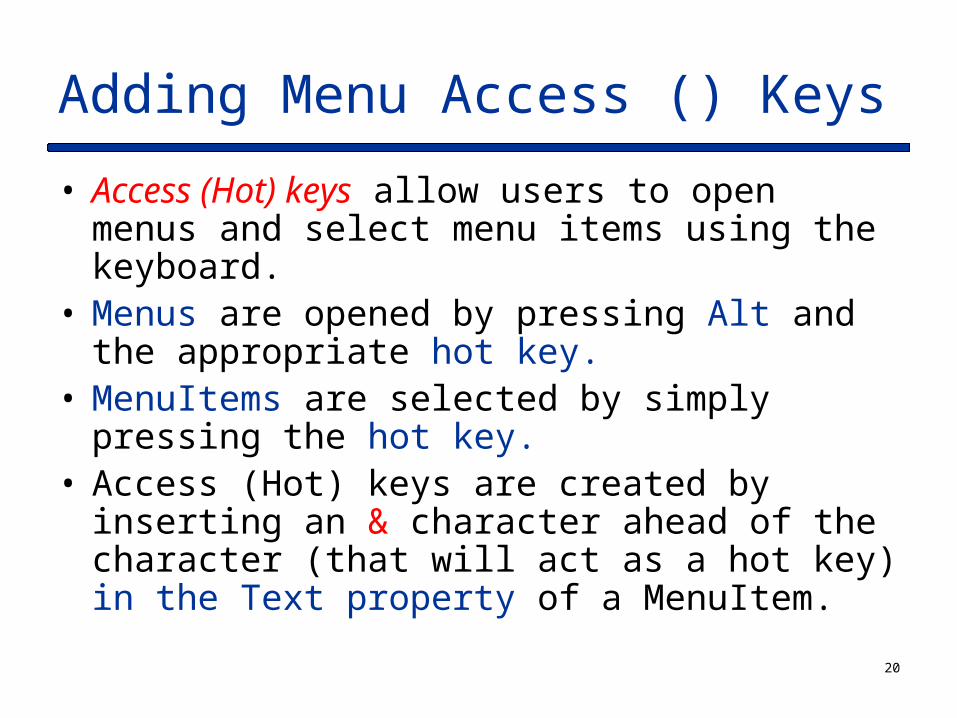
• Access (Hot) keys allow users to open menus and select menu items using the keyboard.
• Menus are opened by pressing Alt and the appropriate hot key.
• MenuItems are selected by simply pressing the hot key.
• Access (Hot) keys are created by inserting an & character ahead of the character (that will act as a hot key) in the Text property of a MenuItem.
21
Hot Keys at Run Time
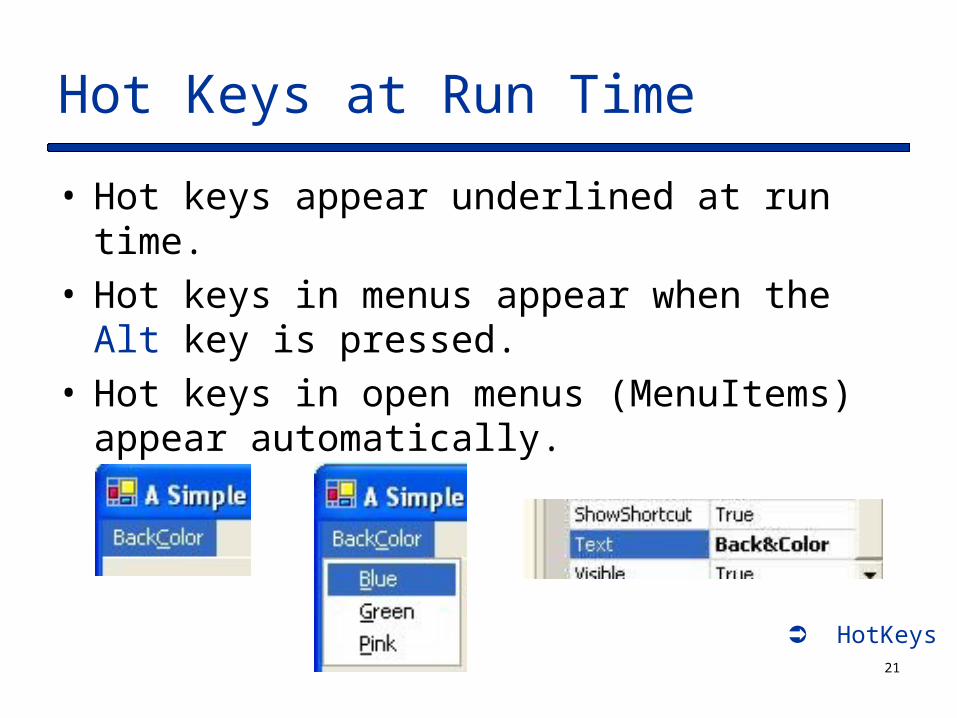
• Hot keys appear underlined at run time.• Hot keys in menus appear when the Alt key is
pressed.• Hot keys in open menus (MenuItems) appear
automatically.
HotKeys
22
Menu Shortcuts
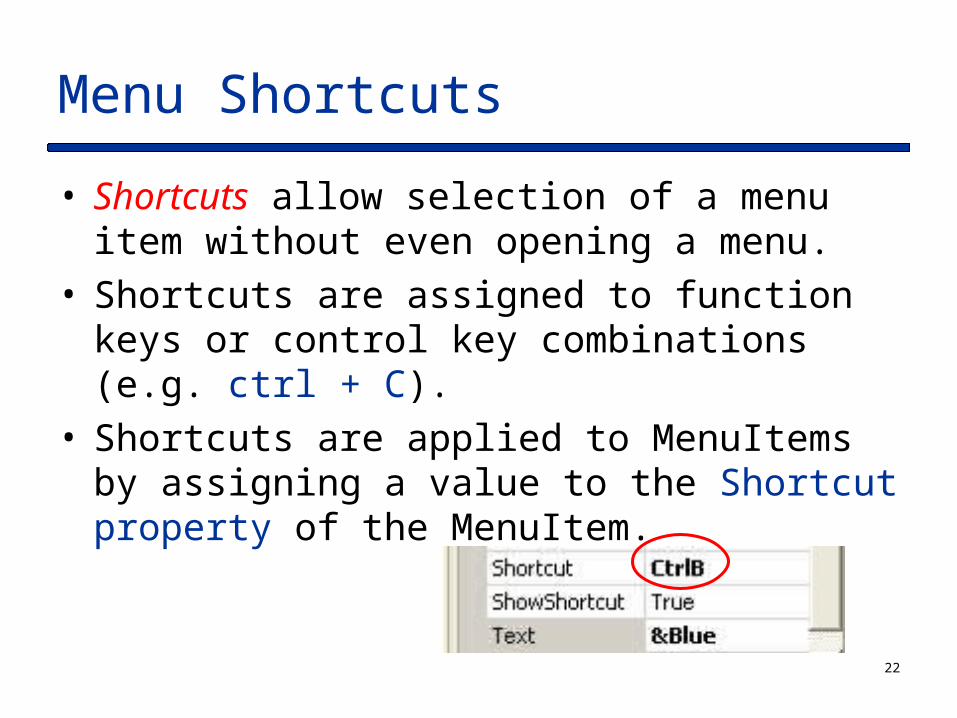
• Shortcuts allow selection of a menu item without even opening a menu.
• Shortcuts are assigned to function keys or control key combinations (e.g. ctrl + C).
• Shortcuts are applied to MenuItems by assigning a value to the Shortcut property of the MenuItem.
23
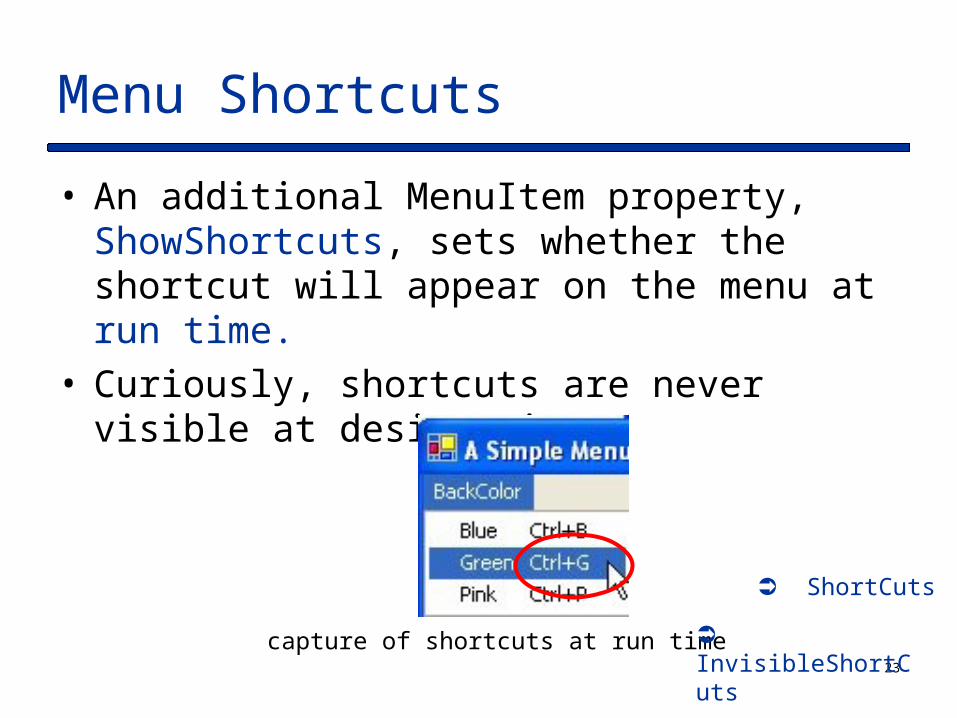
Menu Shortcuts
• An additional MenuItem property, ShowShortcuts, sets whether the shortcut will appear on the menu at run time.
• Curiously, shortcuts are never visible at design time.
capture of shortcuts at run time
ShortCuts
InvisibleShortCuts
24
Menu Branching
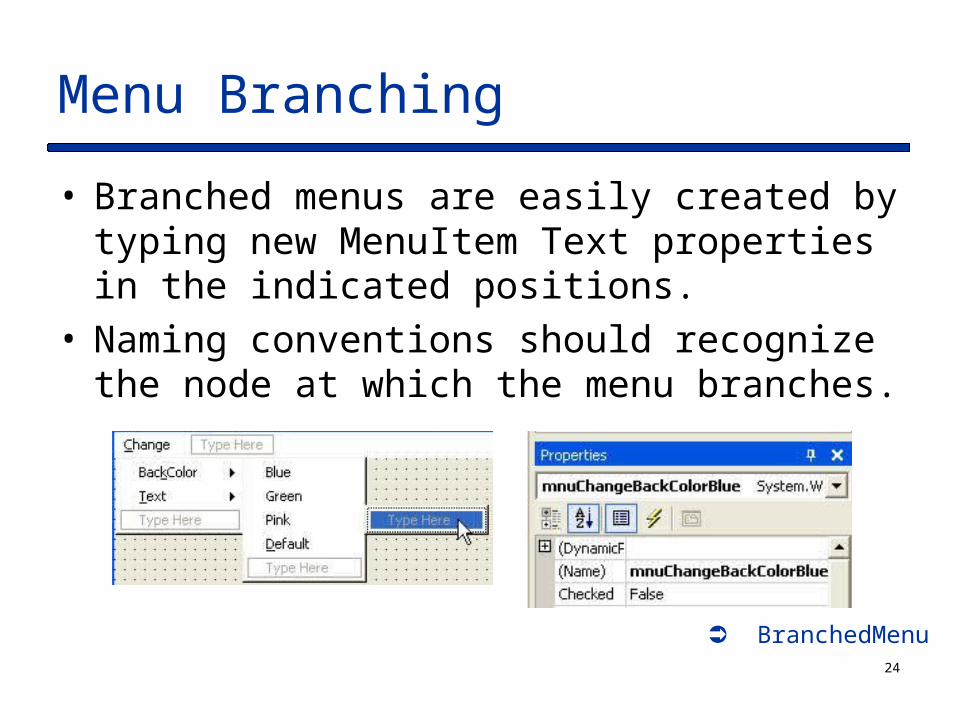
• Branched menus are easily created by typing new MenuItem Text properties in the indicated positions.
• Naming conventions should recognize the node at which the menu branches.
BranchedMenu
25
Menu Separators
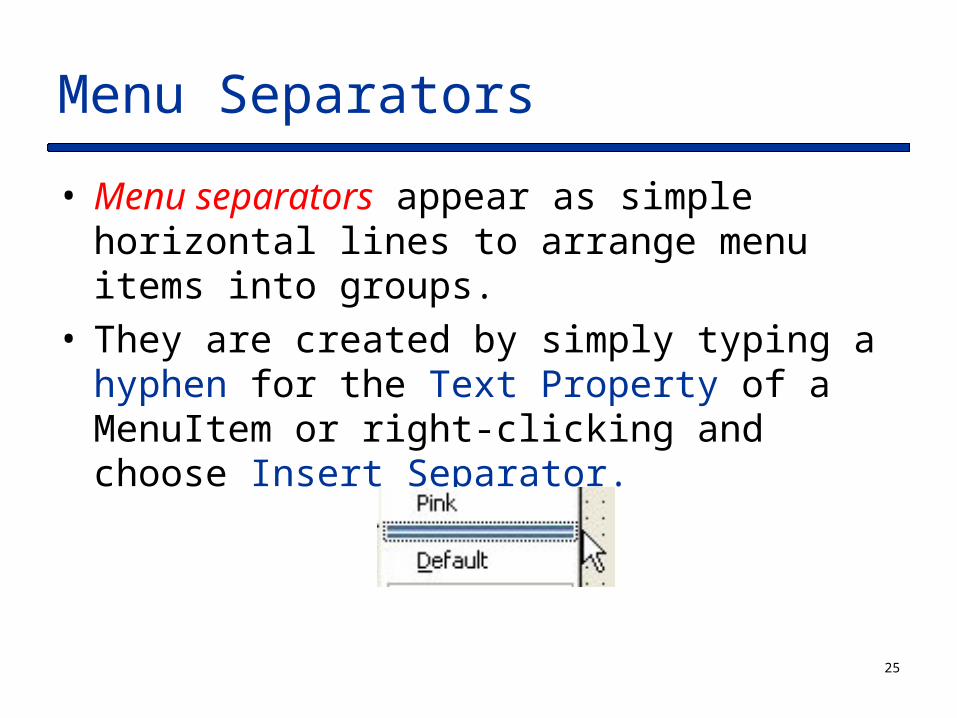
• Menu separators appear as simple horizontal lines to arrange menu items into groups.
• They are created by simply typing a hyphen for the Text Property of a MenuItem or right-clicking and choose Insert Separator.
26
ContextMenuStrips
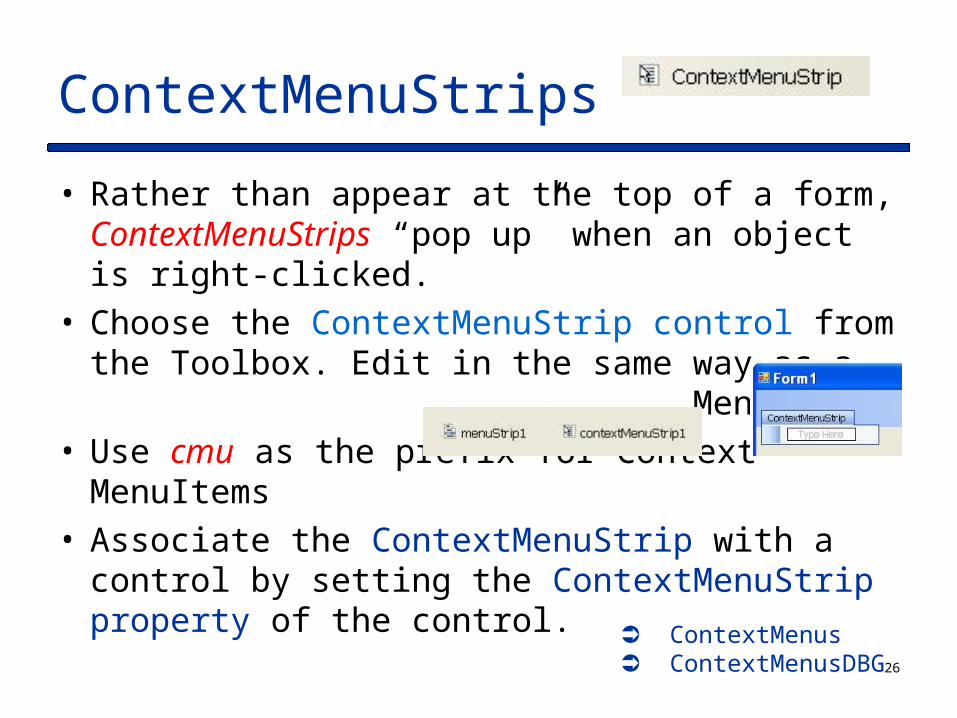
• Rather than appear at the top of a form, ContextMenuStrips “pop up” when an object is right-clicked.
• Choose the ContextMenuStrip control from the Toolbox. Edit in the same way as a MenuStrip.
• Use cmu as the prefix for Context MenuItems• Associate the ContextMenuStrip with a control
by setting the ContextMenuStrip property of the control. ContextMenus
ContextMenusDBG
27
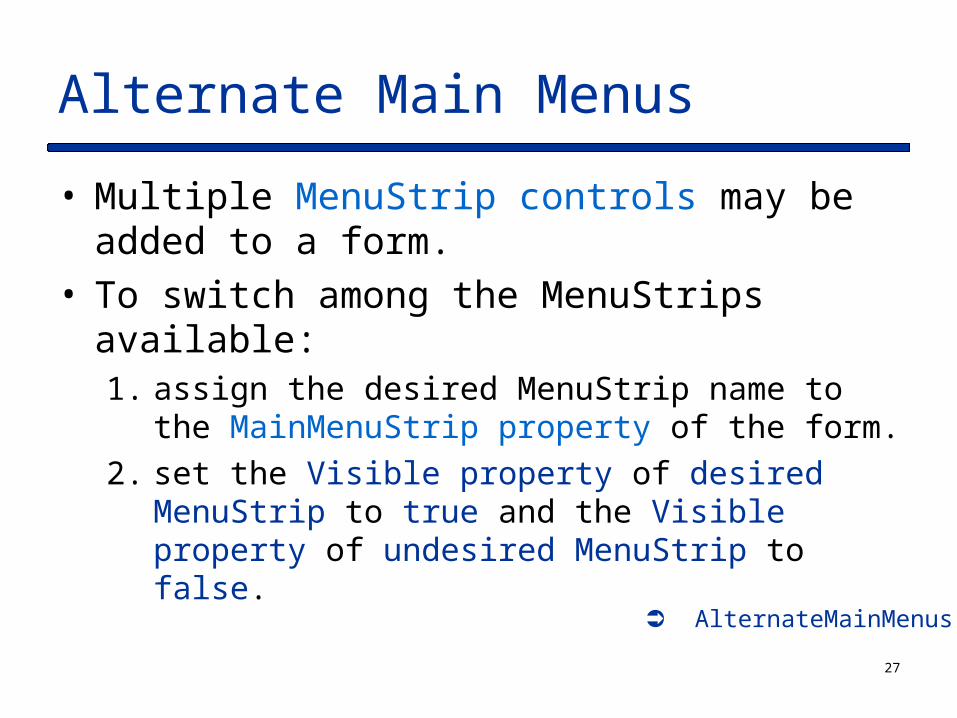
Alternate Main Menus
• Multiple MenuStrip controls may be added to a form.
• To switch among the MenuStrips available:1. assign the desired MenuStrip name to the
MainMenuStrip property of the form.
2. set the Visible property of desired MenuStrip to true and the Visible property of undesired MenuStrip to false.
AlternateMainMenus
28
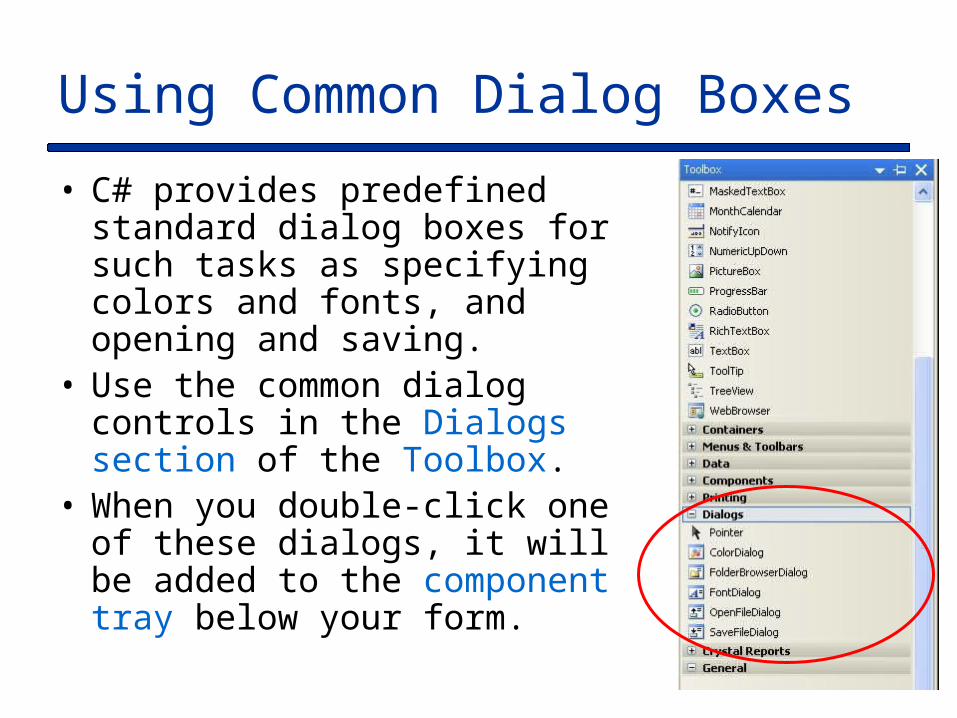
Using Common Dialog Boxes
• C# provides predefined standard dialog boxes for such tasks as specifying colors and fonts, and opening and saving.
• Use the common dialog controls in the Dialogs section of the Toolbox.
• When you double-click one of these dialogs, it will be added to the component tray below your form.
29
Common Dialog Objects
• Use the supplied object name (ex. FontDialog1). • To change the font of lblOutput via FontDialog1,
include the following code in the appropriate event handler:1. Display the current property setting in the dialog.
FontDialog1.Font = lblOutput.Font; //display current label font as selected font of dialog
2. Display the dialog FontDialog1.ShowDialog(); //display the dialog
3. After user makes a selection from dialog, assign user selection to the appropriate property.lblOutput.Font = FontDialog1.Font; //set label font to new user
selected font

30
Let’s Do a Problem Together
• Make a copy of Piecework complete and paste it into your CIS205 folder on the hard drive.
• Add the following menu structure to this existing problem:
File Edit Help
Calculate Pay Clear About
Summary ---------
Exit Font …
Color …

31
Writing functions/methods
• So far the only functions/methods we have been working with are functions/methods that handle events; the skeleton of these functions/methods were typed for us when we double-clicked a control.
• You will recall from C++ or Java, that it is often convenient to write our own functions/methods:– To break a problem into smaller parts– Because some code will be executed in more than 1
place (reusable code)
• Before writing our own functions in C#, let’s review C++ and Java function/method syntax.

32
C++ Functions
• C++ functions consist of 2 parts:– Function prototype --- declares the function, specifies
data type of returned value, lists number of parameters and their data types
– Function definition --- function header (copy of prototype without ;) plus actual code to be executed
• These could be written within the source program file or contained in separate .cpp and .h files. Remember, a #include statement is necessary to incorporate the .h file when storing function definitions in separate files.

33
C++ Function Syntax
Syntax:return-type functionName(data-type variable1, data-type
variable2, …)
Example 1://function prototypedouble calcInterest (int y, double p, double r);
//function definitiondouble calcInterest(int y, double p, double r){ double temp; temp = p * r * y; return temp;}
//function call in main()interest = calcInterest (years, principal, rate);

34
Another C++ Function Example
Syntax: return-type functionName(data-type variable1, data-type
variable2, …)
Example2://function prototypevoid printLoanInfo(int y, double p, double r, double i);
//function definitionvoid printLoanInfo(int y, double p, double r, double i){ cout << “You will have to pay $” << i <<
<< “ interest on your loan of $” << p << “ for a term of ” << y << “ years at a rate of
” << r << “%.\n”;
}
//function call in main()printLoanInfo(years, principal, rate, interest);
35
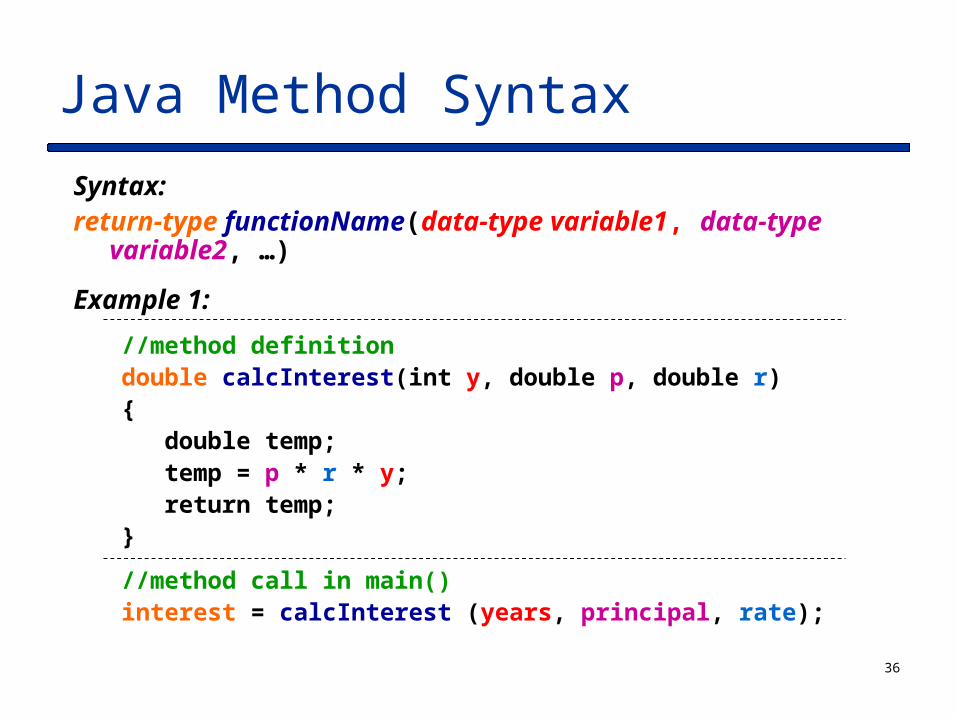
Java Methods
• A Java method consists of just one part, the method definition. The method definition is made up of the method header and the actual code to be executed.
• No function/method prototype or import statements are required; just the function/method definition (without ;) is required.
36
Java Method Syntax
Syntax:return-type functionName(data-type variable1, data-type
variable2, …)
Example 1:
//method definitiondouble calcInterest(int y, double p, double r){ double temp; temp = p * r * y; return temp;}
//method call in main()interest = calcInterest (years, principal, rate);

37
Another Java Method Example
Syntax:return-type functionName(data-type variable1, data-type
variable2, …)
Example2:
//method definitionvoid printLoanInfo(int y, double p, double r, double i){ System.out.println(“You will have to pay $” + i
+ “ interest on your loan of $” + p + “ for a term of ” + y + “ years at a rate of ”
+ r + “%.\n”;}
//method call in main()printLoanInfo(years, principal, rate, interest);
38
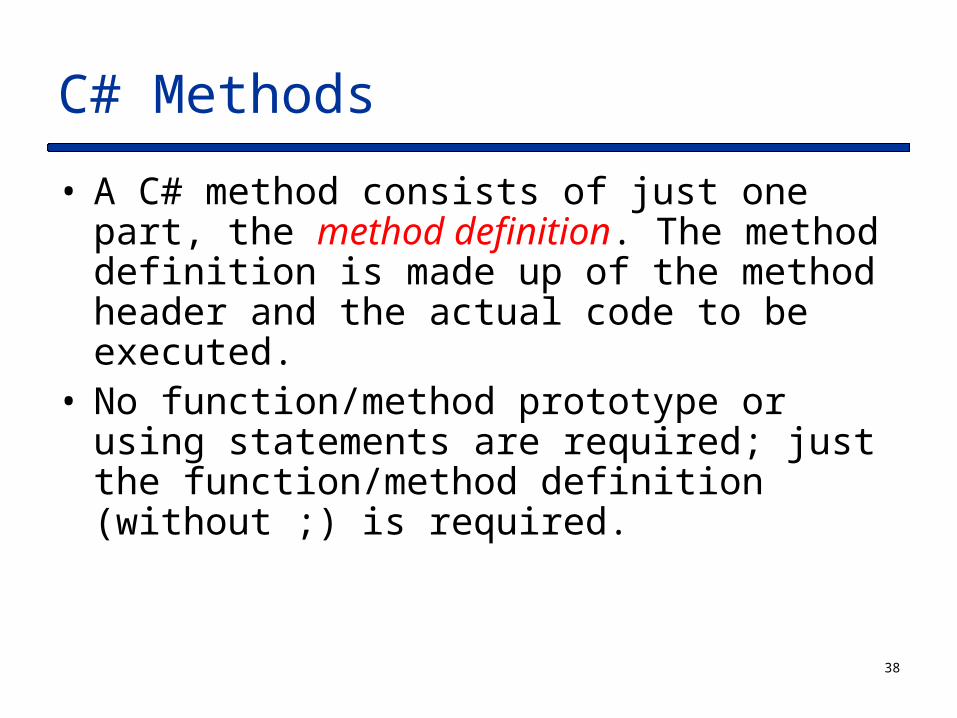
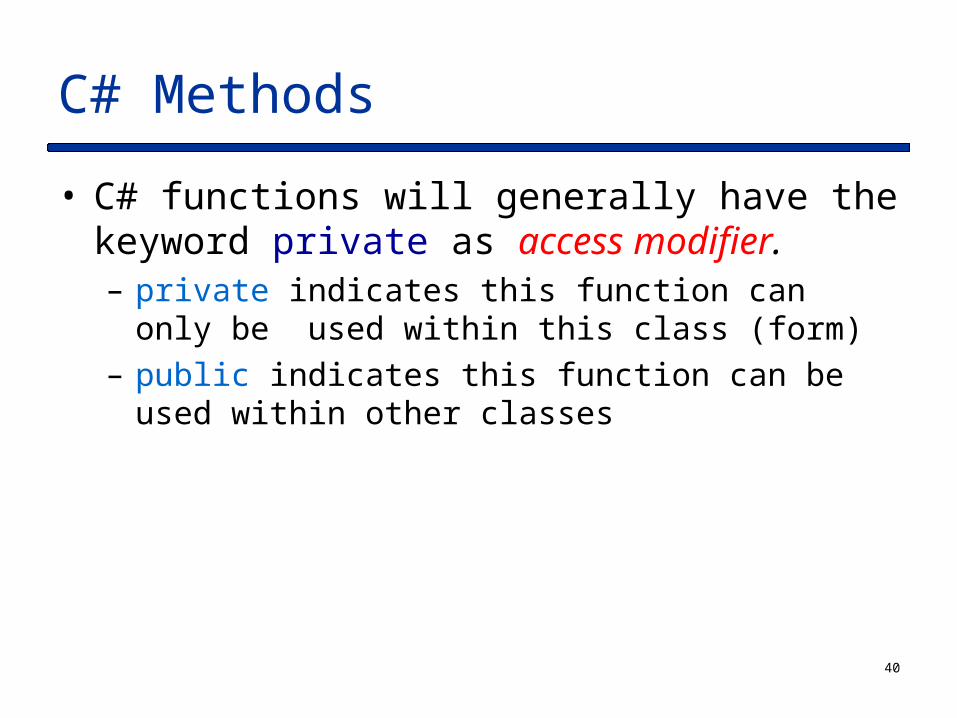
C# Methods
• A C# method consists of just one part, the method definition. The method definition is made up of the method header and the actual code to be executed.
• No function/method prototype or using statements are required; just the function/method definition (without ;) is required.
39
C# Function/Method Syntax
Syntax:
private return-type functionName(data-type variable1, data-type variable2, …)
Example 1:
//method definition
private decimal calcInterest(int y, decimal p, decimal r)
{
decimal temp;
temp = p * r * y;
return temp;
}
//method call
interest = calcInterest(years, principal, rate);
40
C# Methods
• C# functions will generally have the keyword private as access modifier. – private indicates this function can only be used within
this class (form) – public indicates this function can be used within other
classes

41
Create a project to compute a checking account balance. Use radio buttons to choose the type of transaction (deposit, checking, or service charge). The user will enter the amount of transaction in a text box. Display the new balance in a label. Include validation that displays a message box if the amount of transaction is 0 or less. If there is not enough money to cover a check, display a message box with “Insufficient Funds”. Do not pay the check, but deduct a service charge of $10.
Let’s Do a Problem Together

Write methods for processing deposits, checks, and service charges. The deposit method adds the deposit to the balance; the check method subtracts the check amount from the balance; the service charge method subtracts $10 from the balance.
The Summary menu item displays the total number of deposits, the dollar amount of the deposits, the total number of checks, and the dollar amount of the checks in a message box. The Clear menu item clears the radio buttons and the amount and resets the focus. The Color and Font menu items change the color and the font of the information displayed in the balance label. Use a message box to display the program name and your name for the About menu item.
Related Documents