DAVE™ v4 – Quick Start 1 Simple LED Blinky via a generated PWM Signal February, 2015

Welcome message from author
This document is posted to help you gain knowledge. Please leave a comment to let me know what you think about it! Share it to your friends and learn new things together.
Transcript
DAVE™ v4 – Quick Start 1 Simple LED Blinky via a generated PWM Signal February, 2015
Learning Outcome
Learn the basic principles of DAVETM version 4:
Installation
Required XMC kit
Create DAVETM Project
GUI based DAVETM APPs configuration
Graphical pin mapping
One touch code generation
Download and debug code
DAVETM updates
Expert support
Page 2 set date Copyright © Infineon Technologies AG 2013. All rights reserved.

DAVE™ installation and update
Page 3
Easy installation
1. Go to www.infineon.com/DAVE and download DAVE™ version 4
2. The downloaded zip file contains all required installation instructions, please follow the instructions described in section 1
3. Then follow the update instructions described in section 2
4. After installation, DAVE™ v4 can be started from the desktop
set date Copyright © Infineon Technologies AG 2013. All rights reserved.
Required XMC kit
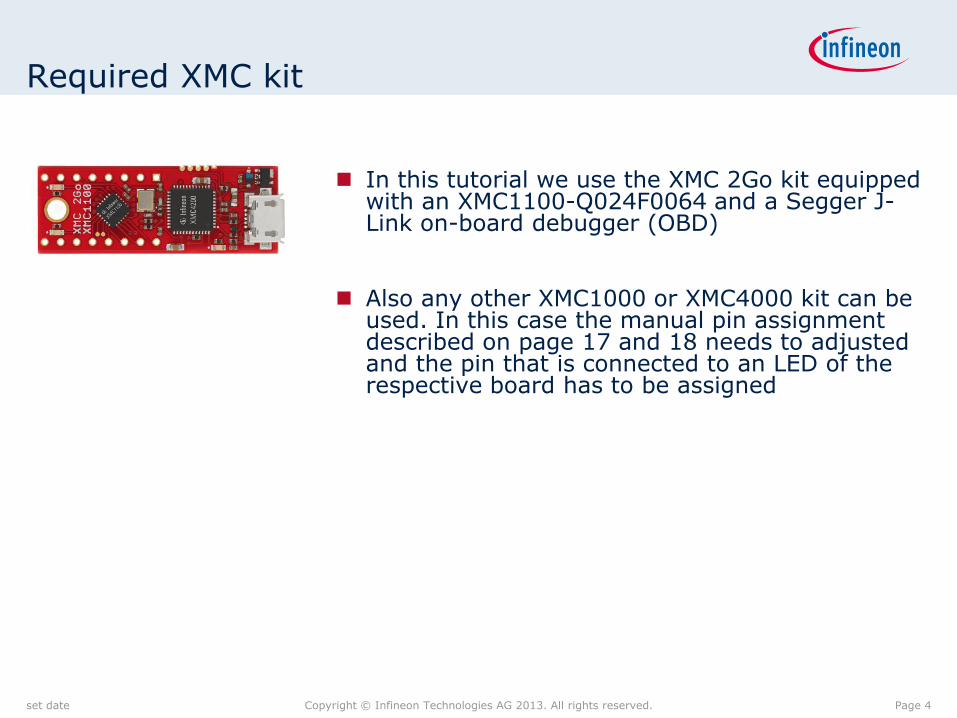
In this tutorial we use the XMC 2Go kit equipped with an XMC1100-Q024F0064 and a Segger J-Link on-board debugger (OBD)
Also any other XMC1000 or XMC4000 kit can be used. In this case the manual pin assignment described on page 17 and 18 needs to adjusted and the pin that is connected to an LED of the respective board has to be assigned
Page 4 set date Copyright © Infineon Technologies AG 2013. All rights reserved.
Starting DAVETM for the first time
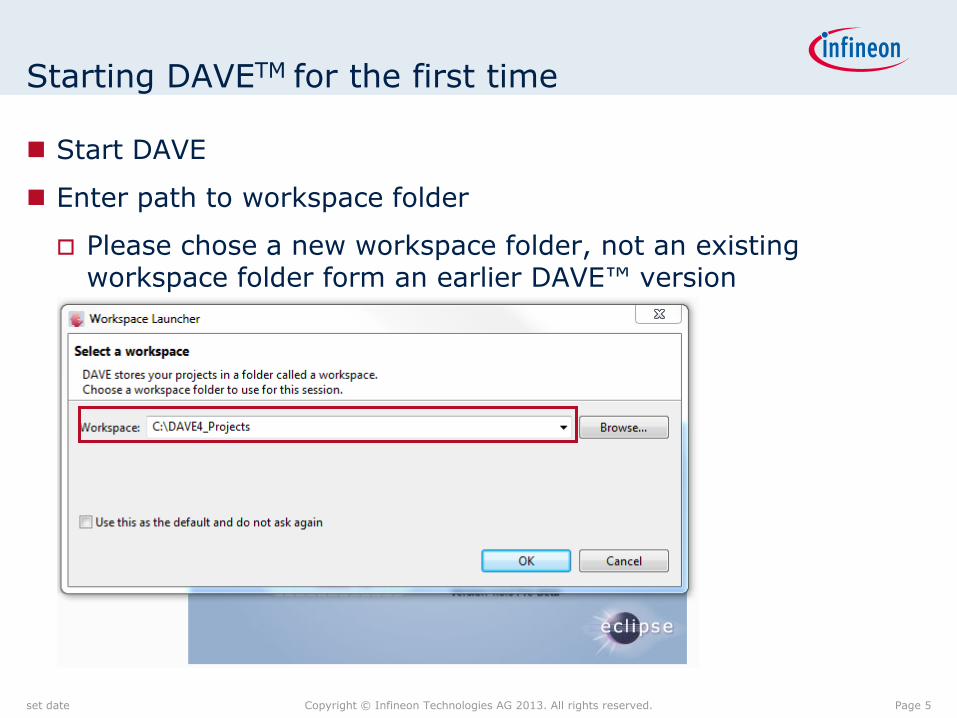
Start DAVE
Enter path to workspace folder
Please chose a new workspace folder, not an existing workspace folder form an earlier DAVE™ version
Page 5 set date Copyright © Infineon Technologies AG 2013. All rights reserved.
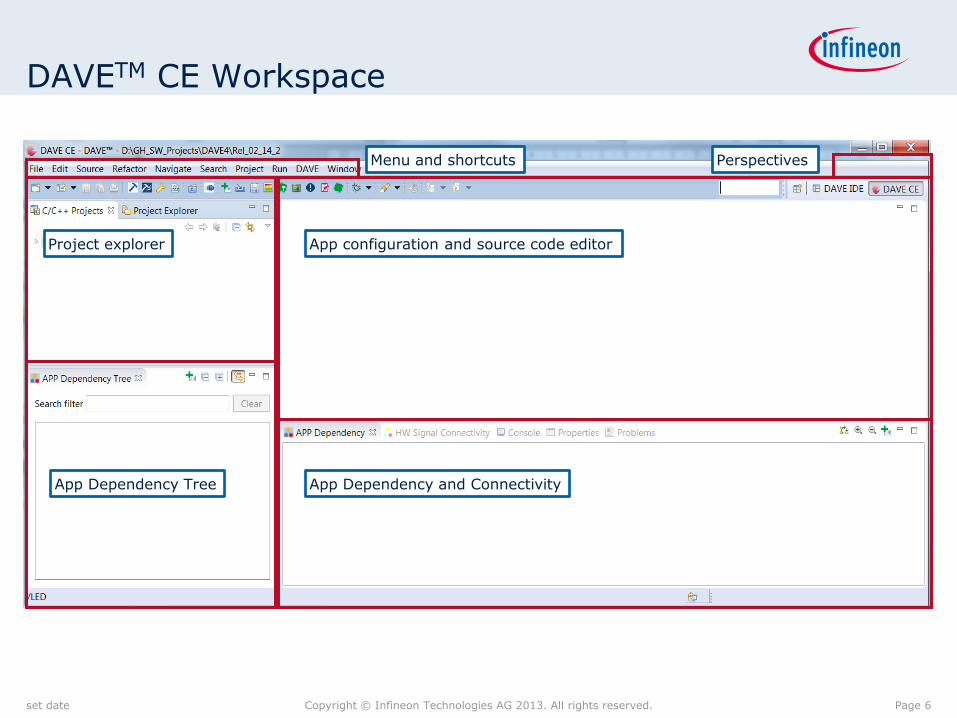
DAVETM CE Workspace
Page 6 set date Copyright © Infineon Technologies AG 2013. All rights reserved.
Menu and shortcuts
Project explorer
App Dependency Tree
App configuration and source code editor
App Dependency and Connectivity
Perspectives
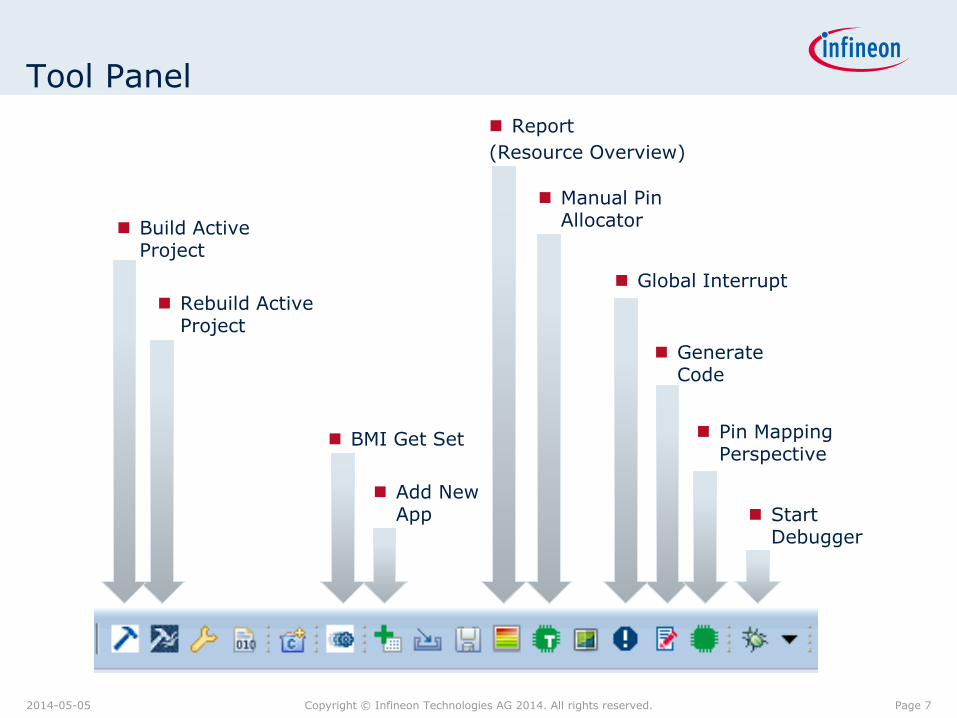
Tool Panel
Generate Code
Global Interrupt
Pin Mapping Perspective
Report
(Resource Overview)
Rebuild Active Project
Build Active Project
Start Debugger
Page 7 2014-05-05 Copyright © Infineon Technologies AG 2014. All rights reserved.
Manual Pin Allocator
Add New App
BMI Get Set
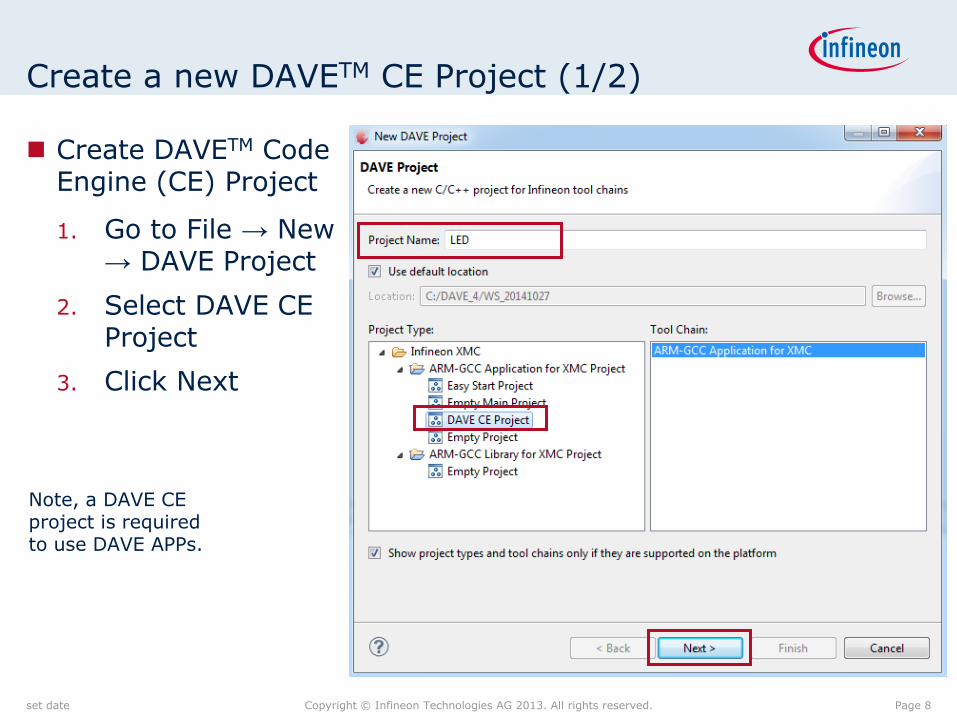
Create a new DAVETM CE Project (1/2)
Create DAVETM Code Engine (CE) Project
1. Go to File → New → DAVE Project
2. Select DAVE CE Project
3. Click Next
Page 8 set date Copyright © Infineon Technologies AG 2013. All rights reserved.
Note, a DAVE CE project is required to use DAVE APPs.
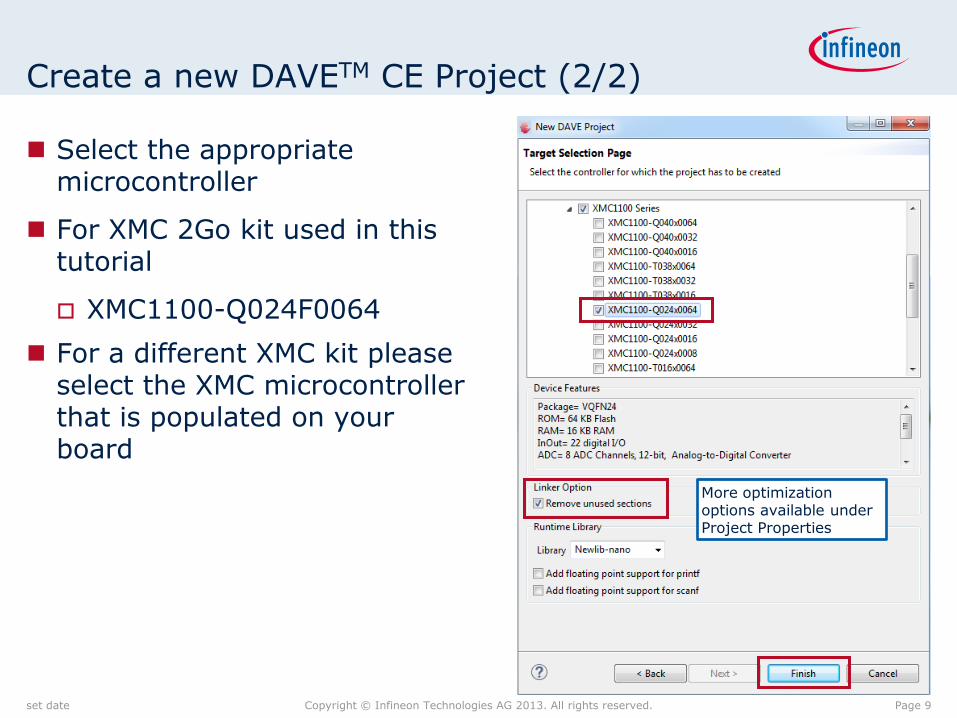
Create a new DAVETM CE Project (2/2)
Select the appropriate microcontroller
For XMC 2Go kit used in this tutorial
XMC1100-Q024F0064
For a different XMC kit please select the XMC microcontroller that is populated on your board
Page 9 set date Copyright © Infineon Technologies AG 2013. All rights reserved.
More optimization options available under Project Properties

Project View
Page 10 set date Copyright © Infineon Technologies AG 2013. All rights reserved.
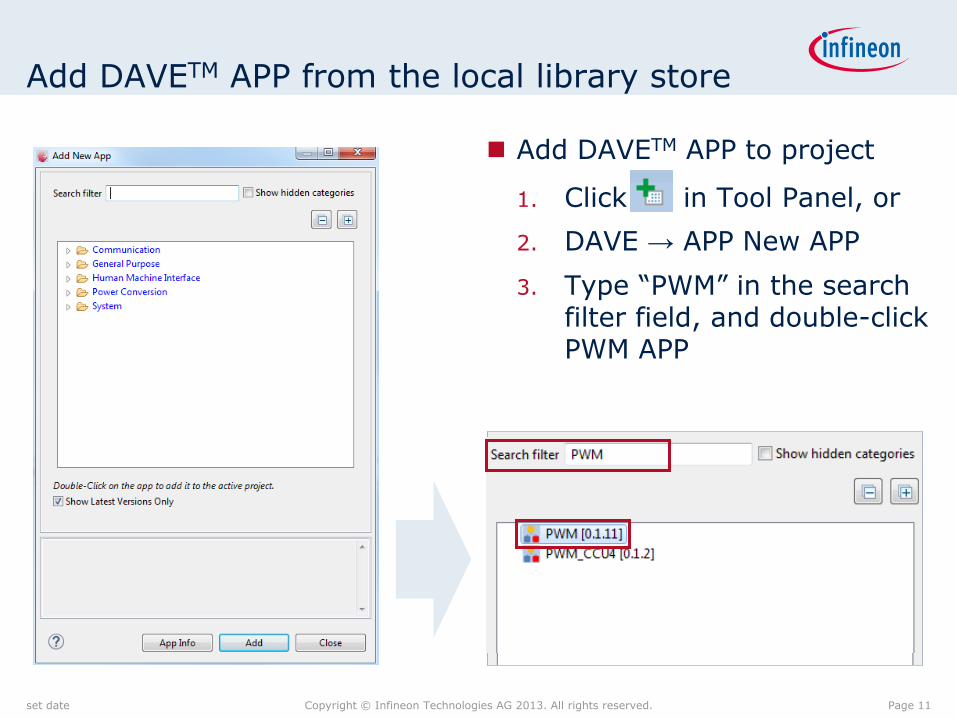
Add DAVETM APP from the local library store
Add DAVETM APP to project
1. Click in Tool Panel, or
2. DAVE → APP New APP
3. Type “PWM” in the search filter field, and double-click PWM APP
Page 11 set date Copyright © Infineon Technologies AG 2013. All rights reserved.
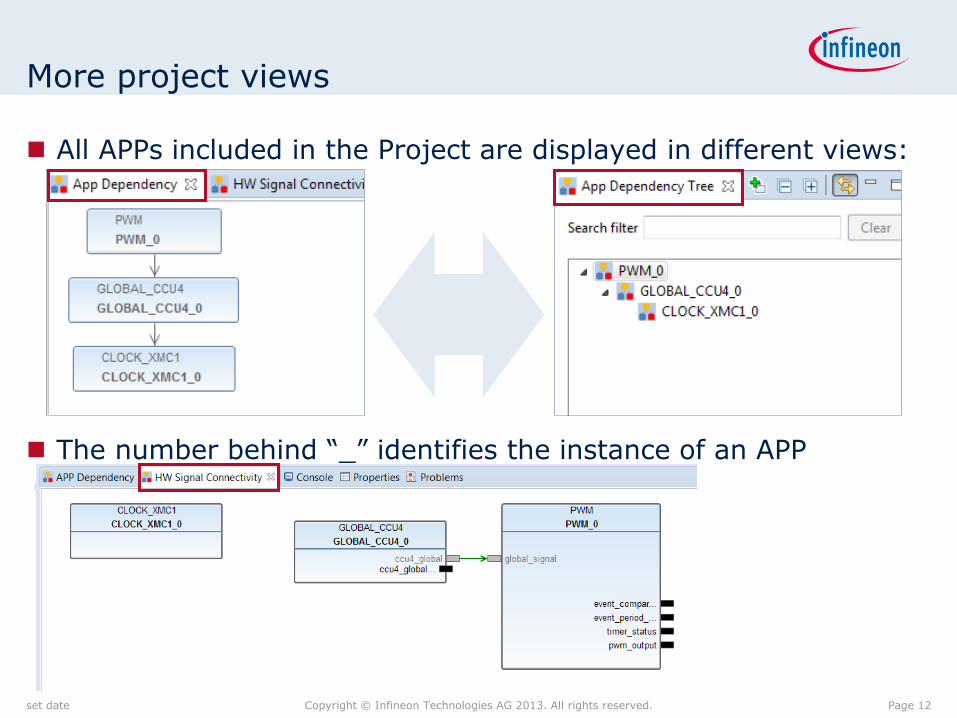
All APPs included in the Project are displayed in different views:
The number behind “_” identifies the instance of an APP
More project views
Page 12 set date Copyright © Infineon Technologies AG 2013. All rights reserved.
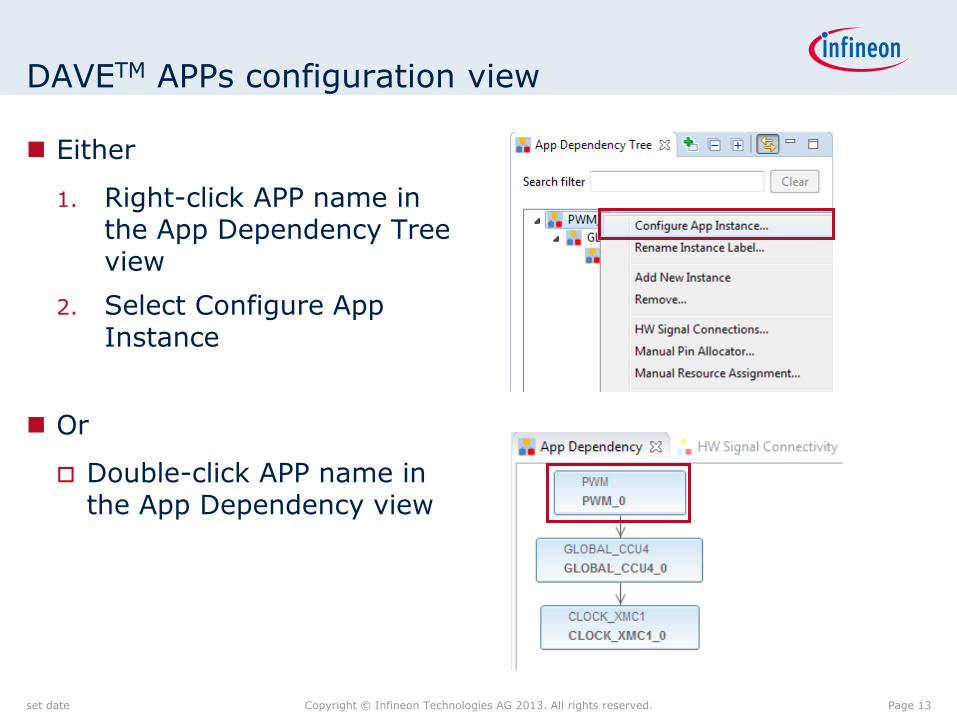
DAVETM APPs configuration view
Either
1. Right-click APP name in the App Dependency Tree view
2. Select Configure App Instance
Or
Double-click APP name in the App Dependency view
Page 13 set date Copyright © Infineon Technologies AG 2013. All rights reserved.

PWM APP configuration
Configure PWM APP via graphical user interface editor
1. Set PWM Frequency to 1 Hz
2. LED blinks every 0.5 second
3. Check “Start Timer After Initialization”
Page 14 set date Copyright © Infineon Technologies AG 2013. All rights reserved.

Rename the Instance Label of the PWM APP
Right click on the PWM APP
Select Rename Instance Label…
Type in: MyLED
Now “MyLED” can be used as handler in the APIs of the PWM APP to reference this instance
Page 15 set date Copyright © Infineon Technologies AG 2013. All rights reserved.
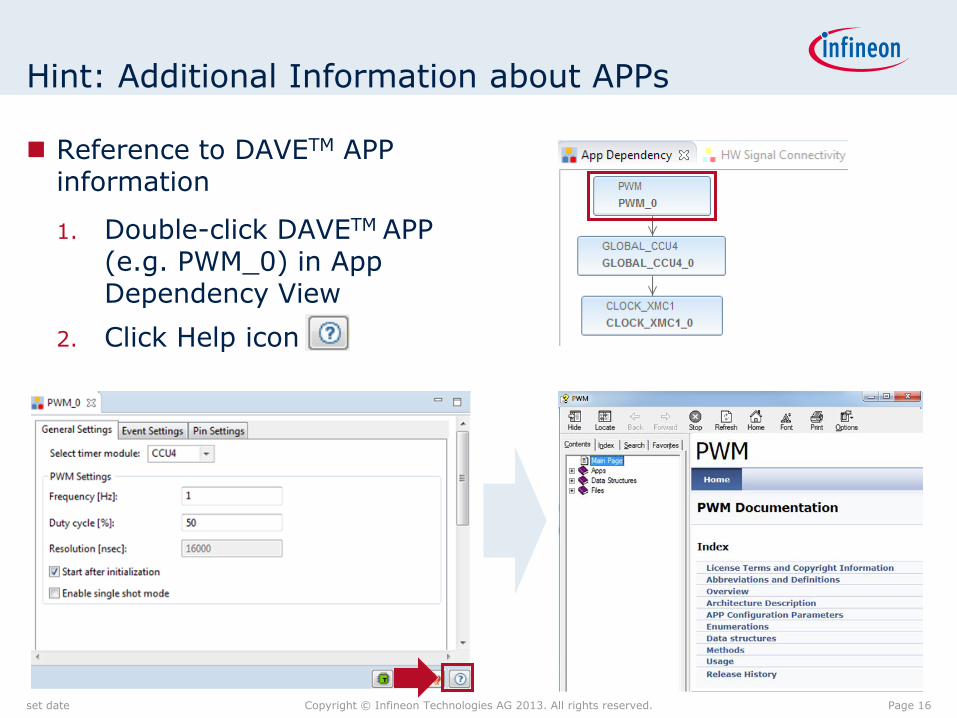
Reference to DAVETM APP information
1. Double-click DAVETM APP (e.g. PWM_0) in App Dependency View
2. Click Help icon
Hint: Additional Information about APPs
Page 16 set date Copyright © Infineon Technologies AG 2013. All rights reserved.

Pin Mapping for PWM App (1/2)
Assign signal to pin with graphical pin mapping view
1. Click to open Pin Mapping Perspective
2. Under Virtual Pin List, select PWM Output Pin
― Green pin: All possible pins for selected signal
― Blue pin: User assigned pin
Page 17 set date Copyright © Infineon Technologies AG 2013. All rights reserved.
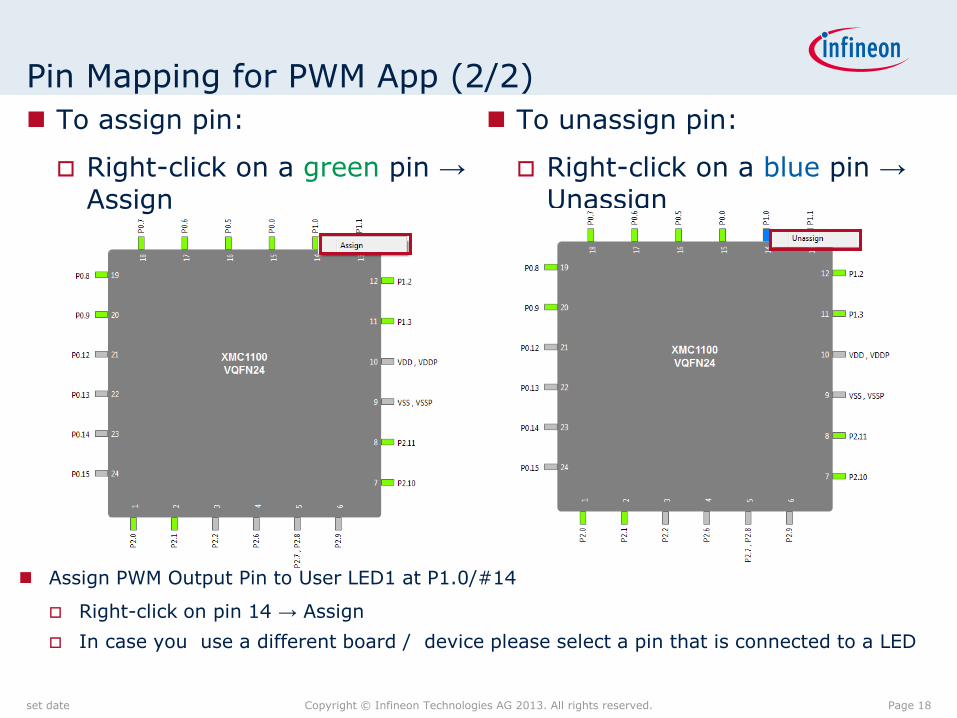
To unassign pin:
Right-click on a blue pin → Unassign
To assign pin:
Right-click on a green pin → Assign
Pin Mapping for PWM App (2/2)
Page 18 set date Copyright © Infineon Technologies AG 2013. All rights reserved.
Assign PWM Output Pin to User LED1 at P1.0/#14
Right-click on pin 14 → Assign
In case you use a different board / device please select a pin that is connected to a LED
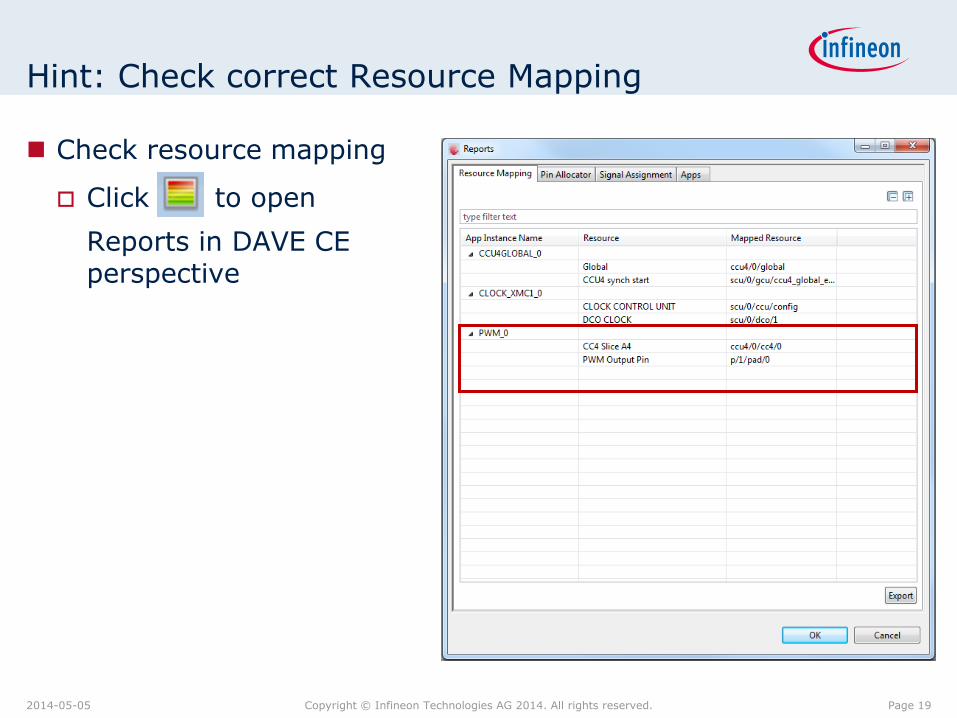
Hint: Check correct Resource Mapping
Check resource mapping
Click to open
Reports in DAVE CE perspective
Page 19 2014-05-05 Copyright © Infineon Technologies AG 2014. All rights reserved.
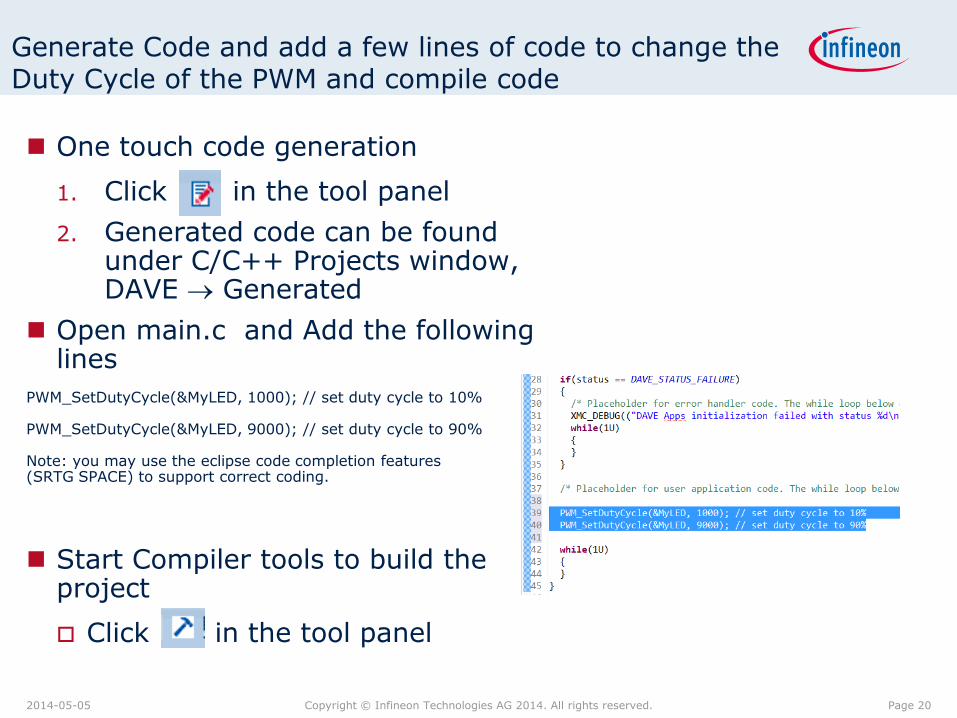
Generate Code and add a few lines of code to change the Duty Cycle of the PWM and compile code
One touch code generation
1. Click in the tool panel
2. Generated code can be found under C/C++ Projects window, DAVE Generated
Open main.c and Add the following lines
PWM_SetDutyCycle(&MyLED, 1000); // set duty cycle to 10%
PWM_SetDutyCycle(&MyLED, 9000); // set duty cycle to 90%
Note: you may use the eclipse code completion features (SRTG SPACE) to support correct coding.
Start Compiler tools to build the project
Click in the tool panel
Page 20 2014-05-05 Copyright © Infineon Technologies AG 2014. All rights reserved.
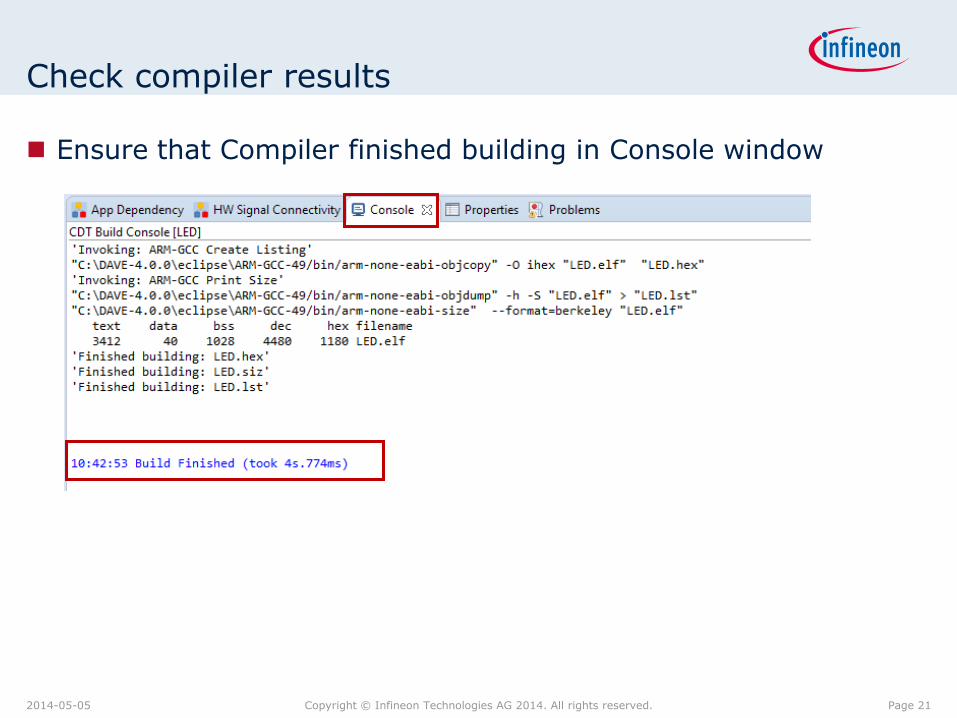
Check compiler results
Ensure that Compiler finished building in Console window
Page 21 2014-05-05 Copyright © Infineon Technologies AG 2014. All rights reserved.
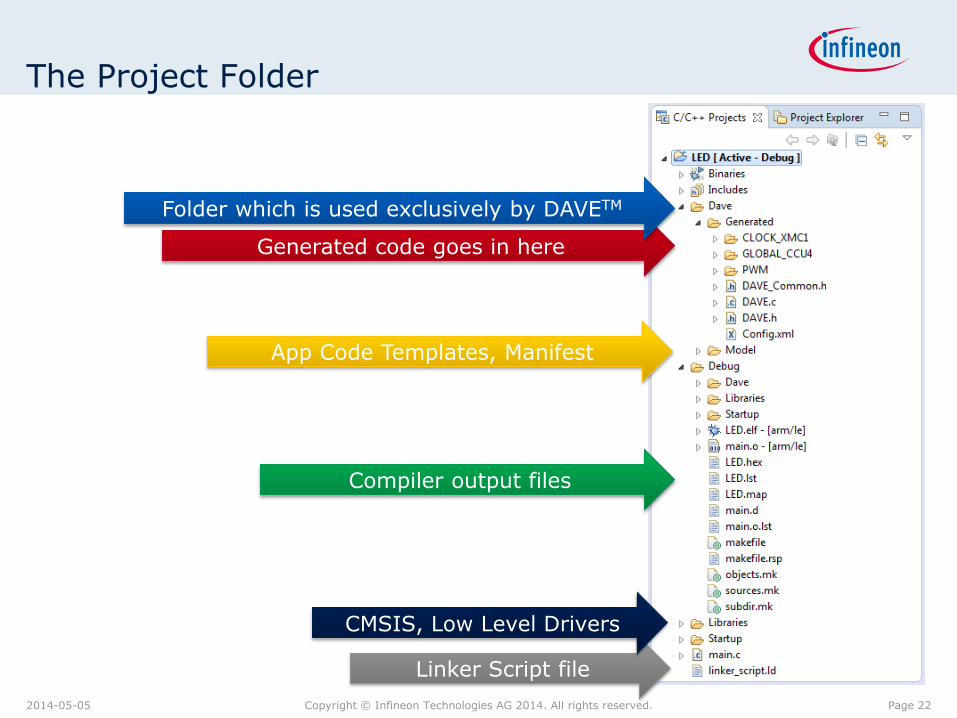
The Project Folder
Generated code goes in here
Compiler output files
Linker Script file
Page 22 2014-05-05 Copyright © Infineon Technologies AG 2014. All rights reserved.
App Code Templates, Manifest
Folder which is used exclusively by DAVETM
CMSIS, Low Level Drivers

Ensure the Debugger of the XMC 2Go Kit is connected to your PC via USB
Flash and Debug (1/3)
Debugger
Micro USB
Page 23 2014-05-05 Copyright © Infineon Technologies AG 2014. All rights reserved.
XMC1100
Microcontroller
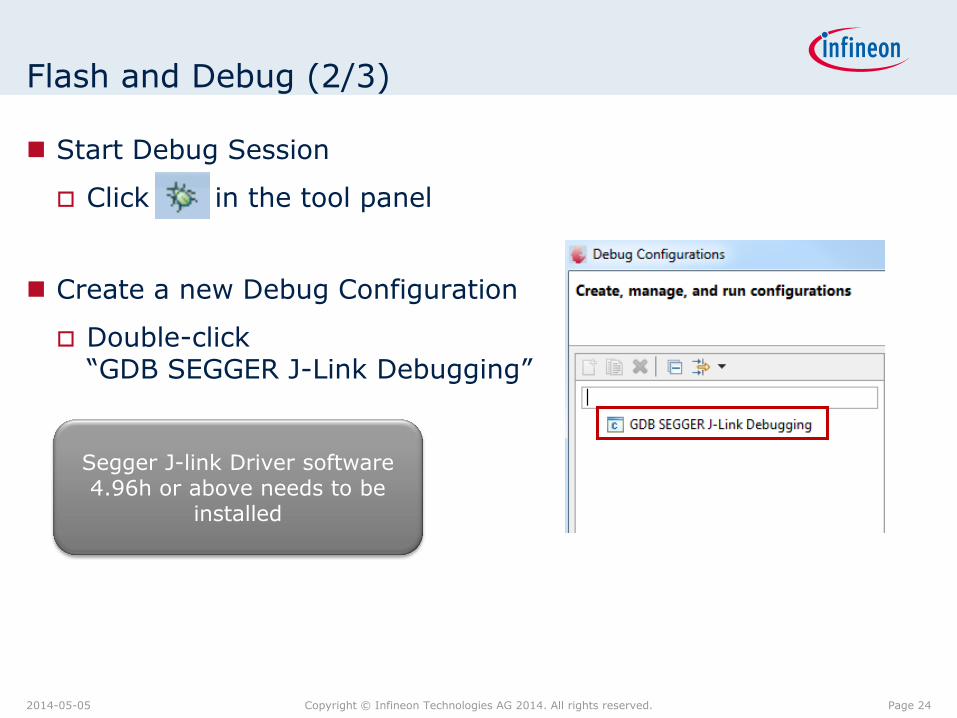
Start Debug Session
Click in the tool panel
Create a new Debug Configuration
Double-click “GDB SEGGER J-Link Debugging”
Flash and Debug (2/3)
Page 24 2014-05-05 Copyright © Infineon Technologies AG 2014. All rights reserved.
Segger J-link Driver software 4.96h or above needs to be
installed
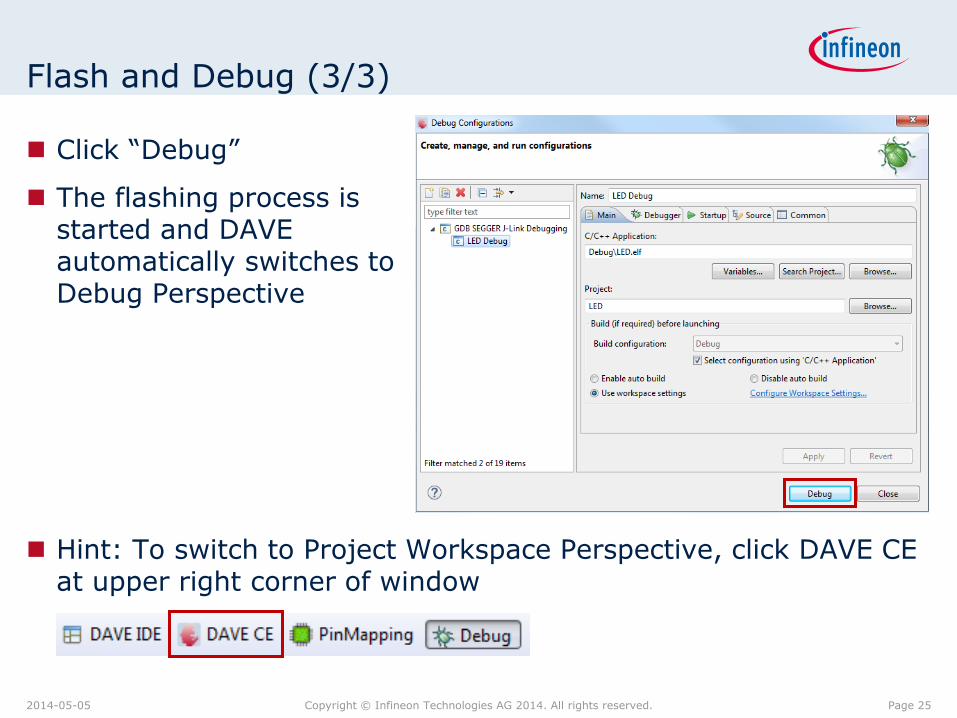
Hint: To switch to Project Workspace Perspective, click DAVE CE at upper right corner of window
Flash and Debug (3/3)
Click “Debug”
The flashing process is started and DAVE automatically switches to Debug Perspective
Page 25 2014-05-05 Copyright © Infineon Technologies AG 2014. All rights reserved.

The Debug Perspective (1/6) Debug Workspace
Page 26 set date Copyright © Infineon Technologies AG 2013. All rights reserved.
Debugger actions
Inspection controls
Breakpoint automatically set in main()
Device memory
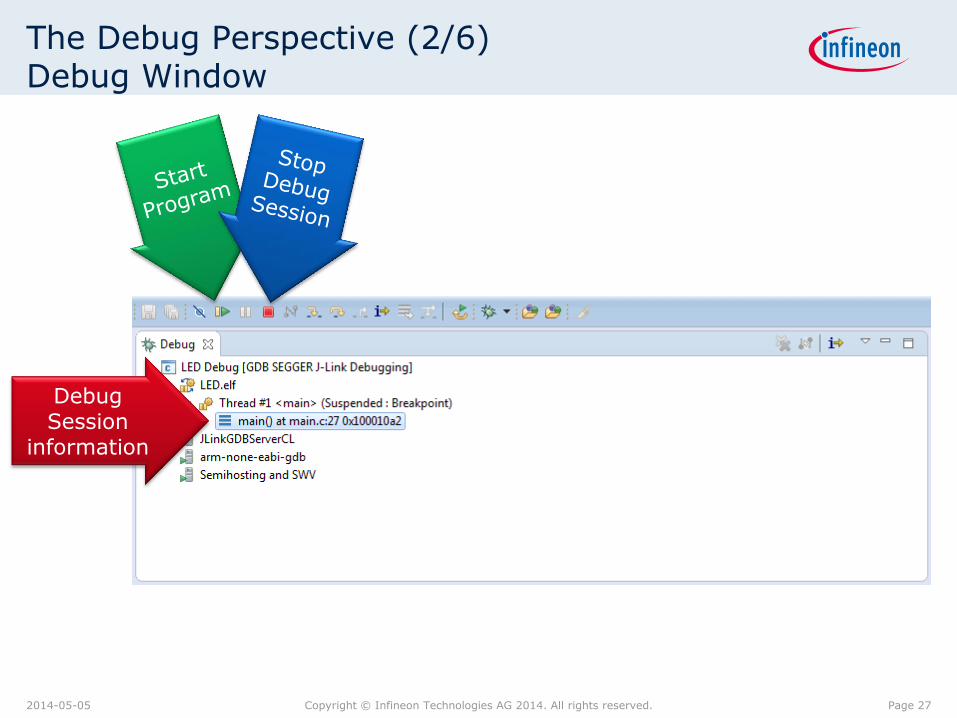
The Debug Perspective (2/6) Debug Window
Debug Session
information
Page 27 2014-05-05 Copyright © Infineon Technologies AG 2014. All rights reserved.
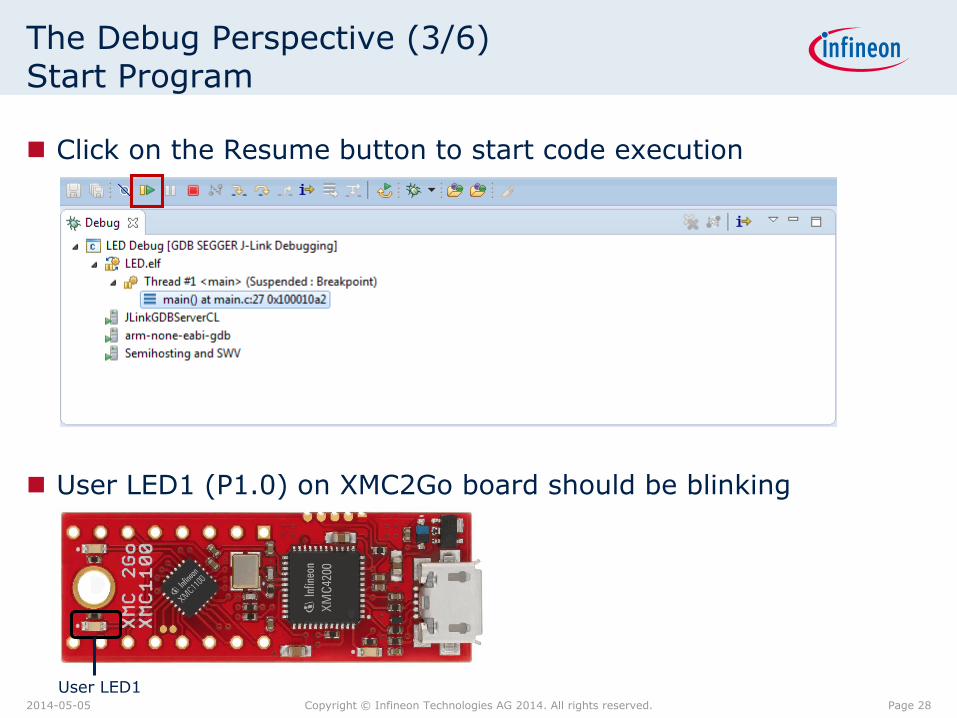
Click on the Resume button to start code execution
User LED1 (P1.0) on XMC2Go board should be blinking
The Debug Perspective (3/6) Start Program
Page 28 2014-05-05 Copyright © Infineon Technologies AG 2014. All rights reserved.
User LED1
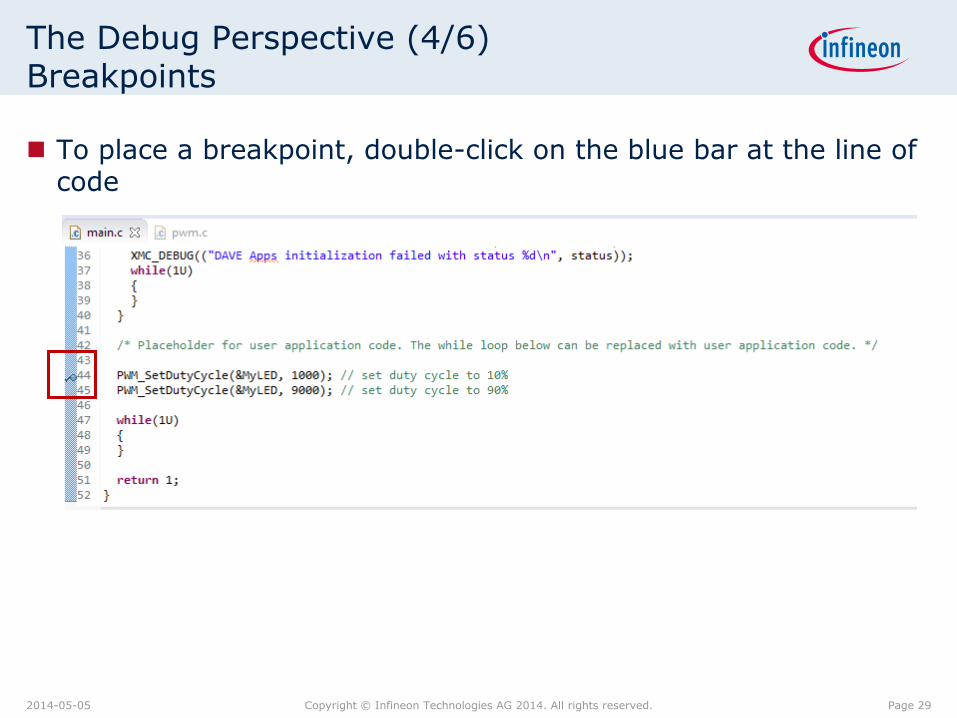
The Debug Perspective (4/6) Breakpoints
To place a breakpoint, double-click on the blue bar at the line of code
Page 29 2014-05-05 Copyright © Infineon Technologies AG 2014. All rights reserved.
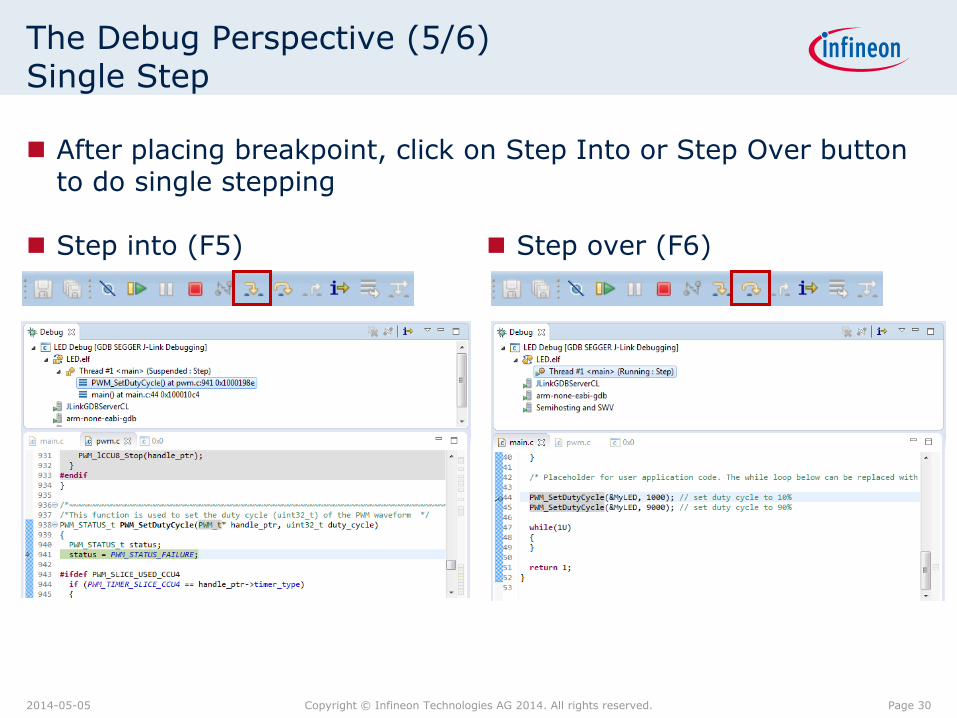
The Debug Perspective (5/6) Single Step
Step into (F5)
Step over (F6)
Page 30 2014-05-05 Copyright © Infineon Technologies AG 2014. All rights reserved.
After placing breakpoint, click on Step Into or Step Over button to do single stepping

The Debug Perspective (6/6) End Debug Session
Always end a debug session by clicking the Terminate Button
Page 31 2014-05-05 Copyright © Infineon Technologies AG 2014. All rights reserved.
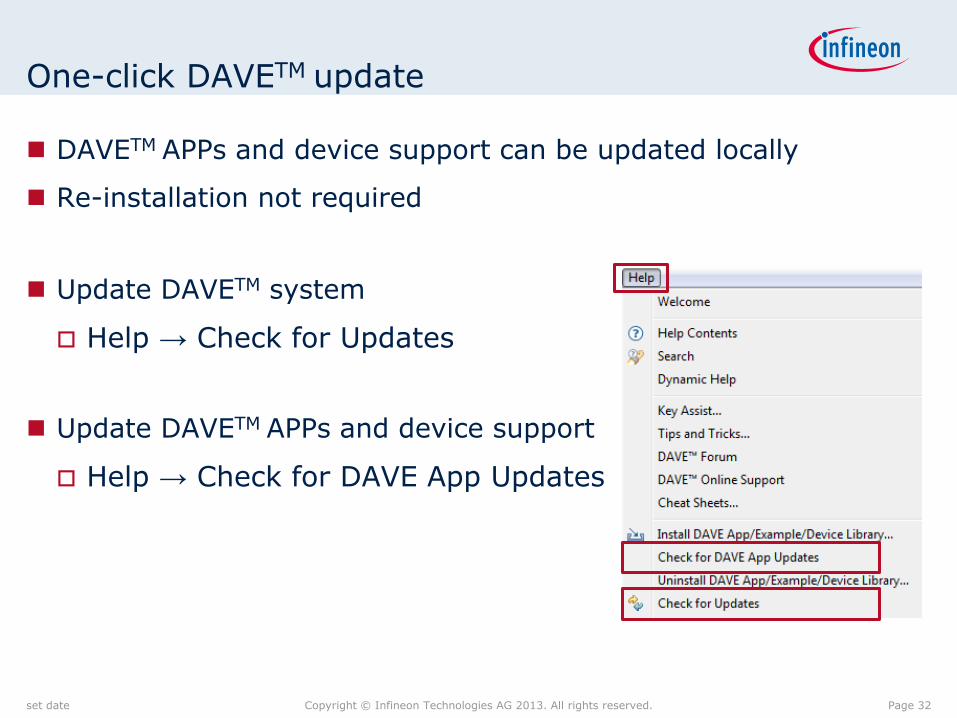
DAVETM APPs and device support can be updated locally
Re-installation not required
Update DAVETM system
Help → Check for Updates
Update DAVETM APPs and device support
Help → Check for DAVE App Updates
One-click DAVETM update
Page 32 set date Copyright © Infineon Technologies AG 2013. All rights reserved.
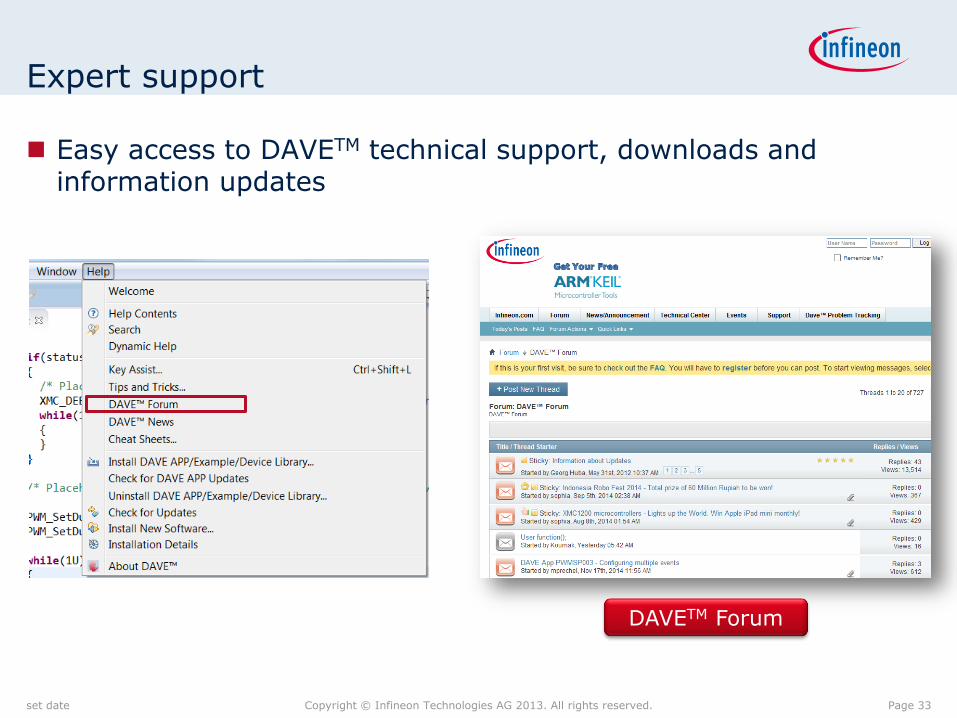
Expert support
Easy access to DAVETM technical support, downloads and information updates
Page 33 set date Copyright © Infineon Technologies AG 2013. All rights reserved.
DAVETM Forum

Page 34 set date Copyright © Infineon Technologies AG 2013. All rights reserved.
Related Documents