1. 2. 3. With a Stampin' Trimmer, cut a piece of Joyous Noel Specialty Designer Series Paper to 5 1/2" x 12". Use the Stampin' Trimmer or Simply Scored Tool to add score lines at 2", 4", 8", and 10". Mark each end (lightly with a pencil) at 2 3/4". Cut each side at a diagonal from the pencil mark up to the end of the 4" score line. Adhere the cut-off pieces to the inside bottom of the paper, ensuring that the opposite design is showing. Fold the 4" and 8" score lines to the inside and the 2" and 10" score lines to the outside. Cut a piece of Joyous Noel Specialty Designer Series Paper to 1 1/4" x 12". Score at 4" and 8". Fold in at the score lines and adhere the top pieces together to create a band. Wrap several times with Copper Metallic Thread and secure with a knot. Dashing Deer Double Gatefold Christmas Card Stesha Bloodhart [email protected] www.stampinhoot.com Images © Stampin' UP! 1990 - Current

Welcome message from author
This document is posted to help you gain knowledge. Please leave a comment to let me know what you think about it! Share it to your friends and learn new things together.
Transcript

1.
2.
3.
With a Stampin' Trimmer, cut a piece of Joyous Noel Specialty Designer Series Paper to 5 1/2"x 12". Use the Stampin' Trimmer or Simply Scored Tool to add score lines at 2", 4", 8", and 10". Markeach end (lightly with a pencil) at 2 3/4". Cut each side at a diagonal from the pencil mark up tothe end of the 4" score line. Adhere the cut-off pieces to the inside bottom of the paper, ensuringthat the opposite design is showing. Fold the 4" and 8" score lines to the inside and the 2" and10" score lines to the outside. Cut a piece of Joyous Noel Specialty Designer Series Paper to 1 1/4" x 12". Score at 4" and 8". Fold in at the score lines and adhere the top pieces together to create a band. Wrap severaltimes with Copper Metallic Thread and secure with a knot.
Dashing Deer DoubleGatefold Christmas Card
Stesha [email protected]
www.stampinhoot.com
Images © Stampin' UP! 1990 - Current

2.a.
b.
c.
d.
3.4.
5.6.7.
8.
Crop the following with a Big Shot Die-Cutting Tool and the following dies:
Merry Merlot Cardstock with the largest scalloped circle die from the Layering CircleFramelits Dies. Crumb Cake Cardstock with the largest stitched shaped circle die from the StitchedShaped Framelits Dies. Copper Foil Sheet with the 4 small flowers and 2 filigree corners from the Detailed DeerThinlits Dies. TIP: Use the Take Your Pick Tool to easily remove the Copper Foil from thedetailed dies.Stamp the deer in Soft Suede Ink onto Whisper White Cardstock. Crop with thecoordinating die from the Detailed Deer Thinlits Dies.
Cut a piece of Copper Foil to 1/2" x 3 1/2". Flag the ends with the Banner Triple Punch. Adhere the Merry Merlot Scalloped Circle to the belly band with Stampin' Dimensionals. Add twostrips of Snail Adhesive to the top of the circle and add loops of Copper Metallic Thread.Adhere the Crumb Cake Stitched Circle Die with Stampin' Dimensionals.Adhere the remaining die cuts and flagged banner as shown with Mini Glue Dots. Stamp the top image in Versamark onto Whisper White Cardstock. Cover with Copper Stampin'Emboss Powder and set with a Heat Tool. Snip with a Paper Snips and adhere with MiniStampin' Dimensionals.Cut a piece of Merry Merlot Cardstock to 3 1/2" x 5". Adhere to the center of the card base with
Dashing Deer DoubleGatefold Christmas Card
Stesha [email protected]
www.stampinhoot.com
Images © Stampin' UP! 1990 - Current
9.
10.
11.
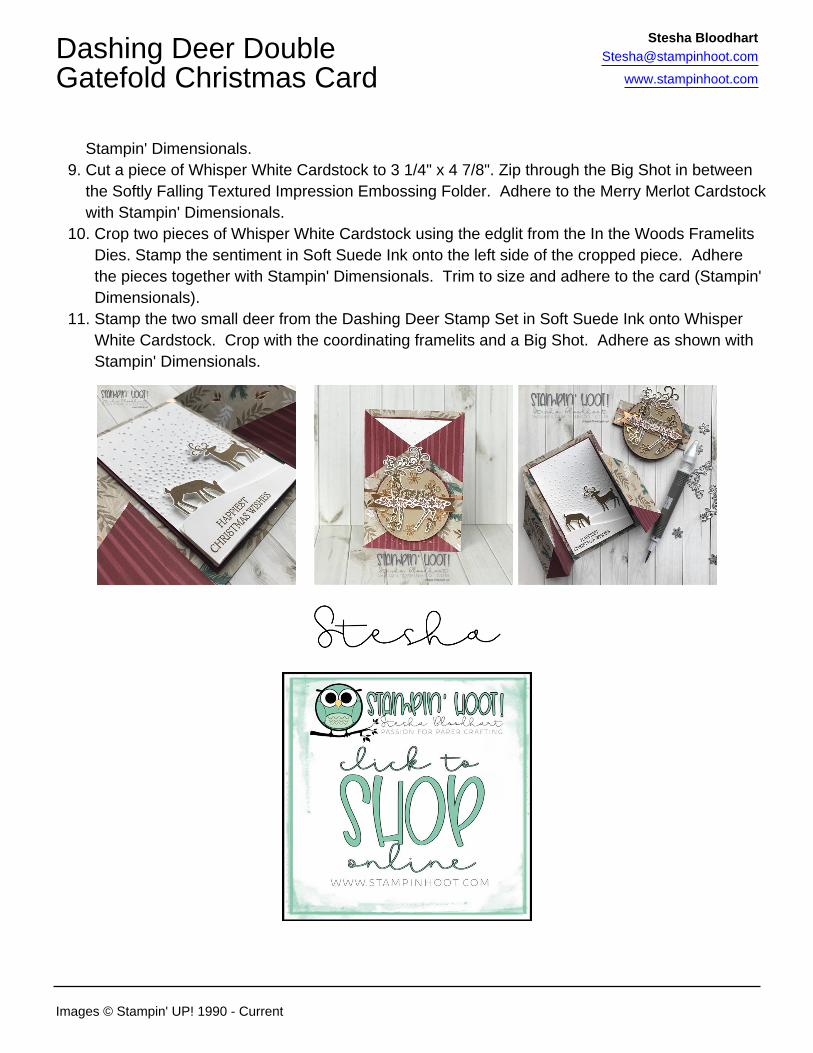
Stampin' Dimensionals.Cut a piece of Whisper White Cardstock to 3 1/4" x 4 7/8". Zip through the Big Shot in betweenthe Softly Falling Textured Impression Embossing Folder. Adhere to the Merry Merlot Cardstockwith Stampin' Dimensionals.
Crop two pieces of Whisper White Cardstock using the edglit from the In the Woods FramelitsDies. Stamp the sentiment in Soft Suede Ink onto the left side of the cropped piece. Adherethe pieces together with Stampin' Dimensionals. Trim to size and adhere to the card (Stampin'Dimensionals).Stamp the two small deer from the Dashing Deer Stamp Set in Soft Suede Ink onto WhisperWhite Cardstock. Crop with the coordinating framelits and a Big Shot. Adhere as shown withStampin' Dimensionals.
Dashing Deer DoubleGatefold Christmas Card
Stesha [email protected]
www.stampinhoot.com
Images © Stampin' UP! 1990 - Current

Dashing Deer Clear-
Mount Bundle
149935
Price: $50.25
Dashing Deer Wood-
Mount Bundle
149934
Price: $57.50
Dashing Deer Clear-
Mount Stamp Set
147728
Price: $22.00
Dashing Deer Wood-
Mount Stamp Set
147731
Price: $30.00
Joyous Noel 12" X
12" (30.5 X 30.5 Cm)
Specialty Designer
Series Paper
147816
Price: $14.00
Merry Merlot 8-1/2" X
11" Cardstock
146979
Price: $8.50
Whisper White 8-1/2"
X 11" Cardstock
100730
Price: $9.75
Crumb Cake 8-1/2" X
11" Cardstock
120953
Price: $8.50
Dashing Deer DoubleGatefold Christmas Card
Stesha [email protected]
www.stampinhoot.com
Images © Stampin' UP! 1990 - Current
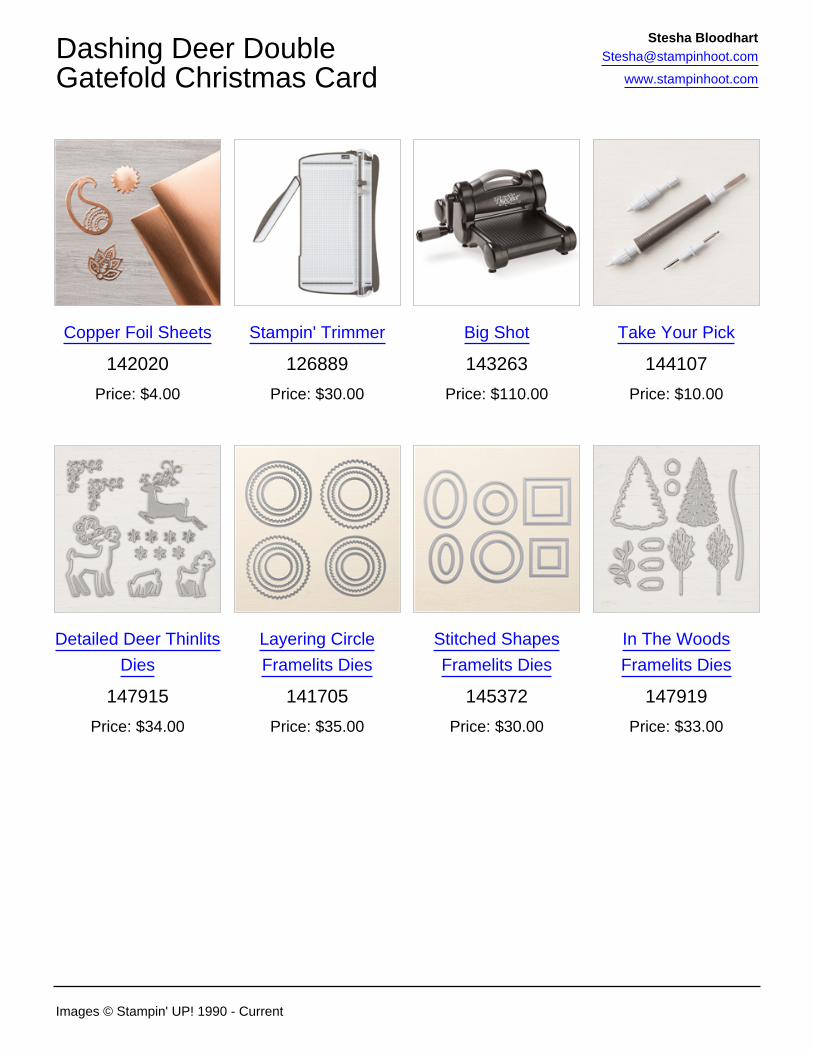
Copper Foil Sheets
142020
Price: $4.00
Stampin' Trimmer
126889
Price: $30.00
Big Shot
143263
Price: $110.00
Take Your Pick
144107
Price: $10.00
Detailed Deer Thinlits
Dies
147915
Price: $34.00
Layering Circle
Framelits Dies
141705
Price: $35.00
Stitched Shapes
Framelits Dies
145372
Price: $30.00
In The Woods
Framelits Dies
147919
Price: $33.00
Dashing Deer DoubleGatefold Christmas Card
Stesha [email protected]
www.stampinhoot.com
Images © Stampin' UP! 1990 - Current
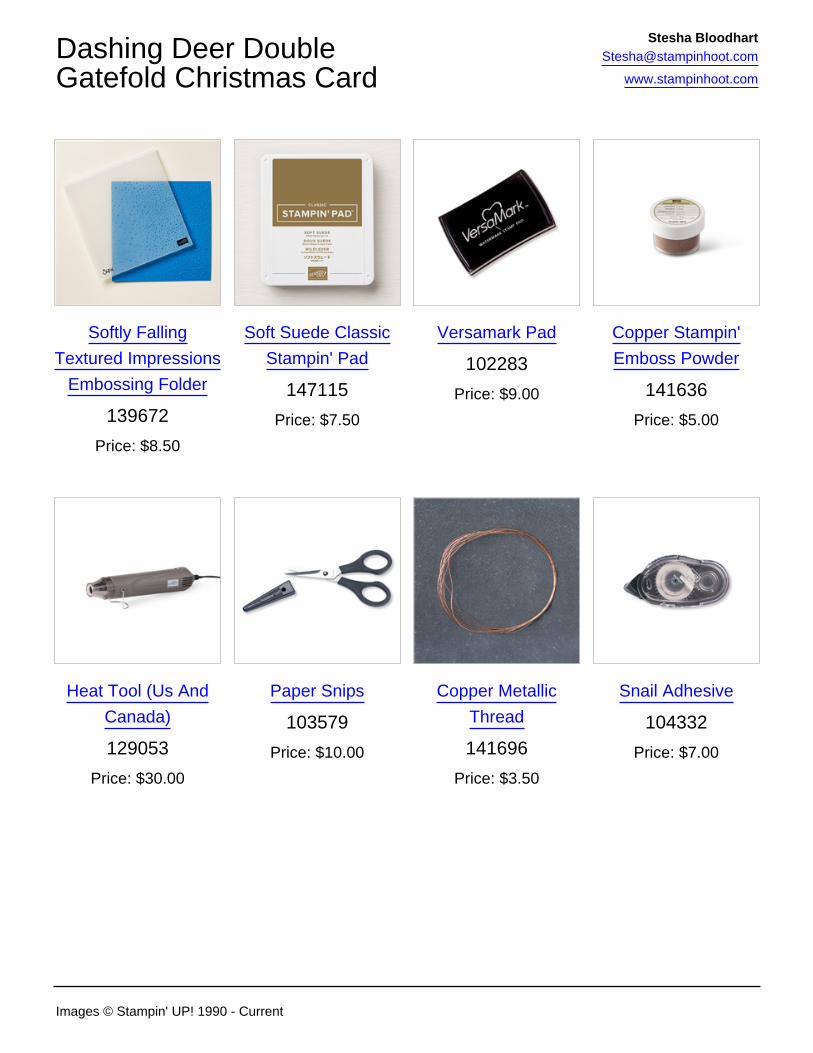
Softly Falling
Textured Impressions
Embossing Folder
139672
Price: $8.50
Soft Suede Classic
Stampin' Pad
147115
Price: $7.50
Versamark Pad
102283
Price: $9.00
Copper Stampin'
Emboss Powder
141636
Price: $5.00
Heat Tool (Us And
Canada)
129053
Price: $30.00
Paper Snips
103579
Price: $10.00
Copper Metallic
Thread
141696
Price: $3.50
Snail Adhesive
104332
Price: $7.00
Dashing Deer DoubleGatefold Christmas Card
Stesha [email protected]
www.stampinhoot.com
Images © Stampin' UP! 1990 - Current

Stampin'
Dimensionals
104430
Price: $4.00
Mini Stampin'
Dimensionals
144108
Price: $4.00
Dashing Deer DoubleGatefold Christmas Card
Stesha [email protected]
www.stampinhoot.com
Images © Stampin' UP! 1990 - Current
Related Documents