Step-by-Step Finishing German Armor By Glenn Bartolotti A complete step-by-step guide to painting and finishing Armor Models and Figures Vol. 1 $1.95 USA DAK Sdkfz 251 Ausf B Barkmann’s Panther

Welcome message from author
This document is posted to help you gain knowledge. Please leave a comment to let me know what you think about it! Share it to your friends and learn new things together.
Transcript
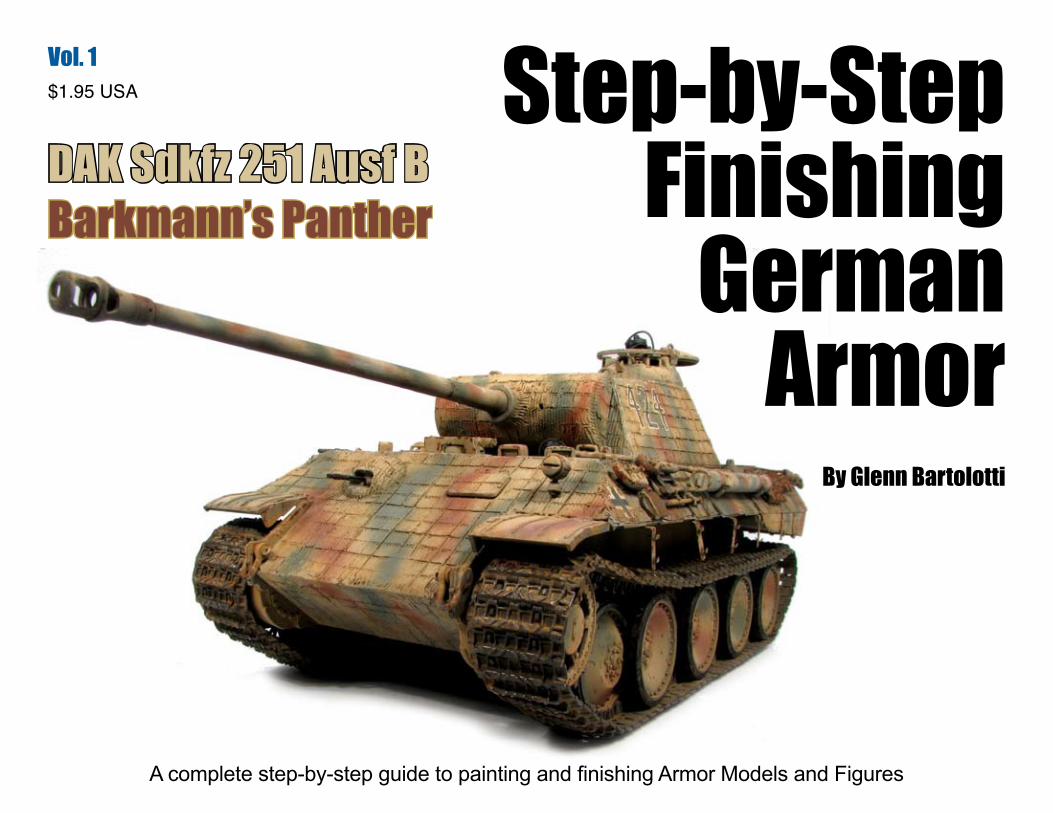
Step-by-Step Finishing
GermanArmor
By Glenn Bartolotti
A complete step-by-step guide to painting and finishing Armor Models and Figures
Vol. 1$1.95 USA
DAK Sdkfz 251 Ausf BBarkmann’s Panther
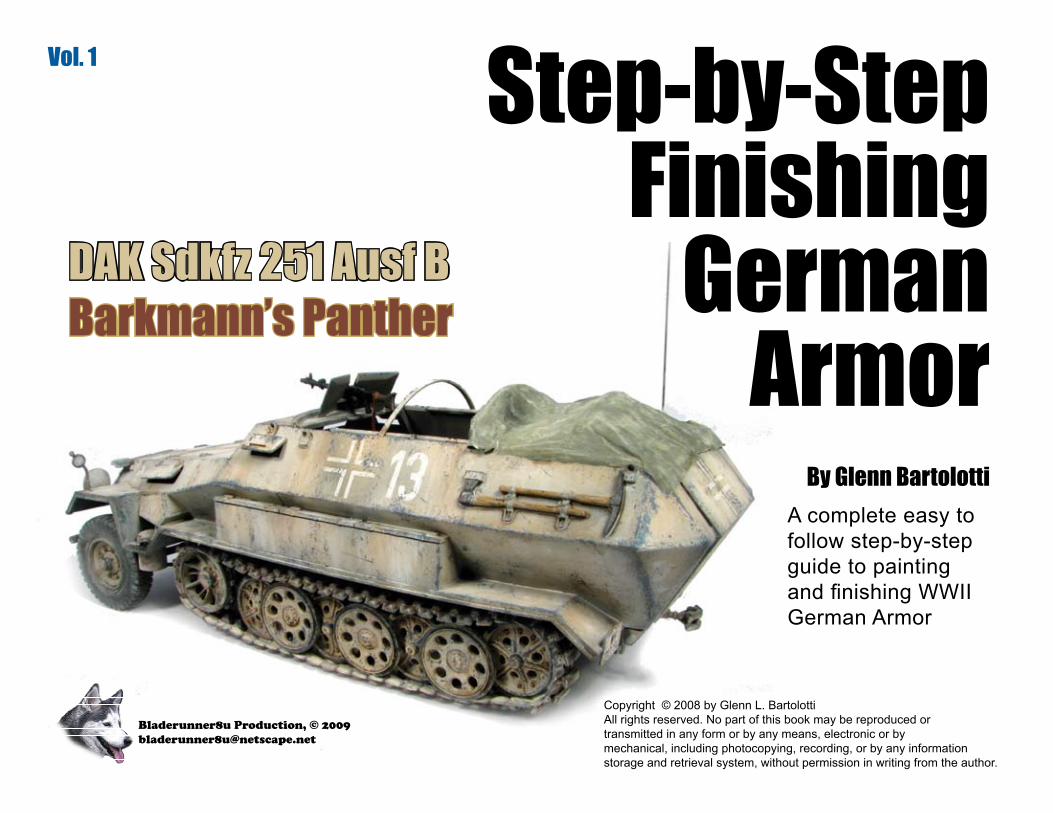
Step-by-Step Finishing
GermanArmor
By Glenn Bartolotti
Bladerunner8u Production, © [email protected]
Copyright © 2008 by Glenn L. BartolottiAll rights reserved. No part of this book may be reproduced or transmitted in any form or by any means, electronic or bymechanical, including photocopying, recording, or by any informationstorage and retrieval system, without permission in writing from the author.
DAK Sdkfz 251 Ausf BBarkmann’s Panther
Vol. 1
A complete easy to follow step-by-step guide to painting and finishing WWII German Armor
Materials Used
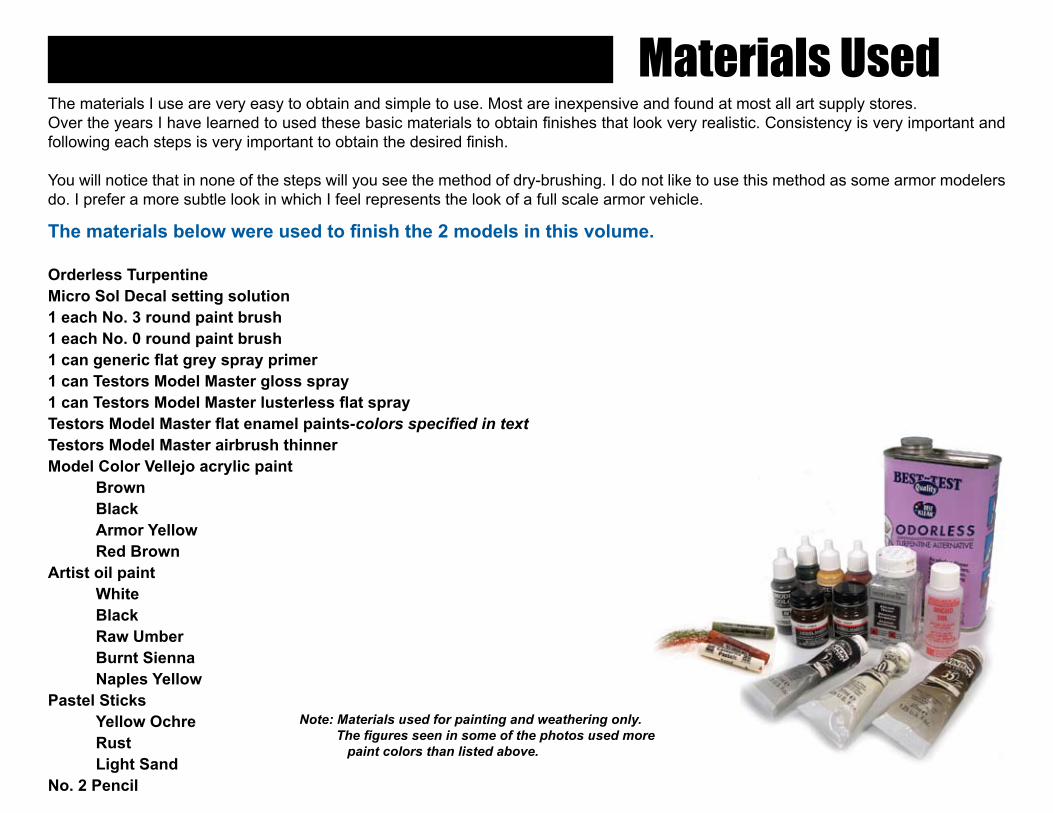
The materials below were used to finish the 2 models in this volume.
Orderless TurpentineMicro Sol Decal setting solution1 each No. 3 round paint brush1 each No. 0 round paint brush1 can generic flat grey spray primer1 can Testors Model Master gloss spray1 can Testors Model Master lusterless flat sprayTestors Model Master flat enamel paints-colors specified in textTestors Model Master airbrush thinnerModel Color Vellejo acrylic paint Brown Black ArmorYellow Red BrownArtist oil paint White Black RawUmber Burnt Sienna NaplesYellowPastelSticks YellowOchre Rust Light SandNo. 2 Pencil
The materials I use are very easy to obtain and simple to use. Most are inexpensive and found at most all art supply stores.Over the years I have learned to used these basic materials to obtain finishes that look very realistic. Consistency is very important and following each steps is very important to obtain the desired finish.
You will notice that in none of the steps will you see the method of dry-brushing. I do not like to use this method as some armor modelers do. I prefer a more subtle look in which I feel represents the look of a full scale armor vehicle.
Note: Materials used for painting and weathering only. The figures seen in some of the photos used more paint colors than listed above.
DAK Sdkfz 251 Ausf B
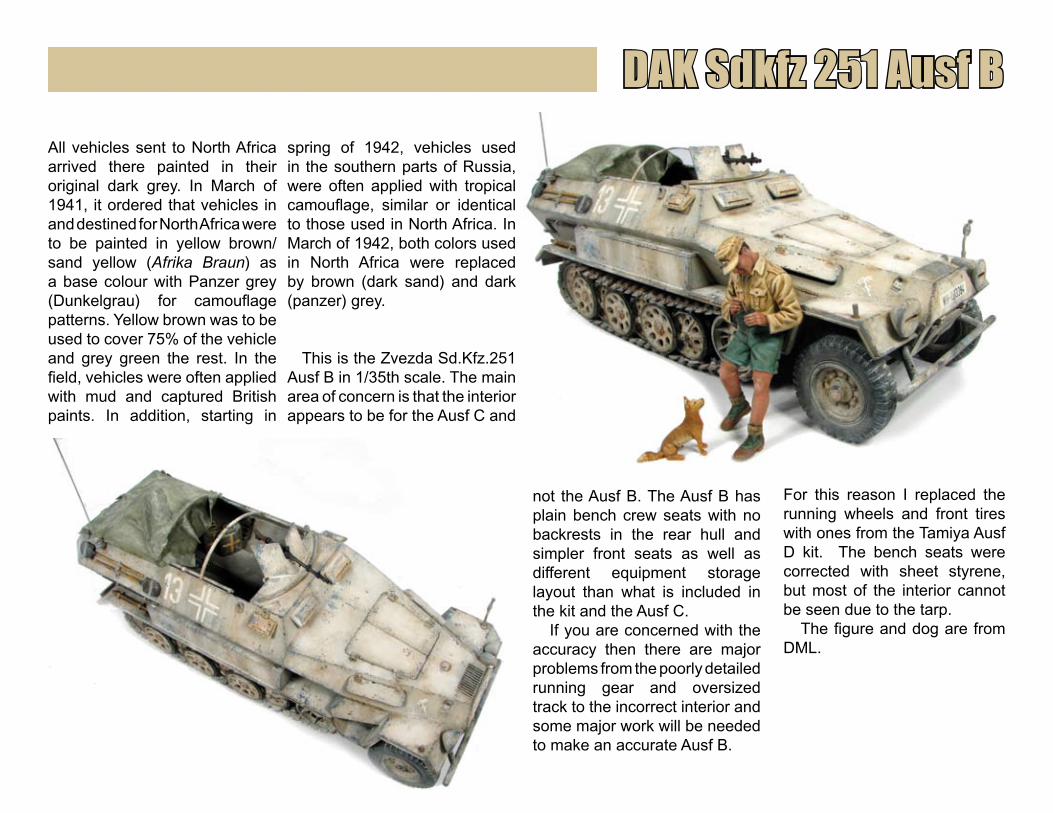
not the Ausf B. The Ausf B has plain bench crew seats with no backrests in the rear hull and simpler front seats as well as different equipment storage layout than what is included in the kit and the Ausf C. If you are concerned with the accuracy then there are major problems from the poorly detailed running gear and oversized track to the incorrect interior and some major work will be needed to make an accurate Ausf B.
For this reason I replaced the running wheels and front tires with ones from the Tamiya Ausf D kit. The bench seats were corrected with sheet styrene, but most of the interior cannot be seen due to the tarp. The figure and dog are from DML.
All vehicles sent to North Africa arrived there painted in their original dark grey. In March of 1941, it ordered that vehicles in and destined for North Africa were to be painted in yellow brown/sand yellow (Afrika Braun) as a base colour with Panzer grey (Dunkelgrau) for camouflage patterns. Yellow brown was to be used to cover 75% of the vehicle and grey green the rest. In the field, vehicles were often applied with mud and captured British paints. In addition, starting in
spring of 1942, vehicles used in the southern parts of Russia, were often applied with tropical camouflage, similar or identical to those used in North Africa. In March of 1942, both colors used in North Africa were replaced by brown (dark sand) and dark (panzer) grey.
This is the Zvezda Sd.Kfz.251 Ausf B in 1/35th scale. The main area of concern is that the interior appears to be for the Ausf C and
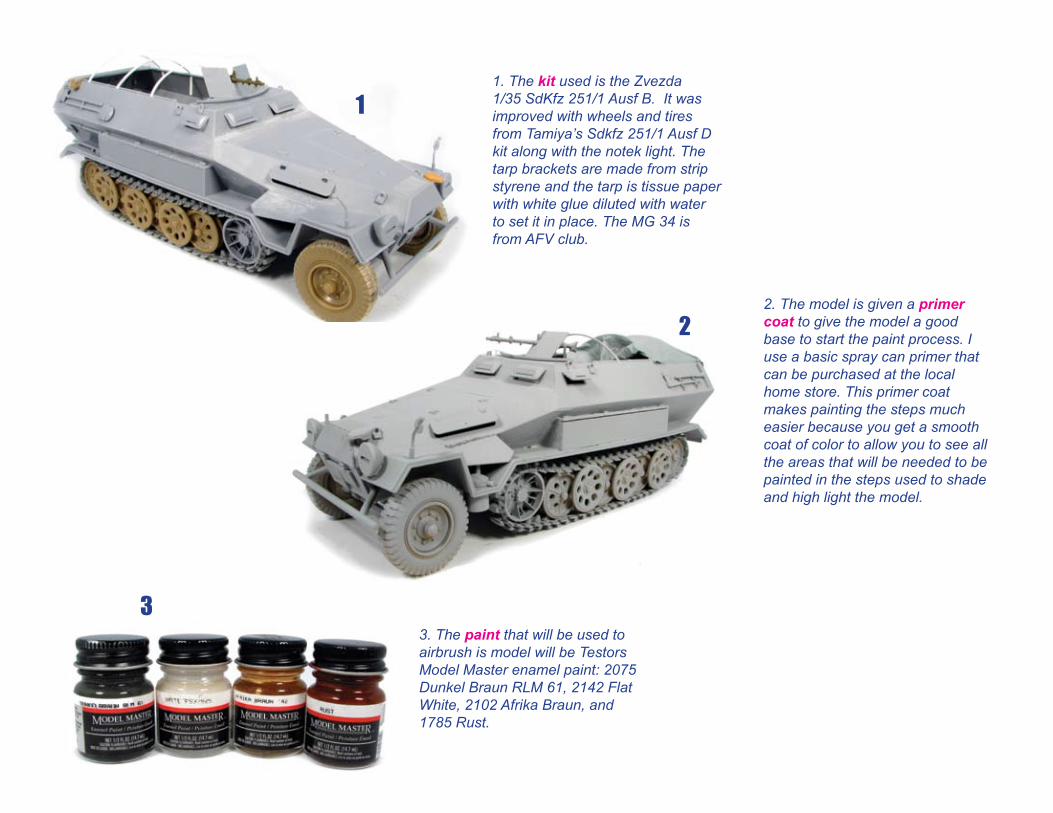
1. The kit used is the Zvezda 1/35 SdKfz 251/1 Ausf B. It was improved with wheels and tires from Tamiya’s Sdkfz 251/1 Ausf D kit along with the notek light. The tarp brackets are made from strip styrene and the tarp is tissue paper with white glue diluted with water to set it in place. The MG 34 is from AFV club.
1
22. The model is given a primer coat to give the model a good base to start the paint process. I use a basic spray can primer that can be purchased at the local home store. This primer coat makes painting the steps much easier because you get a smooth coat of color to allow you to see all the areas that will be needed to be painted in the steps used to shade and high light the model.
3. The paint that will be used to airbrush is model will be Testors Model Master enamel paint: 2075 Dunkel Braun RLM 61, 2142 Flat White, 2102 Afrika Braun, and 1785 Rust.
3
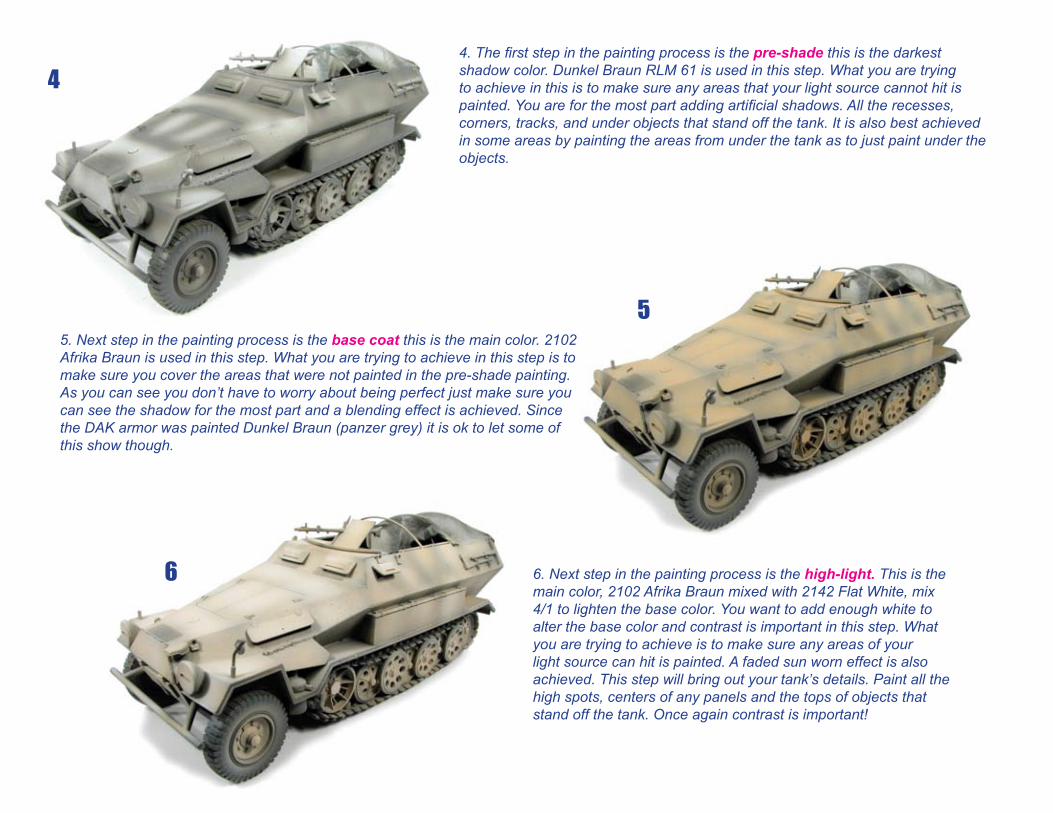
4. The first step in the painting process is the pre-shade this is the darkest shadow color. Dunkel Braun RLM 61 is used in this step. What you are trying to achieve in this is to make sure any areas that your light source cannot hit is painted. You are for the most part adding artificial shadows. All the recesses, corners, tracks, and under objects that stand off the tank. It is also best achieved in some areas by painting the areas from under the tank as to just paint under the objects.
4
5. Next step in the painting process is the base coat this is the main color. 2102 Afrika Braun is used in this step. What you are trying to achieve in this step is to make sure you cover the areas that were not painted in the pre-shade painting.As you can see you don’t have to worry about being perfect just make sure you can see the shadow for the most part and a blending effect is achieved. Since the DAK armor was painted Dunkel Braun (panzer grey) it is ok to let some of this show though.
5
6. Next step in the painting process is the high-light. This is the main color, 2102 Afrika Braun mixed with 2142 Flat White, mix 4/1 to lighten the base color. You want to add enough white to alter the base color and contrast is important in this step. What you are trying to achieve is to make sure any areas of your light source can hit is painted. A faded sun worn effect is also achieved. This step will bring out your tank’s details. Paint all the high spots, centers of any panels and the tops of objects that stand off the tank. Once again contrast is important!
6
8
7
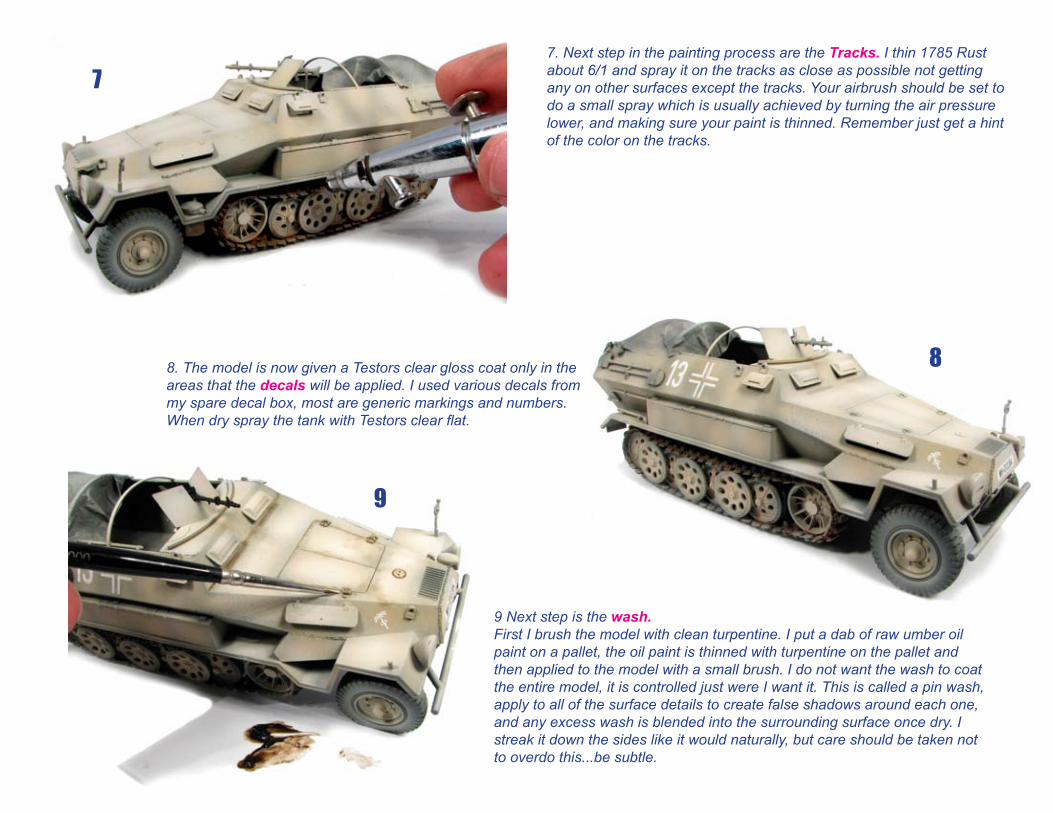
8. The model is now given a Testors clear gloss coat only in the areas that the decals will be applied. I used various decals from my spare decal box, most are generic markings and numbers. When dry spray the tank with Testors clear flat.
9
7. Next step in the painting process are the Tracks. I thin 1785 Rust about 6/1 and spray it on the tracks as close as possible not getting any on other surfaces except the tracks. Your airbrush should be set to do a small spray which is usually achieved by turning the air pressure lower, and making sure your paint is thinned. Remember just get a hint of the color on the tracks.
9 Next step is the wash. First I brush the model with clean turpentine. I put a dab of raw umber oil paint on a pallet, the oil paint is thinned with turpentine on the pallet and then applied to the model with a small brush. I do not want the wash to coat the entire model, it is controlled just were I want it. This is called a pin wash, apply to all of the surface details to create false shadows around each one, and any excess wash is blended into the surrounding surface once dry. I streak it down the sides like it would naturally, but care should be taken not to overdo this...be subtle.
10
11
12
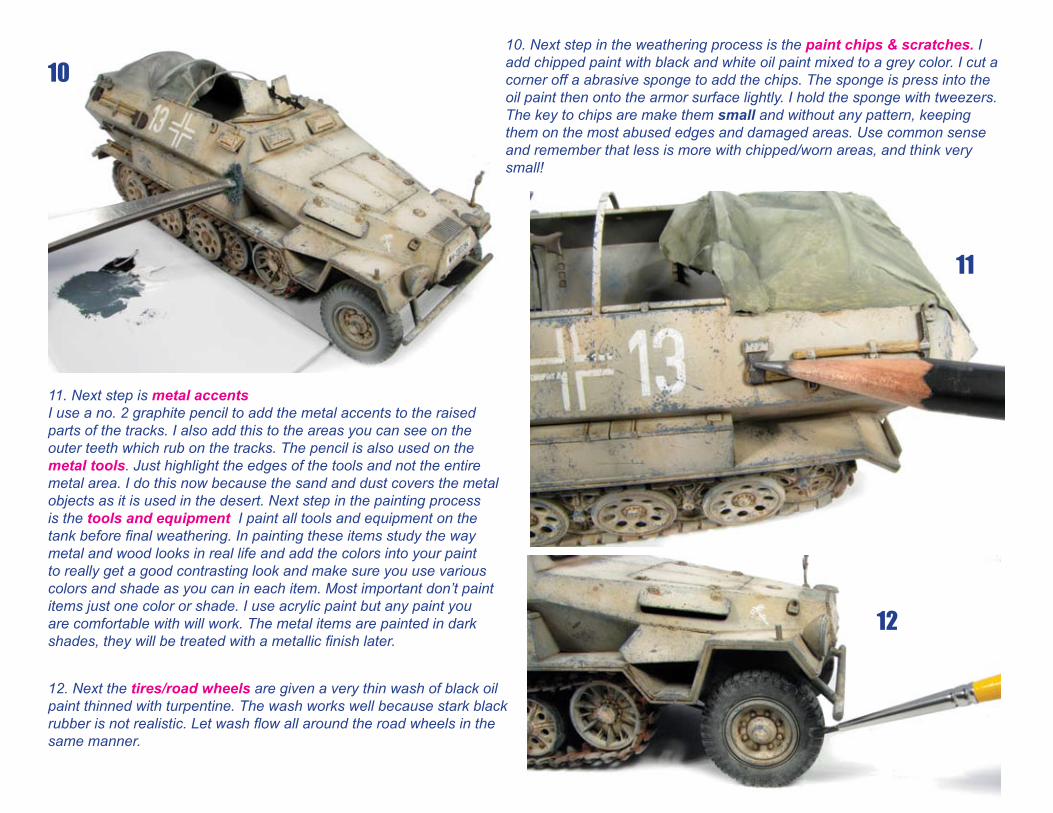
11. Next step is metal accents I use a no. 2 graphite pencil to add the metal accents to the raised parts of the tracks. I also add this to the areas you can see on the outer teeth which rub on the tracks. The pencil is also used on the metal tools. Just highlight the edges of the tools and not the entire metal area. I do this now because the sand and dust covers the metal objects as it is used in the desert. Next step in the painting process is the tools and equipment I paint all tools and equipment on the tank before final weathering. In painting these items study the way metal and wood looks in real life and add the colors into your paint to really get a good contrasting look and make sure you use various colors and shade as you can in each item. Most important don’t paint items just one color or shade. I use acrylic paint but any paint you are comfortable with will work. The metal items are painted in dark shades, they will be treated with a metallic finish later.
10. Next step in the weathering process is the paint chips & scratches. I add chipped paint with black and white oil paint mixed to a grey color. I cut a corner off a abrasive sponge to add the chips. The sponge is press into the oil paint then onto the armor surface lightly. I hold the sponge with tweezers. The key to chips are make them small and without any pattern, keeping them on the most abused edges and damaged areas. Use common sense and remember that less is more with chipped/worn areas, and think very small!
12. Next the tires/road wheels are given a very thin wash of black oil paint thinned with turpentine. The wash works well because stark black rubber is not realistic. Let wash flow all around the road wheels in the same manner.
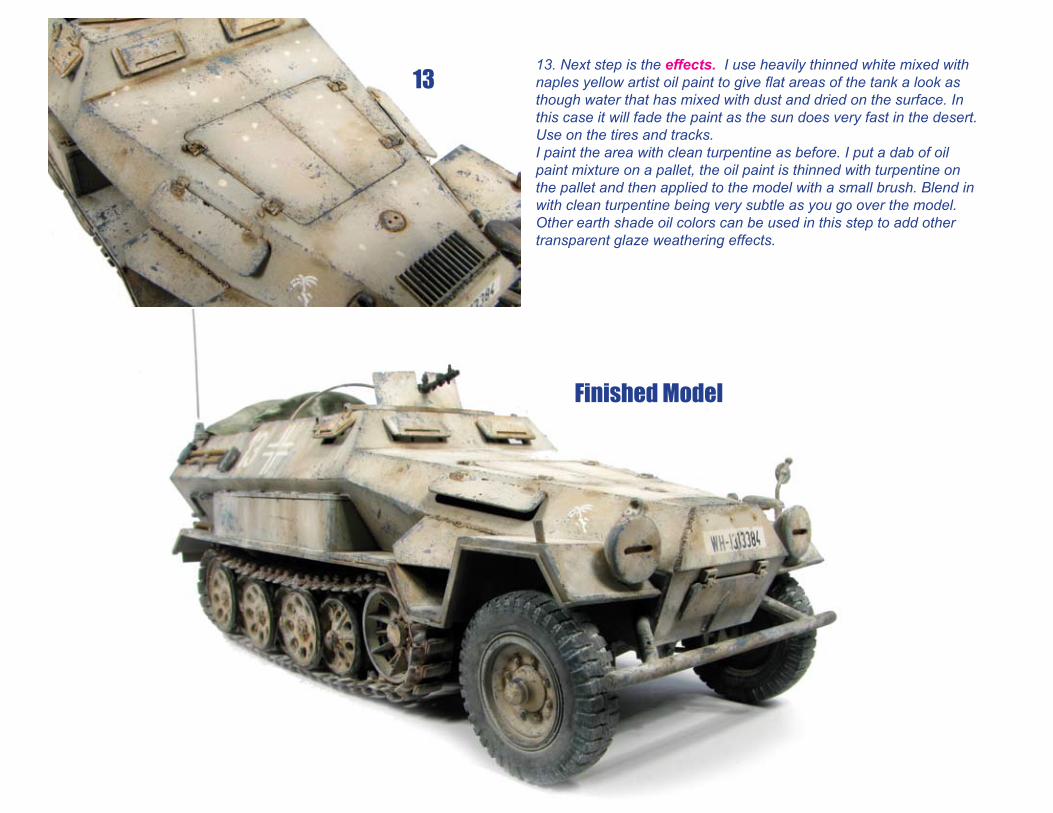
1313. Next step is the effects. I use heavily thinned white mixed with naples yellow artist oil paint to give flat areas of the tank a look as though water that has mixed with dust and dried on the surface. In this case it will fade the paint as the sun does very fast in the desert. Use on the tires and tracks.I paint the area with clean turpentine as before. I put a dab of oil paint mixture on a pallet, the oil paint is thinned with turpentine on the pallet and then applied to the model with a small brush. Blend in with clean turpentine being very subtle as you go over the model. Other earth shade oil colors can be used in this step to add other transparent glaze weathering effects.
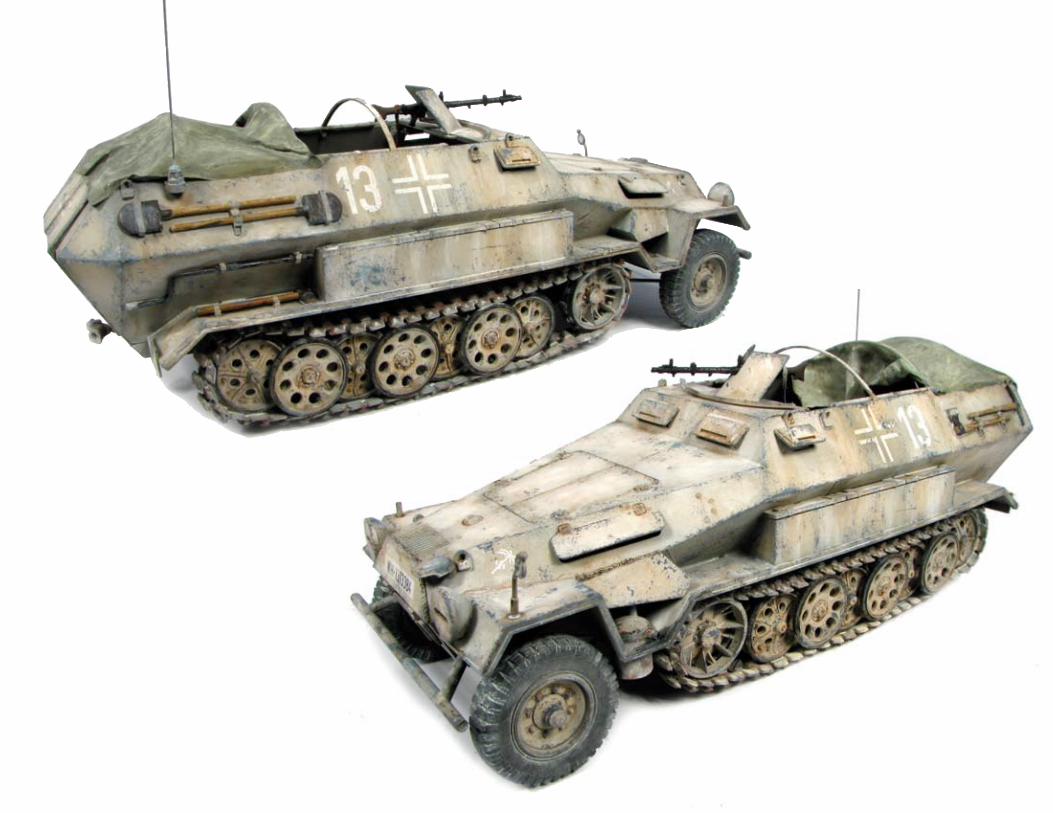
Finished Model
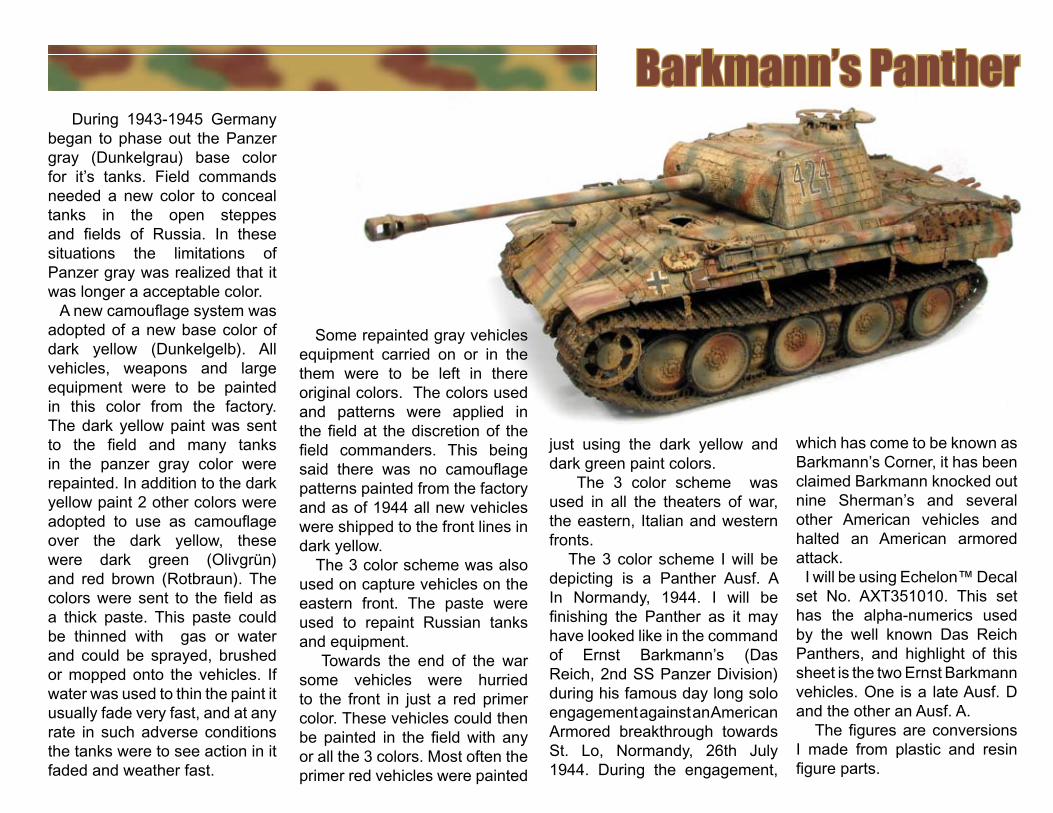
Barkmann’s Panther During 1943-1945 Germany began to phase out the Panzer gray (Dunkelgrau) base color for it’s tanks. Field commands needed a new color to conceal tanks in the open steppes and fields of Russia. In these situations the limitations of Panzer gray was realized that it was longer a acceptable color. A new camouflage system was adopted of a new base color of dark yellow (Dunkelgelb). All vehicles, weapons and large equipment were to be painted in this color from the factory. The dark yellow paint was sent to the field and many tanks in the panzer gray color were repainted. In addition to the dark yellow paint 2 other colors were adopted to use as camouflage over the dark yellow, these were dark green (Olivgrün) and red brown (Rotbraun). The colors were sent to the field as a thick paste. This paste could be thinned with gas or water and could be sprayed, brushed or mopped onto the vehicles. If water was used to thin the paint it usually fade very fast, and at any rate in such adverse conditions the tanks were to see action in it faded and weather fast.
Some repainted gray vehicles equipment carried on or in the them were to be left in there original colors. The colors used and patterns were applied in the field at the discretion of the field commanders. This being said there was no camouflage patterns painted from the factory and as of 1944 all new vehicles were shipped to the front lines in dark yellow. The 3 color scheme was also used on capture vehicles on the eastern front. The paste were used to repaint Russian tanks and equipment. Towards the end of the war some vehicles were hurried to the front in just a red primer color. These vehicles could then be painted in the field with any or all the 3 colors. Most often the primer red vehicles were painted
just using the dark yellow and dark green paint colors. The 3 color scheme was used in all the theaters of war, the eastern, Italian and western fronts. The 3 color scheme I will be depicting is a Panther Ausf. A In Normandy, 1944. I will be finishing the Panther as it may have looked like in the command of Ernst Barkmann’s (Das Reich, 2nd SS Panzer Division) during his famous day long solo engagement against an American Armored breakthrough towards St. Lo, Normandy, 26th July 1944. During the engagement,
which has come to be known as Barkmann’s Corner, it has been claimed Barkmann knocked out nine Sherman’s and several other American vehicles and halted an American armored attack. I will be using Echelon™ Decal set No. AXT351010. This set has the alpha-numerics used by the well known Das Reich Panthers, and highlight of this sheet is the two Ernst Barkmann vehicles. One is a late Ausf. D and the other an Ausf. A. The figures are conversions I made from plastic and resin figure parts.

1. The kit used is the Dragon (DML) Panther Ausf. A late kit.It was built using Cavalier 1/35 scale resin zimmerit #CV134 Panther A (Tile Pattern) and Lion Roar’s photo etch update set #LE35022. The tow cable was fashioned from using the cable ends from a Tamiya Panther and braided wire purchased from a local home store. Barkmann’s Panther was battle hardened so I left some of the side skirts off.
1
22. The model is given a primer coat to cover and protect the photo etch parts and give the model a good base to start the paint process. I use a basic spray can primer that can be purchased at the local home store. This primer coat makes painting the steps much easier because you get a smooth coat of color to allow you to see all the areas that will be needed to be painted in the steps used to shade and high light the model.
3. The paint that will be used to airbrush is model will be Testors Model Master enamel paint: 2142 Flat White, 2005 Burnt Umber, 2102 Afrika Braun, 1785 Rust, 2091 Dunkelgrun, and 2007 Burnt Sienna. 3
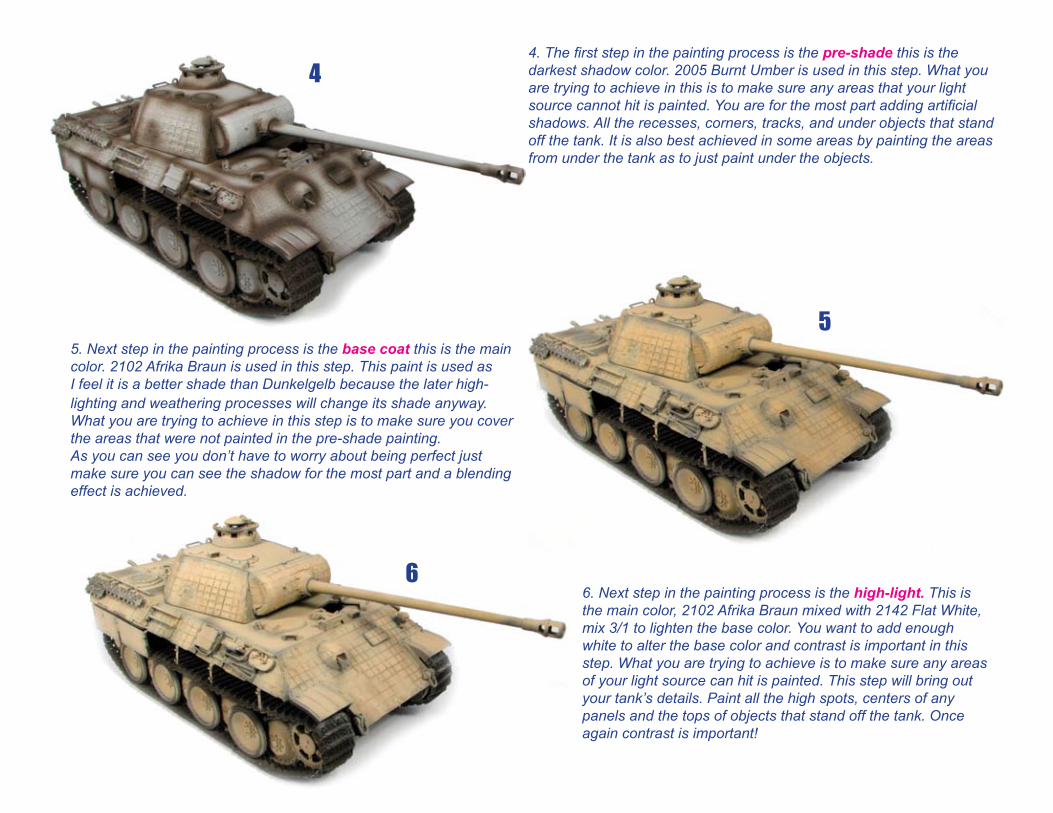
4. The first step in the painting process is the pre-shade this is the darkest shadow color. 2005 Burnt Umber is used in this step. What you are trying to achieve in this is to make sure any areas that your light source cannot hit is painted. You are for the most part adding artificial shadows. All the recesses, corners, tracks, and under objects that stand off the tank. It is also best achieved in some areas by painting the areas from under the tank as to just paint under the objects.
4
5. Next step in the painting process is the base coat this is the main color. 2102 Afrika Braun is used in this step. This paint is used as I feel it is a better shade than Dunkelgelb because the later high-lighting and weathering processes will change its shade anyway. What you are trying to achieve in this step is to make sure you cover the areas that were not painted in the pre-shade painting.As you can see you don’t have to worry about being perfect just make sure you can see the shadow for the most part and a blending effect is achieved.
5
6. Next step in the painting process is the high-light. This is the main color, 2102 Afrika Braun mixed with 2142 Flat White, mix 3/1 to lighten the base color. You want to add enough white to alter the base color and contrast is important in this step. What you are trying to achieve is to make sure any areas of your light source can hit is painted. This step will bring out your tank’s details. Paint all the high spots, centers of any panels and the tops of objects that stand off the tank. Once again contrast is important!
6

8
7. Next step in the painting process is the 1st camo color. 2091 (Dunkelgrun). This is the green shade of the camo pattern I paint this color first because the next red brown shade covers it better. In painting this step remember that the airguns used by the crews did not cover large areas at a time so make sure your airbrush is set to do a small spray which is usually achieved by turning the air pressure lower, and making sure your paint is thinned correctly. It is a good idea to practice first on some card stock.
7
8. Next step in the painting process is the 2nd camo color. 2007 Burnt Sienna. This is the red brown (Rotbraun) shade of the camo pattern. I like this shade best for the red brown color. Again it is a good idea to practice first on some card stock to get your airbrush zeroed in.
9. The model is now given a Testors clear gloss coat only in the areas that the decals will be applied. As stated before I am using Echelon™ Decal set No. AXT351010. Micro Sol is used to set and flatten the decals into the cracks of the zimmerit. When the decals dry you may have to puncture with a xacto knife blade tip any areas that don’t set down and then reapply some Micro Sol.When dry spray the tank with Testors clear flat.
9

1010. After the Testors clear flat has dried completely the next step in the painting process is the fading. Fading helps tie the colors together, tone down the decal markings and get the tank the look that it has been in the elements. 2102 Afrika Braun mixed with Testors airbrush thinner 10/1 is used for this. Set your airbrush at a high pressure with a wide spray and make passes over the entire model, tracks and all. The more passes you make the more it will fade the paint. This step really ties things together!
11
11. Next step in the painting process is the Tracks. I thin 1785 Rust about 6/1 and spray it on the tracks as close as possible not getting any on other surfaces except the tracks. Your airbrush should be set to do a small spray which is usually achieved by turning the air pressure lower, and making sure your paint is thinned. Remember just get a hint of the color on the tracks.
12
12. Next step in the painting process is the tools and equipment I paint all tools and equipment on the tank before final weathering. In painting these items study the way metal and wood looks in real life and add the colors into your paint to really get a good contrasting look and make sure you use various colors and shade as you can in each item. Most important don’t paint items just one color or shade. I use acrylic paint but any paint you are comfortable with will work. The metal items are painted in dark shades, they will be treated with a metallic finish later.
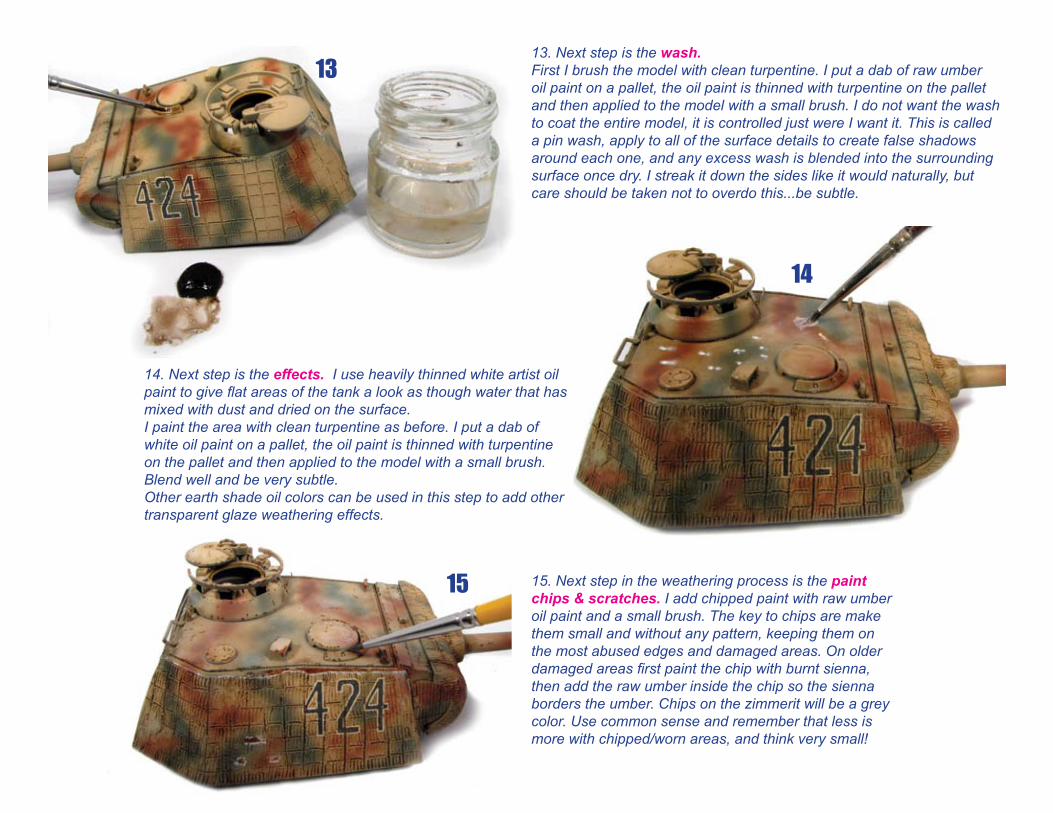
1313. Next step is the wash. First I brush the model with clean turpentine. I put a dab of raw umber oil paint on a pallet, the oil paint is thinned with turpentine on the pallet and then applied to the model with a small brush. I do not want the wash to coat the entire model, it is controlled just were I want it. This is called a pin wash, apply to all of the surface details to create false shadows around each one, and any excess wash is blended into the surrounding surface once dry. I streak it down the sides like it would naturally, but care should be taken not to overdo this...be subtle.
14
14. Next step is the effects. I use heavily thinned white artist oil paint to give flat areas of the tank a look as though water that has mixed with dust and dried on the surface. I paint the area with clean turpentine as before. I put a dab of white oil paint on a pallet, the oil paint is thinned with turpentine on the pallet and then applied to the model with a small brush. Blend well and be very subtle. Other earth shade oil colors can be used in this step to add other transparent glaze weathering effects.
15 15. Next step in the weathering process is the paint chips & scratches. I add chipped paint with raw umber oil paint and a small brush. The key to chips are make them small and without any pattern, keeping them on the most abused edges and damaged areas. On older damaged areas first paint the chip with burnt sienna, then add the raw umber inside the chip so the sienna borders the umber. Chips on the zimmerit will be a grey color. Use common sense and remember that less is more with chipped/worn areas, and think very small!
16
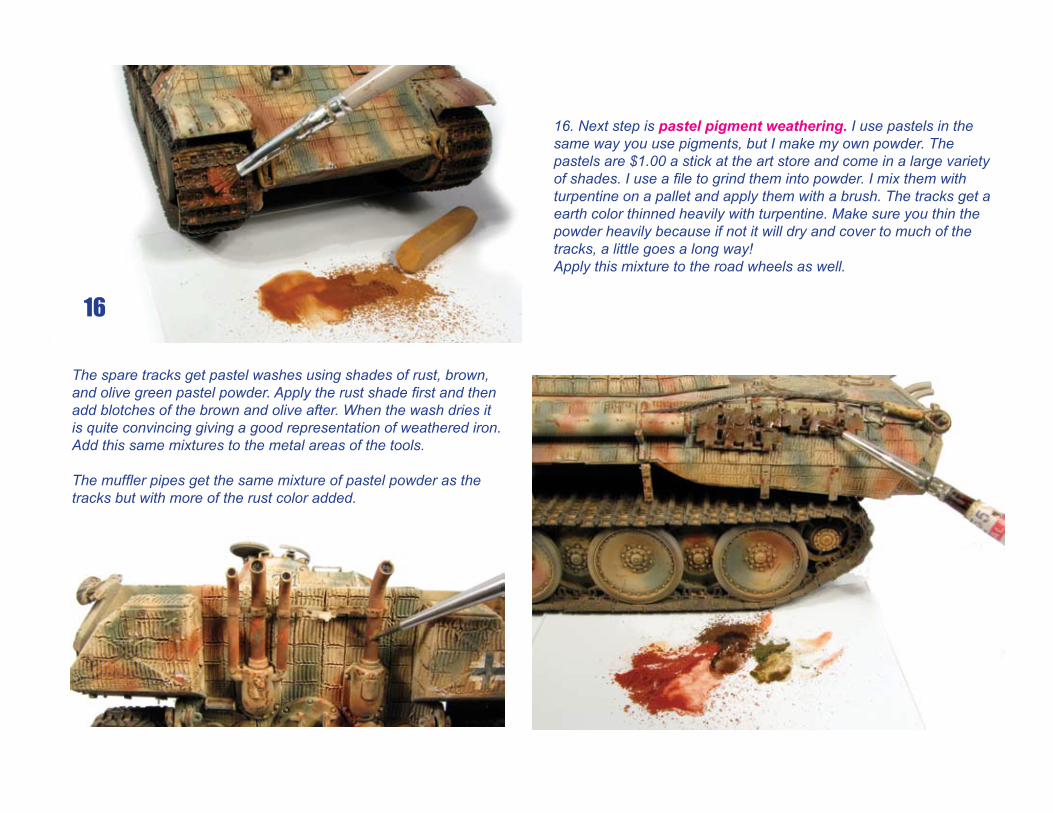
16. Next step is pastel pigment weathering. I use pastels in the same way you use pigments, but I make my own powder. The pastels are $1.00 a stick at the art store and come in a large variety of shades. I use a file to grind them into powder. I mix them with turpentine on a pallet and apply them with a brush. The tracks get a earth color thinned heavily with turpentine. Make sure you thin the powder heavily because if not it will dry and cover to much of the tracks, a little goes a long way!Apply this mixture to the road wheels as well.
The spare tracks get pastel washes using shades of rust, brown, and olive green pastel powder. Apply the rust shade first and then add blotches of the brown and olive after. When the wash dries it is quite convincing giving a good representation of weathered iron. Add this same mixtures to the metal areas of the tools.
The muffler pipes get the same mixture of pastel powder as the tracks but with more of the rust color added.
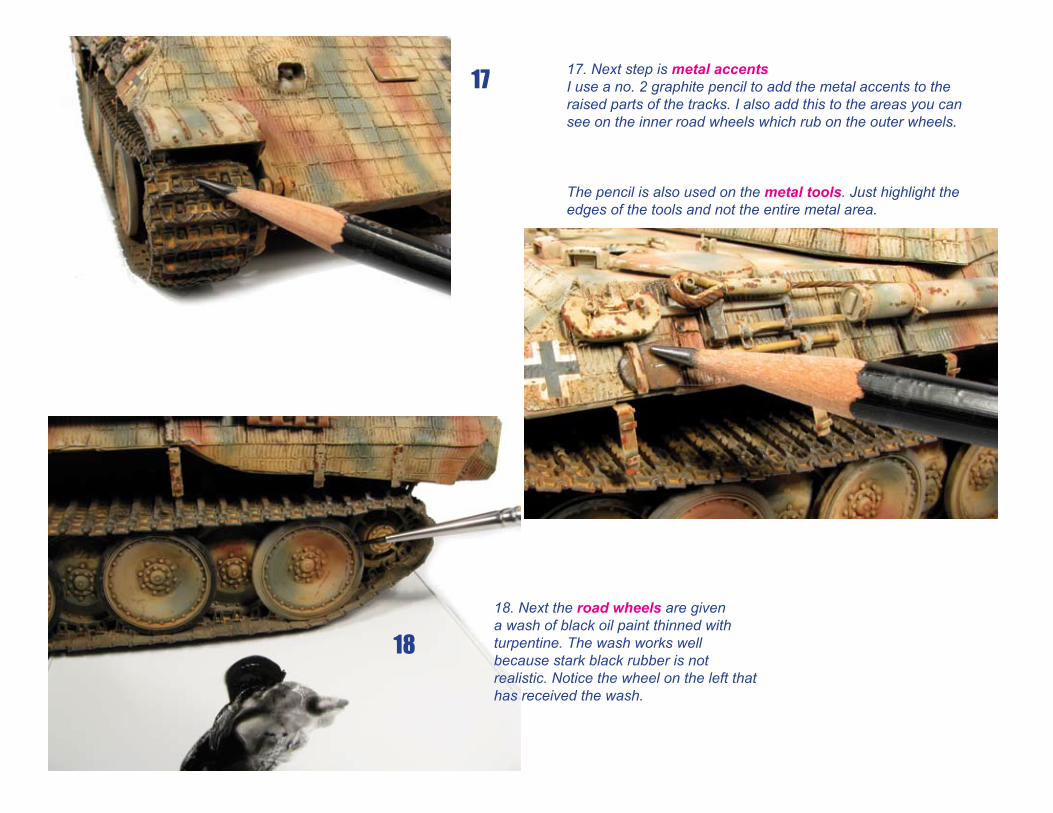
17 17. Next step is metal accents I use a no. 2 graphite pencil to add the metal accents to the raised parts of the tracks. I also add this to the areas you can see on the inner road wheels which rub on the outer wheels.
The pencil is also used on the metal tools. Just highlight the edges of the tools and not the entire metal area.
18
18. Next the road wheels are given a wash of black oil paint thinned with turpentine. The wash works well because stark black rubber is not realistic. Notice the wheel on the left that has received the wash.
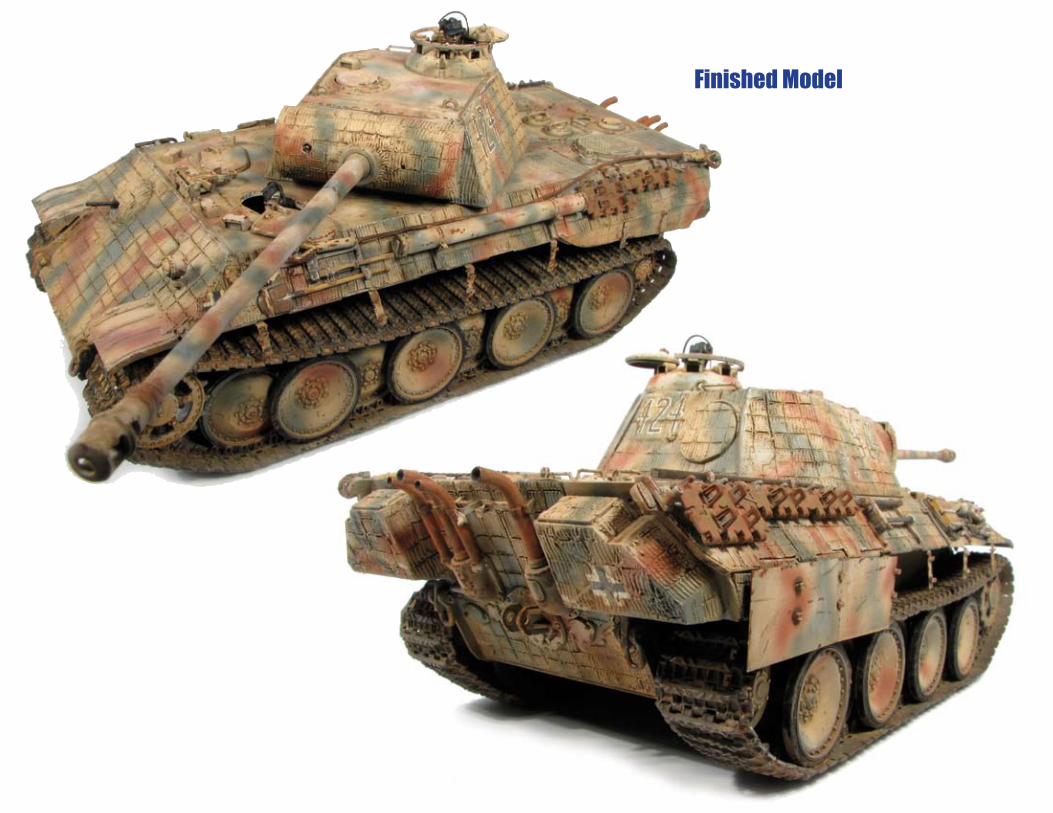
Finished Model

Bladerunner8u Production, © 2010
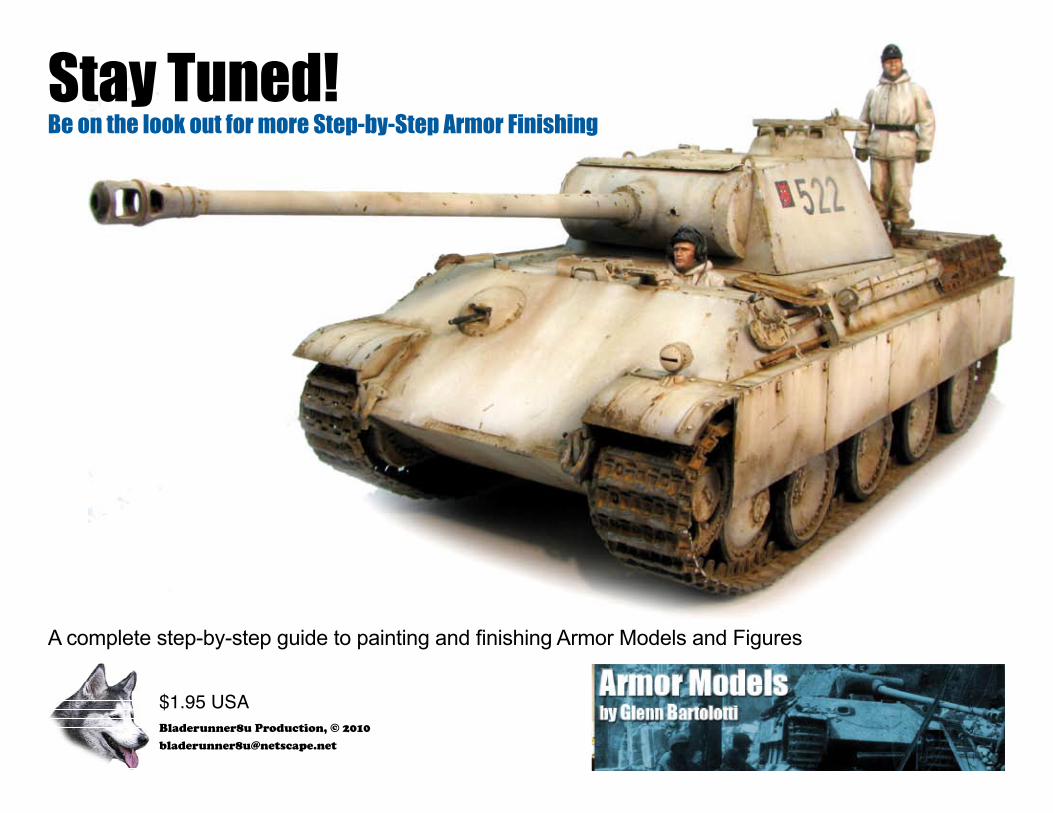
Stay Tuned!Be on the look out for more Step-by-Step Armor Finishing
A complete step-by-step guide to painting and finishing Armor Models and Figures
$1.95 USA
Related Documents

![[Modelik 2003 02] - SdKfz 141-1 PzKpfw III Ausf M](https://static.cupdf.com/doc/110x72/577cc77d1a28aba711a11a1e/modelik-2003-02-sdkfz-141-1-pzkpfw-iii-ausf-m.jpg)


![(Papermodels@Emule) [GPM 237] [Armor] SdKfz 161-2 PzKpfw IV Ausf H](https://static.cupdf.com/doc/110x72/577cc7781a28aba711a10729/papermodelsemule-gpm-237-armor-sdkfz-161-2-pzkpfw-iv-ausf-h.jpg)