Biodata ba 'kamo? end term requirement in elective 4 2 3 FEB 2014 C RUD (Create, Update, Delete) Operations + Searching in MVC 2 (VB) posted in biodata, CRUD, MVC, searching, VB by joannamarielm This article describes how to perform basic CRUD (Create, Update, Delete) operations + Searching in an MVC 2 application using Entity Framework 4. The purpose of this tutorial is to give a sense of “what it is like” to build an ASP.NET MVC application. In this tutorial, we’ll show you how to build a simple database-driven application that illustrates how you can list, create, delete, and edit database records. But first, let’s have a short introduction about MVC and Entity Framework. I. MVC Model: is an object representing data or even activity, e.g. a database table or even some plant-floor production-machine process. View: is some form of visualization of the state of the model. Controller: offers facilities to change the state of the model. To implement MVC in .NET we need mainly three classes (View, Controller and the Model). II. ENTITY FRAMEWORK Let’s have a look at the standard definition of Entity Framework given by Microsoft: “The Microsoft ADO.NET Entity Framework is an Object/Relational Mapping (ORM) framework that enables developers to work with relational data as domain-specific objects, eliminating the need for most of the data access plumbing code that developers usually need to write. Using the Entity Framework, developers issue queries using LINQ, then retrieve and manipulate data as strongly typed objects. The Entity Framework’s ORM implementation provides services like change tracking, identity resolution, lazy loading, and query translation so that developers can focus on their application-specific business logic rather than the data access fundamentals.” In simple terms, Entity Framework is an Object/Relational Mapping (ORM) framework. It is an enhancement to ADO.NET, an upper layer to ADO.Net that gives developers an automated mechanism for accessing and storing the data in the database.

Welcome message from author
This document is posted to help you gain knowledge. Please leave a comment to let me know what you think about it! Share it to your friends and learn new things together.
Transcript

Biodata ba 'kamo?
end term requirement in elective 4
23FEB2014
CRUD (Create, Update, Delete) Operations +
Searching in MVC 2 (VB)
posted in biodata, CRUD, MVC, searching, VB by joannamarielm
This article describes how to perform basic CRUD (Create, Update, Delete) operations + Searching inan MVC 2 application using Entity Framework 4.
The purpose of this tutorial is to give a sense of “what it is like” to build an ASP.NET MVC application.In this tutorial, we’ll show you how to build a simple database-driven application that illustrates how
you can list, create, delete, and edit database records. But first, let’s have a short introduction aboutMVC and Entity Framework.
I. MVC
Model: is an object representing data or even activity, e.g. a database table or even some plant-floorproduction-machine process.
View: is some form of visualization of the state of the model.
Controller: offers facilities to change the state of the model.
To implement MVC in .NET we need mainly three classes (View, Controller and the Model).
II. ENTITY FRAMEWORK
Let’s have a look at the standard definition of Entity Framework given by Microsoft:
“The Microsoft ADO.NET Entity Framework is an Object/Relational Mapping (ORM) framework that
enables developers to work with relational data as domain-specific objects, eliminating the need formost of the data access plumbing code that developers usually need to write. Using the Entity
Framework, developers issue queries using LINQ, then retrieve and manipulate data as strongly typedobjects. The Entity Framework’s ORM implementation provides services like change tracking, identityresolution, lazy loading, and query translation so that developers can focus on their application-specific
business logic rather than the data access fundamentals.”
In simple terms, Entity Framework is an Object/Relational Mapping (ORM) framework. It is anenhancement to ADO.NET, an upper layer to ADO.Net that gives developers an automatedmechanism for accessing and storing the data in the database.

III. OVERVIEW OF THE BIODATA DATABASE APPLICATION
Because our goal is to keep things simple, we’ll build a very simple Biodata Database application. Oursimple Biodata Database application will allow us to do three things:
List a set of biodata database recordsCreate a new biodata database record
Edit an existing biodata database recordDelete an existing biodata database recordSearch for an existing biodata database record
Viewing of Biodata
In order to create our application, we need to complete each of the following steps:
Create the ASP.NET MVC Web Application Project
Create the databaseCreate the database model
Create the ASP.NET MVC controllerCreate the ASP.NET MVC views
IV. PRELIMINARIES
Microsoft Visual Studio 2010SQL Server Management Studio Express
V. CRUD (Create, Update, Delete) Operations + Searching in MVC 2 (VB)
Creating a New ASP.NET MVC 2 WEB APPLICATION
Let’s start by creating a new ASP.NET MVC 2 Web Application project in Visual Studio 2010. Selectthe menu option File, New Project and you will see the New Project dialog box. Select Visual Basic asthe programming language and select the ASP.NET MVC Web Application project template. Give your
project the name BiodataSampleApplication and click the OK buDon.

(hDp://joannamarielm.files.wordpress.com/2014/02/3.jpg)
Whenever you create a new MVC 2 Web Application project, Visual Studio prompts you to create aseparate unit test project. The dialog below appears. Because we won’t be creating tests in this tutorial,
select the No option and click the OK buDon.
(hDp://joannamarielm.files.wordpress.com/2014/02/4.jpg)
An ASP.NET MVC application has a standard set of folders: a Models, Views, and Controllers folder.You can see this standard set of folders in the Solution Explorer window. We’ll need to add files to each
of the Models, Views, and Controllers folders in order to build our Biodata Database application.
When you create a new MVC application with Visual Studio, you get a sample application. Because wewant to start from scratch, we need to delete the content for this sample application. You need todelete the following file and the following folder:
Controllers\HomeController.vb
Controllers\AccountController.vbModels\AccountModels.vbViews\Home
Views\Account

Creating the Database
We need to create a database to hold our database records. So we need to open our SQL ServerManagement Studio Express.
First, we need to connect to our Server. Enter your Server Name, select Windows Authentication, andclick Connect.
(hDp://joannamarielm.files.wordpress.com/2014/02/11.jpg)
Follow these steps to create the database and the table:
Right-click on the Databases and select New Database.1.
Enter the database name and click OK.2.
Double click on the created database, right click on the Tables and choose New Table.3.
Enter the fields below.4.

(hDp://joannamarielm.files.wordpress.com/2014/02/aaa.jpg)
The first column, the Id column, has two special properties. First, you need to mark the Id column asthe primary key column. After selecting the Id column, click the Set Primary Key buDon (it is the icon
that looks like a key). Second, you need to mark the Id column as an Identity column. In the ColumnProperties window, scroll down to the Identity Specification section and expand it. Change the IsIdentity property to the value Yes. When you are finished, the table should look like the one above.
The final step is to save the new table. Click the Save buDon (the icon of the floppy) and give the new
table the name BioTB.
After you finish creating the table, add some records to the table. Right-click the BioTB table in the
Server Explorer window and select the menu option Open Table and enter some records.
(hDp://joannamarielm.files.wordpress.com/2014/02/2.jpg)
Creating the Model
We next need to create a set of classes to represent our database. We need to create a database model.We’ll take advantage of the Microsoft Entity Framework to generate the classes for our database model
automatically.

Follow these steps to launch the Entity Data Model Wizard:
Right-click the Models folder in the Solution Explorer window and the select the menu option Add,
New Item.
1.
Select the Data category and select the ADO.NET Entity Data Model template.2.
Give your data model the name BioDBModel.edmx and click the Add buDon.3.
(hDp://joannamarielm.files.wordpress.com/2014/02/7.jpg)
After you click the Add buDon, the Entity Data Model Wizard appears.

(hDp://joannamarielm.files.wordpress.com/2014/02/8.jpg)
Click on the New Connection and select Microsoft SQL Server from the list.
(hDp://joannamarielm.files.wordpress.com/2014/02/9.jpg)
Enter your Server Name and select your database. Click Test Connection. Click OK.

(hDp://joannamarielm.files.wordpress.com/2014/02/10.jpg)
Follow these steps to complete the wizard:
In the Choose Model Contents step, select the Generate from database option.1.
Type the name BioEntities for the connection seDings. Click the Next buDon.2.
In the Choose Your Database Objects step, expand the Tables node, select the BioTB table. Enter
the namespace BioModel.Models and click the Finish buDon.
3.
(hDp://joannamarielm.files.wordpress.com/2014/02/111.jpg)

After you complete the Entity Data Model Wizard, the Entity Data Model Designer opens. TheDesigner should display the BioTB database table.
(hDp://joannamarielm.files.wordpress.com/2014/02/13.jpg)
Creating the Controller
The next step is to create the ASP.NET MVC controller. A controller is responsible for controlling howa user interacts with an ASP.NET MVC application.
Follow these steps:
In the Solution Explorer window, right-click the Controllers folder and select the menu option Add,
Controller.
1.
In the Add Controller dialog, enter the name HomeController and check the checkbox labeled Add
action methods for Create, Update, and Details scenarios.
2.
Click the Add buDon to add the new controller to your project.3.

(hDp://joannamarielm.files.wordpress.com/2014/02/14.jpg)
After you complete these steps, the controller is created. Notice that it contains methods named Index,
Details, Create, and Edit. In the following sections, we’ll add the necessary code to get these methodsto work.
Listing Database Records
The Index() method of the Home controller is the default method for an ASP.NET MVC 2 application.When you run an ASP.NET MVC 2 application, the Index() method is the first controller method that
is called.
We’ll use the Index() method to display the list of records from the BioTB database table. We’ll takeadvantage of the database model classes that we created earlier to retrieve the movie database recordswith the Index() method.
I’ve modified the HomeController class so that it contains a new private field named _db. The
BioEntities class represents our database model and we’ll use this class to communicate with ourdatabase.
I’ve also modified the Index() method. The Index() method uses the BioEntities class to retrieve all ofthe movie records from the Movies database table. The expression _db.BioTBs.ToList() returns a list of
all of the records from the database table.
The list of records is passed to the view. Anything that gets passed to the View() method gets passed tothe view as view data.
Controllers/HomeController.vb (modified Index() method)
The Index() method returns a view named Index. We need to create this view to display the list ofmovie database records. Follow these steps:
You should build your project (select the menu option Build, Build Solution) before opening the AddView dialog or no classes will appear in the View data class dropdown list.
Right-click the Index() method in the code editor and select the menu option Add View.1.
In the Add View dialog, verify that the checkbox labeled Create a strongly-typed view is checked.2.
From the View content dropdown list, select the value List.3.
From the View data class dropdown list, select the value BiodataSampleApplication.BioTB.4.
12345678
Public Class HomeControllerInherits System.Web.Mvc.ControllerPrivate _db As New BioEntities()'' GET: /HomeFunction Index(ByVal searchString As String) As ActionResultReturn View(_db.BioTBs.ToList())End Function

Click the Add buDon to create the new view.5.
(hDp://joannamarielm.files.wordpress.com/2014/02/15.jpg)
(hDp://joannamarielm.files.wordpress.com/2014/02/16.jpg)
After you complete these steps, a new view named Index.aspx is added to the Views\Home folder.
The Index view displays all of the records from the database table within an HTML table. The viewcontains a For Each loop that iterates through each movie represented by the ViewData.Modelproperty. If you run your application by hiDing the F5 key, then you’ll see the web page like the one

below. Since we have many fields, the table extends outside the main body portion of our project.
(hDp://joannamarielm.files.wordpress.com/2014/02/17.jpg)
To solve this, I modified the Index.aspx and deleted some of the fields. Don’t worry because deletingthem from Index.aspx won’t delete them from the database. In order to view the whole record of eachperson, I added a View link that redirects to another page which displays all the information of each
record. I also added a Upload Photo link.
(hDp://joannamarielm.files.wordpress.com/2014/02/bbb.png)

Creating New Database Records
The Index view that we created in the previous section includes a link for creating new databaserecords.
The Home controller contains two methods named Create(). I used the code below for validation, so
that if you tried to create an empty record, a validation message is shown.
Controllers/HomeController.vb (modified Create() method)
And then follow the following steps:
Right-click the Create() method in the code editor and select the menu option Add View.1.
Verify that the checkbox labeled Create a strongly-typed view is checked.2.
From the View content dropdown list, select the value Create.3.
From the View data class dropdown list, select the value BiodataSampleApplication.BioTB.4.
Click the Add buDon to create the new view.5.
12
If stud.bname.Trim().Length = 0 ThenModelState.AddModelError("bname", "Name is required.")
12345678910111213141516171819202122
'' GET: /Home/CreateFunction Create() As ActionResultReturn View()End Function'' POST: /Home/Create</pre><HttpPost()> _Function Create(<Bind(Exclude:="id")> ByVal bio As BioTB) As ActionResultTryIf bio.bname.Trim().Length = 0 ThenModelState.AddModelError("bname", "Name is required.")Return View(bio)Else_db.AddToBioTBs(bio)_db.SaveChanges()Return RedirectToAction("Index")End IfCatchModelState.AddModelError("bname", "Name is required.")Return View(bio)End Try

(hDp://joannamarielm.files.wordpress.com/2014/02/23.jpg)
The HTML form generated by the Add View dialog generates an Id form field. Because the Id columnis an Identity column, we don’t need this form field and you can safely remove it.
After you add the Create view, you can add new records to the database. Press the F5 key and click theCreate New link to see the create form. If you complete and submit the form, a new database record is
created.
(hDp://joannamarielm.files.wordpress.com/2014/02/26.jpg)

(hDp://joannamarielm.files.wordpress.com/2014/02/27.jpg)
Editing Existing Database Records
First, we need to generate the Edit form. This step is easy since Visual Studio will generate the Edit
form for us automatically. Open the HomeController.vb class in the Visual Studio code editor andfollow these steps:
Right-click the Edit() method in the code editor and select the menu option Add View.1.
Check the checkbox labeled Create a strongly-typed view.2.
From the View content dropdown list, select the value Edit.3.
From the View data class dropdown list, select the value BiodataSampleApplication.BioTB.4.
Click the Add buDon to create the new view.5.
Completing these steps adds a new view named Edit.aspx to the Views\Home folder. This viewcontains an HTML form for editing a record.
(hDp://joannamarielm.files.wordpress.com/2014/02/28.jpg)
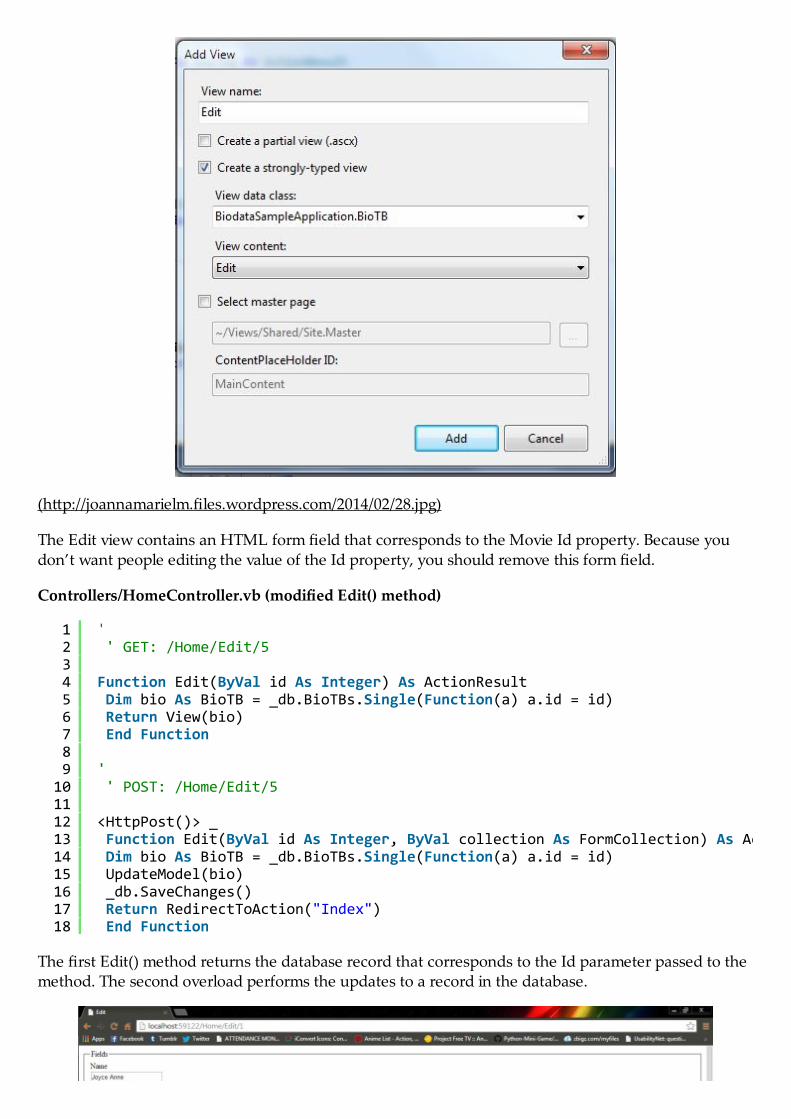
The Edit view contains an HTML form field that corresponds to the Movie Id property. Because you
don’t want people editing the value of the Id property, you should remove this form field.
Controllers/HomeController.vb (modified Edit() method)
The first Edit() method returns the database record that corresponds to the Id parameter passed to themethod. The second overload performs the updates to a record in the database.
123456789101112131415161718
'' GET: /Home/Edit/5
Function Edit(ByVal id As Integer) As ActionResultDim bio As BioTB = _db.BioTBs.Single(Function(a) a.id = id)Return View(bio)End Function
'' POST: /Home/Edit/5
<HttpPost()> _Function Edit(ByVal id As Integer, ByVal collection As FormCollection) As ActionResultDim bio As BioTB = _db.BioTBs.Single(Function(a) a.id = id)UpdateModel(bio)_db.SaveChanges()Return RedirectToAction("Index")End Function

(hDp://joannamarielm.files.wordpress.com/2014/02/311.jpg)
(hDp://joannamarielm.files.wordpress.com/2014/02/321.jpg)

(hDp://joannamarielm.files.wordpress.com/2014/02/331.jpg)
Deleting Existing Database Record
First, we need to generate the Delete form. This step is easy since Visual Studio will also generate theDelete form for us automatically. Open the HomeController.vb class in the Visual Studio code editorand follow the following steps:
Right-click the Delete() method in the code editor and select the menu option Add View.1.
Check the checkbox labeled Create a strongly-typed view.2.
From the View content dropdown list, select the value Delete.3.
From the View data class dropdown list, select the value BiodataSampleApplication.BioTB.4.
Click the Add buDon to create the new view.5.
(hDp://joannamarielm.files.wordpress.com/2014/02/29.jpg)
By clicking the Add buDon, Delete.aspx is created. You can modify your Delete View based on whatyou want it to be.
This is my modified Delete.aspx code:

When you click the Delete link, a confirmation appears. Clicking the Delete buDon, the record will be
deleted.
(hDp://joannamarielm.files.wordpress.com/2014/02/27.jpg)
(hDp://joannamarielm.files.wordpress.com/2014/02/36.jpg)
123456789
</pre><h2>Delete</h2><h3>Are you sure you want to delete <%=Model.bname %>?</h3><pre><% Using Html.BeginForm() %>
<input type="submit" value="Delete" /> |<%: Html.ActionLink("Back to List", "Index") %>
<% End Using %>

(hDp://joannamarielm.files.wordpress.com/2014/02/41.jpg)
Searching a Record
I added a textbox and a submit buDon just below the Create link on the Index.aspx:
And this is the modified Index() method:
1234
<%Using Html.BeginForm("Index","Home",FormMethod.Get)%>Search by name: <%=Html.TextBox("searchString")%><input type="submit" value="search" /><%End Using%>
1234567
Private _db As New BioEntities()'' GET: /Home
Function Index(ByVal searchString As String) As ActionResultReturn View(_db.BioTBs.Where(Function(a) a.bname.StartsWith(searchString) OrEnd Function

(hDp://joannamarielm.files.wordpress.com/2014/02/43.jpg)
(hDp://joannamarielm.files.wordpress.com/2014/02/44.jpg)
Adding a Photo
I added a new method under the HomeController:
Follow the following steps:
Right-click the Upload() method in the code editor and select the menu option Add View.1.
Check the checkbox labeled Create a strongly-typed view.
From the View content dropdown list, select the value Details.
From the View data class dropdown list, select the value BiodataSampleApplication.BioTB.
Click the Add buDon to create the new view.
1234
Function Upload(ByVal id As Integer) As ActionResultDim biophoto As BioTB = _db.BioTBs.Single(Function(a) a.id = id)Return View(biophoto)End Function

(hDp://joannamarielm.files.wordpress.com/2014/02/37.jpg) This will create another view namedUpload. I modified the code and this is my final code:
And since Upload.aspx redirects to UploadPhoto, this is the code for the UploadPhoto in theHomeController.
1234567
Upload Photo</pre><h3>Name: <%: Model.bname %></h3><h3>Current Photo:</h3><img alt="<%: Model.bname %>" src="../../Images/<%: Model.pic %>" width="100px" height="100px" <form action="/Home/UploadPhoto?id=<%: Model.id %>" enctype="multipart/form-data" method="post"><input type="file" name="FileUpload1" /><input id="Submit" type="submit" name="Submit" value="Upload" /></form>
123456789101112131415
</pre>Function UploadPhoto() As ActionResultFor Each Upload As String In Request.FilesDim path As String = AppDomain.CurrentDomain.BaseDirectory + "Images/"Dim filename As String = System.IO.Path.GetFileName(Request.Files(Upload).FileName)Request.Files(Upload).SaveAs(System.IO.Path.Combine(path, filename))Dim dbconn As New SqlClient.SqlConnection("Data Source=JOANNA-PC;Initial Catalog=joanna;IntegrDim comm As New SqlClient.SqlCommand("UPDATE BioTB SET pic='" & filename.ToString & "' WHERE idbconn.Open()comm.ExecuteNonQuery()dbconn.Close()NextReturn RedirectToAction("Index")End Function<pre>

(hDp://joannamarielm.files.wordpress.com/2014/02/40.jpg)
(hDp://joannamarielm.files.wordpress.com/2014/02/41.jpg)
Viewing of Biodata
I created a new method in HomeController and named it ViewBio.
Follow the following steps in creating the ViewBio view:
Right-click the ViewBio() method in the code editor and select the menu option Add View.1.
Check the checkbox labeled Create a strongly-typed view.2.
From the View content dropdown list, select the value Empty.3.
1234
Function ViewBio(ByVal id As Integer) As ActionResultDim biodata As BioTB = _db.BioTBs.Single(Function(a) a.id = id)Return View(biodata)End Function

From the View data class dropdown list, select the value BiodataSampleApplication.BioTB.4.
Click the Add buDon to create the new view.5.
(hDp://joannamarielm.files.wordpress.com/2014/02/20.jpg)
To make it more presentable, I downloaded a template (Curriculum Vitae Template since I had troublefinding Biodata Template), and modified it. Credits to the owner of the CSS template. Sorry, I forgotwhich site I got it from.

1234567891011121314151617181920212223242526272829303132333435363738394041424344454647484950515253545556575859
Biodata
<meta name="viewport" content="width=device-width" /><meta name="description" content="Biodata" /><meta charset="UTF-8" />
<link href="../../Content/style.css" rel="stylesheet" type="text/css"<link href="http://fonts.googleapis.com/css?family=Rokkitt:400 (http://fonts.googleapis
<!--[if lt IE 9]><script src="//html5shiv.googlecode.com/svn/trunk/html5.js"></script><![endif]--></pre>
<div class="instaFade" id="cv">
<div class="mainDetails">
<div class="quickFade" id="headshot"><img alt="<%= Model.bname %>" src="../../Images/<%= Model.
<div id="name">
<h1 class="quickFade delayTwo"><%=Model.bname %></h1></div>
<div class="quickFade delayFour" id="contactDetails"><ul><ul><ul>
<li>email address: <%=model.emailadd %></li></ul></ul></ul>
<ul><ul><ul>
<li>mobile number: +63<%=Model.mobileno %></li></ul></ul></ul>
</div>
<div class="clear"></div></div>
<div class="quickFade delayFive" id="mainArea"><section><article>
<div class="sectionTitle">
<h1>Personal Information</h1></div>
<div class="sectionContent">Age: <%=Model.age %> Gender: <%=Model.gender %> Date of Birth: <%=M</article>
<div class="clear"></div>

Since the template gets its css style from a different css file, we will create another css file by right-
clicking on the Content folder and adding a New Item. Select Style Sheet and name it style.css thenclick OK.
Paste the following code and save:
60616263646566676869707172737475767778798081828384858687888990919293949596979899
</section>
<section>
<div class="sectionTitle">
<h1>Educational Background</h1></div>
<div class="sectionContent"><article>
<h2>Elementary</h2>
<%=Model.elem_yr%> School Name: <%=Model.elem_name %> School Address: <%=Model.elem_add %></
<article>
<h2>High School</h2>
<%=Model.hs_yr %> School Name: Luciano Millan National High School School Address: <%=Model.hs_
<article>
<h2>College</h2>
<%=Model.coll_yr %> School Name: <%=Model.coll_name%> School Address: <%=Model.coll_add %></
<div class="clear"></div></section></div></div>
<pre><script type="text/javascript">// <![CDATA[var gaJsHost = (("https:" == document.location.protocol) ? "https://ssl. (https://ssl.// ]]></script><script type="text/javascript">// <![CDATA[var pageTracker = _gat._getTracker("UA-3753241-1"); pageTracker._initData(); pageTracker._tra// ]]></script>

1234567891011121314151617181920212223242526272829303132333435363738394041424344454647484950515253545556575859
html,body,div,span,object,iframe,h1,h2,h3,h4,h5,h6,p,blockquote,pre,abbr,address,cite,code,delborder:0;font:inherit;font-size:100%;margin:0;padding:0;vertical-align:baseline;}
article,aside,details,figcaption,figure,footer,header,hgroup,menu,nav,section {display:block;}
html, body {background: #181818; font-family: 'Lato', helvetica, arial, sans-serif; font-size:
.clear {clear: both;}
p {font-size: 1em;line-height: 1.4em;margin-bottom: 20px;color: #444;}
#cv {width: 90%;max-width: 800px;background: #f3f3f3;margin: 30px auto;}
.mainDetails {padding: 25px 35px;border-bottom: 2px solid #cf8a05;background: #ededed;}
#name h1 {font-size: 2.5em;font-weight: 700;font-family: 'Rokkitt', Helvetica, Arial, sans-serif;margin-bottom: -6px;}
#name h2 {font-size: 2em;margin-left: 2px;font-family: 'Rokkitt', Helvetica, Arial, sans-serif;}
#mainArea {padding: 0 40px;}
#headshot {width: 12.5%;float: left;margin-right: 30px;}

60616263646566676869707172737475767778798081828384858687888990919293949596979899100101102103104105106107108109110111112113114115116117118
#headshot img {width: 100%;height: auto;-webkit-border-radius: 50px;border-radius: 50px;}
#name {float: left;}
#contactDetails {float: right;}
#contactDetails ul {list-style-type: none;font-size: 0.9em;margin-top: 2px;}
#contactDetails ul li {margin-bottom: 3px;color: #444;}
#contactDetails ul li a, a[href^=tel] {color: #444;text-decoration: none;-webkit-transition: all .3s ease-in;-moz-transition: all .3s ease-in;-o-transition: all .3s ease-in;-ms-transition: all .3s ease-in;transition: all .3s ease-in;}
#contactDetails ul li a:hover {color: #cf8a05;}section {border-top: 1px solid #dedede;padding: 20px 0 0;}
section:first-child {border-top: 0;}
section:last-child {padding: 20px 0 10px;}
.sectionTitle {float: left;width: 25%;}
.sectionContent {

119120121122123124125126127128129130131132133134135136137138139140141142143144145146147148149150151152153154155156157158159160161162163164165166167168169170171172173174175176177
float: right;width: 72.5%;}
.sectionTitle h1 {font-family: 'Rokkitt', Helvetica, Arial, sans-serif;font-style: italic;font-size: 1.5em;color: #cf8a05;}
.sectionContent h2 {font-family: 'Rokkitt', Helvetica, Arial, sans-serif;font-size: 1.5em;margin-bottom: -2px;}
.subDetails {font-size: 0.8em;font-style: italic;margin-bottom: 3px;}
.keySkills {list-style-type: none;-moz-column-count:3;-webkit-column-count:3;column-count:3;margin-bottom: 20px;font-size: 1em;color: #444;}
.keySkills ul li {margin-bottom: 3px;}
@media all and (min-width: 602px) and (max-width: 800px) {#headshot {display: none;}
.keySkills {-moz-column-count:2;-webkit-column-count:2;column-count:2;}}
@media all and (max-width: 601px) {#cv {width: 95%;margin: 10px auto;min-width: 280px;}
#headshot {display: none;}
178179180181182183184185186187188189190191192193194195196197198199200201202203204205206207208209210211212213214215216217218219220221222223224225226227228229230231232233234235236
#name, #contactDetails {float: none;width: 100%;text-align: center;}
.sectionTitle, .sectionContent {float: none;width: 100%;}
.sectionTitle {margin-left: -2px;font-size: 1.25em;}
.keySkills {-moz-column-count:2;-webkit-column-count:2;column-count:2;}}
@media all and (max-width: 480px) {.mainDetails {padding: 15px 15px;}
section {padding: 15px 0 0;}
#mainArea {padding: 0 25px;}.keySkills {-moz-column-count:1;-webkit-column-count:1;column-count:1;}
#name h1 {line-height: .8em;margin-bottom: 4px;}}
@media print {#cv {width: 100%;}}
@-webkit-keyframes reset {0% {opacity: 0;}100% {

237238239240241242243244245246247248249250251252253254255256257258259260261262263264265266267268269270271272273274275276277278279280281282283284285286287288289290291292293294295
opacity: 0;}}
@-webkit-keyframes fade-in {0% {opacity: 0;}40% {opacity: 0;}100% {opacity: 1;}}
@-moz-keyframes reset {0% {opacity: 0;}100% {opacity: 0;}}
@-moz-keyframes fade-in {0% {opacity: 0;}40% {opacity: 0;}100% {opacity: 1;}}
@keyframes reset {0% {opacity: 0;}100% {opacity: 0;}}
@keyframes fade-in {0% {opacity: 0;}40% {opacity: 0;}100% {opacity: 1;}}
.instaFade {

Now the view will look like this:
296297298299300301302303304305306307308309310311312313314315316317318319320321322323324325326327328329330331332333334335336337338339340341342343344345346347348349350351
-webkit-animation-name: reset, fade-in;-webkit-animation-duration: 1.5s;-webkit-animation-timing-function: ease-in;
-moz-animation-name: reset, fade-in;-moz-animation-duration: 1.5s;-moz-animation-timing-function: ease-in;
animation-name: reset, fade-in;animation-duration: 1.5s;animation-timing-function: ease-in;}
.quickFade {-webkit-animation-name: reset, fade-in;-webkit-animation-duration: 2.5s;-webkit-animation-timing-function: ease-in;
-moz-animation-name: reset, fade-in;-moz-animation-duration: 2.5s;-moz-animation-timing-function: ease-in;
animation-name: reset, fade-in;animation-duration: 2.5s;animation-timing-function: ease-in;}
.delayOne {-webkit-animation-delay: 0, .5s;-moz-animation-delay: 0, .5s;animation-delay: 0, .5s;}
.delayTwo {-webkit-animation-delay: 0, 1s;-moz-animation-delay: 0, 1s;animation-delay: 0, 1s;}
.delayThree {-webkit-animation-delay: 0, 1.5s;-moz-animation-delay: 0, 1.5s;animation-delay: 0, 1.5s;}
.delayFour {-webkit-animation-delay: 0, 2s;-moz-animation-delay: 0, 2s;animation-delay: 0, 2s;}
.delayFive {-webkit-animation-delay: 0, 2.5s;-moz-animation-delay: 0, 2.5s;animation-delay: 0, 2.5s;}

(hDp://joannamarielm.files.wordpress.com/2014/02/42.jpg)
(hDp://joannamarielm.files.wordpress.com/2014/02/22.jpg)
ConclusionIn this tutorial we learned to set up an environment for MVC 2 and Entity Framework 4 and perform
CRUD operations + searching. You can expand the application by adding multiple Controllers, Modelsand Views.
You can download the finished project at: BiodataSampleApplication (hDps://app.box.com/s/r5oo5hjrcbhrucx7Nms)

Happy Coding!
crud Leave a comment
Biodata ba ʹkamo?Blog at WordPress.com. The Adelle Theme.
Related Documents
![Experimentell jämförelse av Cassandra, MongoDB och MySQL831076/FULLTEXT01.pdf · operationer i CRUD (Create, Read Update, Delete) [4] på mer komplexa datamodeller. Jämförelser](https://static.cupdf.com/doc/110x72/5eca5822c38f4e40c93e9f4b/experimentell-jmfrelse-av-cassandra-mongodb-och-mysql-831076fulltext01pdf.jpg)