Creating Content with the HP Adoption Readiness Tool ™ Version 4.4 User Manual

Welcome message from author
This document is posted to help you gain knowledge. Please leave a comment to let me know what you think about it! Share it to your friends and learn new things together.
Transcript

Creating Content with the HP Adoption Readiness Tool™
Version 4.4
User Manual

PROPRIETARY RIGHTS NOTICE
This user manual contains proprietary and confidential information of ANCILE Solutions, Inc. This manual is furnished under license only for the use and information of the licensee, and the content is subject to change without notice. Use of the contents of the manual for any purpose other than that for which it was provided is prohibited, and this manual may not be reprinted or redistributed to any third party without the written consent of ANCILE Solutions, Inc. ANCILE Solutions does not warrant or guarantee the contents of this user manual.
ANCILE uPerform™, ANCILE uLearn™, ANCILE Info Pak™, and ANCILE uBenchmark™ are trademarks of ANCILE Solutions, Inc. in the U.S. and other foreign countries. All other product and company names
referenced herein are the registered or unregistered trademarks of their respective owners.
Your HP Adoption Readiness Tool (HP ART™) is built on a tool called ANCILE uPerform™, which is developed by ANCILE Solutions. Throughout your Adoption Readiness Tool Author product, you will see the term “Powered by ANCILE Solutions” and, throughout your documentation, you will see references to both ANCILE and uPerform. You may also see screen shots that include uPerform in the graphic rather
than as it displays on your screen as ART. The terms ART and uPerform are, for the case of this documentation only, interchangeable. Any time you see uPerform or uPerform Author, you can substitute
ART or ART Author. For example, if you see a direction to “Open the uPerform Content” you should instead “Open the ART Content” .
COPYRIGHT © 2011 ANCILE Solutions, Inc. and Hewlett-Packard Development Company, L.P. ALL RIGHTS RESERVED

1
ContentsChapter 1: Introduction .............................................................................. 6
What is the HP Adoption Readiness Tool™? .............................................................................. 7About This Manual ................................................................................................................... 7Who Should Read This Manual ............................................................................................... 8Organization Of This Manual .................................................................................................. 8Conventions Used In This Manual ........................................................................................... 8
Available Technical Support ........................................................................................................ 9
Chapter 2: Getting Started ....................................................................... 11Confirming the Required Hardware and Software ..................................................................... 12Installation .................................................................................................................................. 13
Overview of the Client Installation ........................................................................................ 13Installation Parameters and Properties ................................................................................... 13Running the Install with a setup.ini File ................................................................................ 17Running the .msi File Directly ............................................................................................... 18Installing the uPerform Express Client Software ................................................................... 18Implementing uPerform with Citrix ....................................................................................... 20
Starting the uPerform Express Editor ......................................................................................... 22Using the Quick Start Panel ....................................................................................................... 23Managing Your Editor Configuration Settings .......................................................................... 25Getting Help on the uPerform Express Editor ........................................................................... 28Exiting ........................................................................................................................................ 29Uninstalling ................................................................................................................................ 30Upgrading from a Previous Version ........................................................................................... 31
Chapter 3: Exploring the Editor Workspace .......................................... 33Introduction to the Editor Workspace ........................................................................................ 34
Overview of the Content Area and Task Pane ....................................................................... 34Using Right-Click Menus ....................................................................................................... 38Using the Content Area .......................................................................................................... 38
Chapter 4: Creating and Opening Content ............................................. 41Introduction to Creating and Opening Content .......................................................................... 42Specify Document and Simulation Editor Options .................................................................... 43
Specifying Step Filter Options ............................................................................................... 46Specify Course Editor Options ................................................................................................... 48Creating uPerform Content ........................................................................................................ 49
Creating Content .................................................................................................................... 49Open uPerform Express Content ................................................................................................ 52
Opening Express Content ....................................................................................................... 52

Chapter 1: Introduction
2 HP Adoption Readiness Tool™
Chapter 5: Recording Procedural Content ............................................. 53Introduction to Recording Procedural Content .......................................................................... 54Preparing to Record .................................................................................................................... 55
Preparing Your Computer ...................................................................................................... 55Preparing Your Data ............................................................................................................... 56
Starting the Recorder .................................................................................................................. 57Displaying the Recorder Preview Pane .................................................................................. 59
Capturing Controls ..................................................................................................................... 60Specifying Recorder Tuning Options ......................................................................................... 62Using the Screen Percent Differential Feature ........................................................................... 64Using Image Mode ..................................................................................................................... 65Using Undo and Redo ................................................................................................................ 66Minimizing the Recorder Window ............................................................................................. 67Pausing and Stopping the Recorder ........................................................................................... 68
Chapter 6: Managing Content Languages ............................................. 69Introduction to Managing Content Languages ........................................................................... 70Creating Translated Documents ................................................................................................. 71Using Guided Re-Record Functionality ..................................................................................... 80Re-Record Prerequisites: Before You Get Started ..................................................................... 81Re-Record Scenarios .................................................................................................................. 82
Scenario 1: Translating Before Re-Record ............................................................................ 82Scenario 2: Translating After Re-Record ............................................................................... 82Scenario 3: Using Translation and Guided Re-Record in Parallel ......................................... 82
What Happens During Guided Re-Record? ............................................................................... 84Exporting, Importing, and Applying XLIFF Translations ..................................................... 86
Chapter 7: Editing and Formatting: Basics ............................................ 91Introduction to Editing and Formatting: Basics ......................................................................... 92Specify Content Properties ......................................................................................................... 93Using Undo and Redo During Editing ....................................................................................... 96Using Spellcheck ........................................................................................................................ 97Using Save .................................................................................................................................. 99Using Save As .......................................................................................................................... 100Printing ..................................................................................................................................... 101Closing ..................................................................................................................................... 102
Chapter 8: Editing and Formatting: Procedural Content .................... 103Introduction to Editing and Formatting: Procedural Content ................................................... 104Inserting Standard Simulation Objects ..................................................................................... 105
Inserting a Highlighted Note ................................................................................................ 108Editing Standard Simulation Objects ....................................................................................... 113
Editing Steps ........................................................................................................................ 113

Chapter 1: Introduction
HP Adoption Readiness Tool™ 3
Editing Notes ........................................................................................................................ 120Editing Actions ..................................................................................................................... 125
Using Document Sections ........................................................................................................ 134Editing Document Sections .................................................................................................. 135Inserting Objects in Document Sections .............................................................................. 135Editing Objects in Document Sections ................................................................................. 140Modifying Paragraphs .......................................................................................................... 145Modifying Characters ........................................................................................................... 146
Working With Images, Masks, and Callouts ............................................................................ 147Working with Images ........................................................................................................... 148Viewing an Image Mask ...................................................................................................... 149Creating an Image Mask ...................................................................................................... 149Editing an Image Mask ........................................................................................................ 150Copying and Pasting an Image Mask ................................................................................... 152Deleting an Image Mask ...................................................................................................... 152
Working with Callouts ............................................................................................................. 155Generating the Exercise Section .............................................................................................. 158
Required Data Table ............................................................................................................. 158Tasks Section ........................................................................................................................ 158
Change the Language of Default Text ..................................................................................... 160Changing the Language of Default Text .............................................................................. 160
Working with the Screenflow .................................................................................................. 161
Chapter 9: Editing and Formatting: Courses ....................................... 163Introduction to Editing and Formatting: Courses ..................................................................... 164Working with Lessons .............................................................................................................. 166Working with Pages ................................................................................................................. 169
Inserting a Page .................................................................................................................... 169Switching a Stencil ................................................................................................................... 172Editing Course Content ............................................................................................................ 173Using Images ............................................................................................................................ 175Editing Interaction Pages ......................................................................................................... 177Importing Microsoft PowerPoint Content ................................................................................ 181Using Hotspots, Popups, and Hyperlinks ................................................................................. 187Insert Published Simulations and Course Content ................................................................... 190Working with Flash Content .................................................................................................... 193Using Audio Files ..................................................................................................................... 194Working with Assessment Sections, Self-Tests, and Branches ............................................... 198
Creating Custom Assessment Feedback for a Page ............................................................. 200Working with Branches ........................................................................................................ 203
Chapter 10: Editing and Formatting: Student Guides and Course Packages ................................................................................................. 209
Introduction to Editing and Formatting Student Guides and Course Packages ....................... 210

Chapter 1: Introduction
4 HP Adoption Readiness Tool™
Working With a Student Guide ................................................................................................ 211Working with Course Packages ............................................................................................... 215
Chapter 11: Searching Content ............................................................. 219Introduction to Searching ......................................................................................................... 220Searching Within Content ........................................................................................................ 221
Chapter 12: Using the Glossary ............................................................ 225Introduction to the Glossary ..................................................................................................... 226Create the Glossary .................................................................................................................. 227Open and Save the Glossary ..................................................................................................... 229Adding Terms and Definitions ................................................................................................. 230Updating Terms and Definitions .............................................................................................. 231Browsing the Glossary ............................................................................................................. 232Using Globalize ........................................................................................................................ 233Publish the Glossary ................................................................................................................. 235
Integrating a Published Glossary into the Website .............................................................. 236Export a Glossary File .............................................................................................................. 237
Chapter 13: Using Annotations ............................................................. 239Introduction to Annotations ..................................................................................................... 240Viewing Annotations ................................................................................................................ 241Creating Annotation Sets ......................................................................................................... 243Managing Annotation Sets ....................................................................................................... 246Managing Annotation Notes .................................................................................................... 249
Chapter 14: Previewing and Publishing Content ................................ 251Introduction to Previewing and Publishing Content ................................................................ 252
Overview of Document Publishing ...................................................................................... 252Overview of Simulation Publishing ..................................................................................... 253Overview of Course Publishing ........................................................................................... 253Overview of Student Guide Publishing ................................................................................ 254Overview of Course Package Publishing ............................................................................. 254Overview of Guided Help Publishing .................................................................................. 254
Previewing a Simulation .......................................................................................................... 255Previewing a Course ................................................................................................................. 256Publishing Content ................................................................................................................... 257Viewing and Working with Published Content ........................................................................ 259
Viewing Documents ............................................................................................................. 259Viewing Simulations ............................................................................................................ 260Viewing Courses .................................................................................................................. 262Viewing Student Guides and Course Packages .................................................................... 263

Chapter 1: Introduction
HP Adoption Readiness Tool™ 5
Chapter 15: Using Author Templates ................................................... 267Introduction to Author Templates ............................................................................................ 268Managing Author Templates .................................................................................................... 270
Create and Open a New Author Template ........................................................................... 270Specifying New Template Settings: General ....................................................................... 272Specifying New Template Settings: Properties .................................................................... 277Specifying New Template Settings: Phrases ........................................................................ 280Specifying New Template Settings: Publications ................................................................ 282Specifying New Template Settings: Styles .......................................................................... 318Specifying New Template Settings: Blocks ......................................................................... 324Specifying New Template Settings: Sections ...................................................................... 327
Export and Import an Author Template ................................................................................... 331Delete an Author Template ...................................................................................................... 334
Chapter 16: Building a Website ............................................................ 335Introduction to the Website ...................................................................................................... 336Create the Website ................................................................................................................... 337
Exploring the Website Editor ............................................................................................... 337Planning and Designing the Website ................................................................................... 337What Can My Website Include? .......................................................................................... 338Page and Link Limits ........................................................................................................... 339
Open and Save the Website ...................................................................................................... 341Building the Website Structure Manually ................................................................................ 343
Create and Edit Pages ........................................................................................................... 343Adding Content to the Website ................................................................................................ 346
Add and Edit Content Links ................................................................................................. 346Populating the Website Structure Automatically ..................................................................... 351Viewing Website Properties ..................................................................................................... 353
Set Link List Details ............................................................................................................. 354Refreshing the Website ............................................................................................................ 356Publishing the Website ............................................................................................................. 357Batch Publish Process .............................................................................................................. 359Navigate the Website ............................................................................................................... 361
Overview of Navigation Pages ............................................................................................. 361Overview of Content Pages .................................................................................................. 361
Making Your Website Available to End Users ........................................................................ 363Overview of the Website Directory Structure ...................................................................... 363Directory Structure Details ................................................................................................... 364Transferring Your Website to a Server ................................................................................ 364
Glossary of Terms .................................................................................. 365
Index ........................................................................................................ 373

Chapter 1: Introduction
6 HP Adoption Readiness Tool™
Chapter 1: Introduction
ANCILE uPerform Express provides authors with a robust content development environment to expedite your development and delivery of training materials.

Chapter 1: Introduction
HP Adoption Readiness Tool™ 7
What is the HP Adoption Readiness Tool™?
The HP Adpotion Readiness Tool (HP ART™) is a new solution from HPSE that accelerates user adoption of HP software by enabling continuous learning, empowering implementations, and reducing risk throughout the application lifecycle.
HP ART provides simulation-based learning content that customers can use straight out of the box, either through a hosted subscription model or through a license purchase that they then deploy onsite via their learning management system (LMS) or learning portal.
Content is designed to be used throughout the application lifecycle, beginning with configuration decisions and extending into performance support for users once live.
Users can learn by taking the full course, or by accessing short simulations that teach a specific task.
Your HP Adoption Readiness Tool (HP ART™) is built on a tool called ANCILE uPerform™, which is developed by ANCILE Solutions. Throughout your Adoption Readiness Tool Author product, you will see the term “Powered by ANCILE Solutions” and, throughout your documentation, you will see references to both ANCILE and uPerform. You may also see screen shots that include uPerform in the graphic rather than as it displays on your screen as ART. The terms ART and uPerform are, for the case of this documentation only, interchangeable. Any time you see uPerform or uPerform Author, you can substitute ART or ART Author. For example, if you see a direction to “Open the uPerform Content” you should instead “Open the ART Content” .
About This Manual
This manual provides details regarding the authoring of content and the creation of a glossary and a performance support website.

Chapter 1: Introduction
8 HP Adoption Readiness Tool™
Who Should Read This Manual
This manual includes overview information and step-by-step procedures for content authors who develop documentation for end users. Authors have the following rights and responsibilities:
Create and edit documents, simulations, eLearning courses, course packages, and student guides.
Organization Of This Manual
This manual contains information intended for content authors. This manual also contains a glossary with terms and definitions relevant to the concepts discussed within this manual.
Conventions Used In This Manual
The following conventions are used in this manual:
Style DescriptionBold Indicates a field name, button name, or an option.
Example: Click General on the left pane.
Italic Indicates a screen or window title. Example: The Step Properties window is displayed.
SMALL CAPS AND GREATER THAN SYMBOL (>)
Indicates a menu path. Example: Select START > PROGRAMS > HP ADOPTION READINESS TOOL.
Indicates an important concept or a caution.
Indicates a helpful hint or amplifying information.

Chapter 1: Introduction
HP Adoption Readiness Tool™ 9
Available Technical Support
In addition to the online help delivered with uPerform Express, several additional support mechanisms are available:
The HP Product Support Center is available at http://www.hp.com/go/hpsoftwaresupport.
Optional instructor-led training. For additional information about our training services, contact your sales representative.


11
Chapter 2: Getting Started
The editor has several hardware and software requirements for installation and operation.
After installation, you can access features via a Quick Start panel and obtain online help via the editor.

Chapter 2: Getting Started
12 HP Adoption Readiness Tool™
Confirming the Required Hardware and Software
To install and operate ANCILE uPerform Express, your environment must meet minimum hardware and software specifications. A complete set of hardware and software requirements for uPerform Express can be found in the ANCILE uPerform Express Technical Specifications,available on the HP Product Support Center.

Chapter 2: Getting Started
HP Adoption Readiness Tool™ 13
Installation
Overview of the Client Installation
The uPerform Express client installation is delivered as a single file wrapper or, in the Microsoft terminology, bootstrapper executable. The installation contains the uPerform Express client Microsoft Installer package (the .msi file) and the redistributable packages for various prerequisites. When the install is executed, a check is performed to ensure that the following prerequisites are installed on the computer:
Microsoft .NET Framework v3.5 SP1. An Internet connection is required for the .NET installation. If an Internet connection is not available, install .NET prior to installing uPerform. A full install of .NET is available from Microsoft at: http://download.microsoft.com/download/2/0/e/20e90413-712f-438c-988e-fdaa79a8ac3d/dotnetfx35.exe(http://download.microsoft.com/download/2/0/e/20e90413-712f-438c-988e-fdaa79a8ac3d/dotnetfx35.exe)
Microsoft Visual J# Redistributable v2.0.50727
Microsoft Visual C++ 2005 Redistributable v8.0.50727
Windows Installer 3.0.0
If a prerequisite is not present on the target computer, the installation extracts the pertinent Microsoft redistributable package to a local source folder and executes the package automatically.
After all prerequisite conditions are met, the uPerform Express client Microsoft Installer package is extracted to a temporary folder and executed.
Installation Parameters and Properties
The parameters described in the following table can be used when running the delivered installation executable. Some of these properties exist in the .msi file and their defined value is used when the .msi file is run. Others are parameters that are passed to the Windows Installer service to control whether a log file is created or how much of the user interface is displayed.

Chapter 2: Getting Started
14 HP Adoption Readiness Tool™
Property Name Possible Value(s) Usage Example/Description COMPANY NAME
The value for this field is provided by ANCILE and is the company name under which ANCILE uPerform was licensed.
COMPANYNAME="ANCILESolutions" When passed on the command line to the setup package, the value should be wrapped in quotation marks if it contains spaces.This property populates the "Company Name" field on the Customer Information dialog.
PRODUCT_ID The value for this field is provided by ANCILE.
PRODUCT_ID=XXXXXX-XXXXXX-XXXXXX-XXXXXX-XXXXXX-XXXXXX This property populates the "Product Key" field on the Customer Information dialog.
UPERFORM_DESKTOP_ SHORTCUT
0 or 1 A value of 1 will set the option to create a desktop shortcut for the ANCILE uPerform application. The default value of this property is 0.
INSTALLDIR INSTALLDIR=C:\Program Files\HP Adoption Readiness Tool\ Defines the folder path where HP ART will be installed. A trailing backslash should be included. When passed on the command line to the setup package, the value should be wrapped in quotation marks if the path contains spaces.

Chapter 2: Getting Started
HP Adoption Readiness Tool™ 15
Property Name Possible Value(s) Usage Example/Description INSTALL_ LANGUAGE
ISO Codes are case-sensitive. Bulgarian (bg-BG) Catalan (ca-ES) Chinese (zh-CN) Chinese - Taiwan (zh-TW) Croatian (hr-HR) Czech (cs-CZ) Danish (da-DK) Dutch - Netherlands (nl-NL) Dutch - Belgium (nl-BE) English - US (en-US) English - UK (en-GB) Finnish (fi-FI) French - Canada (fr-CA) French - France (fr-FR) German (de-DE) Greek (el-GR) Hungarian (hu-HU) Indonesian (id-ID) Italian (it-IT) Japanese (ja-JP) Korean (ko-KR) Norwegian (nb-NO) Polish (pl-PL) Portuguese - Portugal (pt-PT) Portuguese - Brazil (pt-BR) Romanian (ro-RO) Russian (ru-RU) Spanish - Spain (es-ES) Swedish (sv-SE) Thai (th-TH) Turkish (tr-TR)
INSTALL_LANGUAGE=en-US This property sets the default user interface language for the ANCILE uPerform client application. Note: This selection does not change the user interface for the setup program.
Parameter Name Usage Example/Description /s : silent mode Setup.exe/s
Running the insteall executable in silent mode suopresses the initialization dialog and launches any needed pre-requisites in silent mode. To run the full install silently, use Setup.exe/s/v"/qn"

Chapter 2: Getting Started
16 HP Adoption Readiness Tool™
Parameter Name Usage Example/Description /v : pass arguments to Msiexec setup.exe /v"/l*v c:\test.log MYPROPERTY1=\"value1\"
/qb" Use the /v option to pass command-line options and values of public properties through to Msiexec.exe. Note that as shown above, when you want to specify that a double quote character is not a delimiter for the command line but a delimiter for the property, use
/a : administrative installation The /a option causes the installation executable to perform an administrative installation. An administrative installation copies (and uncompresses) your data files to a directory specified by the user, but it does not create shortcuts, register COM servers, or create an uninstallation log. If you want to extract the pre-requisites from setup.exe, add a path after the /a parameter to extract the prerequisites to that location. Do not use a trailing backslash. A sample command is: setup.exe /a"C:\temp"
/b: cache installation locally With the /b option, the user can specify the directory in which to cache the installation files. If you want to extract the MSI from setup.exe, specify the path after the /b parameter to extract the prerequisites to that location. Do not use a trailing backslash. A sample command is: setup.exe /b"C:\temp"
/w : wait setup.exe /w The /w option forces the installation executable to wait until the installation is complete before exiting.
/x : uninstall mode The /x option causes the installation executable to uninstall a previously installed product.
/L /L*v C:\test\install.log "/L" is the standard Windows Installer parameter used to ensure a log is created. This set of parameters would create a verbose log file with all available information using the filename install.log in the C:\test folder. Possible values include: i - Status messages w - Nonfatal warnings e - All error messages a - Start up of actions r - Action-specific records u - User requests c - Initial UI parameters m - Out-of-memory or fatal exit information o - Out-of-disk-space messages p - Terminal properties v - Verbose output

Chapter 2: Getting Started
HP Adoption Readiness Tool™ 17
Parameter Name Usage Example/Description x - Extra debugging information + - Append to existing log file ! - Flush each line to the log * - Log all information, except for v and x options
/q [n|b|r|f][+|-][!] Use any of the standard Windows Installer display option values. Windows Installer runs in full UI mode (/qf) by default. If you use any of the values other than "full UI" you must define values for the properties listed above in order for the install to succeed. Possible values include: /qn - no UI /qb - basic UI /qr - reduced UI /qf - full UI /qb+ basic UI with modal dialog at the end /qb- basic UI without a modal dialog at the end Use the ! parameter to suppress the Cancel button
For more information about Windows Installer command line parameters, refer to the Microsoft Website at http://msdn2.microsoft.com/en-us/library/Aa367988.aspx.
These parameters can be used either in a setup.ini file or passed via the command line. When used in a setup.ini file, each parameter should be on a separate line in the file.
The proper format for the file data is VariableName=value. Do not include a space before or after the '=' sign.
Running the Install with a setup.ini File
If you are using a setup.ini file, you must run the installation with a special command line switch - /m=setup.ini. For example:
setup.exe /m=setup.ini
The installation (the uPerform Express.exe file) has only two user interface elements: an initial splash screen and a possible error message as described previously. The .msi file has a full user interface typically seen in an installation package. The QUIET parameter defined previously controls the user interface level of the .msi file. To set the .exe file to have no user interface (that is, hide the splash screen and any error messages), the .exe file must be run with a "/s" command line switch. For example:
setup.exe /s

Chapter 2: Getting Started
18 HP Adoption Readiness Tool™
To set the .msi to have no user interface when run from within the .exe file, the QUIET parameter must be used. All properties must be defined because the .msi will run without a user interface.
The parameters also may be used from the command line directly. In general, spaces are used to separate the parameters on the command line. Since some values may contain spaces, those particular values should be wrapped in double-quote marks. The preceding table identifies to which parameters this applies.
If you use the /S or /M switches that pertain to the .exe file, they must precede any of the other parameters on the command line.
Running the .msi File Directly
There are other parameters that can be used when using Windows Installer. These parameters are not covered here and are not supported by the installation package (the uPerform Express .exe file). To use these parameters, or if you would prefer to run the .msi file directly, the .msi file and the prerequisite redistributables can be extracted to a local folder with the "-EXTRACT" command line. For example:
setup.exe -EXTRACT
You will be prompted to select a folder to which to extract the files. If you choose to run the .msi file directly, all prerequisites should be installed prior to the ANCILE uPerform Express client application.
Installing the uPerform Express Client Software
1. Insert the ANCILE uPerform Express CD or navigate to the location of the setup.exe file.
2. If necessary, double-click on the .exe file to begin the installation.
3. Click Next.

Chapter 2: Getting Started
HP Adoption Readiness Tool™ 19
4. Complete the following information:
Field DescriptionCompany Name Enter your company or organization name delivered
with the software. This value should be entered exactly as provided.
Product Key Enter the product key delivered with the software. This value should be entered exactly as provided. You can enter the product key during install or during a user's first use of the software. If multiple users will be using the computer, you may find it more convenient to enter the product key once during install.
5. Select the appropriate radio button to specify Anyone who uses this computer or Only for me.
6. Click Next.
7. Optionally, select Browse to specify a destination folder other than the default.
8. Optionally, select the ANCILE uPerform Client checkbox to create a desktop shortcut for the application.
9. Click Next.

Chapter 2: Getting Started
20 HP Adoption Readiness Tool™
10. Select the desired interface language from the drop-down list.
11. Click Next.
12. Click Next.
13. Click Finish.
Implementing uPerform with Citrix
If you are planning to use uPerform in a Citrix environment, perform the following procedure to ensure a smooth implementation:
1. Close the uPerform client software.
2. Locate your current uPerform resources directory. (example: START > PROGRAMS > HPADOPTION READINESS TOOL > HP ADOPTION READINESS TOOL RESOURCES).
3. Note the location of your templates directory. The default location is: C:\Documents and Settings\[user name]\Application Data\ANCILE\uPerform\versionX.xx\templates.
4. Navigate to the uPerform client program files. The default location is: C:\Program Files\HP Adoption Readiness Tool\client.
5. Create a backup copy of the install.config file.
6. Edit the install.config file to add the new location you would like to create. The area to be edited is displayed in bold below:
(i.e., D: <?xml version="1.0"?> <InstallConfig xmlns:xsi="http://www.w3.org/2001/XMLSchema-instance" xmlns:xsd="http://www.w3.org/2001/XMLSchema"> <Language>de-DE</Language> <CompanyName>ANCILE Demo test for Greg Smith</CompanyName> <ProductId>BVS85J-A2L8F3-MWWSLW-TWBMSM-XM4WKH-CUW3LS</ProductId>

Chapter 2: Getting Started
HP Adoption Readiness Tool™ 21
<BaseAppData>D:\Resources\</BaseAppData> </InstallConfig>
In Windows 7 environments, you must have Administrator rights in order to edit install.config.
7. Save and close the install.config file.
8. Start the uPerform client software.
9. The new resources directory will display similar to C:\[username]\ANCILE\uPerform\version X.xx.
10. On the Shortcut tab, update the Target field to reflect the location you noted in Step 6.
11. Copy the templates from the directory you noted in Step 3 into the new directory created in Step 9.

Chapter 2: Getting Started
22 HP Adoption Readiness Tool™
Starting the uPerform Express Editor
The uPerform Express editor operates in a standalone mode; the server delivered with the full ANCILE uPerform Express product suite is not available with the product. Consequently, options related to server functionality are disabled in the uPerform Express editor.
Starting uPerform Express Select START > PROGRAMS > HP ADOPTION READINESS TOOL > HP ADOPTION READINESS TOOL.

Chapter 2: Getting Started
HP Adoption Readiness Tool™ 23
Using the Quick Start Panel
Upon startup of the uPerform editor, the Quick Start panel is displayed.
The Quick Start panel provides easy access to the basic authoring functions, including recording and editing. You can enable or disable the display of the Quick Start panel.
Using the Quick Start Options The following options are available from the Quick Start panel:
Option DescriptionNew Starts the editor to create new uPerform Express
content. For more information, refer to Creating Content.
Open local Opens existing uPerform Express content from the local computer. For more information, refer to Opening Content.
Batch Publish Publishes one or more files locally on your computer. For more information, refer to Previewing and Publishing Content.
Go to editor Launches the editing application to provide access to all author functionality.

Chapter 2: Getting Started
24 HP Adoption Readiness Tool™
Disabling the Quick Start Panel From the Quick Start panel, deselect the SHOW QUICK START WINDOW ON STARTUP checkbox to disable display of the panel. You can also disable the display of the Quick Start panel from the TOOLS > OPTIONS... menu within the editor.
Enabling the Quick Start Panel
1. Open the editor.
2. Select TOOLS > OPTIONS... .
3. Click General on the left pane.
4. Select the Show quick start window on startup checkbox.
5. Click OK.

Chapter 2: Getting Started
HP Adoption Readiness Tool™ 25
Managing Your Editor Configuration Settings
The following basic configuration settings can be specified in the editor from the TOOLS >OPTIONS... menu. Prior to using uPerform Express to create content, you should review these settings and determine the best options for your needs:
Appearance: Enable or disable the Quick Start panel and specify the language of the uPerform Express interface. The following languages are supported in uPerform Express: Bulgarian, Catalan, Chinese (Traditional), Chinese (Simplified), Czech, Danish, Dutch (Belgium), Dutch (Netherlands), English (US), English (UK), Finnish, French (Canada), French (France), German, Greek, Hungarian, Indonesian, Italian, Japanese, Korean, Norwegian, Polish, Portuguese (Brazil), Portuguese (Portugal), Romanian, Russian, Spanish, Swedish, Thai, and Turkish.
Audio: Specify recording device and quality for audio files created with uPerform. For details, refer to Specifying Course and Simulation Audio Options (on page 43).
Recorder: Elect to capture actions in a selected target application only (ignoring applications other than the selected application), or elect to capture actions across multiple applications. When capturing a target application, child processes of the selected target application are recorded.
Logging: Specify the level of logging you want uPerform Express to record. The higher the log level, the more information the application will log. For details on setting log levels, refer to Specifying Logs (on page 27).
Document editor: Set the maximum screen size. For details on configuring the document editor, refer to Specifying Document Options (on page 43).
Simulation editor: Set options to control the display of simulation editor features. For details on configuring the simulation editor, refer to Editing and Formatting: Procedural Content (on page 103).
Course editor: Set options to control the display of course editor features. For details on using the course editor, refer to Editing and Formatting: Courses (on page 163).
Selecting the Interface Language After specifying the interface language, you must restart the editor for the changes to take effect.
1. Open the editor.
2. Select TOOLS > OPTIONS... .

Chapter 2: Getting Started
26 HP Adoption Readiness Tool™
3. Click General on the left pane.
4. Select your desired language from the Interface language drop-down list.
5. Click OK.
Specifying Recording and HTML Capture Modes
1. Open the editor.
2. Select TOOLS > OPTIONS... .
3. Click Recorder on the left pane.
4. In the Recording mode drop-down list, choose from the following options:
If you want to ThenCapture only the target application during recording
Select Application from the Recording modedrop-down list
Capture only the window for the active application(s)
Select Active Window from the Recording mode drop-down lis
5. In the Recorder Html Capture Mode drop-down list, choose from the following options:
If you want to ThenCapture only the active frame when recording in an Internet browser
Select Active Frame.
Capture only the top-most fram when recording in an Internet browser
Select Top-most Frame.
Capture the entire browser window when recording in an Internet browser
Select Entire Browser Window.
6. Click OK.

Chapter 2: Getting Started
HP Adoption Readiness Tool™ 27
Specifying Editor Options For more information on specifying document and simulation editor options, refer to Specify Document and Simulation Editor Options (on page 43).
For more information on specifying course editor options, refer to Specify Course Editor Options (on page 48).
Specifying Logs
1. Open the editor.
2. Select TOOLS > OPTIONS... .
3. Click General on the left pane.
4. Select one of the following options from the Log Level and/or Publishing Log Leveldrop-down lists:
Field DescriptionOff Turns logging off.
Low Logs critical and fatal alerts. Medium Logs critical and warning alerts. High Logs critical, warning, and information alerts. Debug Logs critical, warning, information, and debug
errors.
5. Click OK.
These logs are stored in C:\Documents and Settings\[username]\Application Data\ANCILE\uPerform Express\version X.xx\configuration\logs for Windows XP and C:\Users\[username]\AppData\Roaming\ANCILE\uPerform Expressversion X.xx\configuration for Windows Vista and Windows 7.

Chapter 2: Getting Started
28 HP Adoption Readiness Tool™
Getting Help on the uPerform Express Editor
The HP ART Help menu provides access to online help and the HP Product Support Center. From the Help menu, you can also quickly identify your HP ART version.
Accessing Help Files for the Editor Select HELP > CONTENTS... from the uPerform Express editor.
Accessing the Product Support Center Select HELP > ONLINE SUPPORT from the uPerform Express editor to access the HP Product Support Center.
Viewing the uPerform Express Editor Version
1. Select HELP > ABOUT... from the uPerform Express editor.
2. Optionally, select one or more of the following checkboxes to capture detailed trouble-shooting information in a .zip file to send to HP Product Support for troubleshooting:
Application configuration files
Computer configuration
Application logs
Version information
Include active file and/or Template
3. Click Create File to create the zip file. The filename is prefaced with 'SysInfo_', and the file is stored on the computer desktop.
4. Click OK.

Chapter 2: Getting Started
HP Adoption Readiness Tool™ 29
Exiting
If you attempt to exit the uPerform Express editor without saving your content, you will receive a prompt confirming you want to exit prior to saving.
Exiting the uPerform Editor Select FILE > EXIT from the uPerform editor.

Chapter 2: Getting Started
30 HP Adoption Readiness Tool™
Uninstalling
The uPerform Express editor application can be uninstalled from your computer using standard Microsoft Windows Installer uninstall functionality.
Uninstalling the uPerform Express Client Software
1. Select START > SETTINGS > CONTROL PANEL > ADD OR REMOVE PROGRAMS.
2. Select HP Adoption Readiness Tool from the Currently installed programs list.
3. Click Remove.
4. Click Yes at the prompt to confirm.
5. Close the Add or Remove Programs window.
uPerform Express information for individual users is stored in the Documents and Settings or Users folders on the computer. The uninstall does not remove this content.

Chapter 2: Getting Started
HP Adoption Readiness Tool™ 31
Upgrading from a Previous Version
The client upgrade is designed to allow you to install a new version on top of your current version. Refer to the ANCILE uPerform Express Release Notes and Technical Specifications prior to upgrading.
Upgrading Content and Templates Your uPerform Express content and custom templates are automatically upgraded during the following activities:
Content is upgraded when it is opened for editing.
Content and templates are temporarily upgraded during publishing. The temporary upgrades are deleted upon completion of publishing.
Existing uPerform Express templates are upgraded and placed in the current version’s Documents and Settings or Users folder the first time the uPerform Express client is launched.
To take advantage of template features in the latest uPerform Express version, you must create new content with the most current standard author template; new template features are not available in upgraded documents. For more information, refer to Creating a New Author Template.


33
Chapter 3: Exploring the Editor Workspace
The editor workspace uses standard features such as a menu bar and toolbars. The interface provides two main working areas: the content area and the task pane. These areas provide access to your content and the ability to edit your content.

Chapter 3: Exploring the Editor Workspace
34 HP Adoption Readiness Tool™
Introduction to the Editor Workspace
The editor workspace provides access to all authoring functions and the tools to help you maintain consistency and manage your content. Specifically, the editor workspace includes the following functionality:
Create and edit documents, simulations, and courses
Insert steps, actions, notes, links, and tooltips into documents and simulations
Insert hotspots and weblinks into courses
Specify formatting options, such as font and paragraph style
Use spellcheck, glossary, and annotation functionality
Create and update your website
Overview of the Content Area and Task Pane
In addition to standard application features such as menus and toolbars, the editor includes the following main areas:
The procedural content area contains the document, simulation, and screenflow views. The course content area contains the course, audio, and preview views. The content area also displays the functions to manage glossary terms and definitions and create a website.
The task pane view is customizable and can include such information as an outline view of the content, and a list of annotation sets for the current content.

Chapter 3: Exploring the Editor Workspace
HP Adoption Readiness Tool™ 35
Using the Menu The menu provides access to all author functionality.
The options available on a menu are dependent upon the content you are displaying. Based on what type of content you are viewing, the available options within a menu will differ.
Using the Toolbars The toolbar options displayed below the menu bar are customizable and are dependent upon your toolbar display selections and the content you are displaying. Based on what type of content you are viewing, the available toolbar options will differ.

Chapter 3: Exploring the Editor Workspace
36 HP Adoption Readiness Tool™
1. To toggle the display of a toolbar, select VIEW > TOOLBARS... .
2. Double-click on a toolbar in the list to toggle the toolbar display.
Customizing a Toolbar
1. Select VIEW > TOOLBARS... .
2. Click Commands on the left pane.
3. Select the toolbar to be customized from the drop-down list.
4. Use the right arrow to add a command to the toolbar.
5. Use the up and down arrows to sequence commands on the toolbar.
6. Use the X to remove a command from the toolbar.
7. Click OK.

Chapter 3: Exploring the Editor Workspace
HP Adoption Readiness Tool™ 37
Creating a Toolbar
1. Select VIEW > TOOLBARS... .
2. Select Toolbars on the left pane.
3. Click New... .
4. Enter a name, and click OK.
5. Select the new toolbar in the Toolbars list.
6. Click Commands on the left pane.
7. Click the right arrow to move the highlighted command onto the toolbar.
8. Use the up and down arrows to sequence commands on the toolbar. Optionally, click InsertSeparator to insert a line below the currently-highlighted command.
9. Click OK.
Renaming a Toolbar
1. Select VIEW > TOOLBARS... .
2. Select Toolbars on the left pane.
3. Select the toolbar name.
4. Click Rename... .
5. Enter a new name for the toolbar.
6. Click OK.
Deleting a Toolbar
1. Select VIEW > TOOLBARS... .
2. Select Toolbars on the left pane.
3. Select the toolbar name.
4. Click Delete.

Chapter 3: Exploring the Editor Workspace
38 HP Adoption Readiness Tool™
5. Click OK at the confirmation prompt.
Using Right-Click Menus
Right-click menus are available throughout the editor workspace to provide shortcut methods of performing a variety of tasks. The menu options differ depending upon the type of field or object that is selected when the right-click action is performed.
Some of the right-click menu options available include:
Cut
Copy
Paste
Delete
Undo/Redo
Edit steps, actions, notes, and callouts
Edit tooltips, screens, and images
Various character and paragraph format options
Various insertion and editing options
Using the Content Area
The content area displays a WYSIWYG (what you see is what you get) view of the underlying extensible markup language (XML) structure of the document and simulation.
Changing Content Views Tabs in the lower left allow you to select the desired view of procedural content: document, simulation, or screenflow. Additionally, you can right click on an item in the task pane and select "Edit in document view" or "Edit in simulation view". If you are in course mode, you can select the desired view of course content: course, audio, or preview. If you are in website mode, you can select the page or content view.

Chapter 3: Exploring the Editor Workspace
HP Adoption Readiness Tool™ 39
To display a particular view in the content area, select the desired tab or select VIEW > [CONTENTVIEW] .
You may encounter a slight time delay when switching between views. This is due to the processing necessary to reformat the data for display. It is good practice to save your file before switching the views.
Viewing the Status Bar The status bar at the bottom of the editor window provides information on processing status and the glossary terms or page links remaining within the system limit.
Using the Task Pane The following task panes are available in the editor. Selection availability is dependent on the file type that is open, and the view displayed, and the connection to the server.
Annotations: Displays the annotation sets available for the displayed document.
Translated Documents: Displays links to similar content available on the uPerform Express server (not applicable for product).
Collaboration: Displays discussions available on the uPerform Express server (not applicable for product).
Contexts: Displays document context information stored in the uPerform Express server (not applicable for product).
Course: Displays the lessons and pages in the course.
Layout: Displays an outline view of the sections and the steps in the document.
Steps: Displays the steps in the simulation.
Version History: Displays version information stored in the uPerform Express server (not applicable for product).

Chapter 3: Exploring the Editor Workspace
40 HP Adoption Readiness Tool™
Pages: Displays page hierarchy information for the website.
Glossary: Displays the list of terms.
When you click on an element in the task pane, the content area refreshes to display the corresponding information in the content area. To change the displayed task pane, select the desired pane from the VIEW menu, or click the down arrow in the upper right of the task pane.

41
Chapter 4: Creating and Opening Content
In addition to recording a target application to produce a document and simulation, the editor can be used to create and open ANCILE uPerform Express content independent of the recorder.

Chapter 4: Creating and Opening Content
42 HP Adoption Readiness Tool™
Introduction to Creating and Opening Content
In addition to recording a task to create procedural content, you can use the editor to:
Create a file into which recorded steps and amplifying information can be added. When you create content, the document, simulation, and screenflow views are generated.
Rapidly create eLearning courses. When you create course content, the course, audio, and preview views are generated.
Combine concepts, procedures, and exercises related to a series of tasks or a process into a student guide.
Combine multiple uPerform eLearning courses and documents into a single SCORM package for use with an LMS.
Lastly, the editor is used to create a project-wide glossary of terms and definitions and a website to provide end users with access to content.

Chapter 4: Creating and Opening Content
HP Adoption Readiness Tool™ 43
Specify Document and Simulation Editor Options
You have several options to control the display of features within the document and simulation editor.
Specifying Course and Simulation Audio Options
1. Select TOOLS> OPTIONS... on the main window.
2. Click Audio on the left pane.
3. Complete the following fields:
Field DescriptionRecording Device Specify the input recording device. This selection is
machine specific.
Recording Quality Specify the audio quality setting. Setting MP3 WAVHigh 320kbps 16-bit Medium 128kbps 8-bit Low 64kbps 8-bit
4. Click OK to save your changes and close the window.

Chapter 4: Creating and Opening Content
44 HP Adoption Readiness Tool™
Specifying Document Options
1. Select TOOLS > OPTIONS... on the main window.
2. Click Document on the left pane.
3. Complete the following fields:
Field DescriptionWidth Specify the maximum pixel width for the displayed
document.
Height Specify the maximum pixel height for the displayed document.
4. Select Show R/O/C column to display the Required, Optional, Conditional columns in the document editor.
5. Optionally, select Use full-text option value in R/O/C column.
6. Select the Show callouts checkbox to enable the display of callouts in the document editor.
Enabling this option does not affect published output.
7. Click OK to save your changes and close the window.

Chapter 4: Creating and Opening Content
HP Adoption Readiness Tool™ 45
Specifying Simulation Editor Options
1. Select TOOLS > OPTIONS... on the main window.
2. Click Simulation Editor on the left pane.
3. Complete the following fields:
Field DescriptionMouse action Specify the color of the mouse action displayed in the editor.
Key action Specify the color of the key action displayed in the editor. Edit action Specify the color of the text action displayed in the editor. Tooltip Specify the color of the tooltip displayed in the editor. Action hotspot: Width Specify the initial width of the hotspot.
Action hotspot: Height Specify the initial height of the hotspot. Note: Width Specify the initial width of the note. Note: Height Specify the initial hieght of the note.
4. Optionally, choose custom colors by clicking to the right of the color drop-down list.
5. Select Show action notes to display action notes in the simulation editor.
6. Click OK to save your changes and close the window.

Chapter 4: Creating and Opening Content
46 HP Adoption Readiness Tool™
Specifying Step Filter Options
1. Select TOOLS > OPTIONS... on the main window.
2. Select the Step Filters menu on the left pane.
3. Choose from the following options:
Field DescriptionHighlight steps with missing text in edit actions
This option will highlight edit steps in the task pane that are missing text in an edit action.
Highlight steps with missing hint text in edit actions
This option will highlight edit steps in the task pane that are missing hint text.
Highlight steps with unknown control types
This option will highlight steps in the task pane that contain unknown control types. For more information on control types, refer to Editing an Action: Advanced (on page 131).
Highlight steps with broken step links
This option will highlight steps in the task pane that contain broken step links.
Highlight steps with possible incorrect hotspot location
This option will highlight steps in the task pane that might contain incorrect hotspot locations.
Highlighting displays in the task pane as a warning icon. When you hover the mouse over the step, a tooltip will display containing more details in regard to the missing information.

Chapter 4: Creating and Opening Content
HP Adoption Readiness Tool™ 47
Specifying Screenshot and Scripting Options for the Recorder
1. Select TOOLS > OPTIONS... on the main window.
2. Click Recorder on the left pane.
3. Select Always use desktop screen shot in the Document editor to display the entire desktop screenshot in your document.
4. Select Always use desktop screen shot in the Simulation editor to display the entire desktop screenshot in your simulation.
5. Select Enable interaction with SAP Scripting (for SAP Windows GUI context-sensitive help) to capture screen information for context-sensitive help.
6. Click OK.

Chapter 4: Creating and Opening Content
48 HP Adoption Readiness Tool™
Specify Course Editor Options
You have several options to control the display of hotspots within the course editor. For more information, refer to Inserting a Hotspot on an Image (on page 187).
Specifying Course Editor Options
1. Select TOOLS > OPTIONS... on the main window.
2. Click Course Editor on the left pane.
3. Complete the following fields:
Field DescriptionBackground color Specify the color of the hotspot background.
Width Specify the initial width of the hotspot. Height Specify the initial height of the hotspot.
4. Optionally, choose custom colors by clicking to the right of the color drop-down list.
5. Click OK to save your changes and close the window.

Chapter 4: Creating and Opening Content
HP Adoption Readiness Tool™ 49
Creating uPerform Content
Creating Content
1. From the editor, select FILE > NEW.
2. Enter a name in the Name field.
While there is no limit to the amount of characters in the name, the uPerform Express server will display only the first 60 characters.
3. In the Type drop-down list, select one of the following options:
If You Want To ThenCreate and record a new document Select Recording.
Create a blank document Select Document.Create a course Select Course.Create a student guide Select Student Guide.Create a course package Select Course Package.
Create a template For more information, refer to Using Author Templates (on page 267).
Create a glossary Refer to Creating a Glossary (on page 227).
Create a website Refer to Creating a Website (on page 339).
4. Select a template from the Template listbox.
5. Select a language from the Language drop-down list.
This option is not available for course packages.

Chapter 4: Creating and Opening Content
50 HP Adoption Readiness Tool™
6. Click Browse ... to select a location in which to store your uPerform Express content.
The default location for Windows XP is C:\Documents and Settings\[username]\My Documents. The default location for Windows Vista and Windows 7 is C:\Users\[username]\Documents.
7. Click OK.
Selecting Recording displays the Recorder window. Selecting Document creates a blank document. Selecting Course displays the root course page in the editor window.
8. If you selected Course, choose one of the following stencils:
Field DescriptionStandard - Flash This stencil creates a standard content page
containing a single Flash file. Standard - Full This stencil creates a standard content page with
text.Standard - Half - Bottom This stencil creates a standard content page with text
on the bottom of the page. An optional image can be placed on top.
Standard - Half - Left This stencil creates a standard content page with text on the left of the page. An optional image can be placed to the right.
Standard - Half - Right This stencil creates a standard content page with text on the right of the page. An optional image can be placed to the left.
Standard - Half - Two Image - Bottom
This stencil creates a standard content page with text on the bottom of the page. An optional two images can be placed on top.
Standard - Half - Two Image - Left
This stencil creates a standard content page with text on the left of the page. An optional two images can be placed to the right.
Standard - Image This stencil creates a standard content page containing an image.
Standard - Image - Diagonal - Left
This stencil creates a standard content page with text on the top left and bottom right of the page. An optional two images can be placed diagonally within the stencil.
Standard - Image - Diagonal - Right
This stencil creates a standard content page with text on the top right and bottom left of the page. An optional two images can be placed diagonally within the stencil.
Simulation This stencil creates a standard content page that allows you to insert a uPerform Express simulation file.

Chapter 4: Creating and Opening Content
HP Adoption Readiness Tool™ 51
9. Click OK.
For more information on editing and formatting procedural content, refer to Editing and Formatting: Procedural Content (on page 103).
For more information on editing and formatting course content, refer to Editing and Formatting: Courses (on page 163).
For more information on editing and formatting student guides, refer to Editing and Formatting: Student Guides (see "Editing and Formatting: Student Guides and Course Packages" on page 209).

Chapter 4: Creating and Opening Content
52 HP Adoption Readiness Tool™
Open uPerform Express Content
Only one content item can be open in the editor at a time (for example, one course).
Opening Express Content
1. From the editor, select FILE > OPEN > OPEN LOCAL... .
2. In the Open window, browse to the location of your uPerform Express document, simulation, course, glossary, or website, and click Open to display the content in the editor.
uPerform Express document and simulation files have a .udc extension. uPerform Express courses have a .ulc extension. uPerform Express student guide files have a .usg extensionuPerform Express glossary files have a .upg extension. uPerform Express website files have a .uws extension. You can also use Windows Explorer to browse to the file, and double-click to open the file in the editor.

53
Chapter 5: Recording Procedural Content
ANCILE uPerform Express records your actions in Microsoft Windows, web-based, and enterprise applications, and outputs a professionally formatted document and simulation. You can capture screens, buttons, edit fields, and more in the target application.
The recording process captures information to simultaneously produce both a simulation view and a document view of procedural content.

Chapter 5: Recording Procedural Content
54 HP Adoption Readiness Tool™
Introduction to Recording Procedural Content
ANCILE uPerform Express reduces procedural content development time and cost by automatically capturing each screen, step, field entry, and button in the target application. ANCILE uPerform Express watches your actions in the application, captures each step in the task, and converts the result to professionally formatted documents and simulations. You simply start the recorder, perform the actions that you would like to document, turn the recorder off, and then make edits to the resulting content.
ANCILE uPerform Express captures actions in the following target applications:
Standard Microsoft Windows and web browser applications: Support for these applications is provided in the uPerform Express base recorder. Application adherence to World Wide Web Consortium (W3C) and Microsoft Windows standards will determine the consistency and quality of recording. Due to the technology involved in recording, the DOS command window cannot be recorded.
HP: Support for HP applications is provided in the uPerform Express HP recorder plug-in.
SAP: Support for SAP applications is provided in the uPerform Express SAP recorder plug-in.
Oracle: Support for this application is provided in the uPerform Express Oracle recorder plug-in.
PeopleSoft: Support for this application is provided in the uPerform Express PeopleSoft recorder plug-in.
Citrix: Support for applications in the Citrix Presentation Server 4.5 environment is also available.
Siebel: Support for this application is provided in the uPerform Express Siebel recorder plug-in.
For detailed information on enterprise applications supported by the uPerform Express recorder, refer to the ANCILE uPerform Express Technical Specifications.
In addition, control recognition recording is available for non-accessible applications such as Adobe forms. Control recognition recording uses image processing to capture screens and entered information. For more information, refer to Specifying Recorder Tuning Options (on page 62).

Chapter 5: Recording Procedural Content
HP Adoption Readiness Tool™ 55
Preparing to Record
Before you begin recording the target application, prepare your computer and the data you will need to complete a task in the application. In addition, you should perform several test recordings using your target application. You may find it helpful to prepare a quick reference that outlines for authors the standards you are using for recording and provides any helpful tips to use during the recording and editing processes.
If you are planning to use the guided Re-Record functionality, refer to Managing Content Languages (on page 69) before you begin the recording process.
Preparing Your Computer
To create a consistent recording environment, the following are several suggestions for ensuring standardization among all authors:
Ensure all authors are using the same windows and buttons scheme or theme (for example, in Windows XP, Windows XP style.
Ensure all authors are using the same Microsoft Windows color scheme (for example, in Windows XP, Default [blue].
Ensure all authors are using the same Microsoft Windows color palette settings (for example, Highest [32 bit]).
Standardize the Desktop area setting for all authors to maintain consistency for screen captures. A setting of 1024 by 768 pixels is suggested.
Ensure all authors are using the same Microsoft Windows font size (for example, "Normal").
Ensure all authors are using the same HP GUI version and have specified consistent font and color settings in the HP GUI.
If you are recording Adobe forms in Adobe Reader, ensure all authors turn off the Adobe Reader "protected mode" setting.

Chapter 5: Recording Procedural Content
56 HP Adoption Readiness Tool™
Preparing Your Data
Before recording a task, you should identify data that will allow you to navigate through the task and will also serve as example data in the procedure. This will ensure you can proceed through the task easily and without errors.
You may find it helpful to sketch a screen flow to capture usable data and provide you with a map to use while recording the task. A rough sketch can be helpful while recording and can serve as a reference later during editing to verify the recorded data.

Chapter 5: Recording Procedural Content
HP Adoption Readiness Tool™ 57
Starting the Recorder
ANCILE uPerform Express does not support recording on secondary monitors. If you use dual monitors, ensure that the application you want to record is displayed on the primary monitor.
Start Recording
1. Select START > PROGRAMS > HP ADOPTION READINESS TOOL > HP ADOPTIONREADINESS TOOL.
2. Use one of the following two methods to start the recorder:
If ThenYou are starting the recorder from the Quick Start panel
Select the New option.
You are starting the recorder from the editor application
Select FILE > NEW.
3. Select Recording from the Type drop-down list.
4. Complete the following fields:
Field DescriptionName Enter the filename.
Do not use special characters in the filename.

Chapter 5: Recording Procedural Content
58 HP Adoption Readiness Tool™
Template Select the template from the listbox.
Language Select the language for the document from the drop-down list.
Location Enter, or browse to, the location where the file will be saved. The default save locations are Windows XP: C:\Documents and Settings\[username]\My Documents Windows Vista and Windows 7: C:\Users\Documents
5. Click OK.
6. Select one of the following options:
If You Want To ThenRecord across a series of applications. Go to Step 9.
Record a single target applicationIf you have specified to record a single target application, you must specify the application after entering the project and template information. For information on specifying a recording mode, refer to Specifying a Recording Mode (see "Specifying Recording and HTML Capture Modes" on page 26).
Go to Step 7.
Record the active window for the application(s).
Go to Step 9.
7. From the Select Application window, select the target application.

Chapter 5: Recording Procedural Content
HP Adoption Readiness Tool™ 59
8. Click OK to display the Recorder window.
9. Click to start recording.
For detailed information on capturing various controls, refer to Capturing Controls in the Target Application (see "Capturing Controls" on page 60).
Displaying the Recorder Preview Pane
During recording, a real-time preview of the recorded actions is displayed in a preview pane in the Recorder window. The preview pane allows you to view data as it is captured by uPerform Express. The preview pane and window are not captured during recording.
You can hide or display the recorder preview pane.
Click to toggle the display of the preview pane during recording.

Chapter 5: Recording Procedural Content
60 HP Adoption Readiness Tool™
Capturing Controls
The uPerform Express recorder captures a variety of interface objects, including screens, buttons, tabs, checkboxes, drag-and-drop actions, menu paths, edit fields, grids, trees, radio buttons, match codes, list items, and combo boxes.
uPerform Express does not support recording on secondary monitors. If you use dual monitors, ensure that the application you want to record is displayed on the primary monitor.
The following table provides an overview of recorder capabilities, limitations, and the steps you must take to capture specific objects.
Object Description Required Steps Edit Fields The recorder captures field labels
and data. The field name, a generic placeholder description, and the data that was entered will be captured.
1. Click or tab in the field. 2. Type in the field. 3. Exit the field. To capture default data, click or tab into the field containing the default data and exit the field. The default data and field name will be captured. In the document view, data is inserted into a Field/Description table. If a value exists in the field on exit, the recorder will capture this value. If the field is empty, the recorder captures a step without a value in the field.
Menu Paths uPerform Express automatically records menu paths. The recorder captures menu text when you click on the text.
Simply execute the menu path, and the recorder will capture the first initial click as a step and then display the full menu path as a single step.
Grids When entering data into a table, the field labels are typically located at the top of the column. The recorder will capture both the row and the column label.
1. Click in the grid cell. 2. Enter data. 3. Click out of the cell.

Chapter 5: Recording Procedural Content
HP Adoption Readiness Tool™ 61
Object Description Required Steps Screens New screens are captured
automatically as you progress through a task.
The following types of actions will trigger a new screenshot to be captured. The order that the criteria are applied is as follows: 1. When you take an action on a screen, the recorder checks if the screen title is different than on the last screen captured. If yes, a new screen image is captured. 2. If the screen title did not change, the recorder checks if the dimensions of the active region are different than on the last screen captured. If yes, a new screen image is captured on your next action. 3. If the action is performed on a tab within a dialog box, a new screen image is captured for the menu item before the next step. The recorder also captures the last screen upon stopping the recording process.
Match Codes, Buttons, Checkboxes, Combo Boxes, Tree Items, Tab Controls, Labels, Links, Radio Buttons, and Images
The recorder captures match codes, the button image, the checkbox or radio button and the associated label, and any other images on which you click.
Click on the button, checkbox, radio button, or image. If you are planning to Re-Record and are selecting a combo box, be sure to click a selection in a combo box, even if the default value in the combo box is the one desired.
Combination Keystrokes
Keystrokes are captured and recorded as new steps.
Type combinations keystrokes Ctrl+N and Alt+F are supported. Command combination keystrokes ALT+TAB, CTRL+ALT+DEL, and ALT+ESC are not supported.
Function Keys Function keys are captured and recorded as new steps.
Type the function keys F1-F9, F11, and F12.

Chapter 5: Recording Procedural Content
62 HP Adoption Readiness Tool™
Specifying Recorder Tuning Options
The recorder tuning option allows you to specify how you want the recorder to handle certain actions during the recording process. Thsese options are useful for when you want to record supported, target applications, as well as record unknown and unaccessible controls.
Selecting the Recorder Tuning Options
1. Click on the Recorder window.
2. Choose from the following options:
Field DescriptionEnable target recognition Select Enable target recognition to enable the
recorder to capture screen regions, titles, and context-sensitive help data that is specific to the target application. Go to Step 3.
Use only Image Processing for control recognition
Select Use only Image Processing for control recognition to capture control information in a screen shot when it is known that the target is not captured well by a plug-in. An example of such a target is an Adobe Form. For a list of available plug-ins, refer to the ANCILE uPerform Express Technical Specifications.Go to Step 5.
3. Choose one of the following options:
Field DescriptionEntire Value Captures characters in a text box after the user
exits the text box.
Typed characters Monitors the captured characters as they are typed based on keyboard or IME output.

Chapter 5: Recording Procedural Content
HP Adoption Readiness Tool™ 63
4. Select the amount of delay for the screen shot capture.
5. Click OK.

Chapter 5: Recording Procedural Content
64 HP Adoption Readiness Tool™
Using the Screen Percent Differential Feature
The screen differential allows you to choose the percent of pixels that must change on a screen before a new screen shot is recorded. This is helpful if you are recording several actions on the same screen as you might not want a new screen shot for each action unless a significant portion of the screen has changed.
A higher screen differential will yield fewer screen shots; a lower screen differential will yield more screen shots.
Adjusting the Screen Percent Differential Select, or enter, the percent of pixels in the field on the Recorder window.

Chapter 5: Recording Procedural Content
HP Adoption Readiness Tool™ 65
Using Image Mode
The image mode option allows you to capture a specific area of the screen that does not have clearly defined edges or boundaries. The resulting image is inserted into your content as a new step.
Using Image Mode During Recording
1. Open a document containing at least one recorded step.
2. Click on the Recorder window to activate image mode.
The cursor displays as a crosshair.
3. Click in the window where you want to capture an image.
4. Click and hold the left mouse button as you drag a rectangle around the image you want to capture.
5. Release the mouse button to turn off image mode and capture the selected area.
The image will be inserted as a new step.

Chapter 5: Recording Procedural Content
66 HP Adoption Readiness Tool™
Using Undo and Redo
The undo and redo options allow you to remove and restore data captured during recording.
Using Undo During Recording Click on the Recorder window to remove the last item recorded.
You can click more than once to remove additional items that have been recorded. The undo functionality caches up to twenty steps.
Using Redo During Recording Click on the Recorder window to restore the last item that was removed with the undo function.
You can click more than once to restore additional items that were removed.

Chapter 5: Recording Procedural Content
HP Adoption Readiness Tool™ 67
Minimizing the Recorder Window
You can minimize the Recorder window to the Microsoft Windows task tray.
Click on the Recorder window to minimize the window during recording.
To restore the window display, right-click on the icon in the task tray and select Show/HideToolbar.

Chapter 5: Recording Procedural Content
68 HP Adoption Readiness Tool™
Pausing and Stopping the Recorder
You can pause the recorder during the data capture process. While the recorder is paused, you can open other applications and perform other tasks.
When you have finished recording, you must stop the recorder to complete processing and save your content.
Pausing the Recorder Click on the Recorder window to pause the recorder.
Remember to resume recording when you are ready.
Stopping the Recorder
Click on the Recorder window to stop the recorder.

69
Chapter 6: Managing Content Languages
ANCILE uPerform Express expedites the creation of content in other languages. In particular, guided Re-Record functionality allows you to easily repeat steps from an original document in a new document.

Chapter 6: Managing Content Languages
70 HP Adoption Readiness Tool™
Introduction to Managing Content Languages
ANCILE uPerform provides several options to manage the language of your content so you can easily produce translated versions of your uPerform content. Three options are available for managing content languages:
Create translated documents: Creates a new uPerform document with text in the new target language(s). This functionality is useful in cases where you have customized your uPerform documents and phrases and want to export content in XLIFF format for translation in order to create a new version with translated text. For more information, refer to Creating Translated Documents (on page 71).
Use Guided Re-Record to capture graphics in another language: Creates a new uPerform document with text and graphics (screens, buttons, and images) in the new target language(s.) This functionality is useful if you have customized your documents and phrases and plan to include translated graphics in your new documents. For more information, refer to Using Guided Re-Record Functionality (on page 80). This is the most robust translation option.
Create translations of standard uPerform-provided boilerplate text: Creates a new uPerform document by morphing uPerform-provided boilerplate text into another language. This functionality is useful if you have not customized your uPerform documents and phrases. For more information, refer to Change the Language of Default Text (on page 160) for instructions on changing the document language property.

Chapter 6: Managing Content Languages
HP Adoption Readiness Tool™ 71
Creating Translated Documents
Exporting Content for Translation
1. Open the uPerform Express content.
2. Select FILE > MANAGE CONTENT LANGUAGE > EXPORT [CONTENT NAME].
3. Select the language(s) corresponding to the translated content to be created.
4. Choose from the following options:
Field DescriptionCreate XLIFF file for Re-Recording
This option is not recommended for use with exporting content for translation because it does not include step text or screen titles. For more information on Re-Recording, refer to Using Guided Re-Record Functionality (on page 80).
Create XLIFF file and include screen titles
Select Create XLIFF files and include screen titles to create an XLIFF file for translation that includes step text and screen titles.
Create XLIFF file without including screen titles
Select Create XLIFF files without including screen titles to create an XLIFF file for translation that includes step text but does not include screen titles.
Include annotation sets Select this option if you want to include your annotations in the XLIFF file.
5. Click to browse to an export location.

Chapter 6: Managing Content Languages
72 HP Adoption Readiness Tool™
Note the export location for later use.
6. Click OK.
7. Click Export.
8. Perform one of the following options:
If You Want To ThenEdit the files to translate Refer to Editing Exported Files.
Close the export summary window Click OK.
Editing Exported Files For each exported language, one XML Localization Interchange File Format (XLIFF) file is created. The exported XLIFF file(s) contain all phrases and author-entered text in the content. Both the phrases and the author-entered text must be translated. Boilerplate text provided with the template (for example, "Use this procedure to") is automatically translated via the phrases provided in the template.
The file is formatted to facilitate translation by displaying the source (original) text co-located next to the target translated text.
1. Open the exported XLIFF file in the desired editor.
The XLIFF file can be edited in Notepad, in an HTML editor, or via a specialized XLIFF editor such as Xliff Editor or Heartsome.

Chapter 6: Managing Content Languages
HP Adoption Readiness Tool™ 73
2. Edit the text or data values as necessary.
3. Save the file(s).
Importing Translated Content You must perform an export before you can import the files. For more information, refer to Exporting Content for Translation (on page 71).
1. Open the uPerform Express content that has been exported and edited.
2. Select FILE > MANAGE CONTENT LANGUAGE > IMPORT [CONTENT NAME].
3. Click to select the import location.
This location must match the Export to location specified in Exporting Content for Translation (on page 71).
4. Select the exported language(s) for import.
5. Click OK.

Chapter 6: Managing Content Languages
74 HP Adoption Readiness Tool™
6. Click Import.
7. Click OK.
Create Translations for a Single Document
1. Open the uPerform content for which you want to create translated file(s).
2. Select FILE > MANAGE CONTENT LANGUAGE > CREATE TRANSLATIONS.
3. Expand the template used for the content.
4. Select the language(s) corresponding to the translated content files to be created.
5. Click next to Outbox to select an Outbox location.
6. Click Translate.
7. Click OK.

Chapter 6: Managing Content Languages
HP Adoption Readiness Tool™ 75
8. On the Translation Summary window, click the name of the translated file to view in the uPerform editor.
Batch Exporting Content for Translation
1. Select FILE > MANAGE CONTENT LANGUAGE > BATCH EXPORT... .
2. Expand the template(s) used for the content.
3. Select the language(s) corresponding to the new translation content to be created.
4. Click next to Export from to select the folder containing the content to export.
Note the export location for later use.
All uPerform Express content in this location that is associated with the selected template(s) will be processed.
5. Click OK.
6. Click next to Export to to select an export location.
Note the export location for later use.
7. Click OK.
8. Choose from the following options:

Chapter 6: Managing Content Languages
76 HP Adoption Readiness Tool™
Field DescriptionCreate XLIFF file for Re-Recording
This option is not recommended for use with exporting content for translation because this option does not include step text. For more information on Re-Recording, refer to Using Guided Re-Record Functionality (on page 80).
Create XLIFF file and include screen titles
Select Create XLIFF files and include screen titles to create an XLIFF file for translation that includes screen titles.
Create XLIFF file without including screen titles
Select Create XLIFF files without including screen titles to create an XLIFF file for translation that does not includes screen titles.
Include annotation sets Select this option if you want to include your annotations in the XLIFF file.
9. Click Export.
10. Perform one of the following options:
If You Want To ThenEdit the files to translate text and values
Refer to Editing Exported Files (see "Editing Exported Content for Guided Re-Record" on page 88) for information on editing exported files.
Close the batch export summary window
Click OK.

Chapter 6: Managing Content Languages
HP Adoption Readiness Tool™ 77
Batch Importing Translated Content You must perform an export before you can import files. For more information, refer to Batch Exporting for Translation (see "Batch Exporting Content for Translation" on page 75).
1. Select FILE > MANAGE CONTENT LANGUAGE > BATCH IMPORT... .
2. Expand the template(s) used for the content.
3. Select the exported language(s) for the content.
4. Click next to Import to to select the folder containing the content to import.
This location must match the Export from location specified in Batch Exporting for Translation (see "Batch Exporting Content for Translation" on page 75).
5. Click OK.
6. Click next to Import from to select the folder containing the content to import.
This location must match the Export to location specified in Batch Exporting for Translation (see "Batch Exporting Content for Translation" on page 75).
7. Click OK.

Chapter 6: Managing Content Languages
78 HP Adoption Readiness Tool™
8. Click Import.
9. Click OK.
Creating Translated Files in Batch Mode
1. Select FILE > MANAGE CONTENT LANGUAGE > BATCH CREATE TRANSLATIONS.
2. Expand the template(s) used for the content.
3. Select the language(s) corresponding to the translated content files to be created.
4. Click next to Inbox to select an Inbox location.
5. Click next to Outbox to select an Outbox location.
6. Click Translate.
7. Click OK.

Chapter 6: Managing Content Languages
HP Adoption Readiness Tool™ 79
8. On the Translation Summary window, click the name of a translated file to view in the uPerform editor.

Chapter 6: Managing Content Languages
80 HP Adoption Readiness Tool™
Using Guided Re-Record Functionality
Guided Re-Record functionality allows you to recreate steps from an original document into a new document, as well as capture translated screen images and graphics.
When you open an existing document and select to Re-Record, a guide pane opens in the recorder preview pane to display the guide steps. Use the guide steps to help you recreate the required actions in the target language.

Chapter 6: Managing Content Languages
HP Adoption Readiness Tool™ 81
Re-Record Prerequisites: Before You Get Started
Before you initially record a document that will eventually be re-recorded, you must:
Review Capturing Controls in the Target Application (see "Capturing Controls" on page 60) for an overview of recorder capabilities, limitations, and the steps you must take to capture specific objects.
Review recording preparation guidelines and recorder options as specified in Specify Document and Simulation Editor Options (on page 43).
Select the desired language(s) for Re-Record within the template as specified in Specifying General Settings: Languages.
Use the following guidelines to help ensure a smooth re-recording session:
Ensure the desired target languages are installed in the application to be recorded.
Use the pause feature if you must take a break. Stopping the re-recording will end the session.
Do not move action notes, simply perform the action as guided. If you think you will need to adjust the position before re-recording, perform the adjustment in the original source document before you start the re-recording session.
Ensure you are re-recording with the same screen resolution as the original content.
Add any additional information to the resulting document via the Insert > Steps functionality in the uPerform editor; however, if you need to pause the recorder to record additional steps into a document based on a language-related change in process, ensure you resume the guided re-record functionality before continuing.
Do not resize or move windows during a session.
Perform only the actions necessary to perform the tasks being documented.

Chapter 6: Managing Content Languages
82 HP Adoption Readiness Tool™
Re-Record Scenarios
Guided Re-Record allows you to recreate steps in a new language document, as well as apply translations to documents after Re-Recording has been completed.
Scenario 1: Translating Before Re-Record
Pre-translation guided Re-Record is used with an exported, translated, and imported original document. Scenario 1 is the "all at once" option. The re-recorded document contains all translations, with no additional action required beyond basic editing and quality assurance. For more information on applying translations, refer to Importing Content for Guided Re-Record Using Scenario 1 (on page 88):
1. Export phrases.
2. Translate phrases.
3. Import phrases.
4. Re-record the document.
Scenario 2: Translating After Re-Record
Post-translation guided Re-Record can be used before translation is complete. This allows you to re-record your documents and create your XLIFF translation files from the re-recorded document. This is useful if you plan to add additional information to your re-recorded documents and want to ensure that information is translated. For more information on applying translations, refer to Applying XLIFF Translations for Guided Re-Record Using Scenarios 2 and 3:
1. Re-record the document
2. Export from the re-recorded document.
3. Translate phrases.
4. Apply the XLIFF translations to the re-recorded document.
Scenario 3: Using Translation and Guided Re-Record in Parallel
A parallel translation for guided Re-Record can be used before translation is complete. Since the export is from the original document, translations applied to the re-recorded document will overwrite what was captured by the Recorder during the re-record process. This allows you to retain and translate custom step text you added to the original document.

Chapter 6: Managing Content Languages
HP Adoption Readiness Tool™ 83
It is recommended that screen titles, button names, menu and list item values, etc. not be translated as these may appear differently in the new language. For example, if your step text reads, "Press Collect," where "Press" is the custom text and "Collect" is the button name, you will be able to retain and translate "Press." For more information on applying translations, refer to Applying XLIFF Translations for Guided Re-Record Using Scenarios 2 and 3.
1. Export from the original document.
2. Translate phrases.
3. Re-record the document.
4. When both translation and re-recording are complete, apply the XLIFF translations to the re-recorded document.

Chapter 6: Managing Content Languages
84 HP Adoption Readiness Tool™
What Happens During Guided Re-Record?
Guided Re-Record is a simple, flexible way to create translated content for a wide range of applications. Guided Re-Record can be used on any .udc file.
During the guided Re-Record process, uPerform Express displays an on-screen script that you can follow while recording a new uPerform document in a different language. Guided Re-Recording displays a list of screens and steps from a previously recorded document, and prompts you with the steps to take to record the same steps again in the target application.
Guided Re-Record screen prompts display as:
A new pane in the recorder toolbar that displays the list of steps in the original uPerform file
An action hotspot directly on the application screen that indicates where the next action should occur
An action note that displays the action text for the step
Using Guided Re-Record
1. Open the document to be Re-Recorded.
2. Select FILE > MANAGE CONTENT LANGUAGE > RE-RECORD [DOCUMENT NAME].
3. If presented with the prompt, choose from the following options:

Chapter 6: Managing Content Languages
HP Adoption Readiness Tool™ 85
If You Want To ThenSave the changes Click OK.
Continue Re-Recording Click Cancel.
4. Select one of the available language(s) from the Languages drop-down list.
5. Click to select an Outbox location.
6. Click OK.
7. Click Re-Record.
8. Click to begin the Re-Record process.
9. Use the guide pane as a prompt to assist in recreating the steps in the target application.
10. Optionally, perform one of the following during the Re-Record process. If the toolbar is hidden, right-click on the recorder icon in the system tray to access these functions.
If You Want To ThenPause the Re-Record guide script Click .
Use the guide script pause feature if you need to record an additional language-based step that is not part of the original document.
Ensure you click when you are ready to resume the Re-Record guide script.
Pause the recorder Click .Use the record pause feature if you need to take a break from recording and Re-Recording. Ensure you click when you are ready to resume recording. If you have also paused the Re-Record guide script, ensure you click to resume.
Stop the Re-Record process Click .Use the stop feature only when you are finished Re-Recording. The stop feature ends Re-Recording for the document.

Chapter 6: Managing Content Languages
86 HP Adoption Readiness Tool™
If You Want To ThenHide the Re-Record pane Click .Hide or show the guide pane Click . Hide or show notes
Click . Hide or show hotspots
Click .View step details
Click to open an additional step detail pane to help ensure you re-record the correct information.
11. Click to stop the guided Re-Record process.
The re-recorded document will open in the editor.
Exporting, Importing, and Applying XLIFF Translations
Exporting Content for Guided Re-Record
1. Open the uPerform Express content.
2. Select FILE > MANAGE CONTENT LANGUAGE > EXPORT [CONTENT NAME].
3. Select the language(s) corresponding to the translated content to be created.

Chapter 6: Managing Content Languages
HP Adoption Readiness Tool™ 87
4. Choose from the following options:
If You Want To ThenCreate XLIFF file for Re-Recording
Select this option to generate the XLIFF file required for Re-Recording. This option does not include screen titles or step text. This model is recommended for use with Scenario 1 and Scenario 2. For more information, refer to Scenario 1: Translating Before Re-Record (on page 82) and Scenario 2: Translating After Re-Record (on page 82).
Create XLIFF file and include screen titles and step text
This option is not recommended for use with Guided Re-Record because Guided Re-Record replaces screen titles based on the user interface you are Re-Recording.If you want the ability to translate screen titles, refer to Creating Translated Documents (on page 71).
Create XLIFF file without including screen titles
Select Create XLIFF files without including screen titles to create an XLIFF file for Re-Recording. This option includes step text but does not includes screen titles. This model is recommended for use with Scenario 3. For more information, refer to Scenario 3: Using Translations and Re-Record in Parallel (see "Scenario 3: Using Translation and Guided Re-Record in Parallel" on page 82).
Include annotation sets Select this option if you want to include your annotations in the XLIFF file.
5. Click to browse to an export location.
Note the export location for later use.
6. Click OK.
7. Click Export.

Chapter 6: Managing Content Languages
88 HP Adoption Readiness Tool™
8. Perform one of the following options:
If You Want To ThenEdit the files to translate text or values Refer to Editing Exported Content for Re-Record
(see "Editing Exported Content for Guided Re-Record" on page 88).
Close the export summary window Click OK.
Editing Exported Content for Guided Re-Record For each exported language, one XML Localization Interchange File Format (XLIFF) file is created. The exported XLIFF file(s) contain all phrases and author-entered text in the content. Both the phrases and the author-entered text must be translated. Boilerplate text provided with the template (for example, "Use this procedure to") is automatically translated via the phrases provided in the template.
The file is formatted to facilitate translation by displaying the source (original) text co-located next to the target translated text.
1. Open the exported XLIFF file in the desired editor.
The XLIFF file can be edited via a specialized XLIFF editor such as Xliff Editor or Heartsome.
2. Edit the text or data values as necessary.
3. Save the file(s).

Chapter 6: Managing Content Languages
HP Adoption Readiness Tool™ 89
Importing Content for Guided Re-Record Using Scenario 1 For more information on Scenario One, refer to Scenario 1: Translating Before Re-Record (on page 82).
You must perform an export before you can import the files. For more information, refer to Exporting Content for Re-Record (see "Exporting Content for Guided Re-Record" on page 86).
1. Open the uPerform Express file that has been exported.
2. Select FILE > MANAGE CONTENT LANGUAGE > IMPORT [CONTENT NAME].
3. Click in the Import From field.
4. Navigate to the Export to location specified in Exporting Content for Re-Record (see "Exporting Content for Guided Re-Record" on page 86).
5. Select the folder containing languages you want to import.
6. Click OK.
7. Select the exported language(s) for import.
8. Click OK.

Chapter 6: Managing Content Languages
90 HP Adoption Readiness Tool™
9. Click Import.
10. Click OK.
Applying XLIFF Translations for Guided Re-Record Using Scenarios 2 and 3 For more information on Scenarios 2 and 3, refer to Scenario 2: Translating After Re-Record (on page 82) and Scenario 3: Using Translations and Re-Record in Parallel (see "Scenario 3: Using Translation and Guided Re-Record in Parallel" on page 82).
You must perform an export and Guided Re-Record before you can apply XLIFF translations. For more information, refer to Exporting Content for Re-Record (see "Exporting Content for Guided Re-Record" on page 86) and Using Guided Re-Record Functionality (on page 80).
1. Open the Re-Recorded uPerform Express file.
2. Select FILE > MANAGE CONTENT LANGUAGE > APPLY XLIFF TRANSLATIONS.
3. Navigate to the location of the exported and translated XLIFF file.
4. Select the [filename]_[language].xlf file for which you want to apply translations. For example: NewDocument_ru-RU.xlf
5. Click Open.
6. Click OK.

91
Chapter 7: Editing and Formatting: Basics
Basic editing and formatting refers to standard editing features available within the editor. These features apply to all ANCILE uPerform Express files.

Chapter 7: Editing and Formatting: Basics
92 HP Adoption Readiness Tool™
Introduction to Editing and Formatting: Basics
You can enhance your content using basic editing and formatting functionality.
Some of the editing and formatting functions available to you include:
Modify content properties such as title
Cut, copy, and paste text
Spellcheck
Change the language of default text for content

Chapter 7: Editing and Formatting: Basics
HP Adoption Readiness Tool™ 93
Specify Content Properties
All ANCILE uPerform Express content can be tagged with both built-in and custom properties. Properties are useful in specifying metadata about content. For example, the Transaction Code property is needed in the SAP environment to enable the context-sensitive help link from SAP to uPerform Express content.
Several built-in property fields are delivered with the default uPerform Express template. You can enable and customize display of these properties to your authors by creating a new author template. Custom properties may include such items as business owner or a documentation reference number. For detailed information on creating a new template, refer to Using Author Templates.
Specifying General Properties
1. Create or open uPerform Express content.
2. Select FILE > PROPERTIES... on the main window.
3. Click General on the left pane.
Information such as the size, creation date, and last modified date are displayed as view-only information.
4. Review the following fields:
Field DescriptionTitle Edit the name for the content.

Chapter 7: Editing and Formatting: Basics
94 HP Adoption Readiness Tool™
Field DescriptionLanguage For information on changing the language of
existing content text, refer to Change the Language of Default Text (on page 160). If the content is translated, select the desired language for the content from the drop-down list to enable globalization of definitions in the content. For information on translated content, refer to Using Save As.
Allow simulation publishing on the uPerform server
To enable server publishing of the uPerform document to simulation output, select the AllowSimulation publishing on the uPerform servercheckbox. This option is not available in course mode.
5. Click OK to save your changes and close the window.
Specifying Built-In or Custom Properties By default, the display of all built-in properties, with the exception of Description, is disabled in the template. You can enable display of those properties necessary for your authors by creating a custom template.
For information on enabling built-in properties or adding custom properties to your template, refer to "Using Author Templates".
1. Create or open uPerform Express content.
2. Select FILE > PROPERTIES... on the main window.
3. Click Properties on the left pane.
4. Enter values for the properties in the Value column, or select available properties from the drop-down lists.

Chapter 7: Editing and Formatting: Basics
HP Adoption Readiness Tool™ 95
5. Click OK to save your changes and close the window.

Chapter 7: Editing and Formatting: Basics
96 HP Adoption Readiness Tool™
Using Undo and Redo During Editing
You can undo and redo one or more editing actions in the editor workspace.
Using Undo During Editing Select EDIT > UNDO to remove the last edit.
You can select the Undo option more than once to remove additional edits. The undo functionality caches up to twenty steps.
Using Redo During Editing Select EDIT > REDO to re-apply the last edit.
You can select the Redo option more than once to restore additional edits.

Chapter 7: Editing and Formatting: Basics
HP Adoption Readiness Tool™ 97
Using Spellcheck
During the spellcheck process, action text, step text, notes, narrative, tooltip text, and course content are reviewed. The spellcheck process does not include audio transcript text.
The proofing language for the spellcheck is based on the current file's language.
Starting a Spellcheck
1. Create or open a file.
2. Select TOOLS > SPELLCHECK.
To apply changes to the entire file, allow spellcheck to complete the entire spellcheck task.
Specifying Spellcheck Options
1. Create or open a file.
2. Select TOOLS > SPELLCHECK OPTIONS.

Chapter 7: Editing and Formatting: Basics
98 HP Adoption Readiness Tool™
3. Choose one of the following options:
If You Want To ThenAllow the spellchecker to suggest corrections
Select Always suggest corrections.
Enable the spellchecker to suggest from main dictionaries only
Select Suggest from main dictionaries only.
Ignore words in uppercase Select Ignore words in UPPERCASE.
Ignore words with numbers Select Ignore words with numbers.Ignore Internet and file addresses Select Ignore internet and file addresses.
4. Optionally, under Main Dictionaries, click Add to select a dictionary.
5. Optionally, under Custom Dictionaries, perform one of the following:
If You Want To ThenCreate a new custom dictionary from a default dictionary
Click New... .Browse to the location of the existing dictionary. Rename the file. Click Save.
To add words to a dictionary during spellcheck, you must create a custom dictionary from the default dictionary. You cannot add words to the default dictionary.
Add a custom dictionary Click Add... to specify a dictionary.
Edit an existing dictionary Click on the dictionary in the list box. Click Edit to edit the dictionary.
Remove an existing dictionary Click on the dictionary in the list box. Click Remove to remove the dictionary.
Change the default Click on the dictionary you want to specify as the default. Click Change Default.
6. Click OK.

Chapter 7: Editing and Formatting: Basics
HP Adoption Readiness Tool™ 99
Using Save
When you save your work, the content is saved on your local hard drive. The save location is specified when you first record or create the content. uPerform Express notifies you of progress, success, and failure in the status bar.
Saving Your Work
1. Create or open content.
2. Select FILE > SAVE.
It is good practice to save your file before switching between views.

Chapter 7: Editing and Formatting: Basics
100 HP Adoption Readiness Tool™
Using Save As
The Save As functionality in uPerform Express is specifically designed to enable you to create a copy of the file.
Using Save As to Create a Duplicate of uPerform Content
1. Create or open uPerform content.
2. Select FILE > SAVE AS... .
3. Click No to create a copy.
4. Enter a name in the File name field.
Avoid the use of special characters when naming your content.
5. Click Save.
The duplicate will display in the editor.
Using Save As to Assign a New ID to uPerform Content
1. Create or open uPerform content.
2. Select File > Save As... .
3. Click Yes to assign a new ID.
4. Enter a name in the File name field.
Avoid the use of special characters when naming your content.
5. Click Save.
The file with the new ID is displayed in the editor.

Chapter 7: Editing and Formatting: Basics
HP Adoption Readiness Tool™ 101
Printing
You can send the document view of your procedural content directly to the printer. Header and footer information is not included in the print output. You can also print a student guide and a storyboard of course content.
Printing Content
1. Create or open content.
2. Perform one of the following options:
If You Want To ThenPrint a document, simulation, student guide, or course storyboard
Select FILE > PRINT.
Print a course storyboard with annotations
Open the course. Select VIEW > VIEW ANNOTATIONS.Select the annotation set you want to print. Select FILE > PRINT.
Printing a course storyboard with annotations can provide helpful hints to end users and additional information for course instructors.

Chapter 7: Editing and Formatting: Basics
102 HP Adoption Readiness Tool™
Closing
Only one uPerform Express file can be open at a time. Close the existing open file before opening a new file.
Closing the Current File Click to close the current file.
If you attempt to exit the uPerform Express editor prior to saving your content, you will receive a prompt confirming you want to exit prior to saving.

103
Chapter 8: Editing and Formatting: Procedural Content
After recording is complete, you have many options for adding and formatting content in both the document and simulation views.
In addition to inserting standard objects such as steps, actions, tooltips, and notes, you can also specify note and step properties.

Chapter 8: Editing and Formatting: Procedural Content
104 HP Adoption Readiness Tool™
Introduction to Editing and Formatting: Procedural Content
After you have captured actions in the target application, you can enhance your content using basic editing and formatting functionality. For basic formatting functionality, refer to Editing and Formatting: Basics (on page 91). In addition, you can edit procedural content to insert steps, notes, tooltips, and branches.
Edits performed in one view affect the other view. In other words, when you insert a note in the simulation view, this note is also inserted in the corresponding location in the document view. Edits should be performed on content stored on your local computer.

Chapter 8: Editing and Formatting: Procedural Content
HP Adoption Readiness Tool™ 105
Inserting Standard Simulation Objects
You can insert several standard simulation objects including:
Step: You can insert one or more steps from a new recording session or from an existing uPerform Express document. In addition, you can insert default steps or substeps during editing.
Note: Two types of notes are available: default notes, which can be inserted from the template and are intended to provide standardization across content, and action notes, which are automatically created and include the action text for an action. You can enable or disable the display of action notes.
Action: An action hotspot is indicated as a border around the relevant item. For example, an action hotspot may be displayed around a button to indicate that clicking the button is the desired user action.
Tooltip: Tooltips are displayed as notes that pop up when a user hovers over a specific area of the screen.
Branch: Branches allow you to create a primary simulation path and include secondary path(s) that produce the same end result but offer alternative methods of reaching the result.
Inserting Steps You can use the recorder to capture your actions and create one or more new steps, or you can insert steps from an existing uPerform Express document.
For information on editing steps properties, refer to Editing Steps (on page 113).
Inserting a Newly-Recorded Step
1. In the editor workspace, click the Simulation tab.
2. Select the position to insert the new step(s) in the Steps task pane.
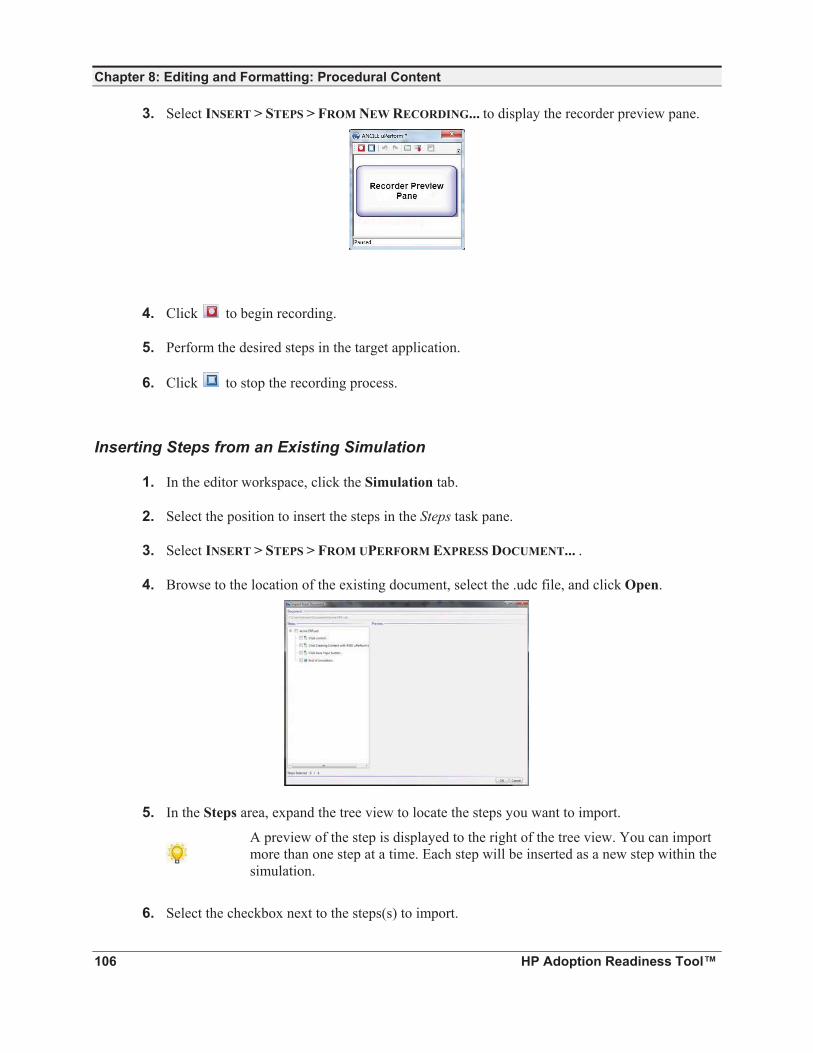
Chapter 8: Editing and Formatting: Procedural Content
106 HP Adoption Readiness Tool™
3. Select INSERT > STEPS > FROM NEW RECORDING... to display the recorder preview pane.
4. Click to begin recording.
5. Perform the desired steps in the target application.
6. Click to stop the recording process.
Inserting Steps from an Existing Simulation
1. In the editor workspace, click the Simulation tab.
2. Select the position to insert the steps in the Steps task pane.
3. Select INSERT > STEPS > FROM UPERFORM EXPRESS DOCUMENT... .
4. Browse to the location of the existing document, select the .udc file, and click Open.
5. In the Steps area, expand the tree view to locate the steps you want to import.
A preview of the step is displayed to the right of the tree view. You can import more than one step at a time. Each step will be inserted as a new step within the simulation.
6. Select the checkbox next to the steps(s) to import.

Chapter 8: Editing and Formatting: Procedural Content
HP Adoption Readiness Tool™ 107
7. Click OK.
Inserting Steps and Substeps
1. In the editor workspace, click the Simulation tab.
2. Select the position to insert the new step(s) or substep(s) in the Steps task pane.
3. Perform one of the following options:
If You Want To ThenInsert a step Select INSERT > STEPS > STEP.
Insert a substep Select INSERT > STEPS > SUBSTEP.Create an information-only step from a step containing an action.
Delete the action(s) from the step. Information-only steps are steps that contain notes and references but no action.
4. Edit the step as desired.
Inserting Notes Notes can be added to simulation steps to help explain an action, provide details regarding the step, or to provide tips to the user in playback mode. The notes display as callout boxes on top of the target application.
Two types of notes are available:
Default Notes: A standard, information- and icon-only note that provides additional details for a step and provides the option to optionally highlight and draw attention to a specific area within a step.
Highlighted Notes: An information note that automatically highlights and draws attention to a specific area within a step.
For information on note formatting options, refer to Editing Notes (on page 120). For information on customizing notes, refer to "Specifying New Template Settings: Styles.

Chapter 8: Editing and Formatting: Procedural Content
108 HP Adoption Readiness Tool™
Inserting a Default Note
1. In the editor workspace, click the Simulation tab.
2. Select the desired step in the Steps task pane.
3. Select INSERT > NOTE > NOTE.
4. Double-click on the new note, and enter text.
In addition to text, you can create a hyperlink within the note by highlighting the desired link text, right-clicking, and selecting INSERT > WEB LINK from the right-click menu.
Inserting a Highlighted Note
1. In the editor workspace, click the Simulation tab.
2. Select the desired step in the Steps task pane.
3. Select INSERT > NOTE > HIGHLIGHTED NOTE.

Chapter 8: Editing and Formatting: Procedural Content
HP Adoption Readiness Tool™ 109
4. Double-click on the new note, and enter text.
Displaying and Hiding Action Notes in the Document Editor
1. In the editor workspace, select the Simulation view.
2. Right-click on the note.
3. Select Edit Action.
4. Click [Action Type] Action in the left pane.
5. Select the Show Action Note checkbox.
6. Click OK.
For information on enabling display of action notes in published output, refer to "Using Author Templates. For information on editing action notes, refer to Editing Actions.
Inserting Actions, Tooltips, and Branches Action hotspots indicate an action that must be taken to proceed to the next lesson step or branch. Hotspots display as colored rectangles that highlight the area of action:
Mouse - the area to perform a mouse action (for example, click, right-click, double-click).
Edit/Text - the area in which text must be entered to complete the action.
Key - the key required to execute the action (for example, F1, F2, Tab, 1, 2, a, b, c).
Drag & Drop - the areas to perform a drag-and-drop mouse action (for example, left down, drag, left up).
Tooltips can be added to simulation steps to provide amplifying information about a button or area of the screen when the user hovers over the tooltip area.
A branch allows you to create a primary simulation and include secondary simulations, which allow the same end result but offer alternative paths.
Although the steps to insert a branch are essentially the same as inserting steps, some pre-planning is usually required to ensure the simulation logic flows properly. As with the insertion of steps, new branches can originate as steps from an existing simulation or be captured during a new recording session. Secondary branches can be directed to any step in the simulation.

Chapter 8: Editing and Formatting: Procedural Content
110 HP Adoption Readiness Tool™
Inserting an Action
1. In the editor workspace, click the Simulation tab.
2. Select the desired step in the Steps task pane.
3. Select INSERT > ACTION > [ACTION TYPE...] to display the Action Properties window.
For information on editing action properties, refer to Editing Actions (on page 125).
Inserting a Tooltip
1. In the editor workspace, click the Simulation tab.
2. Select the desired step in the Steps task pane.
3. Select INSERT > TOOLTIP... to display the Tooltip Properties window.

Chapter 8: Editing and Formatting: Procedural Content
HP Adoption Readiness Tool™ 111
For information on editing tooltip properties, refer to Editing a Tooltip (on page 133).
Inserting a Branch for Display During Auto Playback
1. In the editor workspace, click the Simulation tab.
2. Select the position to insert the branch steps in the Steps task pane.
3. As necessary, record or insert the new branch steps.
4. Insert the branching action that will lead to the new step via INSERT > ACTION ... > [ACTIONTYPE].
5. In the Action Properties window, click [Action Type] in the left pane.
6. Set the Go to step option for this action to be the first step in the new branch.
7. Click OK.
8. Right-click on the branch step from which the branch will initiate.
9. Select Edit Step to display the Step Properties window.

Chapter 8: Editing and Formatting: Procedural Content
112 HP Adoption Readiness Tool™
10. Select Auto Playback in the left pane.
11. In the Go to step listbox, select the action that should be simulated in the output for Auto Playback mode.
12. Click OK to save your changes and close the window.
The branch will display under the appropriate step in the Task Pane.

Chapter 8: Editing and Formatting: Procedural Content
HP Adoption Readiness Tool™ 113
Editing Standard Simulation Objects
The standard simulation objects - steps, notes, actions, and tooltips - can be edited to modify their display and functionality. The Steps task pane displays the text-only information about the step. You can use the step text editor to edit the step information.
In addition to editing simulation objects using the toolbar and right-click menu, you can double-click on steps within the task pane to open the Step Properties window.
Editing Steps
You can edit the general, audio, auto playback, screen, and step text properties of a simulation step by right-clicking or double-clicking on a step in the task pane.
You can view context information for enterprise systems recorded using uPerform. This will assist in setting up context-sensitive help with the uPerform server, as an author will be able to easily identify screen information within a uPerform document.
Editing a Simulation Step: Reordering Steps
1. In the Steps task pane, click on the step you want to move.
2. Drag the step to above or below the step where you want it to display.
This action will automatically renumber the steps.

Chapter 8: Editing and Formatting: Procedural Content
114 HP Adoption Readiness Tool™
Editing a Simulation Step: Step Text Editor
1. Select VIEW > SHOW STEP TEXT EDITOR to display the step text editor.
2. In the Steps task pane, select the step to be edited.
Action text is highlighted with the background color of the action note styles. Action text displays in the same color as the text within the note. This will allow you to confirm that the text you are editing is for an action.
3. Edit the step text in the editor.
4. Optionally, click Reset to Default Text to revert to the last saved text.
Editing a Simulation Step: General Properties
1. Double-click on the step in the Steps task pane.

Chapter 8: Editing and Formatting: Procedural Content
HP Adoption Readiness Tool™ 115
2. Select General in the left pane.
3. Edit the following fields:
Field DescriptionHelp text To display the default help text when the user makes
an incorrect response during the Self-Test or Assessment mode, enable the Use default help text checkbox. To display custom help text, disable the Use default help text checkbox, and enter your text in the Helptext field.
Cursor image Browse to select the cursor graphic displayed during the particular step.
Use composite Brings extra attention to the hotspot by slowly blacking out the screen except for the hotspot area, and then returning to the screen display.
Include in assessment grade To include this step in the grade calculated for Assessment mode, select the Include in assessment grade checkbox.
Visibility To display this step in the simulation view, select the Simulation View checkbox. To display this step in the document view, select the Document View checkbox.
4. Click OK to save your changes and close the window.
Editing a Simulation Step: Audio Properties To enable MP3 recording, refer to Installing LAME (on page 194).
1. Double-click on the step in the Steps task pane.

Chapter 8: Editing and Formatting: Procedural Content
116 HP Adoption Readiness Tool™
2. Select Audio in the left pane.
For more information, see Importing an Audio File (on page 196) and Creating an Audio File (on page 195).
3. Select to launch the Recording Options dialog.
4. Complete the following fields:
Field DescriptionRecording Device Specify the input recording device. This selection is
computer specific.
Recording Quality Specify the audio quality setting. Setting MP3 WAVHigh 320kbps 16-bit sampling Medium 128kbps 8-bit sampling Low 64kbps 8-bit sampling
5. Once you have set your options, the following controls are activated:
Control DescriptionClick Pause to pause the current recording
Click Stop to stop the current recording. Click Play to review the current recording.
6. Click OK to save your changes and close the window.
Editing a Simulation Step: Auto Playback Properties
1. Double-click on the step in the Steps task pane.

Chapter 8: Editing and Formatting: Procedural Content
HP Adoption Readiness Tool™ 117
2. Select Auto Playback in the left pane.
3. Edit the following fields:
Field DescriptionTime length Specify the delay between each simulation step
during Auto Playback mode. To use the default wait time specified in the template, select Use default time length.To specify a custom wait time, enter the value in the Time length field.
Go to step Edit the next step or action to be displayed during Auto Playback mode. Use this option to set which branch should be displayed in Auto Playback mode.
4. Click OK to save your changes and close the window.
Editing a Simulation Step: Screen Properties
1. Double-click on the step in the Steps task pane.
2. Select Screen in the left pane.

Chapter 8: Editing and Formatting: Procedural Content
118 HP Adoption Readiness Tool™
3. Optionally, you can edit the screen title of the main window of the target application during this particular step.
4. As desired, select one of the following options:
If You Want To ThenPaste a new image from the clipboard Copy the new background image to be used to
your Microsoft Windows clipboard. Click Paste.
Copy the current image to the clipboard for editing in an external application
Click Copy, and edit the image in the external application.Copy the edited image to your Microsoft Windows clipboard, and click Paste (as described above) to replace the background image.
Change the display of the image to reflect either the entire desktop or only the application window
Click Edit..., and select Regions on the resulting screen.Select the area you want to display. Click OK.Click OK.
If the clipboard image you are pasting is larger than the current image, a prompt is displayed. Select Yes to resize the clipboard image before pasting, or select No to insert the image without resizing.
5. Click OK to save your changes and close the window.
Editing a Simulation Step: Step Text Properties
1. Double-click on the step in the Steps task pane.

Chapter 8: Editing and Formatting: Procedural Content
HP Adoption Readiness Tool™ 119
2. Select Step text in the left pane.
3. Edit the following fields:
Field DescriptionStep text Displays the current step text.
Actions You can select any action text in the Actions list box and click Insert to include the text in the step text.You can also insert additional text before or after the action text by entering the text in the Step text field. For example, you can insert "and" or "or" to join two actions in a sentence.
4. Click OK.
Editing a Simulation Step: Viewing Context Information
1. Double-click on the step in the Steps task pane.
2. Select Context Information in the left pane.
3. Review the following fields:

Chapter 8: Editing and Formatting: Procedural Content
120 HP Adoption Readiness Tool™
Depending on the application or enterprise system recorder, some fields will not be populated.
Field DescriptionContext Identifier Type Displays the name of the recorded application.
Primary Displays the transaction code(s) or screen ID(s) associated with the step.
Secondary Displays the ID for the screen.
Tertiary Displays the location of the application recorded into the step.
Editing Notes
You can edit and format note text, modify the note display characteristics, and edit the note pointer location and icon.
Notes and action notes have different characteristics. For more information on editing action notes, refer to Editing an Action: Edit (on page 127).
Editing a Note: Note Text
1. Double-click on the note.
2. Highlight the text to be edited or place the cursor at the insertion point.
3. Right-click and select from among the following edit and format options:
Option DescriptionTable Several table options are available, including:
Properties, Insert Row, Delete Row, Insert Column, and Delete Column.
Edit Several editing options are available, including: undo and redo; cut, copy, paste; find and replace; select all; and delete.

Chapter 8: Editing and Formatting: Procedural Content
HP Adoption Readiness Tool™ 121
Option DescriptionFormat Select Font Dialog to specify the font style and size.
Select Font Color to specify the font color. Modify the character format using the Bold, Italic,Underline, Superscript, Subscript, and Strikeoutoptions. To return the character format to the default, select Normal.Modify the paragraph format using the indent and list functionality.
Justify Select Left, Center, or Right to specify the text justification.
Insert: Line Right-click on the text, and select INSERT > LINE.
Insert: Step Link Click into the text where you want to insert a step link. Select a step from the Step Link Location drop-down list.
Insert: Web Link Highlight the text for the web link, and select INSERT > WEB LINK.Specify the link location and the target window. You must publish the document in order to activate the web link.
Insert: Image Right-click on the text for which you want to insert an image, and select INSERT > IMAGE.Specify the image location, caption, and alignment.
Insert: Table Right-click on the text for which you want to insert a table, and select INSERT > TABLE.Specify the properties.
Insert: Captured Image Highlight the text for which you want to insert a captured image, and select INSERT > CAPTURED IMAGE.Specify the application to capture. Click and drag the crosshair to select the image to capture.
Many of the text format options are also available via the toolbars.
Editing a Note: General
1. Right-click on the note in the editor workspace.

Chapter 8: Editing and Formatting: Procedural Content
122 HP Adoption Readiness Tool™
2. Select Edit Note... to display the Note Properties window.
3. Select General in the left pane.
4. Edit the following fields:
Field DescriptionIcon Select a note icon from the drop-down list.
Document View To display this note in the document view, select the Document View checkbox.
Simulation View To display this note in the simulation view, select the Simulation View checkbox.
Enable callout in document view
To display a callout for this note, select the Enablecallout in document view checkbox.
Callouts must be enabled in the template editor and in the options menu in order for them to display in published output. For more information, refer to Specifying Document Options and Default Publication Settings: Document.
Display the highlighted note area and customize the appearance
To display the visible rectangular line around an area associated with a highlighted note, select the Display Highlight Area checkbox. Select a border color, border size, fill color, and transparency for the highlighted note.
5. Click OK.
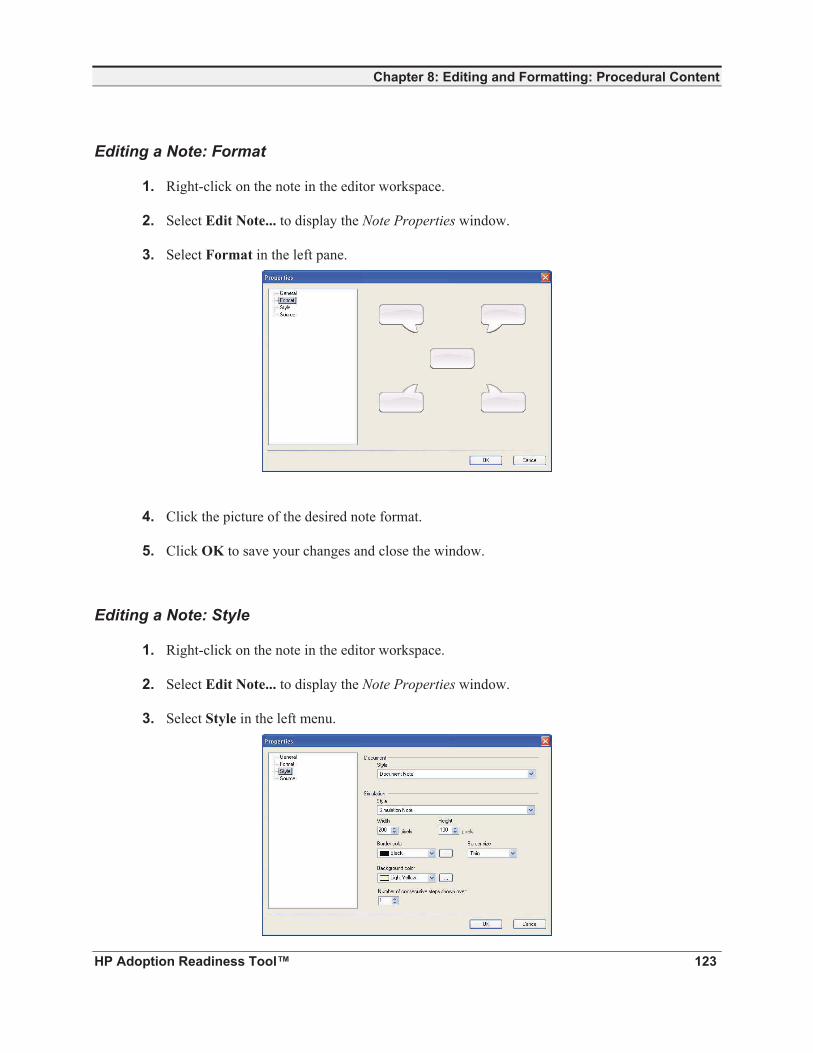
Chapter 8: Editing and Formatting: Procedural Content
HP Adoption Readiness Tool™ 123
Editing a Note: Format
1. Right-click on the note in the editor workspace.
2. Select Edit Note... to display the Note Properties window.
3. Select Format in the left pane.
4. Click the picture of the desired note format.
5. Click OK to save your changes and close the window.
Editing a Note: Style
1. Right-click on the note in the editor workspace.
2. Select Edit Note... to display the Note Properties window.
3. Select Style in the left menu.

Chapter 8: Editing and Formatting: Procedural Content
124 HP Adoption Readiness Tool™
4. Choose from the following options:
Option DescriptionDocument: Style Select a document-display style from the list.
Simulation: Style Select a simulation-display style from the list.
Width Specify the width of the note in pixels.
Height Specify the height of the note in pixels.
Border color Select the color of the note border from the drop-down list, or click the ... button to specify a custom color..
Border size Select the width of the note border from the drop-down list.
Background color Select the color of the note background from the drop-down list, or click the ... button to specify a custom color..
Number of consecutive steps shown over
Specify the number of following steps in which the note should be displayed (simulation view only).
5. Click OK.
Editing a Note: Size
1. Select the step containing the note you want to resize.
2. Perform one of the following options:
If You Want To ThenAllow uPerform to auto size the note based on the text within the note
Right-click on the note. Select Auto Size Note.
Manually size the note Click on the note. Click and drag on a sizing handle to resize.
The action note tail will snap to the location closest to the center point of the action note associated with the hotspot.

Chapter 8: Editing and Formatting: Procedural Content
HP Adoption Readiness Tool™ 125
Editing a Note: Source
1. Right-click on the note in the editor workspace.
2. Select Edit Note... to display the Note Properties window.
3. Select Source in the left pane.
4. Edit the source code.
Knowledge of HTML is required.
Editing Actions
You can edit and format the general and display properties of mouse, edit, key, and drag & drop actions.
You can also switch an action type, which allows you to utilize existing content without having to recreate a step.
Editing an Action: Mouse
1. Right-click on the mouse action rubber band in the editor workspace.
2. Select Edit Action... to display the Action Properties window.
3. Select Mouse action in the left pane.

Chapter 8: Editing and Formatting: Procedural Content
126 HP Adoption Readiness Tool™
4. Edit the following fields:
Field DescriptionAction Select the mouse action required for the user to
move to the next step.
Modifiers If necessary, specify the Shift, Control, and/or Alt key modifiers to accompany the mouse action.
Go to step Edit the next step to be displayed after performing the action. Use this option to create a new branch in the simulation.
Show Action Note Select this option to display the action note in the simulation editor.
Action text Enter the specific instructional text to display to the user.This text is also displayed in action notes and step text. Right-click in this field to format the text. To reflect a change in the action type or a change in the language, click Reset to Default Text to reset the action text. (You must click OK to save any changes in the current session before you can reflect the changes via Reset to Default Text.)
5. To edit hotspot properties, refer to Editing an Action: Hotspot (on page 131).
6. To edit advanced properties, refer to Editing an Action: Advanced (on page 131).
7. Click OK.

Chapter 8: Editing and Formatting: Procedural Content
HP Adoption Readiness Tool™ 127
Editing an Action: Edit
1. Right-click on the edit action rubber band in the editor workspace.
2. Select Edit Action... to display the Action Properties window.
3. Select Edit action in the left pane.
4. Edit the following fields:
Field DescriptionEntry type Select the type of text entry required for the user to
move to the next step. Free text playback means the user can enter anything in this field to proceed to the next step. Exact text playback means the user must enter text that matches your designated entry. Regular Expression playback allows the user to enter any data matching the specified regular expression pattern to proceed to the next step. When using regular expression, the user must press a specific key to exit the field: the Enter key is supported in Flash output. Enter the expression in the Text field. Example: Email address Example: ^([a-z\.]+)@([a-z\.]+)$ In this example, [email protected] would be permitted, while [email protected] would not be permitted. Example: ^([a-zA-Z0-9]+)@ancile.com$ In this example, any email address (in upper- or lowercase) from ancile.com would be permitted.

Chapter 8: Editing and Formatting: Procedural Content
128 HP Adoption Readiness Tool™
Field DescriptionText Type the specific text or regular expression pattern
the user must enter. Be aware that if the Case sensitive option is set to Yes, the user must type the case-specific text in the hotspot to continue to the next step.
Case sensitive Select Yes or No to specify whether the text entered during playback must exactly match the recorded text.To use the default setting specified in the template, select Use default setting from the drop down-list.
Go to step Edit the next step to be displayed after performing the action. Use this option to create a new branch in the simulation.
Hint Enter the hint to be displayed during Self-Test or Assessment modes.
Show Action Note Select this option to toggle the display of the action note in the simulation editor.
Action text Enter the specific instructional text to display to the user.To reflect a change in the action type or a change in the language, click Reset to Default Text to reset the action text. (You must click OK to save any changes in the current session before you can reflect the changes via Reset to Default Text.)
5. To edit hotspot properties, refer to Editing an Action: Hotspot (on page 131).
6. To edit advanced properties, refer to Editing an Action: Advanced (on page 131).
7. Click OK.
Editing an Action: Key
1. Right-click on the key action rubber band in the editor workspace.
2. Select Edit Action... to display the Action Properties window.

Chapter 8: Editing and Formatting: Procedural Content
HP Adoption Readiness Tool™ 129
3. Select Key action in the left pane.
4. Edit the following fields:
Field DescriptionKey Select the key action required for the user to move
to the next step.
Modifiers If necessary, specify the Shift, Control, and/or Alt key modifiers to accompany the key action.
Go to step Edit the next step to be displayed after performing the action. Use this option to create a new branch in the simulation.
Hint Enter the hint to be displayed during Self-Test or Assessment modes.
Show Action Note Select this option to toggle the display of the action note in the simulation editor.
Action text Enter the specific instructional text to display to the user.To reflect a change in the action type or a change in the language, click Reset to Default Text to reset the action text. (You must click OK to save any changes in the current session before you can reflect the changes via Reset to Default Text.)
5. To edit hotspot properties, refer to Editing an Action: Hotspot (on page 131).
6. To edit advanced properties, refer to Editing an Action: Advanced (on page 131).
7. Click OK.

Chapter 8: Editing and Formatting: Procedural Content
130 HP Adoption Readiness Tool™
Editing an Action: Drag & Drop
1. Right-click on the drag & drop action rubber band in the editor workspace.
2. Select Edit Action... to display the Action Properties window.
3. Select Drag & Drop action in the left pane.
4. Edit the following fields:
Field DescriptionModifiers If necessary, specify the Shift, Control, and/or Alt
key modifiers to accompany the key action.
Go to step Edit the next step to be displayed after performing the action. Use this option to create a new branch in the simulation.
Show Action Note Select this option to toggle the display of the action note in the simulation editor.
Action text Enter the specific instructional text to display to the user.To reflect a change in the action type or a change in the language, click Reset to Default Text to reset the action text. (You must click OK to save any changes in the current session before you can reflect the changes via Reset to Default Text.)
5. To edit hotspot properties, refer to Editing an Action: Hotspot (on page 131).
6. Click OK.

Chapter 8: Editing and Formatting: Procedural Content
HP Adoption Readiness Tool™ 131
Editing an Action: Hotspot
1. Right-click on the [Action Type] rubberband.
2. Select Edit Action... to display the Action Properties window.Select Hotspot in the left pane.
3. Edit the following fields:
Options display based on the action type selected.
Field DescriptionWidth Specify the width of the hotspot in pixels.
Height Specify the height of the hotspot in pixels.
Border size Select the width of the hotspot border from the drop-down list.
Playback color Select the playback color of the hotspot from the drop-down list. Select the Use default setting checkbox to specify the template default.
Cursor image Browse to select the cursor graphic displayed inside the action hotspot.
Editing an Action: Advanced
1. Right-click on the [Action Type] rubberband.
2. Select Edit Action... to display the Action Properties window.

Chapter 8: Editing and Formatting: Procedural Content
132 HP Adoption Readiness Tool™
3. Select Advanced in the left pane.
4. Select a control type for the action rubberband from the Control Type drop-down list.
This is useful if you want to change the control type for the action on a step. For example, if you want want to change "Main Menu" to "Menu item, or if you have inserted a step manually and want to define a control type for the action. For example, changing the manually-inserted action from the default "Unknown" to "List Box."
5. Select an action type from the Action Type drop-down list.
6. Click OK to save your changes and close the window.
Displaying and Hiding Action Notes in the Document Editor
1. In the editor workspace, select the Simulation view.
2. Right-click on the note.
3. Select Edit Action.
4. Click [Action Type] Action in the left pane.
5. Select the Show Action Note checkbox.
6. Click OK.
For information on enabling display of action notes in published output, refer to "Using Author Templates". For information on editing action notes, refer to Editing Actions.

Chapter 8: Editing and Formatting: Procedural Content
HP Adoption Readiness Tool™ 133
Moving and Adjusting a Rubberband
1. Click on the rubberband.
2. Drag the rubberband to the desired location on the image, or click and drag on a sizing handle to resize.
Optionally, you can use the cursor keys to move the rubberband around on the image. The action note tail will snap to the location closest to the center point of the action note associated with the hotspot.
Editing a Tooltip
1. Right-click on the tooltip in the editor workspace.
2. Select Edit Tooltip... to display the Tooltip Properties window.
3. Select General in the left pane, and edit the following fields:
Field DescriptionText Enter the specific text to display to the user.
Width Specify the width of the hotspot in pixels. Height Specify the height of the hotspot in pixels.
4. Click OK to save your changes and close the window.
Editing a Branch for Display in Auto Playback
1. Click on the branch step in the Steps task pane.
2. In the Content Pane, right-click on the branch action rubber band.
3. Select Edit Action... to display the Action Properties window.
4. Select the [Action Type] in the left pane.
5. Select the desired step number or action in the Go to step field.
6. To edit hotspot properties, refer to Editing an Action: Hotspot (on page 131).
7. To edit Advanced properties, refer to Editing an Action: Advanced (on page 131).
8. Click OK to save your changes and close the window.

Chapter 8: Editing and Formatting: Procedural Content
134 HP Adoption Readiness Tool™
Using Document Sections
The document view in uPerform Express is divided into several sections. Sections are used to provide 'containers' for specialized information that you may wish to use in your published content. The inclusion and order of sections is dictated by your template.
Sections are displayed in the Layout task pane. When you expand a section displayed in the task pane, you can click on a sub-section to navigate to that location in the content area.
Several standard document sections are delivered with uPerform Express:
Purpose (Overview) - contains front matter information.
Configuration Information: Lists information such as configuration menu path, key field changes, and date of configuration change.
Test Information: Documents the test conditions, expected results, and actual results that ensure that the related transaction has been correctly configured and documented and is functioning correctly in the system.
ASAP BPP: Mimics the business process procedure (BPP) documents delivered with an Accelerated SAP (ASAP) implementation.
Exercise/Data Sheet: Provides a user training document that includes data for a given procedure, and tasks and questions for students to complete. For additional information on the exercise section, refer to Generating the Exercise Section (on page 158).
Screenflow: Provides a graphical overview of the entire task or process. For additional information on the screenflow section, refer to Working with the Screenflow (on page 161).
Procedure - end user procedures with steps, field description tables, and screen shots.
Result - provides a location to enter any final comments or notes.

Chapter 8: Editing and Formatting: Procedural Content
HP Adoption Readiness Tool™ 135
Only the Procedure, Screenflow, and Exercise/Data Sheet sections are required to be included in the document. All other sections can be included or excluded from your documents via the template. In addition, the administrator can create custom sections within the author template. For more information on author templates, refer to "Create and Open a New Author Template".
Editing Document Sections
The uPerform Express document view contains overview information consisting of:
Purpose: intention of the document
Trigger: activities that may trigger use of the documented procedure
Prerequisites: requirements for using the documented procedure
Menu Path: menu path for initiating the application or transaction addressed in the document
Transaction Code: References the transaction code to which the document refers
Helpful Hints: information that the end user may find beneficial
In addition, each uPerform Express document contains a Result section at the conclusion of the procedure steps. These sections, and the Configuration, Test, and ASAP BPP sections, can be edited to include supplemental text, tables, and images.
The majority of editing and formatting options are available from both the toolbars and the right-click menu.
Inserting Objects in Document Sections
Inserting Text
1. Create or open a document.
2. Click the Document tab.
3. Place the cursor at the desired insertion point.
4. Enter text.

Chapter 8: Editing and Formatting: Procedural Content
136 HP Adoption Readiness Tool™
Inserting a Manual Page Break
1. Place the cursor where you want to insert the page break.
2. Select INSERT > INSERT PAGE BREAK.
3. To remove, right-click on the page break, and select Remove Page Break.
Inserting a Web, File, or Intra Link
1. Highlight the free text or text within a note.
2. Select INSERT > LINK from the drop-down list.
3. Complete the following fields:
Field DescriptionType Select Web Link to add a link to a URL or to a file.
Select Intra-Link to add a link to a location within the document.
Text Displays the text selected for link. This field is not editable.
Target For a web link, select the action for the link: Default: Opens the link based on your browser settings. New Window: Opens the link in a new browser window. Same Window: Opens the link in an existing browser window.
Link Location Enter a URL address, or click Browse ... to specify a file location locally or on a network.
Intra-Link Location Click Browse ... to select a location within the document.
4. Click Insert.
Inserting Headings, Examples, and Menu Items
1. Create or open a document.
2. Click the Document tab.
3. Place the cursor at the desired insertion point.

Chapter 8: Editing and Formatting: Procedural Content
HP Adoption Readiness Tool™ 137
4. As desired, select one of the following options:
If You Want To ThenInsert a heading and sub-bullets Select INSERT > INSERT HEADING.Insert an example Select INSERT > INSERT EXAMPLE.Insert a menu item Select INSERT > INSERT MENU ITEM.Insert a standard code Select INSERT > STANDARD CODE.
Inserting a Table
1. Position the cursor where the table is to be inserted.
2. Select INSERT > INSERT TABLE.
3. Complete the following fields:
Field DescriptionRows Enter the number of table rows.
Columns Enter the number of table columns.
Border Enter a value for the table border width.
Alignment Specify a Left, Center, or Right alignment for the caption.
Width Specify Percent or Pixels, and enter the width of the table.
Cell Padding Specify the amount of space between the border of the cell and the content of the cell.
Cell Spacing Specify the amount of space between the cells within a table.
4. Click Insert to insert the table.

Chapter 8: Editing and Formatting: Procedural Content
138 HP Adoption Readiness Tool™
Inserting and Deleting Rows and Columns
1. Right-click on the table.
2. Select INSERT > TABLE.
3. Choose from the following options:
Field DescriptionProperties Allows you to edit the properties specified in
Inserting a Table (on page 137).
Insert Row Inserts a row below the selected row.
Delete Row Deletes the selected row.
Insert Column Inserts a column to the left of the selected column.
Delete Column Deletes the selected column.
Inserting and Editing a Field/Description or an If/Then Table A Field/Description table is used to capture the name of the field; whether the field is required, optional, or conditional; and a description of the field. An editable area below the table allows you to enter additional information about what the table contains.
An If/Then table provides the user with more than one performance option before continuing to the next step.
1. Position the cursor where the table is to be inserted.
2. Select INSERT >STEPS.
3. Choose from the following options:
If You Want To ThenInsert a Field/Description Table Select Field.
Insert an If/Then Table Select If.
4. Optionally, right-click within the table, and select INSERT > INSERT FIELD ENTRY to insert a new field into the table.
5. Optionally, click on the Example text and press the Delete key to remove the Example field from the table.
Manually inserted Field/Description tables are not globalized. For more information on globalizing, refer to "Using Globalize".

Chapter 8: Editing and Formatting: Procedural Content
HP Adoption Readiness Tool™ 139
Inserting an If/Then/Go To Table An If/Then/Go To table provides a user with more than one performance option to complete before branching to another step.
1. Click the Simulation tab
2. Select the step in which you want to insert an If/Then/Go To table.
3. Select INSERT >ACTION>[ACTION TYPE].
4. Edit the action properties.
5. Click OK.
6. Right-click on the step and select Edit in document view to edit the If/Then/Go To table.
7. Optionally, right-click in a row and select Move Up or Move Down to reorder the rows in the table.
Inserting a Freetext Block
1. Position the cursor where the freetext block is to be inserted.
2. Select INSERT > FREETEXT > [BLOCK NAME].
Inserting a Note
1. Position the cursor where the note is to be inserted.
2. Select INSERT > NOTE > [NOTE].
Inserting an Icon
1. Position the cursor in the freetext block, note, or Field/Description into which you want to insert an icon.
2. Right-click and select ICON > [ICON].

Chapter 8: Editing and Formatting: Procedural Content
140 HP Adoption Readiness Tool™
Inserting a Step
1. Position the cursor where the step is to be inserted.
2. Select INSERT > STEPS > [STEP TYPE].
If you are inserting a step from the first step, you will be prompted as to where you want to insert the step.
Editing Objects in Document Sections
Editing Button Image Layout
1. Create or open a document.
2. Click the Document tab.
3. Navigate to the step containing the button image you want to edit.
4. Right-click on the image.
5. Select Image Layout.
6. Choose from the following options:
Field DescriptionBottom Positions the button image along the bottom of the
step text.
Left Positions the image to the left of the step text.
Image Middle = Text Bottom Positions the image in the center of the image area within the step text.
Right Positions the image to the right of the step text.
Top Positions the image at the top of the step text.
7. Click OK.
Copying Steps, Notes, and Freetext Blocks
1. In the Task Pane, right-click on the step, note, or freetext block to be copied.
2. Select EDIT > COPY.

Chapter 8: Editing and Formatting: Procedural Content
HP Adoption Readiness Tool™ 141
3. Click below the object where you would like to insert the step, note, or freetext.
4. Right-click, and select EDIT > PASTE to paste the step, note, or freetext.
Deleting Steps, Notes, and Freetext Blocks
1. In the Task Pane, right-click on the step, note, or freetext block to be deleted.
2. Select EDIT > DELETE to delete the object.
Deleting a Web Link
1. Right-click on the web link you want to delete.
2. Select INSERT > REMOVE LINK.
3. Click Remove Link.
Editing Text
1. Create or open a document.
2. Highlight the text to be edited.
3. Right-click and select the desired option from the Edit submenu.
Editing the Format of Blocks Within a Section
1. Create or open a document.
2. Click the Document tab.
3. Select the desired block in the Layout pane (for example, Configuration Information).
4. Select FORMAT > FORMAT OBJECT.
5. Select Format in the left pane.
6. Select a style from the Style drop-down list.
7. Optionally, select or deselect, the Make Step Visible checkbox.

Chapter 8: Editing and Formatting: Procedural Content
142 HP Adoption Readiness Tool™
8. Select Source in the left pane.
9. Edit the source code.
Basic knowledge of HTML is required.
For detailed information on editing blocks, refer to Specifying New Template Settings: Blocks.
Editing Notes and Free Text
1. Create or open a document.
2. Click the Document tab.
3. In the Content Area, right-click on the note or free text you want to edit.
4. Choose from the following options:
If You Want To ThenInsert an object Select an object from the list.
Delete the note or free text Select EDIT > DELETE.
Modify the note or free text Select Edit [Freetext or Note] ..., and go to Step 5.
5. In the Format pane choose from the following options:
Depending on the item selected, some of the following options may not display.
Field DescriptionDocument Select a style from the Style drop-down list. Click in
the checkbox next to Visible to enable display in published output.
Simulation Select a style from the Style drop-down list. Click in the checkbox next to Visible to enable display in published output.
Note Select an icon from the Icon drop-down list. Click the checkbox next to Pointer to enable a pointer in published output.
6. In the Source pane, edit the note or free text.
7. Click OK to apply changes.

Chapter 8: Editing and Formatting: Procedural Content
HP Adoption Readiness Tool™ 143
Editing Steps
1. Create or open a document.
2. Click the Document tab.
3. Perform one of the following options:
If You Want To ThenEdit a single step In the Task Pane, right-click on the step you
want to edit. Select Insert, and select an object from the list. Go to Step 5.
Edit multiple steps In the Task Pane, shift+left-click, or Ctrl+left-click, to select multiple steps. Right-click on any selected step, and go to Step 4.
4. Choose from the following options:
If You Want To ThenInsert an object Select Insert, and select an object from the list.
Delete the step Select Delete.Modify the step Select Edit Step ... and go to Step 5. Copy the step Select Copy.Cut the step to paste in another location within the document
Select Cut.
5. In the Format pane choose from the following options:
Field DescriptionDocument Select a style from the Style drop-down list.
Select the Make Step Visible checkbox to enable display in the published output. Select the Make Callouts Visible checkbox to enable display in the published output.
Simulation Select the Make Step Visible checkbox to enable display in the published output.
Step Numbers Select a style from the Style drop-down list to select the style of the step-action type. Select a level from the Level drop-down list to enable the step as a sub-step.

Chapter 8: Editing and Formatting: Procedural Content
144 HP Adoption Readiness Tool™
6. In the Screen pane, choose from the following options:
Field DescriptionScreen title Select a screen title from the Screen title drop-down
list or manually specify a caption. Optionally, select Use this screen title in all views.
Use this screen title in all views
Select the Use this screen title in all views option to use the selected screen title for all matching screens in the document.
Screen Click Select... or use the Copy and Paste commands to specify a screen to use for the step or to choose an appropriate thumbnail on the Available Backgroundswindow.
Show the screen for this step in the document
Only if it is the first time this screen is used:Displays a new screen only if the screen is different from the previous step. This is the default action. Never: Does not display a screen for this step. Always: Displays a new screen for the step.
7. In the Step pane, choose from the following options:
This pane is only available if the object is a field entry in a Field/Description table.
If you want to ThenEnable a field Click the Enabled checkbox to display the label
during publication.
Add a new label Click Add.Enter a caption in the Caption field.Select a location from the Location drop-down list. Click OK.

Chapter 8: Editing and Formatting: Procedural Content
HP Adoption Readiness Tool™ 145
Modify a field Select a label from the Label window. Click Modify.Edit the caption in the Caption field.Edit the location in the Location drop-down list. Click OK.
Delete a field Select a label from the Label window. Click Delete.
Specify a field requirement Select Required, Optional, or Conditional from the Required drop-down list to determine the requirement for the step. Optionally, you can edit the requirement by clicking on the requirement in the R/O/C column in the Field/Description table in the Editor Pane, and then selecting a requirement from the drop-down list.
8. In the Source pane, edit the source code.
Depending on what action the step contains, this pane may not be available. Basic knowledge of HTML is required.
9. Select Context Information in the left pane.
10. Review the context information.
For more information, refer to Editing a Simulation Step: Viewing Context Information (on page 119).
11. Click OK to save your changes and close the window.
Modifying Paragraphs
Setting the Paragraph Format
1. Right-click within the paragraph you wish to edit and select Format.
2. Modify the paragraph format using the indent and list functionalities.
Setting the Paragraph Justification
1. Right-click within the paragraph you wish to edit, and select Justify.

Chapter 8: Editing and Formatting: Procedural Content
146 HP Adoption Readiness Tool™
2. Select Left, Center, or Right to specify the text justification.
Modifying Characters
Setting the Font Type and Size
1. Highlight the text.
2. Right-click, and select Format.
3. Select Font Dialog to specify the font style and size, or select Font Color to specify the font color.
Setting the Character Format
1. Highlight the text.
2. Right-click, and select Format.
3. Modify the character format using the Bold, Italic, Underline, Superscript, Subscript, and Strikeout options. To return the character format to the default, select Normal.

Chapter 8: Editing and Formatting: Procedural Content
HP Adoption Readiness Tool™ 147
Working With Images, Masks, and Callouts
Images allow you to provide graphic examples within your documents and simulations. You can control what displays in your images and reduce the amount of time your authors spend editing and formatting after image capture. You don't have to take extra steps to modify a screen shot, alter information, or move action notes to hide non-pertinent information.
Callouts allow you to bring attention to specific controls and regions on screen images within a published uPerform document. Two types of callouts are available:
Numbered callouts, which are automatically created for mouse, edit, and drag-and-drop actions; field/description tables; and if/then tables within the procedure section of a document. These callouts display as a number in the left or right margins of the screen image. For a field/description or if/then table, the callout will display in published output as a bracket that highlights a group of fields. For all other actions, the callout displays as a trajectory line.
Non-step callouts, which you can create manually anywhere within the procedure section of the document. Non-step callouts display and are edited like simulation notes.
Callout display is enabled in the simulation by editing the step properties. Callout display and line color in published content is controlled within the template. For more information, refer to Default Publication Settings: Document.
Callout lines are created and adjusted according to the following conditions:
Condition How the Line is Drawn The step number is placed within the vertical coordinate range of the hotspot.
The starting point of the callout will display on the side of the action note with the central vertical coordinate matching. For example, center to center. A horizontal line will be drawn to connect the step number with the starting point of the callout.
The step number is placed above/below the vertical coordinate range of the hotspot.
The starting point of the callout will display at the top/bottom center of the hotspot. A vertical line is drawn from that position to the central vertical coordinate of the step number. A horizontal line is drawn to connect the vertical line with the step number.
The step number is placed above/below the vertical coordinate range of the combined hotspot region.
A Z-shaped line will connect the center of the bracket to the step number. The vertical split of the Z-shaped line will start halfway between the step number and the bracket.

Chapter 8: Editing and Formatting: Procedural Content
148 HP Adoption Readiness Tool™
Condition How the Line is Drawn The step number is placed within the vertical coordinate range of the hotspot.
You can shift the callout horizontally from the margin to the callout hotspot. In the case of range callouts, the limiting hotspot will be the hotspot closest to the margin that the callout step number is drawn on.
Step number is placed above/below the vertical coordinate range of the hotspot.
You can shift the callout horizontally within horizontal range of the callout hotspot. If a hotspot covers a textbox, you can only shift the callout along the bottom or top side of the textbox.
Working with Images
Editing Images
1. Create or open a document.
2. Click the Document tab.
3. Navigate to the step containing the image you want to edit.
4. Right-click on the image.
5. Select Edit Screen ... .
6. Perform one of the following options:
If You Want To ThenResize the image Click on the up or down arrow in the Image Size
field . Crop the image Grab a sizing handle and drag to crop the image. Determine the region that displays
Select an image from the Regions drop-down list.

Chapter 8: Editing and Formatting: Procedural Content
HP Adoption Readiness Tool™ 149
7. Click OK.
Viewing an Image Mask
1. Create or open a document.
2. Click the Document tab.
3. Navigate to the step containing the mask you want to view.
4. Right-click on the imag containing the mask.
5. Select Edit Screen ... .
6. Select View > Masks.
Creating an Image Mask
1. Create or open a document.
2. Click the Document tab.
3. Navigate to the step containing an image for which you want to create a mask.
4. Select Edit Screen ... .
5. Right-click on the image.

Chapter 8: Editing and Formatting: Procedural Content
150 HP Adoption Readiness Tool™
6. Click .
The mask will display as a small, rectangular, black box in the upper left corner of the screen image.
7. Select the mask, and drag it to the area you want to mask.
8. Click OK.
Editing an Image Mask
1. Create or open a document.
2. Click the Document tab.
3. Navigate to the step containing the mask you want to edit.
4. Right-click on the image containing the mask.

Chapter 8: Editing and Formatting: Procedural Content
HP Adoption Readiness Tool™ 151
5. Select Edit Screen ... .
6. Select View > Mask Properties.
7. Choose from the following options:
Field DescriptionLeft, Top, Width, Height Enter values in the Left, Right, Height, and Width
fields, or grab a sizing handle on the mask within the image, and drag it to the size you want the mask to cover. The Left, Right, Height, and Width fields will adjust accordingly.
Background Click ... to select a background color. Border Color Click ... to select a background color. Border Thickness Chose a border thickness from the drop-down list. Preview Allows you to preview the mask. Steps Select the steps for which you want to include the
mask.
8. Click the X to close the Mask Properties window.

Chapter 8: Editing and Formatting: Procedural Content
152 HP Adoption Readiness Tool™
9. Click OK.
Copying and Pasting an Image Mask
1. Create or open a document.
2. Click the Document tab.
3. Navigate to the step containing the image you want to copy and paste.
4. Right-click on the image containing the mask.
5. Select Edit Screen ... .
6. Select the mask you want to copy.
7. Click to copy the mask.
8. Click to paste the mask.
Deleting an Image Mask
1. Create or open a document.
2. Click the Document tab.
3. Navigate to the step containing the mask you want to delete.
4. Right-click on the image containing the mask.

Chapter 8: Editing and Formatting: Procedural Content
HP Adoption Readiness Tool™ 153
5. Select Edit Screen ... .
6. Right-click on the mask to be deleted.
7. Select Delete.
8. Click OK.
Resetting Screen Images You can reset an image to its originally-recorded state as long as the image has not been saved. Resetting an image will remove all masks, callout edits, and additional image edits you have made to the screen.
1. Create or open a document.
2. Click the Document tab.
3. Navigate to the step containing the image you want to edit.
4. Right-click on the image.

Chapter 8: Editing and Formatting: Procedural Content
154 HP Adoption Readiness Tool™
5. Select Edit Screen ... .
6. Click Reset.

Chapter 8: Editing and Formatting: Procedural Content
HP Adoption Readiness Tool™ 155
Working with Callouts
Inserting a Numbered Callout If callout functionality has been enabled in the template and visibility turned on within the document options, numbered callouts are automatically inserted into the document.
For information on enabling functionality within the template, refer to Default Publication Settings: Document. For information on enabling visibility within the document, Specifying Document Options (on page 43).
Simulation View must be enabled in order to activate the display of callouts.
Inserting a Non-Step Callout
1. Create or open a document.
2. Click the Simulation tab.
3. Navigate to the step for which you want to create a callout.
4. Select INSERT > NOTE > NOTE.
5. Reposition the callout within the screen image.
Non-step callouts will not display in the document view if they are placed outside the screen image.
6. Right-click on the note.
7. Select Edit Note... .
8. Select General on the left pane.
9. Select the Enable callout in document view checkbox.
Simulation View must be enabled in order to activate the display of callouts.
10. Click OK.

Chapter 8: Editing and Formatting: Procedural Content
156 HP Adoption Readiness Tool™
Viewing Callouts
1. Create or open a document.
2. Click the Document tab.
3. Navigate to the step containing the callout you want to view.
4. Right-click on the imag containing the callout.
5. Select Edit Screen ... .
6. Select View > Callouts.
Editing a Numbered Callout
1. Create or open a document.
2. Click the Document tab.
3. Navigate to the step containing the numbered callout you want to edit.
4. Right-click on the image containing the callout.

Chapter 8: Editing and Formatting: Procedural Content
HP Adoption Readiness Tool™ 157
5. Select Edit Screen ... .
6. Click on a callout.
The displayed number is the step number to which the callout is associated.
7. Perform one of the following actions:
If You Want To ThenEdit the location of the callout number Drag the callout up, down, left, or right to change
the angle of the trajectory line. Edit the destination of the trajectory line
Click on the circular grip and move it left or right to adjust the destination of the trajectory line.
8. Click OK.
Callout line color is defined in the template. For more information, refer to Specifying General Settings: Information.
Editing a Non-Step Callout
1. Create or open a document.
2. Click the Document tab.
3. Navigate to the step containing the non-step callout you want to edit.
4. Edit the callout as you would a simulation note. For more information, refer to Editing Notes (on page 120).

Chapter 8: Editing and Formatting: Procedural Content
158 HP Adoption Readiness Tool™
Generating the Exercise Section
The Exercise section is automatically generated based on the information contained in the Procedure section of the document. To limit rework, you should complete editing of the Procedure section before generating the exercise section.
If you must repopulate the Exercise section after initial creation, refer to Rebuilding the Exercise Section (on page 159).
When generating the Exercise section, data is taken from the field description tables and screen titles to create and populate the Required Data table and the Tasks section.
Required Data Table
A required data table is created from field description tables in the Procedure section. The required data table lists field names and the values listed as examples in the field description tables. If the recorder was used to capture data, these examples are the actual data typed during the task. It does not matter if the examples were automatically inserted during recording or manually inserted later.
Tasks Section
Specific tasks are created for each screen documented. These tasks are created from the screen titles that exist in the Procedure section. It does not matter if the screens were originally captured during recording or were inserted later in editing.
Generating the Exercise Section
1. Open the uPerform Express document.
2. Select TOOLS > GENERATE EXERCISE SECTION.
3. Scroll to the Exercise section and edit the section as needed.

Chapter 8: Editing and Formatting: Procedural Content
HP Adoption Readiness Tool™ 159
Adding User-Specific Data In certain transactions, the same data cannot be used for every user in the training environment, and user-specific data must be used. This user-specific data will not automatically be created by the template and must be populated by the author.
1. Open the uPerform Express document.
2. Scroll to the User-Specific Data subsection.
3. Double-click to highlight the xxxx generic text in the column headings, and type the desired student identifier (for example, "Student 1").
4. Double-click to highlight the xxxx generic text in the rows, and type the user-specific data.
Replacing the Boilerplate Questions You should enter customized questions and answers in the Tasks subsection.
1. Double-click to highlight the xxxx generic text.
2. Type the appropriate question or answer.
Rebuilding the Exercise Section The Exercise section is automatically populated based on the information contained in the Procedure section of the document. While it is recommended that you complete the Procedure section before including the Exercise section, you can rebuild your exercise information after initial creation if necessary.
When you rebuild the Exercise section, any text you have entered in the tables, tasks, or question and answer areas will be overwritten.

Chapter 8: Editing and Formatting: Procedural Content
160 HP Adoption Readiness Tool™
Change the Language of Default Text
After document creation, you can morph the language of the boilerplate text and simulation action text in your uPerform Express document, simulation, or course. The boilerplate text includes such phrases as "Use this procedure to" and "Helpful Hints." The simulation action text includes such standard introductory step text as "Click," "Type," and "Press."
uPerform Express will only morph default text. Text you type in the document, simulation, or course views is not morphed to another language. In addition, if you have customized simulation action text, these customizations will be lost during morphing.
Changing the Language of Default Text
1. Open the uPerform Express document.
2. Select FILE > PROPERTIES... .
3. Select the new language from the Language drop-down list.
4. Click OK.
5. Click Yes at the confirmation prompt.

Chapter 8: Editing and Formatting: Procedural Content
HP Adoption Readiness Tool™ 161
Working with the Screenflow
The uPerform Express screenflow is an additional view available from the editor workspace. The screenflow provides a graphical overview of the entire task or process. The screenflow is automatically updated as elements are added or edited in either the document or the simulation view. Branching is not depicted in the screenflow.
When published in HTML output, the screenflow displays at the beginning of the document and is mapped so that each screen in the flow is hyperlinked to the correlating step in the procedure.
Viewing the Screenflow
1. Select the Screenflow tab in the lower left.
The screenflow view is also available via the VIEW > SCREENFLOW menu option.

Chapter 8: Editing and Formatting: Procedural Content
162 HP Adoption Readiness Tool™
Customizing the Screenflow Display Choose one or more of the following options:
If You Want To ThenDisplay the screens in a thumbnail view Select the Thumbnail View radio button in the
task pane. The view that is selected in the document will be reflected in the published output.
Display only the screen title bars with optional additional information
Select the Step View radio button in the task pane. When displaying the step view, you can also elect to display a list of the fields and/or the steps on the screen. The view that is selected in the document will be reflected in the published output.
Edit the screen title Double-click in the screen title portion of the screen image, and select a new title from the drop-down menu or enter a new title.
Changing the screen title in this manner in the screenflow view will also change the screen title for all screens with the same title in the document view. The simulation view is not affected.
Quickly navigate to a particular step in the document or simulation views
Right-click on the screen image and select Edit in document view or Edit in simulation view.

163
Chapter 9: Editing and Formatting: Courses
After you have created a course, you have many options for editing and formatting content in the course.
In addition to inserting standard objects such as lessons, pages, and assessment sections, you can also insert text, images, hyperlinks, hotspots, Microsoft PowerPoint content, Adobe Flash content, and audio.

Chapter 9: Editing and Formatting: Courses
164 HP Adoption Readiness Tool™
Introduction to Editing and Formatting: Courses
After you have created a course, you can enhance your course using basic editing and formatting functionality. For basic formatting functionality, refer to Editing and Formatting: Basics (on page 91). In addition, you can edit course content to include such options as inserting text, images, pages, Microsoft PowerPoint content, and Flash content. Edits should be performed on content stored on your local computer.
ANCILE uPerform Express courses are made up of a course root page, lesson folders, pages (standard or interaction), and optional branching or assessment sections. Standard content pages can contain conceptual information about the course topic and interaction pages quiz the end user on course materials. Results of the optional branching or assessment sections can be tracked and analyzed using a Learning Management System (LMS).
Lessons are similar to a chapter in a textbook. You can use lessons to introduce content, and then use pages to deliver topic details to the end user. The following is an illustration of a typical course hierarchy within the uPerform Express course editor:
Some of the editing and formatting functions available to you include:
Insert text and images, and apply formatting
Insert uPerform Express procedural content
Import Microsoft PowerPoint content
Import content from another uPerform Express course
Insert hotspots and links
Embed Flash content
Insert MP3 audio files

Chapter 9: Editing and Formatting: Courses
HP Adoption Readiness Tool™ 165
Create self-tests
Create branching sections
Create assessments for integration with an LMS

Chapter 9: Editing and Formatting: Courses
166 HP Adoption Readiness Tool™
Working with Lessons
ANCILE uPerform Express course lessons are folders that contain pages. Pages are inserted into lesson folders to create the course content. You can use standard content pages to provide conceptual information to end users. You can use interaction pages to quiz the user throughout the course, then track and analyze results via an LMS.
For detailed information on creating a course, refer to Introduction to Creating and Opening Content.
1. Create or open a course.
2. In the Course Pane area, select the course root page or place the cursor where you want to insert a lesson.
3. Select INSERT > INSERT LESSON... .
4. Choose a stencil from the following options:
Stencil Options
Standard - Flash This stencil creates a standard content page containing a single Flash file.
Standard - Full This stencil creates a standard content page with text.
Standard - Half - Bottom This stencil creates a standard content page with text on the bottom of the page. An optional image can be placed on top.
Standard - Half - Left This stencil creates a standard content page with text on the left of the page. An optional image can be placed to the right.

Chapter 9: Editing and Formatting: Courses
HP Adoption Readiness Tool™ 167
Stencil Options
Standard - Half - Right This stencil creates a standard content page with text on the right of the page. An optional image can be placed to the left.
Standard - Half - Two Image - Bottom
This stencil creates a standard content page with text on the bottom of the page. An optional two images can be placed on top.
Standard - Half - Two Image - Left
This stencil creates a standard content page with text on the left of the page. An optional two images can be placed to the right.
Standard - Half - Two Image - Right
This stencil creates a standard content page with text on the right of the page. An optional two images can be placed to the left.
Standard - Image This stencil creates a standard content page containing an image.
Standard - Image - Diagonal - Left
This stencil creates a standard content page with text on the top left and bottom right of the page. An optional two images can be placed diagonally within the stencil.
Standard - Image - Diagonal - Right
This stencil creates a standard content page with text on the top right and bottom left of the page. An optional two images can be placed diagonally within the stencil.
Simulation This stencil creates a standard content page that allows you to import a published uPerform Express simulation.
5. Enter a name in the Name field.
6. Click OK.
7. In the course content pane, complete the following fields:

Chapter 9: Editing and Formatting: Courses
168 HP Adoption Readiness Tool™
Based on the page selected, some of the following options may not be displayed.
Field Description{Enter content title here} Click to highlight the placeholder and overwrite
with the title of the lesson.
{Enter content here} Click to highlight the placeholder and overwrite with the lesson page content.
Add Picture... Click the hyperlink to browse to the image location.
Add Simulation ... Click the hyperlink to browse to the published simulation location.
A caution icon will display in the outline view on a lesson that does not contain pages or that contains pages that have not been filled out completely.

Chapter 9: Editing and Formatting: Courses
HP Adoption Readiness Tool™ 169
Working with Pages
ANCILE uPerform Express pages contain the content for the course. The layout of a page is based on the stencil that you choose when you insert a new page into the course. Two types of stencils are available:
Standard Content: Contains informational content and optional images.
Interaction: Contains content consisting of questions and answers and optional images. These stencils use traditional eLearning models such as multiple choice, drag and drop, and fill-in.
Interaction pages can be used with an LMS for tracking purposes, or as a standalone self-test for the user. For more information on working with assessments and self-tests, refer to Working with Assessment Sections and Self-Tests.
Inserting a Page
1. Create or open a course.
2. In the Task Pane, click on a course root folder, lesson, page, or assessment.
3. Select INSERT > INSERT PAGE....

Chapter 9: Editing and Formatting: Courses
170 HP Adoption Readiness Tool™
4. Choose a stencil from the following options:
Stencil Option
Standard - Flash This stencil creates a standard content page containing a single Flash file.
Standard - Full This stencil creates a standard content page with text.
Standard - Half - Bottom This stencil creates a standard content page with text on the bottom of the page. An optional image can be placed on top.
Standard - Half - Left This stencil creates a standard content page with text on the left of the page. An optional image can be placed to the right.
Standard - Half - Right This stencil creates a standard content page with text on the right of the page. An optional image can be placed to the left.
Standard - Half - Two Image - Bottom
This stencil creates a standard content page with text on the bottom of the page. An optional two images can be placed on top.
Standard - Half - Two Image - Left
This stencil creates a standard content page with text on the left of the page. An optional two images can be placed to the right.
Standard - Half - Two Image - Right
This stencil creates a standard content page with text on the right of the page. An optional two images can be placed to the left.
Standard - Image - Diagonal - Left
This stencil creates a standard content page with text on the top left and bottom right of the page. An optional two images can be placed diagonally within the stencil.
Standard - Image - Diagonal - Right
This stencil creates a standard content page with text on the top right and bottom left of the page. An optional two images can be placed diagonally within the stencil.
Branching This stencil creates a branch that allows the user to decide where to go next in the course.
Standard - Image This stencil creates a standard content page containing an image.
Drag and Drop This stencil creates an interaction page featuring one matching item per definition.
Drag and Drop - Many-to-One
This stencil creates an interaction page featuring one or more drag-and-drop responses to a single question.
Fill In - Multiple This stencil creates an interaction page that allows the user to enter responses to multiple questions.
Fill In - Single This stencil creates an interaction page that allows the user to enter a response to a single question.

Chapter 9: Editing and Formatting: Courses
HP Adoption Readiness Tool™ 171
Stencil Option
Multiple Choice This stencil creates an interaction page featuring several possible responses to a single question. Only one response is correct.
Multiple Choice - Half This stencil creates an interaction page featuring several possible responses to a single question. Only one response is correct. An optional image can be placed to the right.
Multiple Correct This stencil creates an interaction page featuring several possible responses to a single question. One or more responses may be correct.
Multiple Correct - Half This stencil creates an interaction page featuring several possible responses to a single question. One or more responses may be correct. An optional image can be placed to the right.
Simulation This option is not available for ANCILE uPerform Express. This stencil creates a standard content page that allows you to import a published uPerform Express simulation.
5. Enter a name in the Name field.
6. Click OK.
A caution icon will display in the outline view on a page for which content has not been filled out completely and on the Assessment section if there are no pages inserted into the assessment.

Chapter 9: Editing and Formatting: Courses
172 HP Adoption Readiness Tool™
Switching a Stencil
Switching a stencil allows you to modify any stencil in a uPerform course. This is helpful if you are creating translated courses or need to update the appearance of content within a course stencil. When you switch a stencil, uPerform will preserve the page content.
Switching a Stencil
1. Click in the toolbar.
2. Choose a stencil from the list of options.
3. Click OK.
You will be prompted to confirm your choice. To continue, click Yes. To keep the existing stencil, click No.

Chapter 9: Editing and Formatting: Courses
HP Adoption Readiness Tool™ 173
Editing Course Content
The course editor allows you to set formatting within a page. You can also reorder lessons and pages. By default, uPerform Express inserts lessons and pages below the object selected in the task pane.
Setting the Character Format
1. Highlight the text you want to format.
2. In the toolbar, select one of the following rich-text formatting options:
Field DescriptionBold Select this option to bold the text.
Underline Select this option to underline the text. Italic Select this option to italicize the text. Bullet List Select this option to format the text in a bulleted list.
Numbered List Select this option to format the text in a numbered list.
Increase/Decrease Indent Select this option to increase/decrease the indent.
Subscript Select this option to move a character to the bottom of the character line.
Superscript Select this option to move a character to the top of the character line.
To return the character format to normal, deselect the rich-text formatting from the toolbar.

Chapter 9: Editing and Formatting: Courses
174 HP Adoption Readiness Tool™
Reordering Lessons and Pages
1. Click on the lesson or page you want to move.
2. Choose from the following options:
If You Want To ThenMove the lesson or page above or below another lesson or page
Drag the lesson or page above or below another item in the Course task pane.
Move the lesson or page into another lesson or page
Drag the lesson or page onto the item in the Course task pane.

Chapter 9: Editing and Formatting: Courses
HP Adoption Readiness Tool™ 175
Using Images
Images can be used to further illustrate a specific point in a lesson and also to enhance conceptual points or questions and answers.
Inserting Images Into Pages
1. During page creation, select a stencil that allows you to insert an image. For more informa-tion, refer to Inserting a Page.
2. In the course content area, click Add Picture....
3. Navigate to the image you want to insert.
4. Click Open.
Editing Images
1. Navigate to the image you want to edit.
2. Click on the image.
3. Choose from the following options:
If You Want To ThenEdit the size of the image Click on a sizing handle and adjust the size of the
image.
Edit the content area of the image
Click on the four dots in the center line, and move the line up/down or left/right to adjust the content area of the image.

Chapter 9: Editing and Formatting: Courses
176 HP Adoption Readiness Tool™
If You Want To ThenEdit the image layout Right-click on the image, and select Image Layout.
Choose from the following options: Top left corner - Aligns the image in the top left corner of the image workspace. Top right corner - Aligns the image in the top right corner of the image workspace. Center - Aligns the image in the center of the image workspace. Bottom left corner- Aligns the image in the bottom left corner of the image workspace. Bottom right corner - Aligns the image in the bottom right corner of the image workspace.

Chapter 9: Editing and Formatting: Courses
HP Adoption Readiness Tool™ 177
Editing Interaction Pages
Interaction pages apply only to self-tests, branching pages, and pages within an assessment section. After you insert a page and choose an interaction page stencil, you must enter content into the fields and select your interactions in order to validate the page within the course.
Interactions differ based on the stencil. Interactions only apply to stencils with a question and answer format. In some stencils, the question and answer displays as a term and definition.
You can also customize the instructional phrases of your interactions. For example, you can modify, "Match the term on the left with the definition on the right" to read, "Select the best term for the definition."
Customizing Instructional Phrases Customized instructional phrases will no longer translate when the course language is changed. You can customize interaction instructional phrases globally within the uPerform Express author template. For more information regarding author templates, refer to Using Author Templates.
1. Click to highlight text in the instructional phrase field.
2. Enter new text.
Editing Interactions for Drag and Drop
1. Click on the {Enter term here} field.
2. Enter a term.
3. Click on the corresponding {Enter definition here} field.

Chapter 9: Editing and Formatting: Courses
178 HP Adoption Readiness Tool™
4. Enter a definition.
Definitions will be randomized when the course is published.
Editing Interactions for Drag and Drop - Many-to-One
1. Click on the {Enter question text here} field.
2. Enter a question.
3. Click on an {Enter answer text here} field.
4. Enter an answer.
5. Click next to the correct answer(s) to move the item to the answer pane.
To move an incorrect answer from the answer pane, click .
Editing Interactions for Fill In - Multiple and Single
1. Click on the {Enter question text here} field.

Chapter 9: Editing and Formatting: Courses
HP Adoption Readiness Tool™ 179
2. Enter a question.
3. Click on the {Enter definition here} field.
4. Enter a definition.
5. Click on the corresponding {Enter term here} field.
6. Enter a term.
If you have multiple correct definitions for a term, separate them with a comma.
Editing Interactions for Multiple Choice - Multiple and Half If you choose the Multiple Choice - Half stencil, you can insert an optional image to the right. For detailed information, refer to Using Images (on page 175).
1. Click on the {Enter question text here} field.
2. Enter a question.
3. Click on the {Enter answer text here} field.
4. Enter possible answer text.
5. Click the radio button next to the correct answer.

Chapter 9: Editing and Formatting: Courses
180 HP Adoption Readiness Tool™
Editing Interactions for Multiple Correct - Multiple and Half If you choose the Multiple Correct - Half stencil, you can insert an optional image to the right. For detailed information, refer to Using Images (on page 175).
1. Click on the {Enter question text here} field.
2. Enter a question.
3. Click on the {Enter answer text here} field.
4. Enter possible answer text.
5. Click the checkboxes next to the correct answers.

Chapter 9: Editing and Formatting: Courses
HP Adoption Readiness Tool™ 181
Importing Microsoft PowerPoint Content
ANCILE uPerform Express allows you to import elements from Microsoft PowerPoint presentations. For information on supported versions of Microsoft PowerPoint, refer to the ANCILE uPerform Express Technical Specifications. There are three options for importing Microsoft PowerPoint elements:
Import a slide as a single image
Import graphics from the presentation
Import text elements from the presentation
Importing PowerPoint Slides as Images
1. Select INSERT > IMPORT POWERPOINT... .
2. Choose the .ppt or .pptx file from which you want to import slides.
3. Click Open.
This action will open Microsoft PowerPoint. Do not close the application until you are finished importing slides.
4. In the Slides area, expand the tree view to locate the slides you want to import.

Chapter 9: Editing and Formatting: Courses
182 HP Adoption Readiness Tool™
A preview of the slide is displayed to the right of the tree view. You can import more than one slide at a time. Each slide will be inserted as an image in a new standard content page within the course.
5. Select the checkbox next to the slide(s) to import.
6. Choose a stencil from the following options:
Stencil Options
Standard - Full This stencil creates a standard content page with text.
Standard - Half - Bottom This stencil creates a standard content page with text on the bottom of the page. An optional image can be placed on top.
Standard - Half - Left This stencil creates a standard content page with text on the left of the page. An optional image can be placed to the right.
Standard - Half - Right This stencil creates a standard content page with text on the right of the page. An optional image can be placed to the left.
Standard - Half - Two Image - Bottom
This stencil creates a standard content page with text on the bottom of the page. An optional two images can be placed on top.
Standard - Half - Two Image - Left
This stencil creates a standard content page with text on the left of the page. An optional two images can be placed to the right.
Standard - Half - Two Image - Right
This stencil creates a standard content page with text on the right of the page. An optional two images can be placed to the left.
Standard - Image This stencil creates a standard content page containing an image.
Standard - Image - Diagonal - Left
This stencil creates a standard content page with text on the top left and bottom right of the page. An optional two images can be placed diagonally within the stencil.
Standard - Image - Diagonal - Right
This stencil creates a standard content page with text on the top right and bottom left of the page. An optional two images can be placed diagonally within the stencil.
7. Click OK.
8. Click Yes to confirm the import.

Chapter 9: Editing and Formatting: Courses
HP Adoption Readiness Tool™ 183
Importing Graphics from PowerPoint Slides
1. Select INSERT > IMPORT POWERPOINT... .
2. Choose the .ppt or .pptx file from which you want to import graphics.
3. Click Open.
This action will open Microsoft PowerPoint. Do not close the application until you are finished importing graphics.
4. In the Slides area, expand the tree view to locate the pictures you want to import.
A preview of the graphic is displayed to the right of the tree view. You can only import one graphic per slide, however, you can import graphics from other slides during a single import action. Each graphic is inserted as a new standard content page within the course. The image is not editable on the resulting page.
5. Select the checkbox next to the graphic(s) you want to import.
6. Choose a stencil from the following options:
Stencil OptionsStandard - Full This stencil creates a standard content page with
text.It is recommended that you do not use the Standard - Full template as it does not support graphics.
Standard - Half - Bottom This stencil creates a standard content page with text on the bottom of the page. An optional image can be placed on top.
Standard - Half - Left This stencil creates a standard content page with text on the left of the page. An optional image can be placed to the right.

Chapter 9: Editing and Formatting: Courses
184 HP Adoption Readiness Tool™
Stencil OptionsStandard - Half - Right This stencil creates a standard content page with text
on the right of the page. An optional image can be placed to the left.
Standard - Half - Two Image - Bottom
This stencil creates a standard content page with text on the bottom of the page. An optional two images can be placed on top.
Standard - Half - Two Image - Left
This stencil creates a standard content page with text on the left of the page. An optional two images can be placed to the right.
Standard - Half - Two Image - Right
This stencil creates a standard content page with text on the right of the page. An optional two images can be placed to the left.
Standard - Image This stencil creates a standard content page containing an image.
Standard - Image - Diagonal - Left
This stencil creates a standard content page with text on the top left and bottom right of the page. An optional two images can be placed diagonally within the stencil.
Standard - Image - Diagonal - Right
This stencil creates a standard content page with text on the top right and bottom left of the page. An optional two images can be placed diagonally within the stencil.
7. Click OK.
8. Click Yes to confirm the import.
Importing Text from PowerPoint Slides ANCILE recommends you arrange the slide elements within Powerpoint using the Move to Back functionality so that the text box you wish to import as the title is the bottom/back-most element within each slide.
1. Select INSERT > IMPORT POWERPOINT... .
2. Choose the .ppt or .pptx file from which you want to import text.
3. Click Open.
This action will open Microsoft PowerPoint. Do not close the application until you are finished importing text.

Chapter 9: Editing and Formatting: Courses
HP Adoption Readiness Tool™ 185
4. In the Slides area, expand the tree view to locate the text you want to import.
A preview of the text is displayed to the right of the tree view. You can import more than one text element at a time. All text elements selected are imported into the content area of one new standard content page. Text elements are imported as plain text without character formatting.
5. Select the checkbox next to the text item(s) you want to import.
6. Choose a stencil from the following options:
Stencil Options
Standard - Full This stencil creates a standard content page with text.
Standard - Half - Bottom This stencil creates a standard content page with text on the bottom of the page. An optional image can be placed on top.
Standard - Half - Left This stencil creates a standard content page with text on the left of the page. An optional image can be placed to the right.
Standard - Half - Right This stencil creates a standard content page with text on the right of the page. An optional image can be placed to the left.
Standard - Half - Two Image - Bottom
This stencil creates a standard content page with text on the bottom of the page. An optional two images can be placed on top.
Standard - Half - Two Image - Left
This stencil creates a standard content page with text on the left of the page. An optional two images can be placed to the right.
Standard - Half - Two Image - Right
This stencil creates a standard content page with text on the right of the page. An optional two images can be placed to the left.

Chapter 9: Editing and Formatting: Courses
186 HP Adoption Readiness Tool™
Stencil Options
Standard - Image This stencil creates a standard content page containing an image.
Standard - Image - Diagonal - Left
This stencil creates a standard content page with text on the top left and bottom right of the page. An optional two images can be placed diagonally within the stencil.
Standard - Image - Diagonal - Right
This stencil creates a standard content page with text on the top right and bottom left of the page. An optional two images can be placed diagonally within the stencil.
7. Click OK.
8. Click Yes to confirm the import.

Chapter 9: Editing and Formatting: Courses
HP Adoption Readiness Tool™ 187
Using Hotspots, Popups, and Hyperlinks
ANCILE uPerform Express allows you to insert hotspots on images to provide additional information or hints to end users. In addition, you can insert popups, page links, and hyperlinks in text within standard content areas. Hyperlinks from text launch a destination website in a new web browser window.
Inserting a Hotspot on an Image
1. Select a page that contains an image.
2. Click on the image on which you want to insert the hotspot.
3. Select INSERT > INSERT HOTSPOT....
4. Choose from the following options:
Depending on the type selected, some of the following options may not be displayed.
Field DescriptionType Specify Popup, Web Link, or Page Link.
Popup: Displays text based on an assigned trigger. Web Link: Launches a webpage. Page Link: Navigates to a page within the course
Trigger Specify Mouse click or Mouse over.
Tooltip Text Enter text to display when a user pauses the mouse on the popup.

Chapter 9: Editing and Formatting: Courses
188 HP Adoption Readiness Tool™
Popup Text Enter text to be displayed in a popup in a published course.
Link Location Specify a destination website, or a link to published content, to launch from the published course.
Page Specify a destination within the course.
Background Color Specify a background color for the hotspot. This will display as a gradient box with a matching border in a published course.
Visible Select the Visible checkbox to display the hotspot in published output.
5. Click OK.
Moving and Adjusting a Hotspot
1. Click on the hotspot.
2. Drag the hotspot to the desired location on the image, or click and drag on a sizing handle to resize.
Optionally, you can use the cursor keys to move the hotspot around on the image.
Editing Hotspot Properties
1. Right-click on the hotspot.
2. Select Edit Hotspot....
3. Complete the following fields:
Based on the type selected, some of the following options may not be displayed.
Field DescriptionType Specify Popup or Web Link.
Popup: Displays text based on an assigned trigger. Web Link: Launches a webpage.
Trigger Specify Mouse click or Mouse over.

Chapter 9: Editing and Formatting: Courses
HP Adoption Readiness Tool™ 189
Field DescriptionTooltip Text Enter text to display when a user pauses the mouse
on the popup.
Popup Text Enter text to be displayed in a popup in a published course.
Link Location Specify a destination website, or a link to published content, to launch from the published course.
Background Color Specify a background color for the hotspot. This will display as a gradient box with a matching border in a published course.
4. Click OK.
Inserting Popups, Web Links, and Page Links in Text Popups and hyperlinks are inserted in the text of standard content pages, and can also be inserted into the directions of any interaction page.
1. Select and highlight text within the content area.
2. Click .
3. Complete the following fields:
Depending on the type selected, some of the following options may not be displayed.
Field DescriptionType Specify Popup, Web Link, or Page Link.
Popup: Displays text based on an assigned trigger. Web Link: Launches a webpage. Page Link: Links to another page within the course.
Popup Text Enter text to be displayed in a popup in a published course.
Link Location Specify a destination website, or a link to published content to launch from the published course.
Page Expand or collapse the tree view as needed. Select a page from the list.
4. Click OK.

Chapter 9: Editing and Formatting: Courses
190 HP Adoption Readiness Tool™
Insert Published Simulations and Course Content
You can insert a published uPerform Express simulation via the Simulation stencil. This stencil is accessible when creating a new course or when inserting a new page into an existing course.
A uPerform course treats an inserted published uPerform simulation as a single page. A uPerform course will appear as a single object to an LMS. The LMS will not recognize the simulation as a standalone object.
You can insert course content via the Insert menu. This option is available when inserting objects into an existing course. You can select only the pages you want to include in your course, decreasing the amount of time spent editing.
Inserting Content from Existing Courses You can insert content from an existing uPerform course.
1. Create or open a course.
2. Select INSERT > IMPORT FROM COURSE.
3. Browse to the location of the existing course, select the .ulc file, and click Open.
4. In the Page area, expand the tree view to locate the page(s) you want to import.
A preview of the page is displayed to the right of the tree view. You can import more than one page at a time. Each page will be inserted as a new page within the course.
5. Select the page(s) you want to import.
6. Click OK.

Chapter 9: Editing and Formatting: Courses
HP Adoption Readiness Tool™ 191
You can edit the course using the procedures described in Editing and Formatting: Basics (on page 91) and Editing and Formatting: Courses (on page 163).
Inserting Published Simulations
1. Create or open a course.
2. Select INSERT > PAGE, INSERT > LESSON, OR INSERT > ASSESSMENT.
3. Select the Simulation stencil.
4. Enter a name in the Name field.
5. Click OK.
6. Click Browse for a simulation ....
7. Perform one of the following options:
If You Want To ThenInsert a new simulation Click .
Select the root folder containing all of the elements for the published simulation. Click OK.
Use an available simulation Select a simulation from the AvailableSimulations window.
This window lists all simulations that have been inserted into the course.

Chapter 9: Editing and Formatting: Courses
192 HP Adoption Readiness Tool™
8. Click OK.
9. Optionally, enter identifying information about the simulation into the text field.
10. Complete the following:
Field DescriptionClick here to Start the Auto Playback Tutorial
Select the checkbox to enable this playback option in a published course.
Click here to Start the Standard Tutorial
Select the checkbox to enable this playback option in a published course.
Click here to Start the Self Test Tutorial
Select the checkbox to enable this playback option in a published course.
Click here to Start the Assessment Tutorial
Select the checkbox to enable this playback option in a published course.

Chapter 9: Editing and Formatting: Courses
HP Adoption Readiness Tool™ 193
Working with Flash Content
ANCILE uPerform Express allows you to embed a single Flash file (.swf) into your course. The Flash content must contain all of the files necessary for playback.
You can also edit the Flash file via settings in the Adobe Flash Player Settings.
Embedding and Editing Flash Content
1. Choose one of the following options:
If You Want To ThenEmbed Flash content as a course root page
Select FILE > NEW.Select Course from the Type drop-down list. Choose a project from the Project listbox. Choose a template from the Template listbox. Enter a name in the Name field.
Embed Flash content as a lesson Select INSERT > INSERT LESSON....
Embed Flash content as a standard content page
Select INSERT > INSERT PAGE....
2. Select the Standard - Flash stencil.
3. Enter a name in the Name field.
4. Click OK.
5. In the content area, click Add Flash content ....
6. Navigate to the .swf file.
7. Click Open.
8. Right-click on the flash file in the editor.
9. Select Settings ....
10. Edit the settings using the Adobe Flash Player Settings window.
11. Click Close.

Chapter 9: Editing and Formatting: Courses
194 HP Adoption Readiness Tool™
Using Audio Files
Audio files can help guide the end user through the course and provide supplemental information. Each page or step within a course or simulation can have a supported audio file - MP3 or WAV - associated with the content.
uPerform allows you to incorporate audio two ways:
Create an audio recording from directly within the application. This capability is excellent for quick, simple recordings that will not require further editing or processing.
Import an audio file created with an external audio editor application. Using an external audio editor allows you more flexibility to enhance or edit your audio recording.
Installing LAME To create MP3 files from within uPerform, your computer must have the LAME application installed within the uPerform application directory.
To perform this task, you must be an Administrator on your computer. If you are not, contact your IT department for assistance.
1. In your web browser, navigate to http://www.rarewares.org/mp3-lame-bundle.php.
2. Download the latest version of LAME that is compatible with your computer.
3. On your computer, navigate to your browser's Download folder.
4. Double-click on the LAME zip file to open the file.
5. Select both lame.exe and LAME_ENC.DLL
6. Right-click the selected files and select Copy.
7. Navigate to LOCAL DISK (C:)>PROGRAM FILES>HP ADOPTION READINESS TOOL>BIN.
8. Paste both files into the bin directory.
9. If the uPerform client is running, restart the uPerform client for the changes to take effect.

Chapter 9: Editing and Formatting: Courses
HP Adoption Readiness Tool™ 195
Once you have installed LAME, all recordings will be encoded as MP3 files.
Creating an Audio File
1. In the Course Pane area, select the page to contain the audio.
2. Click the Audio tab on the status bar.
3. Select to launch the Recording Options dialog.
4. Complete the following fields:
Field DescriptionRecording Device Specify the input recording device. This selection is
machine specific.
Recording Quality Specify the audio quality setting. Setting MP3 WAVHigh 320kbps 16-bit Medium 128kbps 8-bit Low 64kbps 8-bit
5. Click to start the recording. Length will display the recording length in seconds.
6. Once you have set your options, the following controls are activated:
Control DescriptionClick Pause to pause the current recording.
Click Stop to stop the current recording.
Click Play to review the current recording.
7. Click OK to save your changes and close the window.

Chapter 9: Editing and Formatting: Courses
196 HP Adoption Readiness Tool™
Importing an Audio File The recommended MP3 encoding quality/bitrate is between 48-64 kbps. Ensure the file is converted to mono to keep the file size as small as possible.
1. In the task pane, select the page for which you want to insert audio.
2. In the status bar, click the Audio tab.
3. Click Browse....
4. Choose the MP3 or WAV audio file to import.
5. Click Open.
Playing an Audio File Adobe Flash must be installed to enable audio playback.
1. In the task pane, select the page containing the audio.
2. In the status bar, click the Audio tab.
3. Click .
You can adjust the volume using the slide bar . To stop the playback, click .
Transcribing an Audio File
1. In the task pane, select the page containing the audio.
2. In the status bar, click the Audio tab.
3. Click in the Transcript field.

Chapter 9: Editing and Formatting: Courses
HP Adoption Readiness Tool™ 197
4. Enter the text of the audio file.
The transcript text is plain text.

Chapter 9: Editing and Formatting: Courses
198 HP Adoption Readiness Tool™
Working with Assessment Sections, Self-Tests, and Branches
Interaction pages are inserted into an assessment section to test user knowledge. Results can be tracked and reported via email, Active Server Pages (ASP), or a Learning Management System (LMS).
Interaction pages can also be used as self-tests to provide ungraded feedback to a user during the course. Insert self-tests within a lesson to allow end users to test themselves on the knowledge in each lesson before moving into an optional graded assessment section.
Inserting an Assessment Section
1. Select INSERT > INSERT ASSESSMENT.
2. Choose a stencil from the following options:
Stencil OptionsStandard - Full This stencil creates a standard content page with
text.
Standard - Half - Bottom This stencil creates a standard content page with text on the bottom of the page. An optional image can be placed on top.
Standard - Half - Left This stencil creates a standard content page with text on the left of the page. An optional image can be placed to the right.
Standard - Half - Right This stencil creates a standard content page with text on the right of the page. An optional image can be placed to the left.
Standard - Half - Two Image - Bottom
This stencil creates a standard content page with text on the bottom of the page. An optional two images can be placed on top.
Standard - Half - Two Image - Left
This stencil creates a standard content page with text on the left of the page. An optional two images can be placed to the right.
Standard - Half - Two Image - Right
This stencil creates a standard content page with text on the right of the page. An optional two images can be placed to the left.
Standard - Image This stencil creates a standard content page containing an image.
Standard - Image - Diagonal - Left
This stencil creates a standard content page with text on the top left and bottom right of the page. An optional two images can be placed diagonally within the stencil.

Chapter 9: Editing and Formatting: Courses
HP Adoption Readiness Tool™ 199
Stencil OptionsStandard - Image - Diagonal - Right
This stencil creates a standard content page with text on the top right and bottom left of the page. An optional two images can be placed diagonally within the stencil.
3. Enter a name in the Name field.
4. Click OK.
Inserting Interaction Pages Into an Assessment Section
1. In the task pane, right-click on the assessment root page.
2. Select Insert Page....
3. Choose a stencil from one of the following options:
Stencil OptionsDrag and Drop This stencil creates an interaction page featuring one
matching item per definition.
Drag and Drop - Many-to-One
This stencil creates an interaction page featuring one or more drag-and-drop responses to a single question.
Fill In - Multiple This stencil creates an interaction page that allows the user to enter responses to multiple questions.
Fill In - Single This stencil creates an interaction page that allows the user to enter a response to a single question.
Multiple Choice This stencil creates an interaction page featuring several possible responses to a single question. Only one response is correct.
Multiple Choice - Half This stencil creates an interaction page featuring several possible responses to a single question. Only one response is correct. An optional image can be placed to the right.
Multiple Correct This stencil creates an interaction page featuring several possible responses to a single question. One or more responses may be correct.
Multiple Correct - Half This stencil creates an interaction page featuring several possible responses to a single question. One or more responses may be correct. An optional image can be placed to the right.
Simulation This stencil creates a standard content page that allows you to import a published uPerform Express simulation.

Chapter 9: Editing and Formatting: Courses
200 HP Adoption Readiness Tool™
4. Enter a name in the Name field.
5. Click OK.
Editing Assessment Section Properties
1. In the task pane, right-click on the assessment root page.
2. Select EDIT ASSESSMENT....
3. Edit the following options:
Field DescriptionName Edit the assessment name.
Select questions from a question pool
This option indicates to display a pre-determined number of interaction pages during the course.
Number of questions to use Use the up and down arrows to specify the number of questions to display during the course.
4. Click OK.
Creating Custom Assessment Feedback for a Page
1. In the task pane, right-click on an interaction page.
2. Select Edit Assessment ....
3. Select Custom Feedback.
4. Select the Use custom feedback text checkbox.
5. Complete the following fields:
Depending on the type of page selected, some options may not display.

Chapter 9: Editing and Formatting: Courses
HP Adoption Readiness Tool™ 201
Field DescriptionCorrect Enter the text to display in response to a correct
answer.For example: That is correct.
Incorrect Enter the text to display in response to an incorrect answer.For example: That is incorrect. Would you like to try again?
6. Click OK.
Editing Custom Assessment Feedback for a Page
1. In the task pane, right-click on the interaction page for which you want to edit custom assessment feedback.
2. Select Edit Assessment ....
3. Select Custom Feedback.
4. Select the Use custom feedback text checkbox.
5. Edit/review the following fields:
Depending on the type of page selected, some options may not display.
Field DescriptionCorrect Enter a value to display for a correct answer.
For example: Correct.
Incorrect Enter a value to display for an incorrect answer. For example: Incorrect. Would you like to try again.
6. Click OK.

Chapter 9: Editing and Formatting: Courses
202 HP Adoption Readiness Tool™
Creating a Self-Test
1. Click on any page within a lesson.
2. Select INSERT > INSERT PAGE....
3. Choose from one of the following options:
Stencils for standard content pages also display in this window. To create a self-test, choose only one of the stencils listed below.
Stencil Options
Drag and Drop This stencil creates an interaction page featuring one matching item per definition.
Drag and Drop - Many-to-One
This stencil creates an interaction page featuring one or more drag-and-drop responses to a single question.
Fill In - Multiple This stencil creates an interaction page that allows the user to enter responses to multiple questions.
Fill In - Single This stencil creates an interaction page that allows the user to enter a response to a single question.
Multiple Choice This stencil creates an interaction page featuring several possible responses to a single question. Only one response is correct.
Multiple Choice - Half This stencil creates an interaction page featuring several possible responses to a single question. Only one response is correct. An optional image can be placed to the right.
Multiple Correct This stencil creates an interaction page featuring several possible responses to a single question. One or more responses may be correct.
Multiple Correct - Half This stencil creates an interaction page featuring several possible responses to a single question. One or more responses may be correct. An optional image can be placed to the right.
4. Enter a name in the Name field.
5. Click OK.

Chapter 9: Editing and Formatting: Courses
HP Adoption Readiness Tool™ 203
Working with Branches
You can use interaction and standard pages to create branches within your course. Branches allow users to choose where in the course they want to go and these choices are specified when you create the branch. The choice will cause the user to take a side road in the content. Based on input provided by the user, and the nature of the branch, the user can then return to the main flow of the course after all pages in the branch have been visited. Branches allow you to give a variety of options to your end users, which allows them to partake in the eLearning course based on their personal needs.
Creating a Branch
1. Select INSERT > INSERT LESSON or INSERT > INSERT PAGE.
2. Select the Branching stencil.
3. Enter a name in the Name field.
4. Click OK.
5. Enter a question.

Chapter 9: Editing and Formatting: Courses
204 HP Adoption Readiness Tool™
6. Click the radio button next to the preferred choice:
Field DescriptionNo Default Choice (User must choose)
Select this option to allow the user to choose which page to visit.
Next Linear Page (User may bypass branching)
Select this option to allow the user to continue to the next page.
Custom Choice Select a custom choice to determine which page the user will visit next.
7. Complete the following fields:
Field DescriptionChoice 1 Enter text for the choice.
Example: Go to the HR Training lesson.
Choice 2 Enter text for the choice. Example: Go to the HR Benefits lesson
Blank field Enter text for the choice. Example: Go to the HR Orientation lesson.
8. On the right pane, right-click on a choice within the branching page.
9. Select Insert Page ... .
10. Choose a stencil from the following options:
Stencil Option Standard - Flash This stencil creates a standard content page
containing a single Flash file.
Standard - Full This stencil creates a standard content page with text.

Chapter 9: Editing and Formatting: Courses
HP Adoption Readiness Tool™ 205
Stencil Option Standard - Half - Bottom This stencil creates a standard content page with text
on the bottom of the page. An optional image can be placed on top.
Standard - Half - Left This stencil creates a standard content page with text on the left of the page. An optional image can be placed to the right.
Standard - Half - Right This stencil creates a standard content page with text on the right of the page. An optional image can be placed to the left.
Standard - Half - Two Image - Bottom
This stencil creates a standard content page with text on the bottom of the page. An optional two images can be placed on top.
Standard - Half - Two Image - Left
This stencil creates a standard content page with text on the left of the page. An optional two images can be placed to the right.
Standard - Half - Two Image - Right
This stencil creates a standard content page with text on the right of the page. An optional two images can be placed to the left.
Standard - Image This stencil creates a standard content page containing an image.
Standard - Image - Diagonal - Left
This stencil creates a standard content page with text on the top left and bottom right of the page. An optional two images can be placed diagonally within the stencil.
Standard - Image - Diagonal - Right
This stencil creates a standard content page with text on the top right and bottom left of the page. An optional two images can be placed diagonally within the stencil.
Branching This stencil creates a branch that allows the user to decide where to go next in the course.
Drag and Drop This stencil creates an interaction page featuring one matching item per definition.
Drag and Drop - Many-to-One
This stencil creates an interaction page featuring one or more drag-and-drop responses to a single question.
Fill In - Multiple This stencil creates an interaction page that allows the user to enter responses to multiple questions.
Fill In - Single This stencil creates an interaction page that allows the user to enter a response to a single question.
Multiple Choice This stencil creates an interaction page featuring several possible responses to a single question. Only one response is correct.
Multiple Choice - Half This stencil creates an interaction page featuring several possible responses to a single question. Only one response is correct. An optional image can be placed to the right.

Chapter 9: Editing and Formatting: Courses
206 HP Adoption Readiness Tool™
Stencil Option Multiple Correct This stencil creates an interaction page featuring
several possible responses to a single question. One or more responses may be correct.
Multiple Correct - Half This stencil creates an interaction page featuring several possible responses to a single question. One or more responses may be correct. An optional image can be placed to the right.
Simulation This stencil creates a standard content page that allows you to import a published uPerform simulation.
11. Edit the stencil using one of the procedures in Editing and Formatting: Courses (on page 163).
12. Repeat Steps 7 - 11 to create additional pages within the branch choice.
Editing Branching Page Properties
1. Right-click on a choice within a branch.
To edit branching properties, a choice must contain one or more pages.
2. Select Edit Page.

Chapter 9: Editing and Formatting: Courses
HP Adoption Readiness Tool™ 207
3. Select Termination in the left pane.
The General tab is read only. The page name is not editable through the properties window.
4. Choose from the following options:
Field DescriptionTerminate course on this page
Select the Terminate course on this page checkbox to end the course once the user has completed this page.
Send score to LMS Select the Send score to LMS checkbox to send the page score to a registered LMS.
Send score as Select a score to be sent to the LMS.
5. Click OK.


209
Chapter 10: Editing and Formatting: Student Guides and Course Packages
You can edit and format a student guide to combine concepts, procedures, and exercises related to a series of tasks or a process. In addition, you can publish multiple uPerform document and course files into a single master SCORM package.

Chapter 10: Editing and Formatting: Student Guides and Course Packages
210 HP Adoption Readiness Tool™
Introduction to Editing and Formatting Student Guides and Course Packages
ANCILE uPerform student guides allow you to combine concepts, procedures, and exercises related to a series of tasks or a process. Student guides can include uPerform documents and courses, as well as Microsoft Word documents. By combining related information into one booklet, you can provide your end users with an easily printable collection of relevant content.
Student guides can be published to Word format and have the file extension .usg. Published student guides can be checked into the uPerform server as a managed document, or they can be printed out as a single file for distribution to end users.
Creating a course package allows a mobile player within a learning management system (LMS), such as ANCILE uLearn, to recognize the course structure without the course structure being created manually. Course packages can be published locally and checked into the uPerform server for content management.
An ANCILE course package allows you to publish multiple uPerform content files into a single master SCORM package. You can combine documents and courses that are based on the same template, and specify the order in which content will be presented to the end user. When adding uPerform source files, you have the option of selecting files that reside locally as well as on a uPerform server. Course packages have the file extension .upc.

Chapter 10: Editing and Formatting: Student Guides and Course Packages
HP Adoption Readiness Tool™ 211
Working With a Student Guide
Inserting Content Into a Student Guide
1. Create a student guide using the procedure found in Creating Content.
2. Perform one of the following options:
If You Want To ThenInsert uPerform source content Select Insert > Insert uPerform Source File.
Go to Step 3. Insert a Microsoft Word document Select Insert > Insert Word Document.
Navigate to the .doc or .docx file you want to insert.Click OK.Go to Step 5.
3. From the Insert menu, chose Local.
4. Perform one of the following options:
If You Want To ThenInsert a uPerform eLearning course In the Source file window, click on the .ulc file
you want to insert.
Insert a published uPerform document In the Source file window, click on the .udc file you want to insert. In the Publication window, click on the publication type. Only those publication types that produce Word output are listed.
5. Click Insert.
Replacing uPerform Express Content within a Student Guide
1. Open a uPerform Express student guide.
2. Select the uPerform content you want to edit or replace in the Task Pane.
3. Click Replace.
4. In the Source file window, click on the .udc or .ulc file you want to insert.

Chapter 10: Editing and Formatting: Student Guides and Course Packages
212 HP Adoption Readiness Tool™
5. In the Publication window, click on the publication type.
Publication types will display for .udc files only if they can be published to Word format. For more information, refer to Previewing and Publishing Content.
6. Click Insert.
Replacing or Editing Microsoft Word Content Within a Student Guide
1. Open a uPerform Express student guide.
2. Select the Word file in the Task Pane that you would like to edit or replace.
3. Perform one of the following options:
If You Want To ThenReplace the Word file Click Replace.
Navigate to the replacement file. Click OK.
Edit the existing Word file Click Edit.This will open the document in Microsoft Word. Edit the Word file. In Word, select FILE > SAVE.In uPerform, click OK when prompted to update the student guide.
Reordering Content within a Student Guide
1. Click on the content you want to move.
2. Choose one of the following options:
If You Want To ThenMove the content above or below another item
Drag the content above or below another item in the task pane.
Move the content under another item to create a chapter
Drag the content onto the item in the task pane.

Chapter 10: Editing and Formatting: Student Guides and Course Packages
HP Adoption Readiness Tool™ 213
Previewing the Table of Contents
1. Open a uPerform Express student guide.
2. Select Table of Contents in the Task Pane.
3. Click Preview.
The table of contents preview will open in Microsoft Word. Any edits made to the table of contents in Word will not be saved in the .usg file.
The display is controlled by options available in the template editor. For more information, refer to Default Publication Settings: Student Guide.
4. Optionally, review the following fields:
Field DescriptionFile Name Displays the file name for the Student Guide.
Source Directory Displays the location where the student guide is save on the author's local computer.
After publishing a student guide, you must open the guide in Microsoft Word and update the table of contents as per Word's table of contents update functionality.
Viewing and Editing Properties for Student Guide Content
1. Open a uPerform Express student guide.
2. Select a file type from the Task Pane.
3. Optionally, edit the name of the document in the Name field.
This changes the display of the document name in the table of contents.
4. Review the following information:
Field DescriptionFile Name Displays the file name for the content
Publication Displays the publication type. This option is available only for uPerform content.

Chapter 10: Editing and Formatting: Student Guides and Course Packages
214 HP Adoption Readiness Tool™
GUID Displays the unique identifier for the content. This option is available only for uPerform content.
Version Number Displays the current version number for the content. This option is available only for uPerform content.
Language Displays the language of the content. This option is available only for uPerform content.
Created Displays the creation date of the content to ensure content is up to date.
Last Modified Display date and time the document was last modified.
Last Accessed Displays the date and time the content was last accessed.

Chapter 10: Editing and Formatting: Student Guides and Course Packages
HP Adoption Readiness Tool™ 215
Working with Course Packages
Inserting a Lesson Into a Course Package
1. Create or open a course package.
2. In the Course Package area, select the package root page or place the cursor where you want to insert a lesson.
3. Select INSERT > INSERT LESSON... .
4. Enter a name for the lesson in the Name field.
Inserting a uPerform Express Source File into a Course Package
1. Create or open a course package.
2. In the Course Package area, click on a root folder, lesson, or uPerform Express source file.
3. Select INSERT > INSERT UPERFORM SOURCE FILE....
4. From the Insert drop-down list, choose one of the following options:
If You Want To ThenInsert content saved to your local source directory
Select Local.
Insert content from the uPerform server Select From ANCILE uPerform Server.Select a project from the Project drop-down list.
5. In the Source file window, click on the file you want to insert.
6. In the Publication window, click on the publication type. Only those publication types that produce Flash output are listed.
7. Click Insert.

Chapter 10: Editing and Formatting: Student Guides and Course Packages
216 HP Adoption Readiness Tool™
Updating or Replacing a uPerform Express uPerform Source File
1. Create or open a course package.
2. In the Course Package area, click on the uPerform Express source file you want to replace.
3. Click Replace.
4. From the Insert drop-down list, choose one of the following options:
If You Want To ThenUpdate content saved to your local source directory
Select Local.
Update content from the uPerform server
Select From ANCILE uPerform Server.Select a project from the Project drop-down list.
5. In the Source file window, click on the file you want to insert.
6. In the Publication window, click on the publication type. Only those publication types that produce Flash output are listed.
7. Click Insert.
8. If you are updating a document from the uPerform server, click Update to ensure you are inserting the most recent version from the server.
Reordering Content within a Course Package
1. Click on the lesson or uPerform Express source file you want to move.
2. Choose from the following options:
If You Want To ThenMove the lesson or source file above or below another lesson or source file
Drag the lesson or page above or below another item in the Course Package pane.
Move the lesson or page into another lesson
Drag the lesson or page onto the item in the Course Package task pane.
Viewing and Editing Properties for Course Packages
1. Open a course package.

Chapter 10: Editing and Formatting: Student Guides and Course Packages
HP Adoption Readiness Tool™ 217
2. Select a file type from the Course Package pane.
3. Optionally, edit the name of the document in the Name field.
4. Review the following information for uPerform Express source files:
Field DescriptionFile Name Displays the file name for the content.
Publication Displays the publication type.
GUID Displays the unique identifier for the content. Version Number Displays the current version number for the content. Language Displays the language of the content. Created Displays the creation date of the content to ensure
content is up to date. Last Modified Display date and time the document was last
modified. Last Accessed Displays the date and time the content was last
accessed.


219
Chapter 11: Searching Content
Search functionality in the editor allows you to search within content.

Chapter 11: Searching Content
220 HP Adoption Readiness Tool™
Introduction to Searching
In addition to basic search functionality, uPerform also includes a find and replace feature to allow you to easily locate and change text within your content.

Chapter 11: Searching Content
HP Adoption Readiness Tool™ 221
Searching Within Content
Two search functions are available within a document or course:
Find one or more instances of particular text
Find and replace one or more instances of particular text
You can search within notes, actions, steps, the document narrative, course text and annotations.
Executing a Search
1. Create or open content.
2. Select EDIT > FIND AND REPLACE... .
3. Select the Find tab.
4. Enter the search text in the Find field.
5. Optionally, click Options to expand and collapse additional search criteria.
6. Optionally, click Find whole words only to search for an exact word, or click Match case to search for words using case sensitivity.
7. Click Find Next.
8. To find additional instances of the search text, click Find Next.
9. Click Cancel to close the window.

Chapter 11: Searching Content
222 HP Adoption Readiness Tool™
Using Find and Replace
1. Create or open content.
2. Select EDIT > FIND AND REPLACE... .
3. Select the Replace tab.
4. Enter the search text in the Find field.
5. Enter the replacement text in the Replace with field.
6. Optionally, click More Option to expand and collapse additional search criteria.
7. Optionally, click Find whole words only to search for an exact word, or click Match case to search for words using case sensitivity.
8. Click Replace to find and replace the next instance of the search text, or click Replace All to find and replace all instances of the search text.
9. To find additional instances of the text, click Find Next.
10. Click Cancel to close the window.
Performing a Quick Search
1. Create or open content.
2. Enter Ctrl+F.
3. Enter the search term in the Find field.

Chapter 11: Searching Content
HP Adoption Readiness Tool™ 223
4. Optionally, click Find whole words only to search for an exact word, or click Match case to search for words using case sensitivity.
5. Click Next.
6. Repeat Step 5 to find the next instance of the term.
7. Click the red X to close the window.


225
Chapter 12: Using the Glossary
ANCILE uPerform Express allows you to maintain a central file of terms and definitions used in procedural content. The glossary functionality ensures authors are using consistent and approved definitions.

Chapter 12: Using the Glossary
226 HP Adoption Readiness Tool™
Introduction to the Glossary
Glossary functionality is provided with uPerform Express to allow you to maintain a collection of terms and definitions used in procedural content. The glossary allows you to specify consistent, business-specific definitions for your terms and then automatically push these definitions into your uPerform Express documents.
Terms and definitions are displayed in recorded Field/Description tables within the document view of uPerform Express content. Field description tables that are inserted during editing as a step will not support glossary functionality. The following is an illustration of a recorded Field/Description table.
Maintaining terms and definitions in one file allows documents to be updated quickly and accurately. New terms can be added, and changes can be made to definitions for existing terms within the glossary. The glossary functionality supports one definition per term.
Once you have standardized the valid terms and definitions, the administrator executes the globalization process to update definitions (descriptions) of terms (fields) within the documents prior to making the documents available to your end users.
Only those documents created with the same template as that used by the current glossary template can be globalized.
To ensure a manageable glossary file size and ensure optimum performance, there is a system limitation of 2500 terms that can be stored and managed in a uPerform Express Glossary. If an action within the glossary editor would cause this limit to be exceeded, a message is displayed. The number of available terms remaining is always displayed in the lower left.
You can choose not to use a central glossary but, rather, have authors enter definitions directly into the Description column of tables.

Chapter 12: Using the Glossary
HP Adoption Readiness Tool™ 227
Create the Glossary
There are two methods for initially creating your glossary:
Create the glossary file from within the uPerform Express editor and proceed to populate the file manually or via the globalization process.
Create the glossary file by importing an existing, tab-delimited text file containing terms and definitions or terms only.
Creating a Glossary
1. Select FILE > NEW from the editor.
2. Select Glossary from the Type drop-down list.
3. Complete/review the following information:
Field DescriptionName Enter the name of the glossary.
Template Select the template associated with this glossary. The template controls the glossary layout and the term and definition styles used. Only documents created with this template can be globalized using this glossary.
Language This field is not applicable to the glossary file type. Location As desired, edit the default location of the glossary.

Chapter 12: Using the Glossary
228 HP Adoption Readiness Tool™
4. Click OK.
For information on adding terms and definitions to your glossary, refer to Adding a Term and Definition (on page 230).
Creating a Glossary by Importing a Text File Prior to importing the text file, save the file using UTF-8 or Unicode encoding to ensure special characters are imported correctly. When saving a text file in Notepad, select FILE > SAVE AS... and specify UTF-8 or Unicode from the Encoding drop-down list.
1. Create the glossary file as described in Creating a Glossary (on page 227).
2. Select TOOLS > IMPORT A GLOSSARY.
3. Click Browse... to navigate to the tab-delimited text file.
4. Click OK.
5. At the confirmation prompt, click Yes to confirm replacement of any existing terms and definitions.
If a line within the file includes a tab, a term and definition pair is imported. If a line within the file does not include a tab but does include text, a term is imported.
6. Review the Application log for any errors. In Windows XP, the log is stored in the \Documents and Settings\[username]\Application Data\ANCILE\uPerform Express\Version X.X\Logs directory. In Windows Vista and Windows 7, the log is stored in the \User\App Data\Roaming\ANCILE\uPerform Express\Version X.X\Logs directory.

Chapter 12: Using the Glossary
HP Adoption Readiness Tool™ 229
Open and Save the Glossary
Opening a Glossary
1. Select FILE > OPEN > OPEN LOCAL... .
2. Select the .upg file.
3. Click Open.
Saving a Glossary Perform one of the following actions:
If You Want To ThenSave an existing glossary Select FILE > SAVE.
If this is the first time you are saving the file and the display of the Properties window is enabled, the Properties window is displayed.
Save the open glossary as a new file Select FILE > SAVE AS... . Enter a new filename, and click Save.

Chapter 12: Using the Glossary
230 HP Adoption Readiness Tool™
Adding Terms and Definitions
When you add a new term and definition pair, the pair is available to all uPerform Express documents when a globalization process is executed.
Adding a Term and Definition
1. Select INSERT > INSERT TERM.
2. Enter the new term in the Term: field.
3. Click OK.
4. Perform one or more of the following actions:
If You Want To ThenSpecify a definition from an existing term (a synonym)
Click Use definition from another term.Select the synonym from the drop-down list.
Add a definition Click Use own definition.Enter the definition.
The term and definition pair are added.
Adding a Definition to an Existing Term
1. Select the term from the Glossary task pane.
2. Enter a definition or specify a synonym.

Chapter 12: Using the Glossary
HP Adoption Readiness Tool™ 231
Updating Terms and Definitions
Editing a Term or Definition
1. Select the term from the Glossary task pane.
2. Edit the term or definition.
Deleting a Term
1. Select the term from the Glossary task pane.
2. Select EDIT > DELETE.
Deleting a term removes the term and its definition from the glossary. If you attempt to delete a term used as a synonym, a warning message is displayed. Any terms using the deleted term as a synonym will be updated to reflect a blank definition.

Chapter 12: Using the Glossary
232 HP Adoption Readiness Tool™
Browsing the Glossary
You can search for one or more specific terms and view all undefined terms in the glossary.
Viewing Term Information
1. Select a term in the Glossary task pane.
2. View the definition or synonym in the content area.
Searching for a Term
1. In the Glossary task pane, enter the term in the [Search for Term] field.
The list refreshes to highlight the first term matching the search criteria. In addition, terms not matching the search criteria are filtered out of the list.
2. View the associated definition or synonym in the content area.
Viewing Undefined Terms In the Glossary task pane, click View undefined terms only.
The list refreshes to display terms with a synonym and terms without a definition.

Chapter 12: Using the Glossary
HP Adoption Readiness Tool™ 233
Using Globalize
Definitions for terms in uPerform Express content can be updated using a process called globalization. During globalization, definitions are inserted into documents and new terms in documents are gathered for inclusion in the glossary. The globalization process affects only text within recorded Field/Description tables. Text within Field/Description tables inserted during editing is ignored.
If a term exists in the document, but not in the glossary, the term is added to the glossary with a blank definition. The glossary will then need to be updated with a customized definition of the new term. You can then globalize to distribute the update to the documents containing the term.
Only those documents created with the same template as that used by the current glossary file can be globalized.
Definitions are never retrieved from documents during globalization. If an author has entered a definition for a term in a document, this definition will be overwritten by the globalization process.
The glossary functionality is not case-sensitive, meaning that a term in a document will be considered the same as a term in the glossary regardless of whether the same capitalization rules are applied. Purchase order and Purchase Order in documents are considered the same term. The Glossary is character-string dependent, however; Purchase order (one space) is different than Purchase order (two spaces).
Globalizing Documents You can globalize a batch of uPerform Express documents directly from the editor workspace. This task is typically performed by your project administrator. During globalization, definitions are pushed to documents. Optionally, new terms (with a blank definition) are added to the glossary.

Chapter 12: Using the Glossary
234 HP Adoption Readiness Tool™
The documents to be globalized must be stored in a location accessible by the computer executing the globalization. Prior to globalization, request that your authoring team upload their uPerform Express content to a designated file server.
Globalizing a Batch of Documents
1. Select TOOLS > APPLY TERM DEFINITIONS.
2. Select one of the following options:
If You Want To ThenApply definitions to a set of documents Click ... .
Specify the location of the uPerform Express content. Click OK.
Apply definitions to a set of documents and retrieve new terms from these documents
Click ... . Specify the location of the uPerform Express content. Select Retrieve New Terms from uPerform Express Documents.Click OK.
All uPerform Express content in the specified folder and any subfolders is globalized.
3. Optionally, review the Application log for details and information on any errors. In Windows XP, the log is stored in the \Documents and Settings\[username]\Application Data\ANCILE\uPerform Express\Version X.X\Logs directory. In Windows Vista and Windows 7, the log is stored in the \User\App Data\Roaming\ANCILE\uPerform Express\Version X.X\Logs directory.

Chapter 12: Using the Glossary
HP Adoption Readiness Tool™ 235
Publish the Glossary
The following subsection describes the steps to publish your glossary.
For detailed information on publishing documents, simulations, and courses, refer to Publishing Content. For information on batch publishing content, the glossary, and your website, refer to Batch Publishing (on page 359).
Publishing the Active Glossary
1. Select FILE > PUBLISH [GLOSSARY NAME]... .
2. Select the template corresponding to the glossary to be published.
3. Optionally, browse to specify an outbox other than the default.
The additional options below the outbox are applicable only if you are batch publishing content and the glossary. For information on batch publishing content, the glossary, and your website, refer to Batch Publishing (on page 359).
4. Click Publish to publish the active glossary.
When you publish the glossary, any existing, previously published glossary at the same location is deleted.
When publishing is complete, a summary message is displayed with a hyperlink to the successfully published glossary. The name of the published glossary is determined by the entry in the glossary publication settings in your template. For detailed information on glossary publication settings, refer to Manage All Publications (on page 282).

Chapter 12: Using the Glossary
236 HP Adoption Readiness Tool™
Optionally, review the Application and Transformation logs for detailed information on events. In Windows XP, the logs are stored in the \Documents and Settings\[username]\ Application Data\ANCILE\uPerform Express\Version X.X\Logs directory. In Windows Vista and Windows 7, the logs are stored in the \User\App Data\Roaming\ANCILE\uPerform Express\Version X.X\Logs directory.
To print the glossary, open and print the published index.xml file located in the specified outbox at \[glossary name]\glossary\xml.
Integrating a Published Glossary into the Website
After publishing the glossary and website, the link to the glossary in the upper right of the website will automatically point to the glossary file. Ensure you move all published files to a central file or web server as described in Making Your Website Available to End Users (on page 363).

Chapter 12: Using the Glossary
HP Adoption Readiness Tool™ 237
Export a Glossary File
You can export a uPerform Express glossary file for import into the uPerform server. This is useful if you have an glossary database and are planning to upgrade from uPerform Express to the full version of uPerform.
Exporting a Glossary File
1. Open a glossary file.
2. Select TOOLS > EXPORT A GLOSSARY.
3. Click Browse... to navigate to the export location.
4. Enter a file name in the File Name field.
5. Click OK.
6. Click OK.
7. Click OK.


239
Chapter 13: Using Annotations
Annotation functionality within the editor allows authors and reviewers to add notes and comments into uPerform Express content.

Chapter 13: Using Annotations
240 HP Adoption Readiness Tool™
Introduction to Annotations
Annotations allow authors and reviewers to insert comments in the form of notes directly within a document, simulation, or course. Annotations are created within a set; each author or reviewer can have a unique, customized annotation set to contain his notes to the author.
Annotations display in the procedural view and in the course view. Annotations made in one procedural view will affect the other view. Annotations do not display on the published content available to end users. Course annotations can be displayed on a printed course storyboard. For more information, refer to Printing Content (on page 101). Printing course annotations can provide additional information for students and course instructors.
You can display or hide annotations within content.

Chapter 13: Using Annotations
HP Adoption Readiness Tool™ 241
Viewing Annotations
You can toggle the display of annotation sets in the content area.
Course annotations are displayed on the bottom of the content area. Document and simulation annotations are displayed in the task pane in the Document view.
Viewing an Annotation Set
1. Open a document, simulation, or course and perform one of the following actions:
If You Want To ThenView annotations for a document or simulation
Select the Document or Simulation tab. Select VIEW > TASK PANE > ANNOTATIONSto display the Annotation task pane.
View annotations for a course Select VIEW > VIEW ANNOTATIONS.

Chapter 13: Using Annotations
242 HP Adoption Readiness Tool™
2. Perform one of the following actions:
If You Want To ThenSelect an annotation set in a document or simulation
Right-click on the annotation set in the task pane, and select View.
Select an annotation set in a course In the content area, click on the tab name corresponding to the annotation set.
3. In the content area, review the annotation notes.
Hiding All Annotation Sets
1. Perform one of the following actions:
If You Want To ThenHide annotations in a document or simulation
Select the Document or Simulation tab. Right-click on the annotation set name in the task pane.
Hide annotations in a course Right-click on an annotation tab in the content area.
2. Click Hide to hide all notes within the content area.

Chapter 13: Using Annotations
HP Adoption Readiness Tool™ 243
Creating Annotation Sets
An annotation set contains all the individual annotations made by one author or reviewer for a simulation, document, or course. A document or course can have more than one annotation set, but only one annotation set is viewable at a time.
Creating an annotation set automatically creates all annotations within the set. Each annotation within an annotation set is associated with only one element in the document or one page in a course. Annotations are stored as part of the uPerform content; they are not stored separately on the local computer.
Creating an Annotation Set
1. Create or open a document, simulation, or course.
2. Perform one of the following actions:
If You Want To ThenCreate an annotation set for a document Select the Document or Simulation tab, and go
to Step 3.
Create an annotation set for a course or a simulation
Go to Step 3.
3. Select VIEW > VIEW ANNOTATIONS to display the Annotation task pane.
4. Perform one of the following actions:
If You Want To ThenCreate an annotation set for a document Right-click in the task pane, and go to Step 5.
Create an annotation set for a course or a simulation
Click on the Click here to create a new Annotation Set hyperlink, and go to Step 6.

Chapter 13: Using Annotations
244 HP Adoption Readiness Tool™
5. Click New... .
6. Complete the following fields:
Field DescriptionName Enter the name of the annotation set.
Owner Enter the name of the annotation author. Style: Font Face Specify a font for the annotation text from the
drop-down list or optionally browse to locate a font.
Style: Font Size Specify a font size for the annotation text from the drop-down list.
Style: Color Specify a font color for the annotation text or optionally browse to choose a custom font color.
Style: Bold Click the checkbox to activate bold formatting.
Style: Italic Click the checkbox to active italic formatting. Style: Background Color Specify a background color for the annotation note
or optionally browse to choose a custom background color.
7. Click OK.
Entering Annotation Text
1. Create or open a document, simulation, or course.
2. Perform one of the following actions:
If You Want To ThenEnter annotation text in a document or simulation
Select the Document or Simulation tab. Select VIEW > TASK PANE > ANNOTATIONSto display the Annotation task pane.
Enter annotation text in a course or a simulation
Select VIEW > VIEW ANNOTATIONS.

Chapter 13: Using Annotations
HP Adoption Readiness Tool™ 245
3. In the content area, perform one of the following actions:
If You Want To ThenEnter annotation text in a document In the content area, double-click in the
annotation note corresponding to the element you wish to annotate, and go to Step 5.
Enter annotation text in a course or a simulation
Navigate to the page you want to annotate. Click on the appropriate tab. Click in the annotation content area, and go to Step 5.
4. Enter your annotation text.

Chapter 13: Using Annotations
246 HP Adoption Readiness Tool™
Managing Annotation Sets
You can create copies of existing annotation sets, modify an annotation set, and delete annotation sets.
Duplicating an Annotation Set
1. Create or open a document, simulation, or course.
2. Perform one of the following actions:
If You Want To ThenDuplicate an annotation set in a document or simulation
Select the Document or Simulation tab. Select VIEW > TASK PANE > ANNOTATIONSto display the Annotation task pane.
Duplicate an annotation set in a course Select VIEW > VIEW ANNOTATIONS.
3. Select the annotation set to duplicate.
4. Perform one of the following actions:
If You Want To ThenDuplicate an annotation set in a document
Right-click on the annotation set name in the task pane. Select Duplicate.
Duplicate an annotation set in a course or a simulation
Right-click on the tab of the annotation set you want to duplicate, and select Duplicate.
5. Right-click on the duplicated annotation set, and select Modify.
6. Specify the annotation set properties. For information on entering properties, refer to Creating an Annotation Set (on page 243).
7. Click OK.
Updating an Annotation Set
1. Create or open a document, simulation, or course.

Chapter 13: Using Annotations
HP Adoption Readiness Tool™ 247
2. Perform one of the following actions:
If You Want To ThenUpdate an annotation set in a document or simulation
Select the Document or Simulation tab. Select VIEW > TASK PANE > ANNOTATIONSto display the Annotation task pane.
Update an annotation set in a course Select VIEW > VIEW ANNOTATIONS.
3. Select the annotation set to modify.
4. Perform one of the following actions:
If You Want To ThenUpdate an annotation set in a document or simulation
Right-click on the annotation set name in the task pane.
Update an annotation set in a course Right-click on the tab of the annotation to be edited.
5. Click Modify... .
6. Edit the annotation set properties. For information on maintaining properties, refer to Creating an Annotation Set (on page 243).
7. Click OK.
Deleting an Annotation Set
1. Create or open a document, simulation, or course.

Chapter 13: Using Annotations
248 HP Adoption Readiness Tool™
2. Perform one of the following actions:
If You Want To ThenDelete an annotation set in a document or simulation
Select the Document or Simulation tab. Select VIEW > TASK PANE > ANNOTATIONSto display the Annotation task pane.
Delete an annotation set in a course Select VIEW > VIEW ANNOTATIONS.
3. Select the annotation set to delete.
4. Perform one of the following actions:
If You Want To ThenDelete an annotation set in a document or simulation
Right-click on the annotation set name in the task pane.
Delete an annotation set in a course Right-click on the annotation set you want to delete.
5. Click Delete.
6. Click Yes at the confirmation prompt.

Chapter 13: Using Annotations
HP Adoption Readiness Tool™ 249
Managing Annotation Notes
After you have created your annotation set and individual annotation notes, you can update the text within a note and modify the note format.
Editing an Annotation Note
1. Perform one of the following actions:
If You Want To ThenEdit an annotation note for a document Double-click on the annotation set name to edit,
and go to Step 2.
Edit an annotation note for a course or a simulation
Go to Step 2.
2. Click in the note in the content area.
3. Edit text as desired.


251
Chapter 14: Previewing and Publishing Content
ANCILE uPerform Express offers flexibility in the content types and formats that you can publish. Published content can be incorporated into your end user website.

Chapter 14: Previewing and Publishing Content
252 HP Adoption Readiness Tool™
Introduction to Previewing and Publishing Content
Publishing has many functions within uPerform Express, and allows you to:
Convert certain sections of a single document into complete, stand-alone publications intended for end user consumption.
Convert your course or simulation into web-ready content.
Create a printable booklet containing concepts, procedures, and exercises.
Combine multiple uPerform content files into a single master SCORM package for use with an LMS.
Produce guided help output to use during task execution.
You may publish as often as necessary. Content that is locally published to the same location will overwrite existing content of the same format and type.
For detailed information regarding publishing the glossary and website, refer to Publishing the Active Glossary (on page 235) and Publishing the Active Website (on page 357).
Overview of Document Publishing
Based on the settings specified by the author template you are using, the following document types may be available to publish:
ASAP BPP (Business Process Procedure) - Mimics the BPP documents that come with an Accelerated SAP (ASAP) implementation.
ASAP BPP Cue Card (HTML and XML formats only) - Mimics the ASAP BPP documents and provides a dynamic, multi-layer format designed specifically for context-sensitive help.
Configuration Information - Lists information such as configuration menu path, key field changes, and date of configuration change.
Cue Card (HTML and XML formats only) - Provides a dynamic, multi-layer document designed specifically for context-sensitive help, includes screenflows.
Exercise - Includes data for a given procedure, and tasks and questions for end users to complete.
Quick Reference (Flow) - Includes overview information and a screenflow.

Chapter 14: Previewing and Publishing Content
HP Adoption Readiness Tool™ 253
Quick Reference (Step) - Includes overview information and end user steps without screen images or field definitions.
Test Document - Includes scenarios and results used in system testing.
Work Instruction - Includes overview information, end user procedures with steps, field description tables, screen shots, and screenflows.
Test Script - Publishes an XML file and creates an "Images" folder containing images that correspond to each step in a uPerform document. A Microsoft Excel add-in allows you to upload this publication type to HP Quality Center version 9.2 or higher as a manual test script.
Your available document publishing settings and output types is mandated by your template. For detailed information on creating and maintaining templates, refer to Using Author Templates.
Overview of Simulation Publishing
Simulations are published as interactive tutorials. Based on the settings specified by the template you are using, the following simulation playback modes may be available to publish:
Auto Playback: Replays the task; no user intervention is required.
Standard: Guides the user through the task with step-by-step instructions.
Self Test: Allows the user to attempt the task and provides guidance when an error is made.
Assessment: Allows results to be captured and integrated into custom or third-party tracking applications.
Interactive tutorials are output as HTML files. HTML output is viewable through standard web browsers.
The tutorials are accessible through a main lesson homepage. The homepage display can be modified via your template. For detailed information on creating and maintaining templates to define your simulation publishing options, refer to Using Author Templates.
Overview of Course Publishing
Courses are published as self-paced content in HTML format, which provides optimal output performance by streaming audio after the content is buffered. Courses are interactive and can be played back using a supported web browser.
In addition, you can publish courses to PDF, print, and Word for distribution to your end users.
Chapter 14: Previewing and Publishing Content
254 HP Adoption Readiness Tool™
Overview of Student Guide Publishing
Student guides are published to Microsoft Word format. You must ensure that all uPerform source files exist in the same directory as the student guide. In addition, your source files must use the same template as the student guide to which they are inserted.
After publishing a student guide, you must open the guide in Microsoft Word and update the table of contents as per Word's table of contents update functionality.
Overview of Course Package Publishing
A uPerform course package (.ucp) is published to .zip, and allows you to publish multiple uPerform content files into a single master SCORM package.
Overview of Guided Help Publishing
Guided Help is published HTML content designed to be used during task execution. Users can start guided help playback for on-the-job support.

Chapter 14: Previewing and Publishing Content
HP Adoption Readiness Tool™ 255
Previewing a Simulation
You can preview simulations prior to publishing output locally or by checking the content into the uPerform Express server.
1. Select FILE > PREVIEW SIMULATION... to display the Preview Simulation window.
2. Click on one of the listed tutorial modes to launch the simulation.
Hyperlinks and hotspots inserted into the simulation will not be active until the simulation is published.
For detailed instructions on interacting with a simulation during playback, refer to Viewing Simulations (on page 260).

Chapter 14: Previewing and Publishing Content
256 HP Adoption Readiness Tool™
Previewing a Course
You can preview individual course pages prior to publishing. Only one page can be viewed at a time.
1. In the Course pane, click on the desired page to preview.
Hyperlinks, hotspots, and simulations inserted into the course will not be active until the course is published.
2. Click Preview in the status bar.

Chapter 14: Previewing and Publishing Content
HP Adoption Readiness Tool™ 257
Publishing Content
You can publish the current open uPerform Express content, or specify an inbox of uPerform Express content to publish in batch mode.
You must have Microsoft Office (specifically, Microsoft PowerPoint and Word) installed on your computer to locally publish .ppt, .pptx, .doc, .docx and .pps output.
Publishing Active Content
1. Select FILE > PUBLISH [DOCUMENT NAME]... .
2. Perform one of the following actions:
If You Want To ThenPublish documents and simulations Select the appropriate checkboxes to the left of
the desired simulation and document types and formats.
Publish a course Select the HTML, PDF, Print, or Word option.
Publish a student guide Select the Word option. Publish a course package Select the zip option. Publish guided help Select the Guided Help option.
3. Optionally, browse to specify an outbox other than the default.
4. Click Publish to publish the selected output types and formats.

Chapter 14: Previewing and Publishing Content
258 HP Adoption Readiness Tool™
When publishing is complete, a summary message is displayed with a hyperlink to successfully published content. For detailed information on viewing simulation playback, refer to Viewing Simulations (on page 260). For detailed information on viewing a course, refer to Viewing Courses (on page 262).
Batch Publishing Content
1. Select FILE > BATCH PUBLISH... .
2. Select the appropriate checkboxes to the left of the desired template, content types, glossaries, websites, and associated formats.
3. Optionally, browse to specify an inbox and/or outbox other than the default.
4. Optionally, select the Publish checkbox to publish only files in the inbox that have changed since the last publish operation.
When this option is enabled, uPerform scans the inbox folder to determine which documents and courses have been modified since the last publish operation. uPerform then includes only these changed files in the list of content to be published to the outbox folder.
5. Click Publish to publish the selected output types and formats.
When publishing is complete, a summary message is displayed with hyperlinks to successfully published content. For detailed information on viewing simulation playback, refer to Viewing Simulations (on page 260). For detailed information on viewing course playback, refer to Viewing Courses (on page 262).

Chapter 14: Previewing and Publishing Content
HP Adoption Readiness Tool™ 259
Viewing and Working with Published Content
Viewing Documents
Published content is stored in the specified outbox folder. Within this folder, content is stored in subfolders based on file name.
Within each folder, output type and format subfolders are displayed. Navigate to the desired subfolder and double-click on the index file to display content.
Working with Test Scripts The test script publication publishes an XML file formatted for use in a Microsoft Excel spreadsheet. If you are using HP Quality Center version 10.0 or higher, the publication will also publish an "Images" folder containing images that correspond to each step in a uPerform document. The XML file contains paths to the images, which are automatically attached to the steps in HP Quality Center version 10.0 or higher.
This document type is available only from the uPerform client. For more information on installing and configuring the Microsoft Excel Add-In, refer to the "Microsoft Excel Add-In Guide" provided with your supported version of HP Quality Center.
The following provides an overview of how to enable and produce a test script publication:
1. Enable Test Script on the Publications tab in the template.
2. Publish the test script from uPerform.
3. Open the test script in Microsoft Excel. Only the step text will be published in the Excel Spreadsheet (XML); no images will display.
4. Complete the Subject and Expected Results columns fields. uPerform documents do not contain a field that represents these values.
5. Upload the test script to HP Quality Center using the Microsoft Excel Add-in.

Chapter 14: Previewing and Publishing Content
260 HP Adoption Readiness Tool™
Viewing Simulations
If you are viewing a simulation outside of a SCORM- or AICC-conformant LMS, enter a username in the Please enter a user name for the test results field, and click .
All output modes can be started by selecting a hyperlink on the published homepage.
For detailed information on customizing playback modes, refer to Default Publication Settings: Simulation: General Settings.
Viewing a Standard Simulation In this playback mode, the end user interacts with the lesson. End users are shown the action hotspots, the steps in the Steps window, the step status bar, notes, and any incorporated audio. The end user performs the actions to complete the tutorial.
Standard mode allows the end user to skip around in the lesson by selecting the desired step in the Steps window. The Steps window display can also be customized.
The following playback options are available:
If You Want To ThenEnable or disable playback of an associated audio file
Click on the bottom right of the simulation playback page.
Remove a bookmark To remove a bookmark, select the bookmarked step, and click .
Hide the Steps window To hide the Step Window, click Hide Steps.
Restore the Steps window To restore the Step Window, click Restore Steps.

Chapter 14: Previewing and Publishing Content
HP Adoption Readiness Tool™ 261
If You Want To ThenSend the simulation output to a printer To send the step text and screens to the printer,
click in the Step Window.
Expand or collapse the Step Windowwindow
Click in the Step Window.
Move to the next or previous step. Click or on the bottom left of the simulation playback page.
Viewing an Auto Playback Simulation This playback mode will automatically run the lesson without user interaction. In this mode, the application performs the actions to complete the simulation with the user as an observer. Although the action hotspots and step status bar are viewable, the user has no input into the actions occurring during playback of the lesson. A Control Toolbar is displayed during the Auto Playback mode so that the user can reverse, pause, forward, stop, or resume the lesson playback. In addition, the user can move forward or backward by selecting a step in the Steps window.
For instructions on creating printable output and inserting bookmarks, refer to Viewing a Standard Simulation (on page 260). In Auto Playback mode, the user must first stop the playback before inserting a bookmark.
Viewing a Self-Test Simulation The Self-Test has no Steps window instructions, hotspots, notes, audio playback, or step status bar information. In this playback mode, the user is encouraged to remember and perform all necessary steps for testing purposes.
If you have enabled the display of hints for this lesson or for all lessons, the hint for the nonessential data will display in the lower left of the playback window. For example, one step of the simulation assessment might require users to enter a training ID, but in real life they will enter their own user id. When creating the simulation, you can type a note in the hint field like "Type Training ID 0001 for this simulation. On the production site, you will use your own User ID". For more information on enabling hints, refer to Default Publication Settings: Simulation: General Settings.
The user must perform all steps within the simulation from memory. If the user makes a mistake on a step, a Help window will display. By selecting Yes on the Help window, the system will display only the location of the required action with the appropriate hotspot.
Upon completion of a lesson in Self-Test mode, the user will receive an accuracy score measuring his performance.

Chapter 14: Previewing and Publishing Content
262 HP Adoption Readiness Tool™
Viewing an Assessment Simulation The Assessment mode has no Steps window instructions, hotspots, notes, audio playback, or step status bar information. In this playback mode, the user is encouraged to remember and perform all necessary steps for testing purposes.
If you have enabled the display of hints for this lesson or for all lessons, the hint for the nonessential data will display in the lower left of the playback window. For example, one step of the simulation assessment might require users to enter a training ID, but in real life they will enter their own user id. When creating the simulation, you can type a note in the hint field like "Type Training ID 0001 for this simulation. On the production site, you will use your own User ID". For more information, refer to Default Publication Settings: Simulation: General Settings.
This mode also provides the ability to send test results. To capture the results of an assessment tutorial if you are working outside of an LMS, you must enter a URL specifying the test result destination in the template. For complete details on specifying assessment options in the template, For more information, refer to Default Publication Settings: Simulation: General Settings.
The user must perform all steps within the simulation from memory. If the user makes a mistake on a step, a Help window will display. By selecting Yes on the Help window, the system will display only the location of the required action with the appropriate hotspot.
Upon completion, the user will receive an accuracy score measuring his performance.
Viewing Courses
If you are using an LMS or score catcher, enter a username in the Please enter a user name for the test results field, and click .
View a course by selecting the Course hyperlink on the published homepage.
Buttons such as Back and Next are used to navigate through the course. The Menu button allows the user to display an outline view of course content and identify his location within the course. The user can also jump to different pages within the course.

Chapter 14: Previewing and Publishing Content
HP Adoption Readiness Tool™ 263
The audio toolbar allows the user to play, pause, stop, and mute the audio that accompanies an individual page.
The History option allows the user to display only pages that have been visited. For example, if a user wanted to change a choice, or review page content, selecting this option displays only the pages visited. This is useful if your course incorporates branching so that the user sees only content relevant to the branch selected, or if a user wants to go directly to a specific page that has already been visited.
A user can opt to zoom into an image on a published page by hovering over the image and clicking the plus (+) sign on the image. This will open the image in a new window.
When a user reaches the end of the course, the user will be given the option to continue into the assessment.
A user can exit the course at any time by clicking Exit. The user will be prompted to confirm course results.
Upon completion, the user will receive an accuracy score measuring his performance.
Viewing Student Guides and Course Packages
Published student guide content is stored in the specified saved location. You can view published student guides by opening them in Microsoft Word.
Published course package content is stored as a .zip file in the specified saved location. You can view content within a published course package by opening the index.html file in a web browser.
Viewing Simulations on the Apple iPad ANCILE uPerform now supports playback of simulations on Apple iPads. Because the iPad does not natively support Windows-specific keys on its keyboard, uPerform provides specific key combinations to allow users to complete simulations.
The following options are available:
If You Want To ThenDisplay iPad-specific help Click on the bottom right of the simulation
playback page.
Enable a right-click event Click on the bottom right of the simulation playback page.

Chapter 14: Previewing and Publishing Content
264 HP Adoption Readiness Tool™
If You Want To ThenEnable the Control (CTRL) key Click on the bottom right of the simulation
playback page. Enable the Alt key Click on the bottom right of the simulation
playback page. Enable the Shift key Click on the bottom right of the simulation
playback page.
Viewing Guided Help Guided help is launched by selecting the hyperlink on the published content home page.
Once the user starts playback, guided help will automatically run without user interaction. This mode is quite similar to the autoplayback mode in simulations; the application performs the actions to complete the transaction with the user as an observer.
A Control Toolbar is displayed in the guided help to allow users to reverse, pause, forward, stop, or resume the help playback. In addition, the user can move forward or backward by selecting a step in the Step window.
If You Want To ThenPlay the playback Click on the bottom right of the help
playback page.
Pause the playback Click on the bottom right of the help playback page.

Chapter 14: Previewing and Publishing Content
HP Adoption Readiness Tool™ 265
If You Want To ThenAdvance one step Click on the bottom right of the help
playback page. Reverse one step Click on the bottom right of the help
playback page. Change Options Click on the top right to open Options.
Refer to Setting Guided Help Options for additional information.
Change to current step mode Click on the top right of the help playback page to toggle between Current Step mode and Full View mode. Current Step mode focuses on the current step only. Full View mode displays the entire transaction and highlights the current step.


267
Chapter 15: Using Author Templates
Author templates in ANCILE uPerform Express control the formatting and publishing options available to authors. Templates allow you to set standards and maintain consistency within your authoring team. The template also controls the functionality and display of your glossary and website.

Chapter 15: Using Author Templates
268 HP Adoption Readiness Tool™
Introduction to Author Templates
A key capability of uPerform Express is the ability to allow administrators to establish and enforce standards through the use of author templates. Author templates contain configuration and style settings to control the appearance and content of your training materials. Templates help you to enforce consistency via these predetermined formatting and configuration settings. Consistent formatting enables your users to quickly and easily find information in all content.
Author templates provide control over the following elements.
Styles - a group of formatting options that relate to paragraphs or character text.
Publications - a designator indicating content output.
Phrases - a group of culture-specific boilerplate text items that are placed into a block by default.
uPerform Properties - metadata such as document title, owner, and version used to describe content.
Image, Data, and Language Management - allows you to control images, data fields, and languages associated with a template.
You can edit author templates via the uPerform editor.

Chapter 15: Using Author Templates
HP Adoption Readiness Tool™ 269
The following diagram illustrates many of the basic uPerform Express procedural document elements that you can modify within the template:

Chapter 15: Using Author Templates
270 HP Adoption Readiness Tool™
Managing Author Templates
At the start of your project, you should create a new template and specify your configuration settings.
Each uPerform Express file is linked to a template via the template's unique 32-bit identifier.
During creation and edit, author templates are stored on your computer in the following locations:
For Windows XP: C:\Documents and Settings\[user name]\Application Data\uPerform\Version X.X\templates
For Windows Vista and Windows 7: C:\User\App Data\Roaming\uPerform\ VersionX.X\templates
You can manage local templates directly through uPerform Express. Author templates have a .udt file extension.
Create and Open a New Author Template
The following best practices apply to your use of author templates:
Create a new template using the uPerform FILE > NEW menu. Do not copy and rename a .udt file. The copy process renames the file but does not modify the template's unique identifier. A uPerform document is linked to a template via the template identifier, not the template name.
After creating a .udt file, do not rename the file via Microsoft Windows Explorer as this may cause an author to have multiple template files with the same identifier.

Chapter 15: Using Author Templates
HP Adoption Readiness Tool™ 271
Creating a New Author Template
1. From the editor, select File > New.
2. Enter a name for the new template in the Name field.
3. Select Template from the Type drop-down list.
4. Select a template from the Template list.
5. Click OK.
Refer to any of the following subsections for more information on customizing the template.
Opening a Template
1. From the editor, select FILE > OPEN > TEMPLATE.
2. Select the template you want to open.
3. Optionally, select Lock template for editing.
4. Click OK.
The standard author template delivered with the product cannot be opened in the editor.

Chapter 15: Using Author Templates
272 HP Adoption Readiness Tool™
Managing Local Templates
1. Select FILE > MANAGE LOCAL TEMPLATES....
2. Perform one of the following options:
If You Want To ThenSave a copy of a template Click Save Copy As....
Navigate to the template location. Enter a new file name. Click OK.
Add a template Click Add Template....Navigate to the location where you want to save the template. Enter a name for the template. Click OK.
Remove a template Select a template from the list. Click Remove.Click Yes.
Specifying New Template Settings: General
Specifying General Settings: Information
1. From the editor, open the new template.
2. Click General on the status bar.

Chapter 15: Using Author Templates
HP Adoption Readiness Tool™ 273
3. Click Information in the task pane.
4. Review the following information:
Field DescriptionName Specifies the name of the new template.
GUID Specifies the unique ID of the template.
Show file properties on first save
Select the Show file properties on first savecheckbox to display the Properties window to the author upon the first save during a new recording.
Allow simulation publishing on the uPerform Express Server
This setting is not applicable to uPerform Express.
Use full text option value in the Document Editor for the R/O/C table
Select the Use full text option value in the Document Editor for the R/O/C table to display Required, Optional, or Conditional in the Document Editor.
Field Label Separator Specifies what character should be used to separate multiple labels in a Field/Description table.
Callout Color Select the color to be used for displayed callouts. Optionally, click Select to choose a color.
5. Perform one or more of the following options:

Chapter 15: Using Author Templates
274 HP Adoption Readiness Tool™
If You Want To ThenAdd built-in or custom properties to be used to organize the website hierarchy Only enabled properties will be displayed in the Properties box. For detailed instructions on enabling built-in and custom properties, refer to Managing Built-in Properties (on page 277) and Creating and Managing Custom Properties (on page 279).
Click on the desired property in the Propertiesbox. Click the right arrow to move the property to the Hierarchy box. If you will be building your website based on properties, it is helpful to ensure the above option - Show file properties on first save - is enabled. This will prompt your authors to specify properties when creating content.
Remove built-in or custom properties to be used to organize the website hierarchy
Click on the desired property in the Hierarchybox. Click the left arrow to move the property to the Properties box.
Specify the hierarchy of selected properties
Use the up and down arrows to order the hierarchy of properties.
6. Select FILE > SAVE to save the template.
Specifying General Settings: Images
1. From the editor, open the new template.
2. Click General on the status bar.

Chapter 15: Using Author Templates
HP Adoption Readiness Tool™ 275
3. Click Images in the task pane.
4. Perform one of the following options:
If You Want To ThenAdd an image to the template Click Add.
Navigate to the image and click Open.
Update an image Select the image to update, and click Update.Navigate to the updated image, and click Open.
Delete a custom image Select the custom image from the list, and click Delete.At the prompt, click Yes.You cannot delete the standard images delivered with uPerform Express.
A preview of the selected image will display to the right.
5. Select FILE > SAVE to save the template.
Specifying General Settings: Data Files
1. From the editor, open the new template.
2. Click General on the status bar.

Chapter 15: Using Author Templates
276 HP Adoption Readiness Tool™
3. Click Data Files in the task pane.
4. Perform one of the following options:
If You Want To ThenAdd a data file to the template Click Add.
Navigate to the data file and click Open.
Update a data file Select the data file to update, and click Update.Navigate to the updated data file, and click Open.
Modify a data file Select a data file, and click Modify.Edit the file, and select FILE > SAVE.Basic knowledge of HTML, XSL, and Java is required. Optionally, click Change Editor ... to specify a different data file editor.
Delete a custom data file Select the custom data file from the list, and click Delete.At the prompt, click Yes.You cannot delete the standard data files delivered with uPerform Express.
5. Select FILE > SAVE to save the template.
Specifying General Settings: Languages
1. From the editor, open the new template.
2. Click General on the status bar.
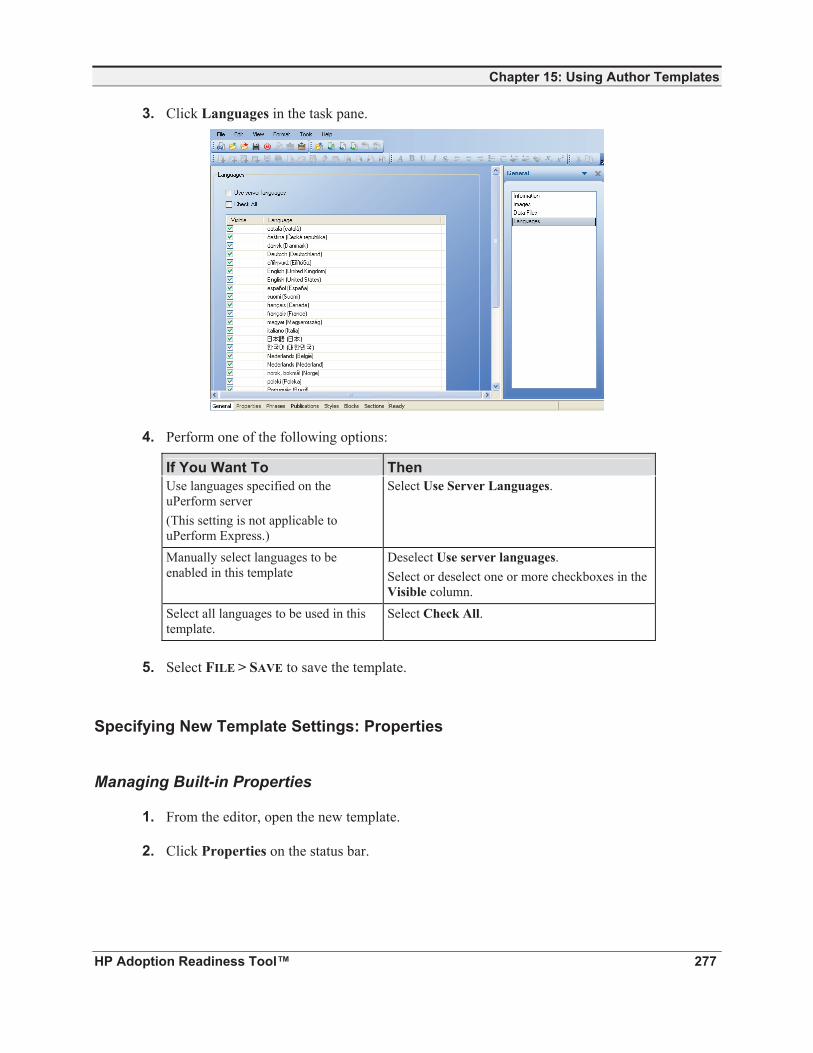
Chapter 15: Using Author Templates
HP Adoption Readiness Tool™ 277
3. Click Languages in the task pane.
4. Perform one of the following options:
If You Want To ThenUse languages specified on the uPerform server (This setting is not applicable to uPerform Express.)
Select Use Server Languages.
Manually select languages to be enabled in this template
Deselect Use server languages.Select or deselect one or more checkboxes in the Visible column.
Select all languages to be used in this template.
Select Check All.
5. Select FILE > SAVE to save the template.
Specifying New Template Settings: Properties
Managing Built-in Properties
1. From the editor, open the new template.
2. Click Properties on the status bar.

Chapter 15: Using Author Templates
278 HP Adoption Readiness Tool™
3. Select a built-in property from the Task Pane.
4. To make the property visible to authors in the Properties... window, click the Visiblecheckbox.
5. Select one of the following options:
Based on the item selected, not all options will display.
If You Want To ThenCreate a value Click Add..., and specify a name for the value.
Click OK.
Modify the selected value Click Modify to edit the value.
Delete the selected value Click Delete.
Move the value earlier in the list Click Move Up one or more times as needed. Move the value later in the list Click Move Down one or more times as needed.
6. Click Select Phrase.
7. Perform one of the following options:
If You Want To ThenAdd a custom phrase Click Add.
Select a language from the left. Enter the text in the Content area.Click OK.
Select a phrase Select a language from the Language drop-down list.Select a phrase from the Phrase listbox.Optionally, enter text into the Phrases field to search for text. Click OK.

Chapter 15: Using Author Templates
HP Adoption Readiness Tool™ 279
8. Select FILE > SAVE to save the template.
Creating and Managing Custom Properties
1. From the editor, open the new template.
2. Click Properties on the status bar.
3. Click Manage Custom Properties in the task pane.
4. Perform one of the following options:
If You Want To ThenAdd a new custom property Click Add.
Enter a value in the Property field.Click OK.Go to Step 5.
Modify an existing custom property Go to Step 5.
5. Select the custom property from the Task Pane.
6. To make the property visible to authors in the Properties... window, click the Visiblecheckbox.

Chapter 15: Using Author Templates
280 HP Adoption Readiness Tool™
7. Select one of the following options:
Based on the item selected, some options may not display.
If You Want To ThenModify the selected property Click Modify to edit the property.
Delete the selected property Click Delete.
Move the property earlier in the list Click Move Up one or more times as needed.
Move the property later in the list Click Move Down one or more times as needed.
8. Click Select Phrase.
9. Perform one of the following options:
If You Want To ThenAdd a custom phrase Click Add.
Select a language from the left. Enter the text in the Content area.Click OK.
Select a phrase Select a language from the Language drop-down list.Select a phrase from the Phrase listbox.Optionally, enter text into the Phrases field to search for text. Click OK.
10. Select FILE > SAVE to save the template.
Specifying New Template Settings: Phrases
Managing Phrases
1. From the editor, open the new template.

Chapter 15: Using Author Templates
HP Adoption Readiness Tool™ 281
2. Click Phrases on the status bar.
3. Select a language from the Language drop-down list in the Task Pane.
4. Choose a phrase name.
The following table lists the phrases for actions during recording and the common phrases for keyboard keys.
Field DescriptionClick %s %t %u %s = label
% t= control type %u = image
Double-click %s %t %u %s = label % t= control type %u = image
Right-click %s %t %u %s = label % t= control type %u = image
Right double-click %s %t %u
%s = label % t= control type %u = image
Type %s in the %t %u %s = typed text Drag %s to %t %s = first image
%t = second image Up, Down, Left, Right Press "Up"
Press "Down" Press "Left" Press "Right"
Page Up, Page Down Press "Page Up" Press "Page Down"
Tab Press "Tab" Return Press "Return"

Chapter 15: Using Author Templates
282 HP Adoption Readiness Tool™
Home, End Press "Home" Press "End"
Insert, Delete Press "Insert" Press "Delete"
5. Perform one of the following options:
If You Want To ThenAdd a phrase In the content pane, click Add.
Select a language from the left navigation pane. Enter the phrase in the Content pane. Click OK.
Modify a phrase Select a phrase in the content pane. Click Modify.Optionally, select a new language from the left navigation pane. Edit the phrase in the Content pane.
Duplicate a phrase Select the phrase you want to duplicate from the Content Pane.Click Duplicate.
Delete a phrase Select the phrase you want to delete. Click Delete.At the prompt, click Yes.
6. Select FILE > SAVE to save the template.
Specifying New Template Settings: Publications
Manage All Publications
1. From the editor, open the new template.

Chapter 15: Using Author Templates
HP Adoption Readiness Tool™ 283
2. Click Publications on the status bar.
3. Click the checkbox in the Enabled column next to the publication types you want to activate.
4. Choose from the following options:
Field DescriptionCourse Preview Select an option from the drop-down list to display
which style course you want to preview. You can create an option by duplicating and modifying the Course publication type as described in Duplicating, Deleting, and Moving Publication Types (on page 285).

Chapter 15: Using Author Templates
284 HP Adoption Readiness Tool™
Field DescriptionSimulation Preview Select an option from the drop-down list to display
which style simulation you want to preview. You can create an option by duplicating and modifying the Simulation publicationtype as described in Duplicating, Deleting, and Moving Publication Types (on page 285).
5. Select a publication type from the Manage All Publications list in the task pane.
6. Click Select Phrase.
7. Perform one of the following options:
If You Want To ThenAdd a custom phrase Click Add.
Select a language from the left. Enter the text in the Content area.Click OK.
Select a phrase Select a language from the Language drop-down list.Select a phrase from the Phrase listbox.Optionally, enter text into the Phrases field to search for text. Click OK.
8. Perform one of the following options:
If You Want To ThenAdd a section Click Add.
Select a section from the list. Click OK.
Remove a section Click Remove.At the prompt, click Yes.
Move the section earlier in the list Click Move Up one or more times as needed.
Move the section later in the list Click Move Down one or more times as needed. Delete a section Select the section.
Click Delete.You cannot delete standard sections delivered with uPerform Express .

Chapter 15: Using Author Templates
HP Adoption Readiness Tool™ 285
Section functionality is not applicable to the glossary or website publication types.
9. Review the publication type in the Type field.
The Type field is not configurable.
10. Enter a format name in the Name field.
11. Perform one of the following options:
If You Want To ThenUse default publication settings Select the checkbox next to Use Default
Publication Settings.
Create custom publication settings Deselect the checkbox next to Use Default Publication Settings.Click a publication setting under the selected publication type. Refer to Setting Default Publication Setting for more information.
12. Select FILE > SAVE to save the template.
Duplicating, Deleting, and Moving Publication Types
1. From the editor, open the new template.

Chapter 15: Using Author Templates
286 HP Adoption Readiness Tool™
2. Click Publications on the status bar.
3. Choose from the following options:
If You Want To ThenCopy a publication type Select the publication type you want to copy, and
click Duplicate.
Delete a publication type Select the publication type you want to delete, and click Delete.
Move the publication type earlier in the list
Click Move Up one or more times as needed to determine where the publication type will display in the uPerform Express website drop-down list.
Move the publication type later in the list
Click Move Down one or more times as needed to determine where the publication type will display in the uPerform Express website drop-down list.
4. Select FILE > SAVE to save the template.
Setting Default Publication Settings
1. From the editor, open the new template.

Chapter 15: Using Author Templates
HP Adoption Readiness Tool™ 287
2. Click Publications on the status bar.
3. Click Default Publication Settings in the task pane.
4. Select one of the following options:
If You Want To ThenModify document publication settings Select Document under Default Publication
Settings in the task pane. Refer to Default Publication Settings: Document (on page 288) for more information.
Modify simulation publication settings Select Simulation under Default Publication Settings in the task pane. Refer to Default Publication Settings: Simulation: General Settings (on page 290), Default Publication Settings: Simulation: User Interface Settings (on page 292), Default Publication Settings: Simulation: LMS Settings (on page 294), and Default Publication Settings: Simulation: Caption Settings (on page 296) for more information.

Chapter 15: Using Author Templates
288 HP Adoption Readiness Tool™
If You Want To ThenModify student guide publication settings
Select Student Guide under Default Publication Settings in the task pane. Refer to Default Publication Settings: Student Guide (on page 296) for more information.
Modify course package settings Select Course Package under DefaultPublication Settings in the task pane. Refer to Default Publication Settings: Course Package for more information.
Modify course publication settings Select Course under Default Publication Settings in the task pane. Refer to Default Publication Settings: Course: General Settings (on page 303), Default Publication Settings: Course: User Interface Settings (on page 306), Default Publication Settings: Course: LMS Settings (on page 307), Default Publication Settings: Course: Caption Settings (on page 309), and Default Publication Settings: Course: Page Settings (on page 310) for more information.
Modify guided help settings Select Guided Help under Default Publication Settings in the task pane. Refer to Guided Help Settings: Guided Help General Settings, refer to Guided Help Settings: User Interface Settings, refer to Guided Help Settings: Guided Help Captions, refer to Guided Help Settings: Mobile Device Publication Settings for more information.
Default Publication Settings: Document
1. From the editor, open the new template.
2. Click Publications on the status bar.

Chapter 15: Using Author Templates
HP Adoption Readiness Tool™ 289
3. Select Document under Default Publication Settings in the task pane.
4. Complete/review the following fields:
Field DescriptionDisplay the R/O/C column in published output
Select Show R/O/C column to display the R/O/C column in published output.
Use full text option value in the Document Editor for the R/O/C table
Select Use full text option value in the Document Editor for the R/O/C table to display Required, Optional, or Conditional in the document editor. Show R/O/C column must be selected in order to enable this option.
Mirror Margins Select Mirror Margins to create booklet-style, double-sided pages for PDF and Word outputs.
Publish Exercise Answers Select Publish Exercise Answers to publish exercise answers.
Insert a page break before each screen shot
Select Insert a page break before each screen shot to insert a break before screen shots.
Screen Select minimum and maximum screen heights and widths.Select Show callouts to display callouts.
Callouts will only display in publications containing screen captures. The font, font size, and line thickness of the callout is not configurable.
Margins Select the unit of measurement and specify the margins for the top, bottom, left, and right pages.
Page Size Select common size, unit of measurement and specify the height and width.

Chapter 15: Using Author Templates
290 HP Adoption Readiness Tool™
5. Select FILE > SAVE to save the template.
Default Publication Settings: Simulation: General Settings
1. From the editor, open the new template.
2. Click Publications on the status bar.
3. Select Simulation under Default Publication Settings in the task pane.
4. Select Simulation General Settings from the drop-down list.
5. Complete the following fields:
Field DescriptionCase-Sensitive Select the Case-Sensitive checkbox to require the
user to enter all text in the same case specified in the action properties (provided an Edit action of type 'Exact String' is used).
Display mouse path Select the Display mouse path checkbox to display mouse movements associated with each step of the simulation during auto playback.
Require enter press Select the Require enter press checkbox to require the user to press enter after an action.

Chapter 15: Using Author Templates
HP Adoption Readiness Tool™ 291
Field DescriptionRight click Select the mouse and key combination to be used to
represent a right-click action in the simulation. Playback Timer Specify the default wait time between steps during
auto playback.
Loop auto playback mode Select this option to loop a simulation when viewed in auto-playback mode.
Display action notes Select the Display action notes checkbox to enable the display and publishing of the auto-generated action notes in simulations.
Enable simulation typing sounds
Select the Enable simulation typing sounds checkbox, and select a sound from the drop-down list to enable typing sounds during simulation playback.For information on adding sound files to the template, refer to Specifying General Settings: Data Files (on page 275).
Image Quality Select a percentage from the drop-down list. The Image Quality option allows you to specify the compression quality of the image. ANCILE recommends the default 85%.
6. Select one of the following modes:
Field DescriptionAssessment mode Select to confirm that this mode is available for
publishing.
Auto Playback mode Select to confirm that this mode is available for publishing.
Self-Test mode Select to confirm that this mode is available for publishing.
Standard mode Select to confirm that this mode is available for publishing.
For more information on simulation output modes, refer to Viewing Simulations (on page 260).
7. Complete the following fields:
These options are set in the document properties and are customizable. For more information on customizing properties, refer to Specifying New Template Settings: Properties (on page 277).

Chapter 15: Using Author Templates
292 HP Adoption Readiness Tool™
Field DescriptionTitle Select Title to display the title on the home page.
Author Select Author to display the author on the home page.
Description Select Description to display the description on the home page.
Copyright Select Copyright to display the copyright on the home page.
Publish date Select Publish Date to display the publish date on the home page.
8. Complete the following fields:
Field DescriptionShow step window Select the Show Step Window checkbox to display
the Steps window to users during simulation playback.
Height Select the height of the published step window.
Width Select the width of the published step window. Dock on startup Select Dock on startup checkbox to set the dock
position on startup. Dock Position Select a dock position of right or left.
Border color Select the color of the hotspot border. Optionally, specify custom colors by clicking Select to the right of the color drop-down list.
Border size Select the size of the hotspot border. Flashing Select the checkbox next to Flashing to enable
flashing hotspots.
9. Select FILE > SAVE to save the template.
Default Publication Settings: Simulation: User Interface Settings
1. From the editor, open the new template.
2. Click Publications on the status bar.
3. Select Simulation under Default Publication Settings in the task pane.

Chapter 15: Using Author Templates
HP Adoption Readiness Tool™ 293
4. Select Simulation User Interface Settings from the drop-down list.
5. Select a skin from the Skins drop-down list.
A preview of the skin selection will display in the Preview window.
6. Complete the following fields:
Field DescriptionPlayer Colors Select a background color, and primary and
secondary colors for the banner background from the drop-down list.
Text Colors Select a primary color for the banner text from the drop-down list.
Optionally, specify custom colors by clicking Select to the right of the color drop-down list.
7. Choose from the following options:
Field DescriptionEnable Transitions Enables a smooth, animated transmission from step
to step. Reuse existing window Uses the same window when an external link is
launched from a simulation. Hide audio bar when audio is not present
Hides the audio bar when audio is not present.
Do not resize Opens the simulation in the current window size. Resize and center window Opens the simulation at the size specified by the
screen width and height, and centers the simulation window.
Start in full screen mode Opens the simulation in full screen mode.

Chapter 15: Using Author Templates
294 HP Adoption Readiness Tool™
8. Under Screen, select a minimum and maximum screen height and width.
This option is available only if Resize and center window is selected.
9. Under Maximum Screen Size, select a minimum or maximum screen size.
10. Select FILE > SAVE to save the template.
Default Publication Settings: Simulation: LMS Settings
1. From the editor, open the new template.
2. Click Publications on the status bar.
3. Select Simulation under Default Publication Settings in the task pane.
4. Select Simulation LMS Settings from the drop-down-list.
5. Complete/review the following fields:
Field DescriptionCreate package Click the Create Package checkbox to create
LMS-conformant output for integration with a Learning Management System (LMS).
Show hints Select the Show hints checkbox to display hints during the simulation self test or assessment test. Hints are nonessential data (for example, a user name) required to complete the simulation.

Chapter 15: Using Author Templates
HP Adoption Readiness Tool™ 295
Field DescriptionEnable remote proxy support Select the Enable remote proxy support checkbox
to enable content to communicate with a custom proxy that has been placed on the LMS server.
Enter the file location in the Assessment URI field.
Display username prompt Select this option to display the username prompt on the home page.
Package Type Select SCORM 2004, SCORM 1.2, or AICC from the drop-down list to select the output. You can edit the SCORM and AICC imsmanifest.xml file via the package editor. For more information, refer to Default Publication Settings: Package Editor (on page 312).
Package Status Value Select a completion-type value from the drop-down list.This option is available only for SCORM 1.2 and AICC.
Assessment URI Enter a destination URI (Uniform Resource Identifier) to send test results for capture by a custom-built utility. You can create an Active Server Page (ASP) or Java Server Page (JSP) on a web server to receive the output for subsequent storage and reporting in a learning management system. Any technology that accepts the form Post method using HTTP can be used to handle the output. Example: http://www.yourcompany.com/results.asp Note that if the student's web browser security settings are set to High, warning messages will be displayed.
The Create Package option must be disabled in order to enter a URI.
6. Complete/review the following fields:
Field DescriptionInclude in results Select the desired checkboxes to indicate the
information to be captured when the simulation self test or assessment is completed.
Passing score Specify the required passing score.
7. Select FILE > SAVE to save the template.

Chapter 15: Using Author Templates
296 HP Adoption Readiness Tool™
Default Publication Settings: Simulation: Caption Settings
1. From the editor, open the new template.
2. Click Publications on the status bar.
3. Select Simulation under Default Publication Settings in the task pane.
4. Select Simulation Caption Settings.
5. Highlight a phrase in the phrase list.
6. Click Select Phrase.
7. Perform one of the following options:
If You Want To ThenAdd a custom phrase Click Add.
Select a language from the left. Enter the text in the Content area.Click OK.
Select a phrase Select a language from the Language drop-down list.Select a phrase from the Phrase listbox.Optionally, enter text into the Phrases field to search for text. Click OK.
8. Select FILE > SAVE to save the template.

Chapter 15: Using Author Templates
HP Adoption Readiness Tool™ 297
Default Publication Settings: Student Guide
1. From the editor, open the new template.
2. Click Publications on the status bar.
3. Select Student Guide under Default Publication Settings in the task pane.
4. Complete/review the following fields:
Field DescriptionMirror Margins Select Mirror Margins to create booklet-style,
double-sided pages for output.
Table of Contents Select Publish Table of Contents to create a table of contents for output. Select Display section titles in the table of contents to display the section titles in inserted uPerform content in the published output. Select Display course cover pages to display the course cover page in published output.
Margins Select the unit of measurement and specify the margins for the top, bottom, left, and right pages.
Page Size Select size and unit of measurement.
5. Choose from the following options:
If You Want To ThenCopy a style Select the style you want to copy, and click Add....
Delete a style Select the style you want to delete, and click Delete.Move the style earlier in the list
Click Move Up one or more times as needed to determine where the style will display in the table of contents.
Move the style later in the list Click Move Down one or more times as needed to determine where the style will display in the table of contents.

Chapter 15: Using Author Templates
298 HP Adoption Readiness Tool™
6. Click Select Phrase to select a phrase for the player.
7. Perform one of the following options:
If You Want To ThenAdd a custom phrase Click Add.
Select a language from the left. Enter the text in the Content area.Click OK.
Select a phrase Select a language from the Language drop-down list.Select a phrase from the Phrase listbox.Optionally, enter text into the Phrases field to search for text. Click OK.
8. Click Select Phrase.
9. Choose a phrase from the list.
10. Click OK.
11. Select FILE > SAVE to save the template.
Default Publication Settings: Guided Help: General Settings
1. From the editor, open the new template.
2. Click Publications on the status bar.
3. Selected Guided Help under Default Publication Settings in the task pane.
4. Select Guided Help General Settings from the drop-down list.

Chapter 15: Using Author Templates
HP Adoption Readiness Tool™ 299
5. Complete the following fields:
Field DescriptionPlayback Timer Select the Playback Timer up-down controls to set
the default time in seconds that guided help displays for each page.
Allow User to Store Preferences
Select the Allow User to Store Preferences checkbox to allow users to store preference settings for playback time, screen location of Guided Help, window size and window mode (maximize/minimize).
6. Complete the following fields:
These options are set in the document properties and are customizable. For more information on customizing properties, refer to Specifying New Template Settings: Properties (on page 277).
Field DescriptionTitle Select Title to display the title on the home page.
Author Select Author to display the author on the home page.
Description Select Description to display the description on the home page.
Copyright Select Copyright to display the copyright on the home page.
Publish date Select Publish Date to display the publish date on the home page.
7. Select File>SAVE to save the template.
Default Publication Settings: Guided Help: User Interface Settings
1. From the editor, open the new template.
2. Click Publications on the status bar.
3. Select Guided Help under Default Publication Settings in the task pane.

Chapter 15: Using Author Templates
300 HP Adoption Readiness Tool™
4. Select Guided Help User Interface Settings from the drop-down list.
5. Select a skin from the Skins drop-down list.
A preview of the skin selection will display in the Preview window.
6. Complete the following fields:
Field DescriptionPlayer Colors Select primary and secondary colors from the
drop-down list.
Text Colors Select primary and secondary, and link text colors from the drop-down list.
Optionally, specify custom colors by clicking Select to the right of list.
7. Select from the following options:
Field DescriptionStep Window Under Step Window, select a height and width,
maximum image height and width, and screen position and whether to maximize on startup.
General Enables a smooth, animated transmission from step to step. Also allows the help to always display on top of all other windows when running in Internet Explorer.

Chapter 15: Using Author Templates
HP Adoption Readiness Tool™ 301
8. Select FILE > SAVE to save the template.
Default Publication Settings: Guided Help: Guided Help Captions
1. From the editor, open the new template.
2. Click Publications on the status bar.
3. Selected Guided Help under Default Publication Settings in the task pane.
4. Select Guided Help Captions.
5. Highlight a phrase in the phrase list.
6. Click Select Phrase.
7. Perform one of the following options:
If You Want To ThenAdd a custom phrase Click Add.
Select a language from the left. Enter the text in the Content area. Click OK.

Chapter 15: Using Author Templates
302 HP Adoption Readiness Tool™
Select a phrase Select a language from the Language drop-down list.Select a phrase from the Phrase listbox. Optionally, enter text into the Phrases field to search for text. Click OK.
8. Select FILE>SAVE to save the template.
Default Publication Settings: Guided Help: Mobile Device Publication Settings
1. From the editor, open the new template.
2. Click Publications on the status bar.
3. Selected Guided Help under Default Publication Settings in the task pane.
4. Select Mobile Device Publication Settings from the drop-down list.
5. Perform one of the following options:
If You Want To ThenAdd a new operating system/browser configuration
Click Add.Enter an operating system in the Operating Systemfield. Enter the Browser type in the Browser field. Click OK.
Modify an existing operating system/browser configuration
Select an operating system/browser combination. Select Modify.Change operating system/browser setting as desired. Click OK.
Delete an existing operating system/browser configuration
Select an operating system/browser combination. Select Delete.Click Yes.

Chapter 15: Using Author Templates
HP Adoption Readiness Tool™ 303
The Operating System and Browser settings are detected by Guided Help during launch. At this time, there are no custom settings for each mobile device.
6. Select FILE>SAVE to save the template.
Default Publication Settings: Course Package
1. From the editor, open the new template.
2. Click Publications on the status bar.
3. Select Course Package under Default Publication Settings in the task pane.
4. Select SCORM 2004 or SCORM 1.2 from the drop-down list to select the output.
5. If you are using SCORM 1.2, select a completion-type value from the drop-down list.
6. Select FILE > SAVE to save the template.
Default Publication Settings: Course: General Settings
1. From the editor, open the new template.
2. Click Publications on the status bar.

Chapter 15: Using Author Templates
304 HP Adoption Readiness Tool™
3. Select Course under Default Publication Settings in the task pane.
4. Select Course General Settings from the drop-down list.
5. Complete the following fields:
These options are pulled from the document properties and are customizable. For more information on customizing properties, refer to Specifying New Template Settings: Properties (on page 277).
Field DescriptionTitle Select Title to display the title on the home page.
Author Select Author to display the author on the home page.
Description Select Description to display the description on the home page.
Copyright Select Copyright to display the copyright on the home page.
Publish date Select Publish Date to display the publish date on the home page.
Match the course stage size Select Match the course stage size to display the course at the same size as the imported PowerPoint.
Specific dimensions Select Specific dimensions to display the course in a specified width and height.

Chapter 15: Using Author Templates
HP Adoption Readiness Tool™ 305
Increase slide size if possible Select Increase slide size if possible to increase the size of the slides.
6. Select a player element.
7. Select the Enable player element in published output checkbox to enable the use of the element.
8. Click Select Phrase to select a phrase for the player.
9. Perform one of the following phrases:
If You Want To ThenAdd a custom phrase Click Add.
Select a language from the left. Enter the text in the Content area.Click OK.
Select a phrase Select a language from the Language drop-down list.Select a phrase from the Phrase listbox.Optionally, enter text into the Phrases field to search for text. Click OK.
10. Select one of the following feedback phrases:
Field DescriptionCorrect Displays when the end user enters the correct
answer.
First Attempt Incorrect Displays when the end user enters an incorrect answer the first time.
Second Attempt Incorrect Displays when the end user enters an incorrect answer the second time.
11. Click Select Phrase.
12. Perform one of the following phrases:
If You Want To ThenAdd a custom phrase Click Add.
Select a language from the left. Enter the text in the Content area.Click OK.

Chapter 15: Using Author Templates
306 HP Adoption Readiness Tool™
If You Want To ThenSelect a phrase Select a language from the Language drop-down
list.Select a phrase from the Phrase listbox.Optionally, enter text into the Phrases field to search for text. Click OK.
13. Enter a URL in the URL field.
Based on the item selected, this option may not display.
14. Select FILE > SAVE to save the template.
Default Publication Settings: Course: User Interface Settings
1. From the editor, open the new template.
2. Click Publications on the status bar.
3. Select Course under Default Publication Settings in the task pane.
4. Select Course User Interface Settings from the drop-down list.
5. Select a skin from the Skins drop-down list.
A preview of the skin selection will display in the Preview window.
6. Complete the following fields:
Field DescriptionPlayer Colors Select primary and secondary colors from the
drop-down list.

Chapter 15: Using Author Templates
HP Adoption Readiness Tool™ 307
Field DescriptionText Colors Select primary and secondary, and link text colors
from the drop-down list.
Optionally, specify custom colors by clicking Select to the right of list.
7. Select from the following options:
Field DescriptionEnable Transitions Enables a smooth, animated transition from slide to
slide.Reuse existing window Uses the same window when an external link is
launched from the course.
Hide audio bar when audio is not present
Hides the audio bar when audio is not present.
Base progress on current location
Shows percent complete based on where the user is in the course.
Base progress on percentage done
Shows percent complete based on how many of the assessments a user has completed.
Do not resize Opens the course in the current window size. Resize and center window Opens the course at the size specified by the screen
width and height, and centers the course window.
Start in full screen mode Opens the course in full screen mode.
Screen Choose the width and height for the course display. Resize and center window must be enabled.
Stage Specifies the size of the course page content within the browser window.
Logo Select a logo to display in the published course and on the website. Logos are managed in the Image area of the template editor. For more information on images, refer to Specifying General Settings: Images (on page 274).
8. Select FILE > SAVE to save the template.
Default Publication Settings: Course: LMS Settings
1. From the editor, open the new template.
2. Click Publications on the status bar.

Chapter 15: Using Author Templates
308 HP Adoption Readiness Tool™
3. Select Course under Default Publication Settings in the task pane.
4. Select Course LMS Settings from the drop-down list.
5. Complete the following fields:
Field DescriptionCreate package Click the Create Package checkbox to create
SCORM-conformant or AICC-conformant output for integration with a Learning Management System (LMS). For more information on package creation, refer to Default Publication Settings: Package Editor (on page 312).
Show answers Click the Show Answers button to display the answer after a user has submitted a selection.
Enable remote proxy support Click the Enable Remote Proxy Support checkbox to enable remote proxy support.
Display username prompt Select this option to display the username prompt on the home page.
LMS Package Type Select SCORM 2004, SCORM 1.2, or AICC from the drop-down list to select the output. For more information on packages, refer to Default Publication Settings: Package Editor (on page 312).
Package status value Select a completion-type value from the drop-down list.This option is available only for SCORM 1.2 and AICC.

Chapter 15: Using Author Templates
HP Adoption Readiness Tool™ 309
Field DescriptionAssessment URI Enter a destination URI (Uniform Resource
Identifier) to send test results for capture by a custom-built utility. You can create an Active Server Page (ASP) or Java Server Page (JSP) on a web server to receive the output for subsequent storage and reporting in a learning management system. Any technology that accepts the form Post method using HTTP can be used to handle the output. Example: http://www.yourcompany.com/results.asp Note that if the student's web browser security settings are set to High, warning messages will be displayed.
The Create Package option must be disabled in order to enter a URI.
6. Complete the following fields:
Field DescriptionInclude in results Select the desired checkboxes to indicate the
information to be captured when the simulation self test or assessment is completed.
The Create Package option must be disabled in order to enter a URI.
Randomize questions in playback
Select this option to randomize the order of assessment pages.
Provide individual feedback Select this option to provide feedback on individual assessment questions.
Passing score Specify the required passing score.
Users may retake No questions: Users may not retake any questions. Incorrect questions: Users may retake only those questions that were answered incorrectly. All questions: Users may retake all questions.
7. Select FILE > SAVE to save the template.
Default Publication Settings: Course: Caption Settings
1. From the editor, open the new template.
2. Click Publications on the status bar.
3. Select Course under Default Publication Settings in the task pane.

Chapter 15: Using Author Templates
310 HP Adoption Readiness Tool™
4. Select Course Caption Settings from the drop-down list.
5. Highlight a phrase in the phrase listbox.
6. Click Select Phrase.
7. Perform one of the following options:
If You Want To ThenAdd a custom phrase Click Add.
Select a language from the left. Enter the text in the Content area.Click OK.
Select a phrase Select a language from the Language drop-down list.Select a phrase from the Phrase listbox.Optionally, enter text into the Phrases field to search for text. Click OK.
8. Select FILE > SAVE to save the template.
Default Publication Settings: Course: Page Settings
1. From the editor, open the new template.
2. Click Publications on the status bar.
3. Select Course under Default Publication Settings in the task pane.

Chapter 15: Using Author Templates
HP Adoption Readiness Tool™ 311
4. Select Course Page Settings from the drop-down list.
5. Complete the following fields:
Field DescriptionMirror Margins Select Mirror Margins to create booklet-style,
double-sided pages for PDF and Word publication.
Show audio transcript Select Show audio transcript to display the audio transcript in published courses.
Show assessment section Select Show assessment section to display the assessment section in a published course.
Show answers Select Show answers to display assessment answers.
Show course links Select Show course links to display links when you publish a course to Word or PDF format.
6. Complete the following fields:
Field DescriptionHeader Select Course Header, Header, Course Footer, or
Footer from the drop-down list to select the header.
Footer Select Course Footer, Footer, Course Header, or Header from the drop-down list to select the footer.
Margins Specify margins for Top, Bottom, Left, and Right.Optionally, select the unit of measurement from the Unit drop-down box.
Page Size Specify the common sizes, height, width, and unit of measurement.
7. Select FILE > SAVE to save the template.

Chapter 15: Using Author Templates
312 HP Adoption Readiness Tool™
Default Publication Settings: Package Editor You can edit the SCORM and AICC imsmanifest.xml file via the package editor.
1. From the editor, open the new template.
2. Click Publications on the status bar.
3. Select Package Editor in the task pane.
4. Select the package file type from the Package File drop down list.
5. In the code box, insert the cursor where you want to insert a variable.
6. Select the variable(s) to be included from the Variables list.
7. Click the right arrow to add the variable(s) to the package file.
8. Edit the file as desired.
9. Repeat Steps 5 through 8 for each element you want to add.
10. Select FILE > SAVE to save the template.
ANCILE supports the following elements from the SCORM/AICC specifications:
Package File Supported Data Elements SCORM 1.2 Lesson Status (cmi.core.lesson_status)
Lesson Location (cmi.core.lesson_location) Suspend Data (cmi.suspend_data) Raw Score (cmi.core.score.raw) Min Score (cmi.core.score.min) Max Score (cmi.core.score max) Session Time (cmi.core.session_time) Interactions (cmi.interactions) Interaction ID (cmi.interactions n.id)

Chapter 15: Using Author Templates
HP Adoption Readiness Tool™ 313
Package File Supported Data Elements Interaction Time (cmi.interactions.n.time) Interaction Type (cmi.interactions n.type) Interaction Correct Response (cmi.interactions n.correct_responses.n.pattern) Interaction Student Response (cmi.interactions n.student_response) Interaction Result (cmi.interactions n.result) *Interaction Description (rwd.interactions.n.description)
SCORM 2004 Completion Status (cmi.completion_status) Success Status (cmi.success_status) Lesson Location (cmi.location) Suspend Data (cmi.suspend_data) Raw Score (cmi.score.raw) Min Score (cmi.score min) Max Score (cmi.score.max) Scaled Score (cmi.score.scaled) Session Time (cmi.session_time) Interactions (cmi.interactions) Interaction ID (cmi.interactions n.id) Interaction Type (cmi.interactions n.type) Interaction Correct Response (cmi.interactions n.correct_responses.n.pattern) Interaction Student Response (cmi.interactions n.student_response) Interaction Result (cmi.interactions n.result) Interaction Description (cmi.interactions n.description)
AICC Lesson Location (Core.Lesson_Status) Lesson Status (Core.Lesson_Location) Suspend Data (Core_Lesson) Raw Score (Core.Score) Session Time (Core.Time)
The following table explains the Data Elements: Data Element ExplanationLesson Status Element utilized to specify the completion status
of the SCO (completed/incomplete). This element can also be utilized to specify the mastery/success of the SCO (passed/failed).
Completion Status Element utilized to specify the completion status of the SCO (completed/incomplete).
Success Status The element utilized to specify the mastery of the SCO (passed/failed).

Chapter 15: Using Author Templates
314 HP Adoption Readiness Tool™
Data Element ExplanationLesson Location The element used to specify the step/page at
which the learner terminated the SCO. Also referred to as the SCO bookmark.
Suspend Data The element utilized to persist content-specific information, such as the pages/steps the learner has viewed within the SCO. This element is primarily utilized by uPerform courses.
Raw Score (0-100) The element utilized for specifying the score achieved by the learner within the SCO. The value is based on the performance within the assessment mode of a simulation, or within either an assessment or terminated branch, with scoring enabled, inserted into a course.
Min Score The minimum score a learner can achieve within a lesson. This value is currently always set to a value of "0" (zero) within published uPerform content.
Max Score The maximum score a learner can achieve within a lesson. This value is currently always set to a value of "100" within published uPerform content.
Scaled Score (0-10) The element utilized to specify the performance of a learner within the SCO that is scaled to fit with the range of 0 – 1.0. The value is based on the performance within the assessment mode of a simulation, or within either an assessment or terminated branch, with scoring enabled, inserted into a course.
Session Time The time the learner has spent in the lesson during a given session.
Interactions The data related to the questions/steps within an assessment. The value is based on the performance within the assessment mode of a simulation, or an assessment inserted into a course.Interaction ID - The unique identifier of the interaction.Interaction Time - A timestamp at which the interaction was completed. Interaction Type - The type of the interaction. Interaction Correct Response - The correct answer for the interaction. Interaction Student Response - The learner's response to the interaction. Interaction Result - The success outcome (correct or incorrect/wrong) Interaction Description - The description of the interaction, utilized to persist the question stem in uPerform. In the case of SCORM 1.2, this is a

Chapter 15: Using Author Templates
HP Adoption Readiness Tool™ 315
Data Element Explanationcustom data model element that is utilized by ANCILE uLearn.
Default Publication Settings: Glossary
1. From the editor, open the new template.
2. Click Publications on the status bar.
3. Select Glossary under Default Publication Settings in the task pane.
4. Complete the following fields:
Field DescriptionLayout: Stylesheet Select the stylesheet used to control the layout of the
glossary. Stylesheets are managed in the Data Files area of the template editor. For more information on data files, refer to Specifying General Settings: Data Files (on page 275).
Glossary Text Styles: Term Text Style
Select the style to be used for the glossary term text. Styles are managed in the Styles area of the template editor. For more information on styles, refer to Specifying Styles (on page 318).
Glossary Text Styles: Definition Text Style
Select the style to be used for the glossary definition text.Styles are managed in the Styles area of the template editor. For more information on styles, refer to Specifying Styles (on page 318).

Chapter 15: Using Author Templates
316 HP Adoption Readiness Tool™
5. Select FILE > SAVE to save the template.
Default Publication Settings: Website
1. From the editor, open the new template.
2. Click Publications on the status bar.
3. Select Website under Default Publication Settings in the task pane.
4. Complete the following fields:
Field DescriptionImages: Page Icon Select an image for the page icon from the
drop-down list. Images are managed in the Images area of the template editor. For more information on Images, refer to Specifying General Settings: Images (on page 274).
Images: Link Icon Select an image for the link icon from the drop-down list. Images are managed in the Images area of the template editor. For more information on Images, refer to Specifying General Settings: Images (on page 274).
Layout: Stylesheet Select the stylesheet used to control the layout of the website.Stylesheets are managed in the Data Files area of the template editor. For more information on data files, refer to Specifying General Settings: Data Files (on page 275).

Chapter 15: Using Author Templates
HP Adoption Readiness Tool™ 317
Field DescriptionStyles: Top Navigation Link Text
Select the style to be used for the navigation text displayed at the top of the website window. Styles are managed in the Styles area of the template editor. For more information on styles, refer to Specifying Styles (on page 318).
Styles: Link Text Select the style to be used for hyperlinked text on the website. Styles are managed in the Styles area of the template editor. For more information on styles, refer to Specifying Styles (on page 318).
Styles: Page Title Text Select the style to be used for page titles on the website.Styles are managed in the Styles area of the template editor. For more information on styles, refer to Specifying Styles (on page 318).
Styles: Page Description Text Select the style to be used for page description text on the website. Styles are managed in the Styles area of the template editor. For more information on styles, refer to Specifying Styles (on page 318).
Global Links: Home Link Caption
Click Select Phrase to specify an alternate phrase for the home link on the website. The default is "Home".
Show glossary link Select this checkbox to display the hyperlink to the glossary from the website.
Global Links: Glossary Link Caption
Click Select Phrase to specify an alternate phrase for the glossary link on the website. The default is "Glossary".
Show Help Link Select this option to display the help link.
Help Link Caption Click Select Phrase to select a phrase for the help link. Show Help Link must be enabled.
Help Link URL Enter a URL for the help link. Show Help Linkmust be enabled.
5. Perform one or more of the following options:
If You Want To ThenHide links to content not yet published to the website
Select the checkbox to the left of Hide links to unpublished uPerform Express content.
Change the message displayed when a user selects a hyperlink for unpublished content
Enter the message to be displayed. This option is not available if you have selected to hide links to unpublished content.

Chapter 15: Using Author Templates
318 HP Adoption Readiness Tool™
If You Want To ThenSpecify a property from which to build quick launch pages for use with SAP and Help Launchpad. You must have first enabled or created the specified property via the template Properties tab.
Select the transaction code property to enable context-sensitive help based on the SAP transaction code. For more information on other properties used for applications other than SAP R/3, refer to Transferring Your Website to a Server (on page 364).
Select the separator to be used if an author specifies multiple property values for content
When entering multiple values for the specified property, you must select a separator to define these values. The default value is a comma.
6. Select FILE > SAVE to save the template.
Specifying New Template Settings: Styles
Specifying Styles
1. From the editor, open the new template.
2. Click Styles on the status bar.
3. Perform one of the following options:
If You Want To ThenEnable the use of language-specific fonts
Select Enable Language Specific Style Fonts,and go to Step 4.
Disable the use of language-specific fonts
Deselect Enable Language Specific Style Fonts, and go to Step 7.

Chapter 15: Using Author Templates
HP Adoption Readiness Tool™ 319
4. Select Style Languages from the task pane.
5. Perform one of the following options:
If You Want To ThenManually select style languages to be enabled in this template
Select or deselect one or more checkboxes in the Enabled column.
Select all languages to be used in this template.
Select Check All.
6. Select Manage All Styles.
7. Click on the drop-down list below Action Note Style.
8. Select one of the following styles from the task pane:
Field DescriptionDefault Course Content Title Text
The style to be used for the text displayed in the content title area of a course.
Default Course Page Title Text
The style to be used for the text displayed as the page title in a course.
Default Course Popup Text The style to be used for the text displayed as a popup in a course.
Default Course Questions Text
The style to be used for the text displayed as assessment questions in a course.
Default Course Text The style to be used for the course text.
Default Course Title Text The style to be used for the text displayed as the course title.
Default Text The style to be used for the page text. Document Note The style to be used for the document note. Document Title The style to be used for the document title that
displays at the top of a document.
Link Text The style to be used for the link text.
Page Description Text The style to be used for the page description text.

Chapter 15: Using Author Templates
320 HP Adoption Readiness Tool™
Field DescriptionPage Title Text The style to be used for the page title text. Screen Caption The style to be used for the captions displayed above
screen captures in a document.
Section Name The style to be used for sections displayed in your document.
Simulation Note The style to be used for simulation notes.
Simulation User Interface The style to be used for simulation user interface. Step The style to be used for step text. Step Number The style to be used for the step number. Table of Contents The style to be used for table of contents heading
Table of Contents Heading 1-6
The style to be used for the levels within the table of contents.
Top Navigation Text The style to be used for the top navigation text displayed in a uPerform Express course.
9. Click Modify.
10. Click Select Phrase.
11. Perform one of the following options:
If You Want To ThenAdd a custom phrase Click Add.
Select a language from the left. Enter the text in the Content area.Click OK.
Select a phrase Select a language from the Language drop-down list.Select a phrase from the Phrase listbox.Optionally, enter text into the Phrases field to search for text. Click OK.
12. Complete the following fields:
Depending on the style selected, some of the following options may not be displayed.
Field DescriptionFont Click Select to choose a font
Size Specify the font size.

Chapter 15: Using Author Templates
HP Adoption Readiness Tool™ 321
Font Color Select a font color from the drop-down list. Optionally, click Select to create a custom color.
Effects Click the checkbox(es) next to Bold, Underline,Italic, or Strikethrough, to apply rich text formatting.
Use Language Specific Fonts Click the checkbox next to Use Language Specific Fonts and click Select to choose the language specific font(s).
Justification Specify a justification setting from the drop-down list.
Margins Specify margins for Top, Bottom, Left, and Right.Optionally, select the unit of measurement from the Unit drop-down box.
First Line Specify the indent of the first line. Optionally, select the unit of measurement from the Unit drop-down box.
Background Color Specify a background color from the drop-down list. Optionally, click Select to create a custom color.
Gradient Select the Gradient checkbox to apply a gradient to section header backgrounds in HMTL outputs viewable in supported versions of Internet Explorer.
Start Color Specify a gradient start color from the drop-down list.Optionally, click Select to create a custom color.
End Color Specify a gradient end color from the drop-down list.Optionally, click Select to create a custom color.
Orientation Specify the orientation of the gradient from the drop-down list.
Border Color Specify a border color from the drop-down list. Optionally, click Select to create a custom color.
Border Size Specify the border width from the drop-down list.
13. Select FILE > SAVE to save the template.
Modifying, Duplicating, and Deleting Styles
1. From the editor, open the new template.
2. Click Styles on the status bar.

Chapter 15: Using Author Templates
322 HP Adoption Readiness Tool™
3. Click Manage All Styles from the task pane.
4. Select a style from the editor pane.
5. Choose from one of the following options:
If You Want To ThenModify the selected style Click Modify, and refer to Specifying Styles (on
page 318).
Duplicate the style Click Duplicate.The duplicated style is added below the original style. Modify the property to specify a new name and characteristics. For more information, refer to Specifying Styles (on page 318).
Delete the selected style Click Delete.At the prompt, click Yes.
6. Click FILE > SAVE to save the template.
Changing Bulk Styles
1. From the editor, open the new template.
2. Click Styles on the status bar.

Chapter 15: Using Author Templates
HP Adoption Readiness Tool™ 323
3. Click Bulk Style Change from the task pane.
4. Select a style from the list.
5. Click Load Style to view the current style settings for the item selected.
6. Using the Ctrl or Shift key, select one or more styles for which you want to apply a bulk change.
7. Complete the following fields:
Field DescriptionFont Select the checkbox next to Font to specify a font.
Font Color Select the checkbox next to Font Color to specify a font color.
Size Select the checkbox next to Size to specify a font size.
Bold Select the checkbox next to Bold, and select Yes or No to specify a bold font.
Underline Select the checkbox next to Underline, and select Yes or No to specify an underline font.
Italic Select the checkbox next to Italic, and select Yes or No to specify an italic font.
Strikethrough Select the checkbox next to Strikethrough, and select Yes or No to specify a strikethrough font.
8. Click Apply.
9. Select FILE > SAVE to save the template.
Viewing Styles
1. From the editor, open the new template.
2. Click Styles on the status bar.

Chapter 15: Using Author Templates
324 HP Adoption Readiness Tool™
3. Click Applied Styles from the task pane.
A list of styles and their descriptions is displayed in the Editor Pane.
Specifying New Template Settings: Blocks
Specifying Blocks
1. From the editor, open the new template.
2. Click Blocks on the status bar.

Chapter 15: Using Author Templates
HP Adoption Readiness Tool™ 325
3. Perform one of the following options:
If You Want To ThenModify a block Go to Step 5.
Duplicate a block Select the block from the content area, and click Duplicate.
Delete a block Select the block from the content area, and click Delete.At the prompt, click Yes.
4. Optionally, select a step type from the Default Recorder Step drop-down list.
5. Select one of the following blocks from the task pane:
Field DescriptionActivity The block that contains the task information.
ASAP BPP The block that contains the business process description overview, input, output, comments, and tips and tricks.
Configuration Information The block that contains the configuration information for the document.
Course Footer The block that contains the course footer information.
Course Header The block that contains the course header information.
Exercise/Data Sheet The block that contains information relevant to the end user's task.
Field The block that contains the Field/Description table.
Footer The block that contains the footer information.
Free Text The block that contains the boilerplate freetext.
Header The block that contains the header information.
Heading The block that contains the heading boilerplate text.
If The block that contains the If/Then table.
Note The block that contains the note boilerplate text.
Purpose The block that contains the trigger, prerequisites, menu path, transaction code, and helpful hints.
Result The block that contains the percent complete.
Screen Flow The block that contains the screen flow image file.
Start the task using the menu path
The block the contains the start transaction text.
Step The block that contains the step boilerplate text.
Student Guide Footer The block that contains the student guide footer information.

Chapter 15: Using Author Templates
326 HP Adoption Readiness Tool™
Field DescriptionStudent Guide Header The block that contains the student guide header
information. Substep The block that contains the substep boilerplate text.
Test Information The block that contains the test history and scenarios.
Test Scenarios The block that contains the table specific to test scenarios.
6. Click Modify.
7. Click Select Phrase.
8. Perform one of the following options:
If You Want To ThenAdd a custom phrase Click Add.
Select a language from the left. Enter the text in the Content area.Click OK.
Select a phrase Select a language from the Language drop-down list.Select a phrase from the Phrase listbox.Optionally, enter text into the Phrases field to search for text. Click OK.
9. In the Content area, modify the text within the curly braces.
10. Perform one or more of the following options:
If You Want To ThenModify the format of displayed block text
Highlight the text to be formatted. Click Format... , and select from the Edit,Format, or Justify options.
Insert an image, table, weblink, or line at the cursor location in the displayed block text
Click Format... , and select from the Table or Insert options.
Insert a phrase or standard document property code at the cursor location in the displayed block text
Click INSERT... > PHRASE... [or] Standard Code..., and select from the displayed list.
Determine where the block is used View the This item is used by the items belowarea.
11. Optionally, edit the source content of the block in the Source pane.

Chapter 15: Using Author Templates
HP Adoption Readiness Tool™ 327
Basic knowledge of HTML, XML, and Java is required.
12. Under Format, select a style from the drop-down list.
13. Click the checkbox next to Visible to display the block in published documentation.
14. Select FILE > SAVE to save the template.
Specifying New Template Settings: Sections
Specifying Sections
1. From the editor, open the new template.
2. Click Sections on the status bar.
3. Select a section from the Task Pane.
4. Click the checkbox next to Visible to display the section in published documentation.
New sections will display in all new documents and older documents will be upgraded to add newly added sections when opened.

Chapter 15: Using Author Templates
328 HP Adoption Readiness Tool™
5. Complete the following fields:
Field DescriptionHeader Specify the header for the section.
Footer Specify the footer for the section.
6. Click Select Phrase.
7. Perform one of the following options:
If You Want To ThenAdd a custom phrase Click Add.
Select a language from the left. Enter the text in the Content area.Click OK.
Select a phrase Select a language from the Language drop-down list.Select a phrase from the Phrase listbox.Optionally, enter text into the Phrases field to search for text. Click OK.
8. Under Content, perform one of the following options:
If You Want To ThenAdd content to the section Click Add.
Select a block from the list. Click OK.
Remove content Click Remove.At the prompt, click Yes.
Move content to earlier in the list Click Move Up one or more times as needed.
Move content to later in the list Click Move Down one or more times as needed.
9. Determine where the section is used in the This item is used by the items below area.
10. Click FILE > SAVE to specify additional sections.

Chapter 15: Using Author Templates
HP Adoption Readiness Tool™ 329
Modifying, Duplicating, and Deleting Sections
1. From the editor, open the new template.
2. Click Sections on the status bar.
3. Perform one of the following options:
If You Want To ThenModify a section Select the section from the Manage All Sections
list in the content pane. Click Modify.For information on modifying a section, refer to Specifying Sections (on page 327).
Duplicate a section Select the section from the content area, and click Duplicate.The duplicated section is added below the original section. Modify the property to specify a new name and characteristics. For information, refer to Specifying Sections (on page 327).
Delete a section Select the section from the content area, and click Delete.At the prompt, click Yes.

Chapter 15: Using Author Templates
330 HP Adoption Readiness Tool™
If You Want To ThenMove a section earlier in the list Select the section.
Click Move Up one or more times as needed.
Move the section later in the list Select the section. Click Move Down one or more times as needed.
4. Click FILE > SAVE to save the template.

Chapter 15: Using Author Templates
HP Adoption Readiness Tool™ 331
Export and Import an Author Template
ANCILE uPerform Express allows users to import and export author template phrases via the XML Localization Interchange File Format (XLIFF) for translating template content in to multiple languages. When a template is exported, one XLIFF file will be created for each language. When a template is imported, it is updated to contain the translated phrases.
The file is formatted to facilitate translation by displaying the source (original) text co-located next to the target translated text.
The XLIFF file can be edited in Notepad, in an HTML editor, or via a specialized XLIFF editor such as Xliff Editor or Heartsome.
Exporting Template Content
1. Select FILE> MANAGE CONTENT LANGUAGE.
2. Select Export [template name].
3. Select the target export language(s).
Multiple languages can be selected. Click the checkbox beside the template name to select all languages.
4. Click Export.
5. Optionally, select , to specify a destination folder other than the default.

Chapter 15: Using Author Templates
332 HP Adoption Readiness Tool™
Only the template will be exported. Any depending uPerform Express content will not be represented in the output.
6. Click Export.
7. Click OK.
Importing Template Content
1. Select FILE> MANAGE CONTENT LANGUAGE.
2. Select Import [template name].
3. Select the template and language(s) to import.

Chapter 15: Using Author Templates
HP Adoption Readiness Tool™ 333
4. Click Import.
5. Click OK.
The template is now updated to include the translated phrases, and will be included in content using that template.

Chapter 15: Using Author Templates
334 HP Adoption Readiness Tool™
Delete an Author Template
Create a backup of the template file prior to deleting the template. Any existing documents created with the deleted template cannot be opened after the template is deleted.
Deleting an Author Template
1. Select FILE > MANAGE LOCAL TEMPLATES.
2. Select the template you want to delete.
3. Click Remove.
4. Click OK.

HP Adoption Readiness Tool™ 335
Chapter 16: Building a Website
With ANCILE uPerform Express you can design, build, and maintain a website to deliver content to your end users. In addition to standard uPerform Express documents, simulations, student guides, and eLearning courses, non-uPerform Express content can be included in the website.

Chapter 16: Building a Website
336 HP Adoption Readiness Tool™
Introduction to the Website
ANCILE uPerform Express allows you to present published content to your end users via a website. You can rapidly build your website by assigning properties to uPerform Express content and then leveraging these properties to automatically organize your website hierarchy. Alternately, you can manually create your website hierarchy and drag-and-drop content into the hierarchy structure.
The uPerform Express website is a collection and organization of pages and content links, not a document repository. You must host the generated website, including the published content, on a web server or network file server to make the website available to your end users.

Chapter 16: Building a Website
HP Adoption Readiness Tool™ 337
Create the Website
Exploring the Website Editor
The uPerform Express website editor consists of the following areas:
Content and Editing Area - displays the title and description of the selected page; also displays the content available from each page and the content available on the entire website.
Task Pane - displays a tree view of the website structure.
Two tabs in the lower left allow you to customize your view of website content:
The Page tab displays the title, description, and included links for the page currently selected in the task pane.
The All Content tab displays the list of all links available for inclusion in the website. Only those links which have been added to a page will display on the website.
Planning and Designing the Website
Before creating your website, you should determine the desired navigation structure to present to your end users. Some potential organization methods include:
Application module (for example, Sales, Human Resources, Finance)
Employee role (for example, Sales Clerk, Personnel Manager, Accountant)
Geographic or organizational location (for example, Headquarters, United States, Tokyo)

Chapter 16: Building a Website
338 HP Adoption Readiness Tool™
Business process or function (Sales Orders, Personnel Development, Budgeting)
When working with uPerform Express, it is helpful to think of your navigation structure as being made up of pages, which can contain subpages and/or links. The pages in your website reflect your desired navigation structure. For example, you might have a page named "Sales" with a subpage named "Sales Clerk."
There are two methods for structuring and populating your website:
Create your website structure manually by creating pages and populate the website by adding content links to these pages.
Automatically build your website structure and populate the website based on the properties of your uPerform Express content. For example, you can use the built-in Category properties within a uPerform Express template to specify your structure. You might specify Category 1 as business process and Category 2 as role. The template also allows you to specify a hierarchy of these category properties. After authors assign a value to the category properties within uPerform Express content, your published website would reflect a navigation structure based on business process as the primary selection and role as the secondary selection.
If you will be automatically populating your website using properties, you should enable these properties in your project template, specify the valid values, and ensure your authors have access to this template prior to developing content. For detailed information on templates, refer to Using Author Templates (on page 267).
What Can My Website Include?
The following types of content can be included within a uPerform Express website:
uPerform Express content, including documents, simulations, and courses
The website can only contain uPerform Express content that was created with the same template as the website.
Hyperlinks to other websites or to files stored on other servers or websites
Within the website editor, the following icons are used to identify content types:
- indicates a uPerform Express document/simulation or student guide.
- indicates a uPerform Express course.
- indicates a link to another website or file.

Chapter 16: Building a Website
HP Adoption Readiness Tool™ 339
- indicates a website page.
- indicates a page shortcut.
- indicates the source file cannot be found.
Page and Link Limits
ANCILE uPerform Express is specifically designed to produce and manage small- and medium-size websites. Consequently, there is a limit of 1000 links or pages within the website to maximize performance and to keep the website to a manageable file size.
Pages are displayed in the task pane. Links are displayed in the Links list.
The number of remaining pages and links is displayed to the right of the tabs in the lower left.
Pages and links that are copied and pasted are included in the limit. A shortcut to a page or link does not count against the limit.
If you attempt to add a page or link and this action will exceed the limit, an error message is displayed. You cannot complete an operation that would result in exceeding the limit.
Creating a Website
1. Select FILE > NEW from the editor.
2. Select Website from the Type drop-down list.

Chapter 16: Building a Website
340 HP Adoption Readiness Tool™
3. Complete/review the following information:
Field DescriptionName Enter the name of the website.
The name you specify here will also be displayed at the top of published website pages.
Template Select the template associated with this website. The template controls the website appearance and, if used, the properties on which the website organization is based. The website can only contain uPerform Express content that is generated by the selected template. For detailed information on templates, refer to .
Language Select the website language from the drop-down list. This selection determines the language used in the list of available child documents on the published website.
Location As desired, edit the default location of the website.
4. Click OK.

Chapter 16: Building a Website
HP Adoption Readiness Tool™ 341
Open and Save the Website
Opening a Website
1. Select FILE > OPEN > OPEN LOCAL... .
2. Select the .uws file.
3. Click Open.

Chapter 16: Building a Website
342 HP Adoption Readiness Tool™
Saving the Website Perform one of the following actions:
If You Want To ThenSave an existing website Select FILE > SAVE.
If this is the first time you are saving the file and the display of the Properties window is enabled, the Properties window is displayed.
Save the open website as a new file Select FILE > SAVE AS... . Enter a new filename, and click Save.

Chapter 16: Building a Website
HP Adoption Readiness Tool™ 343
Building the Website Structure Manually
You can manually build your website structure by creating pages within the website editor.
For information on leveraging content properties to automatically generate a website based on the values of the properties, refer to Populating the Website Structure Automatically (on page 351).
Create and Edit Pages
Pages contain links to uPerform Express content or to content stored on other websites. By defining pages and subpages, you create the website navigation structure that will be viewed by your end users.
Creating a Page
1. Select the Page tab.
2. Select the parent of the new page in the Pages task pane.
3. Select INSERT > INSERT WEBSITE PAGE.
4. Enter the name of the page. This text will display at the top of this website page.
5. Click OK.
Editing a Page
1. Select the Page tab.

Chapter 16: Building a Website
344 HP Adoption Readiness Tool™
2. Select the page in the Pages task pane.
3. Edit the text in the Title or Description fields.
Only plain text is supported in these fields.
Your changes are saved when you move to another page or when you exit a field.
Moving or Copying a Page
1. Select the page to move or copy in the Pages task pane.
2. Perform one of the following options:
If You Want To ThenMove the page Right-click on the page, and select Cut.
Right-click on the new parent for the page, and select Paste to insert the page under the selected parent. ORClick and hold the left mouse button on the name of the page, and drag the page to the new location. A black line is displayed to indicate where the page will be inserted. Release the mouse button.
Copy the page Right-click on the page, and select Copy.Right-click on the new parent for the page, and select Paste to insert the page under the selected parent. ORControl-click the left mouse button on the name of the page, and drag the page to the new location. A black line is displayed to indicate where the page will be inserted. Release the mouse button.

Chapter 16: Building a Website
HP Adoption Readiness Tool™ 345
If You Want To ThenCreate a shortcut to an existing page Right-click on the page, and select Copy.
Right-click on the new parent for the page, and select Paste Shortcut.The shortcut link is displayed in the Links list to the left.
Deleting a Page
1. In the Pages task pane, right-click on the page to be deleted.
2. Select Delete to remove the page from the website.

Chapter 16: Building a Website
346 HP Adoption Readiness Tool™
Adding Content to the Website
Pages and subpages allow you to provide a structural organization to your website. Links are added to these pages to allow your end users to launch specific content items.
Add and Edit Content Links
When you add a link to a page, you are inserting a hyperlink to published uPerform Express content or to non-uPerform Express content stored on another file or web server. You can add a single link to your website or import a folder of links.
Adding a Link to a Page
1. Select the page to contain the link from the Pages task pane.
2. Select INSERT > INSERT LINK... .
3. Perform one of the following options:
If You Want To ThenCreate a link to a website location
Enter a name for the website location in the Namefield. Example: ANCILE Corporate Website Enter the complete website address in the Url field. Example: http://www.ancile.com
Create a link to uPerform Express content
Click ... , and select the uPerform Express file. The Name field is automatically populated based on the filename.

Chapter 16: Building a Website
HP Adoption Readiness Tool™ 347
Create a link to non-uPerform Express content
Click ... , and select the file. The file must be located on a file or web server accessible by your end users. Enter the name of the document in the Name field.
4. Click OK.
The content link is displayed in the Links list.
Adding Links via Drag-and-Drop
1. Select the page to contain the link(s) from the Pages task pane.
2. Select the Page tab.
3. In Windows Explorer, select one or more files or a folder of files.
4. Drag and drop the file(s) or folder into the Links list.
Adding Multiple Links to a Page
1. Select the page to contain the links from the Pages task pane.

Chapter 16: Building a Website
348 HP Adoption Readiness Tool™
2. Select INSERT > INSERT MULTIPLE LINKS... .
3. Select the folder from which links should be imported.
4. Click OK.
ANCILE uPerform Express will import links from the specified folder and all subfolders for all supported document types. These links will be added to the selected page.
Editing a Link
1. Select the Page or All Content tab.
2. Right-click the link name, and select Properties.
3. For non-uPerform Express content, you can edit the name and location fields and the prop-entry values. For uPerform Express content, only the location field may be edited.
Moving and Copying a Link
1. Select the Page tab.

Chapter 16: Building a Website
HP Adoption Readiness Tool™ 349
2. Perform one of the following options:
If You Want To ThenMove a link to another page Right-click on the link in the Links list, and
select Cut.Right-click on the target page in the Pages task pane, and select Paste to insert the link on the selected page. ORClick and hold the left mouse button on the link in the Links list, and drag the link to the target page in the Pages task pane. Release the mouse button.
Copy a link to another page Right-click on the link in the Links list, and select Copy.Right-click on the target page in the task pane, and select Paste to insert the link on the selected page. ORControl-click the left mouse button on the link in the Links list, and drag the link to the target page in the task pane. Release the mouse button.
Reordering Links on a Page
1. Select the Page tab.
2. From the Pages task pane, select the page containing the links to be reordered.
3. From the Links list, select the link to be reordered, and drag the link up or down within the list.
A black line is displayed to indicate where the page will be inserted when you release the mouse button. Note that pages are always displayed above links in the list.
4. Release the mouse button to move the link to the new position.
Removing a Link from a Page
1. Select the Page tab.
2. From the Pages task pane, select the page containing the link to be removed.

Chapter 16: Building a Website
350 HP Adoption Readiness Tool™
3. Right-click on the desired link in the Links list, and select Delete.
Deleting a Link from the Website Deleting a link removes all instances of the link in the website. If you want to remove the link only from a specific page, remove the link via the Page tab.
1. Select the All Content tab.
2. Right-click on the desired link, and select Delete.
3. Click Yes to remove the link from the website.

Chapter 16: Building a Website
HP Adoption Readiness Tool™ 351
Populating the Website Structure Automatically
You can automatically populate your website structure by leveraging the properties and associated property values specified within your uPerform Express template and stored within the content. To enable use of this functionality, you perform the following steps:
1. Enable built-in properties or create custom properties in your template. For example, you might designate Category 1 as Business Process. Refer to Specifying New Template Settings: Properties (on page 277) for detailed information on properties.
2. Specify possible values for these properties in your template. For example, possible values for Business Process might include Sales Orders, Personnel Management, and Accounts Payable.
3. Specify the hierarchy of the properties in your template. For example, Category 2 - Role - might be subordinate to the Business Process property. Refer to Specifying General Settings: Information (on page 272) for detailed information on specifying property hierarchy.
4. Ensure the template is accessible from a location for your users to download.
5. Instruct your authors to specify values for all applicable categories in each uPerform Express file.
You are then ready to import content and automatically structure the website based on the content properties.
Importing Content Links
1. Select INSERT > INSERT MULTIPLE LINKS... to import one or more folders containing your content.
2. Navigate to the folder location.

Chapter 16: Building a Website
352 HP Adoption Readiness Tool™
3. Click OK.
Refer to "Automatically Organizing the Website" below for detailed instructions on automatically organizing the imported content based on the content property values.
Automatically Organizing the Website
1. Select TOOLS > ORGANIZE WEBSITE.
A warning message displays indicating that the current website structure will be overwritten.
2. Click OK.
The Pages task pane is updated to reflect the properties and hierarchy specified in the template. Links to imported content are added to pages based on the property values specified in the content.

Chapter 16: Building a Website
HP Adoption Readiness Tool™ 353
Viewing Website Properties
Viewing Website Properties
1. Select FILE > PROPERTIES... .
2. Click General on the left pane.
Information such as the size, associated template, creation date, and last modified date are displayed as view-only information.
3. As desired, edit the Title or Language fields.
The data entered into the Title field will display as the header on the published website.
4. Click OK to save your changes and close the window.
View Content Properties From the website editor, you can view properties of the included links.
You can modify the properties of non-uPerform Express content only. To modify uPerform Express content properties, you must open and edit the uPerform Express file.

Chapter 16: Building a Website
354 HP Adoption Readiness Tool™
Viewing Link Properties
1. Right-click on a link in the Links list, and select Properties.
2. Perform one of the following options:
If You Want To ThenView general properties Select the General tab.
View content properties Select the Properties tab. Edit the properties of non-uPerform Express content
Select the Properties tab. Select or enter a value for the desired property. You cannot edit the properties of uPerform Express documents from the website editor. You must open and edit the uPerform Express document to modify the properties.
3. Click OK.
Set Link List Details
Within the Links list you can specify up to four built-in or custom properties to display for the content items in the list. Examples of these properties include transaction code and content location. The Title and Type are always displayed.
Note that you must have first enabled the desired properties in the template associated with the website.
For detailed information on templates, refer to Using Author Templates (on page 267).

Chapter 16: Building a Website
HP Adoption Readiness Tool™ 355
Setting Link List Details
1. Select VIEW > CHOOSE DETAILS... .
2. Select up to four enabled built-in or custom properties available from the template to display as a column header in the Links list. You can also specify that the Location property be displayed.
3. Click OK.
The list is refreshed and the selected column headings are displayed.

Chapter 16: Building a Website
356 HP Adoption Readiness Tool™
Refreshing the Website
You should periodically refresh your website if authors are continuing to make changes to materials and may be moving or deleting content. By executing a refresh, you can easily check and verify links without rebrowsing to find content items.
The refresh process checks all uPerform Express links in the website and updates the titles or properties within uPerform Express content if these have changed. In addition, the refresh process will verify that content items are still available at the originally-specified locations. If content has been moved, the links are noted as 'source not found' in the Links list. Provided this content has already been published, it will still be available on the website, however. If source content is replaced, a subsequent refresh will repair these links.
To execute a refresh, select VIEW > REFRESH.

Chapter 16: Building a Website
HP Adoption Readiness Tool™ 357
Publishing the Website
The following subsection describes the steps to publish your website.
For detailed information on publishing documents, simulations, and courses, refer to Publishing Content (on page 257). For information on batch publishing content, the glossary, and your website, refer to Batch Publishing (on page 359).
Publishing the Active Website
1. Select FILE > PUBLISH [WEBSITE NAME]... .
2. Select the template corresponding to the website to be published.
3. Optionally, browse to specify an outbox other than the default.
4. Click Publish to publish the selected website.
When you publish the website, any existing, previously published website at the same location is deleted.
When publishing is complete, a summary message is displayed with a hyperlink to the successfully published website. On the published website, active links are only provided to uPerform Express documents and courses that have at least one published output in the outbox directory. If a uPerform Express document or course has no published content in the outbox directory, the publication settings in the template determine whether an inactive link or no link is shown.

Chapter 16: Building a Website
358 HP Adoption Readiness Tool™
Optionally, review the Application and Transformation logs for detailed information on events. In Windows XP, the logs are stored in the \Documents and Settings\[username]\ Application Data\uPerform\Version X.X\Logs directory. In Windows Vista and Windows 7, the logs are stored in the \User\App Data\Roaming\uPerform\Version X.X\Logs directory.
Refer to Making Your Website Available to End Users (on page 363) for information on making the website available to end users.

Chapter 16: Building a Website
HP Adoption Readiness Tool™ 359
Batch Publish Process
When publishing content, one or more glossaries, and one or more websites in a batch operation, the following processing order is followed:
1. All files in the specified inbox are read.
2. If the inbox contains a glossary, definitions are updated in content and new terms are retrieved (provided these options are enabled in the Batch Publish... window). This step is repeated for each glossary selected to be published.
3. Documents and courses are published. Only updated content is published if Express Publishis selected.
4. If the inbox contains a website, the website is updated and published. This step is repeated for each website selected to be published.
Batch Publishing
1. Select FILE > BATCH PUBLISH... .
2. Select the appropriate checkboxes to the left of the desired template, content types and for-mats, website, and glossary.
3. Optionally, browse to specify an inbox other than the default.
4. Optionally, browse to specify an outbox other than the default.

Chapter 16: Building a Website
360 HP Adoption Readiness Tool™
5. Perform one or more of the following options:
If You Want To ThenPublish only files that have changed since the last publish operation
Select the Express Publish checkbox. When this option is enabled, uPerform Express scans the inbox folder to determine which documents and courses have been modified since the last publish operation. uPerform Express then includes only these changed files in the list of content to be published to the outbox folder.
Update the definitions in uPerform Express documents prior to publishing documents
Select the Update terms definitions before publishing documents checkbox. If you are publishing many documents, updating terms may substantially increase the time necessary to complete the publish process.
Automatically add new terms found in uPerform Express documents to the current glossary while updating the document definitions
Select the Retrieve new terms from uPerform Express documents checkbox. This option is only enabled if the option to update term definitions is enabled. If you are publishing many documents, updating terms may substantially increase the time necessary to complete the publish process.
6. Click Publish to publish the selected content.
When publishing is complete, a summary message is displayed with hyperlinks to successfully published content.

Chapter 16: Building a Website
HP Adoption Readiness Tool™ 361
Navigate the Website
Overview of Navigation Pages
The end user can navigate within the website by selecting one of the following links:
Home - Click to return to the home page.
Glossary - Click to display the list of terms and definitions.
Page or content link - Click on the page name or link to navigate within the website or display content.
Overview of Content Pages
After selecting a content link, the end user selects one of the available published types and formats from the drop-down list.
s

Chapter 16: Building a Website
362 HP Adoption Readiness Tool™
To return to a preceding page in the website, the end user clicks on a breadcrumb link in the upper left below the page title.

Chapter 16: Building a Website
HP Adoption Readiness Tool™ 363
Making Your Website Available to End Users
Overview of the Website Directory Structure
The following list depicts the directory structure of the website after publishing.
[Outbox Directory]
website name
website folder
xml folder
index.htm
site_index.htm
assets folder
content folder
[page id code] folder
index.xml
[link id code] folder
index.xml
[link id code] folder
index.xml
[link id code] folder
index.xml
[page id code] folder
qlaunch folder
fp_upload.txt
[property value] folder
index.xml
[link id code] folder
index.xml
[link id code] folder
index.xml

Chapter 16: Building a Website
364 HP Adoption Readiness Tool™
[property value] folder
[property value] folder
Directory Structure Details
The index.htm file located in the \[outbox]\[website name]\[website folder]\xml directory is the launching page for the website.
For each page in the website, uPerform Express creates a subdirectory within the \xml directory. The name of the subdirectory is determined using a unique alphanumeric id code. To aid in navigating to content folders with an alphanumeric id code, open the site_index.htm file in the \xml directory.
Within each page subdirectory, uPerform Express writes a single "index.xml" file. The index.xml file contains the page information and XSLT stylesheet-linking information.
For each uPerform Express document or course in the website, uPerform Express creates a subdirectory and writes a single "index.xml" file within the subdirectory. The index.xml file contains the list of available publication types and formats for the content, along with XSLT stylesheet-linking information. The publication information in the template determines the link priority of the publish types and formats.
The standard Windows folder structure supports folder names up to 100 characters. If you are using SAP SRM, folder names can be up to 200 characters based on the transaction code associated with the folder. In this instance, the uPerform website will take the first 100 characters, append a unique code, and use this for the folder name in the directory structure.
Transferring Your Website to a Server
To make your content available to end users, you must copy the entire contents of the outbox folder specified during publishing.

Glossary of Terms
HP Adoption Readiness Tool™ 365
Glossary of Terms
AnnotationA note added to content by another author or a reviewer.
Annotation Set The collection of reviewer notes on a particular document.
Application Mode One of three available recording modes. Allows the author to capture actions in one target application.
Assessment Page A page in a course that consists of questions, answers, and optional images. Assessment pages can be used as self-tests throughout the course or can be inserted into an assessment section for tracking via a Learning Management System (LMS).
Assessment Section Part of a course that records an end user's answers and sends results to a Learning Management System (LMS) for tracking.
AuthorA user who creates or edits content.
Auto Playback A simulation playback mode that automatically runs the lesson without user interaction. In this mode, the application performs the actions to complete the simulation with the user as an observer.
Batch An operation performed on more than one document (for example, the batch publishing of content).
BlockA content element containing the information required to render a discrete item in all available views. Types include step, note, freetext, and the header and footer areas. A Freetext Block contains user-defined formatted text. A Note Block contains notation text and a single pre-defined icon graphic. A Step Block contains the information that describes a discrete action, including the screen image for the action.

Glossary of Terms
366 HP Adoption Readiness Tool™
Branch An alternate sequence of steps used to accomplish a secondary flow within a course or simulation.
Branching Table A table inserted into the procedural section of a document to direct users to make a decision regarding going to other steps or options.
CalloutsNumbered objects or notes that allow you to bring attention to specific controls and regions on screen images within a published uPerform document.
Configuration Information A section within a document that contains configuration information and can be output as a publication.
CourseA collection of informational content and optional assessment tools such as multiple choice, drag-and-drop, and fill-in-the-blank.
Course Homepage A web page generated by uPerform Express that contains the link to the published course.
Course Package A container for multiple uPerform content files output to a single master SCORM package.
Cue Card A publication type created from uPerform Express content and typically used in context-sensitive help.
Definition Within the glossary functionality, amplifying information about a term used in the target application. A term can have multiple definitions based on the context of the document.
Desktop Mode One of three available recording modes. Allows the author to capture the complete desktop and actions across a series of applications.
Document A set of instructions, images, and associated objects intended for use as online help or performance support.
Drag and Drop Action A simulation action indicating mouse input is required. This action is used to identify a click, drag, and release mouse action required to navigate to the next step in a simulation or to answer a question in a drag-and-drop assessment page within a course.

Glossary of Terms
HP Adoption Readiness Tool™ 367
Edit Action A simulation action indicating text input is required. This action is used to identify a string of keyboard input (text input) required to navigate to the next step in a simulation.
EditorThe application used to create and modify uPerform content.
eLearningSelf-paced, online learning developed by authors and subject matter experts using the uPerform Express editor.
End User Any person who accesses performance support content through a website.
Express Publish The process of publishing only those documents that have been modified since the last publish operation.
FlashA file format developed by Adobe; this output type is used to display content within uPerform Express courses and simulations.
Glossary The uPerform Express function that enables the management of terms and definitions. Also, the name of an ANCILE Info Pak application.
Guided Help Published HTML content designed to be used during task execution.
HintThe nonessential data (for example, a user name) required to complete a simulation. Hints can be provided to the student during playback of the simulation.
HotspotA resizable box surrounding an action location in a simulation or course.
HP Adoption Readiness Tool (ART) An HPSE solution that accelerates user adoption of HP software for customers.
InboxFolder location containing source content to be published or leveraged.
Key Action A simulation action indicating keyboard input. This action is used to identify a specific keystroke or sequence of keystrokes required to navigate to the next step in a simulation.
Lesson, Course A component of an eLearning course. A lesson contains pages and is typically used as an introduction to a section.

Glossary of Terms
368 HP Adoption Readiness Tool™
Lesson, Simulation The output of a uPerform Express recording and subsequent editing that simulates a task in a software application.
LinkA hyperlink within a document, a course, or a website page.
OutboxFolder location containing content that has been published.
OverviewThe introduction section of a document that contains purpose, trigger, prerequisites, menu paths, and helpful hints; included in Work Instructions, Quick References, and Cue Cards after publishing.
PageA page contains the content of the eLearning course. Page layout is governed by the use of stencils. There are two different page types available: standard content and assessment.
Passing Grade Specifies the minimum percentage of correct responses that the user must achieve to pass the test.
PhraseA group of culture-specific boilerplate text items that are placed into a content block by default.
PlaybackThe interactive output mode of a simulation. Simulator supports four types of playback: Standard Tutorial, Auto Playback Tutorial, Self-Test Tutorial, and Assessment Tutorial.
Preloader A performance-enhancing feature that enables preloading of the simulation or course on the target computer before the content begins to execute.
PropertiesMetadata such as document title, owner, and version used to describe content. In addition to the standard built-in properties, custom properties may be created.
PublicationOutput published from uPerform Express content; a publication is meant to be consumed by an end user.
PublishA process that exports content to a variety of types and formats, including cue card and Flash simulation.
Publish Format The output format of published content. Available formats include Flash simulations and PDF.

Glossary of Terms
HP Adoption Readiness Tool™ 369
Publish Type The output type of published content. Available types include work instruction, cue card, and simulation.
Quick Reference A type of procedural publication often used in end user training.
Quick Start Panel An interface feature of the uPerform Express editor that provides expedited access to the recording and editing functions.
Recorder The uPerform Express functionality that captures author actions in one or more target applications to produce a formatted document, simulation, and screenflow.
Redo An editing option that allows the author to reverse the last Undo action performed.
ScreenflowA diagram representing the flow of steps in a task.
SectionA section represents a single, contiguous group of blocks in a document. In the document arrangement, a block must belong to a section. Each section element consists of a sequential array of cross-references to the available blocks. Similar items within a document can be grouped into discrete sections, and publications can include/exclude particular sections. A section cannot contain another section.
Self-TestA simulation playback mode that includes no instructions, hotspot objects, notes, audio playback, or step status bar information. In this playback mode, the user is encouraged to remember and perform all necessary steps for testing purposes.
SimulationA set of instructions, images, and associated objects intended for export as interactive output.
Simulation Assessment A simulation playback mode with no instructions, hotspot objects, notes, audio playback, or step status bar information. In this mode, the user is encouraged to answer questions regarding material and to remember and perform all necessary simulation steps for testing and grading purposes.
StencilA layout tool governing the design of a course page.
StepOne of a series of actions that collectively form the procedure captured in the document or simulation.

Glossary of Terms
370 HP Adoption Readiness Tool™
Student Guide A collection of concepts, procedures, and exercises related to a series of tasks or a process.
Style A group of formatting options that relate to paragraphs or character text.
Task Pane The area of the editing application that provides access to items such as annotations, document layout, and simulation steps.
TemplateA set of document, simulation, and course options that control formatting and content. Each content file is created from a template which determines the basic structure for content and specifies the content settings. The template also specifies information about the types and formats of content that can be published.
TermThe name of a field or option in the target application being documented. A term can have one or more definitions.
Testing Information A section that contains testing scenarios and history, and can be output as a publication.
TooltipA type of note that displays during simulation playback when the user hovers over the specified area.
UndoAn editing option that allow the author to reverse the last action performed. Undo caches up to twenty steps.
uPerform Document The XML content produced by uPerform as a result of recording author actions in a target application; includes the document, simulation, and screenflow views.
uPerform Express Editor The application used to create, record, and modify documents, simulations, courses, websites, and glossaries.
User The consumer of final published content via online help or the website.
View A way of displaying content to an author or user; there are four views of uPerform content available: document, simulation, screenflow, and course.
Voice Over An option allowing for the inclusion of an audio file during simulation or course playback.

Glossary of Terms
HP Adoption Readiness Tool™ 371
WebsiteA collection of performance support materials such as procedures, simulations, and courses that are available to end users via a web browser.
Work Instruction A type of content output typically used in user training that contains end user procedural information, including screen shots and field description tables.
XMLExtensible Markup Language; the source format of uPerform content.
XSL Extensible Stylesheet Language; the file used to control the format of the content displayed in an XML file.


ANCILE Solutions, Inc. 373
Index
Aaction • 105
drag and drop • 130 edit • 127 editing • 125 inserting • 105, 110, 111, 135, 136, 137,
138, 139, 141, 175, 187, 189 key • 128 mouse • 125 note • 109
add • 159 user-specific data • 159
annotation notes editing • 92, 96, 104, 113, 120, 125, 135,
141, 142, 143, 164 annotation set
deleting • 37, 141 applications
uPerform • 9 ASAP BPP • 134 assessment • 169, 177, 178, 179, 180 audio • 196 audio properties • 115 auto playback properties • 116 Bblock • 141, 142, 143
editing • 141, 142, 143 boilerplate • 159
replace • 159 branch • 105
edit • 133 inserting • 111
built-in • 94 properties • 94
Ccharacters • 146
modifying • 146 cleaning properties
document • 101, 102, 134, 135, 136, 138, 141, 142, 143, 221, 222
client hardware • 12 client software • 12 closing • 102
document • 102 file • 102
configuration information • 134 content • 49
creating • 49 properties • 93, 94, 172, 177
content area • 38 conventions • 8 course package • 209, 210, 215, 216, 263 course text • 173 create
content • 49 editor toolbar • 37
create toolbar • 37 customizing • 36
editor toolbar • 36, 37 interaction • 177, 178, 179, 180 properties • 94 screenflow • 162 toolbars • 35, 36, 37
Ddata table • 158
exercise section • 158, 159 deleting • 37
editor toolbar • 37 disable • 24
quick start panel • 24 display • 121
note • 120, 121, 123 document characters • 146
modifying • 146 document sections • 135
editing • 135 overview • 135
document text • 135, 145 inserting text • 135
documents

Index
374 HP Adoption Readiness Tool™
close • 102 printing • 101 searching • 221 section • 134
drag and drop • 130 Eedit block • 141, 142, 143 editing • 92, 96, 104, 113, 120, 125, 135,
141, 142, 143, 164 actions • 125 introduction • 92, 104, 164 note text • 120 notes • 120 redo • 66, 96 standard simulation objects • 113 steps • 113 undo • 66, 96
editor exit • 29 interface language • 25 product version • 28 toolbars • 35
editor toolbar • 36, 37 create • 37 customizing • 36 deleting • 37 renaming • 37
embedding • 193 enable • 24
quick start panel • 24 exercise section • 158, 159
generate • 158 tasks • 158 user-specific data • 159
exercise/data sheet • 134 exit • 29
editor • 29 Ffile • 102
close • 102 font size • 146
modifying • 146 format text • 173 formatting • 92, 104, 164
introduction • 92, 104, 164 note • 120, 121, 123
Ggeneral properties • 114
edit • 114, 115, 116, 117, 118 guided help • 298, 299, 301, 302 Hhardware • 12
client • 12 headings • 136 Help • 28 Iimages • 175 insert • 105, 106, 107, 138, 139, 140, 190
blank steps • 107 note • 108 standard objects • 105 substeps • 107
insert standard objects • 105 insert step • 105 inserting • 110
action • 110 branch • 111, 203, 206 headings • 136 menu items • 136 web link • 136
inserting example • 136 examples • 136
inserting heading • 136 inserting menu item • 136 inserting text • 135 installation • 13
overview of installation • 13 installation parameters and properties
client • 13 instert steps from simulation • 106 interactions • 177
customizing • 177 interface language • 25
editor • 25 Jjustify • 145
paragraphs • 145 Kkey • 128 Llesson • 166 log file

Index
HP Adoption Readiness Tool™ 375
re-record • 70, 81 log level • 27 logs • 27
publishing log level • 27 re-record • 70, 81 specifying • 27
Mmenu items • 136 minimize • 67
recorder • 59, 67 mode • 26
recording • 26 mouse • 125 move
rubberband • 133 Nnewly recorded step • 105 note text • 120
display • 121 edit • 120, 121, 123 format • 123 style • 123
notes • 105, 107, 120, 140, 141 action • 109 default • 108 editing • 120 insert • 105, 106, 107, 138, 139, 140, 190
Oonline help • 28 options • 97
spellcheck • 97 Ppage • 169
assessment • 169, 177, 178, 179, 180 self-test • 202
paragraphs • 145 format • 145 justify • 145 modifying • 145
pausing • 68 recording • 26, 54, 55, 60, 65, 66, 68
printing • 101 document • 101, 102, 134, 135, 136, 138,
141, 142, 143, 221, 222 product support center • 28 product version • 28
properties • 93, 94, 172, 177 built-in • 94 content • 93, 172, 177 custom • 94
publishing log level • 27 Qquick start panel • 24
disable • 24 enable • 24
Rrecorder • 59, 67
minimize • 67 recording • 26
mode • 26 overview • 54 pausing • 68 prepare • 55 redo • 66 specifying • 27 supported applications • 54 undo • 66
redo • 66 editing • 96 recording • 66
renaming • 37 editor toolbar • 37
reordering steps • 113 replace • 159
boilerplate • 159 re-record • 70, 81
Introduction • 70 preparing • 81
resize • 133 rubberband • 133
result section • 135 rubberband • 133
adjust • 133 move • 133 resize • 133
Ssaving • 99 screen properties • 117 screenflow • 134, 160, 161, 162
customize • 162 view • 161
searching • 221

Index
376 HP Adoption Readiness Tool™
document • 101, 102, 134, 135, 136, 138, 141, 142, 143, 221, 222
section • 134 assessment • 169
self-test • 202 simulation
audio properties • 115 general properties • 114 insert step • 105 notes • 107 reordering steps • 113
simulation step • 113, 114, 115, 116, 117, 118auto playback properties • 116 edit • 113, 114, 115, 116, 117, 118, 120,
121, 123, 125, 127, 128, 130, 133, 141 general properties • 114 reorder • 113 screen properties • 117 step text properties • 118
software • 12 client • 12
spellcheck • 97 options • 97
standard content • 49 standard simulation objects • 113
editing • 92, 96, 104, 113, 120, 125, 135, 141, 142, 143, 164
stencil • 172 switching • 172
step • 105 editing • 113 inserting • 105, 109, 110, 111, 135, 136,
137, 138, 139, 141, 175, 187, 189 step text editor • 114 step text properties • 118 student guide • 209, 210, 211, 212, 213, 263 substeps • 105
insert • 107 Ttask pane • 39 tasks • 158 technical support • 9 test information • 134 test script • 252 toolbars • 35
customizing • 36 deleting • 37 editor • 35 renaming • 37
tooltip • 105 edit • 133 inserting • 110
type • 146 modifying • 146
Uundo • 66
editing • 96 recording • 66
uPerform • 9 online help • 28 technical support • 9
upgradingclient • 13
user manual • 8 conventions • 8
user-specific data • 159 Vview • 161
screenflow • 161 Wweb link • 136
inserting • 136
Related Documents