back4app.com Create a Pokemon Go Game

Welcome message from author
This document is posted to help you gain knowledge. Please leave a comment to let me know what you think about it! Share it to your friends and learn new things together.
Transcript
back4app.comCreate a Pokemon Go Game

How to Build a Pokemon Go App
• Back4app provides Parse server service to take care of your backend and APIs development.
• Parse also provides basic application activity APIs like Login-in, push notification, payment…etc.
• For this demonstration, we can use Parse Geo Point Service and back4app as our backend to build a simple Pokémon-Go.
• You can read the original publication on:
http://docs.back4app.com/docs/new-parse-app/how-to-build-a-pokemon-go-app/

Part 1: Setting up Back4app Parse
on your Unity3d
• Go to https://parse.com/docs/downloads
• Download Unity Blank Project (v1.7.0)
• Download https://drive.google.com/file/d/0B7k7pGQXUypGTWRqS1BqVDBWQUU/view?usp=sharing for updated Parse SDK for Unity3d
Part 1: Setting up Back4app Parse
on your Unity3d
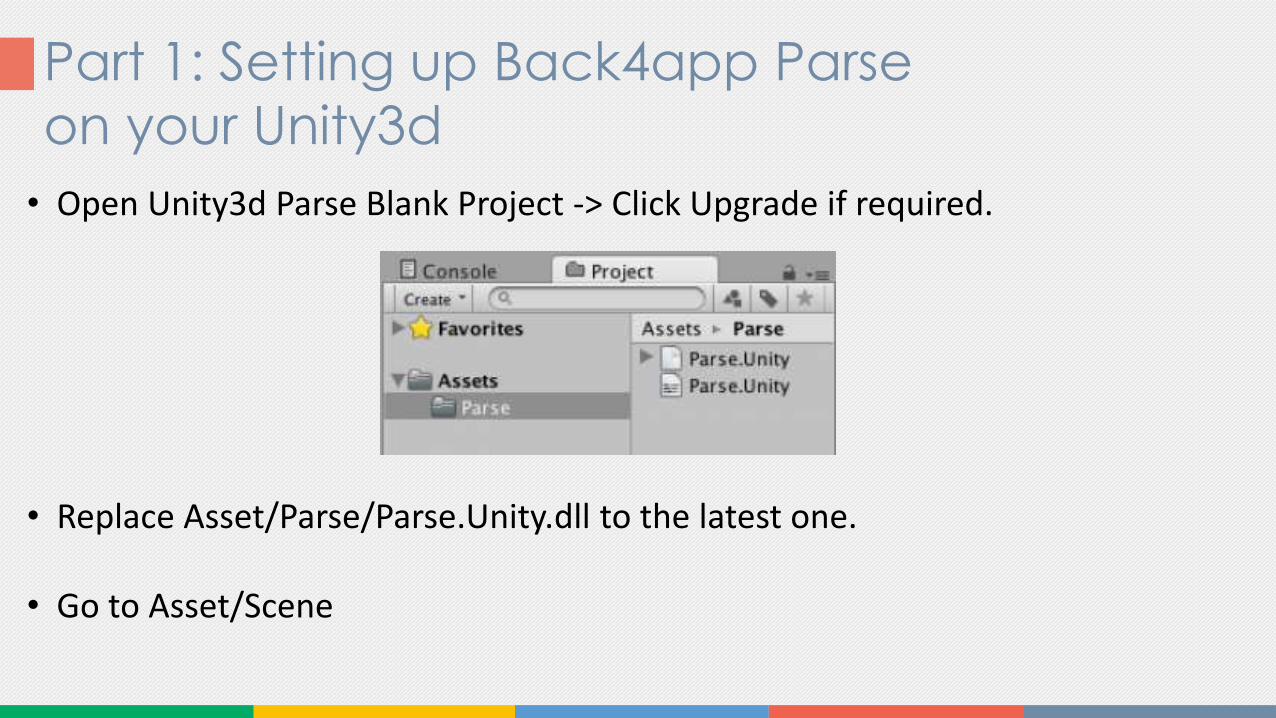
• Open Unity3d Parse Blank Project -> Click Upgrade if required.
• Replace Asset/Parse/Parse.Unity.dll to the latest one.
• Go to Asset/Scene
Part 1: Setting up Back4app Parse
on your Unity3d
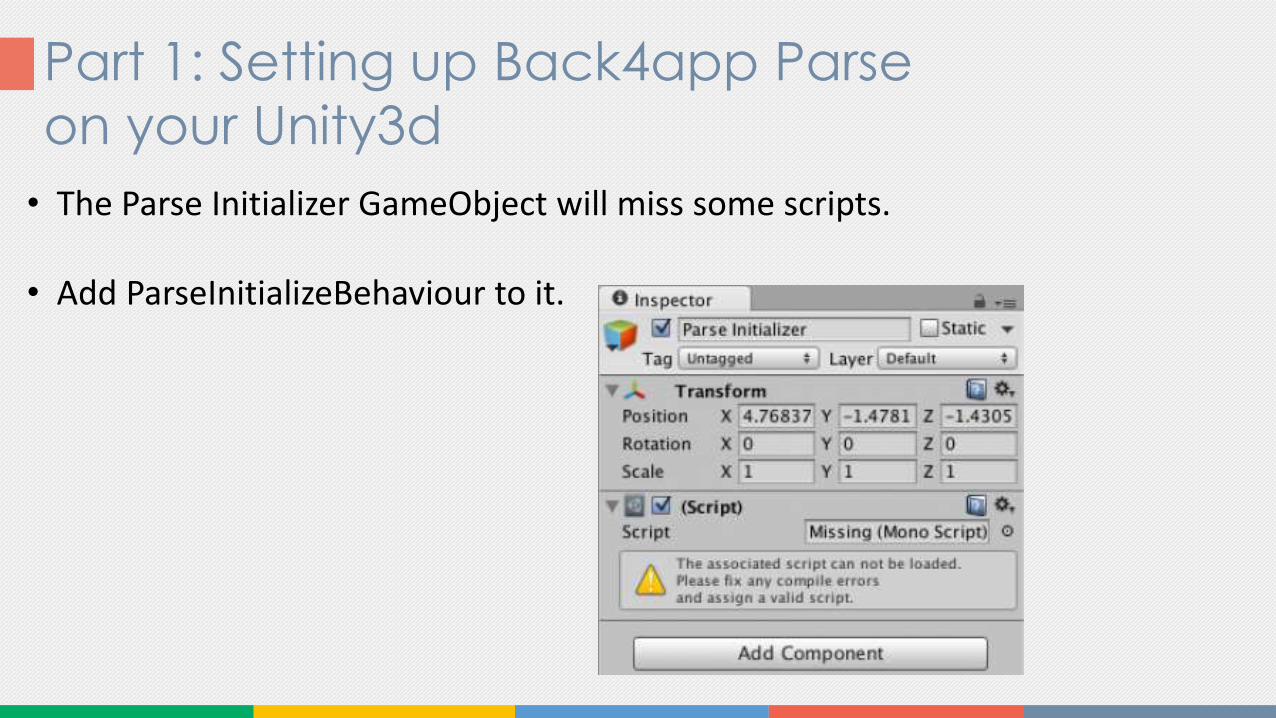
• The Parse Initializer GameObject will miss some scripts.
• Add ParseInitializeBehaviour to it.

Part 1: Setting up Back4app Parse
on your Unity3d
• Type your Application ID, dotNet Key, serverUrl to a parameter from your Back4app dashboard.
Part 1: Setting up Back4app Parse
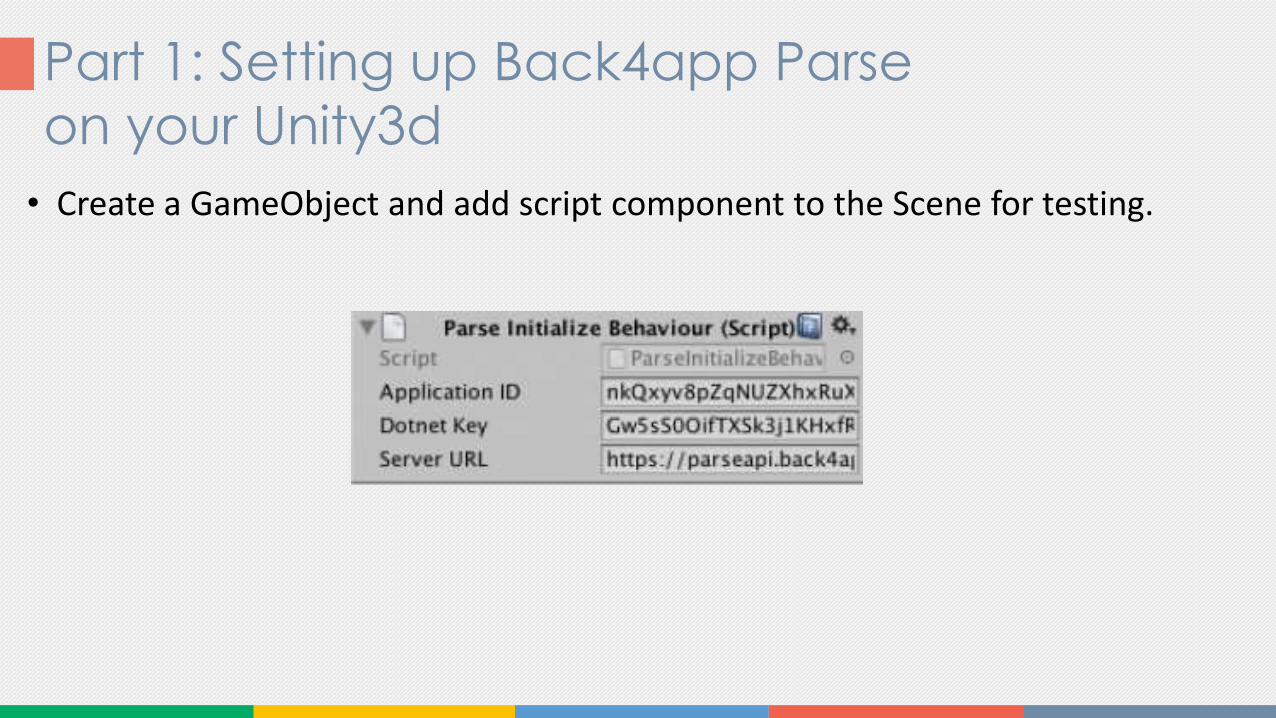
on your Unity3d
• Create a GameObject and add script component to the Scene for testing.

Part 1: Setting up Back4app Parse
on your Unity3d
• Add following code to TestParse.cs

Part 1: Setting up Back4app Parse
on your Unity3d
• using UnityEngine;• using System.Collections;• using Parse;• using System.Threading.Tasks;• public class TestParse : MonoBehavio
ur {• // Use this for initialization• void Start () {• ParseObject testObj = new ParseObje
ct("TestObject");
• testObj["a"] = "HI";• testObj["b"] = "Back4app";• Task saveTask = testObj.SaveAsync();• }• // Update is called once per frame• void Update () {• }• }
Part 1: Setting up Back4app Parse
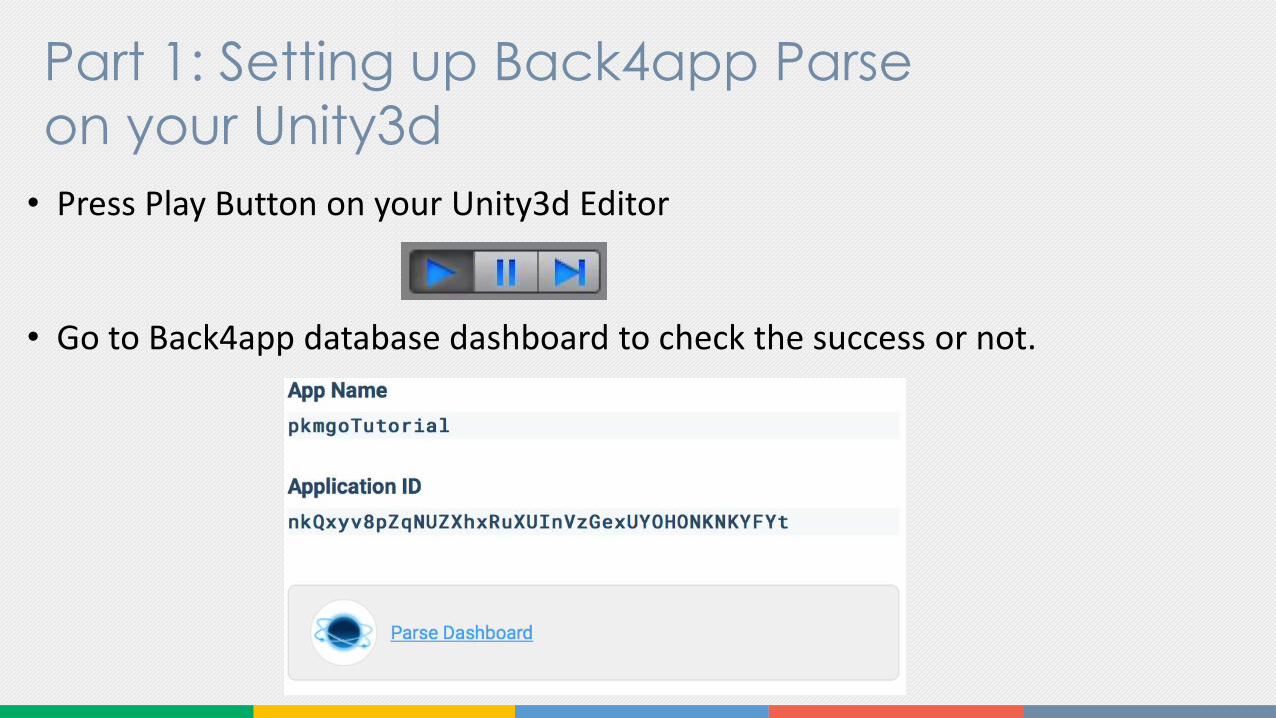
on your Unity3d
• Press Play Button on your Unity3d Editor
• Go to Back4app database dashboard to check the success or not.

Part 1: Setting up Back4app Parse
on your Unity3d
• It is connected with your back4app account successfully if you find your uploaded data in the database.

Part 2: Integrate Google Map
to your Unity3d Project
• To generate the terrain like Pokémon-Go, we need to integrate Google map your Unity3d Project.
• First, create Plane and Name it as “Map”, create directional light.

Part 2: Integrate Google Map
to your Unity3d Project
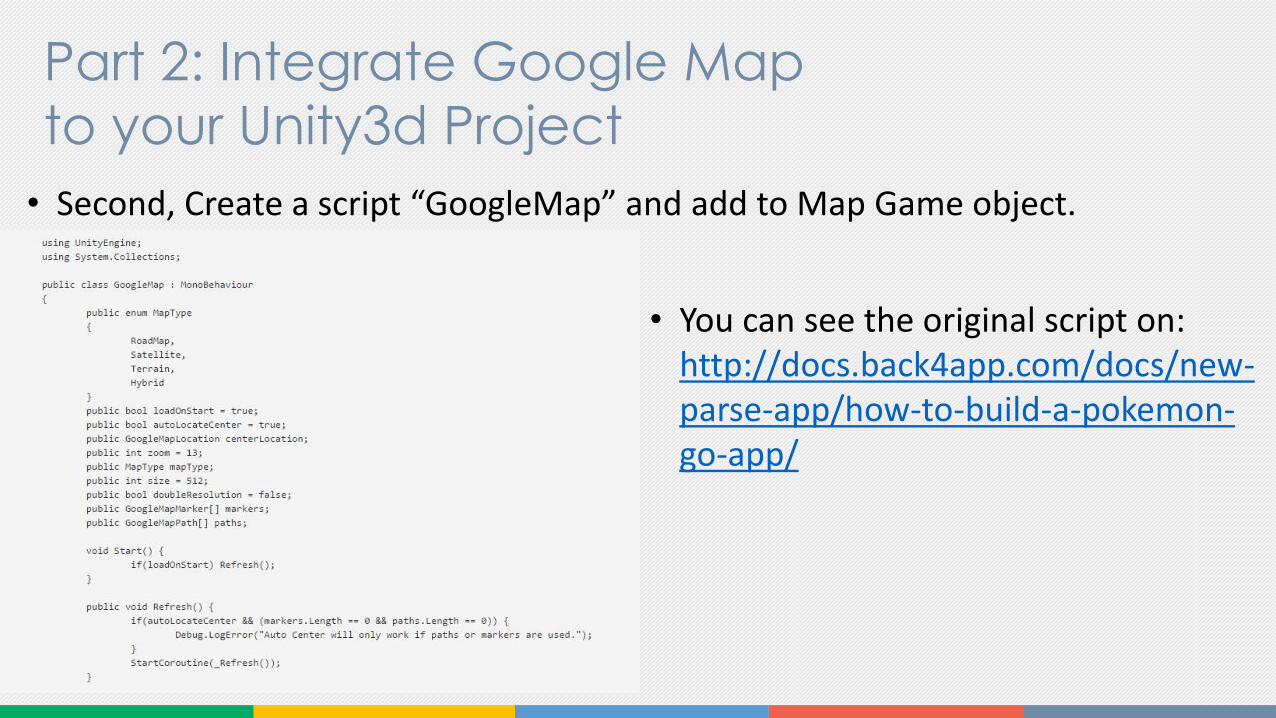
• Second, Create a script “GoogleMap” and add to Map Game object.
Part 2: Integrate Google Map
to your Unity3d Project
• Second, Create a script “GoogleMap” and add to Map Game object.
• You can see the original script on: http://docs.back4app.com/docs/new-parse-app/how-to-build-a-pokemon-go-app/
Part 2: Integrate Google Map
to your Unity3d Project
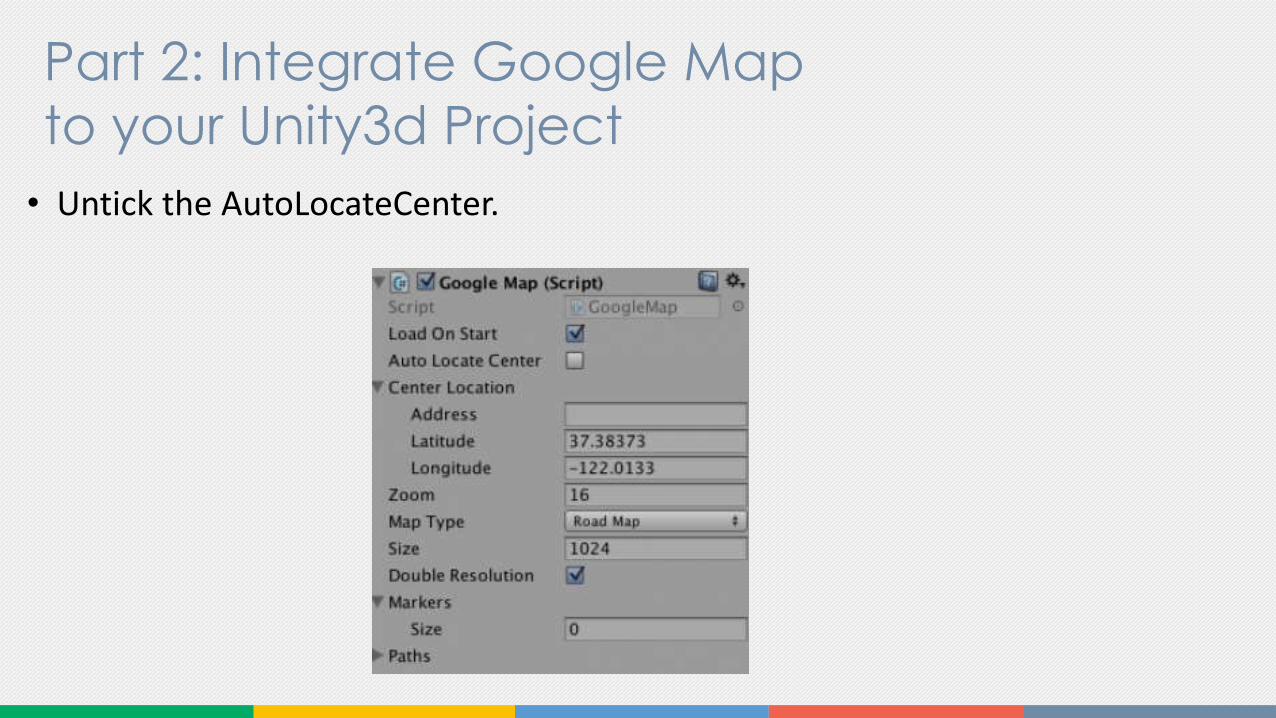
• Untick the AutoLocateCenter.
Part 2: Integrate Google Map
to your Unity3d Project
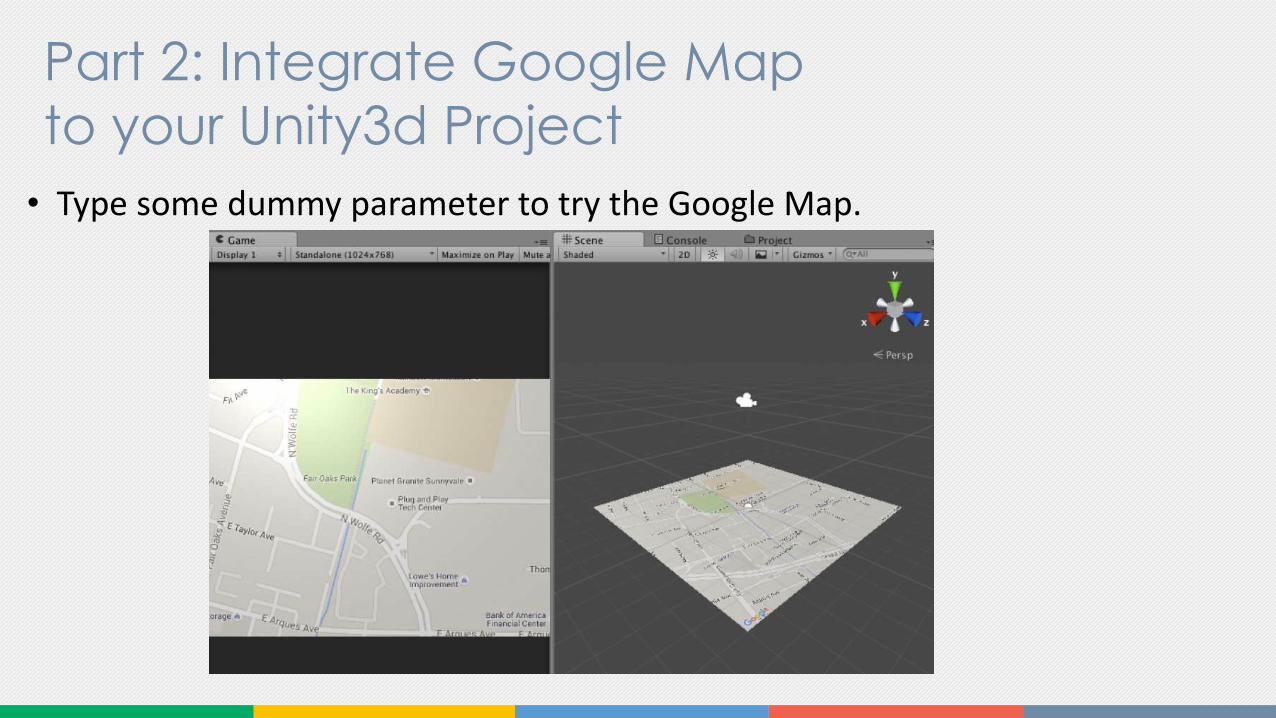
• Type some dummy parameter to try the Google Map.

Part 2: Integrate Google Map
to your Unity3d Project
• If the plane shows the correct location as your parameter, the Google map is successfully integrated.
• You can use Refresh method to refresh the Google map to change location.

Part 3: Integrate Character and Interacting
with GPS Data
• Create LocationManager Gameobject and add the following code.
• This code is getting the GPS Data and updating the Google Map when GPS data is changed.
• You can see the full code on: http://docs.back4app.com/docs/new-parse-app/how-to-build-a-pokemon-go-app/

Part 3: Integrate Character and Interacting
with GPS Data
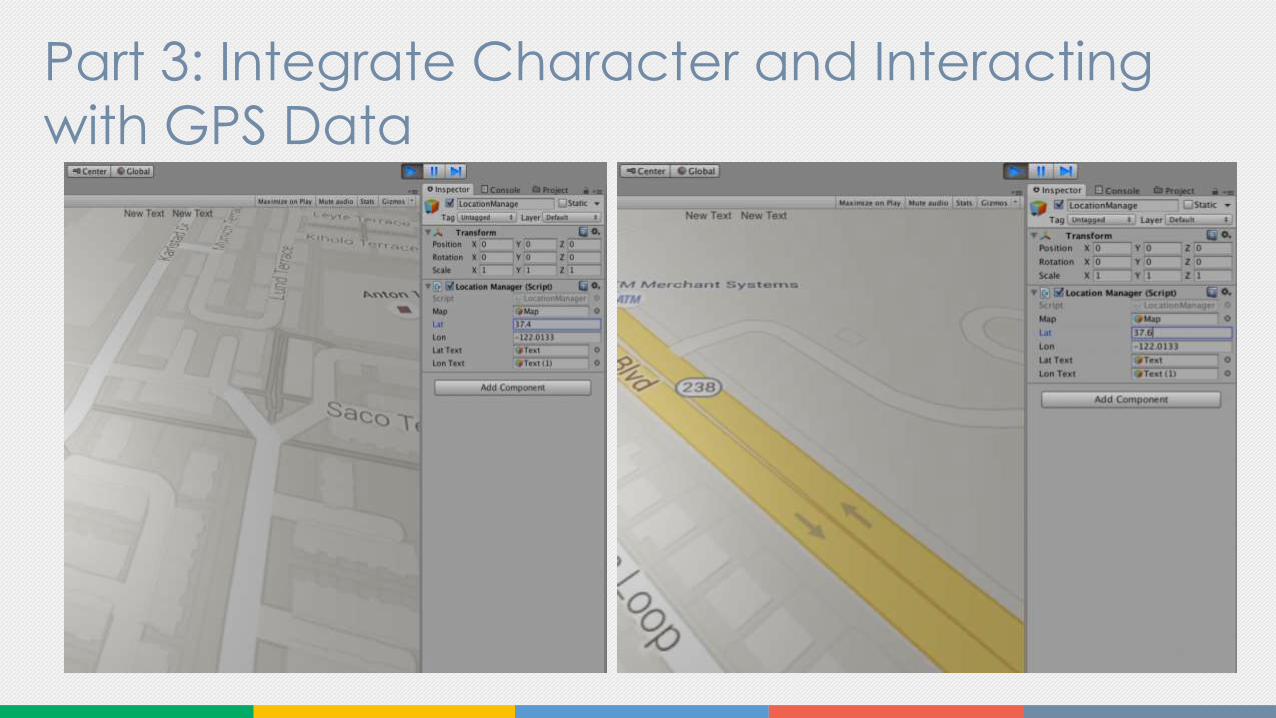
• Let test the Google map again.
• It is successful if the Google map change when you change the GPS Data in Runtime.
Part 3: Integrate Character and Interacting
with GPS Data
Part 3: Integrate Character and Interacting
with GPS Data
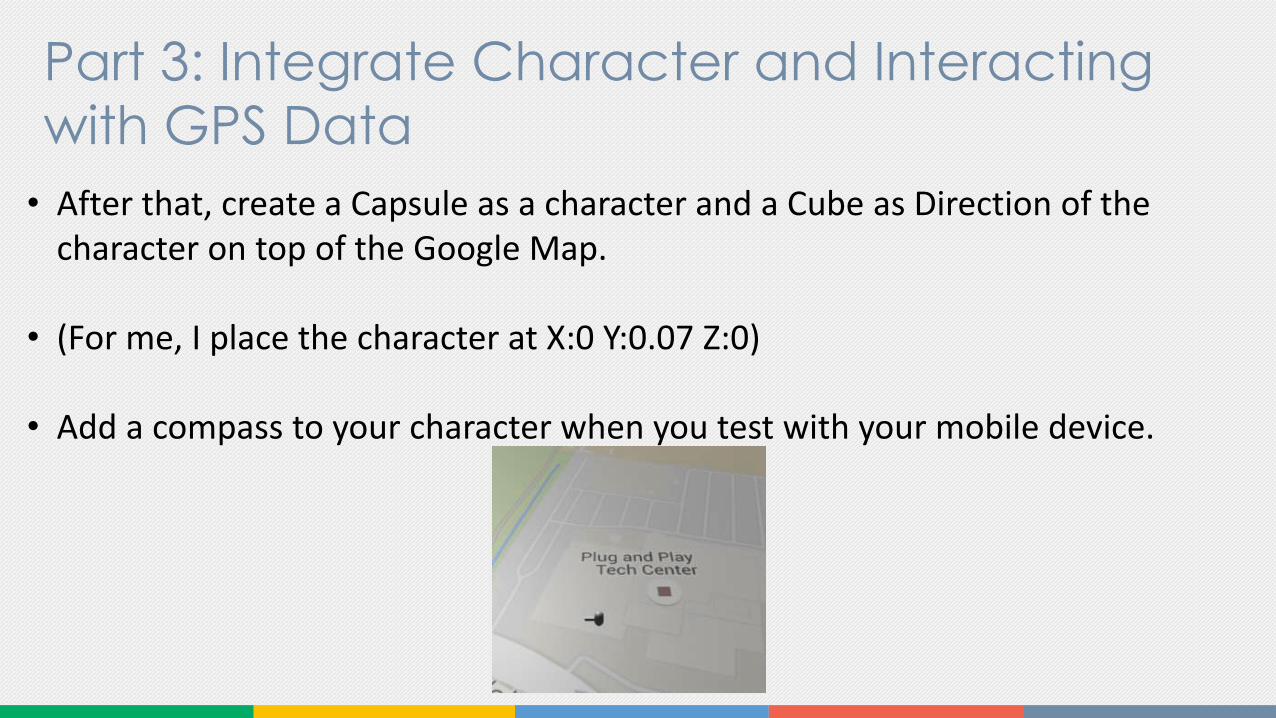
• After that, create a Capsule as a character and a Cube as Direction of the character on top of the Google Map.
• (For me, I place the character at X:0 Y:0.07 Z:0)
• Add a compass to your character when you test with your mobile device.

Part 3: Integrate Character and Interacting
with GPS Data
• Make sure your character is located correctly by checking Latitude and Longitude on Google Map.
Part 4: Generating Monsters on Map (Part A)
• For Generating Monsters, we need to do some calculation on placing the monster with their longitude and latitude location.
• Because the ratio between Google map, reality and Unity3d XYZ-world is different.
• To figure out how to calculate the relationship between them, we need dummy data.
• For more detail : how to calculate.http://www.movable-type.co.uk/scripts/latlong.html
Part 4: Generating Monsters on Map (Part A)
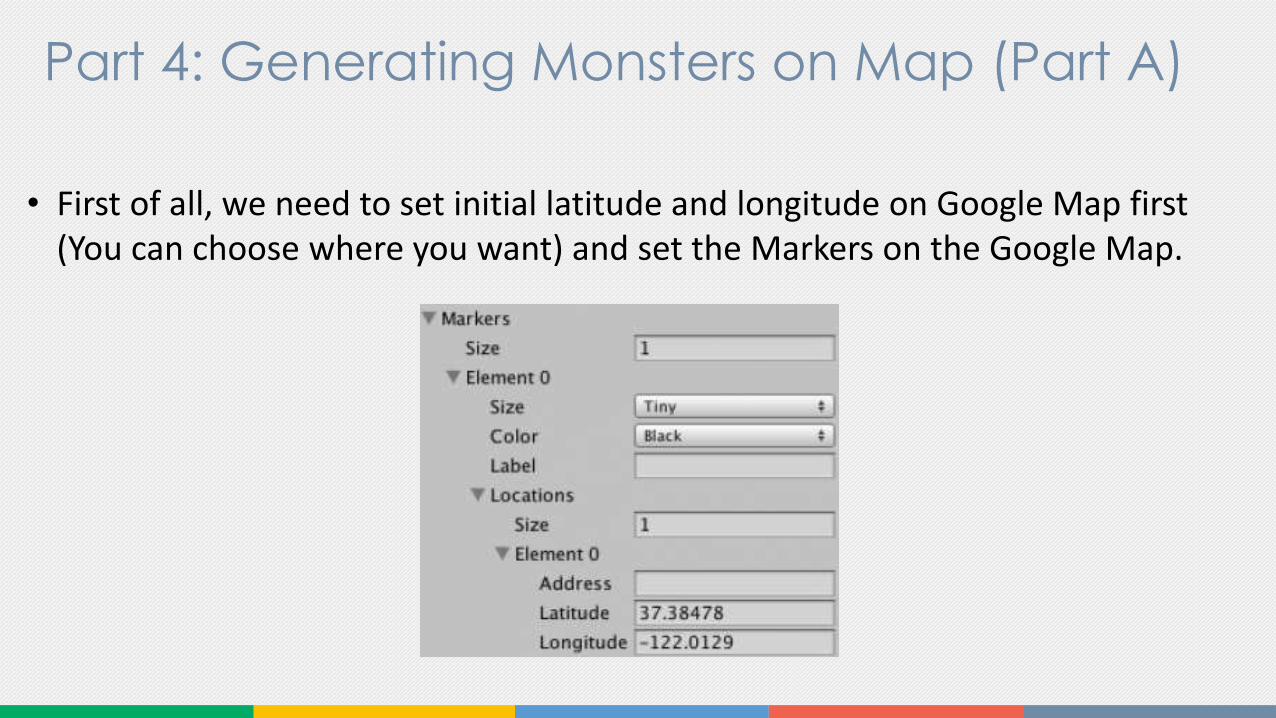
• First of all, we need to set initial latitude and longitude on Google Map first (You can choose where you want) and set the Markers on the Google Map.
Part 4: Generating Monsters on Map (Part A)
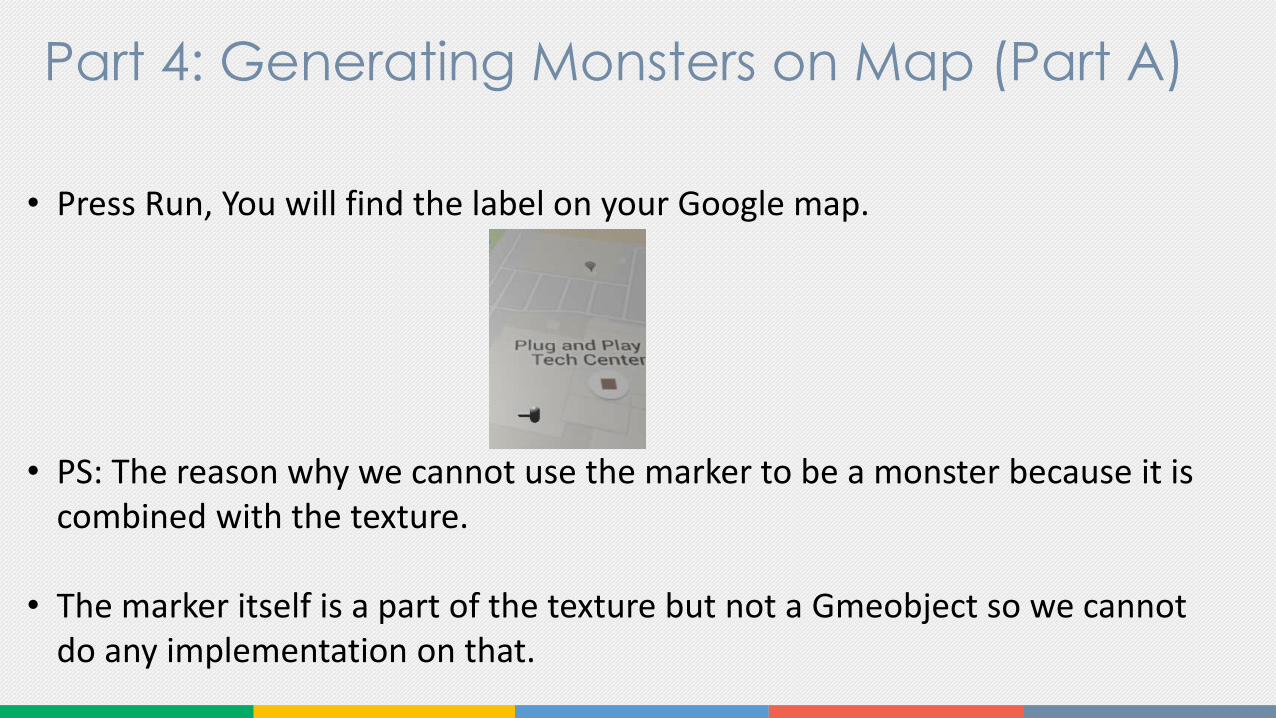
• Press Run, You will find the label on your Google map.
• PS: The reason why we cannot use the marker to be a monster because it is combined with the texture.
• The marker itself is a part of the texture but not a Gmeobject so we cannot do any implementation on that.
Part 4: Generating Monsters on Map (Part A)
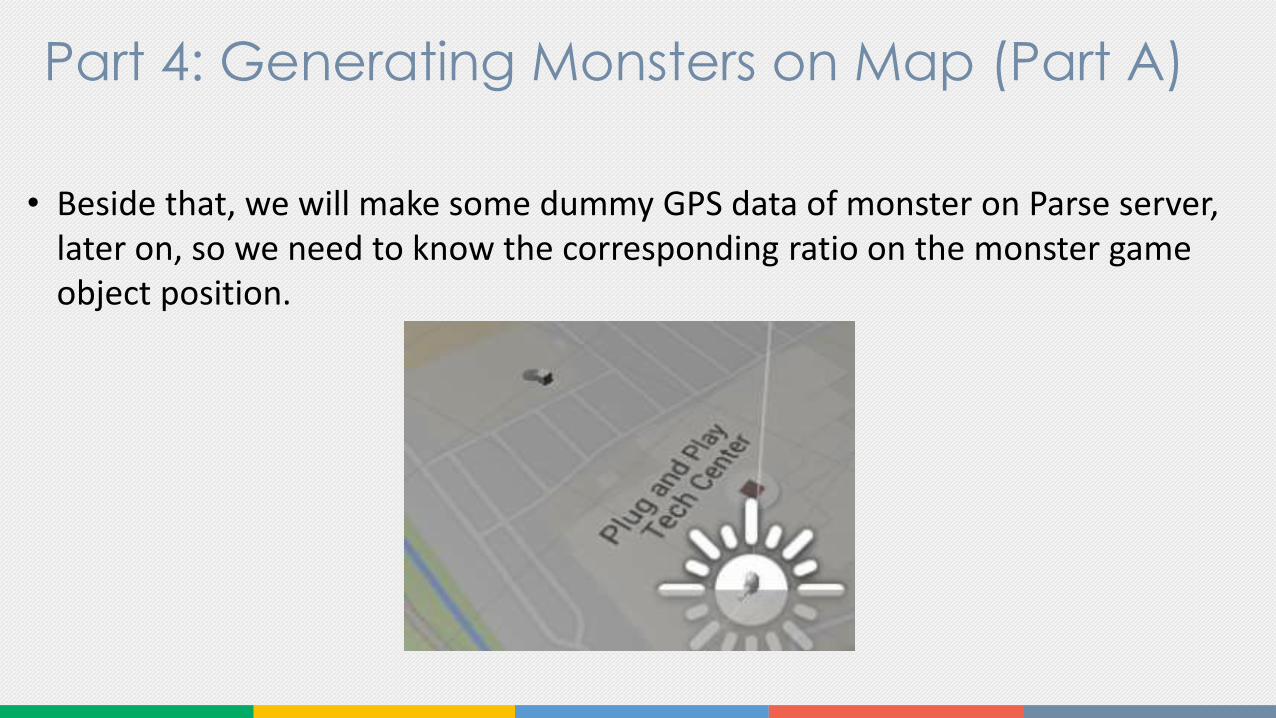
• Beside that, we will make some dummy GPS data of monster on Parse server, later on, so we need to know the corresponding ratio on the monster game object position.
Part 4: Generating Monsters on Map (Part A)
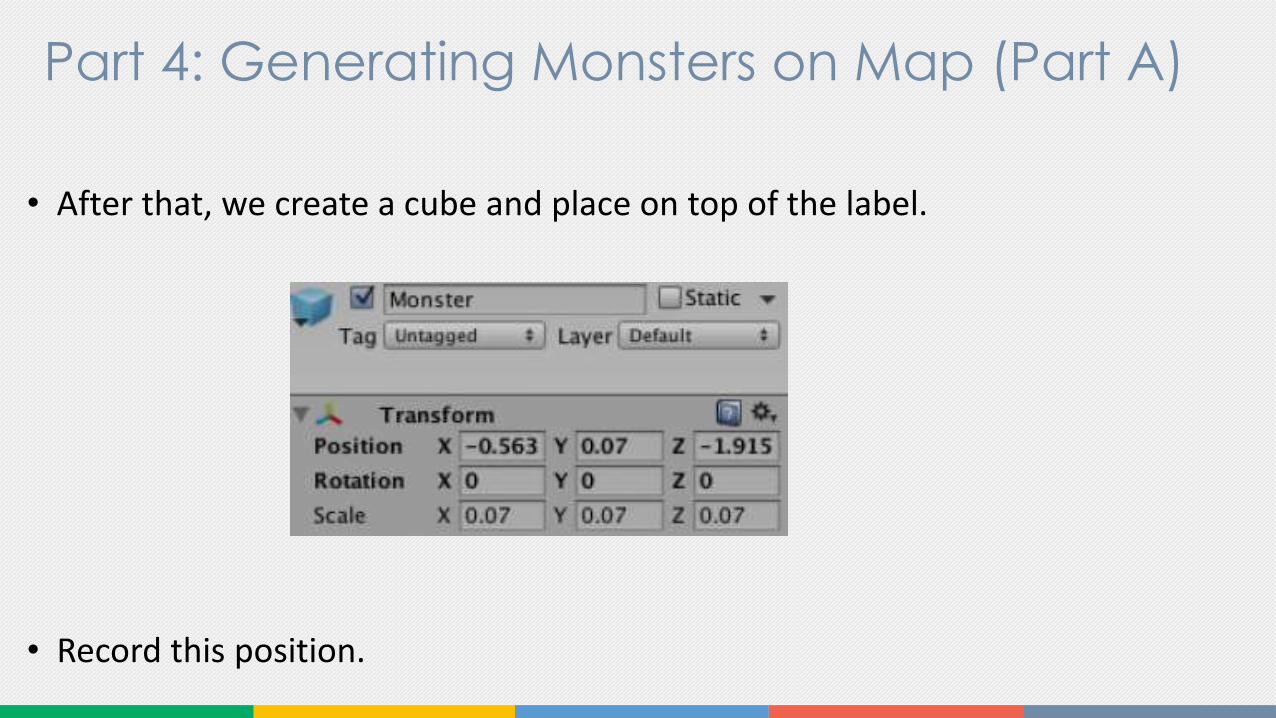
• After that, we create a cube and place on top of the label.
• Record this position.

Part 4: Generating Monsters on Map (Part A)
• Now, we need to find the exact distance between the player GPS location and the marker GPS location.
• The distance between start (37.38373, -122.0133) and marker (37.384782,-122.012893) can be calculated by this script.
Part 4: Generating Monsters on Map (Part A)
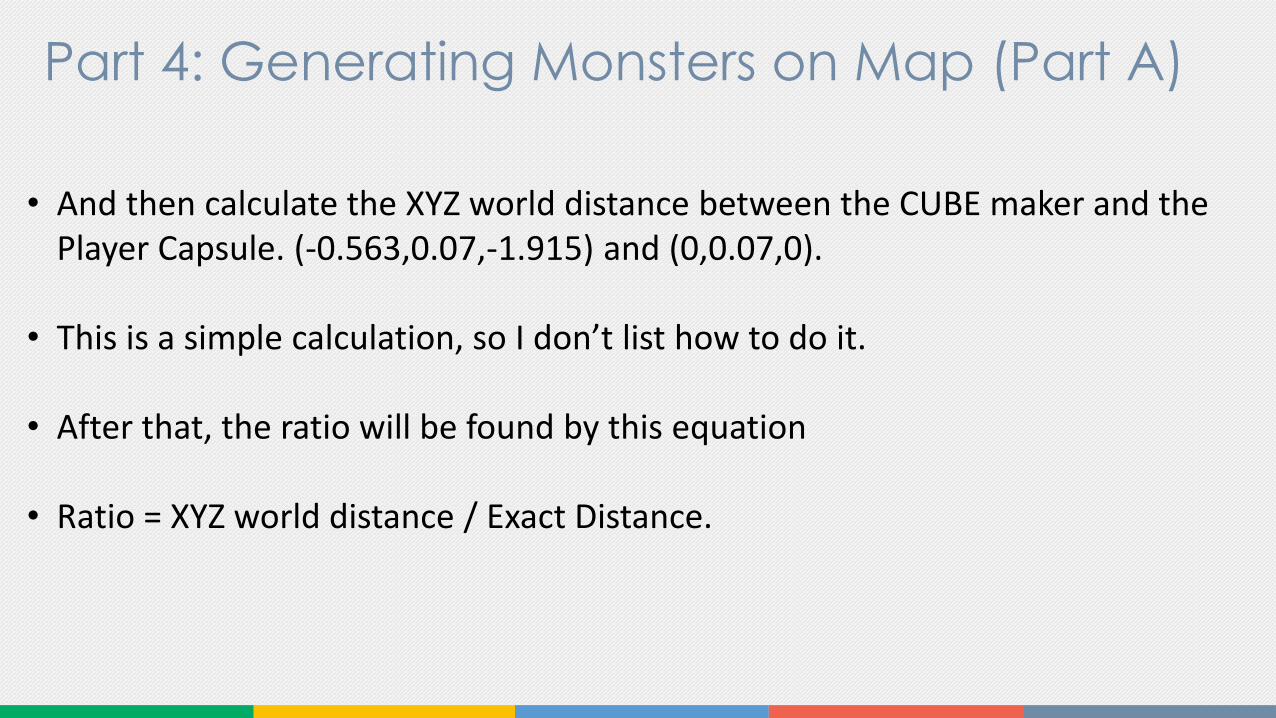
• And then calculate the XYZ world distance between the CUBE maker and the Player Capsule. (-0.563,0.07,-1.915) and (0,0.07,0).
• This is a simple calculation, so I don’t list how to do it.
• After that, the ratio will be found by this equation
• Ratio = XYZ world distance / Exact Distance.
Part 4: Generating Monsters on Map (Part A)
• Once we have this ratio, we able to calculate how far the monster should be placed according to the Player location.
• However, the possible location still undefined because we don’t have the bearing between the player and monster.
• To calculate the bearing.
• We can use this code. (You can see the full code on: http://docs.back4app.com/docs/new-parse-app/how-to-build-a-pokemon-go-app/)

Part 4: Generating Monsters on Map (Part A)
• After we get the ratio and bearing, it is possible to convert Longitude Latitude location to be XYZ-world coordination, which means we can place any monsters with latitude longitude location to correct game world location.
• With the above code, we know the correct XYZ coordination to spawn monster.

Part 5: Generating Monsters on Map (Part B)
• While we are able to convert Longitude and Latitude data to the game world, it is time now to create some dummy monster data on Back4app parse server.
• Go to your Parse back4app dashboard and create a class call Monster.

Part 5: Generating Monsters on Map (Part B)
• Add a column: Location with data type Geopoint.

Part 5: Generating Monsters on Map (Part B)
• Insert some monster dummy row that around you.

Part 5: Generating Monsters on Map (Part B)
• The dummy monsters are set, they are waiting for you to call.
• Then I create a MonsterSpawn GameObject with script Spawn.
• Drop the LocationManager GameObject to it (For getting updated GPS Data)
• M prefab monster for spawning a monster.

Part 5: Generating Monsters on Map (Part B)
Part 5: Generating Monsters on Map (Part B)
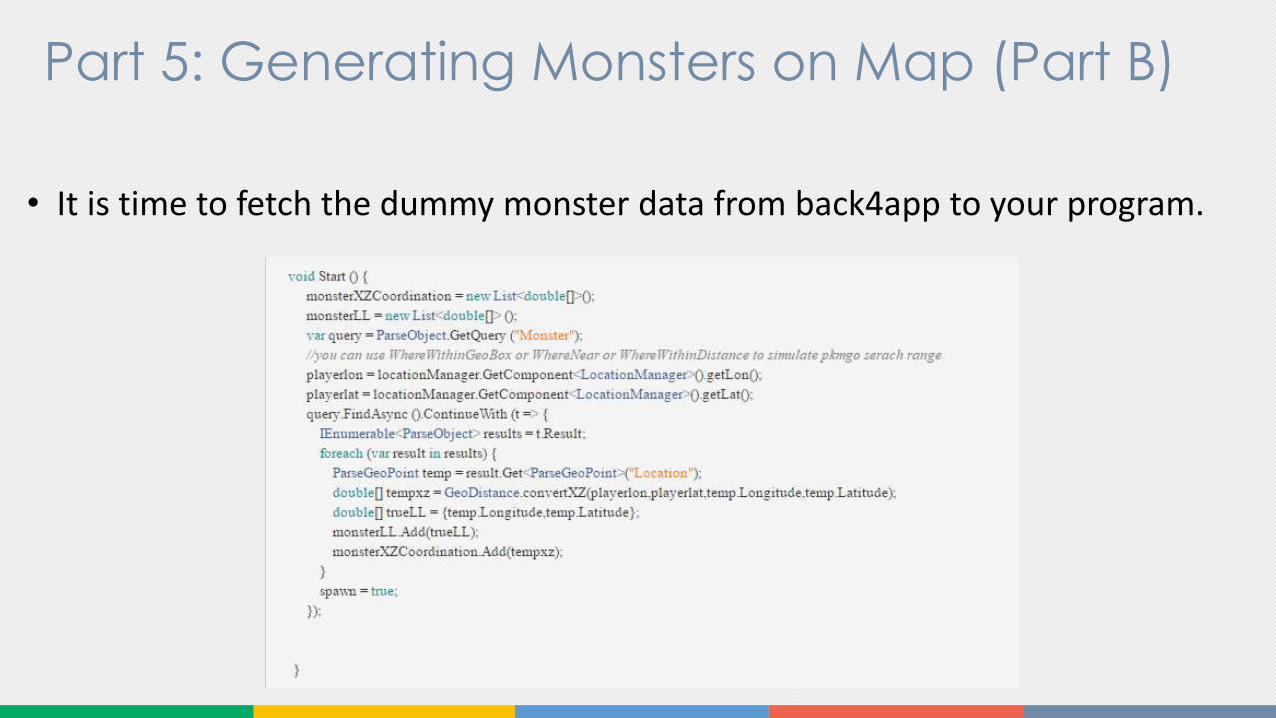
• It is time to fetch the dummy monster data from back4app to your program.
Part 5: Generating Monsters on Map (Part B)
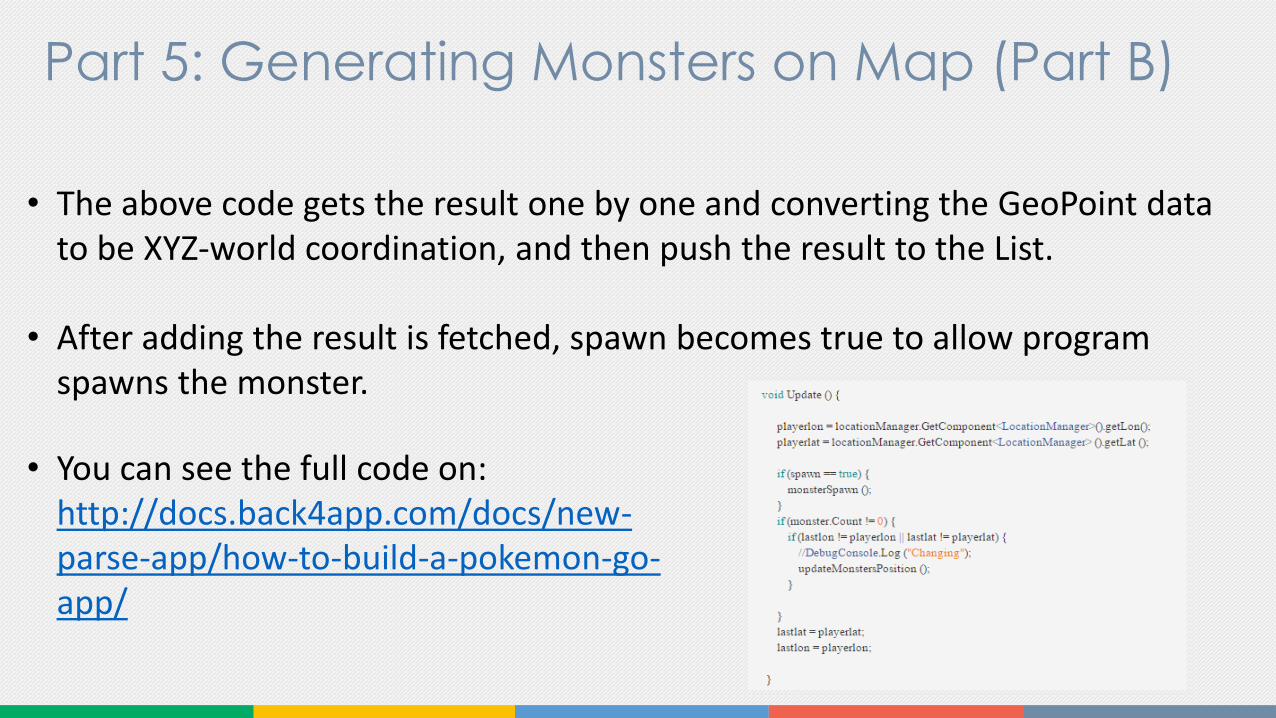
• The above code gets the result one by one and converting the GeoPoint data to be XYZ-world coordination, and then push the result to the List.
• After adding the result is fetched, spawn becomes true to allow program spawns the monster.
• You can see the full code on: http://docs.back4app.com/docs/new-parse-app/how-to-build-a-pokemon-go-app/

Part 5: Generating Monsters on Map (Part B)
• After the Monsters are spawned, the monsters will keep updating when the player GPS data has updated.
• Testing. The monster is spawn at correct XYZ coordination with their Latitude Longitude data.
Part 6: How to move the Player (solve google
map texture slow problem!)
• Until Part 5, the movement of the player is relied on the Google Map texture updating. However, it is not effective to play it.
• The user experience is not good.
• To solve this problem, we “unlock” the player.
• Make player move on the map.
Part 6: How to move the Player (solve google
map texture slow problem!)
• The algorithm behind is similar to updating the monster.
• We apply on the capsule. compare the last GPS data and new GPS data to calculate how should the player move in the Game world.
• As we are updating the position of the player, therefore we don’t need monster update and google map refresh function anymore.
• What you need to do : Modify LocationMaganger.cs

Part 6: How to move the Player (solve google
map texture slow problem!)
Part 6: How to move the Player (solve google
map texture slow problem!)
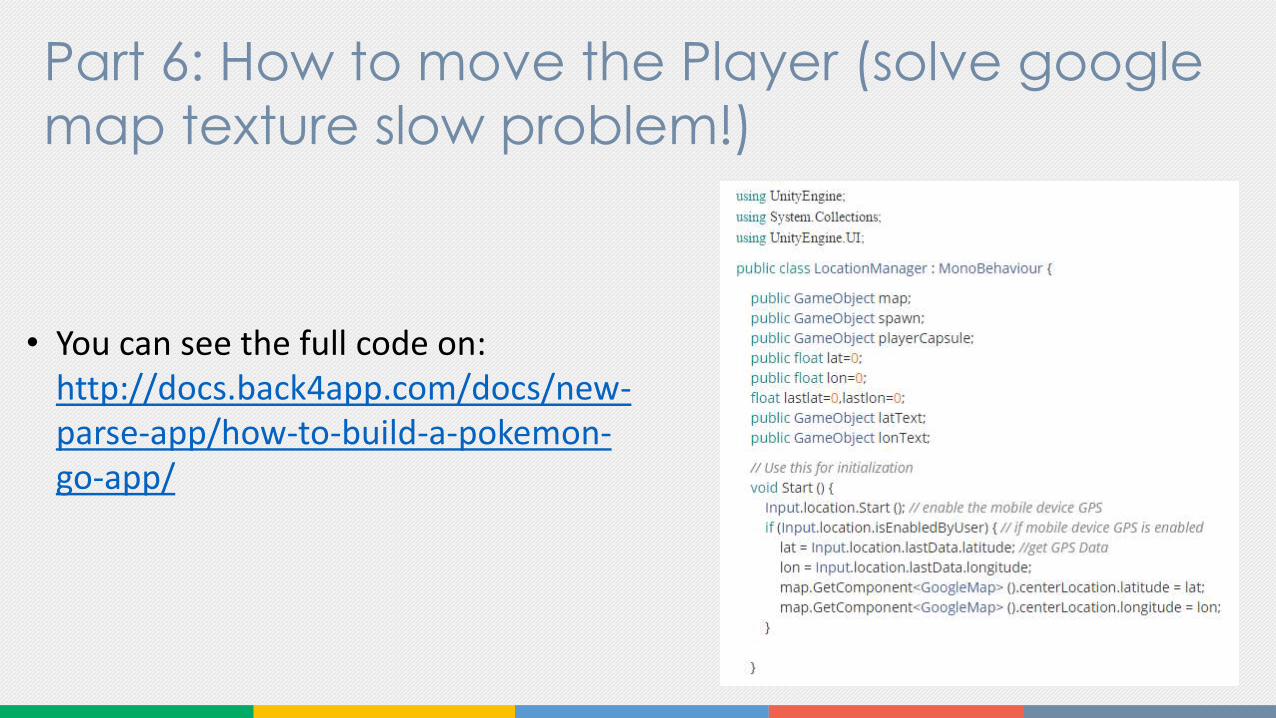
• You can see the full code on: http://docs.back4app.com/docs/new-parse-app/how-to-build-a-pokemon-go-app/

Part 6: How to move the Player (solve google
map texture slow problem!)
• Second, attach following code to you camera make your cam follow you character ( Don’t forget to drag your capsule to inspector.

Part 6: How to move the Player (solve google
map texture slow problem!)
• To view source code and whole project -> Raw Unity Project
• Issues, comments or suggestions? Let’s discuss in our Developers Group Topic.
Related Documents