Copyright 2003, Paradigm Publishing Inc. CHAPTER 1 BACK NEXT END 1-1 LINKS TO OBJECTIVES • Worksheet Ele ments • Create, Save, and Print a Worksheet • Enter Data • Edit Data • AutoFormat • Help Feature • Features Summ ary UNIT 1: PREPARING AND UNIT 1: PREPARING AND FORMATTING A WORKSHEET FORMATTING A WORKSHEET Microsoft Excel 2003 - Specialist PREPARING AN EXCEL WORKSHEET

Copyright 2003, Paradigm Publishing Inc. CHAPTER 1 BACKNEXTEND 1-1 LINKS TO OBJECTIVES Worksheet Elements Create, Save, and Print a Worksheet Create, Save,
Dec 20, 2015
Welcome message from author
This document is posted to help you gain knowledge. Please leave a comment to let me know what you think about it! Share it to your friends and learn new things together.
Transcript
Copyright 2003, Paradigm Publishing Inc.
CHAPTER1
BACK NEXT END
1-1
LINKS TO
OBJECTIVES• Worksheet Elements• Create, Save, and Pri
nt a Worksheet• Enter Data• Edit Data• AutoFormat• Help Feature• Features Summary
UNIT 1: PREPARING ANDUNIT 1: PREPARING ANDFORMATTING A WORKSHEETFORMATTING A WORKSHEET
Microsoft Excel 2003 - Specialist
PREPARING AN EXCEL WORKSHEET
Copyright 2003, Paradigm Publishing Inc.
CHAPTER1
BACK NEXT END
1-2
LINKS TO
OBJECTIVES• Worksheet Elements• Create, Save, and Pri
nt a Worksheet• Enter Data• Edit Data• AutoFormat• Help Feature• Features Summary
Performance ObjectivesPerformance Objectives
• Identify the various elements of an Excel worksheet
• Create, save, and print a worksheet• Enter data in a worksheet• Edit data in a worksheet• Apply an AutoFormat to cells in a
worksheet• Use the Help feature
Copyright 2003, Paradigm Publishing Inc.
CHAPTER1
BACK NEXT END
1-3
LINKS TO
OBJECTIVES• Worksheet Elements• Create, Save, and Pri
nt a Worksheet• Enter Data• Edit Data• AutoFormat• Help Feature• Features Summary
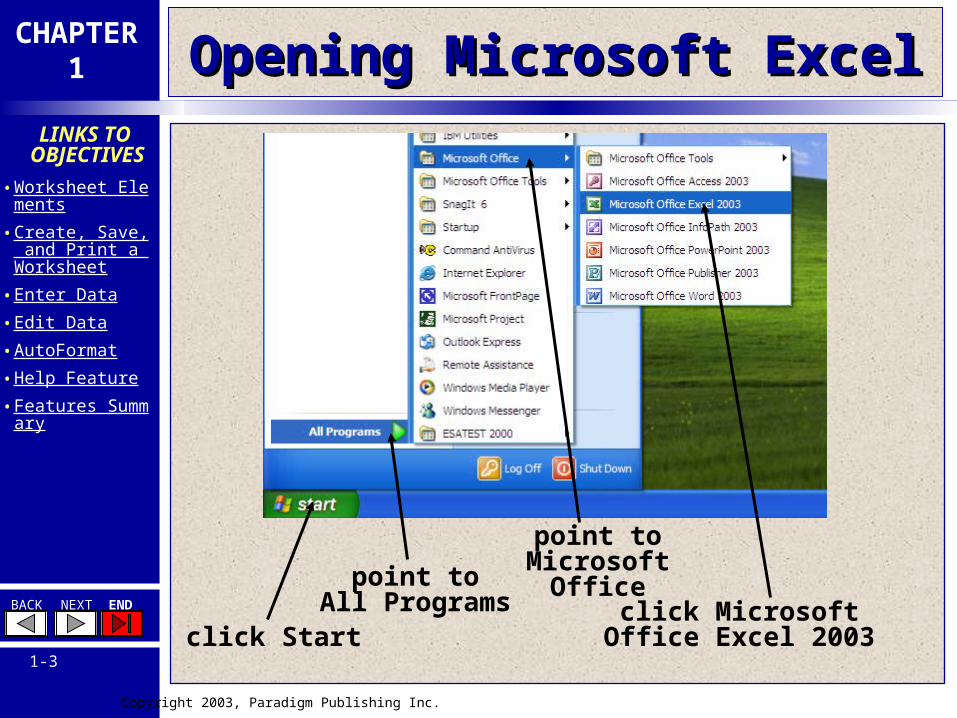
Opening Microsoft ExcelOpening Microsoft Excel
point toAll Programs
point toMicrosoft
Officeclick Microsoft Office
Excel 2003click Start
Copyright 2003, Paradigm Publishing Inc.
CHAPTER1
BACK NEXT END
1-4
LINKS TO
OBJECTIVES• Worksheet Elements• Create, Save, and Pri
nt a Worksheet• Enter Data• Edit Data• AutoFormat• Help Feature• Features Summary
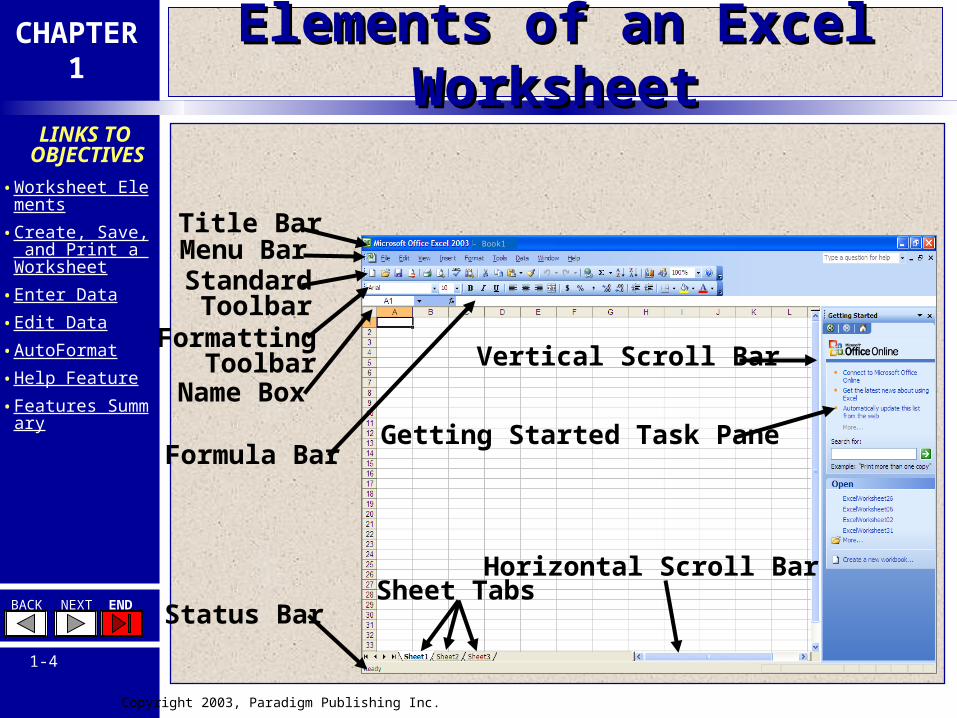
Elements of an Excel WorksheetElements of an Excel Worksheet
- Book1
Title BarMenu BarStandard
ToolbarFormatting
ToolbarName Box
Formula Bar
Status Bar
Vertical Scroll Bar
Horizontal Scroll BarSheet Tabs
Getting Started Task Pane
Copyright 2003, Paradigm Publishing Inc.
CHAPTER1
BACK NEXT END
1-5
LINKS TO
OBJECTIVES• Worksheet Elements• Create, Save, and Pri
nt a Worksheet• Enter Data• Edit Data• AutoFormat• Help Feature• Features Summary
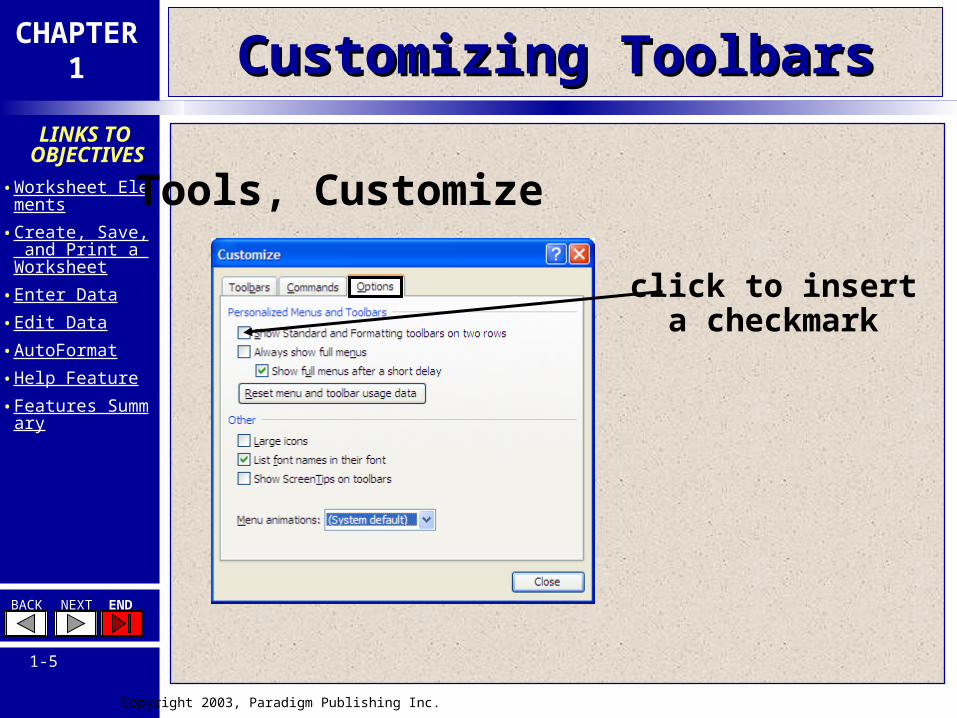
Customizing ToolbarsCustomizing Toolbars
Tools, Customize
click to inserta checkmark
Copyright 2003, Paradigm Publishing Inc.
CHAPTER1
BACK NEXT END
1-6
LINKS TO
OBJECTIVES• Worksheet Elements• Create, Save, and Pri
nt a Worksheet• Enter Data• Edit Data• AutoFormat• Help Feature• Features Summary
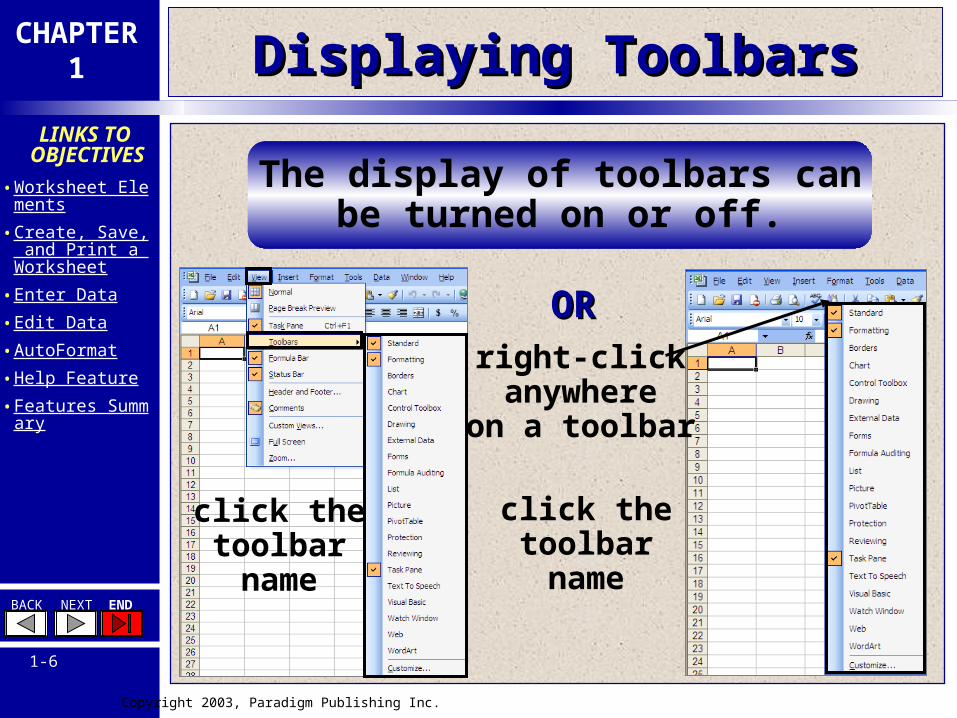
Displaying ToolbarsDisplaying Toolbars
The display of toolbars can be turned on or off.
click thetoolbarname
ORORright-clickanywhere
on a toolbar
click thetoolbarname
Copyright 2003, Paradigm Publishing Inc.
CHAPTER1
BACK NEXT END
1-7
LINKS TO
OBJECTIVES• Worksheet Elements• Create, Save, and Pri
nt a Worksheet• Enter Data• Edit Data• AutoFormat• Help Feature• Features Summary
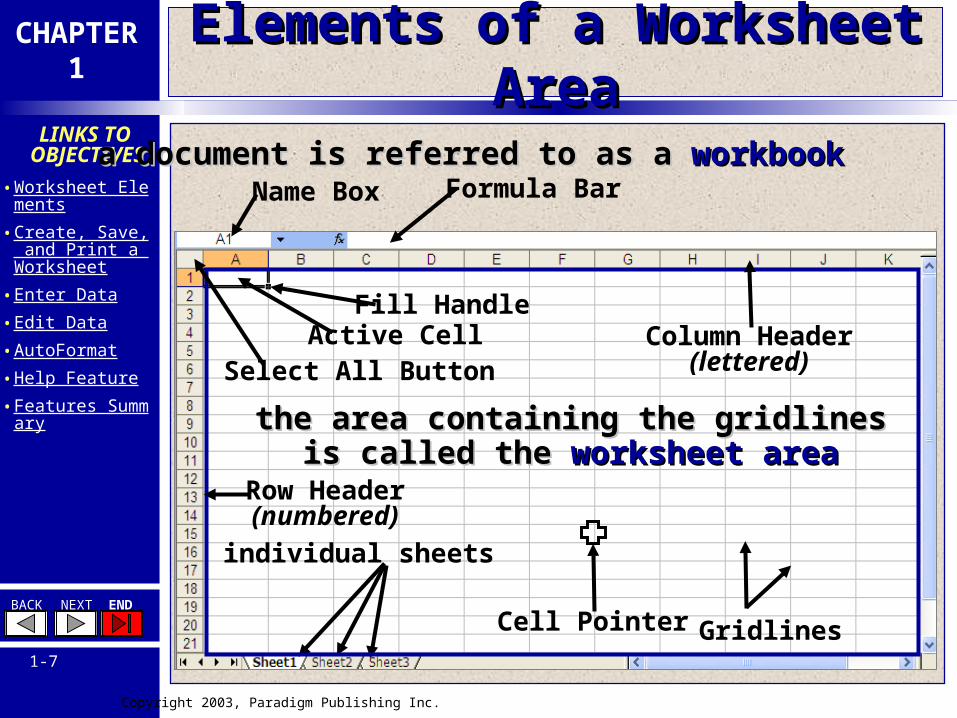
Elements of a Worksheet AreaElements of a Worksheet Area
a document is referred to as a a document is referred to as a workbookworkbook
individual sheets
the area containing the gridlinesthe area containing the gridlinesis called the is called the worksheet areaworksheet area
Name Box Formula Bar
Column Header(lettered)
Row Header(numbered)
Select All ButtonActive Cell
Fill Handle
Cell Pointer Gridlines
Copyright 2003, Paradigm Publishing Inc.
CHAPTER1
BACK NEXT END
1-8
LINKS TO
OBJECTIVES• Worksheet Elements• Create, Save, and Pri
nt a Worksheet• Enter Data• Edit Data• AutoFormat• Help Feature• Features Summary
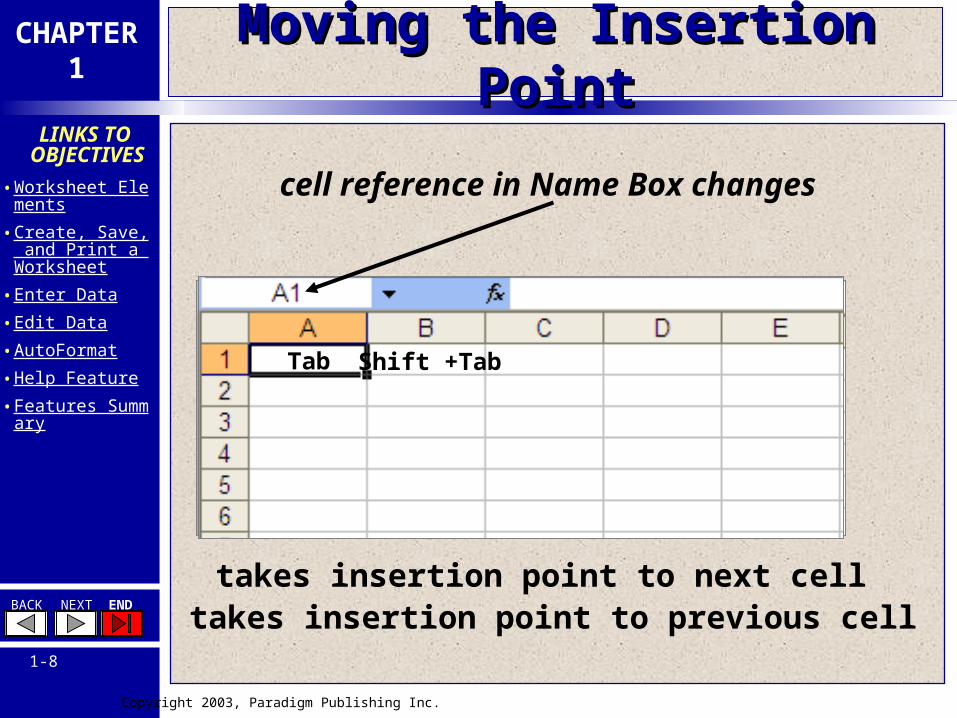
Moving the Insertion PointMoving the Insertion Point
Tab
takes insertion point to next cell
cell reference in Name Box changes
Shift +Tab
takes insertion point to previous cell
Copyright 2003, Paradigm Publishing Inc.
CHAPTER1
BACK NEXT END
1-9
LINKS TO
OBJECTIVES• Worksheet Elements• Create, Save, and Pri
nt a Worksheet• Enter Data• Edit Data• AutoFormat• Help Feature• Features Summary
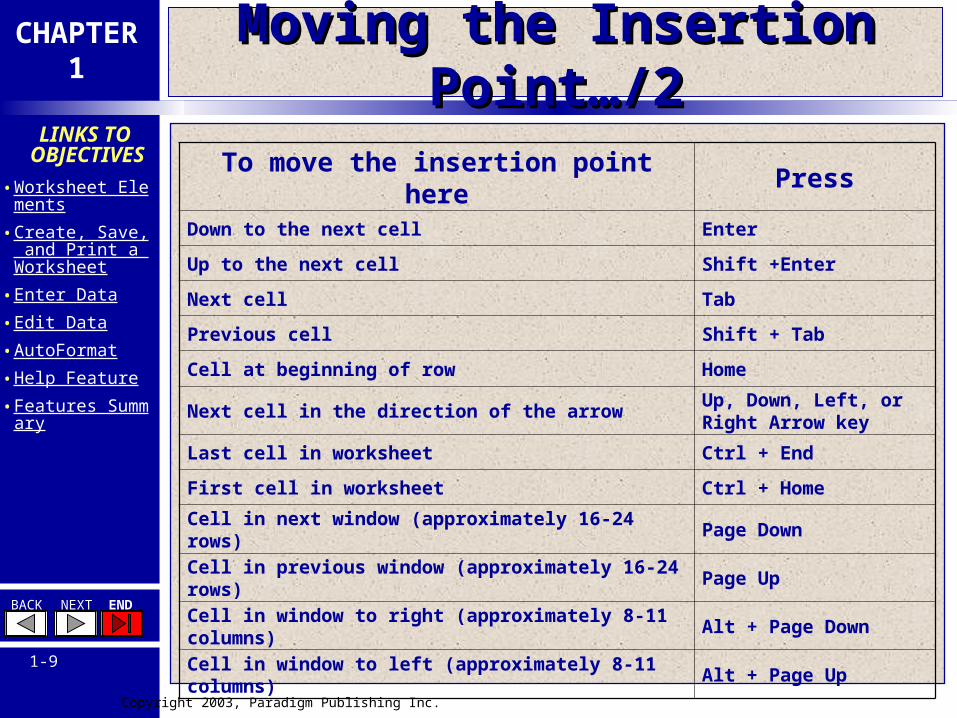
Moving the Insertion Point…/2Moving the Insertion Point…/2
To move the insertion point here PressDown to the next cell Enter
Up to the next cell Shift +Enter
Next cell Tab
Previous cell Shift + Tab
Cell at beginning of row Home
Next cell in the direction of the arrowUp, Down, Left, or Right Arrow key
Last cell in worksheet Ctrl + End
First cell in worksheet Ctrl + Home
Cell in next window (approximately 16-24 rows)
Page Down
Cell in previous window (approximately 16-24 rows)
Page Up
Cell in window to right (approximately 8-11 columns)
Alt + Page Down
Cell in window to left (approximately 8-11 columns)
Alt + Page Up
Copyright 2003, Paradigm Publishing Inc.
CHAPTER1
BACK NEXT END
1-10
LINKS TO
OBJECTIVES• Worksheet Elements• Create, Save, and Pri
nt a Worksheet• Enter Data• Edit Data• AutoFormat• Help Feature• Features Summary
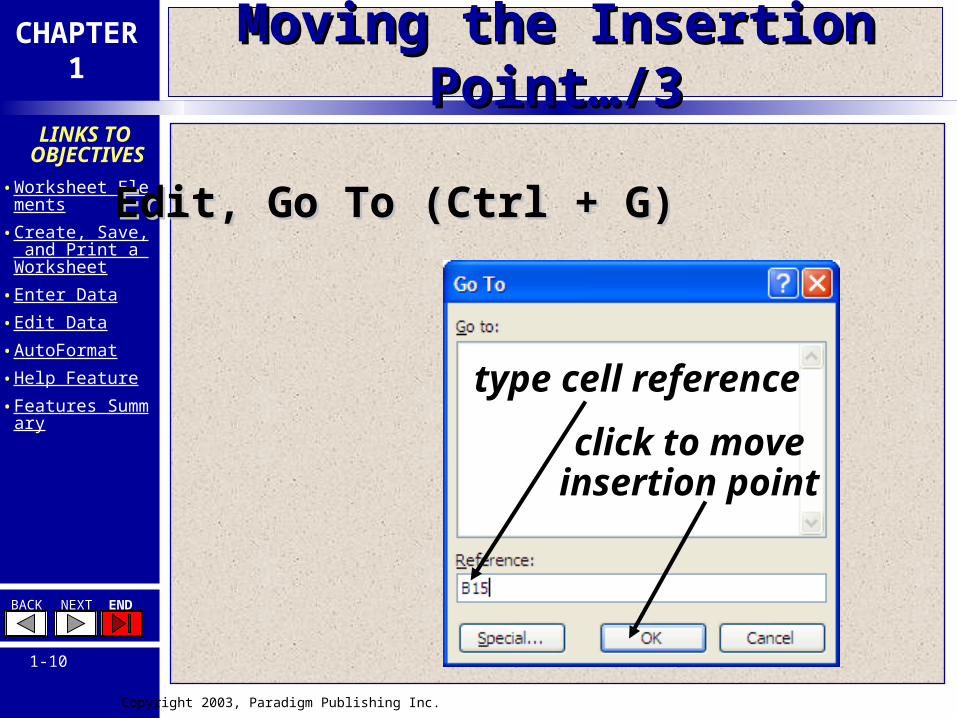
Moving the Insertion Point…/3Moving the Insertion Point…/3
Edit, Go To (Ctrl + G)Edit, Go To (Ctrl + G)
type cell reference
click to moveinsertion point
Copyright 2003, Paradigm Publishing Inc.
CHAPTER1
BACK NEXT END
1-11
LINKS TO
OBJECTIVES• Worksheet Elements• Create, Save, and Pri
nt a Worksheet• Enter Data• Edit Data• AutoFormat• Help Feature• Features Summary
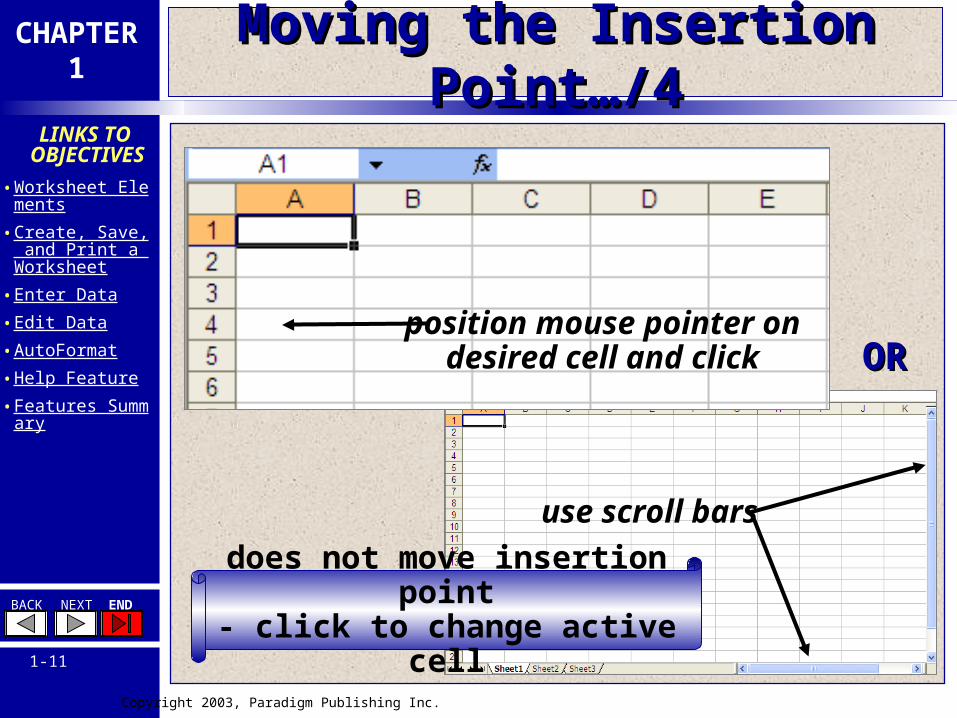
Moving the Insertion Point…/4Moving the Insertion Point…/4
position mouse pointer ondesired cell and click
use scroll bars
OROR
does not move insertion point
- click to change active cell
Copyright 2003, Paradigm Publishing Inc.
CHAPTER1
BACK NEXT END
1-12
LINKS TO
OBJECTIVES• Worksheet Elements• Create, Save, and Pri
nt a Worksheet• Enter Data• Edit Data• AutoFormat• Help Feature• Features Summary
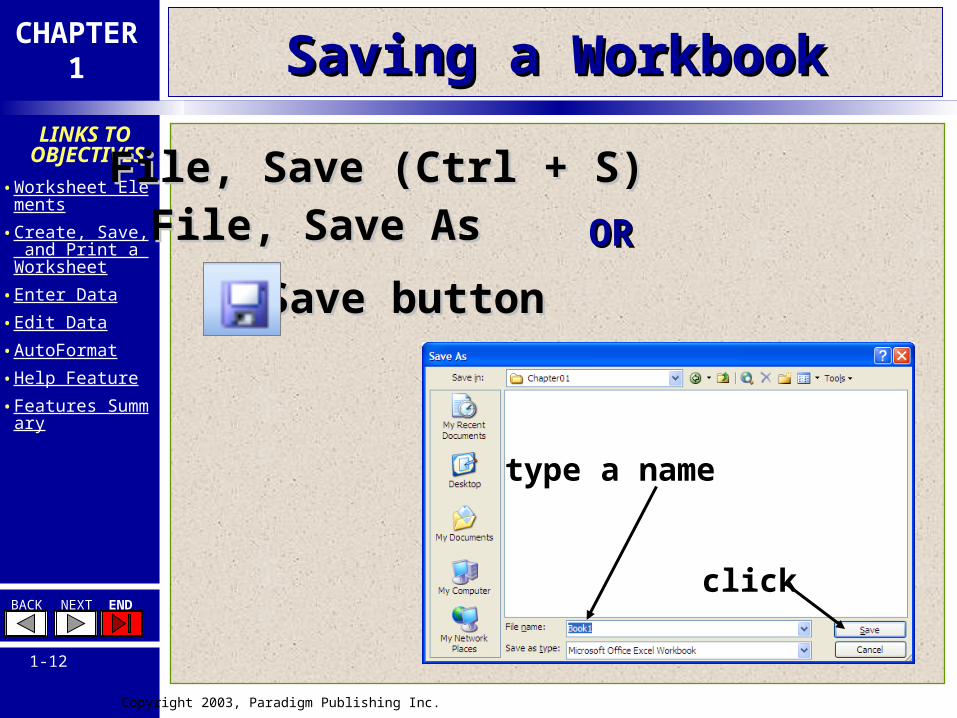
Saving a WorkbookSaving a Workbook
File, Save (Ctrl + S)File, Save (Ctrl + S)
File, Save AsFile, Save As
Save buttonSave button
type a name
click
OROR
Copyright 2003, Paradigm Publishing Inc.
CHAPTER1
BACK NEXT END
1-13
LINKS TO
OBJECTIVES• Worksheet Elements• Create, Save, and Pri
nt a Worksheet• Enter Data• Edit Data• AutoFormat• Help Feature• Features Summary
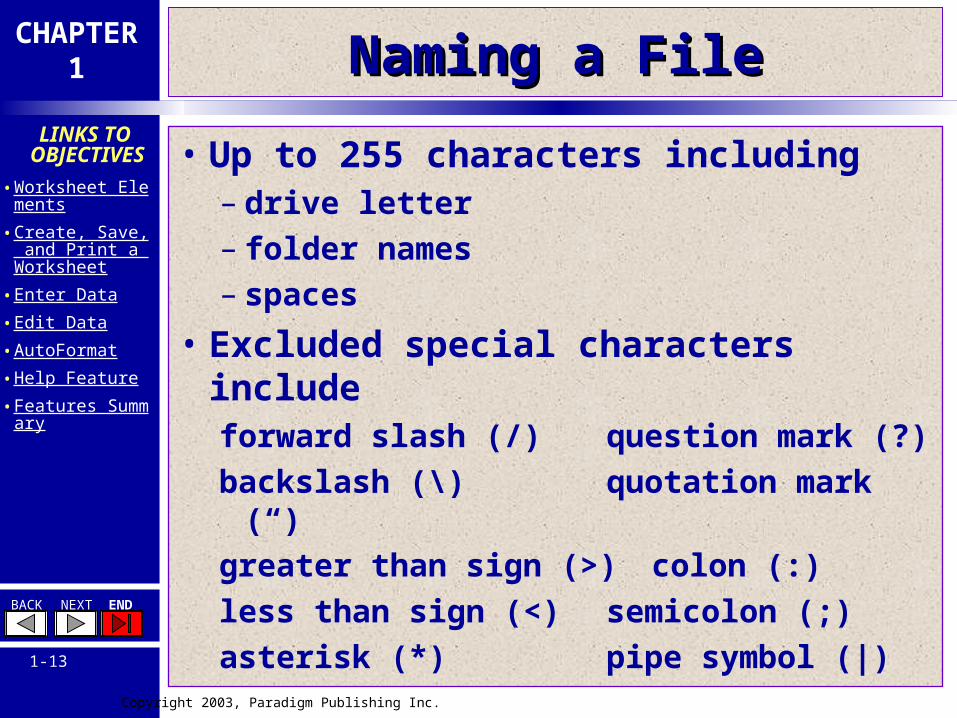
Naming a FileNaming a File
• Up to 255 characters including– drive letter– folder names– spaces
• Excluded special characters includeforward slash (/) question mark (?)
backslash (\) quotation mark (“)
greater than sign (>) colon (:)
less than sign (<) semicolon (;)
asterisk (*) pipe symbol (|)
Copyright 2003, Paradigm Publishing Inc.
CHAPTER1
BACK NEXT END
1-14
LINKS TO
OBJECTIVES• Worksheet Elements• Create, Save, and Pri
nt a Worksheet• Enter Data• Edit Data• AutoFormat• Help Feature• Features Summary
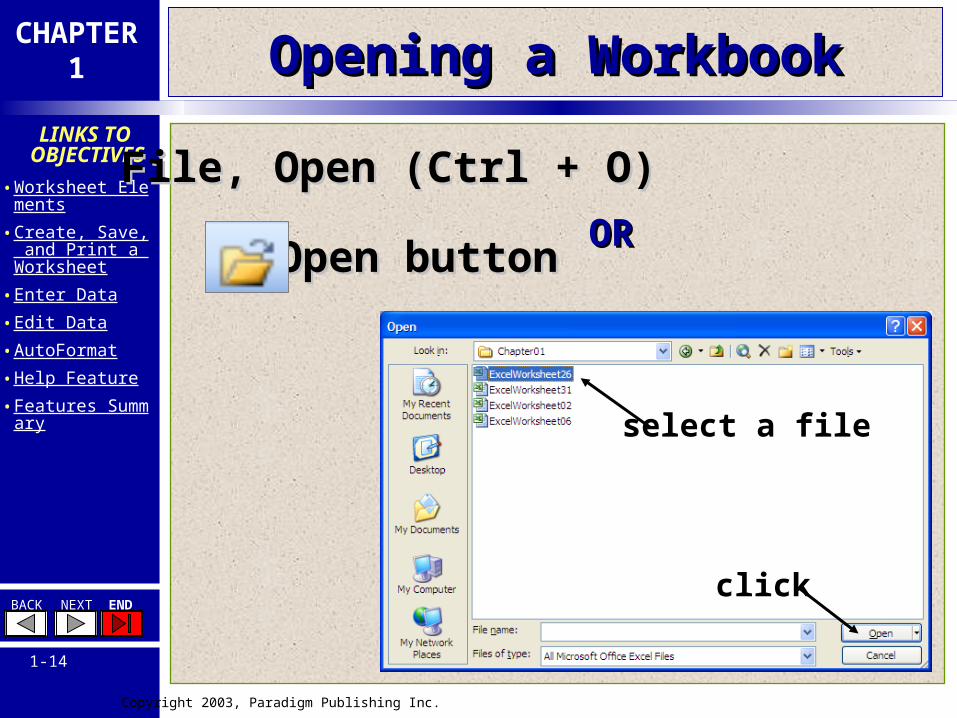
Opening a WorkbookOpening a Workbook
File, Open (Ctrl + O)File, Open (Ctrl + O)
Open buttonOpen button
select a file
click
OROR
Copyright 2003, Paradigm Publishing Inc.
CHAPTER1
BACK NEXT END
1-15
LINKS TO
OBJECTIVES• Worksheet Elements• Create, Save, and Pri
nt a Worksheet• Enter Data• Edit Data• AutoFormat• Help Feature• Features Summary
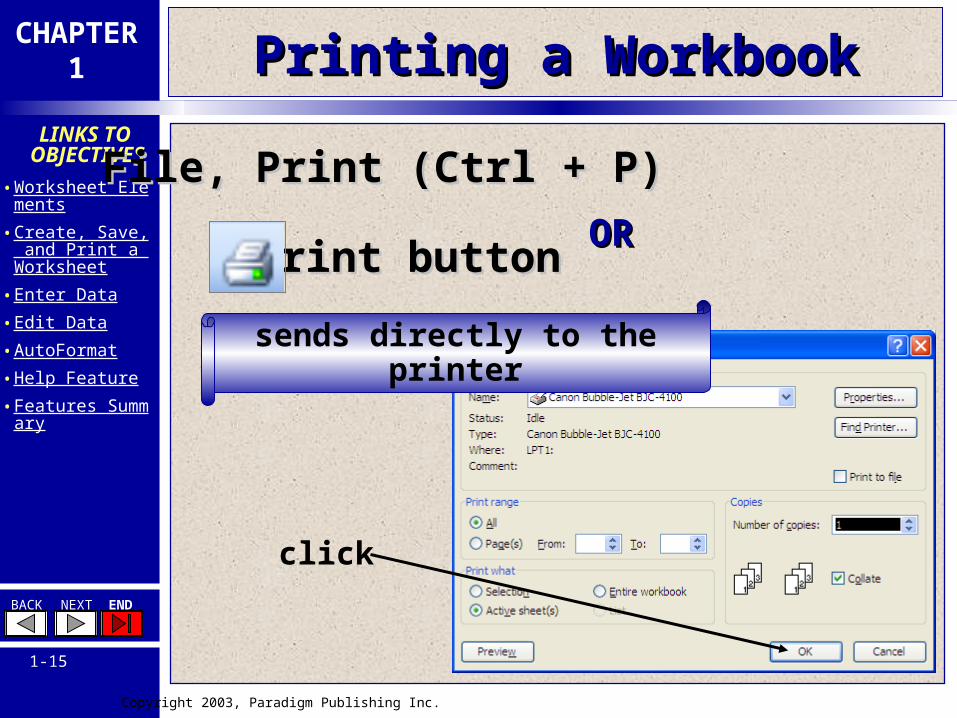
Printing a WorkbookPrinting a Workbook
File, Print (Ctrl + P)File, Print (Ctrl + P)
ORORPrint button Print button
click
sends directly to the printer
Copyright 2003, Paradigm Publishing Inc.
CHAPTER1
BACK NEXT END
1-16
LINKS TO
OBJECTIVES• Worksheet Elements• Create, Save, and Pri
nt a Worksheet• Enter Data• Edit Data• AutoFormat• Help Feature• Features Summary
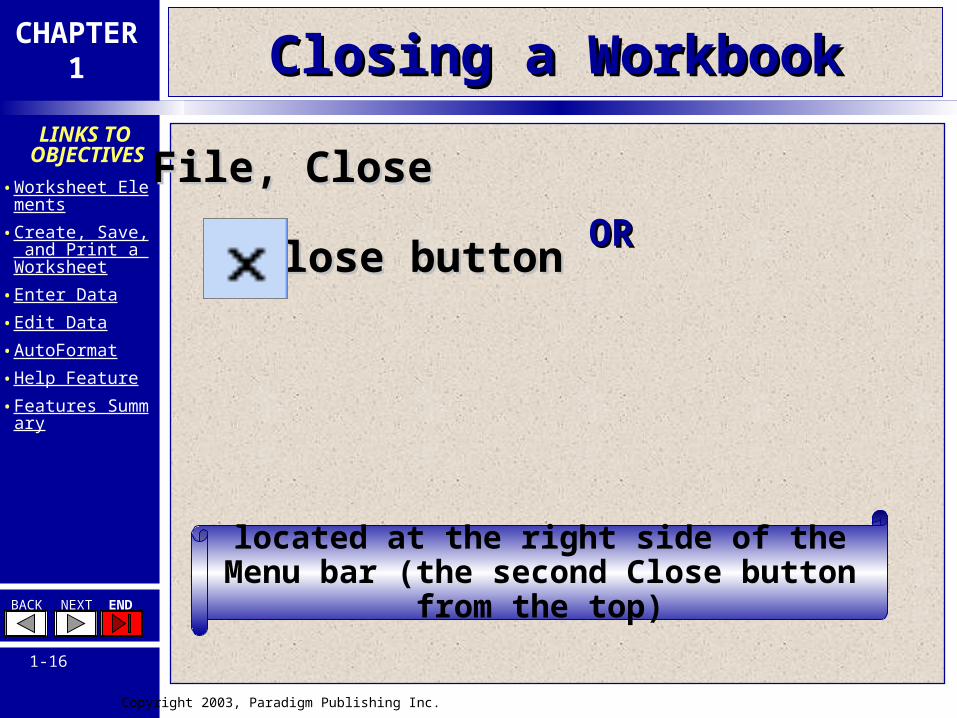
Closing a WorkbookClosing a Workbook
File, CloseFile, Close
ORORClose button Close button
located at the right side of the Menu bar (the second Close button from
the top)
Copyright 2003, Paradigm Publishing Inc.
CHAPTER1
BACK NEXT END
1-17
LINKS TO
OBJECTIVES• Worksheet Elements• Create, Save, and Pri
nt a Worksheet• Enter Data• Edit Data• AutoFormat• Help Feature• Features Summary
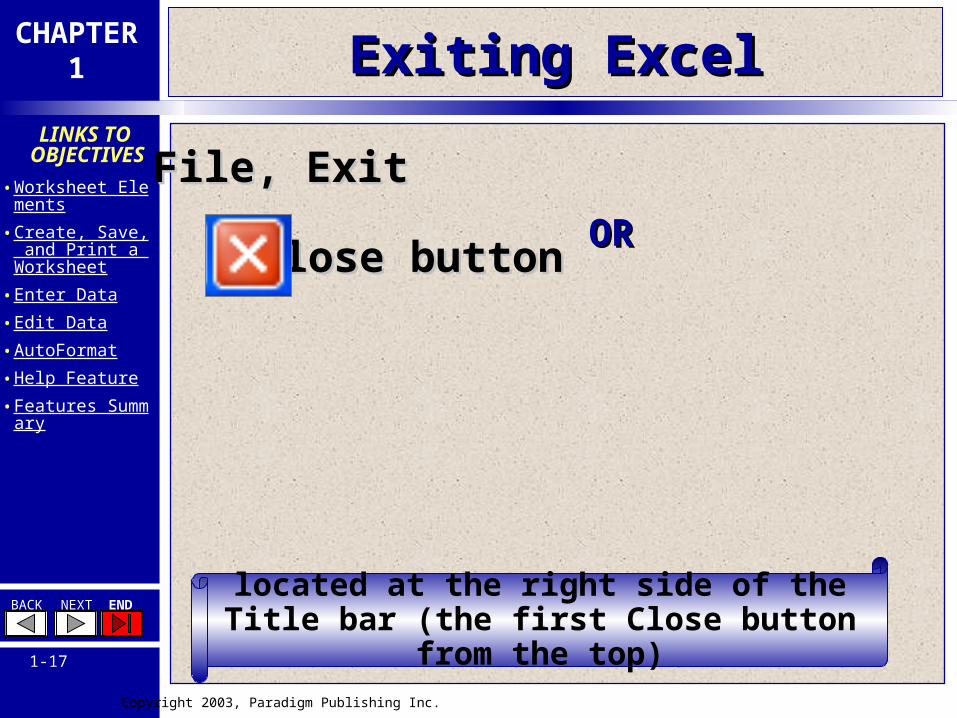
Exiting ExcelExiting Excel
File, ExitFile, Exit
ORORClose button Close button
located at the right side of the Title bar (the first Close button from the
top)
Copyright 2003, Paradigm Publishing Inc.
CHAPTER1
BACK NEXT END
1-18
LINKS TO
OBJECTIVES• Worksheet Elements• Create, Save, and Pri
nt a Worksheet• Enter Data• Edit Data• AutoFormat• Help Feature• Features Summary
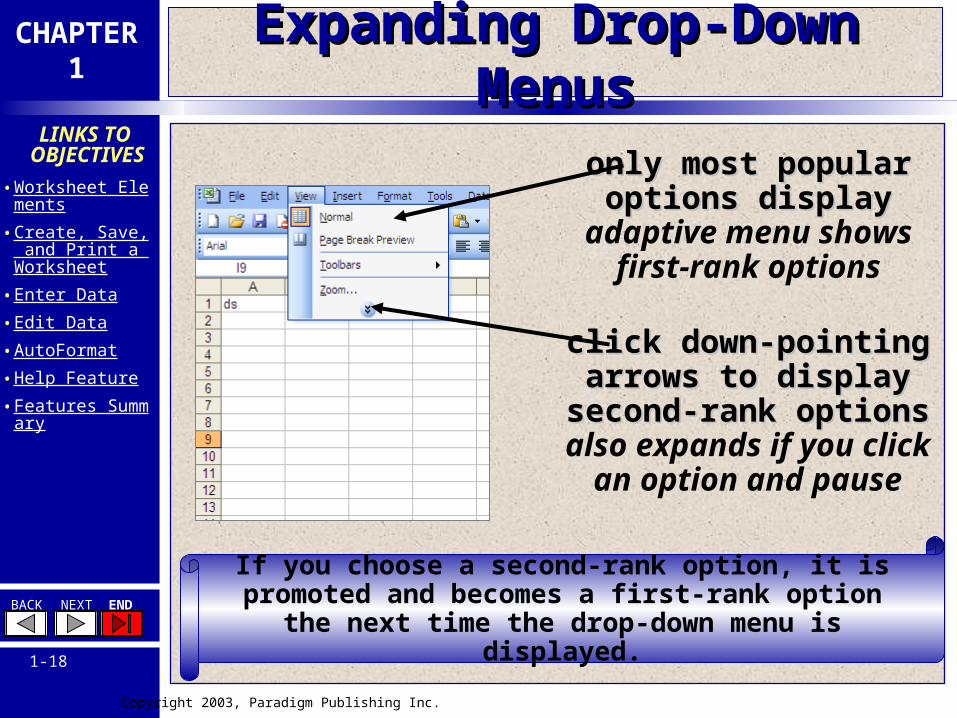
Expanding Drop-Down MenusExpanding Drop-Down Menus
only most popularonly most popularoptions displayoptions display
adaptive menu showsfirst-rank options
click down-pointingclick down-pointingarrows to displayarrows to display
second-rank optionssecond-rank optionsalso expands if you click
an option and pause
If you choose a second-rank option, it ispromoted and becomes a first-rank option
the next time the drop-down menu is displayed.
Copyright 2003, Paradigm Publishing Inc.
CHAPTER1
BACK NEXT END
1-19
LINKS TO
OBJECTIVES• Worksheet Elements• Create, Save, and Pri
nt a Worksheet• Enter Data• Edit Data• AutoFormat• Help Feature• Features Summary
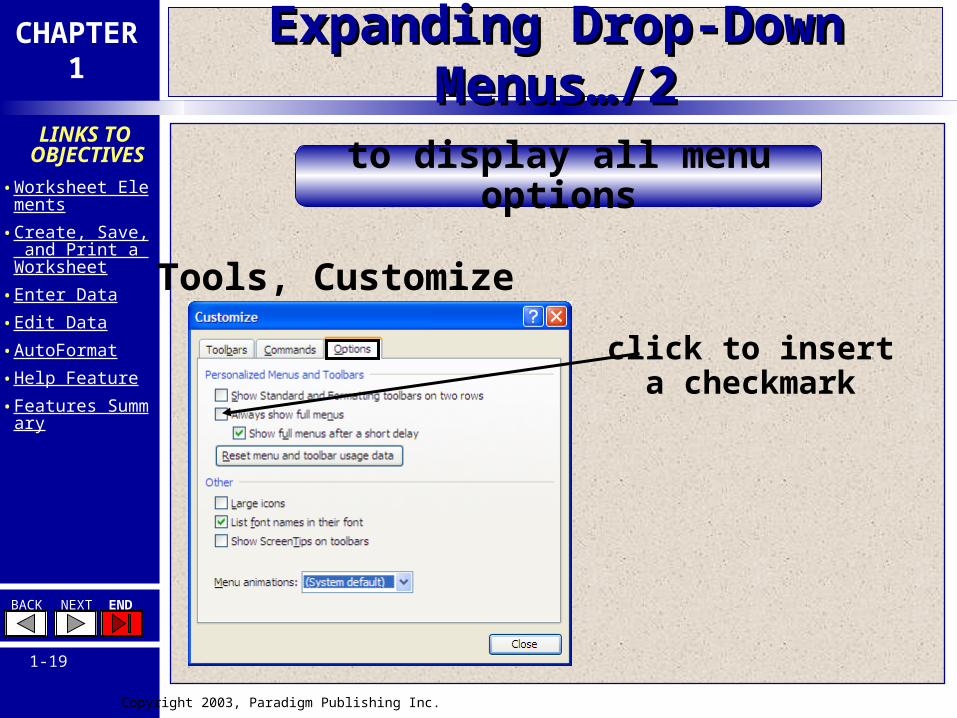
Expanding Drop-Down Menus…/2Expanding Drop-Down Menus…/2
to display all menu options
Tools, Customize
click to inserta checkmark
Copyright 2003, Paradigm Publishing Inc.
CHAPTER1
BACK NEXT END
1-20
LINKS TO
OBJECTIVES• Worksheet Elements• Create, Save, and Pri
nt a Worksheet• Enter Data• Edit Data• AutoFormat• Help Feature• Features Summary
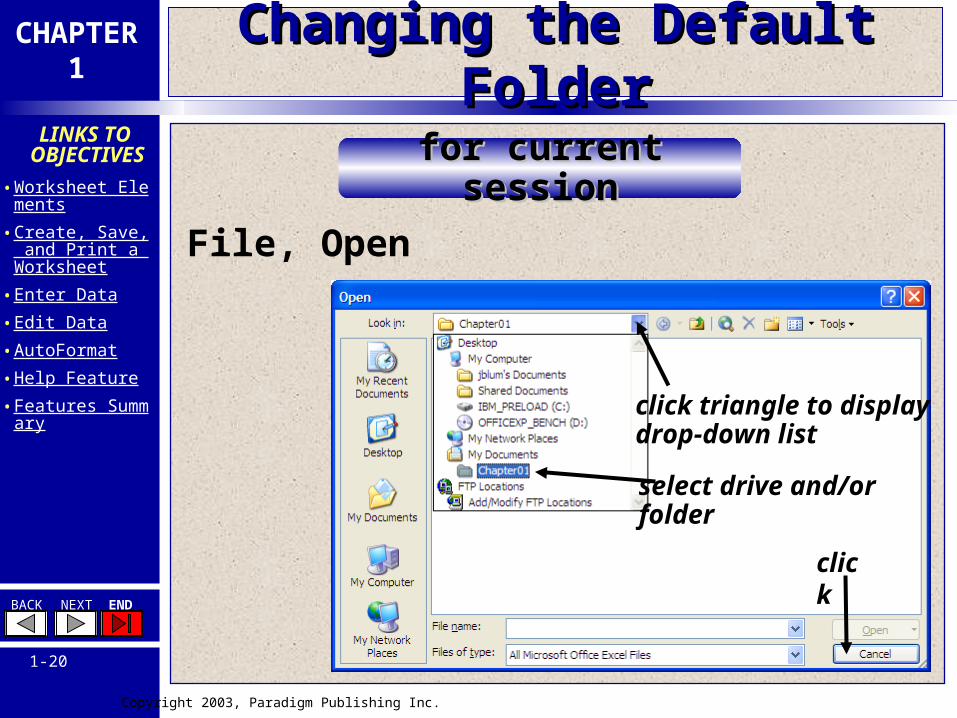
Changing the Default FolderChanging the Default Folder
for current sessionfor current session
File, Open
click triangle to displaydrop-down list
select drive and/orfolder
click
Copyright 2003, Paradigm Publishing Inc.
CHAPTER1
BACK NEXT END
1-21
LINKS TO
OBJECTIVES• Worksheet Elements• Create, Save, and Pri
nt a Worksheet• Enter Data• Edit Data• AutoFormat• Help Feature• Features Summary
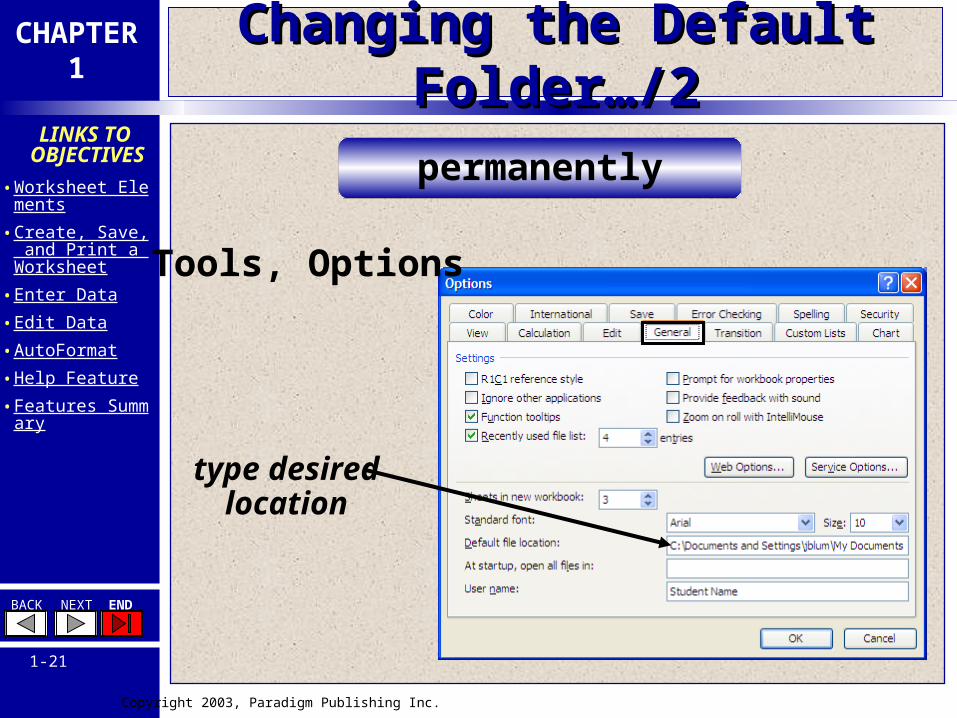
Changing the Default Folder…/2Changing the Default Folder…/2
Tools, Options
type desiredlocation
permanently
Copyright 2003, Paradigm Publishing Inc.
CHAPTER1
BACK NEXT END
1-22
LINKS TO
OBJECTIVES• Worksheet Elements• Create, Save, and Pri
nt a Worksheet• Enter Data• Edit Data• AutoFormat• Help Feature• Features Summary
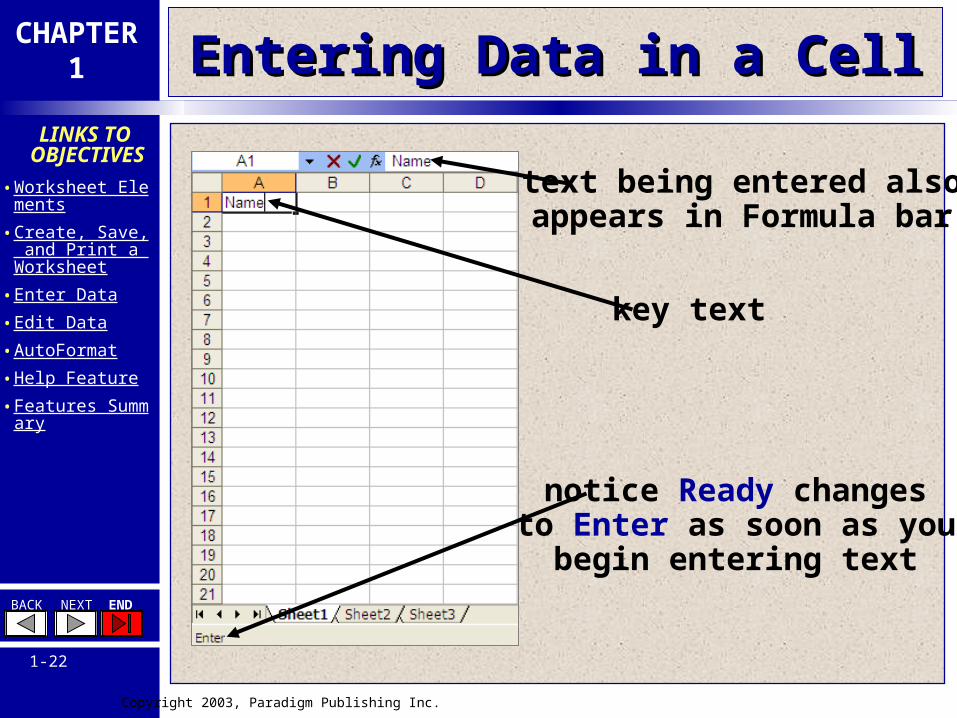
Entering Data in a CellEntering Data in a Cell
key text
notice Ready changesto Enter as soon as you
begin entering text
text being entered alsoappears in Formula bar
Copyright 2003, Paradigm Publishing Inc.
CHAPTER1
BACK NEXT END
1-23
LINKS TO
OBJECTIVES• Worksheet Elements• Create, Save, and Pri
nt a Worksheet• Enter Data• Edit Data• AutoFormat• Help Feature• Features Summary
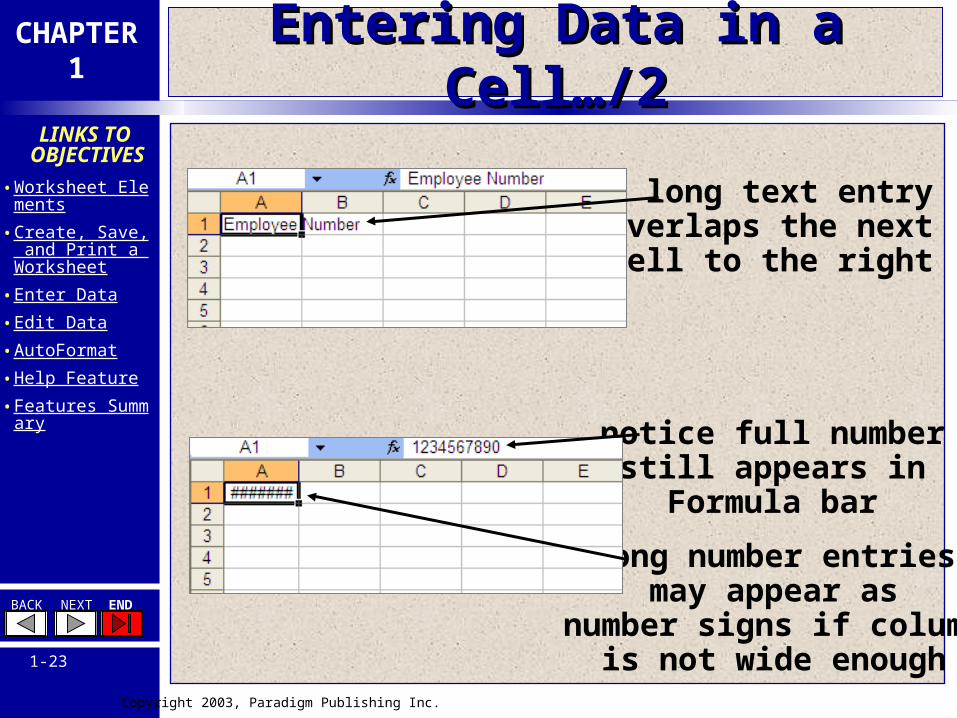
Entering Data in a Cell…/2Entering Data in a Cell…/2
a long text entryoverlaps the nextcell to the right
long number entriesmay appear as
number signs if columnis not wide enough
notice full numberstill appears inFormula bar
Copyright 2003, Paradigm Publishing Inc.
CHAPTER1
BACK NEXT END
1-24
LINKS TO
OBJECTIVES• Worksheet Elements• Create, Save, and Pri
nt a Worksheet• Enter Data• Edit Data• AutoFormat• Help Feature• Features Summary
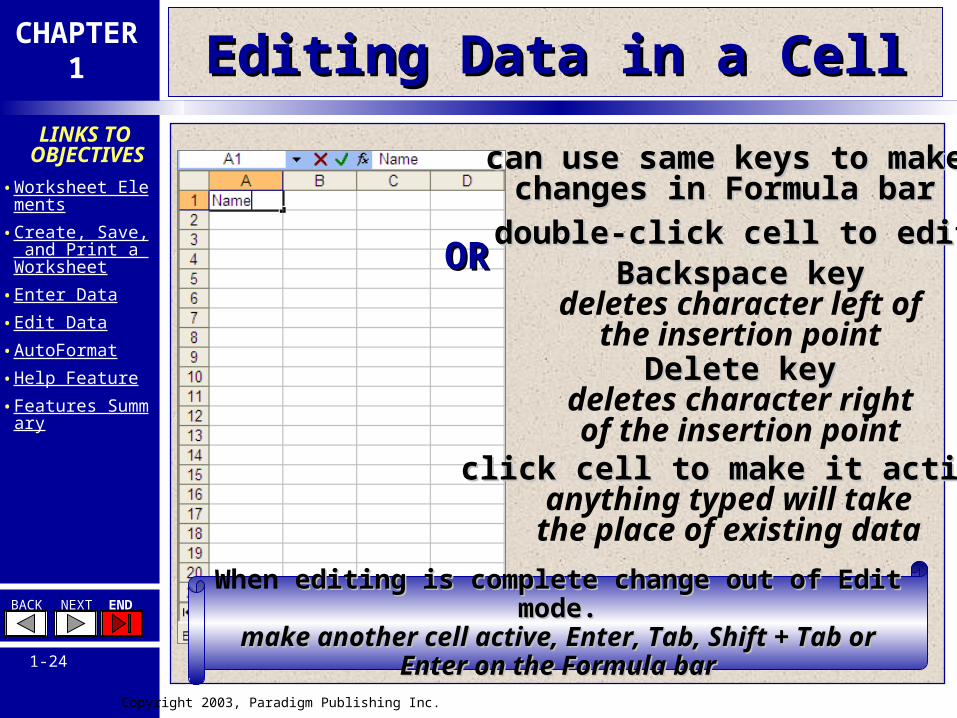
Editing Data in a CellEditing Data in a Cell
click cell to make it activeclick cell to make it activeanything typed will takethe place of existing data
double-click cell to editdouble-click cell to editBackspace keyBackspace key
deletes character left ofthe insertion point
Delete keyDelete keydeletes character rightof the insertion point
can use same keys to makecan use same keys to makechanges in Formula barchanges in Formula bar
When editing is complete change out of Edit editing is complete change out of Edit mode.mode.
make another cell active, Enter, Tab, Shift + make another cell active, Enter, Tab, Shift + Tab orTab or
Enter on the Formula barEnter on the Formula bar
OROR

Copyright 2003, Paradigm Publishing Inc.
CHAPTER1
BACK NEXT END
1-25
LINKS TO
OBJECTIVES• Worksheet Elements• Create, Save, and Pri
nt a Worksheet• Enter Data• Edit Data• AutoFormat• Help Feature• Features Summary
Using Automatic Entering FeaturesUsing Automatic Entering Features
AutoComplete
automatically insertsautomatically insertsdata that begins the samedata that begins the same
as a previous cellas a previous cellpress Enter to accept
or continue typingAutoCorrec
tautomatically corrects manyautomatically corrects many
common typing errorscommon typing errorse.g. teh changes to the
view, add, or deleteview, add, or deletereplacements withreplacements with
Tools, AutoCorrect Options
Copyright 2003, Paradigm Publishing Inc.
CHAPTER1
BACK NEXT END
1-26
LINKS TO
OBJECTIVES• Worksheet Elements• Create, Save, and Pri
nt a Worksheet• Enter Data• Edit Data• AutoFormat• Help Feature• Features Summary
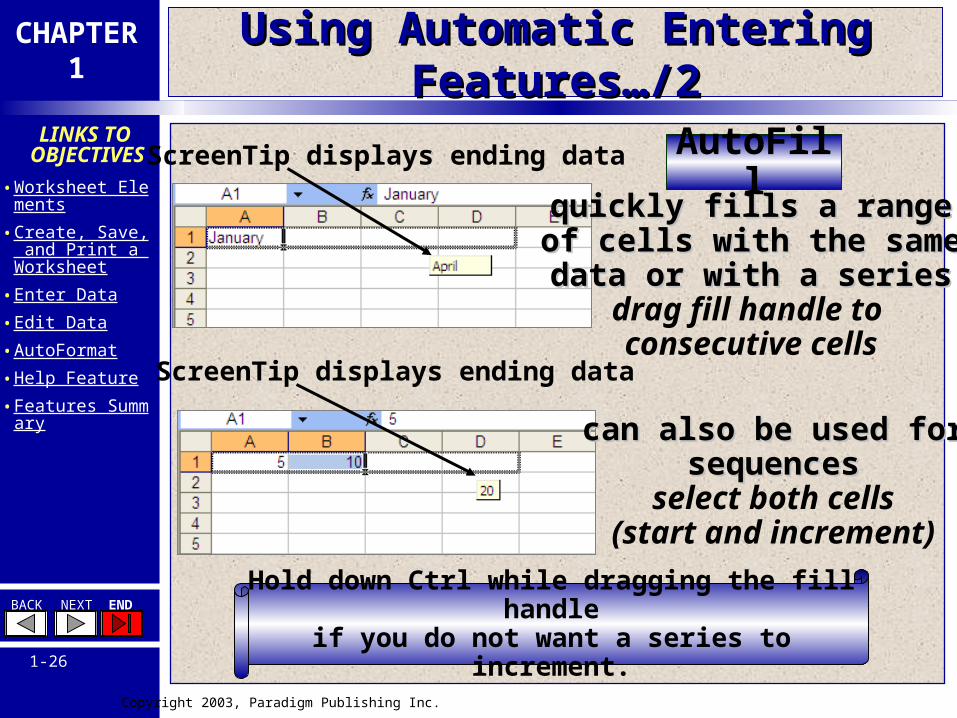
Using Automatic Entering Features…/2Using Automatic Entering Features…/2
AutoFillquickly fills a rangequickly fills a range
of cells with the sameof cells with the samedata or with a seriesdata or with a seriesdrag fill handle to consecutive cells
can also be used forcan also be used forsequencessequences
select both cells(start and increment)
Hold down Ctrl while dragging the fill handle
if you do not want a series to increment.
ScreenTip displays ending data
ScreenTip displays ending data
Copyright 2003, Paradigm Publishing Inc.
CHAPTER1
BACK NEXT END
1-27
LINKS TO
OBJECTIVES• Worksheet Elements• Create, Save, and Pri
nt a Worksheet• Enter Data• Edit Data• AutoFormat• Help Feature• Features Summary
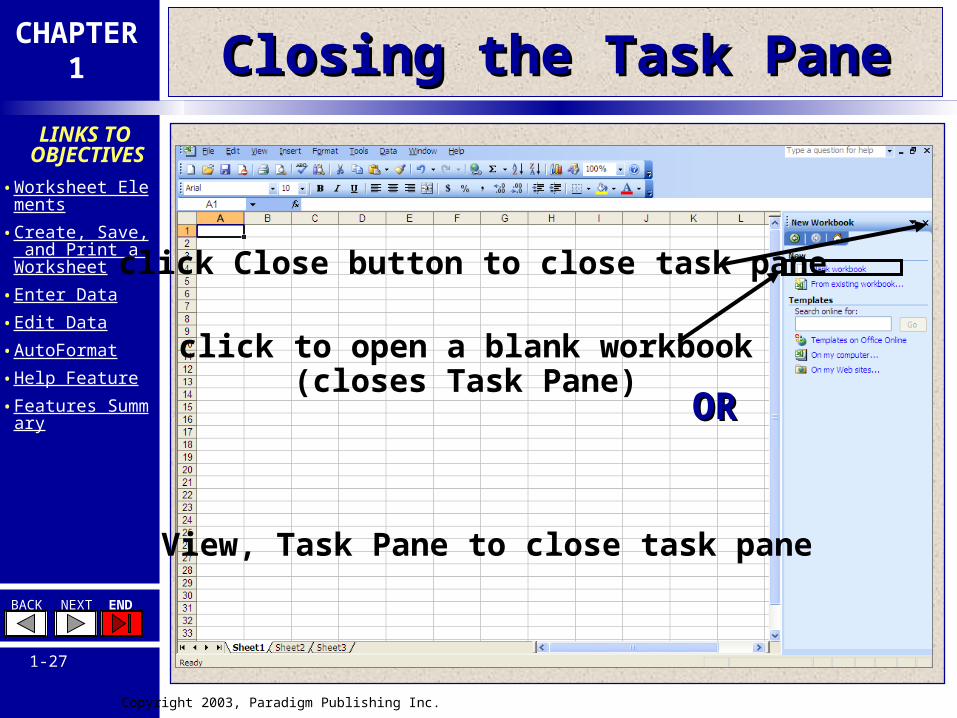
Closing the Task PaneClosing the Task Pane
click to open a blank workbook(closes Task Pane)
click Close button to close task pane
OROR
View, Task Pane to close task pane
Copyright 2003, Paradigm Publishing Inc.
CHAPTER1
BACK NEXT END
1-28
LINKS TO
OBJECTIVES• Worksheet Elements• Create, Save, and Pri
nt a Worksheet• Enter Data• Edit Data• AutoFormat• Help Feature• Features Summary
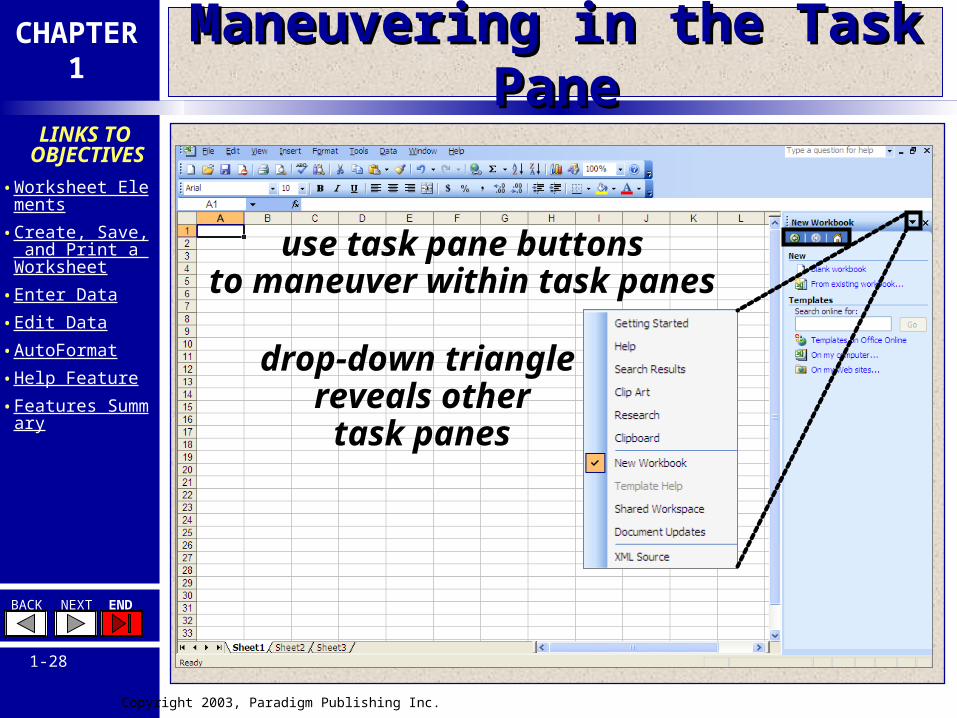
Maneuvering in the Task PaneManeuvering in the Task Pane
drop-down triangle reveals othertask panes
use task pane buttonsto maneuver within task panes
Copyright 2003, Paradigm Publishing Inc.
CHAPTER1
BACK NEXT END
1-29
LINKS TO
OBJECTIVES• Worksheet Elements• Create, Save, and Pri
nt a Worksheet• Enter Data• Edit Data• AutoFormat• Help Feature• Features Summary
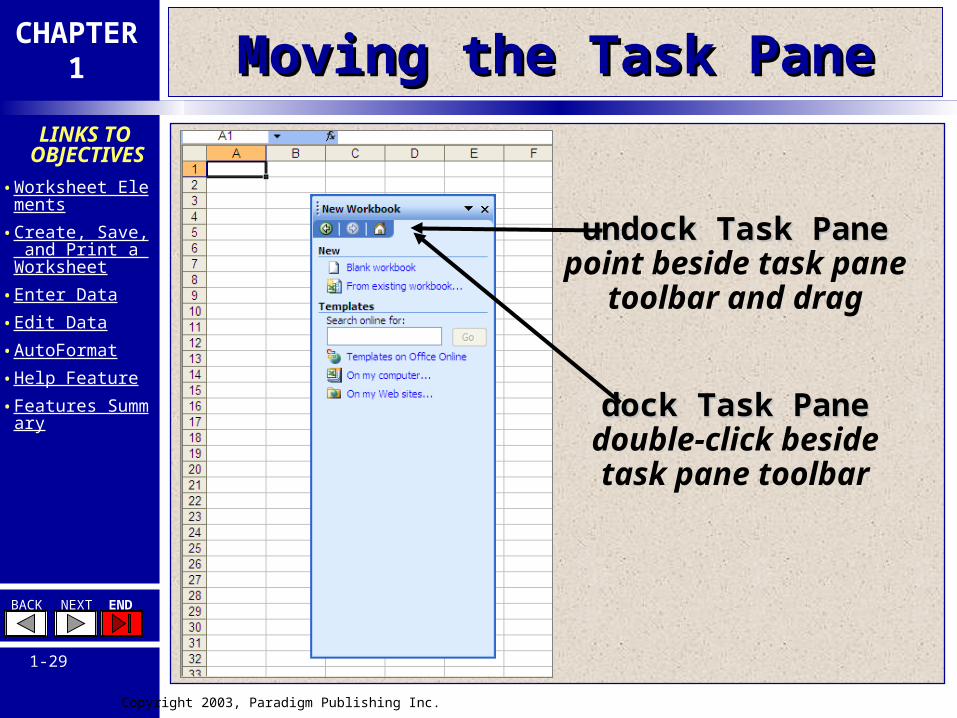
Moving the Task PaneMoving the Task Pane
undock Task Paneundock Task Panepoint beside task pane
toolbar and drag
dock Task Panedock Task Panedouble-click besidetask pane toolbar

Copyright 2003, Paradigm Publishing Inc.
CHAPTER1
BACK NEXT END
1-30
LINKS TO
OBJECTIVES• Worksheet Elements• Create, Save, and Pri
nt a Worksheet• Enter Data• Edit Data• AutoFormat• Help Feature• Features Summary
Selecting CellsSelecting Cells
using the mouse
columncolumnpoint to header and click
rowrowpoint to header and click
adjacent cellsadjacent cellsdrag with mouse
nonadjacent cellsnonadjacent cellsCtrl + click header(s) or cell(s)
all cellsall cellsclick Select All button
Copyright 2003, Paradigm Publishing Inc.
CHAPTER1
BACK NEXT END
1-31
LINKS TO
OBJECTIVES• Worksheet Elements• Create, Save, and Pri
nt a Worksheet• Enter Data• Edit Data• AutoFormat• Help Feature• Features Summary
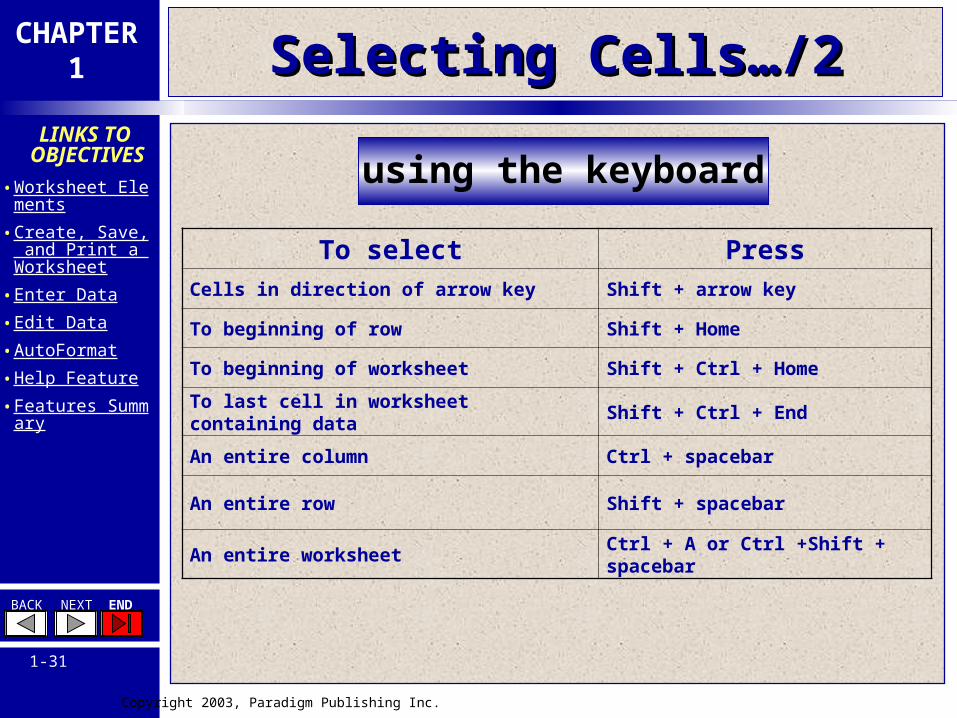
Selecting Cells…/2Selecting Cells…/2
using the keyboard
To select PressCells in direction of arrow key Shift + arrow key
To beginning of row Shift + Home
To beginning of worksheet Shift + Ctrl + Home
To last cell in worksheet containing data
Shift + Ctrl + End
An entire column Ctrl + spacebar
An entire row Shift + spacebar
An entire worksheetCtrl + A or Ctrl +Shift + spacebar
Copyright 2003, Paradigm Publishing Inc.
CHAPTER1
BACK NEXT END
1-32
LINKS TO
OBJECTIVES• Worksheet Elements• Create, Save, and Pri
nt a Worksheet• Enter Data• Edit Data• AutoFormat• Help Feature• Features Summary
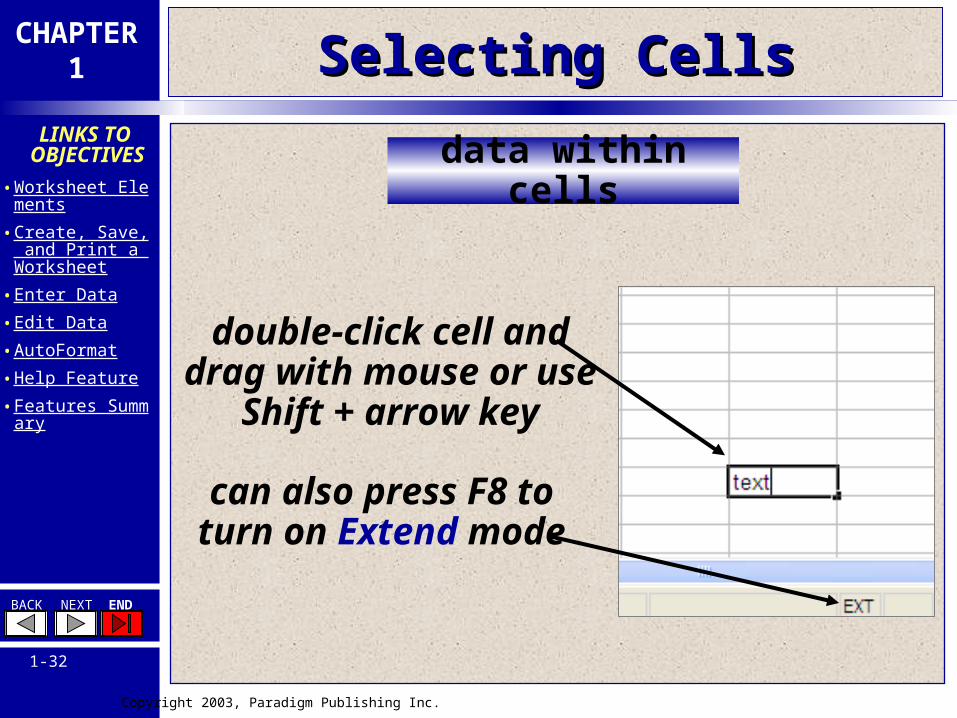
Selecting CellsSelecting Cells
data within cells
double-click cell anddrag with mouse or use
Shift + arrow key
can also press F8 toturn on Extend mode
Copyright 2003, Paradigm Publishing Inc.
CHAPTER1
BACK NEXT END
1-33
LINKS TO
OBJECTIVES• Worksheet Elements• Create, Save, and Pri
nt a Worksheet• Enter Data• Edit Data• AutoFormat• Help Feature• Features Summary
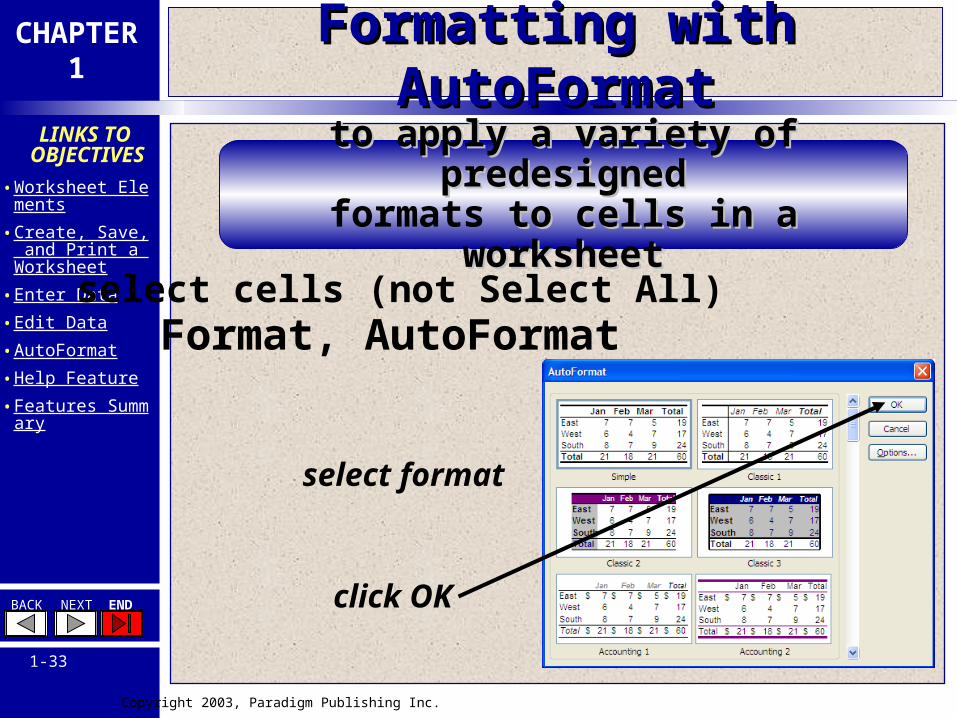
Formatting with AutoFormatFormatting with AutoFormat
to apply a variety of to apply a variety of predesignedpredesigned
formats to cells in a worksheet to cells in a worksheet
select cells (not Select All)Format, AutoFormat
select format
click OK
Copyright 2003, Paradigm Publishing Inc.
CHAPTER1
BACK NEXT END
1-34
LINKS TO
OBJECTIVES• Worksheet Elements• Create, Save, and Pri
nt a Worksheet• Enter Data• Edit Data• AutoFormat• Help Feature• Features Summary
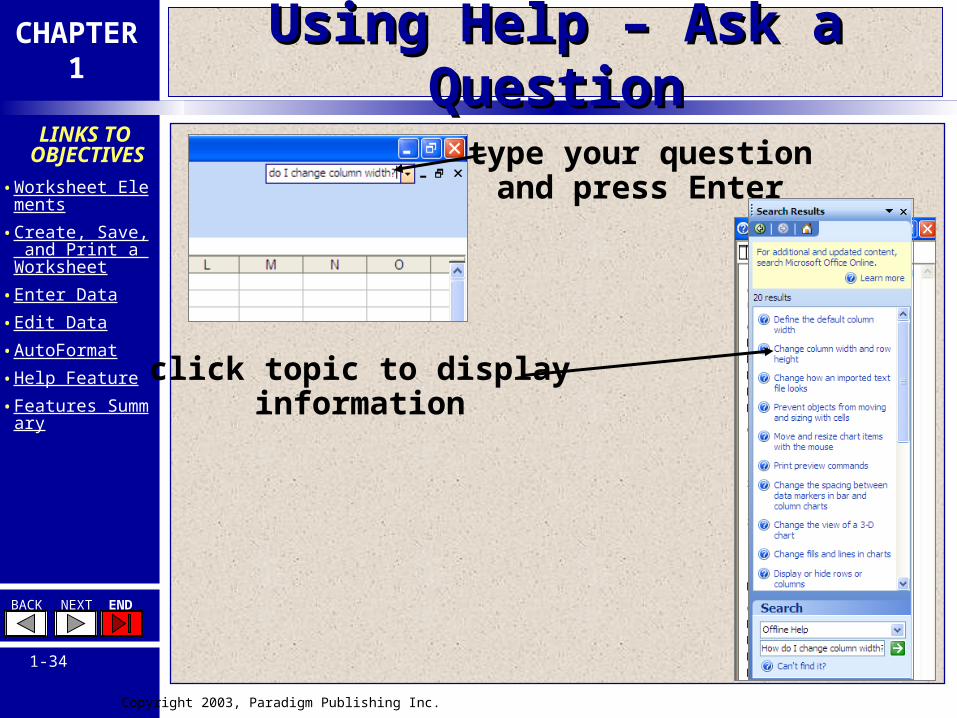
Using Help – Ask a QuestionUsing Help – Ask a Question
type your questionand press Enter
click topic to displayinformation
Copyright 2003, Paradigm Publishing Inc.
CHAPTER1
BACK NEXT END
1-35
LINKS TO
OBJECTIVES• Worksheet Elements• Create, Save, and Pri
nt a Worksheet• Enter Data• Edit Data• AutoFormat• Help Feature• Features Summary
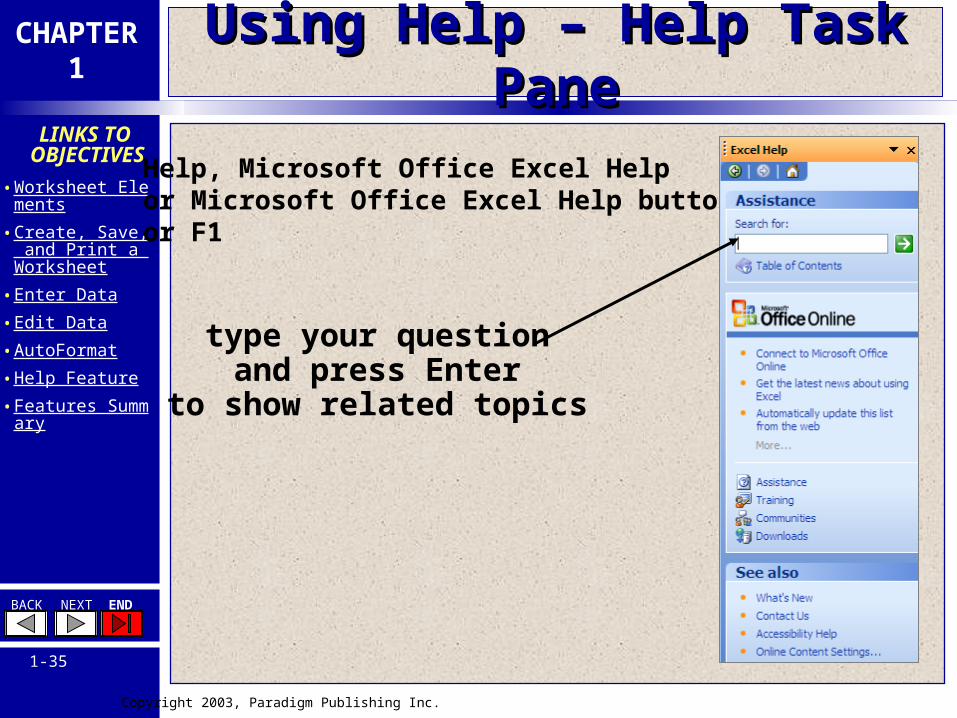
Using Help – Help Task PaneUsing Help – Help Task Pane
Help, Microsoft Office Excel Helpor Microsoft Office Excel Help buttonor F1
type your questionand press Enter
to show related topics
Copyright 2003, Paradigm Publishing Inc.
CHAPTER1
BACK NEXT END
1-36
LINKS TO
OBJECTIVES• Worksheet Elements• Create, Save, and Pri
nt a Worksheet• Enter Data• Edit Data• AutoFormat• Help Feature• Features Summary
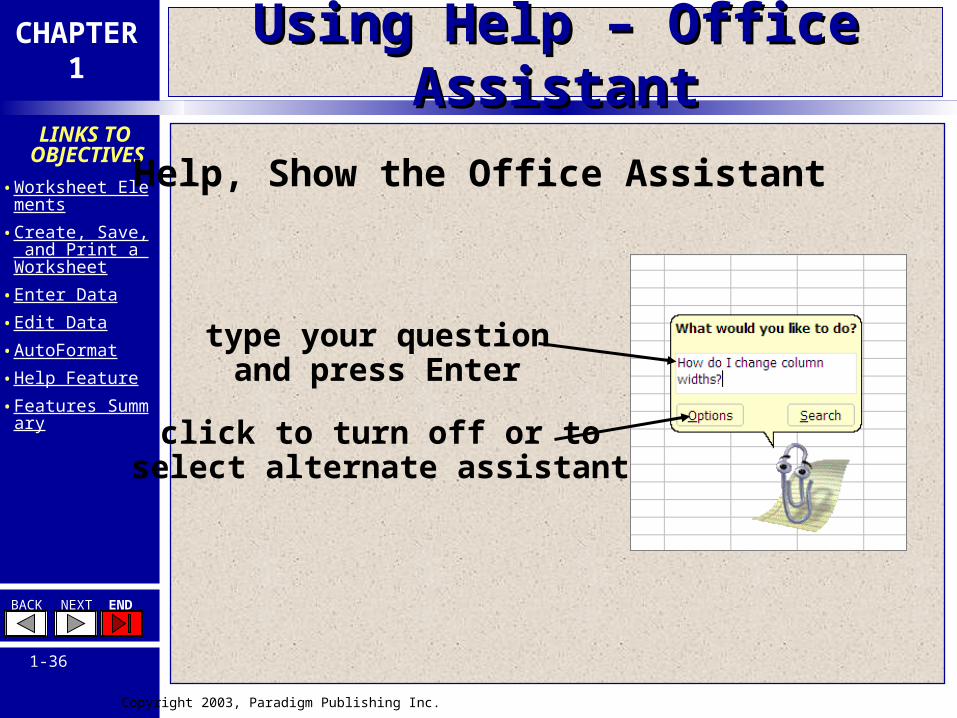
Using Help – Office AssistantUsing Help – Office Assistant
Help, Show the Office Assistant
type your questionand press Enter
click to turn off or toselect alternate assistant
Copyright 2003, Paradigm Publishing Inc.
CHAPTER1
BACK NEXT END
1-37
LINKS TO
OBJECTIVES• Worksheet Elements• Create, Save, and Pri
nt a Worksheet• Enter Data• Edit Data• AutoFormat• Help Feature• Features Summary
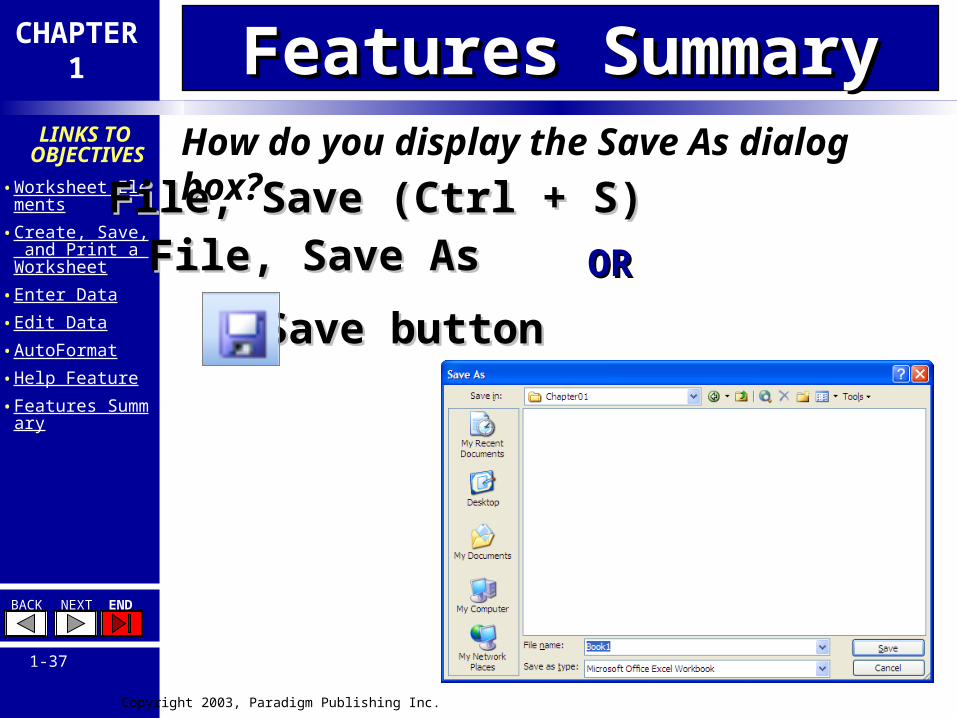
How do you display the Save As dialog box?
Features SummaryFeatures Summary
File, Save (Ctrl + S)File, Save (Ctrl + S)
File, Save AsFile, Save As
Save buttonSave button
OROR
Copyright 2003, Paradigm Publishing Inc.
CHAPTER1
BACK NEXT END
1-38
LINKS TO
OBJECTIVES• Worksheet Elements• Create, Save, and Pri
nt a Worksheet• Enter Data• Edit Data• AutoFormat• Help Feature• Features Summary
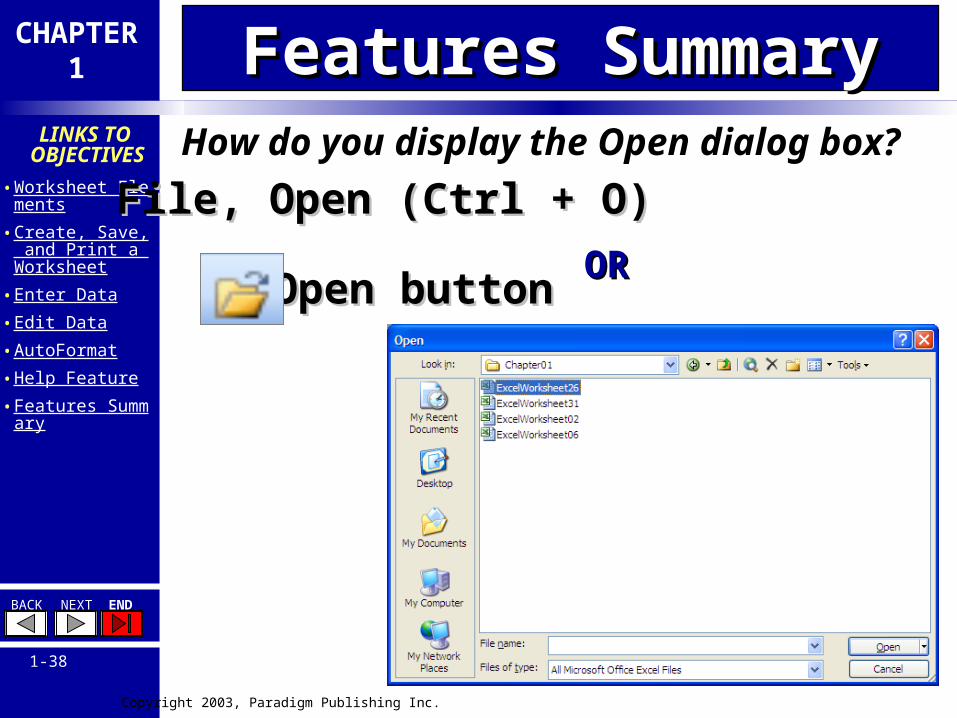
How do you display the Open dialog box?
Features SummaryFeatures Summary
File, Open (Ctrl + O)File, Open (Ctrl + O)
Open buttonOpen buttonOROR
Copyright 2003, Paradigm Publishing Inc.
CHAPTER1
BACK NEXT END
1-39
LINKS TO
OBJECTIVES• Worksheet Elements• Create, Save, and Pri
nt a Worksheet• Enter Data• Edit Data• AutoFormat• Help Feature• Features Summary
How do you print a worksheet?
Features SummaryFeatures Summary
Print button Print button
sends directly to the printer
Copyright 2003, Paradigm Publishing Inc.
CHAPTER1
BACK NEXT END
1-40
LINKS TO
OBJECTIVES• Worksheet Elements• Create, Save, and Pri
nt a Worksheet• Enter Data• Edit Data• AutoFormat• Help Feature• Features Summary
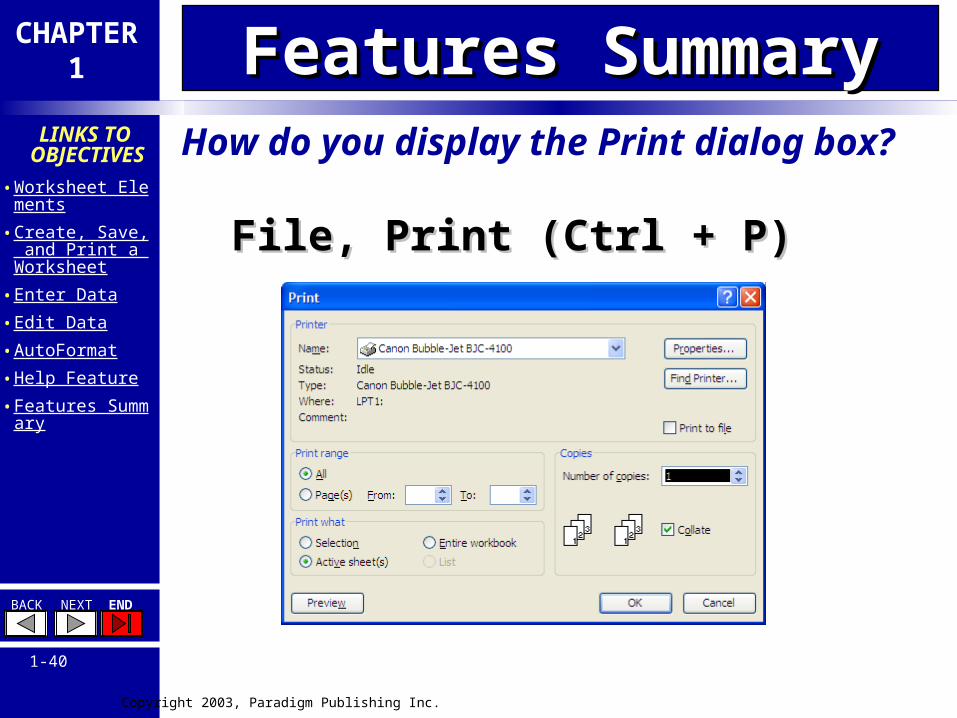
How do you display the Print dialog box?
Features SummaryFeatures Summary
File, Print (Ctrl + P)File, Print (Ctrl + P)
Copyright 2003, Paradigm Publishing Inc.
CHAPTER1
BACK NEXT END
1-41
LINKS TO
OBJECTIVES• Worksheet Elements• Create, Save, and Pri
nt a Worksheet• Enter Data• Edit Data• AutoFormat• Help Feature• Features Summary
How do you close a worksheet?
Features SummaryFeatures Summary
File, CloseFile, Close
Copyright 2003, Paradigm Publishing Inc.
CHAPTER1
BACK NEXT END
1-42
LINKS TO
OBJECTIVES• Worksheet Elements• Create, Save, and Pri
nt a Worksheet• Enter Data• Edit Data• AutoFormat• Help Feature• Features Summary
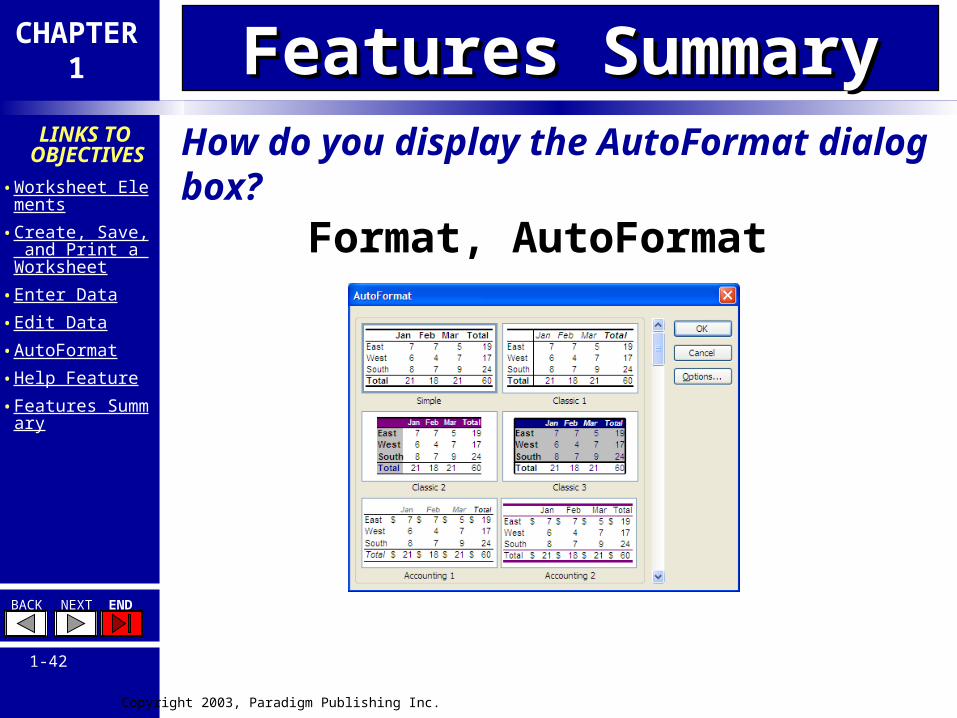
How do you display the AutoFormat dialog box?
Features SummaryFeatures Summary
Format, AutoFormat
Copyright 2003, Paradigm Publishing Inc.
CHAPTER1
BACK NEXT END
1-43
LINKS TO
OBJECTIVES• Worksheet Elements• Create, Save, and Pri
nt a Worksheet• Enter Data• Edit Data• AutoFormat• Help Feature• Features Summary
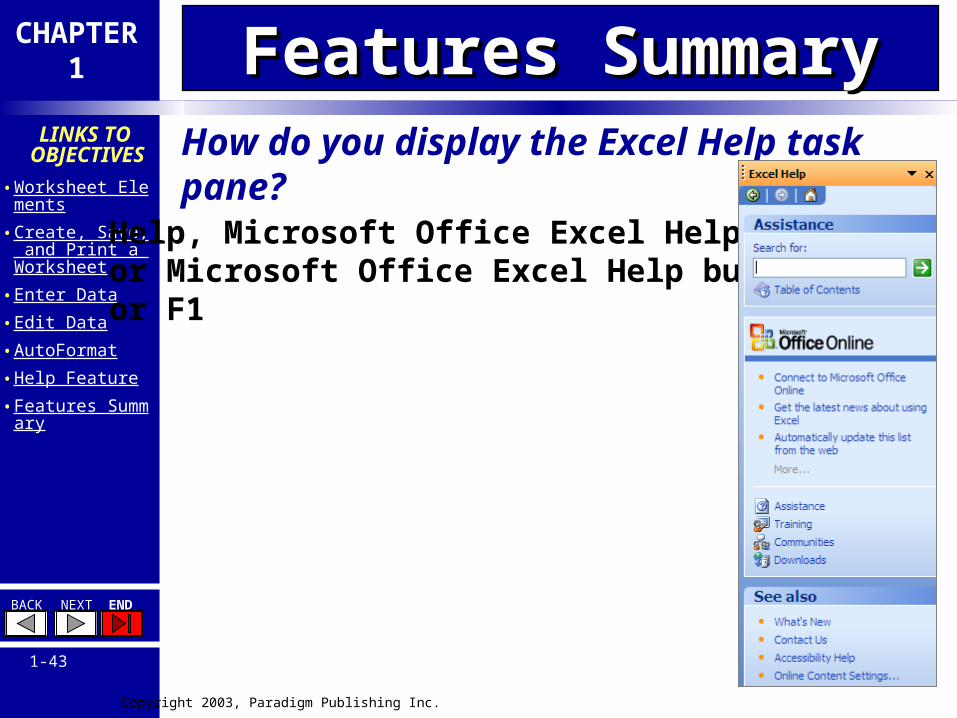
How do you display the Excel Help task pane?
Features SummaryFeatures Summary
Help, Microsoft Office Excel Helpor Microsoft Office Excel Help buttonor F1
Copyright 2003, Paradigm Publishing Inc.
CHAPTER1
BACK NEXT END
1-44
LINKS TO
OBJECTIVES• Worksheet Elements• Create, Save, and Pri
nt a Worksheet• Enter Data• Edit Data• AutoFormat• Help Feature• Features Summary
Coming NextComing Next
FORMATTING AN EXCEL WORKSHEET
Related Documents


![[XLS]Name your File to Save - CGAP · Web viewVisible Worksheet Name and Order ... utilities, supplies, advertising, transportation, communications, ... exprimé sous la forme d'un](https://static.cupdf.com/doc/110x72/5b3518497f8b9a6b548cce47/xlsname-your-file-to-save-cgap-web-viewvisible-worksheet-name-and-order.jpg)


