CONTRAST / EXPOSURE / LIGHTING RATIOS

Welcome message from author
This document is posted to help you gain knowledge. Please leave a comment to let me know what you think about it! Share it to your friends and learn new things together.
Transcript

CONTRAST / EXPOSURE / LIGHTING RATIOS

BASIC PRINCIPLES OF EXPOSURE:
• There is no single correct exposure for a scene. The image needs to show sufficient detail and look good, but the parameters can be subjective. Ask yourself: which elements in the scene are most important?
• Exposure is the total amount of light reflected by the object in the direction of the lens
➡ related to the amount of light falling an an object / scene, i.e. the incident light
➡also related to reflectance of object: what percentage of incidend light does object reflect? This is a factor of color and texture.
• The brightness range of the real world can often exceed the latitude /dynamic range of your recording medium. The HVX can record a brightness range of about 7 stops. What can you do if the range in your scene has more than 7 stops?

The goal is to expose an image in the MIDDLE OF THE RANGE. Over /underexposure appears as a shift in subject brightness range.

Using the Light Meter
A. Incident reading B. Reflected reading
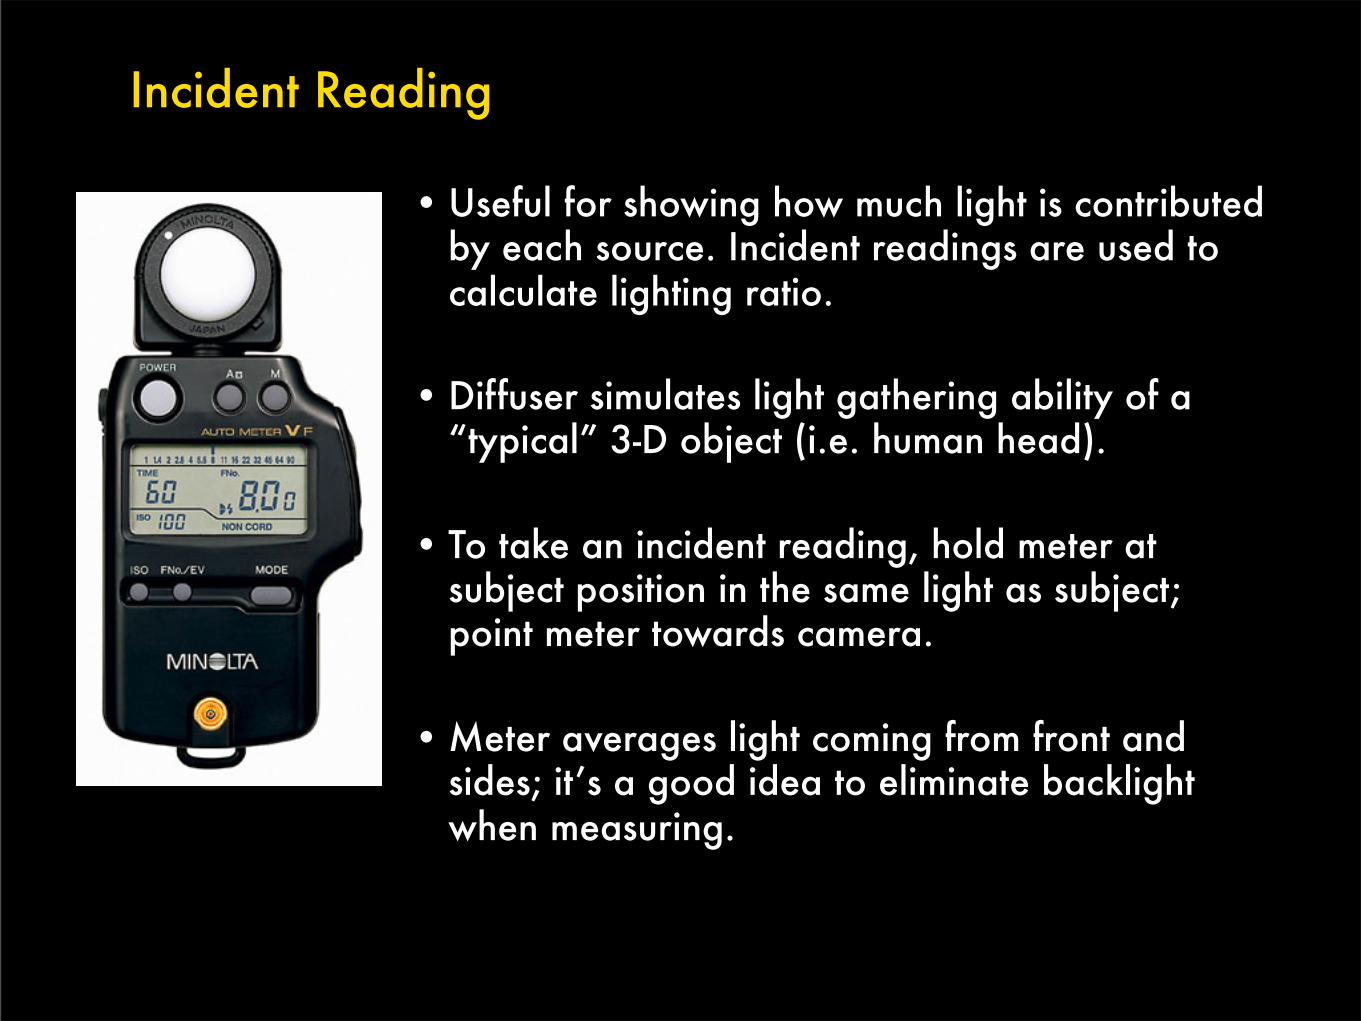
Incident Reading
• Useful for showing how much light is contributed by each source. Incident readings are used to calculate lighting ratio.
• Diffuser simulates light gathering ability of a “typical” 3-D object (i.e. human head).
• To take an incident reading, hold meter at subject position in the same light as subject; point meter towards camera.
• Meter averages light coming from front and sides; it’s a good idea to eliminate backlight when measuring.

Reflected Reading • Reflected reading is taken from camera position, aiming meter at subject.
• For anything other than exposing facial skin tone, reflected reading can be more precise. It can show you the range of brightness in the scene. But reflected reading always requires interpretation (“placing” reading on gray scale).
• Reflected reading tells you what exposure will make object look like middle gray (18% gray).
• Reflected reading is necessary for determining correct exposure for anything that emits or filters light (e.g. TV or shooting through a window).
• Your incident reading should MATCH a reflected reading of an 18% gray card in the same light.

The Zone System
18% middle gray

Light Meter Angle of Acceptance
A. standard reflected light meter has 40º angle of acceptance
B. spot meter has 1º angle of acceptance

Lighting Ratios
Bright side:f/8
Shadow side:f/4
4:1 RATIO (2 stops difference)
• FORMULA: K[ey] + F[ill] / F
• K+F is incident reading taken from bright side of face (since fill is supposed to be shadowless, it wraps around both sides of face).
• F is incident reading taken from shadow side (with key turned off)
• Each stop represents an exponential increase in light, so ratios come out to powers of 2 (i.e. a 4:1 ratio -- 22---- is a difference of 2 stops)

Lighting Ratios
Ratios up to 4:1 look “normal”
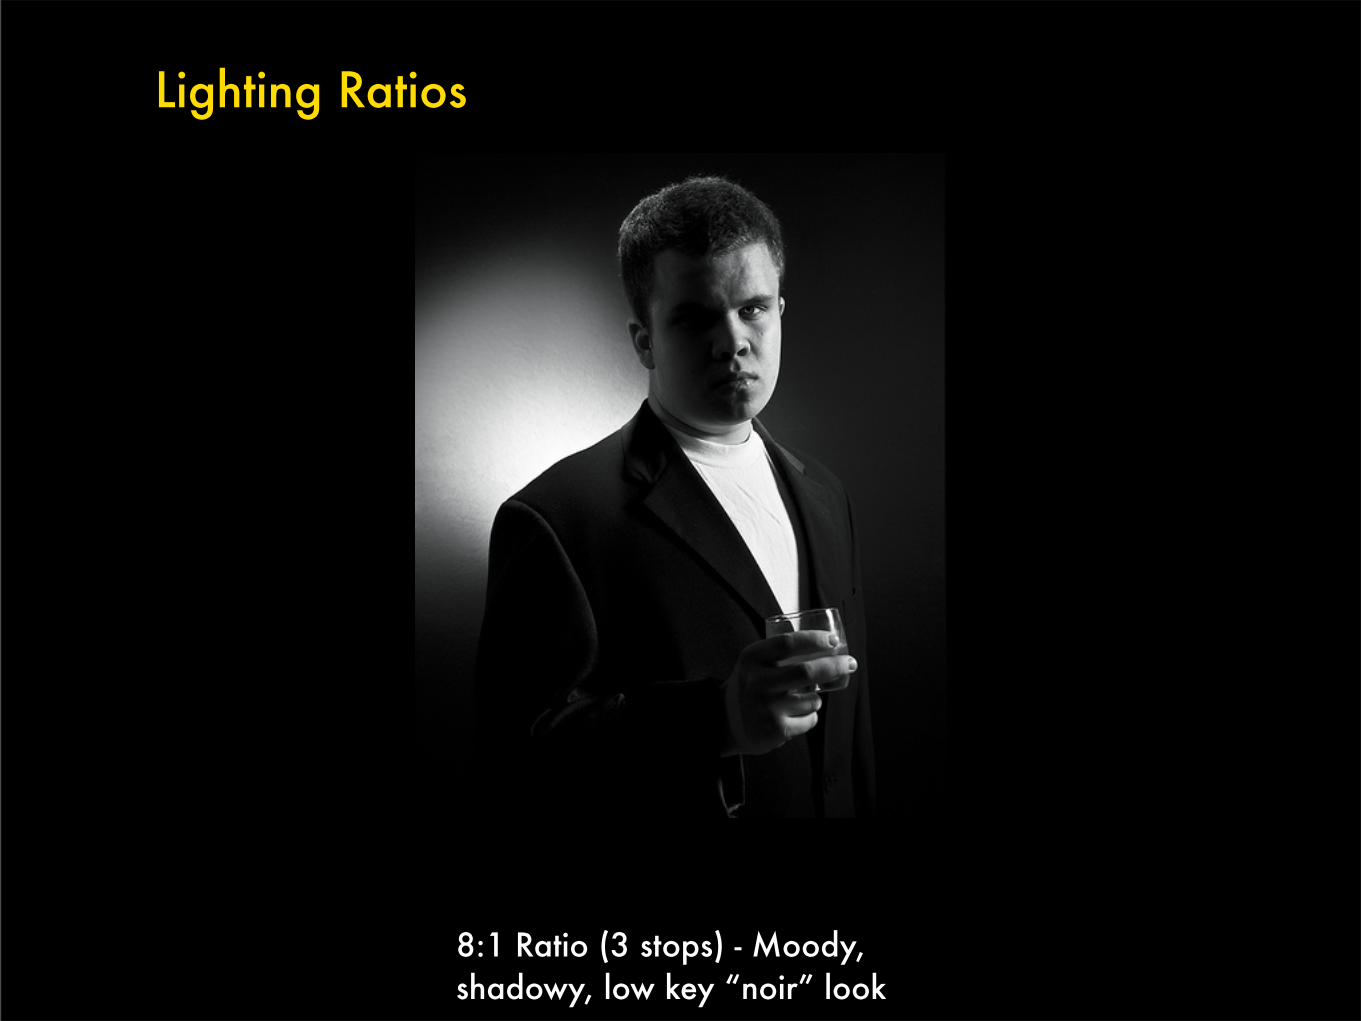
Lighting Ratios
8:1 Ratio (3 stops) - Moody, shadowy, low key “noir” look

Using the Minolta Auto Meter III Light Meter
1. Set correct ASA number: HVX 200 is rated at ASA 320
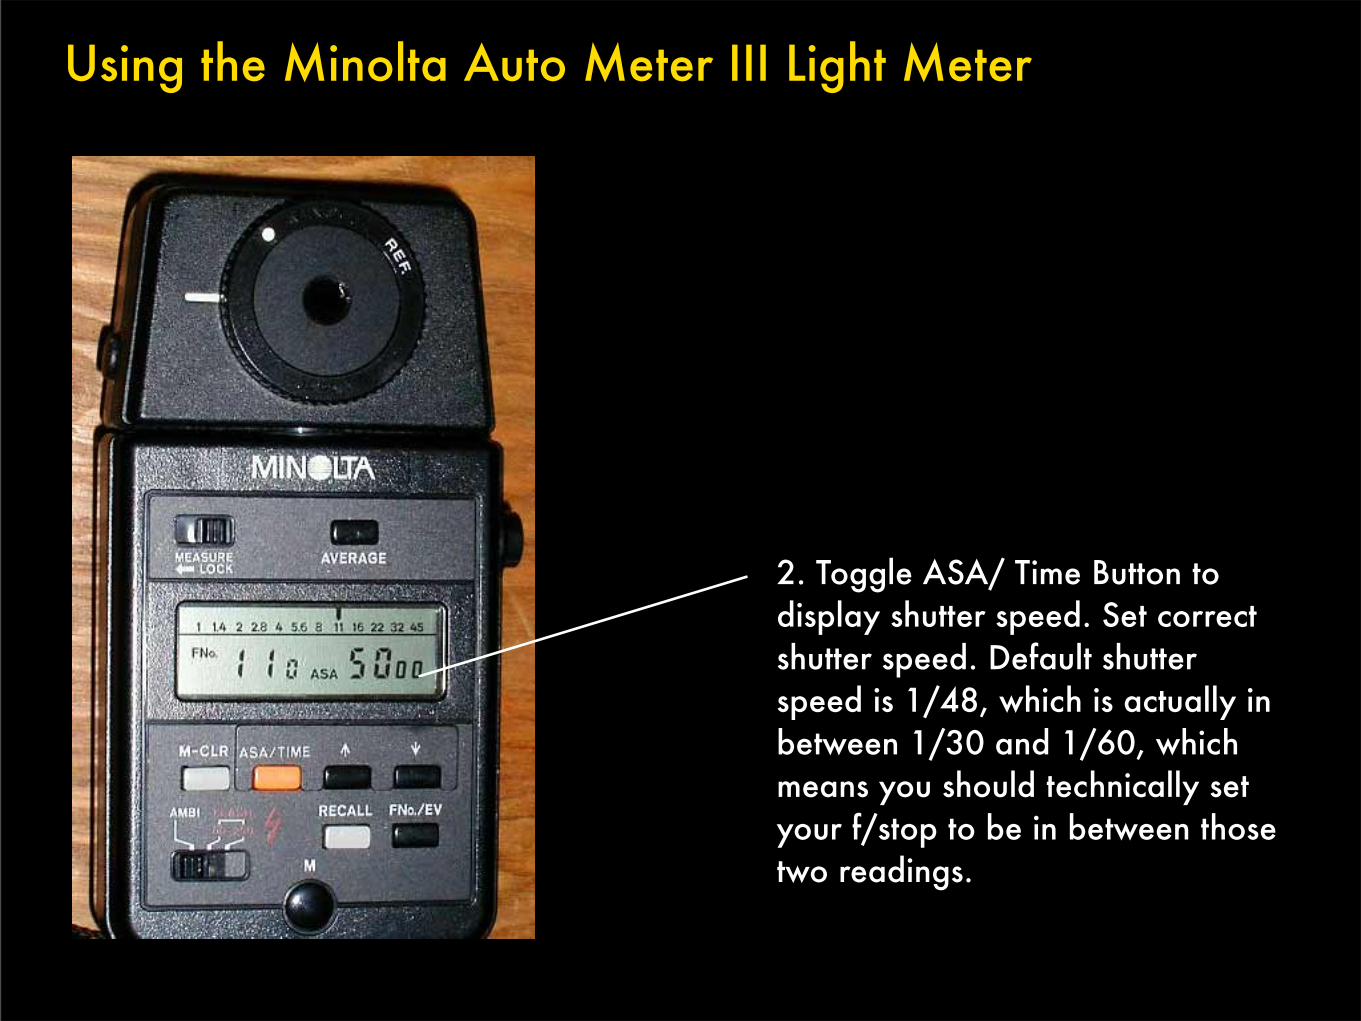
Using the Minolta Auto Meter III Light Meter
2. Toggle ASA/ Time Button to display shutter speed. Set correct shutter speed. Default shutter speed is 1/48, which is actually in between 1/30 and 1/60, which means you should technically set your f/stop to be in between those two readings.

Using the Minolta Auto Meter III Light Meter
3. Make sure meter is displaying f/stop numbers, not EV numbers

Using the Minolta Auto Meter III Light Meter
4. Make sure to use correct attachment for the type of reading you plan to do (incident /reflected). The diffuser attachment is for incident readings.

Using the Minolta Auto Meter III Light Meter
5. Hold light meter in measuring position, making sure not to cast shadows or block lights. Press measuring button to take reading.

Using the Minolta Auto Meter III Light Meter
6. Keep up to three readings in meter memory.
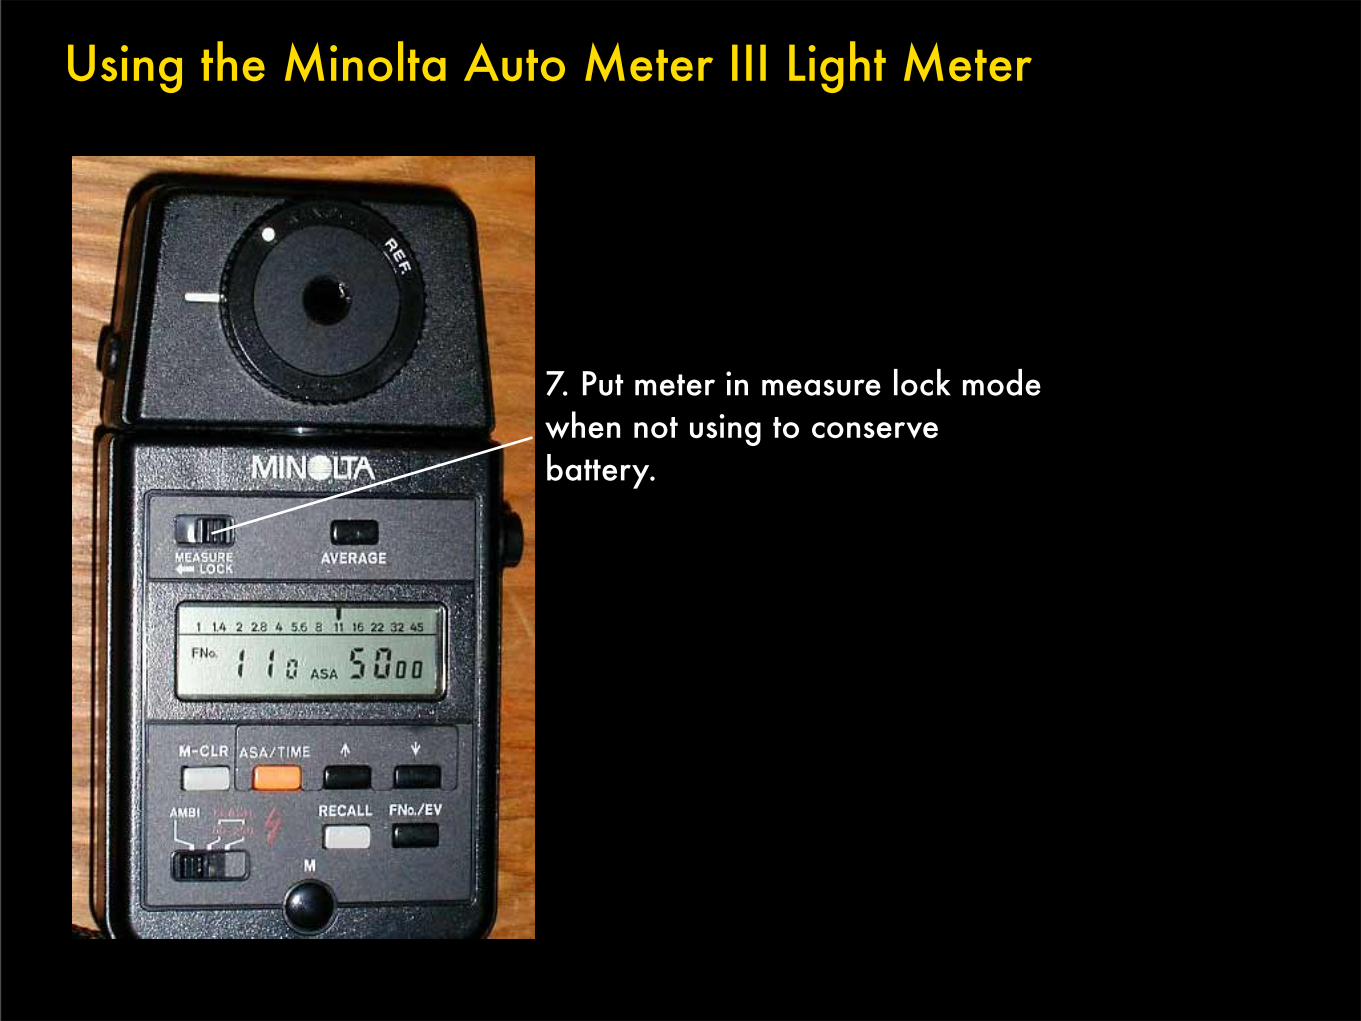
Using the Minolta Auto Meter III Light Meter
7. Put meter in measure lock mode when not using to conserve battery.
Related Documents


