n N About the Software on your Sony Notebook Computer PCG-F801

Welcome message from author
This document is posted to help you gain knowledge. Please leave a comment to let me know what you think about it! Share it to your friends and learn new things together.
Transcript
n N
About the Software onyour Sony NotebookComputerPCG-F801
© 2000 by Sony Corporation.

ur
No
teb
oo
k C
om
pu
ter
2n N
NOTICEThis product contains software owned by Sony and licensed by third parties. Use ofsuch software is subject to the terms and conditions of license agreements enclosedwith this product. Software specifications are subject to change without notice andmay not necessarily be identical to current retail versions.
Updates and additions to software may require an additional charge. Subscriptions toonline service providers may require a fee and credit card information. Financialservices may require prior arrangements with participating financial institutions.
.
rmission is prohibited.
") is a legal agreement between you and Sonyration organized under Japanese Law, theY HARDWARE"). Please read this EULA carefully
her with this EULA (the "SONY SOFTWARE"). Bybe bound by the terms of this EULA. You may useof the SONY HARDWARE. SONY SOFTWARE is
gether with separate End User Software Licenselimited to Windows® operating system provided byrty EULA.
rn the SONY SOFTWARE together with the SONY
mentation are licensed to you by SONY. This EULAnal use for a single SONY HARDWARE outside aWARE in machine-readable form for back-up
Ab
ou
t th
e S
oft
wa
re o
n y
o © 2000 Sony Corporation All rights reserved
Reproduction in whole or in part without pe
End User Software License Agreement This End User Software License Agreement (the "EULACorporation (hereinafter referred to as "SONY"), a corpomanufacturer of your SONY computer system (the "SONbefore installing or using the software distributed togetinstalling or using the SONY SOFTWARE, you agree tothe SONY SOFTWARE only in connection with the uselicensed not sold.
Notwithstanding the foregoing, software distributed toAgreement (the "Third Party EULA"), including but notMicrosoft Corporation, shall be covered by the Third Pa
If you do not agree to the terms of this EULA, please retuHARDWARE to the place where you obtained it.
1. License. This SONY SOFTWARE and the related docuallows you to use the SONY SOFTWARE for your personetwork and only to make one copy of the SONY SOFTpurposes only.

ur
No
teb
oo
k C
om
pu
ter
3n N
2. Restrictions. The SONY SOFTWARE contains copyrighted material and other proprietary material. Inorder to protect them, and except as permitted by applicable law, you may not decompile, reverse engineeror disassemble the SONY SOFTWARE in whole or in part. Except for the transfer of the SONY SOFTWAREtogether with the SONY HARDWARE and prior agreement of the recipient to be bound by the terms andconditions of this EULA, you may not sell or rent the SONY SOFTWARE and its copy to any third party.
3. Limited Warranty. SONY warrants the media on which the SONY SOFTWARE is recorded to be free fromphysical defects for a period of ninety (90) days from the date of purchase as evidenced by a copy of thereceipt. During the applicable warranty period, SONY will replace free of charge such media that proved tobe defective; provided they are returned properly packaged to the place where you obtained it, together withyour name, address, and proof of date of purchase. SONY will have no responsibility to replace mediadamaged by accident, abuse, or misapplication. The above limited warranty replaces all other
ress or implied, by statute or otherwise and SONYns including, but not limited to, the implied
fitness for a particular purpose. The terms of thisry rights as an ultimate consumer, neither do theyy caused by the negligence of SONY.
. You may terminate this EULA at any time byon, and all copies thereof. This EULA will terminatemply with any provision of this EULA. Upon
elated documentation, and all copies thereof.
construed in accordance with the laws of Japan.
r this limited warranty, please refer to the Customer
ow, Smart Capture, Smart Connect, Smart ConnectIO and the VAIO logo are trademarks of Sony
emarks of Microsoft Corporation.
owners.
Ab
ou
t th
e S
oft
wa
re o
n y
o
representations, conditions and warranties, whether expexpressly disclaims all other warranties and all conditiowarranties and/or conditions of satisfactory quality andlimited warranty do not affect or prejudice your statutolimit or exclude any liability for death or personal injur
4. Termination. This EULA is effective until terminateddestroying the SONY SOFTWARE, related documentatiimmediately without notice from SONY, if you fail to cotermination you must destroy the SONY SOFTWARE, r
5. Governing Law. This EULA shall be governed by and
Should you have any questions concerning this EULA oService Guide on how to contact VAIO-Link.
Sony, DVgate, i.LINKTM, Mavica, PictureGear, Visual FlMonitor, Memory Stick and the Memory Stick logo, VACorporation.
Windows and the Windows 98 logos are registered trad
All other trademarks are trademarks of their respective
Specifications are subject to change without notice.

ur
No
teb
oo
k C
om
pu
ter
4n N
As an ENERGY STAR Partner, Sony has determined that this product meets the ENERGY STAR guidelines forenergy efficiency.
The International ENERGY STAR Office Equipment Program is an international program that promotesenergy saving through the use of computers and their office equipment. The program backs thedevelopment and dissemination of products with functions that effectively reduce energy consumption. Itis an open system in which business proprietors can participate voluntarily. The targeted products are officeequipment such as computers, displays, printers, facsimiles and copiers. Their standards and logos areuniform among participating nations.
ENERGY STAR is an U.S. registered mark.
Ab
ou
t th
e S
oft
wa
re o
n y
o

About the Software on Your Notebook ComputerSony software
ur
No
teb
oo
k C
om
pu
ter
5n N
About the Software on Your Notebook ComputerYour Sony notebook computer is ready to help you work, play, learn, andcommunicate as soon as you turn it on. This section gives you an overview of theactivities you can perform with your software titles.
For general information and technical assistance, please refer to your Customer Service
age Library (photos, backgrounds,assistant for creating and implementing
ages)... You can even animate your preferredyour medias with PictureGear Label Maker,
Ab
ou
t th
e S
oft
wa
re o
n y
o
Guide.
Sony software
PictureGearSony ElectronicsCreate your own environment with the Digital Imwallpapers, slide shows, etc). PictureGear is yourpersonal screen savers, panoramas (combined imgifs with Gif Animation Tools, create labels for allor play back movies in a variety of formats.For details, please read the PictureGear Help file.
About the Software on Your Notebook ComputerSony software
ur
No
teb
oo
k C
om
pu
ter
6n N
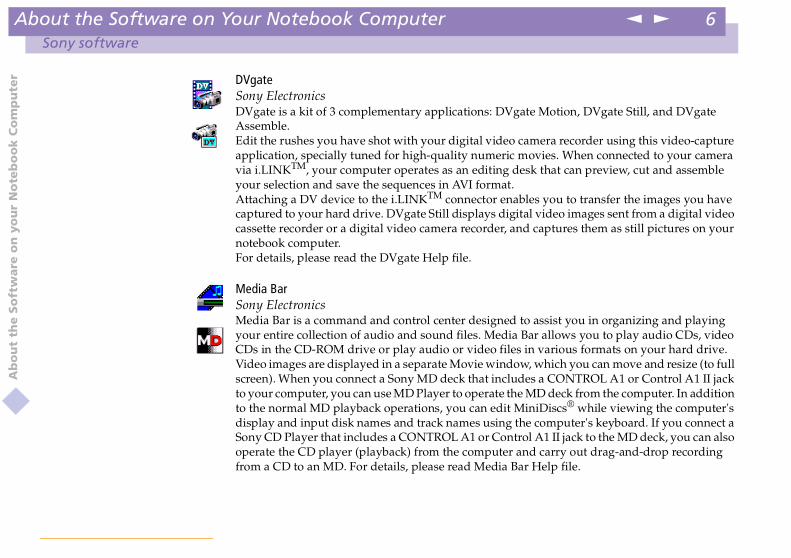
DVgateSony ElectronicsDVgate is a kit of 3 complementary applications: DVgate Motion, DVgate Still, and DVgateAssemble.Edit the rushes you have shot with your digital video camera recorder using this video-captureapplication, specially tuned for high-quality numeric movies. When connected to your cameravia i.LINKTM, your computer operates as an editing desk that can preview, cut and assembleyour selection and save the sequences in AVI format.Attaching a DV device to the i.LINKTM connector enables you to transfer the images you havecaptured to your hard drive. DVgate Still displays digital video images sent from a digital video
er, and captures them as still pictures on your
ned to assist you in organizing and playingedia Bar allows you to play audio CDs, videofiles in various formats on your hard drive.
indow, which you can move and resize (to fullncludes a CONTROL A1 or Control A1 II jackte the MD deck from the computer. In additiondit MiniDiscs® while viewing the computer'sing the computer's keyboard. If you connect aontrol A1 II jack to the MD deck, you can alsoter and carry out drag-and-drop recordingia Bar Help file.
Ab
ou
t th
e S
oft
wa
re o
n y
o cassette recorder or a digital video camera recordnotebook computer.For details, please read the DVgate Help file.
Media BarSony ElectronicsMedia Bar is a command and control center desigyour entire collection of audio and sound files. MCDs in the CD-ROM drive or play audio or videoVideo images are displayed in a separate Movie wscreen). When you connect a Sony MD deck that ito your computer, you can use MD Player to operato the normal MD playback operations, you can edisplay and input disk names and track names usSony CD Player that includes a CONTROL A1 or Coperate the CD player (playback) from the compufrom a CD to an MD. For details, please read Med
About the Software on Your Notebook ComputerSony software
ur
No
teb
oo
k C
om
pu
ter
7n N
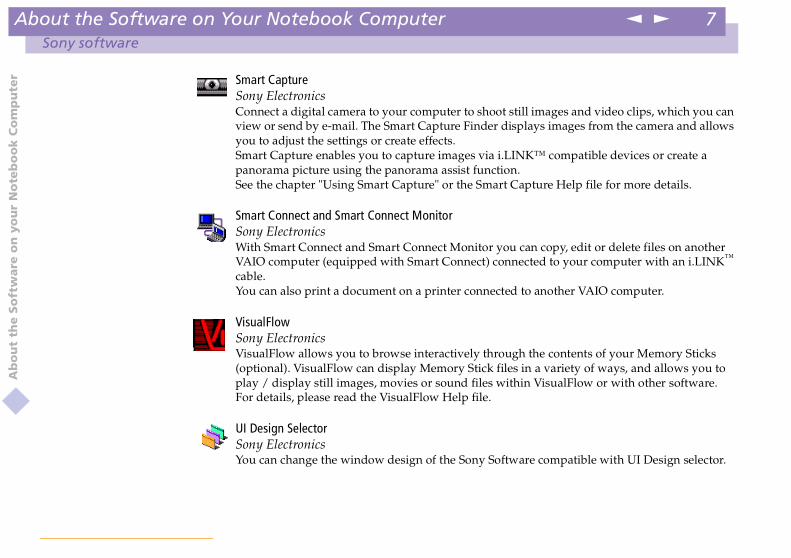
Smart CaptureSony ElectronicsConnect a digital camera to your computer to shoot still images and video clips, which you canview or send by e-mail. The Smart Capture Finder displays images from the camera and allowsyou to adjust the settings or create effects.Smart Capture enables you to capture images via i.LINK™ compatible devices or create apanorama picture using the panorama assist function.See the chapter "Using Smart Capture" or the Smart Capture Help file for more details.
Smart Connect and Smart Connect Monitor
you can copy, edit or delete files on anotheronnected to your computer with an i.LINK™
cted to another VAIO computer.
ough the contents of your Memory Sticksfiles in a variety of ways, and allows you towithin VisualFlow or with other software.
oftware compatible with UI Design selector.
Ab
ou
t th
e S
oft
wa
re o
n y
o
Sony ElectronicsWith Smart Connect and Smart Connect MonitorVAIO computer (equipped with Smart Connect) ccable.You can also print a document on a printer conne
VisualFlowSony ElectronicsVisualFlow allows you to browse interactively thr(optional). VisualFlow can display Memory Stickplay / display still images, movies or sound filesFor details, please read the VisualFlow Help file.
UI Design SelectorSony ElectronicsYou can change the window design of the Sony S

About the Software on Your Notebook ComputerSony software
ur
No
teb
oo
k C
om
pu
ter
8n N
Product Recovery CD-ROMSony ITEThe Product Recovery CD-ROM allows you to reinstall individual applications and devicedrivers if they are corrupted or accidentally erased. It also allows you to restore the softwaretitles that were shipped with your computer if they become corrupted or are erased accidentally.Reinstalling an individual device driver or software title may correct a problem you areexperiencing with your computer, and you may not need to recover the entire contents of yourhard drive.
! You can only use this Recovery CD-ROM on the Sony notebook you purchased and not on any other Sony PC
Ab
ou
t th
e S
oft
wa
re o
n y
o
or other manufacturer's PC.
About the Software on Your Notebook ComputerOperating System and other pre-installed software
ur
No
teb
oo
k C
om
pu
ter
9n N
Operating System and other pre-installed software
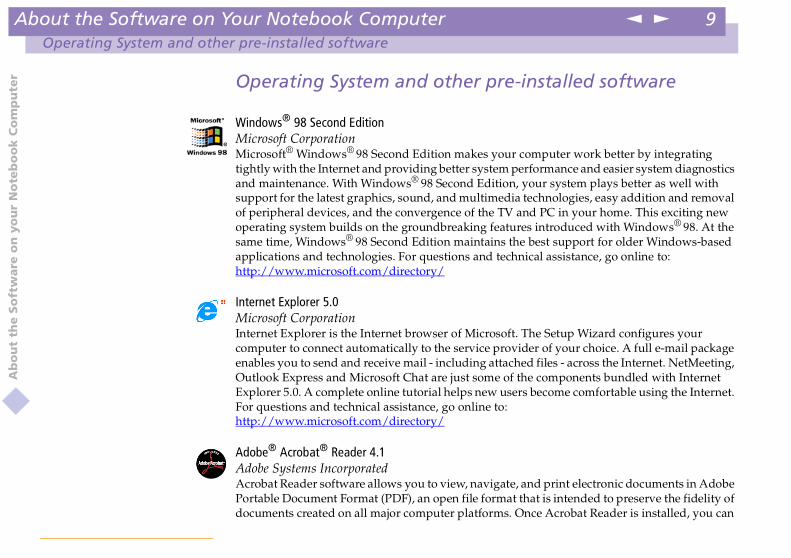
Windows® 98 Second EditionMicrosoft CorporationMicrosoft® Windows® 98 Second Edition makes your computer work better by integratingtightly with the Internet and providing better system performance and easier system diagnosticsand maintenance. With Windows® 98 Second Edition, your system plays better as well withsupport for the latest graphics, sound, and multimedia technologies, easy addition and removalof peripheral devices, and the convergence of the TV and PC in your home. This exciting new
eatures introduced with Windows® 98. At thes the best support for older Windows-based
technical assistance, go online to:
soft. The Setup Wizard configures yourrovider of your choice. A full e-mail package
ttached files - across the Internet. NetMeeting,e of the components bundled with Internetusers become comfortable using the Internet.
to:
ate, and print electronic documents in Adobemat that is intended to preserve the fidelity of
s. Once Acrobat Reader is installed, you can
Ab
ou
t th
e S
oft
wa
re o
n y
o operating system builds on the groundbreaking fsame time, Windows® 98 Second Edition maintainapplications and technologies. For questions andhttp://www.microsoft.com/directory/
Internet Explorer 5.0Microsoft CorporationInternet Explorer is the Internet browser of Microcomputer to connect automatically to the service penables you to send and receive mail - including aOutlook Express and Microsoft Chat are just somExplorer 5.0. A complete online tutorial helps newFor questions and technical assistance, go onlinehttp://www.microsoft.com/directory/
Adobe® Acrobat® Reader 4.1Adobe Systems IncorporatedAcrobat Reader software allows you to view, navigPortable Document Format (PDF), an open file fordocuments created on all major computer platform
About the Software on Your Notebook ComputerOperating System and other pre-installed software
ur
No
teb
oo
k C
om
pu
ter
10n N
open and view PDF files from within your Web browser by clicking on a PDF file embedded inan HTML file. You quickly see the first page while the rest of the document is being downloaded.For questions and technical assistance, go online athttp://www.adobe.com
QuickTime 4.1AppleQuickTime is the Apple technology that makes video, sound, music, 3D and virtual reality comealive for your Internet browser and Windows.For further information, see the web site at:
ti-virus solution.ove it from the infected file, move the file to
sive security program that includes a varietyingful password protection, training, andelp files or for technical support, go to
Ab
ou
t th
e S
oft
wa
re o
n y
o
http://www.apple.com/quicktime/
VirusScanMcAfee (Network Associates)VirusScan is McAfee's powerful and advanced anIf a virus is detected, VirusScan can attempt to rema quarantine location, or delete the infected file.VirusScan is an important element of a comprehenof safety measures such as regular backups, meanawareness. For details, please refer to the online hhttp://www.mcafee.com

Using Smart Captureu
r N
ote
bo
ok
Co
mp
ute
r11n N
Using Smart CaptureYou can use Smart Capture to shoot still images and record video clips from a digitalcamera connected to your computer.
Capturing a still image
1 Launch Smart Capture from the Start menu, in Programs / Smart Capture / SmartCapture.
2 The finder window appears, displaying the image of the subject.
t to shoot.
pture window. The Still Viewer windowtill Image Display area.
n in the top right corner of the window.
� You can capture still images from i.LINK™ compatible devices. For connecting the device, refer to Connecting a Digital Video Camera Recorder in your Notebook Computer user guide. Also consult the Smart Capture online help for information on
till image
Ab
ou
t th
e S
oft
wa
re o
n y
o
3 Adjust the focus on the subject you wan
4 Click the Capture button in the Smart Caappears with the image you shot in the S
5 To end Smart Capture click the butto
installation and use.
Captured s
Using Smart Captureu
r N
ote
bo
ok
Co
mp
ute
r12n N
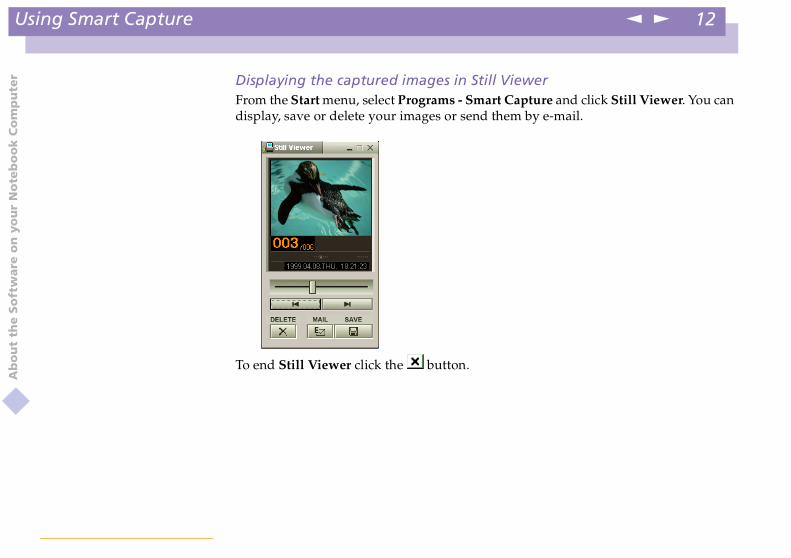
Displaying the captured images in Still ViewerFrom the Start menu, select Programs - Smart Capture and click Still Viewer. You candisplay, save or delete your images or send them by e-mail.
Ab
ou
t th
e S
oft
wa
re o
n y
o
To end Still Viewer click the button.

Using Smart Captureu
r N
ote
bo
ok
Co
mp
ute
r13n N
� See the Smart Capture software online help for more information on installation and use.
You can capture the following still images sizes : 640 x 480, 320 x 240, 160 x 120, 80 x 60, and 40 x 30 pixels.
When capturing a small resolution image (i.e. 80 x 60 or 40 x 30 pixels) , the displayed image on the finder window may appear blurred.
A gap may appear when a rapid-moving object is displayed. However this is not a malfunction.
You can create a panorama picture by using PictureGear 2.5SE or higher.
See the software online help for information on installation and use.
ital video camera using Smart Capture.
Ab
ou
t th
e S
oft
wa
re o
n y
o
You can capture still images and video clips from a dig
Using Smart Captureu
r N
ote
bo
ok
Co
mp
ute
r14n N
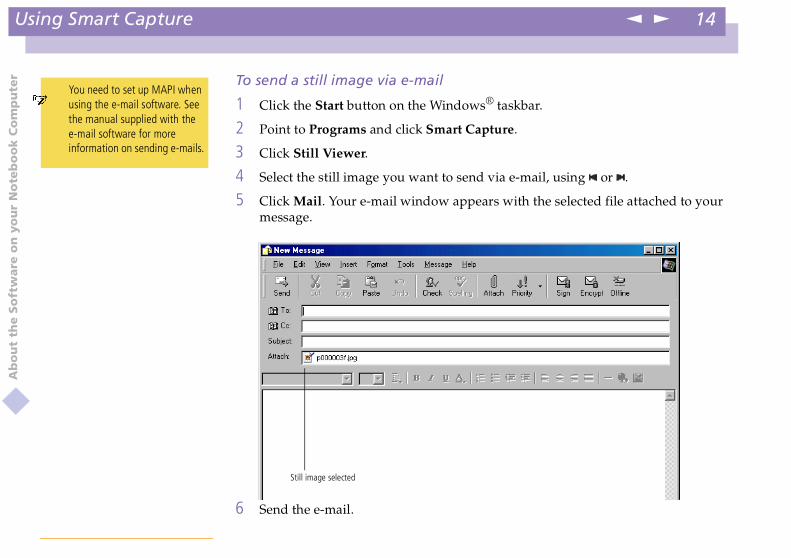
To send a still image via e-mail
1 Click the Start button on the Windows® taskbar.
2 Point to Programs and click Smart Capture.
3 Click Still Viewer.
4 Select the still image you want to send via e-mail, using or .
5 Click Mail. Your e-mail window appears with the selected file attached to yourmessage.
� You need to set up MAPI when using the e-mail software. See the manual supplied with the e-mail software for more information on sending e-mails.
Ab
ou
t th
e S
oft
wa
re o
n y
o
6 Send the e-mail.
Still image selected

Using Smart Captureu
r N
ote
bo
ok
Co
mp
ute
r15n N
Shooting a video clipYou can use Smart Capture to shoot (capture) video clips with a Video Cameraconnected to your computer, as well as play them or send them via e-mail.
1 Launch Smart Capture. Select Movie using the Switch Capture Mode button.
the camera towards the subject.
o clip (you can shoot up to 60 seconds,e Recording options section).
The Movie Player window opens and thee Player window.
Click here
Ab
ou
t th
e S
oft
wa
re o
n y
o
2 The image will appear in the finder. Turn
3 Adjust the image.
4 Click the Capture button to shoot a videaccording to the settings you chose in th
5 Click the Capture button when finished.captured video clip appears in the Movi
Using Smart Captureu
r N
ote
bo
ok
Co
mp
ute
r16n N
to pause, x to stop playback.
Captured video clip
� You can shoot video clips in the following formats :
Non-compressed :
� Video 160 x 120, 24 bits, max. 10 frames/sec.
� Audio PCM, 11.025 kHz, 16 bits, monophonic
Compressed :
Ab
ou
t th
e S
oft
wa
re o
n y
o
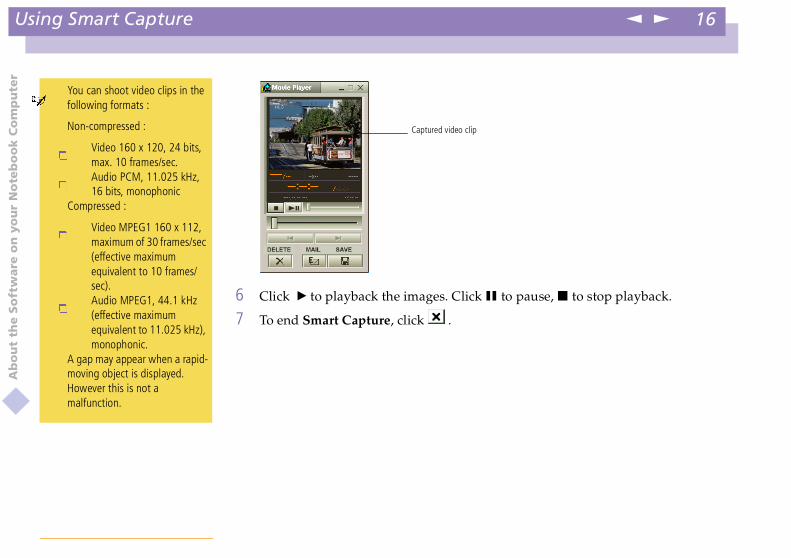
6 Click B to playback the images. Click X
7 To end Smart Capture, click .
� Video MPEG1 160 x 112, maximum of 30 frames/sec (effective maximum equivalent to 10 frames/sec).
� Audio MPEG1, 44.1 kHz (effective maximum equivalent to 11.025 kHz), monophonic.
A gap may appear when a rapid-moving object is displayed. However this is not a malfunction.
Using Smart Captureu
r N
ote
bo
ok
Co
mp
ute
r17n N
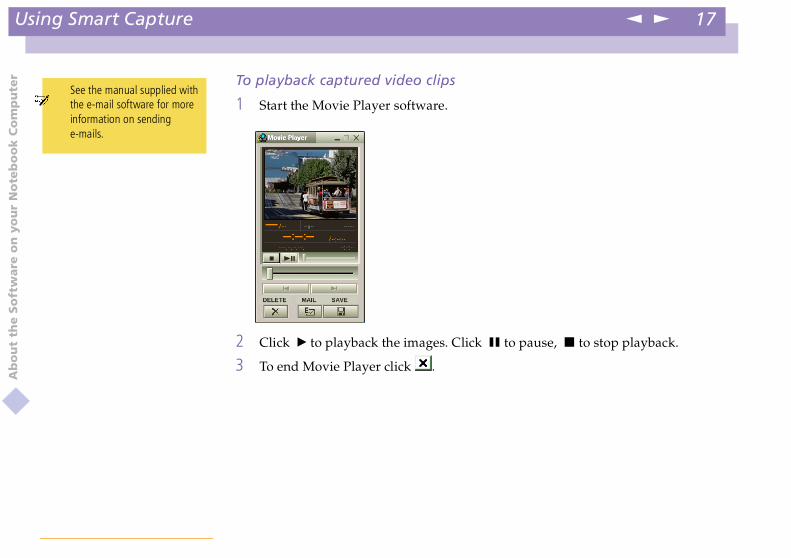
To playback captured video clips
1 Start the Movie Player software.
to pause, x to stop playback.
� See the manual supplied with the e-mail software for more information on sending e-mails.
Ab
ou
t th
e S
oft
wa
re o
n y
o
2 Click B to playback the images. Click X
3 To end Movie Player click .

Using Smart Captureu
r N
ote
bo
ok
Co
mp
ute
r18n N
To send a video clip via e-mailIf you shoot a video clip in a low resolution format, you can send it by e-mail.
1 Click the Start button on the Windows® taskbar.
2 Point to Program and then Smart Capture.
3 Click Movie Player.
4 Click Mail.
5 The Compression Settings window opens.
the slider.
sion is completed, a window messageto your e-mail.
Ab
ou
t th
e S
oft
wa
re o
n y
o
6 Choose the compression rate by moving
7 Click Start Compression. When compreswill ask you if you want to attach the file
8 Accept and send the e-mail.
Using the Product Recovery CD-ROMsu
r N
ote
bo
ok
Co
mp
ute
r19n N
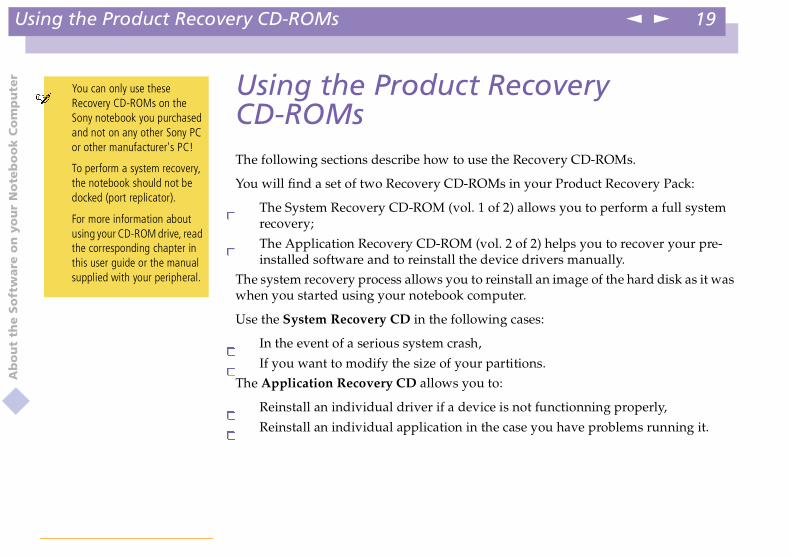
Using the Product Recovery CD-ROMsThe following sections describe how to use the Recovery CD-ROMs.
You will find a set of two Recovery CD-ROMs in your Product Recovery Pack:
� The System Recovery CD-ROM (vol. 1 of 2) allows you to perform a full system
l. 2 of 2) helps you to recover your pre-vice drivers manually.install an image of the hard disk as it wasuter.
g cases:
rtitions.:
is not functionning properly,
case you have problems running it.
� You can only use these Recovery CD-ROMs on the Sony notebook you purchased and not on any other Sony PC or other manufacturer's PC!
To perform a system recovery, the notebook should not be docked (port replicator).
For more information about
Ab
ou
t th
e S
oft
wa
re o
n y
o recovery;
� The Application Recovery CD-ROM (voinstalled software and to reinstall the de
The system recovery process allows you to rewhen you started using your notebook comp
Use the System Recovery CD in the followin
� In the event of a serious system crash,
� If you want to modify the size of your paThe Application Recovery CD allows you to
� Reinstall an individual driver if a device
� Reinstall an individual application in the
using your CD-ROM drive, read the corresponding chapter in this user guide or the manual supplied with your peripheral.

Using the Product Recovery CD-ROMsu
r N
ote
bo
ok
Co
mp
ute
r20n N
Performing a system recovery Use this option only when your system is seriously damaged, e.g. if Windows® doesnot work any more, or your PC behaves abnormally, etc. The system recovery willcompletely reinstall the originally configured system on your C: drive. Your D: drivedata will not be deleted if you choose to keep the same partition settings. If you decideto modify the size of your partitions, the existing data on both drives (C: and D:) willbe deleted.
ll your data stored on your C: drive (and your D: drive if ng a system recovery, copy your data to an external disk.
to AC (not the battery) before you attempt a system
remove the recovery CD-ROM from the drive before rive, you will restart a recovery process.
to complete.
from Windows®. The application will not run from DOS.
lose data on your hard disk.
Ab
ou
t th
e S
oft
wa
re o
n y
o ! Applying a system recovery means that you will lose ayou modify partition settings). Therefore, before applyi
! CAUTION: make sure that your computer is connectedrecovery.
! CAUTION: when the recovery is performed, you must restarting the computer. If the CD-ROM is still in the d
� The recovery process takes between 10 to 20 minutes
� You must run the Application Recovery CD (vol. 2 of 2)
When performing an application recovery, you do not

Using the Product Recovery CD-ROMsu
r N
ote
bo
ok
Co
mp
ute
r21n N
Procedure for starting a system recovery
1 Take the System Recovery CD-ROM (vol. 1 of 2).
2 Turn on your computer (using AC power only) and insert the System RecoveryCD-ROM in the CD-ROM drive.
3 Shut down your computer (Start/Shut Down/Shut Down).
4 Wait ten seconds and turn your computer back on.
5 On the first screen that appears, click OK.
, asking you what to do with thee you have 3 options available.
partitionsrtition sizes
ng partitions
his is the recommended option if you dod if you want to restore your C: driveuntouched.
very.
move the Recovery CD-ROM from theotebook computer.
Ab
ou
t th
e S
oft
wa
re o
n y
o
6 The System Recovery CD screen appearspartitions on your hard disk. At this stag
� Recovering the system without changing� Recovering the system with modified pa
� Aborting the recovery process
Recovering the system without changi
1 Press C to keep your current partitions. Tnot need to modify the partition sizes anwhile keeping the data on your D: drive
2 Press G to proceed with the system reco
3 Follow the instructions on the screen.
4 When the recovery process is finished, redrive and press any key to restart your n

Using the Product Recovery CD-ROMsu
r N
ote
bo
ok
Co
mp
ute
r22n N
Recovering the system with modified partition sizes
1 Press P to modify partitions on your notebook computer. Select this option only ifyou need change the sizes of your partitions. Please note that this option willdelete all existing data both on the C: and D: drives before starting the recovery.
2 On the next screen, press Y to confirm the deletion of the current partitions.
3 The next screen displays a selection of sizes for your new C: drive. According tothe option you select, the recovery process will create 1 or 2 partitions on the harddisk. (For more details on partitions, see the chapter About the Partitions of your
n and wait until the new partitions areots.
evious section Recovering the system
n the decision you are asked to takeovery screens allow you either to go backry process.
tem recovery utility.to contact VAIO-Link.
Ab
ou
t th
e S
oft
wa
re o
n y
o
Hard Disk Drive)
4 Confirm your selection on the next screecreated and the notebook computer rebo
5 Then follow the steps described in the prwithout changing partitions.
Aborting the recovery processThe recovery process always warns you whecannot be undone. Whenever possible, the recto the previous screen, or to abort the recove
If your computer does not start the sysPlease refer to your Customer Service Guide

Using the Product Recovery CD-ROMsPerforming an Application Recovery
ur
No
teb
oo
k C
om
pu
ter
23n N
Performing an Application Recovery The application recovery utility allows you to reinstall individual applications.Reinstalling a program can fix the problems encountered if it does not run correctlyanymore.
Procedure for an application recovery
1 Take the Application Recovery CD-ROM (vol. 2 of 2).
r only) and wait until Windows® has
in the CD-ROM drive. The Install
, follow the instructions on the screen tor.
e Install Manager.
Ab
ou
t th
e S
oft
wa
re o
n y
o 2 Turn on your computer (using AC poweloaded.
3 Insert the Application Recovery CD-ROMManager starts running automatically.
4 When the Install Manager menu appearsselect the application you want to recove
5 Follow the installation instructions in th
Using the Product Recovery CD-ROMsReinstalling a device driver
ur
No
teb
oo
k C
om
pu
ter
24n N
Reinstalling a device driverSome applications or peripherals require specific drivers which you won’t find in theWindows® drivers folder. To help you find or restore typical drivers needed by yourpre-installed applications, you can use the Application Recovery CD-ROM.
1 First check whether the driver you plan to reinstall is on the Application RecoveryCD-ROM. Only device drivers that are not delivered with Windows® can be foundin the Drivers directory.
2 Check all underlying sub-directories for the appropriate driver.
zard (in the Windows® start menu, selecthe appropriate device by browsing
Ab
ou
t th
e S
oft
wa
re o
n y
o
3 Next, launch the Add New Hardware wiSettings, then Control Panel) to install tthrough the appropriate folders.

About the Partitions of your Hard Disk DriveDefault disk space allocation
ur
No
teb
oo
k C
om
pu
ter
25n N
About the Partitions of your Hard Disk DriveIn My Computer or Windows Explorer, you may have noticed the My Computeravailability of two drives (C: and D:): your hard disk drive comes from the factory with2 logical partitions: this does not mean that your computer contains two physical harddisks.
ter, your C: drive contains all the filessoftware, while the D: drive comes
e for all your documents, especially bigith DVgate.
Ab
ou
t th
e S
oft
wa
re o
n y
o Default disk space allocationWhen you start using your notebook compurequired by Windows and other pre-installedempty. The D: drive is the ideal storage spacones like digital motion pictures captured w

About the Partitions of your Hard Disk DriveHow to use your partitioned drives
ur
No
teb
oo
k C
om
pu
ter
26n N
How to use your partitioned drivesIn order to avoid mishandling or malfunction of your software and files, please takethe following precautions:
� To optimize data storage, use the C: drive to install new applications, and save allyour documents to the D: drive. Moreover, doing so will prevent the loss of yourdocuments in the case you need to perform a system recovery.
� Do not try to add, delete, or resize partitions unless you really need it. Changingpartition settings might delete all your files on the hard disk.
y, but do not want to loose all the dataes you want to keep on the D: drive.ose to keep the current partitiondrive unchanged after the recoveryovery process, see the Using the Product
partitions, you can do so by performingtant to note that all data on your hard diskng files, be sure to backup them up beforee information on the recovery process, seeMs chapter.
� While you can perform a system recovery and change the partition settings in order to have one C: drive only, this option is not recommended for using video editing applications like DVgate. For more information, see the DVgate online help (Recommended
SID
Ab
ou
t th
e S
oft
wa
re o
n y
o
� If you need to perform a system recoverstored on your hard disk, copy all the filDuring the system recovery process, choinformation. Doing so will keep your D:process. For more information on the recRecovery CD-ROMs chapter.
� If you do need to change the size of youra system recovery. In this case, it is imporwill be deleted. If you need to keep existiperforming the system recovery. For morthe Using the Product Recovery CD-RO
settings topic).
Related Documents