1 CMPE 450 iOS Device Controlled RC Car Capstone Project Final Report Group 1 Robert Hood [email protected] Barry Peyton [email protected] Max Marcus [email protected] Preferred Lab Day: Wednesdays @ 2:00 p.m. Other Available Lab Days: Mondays/Fridays @ 2:00 p.m. Summary A small RC car with an FPGA board, remotely controlled by an iOS device.

CMPE 450 iOS Device Controlled RC Car Capstone Project ...delliott/cmpe490/projects/2012w/g1_iOS_R… · RC Car Capstone Project Final Report Group 1 Robert Hood [email protected]
Apr 18, 2020
Welcome message from author
This document is posted to help you gain knowledge. Please leave a comment to let me know what you think about it! Share it to your friends and learn new things together.
Transcript

1
CMPE 450
iOS Device Controlled RC Car Capstone Project
Final Report
Group 1 Robert Hood [email protected] Barry Peyton [email protected] Max Marcus [email protected] Preferred Lab Day: Wednesdays @ 2:00 p.m. Other Available Lab Days: Mondays/Fridays @ 2:00 p.m. Summary A small RC car with an FPGA board, remotely controlled by an iOS device.

2
Table Of Contents 1. Declaration of Original Content .............................................................................................................................................................................. 3
2. Abstract ................................................................................................................................................................................................................... 4
3. Functional Requirements ........................................................................................................................................................................................ 5
4. Design and Description of Operation ...................................................................................................................................................................... 7
4.1 Description of Operation ............................................................................................................................................................................ 7
4.2 Design (Hardware) ...................................................................................................................................................................................... 7
4.2.1 RN-‐174 Wi-‐Fi Module ........................................................................................................................................................................ 7
4.2.2 Altera DE0 Nano FPGA Board ............................................................................................................................................................ 7
4.2.3 RC Car Servo, Motor, and Electronic Speed Control .......................................................................................................................... 8
4.3 Design (Software) ....................................................................................................................................................................................... 9
5. Hardware Requirements ....................................................................................................................................................................................... 10
6. Parts List ................................................................................................................................................................................................................ 10
7. Sources of Reusable Design Units ......................................................................................................................................................................... 11
8. All IO Signals .......................................................................................................................................................................................................... 11
9. Background Readings ............................................................................................................................................................................................ 12
10. Test Plan .............................................................................................................................................................................................................. 12
10.1 Software ...................................................................................................................................................................................................... 12
10.2 Hardware ..................................................................................................................................................................................................... 13
11. Results of Experiments and Characterization ..................................................................................................................................................... 13
12. Integrated Circuit Design Proposal ...................................................................................................................................................................... 14
13. References ........................................................................................................................................................................................................... 14
14. Appendix ............................................................................................................................................................................................................. 14
14.1 Quick Start Manual ...................................................................................................................................................................................... 14
14.2 Future Work Possible Extensions: ............................................................................................................................................................... 14
14.3 Hardware Documentation ........................................................................................................................................................................... 15
Figure 2: Hardware Block Diagram ...................................................................................................................................................................... 15
15.4 Source Code: ..................................................................................................................................................................................................... 16
15.4.1 iOS Application ......................................................................................................................................................................................... 16
15.4.2 PWM Module ............................................................................................................................................................................................ 21
15.4.3 RC Car Controller ...................................................................................................................................................................................... 25

3
1. Declaration of Original Content
1. http://developer.apple.com/library/ios/navigation/http://developer.apple.com/library/ios/navigation
2. Multi_PWM from www.grigaitis.eu, green_leds.vhd
3. Quartus Files:
• Timer_0.vhd
• SysId.vhd
• Sdram_0.vhd
• RS_232_UART.vhd
• On_chip_memory_2_0.vhd
• JTAG_UART_).vhd
• Green_LEDS.vhd
• GPIO_0.vhd
• CPU_0.vhd
• Altpll.vhd

4
2. Abstract The goal of this design project is to interface a remotely controlled (RC) car to a handheld Apple iOS device via a wireless connection. The RC car will respond to particular rotational movements of the iOS device detected by its built in accelerometer, as well as button presses on the iOS device’s touchscreen. To achieve this functionality we will be mounting the Altera DE0 Nano FPGA board to the RC car and sending pulse width modulated control signals from the board to the car over a wired interface. The DE0 Nano Board will receive command signals from the iOS device over a Wi-Fi interface. This wireless interface will implemented by connecting an RN-174 Wi-Fi module to the DE0 Nano FPGA Board using a wired RS-232 UART interface. These connections will act as our data pipeline, allowing us to send directional commands from the iOS device to the RC car.

5
3. Functional Requirements Core Requirements:
● The movement of the RC car will be remotely controlled by the iOS device. ○ Steering is controlled by the built in accelerometer, while the speed will be controlled by the touch
screen. Figure 1: iOS Device User Interface
● The iOS app will have three states: Drive_Forwards, Drive_Reverse, and Park. The states can be modelled using a Finite State Machine.
Figure 2: RC Car Movement Modelled As a Finite State Machine

6
● These states are based on two binary parameters: motor_enable (either Drive or Park) and motor_direction (either Forwards or Reverse).
● Park: This is the initial state. In this state, motor and servo movement (acceleration) is not allowed. Switching between Forwards Mode and Reverse Mode is allowed.
● Drive_Forwards and Drive_Reverse: In these states, motor and servo movement is allowed. Switching between Forwards Mode and Reverse Mode is not allowed. When the car is in the Drive states, it can only move in the direction specified by motor_direction.
● The user can switch the motor_direction parameter while the app is in the Park state, using a switch on the iOS device screen.
● When in the Drive states: ○ The car will respond appropriately to the following movement commands from the iOS device:
Set_Max_Speed, Turn_Wheels_Right, and Turn_Wheels_Left. ○ The user will issue the steering commands to the car by tilting the iOS device away from its initial
orientation. By tilting the iOS device right or left, the user causes it to send the Steer Right or Steer Left commands to the car.
○ The user will set the maximum speed of the car using a slider on the screen. The car will accelerate to that speed and attempt to maintain it. If the user sets the maximum speed to 0, or pushes the button to move in the opposite direction then the car will come to a stop.

7
4. Design and Description of Operation
4.1 Description of Operation When initiating control of the RC car, the user must hold the iOS device so that the screen is landscape and faces horizontally (i.e. same orientation as a computer monitor). The user interacts with the iOS app via the iOS device's touchscreen and accelerometer. The user interface allows the user to send the following commands to the app: Connect, Disconnect, Set_Max_Speed, Forwards_Mode, Reverse_Mode, Turn_Wheels_Right, and Turn_Wheels_Left. Table 1: Summary of iOS Device UI The iOS app interacts with the RN-174 Wi-Fi module wirelessly via the iOS device's Wi-Fi radio. The Wi-Fi module should be configured to be in adhoc mode so that it creates an adhoc Wi-Fi network on power-up. The iOS device can then detect this Wi-Fi network and request a connection. Upon accepting the iOS device's request, the Wifi module begins receiving commands from the iOS app via TCP packets. The RN-174 Wi-Fi module interacts with the FPGA-implemented CPU via a wired UART RS-232 interface. The movement commands, passed by the RN-174 module, are received by the CPU using a MicroC/OS-II message queue. The CPU uses the control logic in the program code (written by us in NiosII IDE) to read the movement commands from the message queue and then send the appropriate commands to the PWM generator. The PWM generator sends Pulse Width Modulated (PWM) signals to the servo and motor on the RC car via six wired connections.
4.2 Design (Hardware)
4.2.1 RN-‐174 Wi-‐Fi Module The RN-174 Wi-Fi module receives TCP packets over an IEEE 802.11g adhoc Wi-Fi network. The module strips the headers from the packets and echos their data to its RS-232 port. The Wi-Fi module is mounted on the perforated development board and powered through its RS-232 port. We leave jumper J6 connected, which causes the module to enter adhoc mode as soon as it is powered on. We configured the firmware wirelessly using an application called Telnet, launched from a terminal on a Windows machine. We changed the following configuration settings from their default values: Probe = 60 [seconds] Baud Rate = 19 200 The Wi-Fi module has a green LED indicator that is solid when the iOS device is connected to the adhoc Wi-Fi network and blinking slowly when it is disconnected. Figure 6: RN-174 Wi-Fi Module
4.2.2 Altera DE0 Nano FPGA Board The Altera DE0 Nano board houses the following components used on our design:
● Altera Cyclone IV EP4CE22F17C6 FPGA ● 32MB SDRAM ● 8 green user LEDs
8
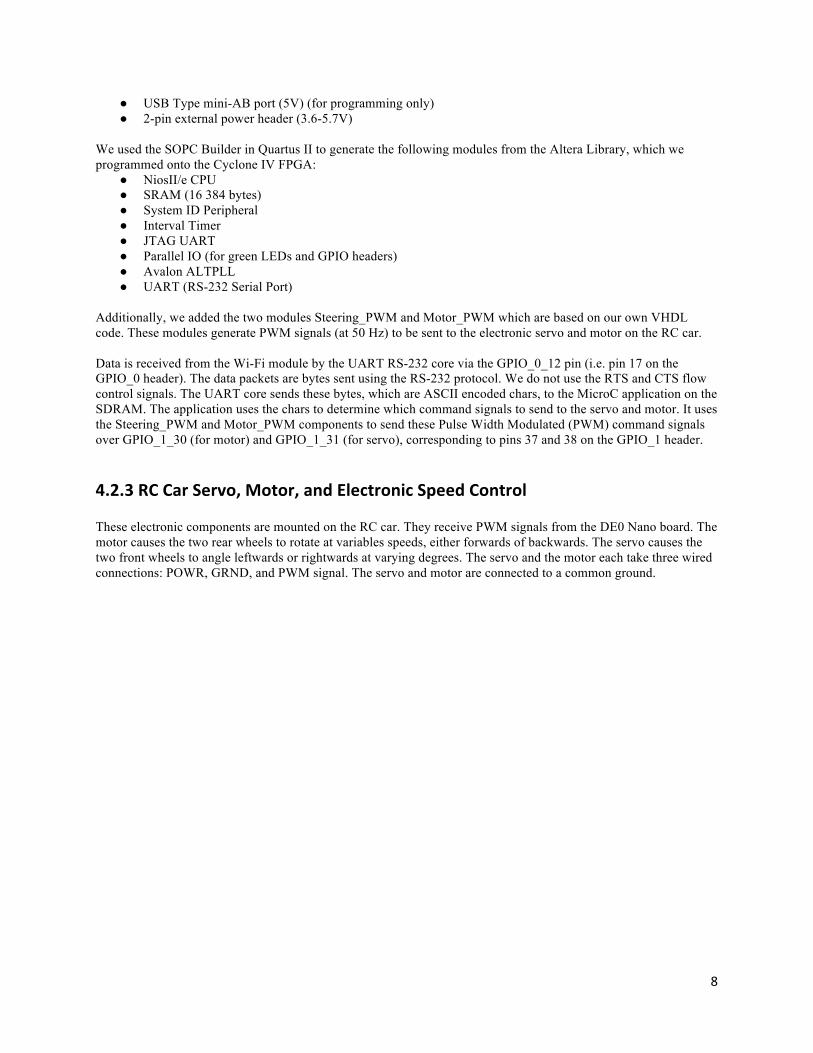
● USB Type mini-AB port (5V) (for programming only) ● 2-pin external power header (3.6-5.7V)
We used the SOPC Builder in Quartus II to generate the following modules from the Altera Library, which we programmed onto the Cyclone IV FPGA:
● NiosII/e CPU ● SRAM (16 384 bytes) ● System ID Peripheral ● Interval Timer ● JTAG UART ● Parallel IO (for green LEDs and GPIO headers) ● Avalon ALTPLL ● UART (RS-232 Serial Port)
Additionally, we added the two modules Steering_PWM and Motor_PWM which are based on our own VHDL code. These modules generate PWM signals (at 50 Hz) to be sent to the electronic servo and motor on the RC car. Data is received from the Wi-Fi module by the UART RS-232 core via the GPIO_0_12 pin (i.e. pin 17 on the GPIO_0 header). The data packets are bytes sent using the RS-232 protocol. We do not use the RTS and CTS flow control signals. The UART core sends these bytes, which are ASCII encoded chars, to the MicroC application on the SDRAM. The application uses the chars to determine which command signals to send to the servo and motor. It uses the Steering_PWM and Motor_PWM components to send these Pulse Width Modulated (PWM) command signals over GPIO_1_30 (for motor) and GPIO_1_31 (for servo), corresponding to pins 37 and 38 on the GPIO_1 header.
4.2.3 RC Car Servo, Motor, and Electronic Speed Control These electronic components are mounted on the RC car. They receive PWM signals from the DE0 Nano board. The motor causes the two rear wheels to rotate at variables speeds, either forwards of backwards. The servo causes the two front wheels to angle leftwards or rightwards at varying degrees. The servo and the motor each take three wired connections: POWR, GRND, and PWM signal. The servo and motor are connected to a common ground.

9
4.3 Design (Software) Figure 2: Software Block Diagram
Using data received from the handheld device, the iOS application will create a TCP/IP packet to send over the Wi-Fi network. Every 100ms the iOS application polls the device’s accelerometer and touch screen. This data is then used to tell the car what to do from its current state. Using this most up-to date data from the device, the iOS application creates a three one-byte data packets. The first packet contains a “control” character, the second packet contains the direction character, while the last packet contain the cars speed character.
Within Nios there are two tasks; one which continuously polls the position data packets sent from the iOS device and a second task which contains the control logic.
The first task fulfills two important requirements. First it extracts the iOS data packets off the WI-FI module and secondly it filters the data packets to ensure that the data received is valid car control commands. Since the packets are each one char, during the extraction process from the WIFI module, our program turns the three single chars into one three char string. This new string is then put through a filtering process which ensures that the string contains one and only one of each of the required chars: the control char, a valid steering char and a valid speed char. If it is determined that the string does not contain all of these chars, this string is not sent to the control logic task.
Once the filtering process determines that the string contains the required data, it sorts the string, ensuring that the first char is the control character, the second char is a steering command and the third char is the speed command. Finally, after the string is sorted, it is sent via a message queue to the control task.

10
The second task (control task) processes the filtered string from the first task. The second task assumes that the data it receives from the first task is a valid three char control string. From there the second char(steering) is compared to the known steering char used for going straight. The difference of the two chars is whats used to actually update the steering. Depending on if this evaluates to positive or negative(positive = greater than neutral char = turn right, negative = less than neutral char = left) the car will turn a certain number of degrees from the neutral position corresponding to the difference. The motor controller works in the same way, except switch turning right for moving forward, and turning left to moving in reverse.
5. Hardware Requirements The Altera DE0 Nano board houses the following components used on our design:
● Altera Cyclone IV EP4CE22F17C6 FPGA ● 32MB SDRAM ● 8 green user LEDs ● USB Type mini-AB port (5V) (for programming only) ● 2-pin external power header (3.6-5.7V)
We use the following interfaces for communication between various hardware components:
● Touchscreen - For the user interface between the user and the iOS device ● TCP/IP - For the IEEE 802.11g adhoc Wi-Fi network, accross which the iOS device connects to the RN-
174 ● RS-232 - For the wired connection between the RN-174 and the GPIO_0 header on the DE0 Nano board ● PWM - For the wired connection between the GPIO_1 header on the DE0 Nano and the servo and motor
We will be using the Altera DE0 Nano FPGA Board as our primary hardware platform along with two Development Environments (Quartus and NIOS) as our primary software development platform. The Altera board comes equipped with a Cyclone IV FPGA that will contain the Pulse Width generator component used to control the on-board motors and servo on the RC Car. The RC car has an 8.4V NiMH battery pack to power the motor and servo. We will be using the RN-174 Wi-Fi Module to create a wireless ad-hoc connection between the iOS device and the moving RC Car. This module has many built in features such as a 2.4GHz radio, processor, full TCP/IP stack and a real-time clock. This module also supports a wide range of communication protocols such as: FTP, DHCP, DNS and HTML client protocols. We will be using the built-in TCP/IP Stack to achieve a communication interface between the iOS device and the Wi-Fi module. The iOS programming will be done on a 15” Apple Macbook Pro with 8GB 1067 MHz DDR3 Ram and a 2.8 GHz Intel Core i7 to power the Apple Xcode 4.3 IDE (personally provided).
6. Parts List - Altera DE0 Nano FPGA Board (Part has been received)
● Available from Digi-Key for $86.25/each ● Requires voltage range between 3.6-5.7VDC to the 2-pin external power header ● http://parts.digikey.com/1/parts/2398386-de0-nano-eval-board-p0082.html ● http://www.terasic.com.tw/cgi-bin/page/archive.pl?No=593 ● http://www.terasic.com.tw/cgi-
bin/page/archive_download.pl?Language=English&No=593&FID=75023fa36c9bf8639384f942e65a46f3 - Roving Networks RN-174 Wi-Fi Module (Part has been received)
● Available from Digi-Key for $86.44/each ● Requires voltage range between 3.3-16 VDC via the RS-232 Interface to be powered ● http://www.rovingnetworks.com/resources/download/14/RN_174 ● http://search.digikey.com/scripts/DkSearch/dksus.dll?x=0&y=0&lang=en&site=ca&KeyWords=rn-174
- iPhone/iPad with accelerometer capabilities (student provided/Part has been received) - Traxxas Slash Pro 2WD Short-Course Truck (student provided/Part has been received)
● Available from Hobby Wholesale for $240/each ● http://traxxas.com/products/models/electric/5805slash
11
● http://traxxas.com/products/models/electric/5805slash-‐downloads
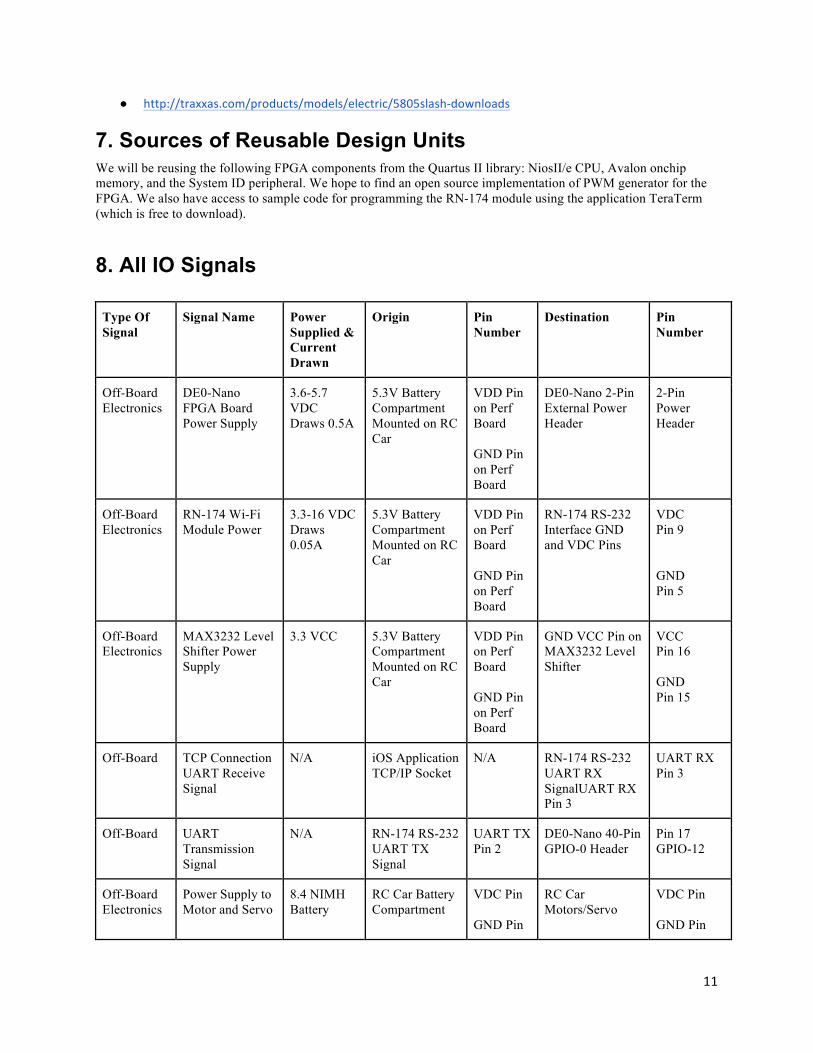
7. Sources of Reusable Design Units We will be reusing the following FPGA components from the Quartus II library: NiosII/e CPU, Avalon onchip memory, and the System ID peripheral. We hope to find an open source implementation of PWM generator for the FPGA. We also have access to sample code for programming the RN-174 module using the application TeraTerm (which is free to download).
8. All IO Signals
Type Of Signal
Signal Name Power Supplied & Current Drawn
Origin Pin Number
Destination Pin Number
Off-Board Electronics
DE0-Nano FPGA Board Power Supply
3.6-5.7 VDC Draws 0.5A
5.3V Battery Compartment Mounted on RC Car
VDD Pin on Perf Board GND Pin on Perf Board
DE0-Nano 2-Pin External Power Header
2-Pin Power Header
Off-Board Electronics
RN-174 Wi-Fi Module Power
3.3-16 VDC Draws 0.05A
5.3V Battery Compartment Mounted on RC Car
VDD Pin on Perf Board GND Pin on Perf Board
RN-174 RS-232 Interface GND and VDC Pins
VDC Pin 9 GND Pin 5
Off-Board Electronics
MAX3232 Level Shifter Power Supply
3.3 VCC 5.3V Battery Compartment Mounted on RC Car
VDD Pin on Perf Board GND Pin on Perf Board
GND VCC Pin on MAX3232 Level Shifter
VCC Pin 16 GND Pin 15
Off-Board TCP Connection UART Receive Signal
N/A iOS Application TCP/IP Socket
N/A RN-174 RS-232 UART RX SignalUART RX Pin 3
UART RX Pin 3
Off-Board UART Transmission Signal
N/A RN-174 RS-232 UART TX Signal
UART TX Pin 2
DE0-Nano 40-Pin GPIO-0 Header
Pin 17 GPIO-12
Off-Board Electronics
Power Supply to Motor and Servo
8.4 NIMH Battery
RC Car Battery Compartment
VDC Pin GND Pin
RC Car Motors/Servo
VDC Pin GND Pin

12
FPGA-Board
DE0-Nano FPGA PWM Signal Generator
N/A DE0 Nano FPGA (PWM Module)
Steering PWM Motor PWM
DE0-Nano 40-Pin GPIO-1 Header
Pin 38 GPIO-31 Pin 37 GPIO-30
Off-‐Board PWM Signal to Motor/Servo
N/A DE0-‐Nano 40-‐Pin GPIO-‐1 Header
Pin 38 GPIO-31 Pin 37 GPIO-30
RC Car Signal Wires
White Wire on Motor & Servo Cable
9. Background Readings AD-Hoc Networks
● http://www.cse.fau.edu/~jie/research/publications/Publication_files/adhoc.pdf ● http://www.sciencedirect.com/science/article/pii/S157087050300043X
Pulse Width Modulation
● http://www.sciencedirect.com/science/article/pii/S1383762105001049 TCP/IP
● http://books.google.ca/books?hl=en&lr=&id=-btNds68w84C&oi=fnd&pg=PR15&dq=TCP/IP&ots=e0s-WSPtrs&sig=tB7DNFpANyX77cAmMg7N84wp9-Y
10. Test Plan
10.1 Software We will perform various tests on the iOS device to ensure the correct functionality of the iOS app. First we will configure the application to display information from the accelerometer in real-time. The next stage will be converting this data into one of the two commands that will control the vehicle’s steering. To test this aspect of the software, we will have the iOS device display the current command on its screen and watch it change in real-time as we tilt the device left and right. Then, we will configure the application to display whichever command (Forward_Mode, Reverse_Mode, Turn_Wheels_Right, and Turn_Wheels_Left) was sent last. To test the task which control the cars operation, we will set up defined duty cycles within the NIOS environment (for example, on the current 8 bit counter, the value 24 corresponds to a full duty cycle, 18 corresponds to a half duty cycle and 12 corresponds to a quarter duty cycle ). Using these pre-defined duty cycles, we will update the contents of the base address of the PWM generator. We will map out the output of the PWM module to output pin 17 of the GPIO_0 header. We will then able to verify the operation of the PWM by observing the wave it produced on the oscilloscope. The next step of our software test plan is to verify that the commands issued by the iOS device are received properly by the RS-232 interface module on the DE0-Nano. By writing a simple program to display the characters received to the NIOS console we can verify proper data transmission. Now that we have verified the software portion of our Design we will move onto the Final Integration Testing of our entire system.

13
10.2 Hardware To begin testing our hardware in our design we will conduct separate Unit Tests to verify that each individual component is functioning properly. The DE0 Nano FPGA Board can be tested by loading a demo program onto it to verify the proper functionality of the elements on the board. The Wi-Fi module will be tested using the program provided by Roving Networks called TerraTerm. This program will allow us to configure the module and then we will write a test program to display certain functionality such as blinking the built in LED’s on the Wi-Fi Module.The RC car will be tested by using the stock remote control to complete a test drive. We will then be using the DE0 Nano FPGA Board to simulate commands passed to the RC Car. This will be accomplished via a test program that will power the motors according to a strict path we will construct. Once the separate units are tested individually, we will start to interface various components and test them together (i.e. integration testing). To test whether the iOS device correctly passes commands to the Wi-Fi module, we will configure the RN-174 to have certain LEDS blink for certain commands. We will also test the RN-174 by having it echo the commands to a PC over RS-232. To test whether the Wi-Fi module correctly passes commands to the CPU, we can download a simple program to the module which makes the LEDs on the DE0 Nano board blink. We will test whether the FPGA can correctly operate the motor and steering servo based on a list of commands downloaded from a computer. For system testing, we will replace the laptop with the iOS Application and repeat the previous testing strategy. The car will be placed on top of a pedestal and a user will attempt to control the RC Car’s movement. The movement will be analyzed to ensure proper functionality of the steering mechanism and motor in proportion to the requested motion from the iOS application.
11. Results of Experiments and Characterization At this time, we have not conducted any experiments on our system, apart from an iOS app that we wrote to test the sensitivity and output of the accelerometer in both an iPhone and an iPad. The app generated the expected output and the accelerometer sensitivity appears to be adequate for our design. At this time, we have only tested the functionality of the iOS application and the PWM module. On the iOS application side of things, we wrote an application to test the sensitivity and output of the accelerometer in both an iPhone and an iPad. The app generated the expected output and the accelerometer sensitivity appears to be adequate for our design.
For the PWM, we wrote a basic task that sends different duty cycles to the PWM module. The output from the oscilloscope is what was expected from our calculations. The PWM also operates at the proper 1600 Hz frequency needed to interact with the car.
14
12. Integrated Circuit Design Proposal Due to a bug in the NiosII IDE that took 21 hours to identify, we have not begun the IC design process.
13. References --References: Multi_PWM from www.grigaitis.eu, green_leds.vhd
14. Appendix
14.1 Quick Start Manual 1)Turn the battery pack switches to “ON”. 2) Launch the app on the iOS device. 3) Press the “Connect” button on the iOS screen. 4)Turn the switch on Electric Speed Controller on the RC Car to “ON” (Light turns Green then Red when ready). 5) Pick a drive direction, either Forward or Reverse. 6) Make the car move by dragging the “Speed” slider away from the stopped position. 7) Steer the car by tilting the iOS device to the left or right. 8) Make the car stop by dragging the slider back to the stopped position, or by selecting a different drive direction.
14.2 Future Work Possible Extensions:
• The iOS device screen will display a live video feed that is sent from a front-facing digital camera, mounted on the car. (Note: We will need to account for the delay in the video feed somehow. Otherwise, we will be sending control signals to the car based on old info.)
• Use accelerometers on the DE0 Nano to detect collisions and stop the motor. • Proximity sensors, placed on four sides of the car, prevent the car from getting into collisions. When nearby
objects get too close, the CPU temporarily blocks the user from controlling the car and runs an obstacle-avoidance subroutine, causing the car to stop and then drive a few centimeters away from the obstacle.
• Mount the digital camera on a platform that can rotate through a 180-degree horizontal viewing range. The user can control this rotation using a button on the iOS device screen.
• Add a second rear-facing camera to the car and allow the user to switch between the front-facing and rear-facing video feeds.
Possible Simplifications:
• Instead of controlling the movement of the RC car over a Wi-Fi network using an iOS device, the user controls the car over a wireless ZigBee connection using a simple remote control comprised of two joysticks and a second DE0 Nano board (to interface the joysticks with the ZigBee modules).
• Only have one maximum speed that the car accelerates to and from. In this case, the Set Speed slider would become a switch (Go and Stop).
• Instead of having the front wheels (the ones that control the steering) turn left and right by a degree that is proportional to the rotation of the iOS device, the front wheels could simply have three positions: Straight, Turned_Right, and Turned_Left.

15
Looking Forward:
• Market our product as a toy. • Expand our controller system to RC Airplanes, Trains. • Adapt our iOS application to replace current remote technologies. Perhaps a universal household remote. • With the addition of a camera, our system could be used for survelance or in bomb squads, to go places
where human safety is perhaps an issue.
14.3 Hardware Documentation
Figure 2: Hardware Block Diagram
16
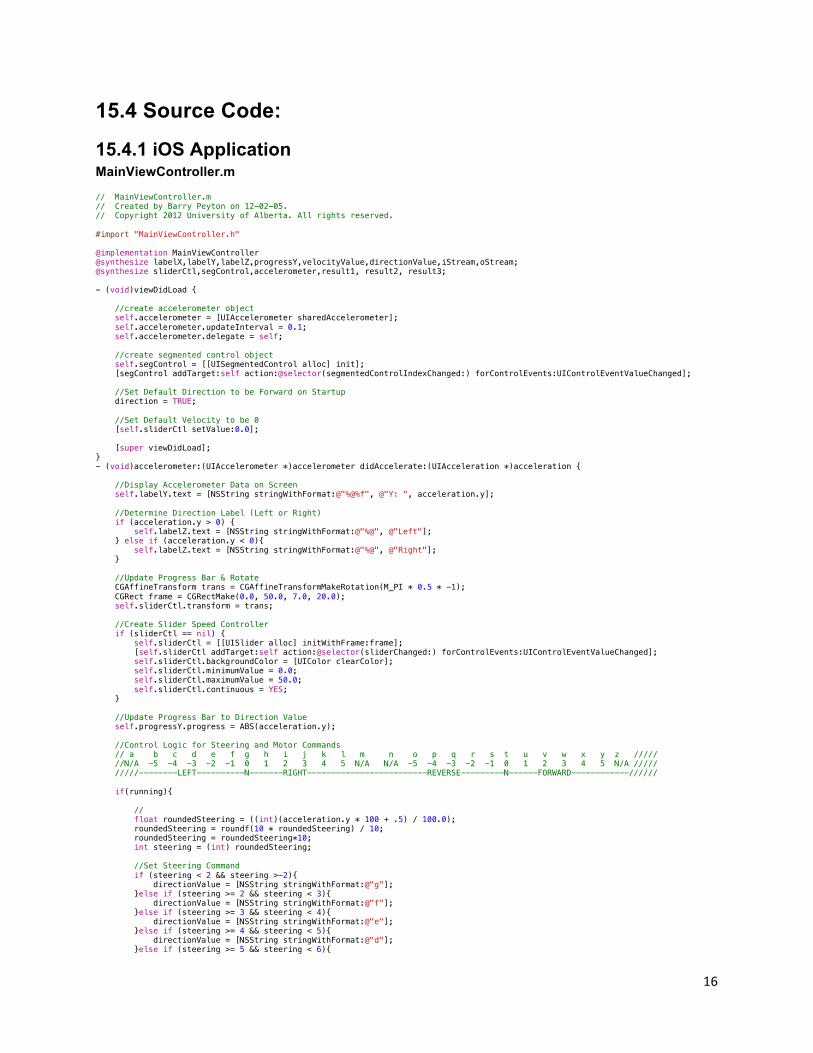
15.4 Source Code:
15.4.1 iOS Application MainViewController.m
// MainViewController.m // Created by Barry Peyton on 12-02-05. // Copyright 2012 University of Alberta. All rights reserved. #import "MainViewController.h" @implementation MainViewController @synthesize labelX,labelY,labelZ,progressY,velocityValue,directionValue,iStream,oStream; @synthesize sliderCtl,segControl,accelerometer,result1, result2, result3; - (void)viewDidLoad { //create accelerometer object self.accelerometer = [UIAccelerometer sharedAccelerometer]; self.accelerometer.updateInterval = 0.1; self.accelerometer.delegate = self; //create segmented control object self.segControl = [[UISegmentedControl alloc] init]; [segControl addTarget:self action:@selector(segmentedControlIndexChanged:) forControlEvents:UIControlEventValueChanged]; //Set Default Direction to be Forward on Startup direction = TRUE; //Set Default Velocity to be 0 [self.sliderCtl setValue:0.0]; [super viewDidLoad]; } - (void)accelerometer:(UIAccelerometer *)accelerometer didAccelerate:(UIAcceleration *)acceleration { //Display Accelerometer Data on Screen self.labelY.text = [NSString stringWithFormat:@"%@%f", @"Y: ", acceleration.y]; //Determine Direction Label (Left or Right) if (acceleration.y > 0) { self.labelZ.text = [NSString stringWithFormat:@"%@", @"Left"]; } else if (acceleration.y < 0){ self.labelZ.text = [NSString stringWithFormat:@"%@", @"Right"]; } //Update Progress Bar & Rotate CGAffineTransform trans = CGAffineTransformMakeRotation(M_PI * 0.5 * -1); CGRect frame = CGRectMake(0.0, 50.0, 7.0, 20.0); self.sliderCtl.transform = trans; //Create Slider Speed Controller if (sliderCtl == nil) { self.sliderCtl = [[UISlider alloc] initWithFrame:frame]; [self.sliderCtl addTarget:self action:@selector(sliderChanged:) forControlEvents:UIControlEventValueChanged]; self.sliderCtl.backgroundColor = [UIColor clearColor]; self.sliderCtl.minimumValue = 0.0; self.sliderCtl.maximumValue = 50.0; self.sliderCtl.continuous = YES; } //Update Progress Bar to Direction Value self.progressY.progress = ABS(acceleration.y); //Control Logic for Steering and Motor Commands // a b c d e f g h i j k l m n o p q r s t u v w x y z ///// //N/A -5 -4 -3 -2 -1 0 1 2 3 4 5 N/A N/A -5 -4 -3 -2 -1 0 1 2 3 4 5 N/A ///// /////--------LEFT----------N-------RIGHT-------------------------REVERSE---------N------FORWARD------------////// if(running){ // float roundedSteering = ((int)(acceleration.y * 100 + .5) / 100.0); roundedSteering = roundf(10 * roundedSteering) / 10; roundedSteering = roundedSteering*10; int steering = (int) roundedSteering; //Set Steering Command if (steering < 2 && steering >-2){ directionValue = [NSString stringWithFormat:@"g"]; }else if (steering >= 2 && steering < 3){ directionValue = [NSString stringWithFormat:@"f"]; }else if (steering >= 3 && steering < 4){ directionValue = [NSString stringWithFormat:@"e"]; }else if (steering >= 4 && steering < 5){ directionValue = [NSString stringWithFormat:@"d"]; }else if (steering >= 5 && steering < 6){

17
directionValue = [NSString stringWithFormat:@"c"]; }else if (steering >= 6 && steering < 7){ directionValue = [NSString stringWithFormat:@"b"]; }else if (steering <= -2 && steering > -3){ directionValue = [NSString stringWithFormat:@"h"]; }else if (steering <= -3 && steering > -4){ directionValue = [NSString stringWithFormat:@"i"]; }else if (steering <= -4 && steering > -5){ directionValue = [NSString stringWithFormat:@"j"]; }else if (steering <= -5 && steering > -6){ directionValue = [NSString stringWithFormat:@"k"]; }else if (steering <= -6 && steering > -7){ directionValue = [NSString stringWithFormat:@"l"]; } int velocity = self.sliderCtl.value + 0.5f; //Forward Operation if(direction){ if (velocity == 0){ //Send Motor Neutral velocityValue = [NSString stringWithFormat:@"t"]; }else if (velocity <= 10 && velocity > 0){ velocityValue = [NSString stringWithFormat:@"u"]; }else if (velocity > 10 && velocity <= 20){ velocityValue = [NSString stringWithFormat:@"v"]; }else if (velocity > 20 && velocity <= 30){ velocityValue = [NSString stringWithFormat:@"w"]; }else if (velocity > 30 && velocity <= 40){ velocityValue = [NSString stringWithFormat:@"x"]; }else if (velocity > 40 && velocity <= 50){ velocityValue = [NSString stringWithFormat:@"y"]; } }//Reverse Operation else if(!direction){ if (velocity == 0){ //Send Motor Neutral velocityValue = [NSString stringWithFormat:@"t"]; }else if (velocity <= 10 && velocity > 0){ velocityValue = [NSString stringWithFormat:@"s"]; }else if (velocity > 10 && velocity <= 20){ velocityValue = [NSString stringWithFormat:@"r"]; }else if (velocity > 20 && velocity <= 30){ velocityValue = [NSString stringWithFormat:@"q"]; }else if (velocity > 30 && velocity <= 40){ velocityValue = [NSString stringWithFormat:@"p"]; }else if (velocity > 40 && velocity <= 50){ velocityValue = [NSString stringWithFormat:@"o"]; } } //Send Command String via TCP Connection result1 = [self sendText:self withValue:@"^"]; NSLog(@"Result is:%@", result1); result2 = [self sendText:self withValue:directionValue]; NSLog(@"Result is:%@", result2); result3 = [self sendText:self withValue:velocityValue]; NSLog(@"Result is:%@", result3); } } - (void)sliderChanged:(id)sender{ //if slider value changes update label int velocity = self.sliderCtl.value + 0.5f; self.labelX.text = [NSString stringWithFormat:@"%@%d", @"Current Speed: ", velocity]; } -(void) segmentedControlIndexChanged:(id)sender{ //if segment control changes negate acceleration to invoke reverse self.sliderCtl.value = 0; int velocity = self.sliderCtl.value; self.labelX.text = [NSString stringWithFormat:@"%@%d", @"Current Speed: ", velocity]; switch (((UISegmentedControl*) sender).selectedSegmentIndex) { case 0: NSLog(@"Segment Value is Forward"); direction = TRUE; break; case 1: NSLog(@"Segment Value is Reverse"); direction = FALSE; //Account for Switching into Reverse with ESC issue we resolved //Send Command String via TCP Connection result1 = [self sendText:self withValue:@"^"]; NSLog(@"Result is:%@", result1); result2 = [self sendText:self withValue:directionValue]; NSLog(@"Result is:%@", result2); result3 = [self sendText:self withValue:@"s"]; NSLog(@"Result is:%@", result3); //Send Command String via TCP Connection result1 = [self sendText:self withValue:@"^"];

18
NSLog(@"Result is:%@", result1); result2 = [self sendText:self withValue:directionValue]; NSLog(@"Result is:%@", result2); result3 = [self sendText:self withValue:@"t"]; NSLog(@"Result is:%@", result3); break; default: break; } } -(void) connect { //Close TCP/IP Connection //Create read & write stream and set IP Address and Port parameters CFReadStreamRef readStream = NULL; CFWriteStreamRef writeStream = NULL; CFStringRef host = CFSTR("169.254.1.1"); UInt32 port = 2000; //Create Socket Connection with given HOST Address CFStreamCreatePairWithSocketToHost(kCFAllocatorDefault, host, port, &readStream, &writeStream); if (readStream && writeStream) { CFReadStreamSetProperty(readStream, kCFStreamPropertyShouldCloseNativeSocket, kCFBooleanTrue); CFWriteStreamSetProperty(writeStream, kCFStreamPropertyShouldCloseNativeSocket, kCFBooleanTrue); iStream = (__bridge NSInputStream *)readStream; [iStream setDelegate:self]; [iStream scheduleInRunLoop:[NSRunLoop currentRunLoop] forMode:NSDefaultRunLoopMode]; [iStream open]; oStream = (__bridge NSOutputStream *)writeStream; [oStream setDelegate:self]; [oStream scheduleInRunLoop:[NSRunLoop currentRunLoop] forMode:NSDefaultRunLoopMode]; [oStream open]; } if (readStream) CFRelease(readStream); if (writeStream) CFRelease(writeStream); //Start sending data running = TRUE; } -(void) disconnect { //Close TCP/IP Connection [iStream close]; [oStream close]; [iStream removeFromRunLoop:[NSRunLoop currentRunLoop] forMode:NSDefaultRunLoopMode]; [oStream removeFromRunLoop:[NSRunLoop currentRunLoop] forMode:NSDefaultRunLoopMode]; [iStream setDelegate:nil]; [oStream setDelegate:nil]; iStream = nil; oStream = nil; //Stop Sending Data running = FALSE; } - (IBAction)connectCommand:(id)sender { if( iStream != nil ) return; [self connect]; } - (IBAction) disconnectCommand: (id) sender { if( iStream == nil ) return; [self disconnect]; } - (NSString *)sendText:(id)sender withValue: (NSString *) value { //Encode Data to be sent NSData * dataToSend = [value dataUsingEncoding:NSASCIIStringEncoding]; //If an output stream exists send data until the value is empty if (oStream) { int remainingToWrite = [dataToSend length]; NSLog(@"Length of data: %d", remainingToWrite); void * marker = (void *)[dataToSend bytes]; while (0 < remainingToWrite) { int actuallyWritten = 0; actuallyWritten = [oStream write:marker maxLength:remainingToWrite]; remainingToWrite -= actuallyWritten; marker += actuallyWritten; } } return value; } - (void)stream:(NSStream *)theStream handleEvent:(NSStreamEvent)streamEvent { //Handle Events in regards to Stream Issues NSString *io;

19
if (theStream == iStream) io = @">>"; else io = @"<<"; NSString *event; switch (streamEvent) { case NSStreamEventNone: event = @"NSStreamEventNone - Can not connect to the host!"; break; case NSStreamEventOpenCompleted: event = @"NSStreamEventOpenCompleted"; break; case NSStreamEventHasBytesAvailable: event = @"NSStreamEventHasBytesAvailable"; if (theStream == iStream) { //read data uint8_t buffer[1024]; int len; while ([iStream hasBytesAvailable]) { len = [iStream read:buffer maxLength:sizeof(buffer)]; if (len > 0) { NSString *input = [[NSString alloc] initWithBytes:buffer length:len encoding:NSASCIIStringEncoding]; if (nil != input) { //do something with data NSLog(@"%@",input); } } } } break; case NSStreamEventHasSpaceAvailable: event = @"NSStreamEventHasSpaceAvailable"; break; case NSStreamEventErrorOccurred: event = @"NSStreamEventErrorOccurred"; break; case NSStreamEventEndEncountered: event = @"NSStreamEventEndEncountered"; [self disconnect]; break; default: event = @"** Unknown"; } NSLog(@"%@ : %@", io, event); } - (BOOL)shouldAutorotateToInterfaceOrientation:(UIInterfaceOrientation)interfaceOrientation { //allow application to not rotate and be locked in one orientation if (interfaceOrientation == UIInterfaceOrientationLandscapeRight){ return YES; }else { return NO; } } - (void)didReceiveMemoryWarning { [super didReceiveMemoryWarning]; } - (void)viewDidUnload { self.labelX = nil; self.labelY = nil; self.labelZ = nil; self.progressY = nil; self.sliderCtl = nil; self.segControl = nil; self.accelerometer = nil; } @end

20
MainViewController.h
// MainViewController.h // Created by Barry Peyton on 12-02-05. // Copyright 2012 University of Alberta. All rights reserved. #import <UIKit/UIKit.h> @interface MainViewController : UIViewController <UIAccelerometerDelegate, NSStreamDelegate> { IBOutlet UILabel *labelX; IBOutlet UILabel *labelY; IBOutlet UILabel *labelZ; IBOutlet UIProgressView *progressY; IBOutlet UISlider *sliderCtl; IBOutlet UISegmentedControl *segControl; UIAccelerometer *accelerometer; NSInputStream *iStream; NSOutputStream *oStream; NSString *velocityValue; NSString *directionValue; NSString *result1; NSString *result2; NSString *result3; BOOL running; BOOL direction; } //Components used to implement the .XIB file for the interface @property (nonatomic, strong) IBOutlet UILabel *labelX; @property (nonatomic, strong) IBOutlet UILabel *labelY; @property (nonatomic, strong) IBOutlet UILabel *labelZ; @property (nonatomic, strong) IBOutlet UIProgressView *progressY; @property (nonatomic, strong) IBOutlet UISlider *sliderCtl; @property (nonatomic, strong) IBOutlet UISegmentedControl *segControl; @property (nonatomic, strong) UIAccelerometer *accelerometer; @property (nonatomic, strong) NSString *velocityValue; @property (nonatomic, strong) NSString *directionValue; @property (nonatomic, strong) NSString *result1; @property (nonatomic, strong) NSString *result2; @property (nonatomic, strong) NSString *result3; @property (nonatomic, strong) NSInputStream *iStream; @property (nonatomic, strong) NSOutputStream *oStream; - (IBAction) connectCommand: (id)sender; - (NSString *)sendText:(id)sender withValue: (NSString *) value; - (IBAction) disconnectCommand: (id) sender; -(IBAction) sliderChanged:(id) sender; -(IBAction) segmentedControlIndexChanged:(id) sender; @end

21
15.4.2 PWM Module --Editor: Robert Hood
--Group: iOS Remote Control Car
--References: Multi_PWM from www.grigaitis.eu, green_leds.vhd
library altera;
use altera.altera_europa_support_lib.all;
library ieee;
use ieee.std_logic_1164.all;
use ieee.std_logic_arith.all;
use ieee.std_logic_unsigned.all;
entity pwm is
port(
csi_myclock_clk : in std_logic; --clk is standard for both PWM and Avalon memory slave
csi_myclock_reset : in std_logic; --clk reset
avs_pwm_write_n : in std_logic; --write
avs_pwm_chipselect : in std_logic; -- chip select
avs_pwm_address : in std_logic_vector(1 downto 0); --address
avs_pwm_readdata : out std_logic_vector(15 downto 0); --Needed for the Avalon interface
avs_pwm_writedata : in std_logic_vector(15 downto 0); -- Data to be input represents the duty cycle
coe_pwm_output_export : out std_logic-- Ouput either 1 (high) or 0 (low)
);
end entity;
architecture pwm_control of pwm is

22
signal pwm_signal : std_logic_vector(19 downto 0); --represents the duty cycle
signal counter : std_logic_vector(19 downto 0) := (others => '0'); -- 20 bit counter
signal read_mux_out :std_logic_vector(19 downto 0);
--Following was manipulated from the green_leds.vhd generated by the SOPC builder
begin
--Create a 20 bit vector from the 16 bit input vector
read_mux_out <= A_REP(to_std_logic((((std_logic_vector'("000000000000000000000000000000") & (avs_pwm_address)) = std_logic_vector'("00000000000000000000000000000000")))), 20) AND pwm_signal;
other_proc:process(csi_myclock_clk,csi_myclock_reset)
begin
--if reset than set the duty cycle to '0'
if csi_myclock_reset= '1' then
pwm_signal <= (others => '0');
--If reset is not set to '1' and chipselect, write_n and address are the correct values
-- Then set the duty cycle to the value that was input by the user
elsif csi_myclock_clk'event and csi_myclock_clk = '1' then
if std_logic'(((avs_pwm_chipselect AND NOT avs_pwm_write_n) AND to_std_logic((((std_logic_vector'("000000000000000000000000000000") & (avs_pwm_address)) = std_logic_vector'("00000000000000000000000000000000")))))) = '1' then
pwm_signal <= avs_pwm_writedata(15 DOWNTO 0) & "0000";
end if;
end if;
end process;

23
--end of code manipulated from green_leds.vhd
clk_proc:process(csi_myclock_clk)
--------Increment the counter
begin
if csi_myclock_reset='1' then
counter <= (others => '0');
--At every rising clock edge, increment the counter
elsif rising_edge(csi_myclock_clk) then
counter <= counter +1;
end if;
--Note: In order to get a frequency of 50Hz, which is what the pwm_output to our car needs to be, both for
--steering and motor control, since we use a 50MHz clock, there had to 1,000,000 clock ticks per period.
--In order to get the required 1,000,000 clock ticks we needed to use a 20 bit counter, however a full
--20 bit counter would count up to 2,097,152, and since we only wanted it to count to 1,000,000 that is why
--you see "11110100001001000000" = 1,000,000 , as opposed to all "1's". This gives us
--the proper output frequency of 50Hz.
if(counter = "11110100001001000000") then
counter <= (others => '0');
end if;
--For as long as the "pwm_signal" value is greater than 0, and greater than the "counter" value,
--set the "pwm_output" to 1(high)
--Else set "pwm_output" it to 0(low)

24
if ((pwm_signal>counter) and (pwm_signal>0))
then
coe_pwm_output_export<='1';
else coe_pwm_output_export<='0';
end if;
end process clk_proc;
end pwm_control;
--Editor: Robert Hood
--Group: iOS Remote Control Car
--References: Multi_PWM from www.grigaitis.eu, green_leds.vhd

25
15.4.3 RC Car Controller
/*************************************************************************
/*
* Title: RC Car Controller
* Authors: Robert Hood, Max Marcus, and Barry Peyton
* Course: CMPE 450 (CmpE Nano Design Project)
* Date: April 13, 2012
*
**************************************************************************/
#include <stdio.h>
#include <string.h>
#include <stdlib.h>
#include <math.h>
#include "includes.h"
/* Definition of Task Stacks */
#define TASK_STACKSIZE 2048
OS_STK task1_stk[TASK_STACKSIZE];
OS_STK task2_stk[TASK_STACKSIZE];
OS_STK task3_stk[TASK_STACKSIZE];
/* Definition of Task Priorities */
#define TASK1_PRIORITY 1
#define TASK2_PRIORITY 3
#define TASK3_PRIORITY 2
/* Base Addresses of LEDS and RS-‐232 */
#define LEDS (char * ) GREEN_LEDS_BASE
#define RS232 (char *) "/dev/RS_232_UART"
/*Car Steering Variables*/
#define STEERING_BASE (char*)STEERING_PWM_BASE

26
#define CAR_STEERING_HALF_DUTY_CYCLE 18
/* Motor controls*/
#define MOTOR_BASE (char*)MOTOR_PWM_BASE
#define MOTOR_HALF_DUTY_CYCLE 18
/*Message Queue Instantiation*/
#define Q_SIZE 15
OS_EVENT* Cmd_Q;
void* StoarageBaseAddress[Q_SIZE];
#define BUFFER_SIZE 3
FILE* RS232_fp;
/*
* task1 simply blinks the 8 green LEDs once per second. This lets us know that the
* application is running on the FPGA.
*/
void task1(void* pdata)
{
char flip = 0;
while (1)
{
if(flip){
*LEDS = 0xff;
} else {
*LEDS = 0x00;
}
flip = ~flip;
OSTimeDlyHMSM(0, 0, 1, 0);
}
}

27
/*
* task2 uses fgets() to collect chars as they arrive at the RS-‐232 UART core. It then checks
* to make sure the three characters are valid command characters and if so, puts them into
* the string rx_msg_str. A valid sequence of command characters must consist of:
*
* 1) The '^' ASCII char
* 2) One ASCII char between 'b' and 'l'
* 3) One ASCII char between 'o' and 'y'
*
* If rx_msg_char is not loaded with a valid sequence by fgets(), the sequence is discarded and
* the loop begins again. If it is valid, it is posted the the Message Queue.
*/
void task2(void* pdata)
{
char* rx_msg_str = malloc(sizeof(char) * BUFFER_SIZE + 1);
char* tx_msg_str = malloc(sizeof(char) * BUFFER_SIZE + 1);
int i=0;
int j=0;
while (1){
if(RS232_fp != NULL){
memset(rx_msg_str, '\0', BUFFER_SIZE + 1);
memset(tx_msg_str, '\0', BUFFER_SIZE + 1);
// Gets the command chars from the RS_232 file stream and stores them in rx_msg_str
fgets(rx_msg_str, BUFFER_SIZE + 1, RS232_fp);
// Ensures that all chars are of the correct type and then sorts the chars into
// the correct order to be read by task3.
if( (rx_msg_str[0] == '^' || rx_msg_str[1] == '^' || rx_msg_str[2] == '^') &&
(((rx_msg_str[0] >= 'b') && (rx_msg_str[0] <= 'l')) || ((rx_msg_str[1] >= 'b') && (rx_msg_str[1] <= 'l')) || ((rx_msg_str[2] >= 'b') && (rx_msg_str[2] <= 'l'))) &&
(((rx_msg_str[0] >= 'o') && (rx_msg_str[0] <= 'y')) || ((rx_msg_str[1] >= 'o') && (rx_msg_str[1] <= 'y')) || ((rx_msg_str[2] >= 'o') && (rx_msg_str[2] <= 'y'))))

28
{
tx_msg_str[0] = '^';
for(i=0; i<3; i++)
{
if( (rx_msg_str[i] >= 'b') && (rx_msg_str[i] <= 'l'))
tx_msg_str[1] = rx_msg_str[i];
}
for(j=0; j<3; j++)
{
if( (rx_msg_str[j] >= 'o') && (rx_msg_str[j] <= 'y'))
tx_msg_str[2] = rx_msg_str[j];
}
// Posts the sorted command sequence to Cmd_Q
OSQPost(Cmd_Q, tx_msg_str);
}
}
OSTimeDlyHMSM(0, 0, 0.05, 0);
}
}
/*
* task3 pends command sequences from the Message Queue (cmd_Q) and sends them to the PWM modules,
* after converting them to the correct numeric constants for the appropriate duty cycles.
*/
// a b c d e f g h i j k l m n o p q r s t u v w x y z
// -‐6 -‐5 -‐4 -‐3 -‐2 -‐1 0 1 2 3 4 5 6 -‐6 -‐5 -‐4 -‐3 -‐2 -‐1 0 1 2 3 4 5 6
void task3(void* pdata)

29
{
char* rx_msg_str = malloc(sizeof(char) * BUFFER_SIZE + 1);
memset(rx_msg_str, '\0', BUFFER_SIZE + 1);
INT8U err_code;
char steer_check=CAR_STEERING_HALF_DUTY_CYCLE;
char motor_check=MOTOR_HALF_DUTY_CYCLE;
while(1)
{
// Posts the command sequence from Cmd_Q
rx_msg_str = (char *) OSQPend(Cmd_Q, 0, &err_code);
// Conversion to appropriate numeric constants for PWM duty cycles
steer_check = CAR_STEERING_HALF_DUTY_CYCLE + rx_msg_str[1] -‐ 'g';
motor_check = MOTOR_HALF_DUTY_CYCLE + rx_msg_str[2] -‐ 't';
// Sends the duty cycles to the PWM_Steering and PWM_Motor modules.
*STEERING_BASE = steer_check;
*MOTOR_BASE = motor_check;
OSTimeDlyHMSM(0, 0, 0.05, 0);
}
}
/* The main function creates two task and starts multi-‐tasking */
int main(void)
{
/* Instantiation of Message Queue */
Cmd_Q = OSQCreate(&StoarageBaseAddress[0], Q_SIZE);
/* Creates the three tasks */

30
OSTaskCreateExt(task1,
NULL,
(void *)&task1_stk[TASK_STACKSIZE-‐1],
TASK1_PRIORITY,
TASK1_PRIORITY,
task1_stk,
TASK_STACKSIZE,
NULL,
0);
OSTaskCreateExt(task2,
NULL,
(void *)&task2_stk[TASK_STACKSIZE-‐1],
TASK2_PRIORITY,
TASK2_PRIORITY,
task2_stk,
TASK_STACKSIZE,
NULL,
0);
OSTaskCreateExt(task3,
NULL,
(void *)&task3_stk[TASK_STACKSIZE-‐1],
TASK3_PRIORITY,
TASK3_PRIORITY,
task3_stk,
TASK_STACKSIZE,
NULL,
0);
RS232_fp = fopen(RS232, "r"); // The file pointer to the input stream from the RS-‐232 UART
OSStart(); // Starts the tasks
return 0;
}
Related Documents


![IT331 Network Development Capstone Project [Onsite]thespringergroup.yolasite.com/resources/IT331_Appendix_A.pdf · Network Development Capstone Project Appendix A—Capstone Project](https://static.cupdf.com/doc/110x72/5aa073e07f8b9a62178e2123/it331-network-development-capstone-project-onsite-development-capstone-project.jpg)