Cloudera Manager 7.5.4 Cloudera Navigator Encrypt Date published: 2020-11-30 Date modified: 2022-01-12 https://docs.cloudera.com/

Welcome message from author
This document is posted to help you gain knowledge. Please leave a comment to let me know what you think about it! Share it to your friends and learn new things together.
Transcript

Cloudera Manager 7.5.4
Cloudera Navigator EncryptDate published: 2020-11-30Date modified: 2022-01-12
https://docs.cloudera.com/

Legal Notice
© Cloudera Inc. 2022. All rights reserved.
The documentation is and contains Cloudera proprietary information protected by copyright and other intellectual propertyrights. No license under copyright or any other intellectual property right is granted herein.
Unless otherwise noted, scripts and sample code are licensed under the Apache License, Version 2.0.
Copyright information for Cloudera software may be found within the documentation accompanying each component in aparticular release.
Cloudera software includes software from various open source or other third party projects, and may be released under theApache Software License 2.0 (“ASLv2”), the Affero General Public License version 3 (AGPLv3), or other license terms.Other software included may be released under the terms of alternative open source licenses. Please review the license andnotice files accompanying the software for additional licensing information.
Please visit the Cloudera software product page for more information on Cloudera software. For more information onCloudera support services, please visit either the Support or Sales page. Feel free to contact us directly to discuss yourspecific needs.
Cloudera reserves the right to change any products at any time, and without notice. Cloudera assumes no responsibility norliability arising from the use of products, except as expressly agreed to in writing by Cloudera.
Cloudera, Cloudera Altus, HUE, Impala, Cloudera Impala, and other Cloudera marks are registered or unregisteredtrademarks in the United States and other countries. All other trademarks are the property of their respective owners.
Disclaimer: EXCEPT AS EXPRESSLY PROVIDED IN A WRITTEN AGREEMENT WITH CLOUDERA,CLOUDERA DOES NOT MAKE NOR GIVE ANY REPRESENTATION, WARRANTY, NOR COVENANT OFANY KIND, WHETHER EXPRESS OR IMPLIED, IN CONNECTION WITH CLOUDERA TECHNOLOGY ORRELATED SUPPORT PROVIDED IN CONNECTION THEREWITH. CLOUDERA DOES NOT WARRANT THATCLOUDERA PRODUCTS NOR SOFTWARE WILL OPERATE UNINTERRUPTED NOR THAT IT WILL BEFREE FROM DEFECTS NOR ERRORS, THAT IT WILL PROTECT YOUR DATA FROM LOSS, CORRUPTIONNOR UNAVAILABILITY, NOR THAT IT WILL MEET ALL OF CUSTOMER’S BUSINESS REQUIREMENTS.WITHOUT LIMITING THE FOREGOING, AND TO THE MAXIMUM EXTENT PERMITTED BY APPLICABLELAW, CLOUDERA EXPRESSLY DISCLAIMS ANY AND ALL IMPLIED WARRANTIES, INCLUDING, BUT NOTLIMITED TO IMPLIED WARRANTIES OF MERCHANTABILITY, QUALITY, NON-INFRINGEMENT, TITLE, ANDFITNESS FOR A PARTICULAR PURPOSE AND ANY REPRESENTATION, WARRANTY, OR COVENANT BASEDON COURSE OF DEALING OR USAGE IN TRADE.

Cloudera Manager | Contents | iii
Contents
Cloudera Navigator Encrypt Overview................................................................. 5Process-Based Access Control List......................................................................................................................5Encryption Key Storage and Management.......................................................................................................... 7
Registering Cloudera Navigator Encrypt with Key Trustee Server....................8Prerequisites.......................................................................................................................................................... 8Registering with Key Trustee Server...................................................................................................................8
Preparing for Encryption Using Cloudera Navigator Encrypt..........................12Navigator Encrypt Commands........................................................................................................................... 12Preparing for Encryption.................................................................................................................................... 12Block-Level Encryption with dm-crypt............................................................................................................. 13
Block-Level Encryption with a Loop Device........................................................................................ 14Navigator Encrypt and Device UUIDs.............................................................................................................. 15Pass-through Mount Options for navencrypt-prepare............................................................................ 16
Encrypting and Decrypting Data Using Cloudera Navigator Encrypt..............16Before You Begin...............................................................................................................................................17Encrypting Data.................................................................................................................................................. 17Decrypting Data.................................................................................................................................................. 18
Converting from Device Names to UUIDs for Encrypted Devices.................... 19Preparing for UUID Conversion........................................................................................................................ 19Converting a Single Device............................................................................................................................... 20Converting All Available Devices..................................................................................................................... 20Finalizing the Conversion...................................................................................................................................21Rolling Back the UUID Conversion.................................................................................................................. 22
Navigator Encrypt Access Control List............................................................... 22Managing the Access Control List.....................................................................................................................22ACL Profile Rules.............................................................................................................................................. 26
Maintaining Cloudera Navigator Encrypt...........................................................27Manually Backing Up Navigator Encrypt......................................................................................................... 27Validating Navigator Encrypt Configuration..................................................................................................... 28Restoring Mount Encryption Keys (MEKs) and Control File...........................................................................28Access Modes..................................................................................................................................................... 29Changing and Verifying the Master Key...........................................................................................................29Listing Categories............................................................................................................................................... 30Updating ACL Fingerprints................................................................................................................................30Managing Mount Points..................................................................................................................................... 31Navigator Encrypt Kernel Module Setup...........................................................................................................32Navigator Encrypt Configuration Directory Structure.......................................................................................32

Collecting Navigator Encrypt Environment Information...................................................................................33Upgrading Navigator Encrypt Hosts.................................................................................................................. 33

Cloudera Manager Cloudera Navigator Encrypt Overview
Cloudera Navigator Encrypt Overview
Cloudera Navigator Encrypt transparently encrypts and secures data at rest without requiring changes to yourapplications, and ensures minimal performance lag in the encryption or decryption process. Advanced keymanagement with Cloudera Navigator Key Trustee Server and process-based access controls in Navigator Encryptenable organizations to meet compliance regulations and prevent unauthorized parties or malicious actors fromgaining access to encrypted data.
Navigator Encrypt features include:
• Automatic key management: Encryption keys are stored in Key Trustee Server to separate the keys from theencrypted data. If the encrypted data is compromised, it is useless without the encryption key.
• Transparent encryption and decryption: Protected data is encrypted and decrypted seamlessly, with minimalperformance impact and no modification to the software accessing the data.
• Process-based access controls: Processes are authorized individually to access encrypted data. If the process ismodified in any way, access is denied, preventing malicious users from using customized application binaries tobypass the access control.
• Performance: Navigator Encrypt supports the Intel AES-NI cryptographic accelerator for enhanced performancein the encryption and decryption process.
• Compliance: Navigator Encrypt enables you to comply with requirements for HIPAA-HITECH, PCI-DSS,FISMA, EU Data Protection Directive, and other data security regulations.
• Multi-distribution support: Navigator Encrypt supports Debian, Ubuntu, RHEL, CentOS, and SLES.• Simple installation: Navigator Encrypt is distributed as RPM and DEB packages, as well as SLES KMPs.• Multiple mountpoints: You can separate data into different mountpoints, each with its own encryption key.
Navigator Encrypt can be used with many kinds of data, including (but not limited to):
• Databases• Temporary files (YARN containers, spill files, and so on)• Log files• Data directories• Configuration files
Navigator Encrypt uses dmcrypt for its underlying cryptographic operations. Navigator Encrypt uses severaldifferent encryption keys:
• Master Key: The master key can be a single passphrase, dual passphrase, or RSA key file. The master key isstored in Key Trustee Server and cached locally. This key is used when registering with a Key Trustee Server andwhen performing administrative functions on Navigator Encrypt clients.
• Mount Encryption Key (MEK): This key is generated by Navigator Encrypt using openssl rand by default,but it can alternatively use /dev/urandom. This key is generated when preparing a new mount point. Eachmount point has its own MEK. This key is uploaded to Key Trustee Server.
• dmcrypt Device Encryption Key (DEK): This key is not managed by Navigator Encrypt or Key Trustee Server.It is managed locally by dmcrypt and stored in the header of the device.
Related InformationInstalling Cloudera Navigator Encrypt
Process-Based Access Control ListThe access control list (ACL) controls access to specified data. The ACL uses a process fingerprint, which is theSHA256 hash of the process binary, for authentication. You can create rules to allow a process to access specific filesor directories. The ACL file is encrypted with the client master key and stored locally for quick access and updates.
5

Cloudera Manager Cloudera Navigator Encrypt Overview
Here is an example rule:
"ALLOW @mydata * /usr/bin/myapp"
This rule allows the /usr/bin/myapp process to access any encrypted path (*) that was encrypted under thecategory @mydata.
Note: You have the option of using wildcard characters when defining process-based ACLs. The followingexample shows valid wildcard definitions:
"ALLOW @* * *""ALLOW @* path/* /path/to/process"
Navigator Encrypt uses a kernel module that intercepts any input/output (I/O) sent to an encrypted and managed path.The Linux module file name is navencryptfs.ko and it resides in the kernel stack, injecting file system hooks. Italso authenticates and authorizes processes and caches authentication results for increased performance.
Because the kernel module intercepts and does not modify I/O, it supports any file system (ext3, ext4, xfs, and soon).
The following diagram shows /usr/bin/myapp sending an open() call that is intercepted by navencrypt-kernel-module as an open hook:
The kernel module calculates the process fingerprint. If the authentication cache already has the fingerprint, theprocess is allowed to access the data. If the fingerprint is not in the cache, the fingerprint is checked against the ACL.If the ACL grants access, the fingerprint is added to the authentication cache, and the process is permitted to accessthe data.
When you add an ACL rule, you are prompted for the master key. If the rule is accepted, the ACL rules file is updatedas well as the navencrypt-kernel-module ACL cache.
The next diagram illustrates different aspects of Navigator Encrypt:
6

Cloudera Manager Cloudera Navigator Encrypt Overview
The user adds a rule to allow /usr/bin/myapp to access the encrypted data in the category @mylogs, and addsanother rule to allow /usr/bin/myapp to access encrypted data in the category @mydata. These two rules areloaded into the navencrypt-kernel-module cache after restarting the kernel module.
The /mydata directory is encrypted under the @mydata category and /mylogs is encrypted under the @mylogscategory using dmcrypt (block device encryption).
When myapp tries to issue I/O to an encrypted directory, the kernel module calculates the fingerprint of the process(/usr/bin/myapp) and compares it with the list of authorized fingerprints in the cache.
Encryption Key Storage and ManagementThe master key and mount encryption keys are securely deposited in Key Trustee Server. One MEK per mount pointis stored locally for offline recovery and rapid access. The locally-stored MEKs are encrypted with the master key.
The connection between Navigator Encrypt and Key Trustee Server is secured with TLS/SSL certificates.
The following diagram demonstrates the communication process between Navigator Encrypt and Key Trustee Server:
The master key is encrypted with a local GPG key. Before being stored in the Key Trustee Server database, it isencrypted again with the Key Trustee Server GPG key. When the master key is needed to perform a NavigatorEncrypt operation, Key Trustee Server decrypts the stored key with its server GPG key and sends it back to the client(in this case, Navigator Encrypt), which decrypts the deposit with the local GPG key.
All communication occurs over TLS-encrypted connections.
7
Cloudera Manager Registering Cloudera Navigator Encrypt with Key Trustee Server
Registering Cloudera Navigator Encrypt with Key TrusteeServer
Prerequisites
Functioning Key Trustee Server
After installing Navigator Encrypt on a host, you must register the host with Key Trustee Server. If you have not yetinstalled Key Trustee Server, see Installing Ranger KMS backed with a Key Trustee Server and HA.
Key Trustee Server Organization
To register with Key Trustee Server, you must have an existing organization. See Managing Key Trustee ServerOrganizations for information about creating and viewing organizations in Key Trustee Server.
Master Password
The Master Key is the primary Navigator Encrypt administrator access code and is configured by the NavigatorEncrypt administrator during installation. The Master Key can take any one of three different forms:
• If you choose a passphrase (single), it must be between 15 and 32 characters long.• If you choose passphrase (dual), both must be between 15 and 32 characters long.• If you choose the RSA option, enter a path to the RSA key file, and if it has RSA passphrase, enter it for this
private key.
Warning: It is extremely important that you keep your master password secret and safe. In the event thatyou lose your master password, you will never be able to recover it, leaving your encrypted data irretrievablylocked away.
Registering with Key Trustee ServerAfter installing Navigator Encrypt on a host, you must register the host with Key Trustee Server in order to encryptand decrypt data. The following section lists the command options for registering your Navigator Encrypt client.
Note: Do not run Navigator Encrypt commands with the screen utility.
If the TLS certificate is signed by an internal CA that is not publicly recognized, then you must add the rootcertificate to the host certificate truststore of each Navigator Encrypt client.
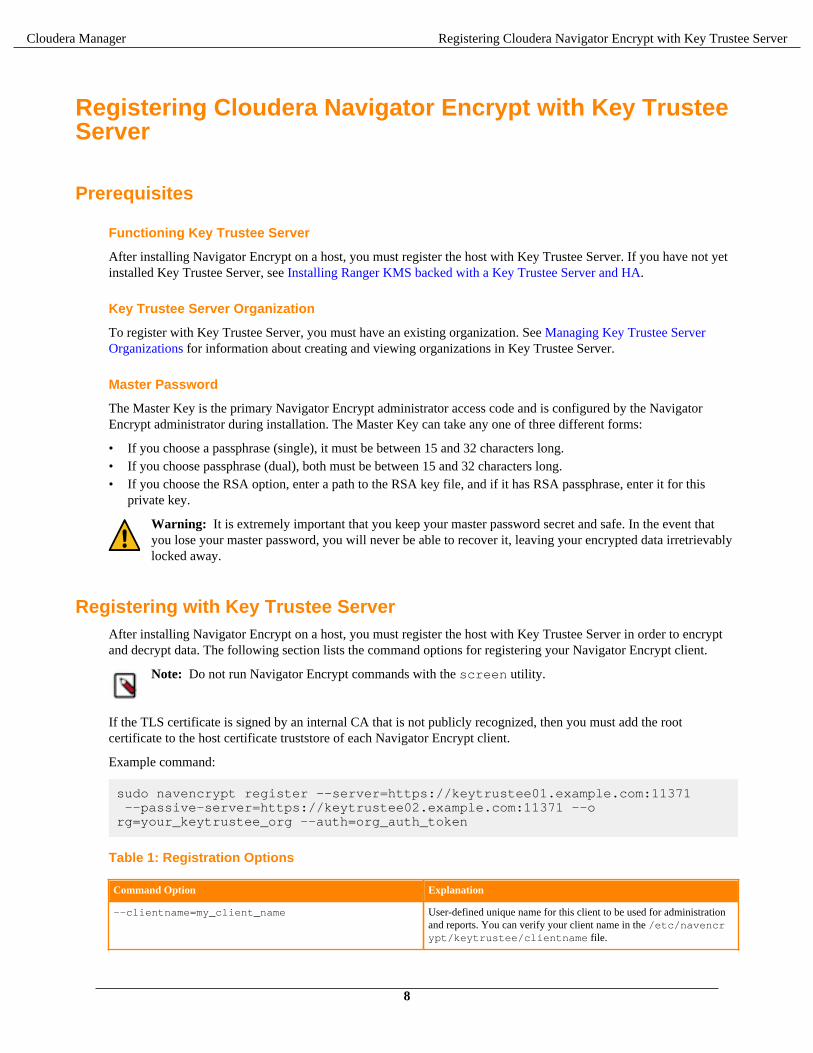
Example command:
sudo navencrypt register --server=https://keytrustee01.example.com:11371 --passive-server=https://keytrustee02.example.com:11371 --org=your_keytrustee_org --auth=org_auth_token
Table 1: Registration Options
Command Option Explanation
--clientname=my_client_name User-defined unique name for this client to be used for administrationand reports. You can verify your client name in the /etc/navencrypt/keytrustee/clientname file.
8

Cloudera Manager Registering Cloudera Navigator Encrypt with Key Trustee Server
Command Option Explanation
--server=https://keytrustee01.example.com:11371 Target Active Key Trustee Server for key storage. Replacekeytrustee01.example.com:11371 with the hostname and port of theActive Key Trustee Server. The default port is 11371.
--passive-server=https://keytrustee02.example.com:11371
Target Passive Key Trustee Server for key storage. Replacekeytrustee02.example.com:11371 with the hostname and port of thePassive Key Trustee Server. The default port is 11371.
--org=your_keytrustee_org Key Trustee organization name configured by the Key Trustee Serveradministrator
--auth=org_auth_token Organization authorization token, a pre-shared secret by the NavigatorKey Trustee Server administrator
--skip-ssl-check Skip SSL certificate verification. Use with self-signed certificates onthe Navigator Key Trustee Server
--trustee Add trustees for retrieval of the master key
--votes Configure voting policy for trustees
--recoverable Master Key will be uploaded without encrypting it with your localGPG Navigator Key Trustee
--scheme "<scheme>" Key Trustee Server scheme that Navigator Encrypt uses for public keyoperations. Specify "http" or "https".
--port Key Trustee Server port that Navigator Encrypt uses for public keyoperations.
Registering with Previous Versions of Key Trustee Server
By default, new installations of Navigator Key Trustee Server 5.4.0 use a single HTTPS port for key storage andpublic key operations. Previous versions and upgrades use separate ports for key storage and public key operations.For backward compatibility, Navigator Encrypt 3.7.0 introduces the --scheme and --port parameters for thenavencrypt register command.
For example, to register a version 3.7.0 Navigator Encrypt client with a version 3.8.0 Key Trustee Server usingHTTPS over port 443 for key storage and HTTP over port 80 for public key operations, run the following command:
sudo navencrypt register --server=https://keytrustee.example.com:443 --org=key_trustee_org --auth=auth_token --scheme "http" --port 80
Navigator Encrypt versions lower than 3.7.0 do not support the --scheme and --port parameters. For theseversions of Navigator Encrypt, you must ensure that the Key Trustee Server is configured to use port 443 (HTTPS)for key storage and port 80 (HTTP) for public key operations.
Navigator Encrypt versions lower than 3.8.0 do not support the --passive-server parameter.
Updating Key Trustee Server Ports
The navencrypt register command does not provide the ability to change the ports for existing registrations.If the Key Trustee Server ports are changed, you must update /etc/navencrypt/keytrustee/ztrustee.conf with the new port and scheme parameters (HKP_PORT and HKP_SCHEME, respectively).
For example, see the following ztrustee.conf excerpt from a registered client that has been upgraded toNavigator Encrypt 3.7.0:
{ "LOCAL_FINGERPRINT": "2048R/182AAA838DC300AC334258D8E7F299BFB68A6F6F", "REMOTES": { "kts01.example.com": { "REMOTE_FINGERPRINT": "4096R/AF6400E12DC149799CA8CE6BF1604C34D830DE20",
9

Cloudera Manager Registering Cloudera Navigator Encrypt with Key Trustee Server
"REMOTE_SERVER": "https://kts01.example.com", "DEFAULT": true, "SSL_INSECURE": false, "PROTOCOL": "json-encrypt" } }}
In this example, the Key Trustee Server (keytrustee.example.com) is using the default configuration of port443 (HTTPS) for key storage and port 80 (HTTP) for public key operations.
If the Key Trustee Server is then updated to use port 11371 (HTTPS) for both key storage and public key operations,you must update ztrustee.conf as follows (changes in bold):
{ "LOCAL_FINGERPRINT": "2048R/182AAA838DC300AC334258D8E7F299BFB68A6F6F", "REMOTES": { "kts01.example.com": { "REMOTE_FINGERPRINT": "4096R/AF6400E12DC149799CA8CE6BF1604C34D830DE20", "REMOTE_SERVER": "https://kts01.example.com:11371", "HKP_PORT": 11371, "HKP_SCHEME": "https", "DEFAULT": true, "SSL_INSECURE": false, "PROTOCOL": "json-encrypt" } }}
Updating Navigator Encrypt for High Availability Key Trustee Server
If you registered a Navigator Encrypt client with a standalone Key Trustee Server, and then configured highavailability for Key Trustee Server, you can edit /etc/navencrypt/keytrustee/ztrustee.conf toenable the client to take advantage of the high availability features. The following example shows the contents ofztrustee.conf after adding the required REMOTE_SERVERS entry (changes in bold):
{ "LOCAL_FINGERPRINT": "2048R/182AAA838DC300AC334258D8E7F299BFB68A6F6F", "REMOTES": { "kts01.example.com": { "REMOTE_FINGERPRINT": "4096R/AF6400E12DC149799CA8CE6BF1604C34D830DE20", "REMOTE_SERVER": "https://kts01.example.com:11371", "HKP_PORT": 11371, "HKP_SCHEME": "https", "DEFAULT": true, "REMOTE_SERVERS": ["https://kts01.example.com:11371", "https://kts02.example.com:11371"], "SSL_INSECURE": true, "PROTOCOL": "json-encrypt" } }}
10

Cloudera Manager Registering Cloudera Navigator Encrypt with Key Trustee Server
Configuration Files
The installer creates the /etc/navencrypt directory. All configuration settings are saved in this directory. Do notdelete any file from /etc/navencrypt. These files provide the necessary information for the Navigator Encryptapplication to function properly.
Warning: Perform backups of encrypted data, mount-points, and Navigator Encrypt configurationdirectories on a regular basis. To do this, ensure you have a backup of /etc/navencrypt. Failure tobackup this directory will make your backed up encrypted data unrecoverable in the event of data loss.
Change Master Key by UUID
It is possible to re-use a previously used Master Key by its UUID. For example, if you currently have a Master keywith a single passphrase, you can see the corresponding Navigator Key Trustee UUID in the /etc/navencrypt/control file:
$ cat /etc/navencrypt/control{ "app": { "name": "navencrypt", "version": "3.5" }, "keys": { "master": { "type": "single-passphrase", "uuid": "qMAKRMdk4HVbhfzR79cp9w92YBmNHJ5nSLhfd8ZVo6L" }, "targets": [] }}
Note: If the control file is accidentally deleted, you can restore it using the navencrypt control --restore-control-file command.
You can copy the UUID (qMAKRMdk4HVbhfzR79cp9w92YBmNHJ5nSLhfd8ZVo6L in this example) and runnavencrypt key --change with option --new-master-key-uuid to change a Master Key by using itsUUID only:
$ sudo navencrypt key --change --new-master-key-uuid=qMAKRMdk4HVbhfzR79cp9w92YBmNHJ5nSLhfd8ZVo6L>> Type your OLD Master keyType MASTER passphrase 1:Type MASTER passphrase 2:Verifying Master Key against Navigator Key Trustee (wait a moment)...OKChanging Master key (wait a moment)... * Setting up EXISTING MASTER key... * Uploading CONTROL content... * Re-encrypting local keys...Master key successfully changed.
Note: The navencrypt key command fails if no volumes are encrypted or the kernel module is notloaded.
11

Cloudera Manager Preparing for Encryption Using Cloudera Navigator Encrypt
Preparing for Encryption Using Cloudera NavigatorEncrypt
Before you can encrypt data, you must prepare a storage repository to hold the encrypted data and a mount pointthrough which to access the encrypted data. The storage repository and mount point must exist before encrypting datausing the navencrypt-move command.
Data stored and retrieved from the repository is encrypted and decrypted transparently.
Cloudera Navigator Encrypt does not support:
• Encrypting a directory that contains or is contained within a mount point for another service (including NavigatorEncrypt and NFS). See Encrypting Data on page 17 for more information.
• Encrypting immutable files or directories containing immutable files.• Installation or use in chroot environments, including creating chroot environments within an encrypted
directory.• Encrypting HDFS data files.
Navigator Encrypt CommandsNote: Do not run Navigator Encrypt commands with the screen utility.
The following table lists the commands used to encrypt data:
Table 2: Navigator Encrypt Commands
Command Description
navencrypt Manage, update, and verify your data.
navencrypt-prepare Prepare your system for encryption by creating mount-points andspecifying storage.
navencrypt-prepare --undo Remove a mountpoint that is no longer in use.
navencrypt-move Encrypt/decrypt your data to/from the encrypted file system.
navencrypt-profile Generate process profile information in JSON format.
navencrypt-module-setup Build or rebuild the Navigator Encrypt kernel module.
Preparing for EncryptionNote: When using an HSM with Key Trustee Server and Navigator Encrypt, encrypting many block devicesmay exceed the capacity of the HSM. A key is created in the HSM for each encrypted block device, so besure that your HSM can support your encryption requirements.
To get an in-depth look at the details behind the navencrypt-prepare command, or to use a uniqueconfiguration, use the interactive prompt by executing navencrypt-prepare with no options. This launches aninteractive console that guides you through the following operations:
• Creating internal encryption keys• Registering internal keys in Navigator Key Trustee• Registering mount point in /etc/navencrypt/ztab• Mounting current mount point• Establishing encryption method (dm-crypt for devices)
12

Cloudera Manager Preparing for Encryption Using Cloudera Navigator Encrypt
Using the console, you can choose how you want your data stored and accessed. Navigator Encrypt offers block-level encryption with dm-crypt, which protects your data by encrypting the entire device. This enables full diskencryption and is optimized for some system configurations. You can use block-level encryption with logical devicessuch as a loop device.
See Block-Level Encryption with dm-crypt on page 13 for more information.
To prepare for encryption, you must specify a location to store the encrypted data and a mount point through which toaccess the data. The storage location and mount point must be created before encrypting data.
Note: If you are performing a file system check as part of your preparation work, then note that the cryptodevice must be mapped and active. Also, be aware that if you run fsck in force mode (-f) , there is a risk ofdata loss. If the force operation fails, it could cause file system corruption at the device header.
Block-Level Encryption with dm-cryptWhen choosing block-level encryption in the interactive console, you must specify two parameters:
1. The first parameter is the block device that you want to store the encrypted file system in. Because this devicestores all of the encrypted data, it must be as large as or larger than the target data. The device must exist and beempty. Supported storage devices are:
• Physical block devices (for example, a disk device)• Virtual block devices (for example, a block device created by LVM)• Loop devices (see Block-Level Encryption with a Loop Device on page 14 for instructions on creating a
loop device)
Important: If the block device to be used for encryption was previously used by the host, entriesfor it must be removed from the file /etc/fstab before running the navencrypt-preparecommand.
2. The second parameter is the mount point for the encrypted file system. This is the location where you can accessthe encrypted data stored in the first parameter. The mount point must already exist. It is not created by the navencrypt-prepare command.
The entire device in the first parameter is used for encrypted data.
Note: Do not manually unmount the encryption mount point (for example, using umount). If you do so, youmust manually close the dm-crypt device using the following procedure:
1. Run dmsetup table to list the dm-crypt devices.2. Run cryptsetup luksClose <device_name> to close the device for the unmounted mount
point.
After specifying these two parameters and following the interactive console (discussed further in Preparing forEncryption on page 12), you are ready to encrypt your data.
The syntax for the prepare command is as follows:
sudo navencrypt-prepare <device_name> <mount_point>
When specifying the mount point path, do not use a trailing / in the path names. The mount point directory must existprior to running the navencrypt-prepare command.
For RHEL 7, run the following command after the navencrypt-prepare command completes:
sudo systemctl start navencrypt-mount
The following example shows successful output from a navencrypt-prepare command using dm-crypt forblock-level encryption:
$ sudo /usr/sbin/navencrypt-prepare urandom /mnt/dm_encrypted
13

Cloudera Manager Preparing for Encryption Using Cloudera Navigator Encrypt
Type MASTER passphrase:Encryption Type: dmCrypt (LUKS)Cipher: aesKey Size: 256Random Interface: /dev/urandomFilesystem: ext4Verifying MASTER key against Navigator Key Trustee (wait a moment) ... OKGeneration Encryption Keys with /dev/urandom ... OKPreparing dmCrypt device (--use-urandom) ... OKCreating ext4 filesystem ... OKRegistering Encryption Keys (wait a moment) ... OKMounting /dev/sda1 ... OK
After you have successfully prepared a client for encryption, you can encrypt and decrypt data using the commandsdescribed in Encrypting and Decrypting Data Using Cloudera Navigator Encrypt on page 16.
Block-Level Encryption with a Loop Device
A block-level encrypted device can be a physical device or a storage space treated as a device.
To configure a loop device, use the dd command to create a storage space:
Warning: The space for the loop device is pre-allocated. After the loop device is created, the size cannotbe changed. Make sure you are allocating enough storage for the current encrypted data as well as any futuredata.
If your disks are mounted individually with a file system on each disk, and your storage needs exceed thecapacity of a single disk, you can create a loop device on each disk for which you want to allocate space forencrypted data. If you have consolidated storage (for example, using LVM), you can create a single loopdevice or multiple devices.
sudo dd if=/dev/zero of=/dmcrypt/storage bs=1G count=500
The dd command above creates a 500 GB file. Modify the bs and count values to generate the required file size.
After generating the file, run losetup -f to view unused loop devices. Use the available loop device with thenavencrypt-prepare -d command, demonstrated below.
Specifically for loop devices, the -d parameter enables Navigator Encrypt to manage the loop device association.You no longer need to use the losetup command to associate the file with the loop device, and the loop device isautomatically prepared at boot. For RHEL 7-compatible OS, you must run the following commands to ensure that aloop device is available at boot:
sudo bash -c 'echo "loop" > /etc/modules-load.d/loop.conf'sudo bash -c 'echo "options loop max_loop=8" > /etc/modprobe.d/loop_options.conf'
Warning: Loop devices are not created by Navigator Encrypt. Instead, Navigator Encrypt assigns a datastoreto a loop device when the navencrypt-prepare --datastore option is used. So, it is up to thesystem administrator to create persistent /dev/loopX devices, which are required to prepare a virtual blockdevice. If the loop device being prepared is not persistent, then Navigator Encrypt will not mount the deviceupon a reboot.
The data storage directory name (/dmcrypt/storage in the previous example) must contain only alphanumericcharacters, spaces, hyphens (-), or underscores (_). Other special characters are not supported.
The following example shows the output from a successful command:
$ losetup -f/dev/loop0$ sudo navencrypt-prepare -d /dmcrypt/storage /dev/loop0 /dmcrypt/mountpointType MASTER passphrase:
14

Cloudera Manager Preparing for Encryption Using Cloudera Navigator Encrypt
Encryption Type: dmCrypt (LUKS)Cipher: aesKey Size: 256Random Interface: OpenSSLFilesystem: ext4Options:
Verifying MASTER key against KeyTrustee (wait a moment) ... OKGeneration Encryption Keys with OpenSSL ... OKAssigning '/dev/loop0'->'/dmcrypt/storage' ... OKPreparing dmCrypt device ... OKCreating ext4 filesystem ... OKRegistering Encryption Keys (wait a moment) ... OKMounting /dev/loop0 ... OK
For upgraded Navigator Encrypt clients that already use loop devices, you can enable Navigator Encrypt to managethe loop device file association (instead of configuring the system to run the losetup command at boot) by addingthe nav_datastore option to the entry in /etc/navencrypt/ztab. For example:
# <target mount-dir> <source device> <type> <options>/dmcrypt/mountpoint /dev/loop0 luks key=keytrustee,nav_datastore='/dmcrypt/storage'
Important: Use caution when editing the /etc/navencrypt/ztab file. Entries are tab-separated (notspace-separated). The ztab file must not contain empty lines.
After you have created the loop device, continue with the instructions in Block-Level Encryption with dm-crypt onpage 13.
Navigator Encrypt and Device UUIDsNavigator Encrypt has always prepared and identified devices simply using a device name, such as /dev/sdb1or /dev/loop0. However, we know that using a device name or label could lead to a conflict and impact systemoperations.
Navigator Encrypt also supports preparing devices using a UUID, in addition to device name. This UUID is simplya symbolic link to the actual device, and is created when preparing a device with Navigator Encrypt during a navencrypt-prepare operation.
The advantage of using a device UUID is that if a device’s name changes, the UUID associated with that devicedoes not change. To ensure that Navigator Encrypt recognizes devices even when the device name changes, enter thecommand:
navencrypt-prepare --use-uuid /dev/sda1 /mountpoint
To unprepare (ensure the device UUID is included), enter either of the following commands:
navencrypt-prepare --undo-force /dev/disk/by-uuid/3a602a15-11f7-46ac-ae98-0a51e1b25cf9navencrypt-prepare --undo /dev/disk/by-uuid/3a602a15-11f7-46ac-ae98-0a51e1b25cf9
Note: While the device name is still used in the navencrypt-prepare statement, rest assured thatNavigator Encrypt handles the device by the UUID, which is calculated and used for mount during boot. Thedevice name is used for convenience so that you do not have to explicitly input the UUID in the command.Ultimately, Navigator Encrypt handles the device via the device UUID rather than the device name.
15

Cloudera Manager Encrypting and Decrypting Data Using Cloudera Navigator Encrypt
Important: UUID device support does not include loop devices; rather, it only applies to physical devices.When preparing loop devices with Navigator Encrypt, always use the device name by using the --use-name option with the navencrypt-prepare command.
Pass-through Mount Options for navencrypt-prepareNavigator Encrypt 3.5 and higher provides the ability to specify options to pass to the mount command that isexecuted during /etc/init.d/navencrypt-mount start (systemctl start navencrypt-mounton RHEL 7). These options are specified with the -o option when preparing a mountpoint with the navencrypt-prepare command.
The following shows an example navencrypt-prepare command output when passing mount options with the -o option:
$ sudo navencrypt-prepare -o discard,resize /mnt/t2 /mnt/t2Type MASTER passphrase:Encryption Type: dmCrypt (LUKS)Cipher: aesKey Size: 256Random Interface: OpenSSLFilesystem: ext4Options: discard,resizeVerifying MASTER key against Navigator Key Trustee(wait a moment) ... OKGeneration Encryption Keys with OpenSSL ... OKRegistering Encryption Keys (wait a moment) ... OKMounting /mnt/t2 ... OK
You can verify the results by viewing the /etc/navencrypt/ztab file:
$ cat /etc/navencrypt/ztab/mnt/t2 /mnt/t2 dmcrypt key=keytrustee,cipher=aes,keysize=256,discard,resize
Options can be added or removed to existing mount points prepared with versions of Navigator Encrypt prior to 3.5by editing the /etc/navencrypt/ztab file and adding the comma-separated options (no spaces) to the end ofeach line as seen in the previous example above.
Important: Use caution when editing the /etc/navencrypt/ztab file. Entries are tab-separated (notspace-separated). The ztab file must not contain empty lines.
To see the mounted file systems and options, run mount:
$ mount/mnt/t2 on /mnt/t2 type dmcrypt (rw,dmcrypt_sig=6de3db1e87077adb,ecryptfs_unlink_sigs,noauto,\dmcrypt_cipher=aes,dmcrypt_key_bytes=32,discard,resize)
For a list of available mount options, see the man pages for cryptsetup and dmCrypt respectively.
Encrypting and Decrypting Data Using ClouderaNavigator Encrypt
Warning: Before encrypting or decrypting any data, stop all processes (for example, MySQL, MongoDB,PostgreSQL, and so on) that have access to the target data. Failure to do so could lead to data corruption.
After the encrypted file system is created and initialized, it is ready to hold data. All encryption and decryptionfunctionality is performed with a single command: navencrypt-move.
16

Cloudera Manager Encrypting and Decrypting Data Using Cloudera Navigator Encrypt
Do not manually create directories or files under a Cloudera Navigator Encrypt mount point; use only the navencrypt-move command to encrypt and decrypt data. See Preparing for Encryption Using Cloudera Navigator Encrypt onpage 12 for more information about mount points.
After encrypting a file or directory, all data written and read through the mount point is transparently encrypted anddecrypted.
Before You BeginNavigator Encrypt does not support encrypting data in certain environments, including the following:
• Do not attempt to encrypt a directory that contains or is contained within a mount point for another service(including Navigator Encrypt and NFS). For example:
• If your encryption mount point is /var/lib/navencrypt/mount, do not attempt to encrypt /var, /var/lib, /var/lib/navencrypt, /var/lib/navencrypt/mount, or anything under /var/lib/navencrypt/mount/.
• If you have mounted an NFS file system at /mnt/home, do not attempt to encrypt /mnt, /mnt/home, oranything under /mnt/home.
• Do not attempt to encrypt immutable files or directories containing immutable files.• Do not use Navigator Encrypt within a chroot environment, or create a chroot environment within an
encrypted directory.• If your Key Trustee Server is managed by Cloudera Manager, do not encrypt the Cloudera Manager database with
Navigator Encrypt; doing so prevents Cloudera Manager from starting.
Encrypting DataDo not manually create directories or files under a Navigator Encrypt mount point; use only the navencrypt-move command to encrypt data.
Here is an example command to encrypt data, with an explanation for each option:
sudo navencrypt-move encrypt @<category> <directory_or_file_to_encrypt> <encrypted_mount_point>
Important: Do not run navencrypt-move commands simultaneously in multiple terminals. Doingso results in failure to encrypt or decrypt all of the specified data. No data is lost, as the source data is notremoved, but you must re-run the failed operations sequentially.
Table 3: navencrypt-move Command Options
Command Option Explanation
navencrypt-move Main command interface for all actions that require moving data eitherto or from the encrypted file system. For more information see thenavencrypt-move man page (man navencrypt-move).
encrypt Identifies the cryptographic operation, in this case, encrypting data.The decrypt option is described later in Decrypting Data on page18.
Note: By default, all Navigator Encrypt encryptioncommands require free space equal to twice the size of theencrypted data. If your environment does not have enoughfree space, add --per-file to the end of the command.This moves each file individually. Per-file encryption onlyrequires free space equal to twice the size of the largestindividual file, but is a slower operation.
17

Cloudera Manager Encrypting and Decrypting Data Using Cloudera Navigator Encrypt
Command Option Explanation
@<category> The access category that is applied to the data being encrypted.Encrypted data is protected by process-based access controls thatrestrict access to only the processes that you allow. You can use anynaming convention you want (the @ symbol is required), but Clouderarecommends keeping it simple and memorable. For example, you canuse a name referencing the data type being encrypted, such as @mysqlfor a MySQL deployment. See Listing Categories on page 30 forinstructions on viewing existing categories.
<directory_or_file_to_encrypt> The data that you want to encrypt. This can be a single file or an entiredirectory. Navigator Encrypt starts after the system boots, so do notencrypt required system files and directories (such as the root partition,/var, and so on). Some examples of recommended data directories toencrypt are /var/lib/mysql/data, /db/data, and so on.
<encrypted_mount_point> Where you want to store the data. This is the path to the mount pointspecified during the navencrypt-prepare command.
When a file is encrypted, a symbolic link (symlink) is created which points to a mount point @<category>directory. The navencrypt-move command moves all specified data to the encrypted file system and replaces itwith a symlink to the mount point for that encrypted file system.
Encrypting a directory is similar to encrypting a file. The following command encrypts a directory:
sudo /usr/sbin/navencrypt-move encrypt @mycategory /path/to/directory_to_encrypt/ /path/to/mount
In this command, a directory is specified instead of a file name, and a symlink is created for that particular directory.To see the effects of this command, run:
ls -l <directory_to_encrypt>du -h <encrypted_storage_directory>
The output demonstrates the new file system layout. Everything that was in the target directory is now securely storedin the encrypted file system.
Decrypting DataThe decryption command requires only the path to the original data, which is now a symbolic link, as an argument.The following example demonstrates how to decrypt a file using the navencrypt-move command:
sudo /usr/sbin/navencrypt-move decrypt /path/to/encrypted/directory_or_file
Important: Do not run navencrypt-move commands simultaneously in multiple terminals. Doingso results in failure to encrypt or decrypt all of the specified data. No data is lost, as the source data is notremoved, but you must re-run the failed operations sequentially.
As with encryption, you can specify a directory instead of a file:
sudo /usr/sbin/navencrypt-move decrypt /path/to/encrypted/directory
18

Cloudera Manager Converting from Device Names to UUIDs for Encrypted Devices
Converting from Device Names to UUIDs for EncryptedDevices
When configuring a Navigator Encrypt mount point, you can use either the device name (sample device name: /dev/sdb1) or the UUID (sample UUID: 3a602a15-11f7-46ac-ae98-0a51e1b25cf9) to configure the mountpoint. For more information, see Navigator Encrypt and Device UUIDs on page 15.
The UUID mount point configuration choice is preferable for Navigator Encrypt, because the device name can changewhen the system is rebooted or newdisks are added, but the UUID never changes. You can only use the UUID (--use-uuid) configuration optionduring the initial mount point configuration. You cannot use the UUID mount point configuration option on existingmount points that were created in Navigator Encrypt 3.12.0 or earlier, or that were configured to use the device nameinstead of the UUID.
For configurations where a device name was used, and you wish to convert to a UUID, you have the option to usethe UUID conversion utility (navencrypt-prepare --convert-uuid), which converts existing mountpoints from using the device name to using the UUID. The UUID conversion utility updates the Navigator Encryptconfiguration files to use UUIDs, and then reloads the updated mount points. You can perform this conversion onmount points with encrypted data without any impact on that data.
Important: Cloudera strongly recommends that Navigator Encrypt mount points that are currently usingthe device name be converted to use the device UUID. This will prevent error situations when the NavigatorEncrypt mount points cannot be mounted, and the encrypted data cannot be accessed because the device namechanged.
Preparing for UUID ConversionThe UUID conversion utility runs as part of the navencrypt-prepare command:
# navencrypt-prepare -h...--convert-uuid --all|--device=DEVICE Converts devices that are stored using the device name to instead use its uuid. '--all' will attempt to convert all device names in the navencrypt ztab file. '--device=DEVICE' will convert a single device....
As shown, you have two options when running the UUID conversion utility:
• --device=DEVICE
Use this option to run the conversion against a single specified device.• --all
Use this option to run the conversion against all mount points that are currently using the device name instead ofthe UUID as defined in the /etc/navencrypt/ztab file.
The conversion utility first backs up all files in /etc/navencrypt to a timestamped directory under /tmp.Ensure that the user running the navencrypt-prepare operation has permission to write to /tmp. If this backupdirectory is not created, then the conversion script will exit without making any changes to the Navigator Encryptconfiguration files.
19

Cloudera Manager Converting from Device Names to UUIDs for Encrypted Devices
Note: Because the conversion utility backs up the Navigator Encrypt configuration files, it is not necessaryto back up the files separately. However, if you want the files backed up elsewhere (somewhere other thanthe /tmp folder), then manually perform this backup by copying the /etc/navencrypt directory to thedesired location before running the conversion utility. Note that the conversion utility will still attempt tocreate its own backup under /tmp, and will not run if this backup cannot be created.
Converting a Single DeviceUse the UUID conversion utility --device=DEVICE optionto convert from a device name to UUID for a mount point on a singledevice. It is recommended that you test the conversion against at least one device before running itagainst all devices:
# navencrypt-prepare --convert-uuid --device=/dev/xvdd
Backing up /etc/navencrypt to /tmp/navencrypt_bkup_20180917_135716 ...
Stopping navencrypt-mount...
Stopping navencrypt directories
Umounting /dev/xvdd ... [ OK ]Umounting /dev/xvde ... [ OK ]Umounting /dev/xvdf ... [ OK ]* Unloading module ... [ OK ]
Running conversion on /dev/xvdd.....
You must approve and finalize the conversion before it is complete.
Converting All Available DevicesUse the UUID conversion utility --all option to convert from the device name to the device UUID on all availabledevices. The conversion utility skips loop devices because they do nothave a dedicated UUID:
# navencrypt-prepare --convert-uuid --all
Backing up /etc/navencrypt to /tmp/navencrypt_bkup_20180917_135731 ...
Stopping navencrypt-mount...Stopping navencrypt directories* Umounting /dev/xvdd ... [ OK ]* Umounting /dev/xvde ... [ OK ]* Umounting /dev/xvdf ... [ OK ]* Unloading module ... [ OK ]
Running conversion on /dev/xvdd...
Running conversion on /dev/xvde...
Running conversion on /dev/xvdf......
You must approve andfinalize the conversion before it is complete.
20

Cloudera Manager Converting from Device Names to UUIDs for Encrypted Devices
Finalizing the ConversionBefore the device name-to-UUID conversion is applied to theconfiguration files, you must review and approve the differences between the/etc/navencrypt/ztab and/etc/navencrypt/control by eitheraccepting the changes ("y"), or rejecting them ("n").
# navencrypt-prepare --convert-uuid --all...Running conversion on /dev/xvdd...Running conversion on /dev/xvde...Running conversion on /dev/xvdf...
Showing diff of ztab and control files
--------------------------------------------- ZTAB---------------------------------------------2,4c2,4< /navencrypt_mount/block1 /dev/xvdd luks key=keytrustee< /navencrypt_mount/block2 /dev/xvde luks key=keytrustee< /navencrypt_mount/block3 /dev/xvdf luks key=keytrustee---/navencrypt_mount/block1 /dev/disk/by-uuid/4206d6d5-6014-435a-b342-1d3dad5559a2 luks key=keytrustee> /navencrypt_mount/block2 /dev/disk/by-uuid/b84c4f38-bc74-40bc-87eb-2e857a996933 luks key=keytrustee> /navencrypt_mount/block3 /dev/disk/by-uuid/622312d0-0e6c-4e37-adeb-f6066a1df07d luks key=keytrustee--------------------------------------------- CONTROL---------------------------------------------8c8< "name": "/dev/xvdd",---> "name": "/dev/disk/by-uuid/4206d6d5-6014-435a-b342-1d3dad5559a2",11c11< "name": "/dev/xvde",---> "name": "/dev/disk/by-uuid/b84c4f38-bc74-40bc-87eb-2e857a996933",14c14< "name": "/dev/xvdf",---> "name": "/dev/disk/by-uuid/622312d0-0e6c-4e37-adeb-f6066a1df07d",
Accept changes? [y/N] yMoving KeyTrustee deposit for /dev/xvdd...Moving KeyTrustee deposit for /dev/xvde...Moving KeyTrustee deposit for /dev/xvdf...Operation completeOverwriting old files...Starting navencrypt-mount...Starting navencrypt directories * Mounting '4206d6d5-6014-435a-b342-1d3dad5559a2' [ OK ] * Mounting 'b84c4f38-bc74-40bc-87eb-2e857a996933' [ OK ] * Mounting '622312d0-0e6c-4e37-adeb-f6066a1df07d' [ OK ]
If you reject the changes, the updated files are saved to /etc/navencrypt/ztab.new and /etc/navencrypt/control.new, and the existing ztab and control files remain unchanged.
21

Cloudera Manager Navigator Encrypt Access Control List
Warning: Do not manually copy the ztab.new and control.new files over the existing ztab andcontrol files. If upon review the new files are correct, then re-issue navencrypt-prepare --convert-uuid and select “y” to use the updated files. If you modify the ztab and control files outside ofthe navencrypt-prepare script, then you will encounter a conflict in the saved keytrustee depositsthat will prevent the Navigator Encrypt mount points from mounting.
# navencrypt-prepare --convert-uuid --all...Accept changes? [y/N] n
Changes will not be applied. Proposed changes are saved to /etc/navencrypt/ztab.new and /etc/navencrypt/control.new
Rolling Back the UUID ConversionIf you experience any problems with the device name-to-UUID conversion, you can restore the previous mount pointstate by replacing the contents of the /etc/navencrypt/directory with the backup created by the conversionutility:
# service navencrypt-mount stop# rm /etc/navencrypt/keytrustee/deposits/dev.disk.by-uuid.*# cp -rp /tmp/navencrypt_bkup_date_time/* /etc/navencrypt/# service navencrypt-mount start
Navigator Encrypt Access Control List
Managing the Access Control ListCloudera Navigator Encrypt manages file system permissions with an access control list (ACL). This ACL is asecurity access control created by Cloudera that enables a predefined Linux process to access a file or directorymanaged by Navigator Encrypt.
The ACL uses rules to control process access to files. The rules specify whether a Linux process has accesspermissions to read from or write to a specific Navigator Encrypt path.
A rule is defined in the following order:
# TYPE @CATEGORY PATH PROCESS PARAMETERS
The following table defines the ACL rule components:
Table 4: ACL Rule Components
Component Description
TYPE Specifies whether to allow or deny a process. It can have either of thefollowing values: ALLOW or DENY.
@CATEGORY This is a user-defined shorthand, or container, for the encrypted datasetthat the process will have access to. For example, if you are encryptingthe directory /var/lib/mysql, you could use the category @mysql to indicate that this rule is granting access to a process on theMySQL data. See Listing Categories on page 30 for instructions onviewing existing categories.
PATH Specifies the rights permissions of a specific path. For example: *,www/*.htaccess. Omit the leading slash (/).
22

Cloudera Manager Navigator Encrypt Access Control List
Component Description
PROCESS Specifies the process or command name for the rule.
PARAMETERS Tells the process the parent-child process to be executed:
--shell defines the script for Navigator Encrypt to allow forexecutable process. Supported shells are /usr/bin/bash, /bin/bash, /usr/bin/dash, and /bin/bash.
--children defines for Navigator Encrypt which child processes toallow that are executed by a process/script.
Example: --shell=/bin/bash, --children=/bin/df,/bin/ls
All rules are stored in an encrypted policy file together with a set of process signatures that are used by NavigatorEncrypt to authenticate each Linux process. This file is encrypted with the Navigator Encrypt key you defined duringinstallation.
Cloudera recommends using permissive mode to assist with the initial ACL rule creation for your environment.In permissive mode, Navigator Encrypt allows full access to the encrypted data by all processes, but logs them indmesg as action="denied" messages. Consult these messages to identify required ACL rules. To set NavigatorEncrypt to permissive mode, use the following command:
sudo /usr/sbin/navencrypt set --mode=permissive
To view the current mode, run navencrypt status -d. For more information on access modes, see AccessModes.
deny2allow
After you generate the action="denied" messages, use the navencrypt deny2allow command to showwhich ACL rules are required, based on the action="denied" messages in dmesg. To show which ACL rulesare required, perform the following steps:
1. Save the dmesg content to a file:
sudo dmesg > /tmp/dmesg.txt
2. Use the dmesg.txt file content as input to the deny2allow command to analyze the action="denied" messages and display a list of required ACL rules based on the action="denied" messages. Here is anexample command and output:
$ sudo /usr/sbin/navencrypt deny2allow /tmp/dmesg.txtALLOW @mysql employees/* /usr/sbin/mysqldALLOW @mysql * /bin/bashALLOW @mysql * /bin/ls
If you need to clear the dmesg log and start fresh, run dmesg -c.
If a rule is displayed in the output from the command, it does not automatically mean the ACL rule must be added.You must determine which rules are actually needed. For example, the rule for ls would not typically be added as anACL rule.
After the initial ACL rules are created, disable permissive mode with the following command:
sudo /usr/sbin/navencrypt set --mode=enforcing
23

Cloudera Manager Navigator Encrypt Access Control List
Adding ACL Rules
Rules can be added one at a time using the command line or by specifying a policy file containing multiple rules. Thefollowing example shows how to add a single rule using the navencrypt acl --add command:
sudo /usr/sbin/navencrypt acl --add --rule="ALLOW @mysql * /usr/sbin/mysqld"
See Listing Categories on page 30 for instructions on viewing existing categories.
The following example shows how to add multiple rules using a policy file:
sudo /usr/sbin/navencrypt acl --add --file=/mnt/private/acl_rules
The contents of the policy file should contain one rule per line. For example:
ALLOW @mysql * /usr/sbin/mysqldALLOW @log * /usr/sbin/mysqldALLOW @apache * /usr/lib/apache2/mpm-prefork/apache2
Navigator Encrypt releases 3.10 and higher support comments in the policy file. Comments begin with the hash (#)symbol. You can use comments to annotate the policy file, or to temporarily disable a rule for testing. For example:
# Cloudera Navigator Encrypt policy file# Allow mysqld to access all database filesALLOW @mysql * /usr/sbin/mysqld# Allow mysqld to write logsALLOW @log * /usr/sbin/mysqld# ALLOW @apache * /usr/lib/apache2/mpm-prefork/apache2
Using a policy file is the fastest way to add multiple rules because it only requires the security key one time.
It is also possible to overwrite the entire current rules set with the option --overwrite. When this command isexecuted, all current rules are replaced by the ones specified in the file that contains the new set of rules. Clouderarecommends to save a copy of your current set of rules by printing it with the option --print.
Here is an example command using the --overwrite option:
sudo /usr/sbin/navencrypt acl --overwrite --file=/mnt/private/acl_rules
Adding ACL Rules by Profile
If your environment requires more granular controls on the processes that can access the data, you can add extracontrols by using profiles. Profiles set requirements on a process other than just having the correct fingerprint. Theycan include such things as process owner and group, required open files, and the current working directory. To seemore about adding rules by profile, see ACL Profile Rules on page 26. For details about fingerprints, see Process-Based Access Control List on page 5.
Deleting ACL Rules
Rules can be deleted in one of two ways:
1. Manually specifying the rule to delete using the command line.2. Specifying the line number of the rule to delete.
The following example shows how to delete a rule by passing it as a parameter:
sudo /usr/sbin/navencrypt acl --del --rule="ALLOW @mysql * /usr/sbin/mysqld "
If you remove a MySQL ALLOW rule, the MySQL cache must be cleaned by executing the FLUSH TABLES;MySQL statement. Otherwise, it will still be possible to view data from encrypted table.
24

Cloudera Manager Navigator Encrypt Access Control List
The following example shows how to delete a rule by specifying a line number:
sudo /usr/sbin/navencrypt acl --del --line 3
It is also possible to delete multiple ACL rules in a single command:
sudo /usr/sbin/navencrypt acl --del --line=1,3
See Printing ACL Rules on page 25 for information on determining line numbers.
Deleting ACL Rules by Profile
See ACL Profile Rules on page 26 for instructions on deleting rules by profile.
Printing ACL Rules
You can print the current Access Control List using the following command:
sudo /usr/sbin/navencrypt acl --print
Save the ACL to a file with the --file option:
sudo /usr/sbin/navencrypt acl --print --file=policy-backup
To display additional information about the organization of the policy file, use the --list option:
sudo /usr/sbin/navencrypt acl --list
Universal ACL Rules
Universal ACLs will allow or deny a process access to all files or directories encrypted with Navigator Encrypt.
The rule ALLOW @* * /process allows the designated process to access anything from all encrypted categories.
The rule ALLOW @data * * allows all processes access to any path under the @data category.
The rule ALLOW @* * * allows all processes access to all encrypted categories. Cloudera does not recommendusing this rule. Use it only in test environments.
Here is an example adding a universal ACL rule and then displaying it:
$ sudo /usr/sbin/navencrypt acl --add --rule="ALLOW @* * /usr/sbin/mysqld"Type MASTER passphrase:1 rule(s) were added# navencrypt acl --listType MASTER passphrase:# - Type Category Path Profile Process1 ALLOW @* * /usr/sbin/mysqld
Enabling Shell Scripts to Be Detected by ACL
All of the previous rules work for binary files. There may be times a script, such as a shell script, must be allowed toaccess the encrypted directory.
You can add the script as a rule by indicating the executable binary process of this script using the --shell option,for example:
ALLOW @scripts * /root/script.sh --shell=/bin/bash
25

Cloudera Manager Navigator Encrypt Access Control List
The --shell option identifies which executable process is used to run the script. Supported shells are /usr/bin/bash, /bin/bash, /usr/bin/dash, and /bin/bash
If the script is altered, it will no longer be trusted by the ACL because the fingerprint has changed. If you edit thescript you must invoke the update option to update the ACL with the new fingerprint.
In some cases, it may be necessary to grant permissions to sub-processes invoked by scripts. For example, it may benecessary to grant permissions to /bin/bash that also allow running the /bin/df command to allow the systemadministrator to check disk capacity through a script run using a crontab entry. By using the --children option,you can specify these permissions. For example:
ALLOW @scripts * /root/script.sh --shell=/bin/bash --children=/bin/df
The --children option tells Navigator Encrypt to allow the /bin/df binary process if it is executed by /root/script.sh.
To allow more than one sub-process, identify them with the --children option as comma-separated values. Forexample:
ALLOW @scripts * /root/script.sh --shell=/bin/bash --children=/bin/df,/bin/ls
To add shell-children sub-processes, run the navencrypt acl --add command, for example:
$ sudo /usr/sbin/navencrypt acl --add --rule="ALLOW @mysql * /usr/bin/mysqld_safe \--shell=/bin/bash --children=/bin/df,/bin/ls"
ACL Profile RulesIf your environment requires more granular controls on the processes that can access the data, you can add extracontrols by using profiles. Profiles set requirements on a process other than just having the correct fingerprint. Theycan include such things as process owner and group, required open files, and the current working directory.
A profile is generated by using the following command:
usr/sbin/navencrypt-profile --pid=<pid>
The output, by default, will be displayed on the screen. You can redirect the output to a file using the > or >> redirectoperators. You can then edit the JSON output in the file to remove lines you do not want. By default, the profileincludes the UID, the short name of the binary or script (identified as comm ), and the full command line of therunning process (including any parameters passed). You can generate information by using one of these flags:
• -c, --with-cwd
Output the current working directory• -e, --with-egid
Output the egid• -g, --with-gid
Output the gid• -u, --with-euid
Output the euid
Example output from the navencrypt-profile command:
{"uid":"0",
26

Cloudera Manager Maintaining Cloudera Navigator Encrypt
"comm":"NetworkManager","cmdline":"NetworkManager –pid-file=/var/run/NetwrkManager/NetworkManager.pid","gid":"0""cwd":"/","fd0":"/dev/null","fd1":"/dev/null","fd2":"/dev/null"}
Some distributions do not support euid and guid. Make sure that your profile file is correct by executing thefollowing command to verify the expected IDs:
ps -p <pid_of_process> -o euid,egid
If cmdline parameters are variable, such as appending a process start timestamp to a file name, then the processprofile will not match on subsequent restarts of the process because the current profile will have an updatedtimestamp and access will be denied by the ACL. You can mark those parameters as variable inside the profile file.For example, if the cmdline of a process is something like this:
"cmdline":"NetworkManager –pid-file=/var/run/NetworkManager/NetworkManager.pid \-logfile=/var/log/NetworkManager/log-20130808152300.log"
Where log-20130505122300.log is a variable cmdline parameter, before adding the process profile to theACL, edit the process profile file and use ## to specify that a particular parameter is variable:
"cmdline":"NetworkManager –pid-file=/var/run/NetworkManager/NetworkManager.pid -logfile=##"
With the above configuration, the ACL will allow any value for the -logfile cmdline parameter.
To enable a profile in the ACL, use the additional parameter --profile-file=<filename> when adding therule to the ACL:
$ sudo /usr/sbin/navencrypt acl --add --rule="ALLOW @mysql * /usr/sbin/mysqld" \–-profile-file=/path/to/profile/file
To display the profile portion of the rules, use the --all parameter with navencrypt acl --list:
$ sudo /usr/sbin/navencrypt acl --list --allType MASTER passphrase:# - Type Category Path Profile Process1 ALLOW @mysql * YES /usr/sbin/mysqldPROFILE:{"uid":"120","comm":"mysqld","cmdline":"mysqld"}
Maintaining Cloudera Navigator Encrypt
Manually Backing Up Navigator EncryptIt is recommended that you back up Navigator Encrypt configuration directory after installation, and again after anyconfiguration updates.
27

Cloudera Manager Maintaining Cloudera Navigator Encrypt
1. To manually back up the Navigator Encrypt configuration directory (/etc/navencrypt):
zip -r --encrypt nav-encrypt-conf.zip /etc/navencrypt
The --encrypt option prompts you to create a password used to encrypt the zip file. This password is alsorequired to decrypt the file. Ensure that you protect the password by storing it in a secure location.
2. Move the backup file (nav-encrypt-conf.zip) to a secure location.
Warning: Failure to back up the configuration directory makes your backed-up encrypted dataunrecoverable in the event of data loss.
Validating Navigator Encrypt ConfigurationTo validate the Navigator Encrypt deployment, run the following command:
sudo navencrypt status --integrity
This command verifies that:
• The mount encryption key (MEK) exists for each mount point.• Each mount point in /etc/navencrypt/ztab has a corresponding entry in the control file (/etc/navencr
ypt/control).• Each mount point directory exists.• For loop devices, the file used for encrypted storage exists.
The output is similar to the following:
$ sudo navencrypt status --integrityChecking MEKs integrity
Mountpoint: /dev/loop0 MEK file exist: ...................... [YES] Mountpoint: /dev/loop1 MEK file exist: ...................... [YES]
Checking Ztab Mountpoints integrity
Mountpoint: /dev/loop0 ztab vs control correspondence: ..... [YES] Mountpoint directory exists: ........ [YES] Mountpoint: /dev/loop1 ztab vs control correspondence: ..... [YES] Mountpoint directory exists: ........ [YES]Checking Datastore backend files
Datastore: '/root/my_storage_test' Backend file exist: ................. [YES]
Restoring Mount Encryption Keys (MEKs) and Control FileNavigator Encrypt deposits its mount encryption keys (MEKs) and control file (/etc/navencrypt/control) inCloudera Navigator Key Trustee Server. If these files are accidentally deleted, they can be restored from Key TrusteeServer using the following commands:
• To restore MEKs:
sudo navencrypt key --restore-keys
28

Cloudera Manager Maintaining Cloudera Navigator Encrypt
• To restore the control file:
sudo navencrypt control --restore-control-file
Access ModesNavigator Encrypt provides three different access modes:
• Enforcing is the default mode in which Navigator Encrypt validates access from all processes against the ACL. Toprotect your data, enforcing mode must be enabled.
• Permissive mode causes action="denied" messages to be logged in dmesg. It does not prevent access tothe encrypted data. This mode is a dry-run feature to run and build ACL rules.
• Admin mode, as well as permissive mode, does not prevent access to the encrypted data. It allows any process toaccess the information because the ACL rules are not validated against the process. Admin mode does not causeaction="denied" messages to be logged in dmesg.
To view the current access mode, run the following command:
sudo /usr/sbin/navencrypt status -d
Note: The navencrypt status command reports that the navencrypt module is not running if novolumes are encrypted or the kernel module is not loaded.
To change the access mode, use the following command:
sudo /usr/sbin/navencrypt set --mode={enforcing|permissive|admin}
You cannot change the Navigator Encrypt access mode unless the Navigator Encrypt module is running. To view thestatus of the Navigator Encrypt module, run navencrypt status --module.
To start the Navigator Encrypt module there must be at least one active mount-point. To verify the mount-pointsstatus, run the following command:
sudo /etc/init.d/navencrypt-mount status
For RHEL 7, use systemctl instead:
sudo systemctl status navencrypt-mount
Changing and Verifying the Master KeyYou can perform two operations with the navencrypt key command: change and verify.
You can verify a key against the Navigator Encrypt module, the Navigator Key Trustee server, or both. For example:
sudo /usr/sbin/navencrypt key --verifysudo /usr/sbin/navencrypt key --verify --only-modulesudo /usr/sbin/navencrypt key --verify --only-keytrustee
Note: The navencrypt key command fails if no volumes are encrypted or the kernel module is notloaded.
29

Cloudera Manager Maintaining Cloudera Navigator Encrypt
The master key can be changed in the event that another key-type authentication mechanism or a new master key isrequired. Valid master key types are single-passphrase, dual-passphrase, and RSA key files. To change the master keytype, issue the following command and follow the interactive console:
sudo /usr/sbin/navencrypt key –-change
You can use the --trustees, --votes, and --recoverable options for the new key as described in Table 1:Registration Options on page 8.
Listing CategoriesTo list the existing categories for each mount point, run the command navencrypt-move --list-categories. For example:
$ sudo navencrypt-move --list-categoriesNavigator Encrypt Categories found per Mountpoint: /dmcrypt-storage @mysql @keytabs
/home/jdoe/secrets @moms_recipes @world_domination_plan
Updating ACL FingerprintsAll rules reference a process fingerprint (a SHA256 digest) that is used to authenticate the process into the filesystem. If the file system detects a fingerprint that is different from the one stored in the ACL, the Linux process isdenied access and treated as an untrusted process.
Occasionally this process fingerprint must be updated, such as when software is upgraded. When the fingerprint mustbe updated, the Navigator Encrypt administrator re-authenticates the process on the ACL by executing the commandnavencrypt acl --update.
The following example demonstrates how to determine when a process fingerprint has been changed and must beupdated:
$ sudo /usr/sbin/navencrypt acl --listType MASTER passphrase:# - Type Category Path Profile Process1 !! ALLOW @mysql * /usr/sbin/mysqld2 ALLOW @log * /usr/sbin/mysqld3 !! ALLOW @apache * /usr/lib/apache2/mpm-prefork/
In the example above, the double exclamation (!!) characters indicate that a process fingerprint has changed andmust be updated. Similarly, double E (EE) characters indicate a process read error. This error can be caused by aprocess that does not exist or that has permission issues.
30

Cloudera Manager Maintaining Cloudera Navigator Encrypt
Note:
For RHEL-compatible OSes, the prelink application may also be responsible for ACL fingerprint issues.Prelinking is intended to speed up a system by reducing the time a program needs to begin. Cloudera highlyrecommends disabling any automated prelink jobs, which are enabled by default in some systems. Asan alternative, Cloudera recommends that you integrate a manual prelink run into your existing changecontrol policies to ensure minimal downtime for applications accessing encrypted data.
To disable prelinking, modify the /etc/sysconfig/prelink file and change PRELINKING=yes toPRELINKING=no. Then, run the /etc/cron.daily/prelink script as root. Once finished, automaticprelinking is disabled.
For more information about how prelinking affects your system, see prelink.
Managing Mount PointsThe /etc/init.d/navencrypt-mount command mounts all mount points that were registered with the navencrypt-prepare command and are listed in the /etc/navencrypt/ztab file. The possible operations are:
• start
• stop
• status
• restart
For RHEL 7, use systemctl [start|stop|status|restart] navencrypt-mount.
Note: On RHEL 7, the systemctl command can obscure the exit status of the start and/or stopcommands because navencrypt-mount is loaded as a kernel module instead of running as a backgroundprocess. Cloudera strongly recommends that you run systemctl status navencrypt-mountwhenever you run the start and/or stop command to verify that the status of the navencrypt kernelmodule is still healthy and functioning.
Note: Do not manually unmount the encryption mount point (for example, using umount). If you do so, youmust manually close the dm-crypt device using the following procedure:
1. Run dmsetup table to list the dm-crypt devices.2. Run cryptsetup luksClose <device_name> to close the device for the unmounted mount
point.
When executing the stop operation, the encrypted mount point is unmounted, and your data becomes inaccessible.
The following example shows how to run navencrypt-mount status with some inactive mount points:
sudo /etc/init.d/navencrypt-mount status
The following example shows how to run the navencrypt-mount stop command:
sudo /etc/init.d/navencrypt-mount stop
The following example shows how to run the navencrypt-mount start command:
sudo /etc/init.d/navencrypt-mount start
Here is an example command used to manually mount a directory:
sudo /usr/sbin/mount.navencrypt /path/to_encrypted_data/ /path/to/mountpoint
This command can be executed only if the navencrypt-prepare command was previously executed.
31

Cloudera Manager Maintaining Cloudera Navigator Encrypt
Navigator Encrypt Kernel Module SetupIf the kernel headers were not installed on your host, or if the wrong version of the kernel headers were installed,the Navigator Encrypt module was not built at installation time. To avoid reinstalling the system, install the correctheaders and run the navencrypt-module-setup command. This attempts to build the module and install it.
This method is also an efficient way to install any new Navigator Encrypt module feature or fix without otherwisemodifying your current Navigator Encrypt environment.
Navigator Encrypt Configuration Directory StructureThe file and directory structure of /etc/navencrypt is as follows:
$ tree /etc/navencrypt//etc/navencrypt/### control -> /etc/navencrypt/jSpi9SM65xUIIhrau1Nn8ZXmQhrrQ9e363EUz8HKiRs### jSpi9SM65xUIIhrau1Nn8ZXmQhrrQ9e363EUz8HKiRs### rules### ztablocust### keytrustee ### clientname ### deposits # ### dev.loop0 # ### media.31E5-79B9locustlocust[system ~]# . /etc/*release[system ~]# . /etc/*release # ### mnt.a # ### mnt.encrypted # ### mnt.tomount ### pubring.gpg ### pubring.gpg~ ### random_seed ### secring.gpg ### trustdb.gpg ### ztrustee.conf
The following files and folders are part of the created file structure:
• control
File that saves information about the mount points and corresponding Navigator Key Trustee keys. If this file isaccidentally deleted, you can restore it using the navencrypt control --restore-control-file command.
• rules
File that contains the ACL rules. It is encrypted with the user-provided master key.• ztab
File that contains information about all the mount points and their encryption type.
Important: Use caution when editing the /etc/navencrypt/ztab file. Entries are tab-separated(not space-separated). The ztab file must not contain empty lines.
• keytrustee
Directory where Navigator Key Trustee GPG keys are stored. These are generated during navencrypt register operations.
32

Cloudera Manager Maintaining Cloudera Navigator Encrypt
• keytrustee/deposits
Directory where the Navigator Encrypt mount encryption keys (MEKs) are saved. These are encrypted with theuser-provided master key. If these are accidentally deleted, you can restore them from Key Trustee Server usingthe navencrypt key --restore-keys command.
Every mount point has an internal randomly-generated encryption passphrase.
Collecting Navigator Encrypt Environment InformationWhen troubleshooting problems with Navigator Encrypt, it is helpful to gather information about the installation andenvironment. Navigator Encrypt provides a command to facilitate this:
sudo navencrypt-collect
This command collects and outputs to the console the following information:
• Information about the system on which Navigator Encrypt is installed• Entries from /etc/navencrypt/ztab• The contents of the keytrustee.conf file• Recent entries from the Navigator Encrypt log file• Configured software repositories• Checksums of all /usr/src/navencrypt* and /usr/sbin/navencrypt* files
You can use this information to compare Navigator Encrypt installations, and you can also provide this information toCloudera Support for troubleshooting. The navencrypt-collect command only outputs this information on theconsole, and does not generate any files or upload to Cloudera.
To save the information to a file, use the redirect operator (>). For example:
sudo navencrypt-collect > navencrypt.info
Upgrading Navigator Encrypt HostsSee "Best Practices for Upgrading Navigator Encrypt Hosts" in the Upgrading Cloudera Navigator Encrypt guide forinformation about upgrading operating systems (OS) and kernels on hosts that have Navigator Encrypt installed.
33
Related Documents