CIS—100 Chapter 10—Creating Presentations 1

CIS—100 Chapter 10—Creating Presentations 1. The PowerPoint Workspace 2 1. The slide pane is the big area in the middle. You work directly on the slide.
Dec 16, 2015
Welcome message from author
This document is posted to help you gain knowledge. Please leave a comment to let me know what you think about it! Share it to your friends and learn new things together.
Transcript
1
CIS—100
Chapter 10—Creating Presentations
2
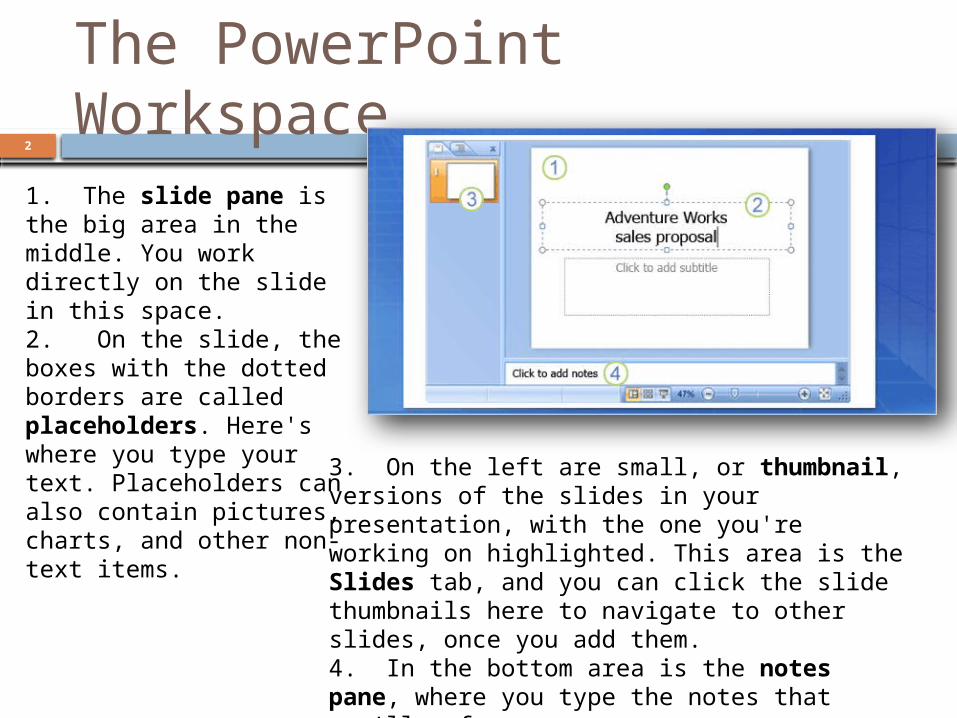
The PowerPoint Workspace
1. The slide pane is the big area in the middle. You work directly on the slide in this space. 2. On the slide, the boxes with the dotted borders are called placeholders. Here's where you type your text. Placeholders can also contain pictures, charts, and other non-text items.
3. On the left are small, or thumbnail, versions of the slides in your presentation, with the one you're working on highlighted. This area is the Slides tab, and you can click the slide thumbnails here to navigate to other slides, once you add them.4. In the bottom area is the notes pane, where you type the notes that you'll referto while you present. There's more room for the notes than shows here.

3
Adding New Slides
1. If you click the top part of the button, where the slide icon is, a new slide is added immediately beneath the slide that's selected in the Slides tab.
2. If you click the bottom part of the button, you get a gallery of layouts for the slide. You choose a layout and the slide is inserted with that layout.

4
Choosing Slide Layouts
1. The Title Slide layout, shown here as it looks in the layouts gallery, is applied to the first slide in the show (the one that's already there when you start).
2. The Title Slide layout contains placeholders for a title and subtitle.
3. The layout you will probably use the most for other slides is called Title and Content, shown here as it looks in the layouts gallery.4. This layout has a placeholder for the slide title and a second, all-purpose placeholder that contains text as well as several icons. This placeholder supports either text or graphic elements like charts, pictures, and movie files.
5
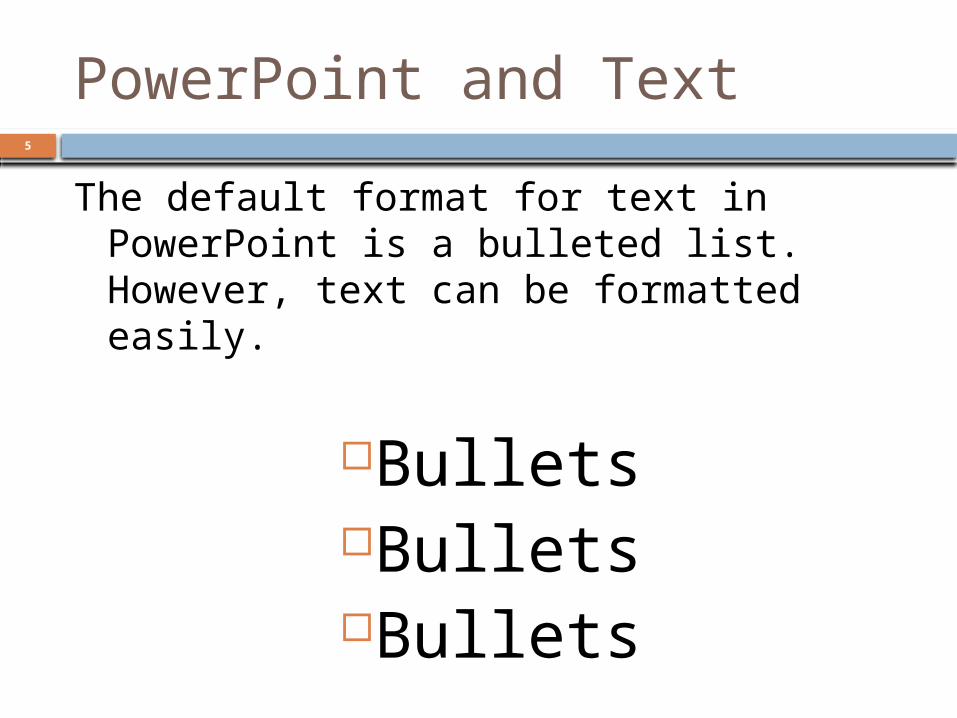
PowerPoint and Text
The default format for text in PowerPoint is a bulleted list. However, text can be formatted easily.
BulletsBulletsBullets
6
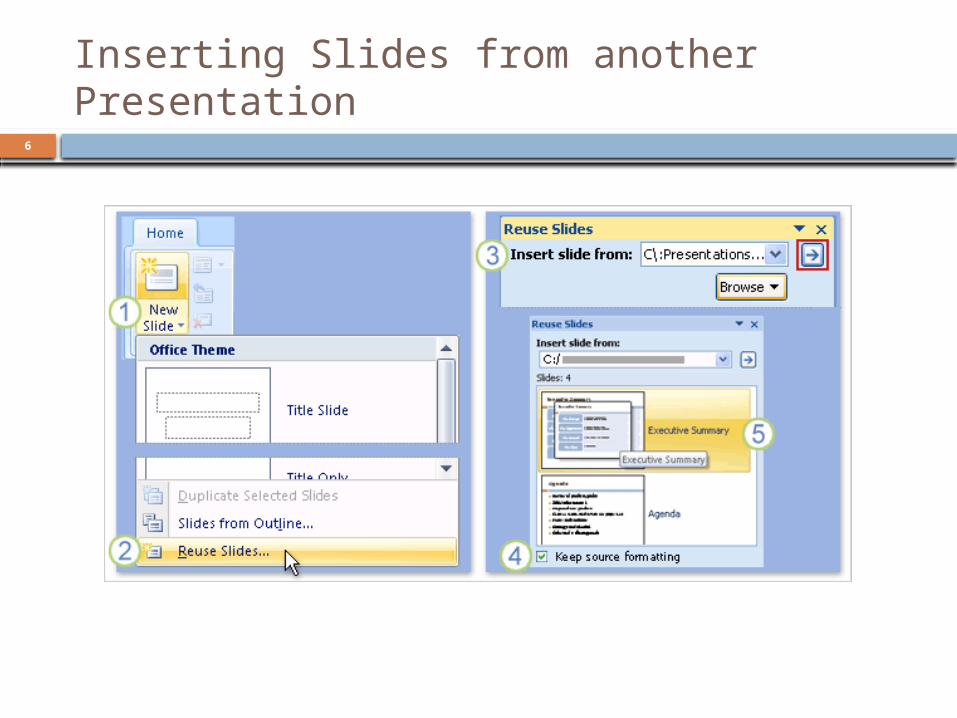
Inserting Slides from another Presentation

7
Inserting Slides from another Presentation Continued
Explanation of the previous slide:1. On the Home tab, click on the arrow next to New Slide, as if you
were going to insert a new slide and choose a layout for it first.2. Below the layout gallery, click Reuse Slides. 3. In the Reuse Slides task pane, under Insert slide from, click
Browse to find the presentation or slide library that has the slides you want. Then click on the arrow to open those slides in the task pane.
4. When you find the slide you want, take notice of the Keep source formatting check box, at the very bottom of the pane. If you want to retain the exact look of the slides you are inserting, be sure this check box is selected before you insert the slide.
5. Click each slide you want to insert. Each one is copied into the open presentation, below the currently selected slide or below your cursor if you have positioned it beneath a slide thumbnail.

8
Creating Speaker Notes
1. As you develop the content on your slides, type your notes in the notes pane located below the slide. Typically, as a presenter, you print these notes and refer to them as you give the presentation.
2. You can enlarge the notes pane so that it is easier to work in by dragging the split bar.
3. Your notes are saved in a notes page, which contains a copy of the slide along with the notes. This is what you print to refer to during the show.
9
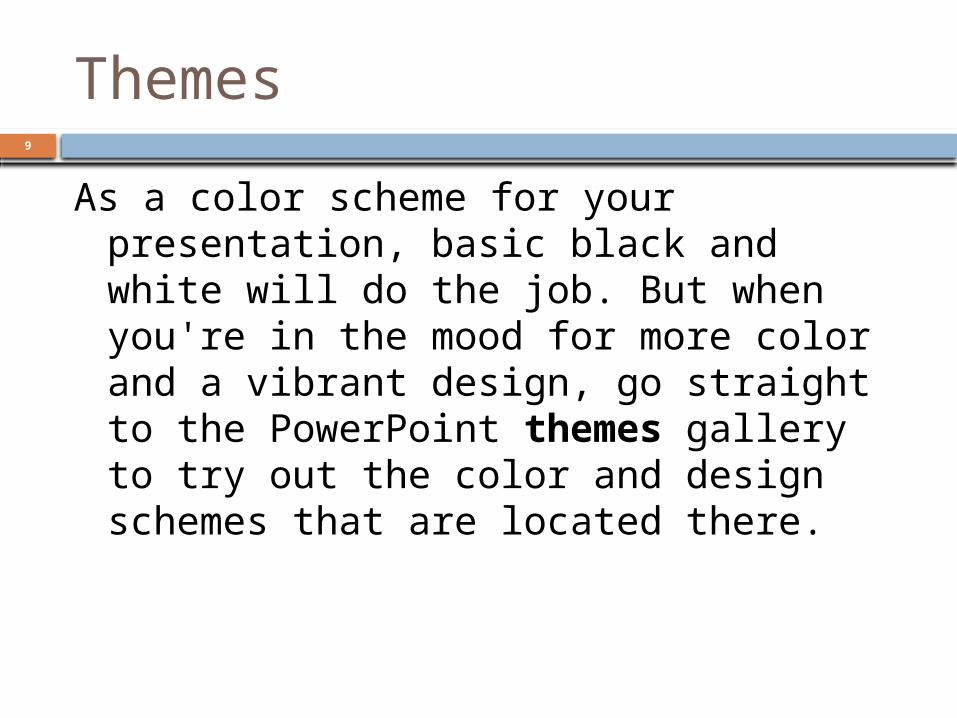
Themes
As a color scheme for your presentation, basic black and white will do the job. But when you're in the mood for more color and a vibrant design, go straight to the PowerPoint themes gallery to try out the color and design schemes that are located there.

10
The Beauty of Themes
A theme includes these elements, offered as a package:
Background
design Color scheme Font types and
sizes, and Placeholder
positions

11
Choosing a Theme
1. Theme samples, in the form of the small thumbnails as seen here, are shown in the Themes group.
2. To see additional themes click the More button located to the right of the group.
3. When you point to any theme thumbnail, a preview of it is shown on the slide.
12
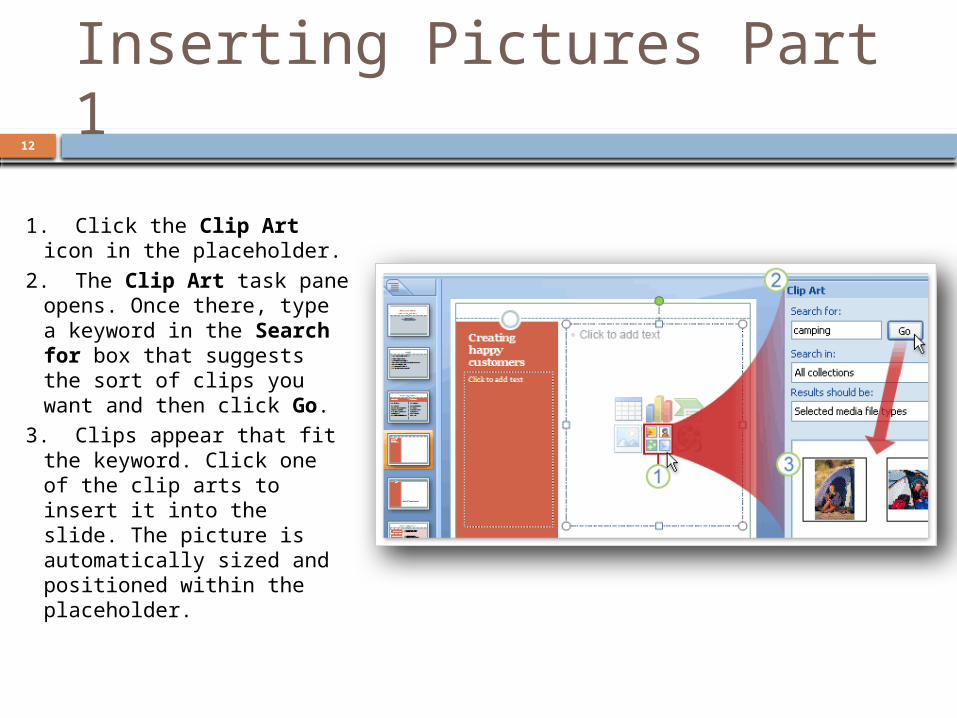
Inserting Pictures Part 1
1. Click the Clip Art icon in the placeholder.
2. The Clip Art task pane opens. Once there, type a keyword in the Search for box that suggests the sort of clips you want and then click Go.
3. Clips appear that fit the keyword. Click one of the clip arts to insert it into the slide. The picture is automatically sized and positioned within the placeholder.

13
Inserting Pictures Part 2
1. Text boxes are handy when you want to add text somewhere and need another placeholder for it, such as for a picture caption. First, you'd click Text Box on the Insert tab.
2. And then you would draw the box on the slide and type in it.

14
Editing Slide Elements
1. Select the picture. 2. Picture Tools appear above the Ribbon. Use options on the Format tab to work with the picture.

15
Arranging Slide Elements
1. To align the caption so it's flush left with the picture, first select both placeholders.
2. Find the Arrange group on the Format tab, in Picture Tools.
3. Click the Align button, and then click Align Left.
16
Proofing, Prepping, and PrintingThe final steps in preparing your
slideshow, proofing, printing, and prepping could be considered the most important.
17
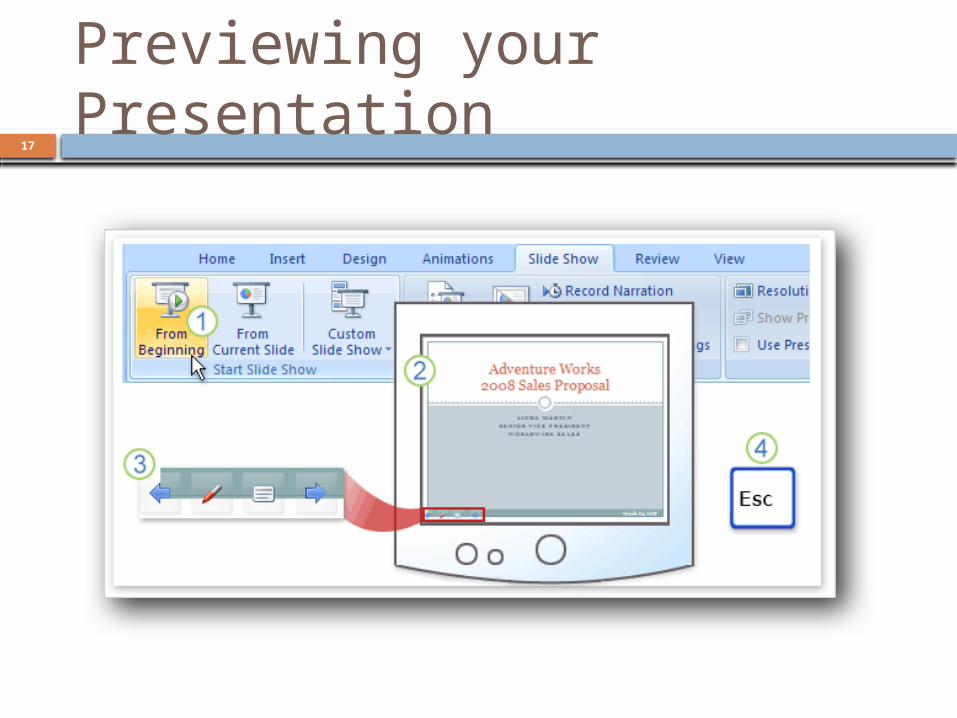
Previewing your Presentation

18
Previewing Your Presentation Continued
Explaining the previous slide:1. To open Slide Show view click the Slide Show tab and
click a command in the Start Slide Show group — to start on the first slide or the current slide.
2. Slide Show view fills your computer screen. 3. One way to navigate from slide to slide is to use the Slide
Show toolbar, at the bottom of the screen, on the left. It has navigational arrows that appear when you position the cursor in that area. Another way to move from slide to slide is simply to click the mouse button.
4. To get out of Slide Show view at any point, press ESC. This returns you to the view you left, which is typically Normal view. There, you can make necessary changes to slides, and then preview the slide show again.
19
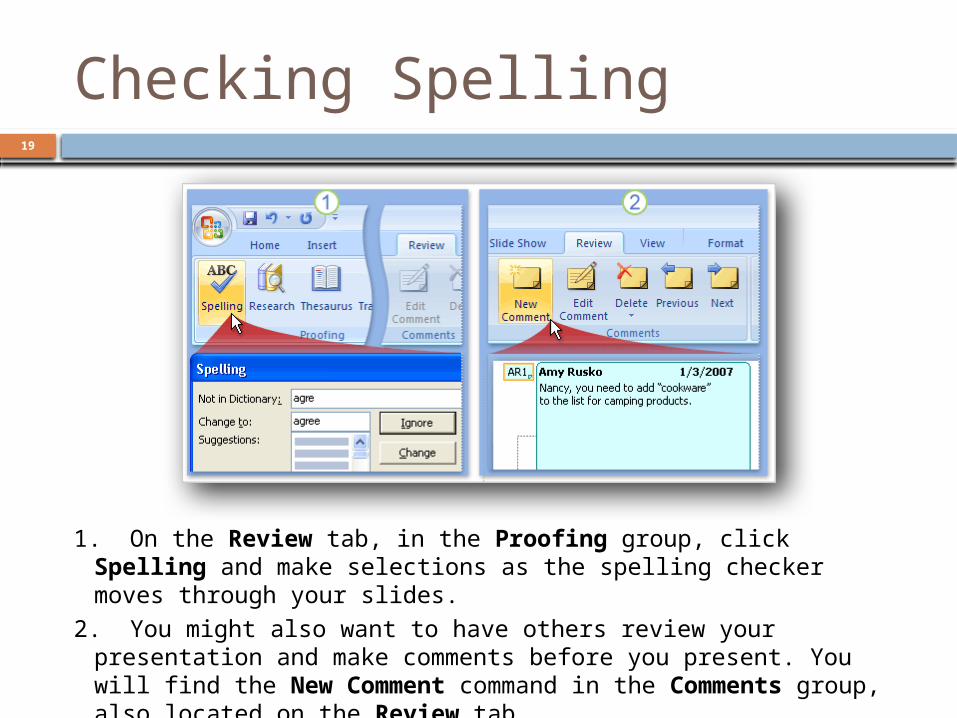
Checking Spelling
1. On the Review tab, in the Proofing group, click Spelling and make selections as the spelling checker moves through your slides.
2. You might also want to have others review your presentation and make comments before you present. You will find the New Comment command in the Comments group, also located on the Review tab.

20
Printing Handouts
1. In Print Preview, display the list in the Print What box by clicking the arrow.
2. Choose one of the handout types from the list. 3. When you click the handout type, you are shown a
preview of how your slides will look when printed in that given format.

21
Printing Speaker Notes
1. To print your speaker notes, select Notes Pages in the Print What list.
2. Your notes pages are shown in the preview window, starting with the first slide (unless you specify otherwise).
22
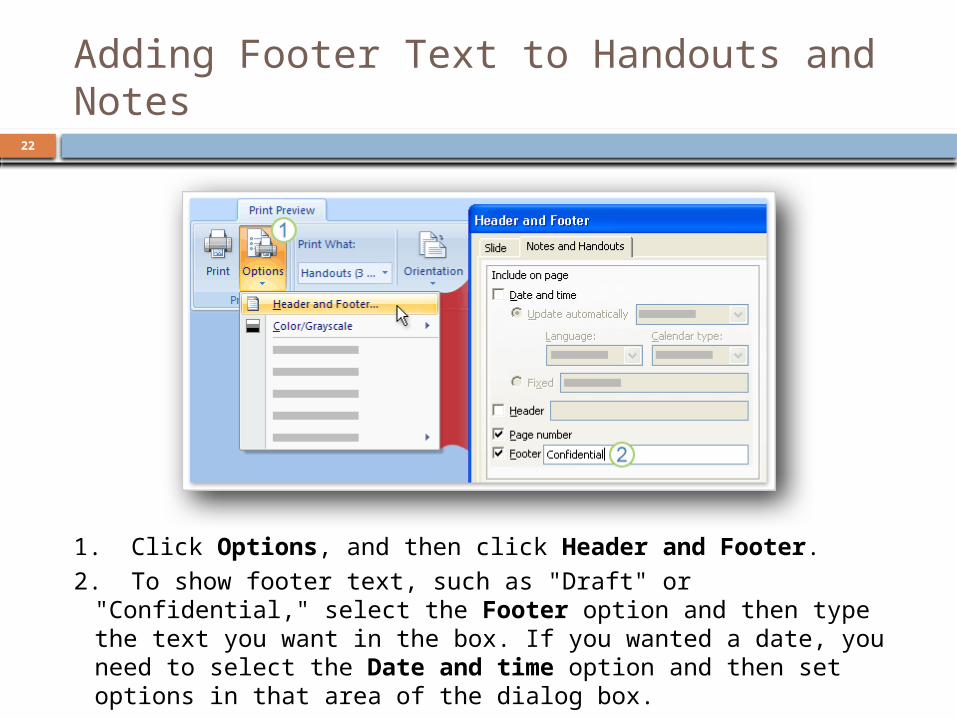
Adding Footer Text to Handouts and Notes
1. Click Options, and then click Header and Footer.2. To show footer text, such as "Draft" or "Confidential," select
the Footer option and then type the text you want in the box. If you wanted a date, you need to select the Date and time option and then set options in that area of the dialog box.
23
Color Options for Printing
Depending on what kind of printer your computer is hooked up to, you can print your presentation in Color or in Grayscale, which consists of various tones of gray combined with black and white, or in Pure Black and White, which eliminates most of the grays and will use the least printer ink.
24
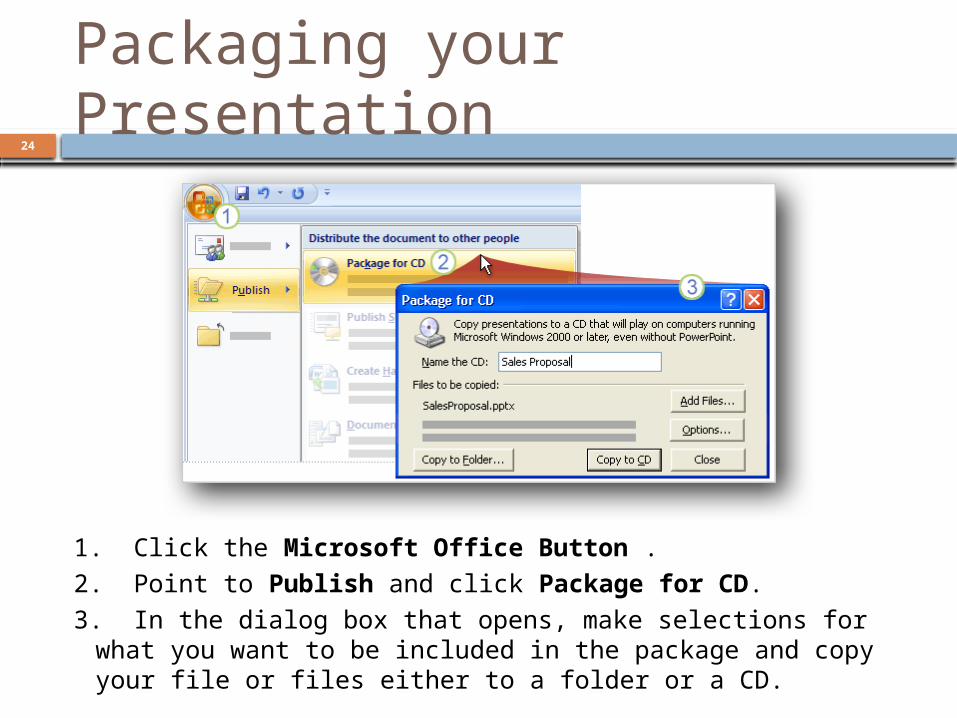
Packaging your Presentation
1. Click the Microsoft Office Button .2. Point to Publish and click Package for CD.3. In the dialog box that opens, make selections for what you
want to be included in the package and copy your file or files either to a folder or a CD.
Related Documents


